Reports
View and manage Inventory
Learn how to manage Inventory and get an Inventory Adjustment Report on the Merchant Portal.
The Inventory settings allow you to keep an inventory of your Items and make adjustments to the Items’ available quantity. From the Inventory settings, you can do the following:
- Check the available quantity of Items
- Adjust the available quantity of Items
- Set the available quantity to reset after processing End of Day
- Reset the Inventory
- Export the Inventory
- Export the Inventory Adjustment Report
View Inventory
To check the inventory of your Items, follow the steps below:
Merchant Portal (Classic Theme)
- Log in to the Merchant Portal.
- On the left panel, click on Reporting.
- Under Inventory, select Inventory. A list of all menu Items and their available quantity appears on the screen.
Tip: If you’re looking for a particular Item to check, you can directly search for the Item on the search bar. You can also filter the list to only show Items from specific categories by choosing the Category from the Category field.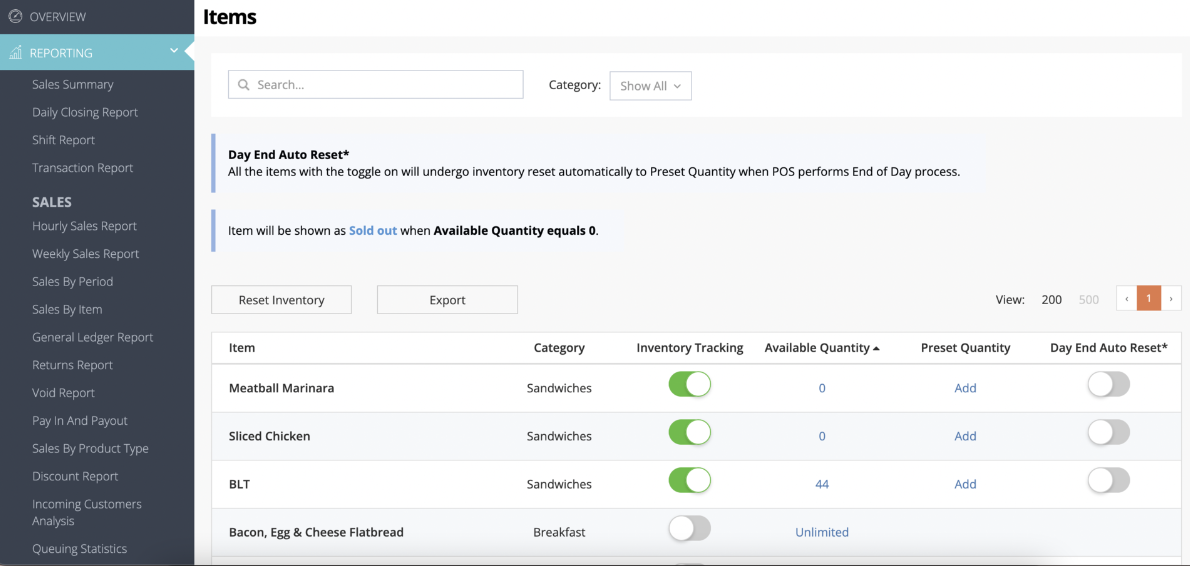
Merchant Portal 2.0
- Log in to the Merchant Portal.
- On the left panel, click on Menu Setup.
- Select Inventory. A list of all menu Items and their available quantity appears on the screen.
Tip: If you’re looking for a particular Item to check, you can directly search for the Item on the search bar. You can also filter the list to only show Items from specific categories by choosing the Category from the Category field.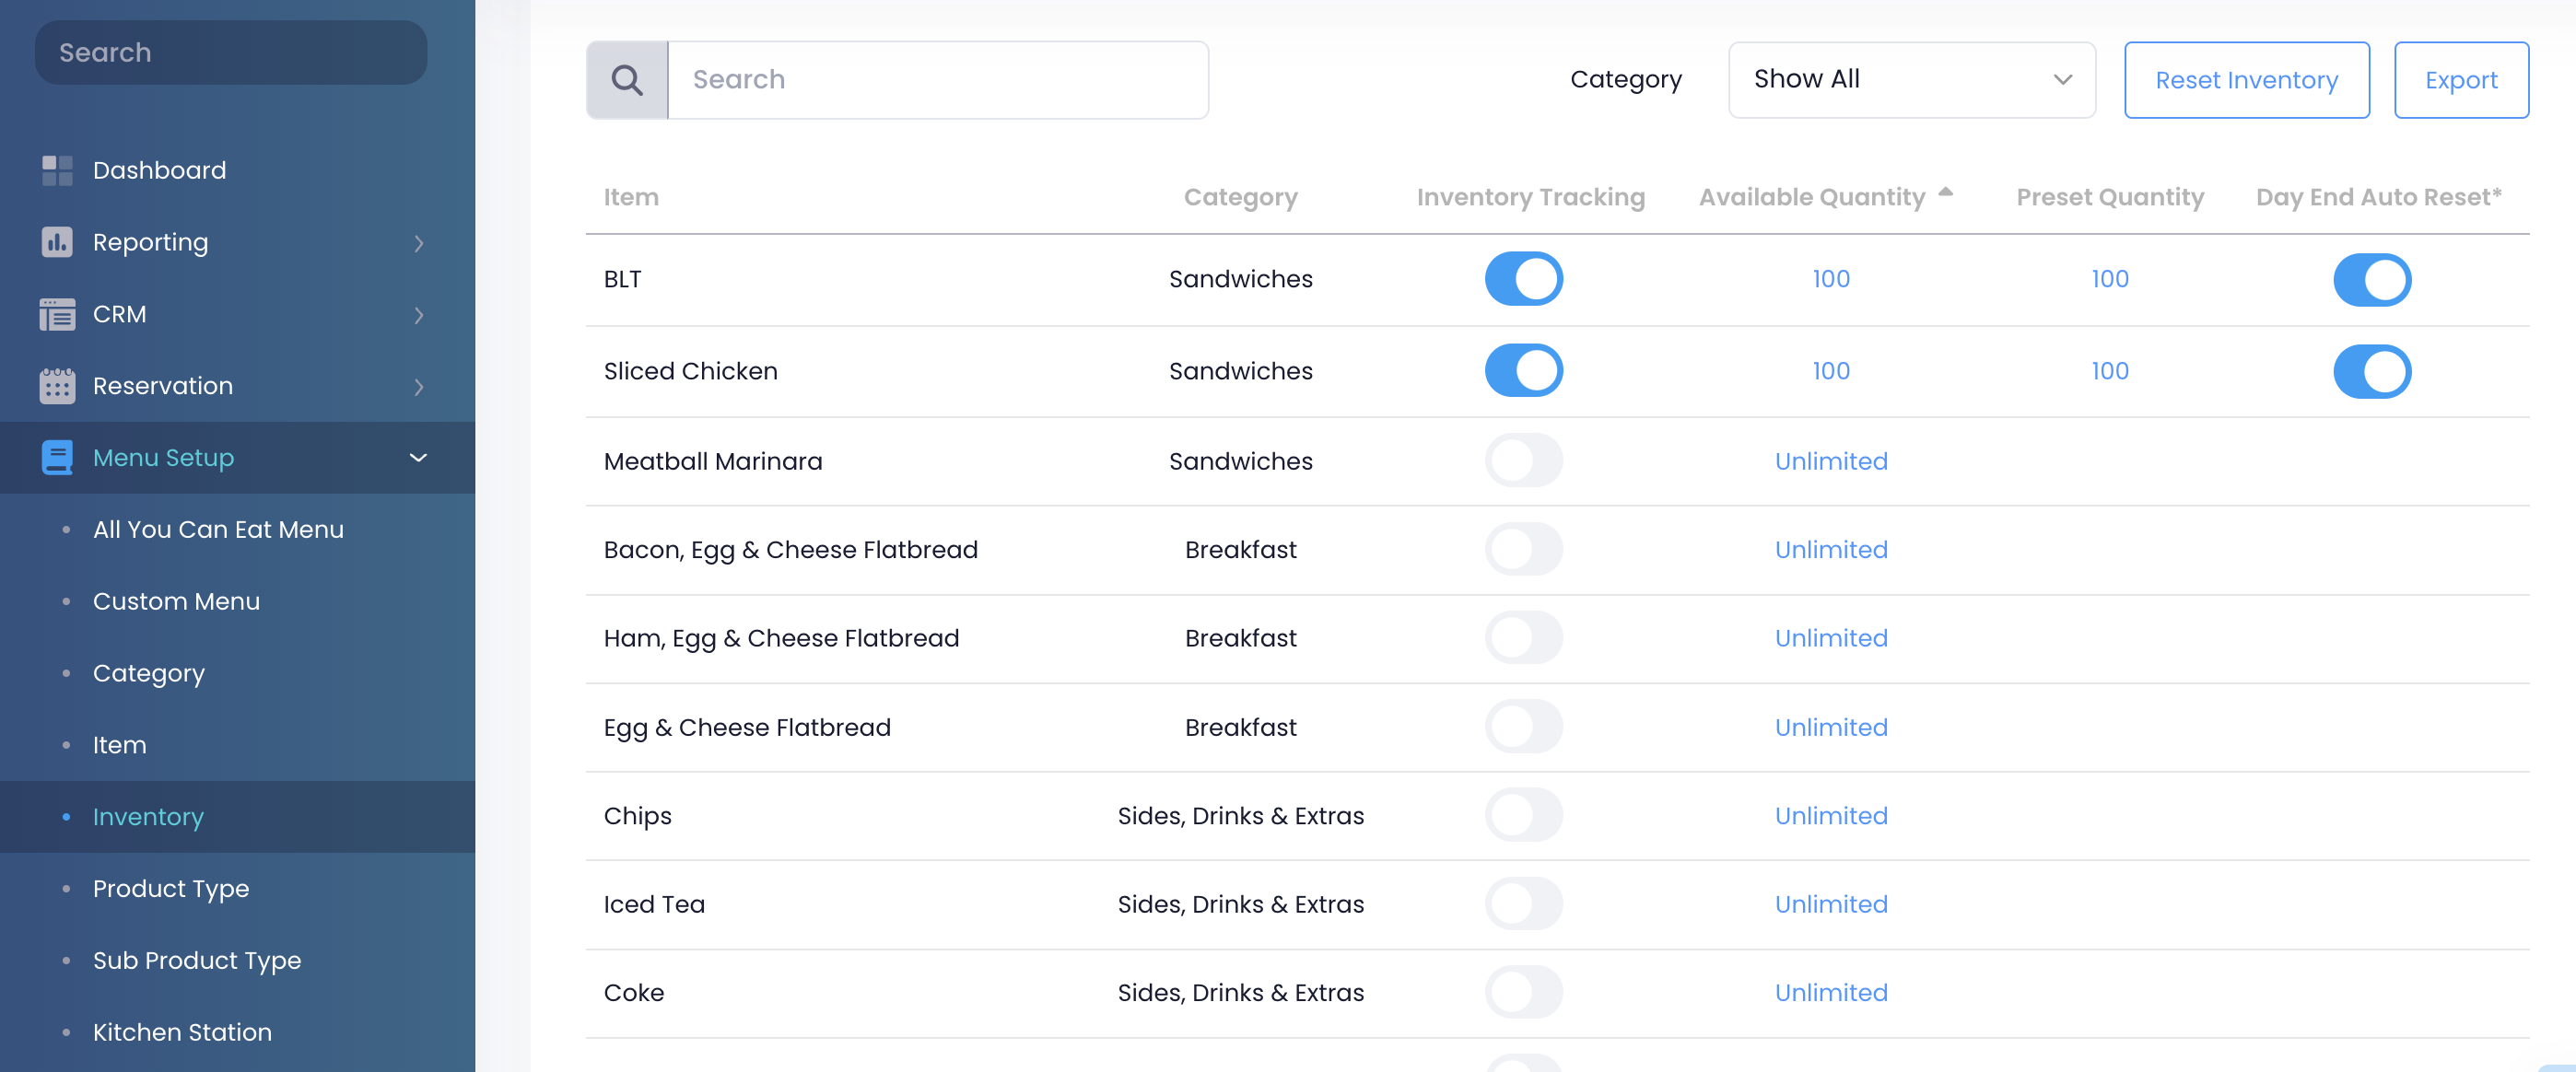
Manage Inventory
To adjust the inventory of your Items, follow the steps below:
Merchant Portal (Classic Theme)
- Log in to the Merchant Portal.
- On the left panel, click on Reporting.
- Under Inventory, select Inventory. A list of all menu Items and their available quantity appears on the screen.
Tip: If you’re looking for a particular Item to check, you can directly search for the Item on the search bar. You can also filter the list to only show Items from specific categories by choosing the Category from the Category field. - Next to the Item that you want to adjust, select a setting to configure.
You can configure the following settings to adjust the Inventory:
Inventory Tracking
When enabled, you can adjust the Item’s available quantity.
Note: By default, the Item’s quantity is set to Unlimited.
Available Quantity
Adjust the available quantity manually.
Preset Quantity
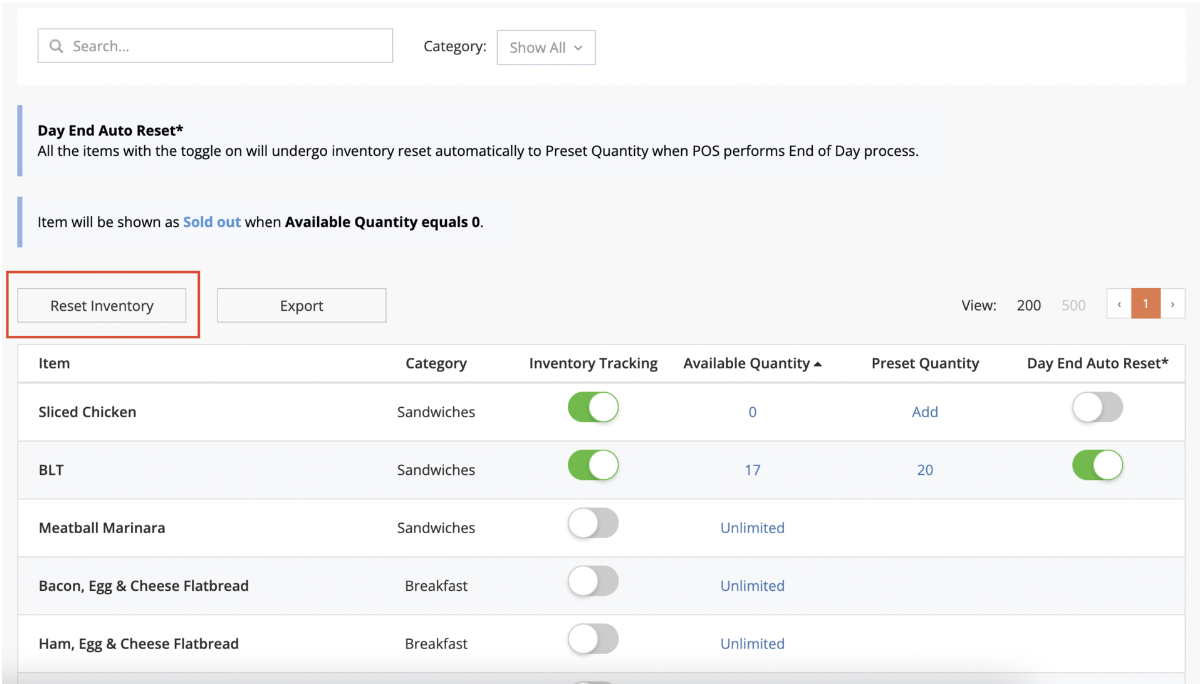
Set the preset quantity to the available quantity that you want to show when End of Day is performed or when you click on Reset Inventory.
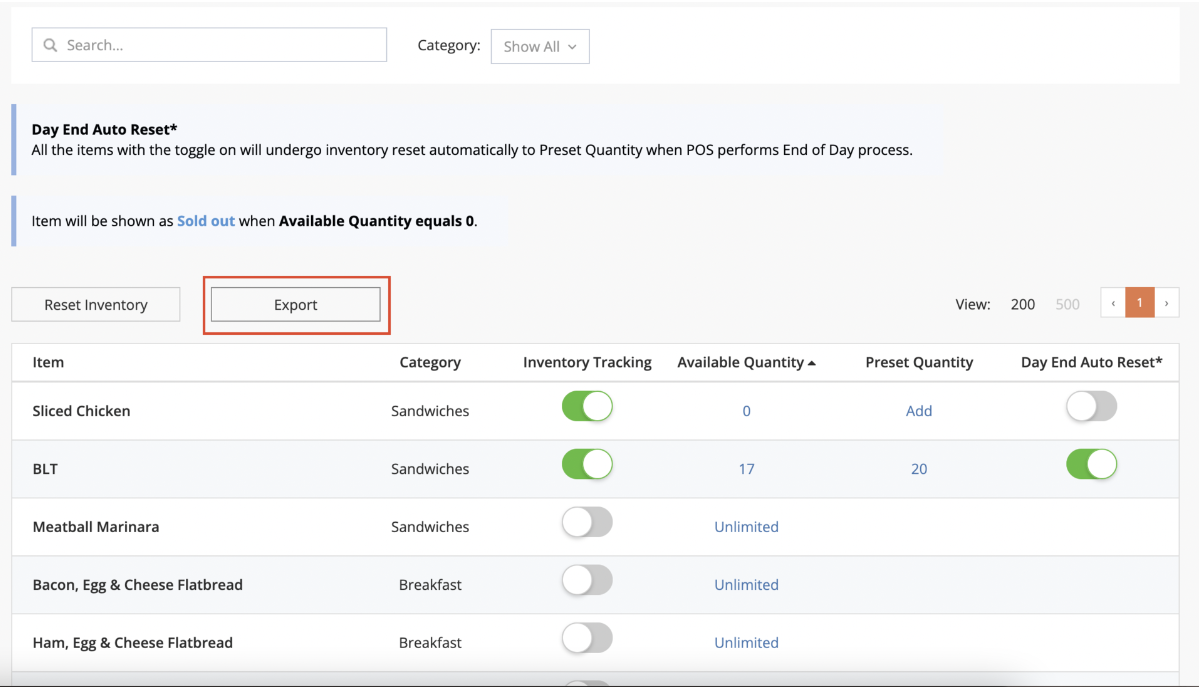
Day End Auto Reset
All the items with the toggle on will be reset automatically to Preset Quantity when End of Day is performed on the POS.
DeleteMerchant Portal 2.0
- Log in to the Merchant Portal.
- On the left panel, click on Menu Setup.
- Select Inventory. A list of all menu Items and their available quantity appears on the screen.
Tip: If you’re looking for a particular Item to check, you can directly search for the Item on the search bar. You can also filter the list to only show Items from specific categories by choosing the Category from the Category field. - Next to the Item that you want to adjust, select a setting to configure.
You can configure the following settings to adjust the Inventory:
Inventory Tracking
When enabled, you can adjust the Item’s available quantity.
Note: By default, the Item’s quantity is set to Unlimited.
Available Quantity
Adjust the available quantity manually.
Preset Quantity
Set the preset quantity to the available quantity that you want to show when End of Day is performed or when you click on Reset Inventory.
Day End Auto Reset
All the items with the toggle on will be reset automatically to Preset Quantity when End of Day is performed on the POS.
DeleteReset Inventory
To reset the Inventory, follow the steps below:
Merchant Portal (Classic Theme)
- Log in to the Merchant Portal.
- On the left panel, click on Reporting.
- Under Inventory, select Inventory.
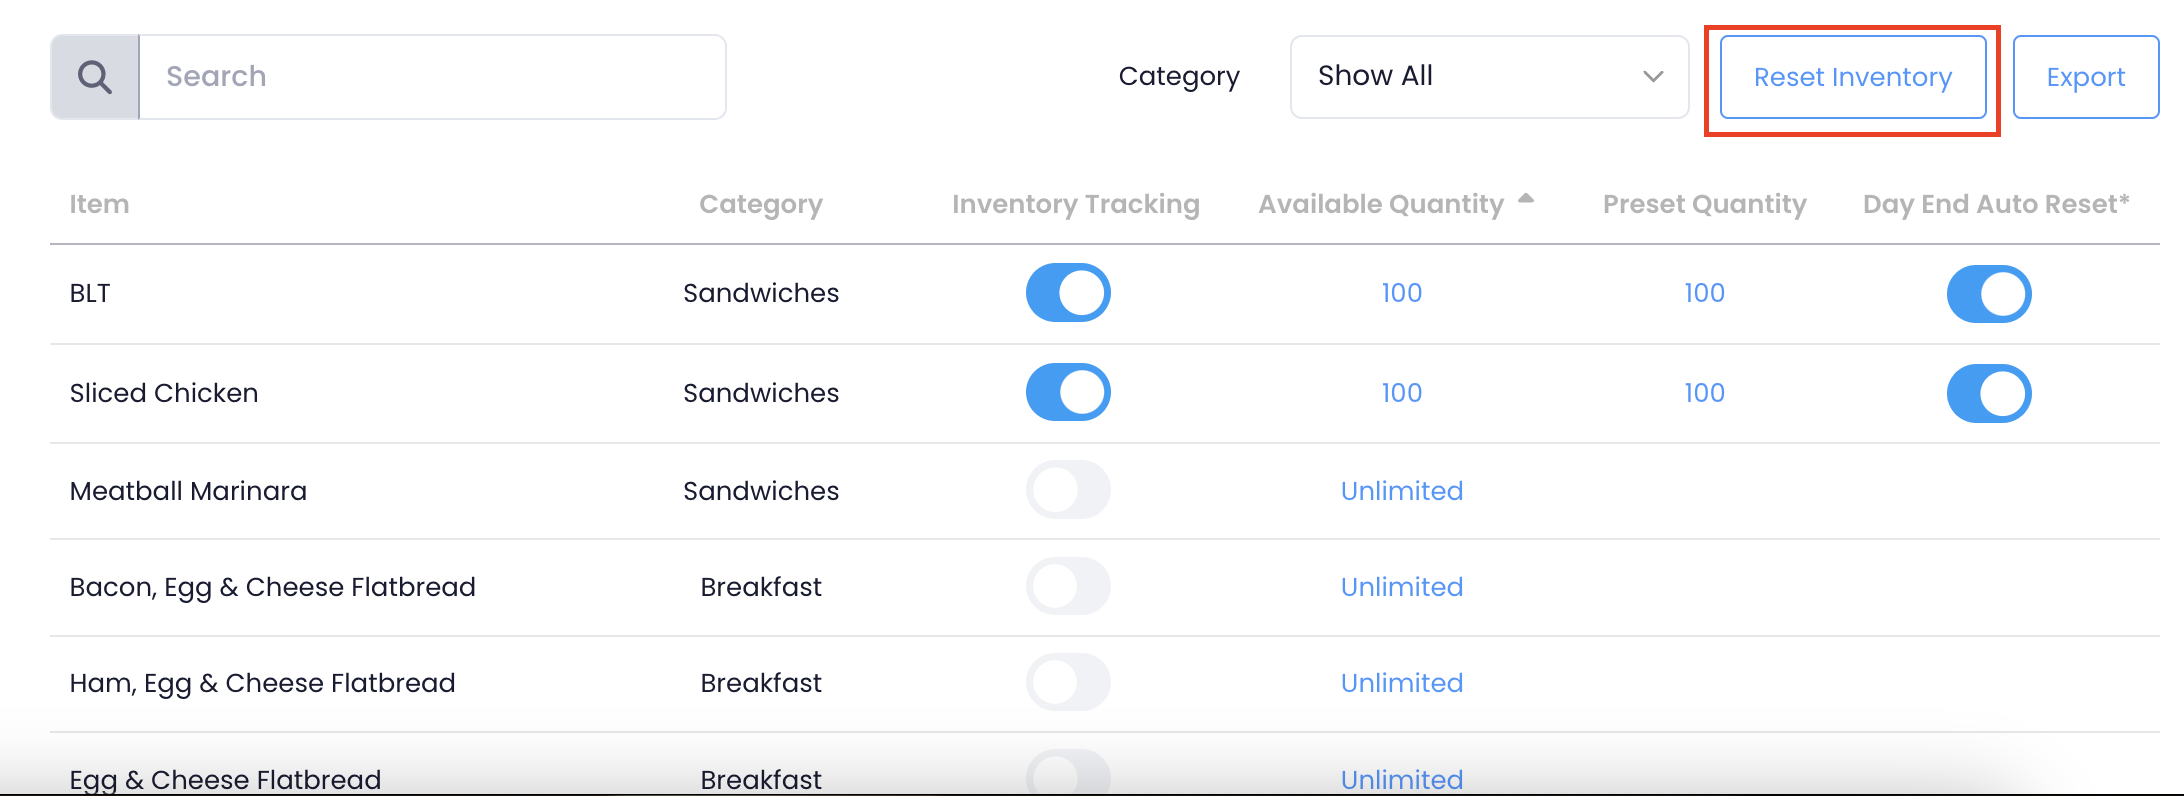
- At the top of the Inventory list, click on Reset Inventory. The available quantity for all menu Items resets to the set Available Quantity.
Merchant Portal 2.0
- Log in to the Merchant Portal.
- On the left panel, click on Menu Setup.
- Select Inventory.
- At the top of the Inventory list, click on Reset Inventory. The available quantity for all menu Items resets to the set Available Quantity.
Export Inventory
To export the Inventory, follow the steps below:
Merchant Portal (Classic Theme)
- Log in to the Merchant Portal.
- On the left panel, click on Reporting.
- Under Inventory, select Inventory.
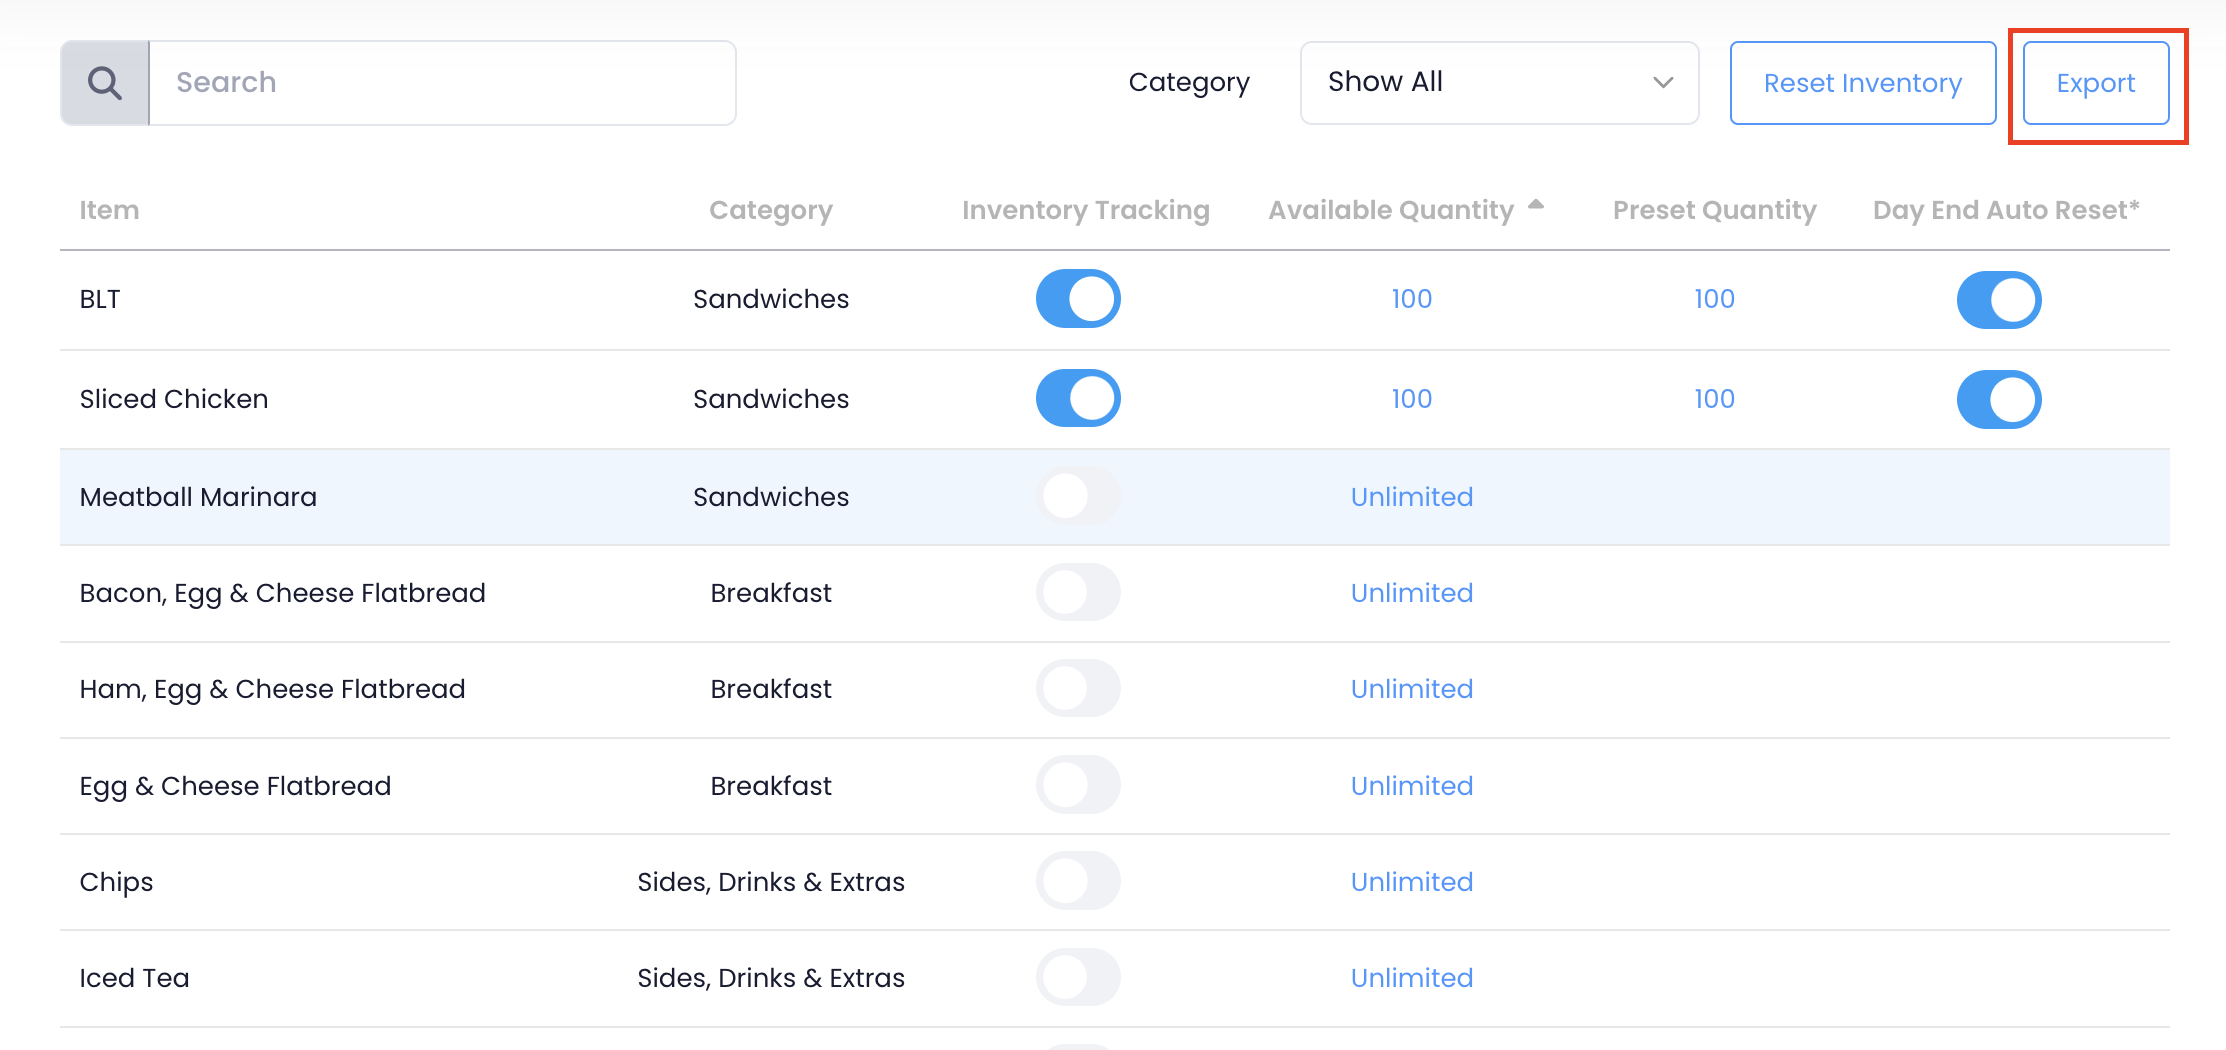
- At the top of the Inventory list, click on Export. An Excel file of the report gets downloaded on your computer.
- Open the file to view your exported Inventory.
Merchant Portal 2.0
- Log in to the Merchant Portal.
- On the left panel, click on Menu Setup.
- Select Inventory.
- At the top of the Inventory list, click on Export. An Excel file of the report gets downloaded on your computer.
- Open the file to view your exported Inventory.
Export Inventory Adjustment Report
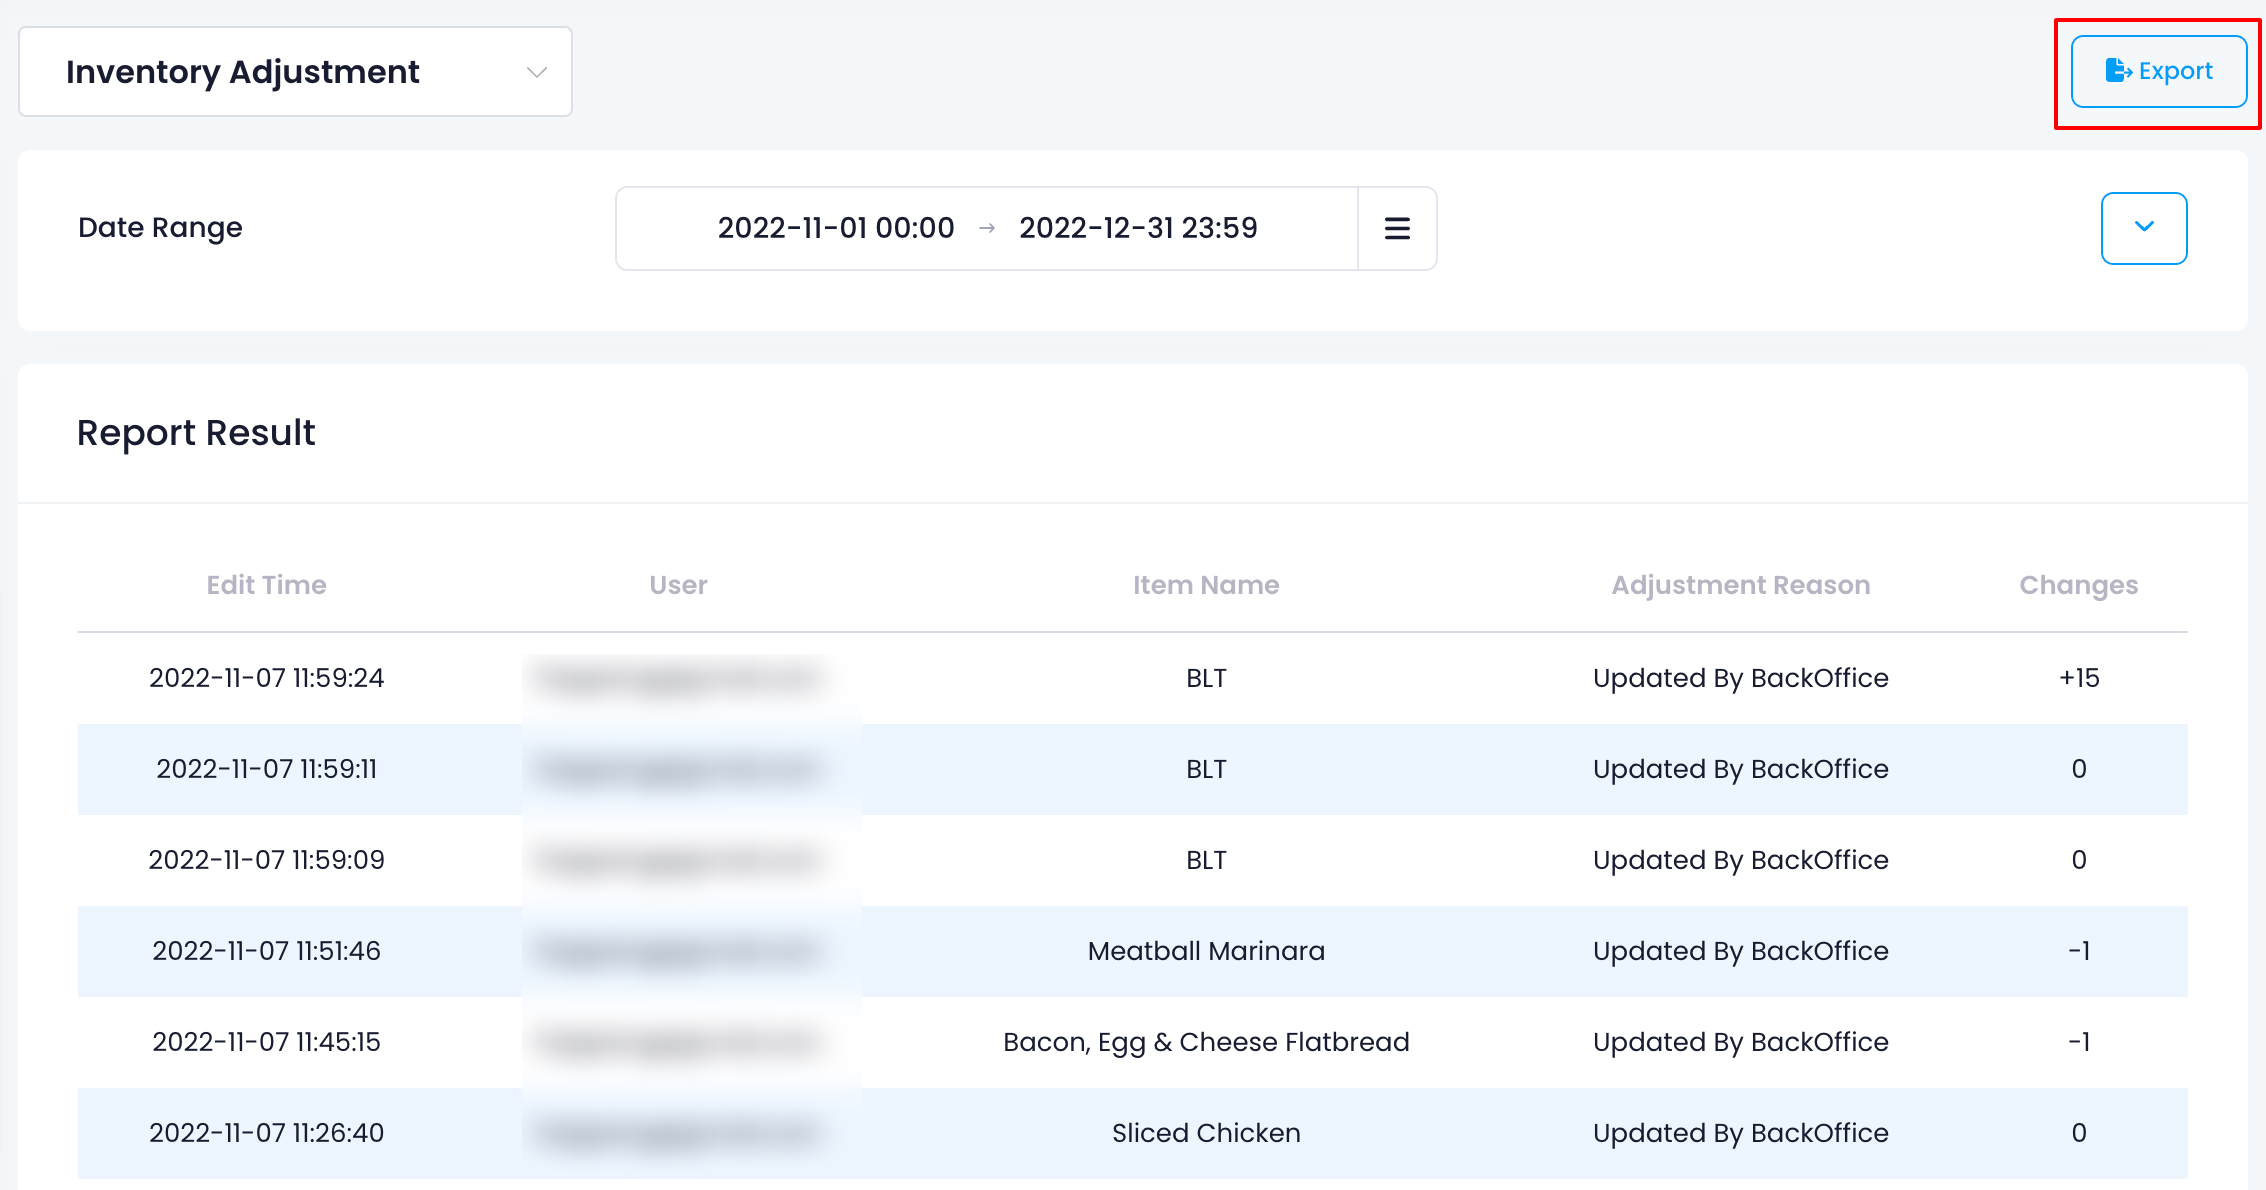
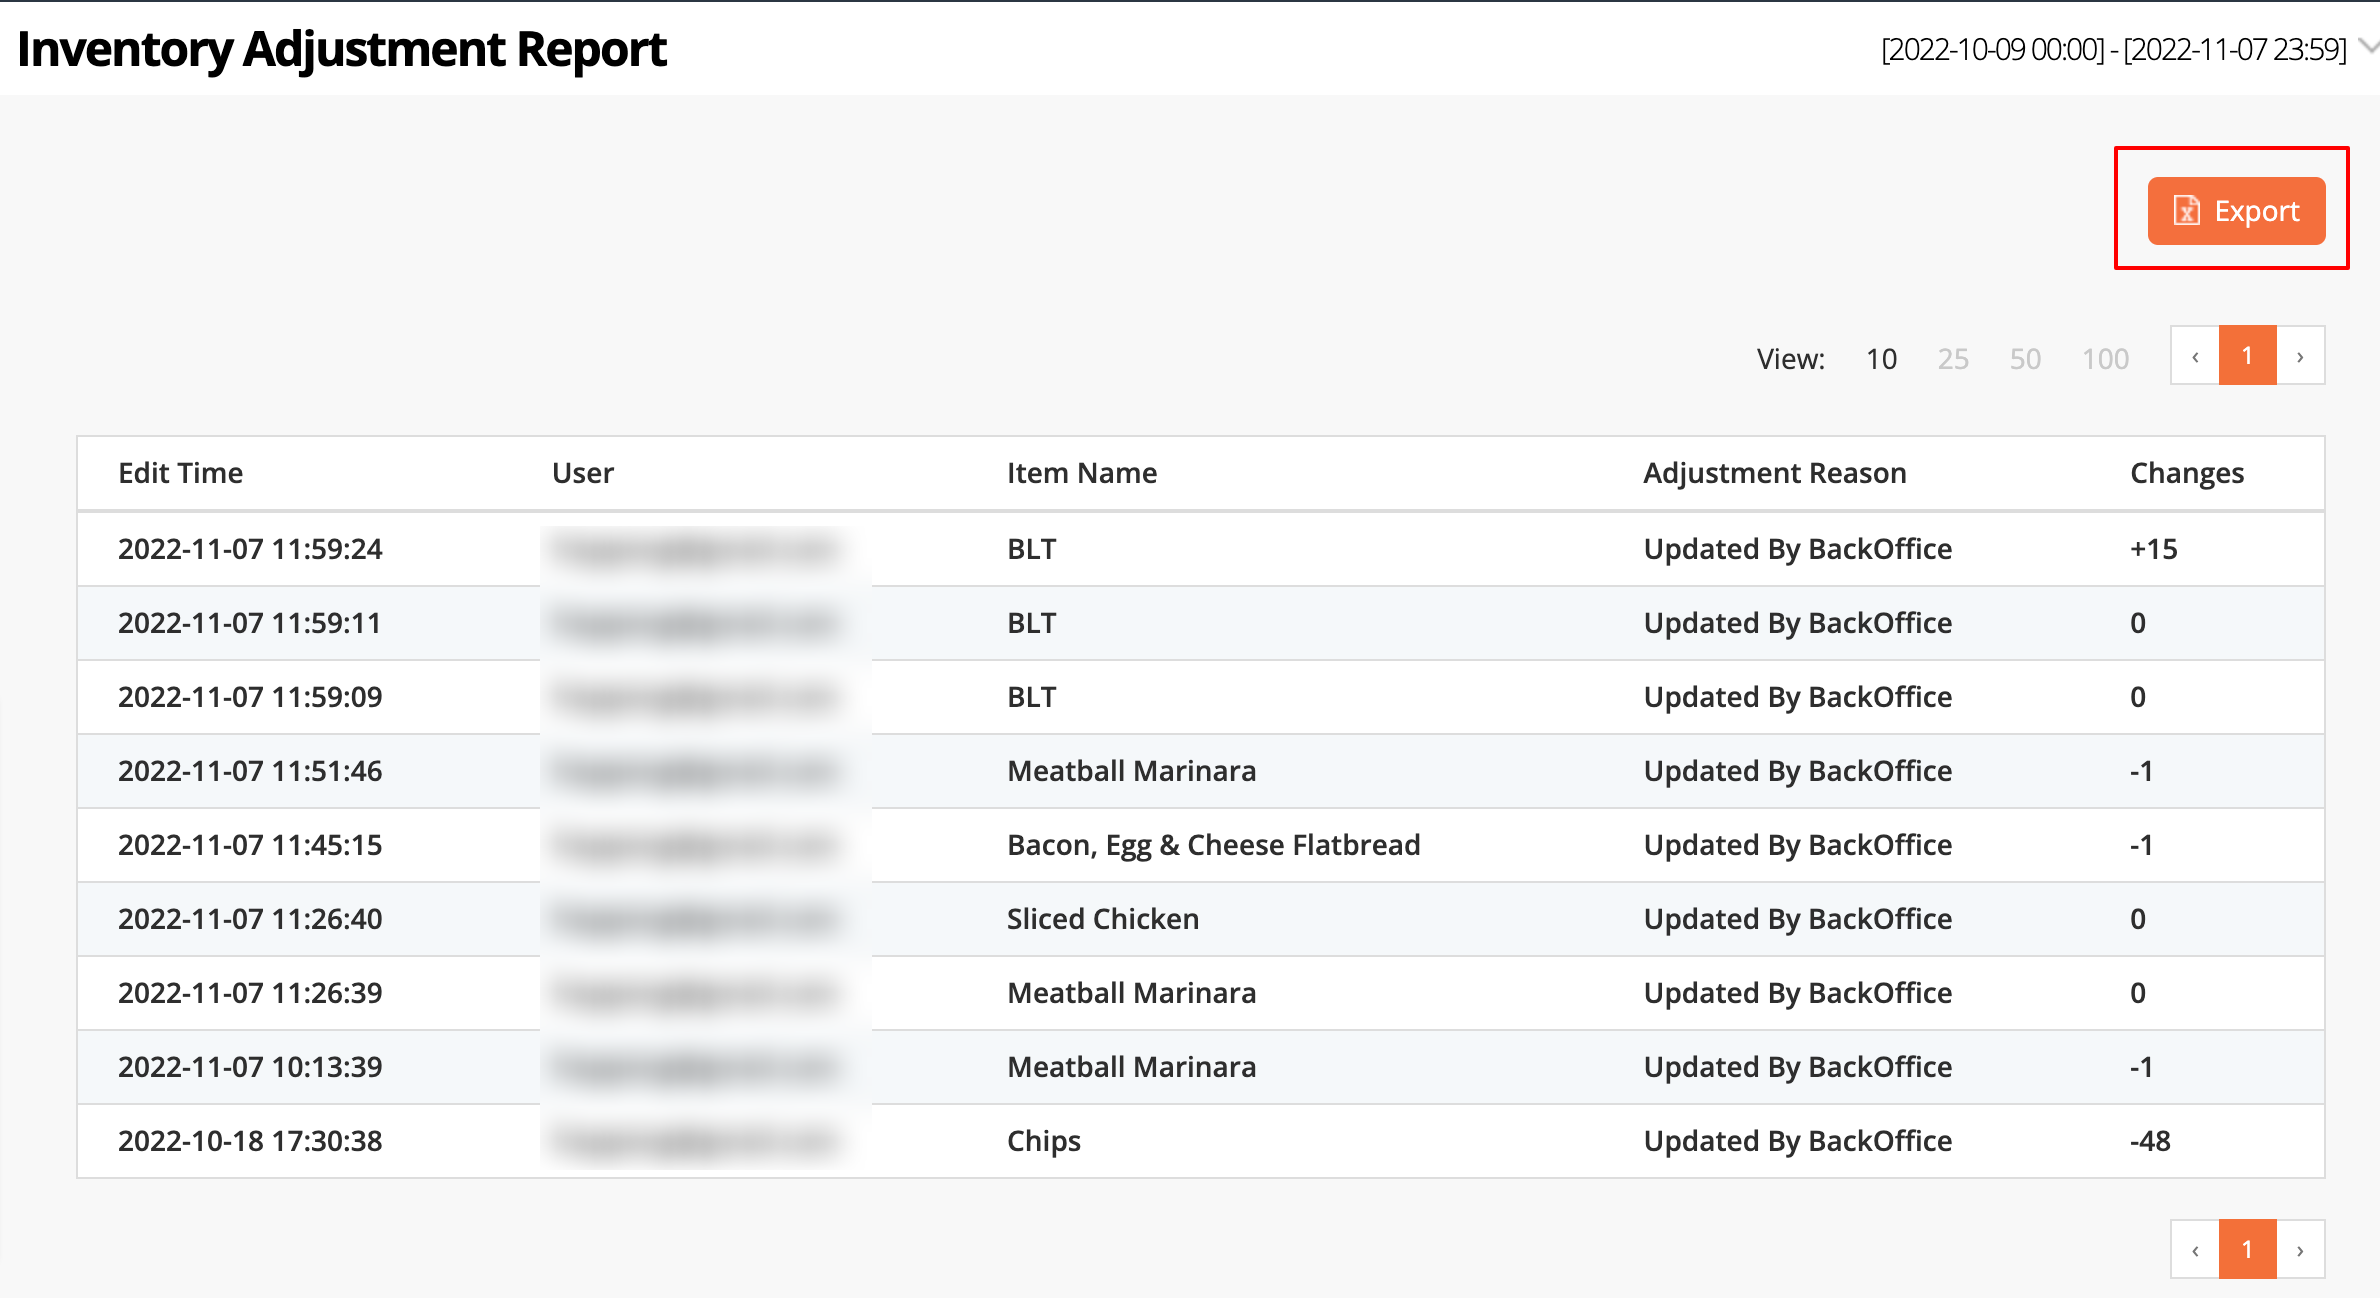
The Inventory Adjust Report shows a summary of adjustments made to the Inventory over a selected period of time.
The Inventory Adjustment Report includes the following information:
- Edit Time
- Email address of the user who made the adjustments
- Item Name
- Adjustment Reason
- Number of changes made to the Inventory
To export the Inventory Adjustment Report, follow the steps below:
Merchant Portal (Classic Theme)
- Log in to the Merchant Portal.
- On the left panel, click on Reporting.
- Under Inventory, select Inventory Adjustment Report.
- Select the date range that you wish to include in the report.
- Click on Submit to retrieve the records.
- At the top right, click on Export.
Merchant Portal 2.0
- Log in to the Merchant Portal.
- On the left panel, click on Reporting.
- Click on Inventory, then select Inventory Adjustment Report.
- Select the date range that you wish to include in the report.
- Filter your search further by selecting the Category or the Item.
- Click on Submit to retrieve the records.
- At the top right, click on Export.