Printer setup
All Product
Table of Contents
Configure receipt printer with cash drawer
Learn how to set up a receipt printer and set the cash drawer to open when settling a bill by cash.
You can set up a receipt printer to print Dine-in and Takeout receipts and set the cash drawer to open automatically when a check is settled by cash payment.
In this article, you’ll learn how to configure a receipt printer with a cash drawer.
To configure a receipt printer with a cash drawer, follow the steps below:
- Log in to the Eats365 POS.
- At the top left, tap Settings
 .
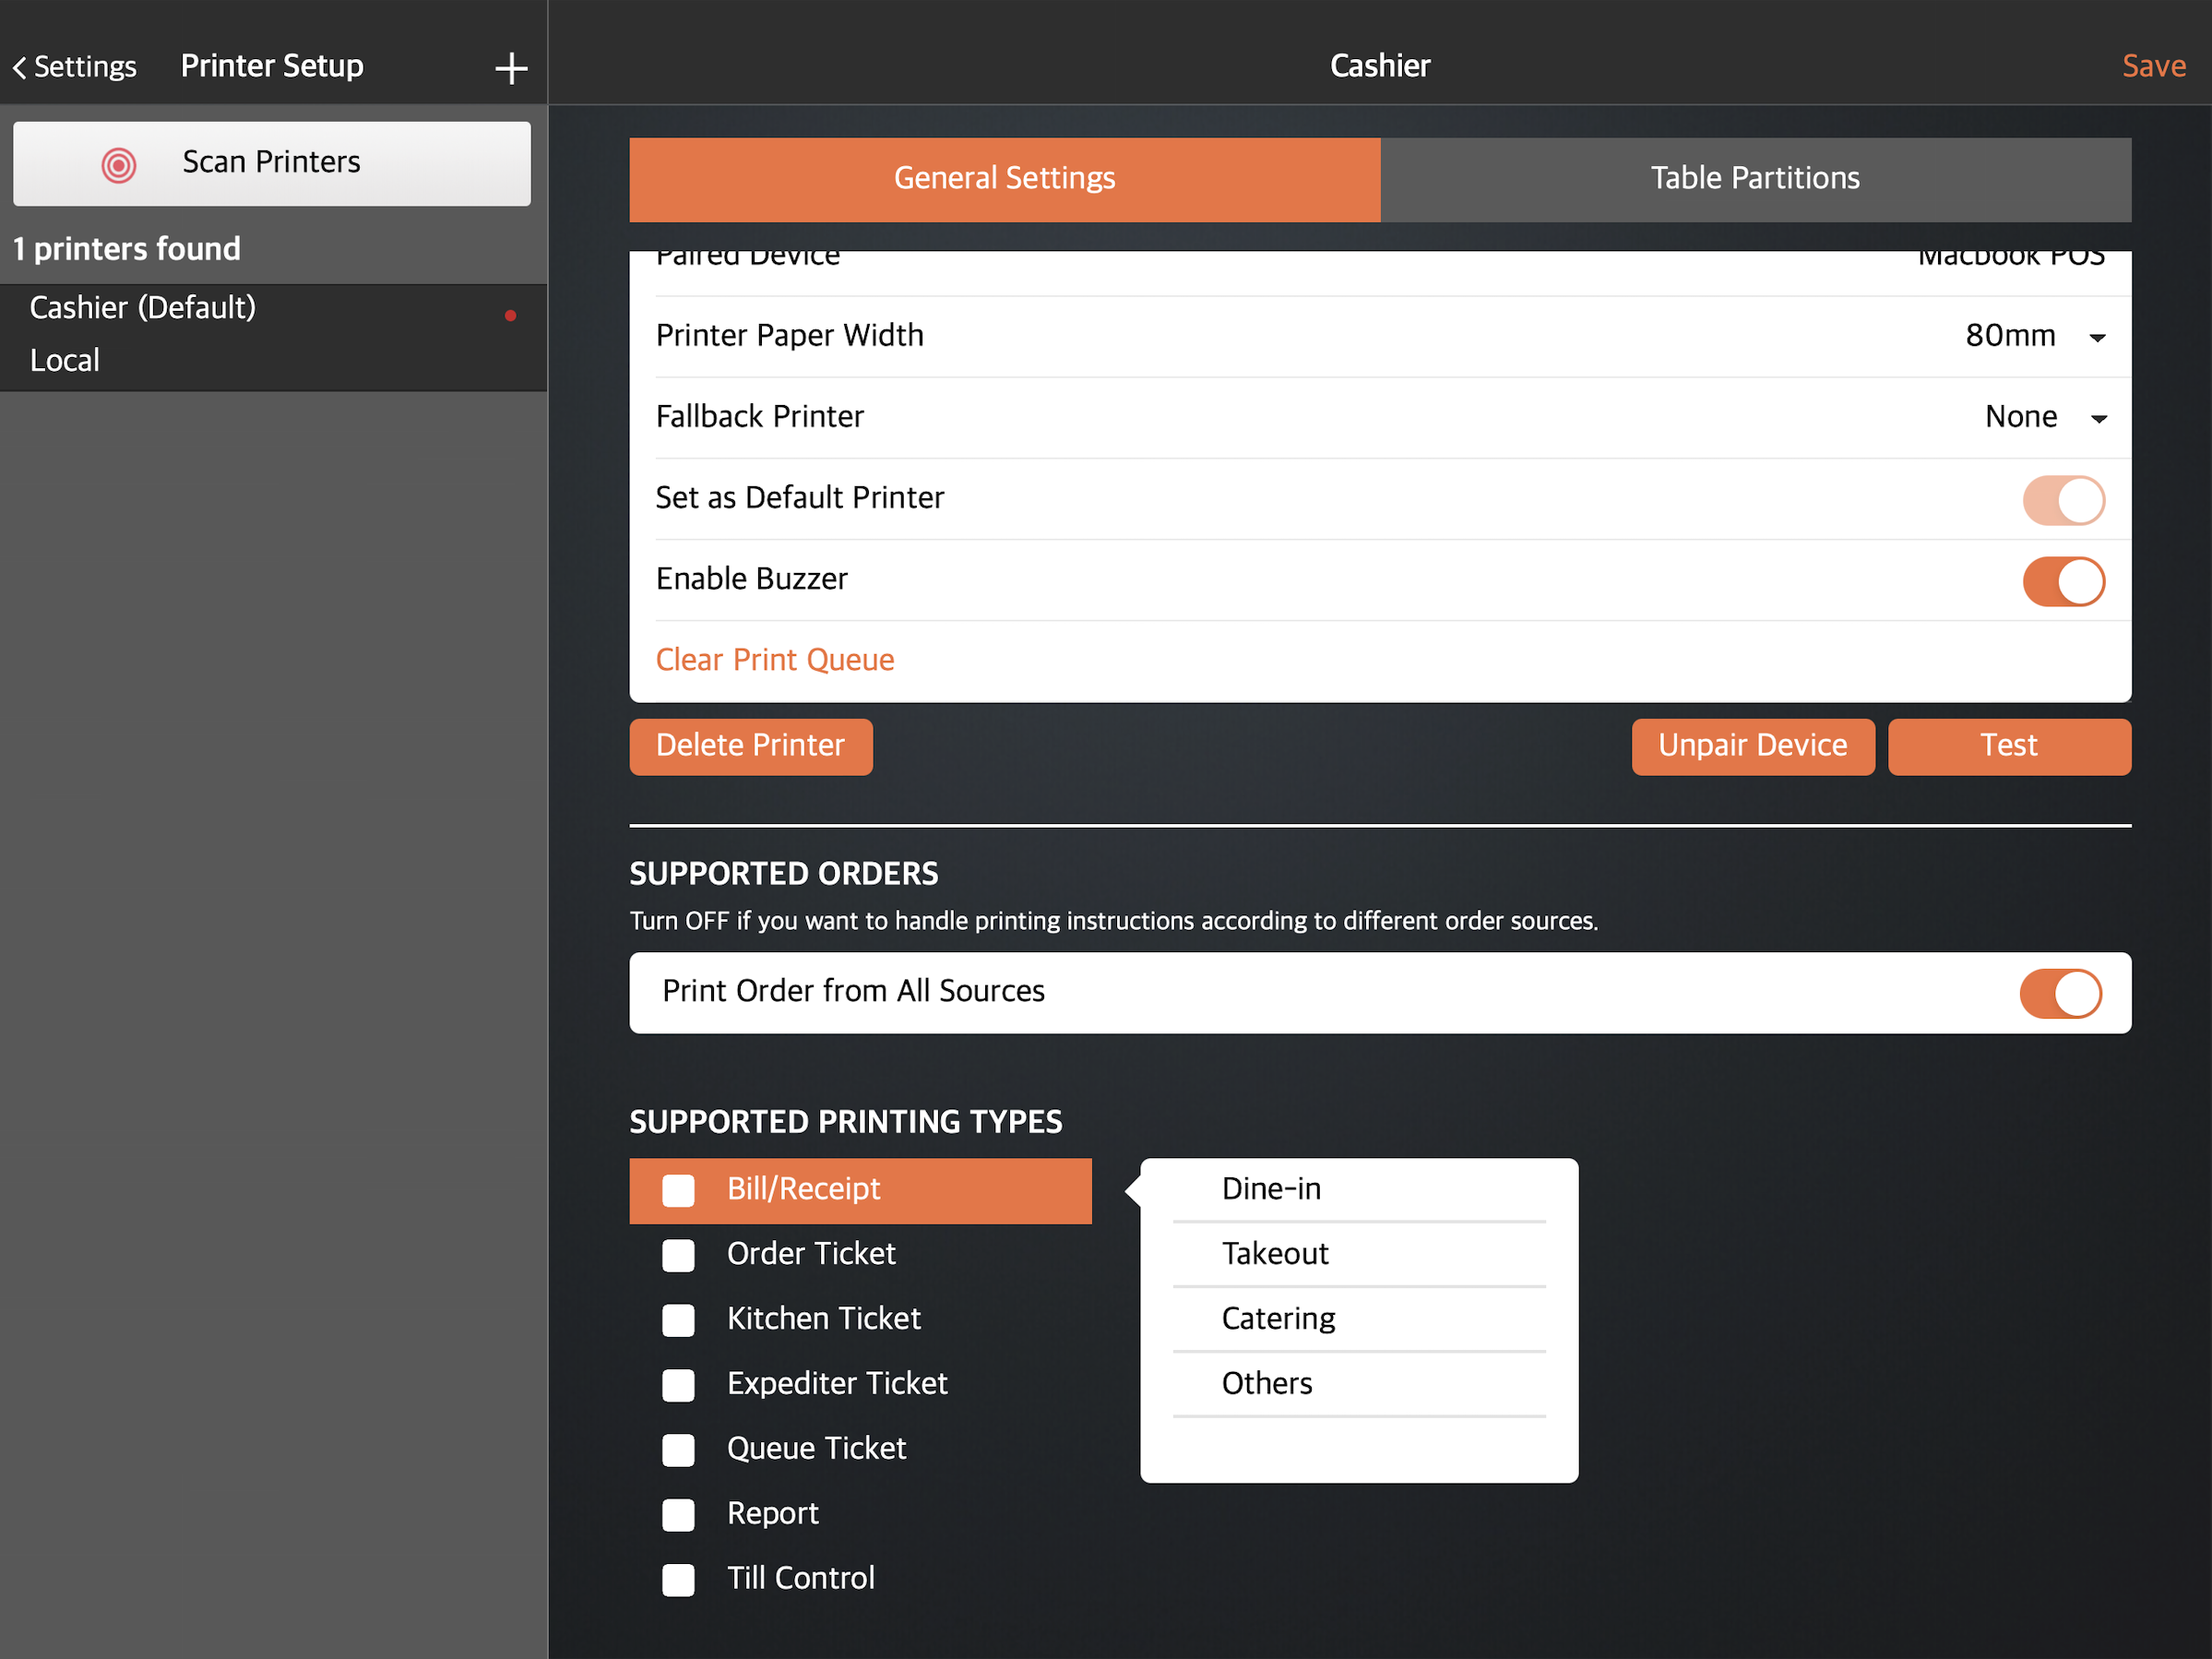
. - Under General, tap Printer Setup, then choose a connected receipt printer.
- Under Supported Printing Types, tap the checkbox next to Bill/Receipt, then choose between Dine-in, Takeout, Catering, or Others.
Tip: You can configure the printer to print receipts for multiple service types. - Tap Save to confirm.
- Tap back
 at the top left to go back to the Settings panel.
 - Under Settings, tap Printing, then select Receipt Printing.
- Turn on the following settings:
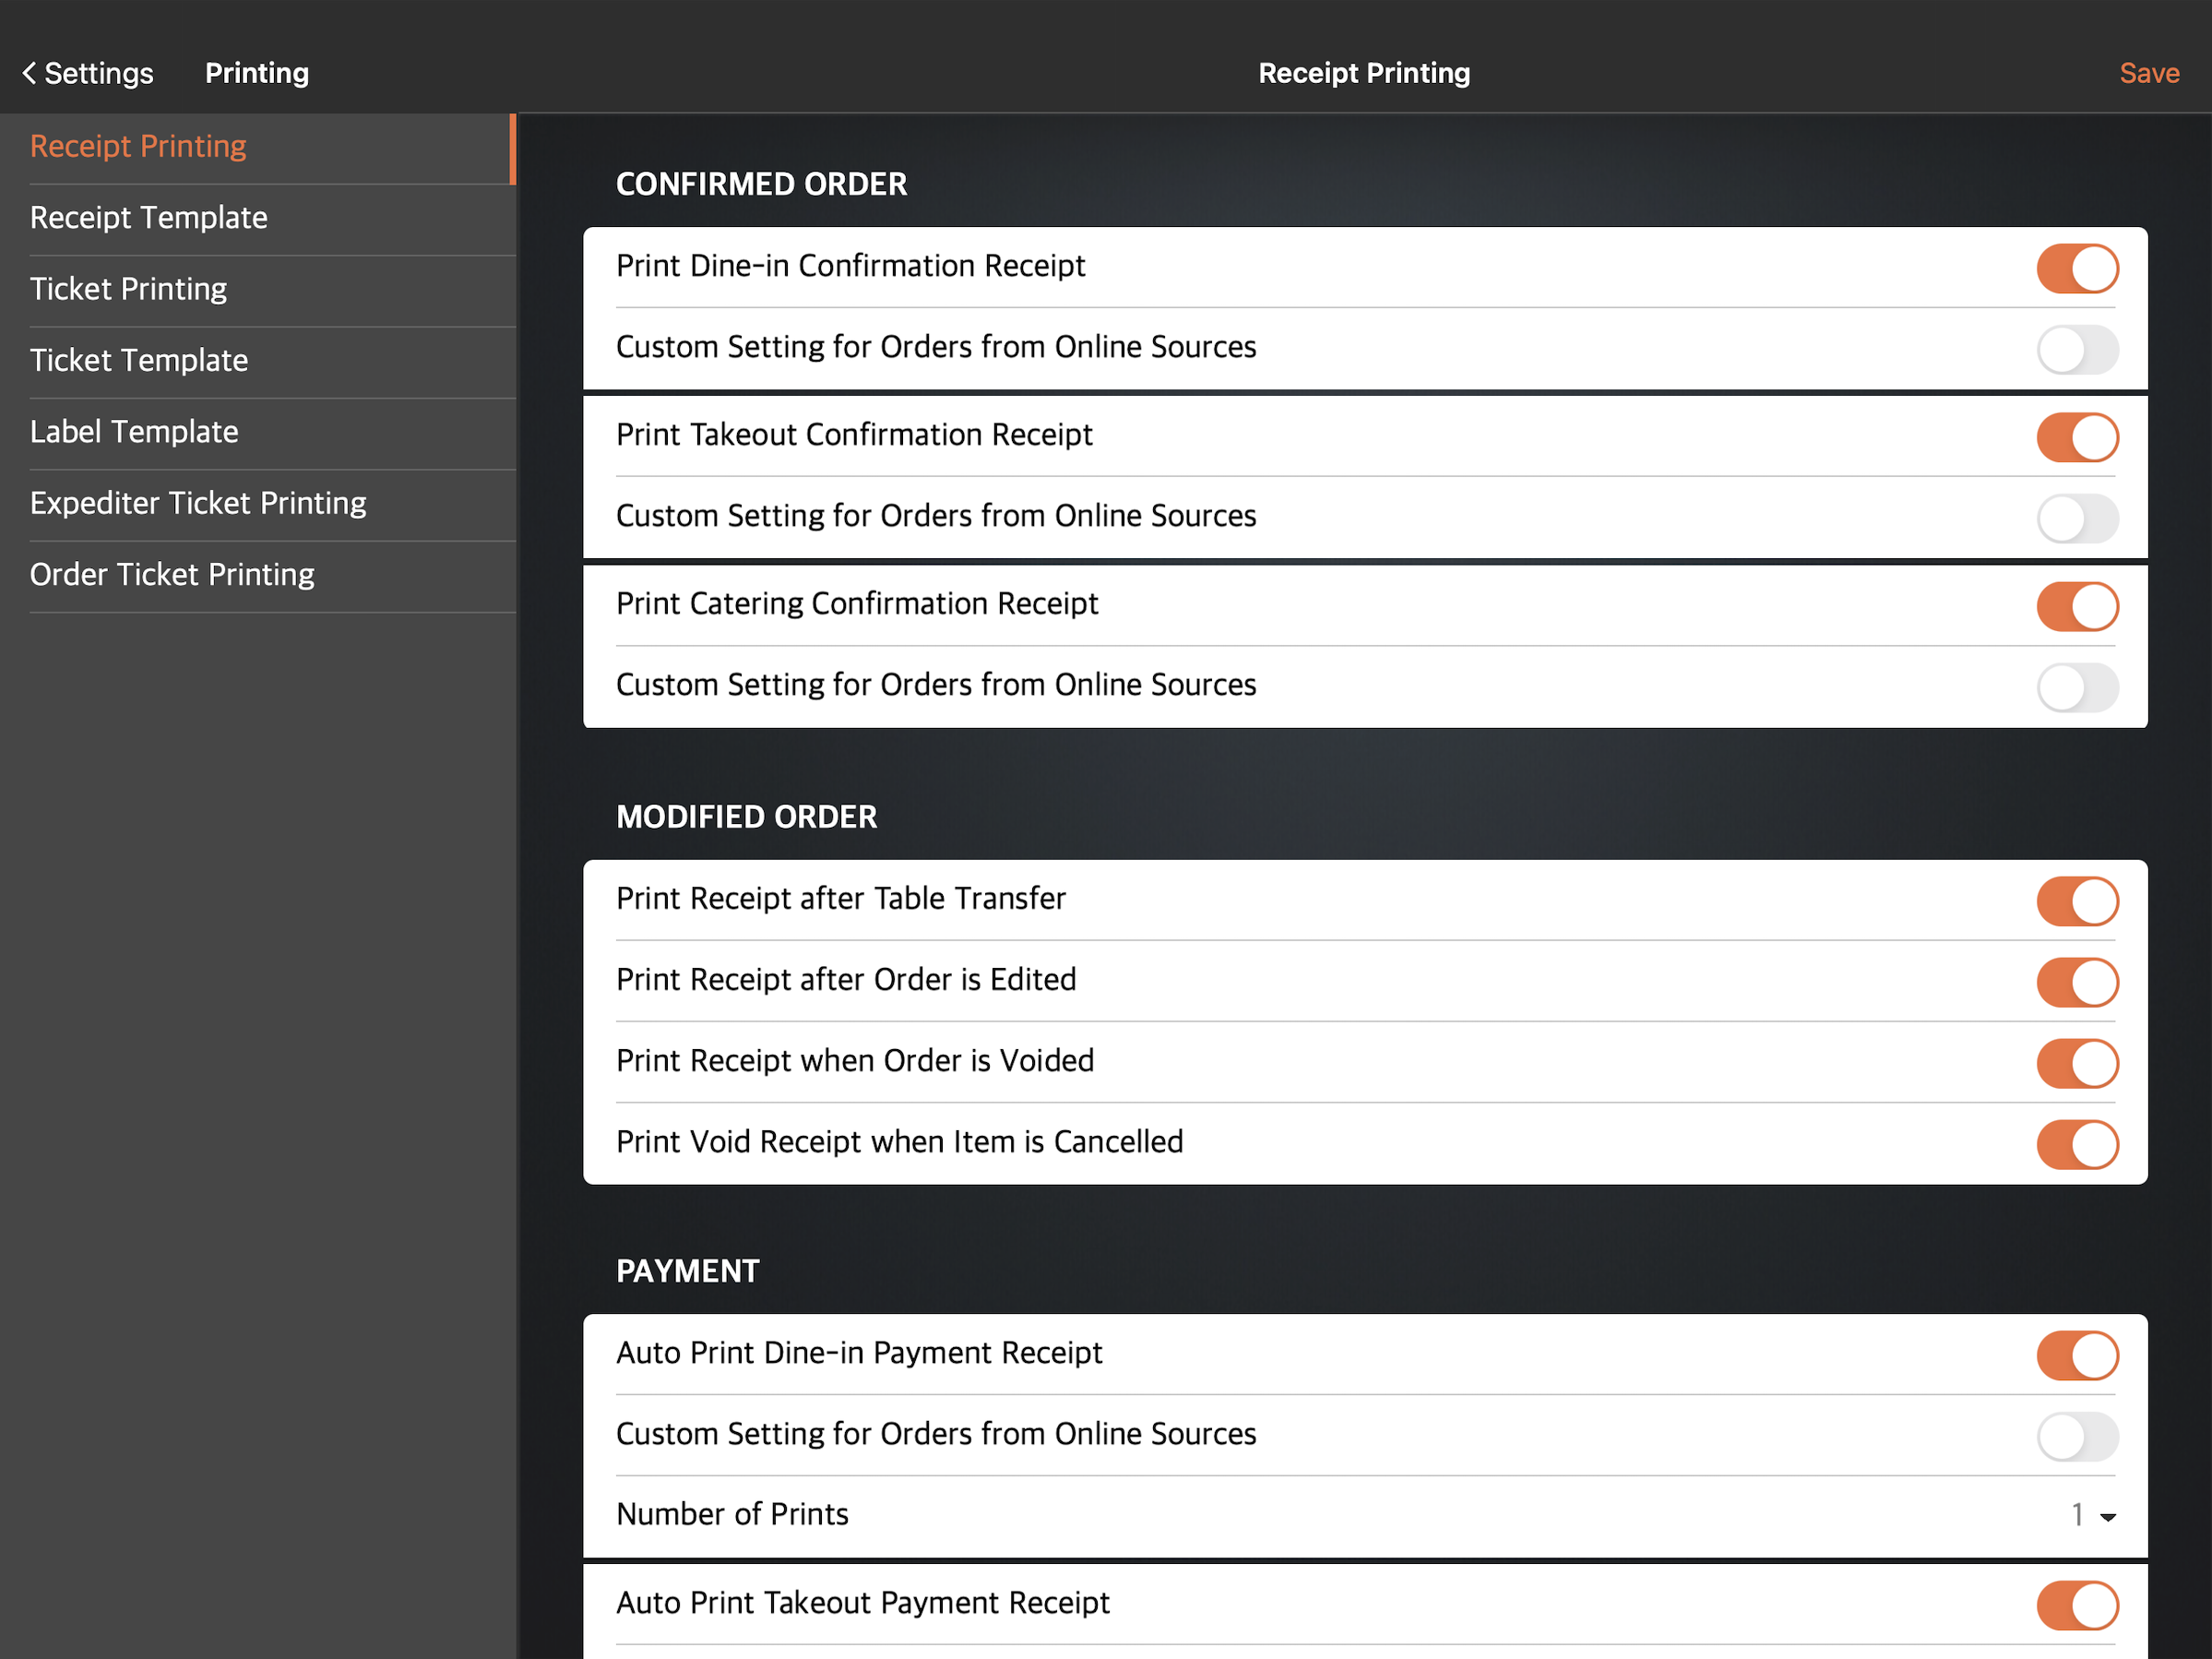
- Under Confirmed Order, turn on Print Dine-in Confirmation Receipt
 if you want the POS to print out a receipt automatically once a Dine-in order is placed. The same applies to Takeout and Catering orders.
 - Under Modified Order:
- Turn on Print Receipt after Table Transfer if you want the POS to automatically print out a receipt with a new table number whenever you transfer a check to another table.
- Turn on Print Receipt after Order is Edited if you want the POS to automatically print out a receipt whenever an order is modified.
- Turn on Print Receipt when Order is Voided if you want the POS to automatically print out a receipt whenever an order is voided.
- Turn on Print Void Receipt when Item is Cancelled if you want the POS to automatically print out a receipt whenever an order is canceled.
- Turn on Print Receipt after Table Transfer
- Under Payment, turn on Auto Print Dine-in Payment Receipt if you want the POS to automatically print out a payment receipt once a Dine-in payment is made. The same applies to Takeout and Catering payments.
Tip: The system can also automatically print an identical merchant and a customer receipt copy by setting the Number of Prints to two. - Under Check Name Display, turn on Display Check Name on Takeout Receipt to add the check name on the printed receipt.
- Under Confirmed Order, turn on Print Dine-in Confirmation Receipt
- Tap Save to confirm.
Till Control
The cash drawer can open automatically when a check is settled by cash payment. To do this, follow the steps below:
- Log in to the Eats365 POS.
- At the top left, tap Settings .
- Under General, tap Printer Setup, then tap on the receipt printer with the connected cash drawer.
- Under Supported Printing Types, place a check mark beside Till Control.
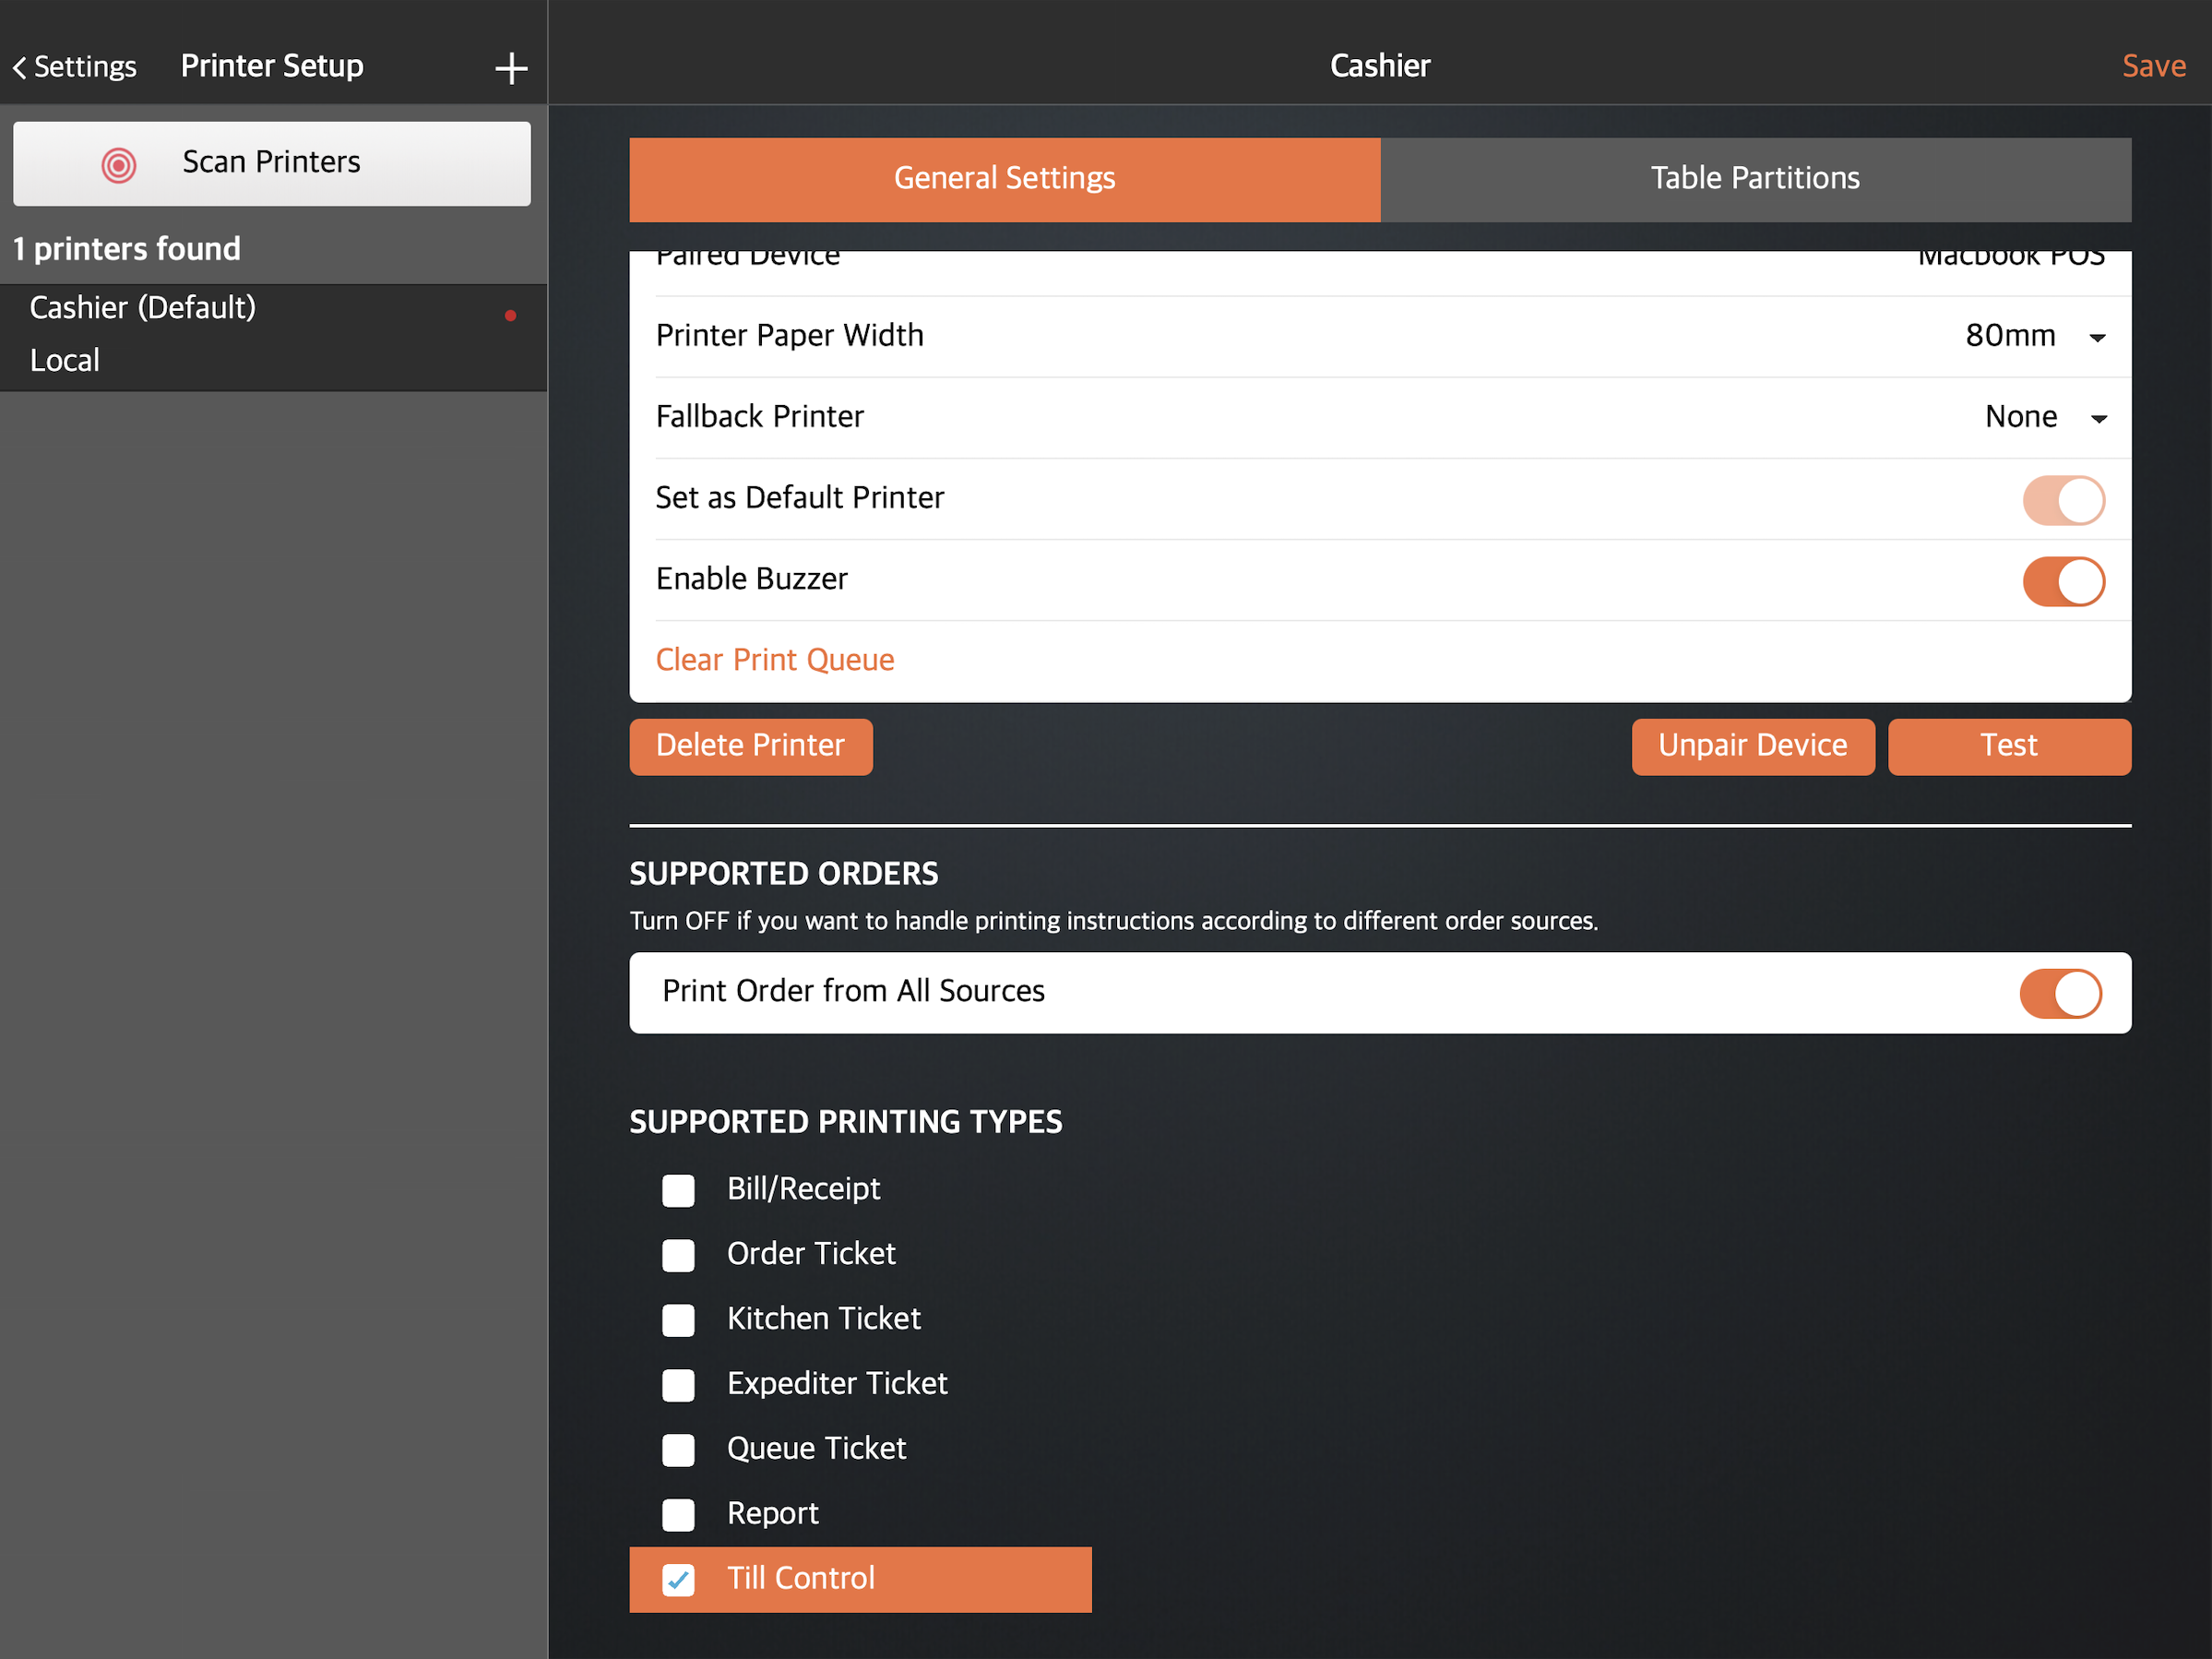
- Tap Save to confirm.