CRM
Table of Contents
Manage CRM Members
Learn how to view and manage CRM Member information on the Merchant Portal.
Customer information can be recorded to track spending habits, which can be used for business analytics. By default, restaurants can view the dashboard and manage the customer list. Acquiring a Loyalty Program license adds more functionality and features to the CRM.
In this article, you'll learn about the CRM Dashboard and its functionalities including viewing data analytics, how to create, modify, import, export, and delete customer records.
Before you start
A Loyalty Program license is required to be able to access CRM features and tools. You may reach out to a Channel Partner or an Eats365 Sales Agent to purchase a license.
CRM Dashboard
The CRM Dashboard displays an easy-to-view summary of CRM-related information.
To view the CRM Dashboard, follow the steps below:
Merchant Portal (Classic Theme)
- Log in to the Merchant Portal.
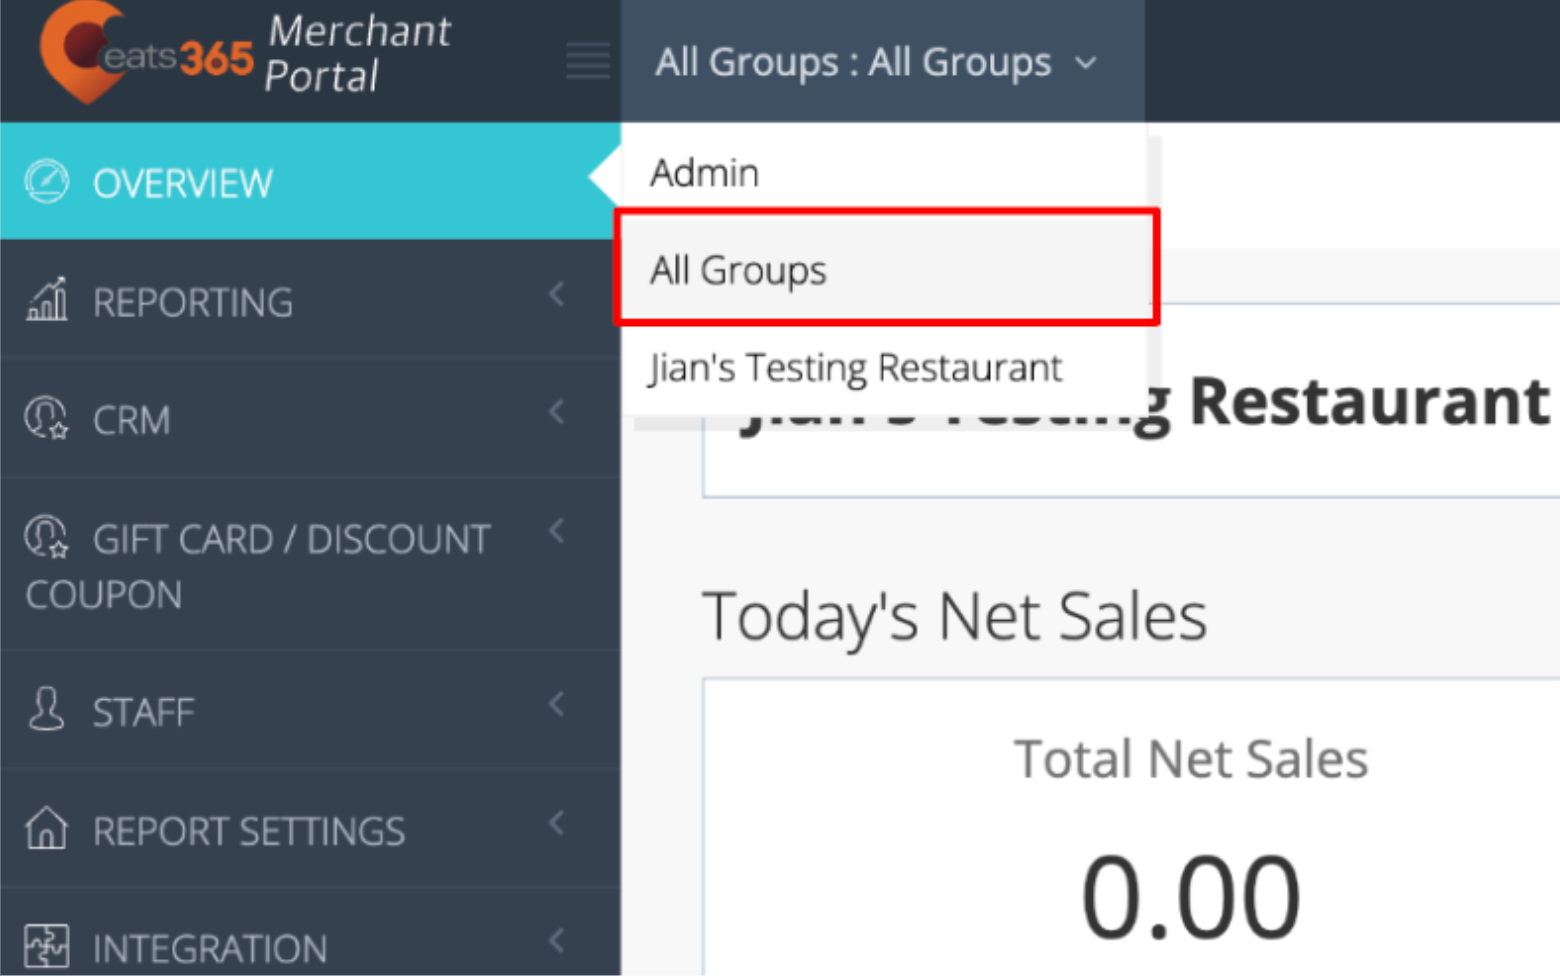
- At the top left, change the view to All Groups to display Organization Settings.

- On the left panel, click on CRM, then click on Dashboard.
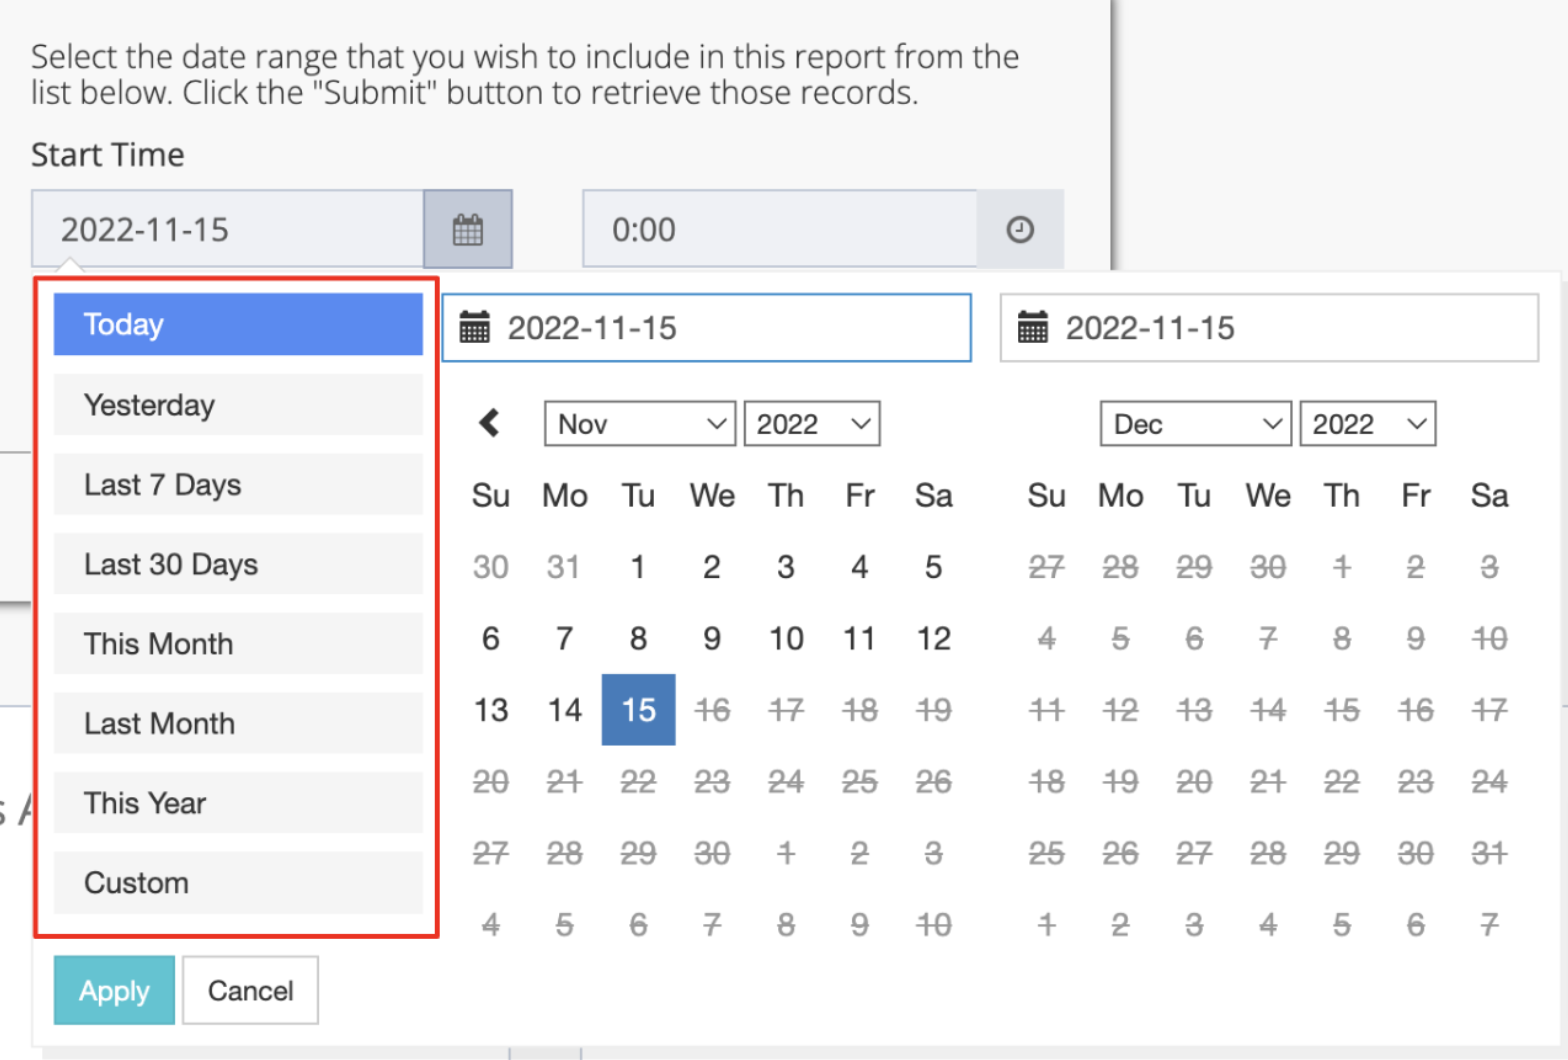
- At the upper right, select the date range and choose a range to review by entering the Start Time and End Time.
Tip: You can select a preset date range by selecting the options at the left of the calendar display. Click Apply to confirm.
- Click Submit to confirm. The CRMDashboard displays the following details:
- New Customers Added
- Transactions Assigned to Customers
- Top Customers by Visits
- Top Customers by Trans. Amount.
Merchant Portal 2.0
- Log in to the Merchant Portal.
- At the top, from the Group drop-down list, select the organization you’d like to manage.

- On the left panel, click on CRM, then click on Dashboard.
- To view data for a specific date range, click on the date range, then Custom. Add the start and end date, then click on Apply. You can also select one of the preset date ranges.
- Click Submit to confirm. The CRMDashboard displays the following details:
- New Customers Added
- Transactions Assigned to Customers
- Top Customers by Visits
- Top Customers by Trans. Amount.
Custom Member Fields
Custom Member Fields allow you to create additional fields where you can enter information based on whatever details a restaurant would like to record.
To create a Custom Member Field, follow the steps below:
- Log in to the Merchant Portal.
- At the top left, change the view to All Groups to display Organization Settings.

- On the left panel, click on CRM, then click on Custom Member Fields.
- At the top left, click on +Custom Field.
- Enter the preferred field details.
- Click on Save to confirm.
Customer List
The Customer List displays a list of registered customers with glanceable details such as their First and Last Name, Creation Date, Last Transaction Date, Accumulated Transaction Amount (Acc. Trans. Amount), and Credit Balance.
Create a new customer record
To add a new customer record, follow the steps below:
Merchant Portal (Classic Theme)
- Log in to the Merchant Portal.
- At the top left, change the view to All Groups to display Organization Settings.

- On the left panel, click on CRM, then click on Customer List.
- At the top left, click on +Customer.
- Enter the customer’s details. Fields marked with a red asterisk (*) are mandatory fields.
Note: The majority of the fields are about the customer’s personal information, except for the following:- VIP Code - Membership plan from the restaurant.
- Consent for marketing - The customer may receive marketing correspondence if turned on.
- Remarks - Free-text field where you can enter any relevant customer information.
- Click on Confirm to finish creating the customer record.
Merchant Portal 2.0
- Log in to the Merchant Portal.
- At the top, from the Group drop-down list, select the organization you’d like to manage.

- On the left panel, click on CRM, then click on Customer List.
- At the top left, click on + Add Customer.
- Enter the customer’s details. Fields marked with a red asterisk (*) are mandatory fields.
Note: The majority of the fields are about the customer’s personal information, except for the following:- VIP Code - Membership plan from the restaurant.
-
Acc. Trans. Amount - The customer’s accumulated transaction amount.
Note: This field is automatically populated and can’t be edited. -
Last Trans. Date - The customer’s last transaction date.
Note: This field is automatically populated and can’t be edited. - Consent for marketing - The customer may receive marketing correspondence if turned on.
- Remarks - Free-text field where you can enter any relevant customer information.
- At the top right, click on Save to finish creating the customer record.
Filter search results
The filter option can easily find specific customer records. To use the filter options, follow the steps below:
Merchant Portal (Classic Theme)
- Log in to the Merchant Portal.
- At the top left, change the view to All Groups to display Organization Settings.

- On the left panel, click on CRM, then click on Customer List.
- At the upper left, click on the filter drop-down list and choose from the following options:
- Name
- Phone
- VIP Code
- Eats365 Membership Card
Note: The VIP Code is the membership plan from the restaurant, while the Eats365 Membership Card option is the membership plan from Eats365.
- In the next field, enter the details of the record you want to look for.
- (Optional) To show customers whose membership has expired, turn on Include expired customers
 .
. - Click on Search to filter the search results.
Merchant Portal 2.0
- Log in to the Merchant Portal.
- At the top, from the Group drop-down list, select the organization you’d like to manage.

- On the left panel, click on CRM, then click on Customer List.
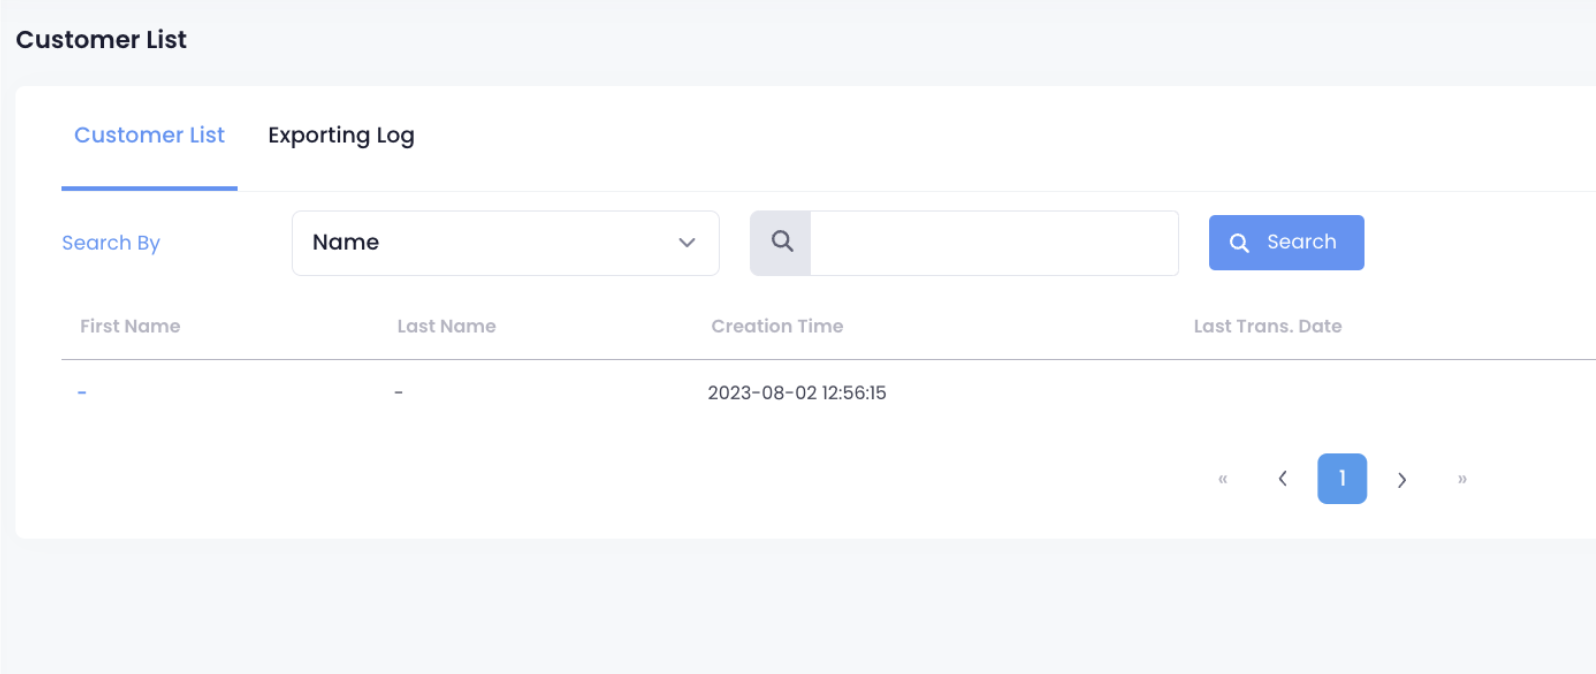
- At the upper left, click on Search By. Then, click on the drop-down list and choose from the following options:
- Name
- Phone
- VIP Code
- Eats365 Membership Card
Note: The VIP Code is the membership plan from the restaurant, while the Eats365 Membership Card option is the membership plan from Eats365.
- In the next field, enter the details of the record you want to look for.
- (Optional) To show customers whose membership has expired, turn on Include expired customers
 .
. - Click on Search to filter the search results.
Modify a customer record
To export the Customer List, follow the steps below:
Merchant Portal (Classic Theme)
- Log in to the Merchant Portal.
- At the top left, change the view to All Groups to display Organization Settings.

- On the left panel, click on CRM, then click on Customer List.
- (Optional) Filter the search results by clicking the filter drop-down list, enter the details of the record that you want to look for, then click on Search.
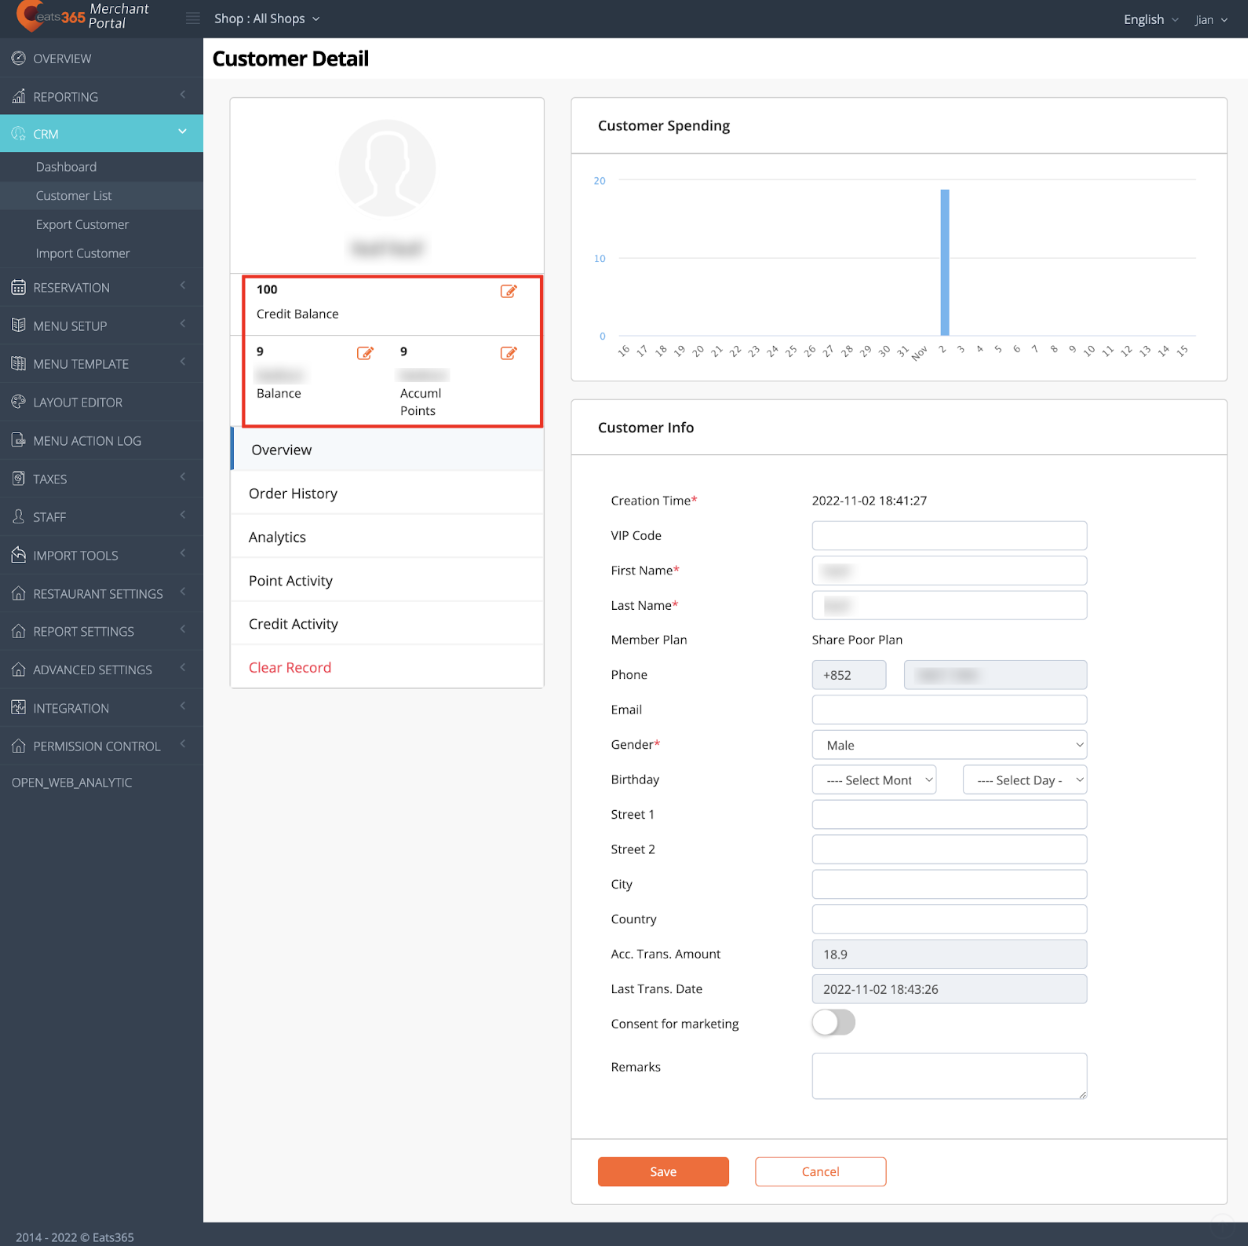
- From the search results, click the First Name of the record that you want to update.
- Update the customer’s record by clicking on the relevant text fields.
- To update the customer’s Credits, Balance, and Accumulated Points, click on Edit
 .
.
Note: You may add or deduct points or set their balance’s expiration date. Click Apply to confirm the changes.
- Tap Save to confirm.
Merchant Portal 2.0
- Log in to the Merchant Portal.
- At the top, on the Group drop-down list, select the organization you’d like to manage.

- On the left panel, click on CRM, then click on Customer List.
- (Optional) Filter the search results by using the Search By feature.
- From the search results, click the First Name of the record that you want to update.
- Update the customer’s record by clicking on the relevant text fields.
- To update the customer’s Credits, Balance, and Accumulated Points, click on Edit
 .
.
Note: You may add or deduct points or set their balance’s expiration date. Click Apply to confirm the changes. - Tap Save to confirm.
Import Customer List
To import a Customer List, follow the steps below:
Merchant Portal (Classic Theme)
- Log in to the Merchant Portal.
- At the top left, change the view to All Groups to display Organization Settings.

- On the left panel, click on CRM, then click on Import Customer.
- Under Step 1, download the template file, then fill in the necessary columns. Make sure to save the file after editing.
- Under Step 3, upload the template file. Then, click on Submit.
Merchant Portal 2.0
- Log in to the Merchant Portal.
- At the top, on the Group drop-down list, select the organization you’d like to manage.

- On the left panel, click on CRM, then click on Import Customer.
- At the top right, select Import Customer List.
- Under Step 1, download the template file, then fill in the necessary columns. Make sure to save the file after editing.
- Under Step 3, upload the template file. Then, click on Submit.
Export Customer List
To export the Customer List, follow the steps below:
Merchant Portal (Classic Theme)
- Log in to the Merchant Portal.
- At the top left, change the view to All Groups to display Organization Settings.

- On the left panel, click on CRM, then click on Export Customer.
- At the top right, click on Download. This downloads a file to your computer.
Merchant Portal 2.0
- Log in to the Merchant Portal.
- At the top, from the Group drop-down list, select the organization you’d like to manage.

- On the left panel, click on CRM, then click on Customer List.
- At the top right, click on
 Export Customer List. This downloads a file to your computer.
Clear a customer record
To clear a customer’s record, follow the steps below:
Merchant Portal (Classic Theme)
- Log in to the Merchant Portal.
- At the top left, change the view to All Groups to display Organization Settings.

- On the left panel, click on CRM, then click on Customer List.
- (Optional) Filter the search results by clicking the filter drop-down list, then enter the details of the record that you want to look for, then click on Search.
- From the search results, click the First Name of the record that you want to clear.
- Click on Clear Record, then click on OK. The customer’s records are removed from the system. A blank row appears on the customer list to mark the deleted record.

Merchant Portal 2.0
- Log in to the Merchant Portal.
- At the top, from the Group drop-down list, select the organization you’d like to manage.

- (Optional) Filter the search results by using the Search By feature.
- From the search results, click the First Name of the record that you want to clear.
- Click on Clear Record, then click on OK. The customer’s records are removed from the system. A blank row appears on the customer list to mark the deleted record.

View Analytics
To view customer spending behavior records, follow the steps below:
Merchant Portal (Classic Theme)
- Log in to the Merchant Portal.
- At the top left, change the view to All Groups to display Organization Settings.

- On the left panel, click on CRM, then click on Customer List.
- (Optional) Filter the search results by tapping the filter drop-down list, enter the details of the record you want to look for, and click on Search.
- From the search results, click the First Name of the record that you want to review. The customer’s records and analytics appear on the screen.
| Order History |
Displays the customer’s past order history. Tip: Tapping on the order number brings up the order details. At the top right, click on Edit to modify the following details:
At the top right, click on Save to confirm if any changes are made. |
| Analytics | Displays a member’s spending habits by listing the Items they’ve purchased and the Item Quantity. |
| Point Activity (Loyalty Program license required) |
Displays information about the customer’s activities whenever they use their points. The following details are shown:
|
| Credit Activity (Loyalty Program license required) |
Displays information about the customer’s activities whenever they use their credits. The following details are shown:
|
 Delete
Merchant Portal 2.0
- Log in to the Merchant Portal.
- At the top, from the Group drop-down list, select the organization you’d like to manage.

- On the left panel, click on CRM, then click on Customer List.
- (Optional) Filter the search results by using the Search By feature.
- From the search results, click the First Name of the record that you want to review. The customer’s records and analytics appear on the screen.
| Order History |
Displays the customer’s past order history. Tip: Tapping on the order number brings up the order details. At the top right, click on Edit to modify the following details:
At the top right, click on Save to confirm if any changes are made. |
| Analytics | Displays a member’s spending habits by listing the Items they’ve purchased and the Item Quantity.Displays a member’s spending habits by listing the Items they’ve purchased and the Item Quantity. |
| Point Activity (Loyalty Program license required) |
Displays information about the customer’s activities whenever they use their points. The following details are shown:
|
| Credit Activity (Loyalty Program license required) |
Displays information about the customer’s activities whenever they use their credits. The following details are shown:
|