 Eats365 Products
 Merchant Guide
 Modules
 Membership
 Integrations
 Hardware
 Staff Operations
 Roles & Permissions
 Payments
 Reports
 What’s New
 Release Notes
 Troubleshooting
 Simulators
 Glossary
 Troubleshooter
 System Status
Organization Preferences
Table of Contents
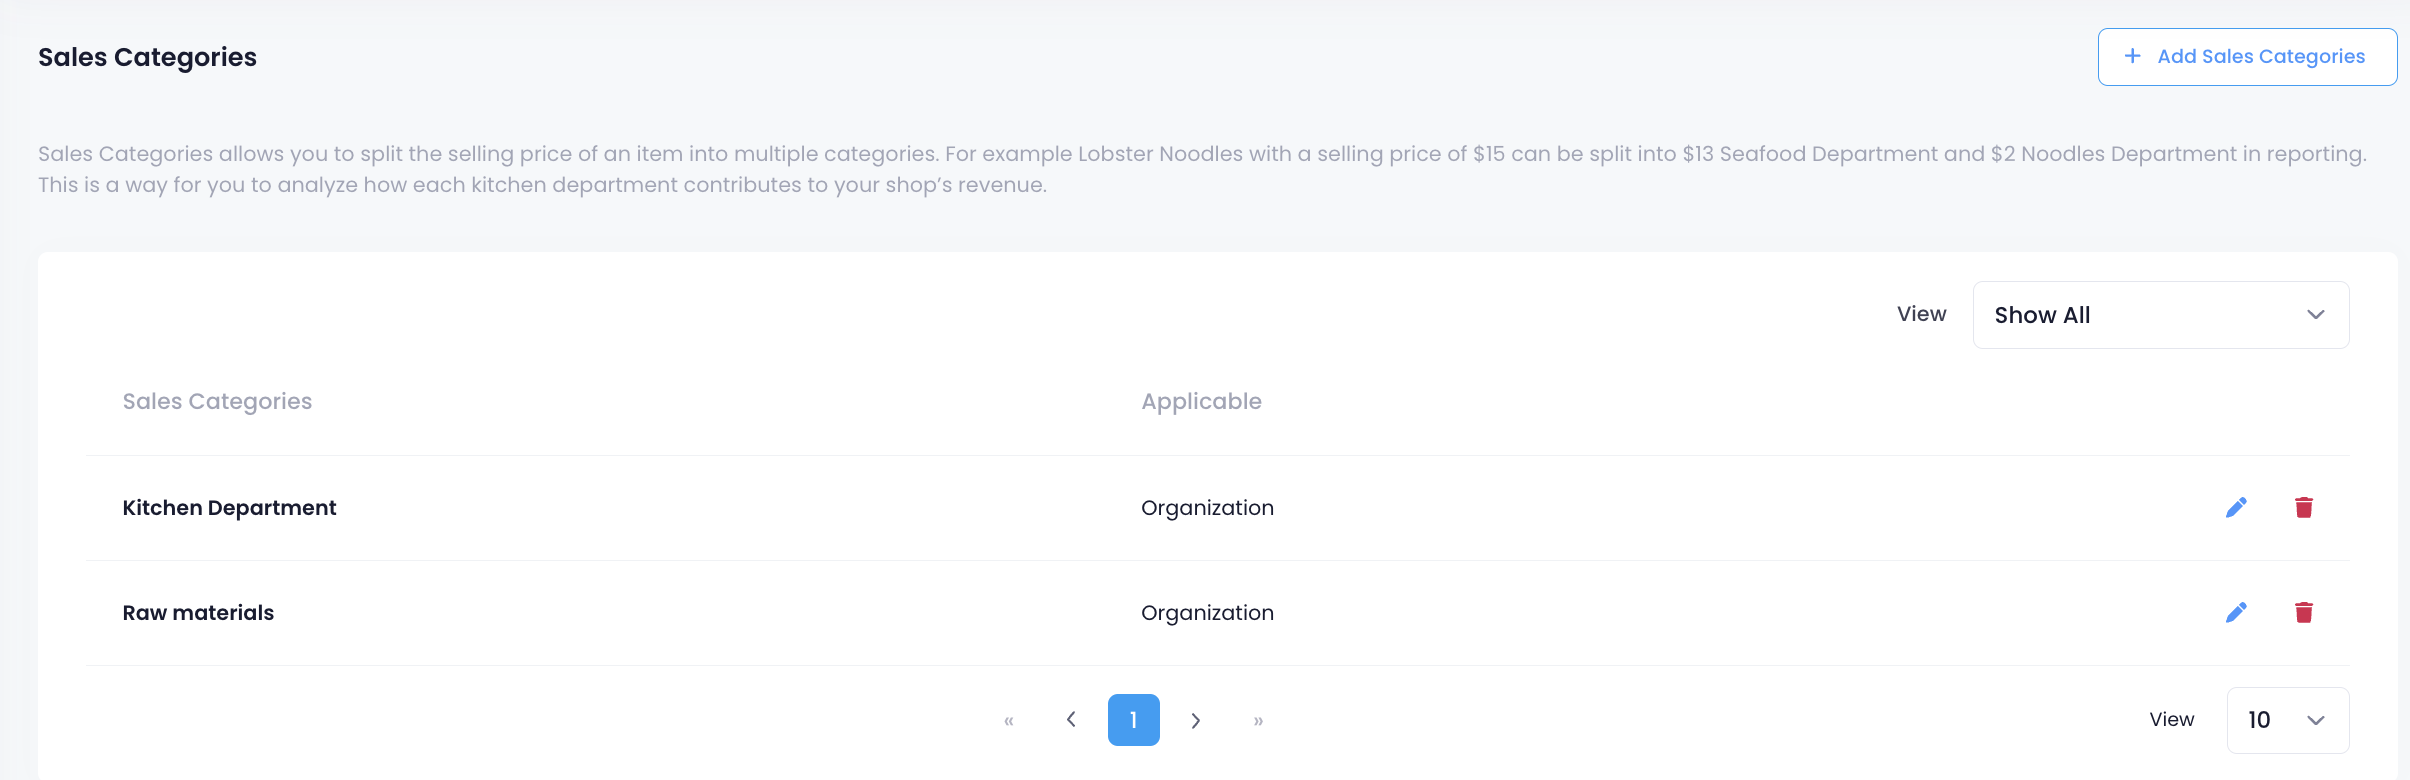
Create and manage Sales Categories
Learn how to add, edit, and delete sales categories on the Merchant Portal.
The Sales Categories feature allows you to create categories that can be used to allocate the sales of an item and track how different departments contribute to your shop’s revenue. The Sales by Category Report shows the percentage or amount of the sales attributed to each item.
In this article, you’ll learn how to create a sales category that can be used to allocate item sales to different sales categories. For more information on how to split item sales to different sales categories, refer to Allocate item sales to different sales categories.
Create a sales category
To create a sales category, follow the steps below:
Merchant Portal (Classic Theme)
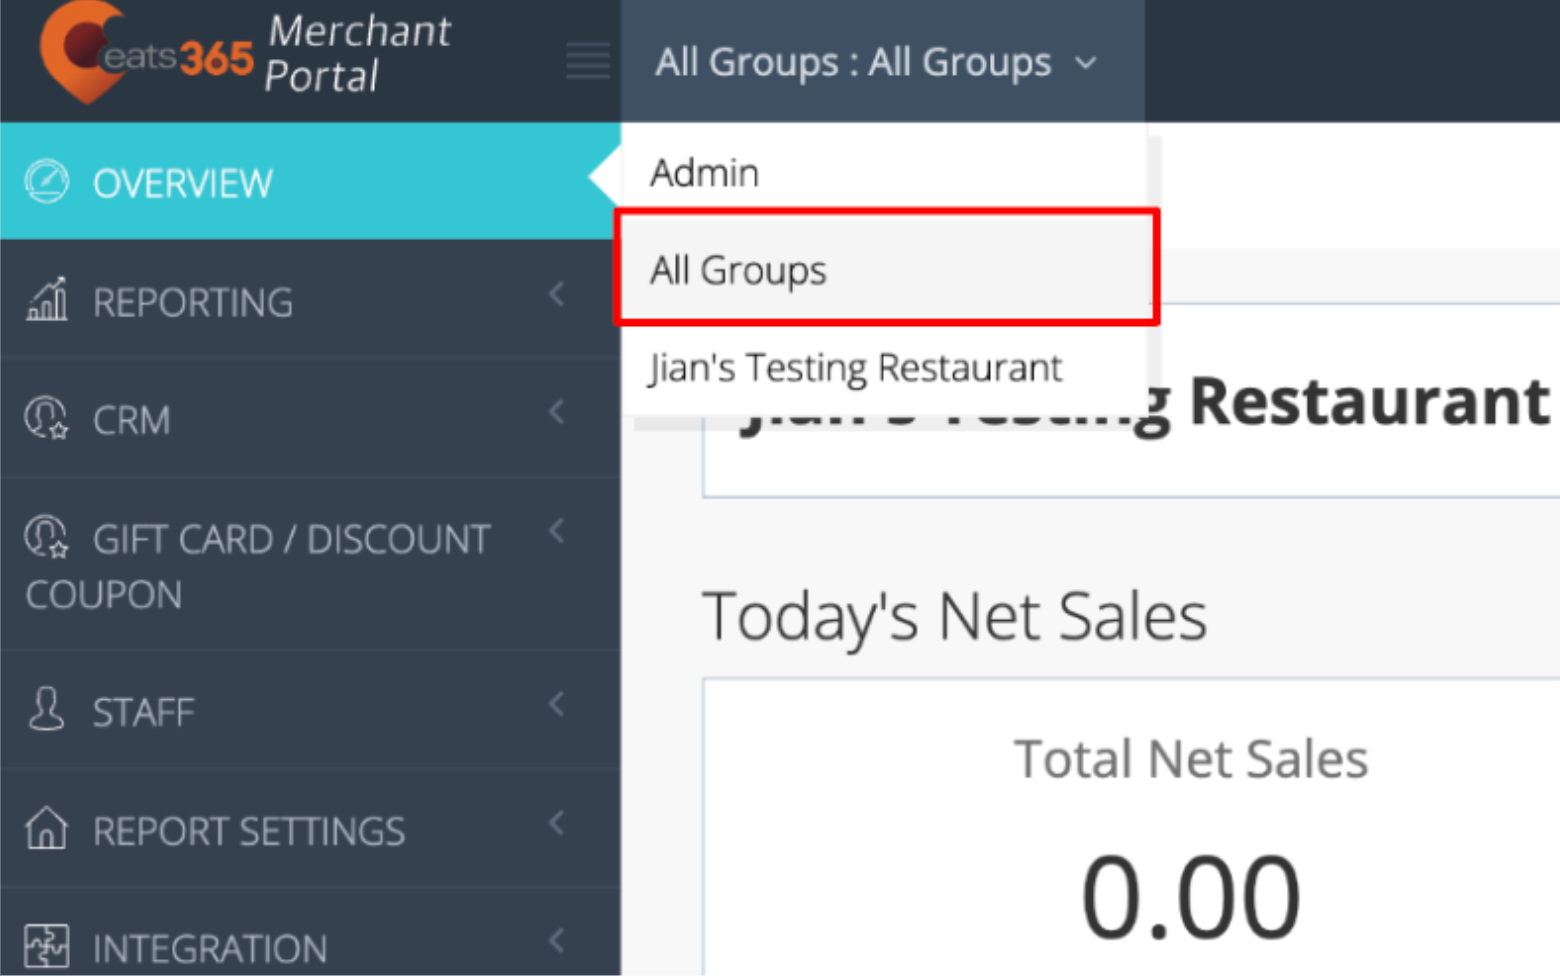
- Log in to the Merchant Portal.
- At the top left, change the view to All Groups to display Organization Settings.
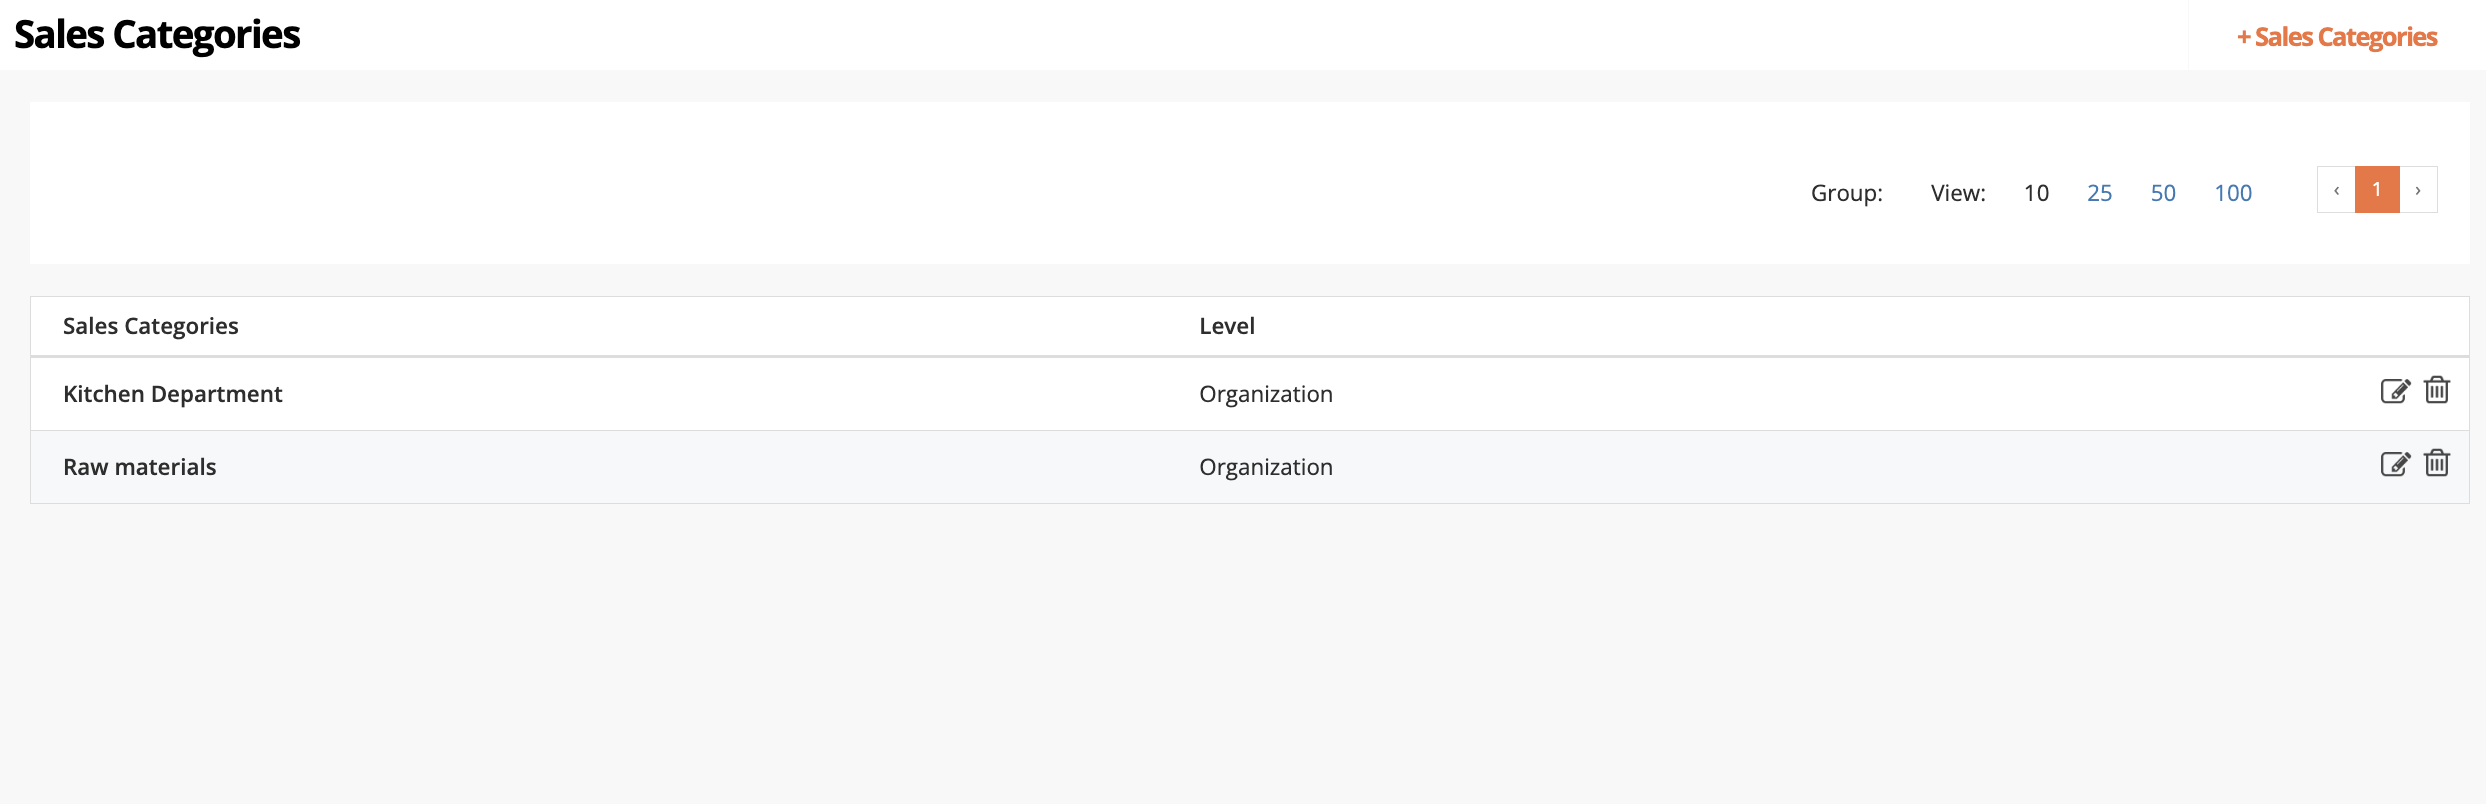
- On the left panel, click on Organization Settings. Then, click on Sales Categories.
- At the top right, click on +Sales Categories.
- Enter the Sales Category Name and Code.
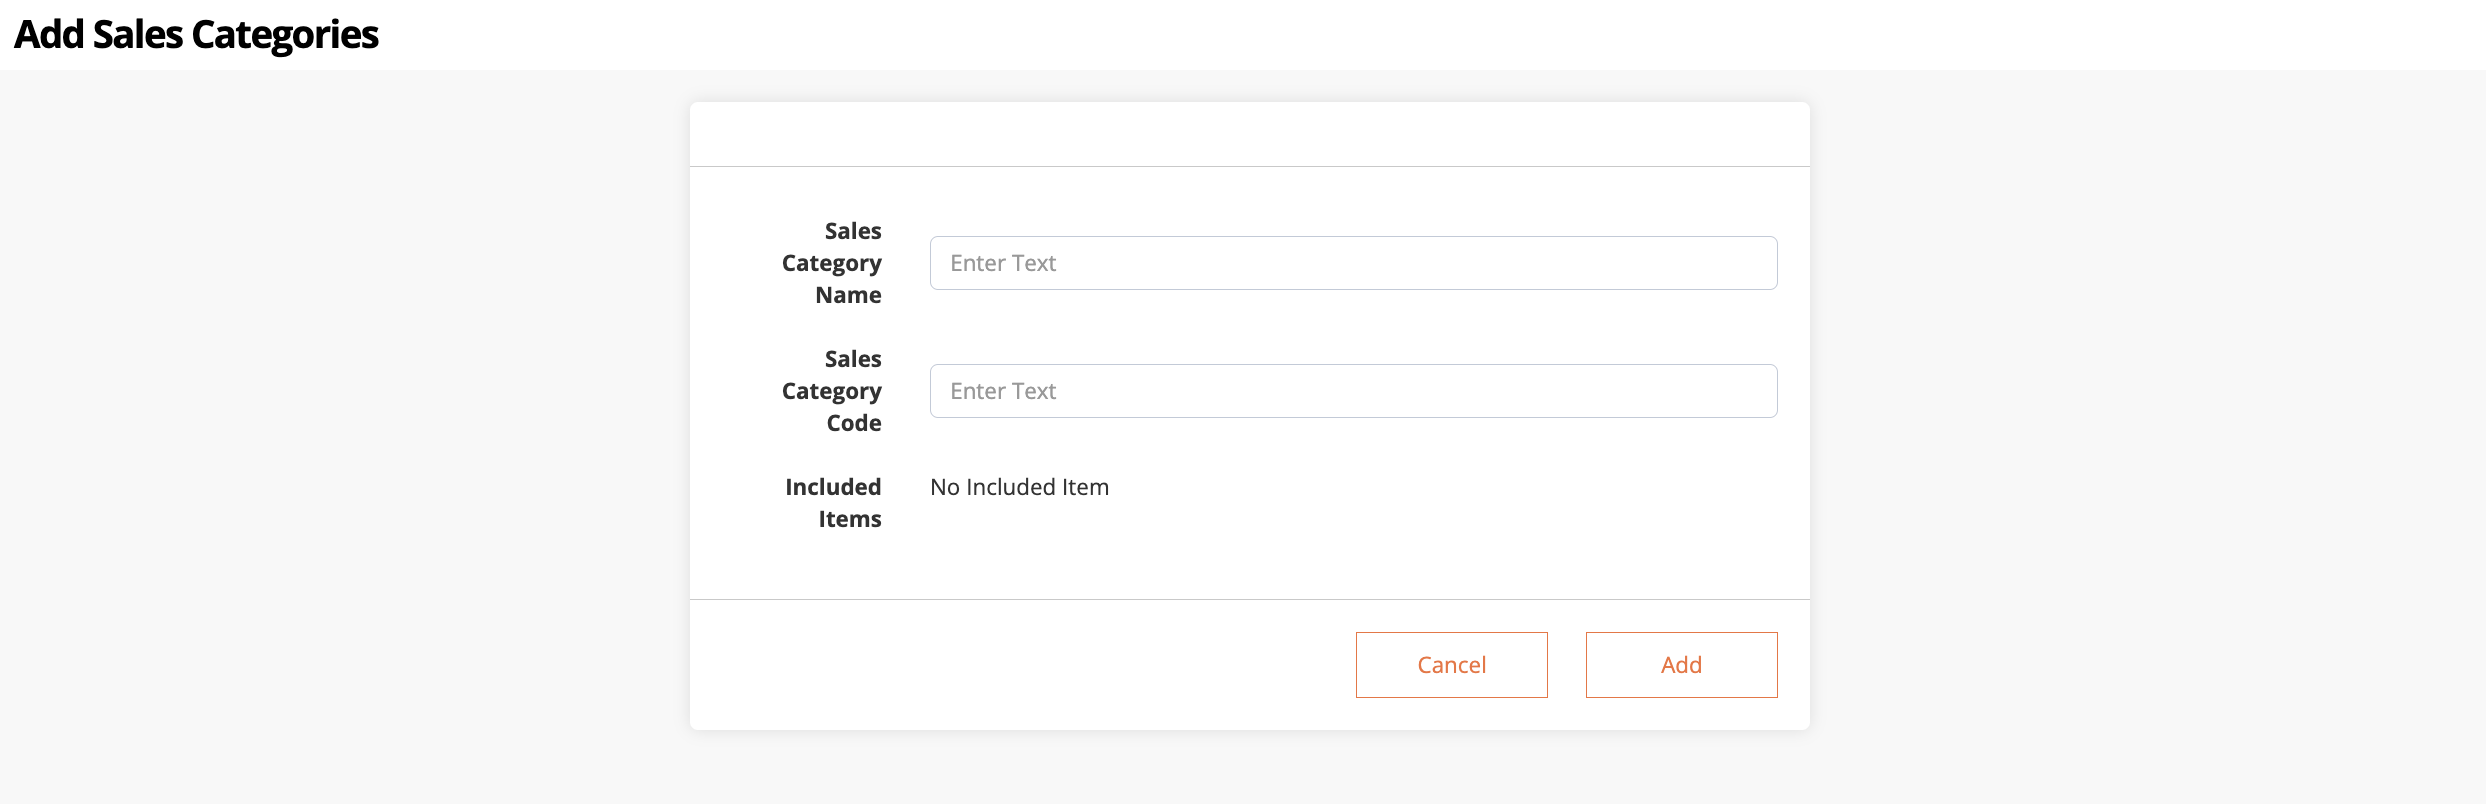
- Click on Add to confirm.
Merchant Portal 2.0
- Log in to the Merchant Portal.
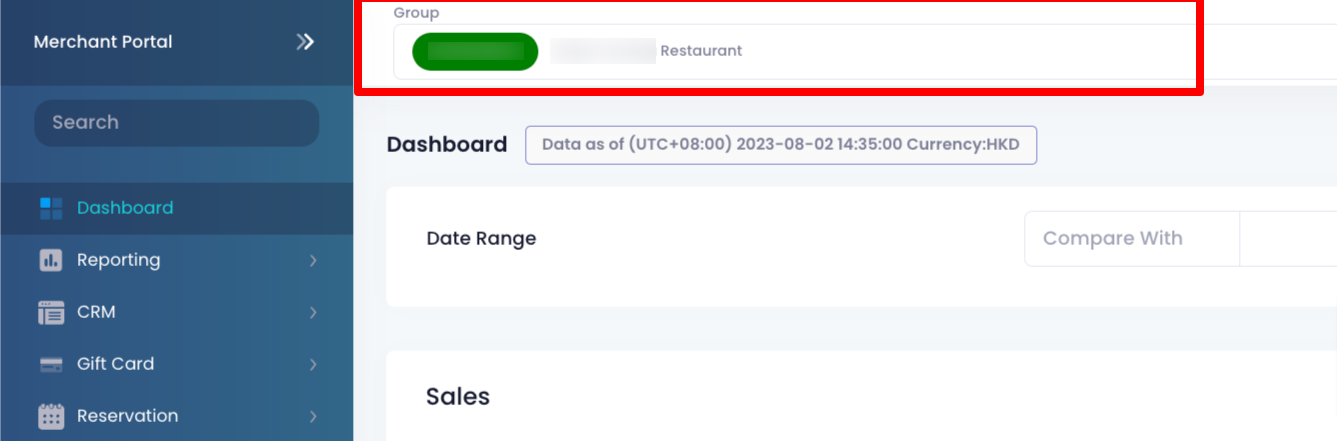
- At the top, from the Group drop-down list, select the group or the organization that you’d like to manage.
- On the left panel, click on Advanced Settings. Then, select Sales Categories.
- At the top right, click on +Add Sales Categories.
- Enter the Sales Category Name and Code.
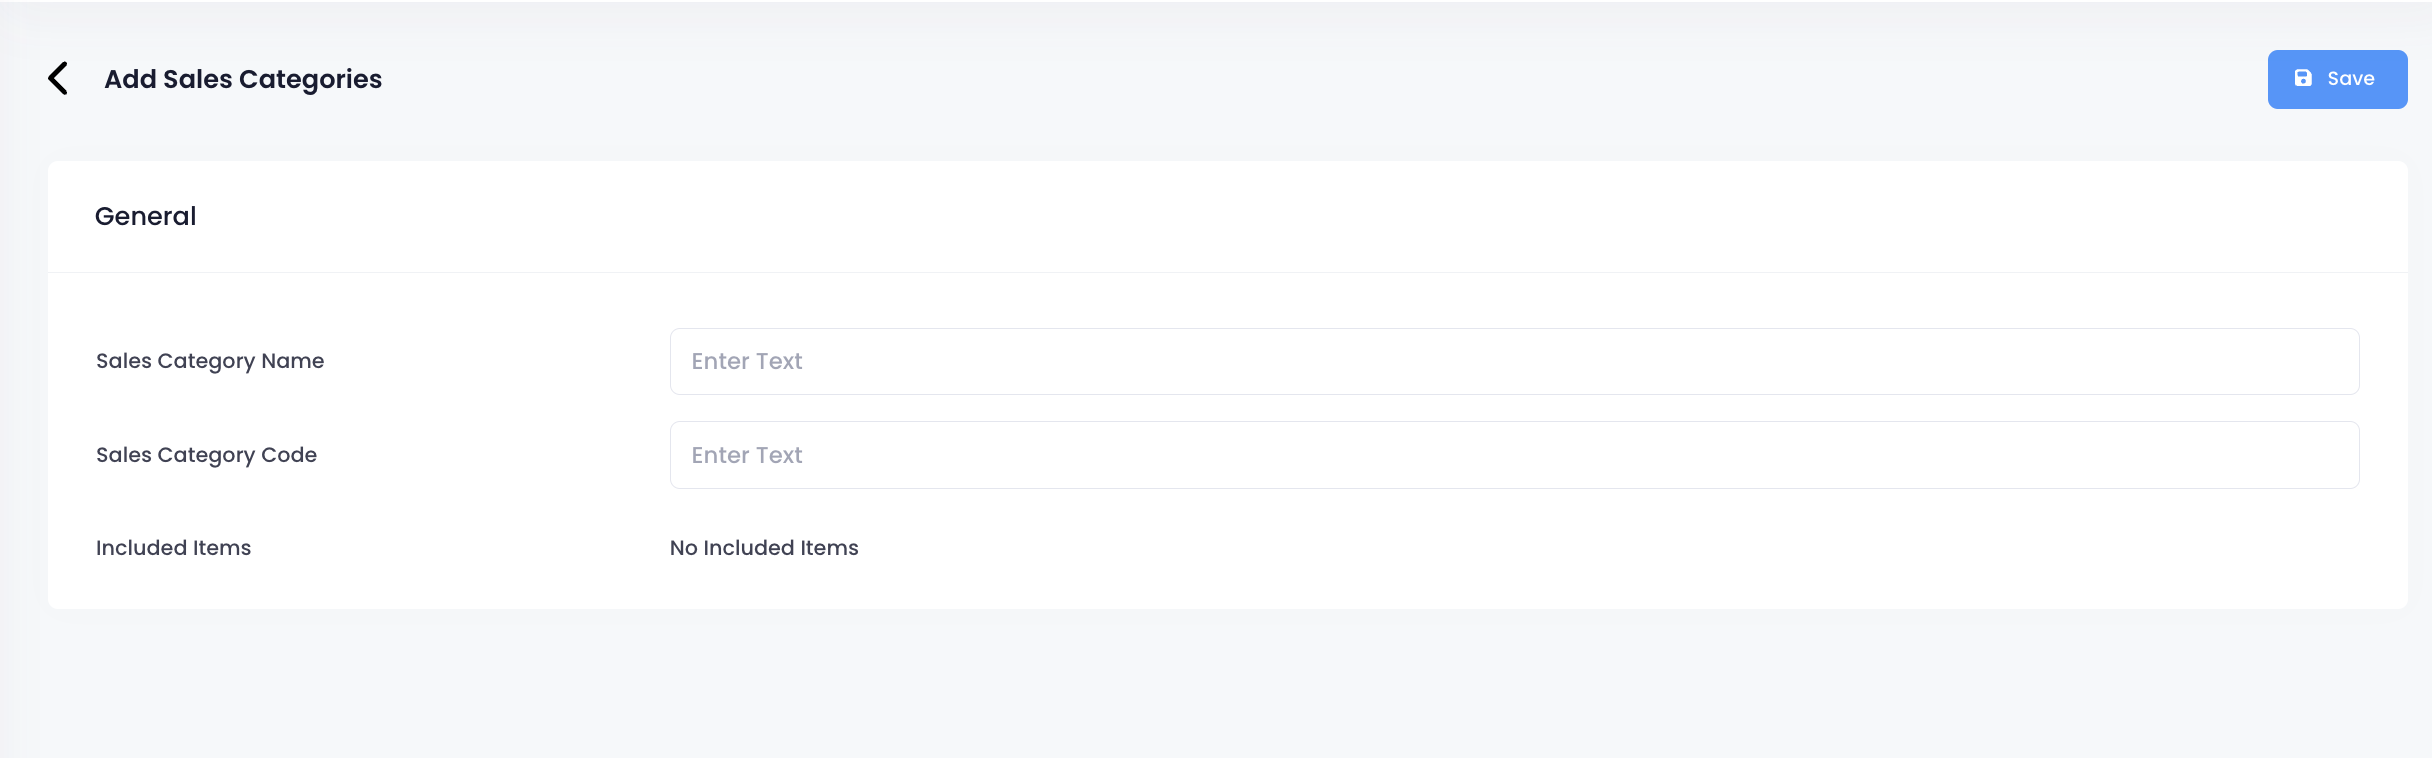
- Click on Save to confirm.
Once a sales category has been created, you can then proceed with allocating an item’s sales to your created sales category.
Manage a sales category
Edit a sales category
To modify a sales category, follow the steps below:
Merchant Portal (Classic Theme)
- Log in to the Merchant Portal.
- At the top left, change the view to All Groups to display Organization Settings.
- On the left panel, click on Organization Settings. Then, click on Sales Categories.
- Next to the sales category that you want to modify, click on Edit
 .
. - Update the sales category.
- Click on Save to confirm.
Merchant Portal 2.0
- Log in to the Merchant Portal.
- At the top, from the Group drop-down list, select the group or organization that you’d like to manage.
- On the left panel, click on Advanced Settings. Then, select Sales Categories.
- Next to the sales category that you want to modify, click on Edit
 .
. - Enter the Sales Category Name and Code.
- Update the sales category.
- Click on Save to confirm.
Delete a sales category
To remove a sales category, follow the steps below:
Merchant Portal (Classic Theme)
- Log in to the Merchant Portal.
- At the top left, change the view to All Groups to display Organization Settings.
- On the left panel, click on Organization Settings. Then, click on Sales Categories.
- Next to the sales category that you want to delete, click on Delete
 . A prompt appears to confirm that you want to proceed.
 - Click on Confirm.
Merchant Portal 2.0
- Log in to the Merchant Portal.
- At the top, from the Group drop-down list, select the group or organization that you’d like to manage.
- On the left panel, click on Advanced Settings. Then, select Sales Categories.
- Next to the sales category that you want to delete, click on Delete
 .
.