 Eats365 Products
 Merchant Guide
 Modules
 Membership
 Integrations
 Hardware
 Staff Operations
 Roles & Permissions
 Payments
 Reports
 What’s New
 Release Notes
 Troubleshooting
 Simulators
 Glossary
 Troubleshooter
 System Status
Membership
Table of Contents
Create a new member
Learn how to add a new member on the Eats365 POS or on the Merchant Portal.
Restaurants may offer membership programs to record customer information. This data helps them analyze customer spending habits and identify popular menu Items. Additionally, membership programs incentivize potential members with exclusive promotions and benefits offered by the restaurant.
In this article, you’ll learn how to add a new member to your membership program.
Add a new member
To create a new member, follow the steps below:
Eats365 POS
- Log in to the Eats365 POS.
- At the top right, tap Member
 . Alternatively, you can add a member from the order-taking screen. On the left panel, tap Add Customer
  .
.
- Tap Create Member.

- Enter the necessary customer information.

- (Optional) If your restaurant offers a membership plan, tap the Plan tab. Tap Plan and select the membership plan that the customer would like to avail. For more information on creating membership plans, refer to Create and manage membership plans.

- At the top right, tap Done to confirm.
Once the customer’s information has been successfully recorded, the customer can then be added to orders as a member. To learn more about adding a member to orders, refer to Add a member to an order.
DeleteMerchant Portal (Classic Theme)
- Log in to the Merchant Portal.
- On the left panel, click on CRM. Then, select Customer List.
- At the top right, click on + Customer.
- Enter the necessary customer information.
Note: First Name, Last Name, Phone number, and Gender are required information.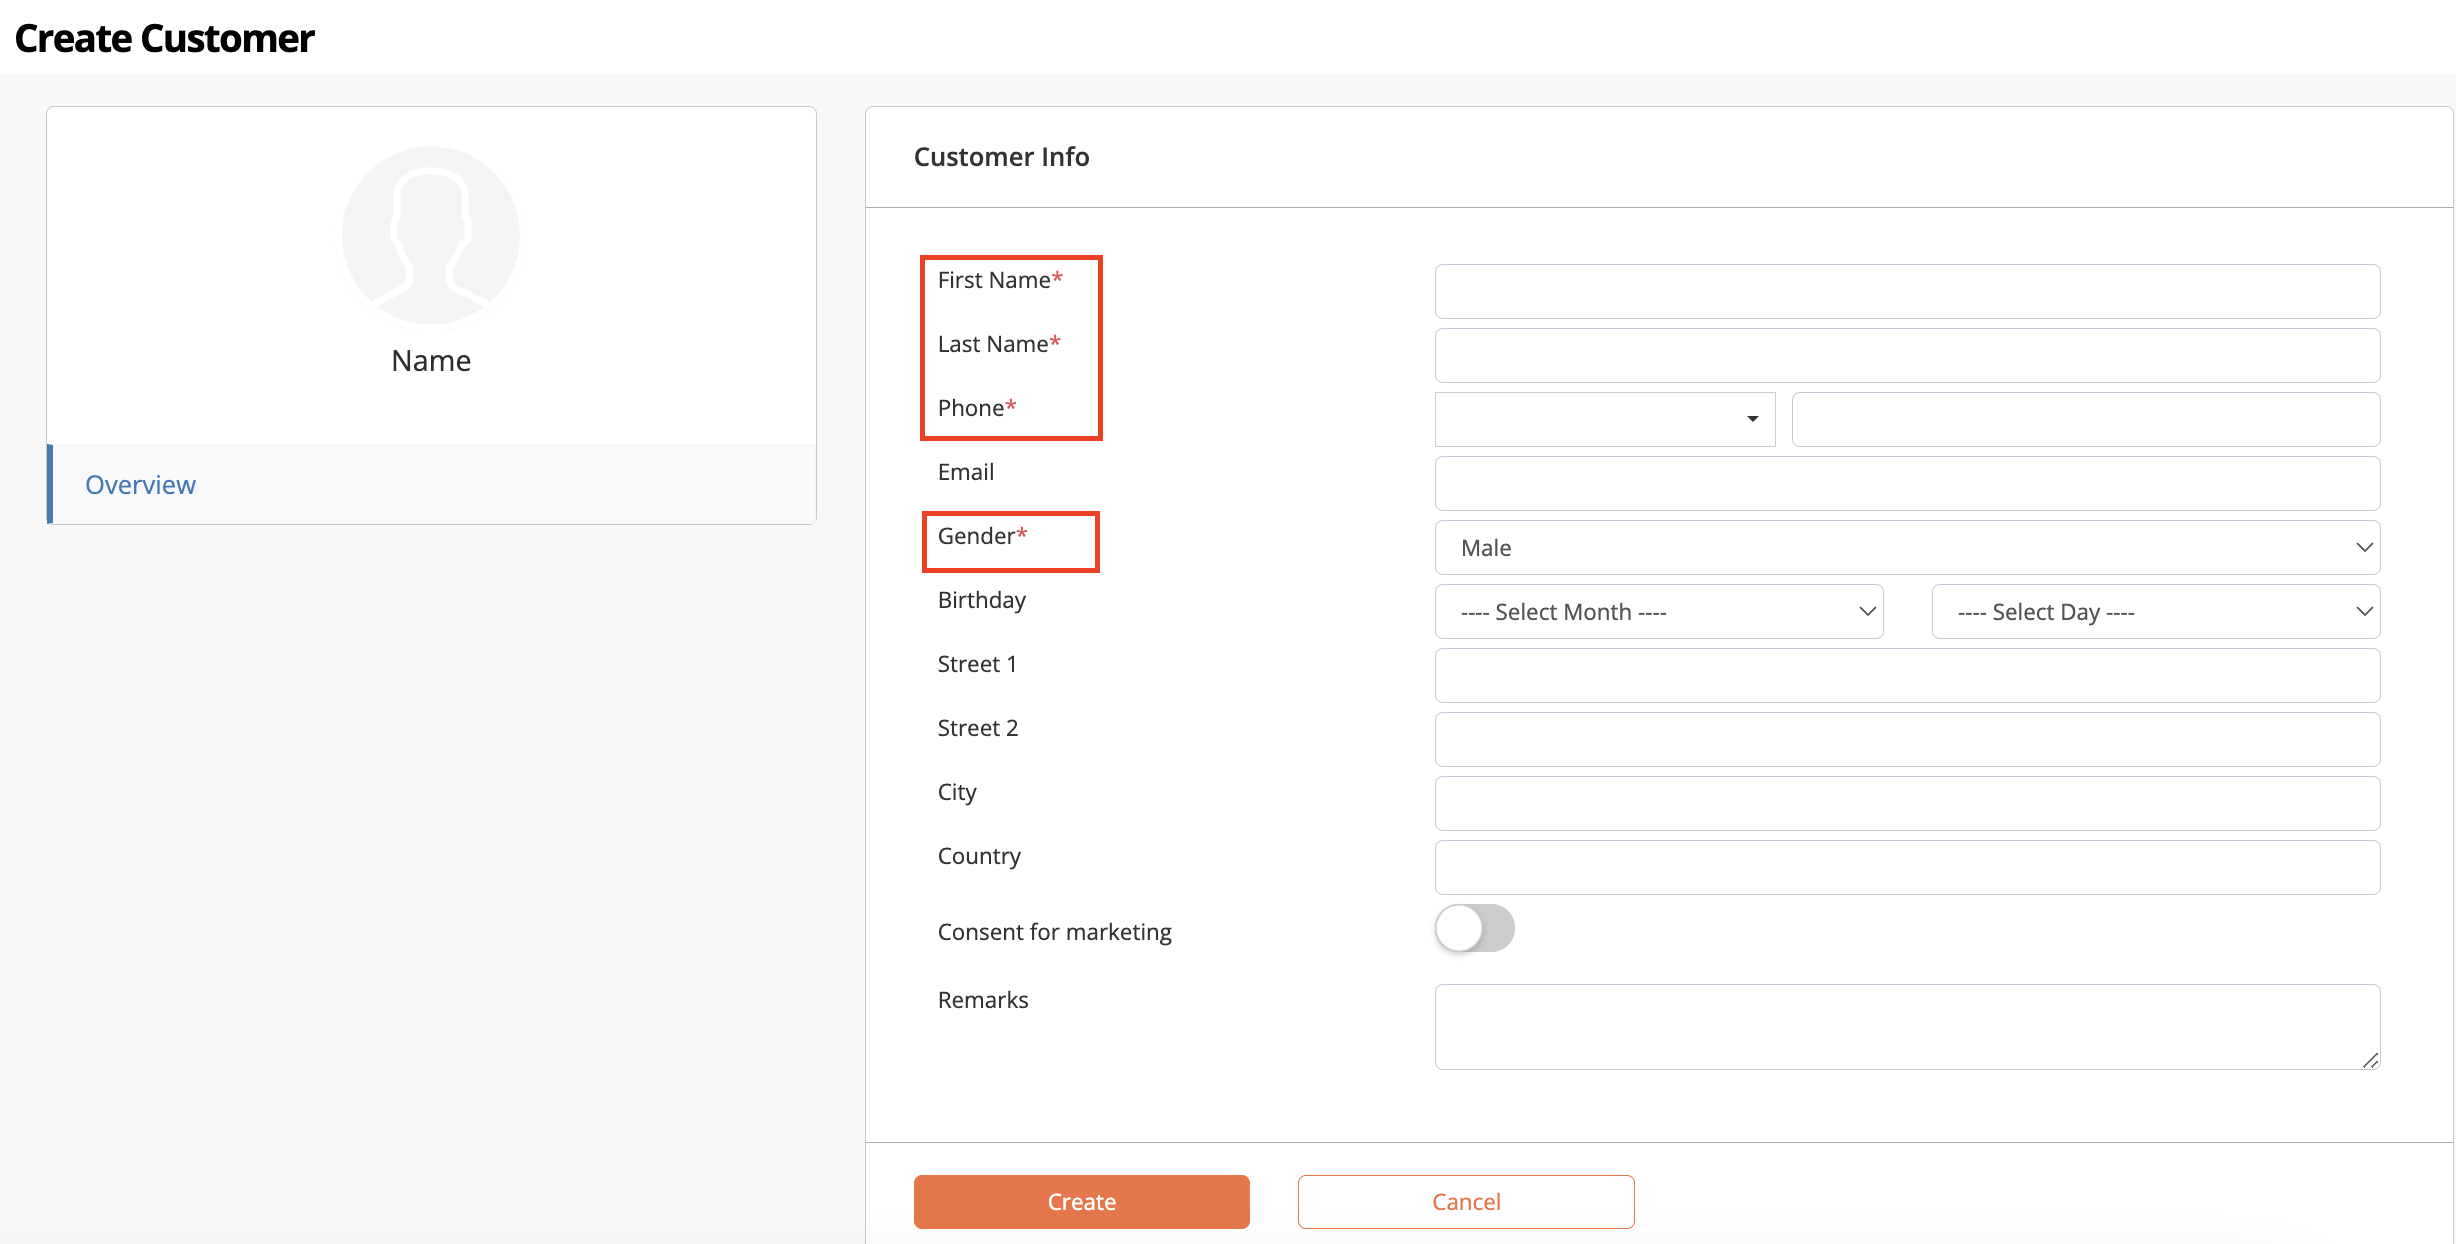
- At the bottom, click on Create.
Once the customer’s information has been successfully recorded, the customer can then be added to orders as a member. To learn more about adding a member to orders, refer to Add a member to an order.
DeleteMerchant Portal 2.0
- Log in to the Merchant Portal.
- On the left panel, click on CRM. Then, select Customer List.
- At the top right, click on + Add Customer.

- Enter the necessary customer information.
Note: First Name, Last Name, Phone number, and Gender are required information.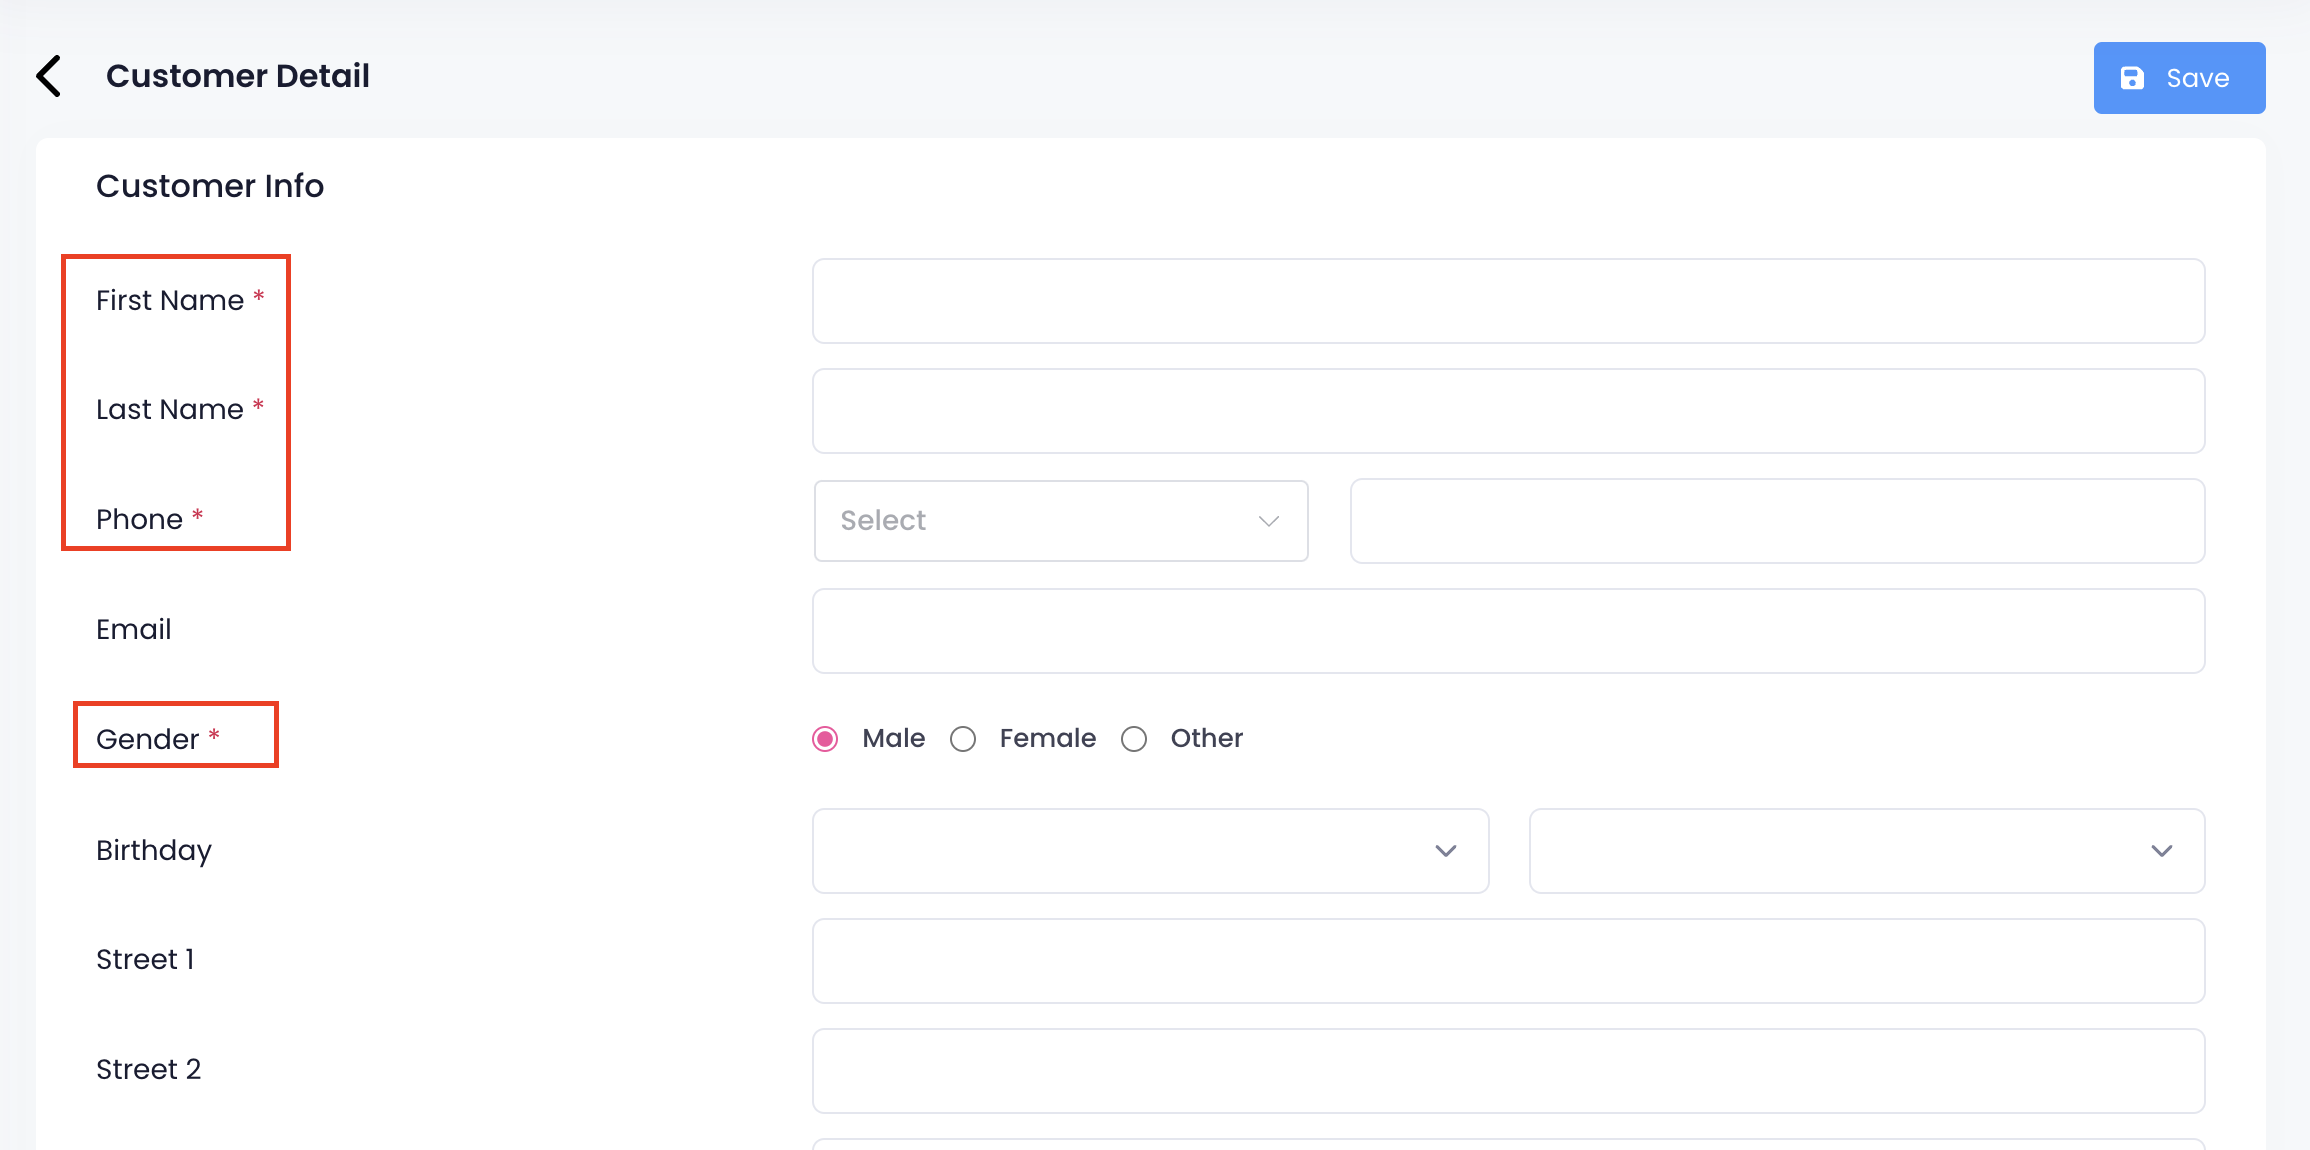
- Click on Save to confirm.
Once the customer’s information has been successfully recorded, the customer can then be added to orders as a member. To learn more about adding a member to orders, refer to Add a member to an order.
DeleteImport customer list
You can also import member information, so you can conveniently add multiple member information to the customer list.
To import member information, follow the steps below:
Merchant Portal (Classic Theme)
- Log in to the Merchant Portal.
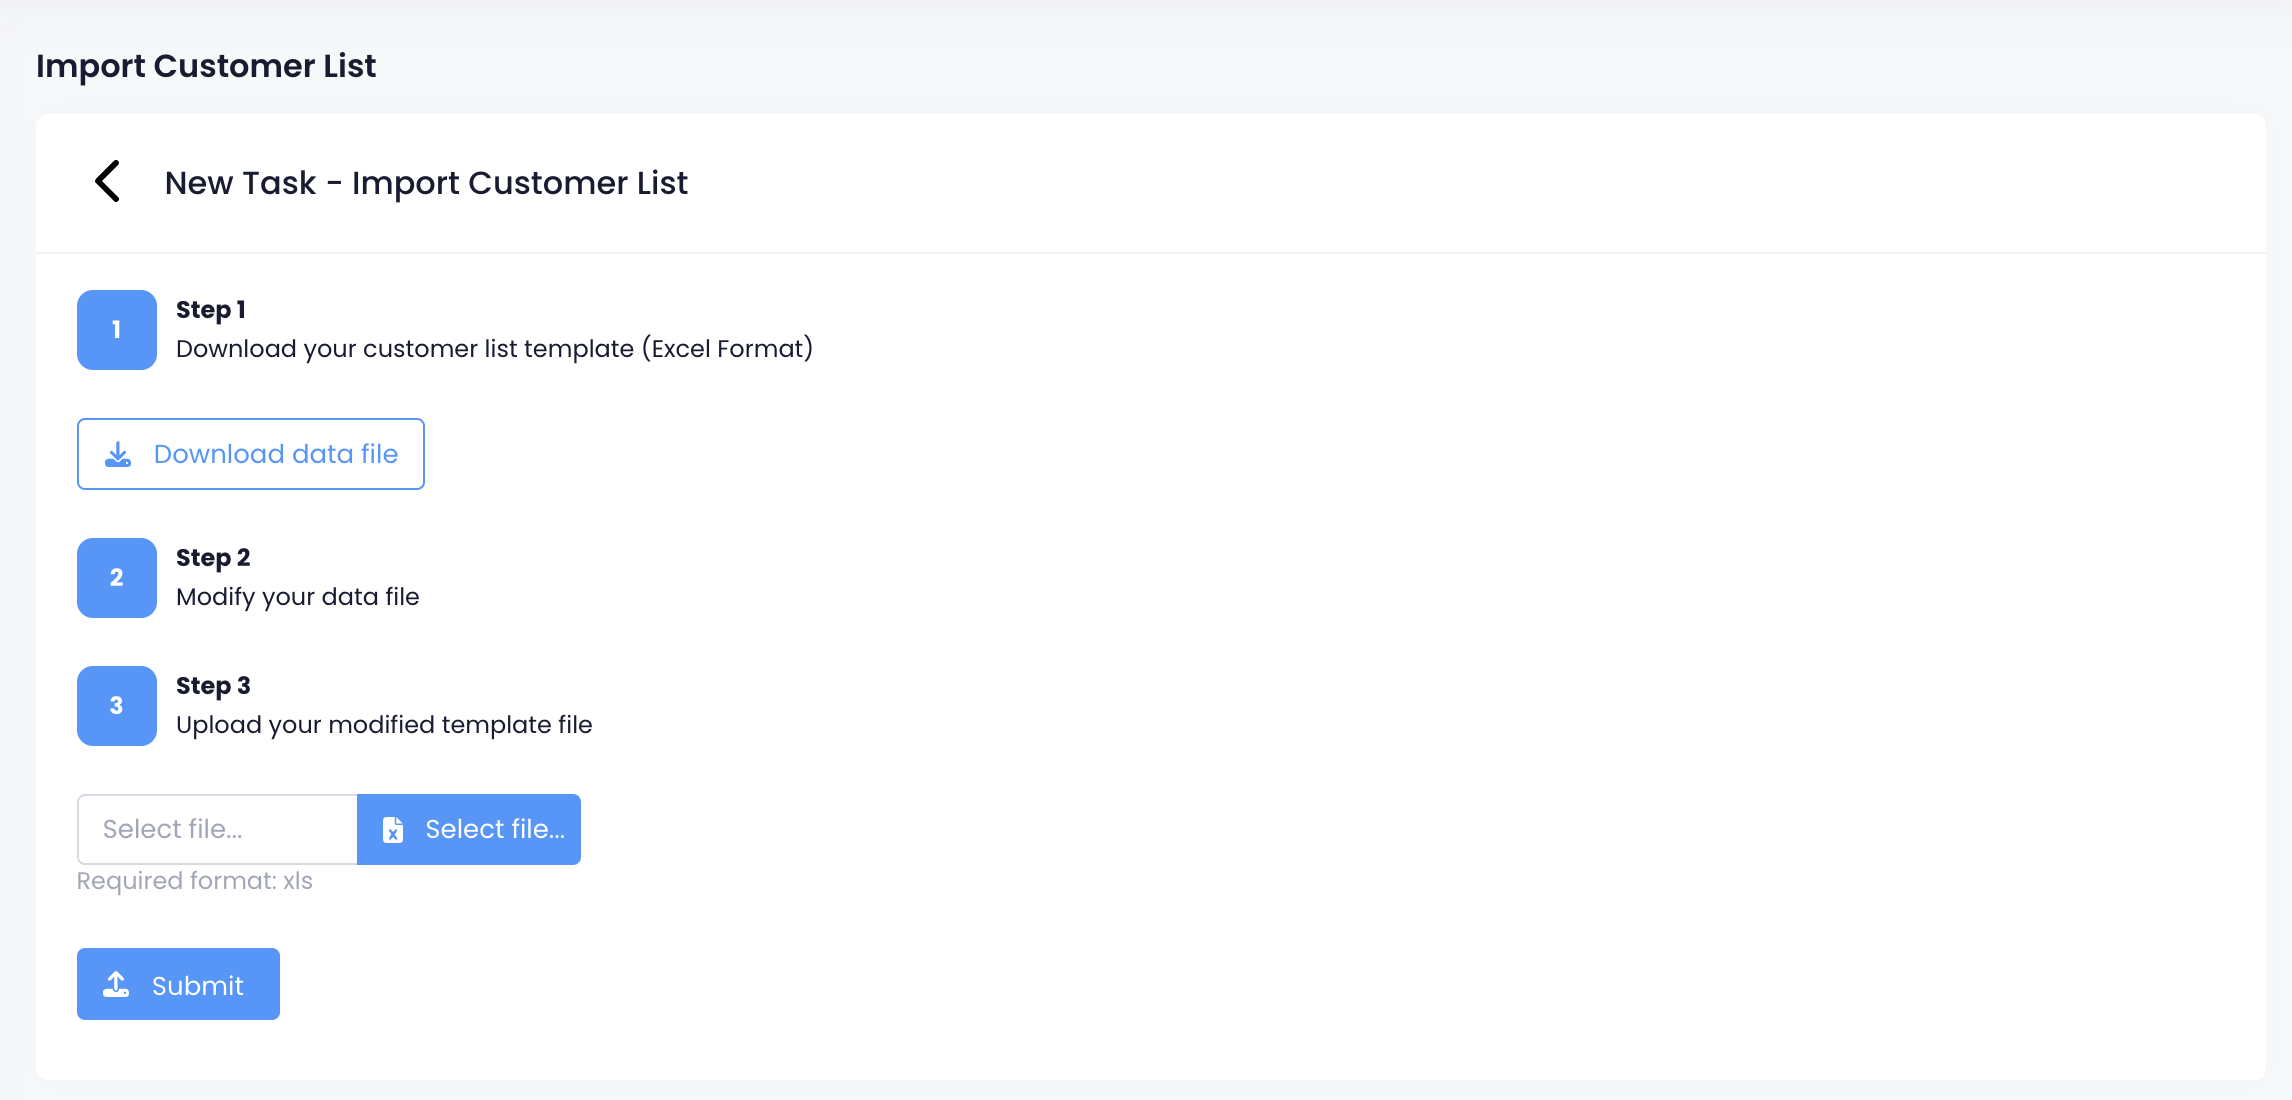
- On the left panel, click on CRM. Then, select Import Customer.
- At the top right, click on Import.
- On the "Import Customer List" screen, you’ll find the steps to import. Follow the on-screen instructions.

Once done, click on Submit.
Merchant Portal 2.0
- Log in to the Merchant Portal.
- On the left panel, click on CRM. Then, select Import Customer.
- At the top right, click on Import Customer List.

- On the "Import Customer List" screen, you’ll find the steps to import. Follow the on-screen instructions.
Once done, click on Submit.