Eats365 Products
 Merchant Guide
 Modules
 Membership
 Integrations
 Hardware
 Staff Operations
 Roles & Permissions
 Payments
 Reports
 What’s New
 Release Notes
 Troubleshooting
 Simulators
 Glossary
 Troubleshooter
 System Status
Membership
Table of Contents
Manage member information and order history
Learn how to manage member information and check member activity on the Eats365 POS and the Merchant Portal.
When a customer signs up for a restaurant’s membership program, customer information, as well as the customer’s order history are saved on the system. This information can be used to track the number of points earned and credits spent by the member, analyze customer spending habits, and identify menu Item strengths.
In this article, you’ll learn how to manage member information, check the member’s order history, and get an analysis of a member’s spending habits.
Before you start
A Loyalty Program license is required to be able to access full CRM features and tools. Depending on your region, you may reach out to a local Channel Partner or Eats365 to purchase a license.
CRM dashboard
The CRM dashboard displays an overview of CRM-related information.
To view the CRM dashboard, follow the steps below:
Merchant Portal (Classic Theme)
- Log in to the Merchant Portal.
- On the left panel, click on CRM, then click on Dashboard.
- At the top right, click on the date range and choose the period that you want to view.
Tip: You can select a preset date range by selecting the options at the left of the calendar display. Click Apply to confirm. - Click on Submit to confirm. The CRM dashboard displays the following details:
- New Customers Added
- Transactions Assigned to Customers
- Top Customers by Visits
- Top Customers by Trans. Amount.
Merchant Portal 2.0
- Log in to the Merchant Portal.
- On the left panel, click on CRM, then click on Dashboard.
- To view data for a specific date range, click on the date range, then select Custom. Add the start and end date, then click on Apply. You can also select one of the preset date ranges.

- Click on Submit to confirm. The CRM dashboard displays the following details:

- New Customers Added
- Transactions Assigned to Customers
Manage member information
Update member information
To modify member information, follow the steps below:
Eats365 POS
- Log in to the Eats365 POS.
- At the top right, tap Member
 .
.
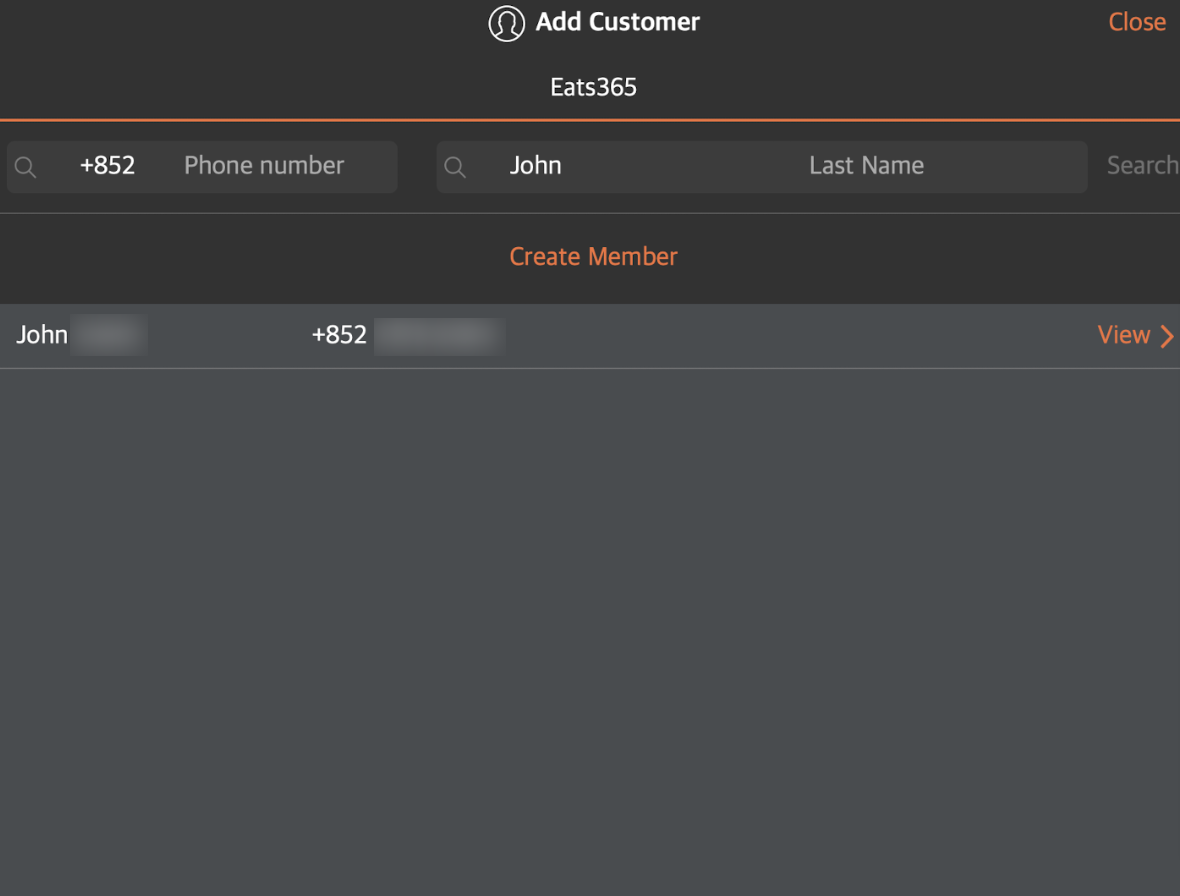
- Enter the phone number, first name, or last name of the member. Then, tap Search.

- Select the member with the information that you want to update. If you search using the member's phone number, the screen will go directly to their profile.
- At the top right, tap Edit.

- Select the information that you want to update. Then, enter the updated information.
Note: You can only update the member’s name, email address, birthday, and gender from the POS. To update the member’s phone number, use the Merchant Portal.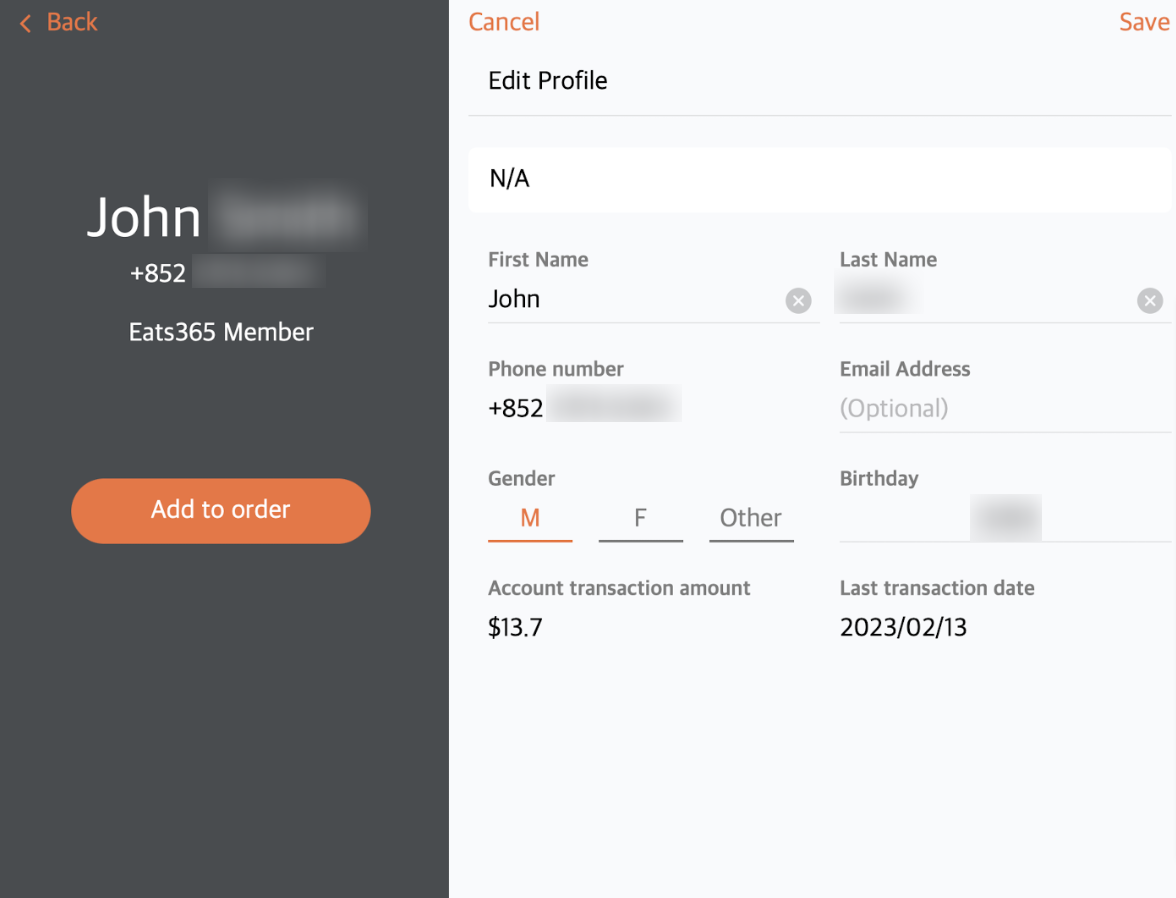
- At the top right, tap Save to confirm changes.
Merchant Portal (Classic Theme)
- Log in to the Merchant Portal.
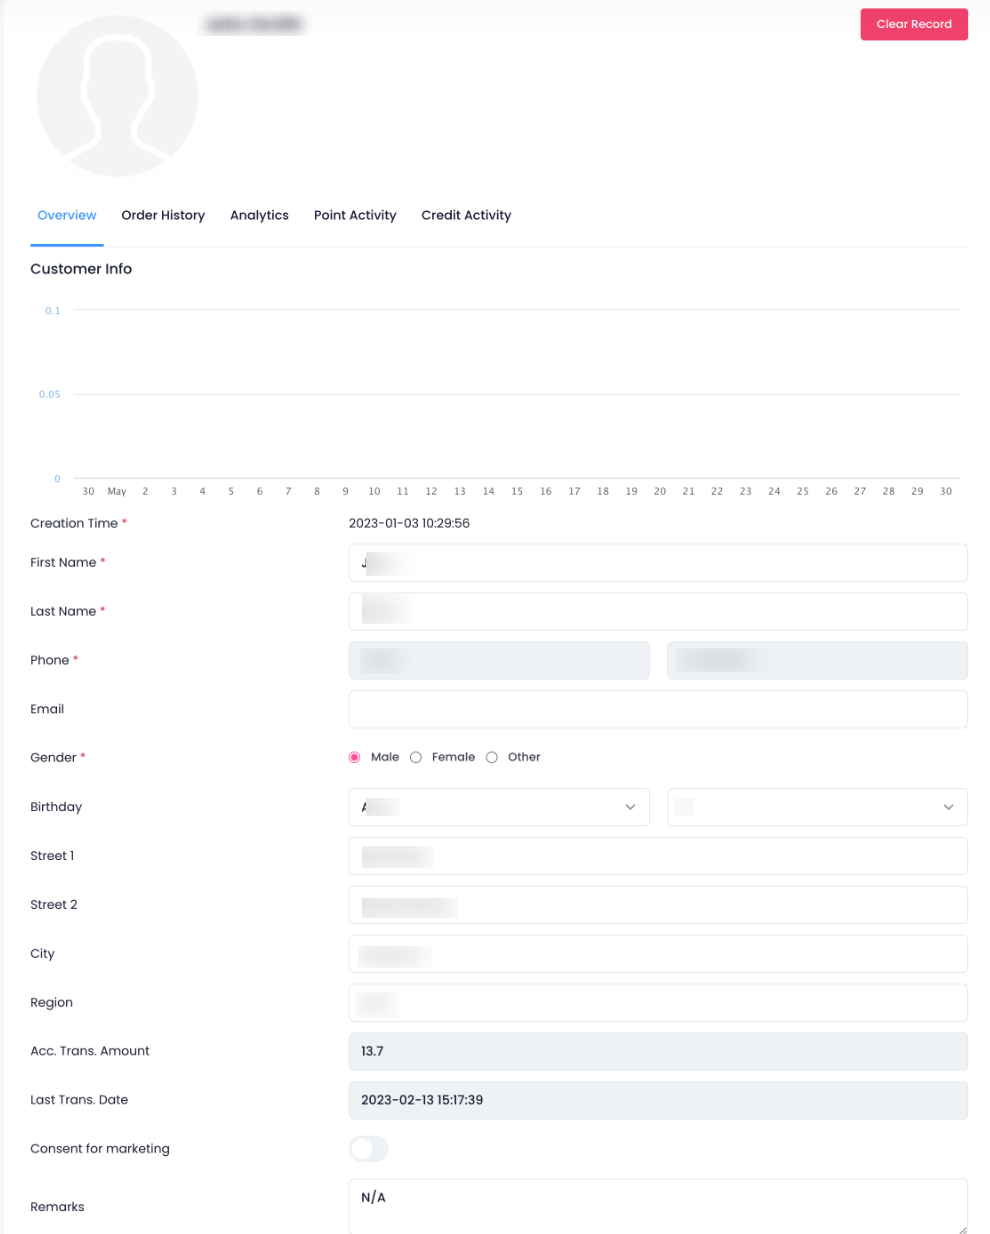
- On the left panel, click on CRM. Then, select Customer List. A list of all current member records is displayed on the screen.
- Click on the member’s name. The screen redirects to the member’s profile.
Tip: You can filter your search further by clicking on the filter drop-down list and selecting one of the available options. Then, enter the necessary information on the search field. - Under "Customer Info," select the information that you want to update. Then, enter the updated information.
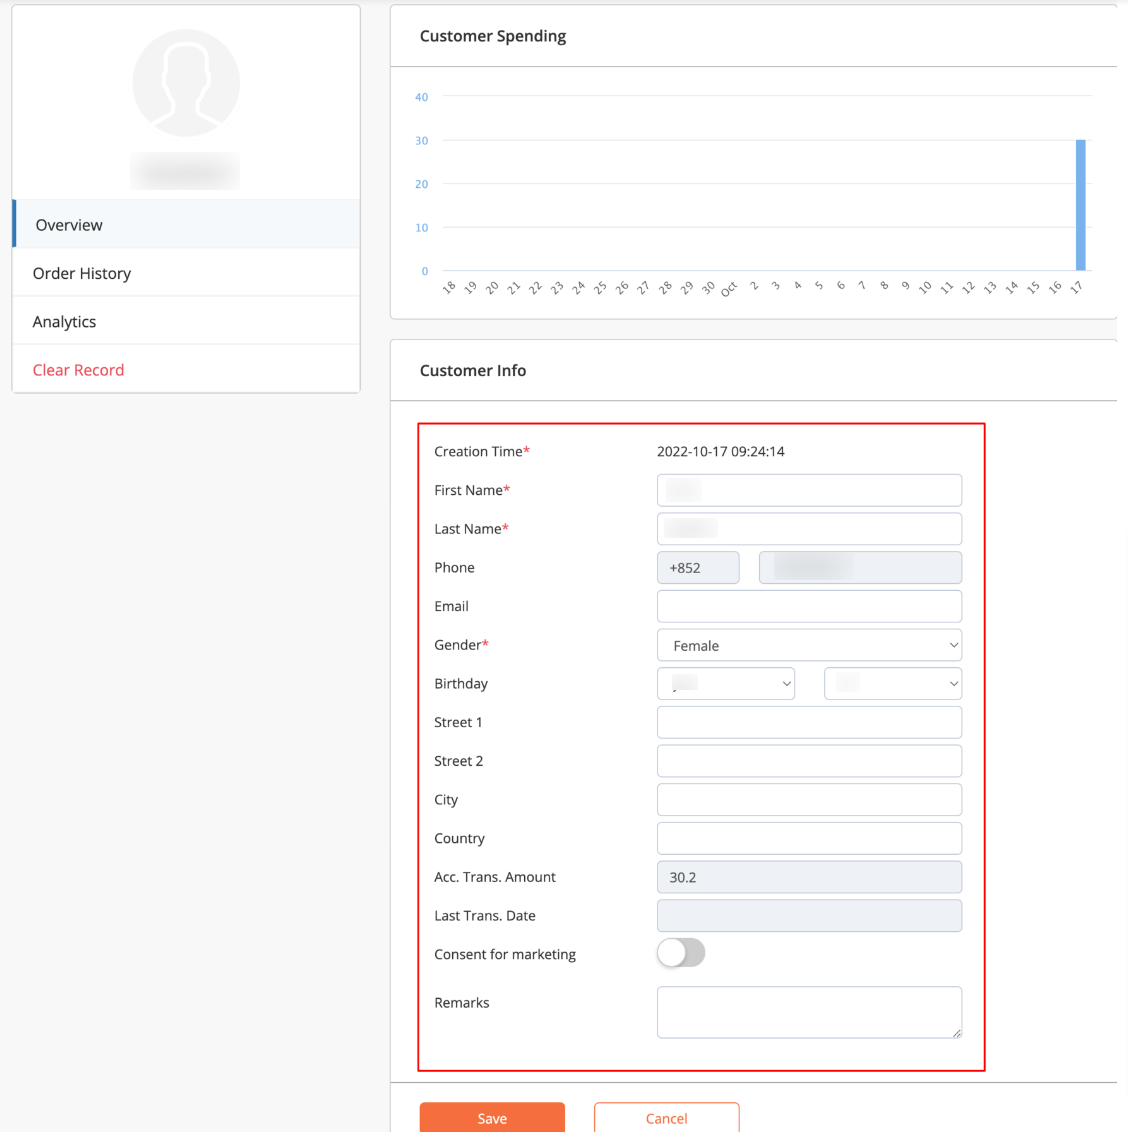
- At the bottom, click on Save to confirm changes.
Merchant Portal 2.0
- Log in to the Merchant Portal.
- On the left panel, click on CRM. Then, select Customer List. A list of all current member records is displayed on the screen.

- Click on the member’s name. The screen redirects to the member’s profile.
Tip: You can filter your search further by clicking on the filter drop-down list and selecting one of the available options. Then, enter the necessary information on the search field.
- Under "Customer Info," select the information that you want to update. Then, enter the updated information.
- Click on Save to confirm changes.
Clear a member’s record
To clear a member’s record, follow the steps below:
Merchant Portal (Classic Theme)
- Log in to the Merchant Portal.
- On the left panel, click on CRM. Then, select Customer List. A list of all current member records is displayed on the screen.
- Click on the member’s name. The screen redirects to the member’s profile.
Tip: You can filter your search further by clicking on the filter drop-down list and selecting one of the available options. Then, enter the necessary information on the search field. - Click on Clear Record. A prompt appears to ask if you want to clear the customer record.
- Click on OK to continue.
The screen redirects to the "Customer List" page. The member is still included in the list but the First and Last Names are no longer recorded. ![]()
Merchant Portal 2.0
- Log in to the Merchant Portal.
- On the left panel, click on CRM. Then, select Customer List. A list of all current member records is displayed on the screen.
- Click on the member’s name. The screen redirects to the member’s profile.
Tip: You can filter your search further by clicking on the filter drop-down list and selecting one of the available options. Then, enter the necessary information on the search field.
- Click on Clear Record. A prompt appears to ask if you want to clear the customer record.

- Click on Confirm to continue.
The screen redirects to the "Customer List" page. The member is still included in the list but the First and Last Names are no longer recorded![]()
Delete a member's records
To remove a member from the Customer List, follow the steps below:
- Log in to the Merchant Portal.
- On the left panel, click on CRM. Then, select Customer List. A list of all current member records is displayed on the screen.
- Click on the member’s name. The screen redirects to the member’s profile.
Tip: You can filter your search further by clicking on the filter drop-down list and selecting one of the available options. Then, enter the necessary information on the search field.
- Click on Delete. A prompt appears to ask if you want to delete the customer.

- Click on Confirm to continue. This deletes the member from the system.
Check order history
The member’s order history allows you to check the member’s previous transactions on the Eats365 POS.
To check the member’s order history, follow the steps below:
Eats365 POS
- Log in to the Eats365 POS.
- At the top right, tap Member .
- Enter the phone number, first name, or last name of the member. Then, tap Search.
- Select the member that you want to check the order history. If you search using the member's phone number, the screen will go directly to their profile.
- Tap Order History.
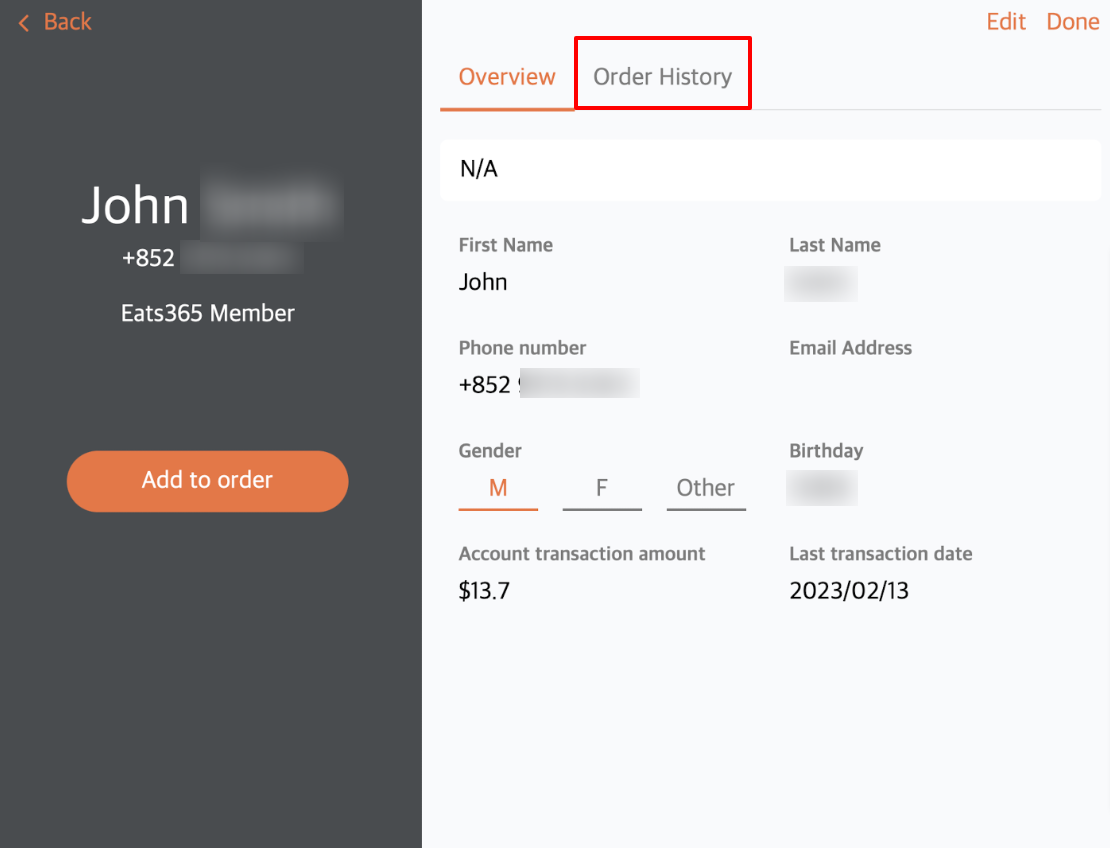
You can then check the member’s order history. From the order history, you can also quickly add the customer’s previous orders to a new order. For more information on how to reorder past orders, refer to Use member order history to reorder.
DeleteMerchant Portal (Classic Theme)
- Log in to the Merchant Portal.
- On the left panel, click on CRM. Then, select Customer List. A list of all current member records is displayed on the screen.
- Click on the member’s name.
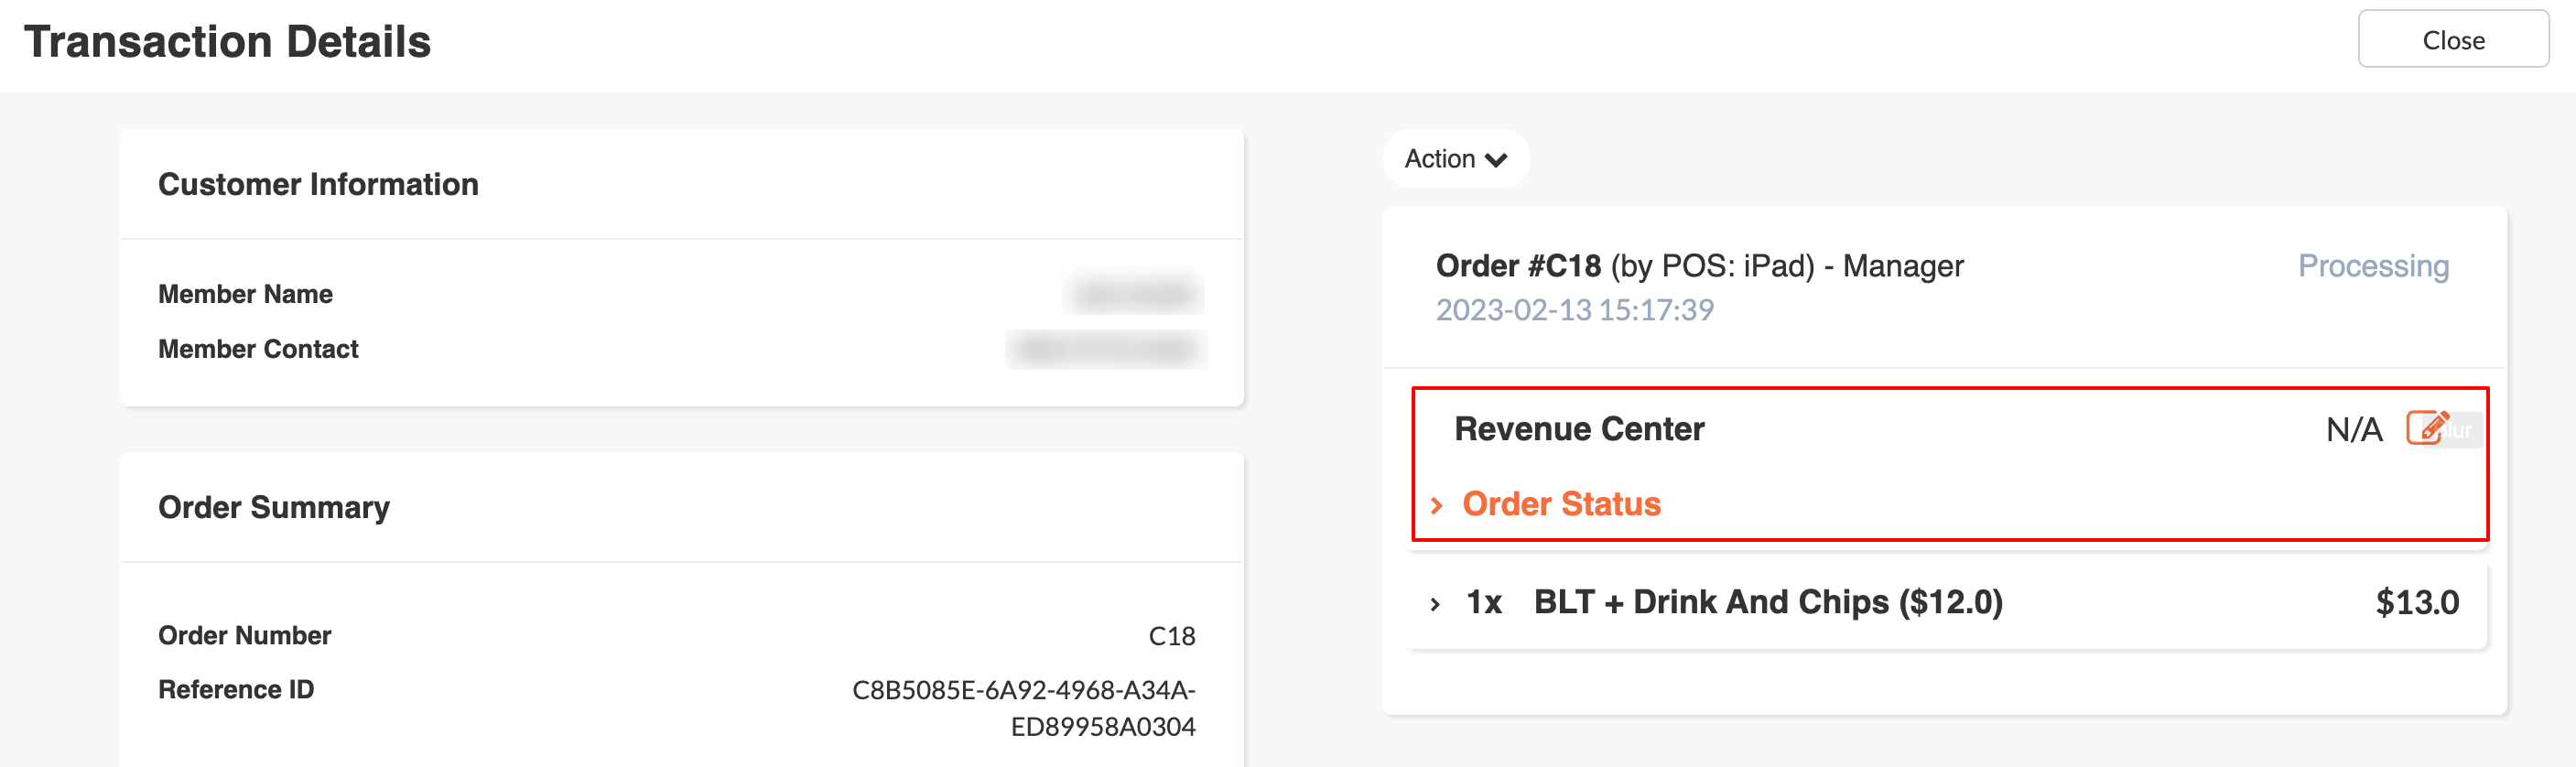
Tip: You can filter your search further by clicking on the filter drop-down list and selecting one of the available options. Then, enter the necessary information on the search field. - Click on Order History. The customer’s past transactions are displayed on the screen.
Tip: To check a past order’s full transaction details, click on the order number of the transaction that you’d like to review. - You can also add the order to a revenue center. To do so, under "Revenue Center," click on Edit
 . Then, select a revenue center.
 - Click on Update to confirm changes.
Merchant Portal 2.0
- Log in to the Merchant Portal.
- On the left panel, click on CRM. Then, select Customer List. A list of all current member records is displayed on the screen.
- Click on the member’s name. The screen redirects to the member’s profile.
Tip: You can filter your search further by clicking on the filter drop-down list and selecting one of the available options. Then, enter the necessary information on the search field.
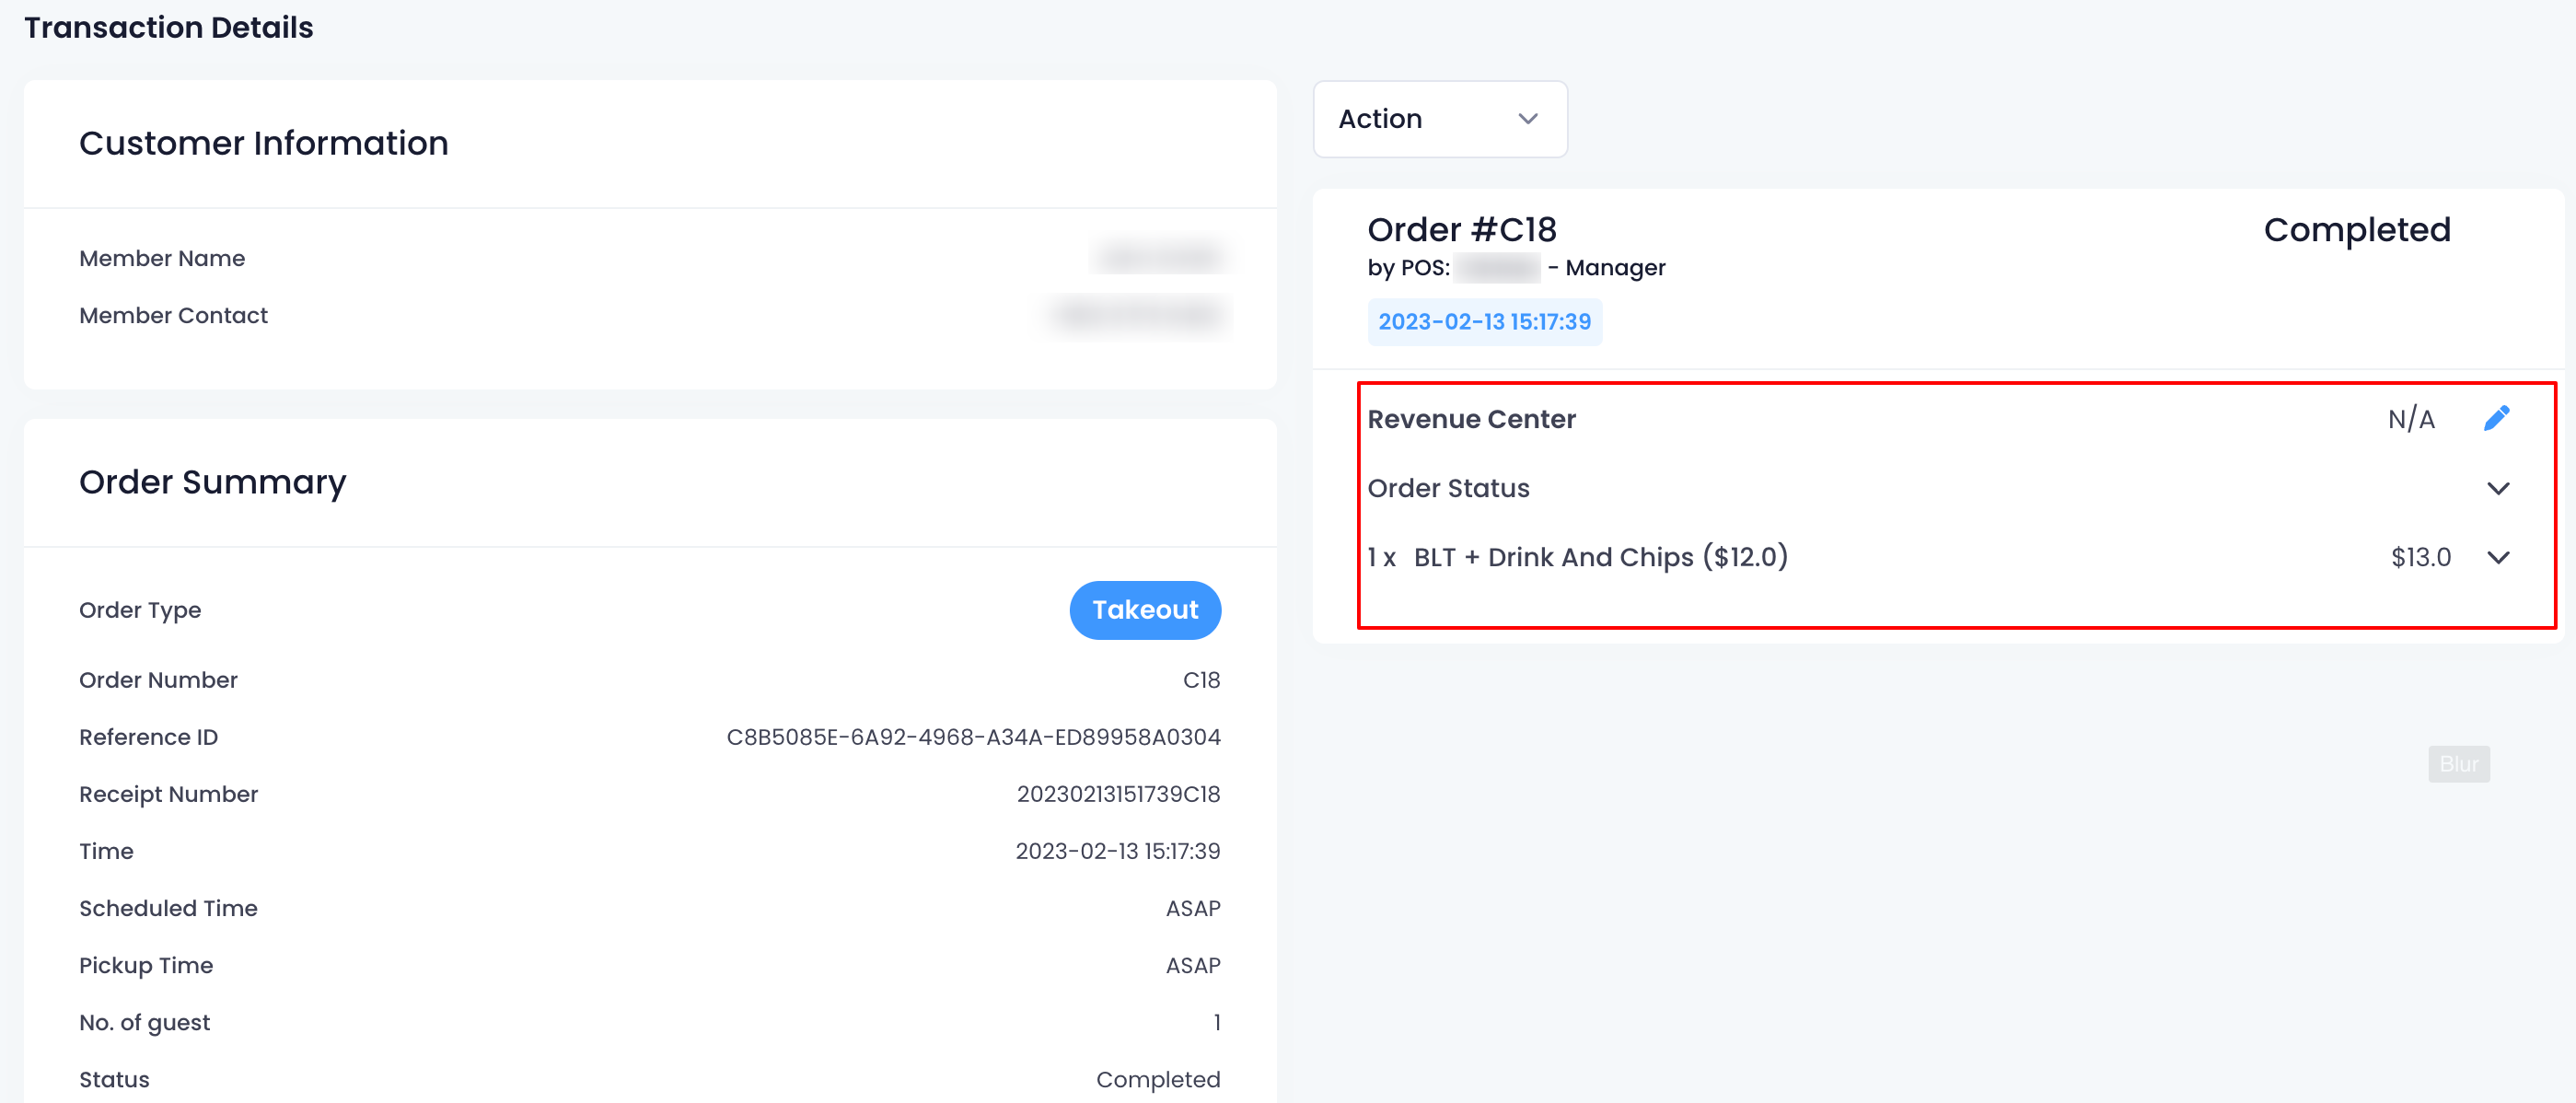
- Click on Order History. The customer’s past transactions are displayed on the screen.
 Tip: To check a past order’s full transaction details, click on the order number of the transaction that you’d like to review.
- You can also add the order to a revenue center. To do so, under "Revenue Center," click on Edit
 . Then, select a revenue center.
 - Click on Confirm to continue.
Check member’s point activity
Point Activity displays information about customer transactions where membership points were used or earned.
To view the member’s point activity, follow the steps below:
Merchant Portal (Classic Theme)
- Log in to the Merchant Portal.
- On the left panel, click on CRM. Then, select Customer List. A list of all current member records is displayed on the screen.
- Click on the member’s name. The screen redirects to the member’s profile.
Tip: You can filter your search further by clicking on the filter drop-down list and selecting one of the available options. Then, enter the necessary information on the search field. - Click on Point Activity. Details about the customer’s point activity are displayed on the screen.
Merchant Portal 2.0
- Log in to the Merchant Portal.
- On the left panel, click on CRM. Then, select Customer List. A list of all current member records is displayed on the screen.
- Click on the member’s name. The screen redirects to the member’s profile.
Tip: You can filter your search further by clicking on the filter drop-down list and selecting one of the available options. Then, enter the necessary information on the search field.
- Click on Point Activity. Details about the customer’s point activity are displayed on the screen.

Check member’s credit activity
Credit Activity displays information about customer transactions where member credits were used. This includes top-up credit details and payment transactions.
To view the member’s credit activity, follow the steps below:
Merchant Portal (Classic Theme)
- Log in to the Merchant Portal.
- On the left panel, click on CRM. Then, select Customer List. A list of all current member records is displayed on the screen.
- Click on the member’s name. The screen redirects to the member’s profile.
Tip: You can filter your search further by clicking on the filter drop-down list and selecting one of the available options. Then, enter the necessary information on the search field. - Click on Credit Activity. Details about the customer’s credit activity are displayed on the screen.
Merchant Portal 2.0
- Log in to the Merchant Portal.
- On the left panel, click on CRM. Then, select Customer List. A list of all current member records is displayed on the screen.
- Click on the member’s name. The screen redirects to the member’s profile.
Tip: You can filter your search further by clicking on the filter drop-down list and selecting one of the available options. Then, enter the necessary information on the search field.
- Click on Credit Activity. Details about the customer’s credit activity are displayed on the screen.

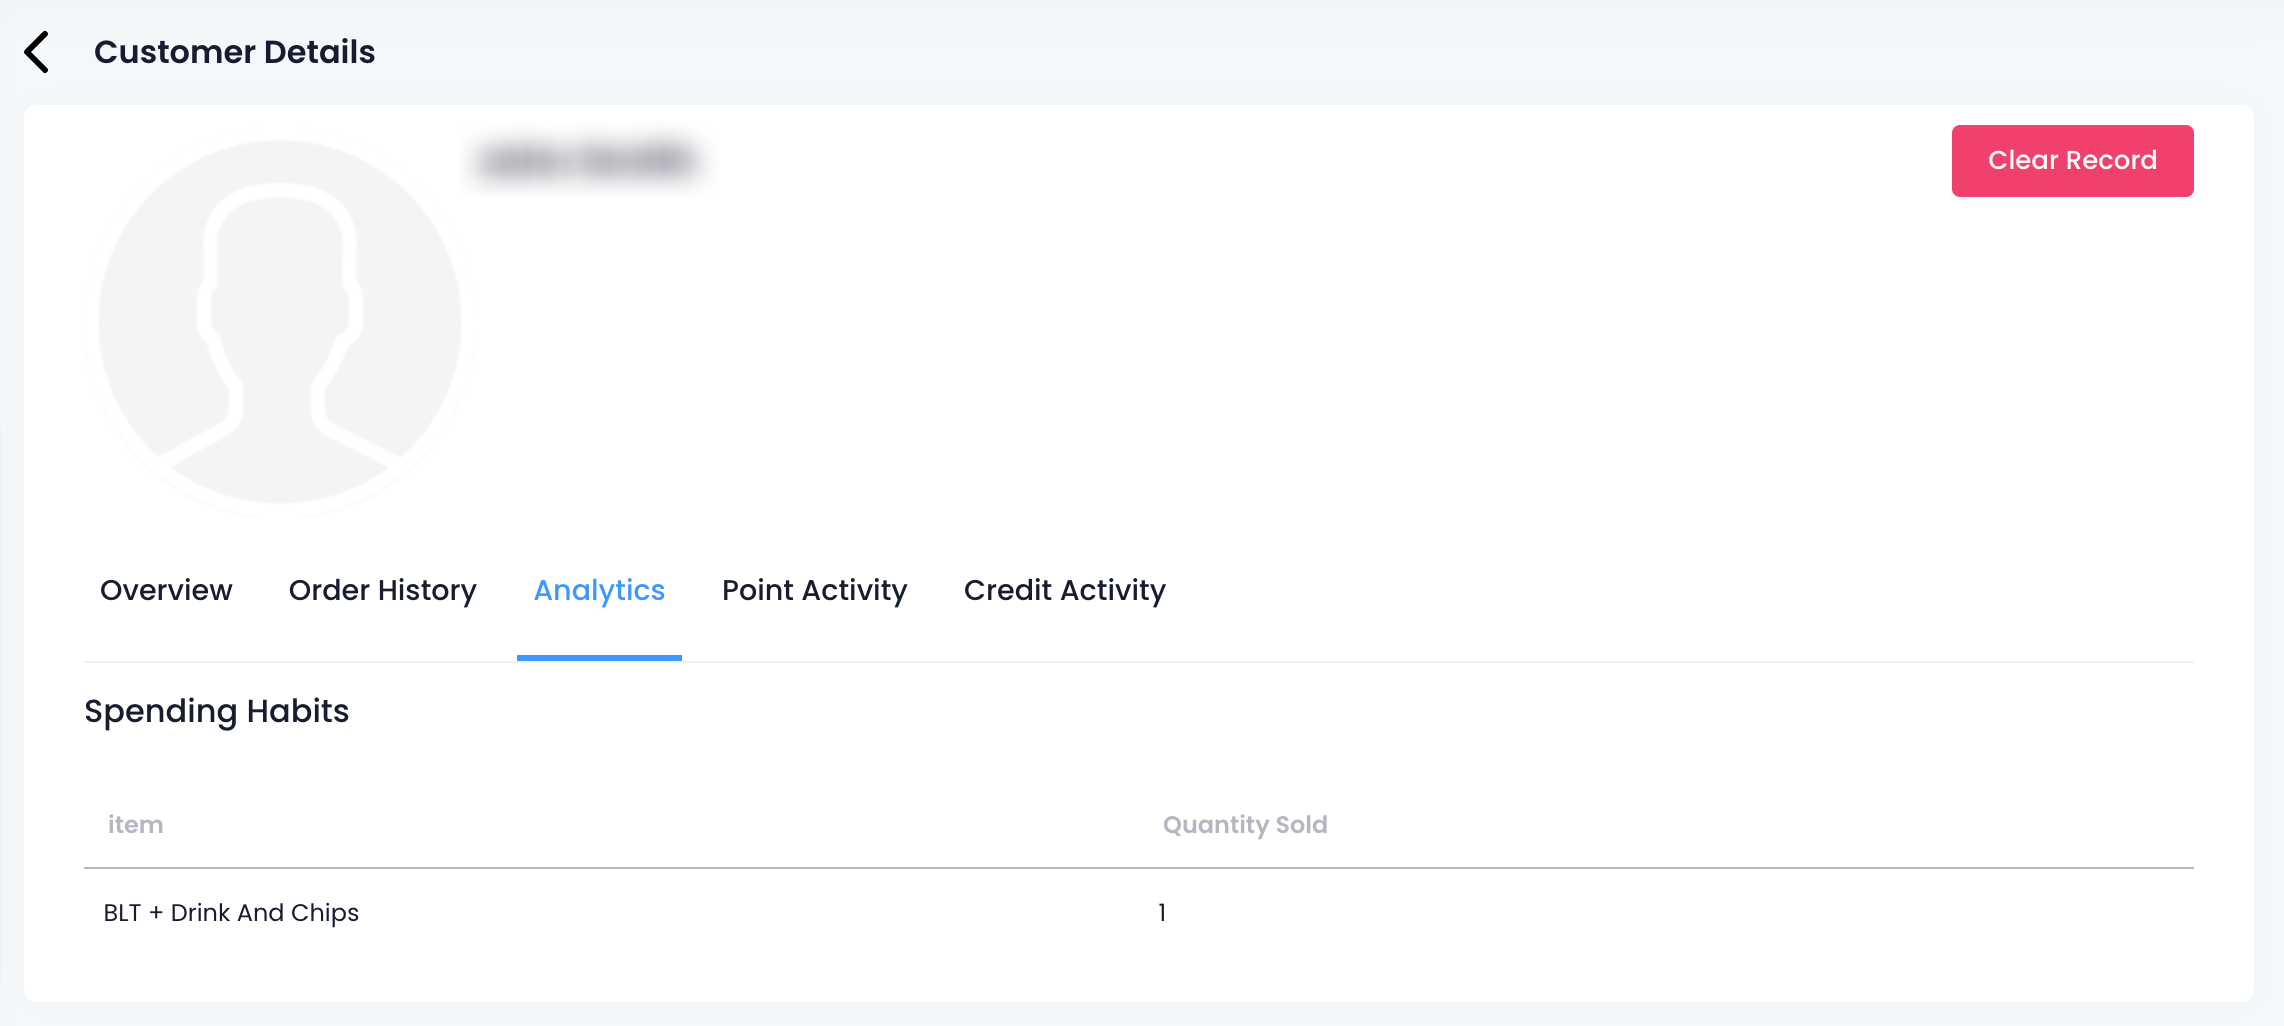
Analyze member’s spending habits
When a member is added to an order on the Eats365 POS, the system automatically analyzes the customer’s spending habits.
To check the analysis of a member’s spending habits, follow the steps below:
Merchant Portal (Classic Theme)
- Log in to the Merchant Portal.
- On the left panel, click on CRM. Then, select Customer List. A list of all current member records is displayed on the screen.
- Click on the member’s name. The screen redirects to the member’s profile.
Tip: You can filter your search further by clicking on the filter drop-down list and selecting one of the available options. Then, enter the necessary information on the search field. - Click on Analytics. The analysis summarizes the member’s spending habits by showing a list of the member’s previously ordered items and the quantity sold.
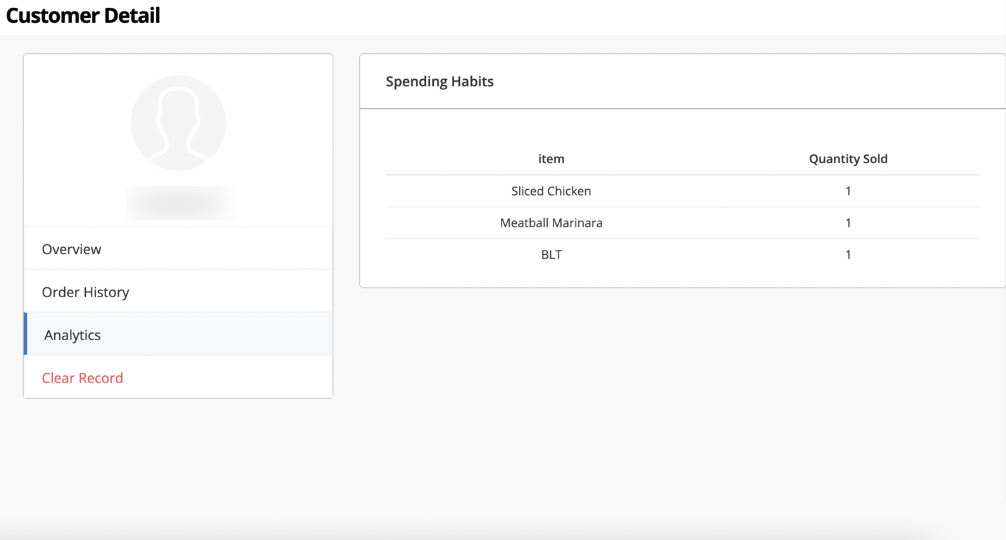
Merchant Portal 2.0
- Log in to the Merchant Portal.
- On the left panel, click on CRM. Then, select Customer List. A list of all current member records is displayed on the screen.
- Click on the member’s name. The screen redirects to the member’s profile.
Tip: You can filter your search further by clicking on the filter drop-down list and selecting one of the available options. Then, enter the necessary information on the search field.
- Click on Analytics. The analysis summarizes the member’s spending habits by showing a list of the member’s previously ordered items and the quantity sold.