 Eats365 Products
 Merchant Guide
 Modules
 Membership
 Integrations
 Hardware
 Staff Operations
 Roles & Permissions
 Payments
 Reports
 What’s New
 Release Notes
 Troubleshooting
 Simulators
 Glossary
 Troubleshooter
 System Status
Printer setup
All Product
Table of Contents
Configure receipt printer with cash drawer
Learn how to set up a receipt printer and set the cash drawer to open when settling a bill by cash.
You can set up a receipt printer to print Dine-in and Takeout receipts and set the cash drawer to open automatically when a check is settled by cash payment.
In this article, you’ll learn how to configure a receipt printer with a cash drawer.
To configure a receipt printer with a cash drawer, follow the steps below:
- Log in to the Eats365 POS.
- At the top left, tap Settings
 .
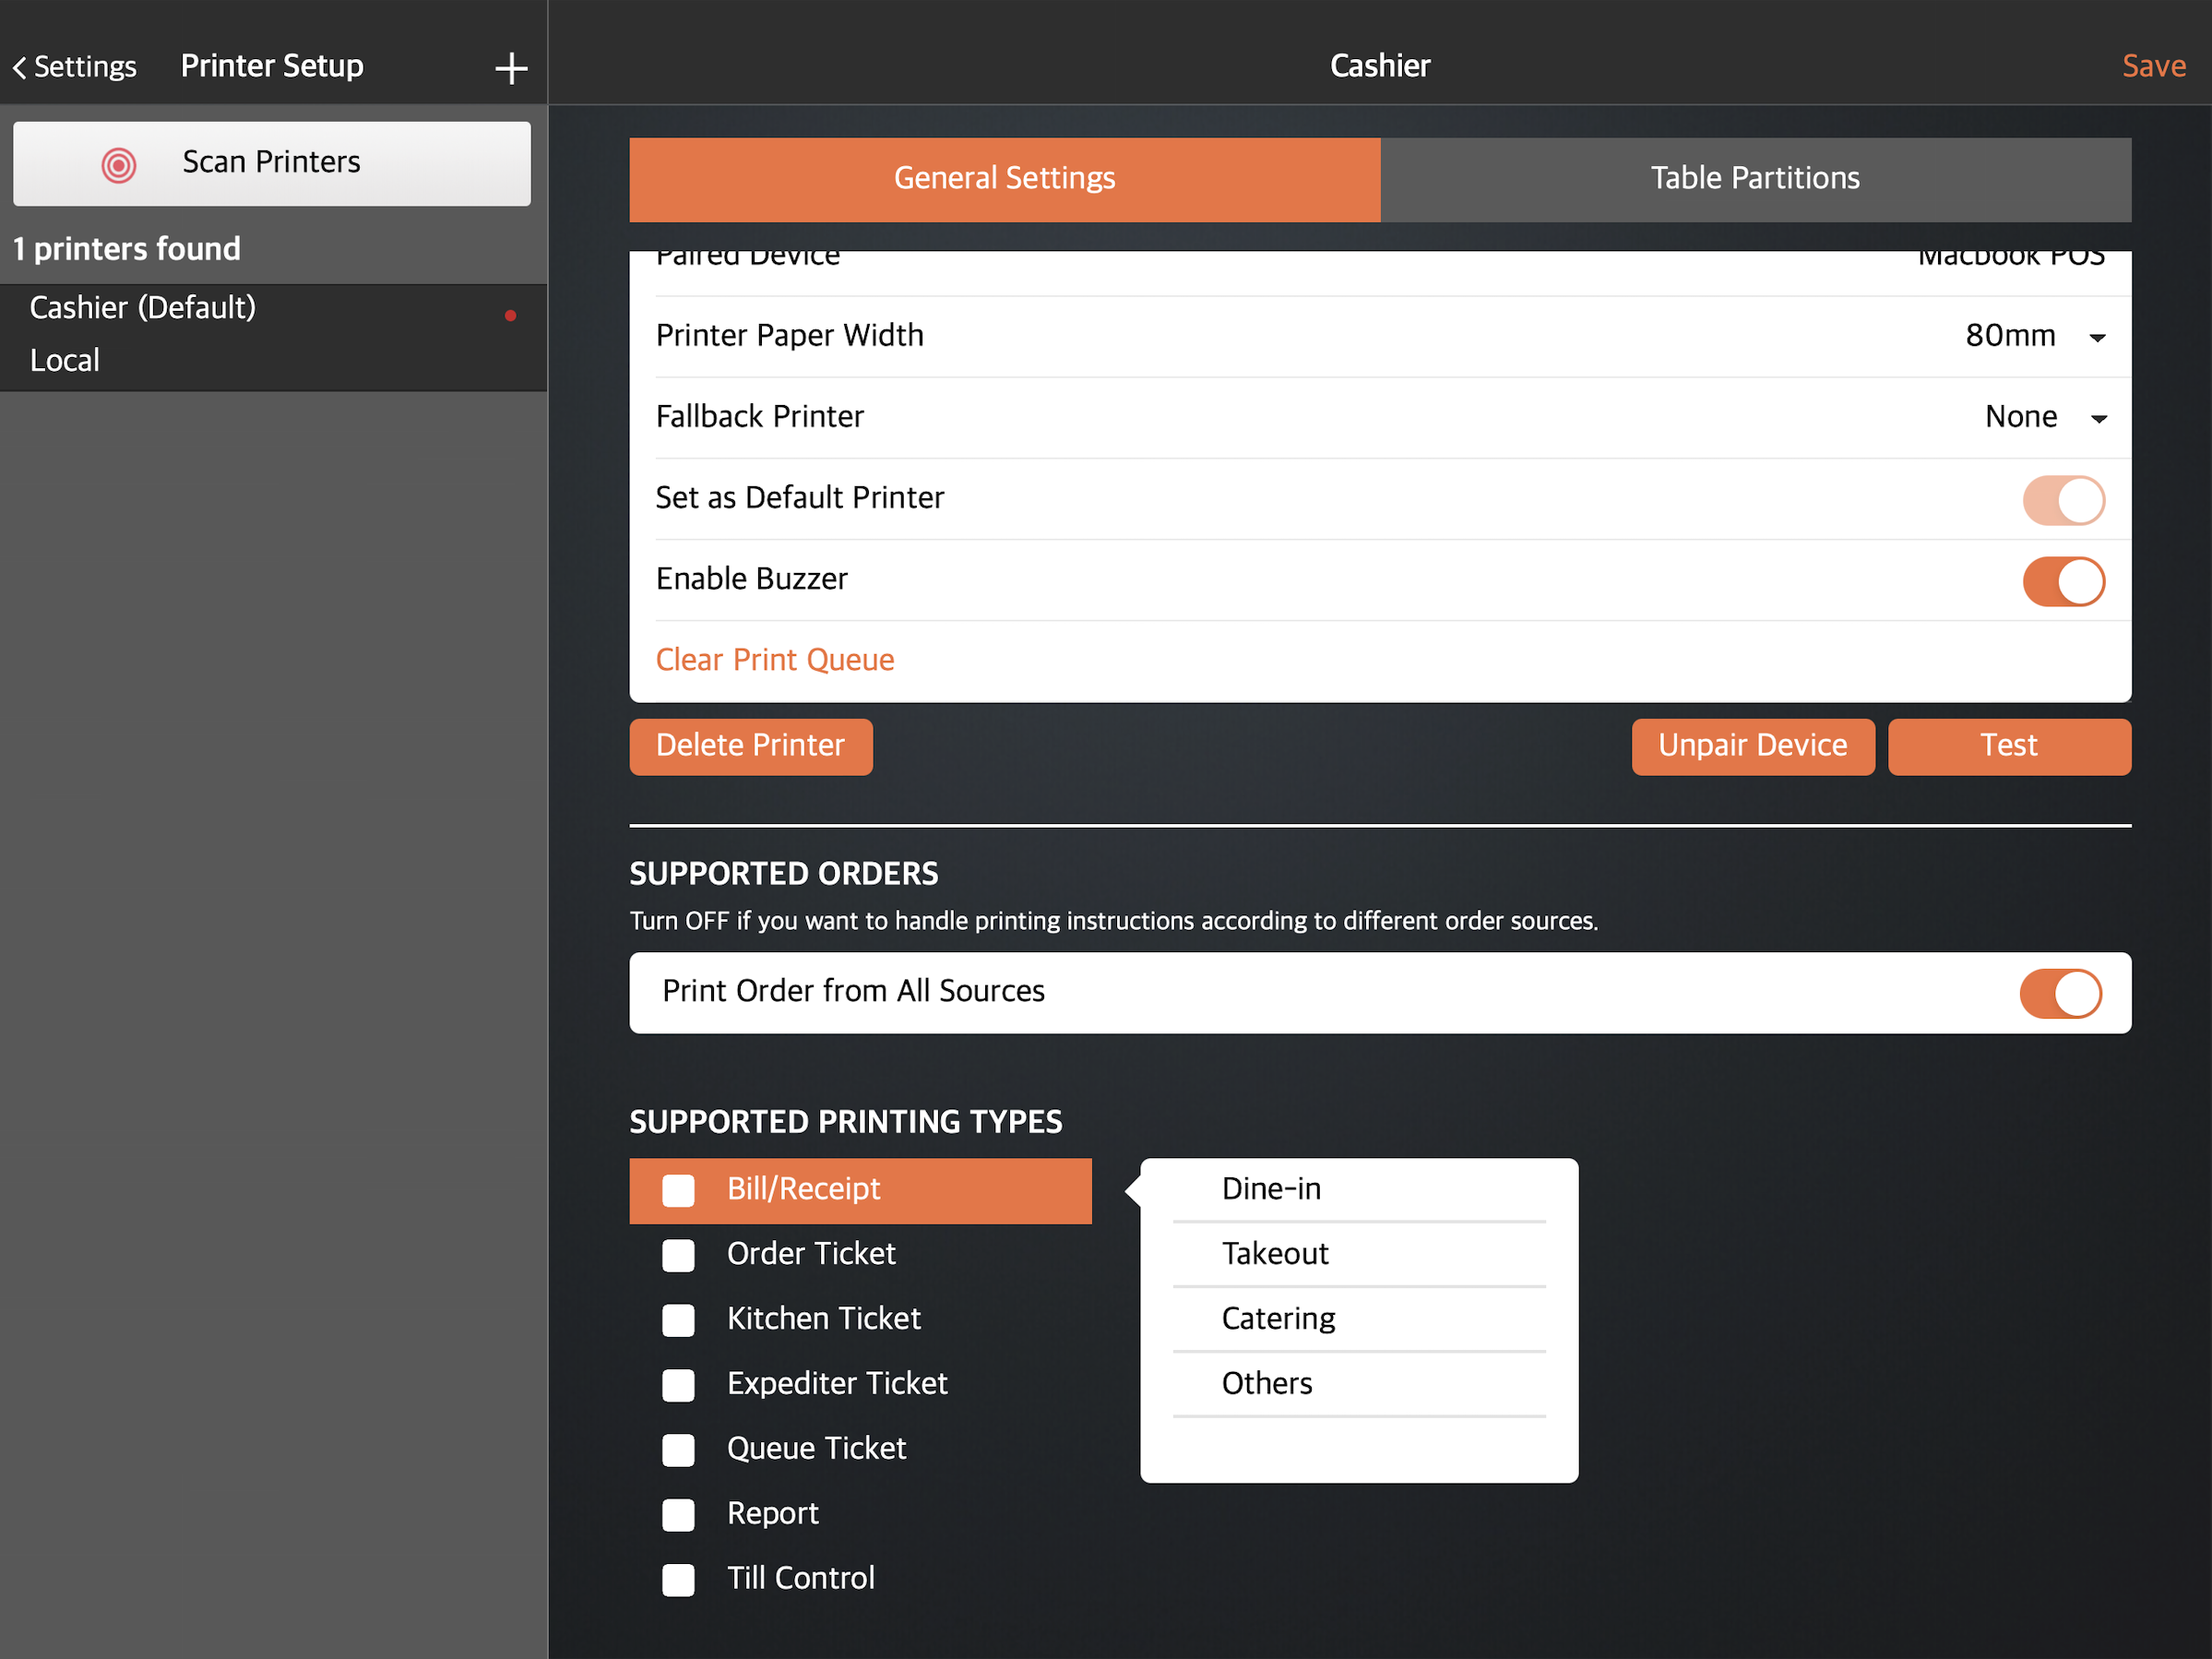
. - Under "General," tap Printer Setup, then choose a connected receipt printer.
- Under "Supported Printing Types," tap the checkbox next to "Bill/Receipt," then choose between Dine-in, Takeout, Catering, or Others.
Tip: You can configure the printer to print receipts for multiple service types. - Tap Save to confirm.
- Tap Back
 at the top left to go back to the Settings panel.
 - Under "Settings," tap Printing, then select Receipt Printing.
- Turn on the following settings:
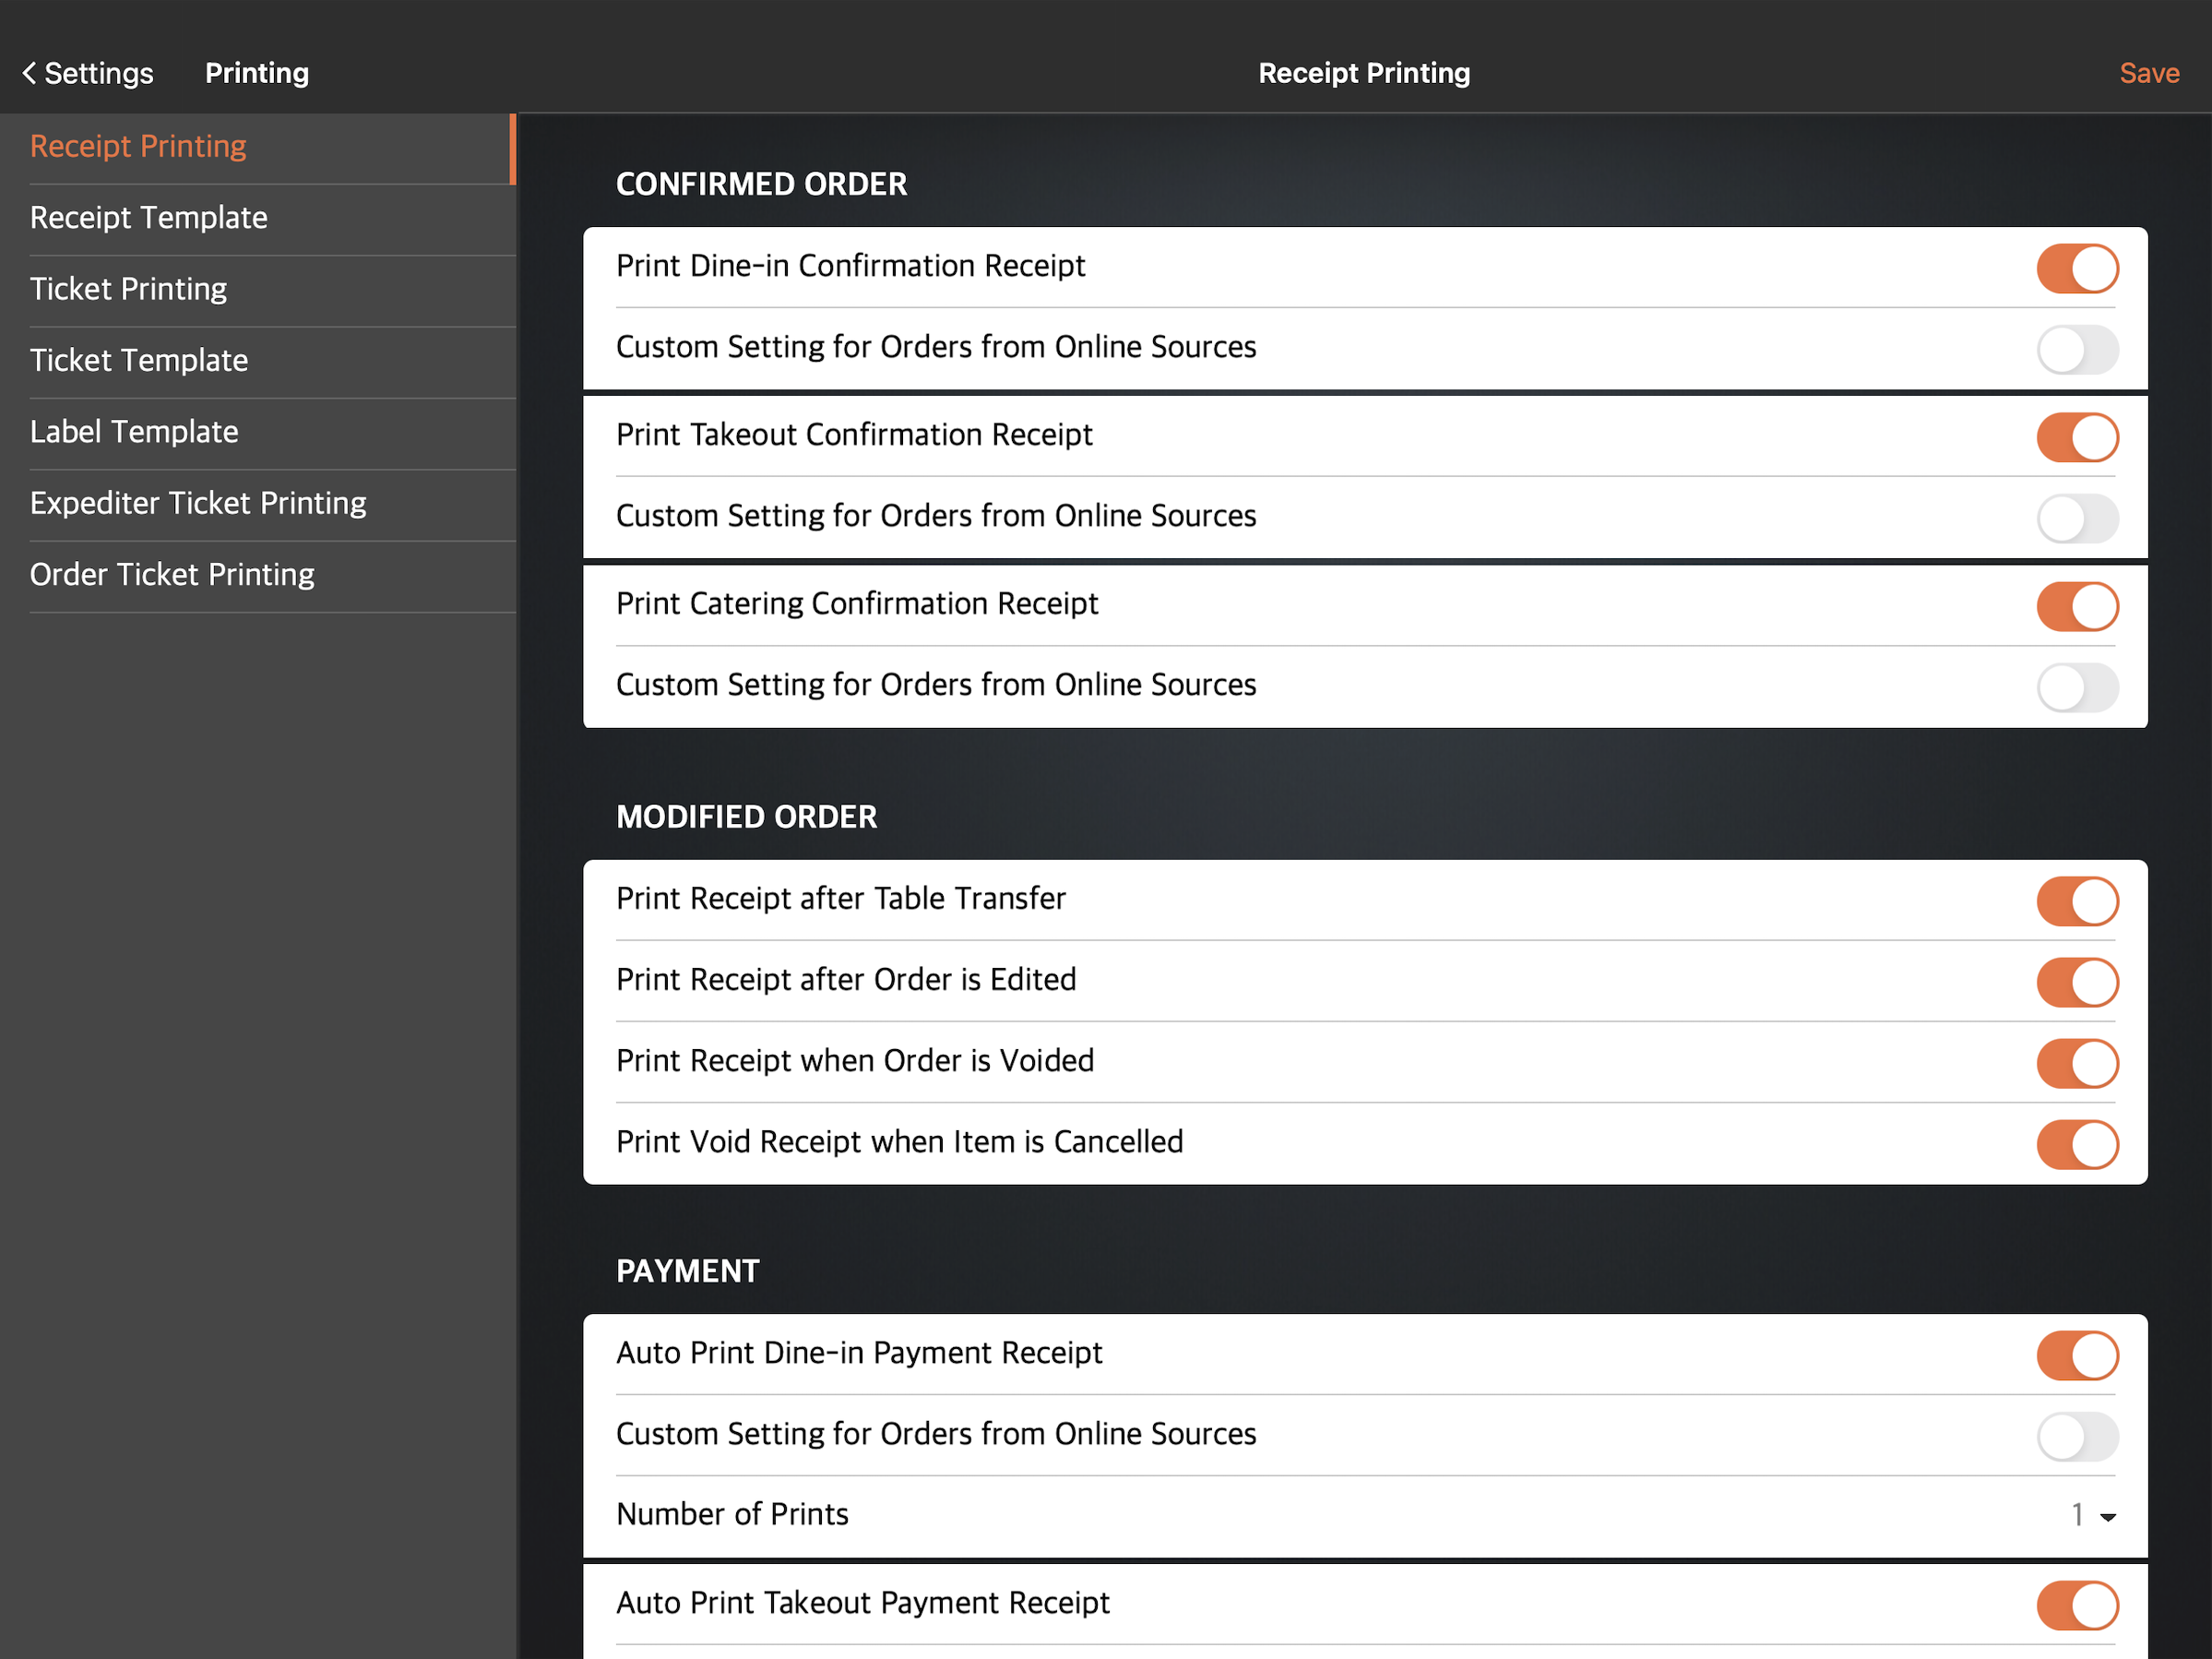
- Under "Confirmed Order," turn on Print Dine-in Confirmation Receipt
 if you want the POS to print out a receipt automatically once a Dine-in order is placed. The same applies to Takeout and Catering orders.
Note: This setting only applies to Full Service restaurants. - Under "Modified Order":
- Turn on Print Receipt after Table Transfer if you want the POS to automatically print out a receipt with a new table number whenever you transfer a check to another table.
Note: This setting only applies to Full Service restaurants. - Turn on Print Receipt after Order is Edited if you want the POS to automatically print out a receipt whenever an order is modified.
- Turn on Print Receipt when Order is Voided if you want the POS to automatically print out a receipt whenever an order is voided.
- Turn on Print Void Receipt when Item is Cancelled if you want the POS to automatically print out a receipt whenever an order is canceled.
- Turn on Print Receipt after Table Transfer
- Under "Payment," turn on Auto Print Dine-in Payment Receipt if you want the POS to automatically print out a payment receipt once a Dine-in payment is made. The same applies to Takeout and Catering payments.
Tip: The system can also automatically print an identical merchant and a customer receipt copy by setting the "Number of Prints" to two. - Under "Check Name Display," turn on Display Check Name on Takeout Receipt to add the check name on the printed receipt.
- Under "Confirmed Order," turn on Print Dine-in Confirmation Receipt
- Tap Save to confirm.
Till Control
The cash drawer can open automatically when a check is settled by cash payment. To do this, follow the steps below:
- Log in to the Eats365 POS.
- At the top left, tap Settings .
- Under "General," tap Printer Setup, then tap on the receipt printer with the connected cash drawer.
- Under "Supported Printing Types," place a check mark beside "Till Control."
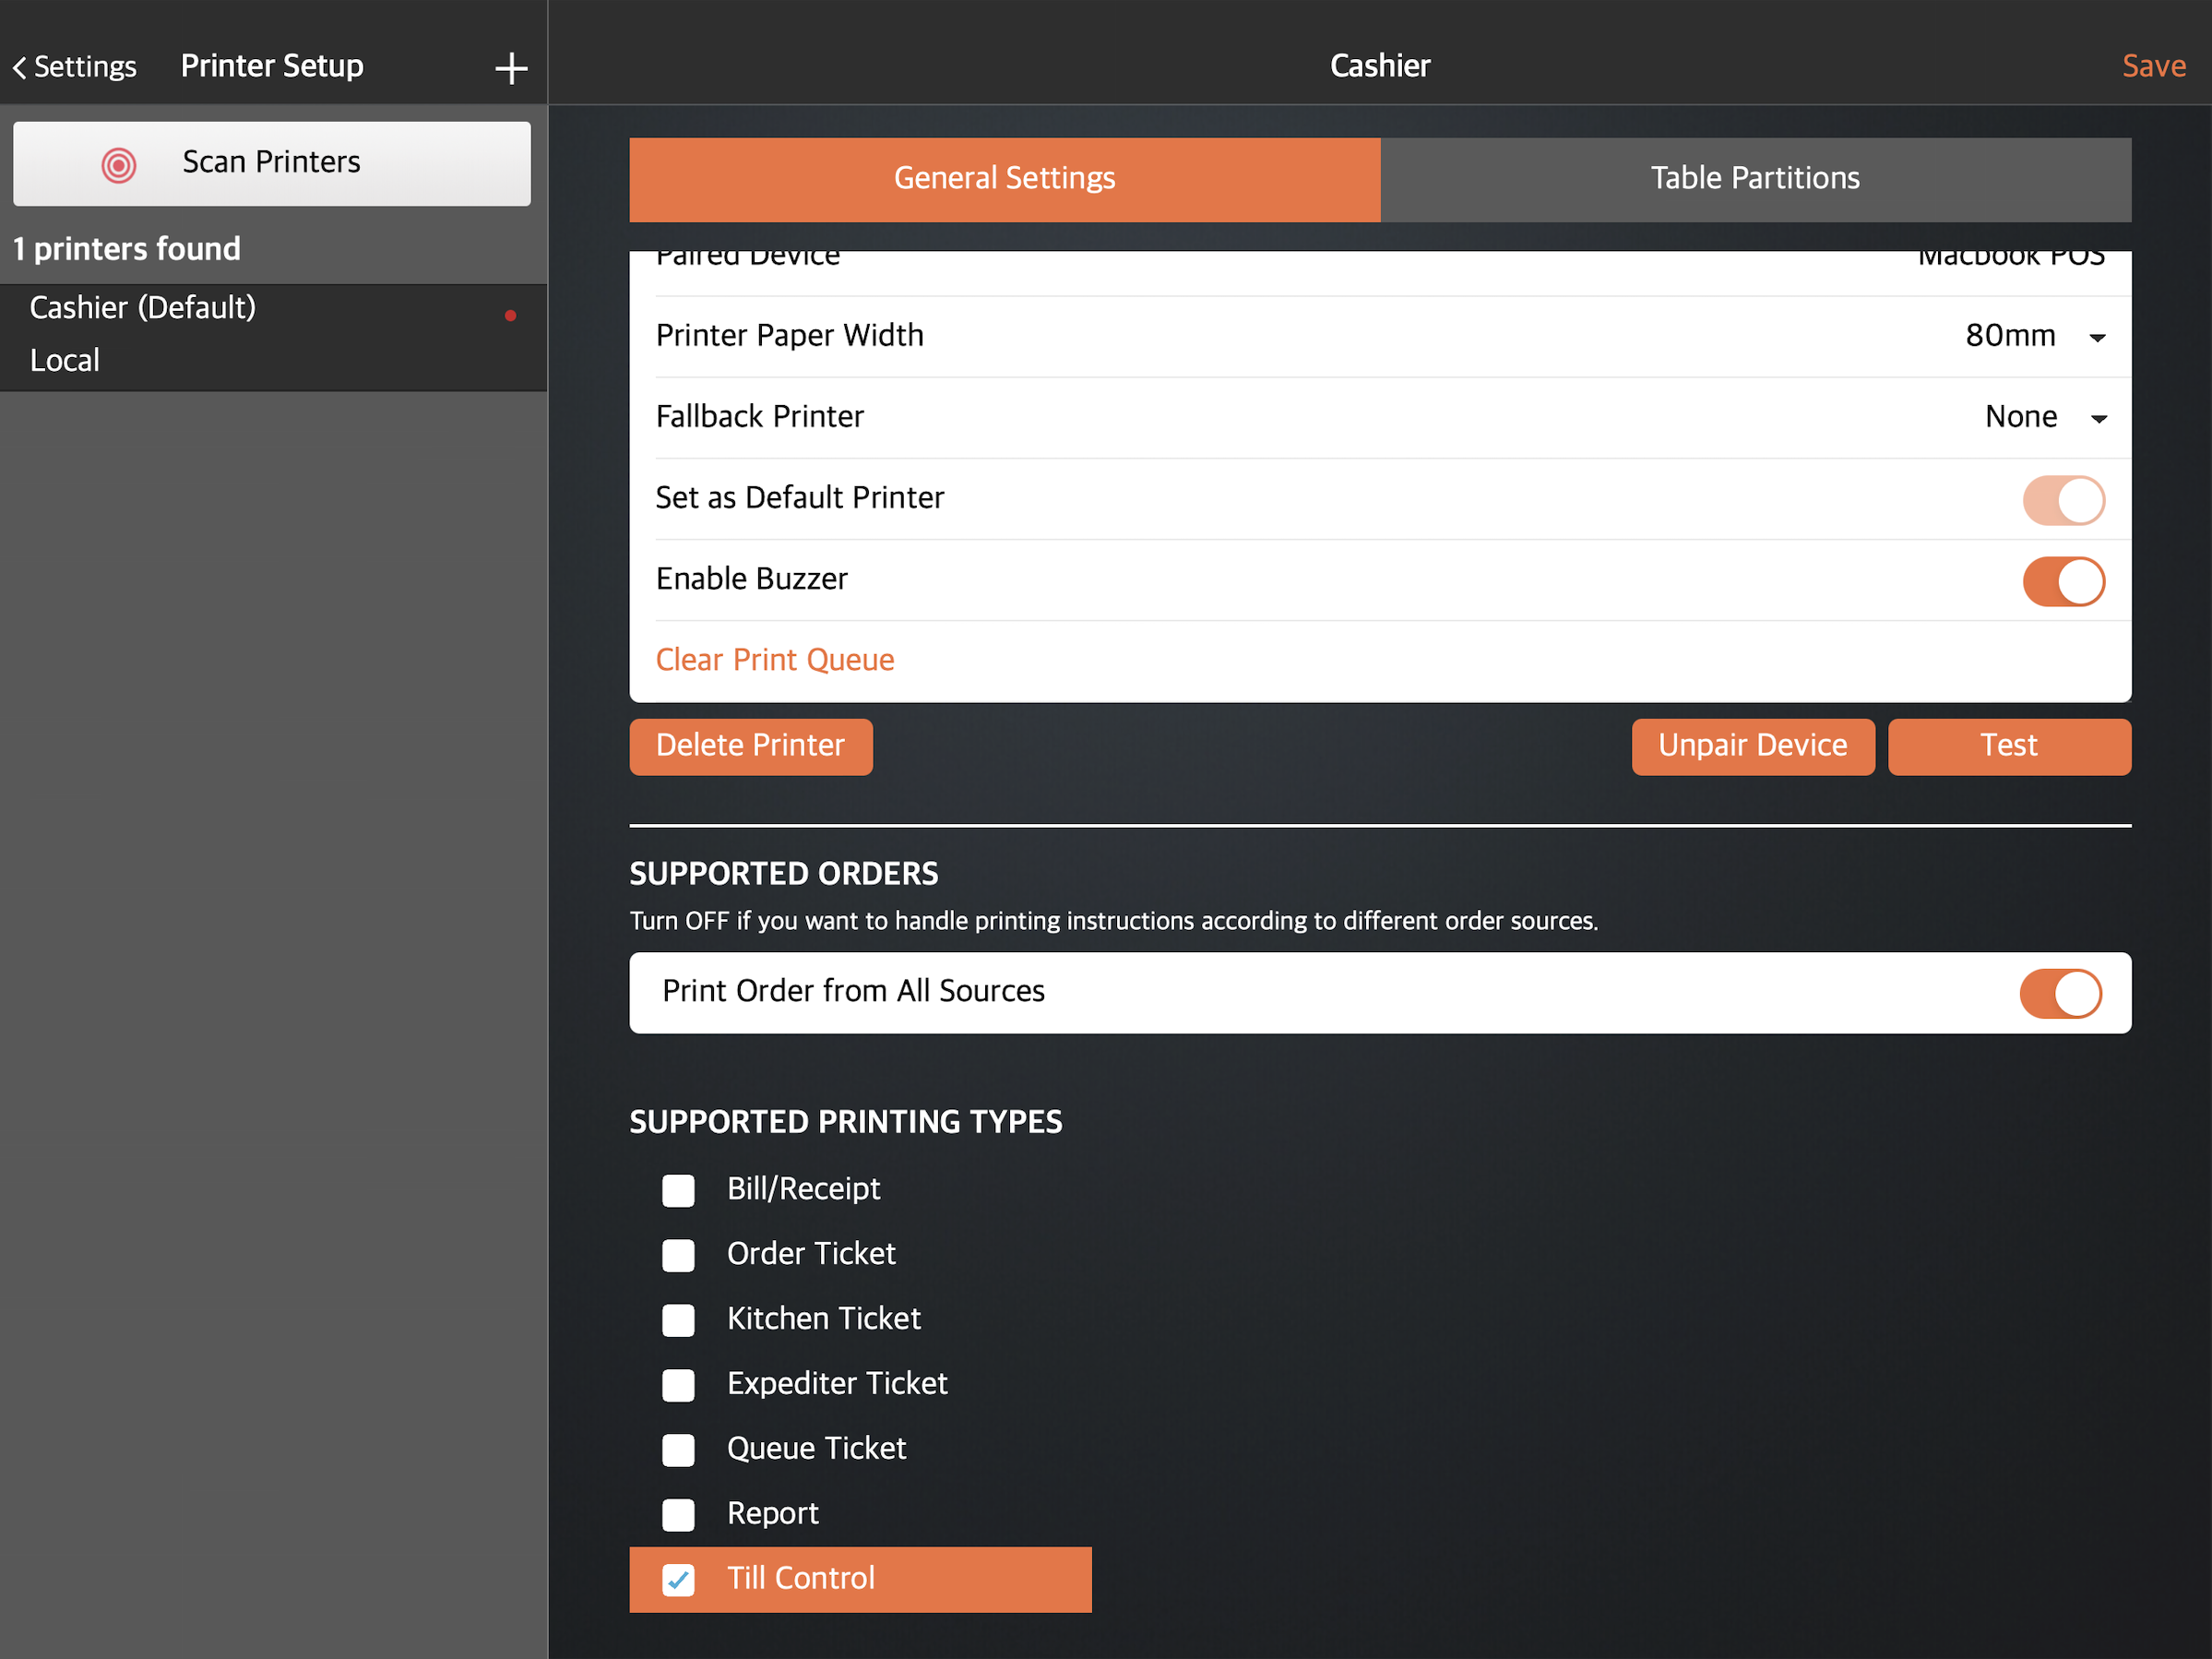
- Tap Save to confirm.