Tenders
Table of Contents
Set up and manage tenders
Learn how to set up the payment types that your restaurant accepts on the Eats365 POS or on the Merchant Portal.
"Tenders" allow you to set the type of payments your restaurant can accept. You can select from a preset of tender types or create a new tender type.
In this article, you’ll learn how to set up the tender types that your restaurant accepts, how to create a custom tender type, and set various tender preferences.
Set up Tenders
To set the payment type accepted by your restaurant, follow the steps below:
Eats365 POS
- Log in to the Eats365 POS.
- At the top left, tap Settings
 .
. - Under "Settings," tap Tenders.
- Under "Tender Types Accepted," tap the tender types that your restaurant accepts. To select all tender types, toggle on Include All
 .
.
Note: A blue check mark appears next to the item that you selected.
- To add a remark request for non-cash tender, turn on Remark Request for Non-Cash Tender.
Note: When enabled, a prompt appears on the payment screen to enter remarks for non-cash payments.
- To set a default tender, scroll down to "Default Tender Type," then select the type of tender that you want to use as the default when a payment is processed. The default tender type will be automatically selected during payment.

- At the top right, tap Save to confirm.
Merchant Portal (Classic Theme)
- Log in to the Merchant Portal.
- On the left panel, click on Restaurant Settings, then click on Tender Settings.
- Select Tender.
- Next to the tender type that you want to add, click on the checkbox
 .
. - At the top right, click on Save to confirm.
Merchant Portal 2.0
- Log in to the Merchant Portal.
- On the left panel, click on Restaurant Settings, then click on Tender Settings.
- Select Tenders.
- Next to the tender type that you want to add, click on Activate.

- At the top right, click on Save to confirm.
Add a Custom Tender Type
"Custom Tender Type" allows you to add a tender that’s not currently available in the list of payment presets.
To add a Custom Tender Type, follow the steps below:
Eats365 POS
- Log in to the Eats365 POS.
- At the top left, tap Settings .
- Under "Settings," tap Tenders.
- Under "Custom Tender Types," tap Add Custom Tender Type.

- Enter the tender type name.
- To add a remark request for your custom tender, turn on Remark Request .
Note: When enabled, a prompt appears on the payment screen to enter remarks for non-cash payments.
- If the custom tender will be used for cash vouchers, note that you must create two separate custom tenders. One will be the actual tender that staff will select on the payment screen, and the other to track remaining unused cash voucher value (forfeited change) in reports. For example, if a customer uses a $50 cash voucher for a $47 transaction, the $3 change is forfeited and will be reported under the corresponding Tender for Forfeit in the Daily Closing Report, Shift Report, and Reconciliation Report. To do this, turn on Cash Voucher . Then, from the Tender for Forfeit drop-down list, select the tender for unused cash voucher value.
- If you want the cash drawer to open automatically when you select this tender type, turn on Open Till .

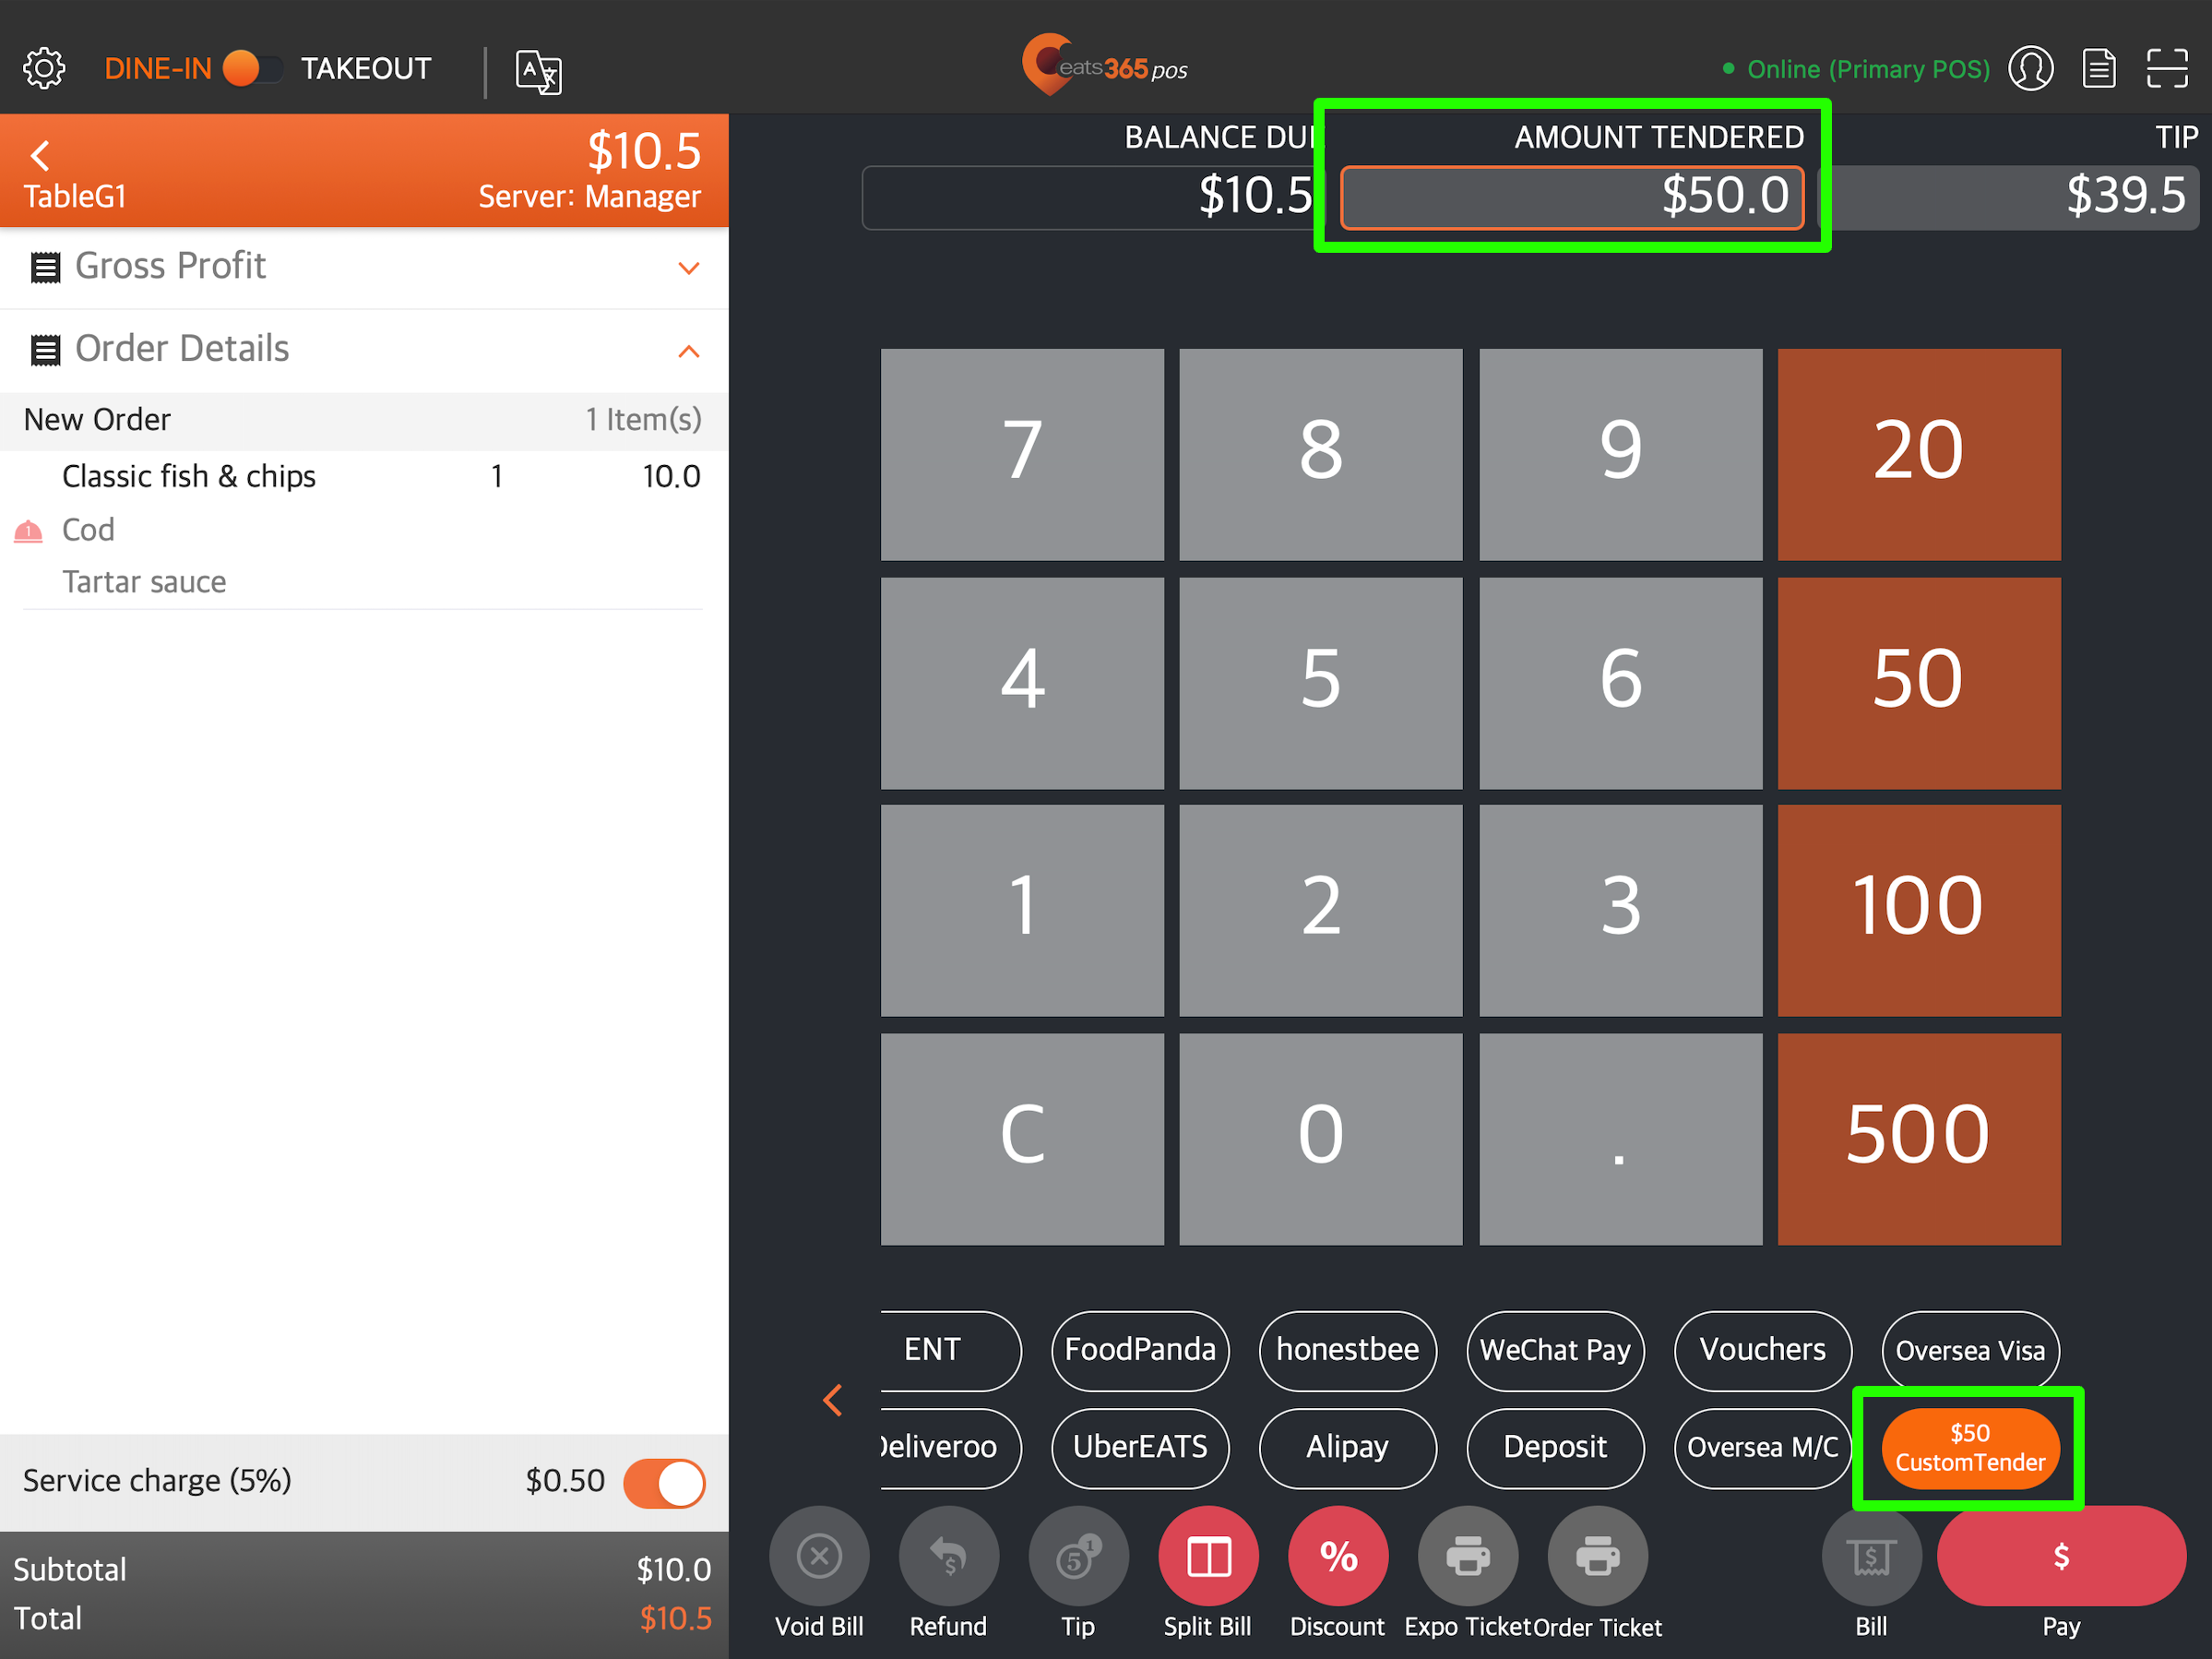
- To set a default amount tendered for the tender type you’re creating, enable Fixed Tender Amount . Then, enter an amount. When this tender type is selected during payment, the Fixed Tender Amount will be the default amount in the “Amount Tendered” field.
- To enable access for different staff roles, toggle the switch next to the staff role.

- At the top right, tap Save to confirm.
Merchant Portal (Classic Theme)
- Log in to the Merchant Portal.
- On the left panel, click on Restaurant Settings.
- Click on Tender Settings. Then, select Custom Tender Type.
- At the top right, click on +Custom Tender Type.
- Enter the tender type name.
- To add a remark request for your custom tender, turn on Remark Request
 .
.
Note: When enabled, a prompt appears on the payment screen to enter remarks for non-cash payments. - If the custom tender will be used for cash vouchers, note that you must create two separate custom tenders. One will be the actual tender that staff will select on the payment screen, and the other to track remaining unused cash voucher value (forfeited change) in reports. For example, if a customer uses a $50 cash voucher for a $47 transaction, the $3 change is forfeited and will be reported under the corresponding Tender for Forfeit in the Daily Closing Report, Shift Report, and Reconciliation Report. To do this, turn on Cash Voucher . Then, from the Tender for Forfeit drop-down list, select the tender for unused cash voucher value.
- If you want the cash drawer to open automatically when you select this tender type, turn on Open Till .
- To set a default amount tendered for the tender type you’re creating, enable Fixed Tender Amount . Then, enter an amount. When this tender type is selected during payment, the Fixed Tender Amount will be the default amount in the “Amount Tendered” field.
- To enable access for different staff roles, toggle the switch next to the staff role.
- At the top right, click on Add to confirm.
Merchant Portal 2.0
- Log in to the Merchant Portal.
- On the left panel, click on Restaurant Settings.
- Click on Tender Settings. Then, select Custom Tender Type.
- At the top right, click on +Add Custom Tender Type.

- Enter the tender type name.
- To add a remark request for your custom tender, turn on Require Remarks Input
 .
.
Note: When enabled, a prompt appears on the payment screen to enter remarks for non-cash payments.
- If the custom tender will be used for cash vouchers, note that you must create two separate custom tenders. One will be the actual tender that staff will select on the payment screen, and the other to track remaining unused cash voucher value (forfeited change) in reports. For example, if a customer uses a $50 cash voucher for a $47 transaction, the $3 change is forfeited and will be reported under the corresponding Tender for Forfeit in the Daily Closing Report, Shift Report, and Reconciliation Report. To do this, turn on Cash Voucher. Then, from the Tender for Forfeit drop-down list, select the tender for unused cash voucher value.
- If you want the cash drawer to open automatically when you select this tender type, turn on Open Till .

- To set a default amount tendered for the tender type you’re creating, enable Fixed Tender Amount . Then, enter an amount. When this tender type is selected during payment, the Fixed Tender Amount will be the default amount in the “Amount Tendered” field.
- To enable access for different staff roles, toggle the switch next to the staff role.

- Click on Save to confirm.
Manage Custom Tender Type
Edit a Custom Tender Type
To update a Custom Tender Type, follow the steps below:
Eats365 POS
- Log in to the Eats365 POS.
- At the top left, tap Settings .
- Under "Settings," tap Tenders.
- Under "Custom Tender Types," tap the Custom Tender Type that you want to edit. You can also tap the three-dot menu
 then tap Edit
  .
.
- Update the Custom Tender Type.
- At the top right, tap Update to confirm.
Merchant Portal (Classic Theme)
- Log in to the Merchant Portal.
- On the left panel, click on Restaurant Settings, then click on Tender Settings.
- Select Custom Tender Type.
- Next to the Custom Tender Type that you want to update, click on Edit .
- Update the Custom Tender Type.
- At the top right, click on Save to confirm.
Merchant Portal 2.0
- Log in to the Merchant Portal.
- On the left panel, click on Restaurant Settings, then click on Tender Settings.
- Select Custom Tender Type.
- Next to the Custom Tender Type that you want to update, click on Edit
 .
.
- Update the Custom Tender Type.
- Click on Save to confirm.
Delete a Custom Tender Type
To remove a Custom Tender Type, follow the steps below:
Eats365 POS
- Log in to the Eats365 POS.
- At the top left, tap Settings .
- Under "Settings," tap Tenders.
- Under "Custom Tender Types," tap the Custom Tender Type that you want to delete. You can also tap the three-dot menuthen tap Remove
 .
.
- At the top right, tap Delete. A prompt appears to confirm if you want to delete the Custom Tender Type.
- Tap Delete to confirm.
Merchant Portal (Classic Theme)
- Log in to the Merchant Portal.
- On the left panel, click on Restaurant Settings, then click on Tender Settings.
- Select Custom Tender Type.
- Next to the Custom Tender Type that you want to update, click on Delete . A prompt appears to confirm if you want to delete the Custom Tender Type.
- Click on OK to confirm.
Merchant Portal 2.0
- Log in to the Merchant Portal.
- On the left panel, click on Restaurant Settings, then click on Tender Settings.
- Select Custom Tender Type.
- Next to the Custom Tender Type that you want to update, click on Delete
 . A prompt appears to confirm if you want to delete the Custom Tender Type.
- Click on Confirm.
Reorder tender options on the POS payment screen
To change how payment options are arranged for easier checkout, follow the steps below:
- Log in to the Merchant Portal.
- On the left panel, click on Restaurant Settings and select Tenders Settings.
- Click on Tenders, then open the Tender Sequence tab.
- Next to the tender you’d like to move in the sequence, click on Move
 and drag the option to where you want it to appear on the POS.
Create Quick Key for Cash Payment
"Quick Keys" allow you to easily choose a payment value on the payment screen.

To create a Quick Key for Cash Payment, follow the steps below:
- Log in to the Eats365 POS.
- At the top left, tap Settings .
- Under "Settings," tap Tenders.
- Under "Quick Key for Cash Payment," enter the quick keys that you want to have.
 Note: You can add up to four quick keys.
 - At the top right, tap Save to confirm.
Auto Fill Amount Tendered
The "Auto Fill Amount Tendered" setting speeds up the payment process by automatically filling out the Amount Tendered field on the POS.

If you want the POS to fill the amount tendered automatically, follow the steps below:
Eats365 POS
- Log in to the Eats365 POS.
- At the top left, tap Settings .
- Under "Advanced Settings," tap System Preferences.
- Scroll down to "Payment," then turn on Auto Fill Amount Tendered .

- At the top right, tap Save to confirm.
Merchant Portal (Classic Theme)
- Log in to the Merchant Portal.
- On the left panel, click on Advanced Settings, then click on System Preferences.
- Select General.
- Scroll down to "Payment," then turn on Auto Fill Amount Tendered.
- At the top right, click on Save to confirm.
Merchant Portal 2.0
- Log in to the Merchant Portal.
- On the left panel, click on Advanced Settings, then click on System Preferences.
- Select Cashier Preferences.
- Scroll down to "Payment," then turn on Auto Fill Amount Tendered.

- At the top right, click on Save to confirm.