 Eats365 Products
 Merchant Guide
 Modules
 Membership
 Integrations
 Hardware
 Staff Operations
 Roles & Permissions
 Payments
 Reports
 What’s New
 Release Notes
 Troubleshooting
 Simulators
 Glossary
 Troubleshooter
 System Status
Taxes
Table of Contents
Manage Tax Invoice preferences (Taiwan)
Learn how to set up your preferred settings for Tax Invoice on the Merchant Portal and Eats365 POS.
In this article, you’ll learn how to set a default tax type for your restaurant and set specific tax types to menu Items, generate Invoice Numbers, and configure a printer to print tax invoices.
Tax types
Set your restaurant’s default tax type, or set an Item’s tax type if they’re an exception to the restaurant’s default tax type. These tax types include Taxable (TX) and Tax Free (TF). To learn about these tax types, refer to Taiwan’s taxation policies.
Restaurant Tax type
To set your whole restaurant’s default tax type, follow the steps below:
- Log in to Merchant Portal.
- On the left panel, click on Restaurant Settings.
- Select Basic Information, then Restaurant Information.
- Under "Tax Type," click on the drop-down arrow and select the applicable Default Tax Type.
- Click on Save to confirm.
Item Tax type
If an Item is an exception to the default tax type that you’ve set for the whole restaurant, you can set the Tax Invoice type that’s specific to the Item.
To specify an Item’s Tax Invoice type, follow the steps below:
Eats365 POS
- Log in to the Eats365 POS.
- At the top left, tap Settings
 .
. - Under "General," tap Menu Setup, then select Item.
- Select the Item that you’d like to set the Tax Invoice type for.
- Next to "Item Tax Type," click on the drop-down arrow and select the applicable Item Tax Type.
- At the top right, tap Save.
Merchant Portal (Classic Theme)
- Log in to Merchant Portal.
- On the left panel, click on Menu Setup, then Item.
- Select the Item you’d like to set the Tax Invoice type for.
- Next to "Item Tax Type," click on the drop-down and select the applicable Item Tax Type.
- Once done, scroll to the top and click on Save at the top right.
Merchant Portal 2.0
- Log in to Merchant Portal.
- On the left panel, click on Menu Setup, then Item.
- Select the Item you’d like to set the Tax Invoice type for.
- Next to "Item Tax Type," click on the drop-down and select the applicable Item Tax Type.
- Once done, scroll to the top and click on Save at the top right.
Set a printer to print Tax Invoice
To configure a printer to print Tax Invoice, follow the steps below:
- Log in to the Eats365 POS.
- At the top left, tap Settings .
- Under "General," tap Printer Setup, then choose a connected printer.
- Set the Printer Paper Width to 58mm.
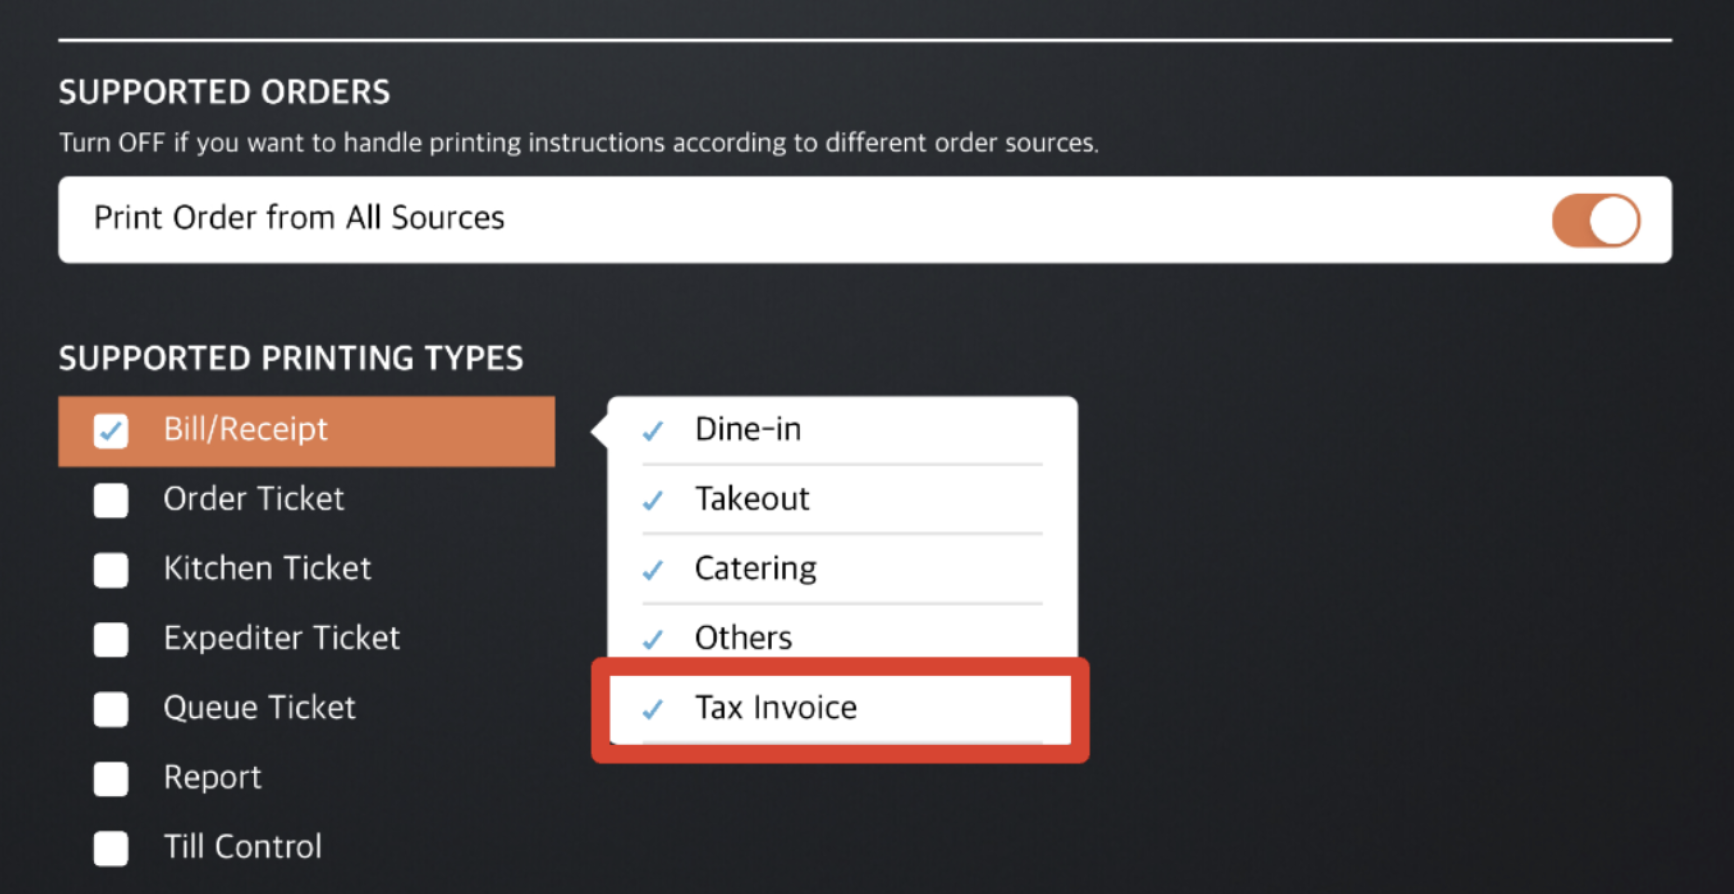
- Under "Supported Printing Types," place a check mark beside "Bill/Receipt," then select Tax Invoice.
- At the top right, tap Save to confirm.
Disable Tax Invoice issuing for select POS terminals
If you have multiple Eats365 POS terminals, you can turn off the ability to issue Tax Invoices on certain terminals. To do this, follow the steps below:
- Log in to the Eats365 POS.
- At the top left, tap Settings .
- Under “Settings,” tap e-Invoice.
- Under “Invoice General Setting,” turn on Suspend Invoice Module
 . This disables the Tax Invoice function on the POS.