 Eats365 Products
 Merchant Guide
 Modules
 Membership
 Integrations
 Hardware
 Staff Operations
 Roles & Permissions
 Payments
 Reports
 What’s New
 Release Notes
 Troubleshooting
 Simulators
 Glossary
 Troubleshooter
 System Status
Taxes
Table of Contents
Issue a Tax Invoice (Taiwan)
Learn how to apply Tax Invoice to transactions using the Eats365 POS and set Custom Tenders to be included or excluded from a Tax Invoice.
In Taiwan, establishments are required by the government to issue a tax invoice for every transaction. In this article, you’ll learn how to issue a tax invoice for transactions and use a Custom Tender as payment for tax-exempt transactions.
Issue a tax invoice
To issue a tax invoice to a transaction, follow the steps below:
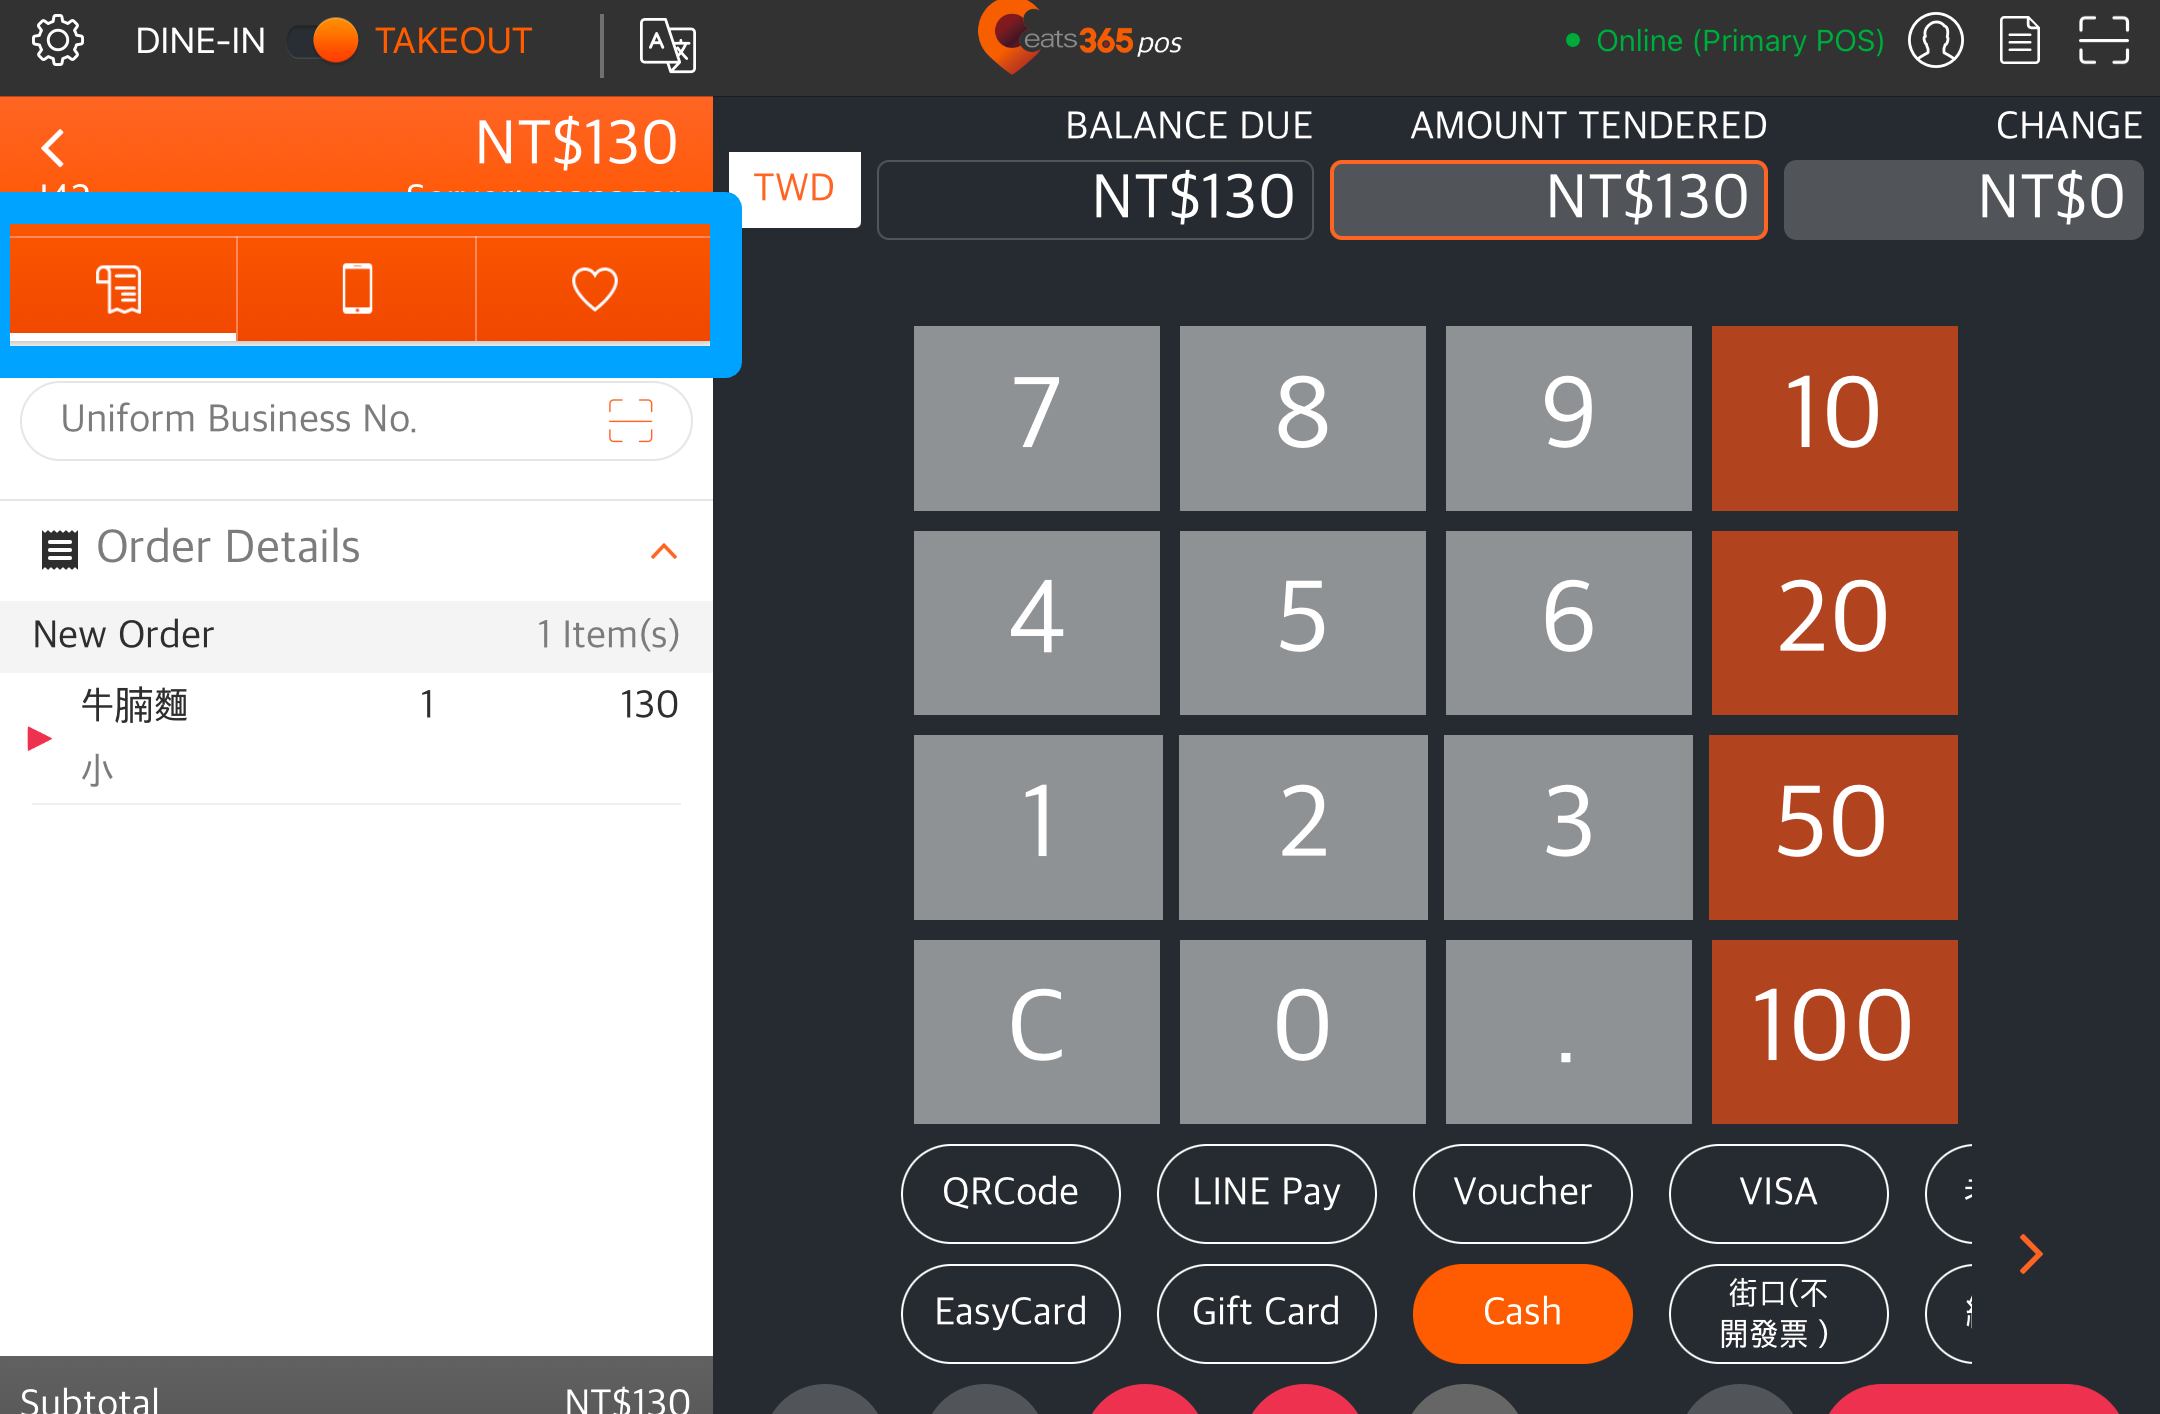
- Log in to the Eats365 POS.
- On the order-taking screen, select the order that you’d like to close and issue a Tax Invoice.
- Tap Pay, then select the preferred tender.
- On the order, select the preferred invoice type.
Note: If the preferred invoice type is Paper, you can proceed directly to payment by tapping Pay.- Uniform Business No.

- Carrier

- Donation Code

- Uniform Business No.
- Tap Scan
 and scan the customer’s Uniform Business Number, Carrier, or Donation Code QR Code. If the QR Code is unavailable, manually enter the Uniform Business Number, Carrier, or Donation Code in the field, depending on the invoice type you selected.
 - At the bottom right, tap Pay to proceed.
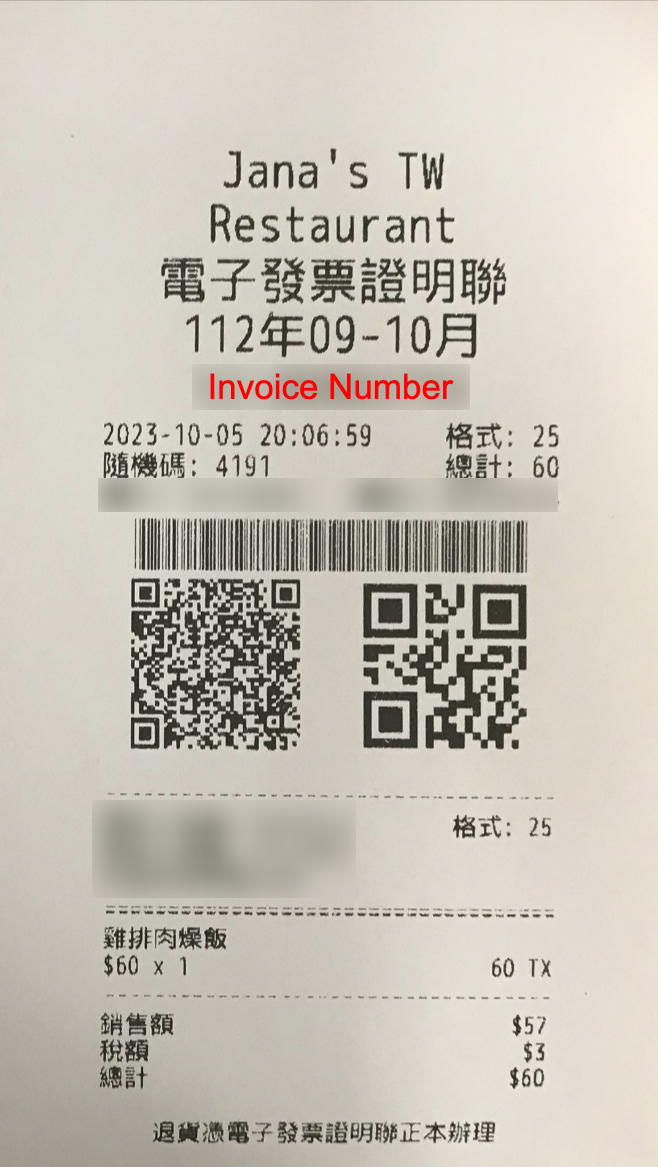
Once the payment has been processed, the order information, including the selected invoice type, will be sent to the E-Invoice Platform that you linked to the POS. You can check the transaction details on the E-Invoice Platform’s portal.
For Paper and Uniform Business No. invoice types, the printer will print out a physical copy of the Tax Invoice.
Issue a tax invoice for a Custom Tender
You can set a Custom Tender to be issued a Tax Invoice or exempted from Tax Invoice when used.
Custom Tender included in Tax Invoice
If you set a Custom Tender to be included in a Tax Invoice and use that Custom Tender as the payment method for an order, the total order amount will be taxed. For example, if the order amount is $60, then $60 would be included in the Tax Invoice.
Tax-exempt Custom Tender
In general, orders are expected to be paid with money in the form of cash, credit cards, and more. With monetary transactions, businesses are tasked to collect taxes based on the amount of a purchase that can be taxed. In cases where, for example, a meal was given for free and therefore no payment was collected, you may need to make exceptions in how the order's total amount will be taxed to avoid discrepancies in your records.
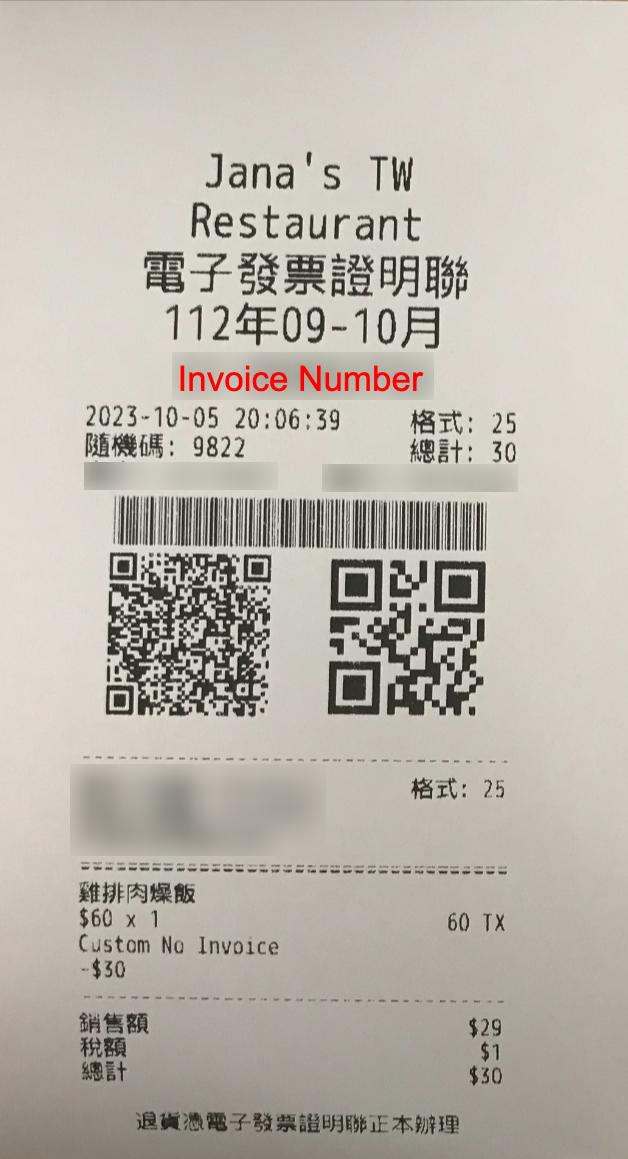
You can create a Custom Tender and set it to be exempt from tax to use for purposes such as payment for when a customer uses a cash or meal voucher that they purchased separately to pay for their order. Since the voucher was already taxed upon purchase, it doesn’t need to be subject to tax again. For example, if the customer’s total bill amounts to $90 and they use a $30 voucher, you can use a Custom Tender to make the $30 voucher exempt from tax. In this case, only $60 would be subject to tax. When a Custom Tender is exempt from tax, it will show up as a discount on the order.
 .
.
Set Tax Invoice setting for a Custom Tender
To configure a Custom Tender’s Tax Invoice setting, follow the steps below:
Eats365 POS
- Log in to the Eats365 POS.
- At the top left, tap Settings
 .
. - Under "Settings," tap Tenders.
- Under "Custom Tender Types," select the custom tender type, or tap Add Custom Tender Type to create a new custom tender.
- Turn Issue Tax Invoice on
 or off
  .
. - At the top right, tap Save to confirm.
Merchant Portal (Classic Theme)
- Log in to the Merchant Portal.
- On the left panel, click on Restaurant Settings. Then, click on Tender Settings.
- Select Custom Tender Type.
- Next to the custom tender type, click on Edit
 , or at the top right, click on +Custom Tender Type to create a new custom tender.
 - Turn Issue e-Invoice on
 or off .
 - Click on Add to confirm.
Merchant Portal 2.0
- Log in to the Merchant Portal.
- On the left panel, click on Restaurant Settings. Then, click on Tender Settings.
- Select Custom Tender Type.
- Next to the custom tender type, click on Edit
 , or at the top right, click on Add Custom Tender Type to create a new custom tender.
 - Turn on Issue e-Invoice on
 or off .
 - Click on Save to confirm.
Reprint a Tax Invoice
To reprint the generated Tax Invoice of a completed or voided order, follow the steps below:
- Log in to the Eats365 POS.
- At the top right of the Table Map or the order-taking screen, tap Order List
 . Then, search and open the order that you want to reprint the Tax Invoice of.
 - Once the order is selected, tap To Payment.

- Tap Receipt
 , then select if you’d like to print only the Tax Invoice or both the order receipt and Tax Invoice.
Sample Reprinted Tax Invoice
