 Eats365 Products
 Merchant Guide
 Modules
 Membership
 Integrations
 Hardware
 Staff Operations
 Roles & Permissions
 Payments
 Reports
 What’s New
 Release Notes
 Troubleshooting
 Simulators
 Glossary
 Troubleshooter
 System Status
Menu Setup
Table of Contents
Allocate item sales to different sales categories
Learn how to split the selling price of items and allocate them to different sales categories.
Sales Categories allow you to split the selling price of an item and allocate the sales into multiple categories. For example, if you have an item with a selling price of $15, you can split the item sales to allocate $5 for raw materials and $10 for kitchen department in reporting. With Sales Categories, you can easily analyze how each kitchen department contributes to your shop’s revenue.
In this article you’ll learn how to divide the selling price of menu items to different sales categories. For more information on creating sales categories, refer to Create and manage Sales Categories.
Split menu item sales to different categories
To split the selling price of an item to different sales categories, follow the steps below:
Merchant Portal (Classic Theme)
- Log in to the Merchant Portal.
- On the left panel, click on Menu Setup. Then, click on Item.
- Click on Dine-In & Takeout or Catering.
- At the top right, click on +Single Item or +Combo Item to create an item. If you already have an existing item, next to the item that you want to update, click on Edit
 .
. - Under Availability & Price, enter the item’s List Price.
- Under Sales Categories, click on +Add New. Then, click on the drop-down list and select the sales categories that you want to include in the allocation of item sales.
Note: You can select multiple sales categories. To add more categories, click on +Add New.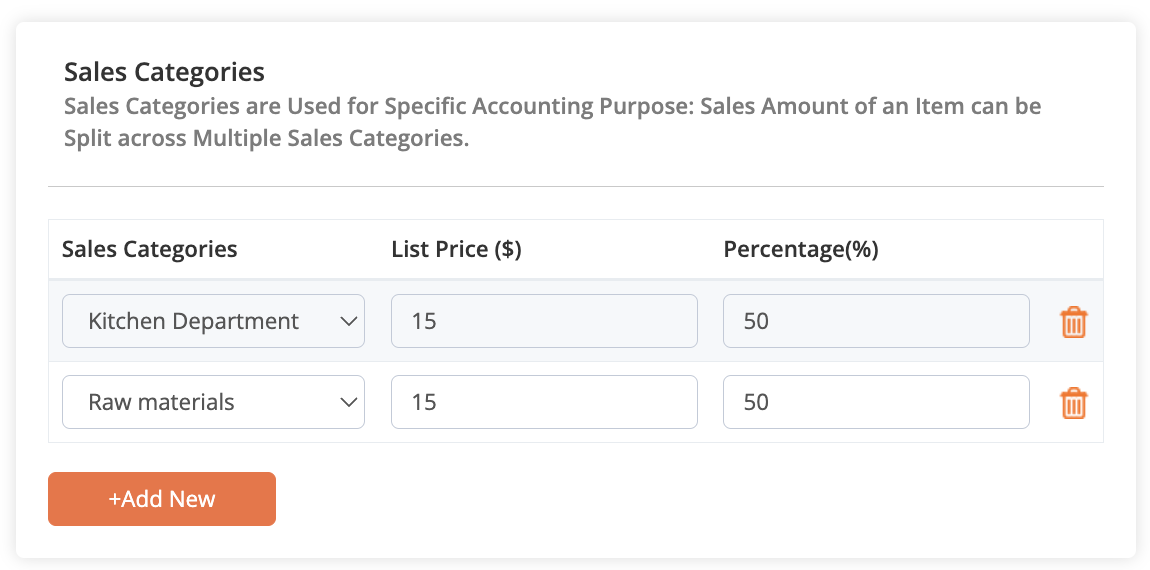
- Enter the List Price or the Percentage that you want to allocate to the selected sales category. The sum of the percentage should total to 100%.
- At the top right, click on Save to confirm.
Merchant Portal 2.0
- Log in to the Merchant Portal.
- On the left panel, click on Menu Setup. Then, click on Item.
- Click on the Dine-In & Takeout or Catering tab.
- At the top right, click on +Single Item or +Combo Item to create an item. If you already have an existing item, next to the item that you want to update, click on Edit
 .
. - Under Availability & Price, enter the item’s List Price.
- Under Sales Categories, click on the drop-down list and select the sales categories that you want to include in the allocation of item sales.
Note: You can select multiple sales categories.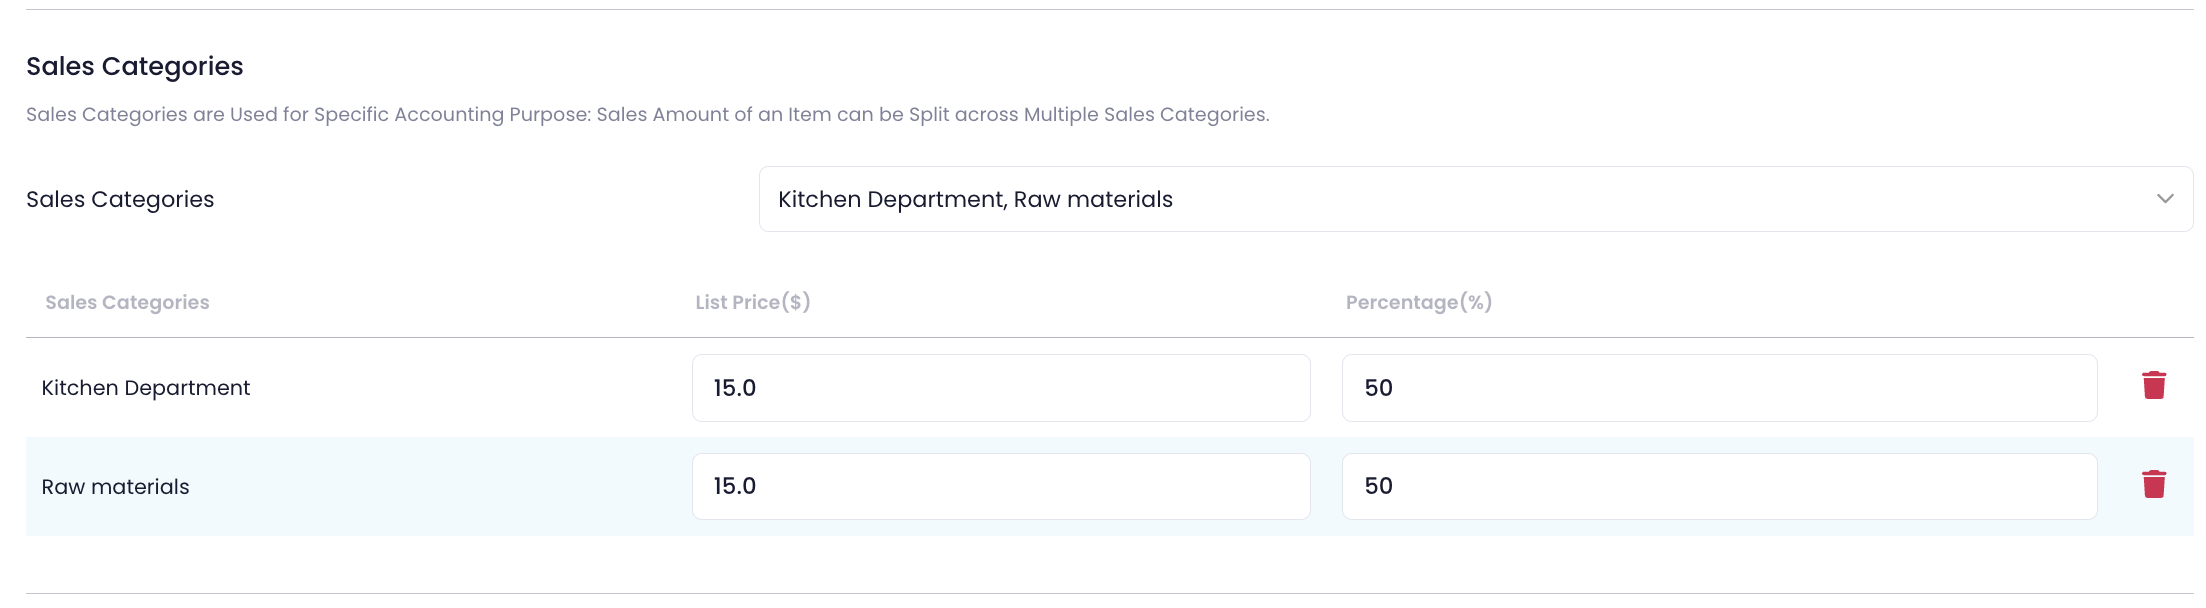
- Enter the List Price or the Percentage that you want to allocate to the selected sales category. The sum of the percentage should total to 100%.
- At the top right, click on Save to confirm.