Sales report
Table of Contents
View and manage Item Sold Report
Learn how to generate an Item Sold Report on the Merchant Portal.
The Item Sold Report provides a summary of all items sold over a selected period. The Report Result details the quantity sold per item and, if available, the number of times a modifier and an option have been chosen.
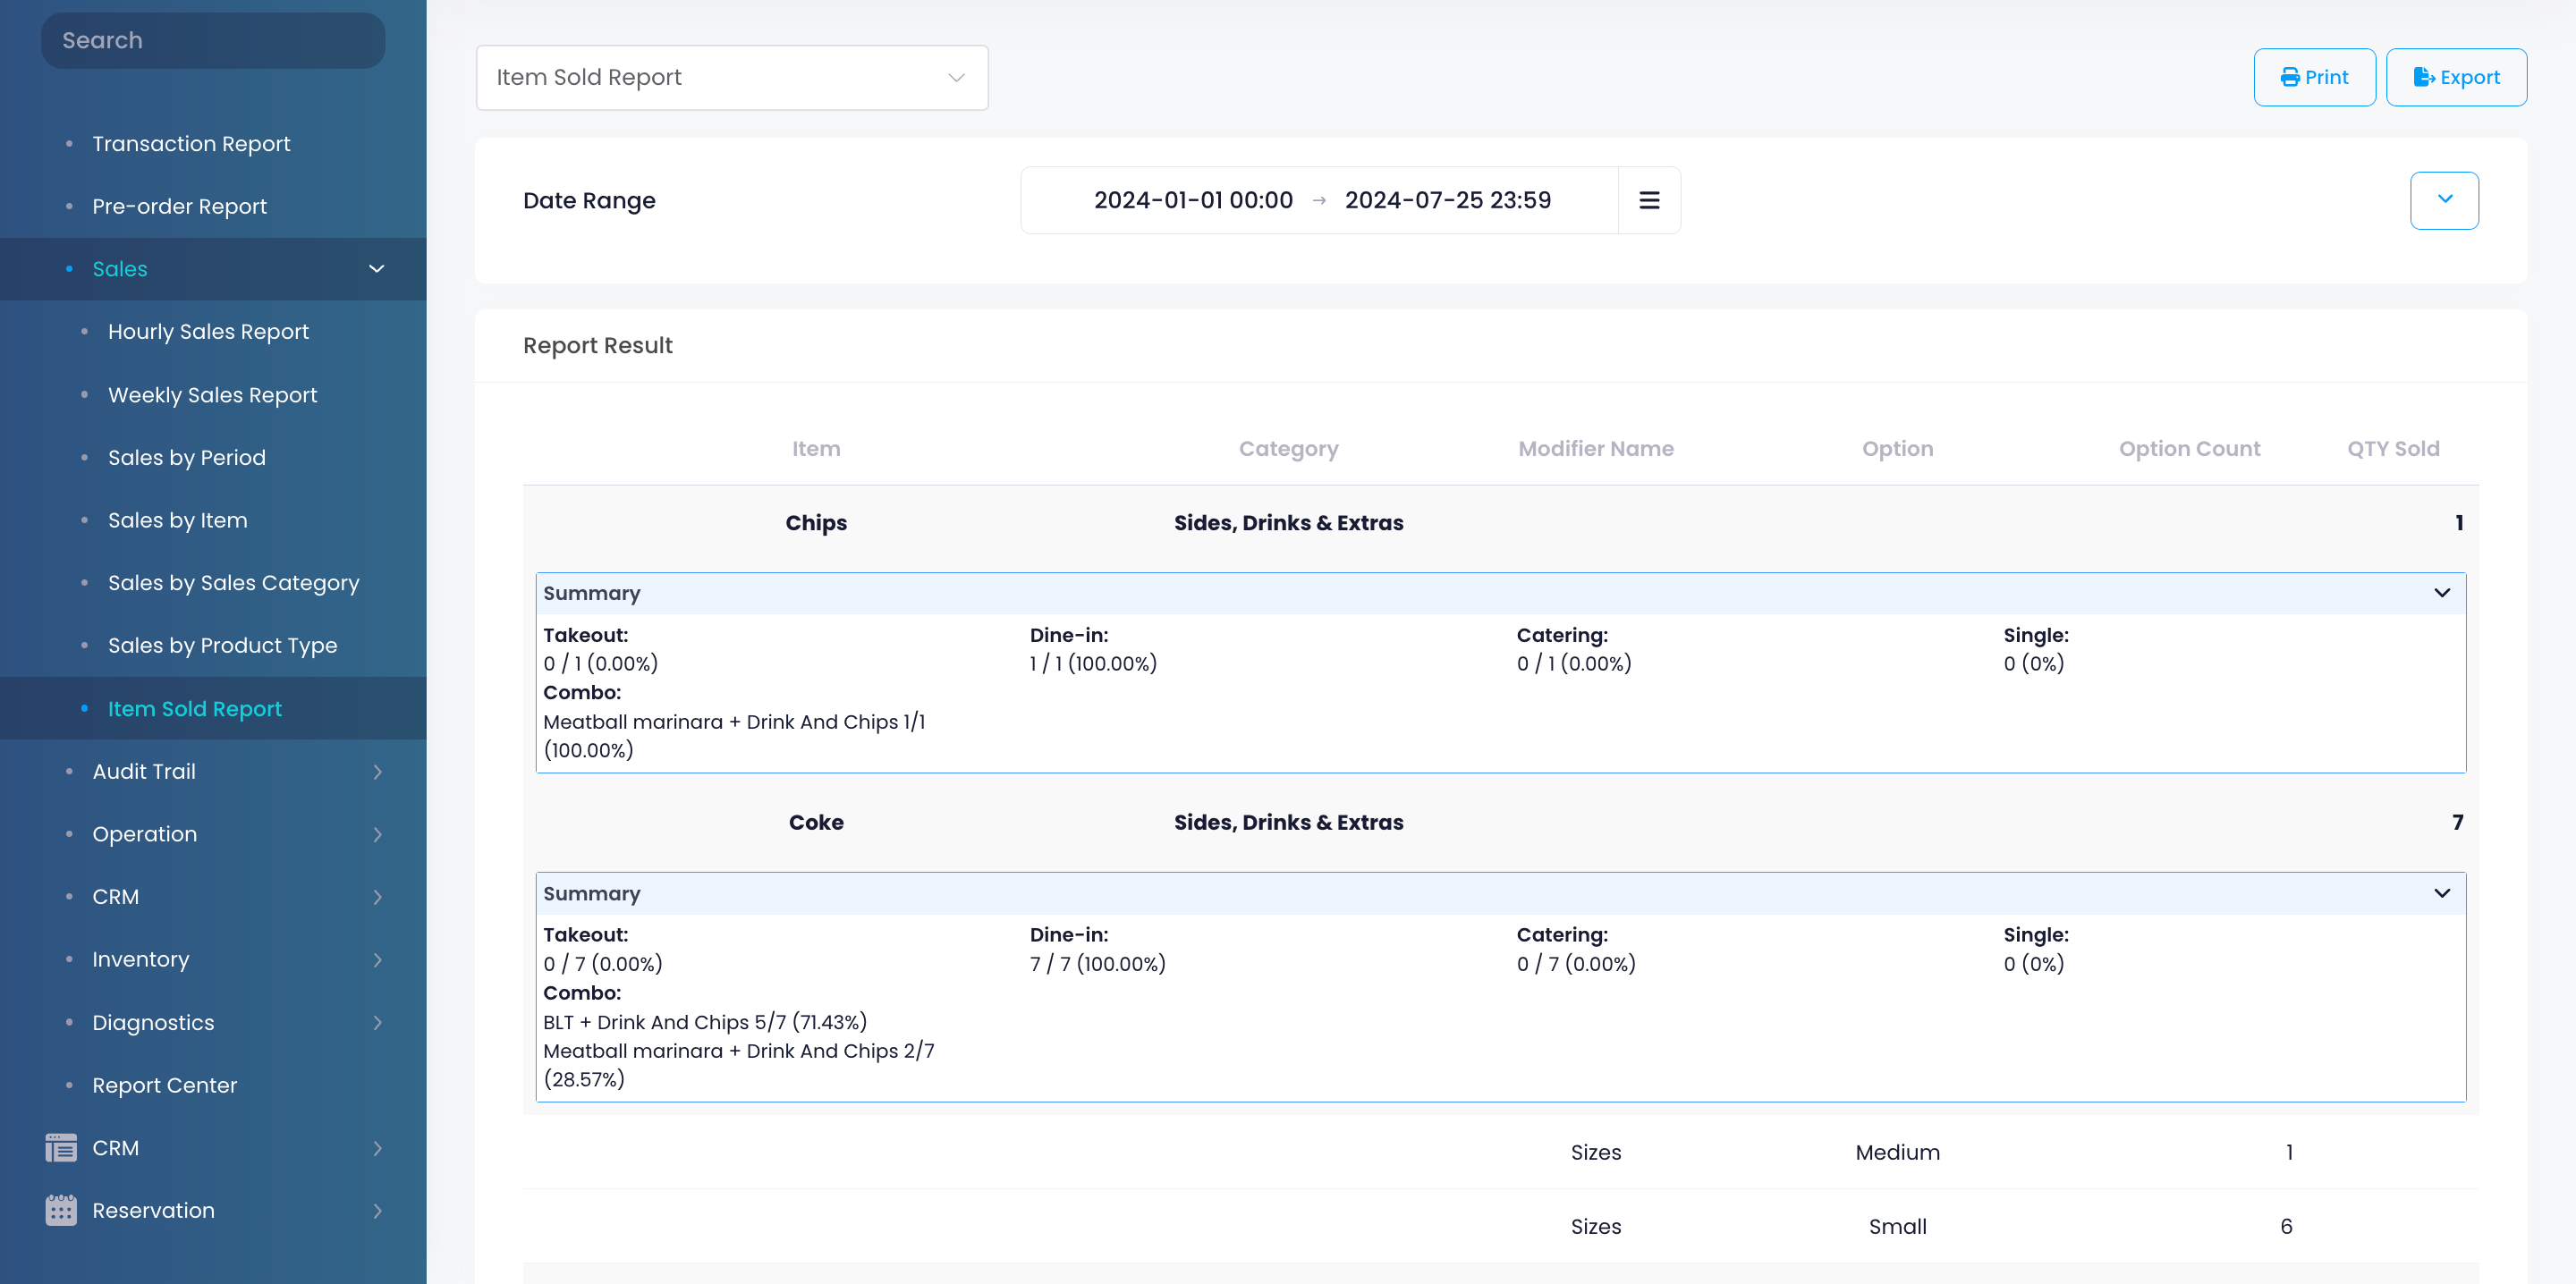
In this article, you’ll learn how to generate, print, and export an Item Sold Report.
View Item Sold Report
To view your Item Sold Report, follow the steps below:
Merchant Portal (Classic Theme)
- Log in to the Merchant Portal.
- On the left panel, click on Reporting.
- Under "Sales," click on Item Sold Report.
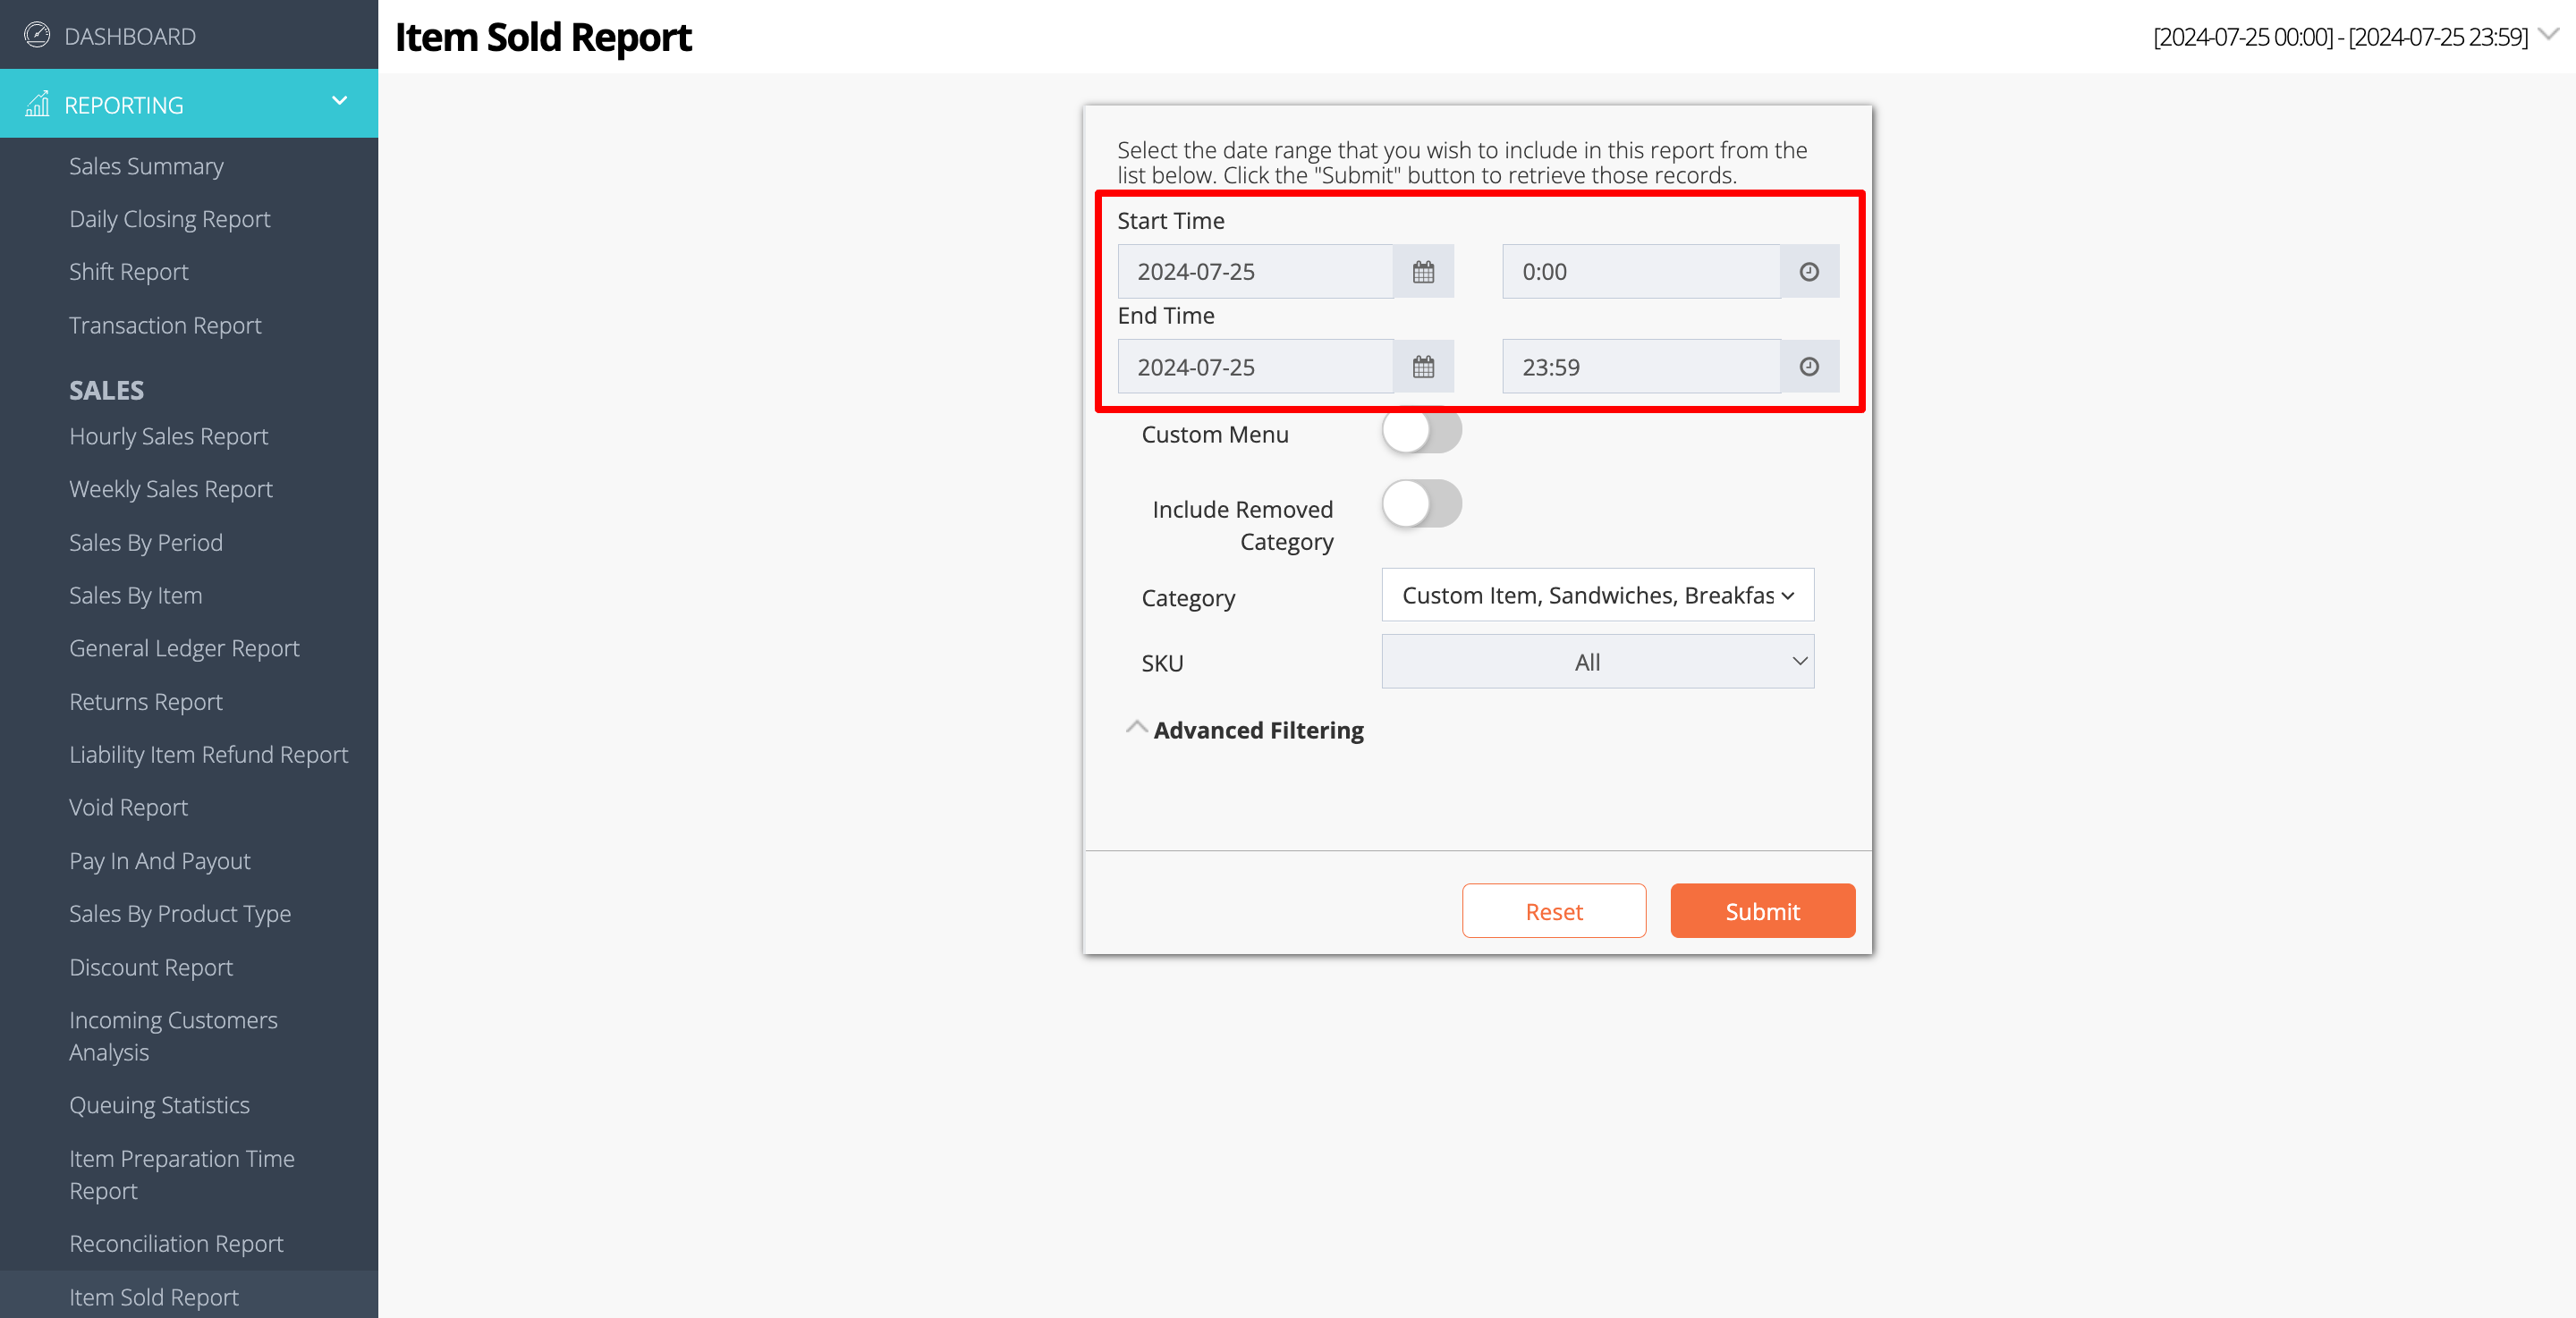
- Select the date range that you wish to include in the report.
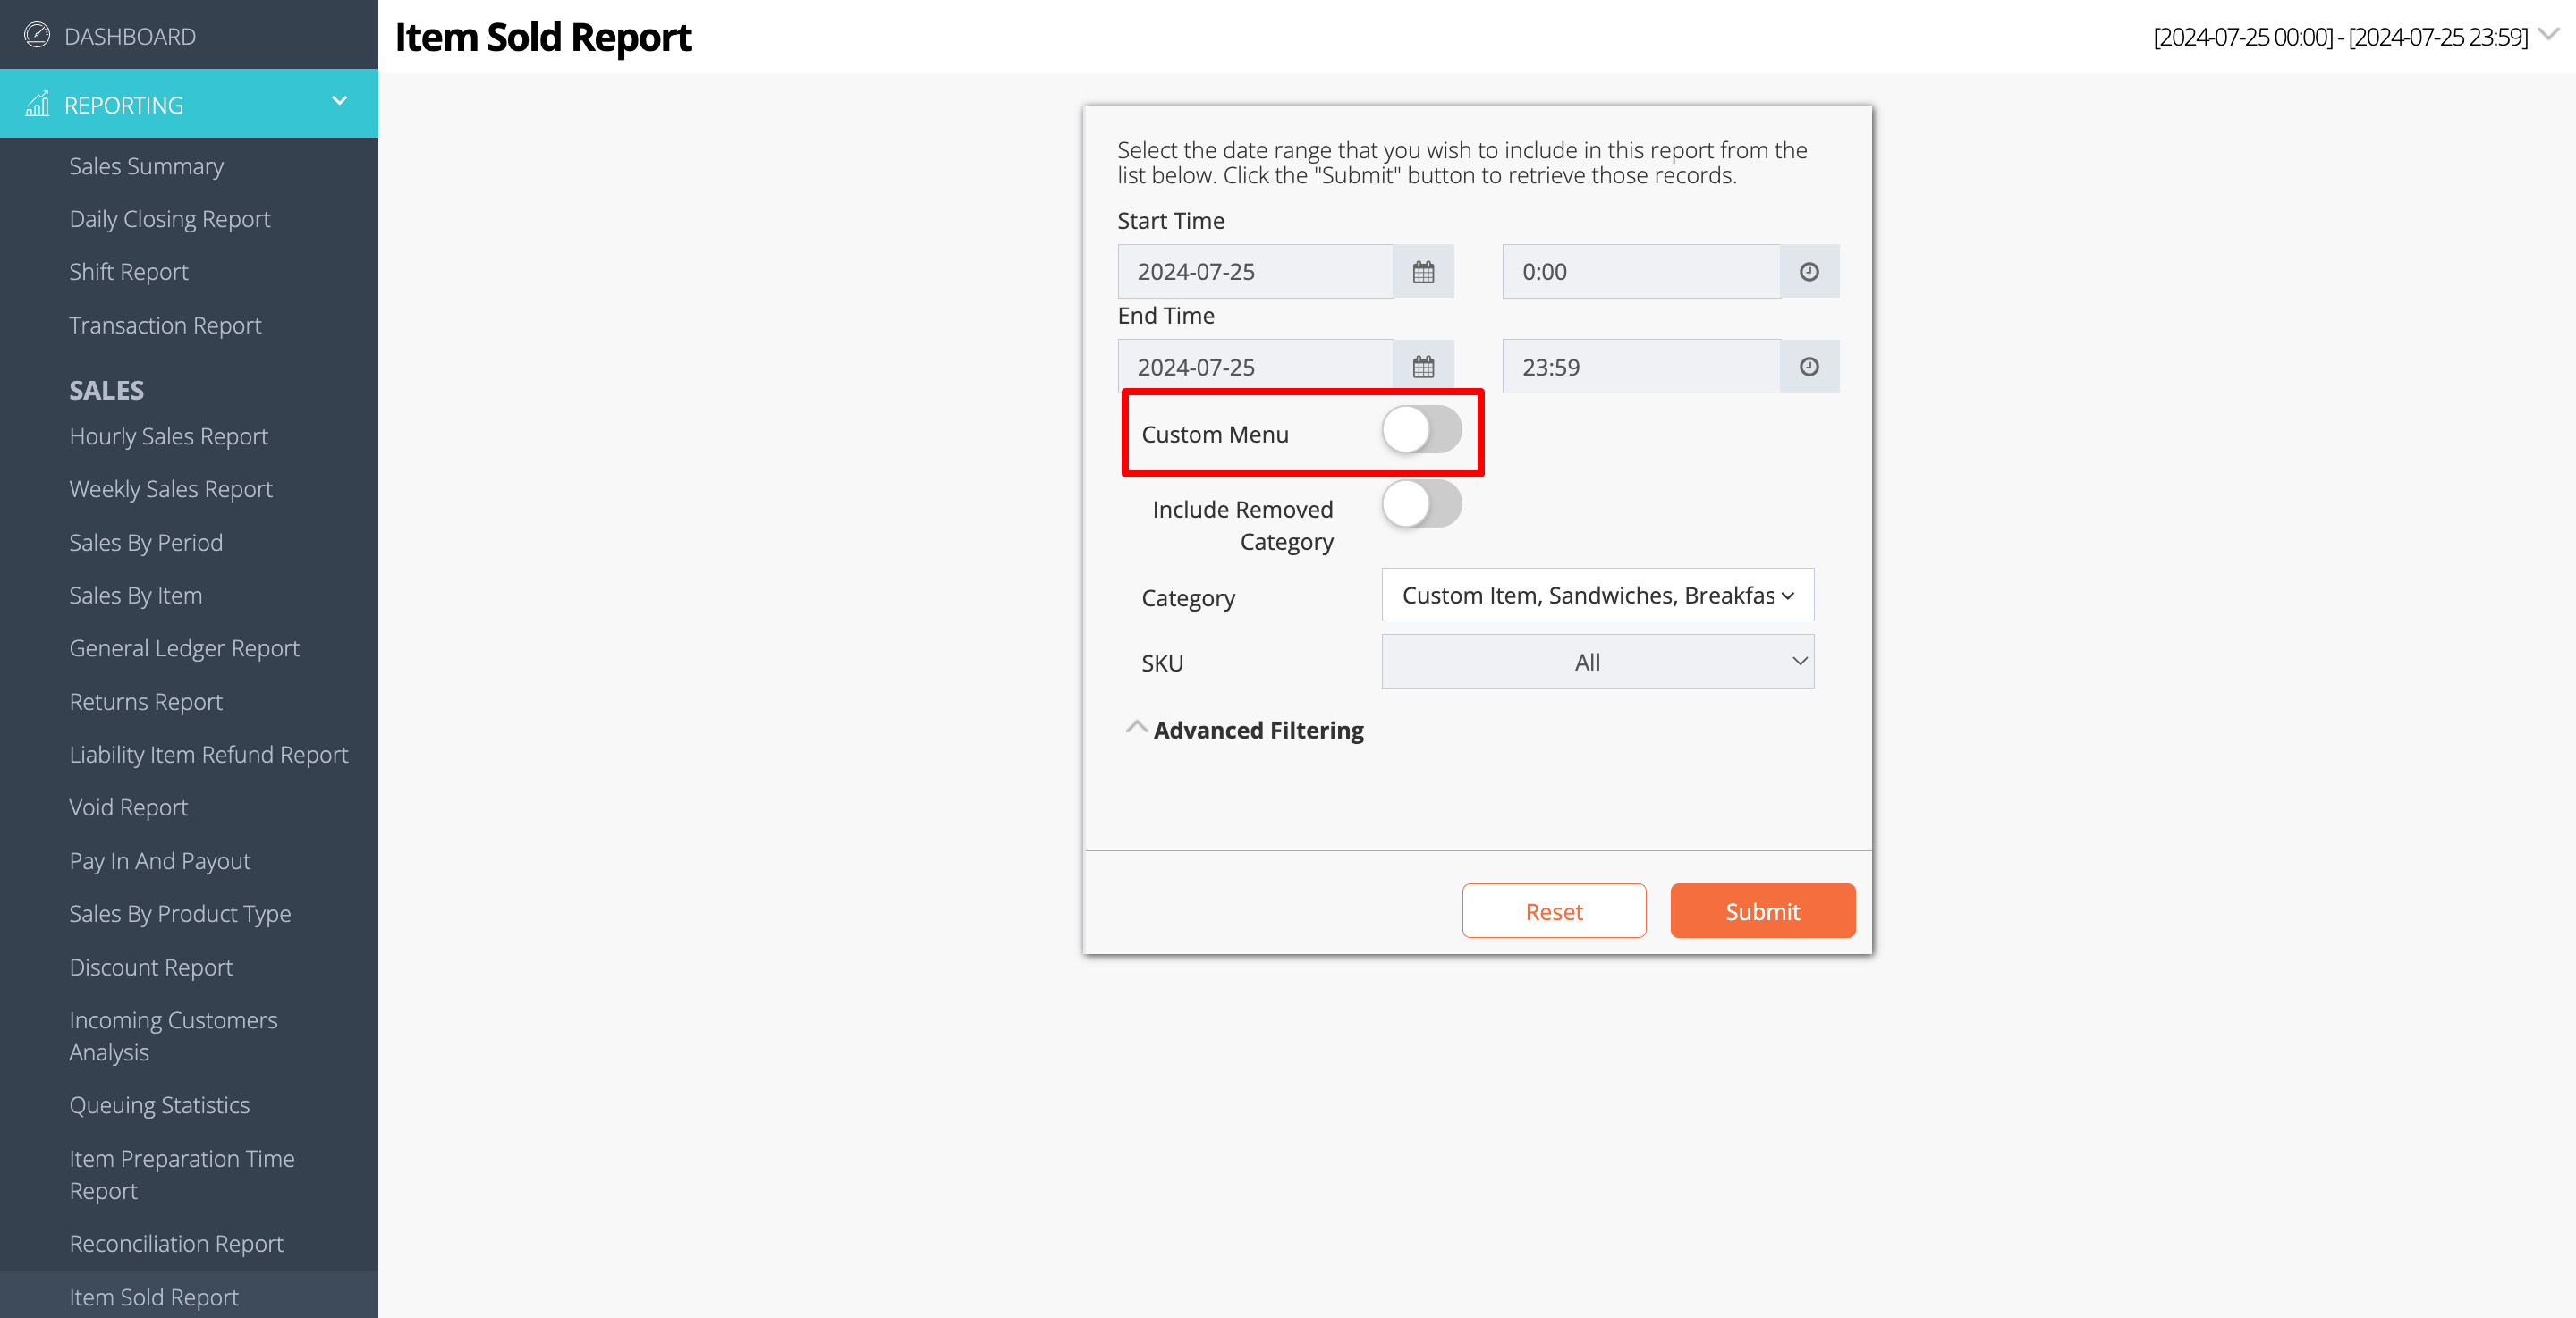
- To generate a report for a specific custom menu, toggle on Custom Menu
 . Then, select the custom menu that you want to include in the report.
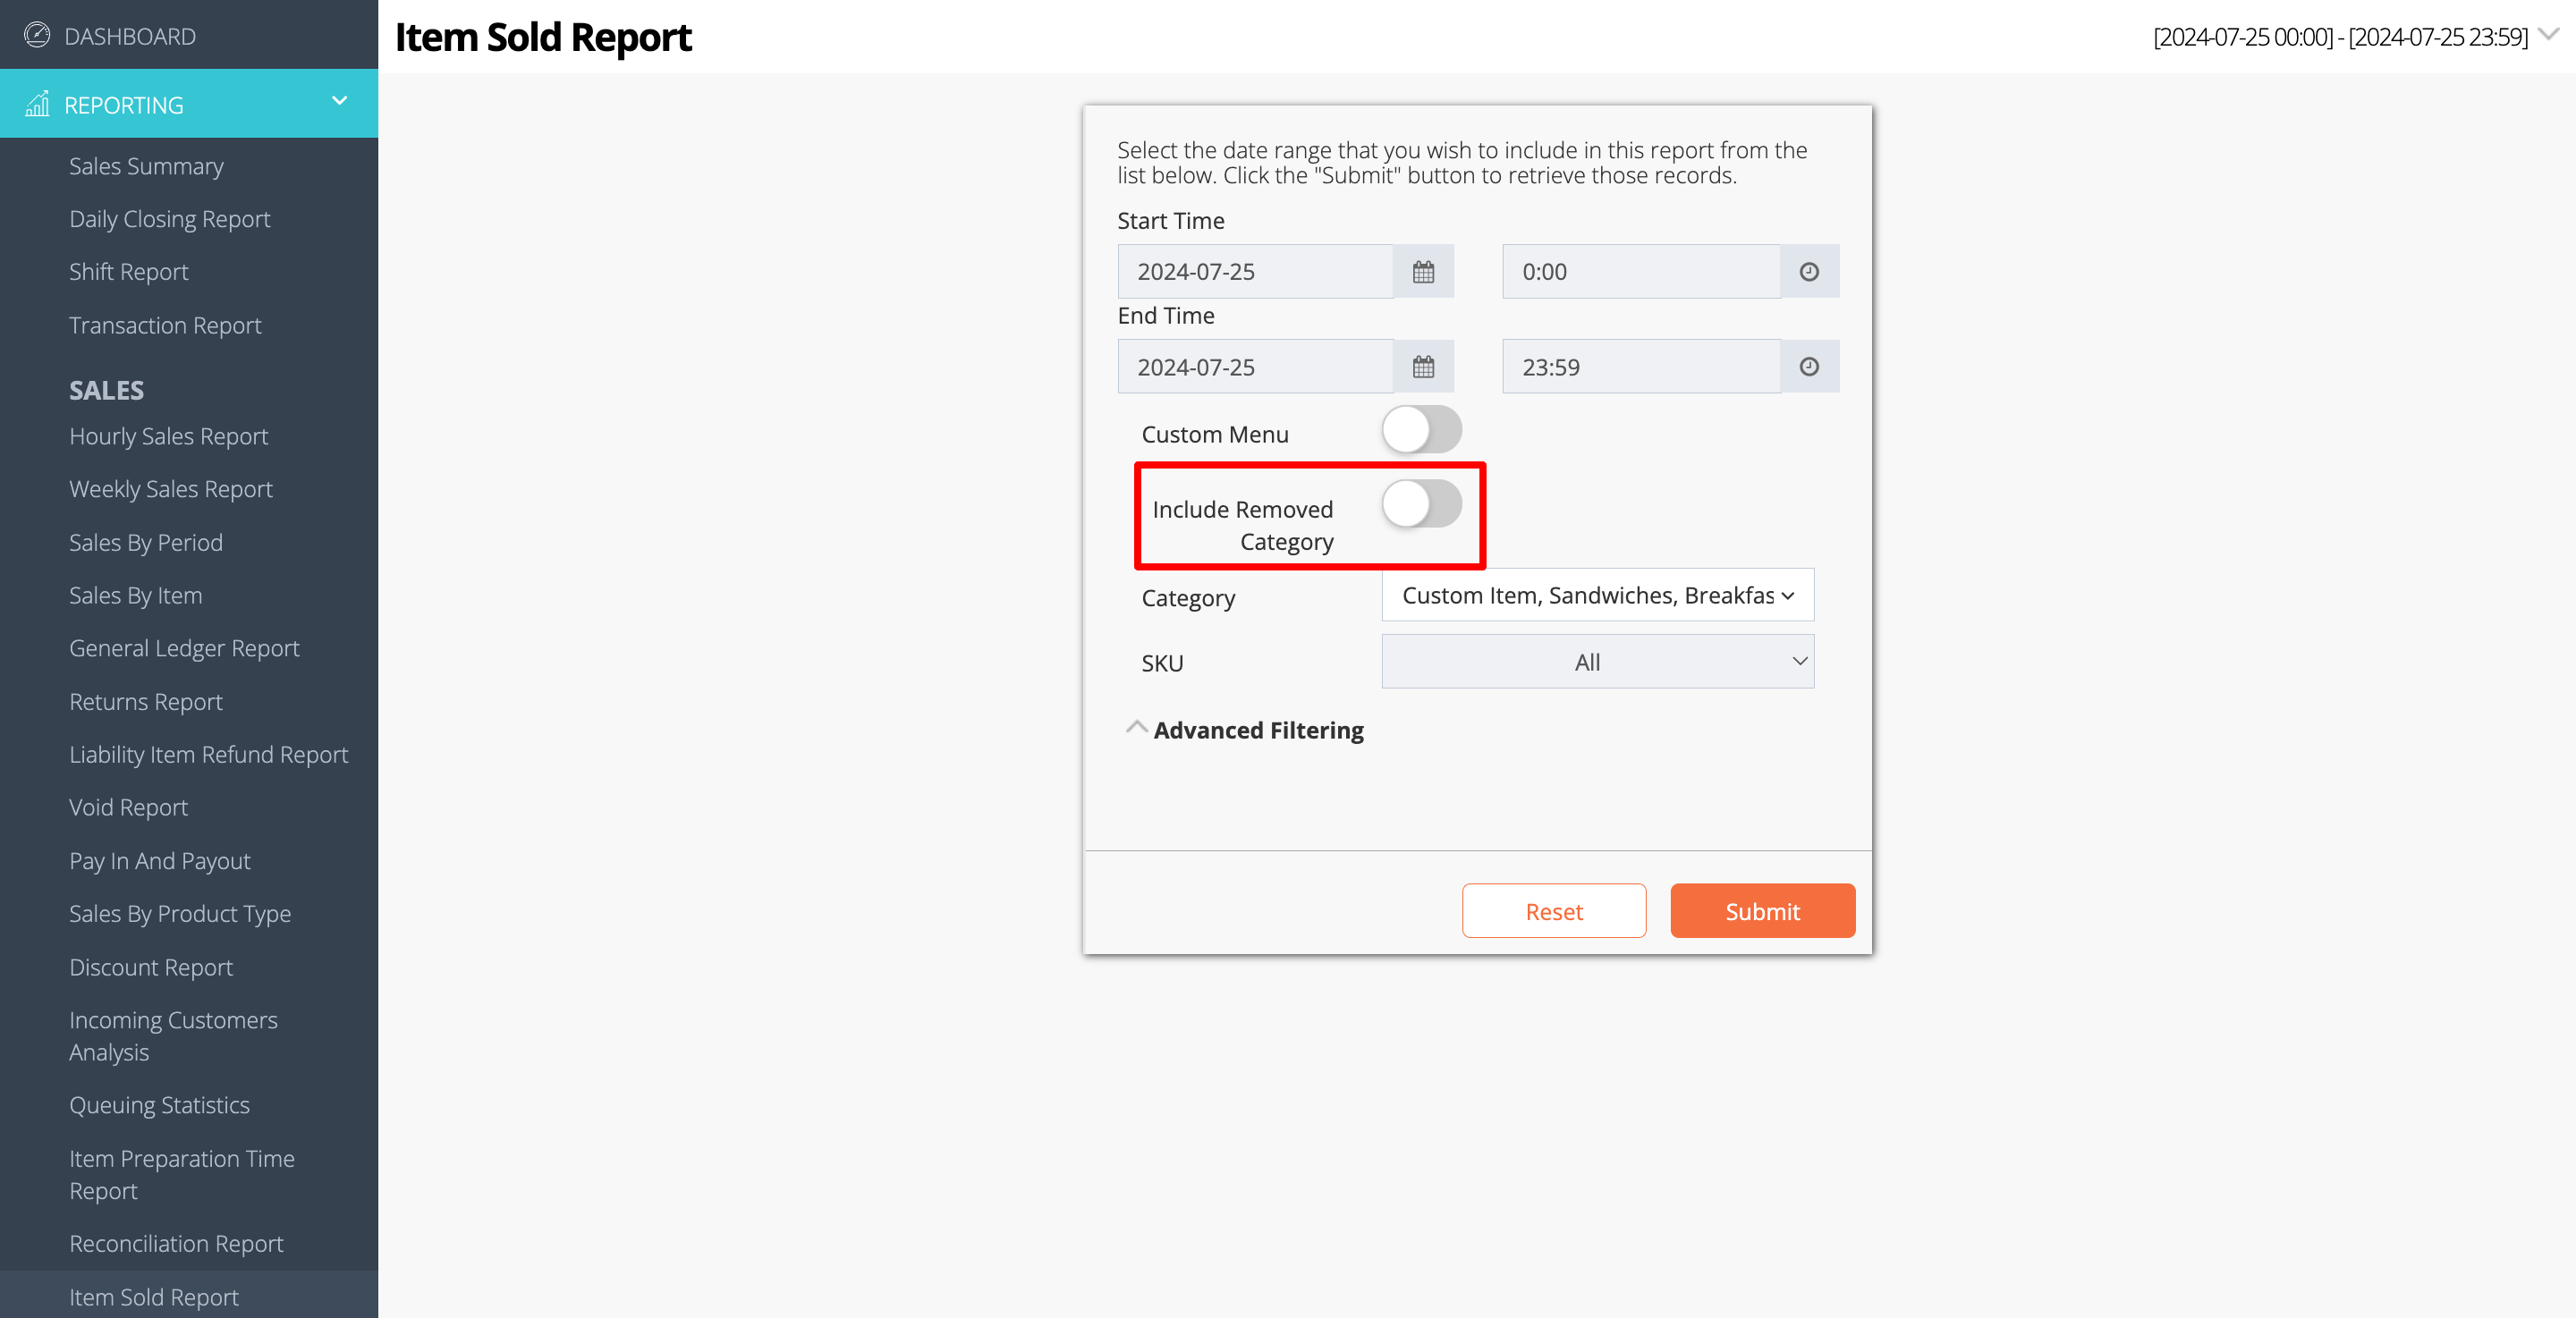
- To include deleted categories in the report, toggle on Include Removed Category
 .
.
- To include specific categories in the report, click on the Category drop-down list. Then, select the categories that you want to include.
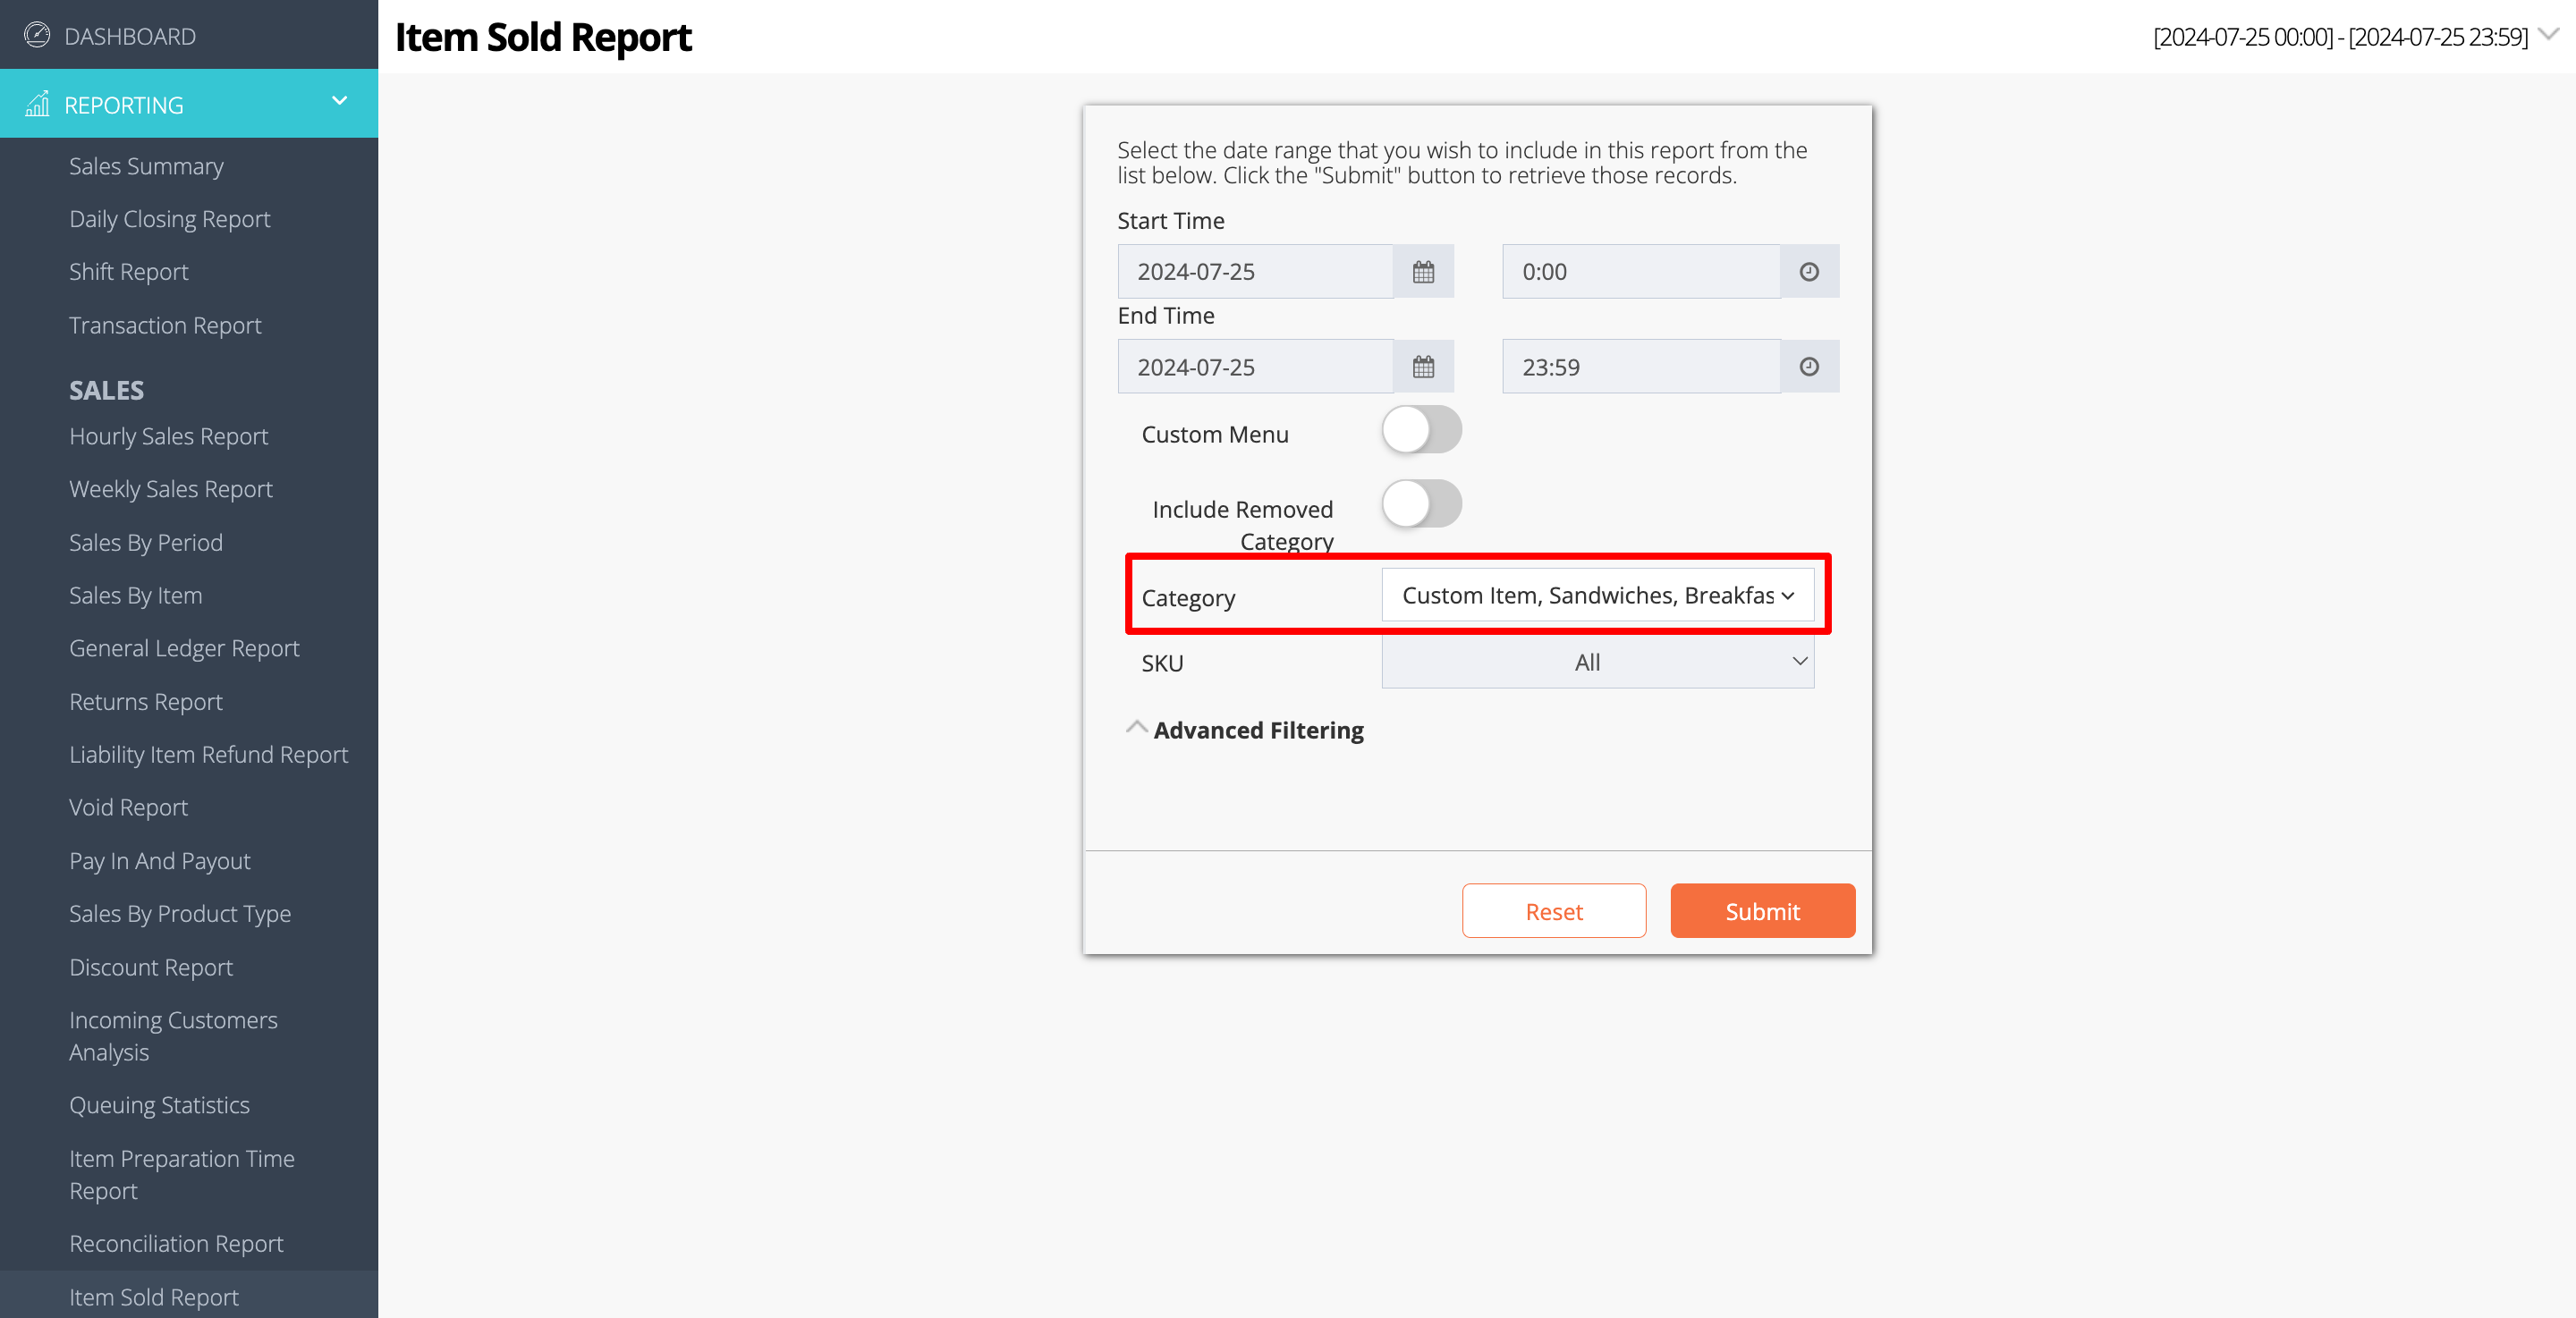
- You can filter your search further by clicking on Advanced Filtering. Then, enter the information in the following filter options:
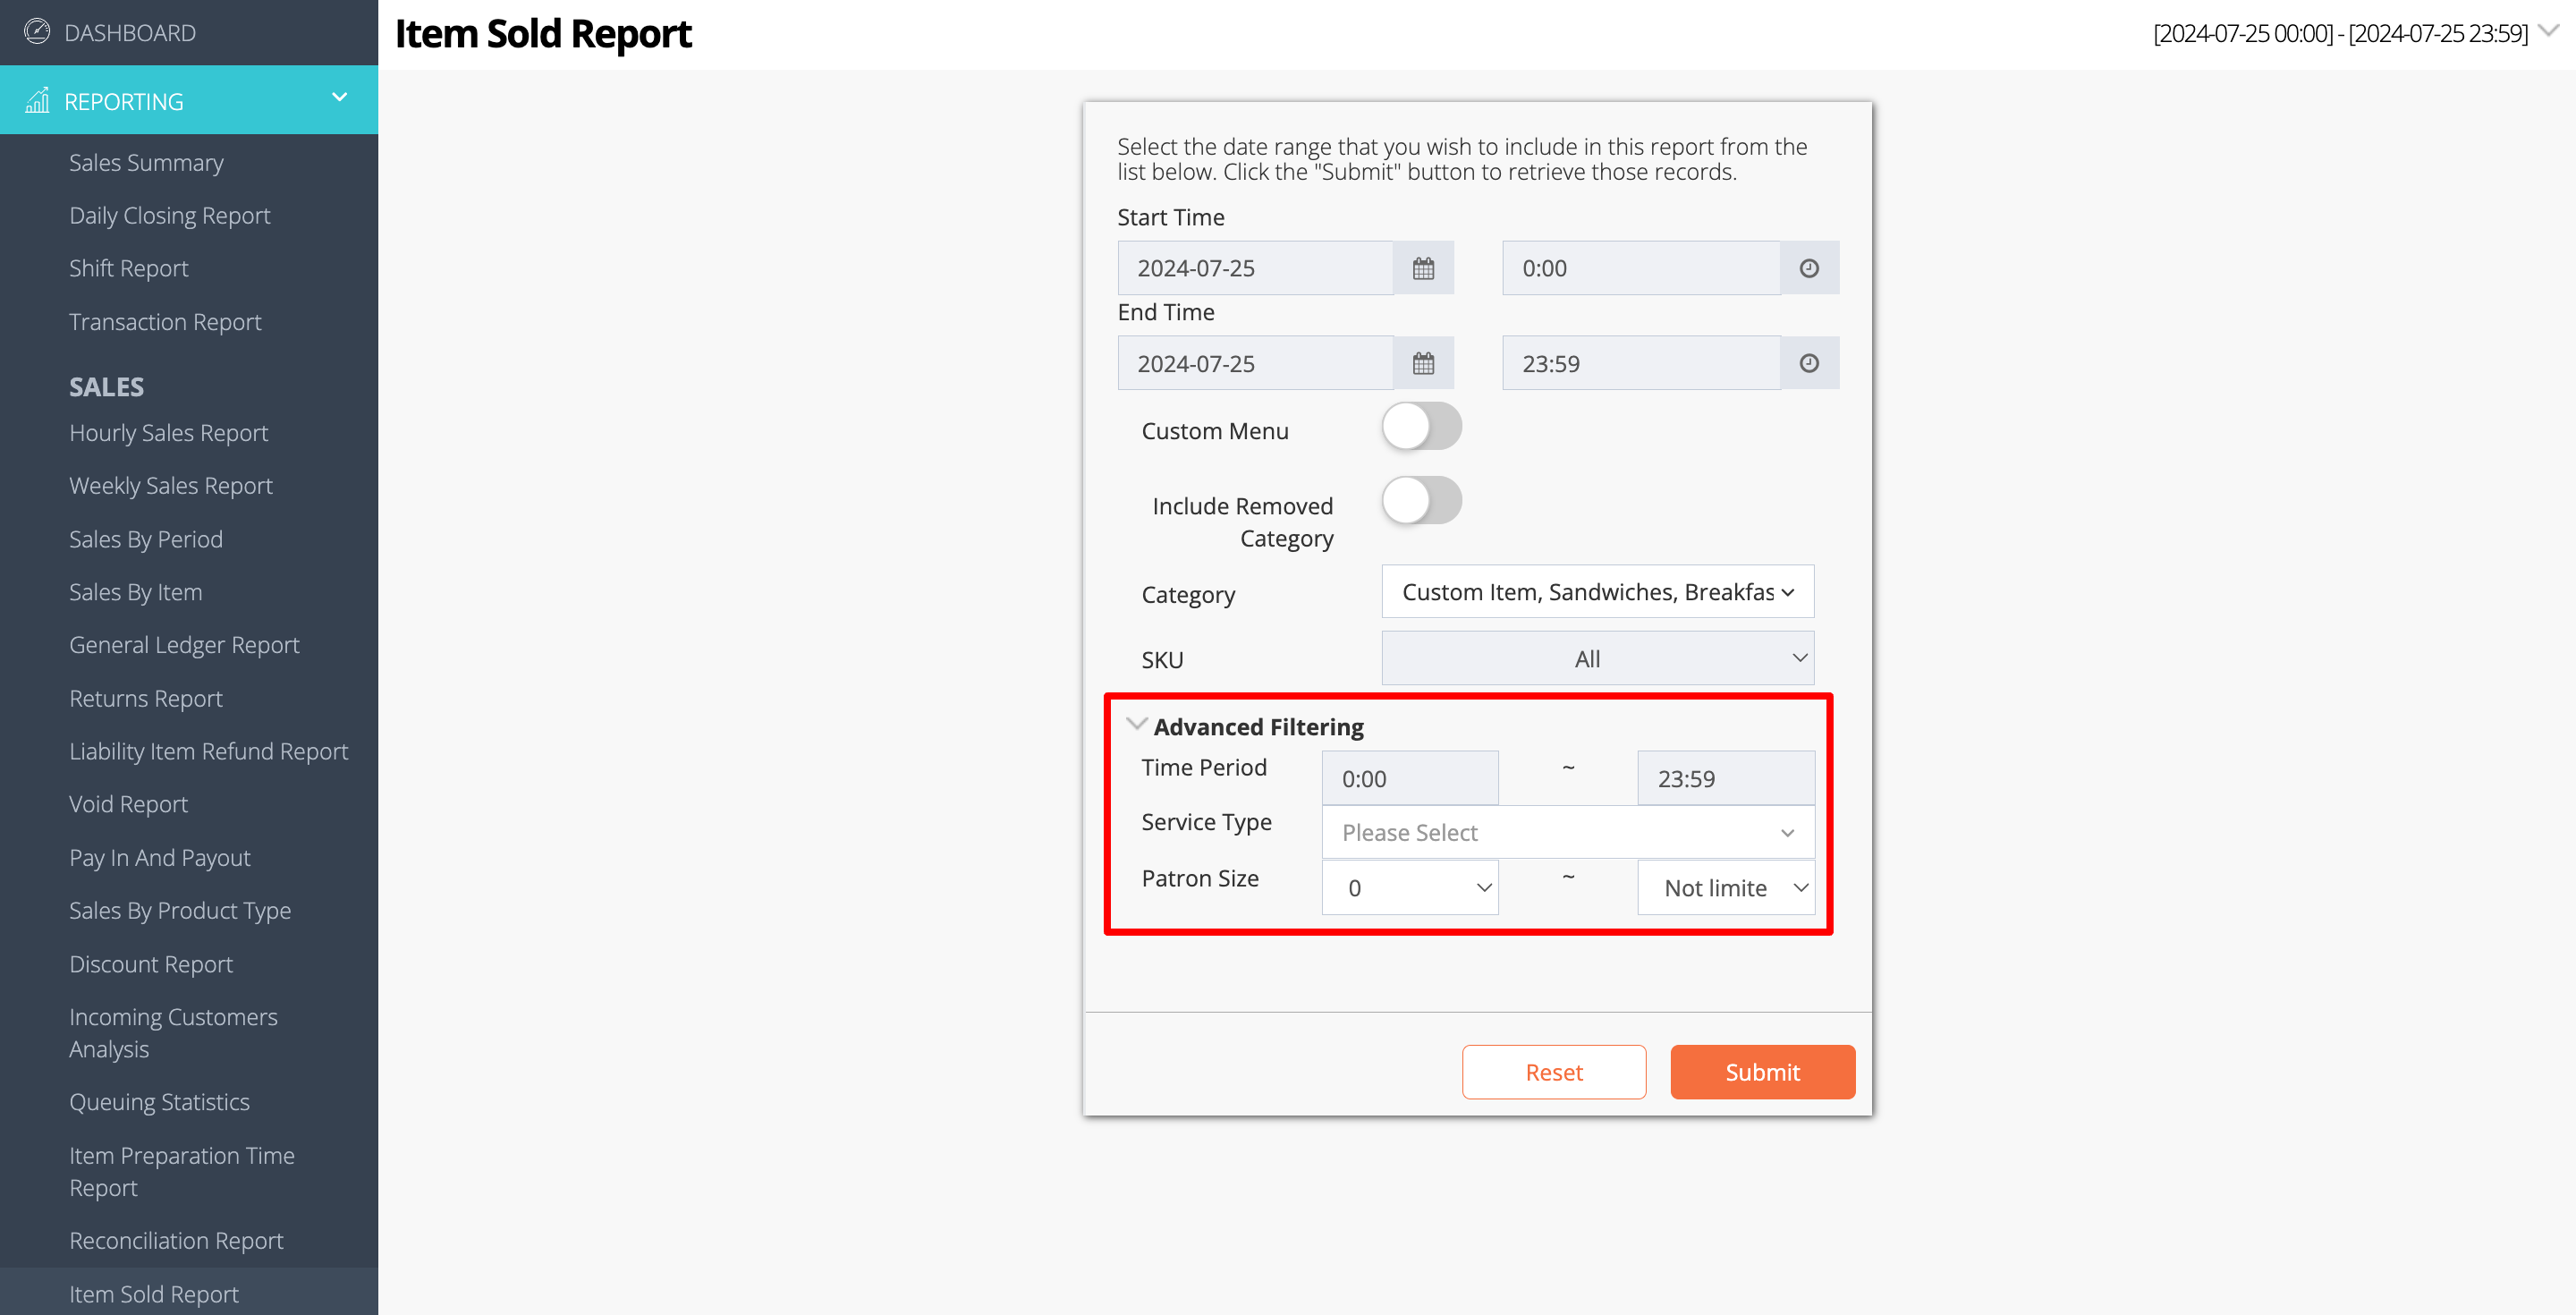
- Time Period
- Service Type
- Patron Size
- Click on Submit to retrieve the records.
Merchant Portal 2.0
- Log in to the Merchant Portal.
- On the left panel, click on Reporting.
- Click on Sales. Then, select Item Sold Report.
- Select the date range that you wish to include in the report.
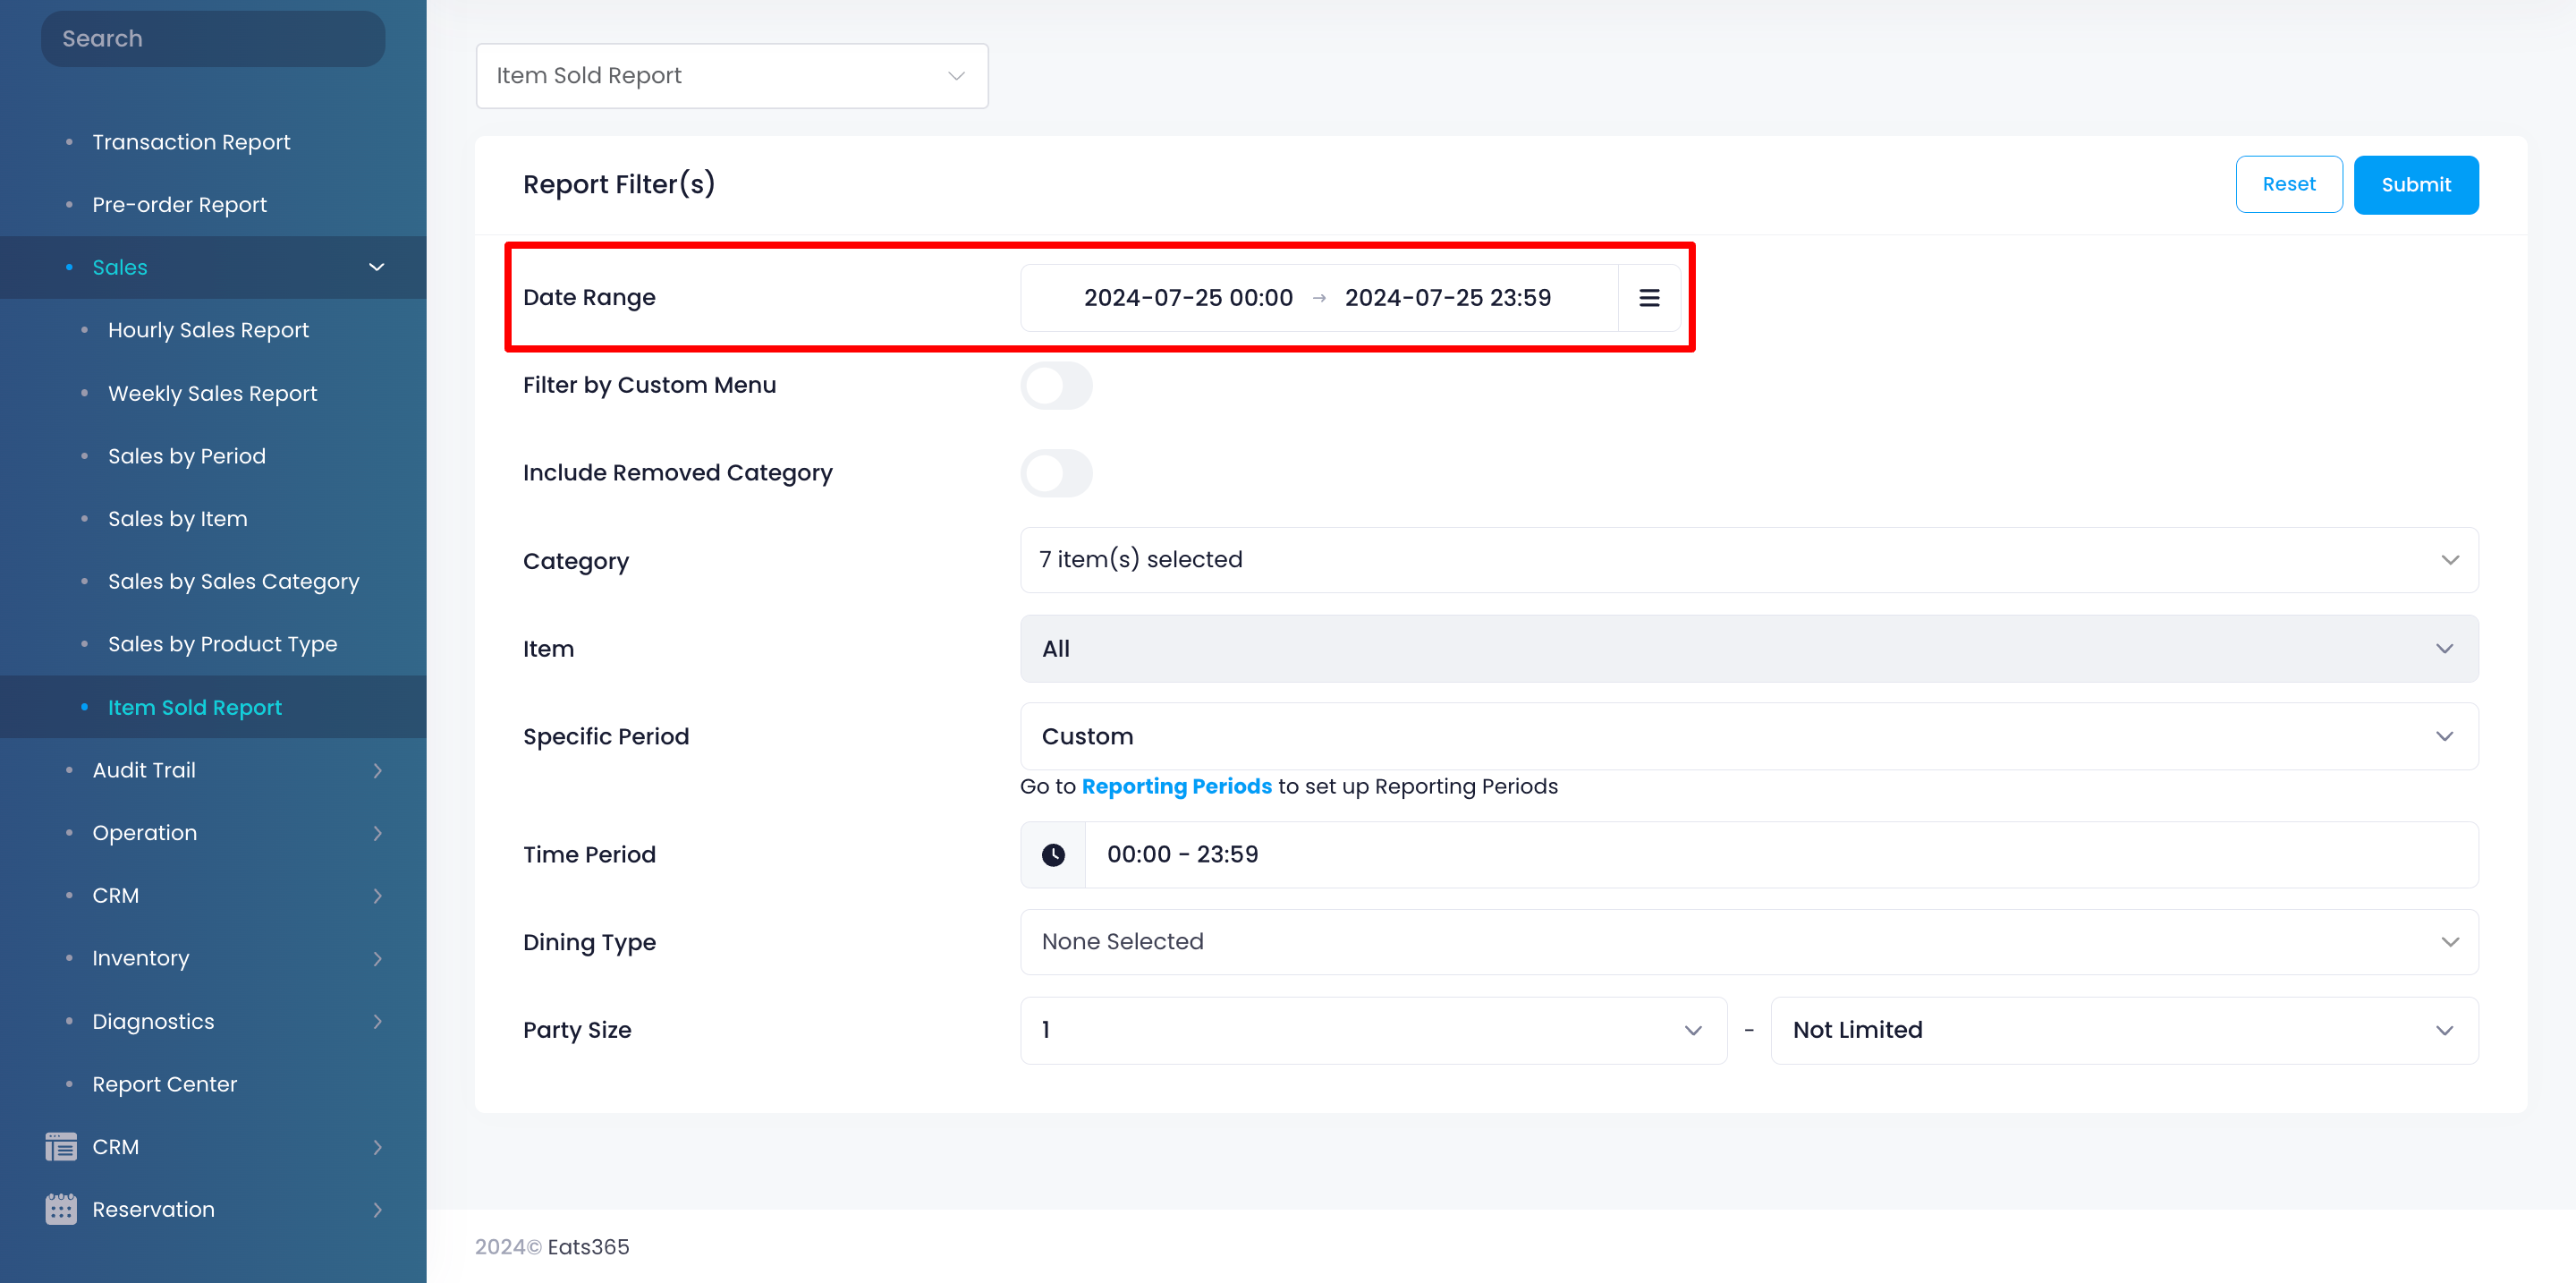
- To generate a report for a specific custom menu, toggle on Filter by Custom Menu
 . Then, select the custom menu that you want to include in the report.
Note: When this is enabled, the "Category" filter will be replaced with "Custom Menu."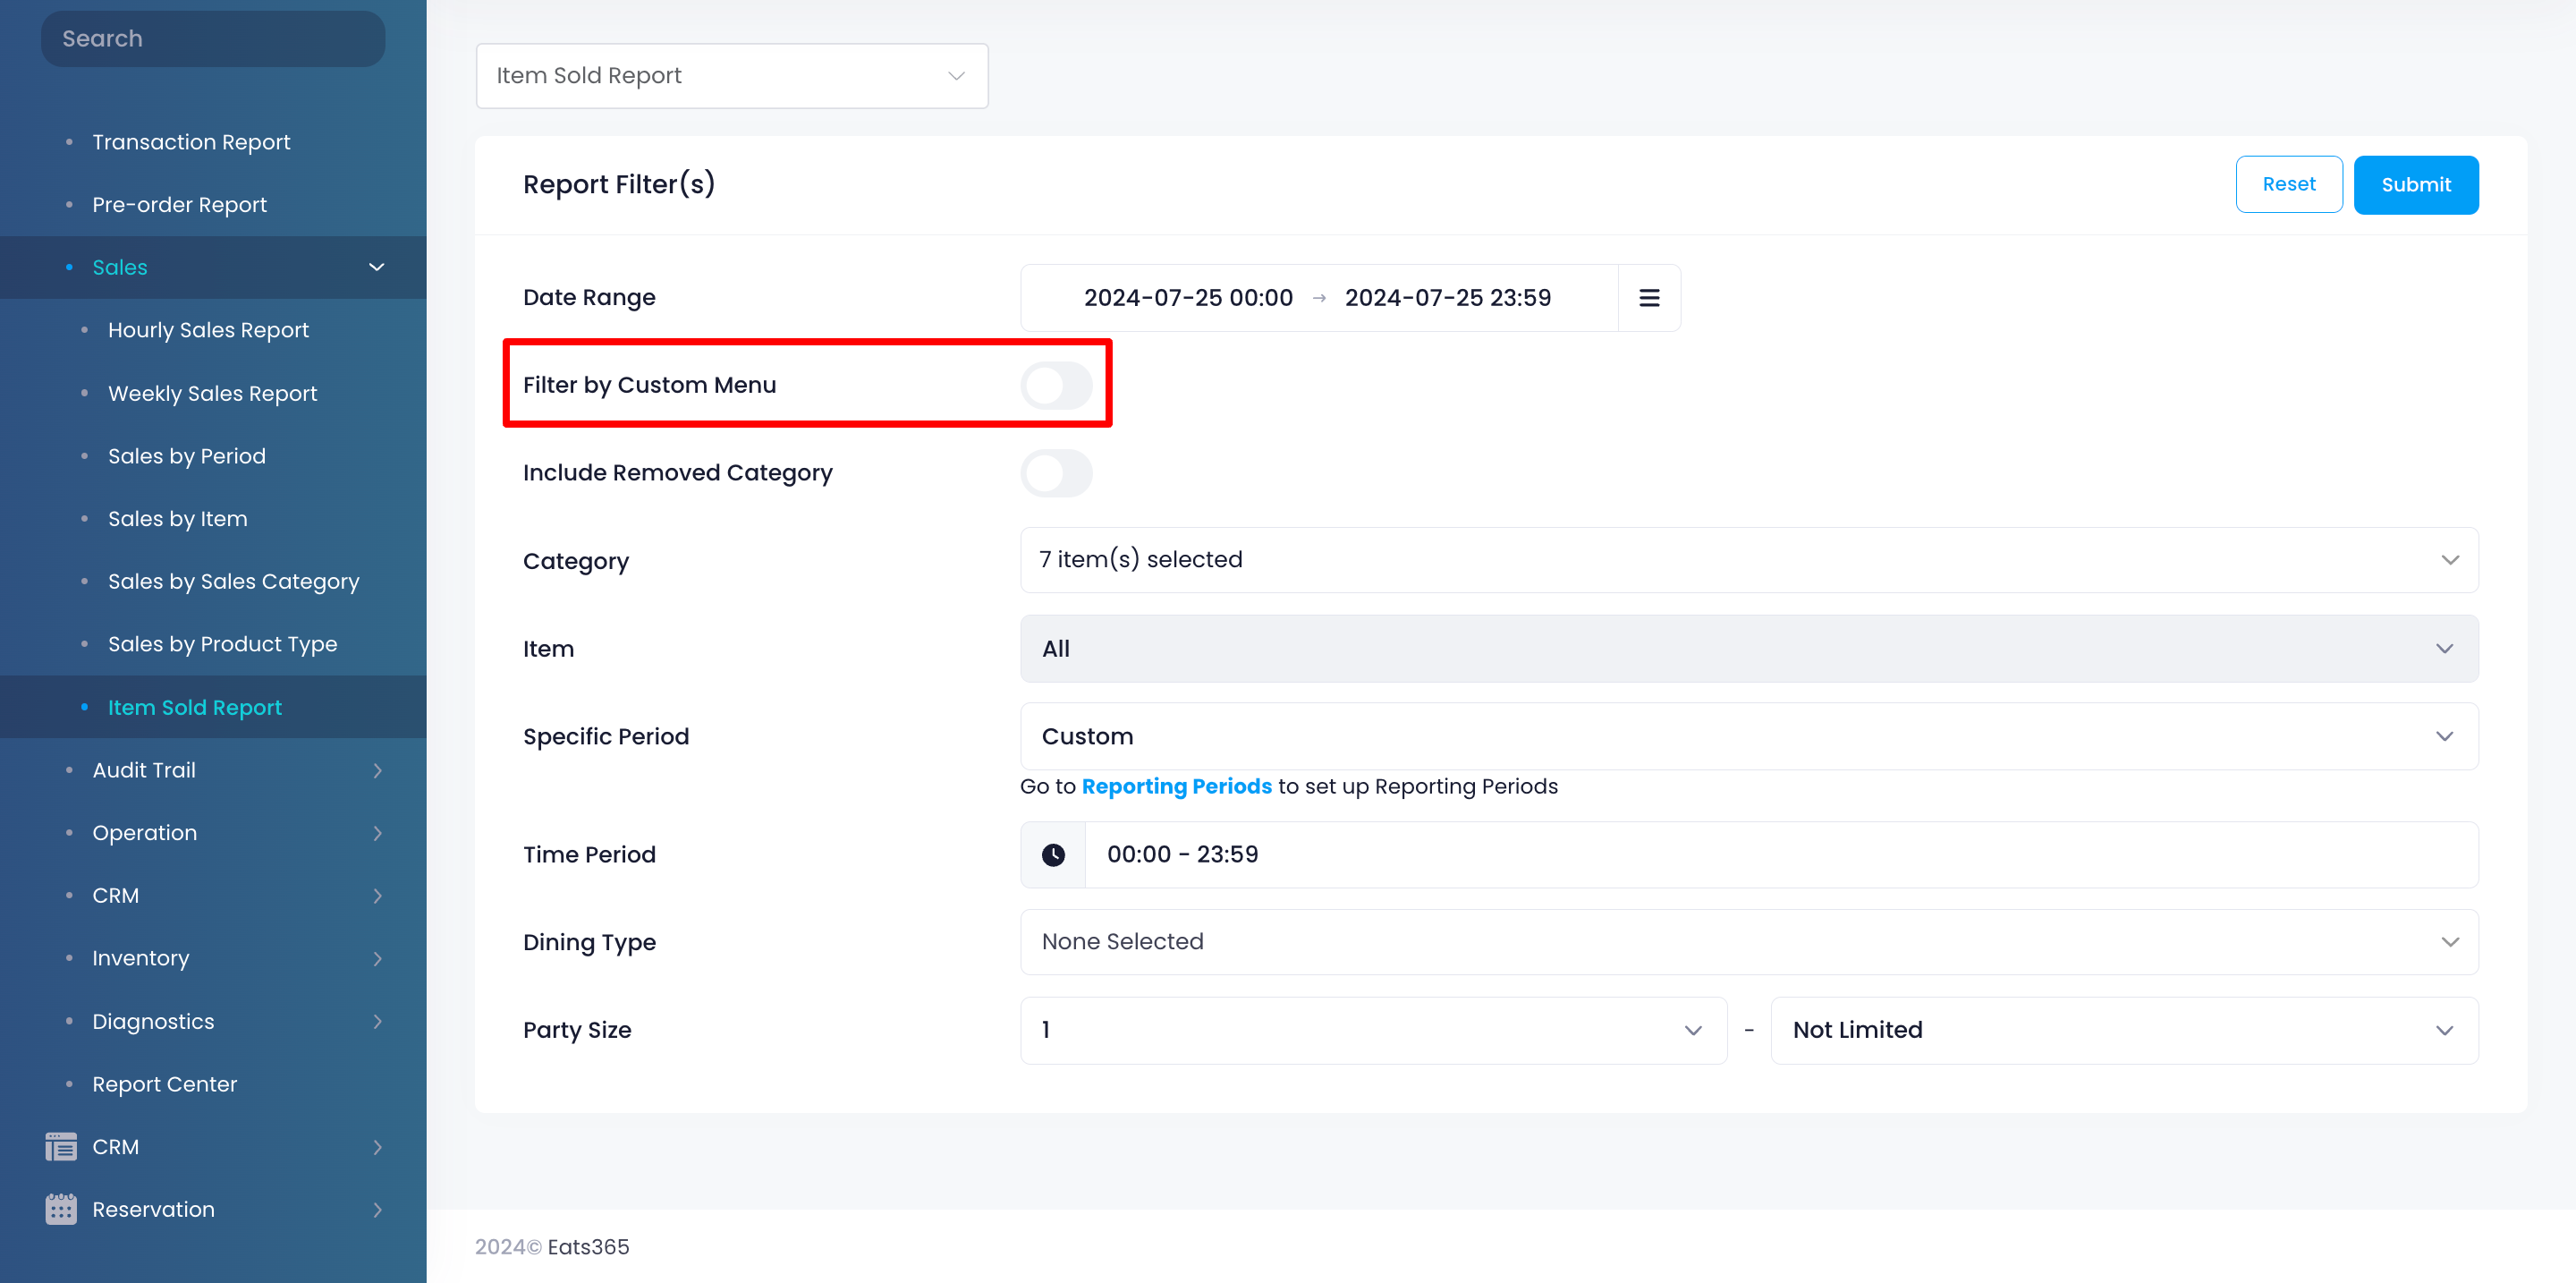
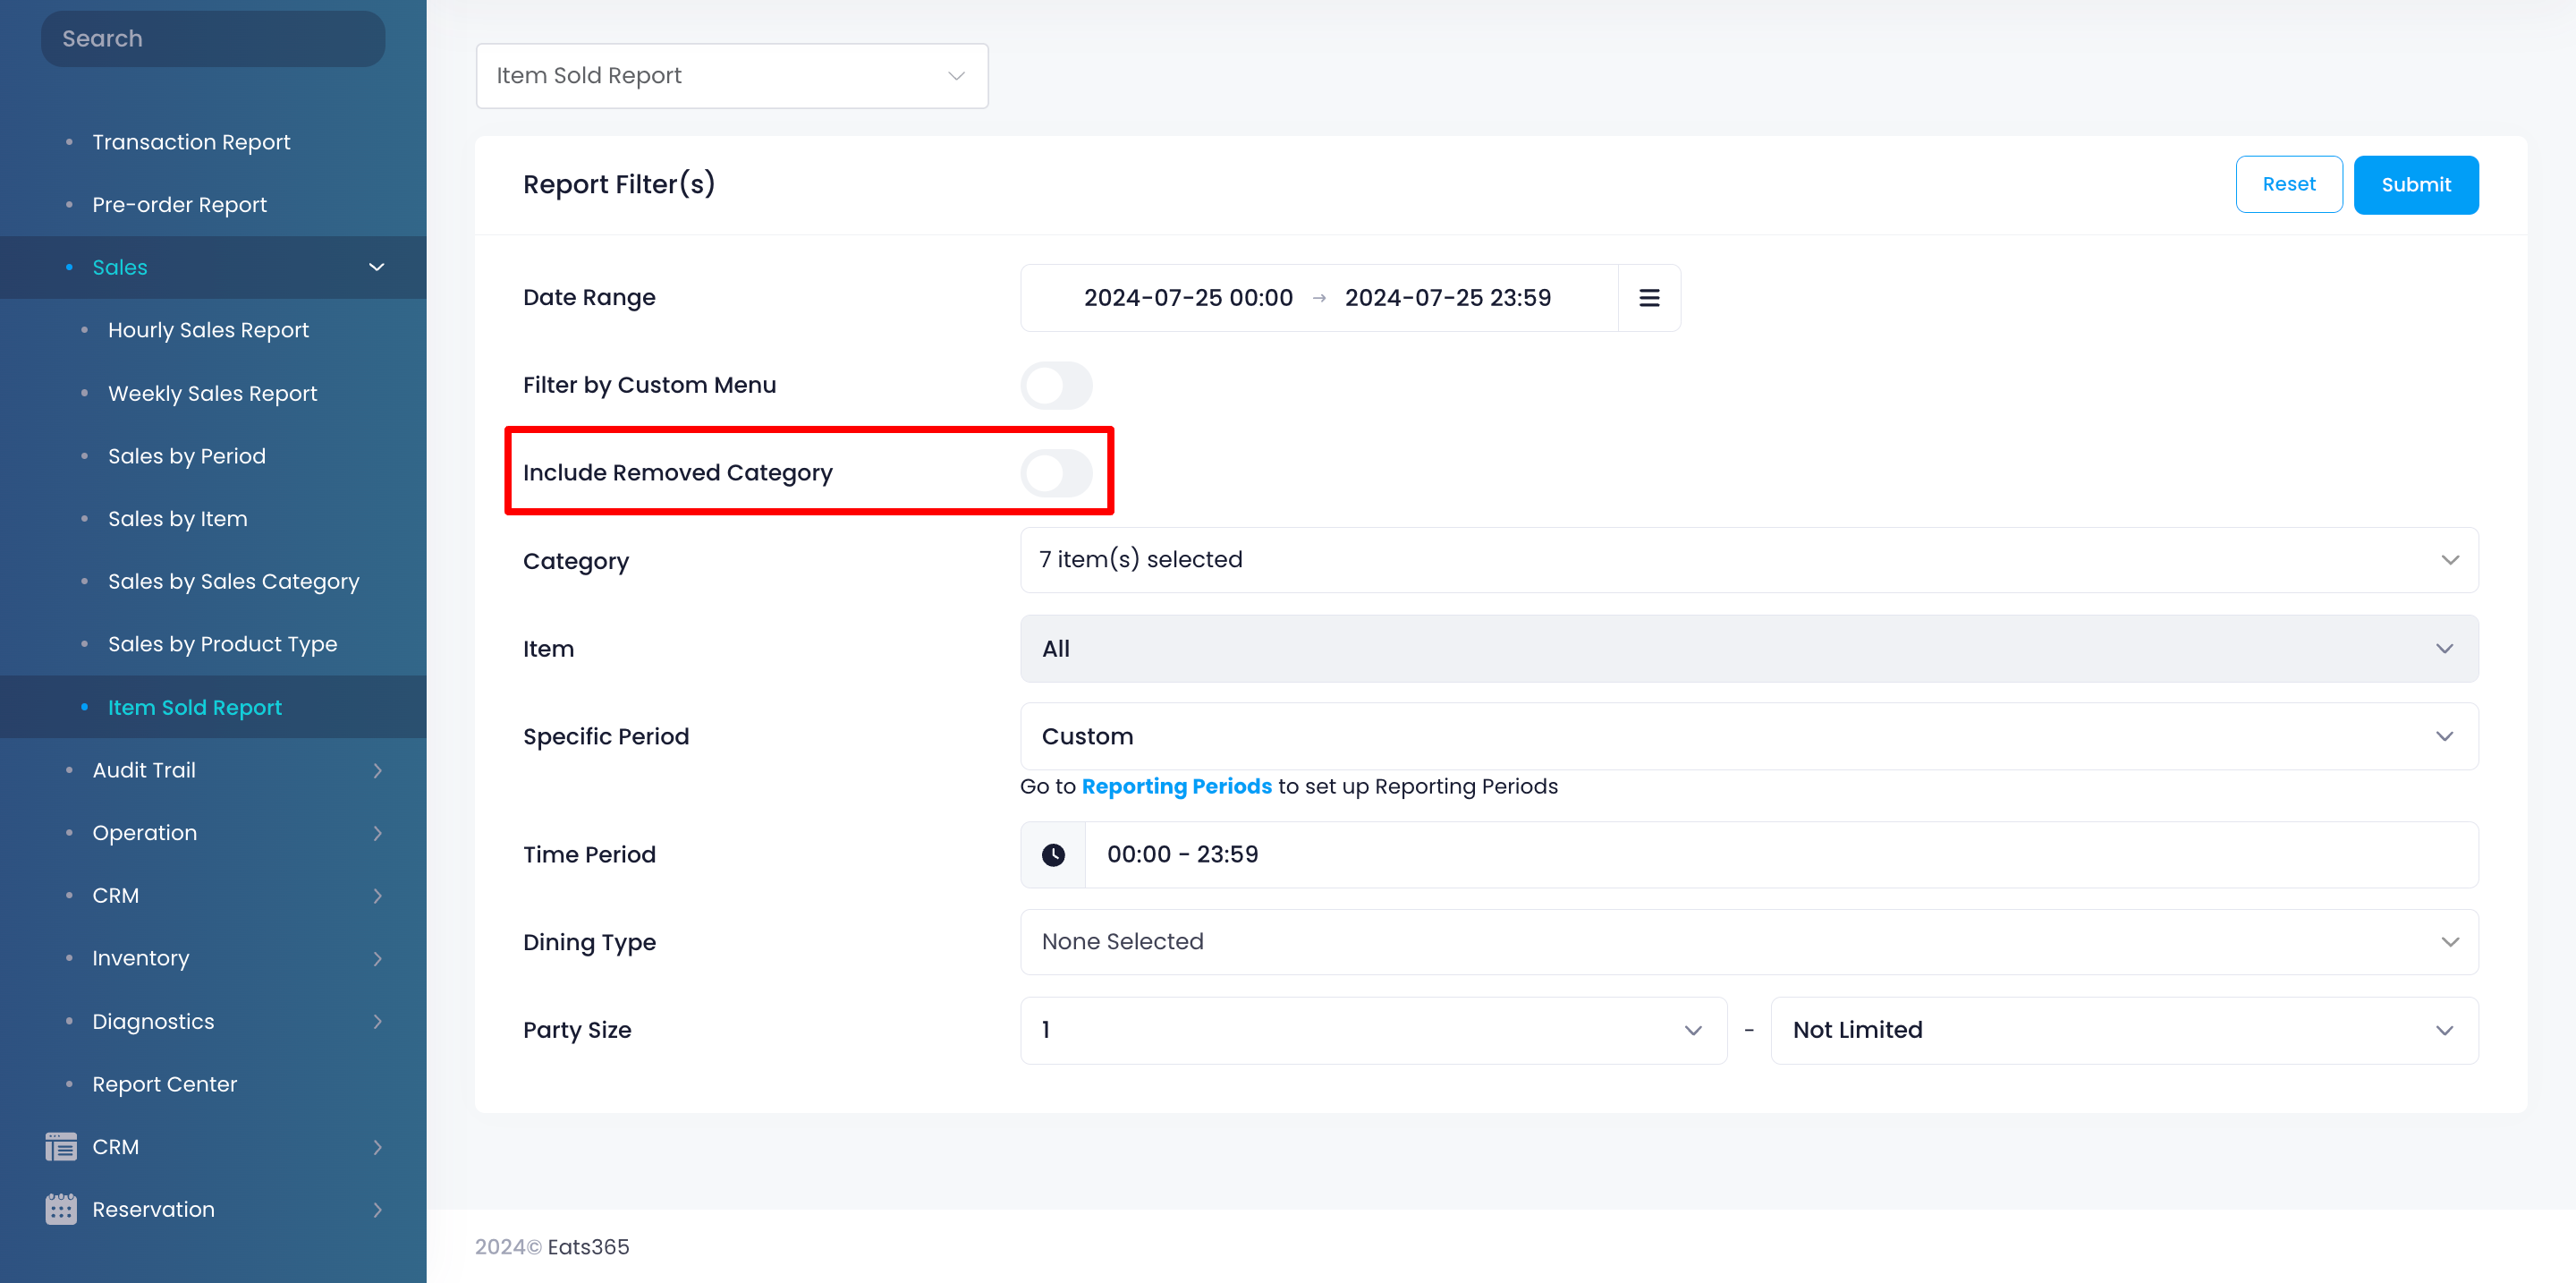
- To include deleted categories in the report, toggle on Include Removed Category
 .
.
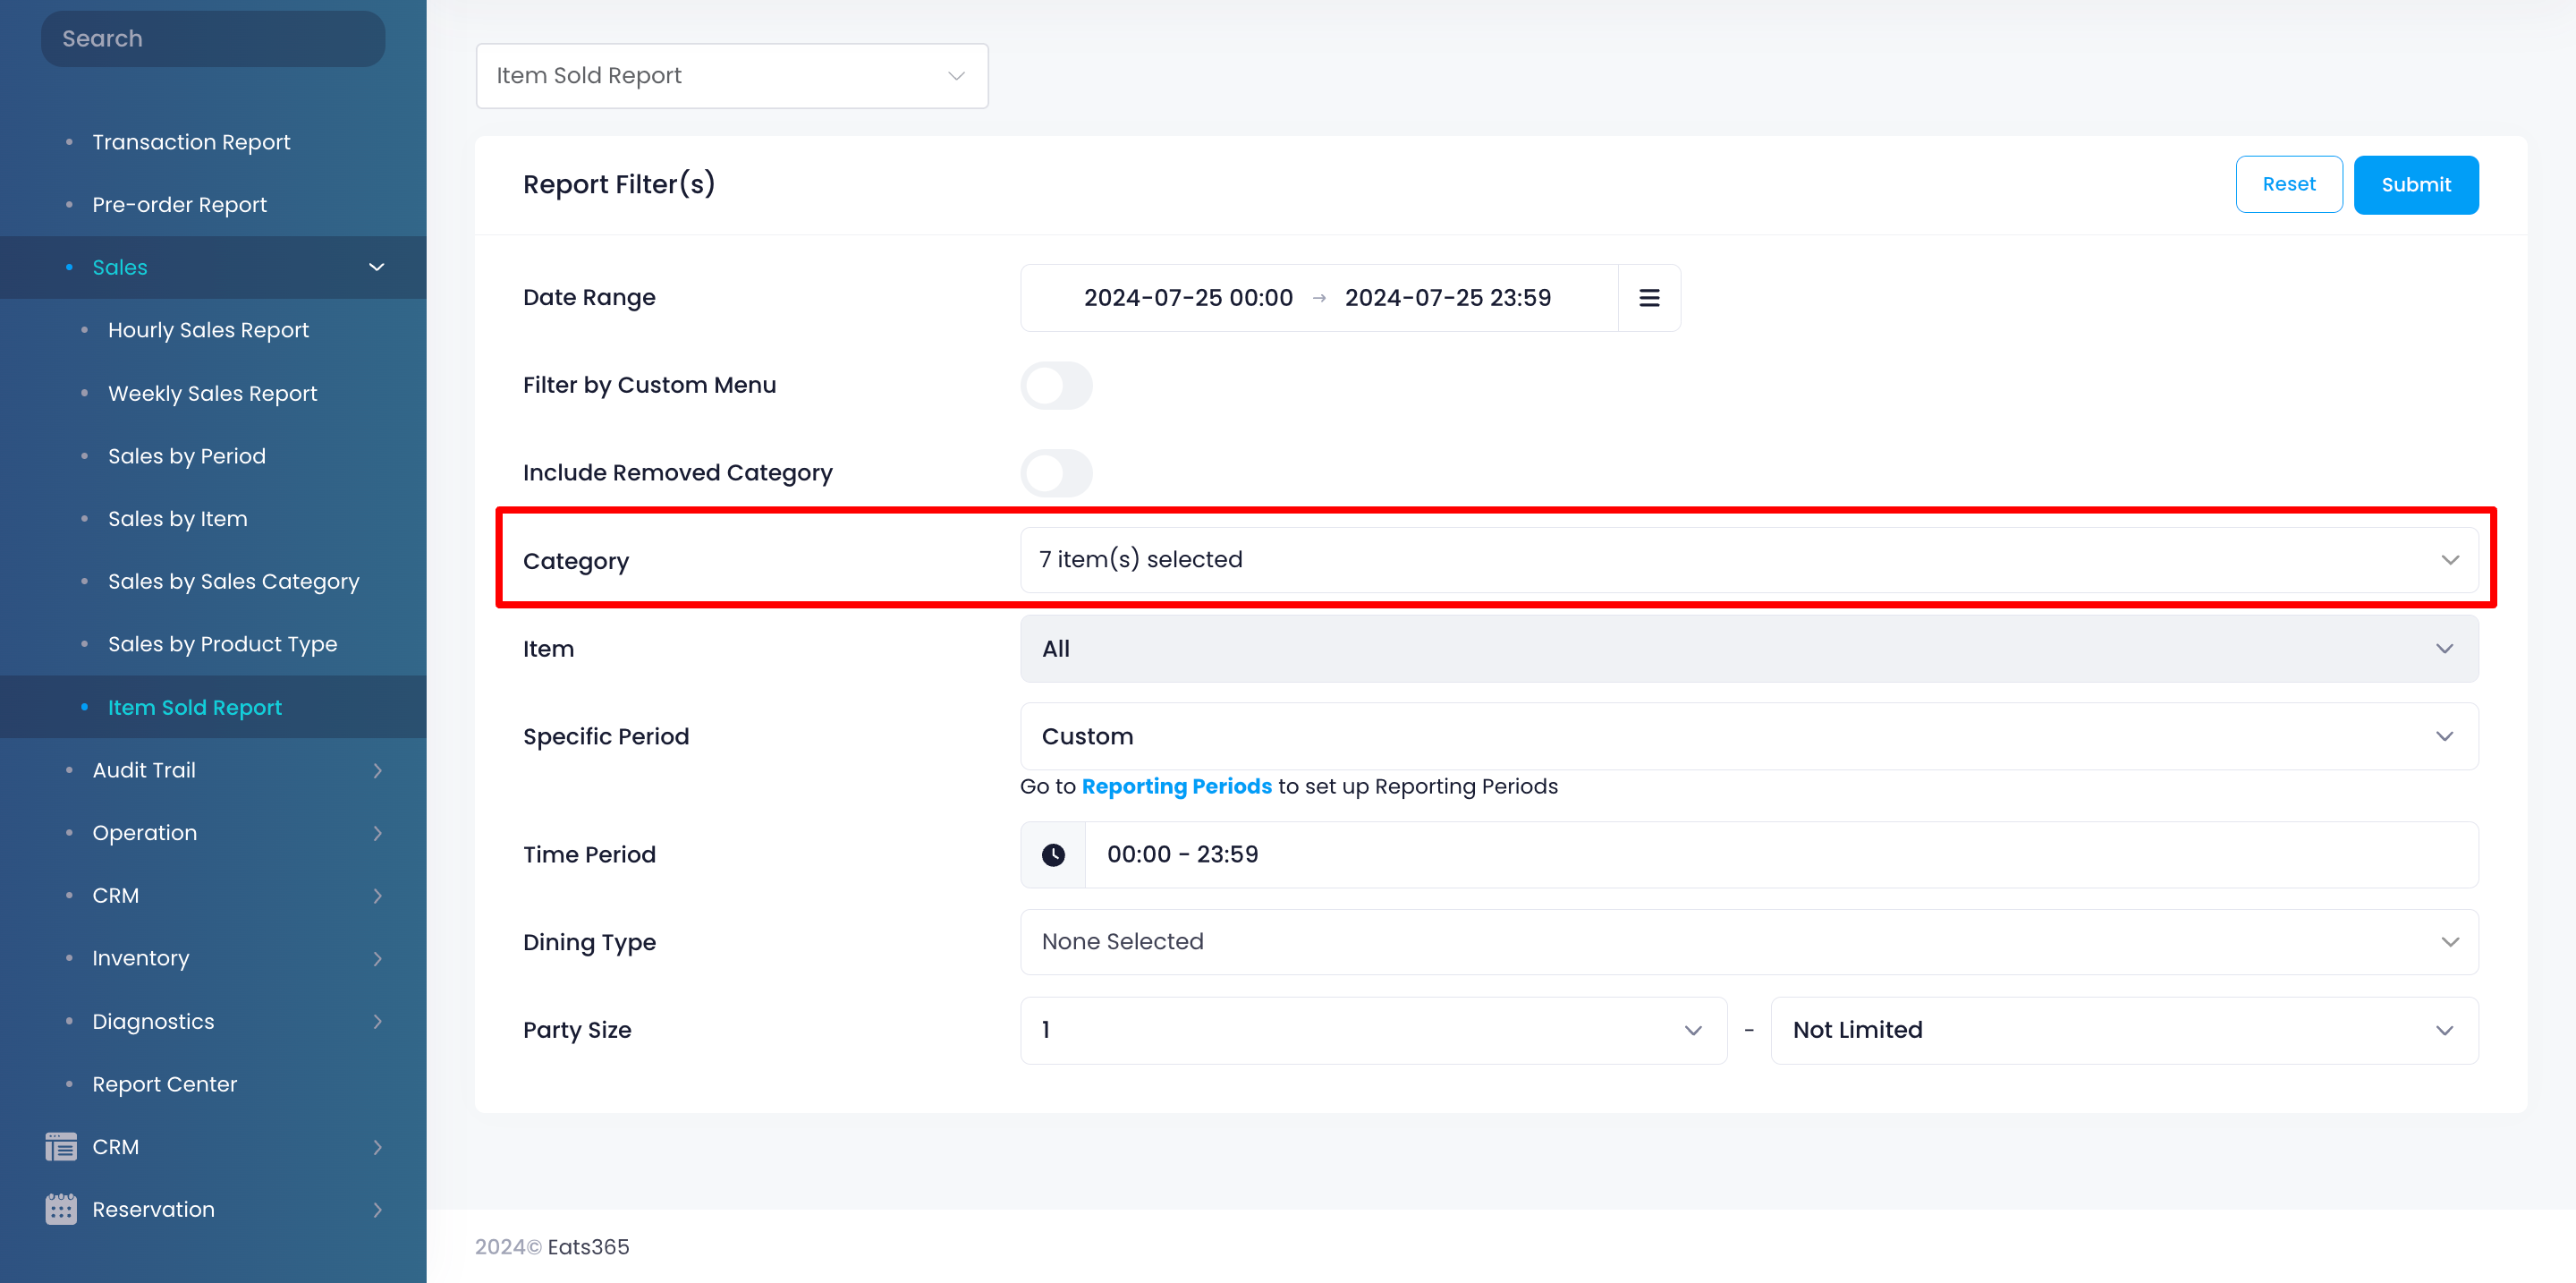
- To include specific categories in the report, click on the Category drop-down list. Then, select the categories that you want to include.
- You can filter your search further by entering the information in the following filter options:
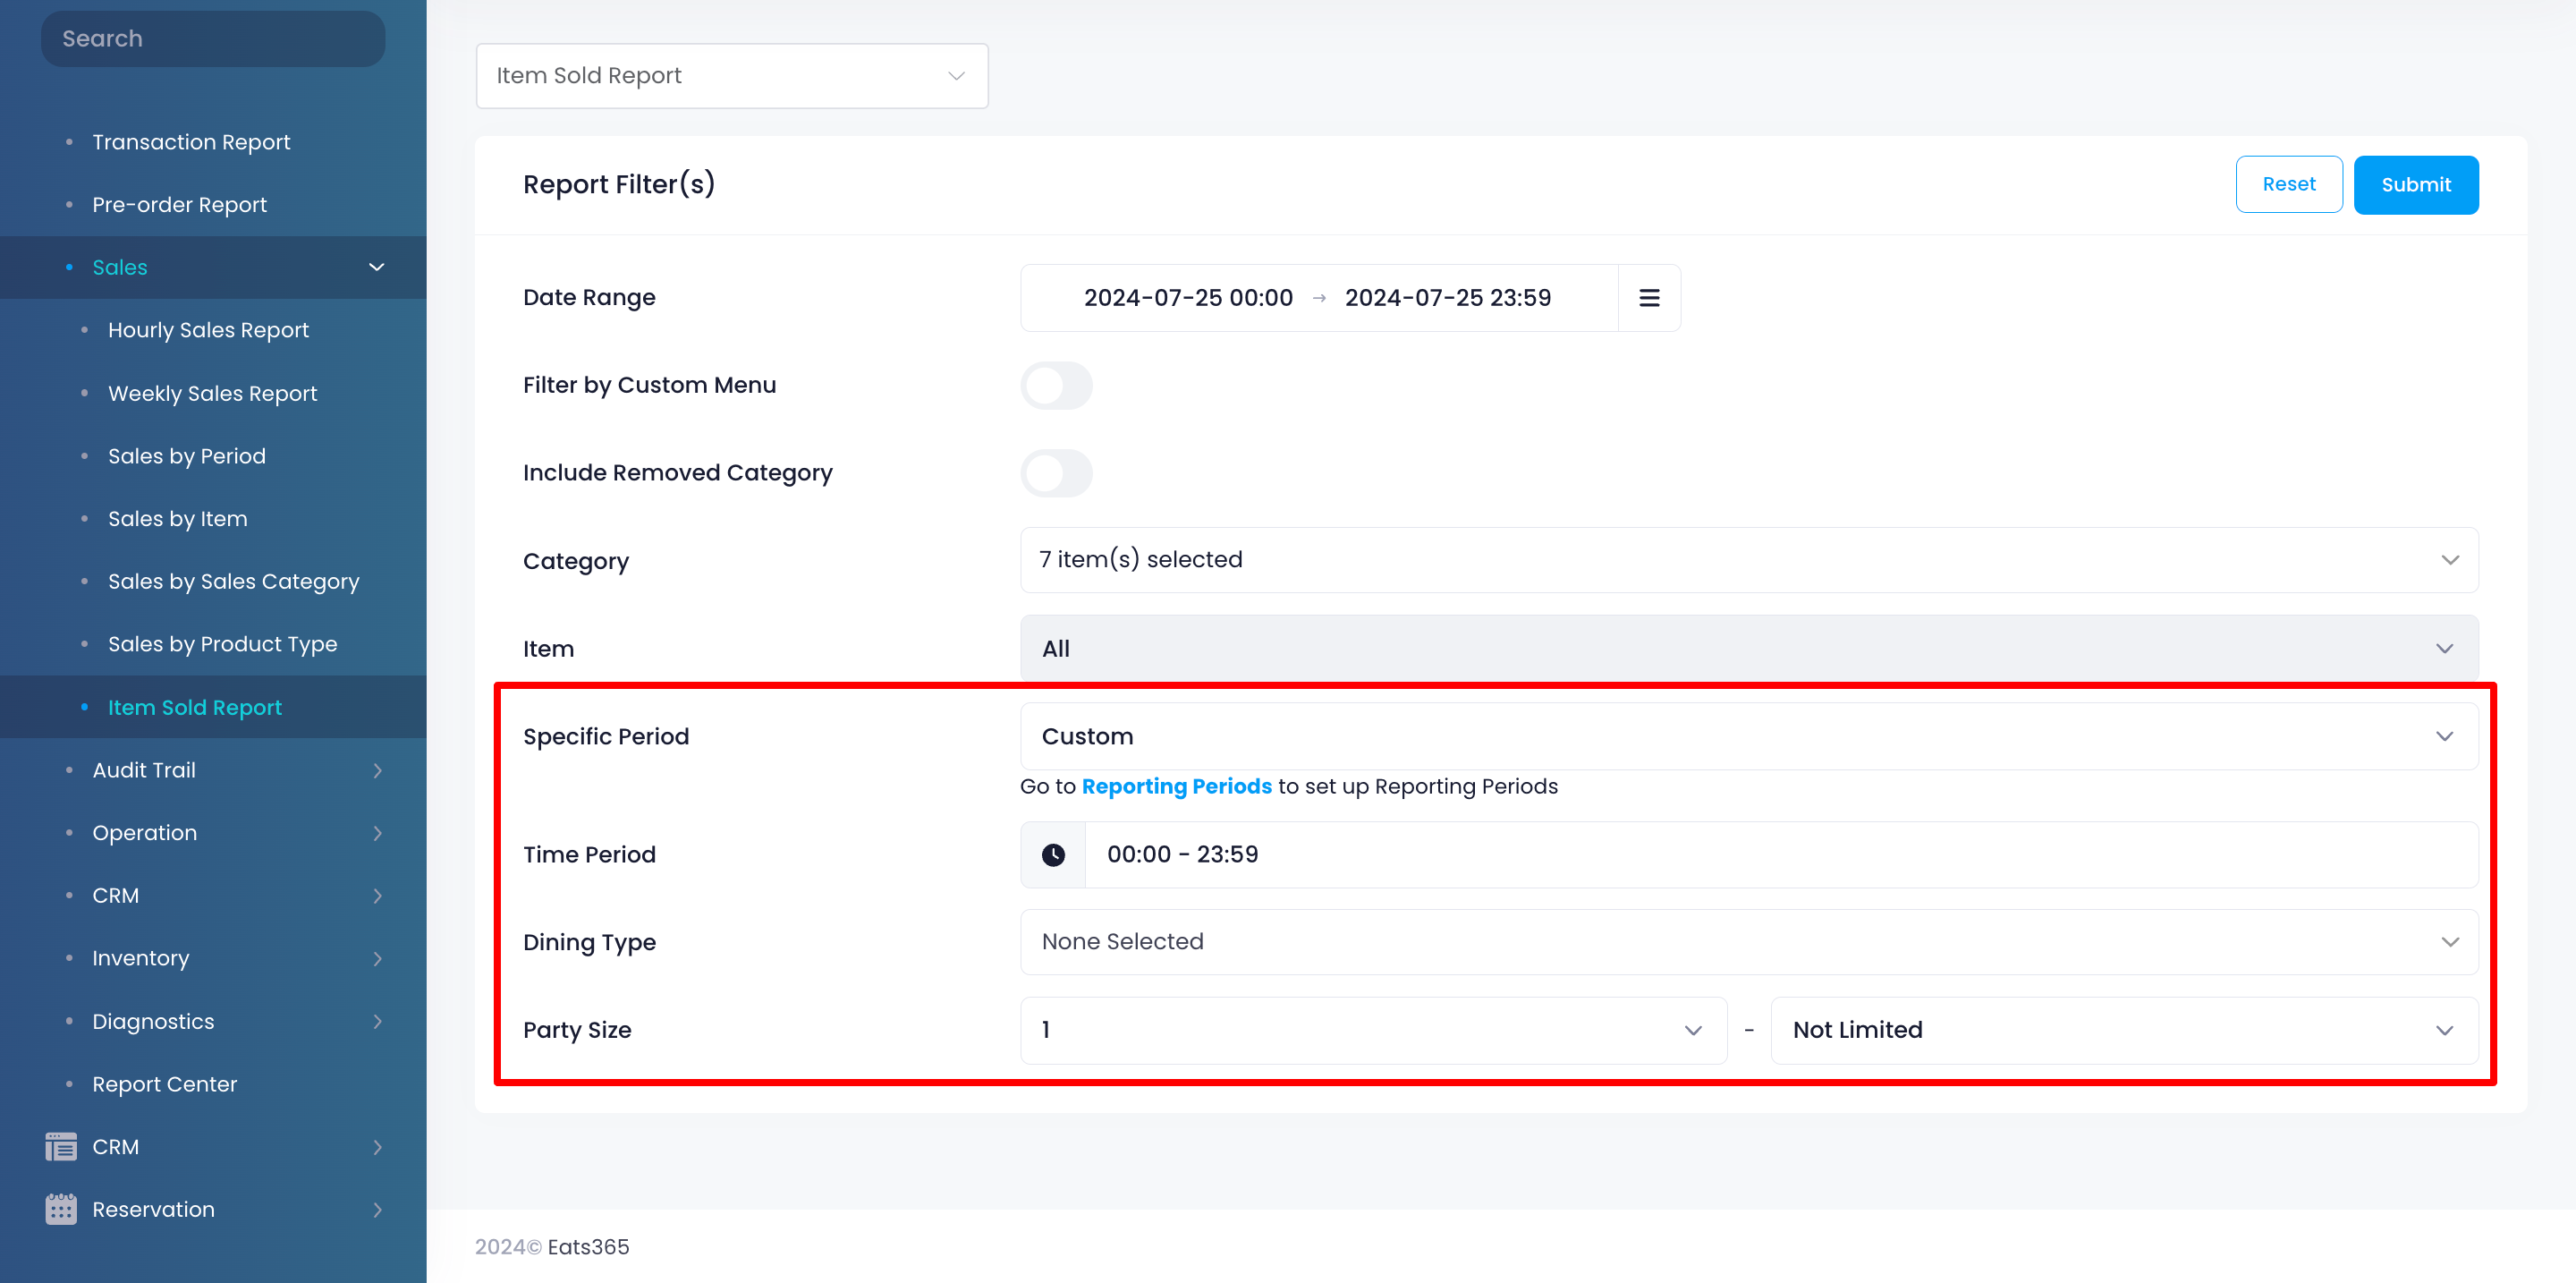
- Specific Period - If you’ve created custom reporting periods, select the one you want to generate the report for.
- Time Period - Set the time range to include only sales made within that period.
- Group By - Choose how you want to organize the items in the report: either by “Item Name” or by “Item Code (Reporting)”
- Dining Type - Select the specific dining type that you want to include in the report. You can choose from the following:
- Dine-In
- Takeout
- Others
- Catering - Pickup
- Catering - Delivery
- Party Size - Set the desired party size to view sales and transactions made by group of that size or smaller.
- Click on Submit to retrieve the records.
Print Item Sold Report
Merchant Portal (Classic Theme)
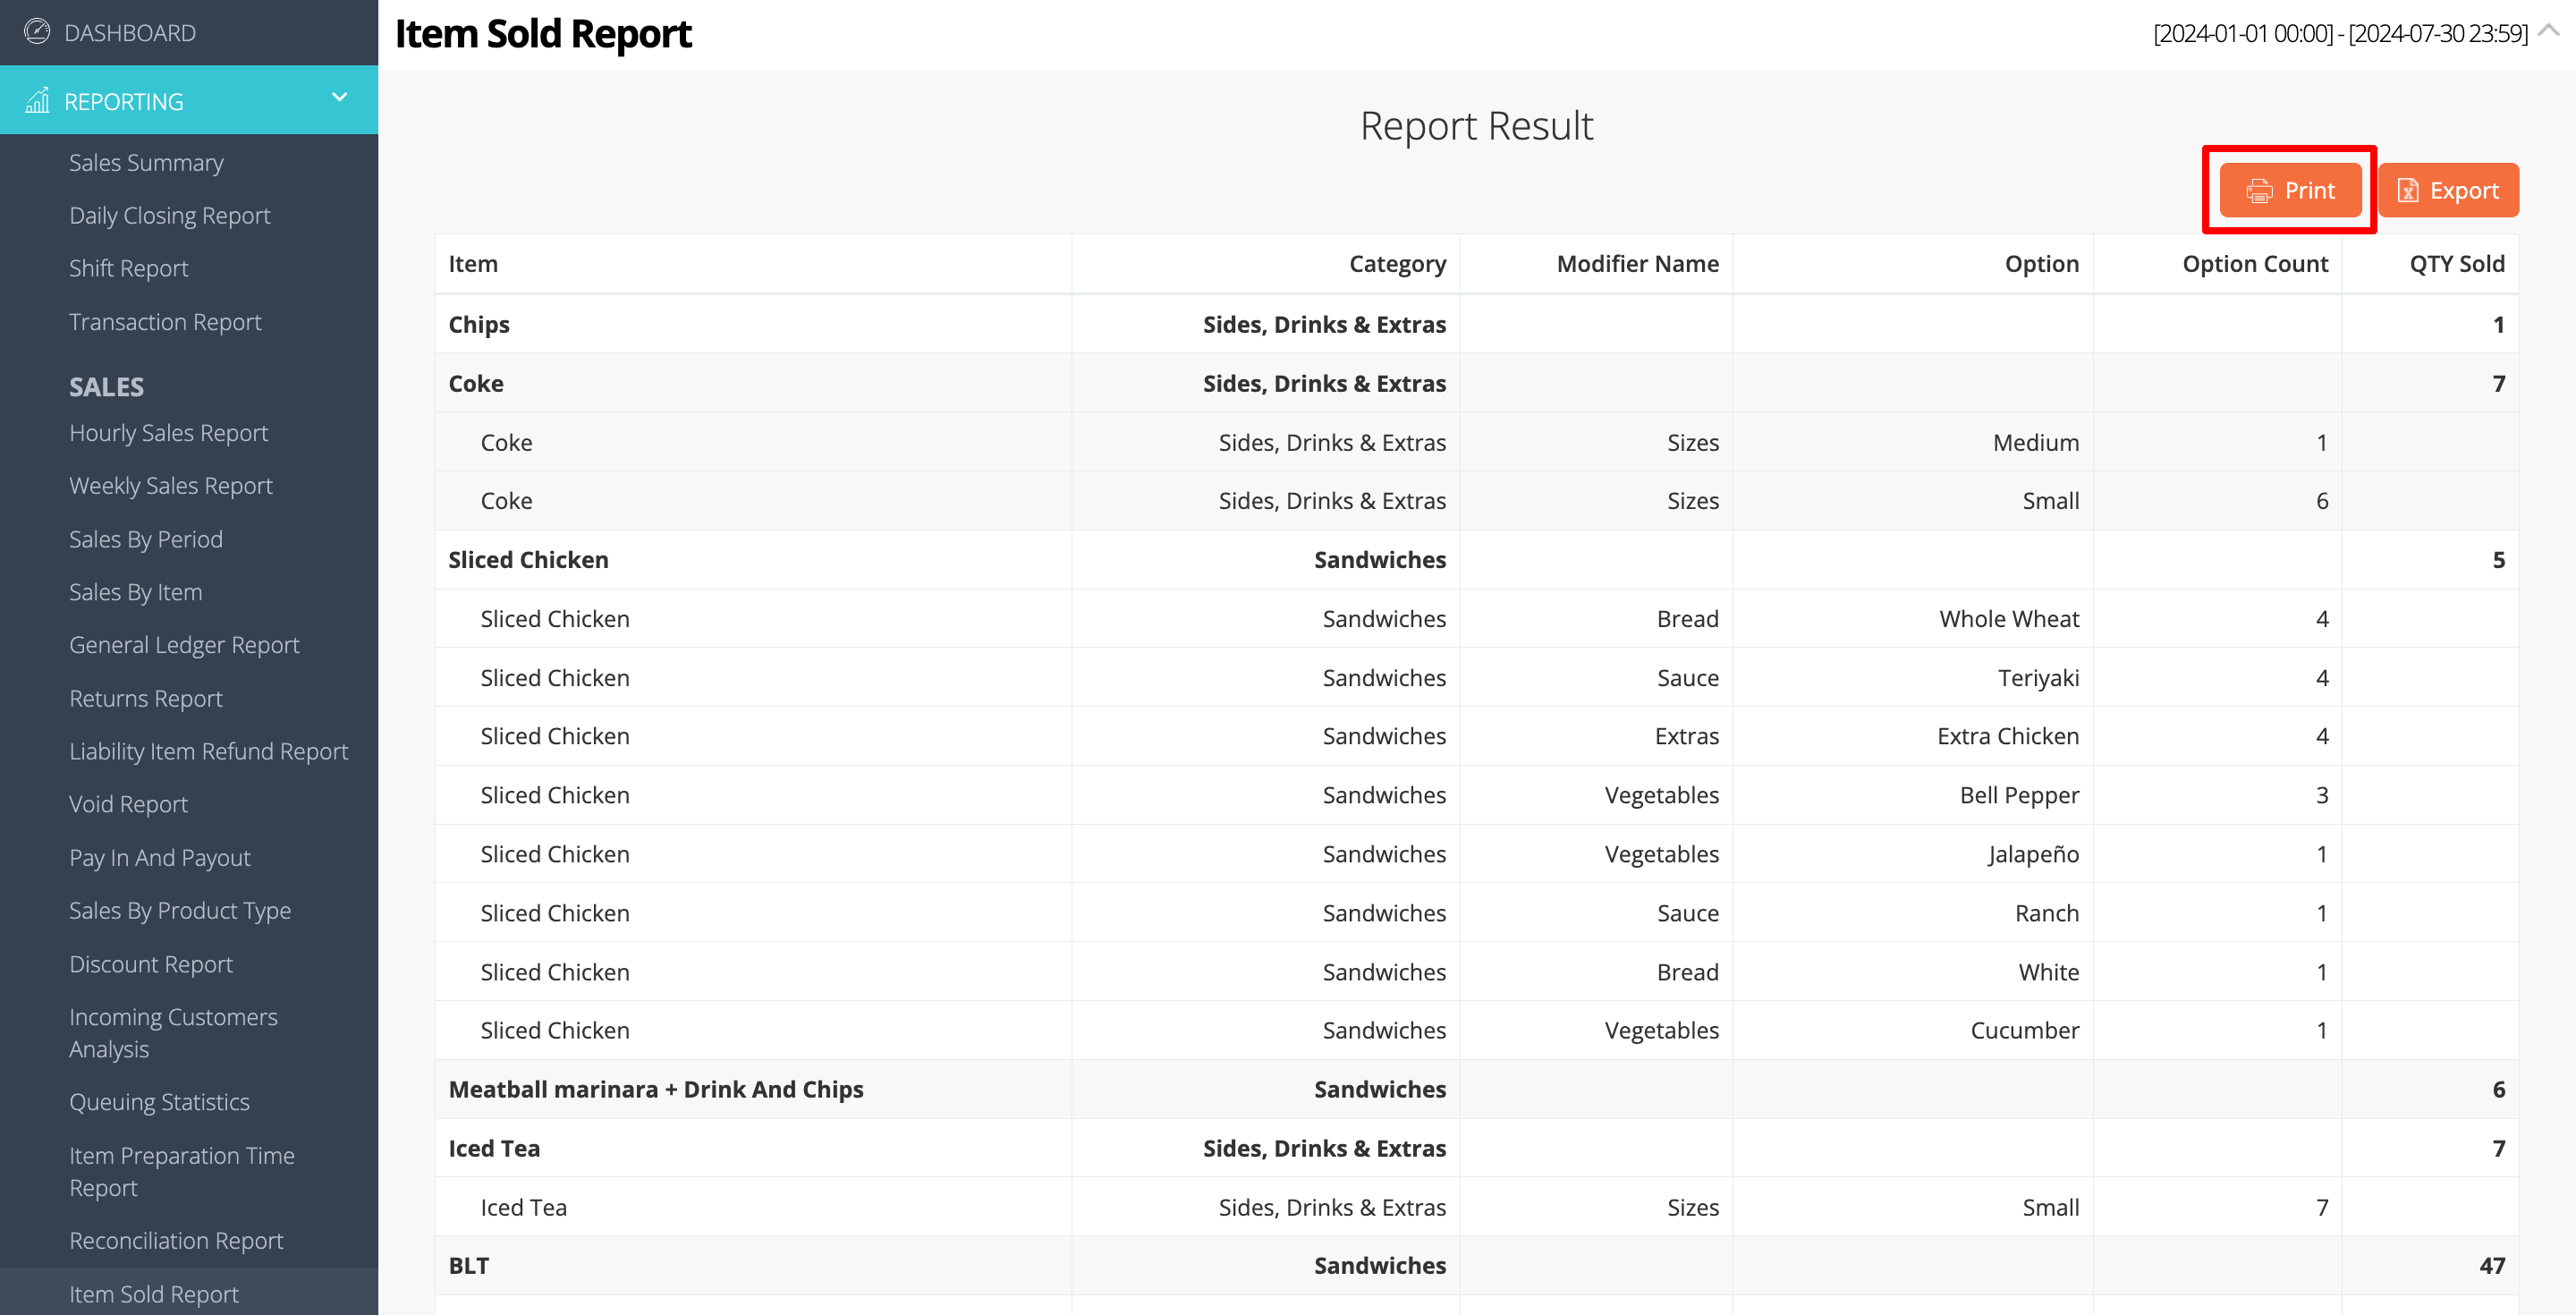
To print an Item Sold Report, click on Print. Then, select the printer where you want to print the report. Click on Save to confirm.
Merchant Portal 2.0
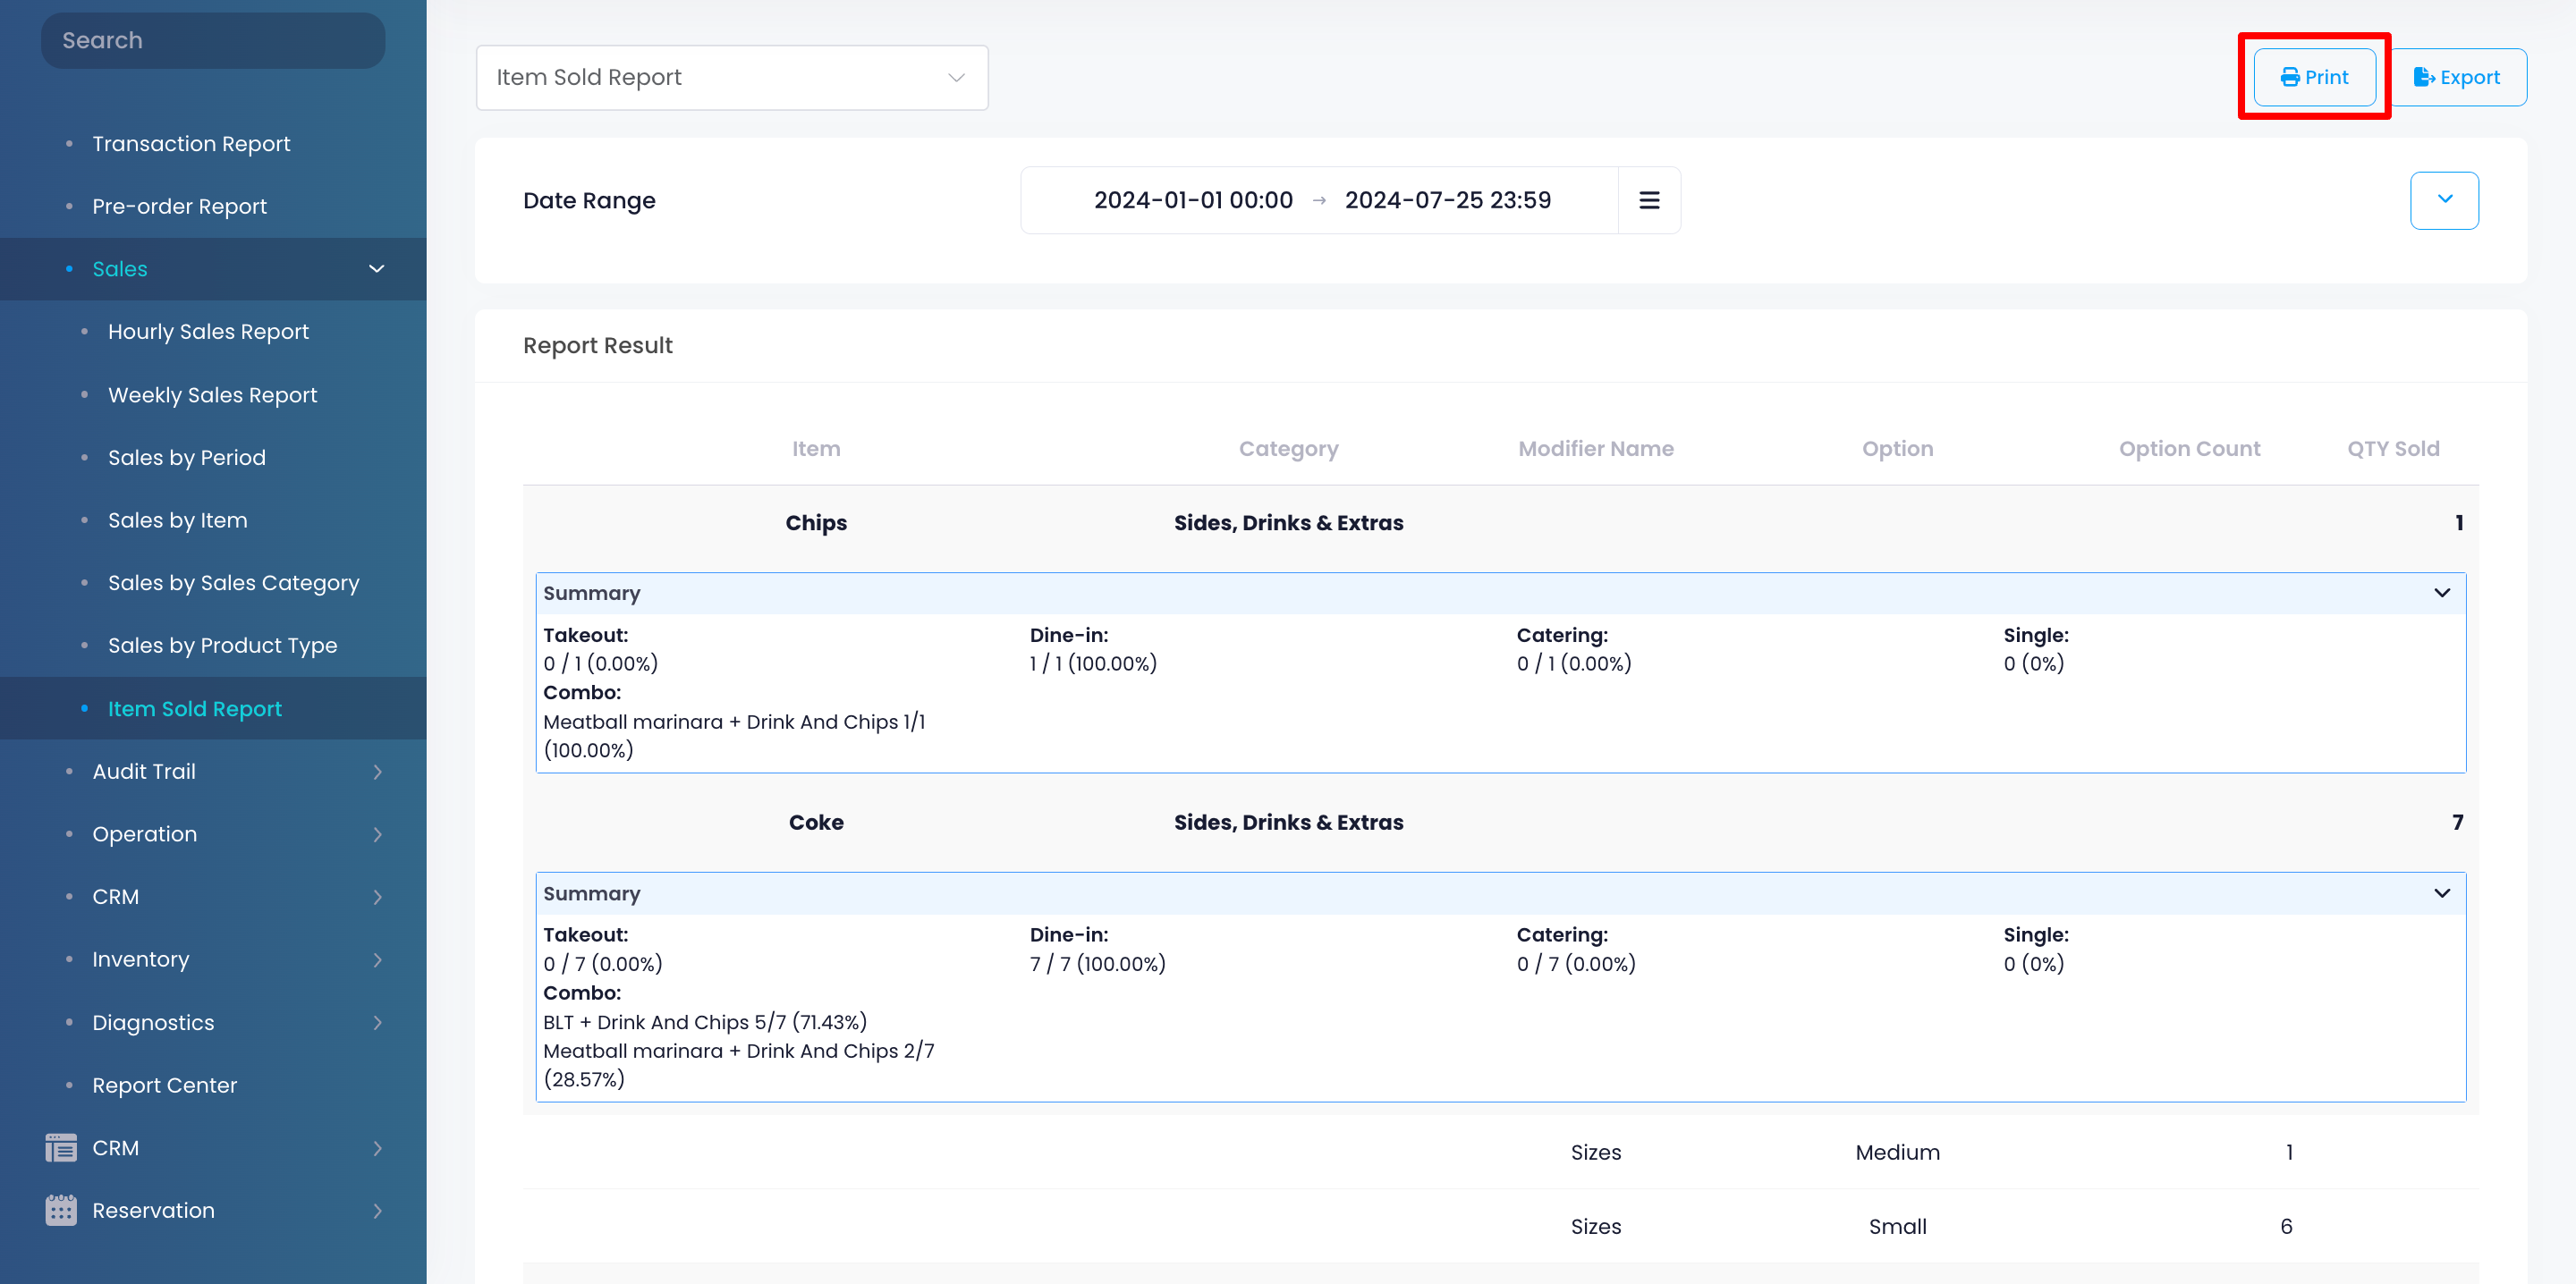
To print an Item Sold Report, click on Print. Then, select the printer where you want to print the report. Click on Save to confirm.
Export Item Sold Report
Merchant Portal (Classic Theme)
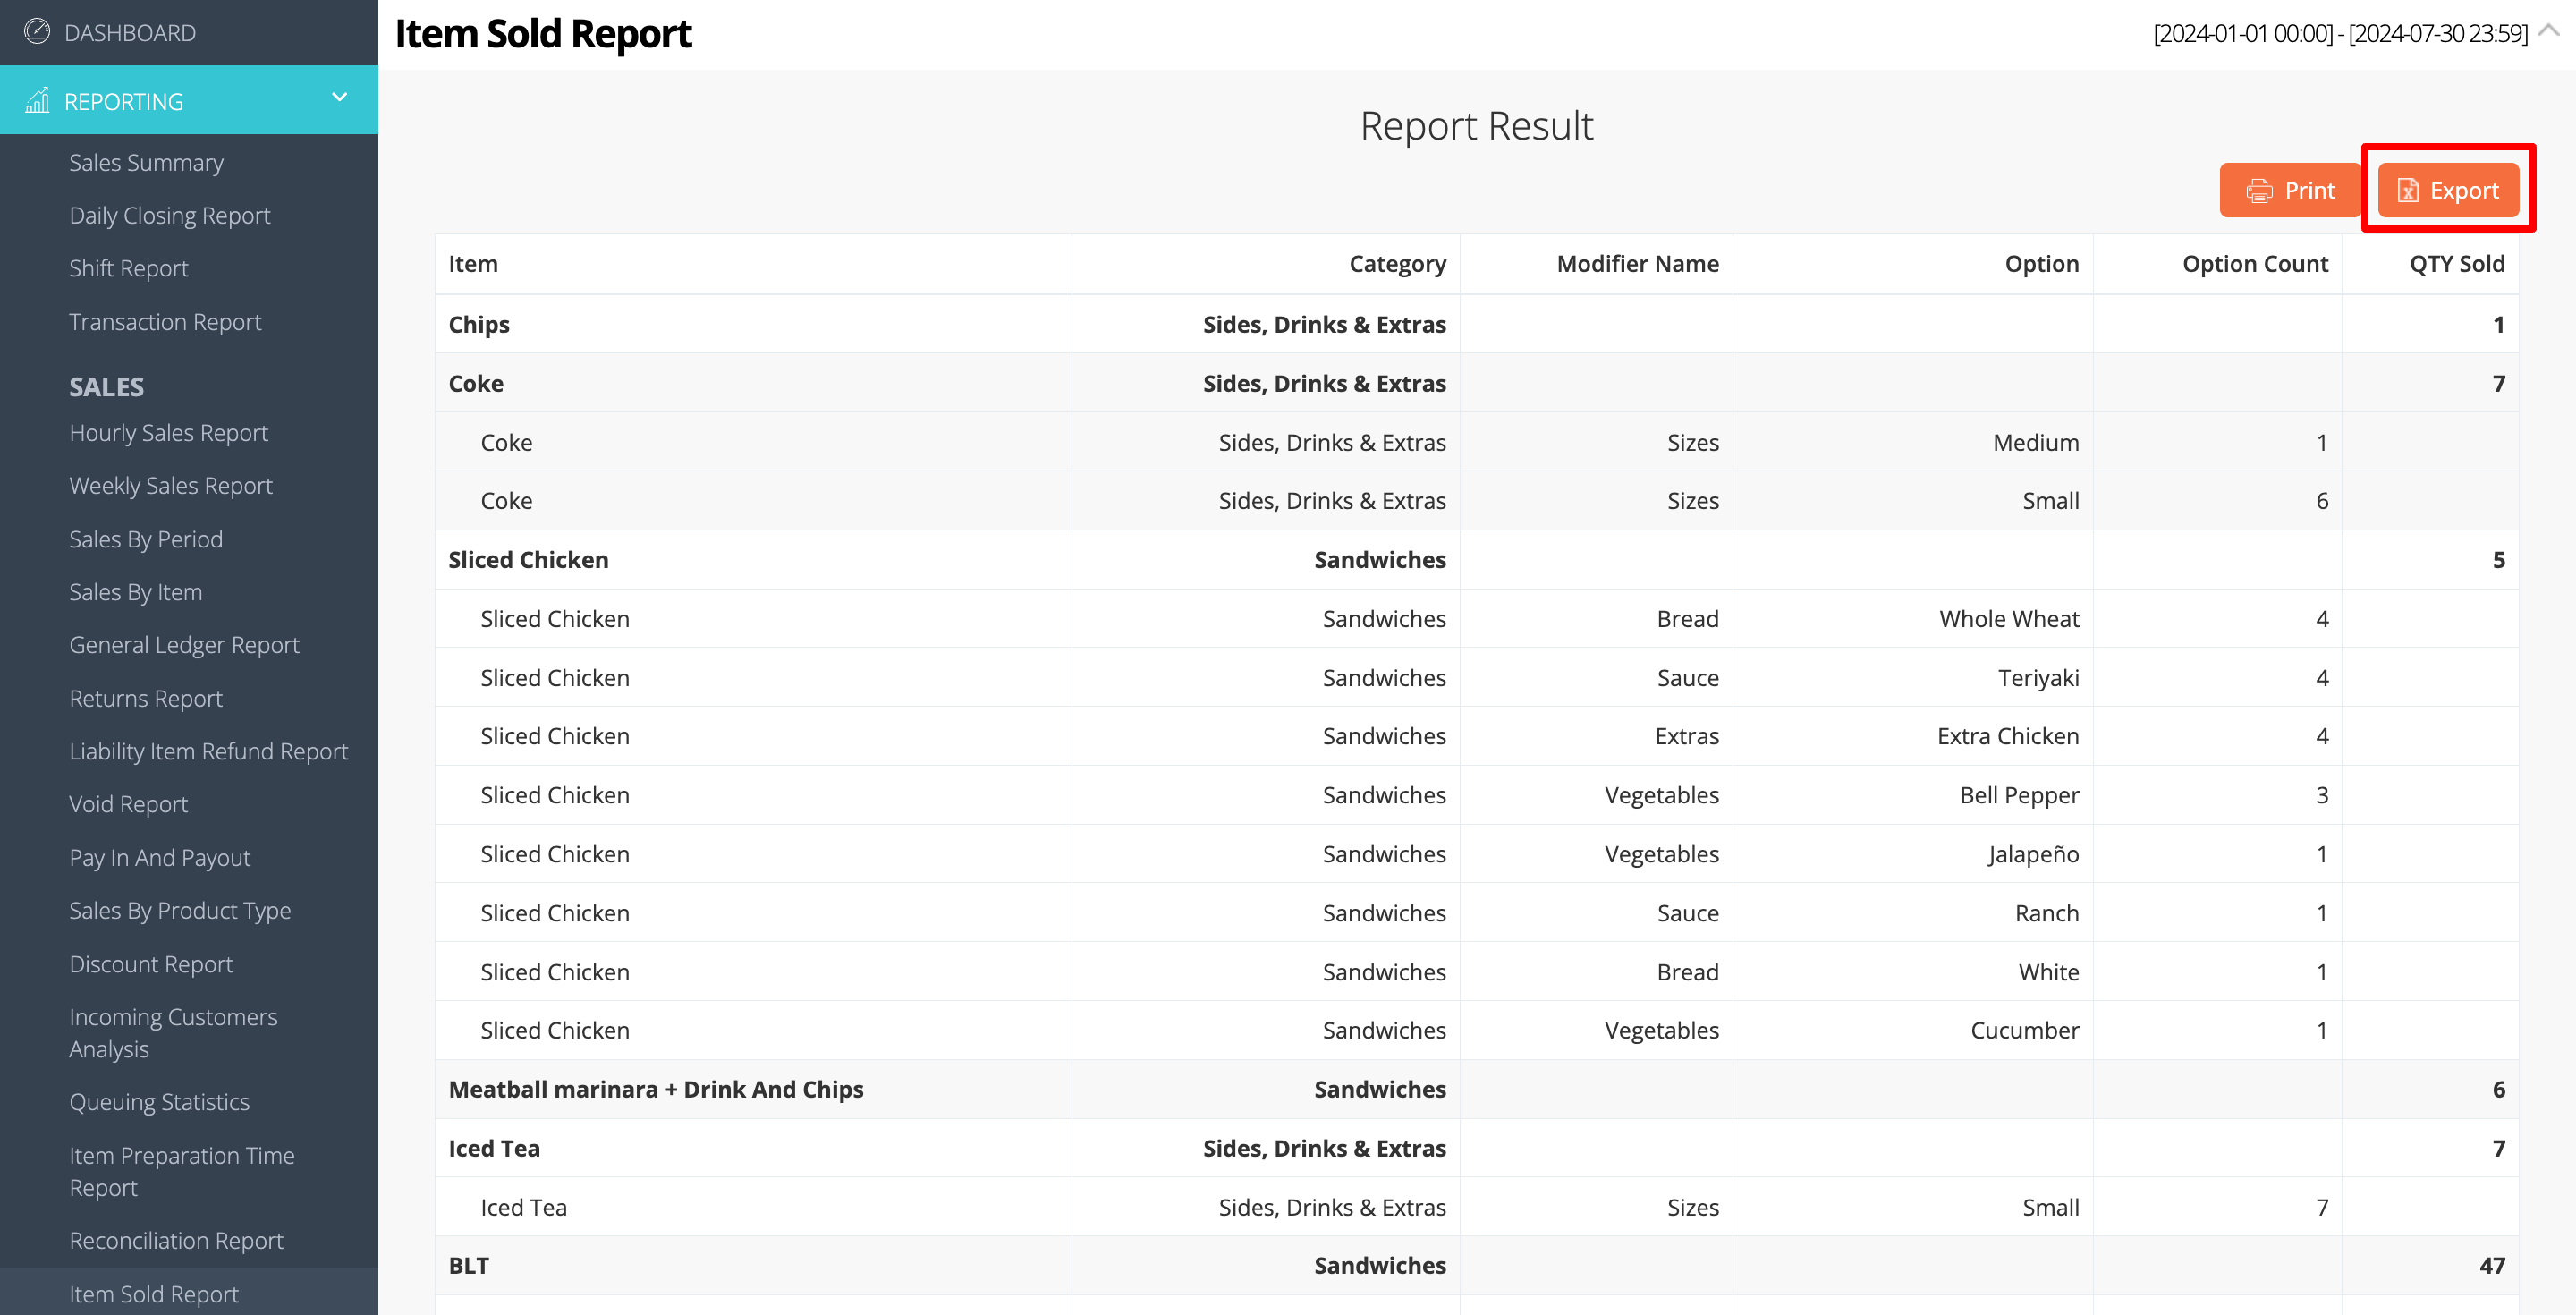
To export an Item Sold Report, click on Export. An Excel file of the report gets downloaded to your computer. Open the file to view your exported report.
 Eats365 Products
 Merchant Guide
 Modules
 Membership
 Integrations
 Hardware
 Staff Operations
 Roles & Permissions
 Payments
 Reports
 What’s New
 Release Notes
 Troubleshooting
 Simulators
 Glossary
 Troubleshooter
 System Status