 Eats365 Products
 Merchant Guide
 Modules
 Membership
 Integrations
 Hardware
 Staff Operations
 Roles & Permissions
 Payments
 Reports
 What’s New
 Release Notes
 Troubleshooting
 Simulators
 Glossary
 Troubleshooter
 System Status
Report Settings
All Product
Table of Contents
Receive automatic email reports from Eats365
Learn how to receive reports about your restaurant operations through your email.
You can configure staff members’ Merchant Portal accounts to automatically send reports to their registered email address at scheduled times or after End of Day is performed. Staff members can receive reports such as:
- Octopus Report
- Daily Closing Report
- Xero Export Report
- Operation Report (For group or organization level reporting)
- Transaction Report
- Reconciliation Report
- Item Preparation Time Report
In this article, you’ll learn how to enable settings to receive restaurant reports through email.
Enable receiving reports through email for staff member
To start receiving reports automatically in the staff member’s registered email address, follow the steps below:
Merchant Portal (Classic Theme)
- Log in to the Merchant Portal.
- On the left panel, click on Staff. Then, select Staff List.
- Click on the name of the staff who you want to receive automatic reports. Alternatively, next to the staff’s name, you can click on Edit
 .
.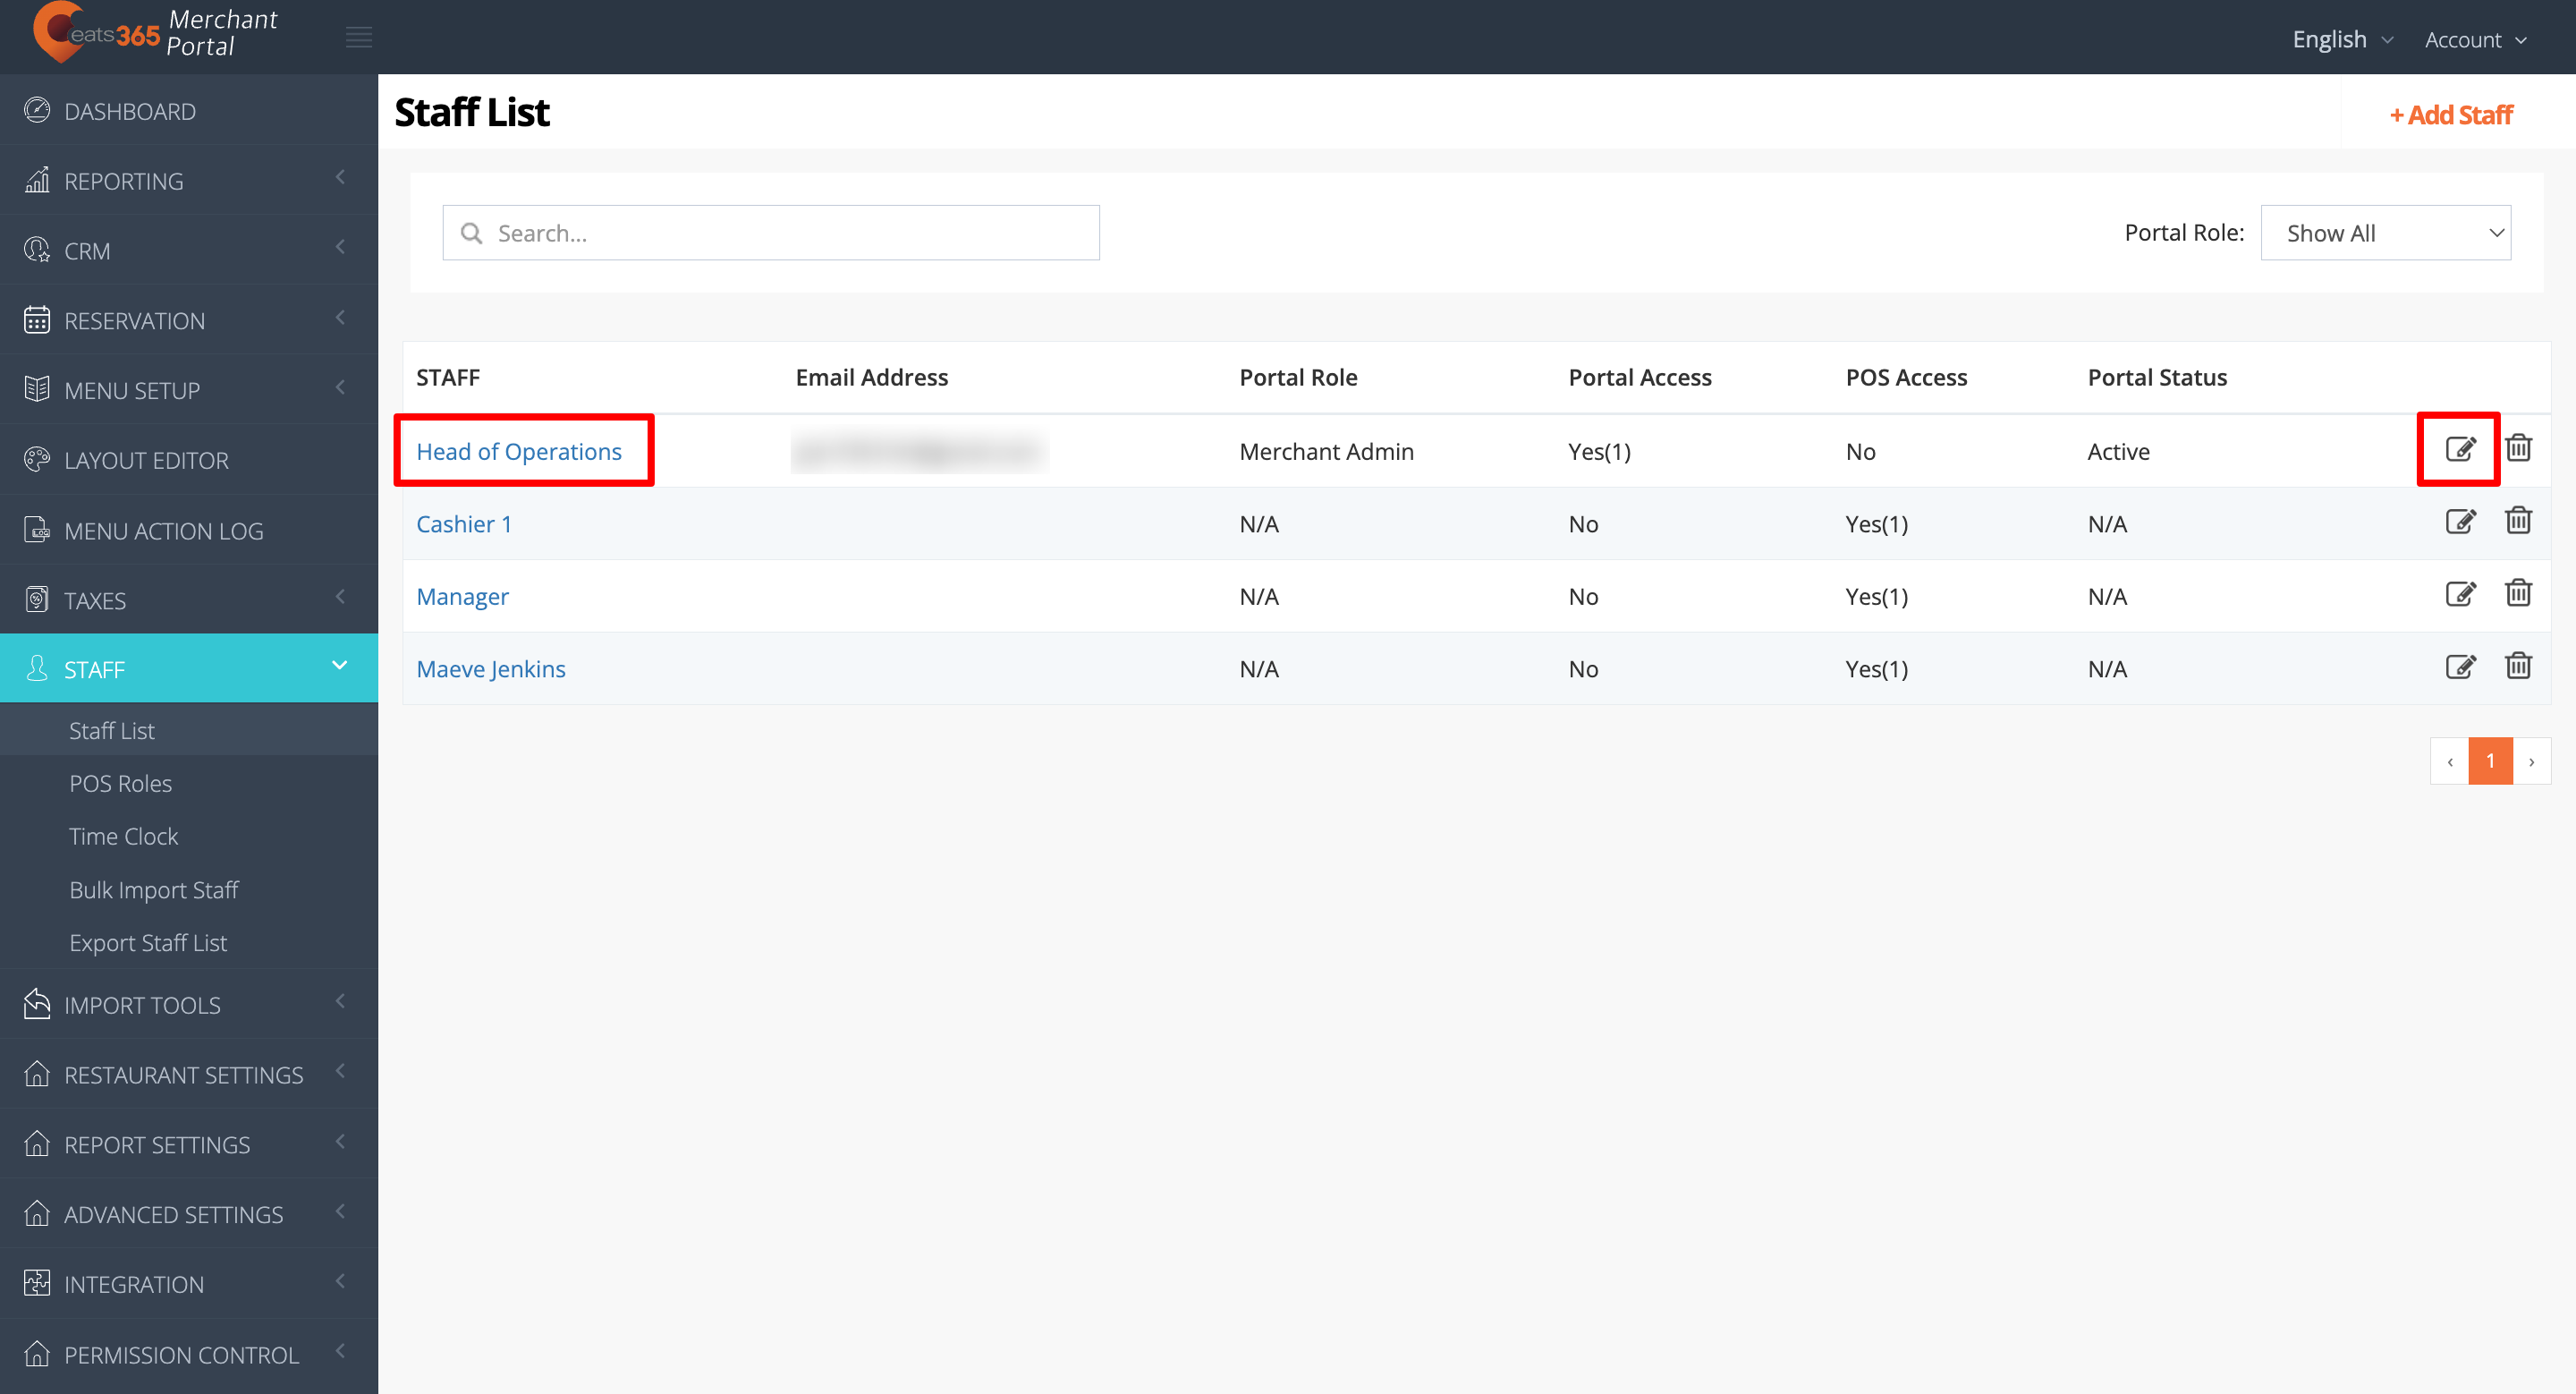
- Click on the Portal Account tab. Under “Notification Status,” select
 which reports you want the staff memberto receive:
- Octopus Report (after End of Day)
- Daily Report (after End of Day)
- Daily Report on Schedule Time
Important: o receive the Daily Closing Report at a scheduled time, enable the “Send Daily Closing Report at Scheduled Time” setting in the restaurant’s Report export settings. Refer to the “Configure automatic email report settings” section below to learn more. - Xero Export Report (after End of Day)
- Operation Report on Schedule Time
Important: To automatically receive Operation Reports via email, enable the “Send Operation Report at Scheduled Time” setting in the restaurant group’s or organization's Report export settings. Refer to the “Configure automatic email report settings” section below to learn more. - Receive Transaction Report after End of Day
- Receive Transaction Report at Scheduled Time
- Receive Reconciliation Report after End of Day
- Receive Reconciliation Report At Scheduled Time
- At the top right, click on Save to confirm.
Merchant Portal 2.0
- Log in to the Merchant Portal.
- On the left panel, click on Staff. Then, select Staff List.
- Click on the name of the staff who you want to receive automatic reports. Alternatively, next to the staff’s name, you can click on Edit
 .
.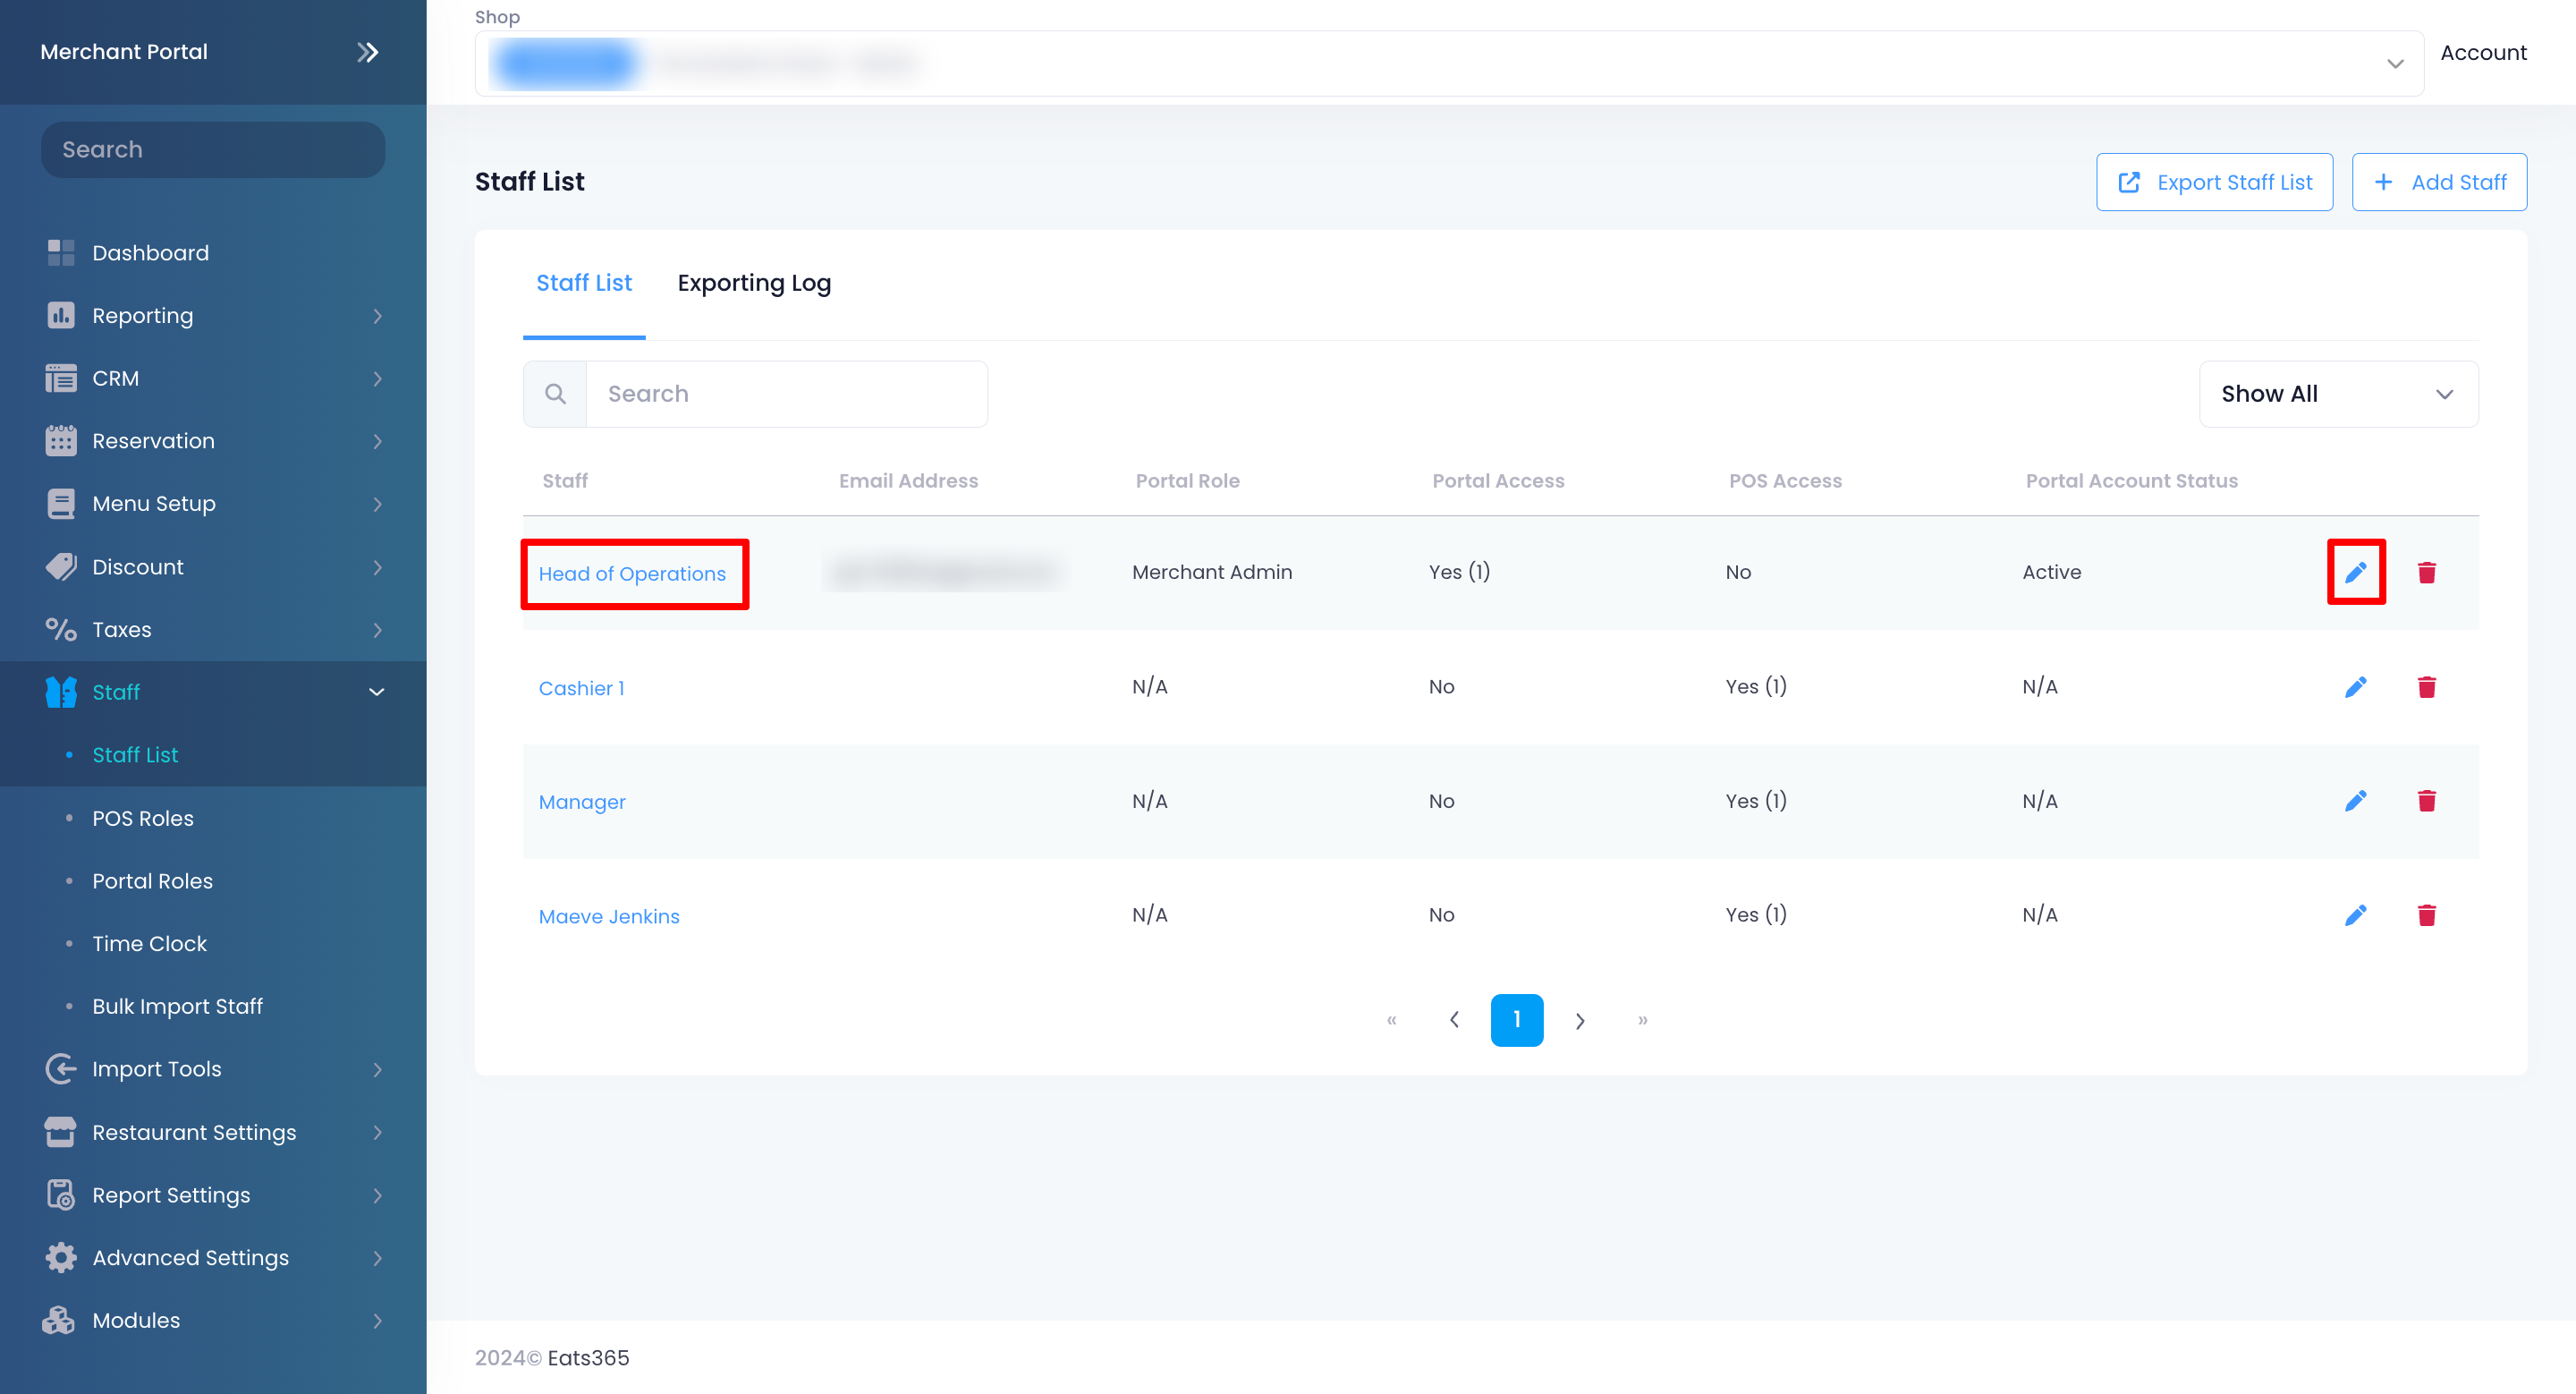
- Click on the Portal Account tab. Under “Notification Status,” select
 which reports you want the staff memberto receive:
- Octopus Report (after End of Day)
- Receive Daily Closing Report after End of Day
- Receive Daily Closing Report at Scheduled Time
Important: To receive the Daily Closing Report at a scheduled time, enable the “Send Daily Closing Report at Scheduled Time” setting in the restaurant’s Report export settings. Refer to the “Configure automatic email report settings” section below to learn more. - Xero Export Report (after End of Day)
- Receive Operation Report at Scheduled Time
Important: To automatically receive Operation Reports via email, enable the “Send Operation Report at Scheduled Time” setting in the restaurant group’s or organization's Report export settings. Refer to the “Configure automatic email report settings” section below to learn more. - Receive Transaction Report after End of Day
- Receive Transaction Report at Scheduled Time
- Receive Reconciliation Report after End of Day
- Receive Reconciliation Report At Scheduled Time
- Receive Item Preparation Time Report after End of Day
- Receive Item Preparation Time Report At Scheduled Time
- At the top right, click on Save to confirm.
Configure automatic email report settings
To set when automatic reports will be sent, follow the steps below:
Operation Report
Merchant Portal (Classic Theme)
- Log in to the Merchant Portal.
- Ensure that you’re on the appropriate view. At the top left, change the view to the restaurant group you’d like to configure.
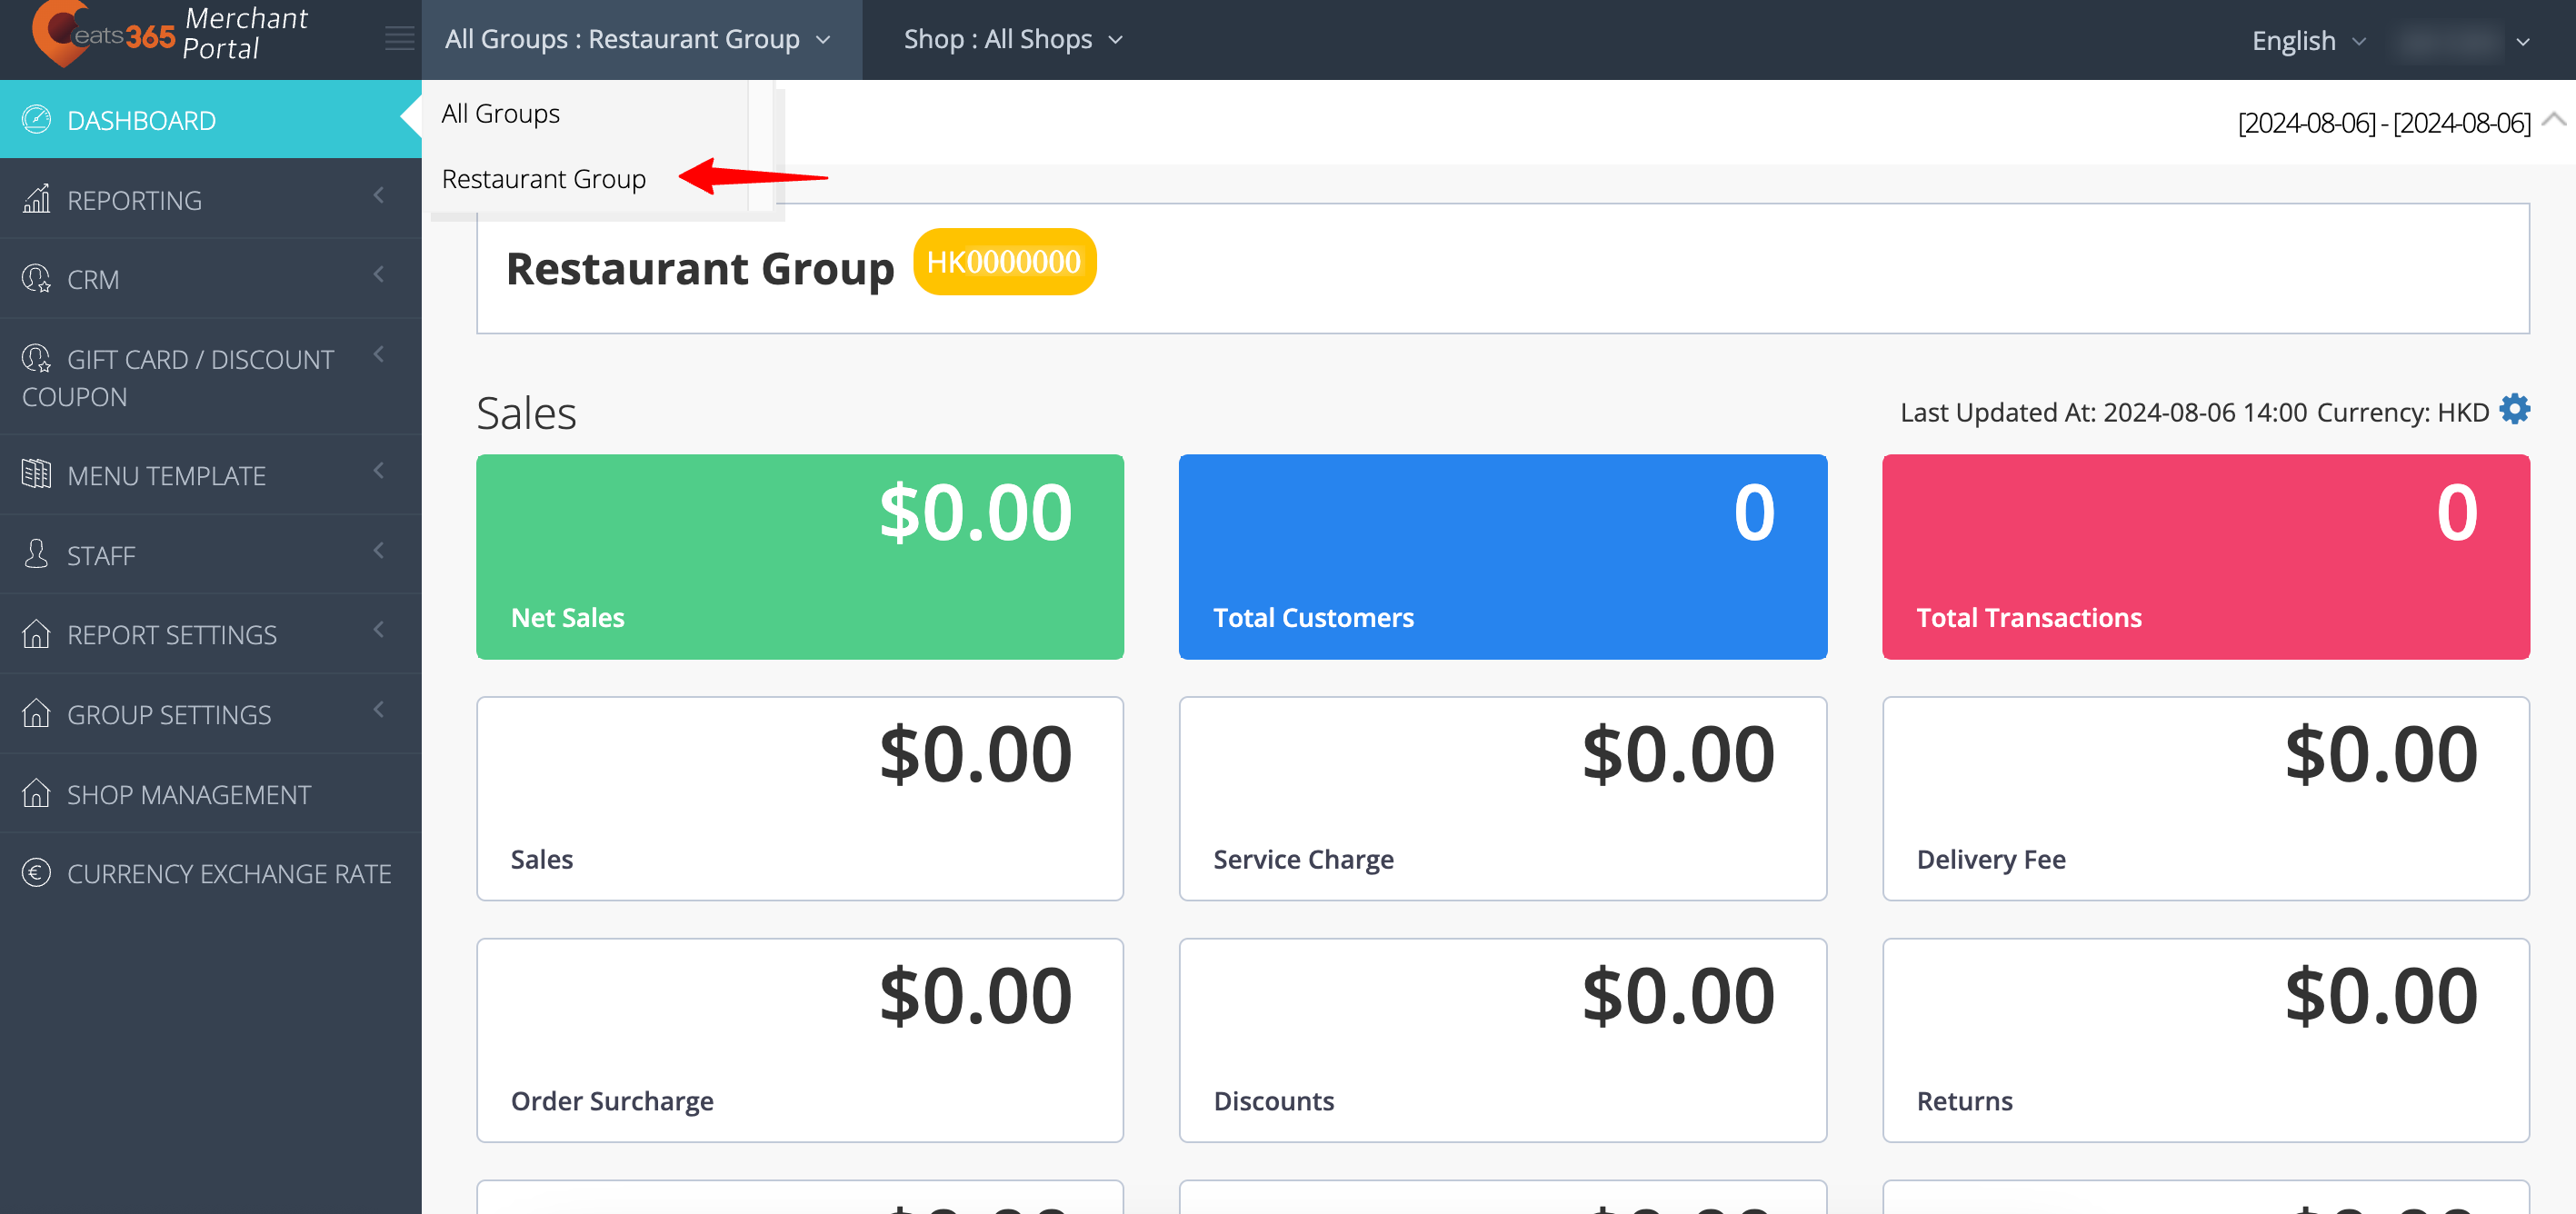 Tip: Restaurant Groups are represented by the color yellow.
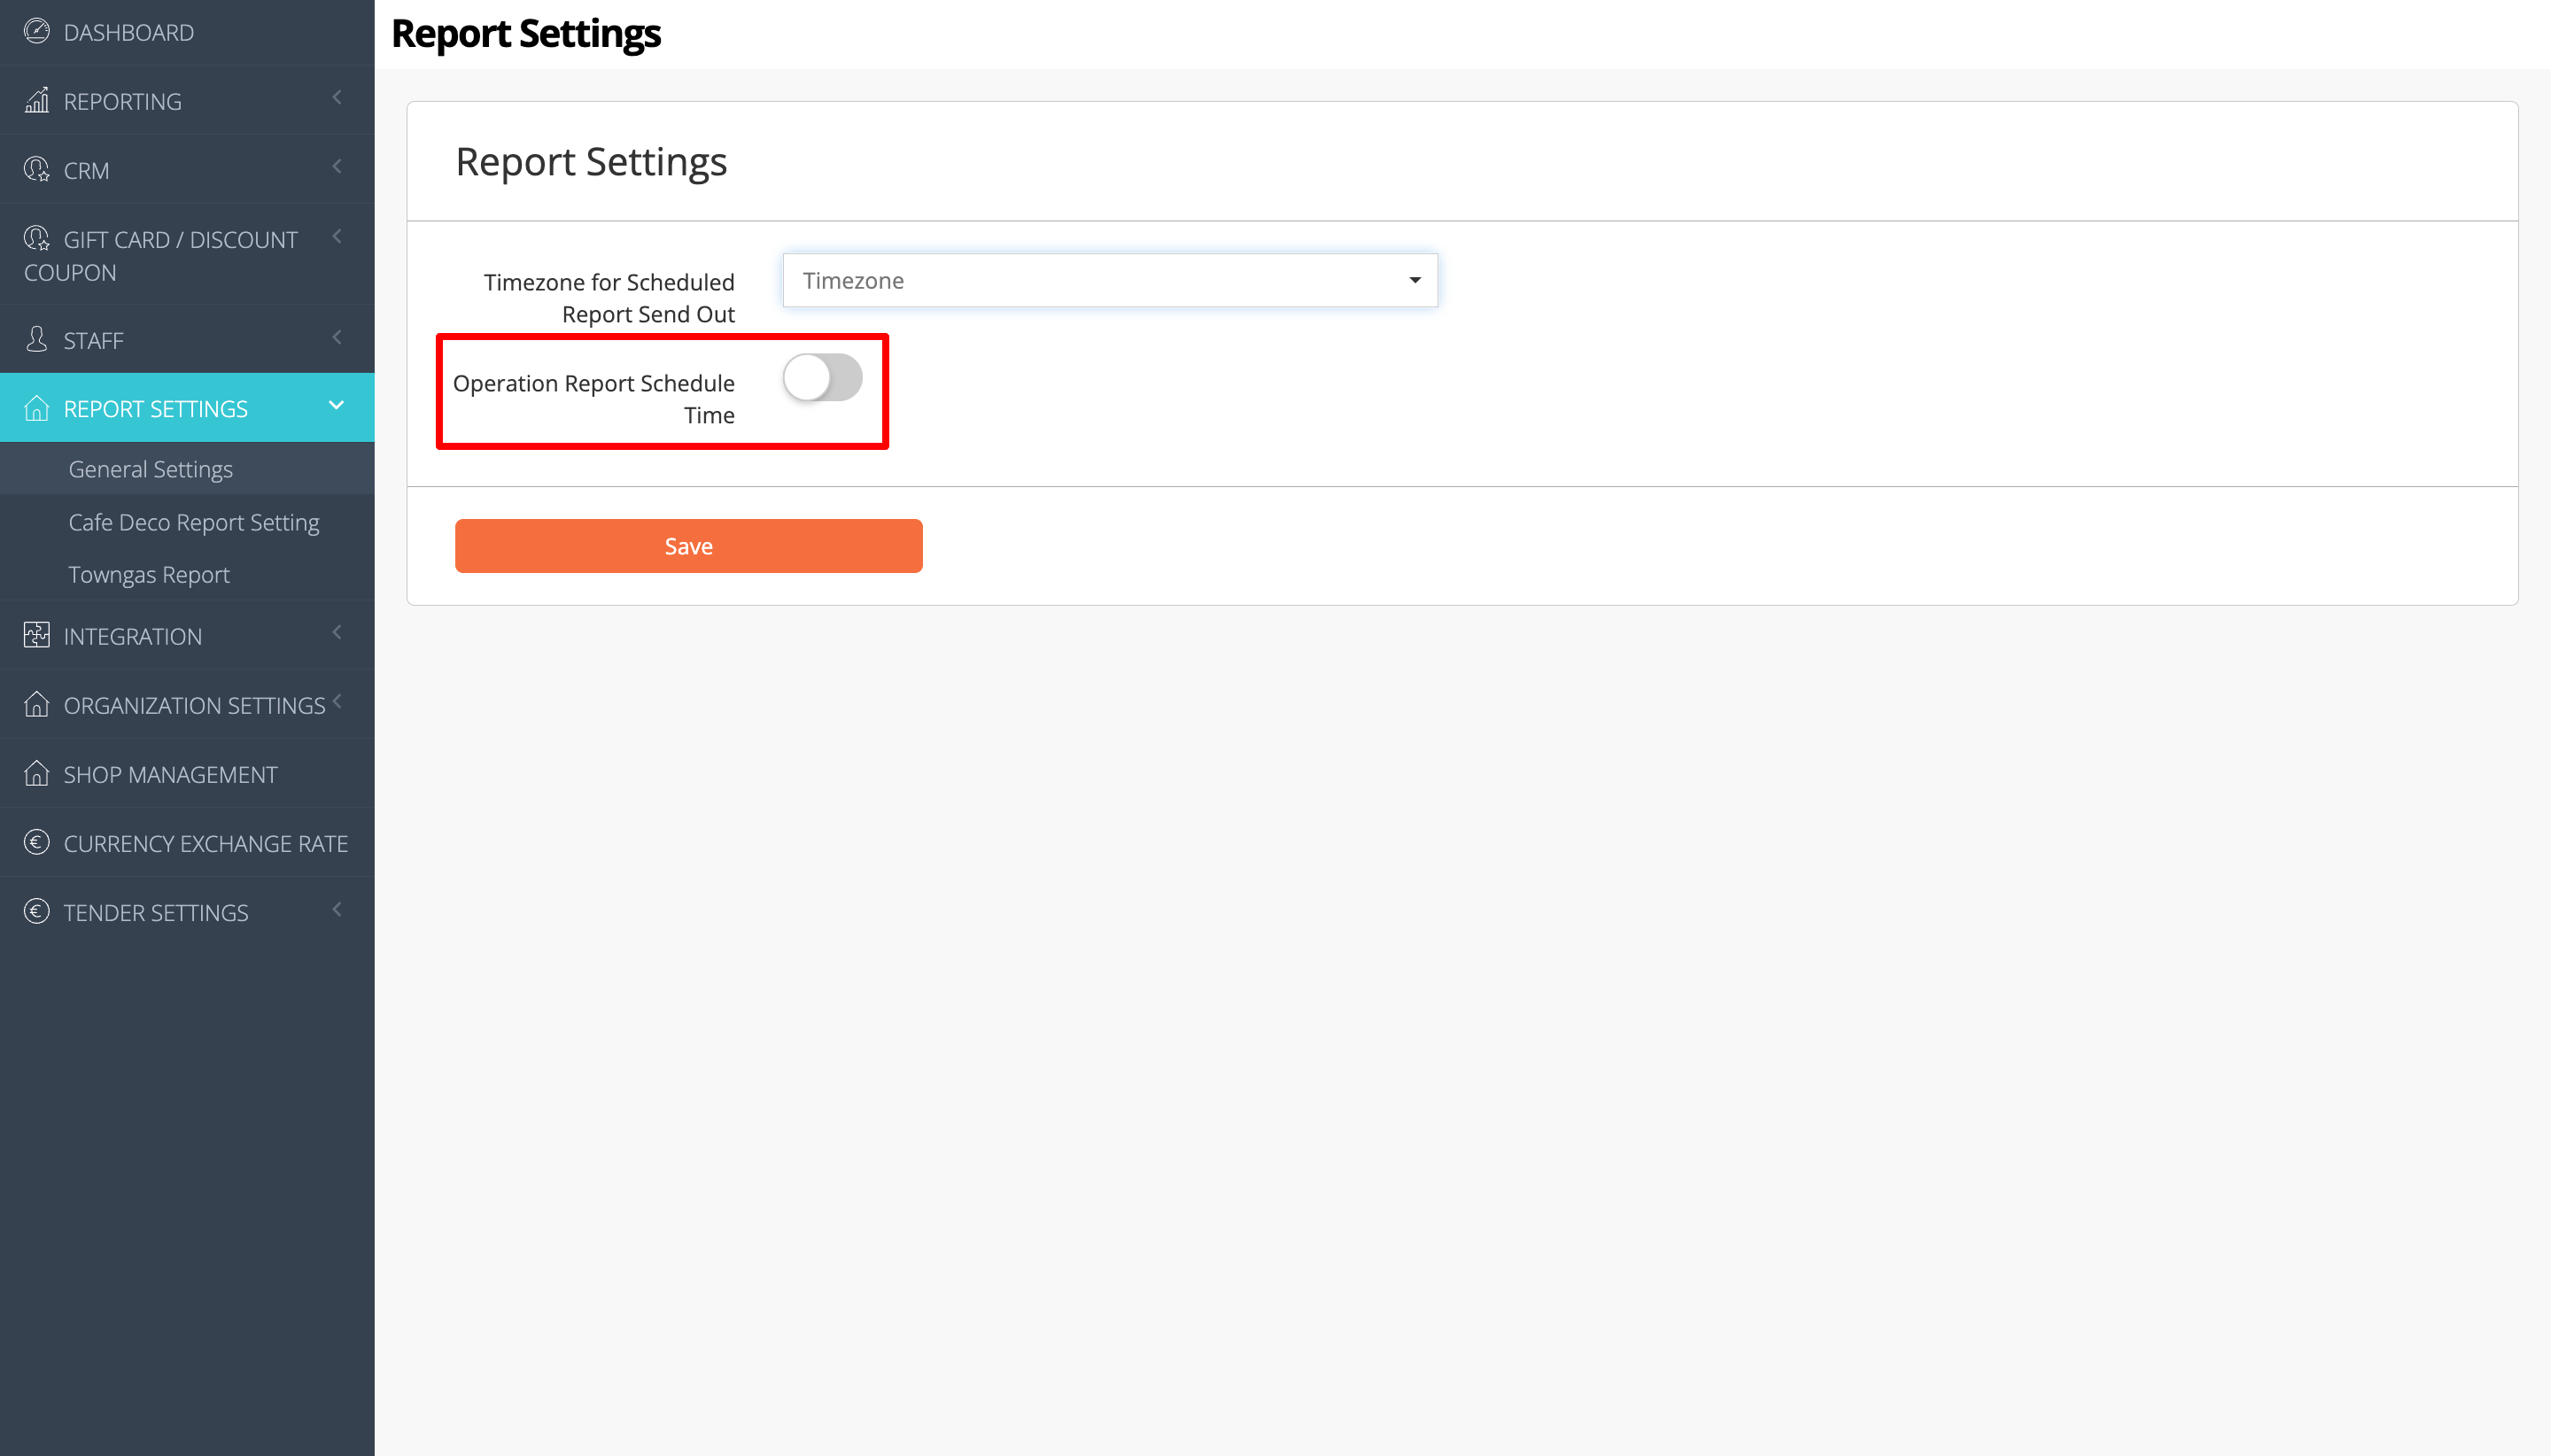
- On the left panel, click on Report Settings. Then, select General Settings.
- Select the timezone of the restaurant’s location by clicking on the Timezone for Scheduled Report Send Out drop-down.
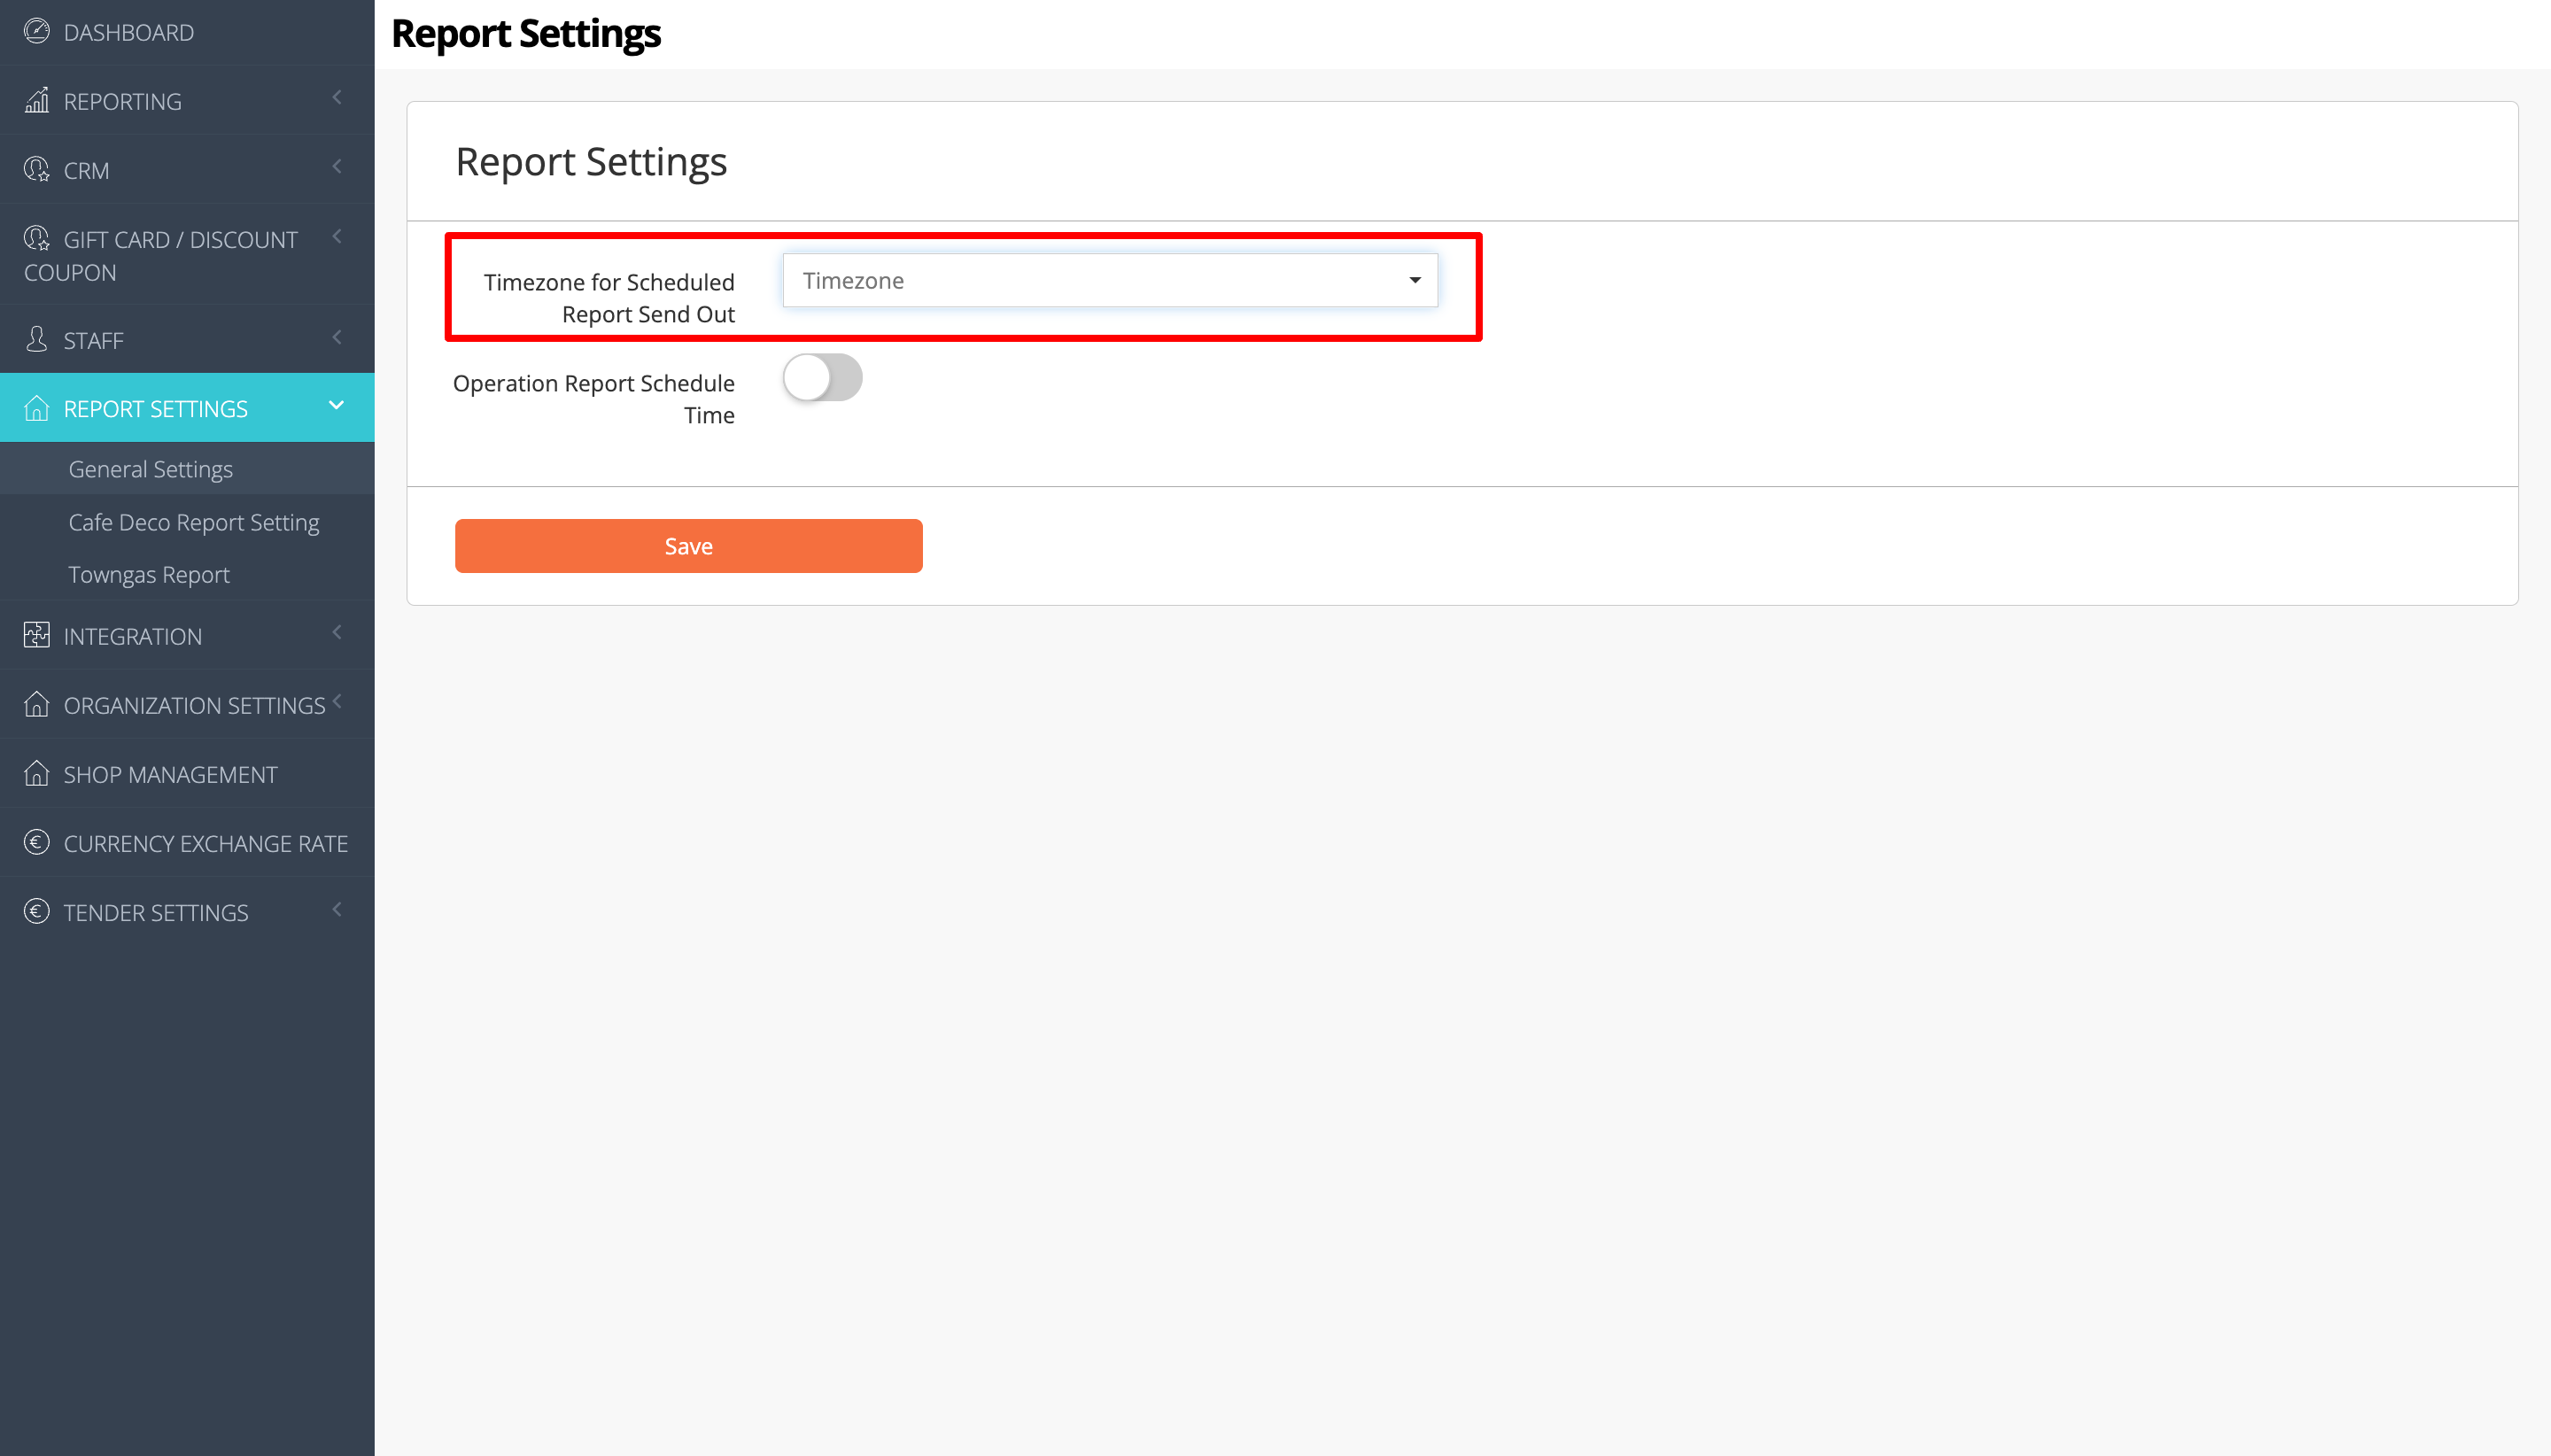
- Enable Operation Report Schedule Time , then set the time when you want automatic Operation Reports to be sent.
- To exclude the data of some restaurants from the Operation Reports that will be generated, click on the Excluded Shop(s) drop-down and select the shops that won’t be included in the report.
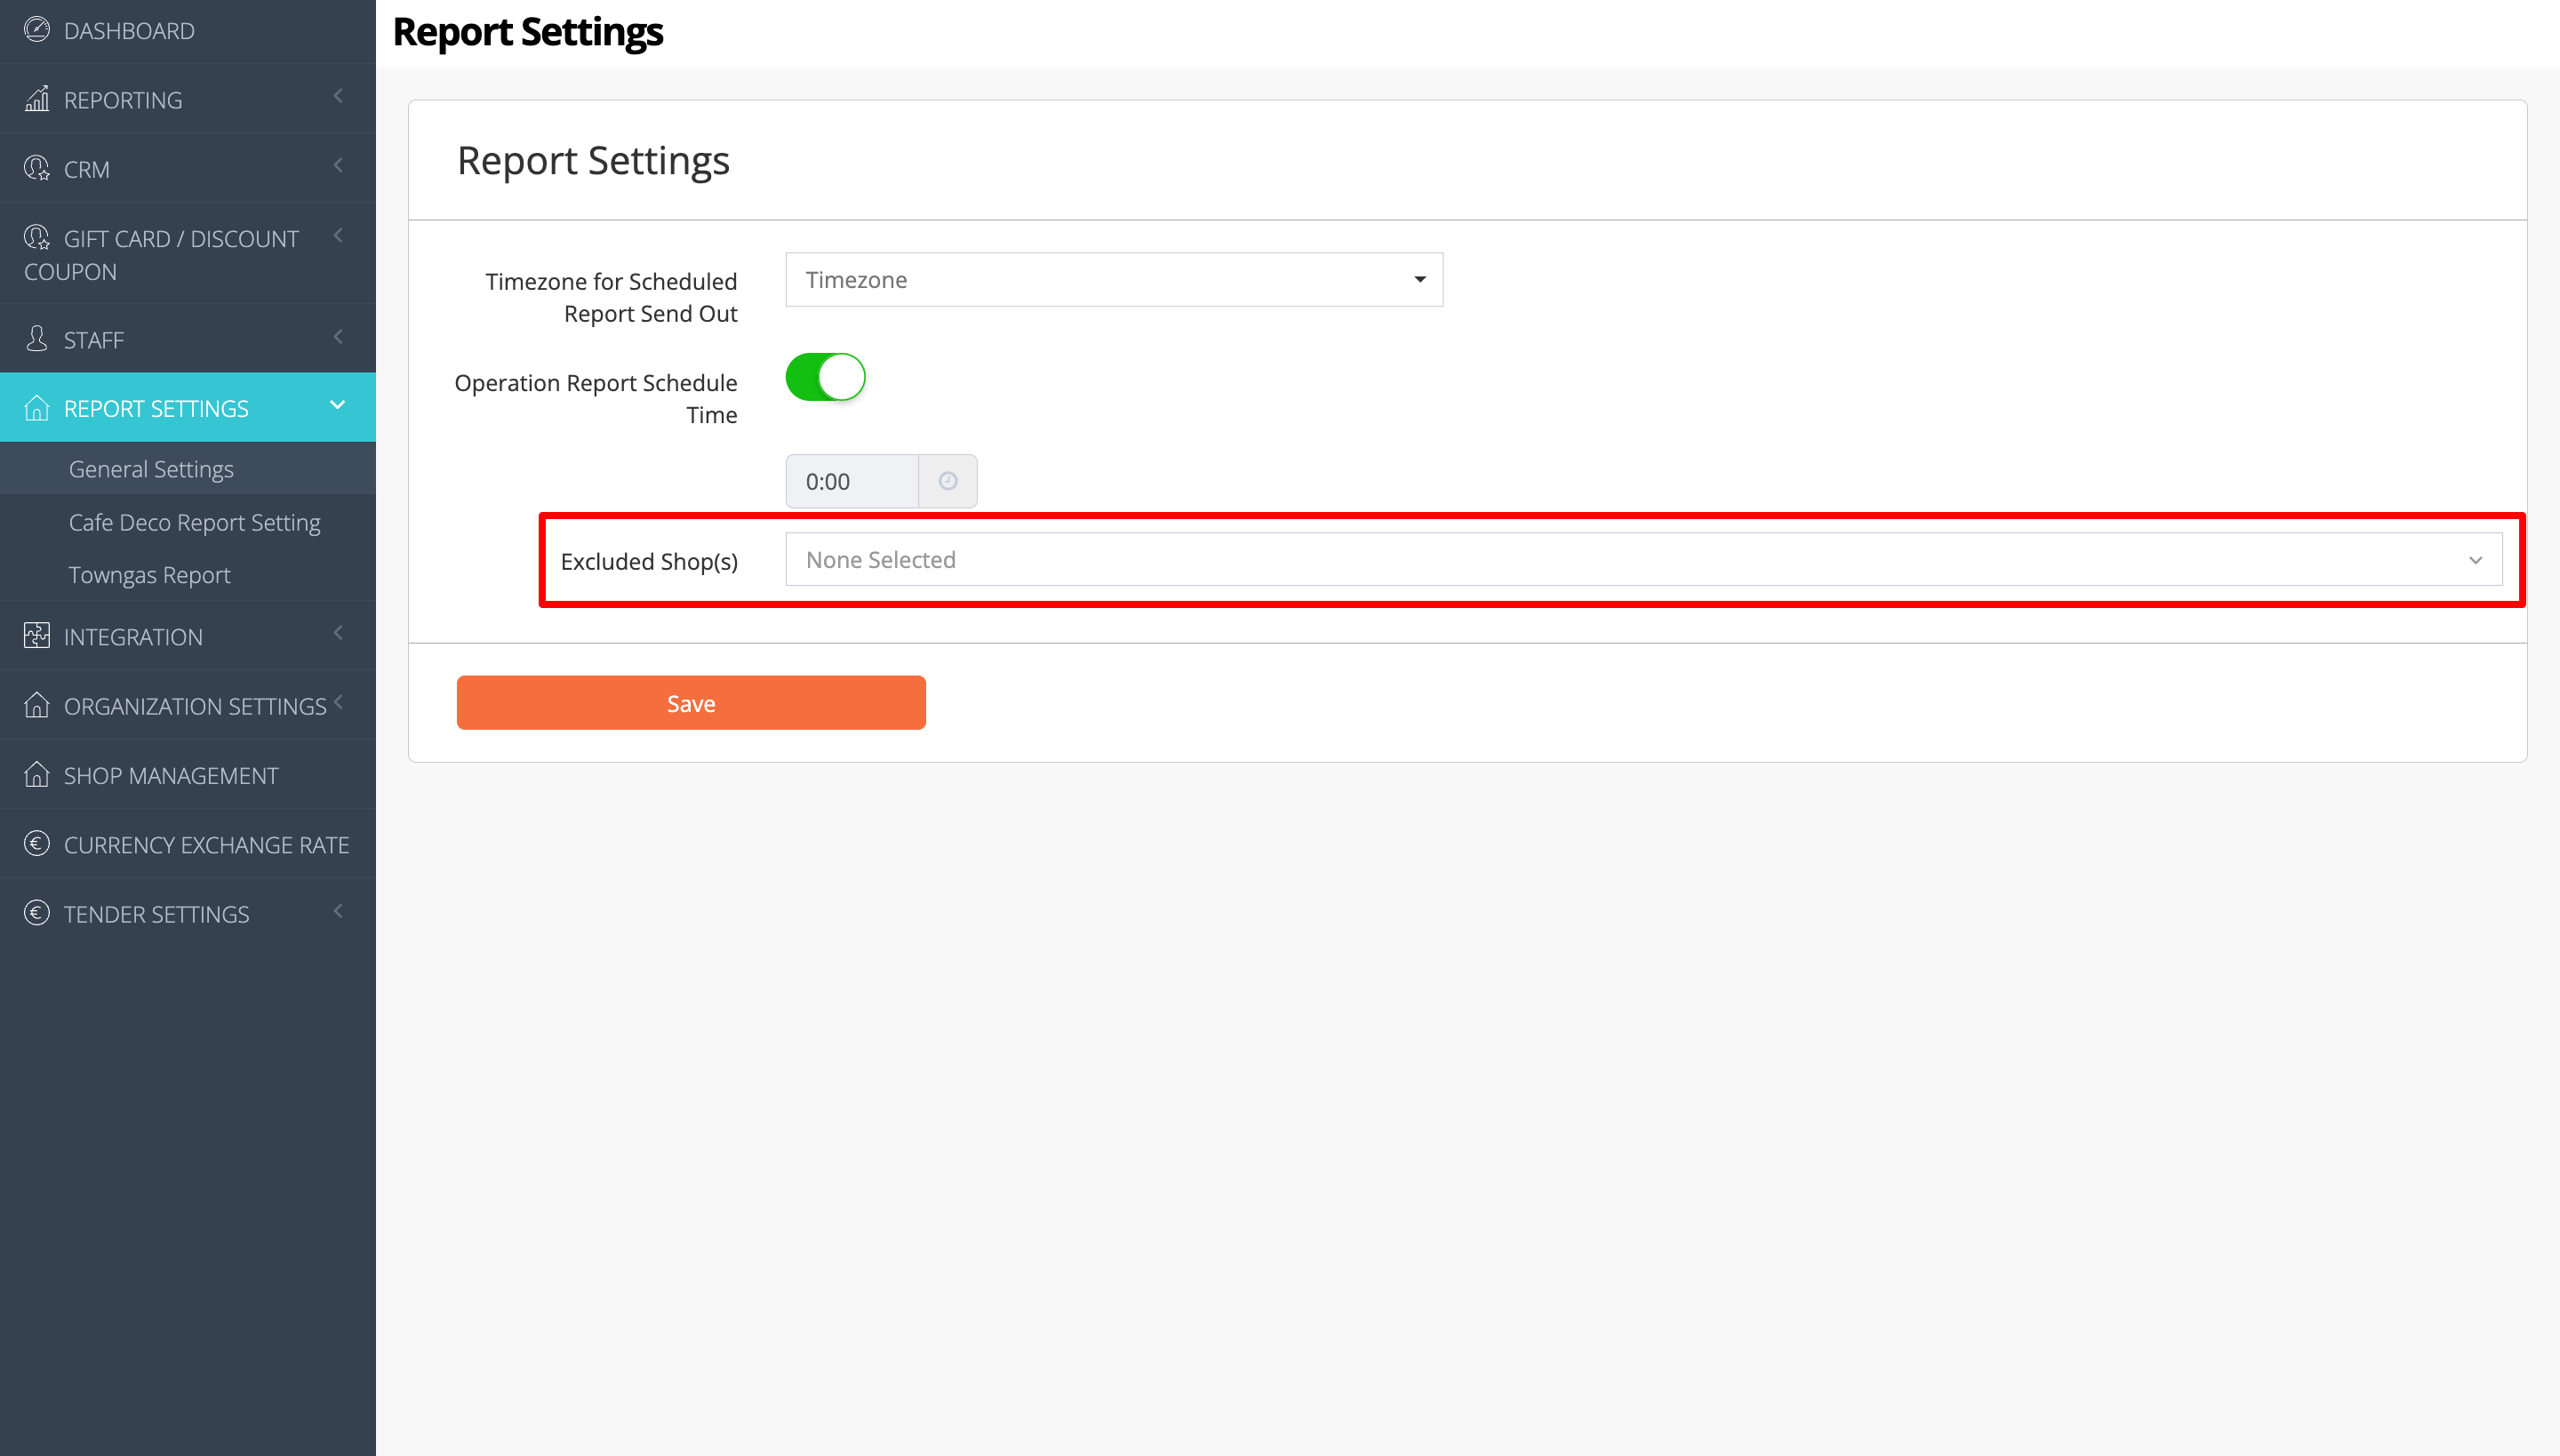
- At the top right, click on Save to confirm.
Merchant Portal 2.0
- Log in to the Merchant Portal.
- Ensure that you’re on the appropriate view. At the top, from the “Group” drop-down list, select the restaurant group you’d like to configure.
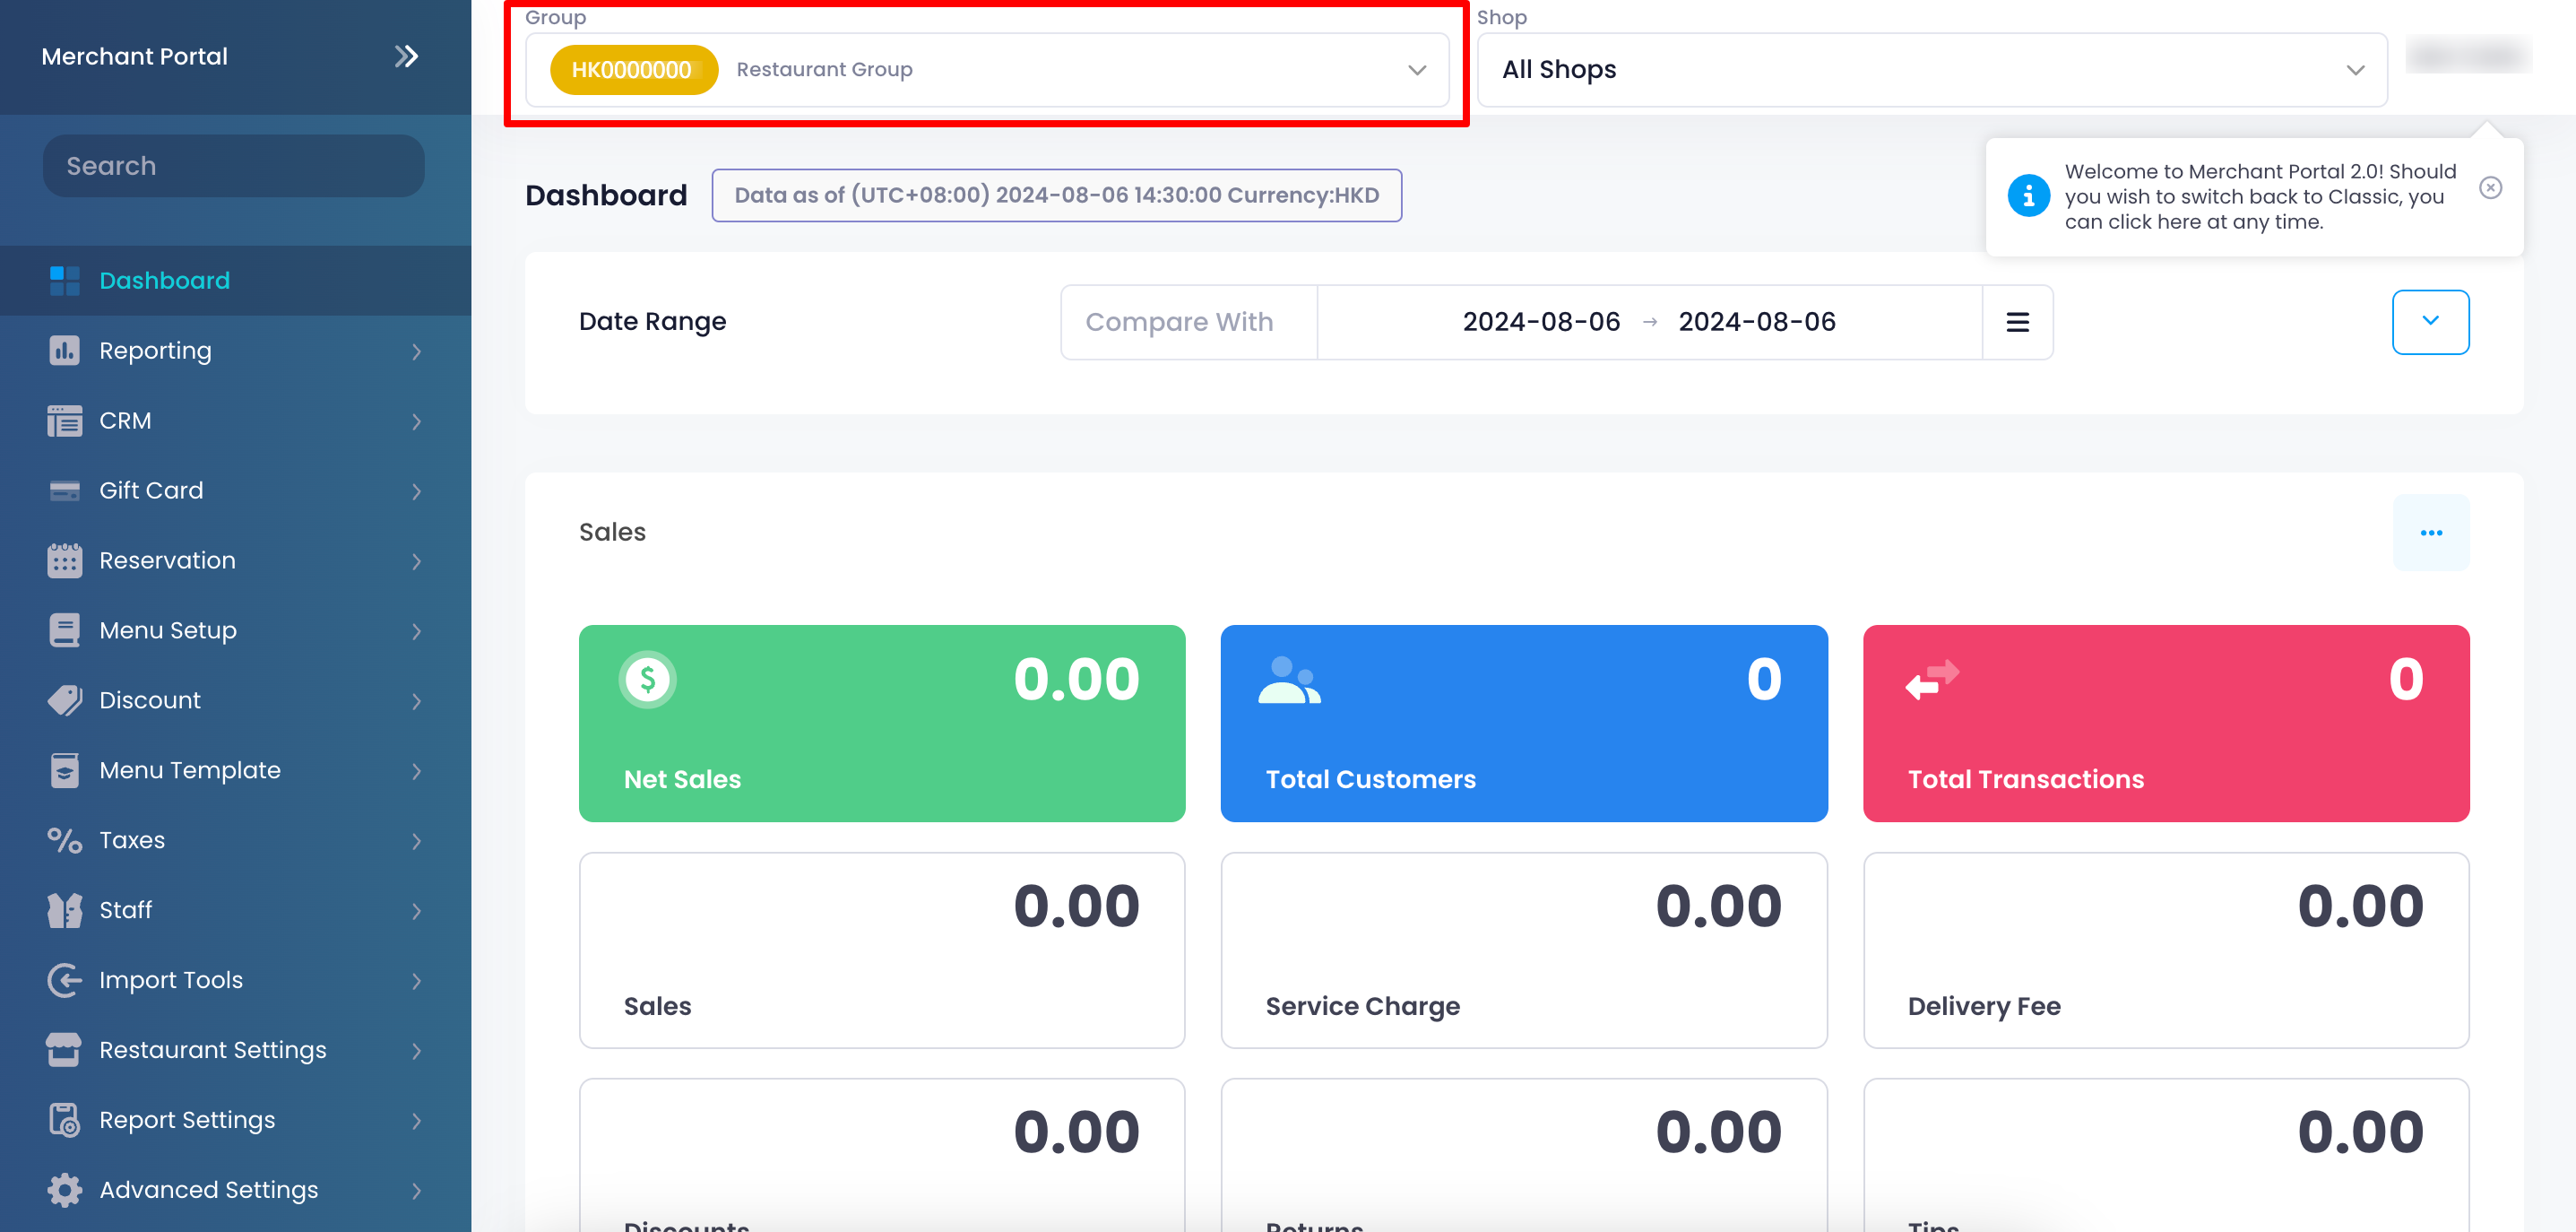 Tip: Restaurant Groups are represented by the color yellow.
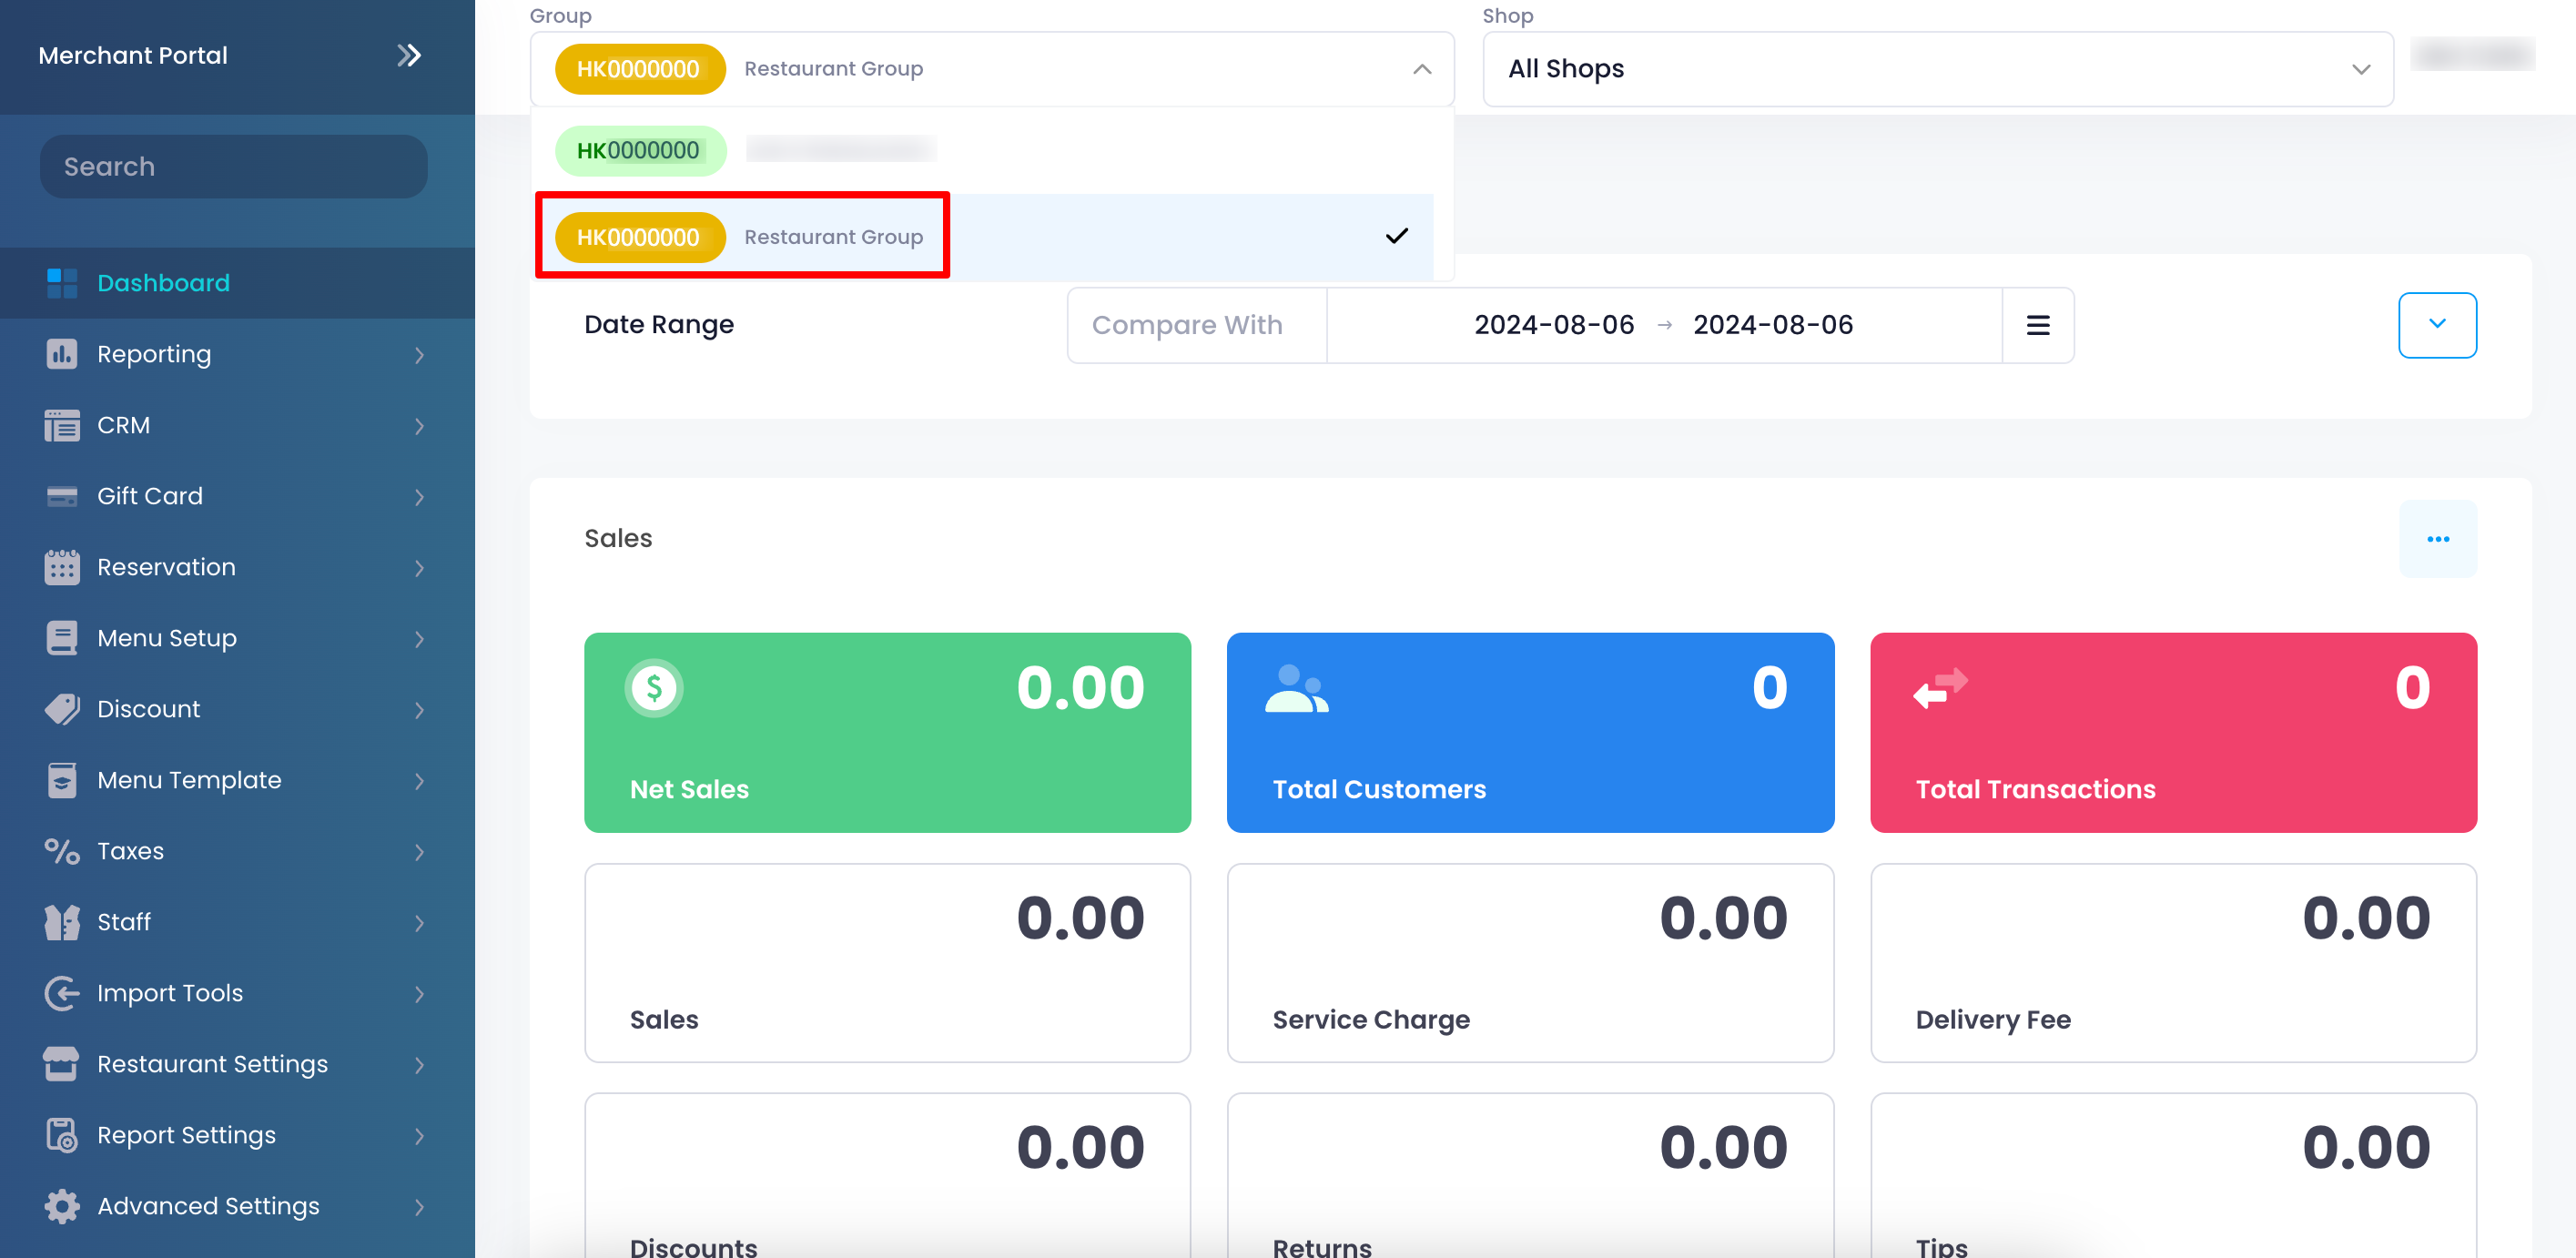
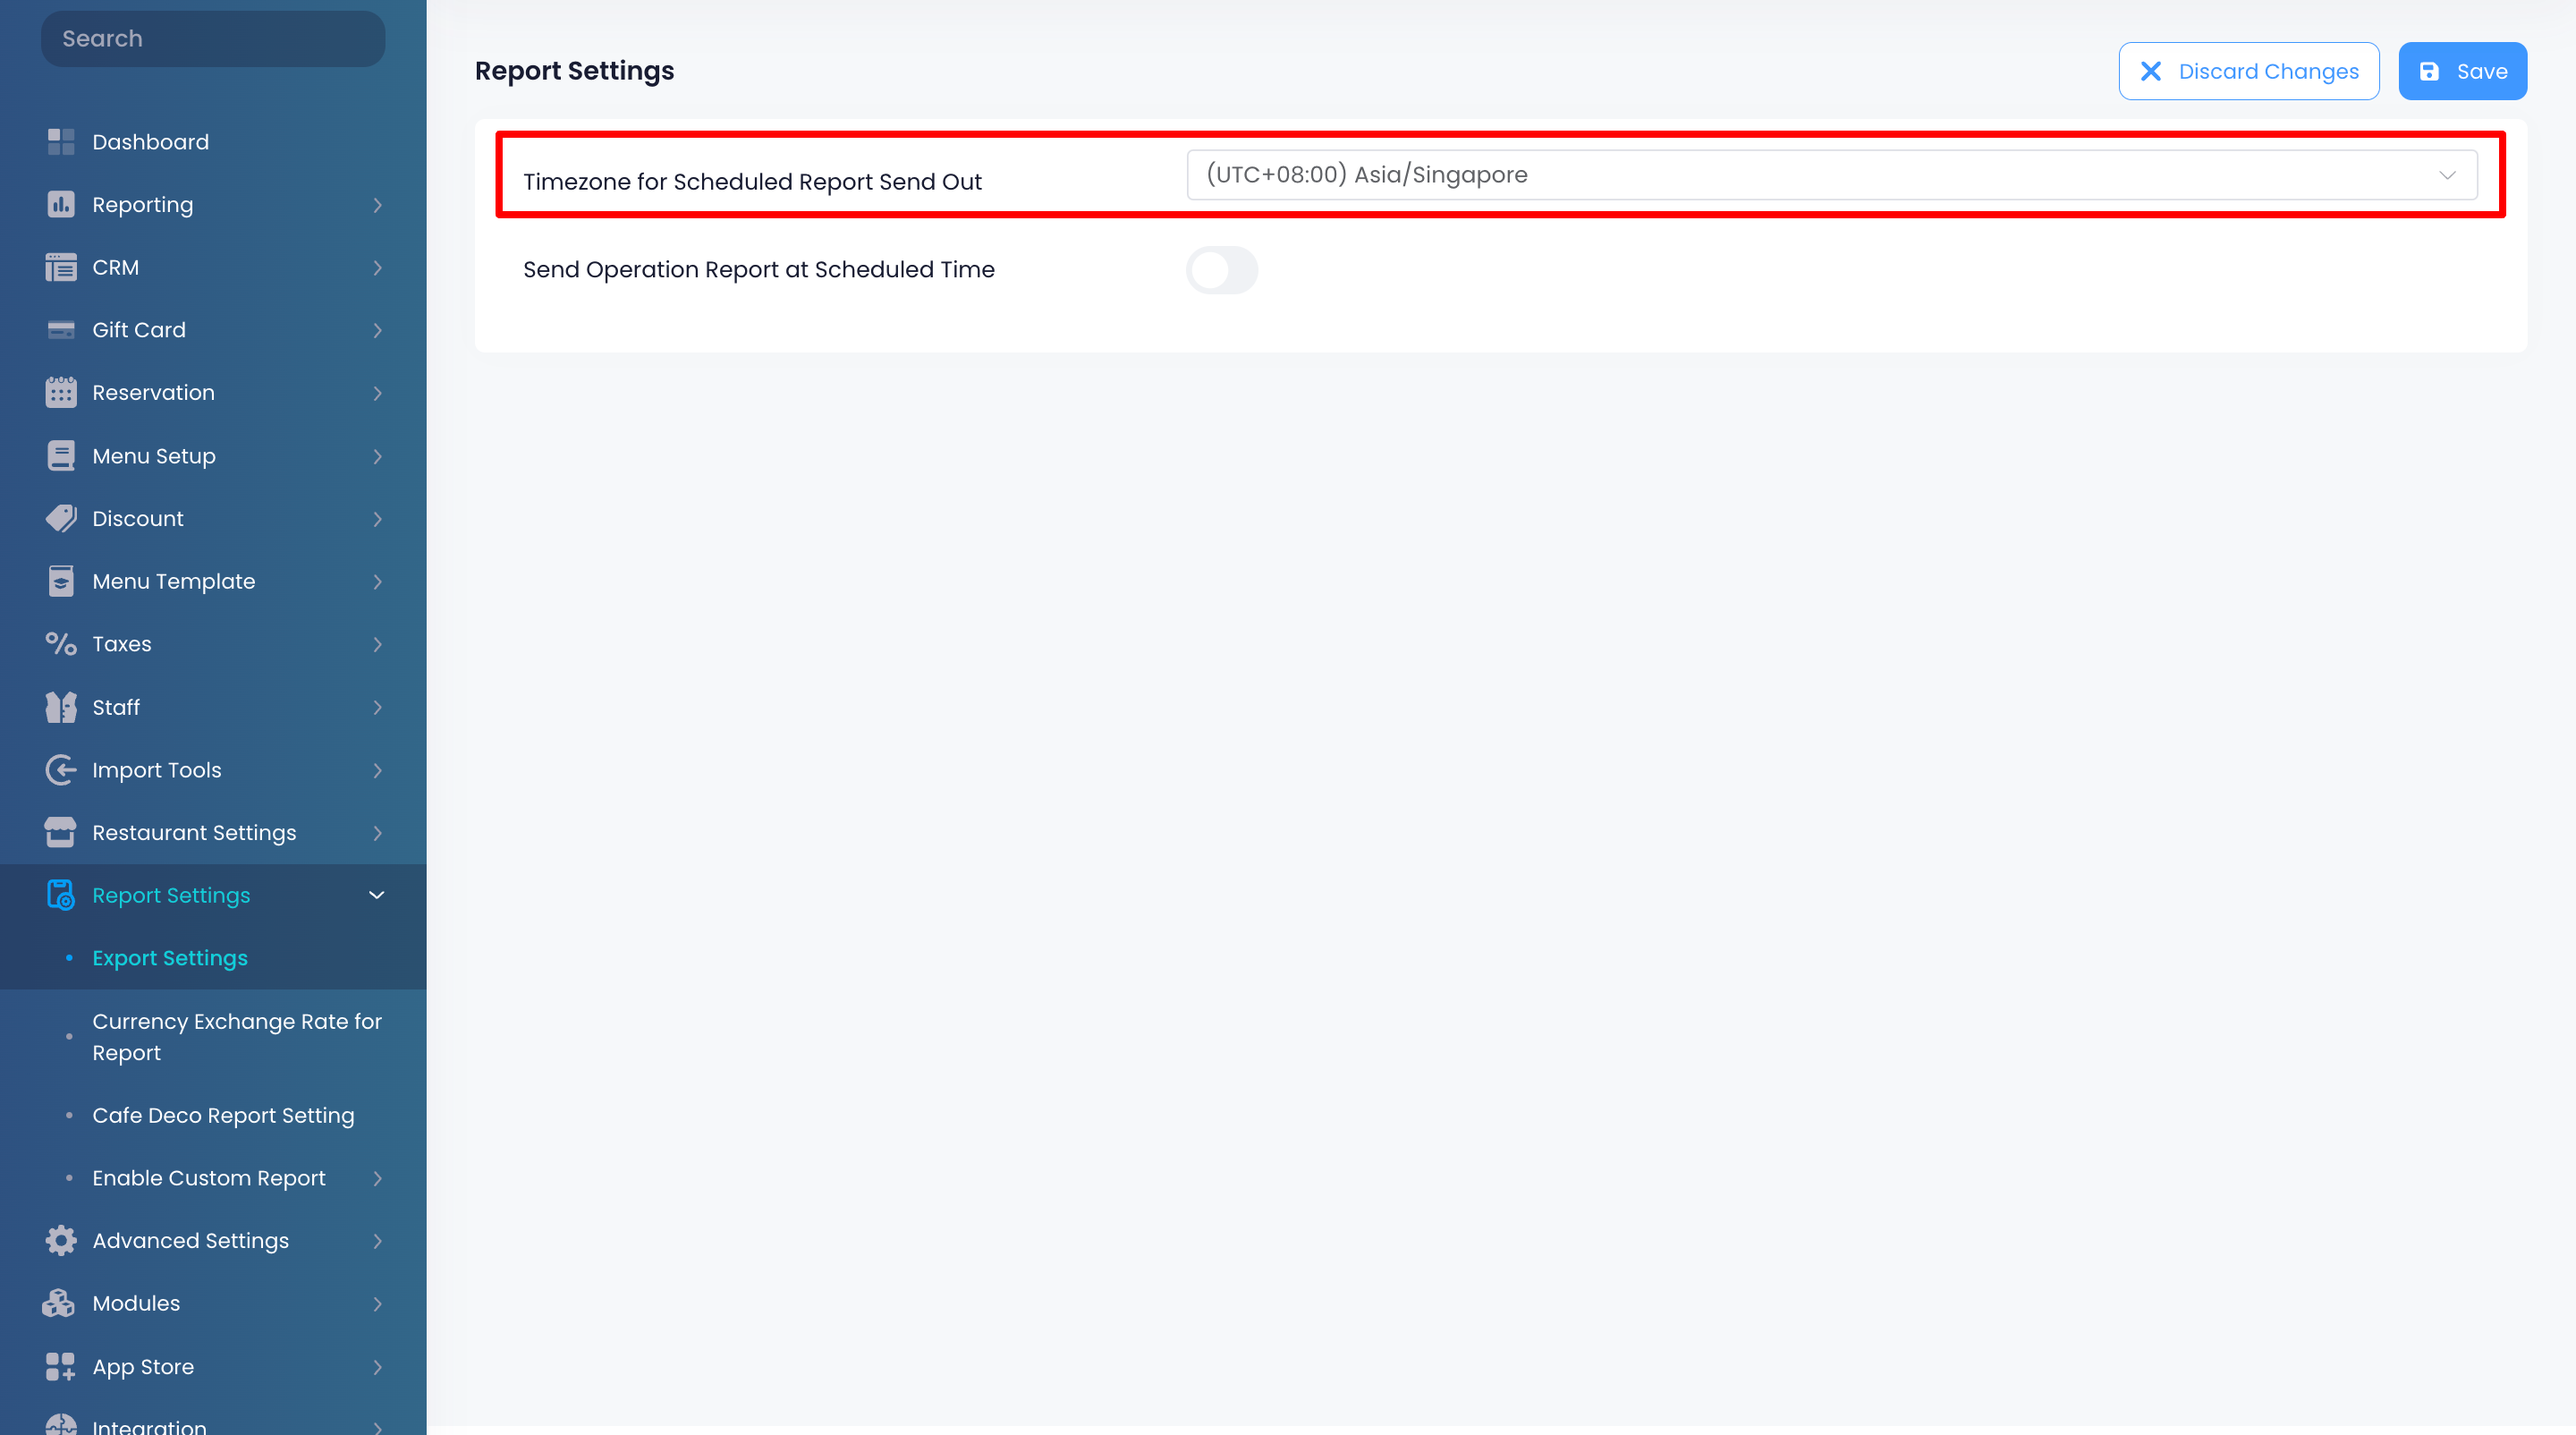
- On the left panel, click on Report Settings. Then, select Export Settings.
- Select the time zone of the restaurant’s location by clicking on the Timezone for Scheduled Report Send Out drop-down.
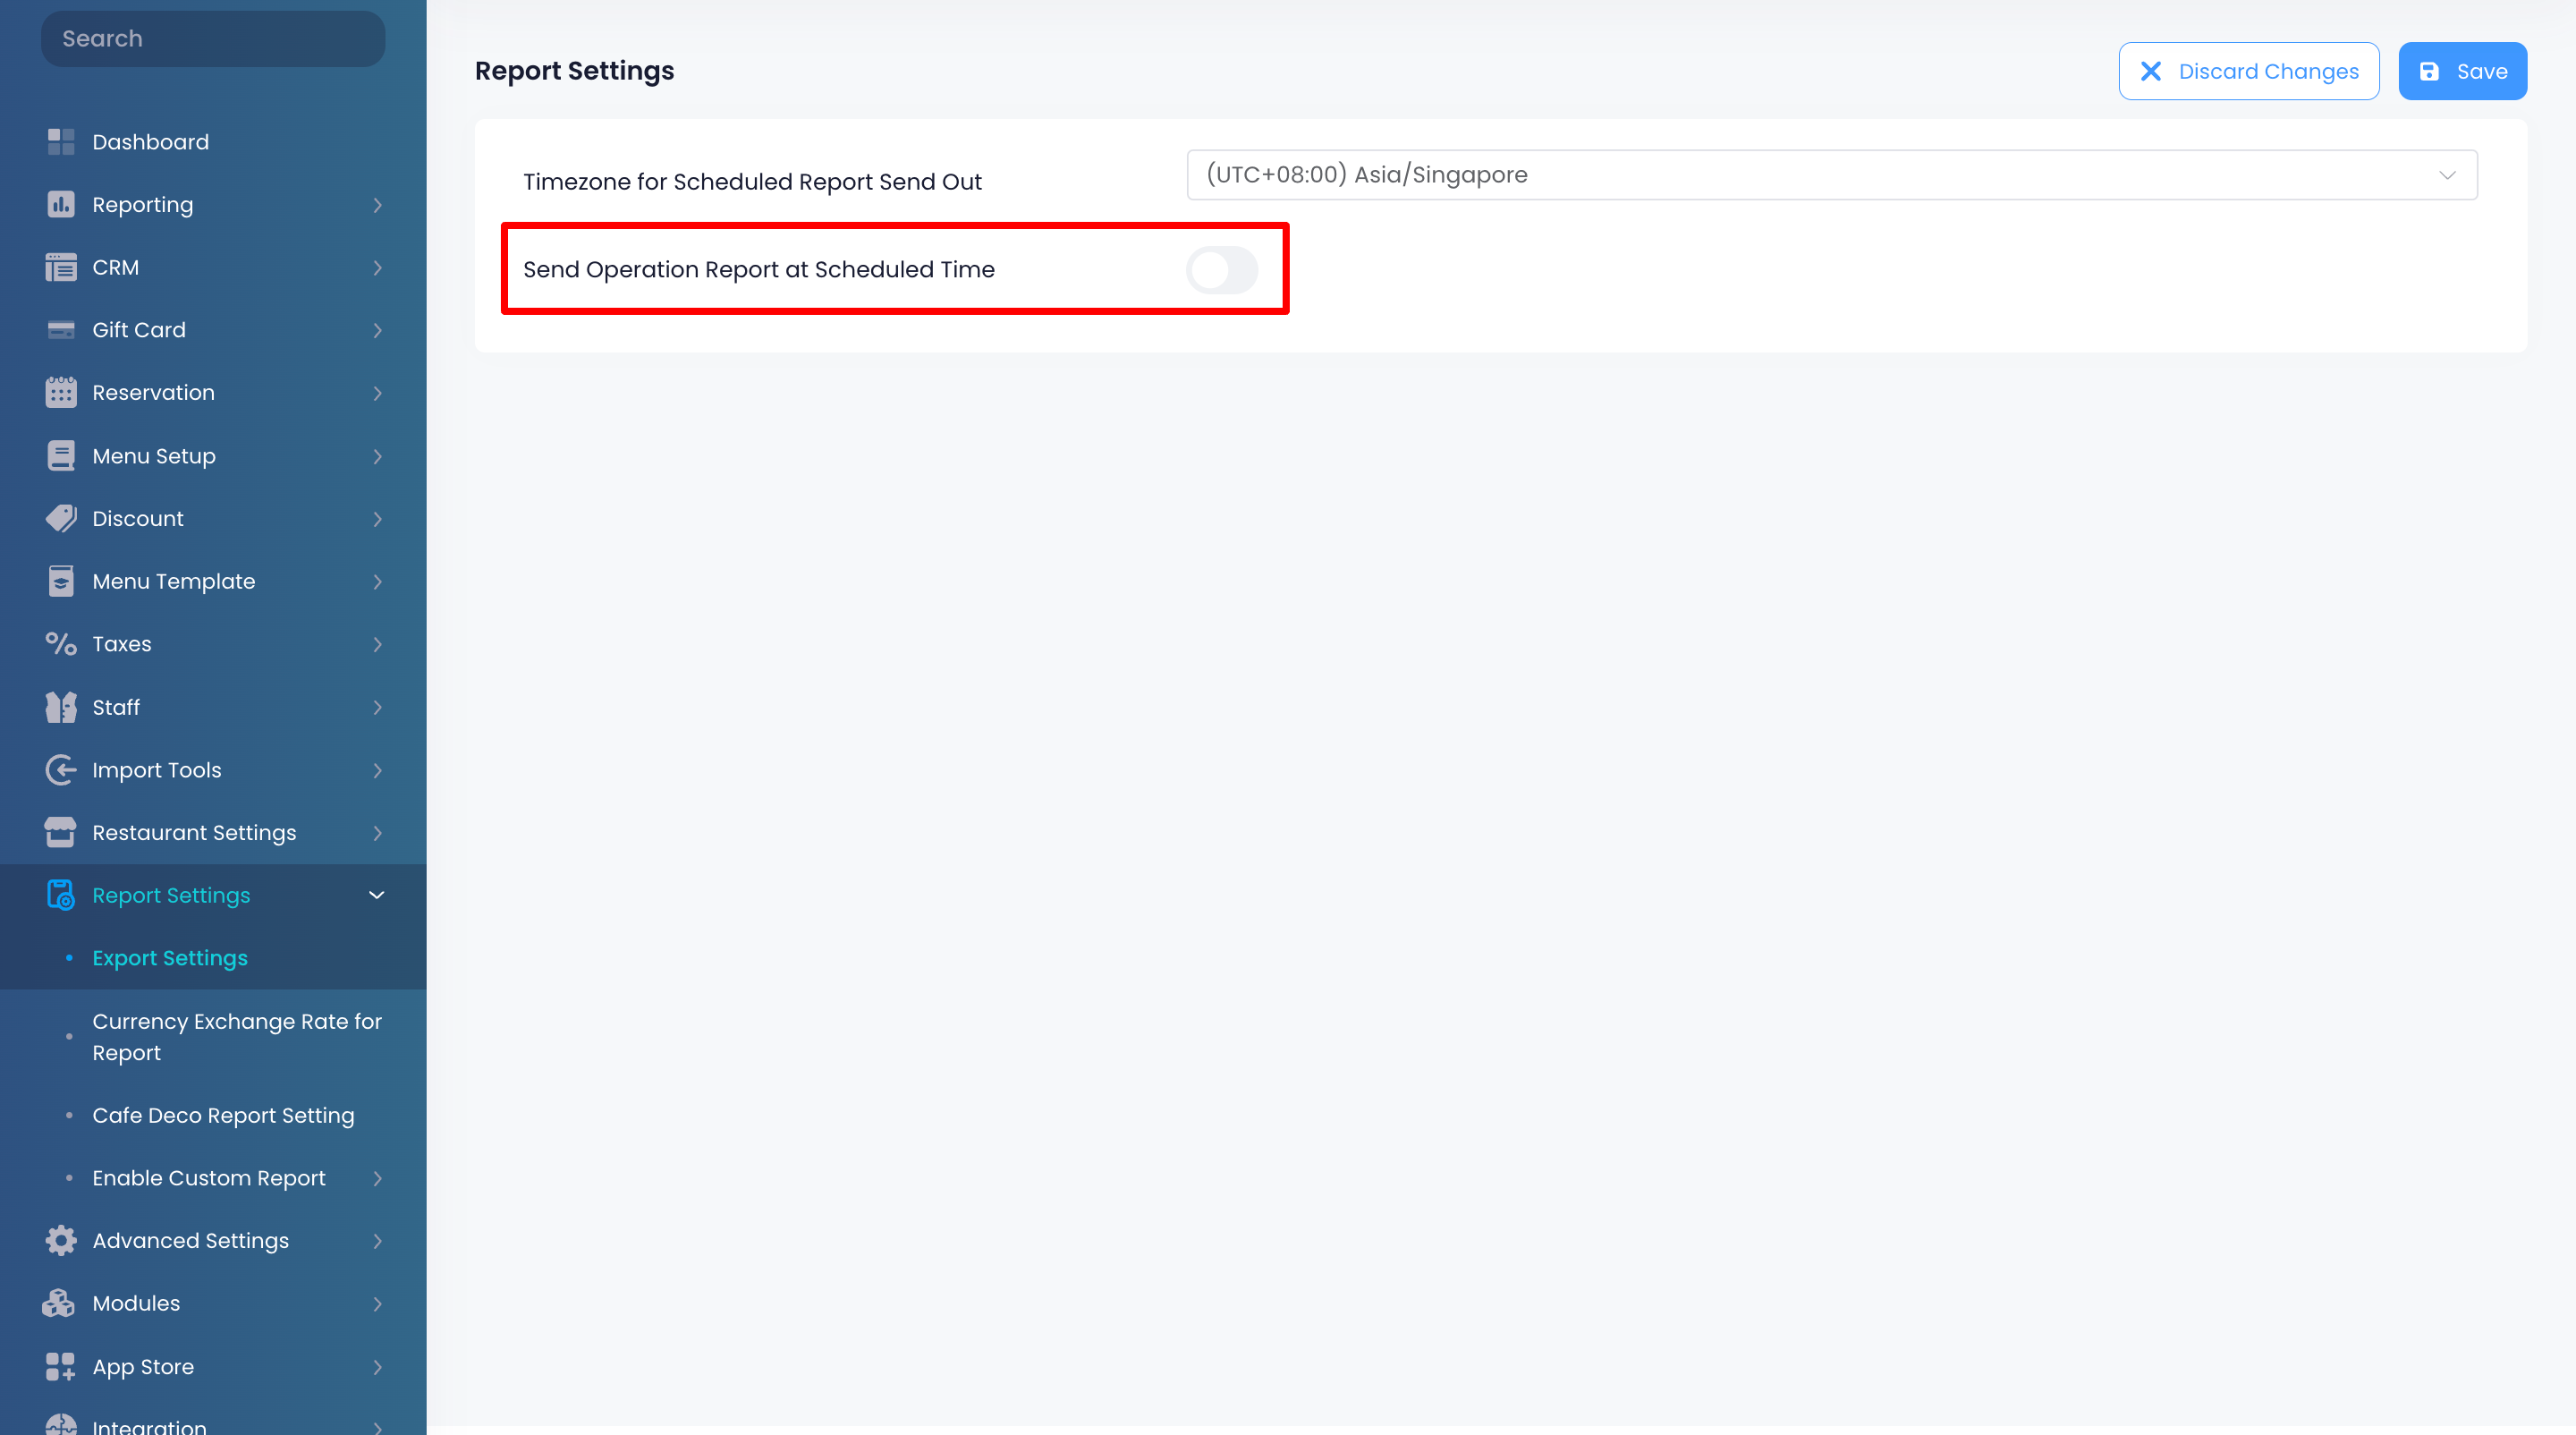
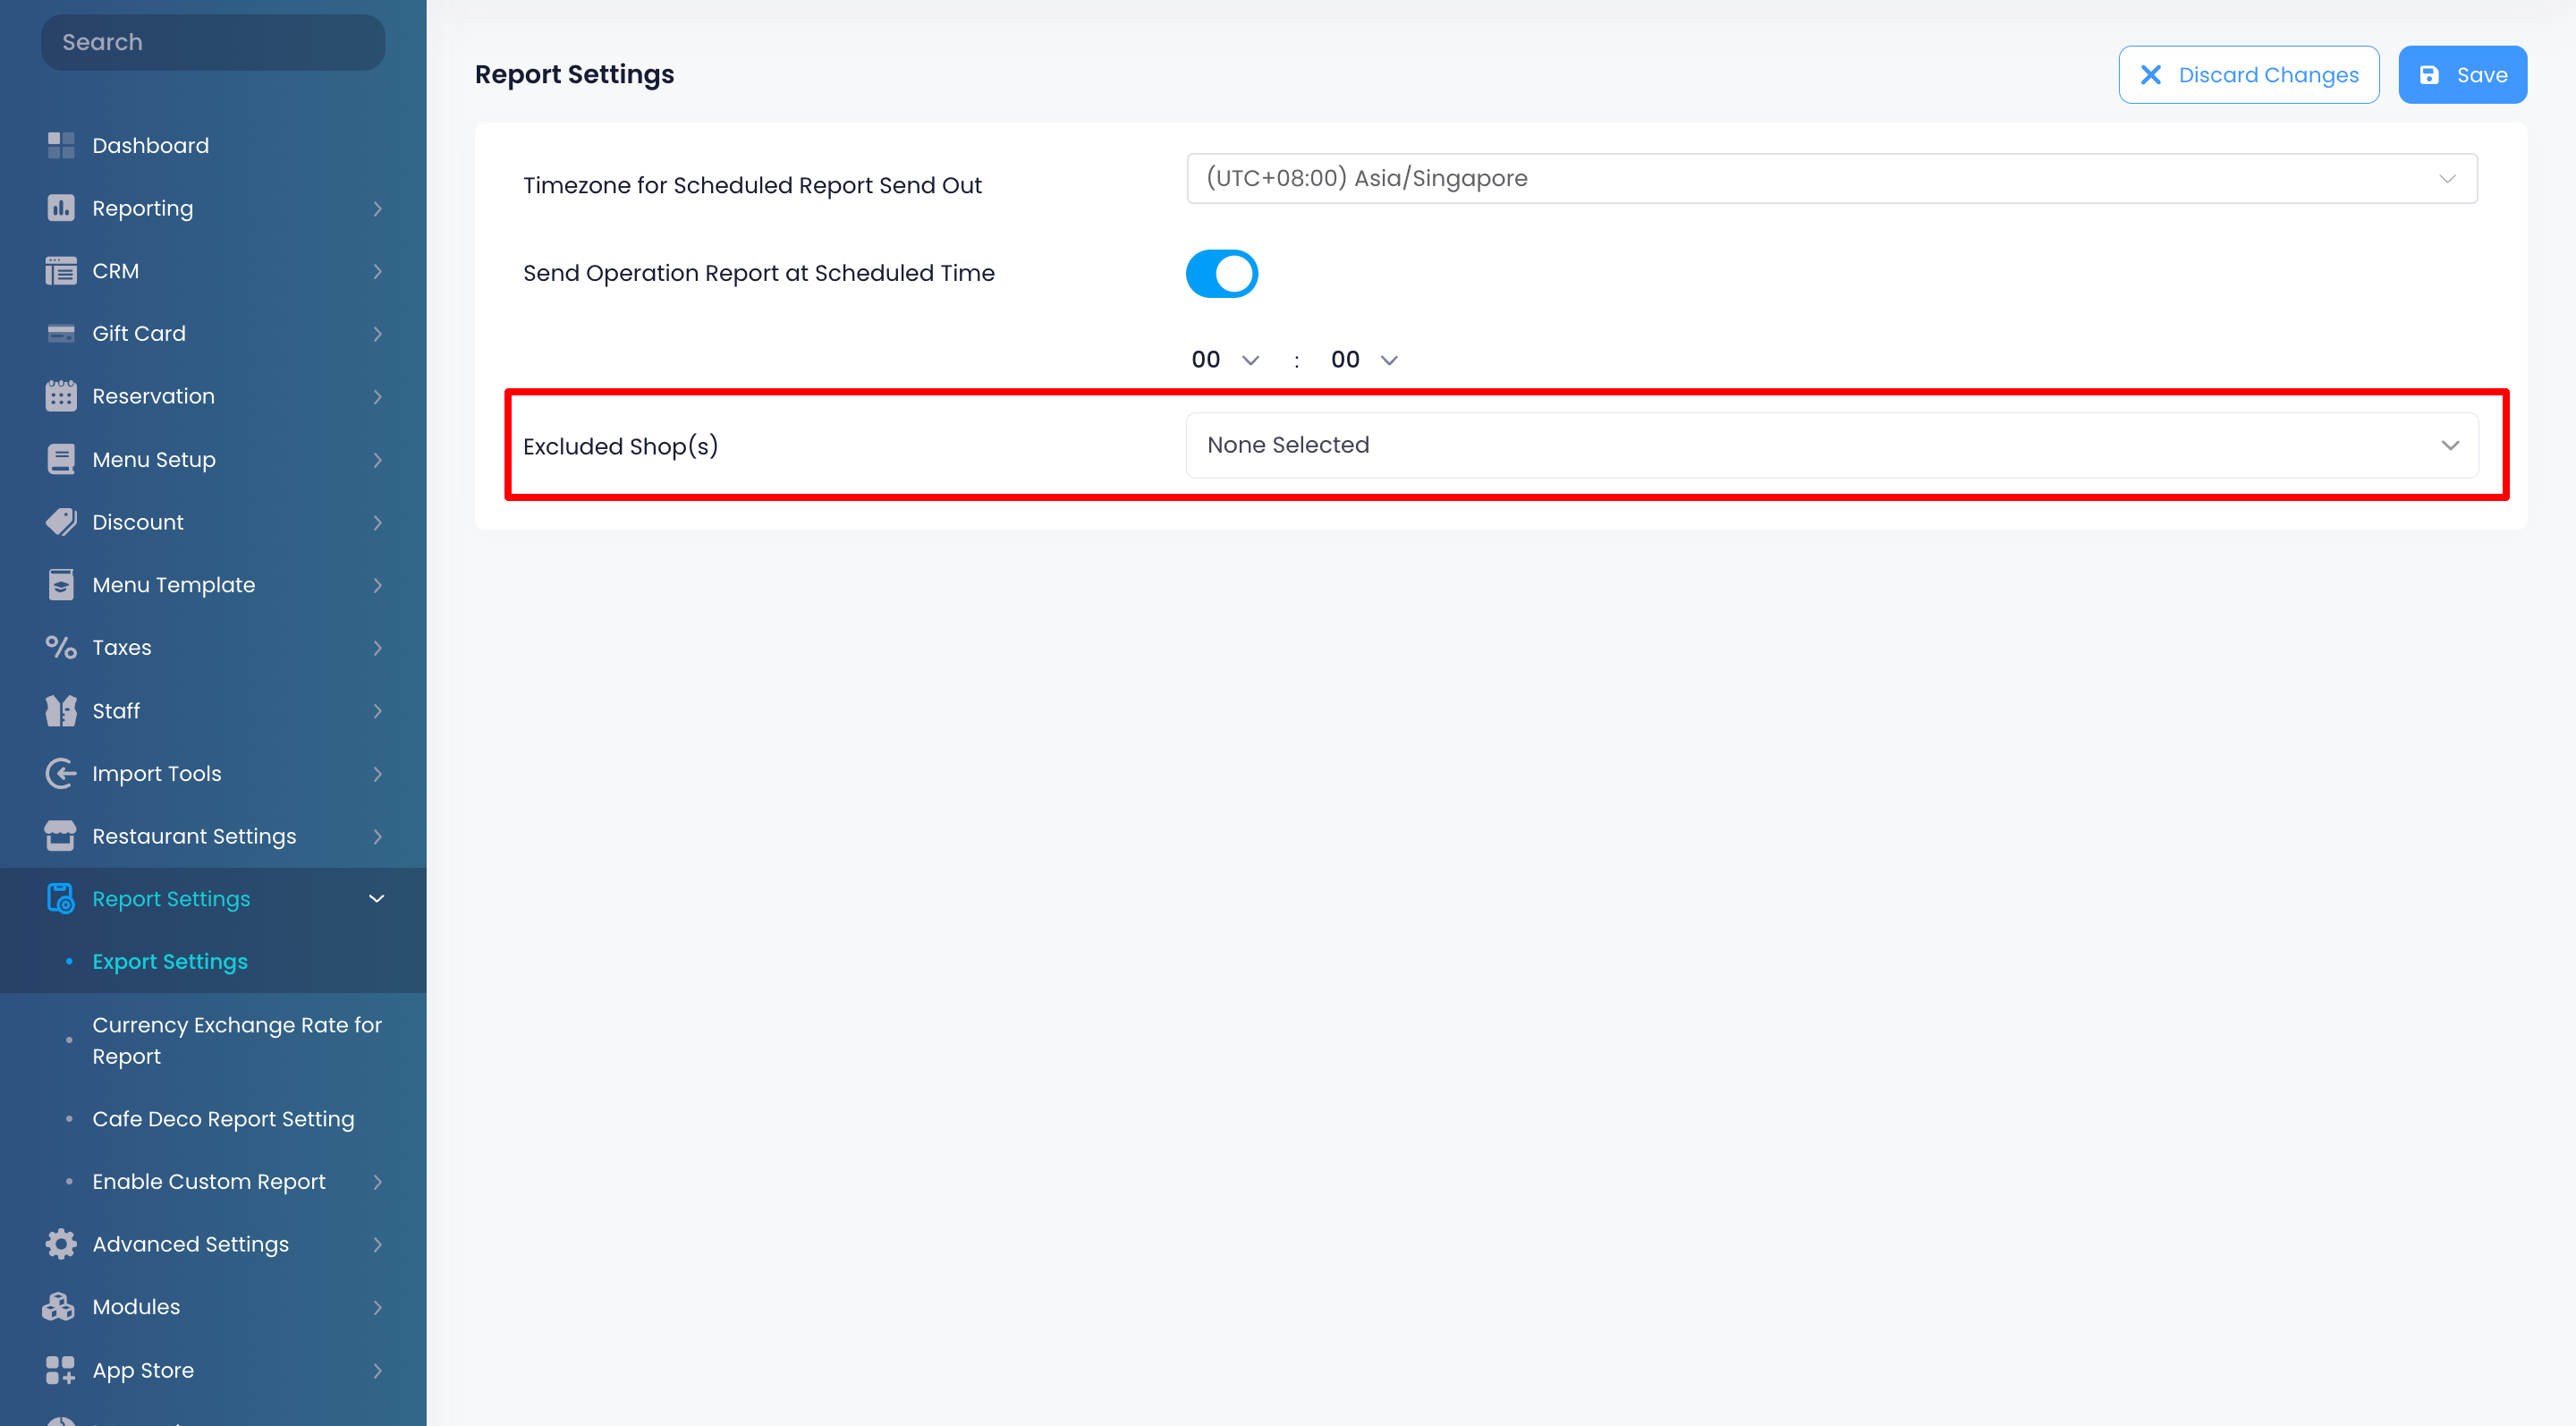
- Enable Send Operation Report at Scheduled Time , then set the time when you want automatic Operation Reports to be sent.
- To exclude the data of some restaurants from the Operation Reports that will be generated, click on the Excluded Shop(s) drop-down and select the shops that won’t be included in the report.
- At the top right, click on Save to confirm.
Daily Closing Report
Merchant Portal (Classic Theme)
- Log in to the Merchant Portal.
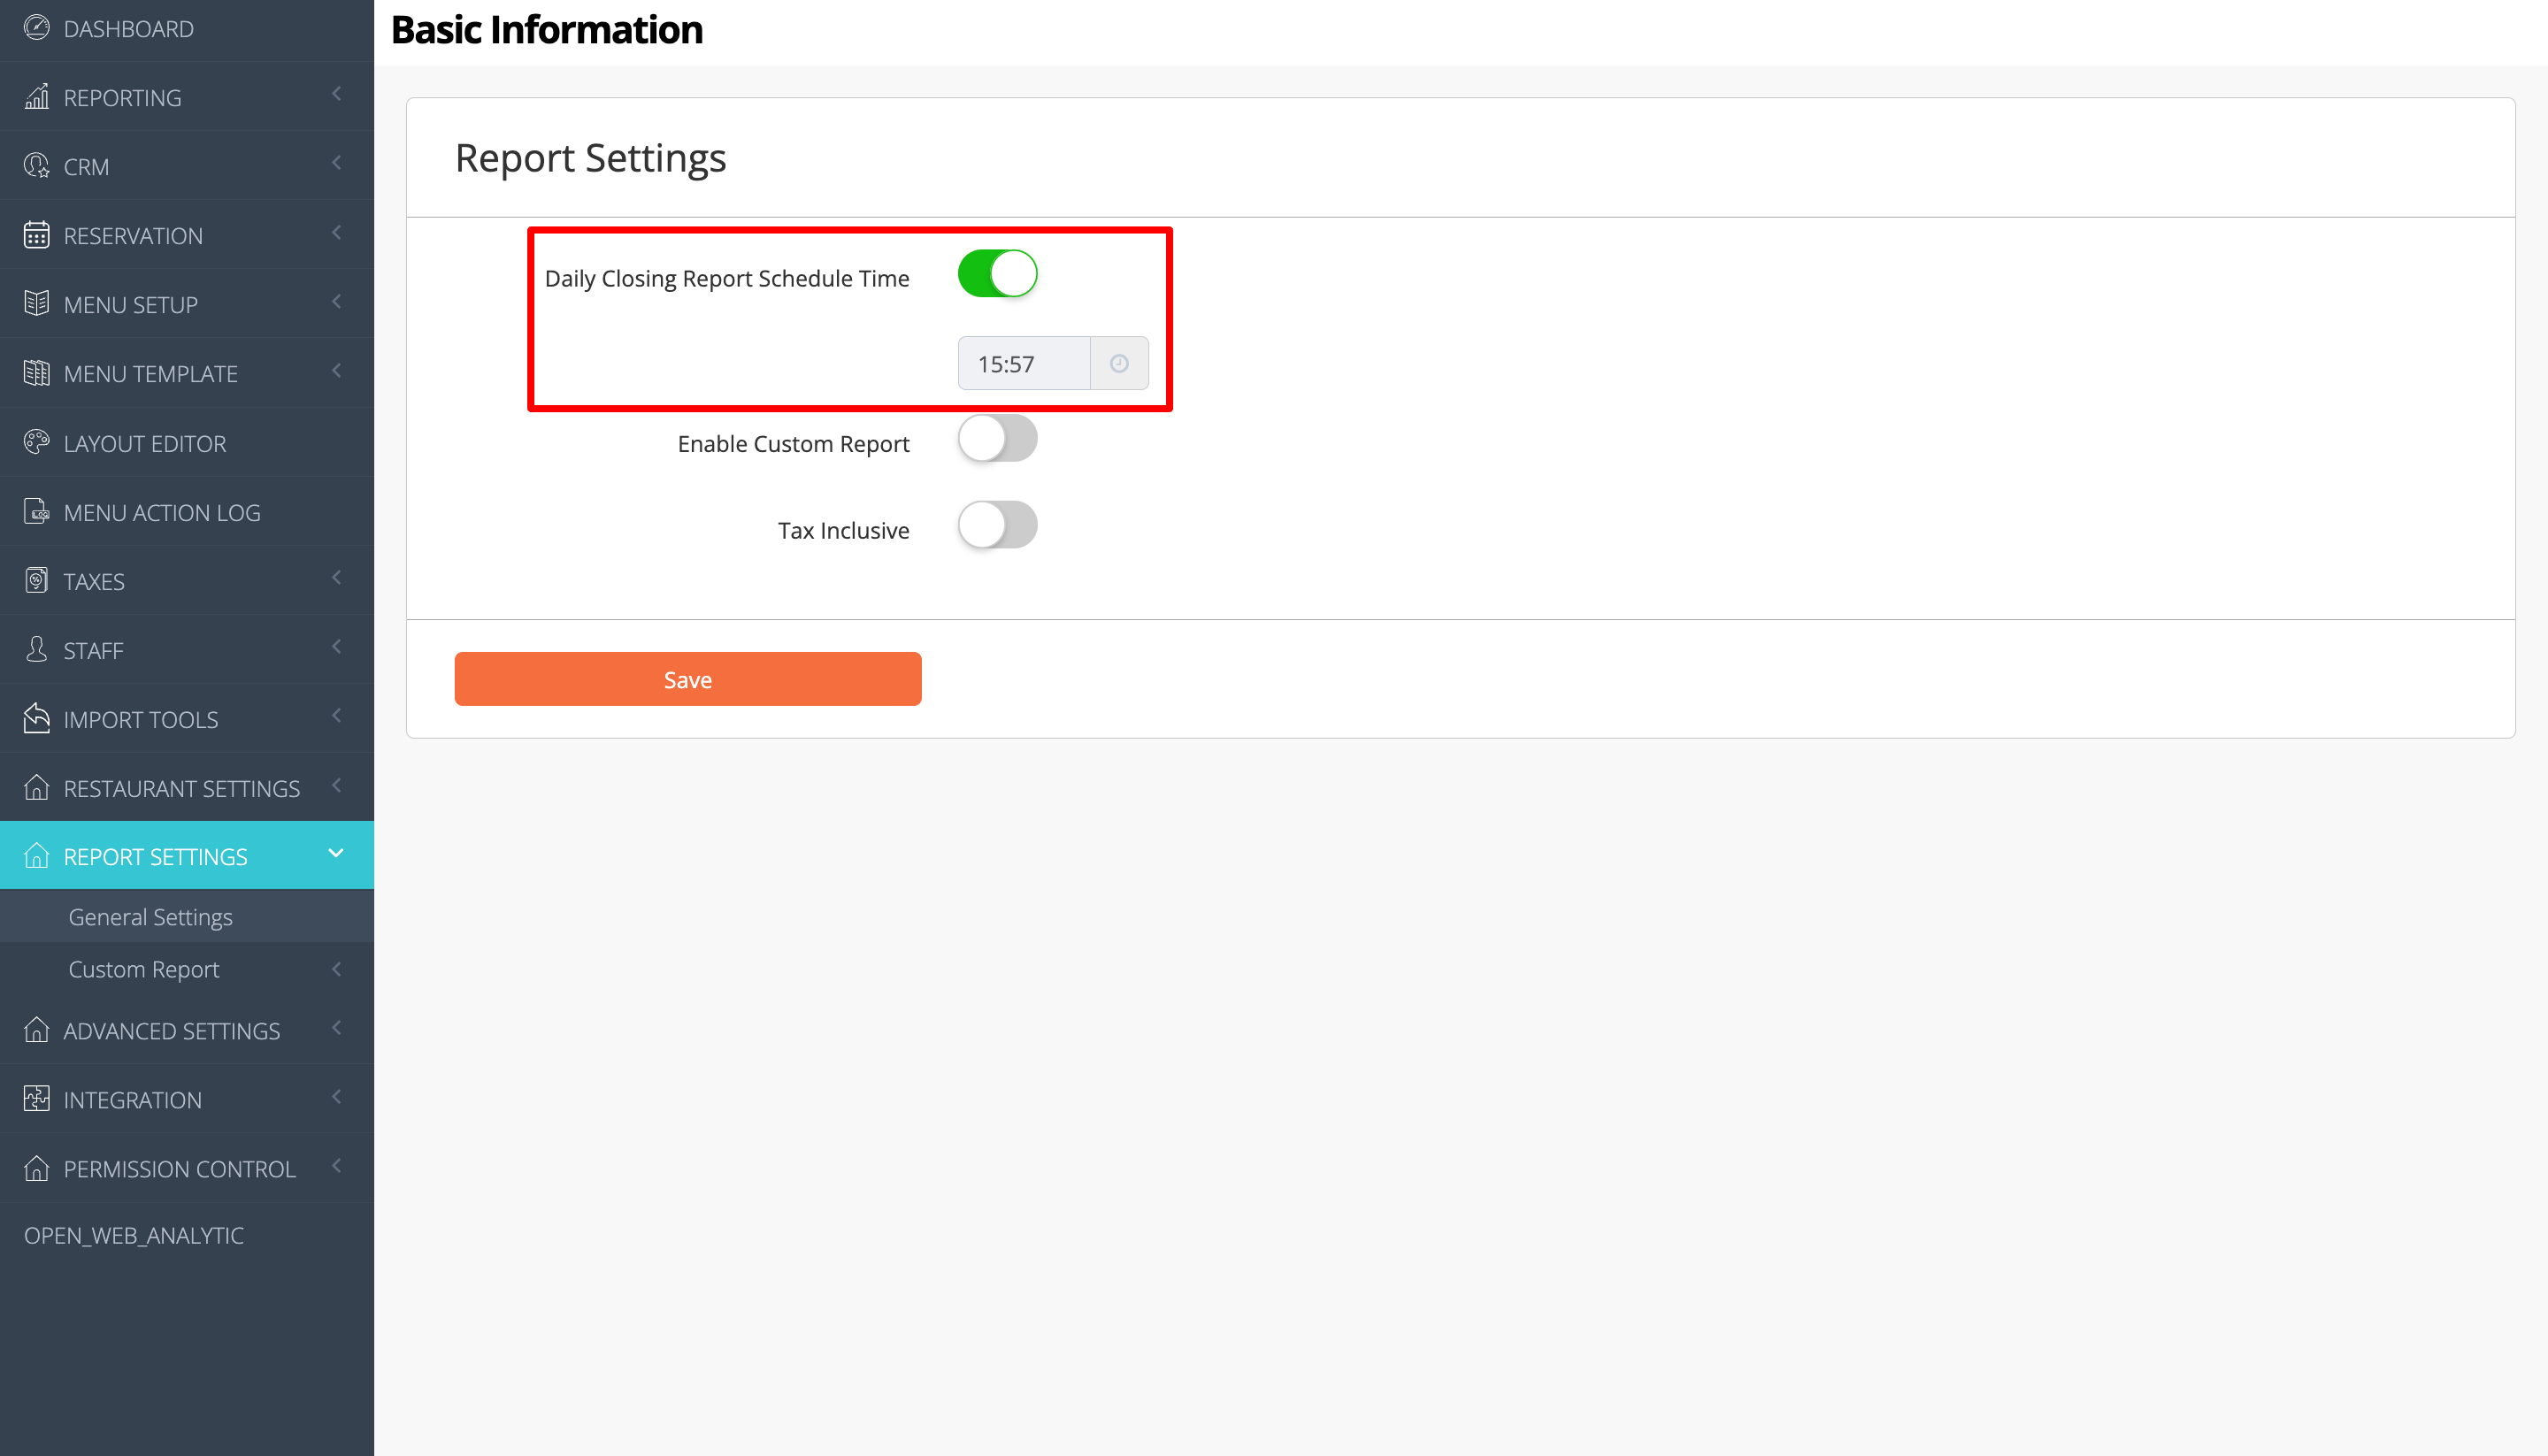
- On the left panel, click on Report Settings. Then, select General Settings.
- Enable Daily Closing Report Schedule Time , then set the time when you want automatic Operation Reports to be sent.
- At the top right, click on Save to confirm.
Merchant Portal 2.0
- Log in to the Merchant Portal.
- On the left panel, click on Report Settings. Then, select Export Settings.
- Enable Send Report at Scheduled Time , then set the time when you want automatic Operation Reports to be sent.

- At the top right, click on Save to confirm.