 Eats365 Products
 Merchant Guide
 Modules
 Membership
 Integrations
 Hardware
 Staff Operations
 Roles & Permissions
 Payments
 Reports
 What’s New
 Release Notes
 Troubleshooting
 Simulators
 Glossary
 Troubleshooter
 System Status
PhotoMenu
Table of Contents
Place orders on the PhotoMenu
Learn how to create a new order on the PhotoMenu.
When an order is placed using the PhotoMenu, it appears as a “New Order” on the Eats365POS. You can either accept each new order as it arrives on the POS, or configure the POS to accept new orders automatically. To learn more about handling orders on the POS, refer to Manage new orders.
In this article, you’ll learn how to place an order, modify added items, send orders to the kitchen, and check a customer’s bill using the PhotoMenu.
Add Items to an order
To add items to an order, follow the steps below:
Add Single Items
- On the PhotoMenu, tap Start.
 Tip: If the PhotoMenu’s media source is set to "Photo Shuffle," you can quickly check an item and add them to the order-taking screen by tapping Details below the item’s image. For more information on how to set the media source to Photo Shuffle, refer to Configure PhotoMenu settings.
- Depending on how the PhotoMenu is set up, the screen shows the menu items or the categories. If the screen shows the categories, select a category first to view menu items.
- To add a single item to an order, tap an item. If the item has modifiers, scroll down and select from the available options.

- (Optional) Enter a request in the "Special Request "field.
- At the bottom, tap Add. The screen redirects to the menu.
- Repeat the same process until all orders are added.
Add Combo Items
- On the PhotoMenu, tap Start.
 Tip: If the PhotoMenu’s media source is set to "Photo Shuffle," you can quickly check an item and add them to the order-taking screen by tapping Details below the item’s image. For more information on how to set the media source to Photo Shuffle, refer to Configure PhotoMenu settings.
- Depending on how the PhotoMenu is set up, the screen shows the menu items or the categories. If the screen shows the categories, select a category first to view menu items.
- To add a combo item to an order, tap a combo Item.
- To modify the Combo Item, tap any of the single items included in the combo option. Then, select from the available options.
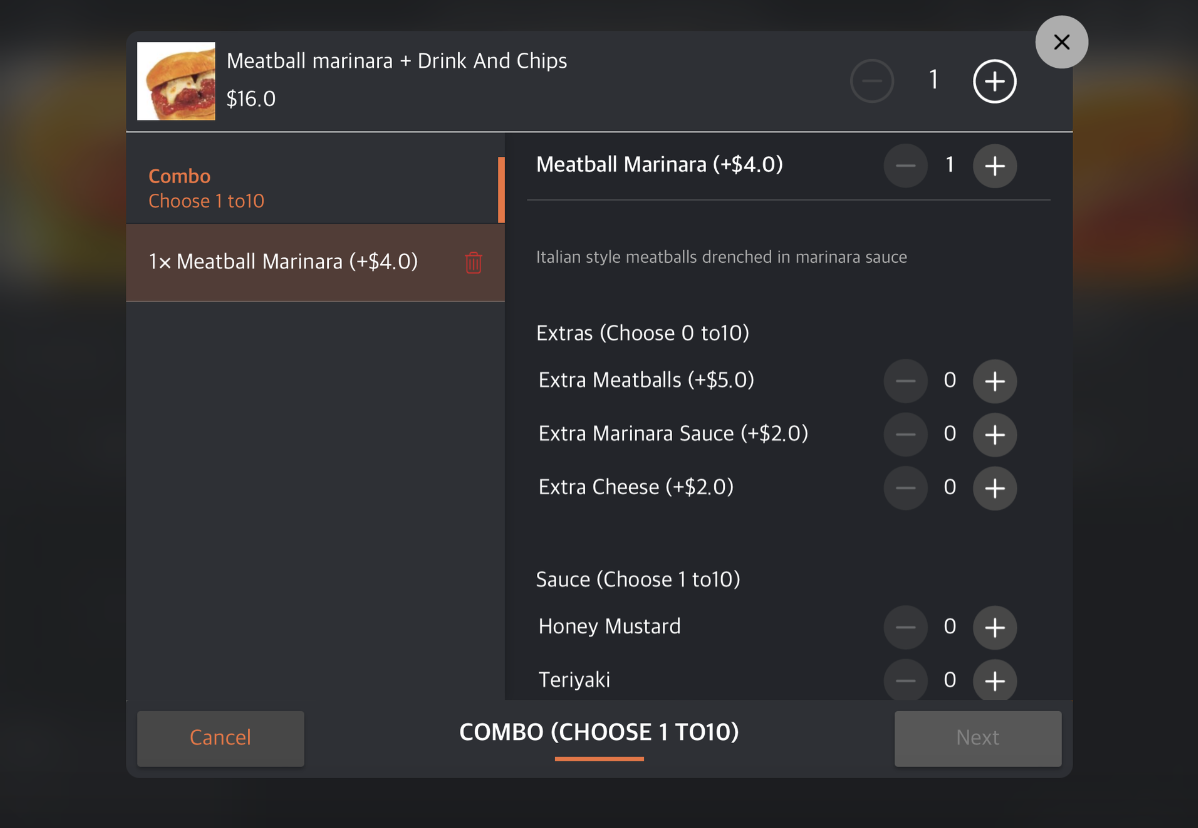
- (Optional) Enter a request in the "Special Request" field.
- At the bottom right, tap Next. Then, tap Add. The screen redirects to the menu.
- Repeat the same process until all orders are added.
Add All You Can Eat items
If “Order Creation is required when ordering with eMenu” is enabled in the shared PhotoMenu settings, a bill must first be created on the POS before customers can start placing orders on the PhotoMenu. If disabled, refer to the “Enable All You Can Eat ordering on the PhotoMenu” section below. To learn how to activate All You Can Eat ordering for a PhotoMenu using the POS, refer to Use All You Can Eat mode on the Eats365 POS.
Once a bill has been created on the POS, the customer can select their table number on the PhotoMenu and start ordering All You Can Eat items.
To order All You Can Eat items, follow the steps below:
- On the PhotoMenu, tap Start.Tip: If the PhotoMenu’s media source is set to "Photo Shuffle," you can quickly check an item and add them to the order-taking screen by tapping Details below the item’s image. For more information on how to set the media source to Photo Shuffle, refer to Configure PhotoMenu settings.
- Select the table number assigned to the table.
- Depending on how the PhotoMenu is set up, the screen shows the menu items or the categories. If the screen shows the categories, select a category first to view menu items.
- (Optional) Enter a request in the "Special Request" field.
- At the bottom, tap Add. The screen redirects to the menu.
- Repeat the same process until all items are added.
To send the order to the POS or directly to the kitchen, refer to the “Place an order” section below.
DeleteEnable All You Can Eat ordering on the PhotoMenu
Ordering All You Can Eat items using the PhotoMenu depends on your configured All You Can Eat service and menu settings. If “Order Creation is required when ordering with eMenu” is disabled in the shared PhotoMenu settings, the All You Can Eat menu on the PhotoMenu must first be enabled by processing an order that includes the designated set items.
To activate the All You Can Eat service on the PhotoMenu, follow the steps below:
- On the PhotoMenu, tap Start.
Tip: If the PhotoMenu’s media source is set to Photo Shuffle, you can quickly check an item and add them to the order-taking screen by tapping Details below the item’s image. For more information on how to set the media source to Photo Shuffle, refer to Configure PhotoMenu settings. - If applicable, select the table number assigned to the table.
- Depending on how the PhotoMenu is set up, the screen shows the menu items or the categories. If the screen shows the categories, select the category that includes the representing item that will enable the All You Can Eat menu on the PhotoMenu.
- Select the representing item.
- At the bottom, tap Add. The screen redirects to the menu.
- Repeat the same process until all representing items have been added.
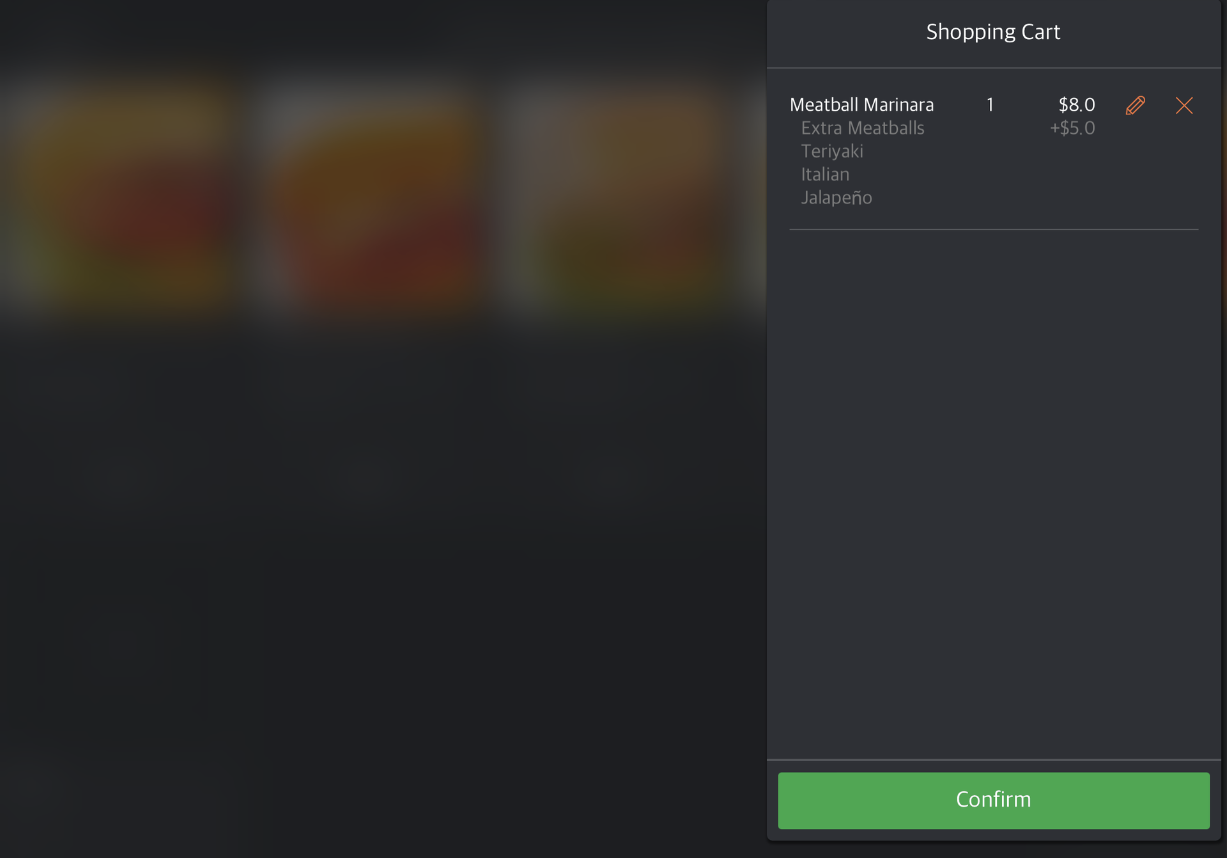
- To confirm the order, tap Shopping Cart
 , then tap Confirm.
Depending on the restaurant’s configured settings, the order might need to be confirmed manually by a staff, or it might be accepted automatically. In either case, once the order is confirmed, the All You Can Eat menu items should appear automatically after a few moments.
To start ordering All You Can Eat items using the PhotoMenu, refer to the “Add All You Can Eat items” section above.
Remove items from an order
To remove any item from an order on the PhotoMenu, follow the steps below:
- On the PhotoMenu, tap Shopping Cart .
- Select the item that you want to remove. Then tap Remove
 .
.
- Tap Confirm to delete the item.
Edit an order
To update any Item added to an order, follow the steps below:
- On the PhotoMenu, tap Shopping Cart .
- Select the item that you want to update. Then tap Edit
 .
.
- Update the Item’s modifiers or quantity. Then, tap Update.

- Tap Confirm to update the item.
Place an order
Once the customer finishes adding items to their order, the order can be sent to the POS for confirmation or directly to the kitchen.
To submit the order, follow the steps below:
- On the PhotoMenu, tap Shopping Cart .
- Check that all items placed in the order are correct.
- To place the order, tap Confirm.
Check the bill
The bill is generated on the PhotoMenu only after an order is placed and sent to the POS.
To check the bill on the PhotoMenu, at the top right, tap Bill  .
.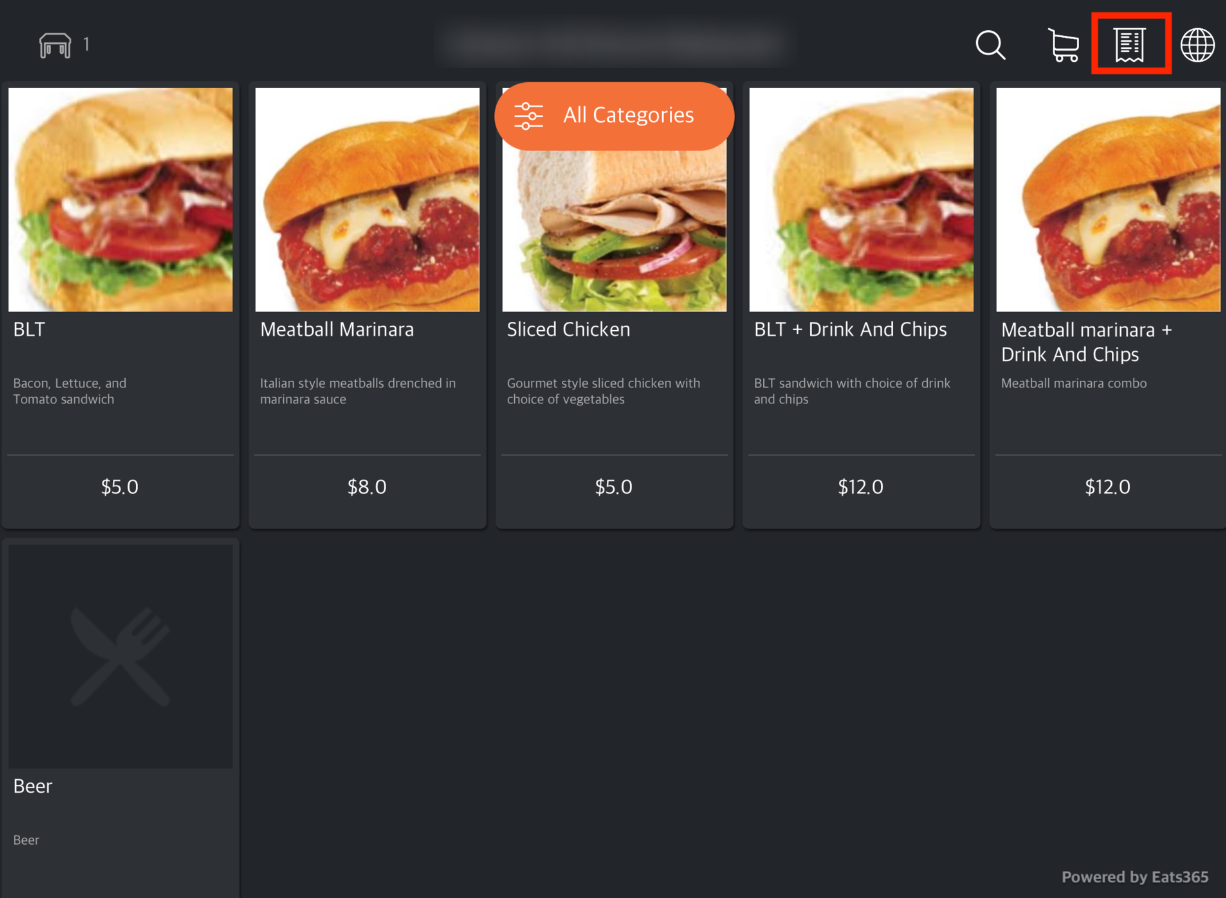 The bill is available until the customer pays for their order. Afterward, the bill gets deleted on the PhotoMenu.