 Eats365 Products
 Merchant Guide
 Modules
 Membership
 Integrations
 Hardware
 Staff Operations
 Roles & Permissions
 Payments
 Reports
 What’s New
 Release Notes
 Troubleshooting
 Simulators
 Glossary
 Troubleshooter
 System Status
Branded Online Store
Table of Contents
Book a reservation using restaurant website
Learn how to place a reservation using a restaurant’s website.
Restaurants with Online Reservations enabled allow customers to book directly through the restaurant’s website. Confirmed reservations for logged in users can be modified, subject to the restaurant’s reservation policy.
In this article, you’ll learn how to book, edit, and cancel an online reservation on the restaurant’s website.
Make an online reservation
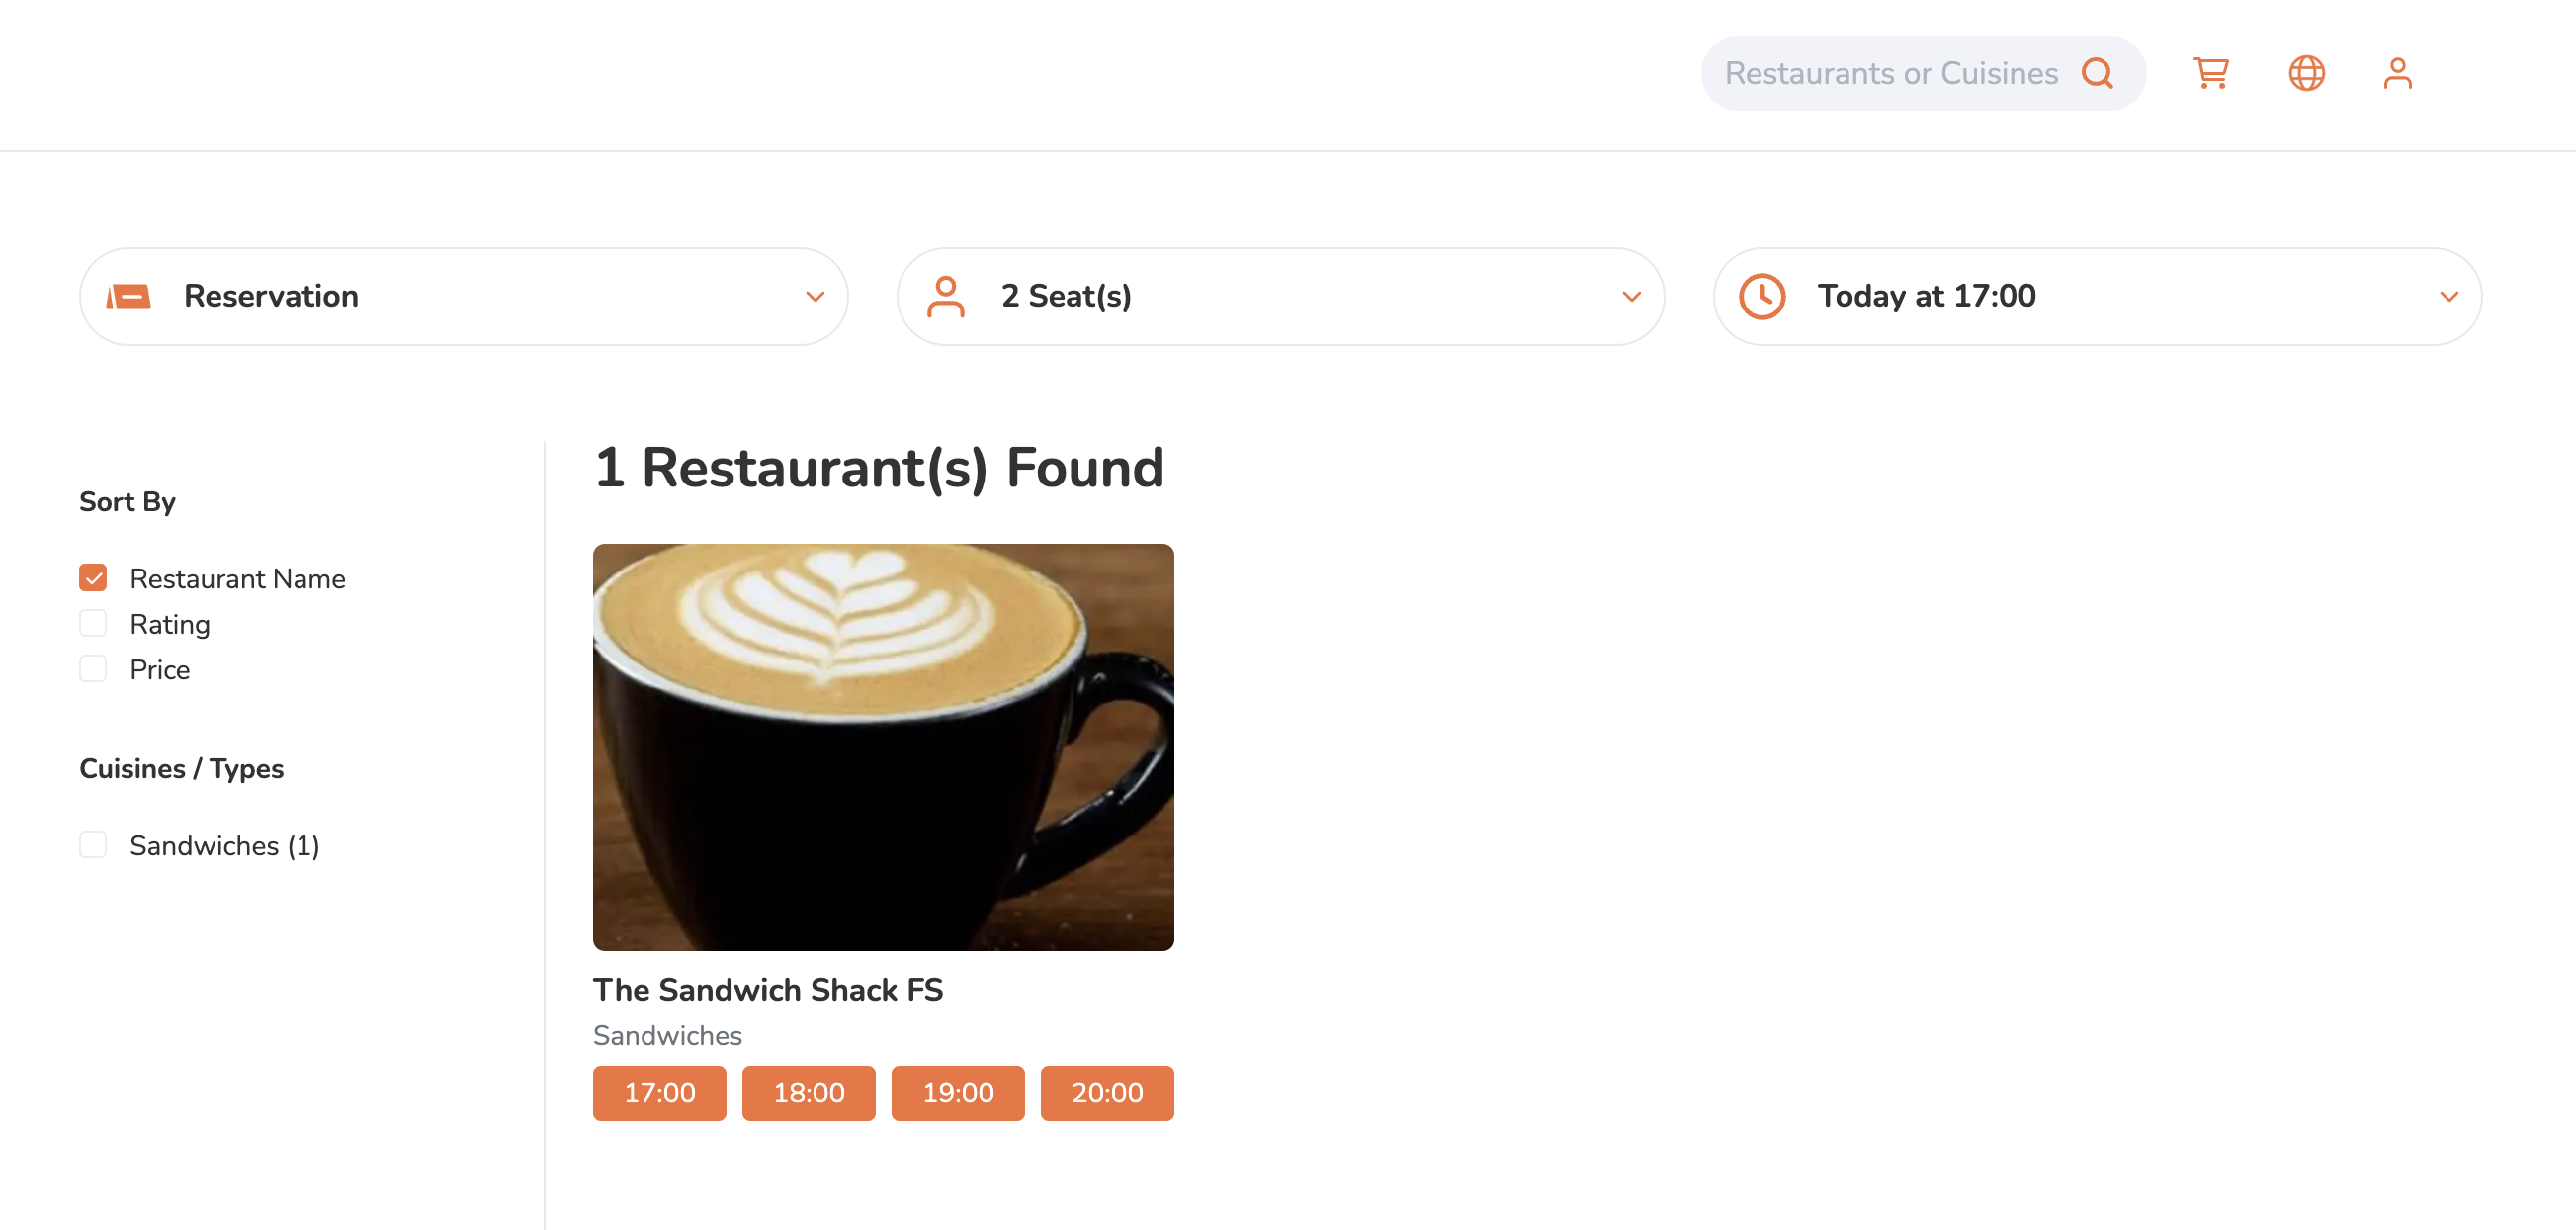
To place a reservation using the restaurant’s website, follow the steps below:
Mobile
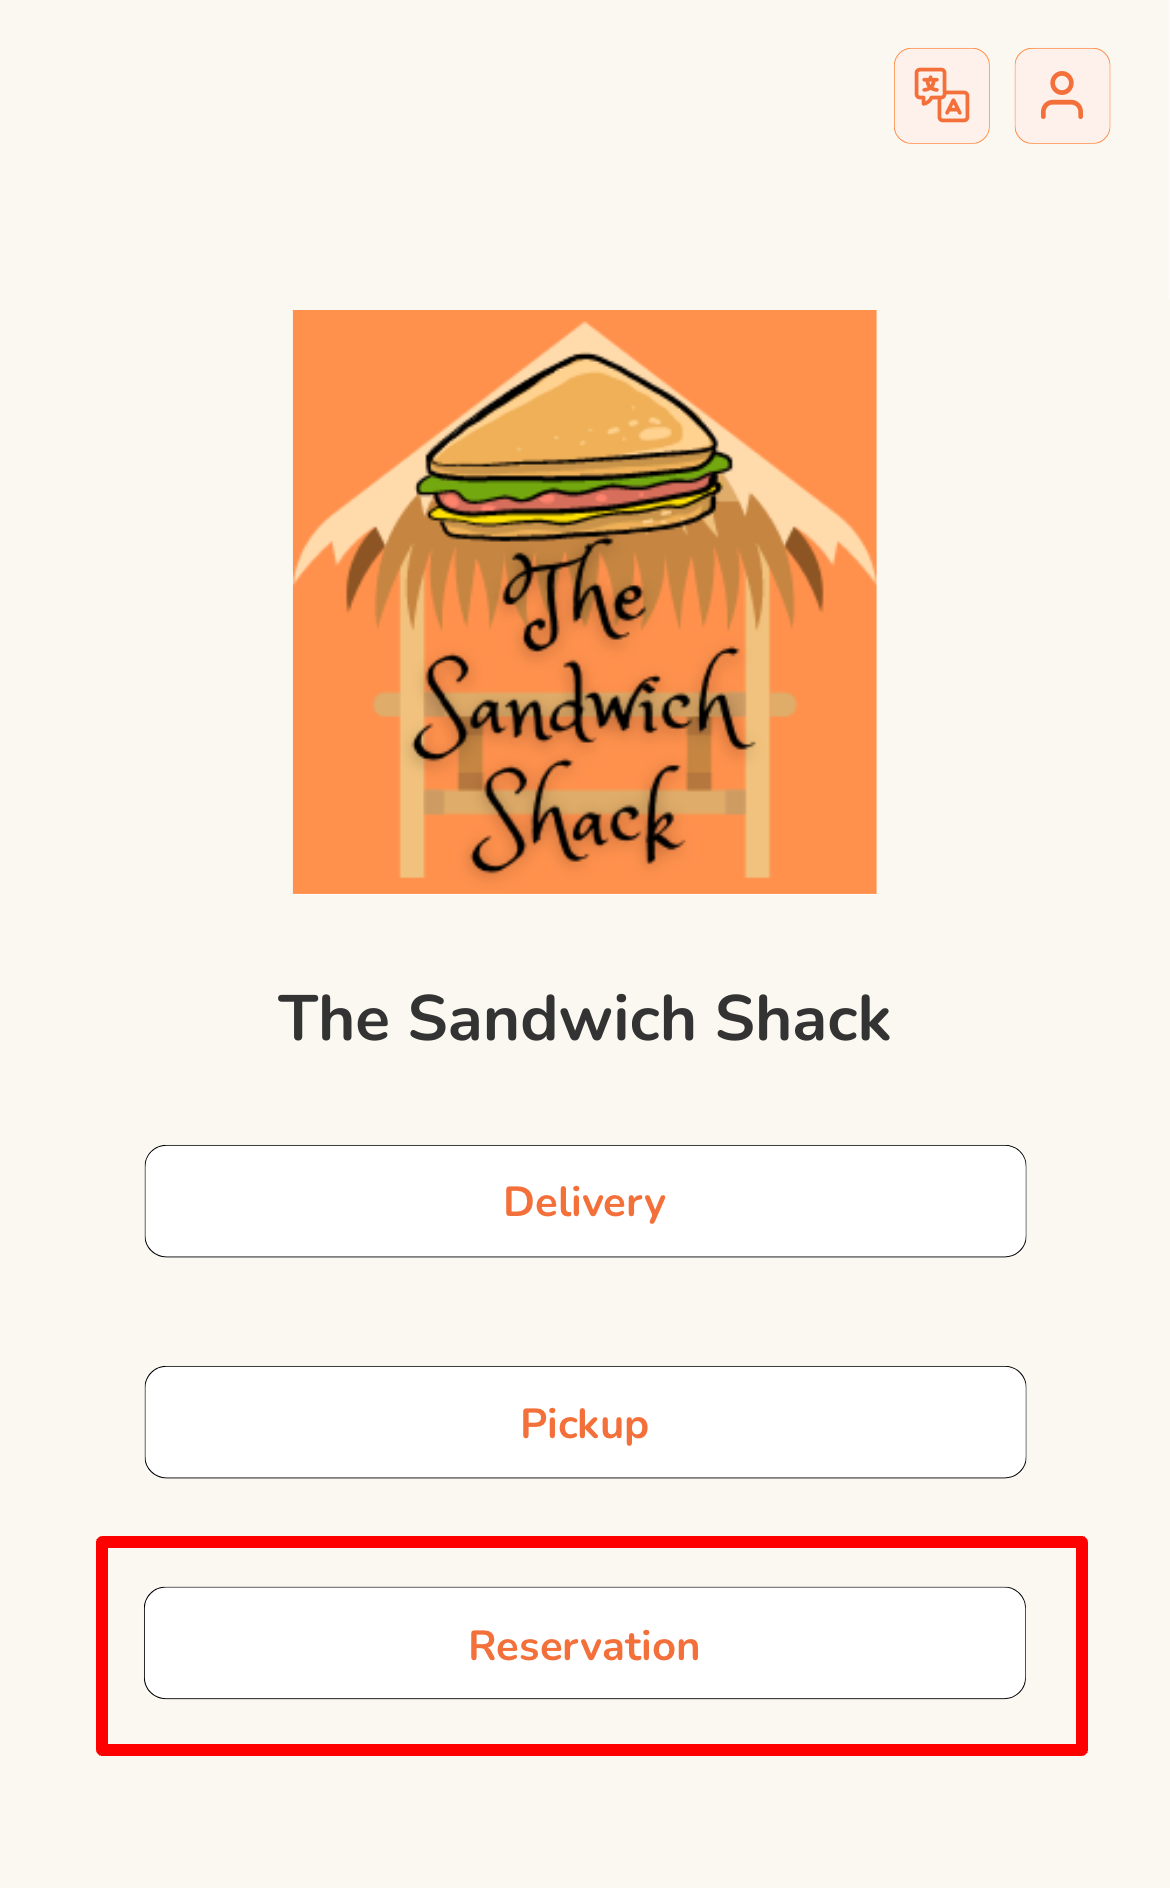
- Log in to the restaurant’s website. If the website includes multiple restaurants, select your preferred restaurant from the list.
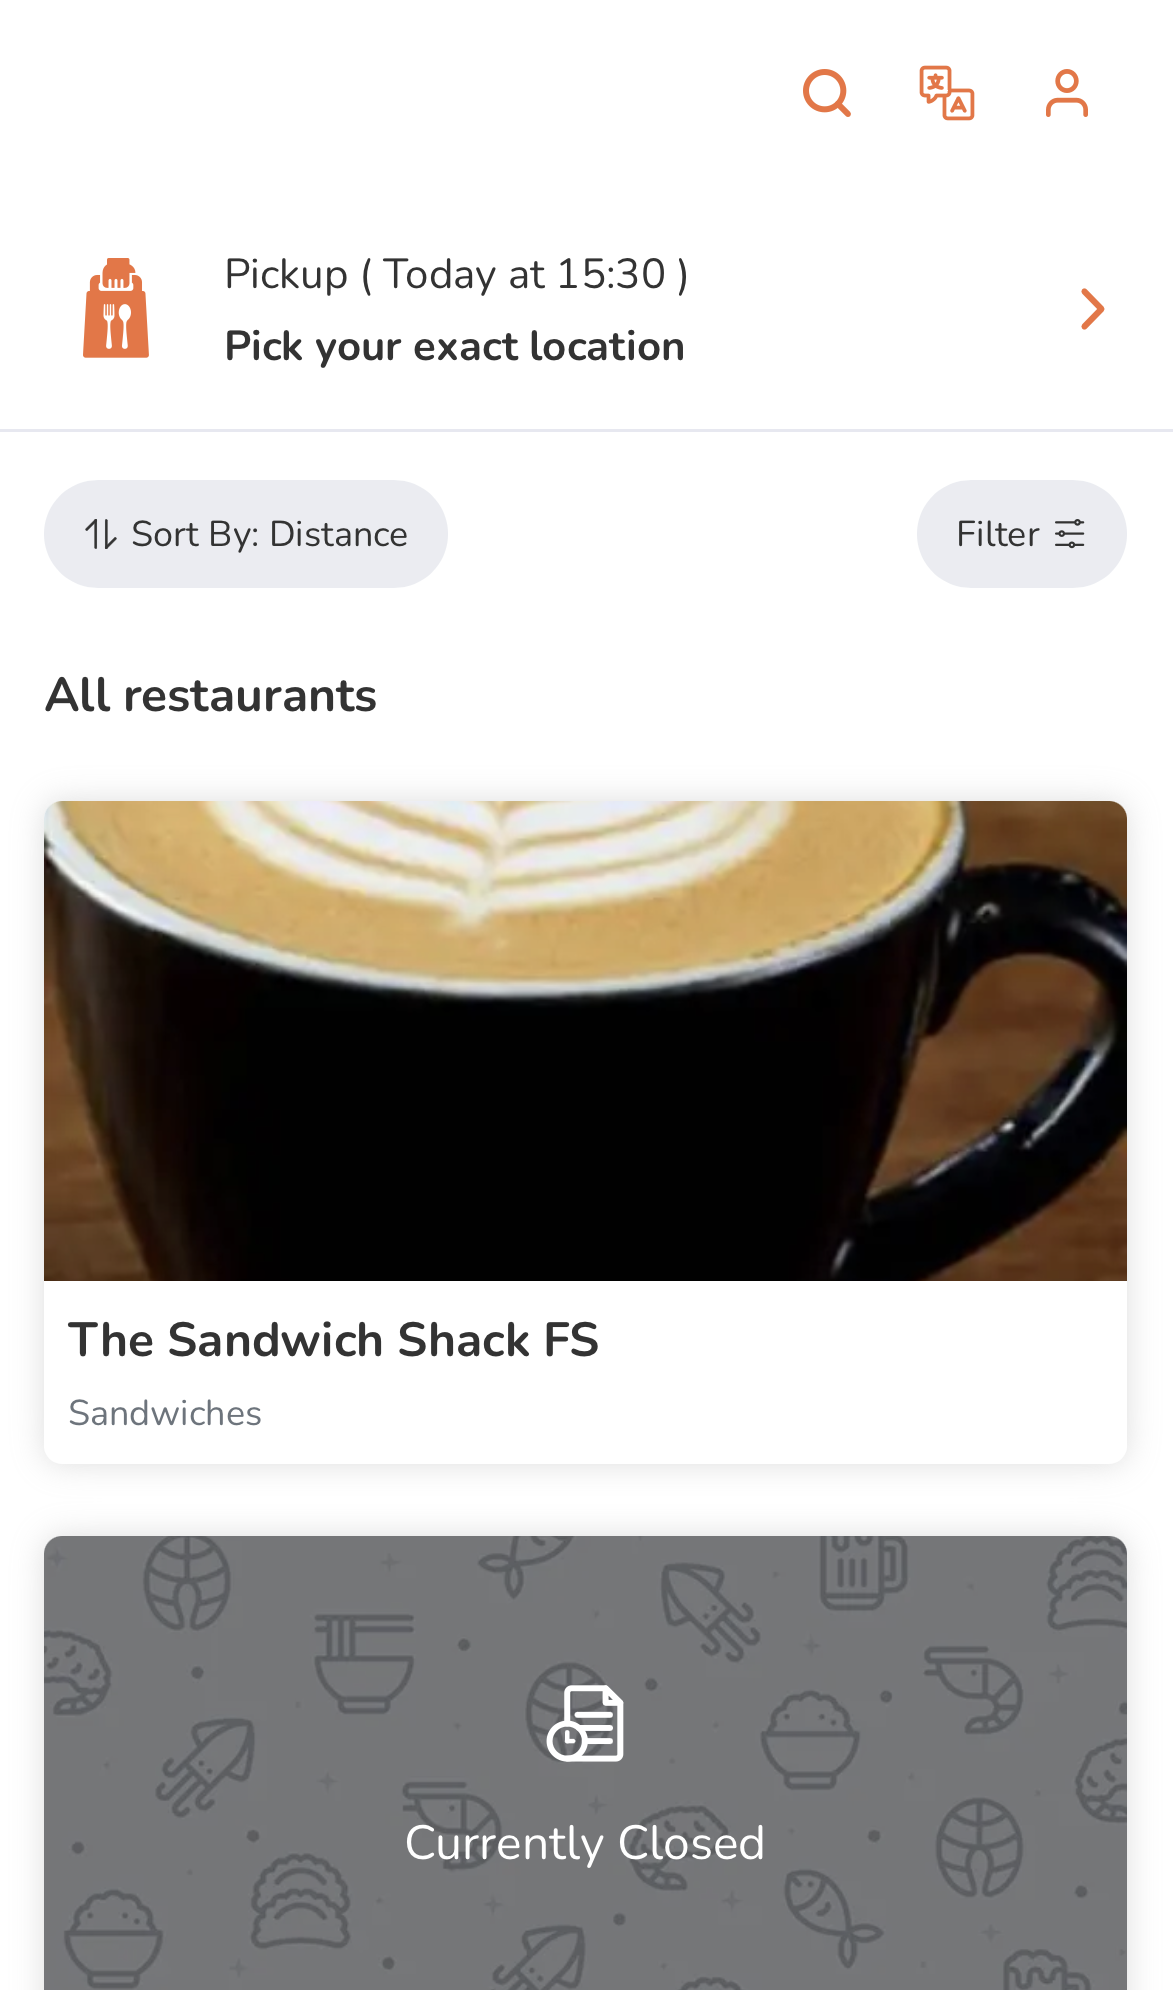
- From the options, select Reservation.
- For single restaurant websites: click on Reservation from the main page.
- For multi-restaurant websites: at the top left, tap Menu
 . Then, under Other Services, tap Reservation.
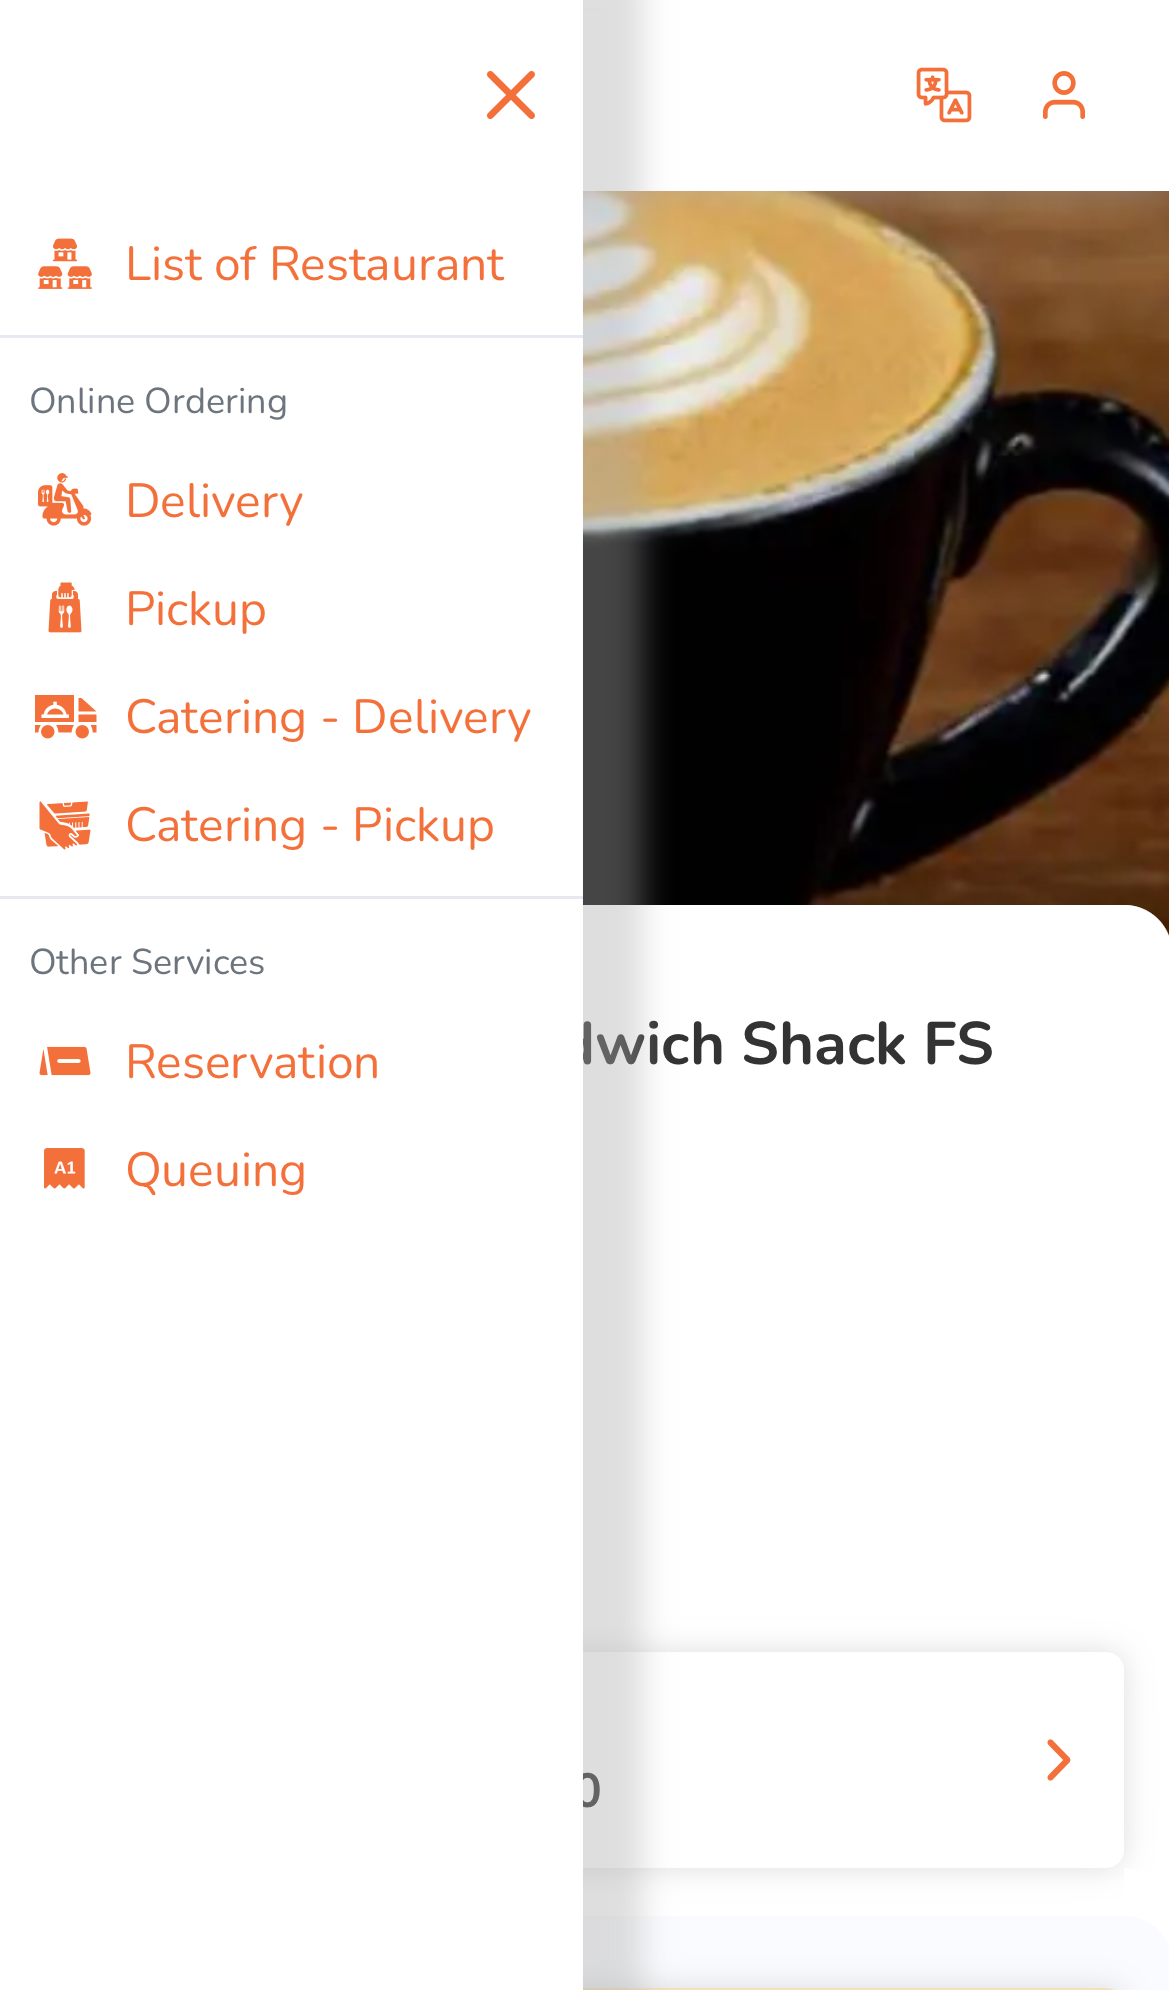
- For single restaurant websites: click on Reservation from the main page.
- Under Make a Reservation, enter the following reservation details:
- Date
- Party size
- Time
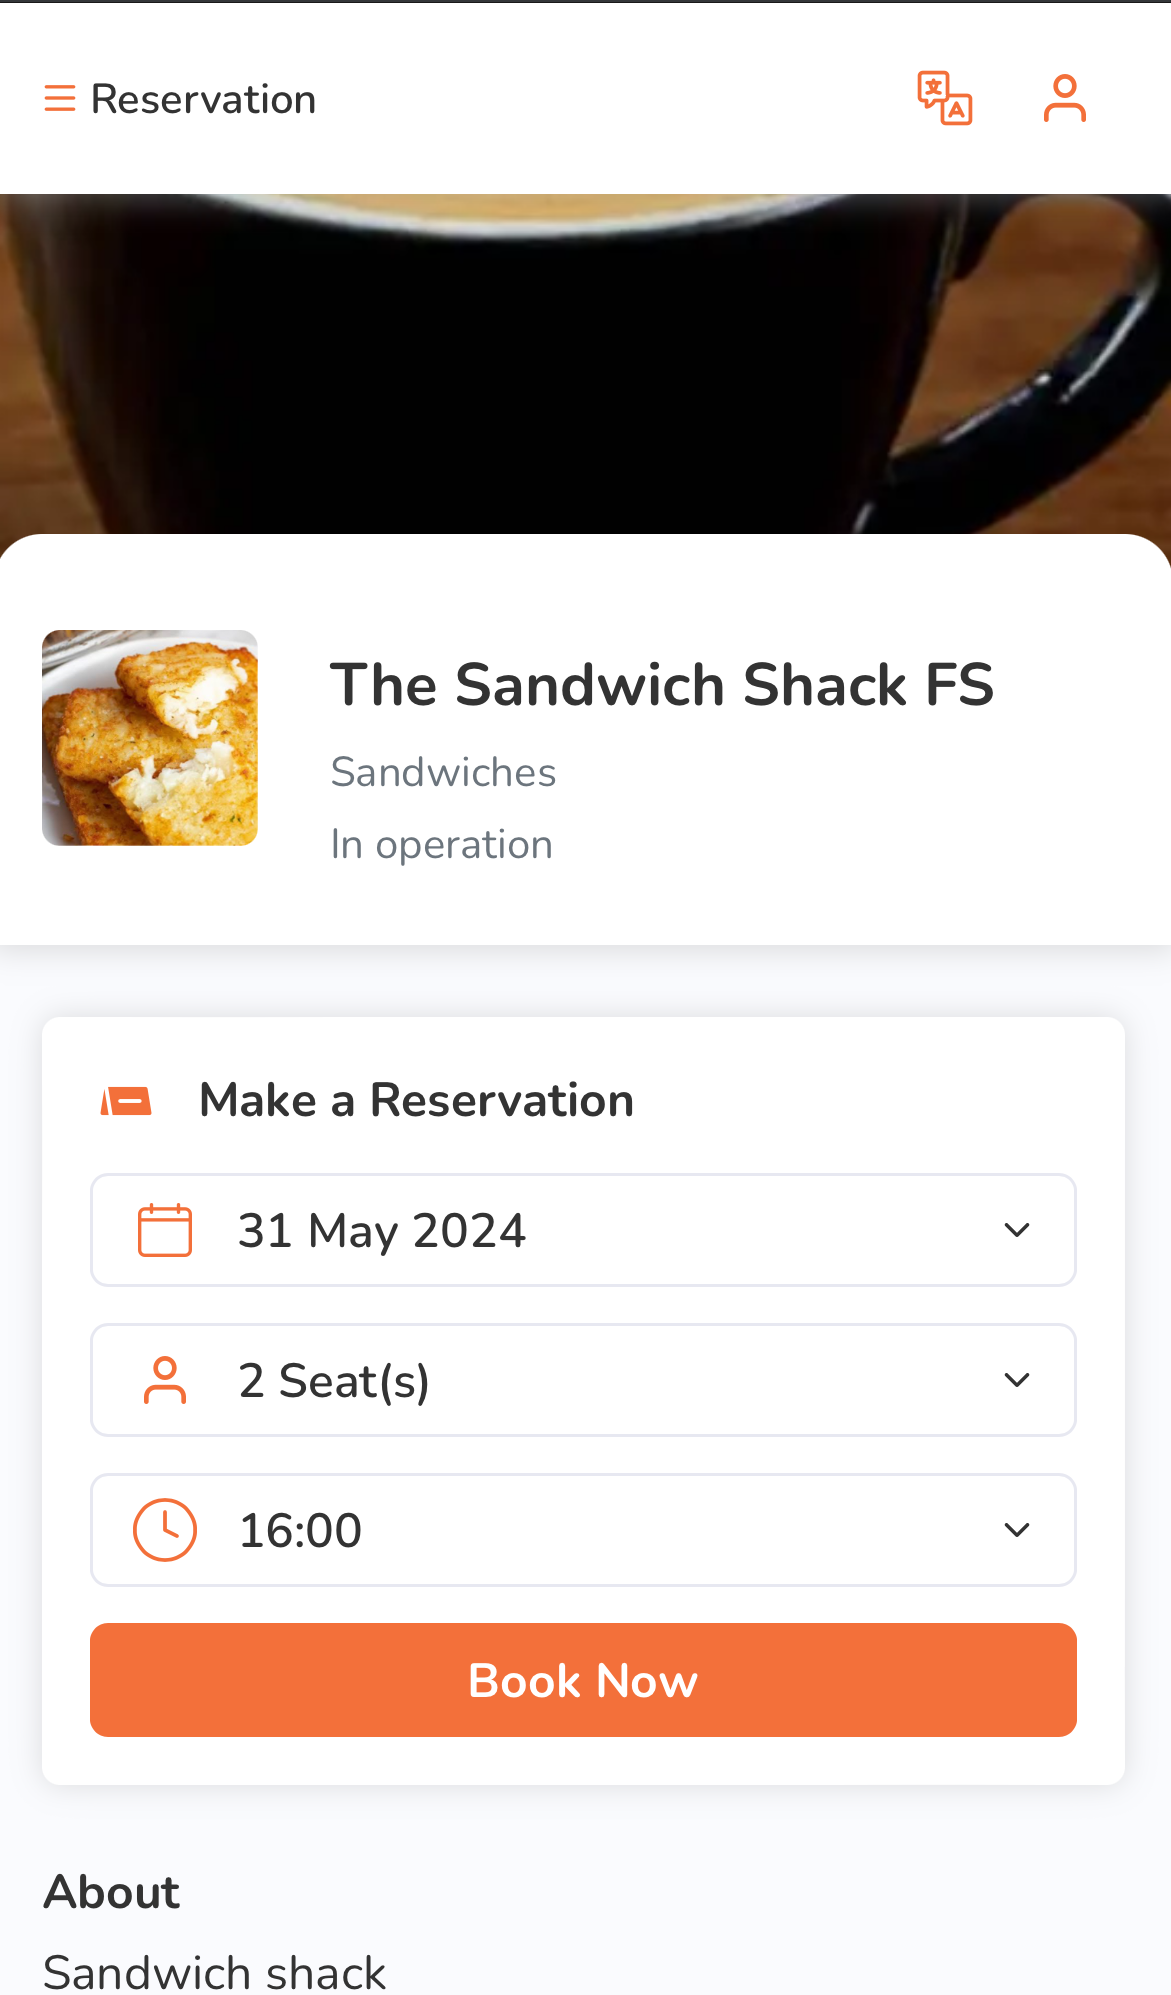
- Once done, tap Book Now.
- On the Review & Confirm page, ensure that the details you’ve entered for your reservation are accurate. If you need to make any changes, tap Edit
 . Then, apply your edits.
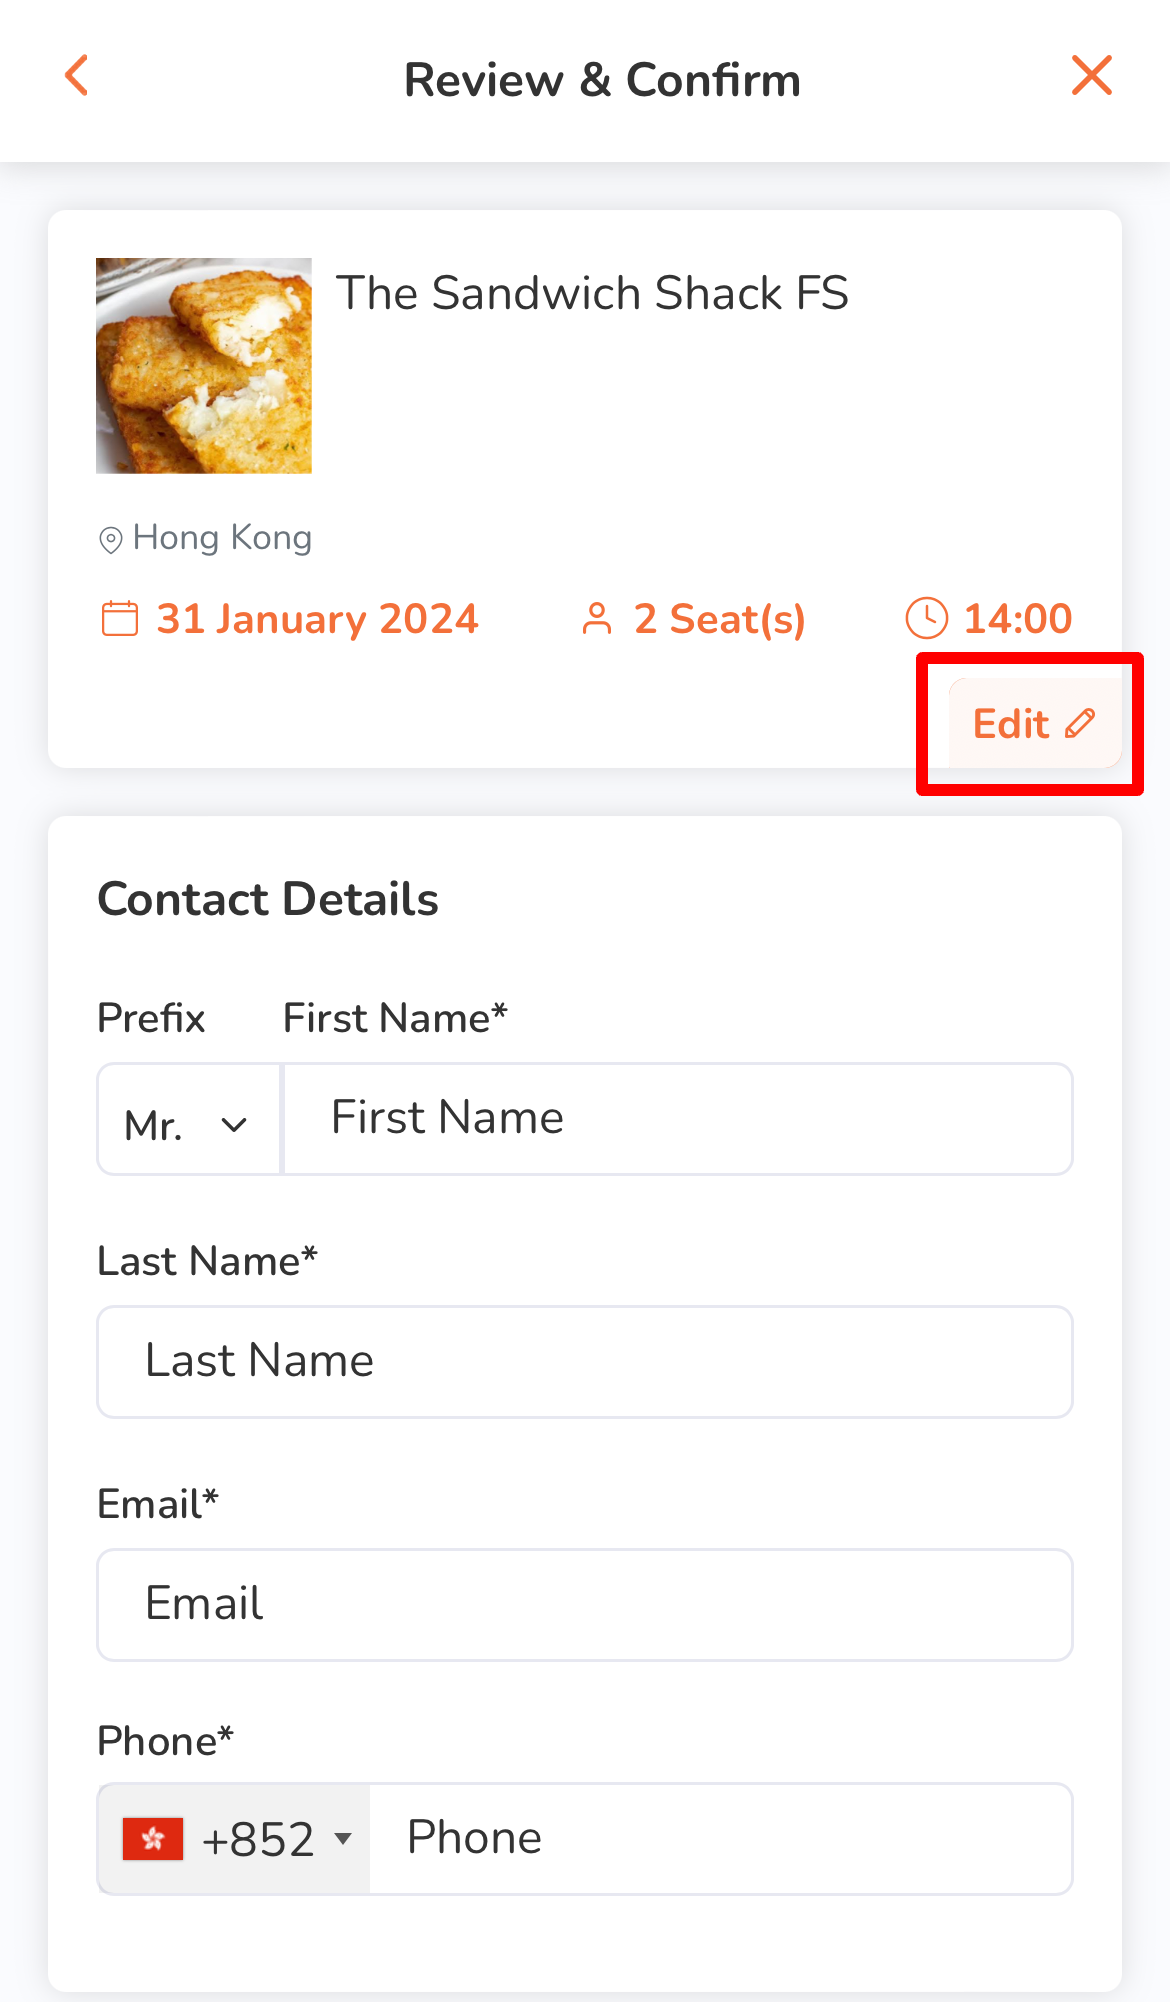
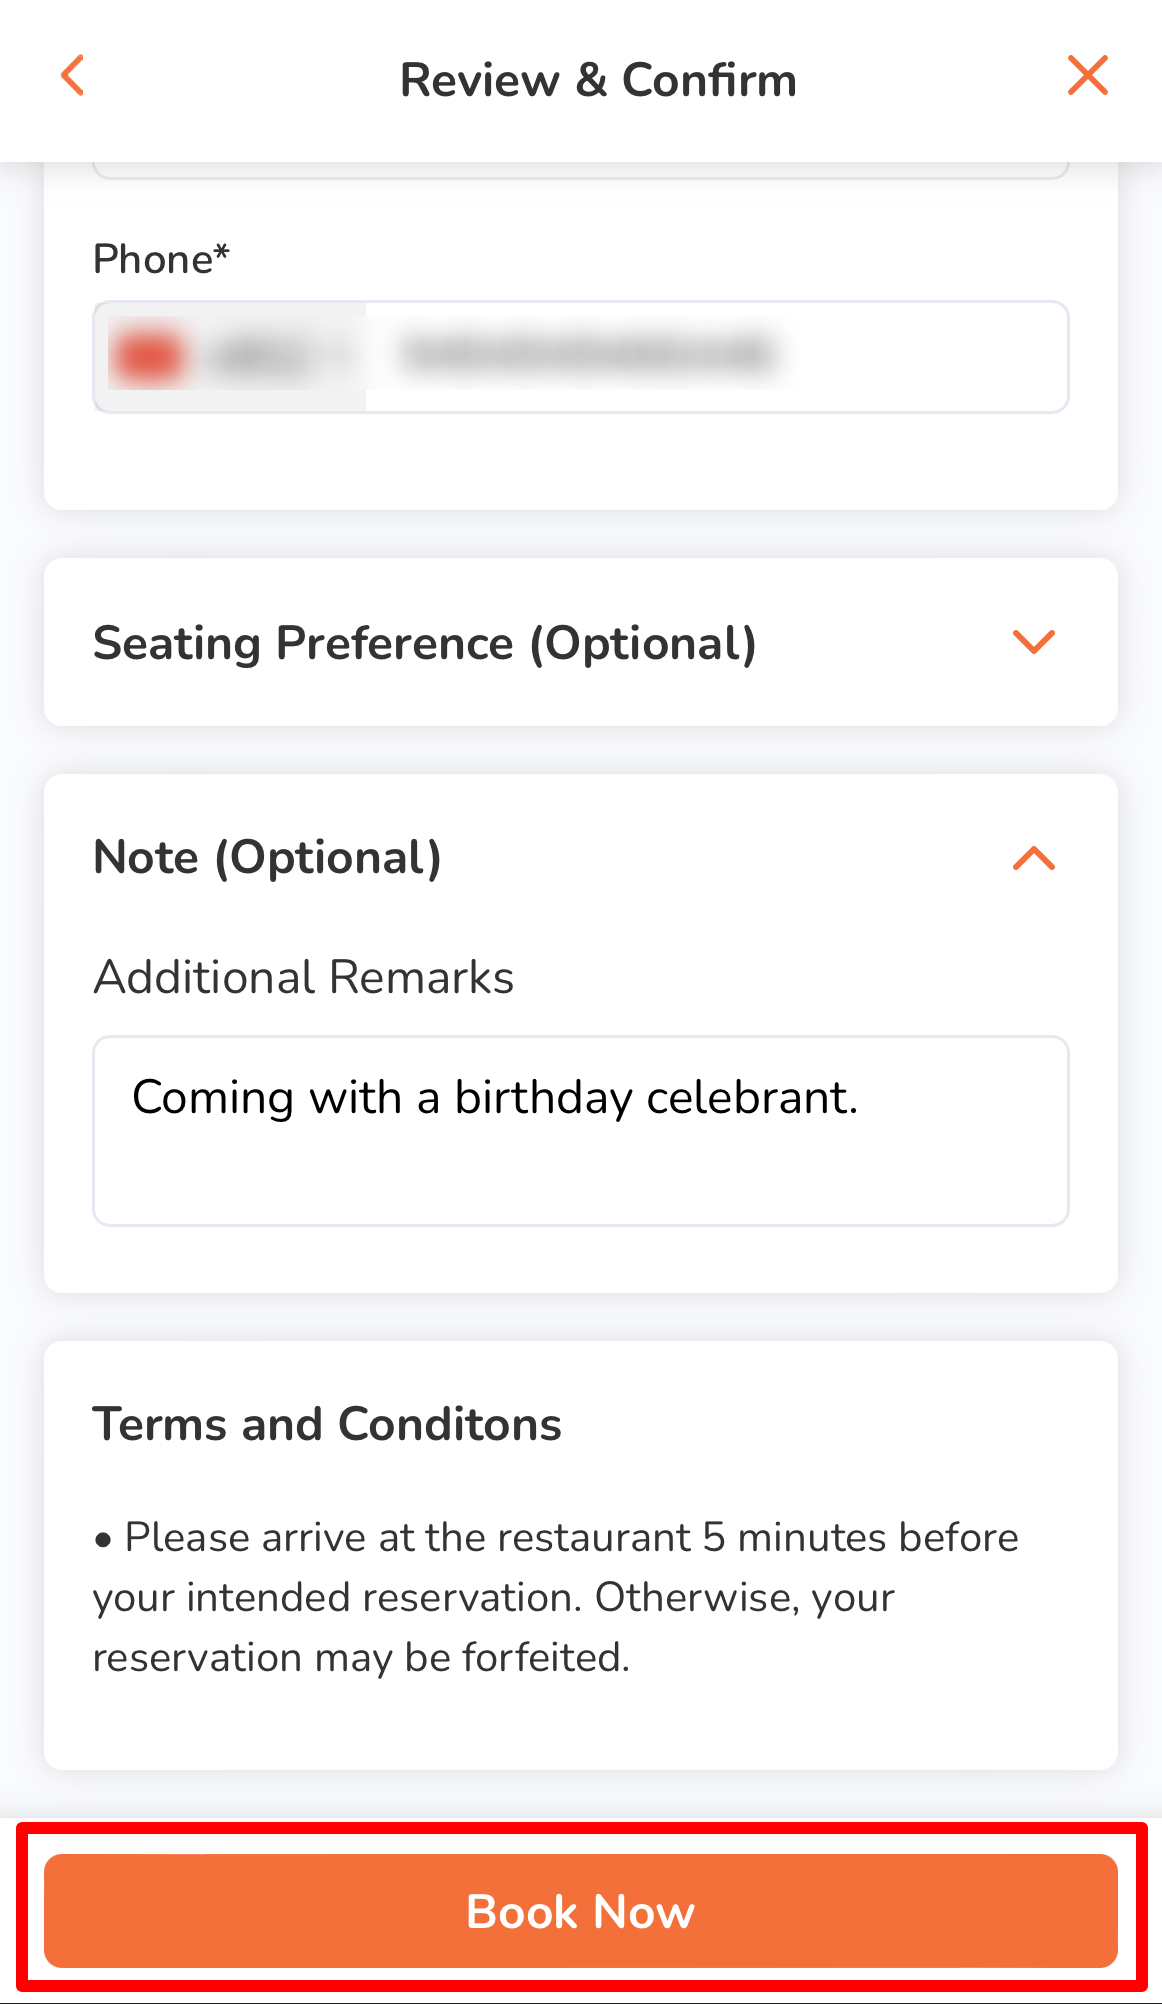
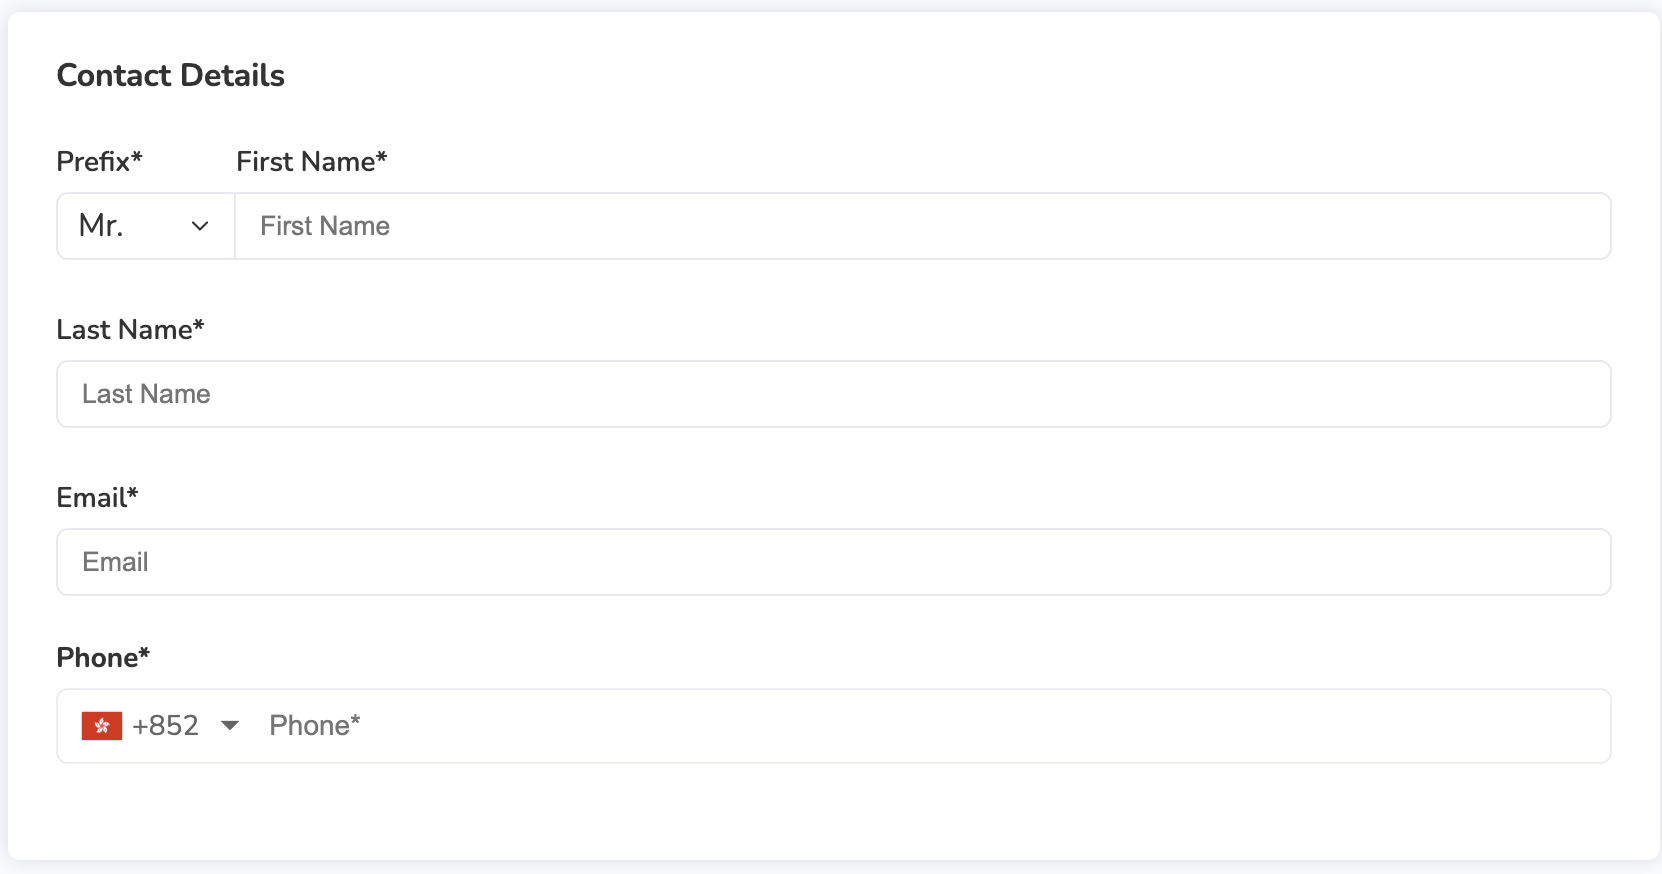
- Under Contact Details, enter the following information:
Important: Once your reservation is confirmed, you can no longer change your contact information.- Prefix
- First Name
- Last Name
- Email address
- Phone number

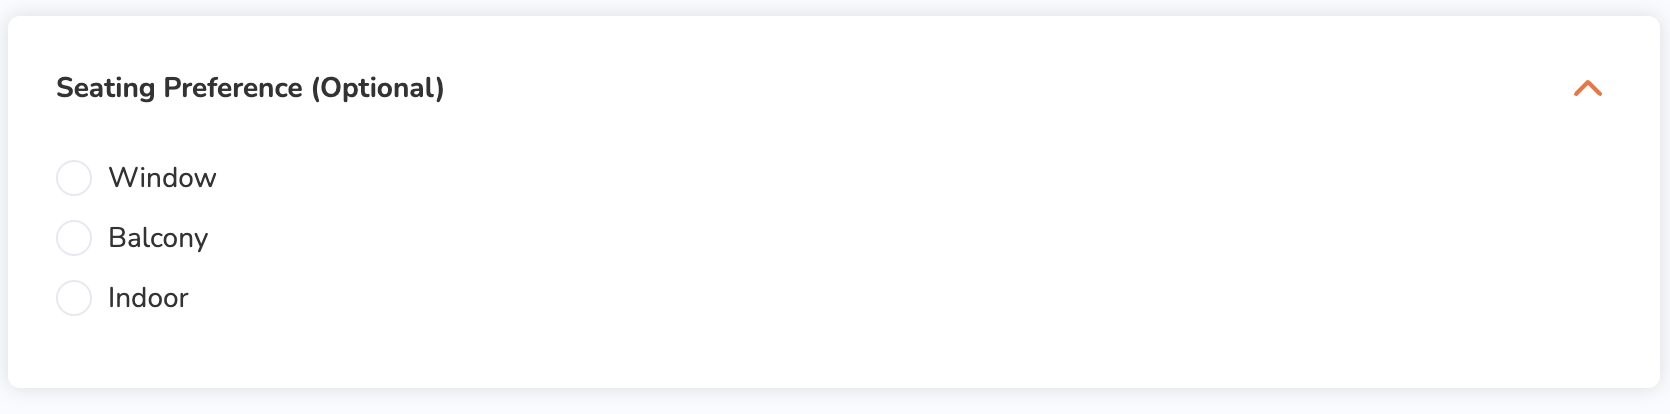
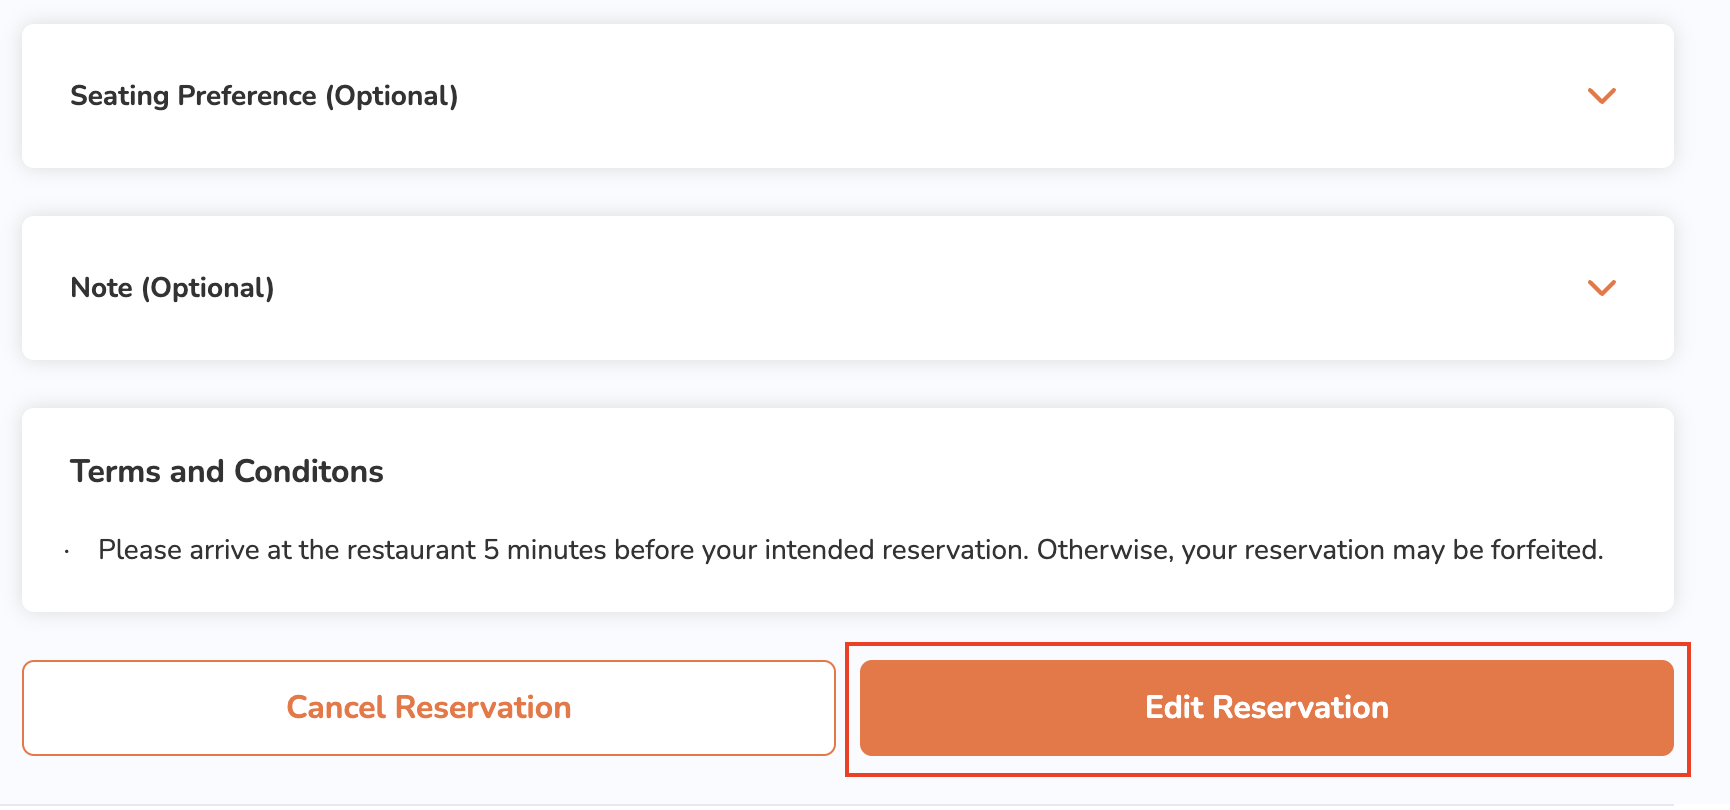
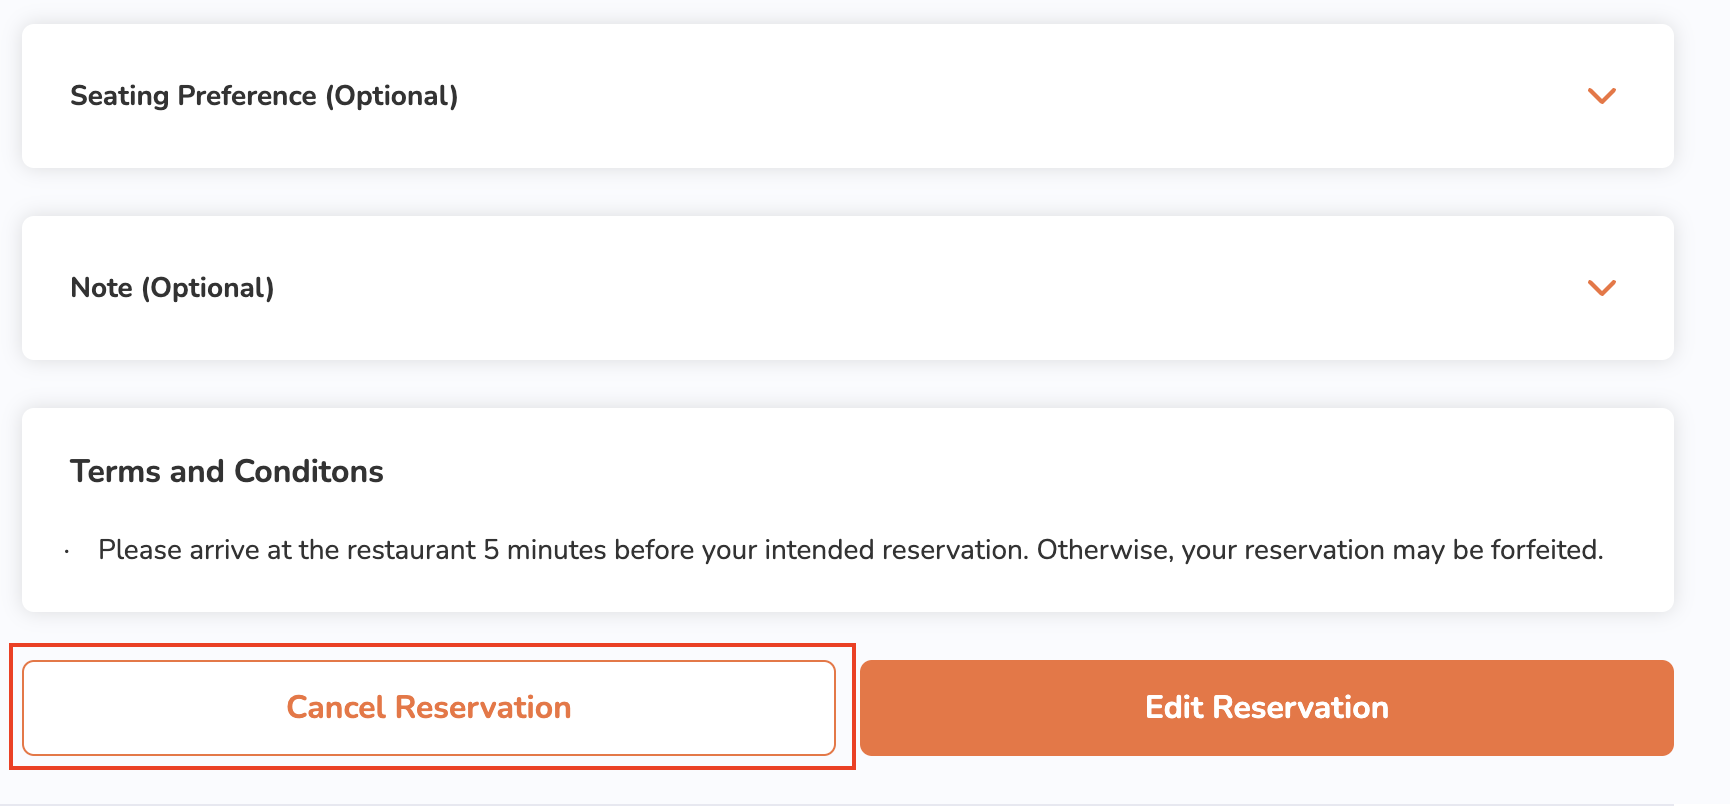
- (Optional) Under Seating Preference, select your preferred seating option.
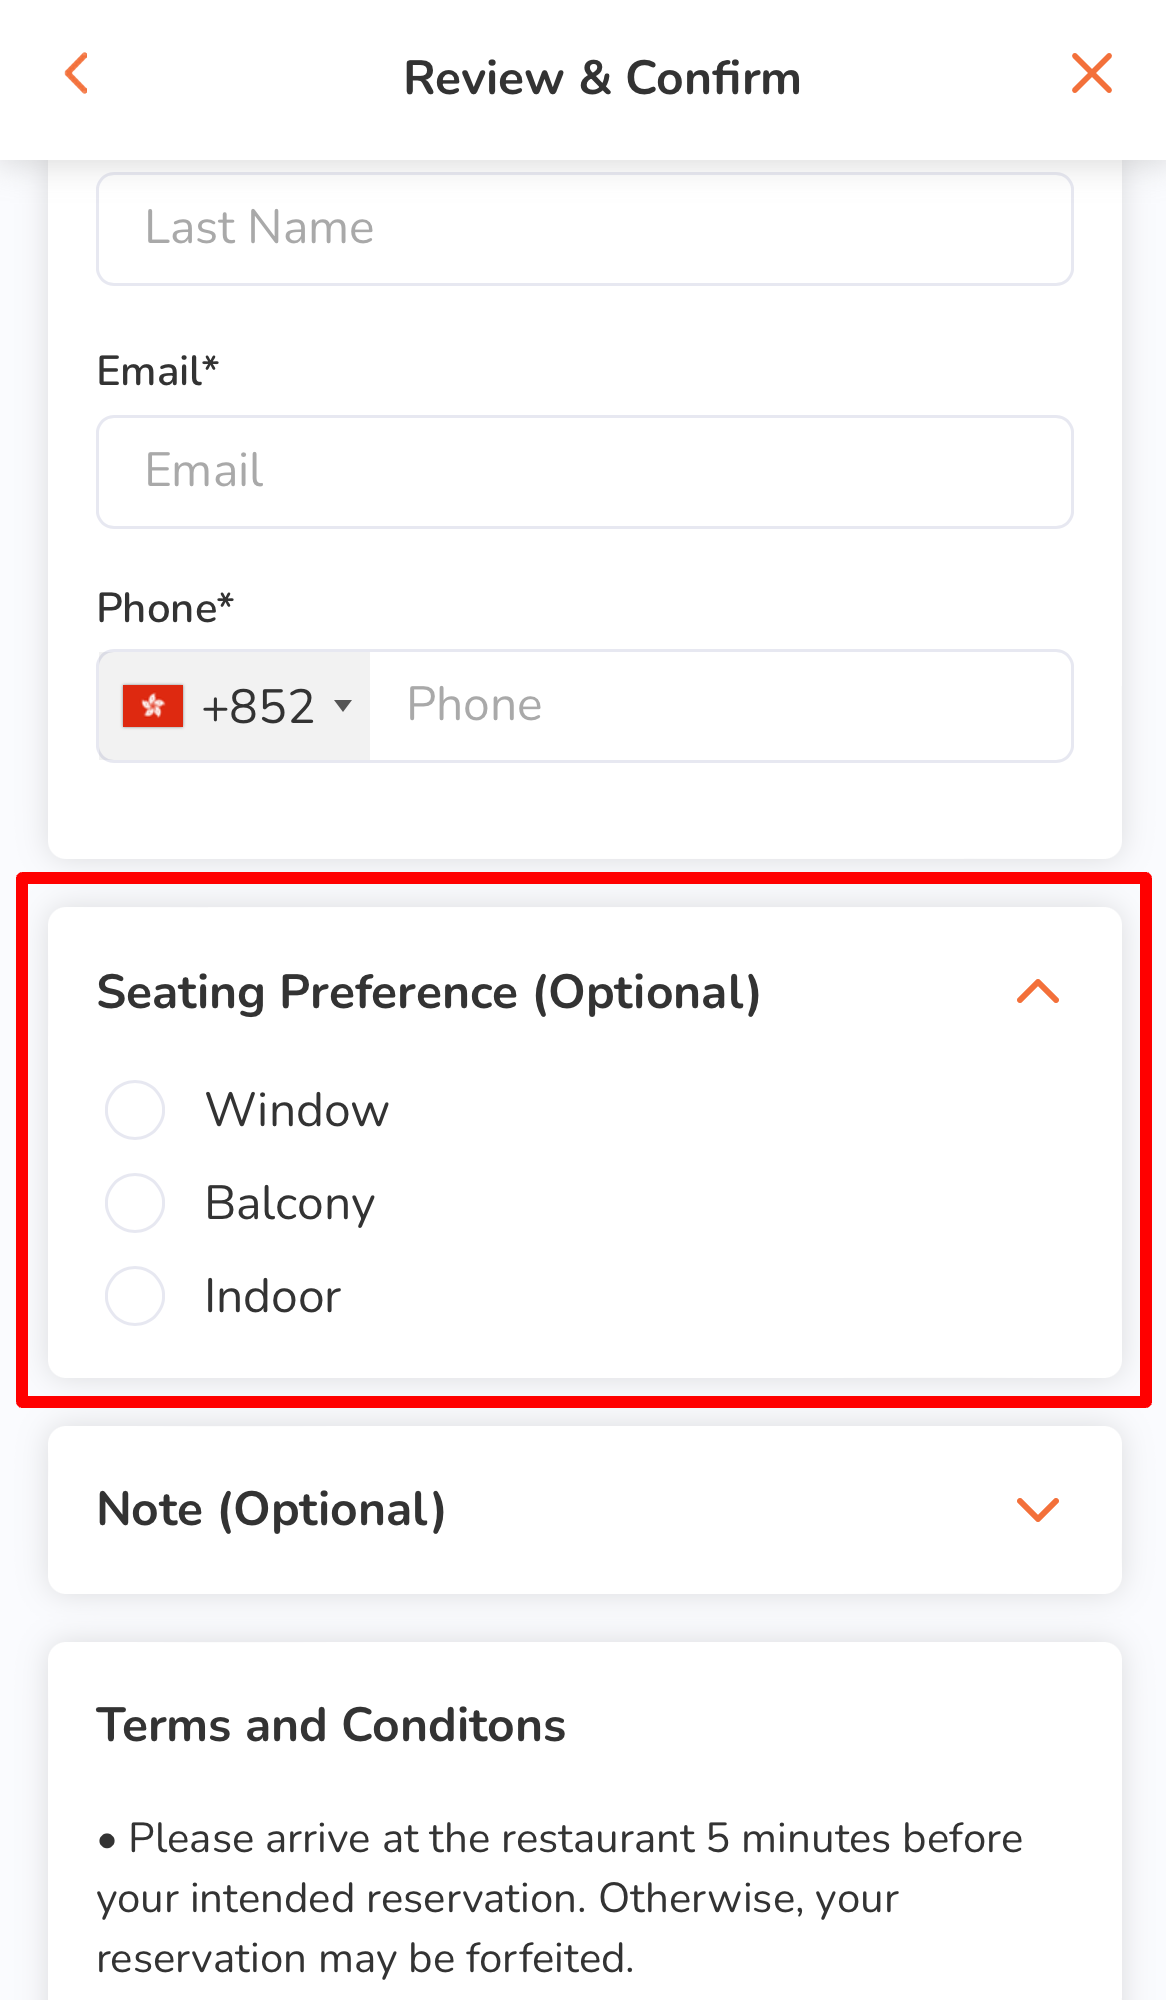
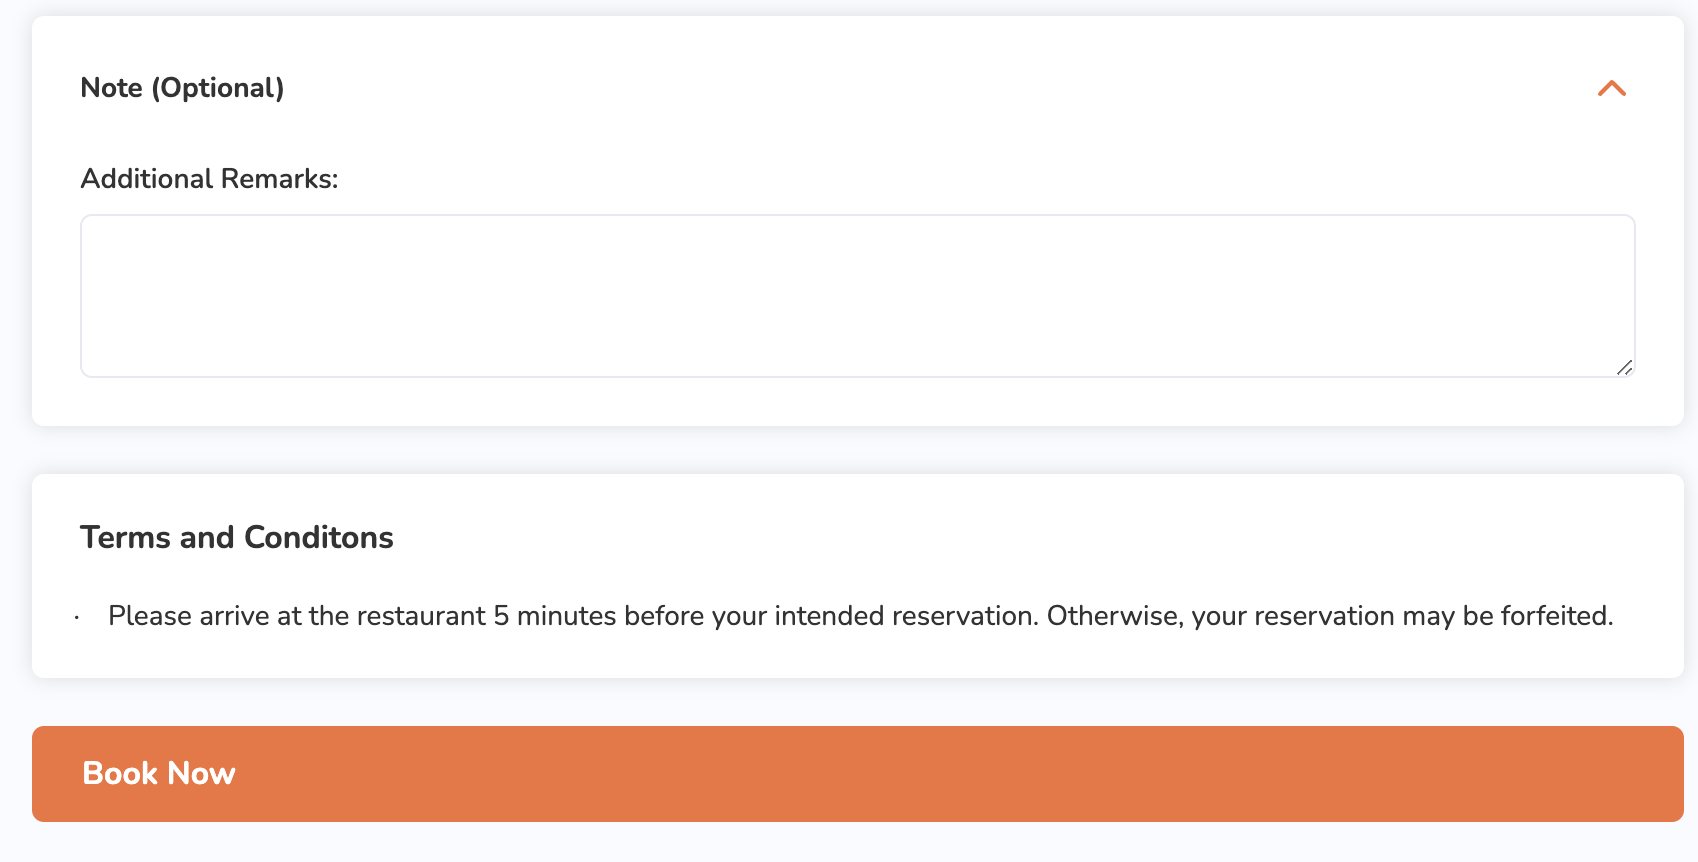
- (Optional) To add a note about your reservation, under Note, enter additional remarks for your reservation.
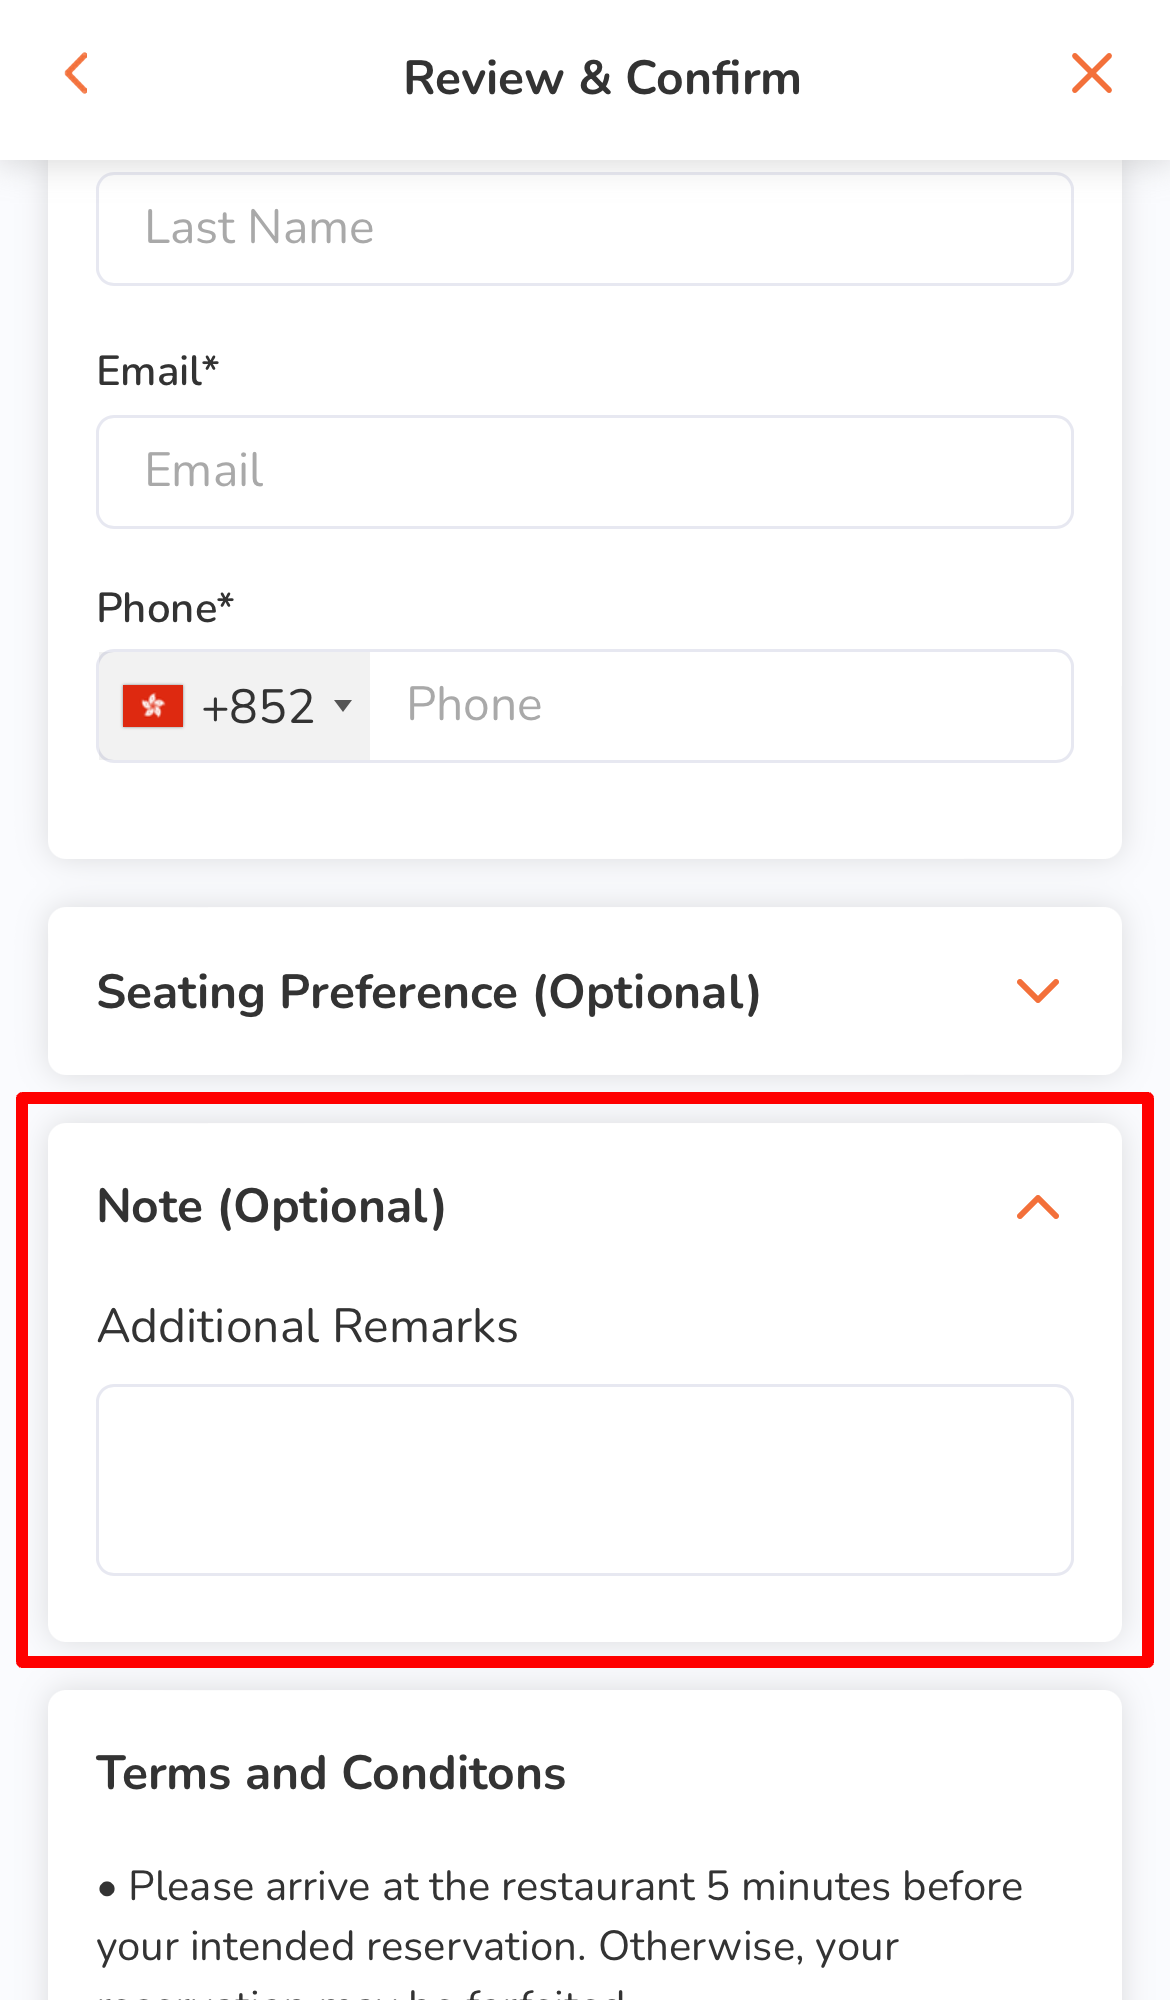
- If available, under Terms and Conditions, check the restaurant’s reservation Terms and Conditions before proceeding with the booking.
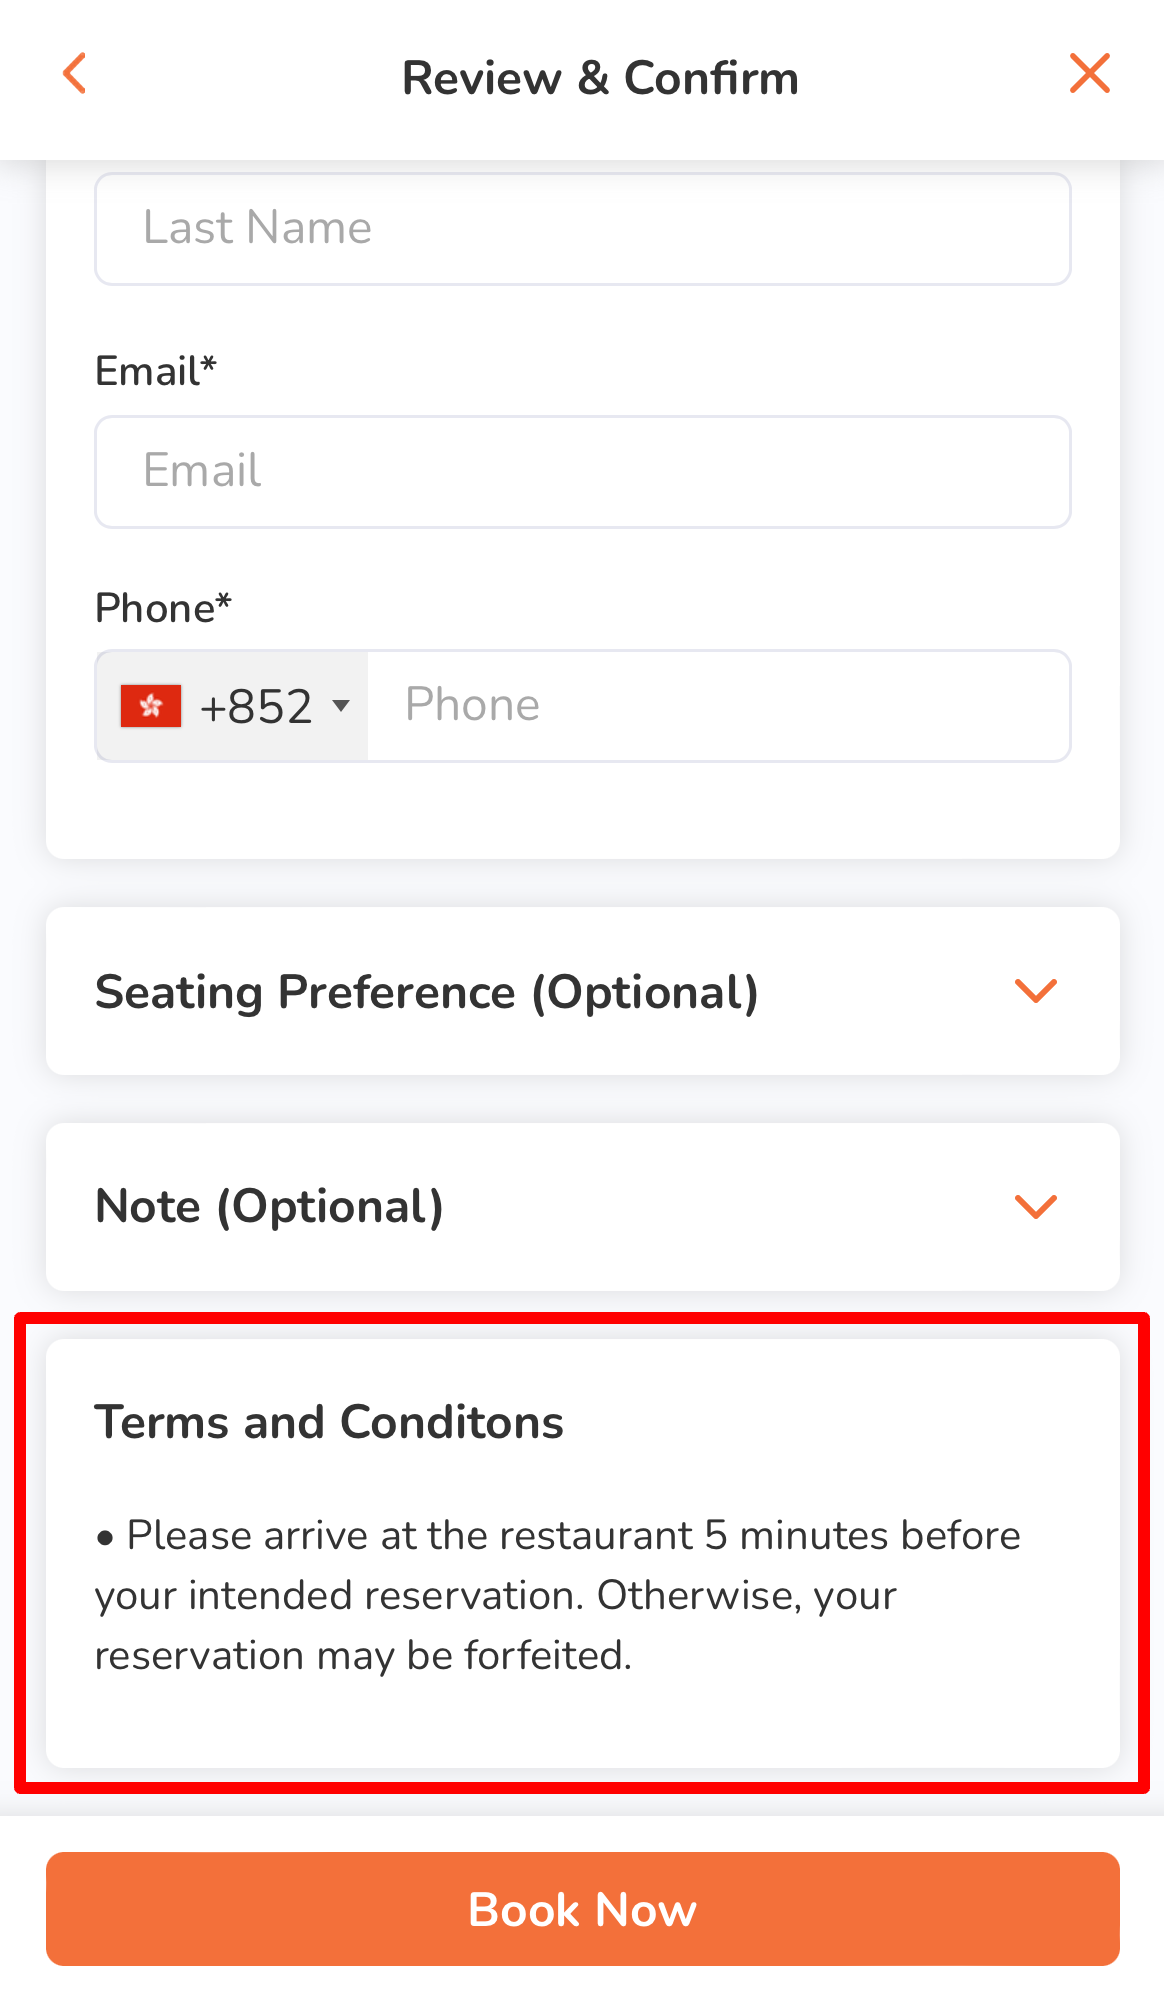
- Once done, tap Book Now to confirm the reservation.
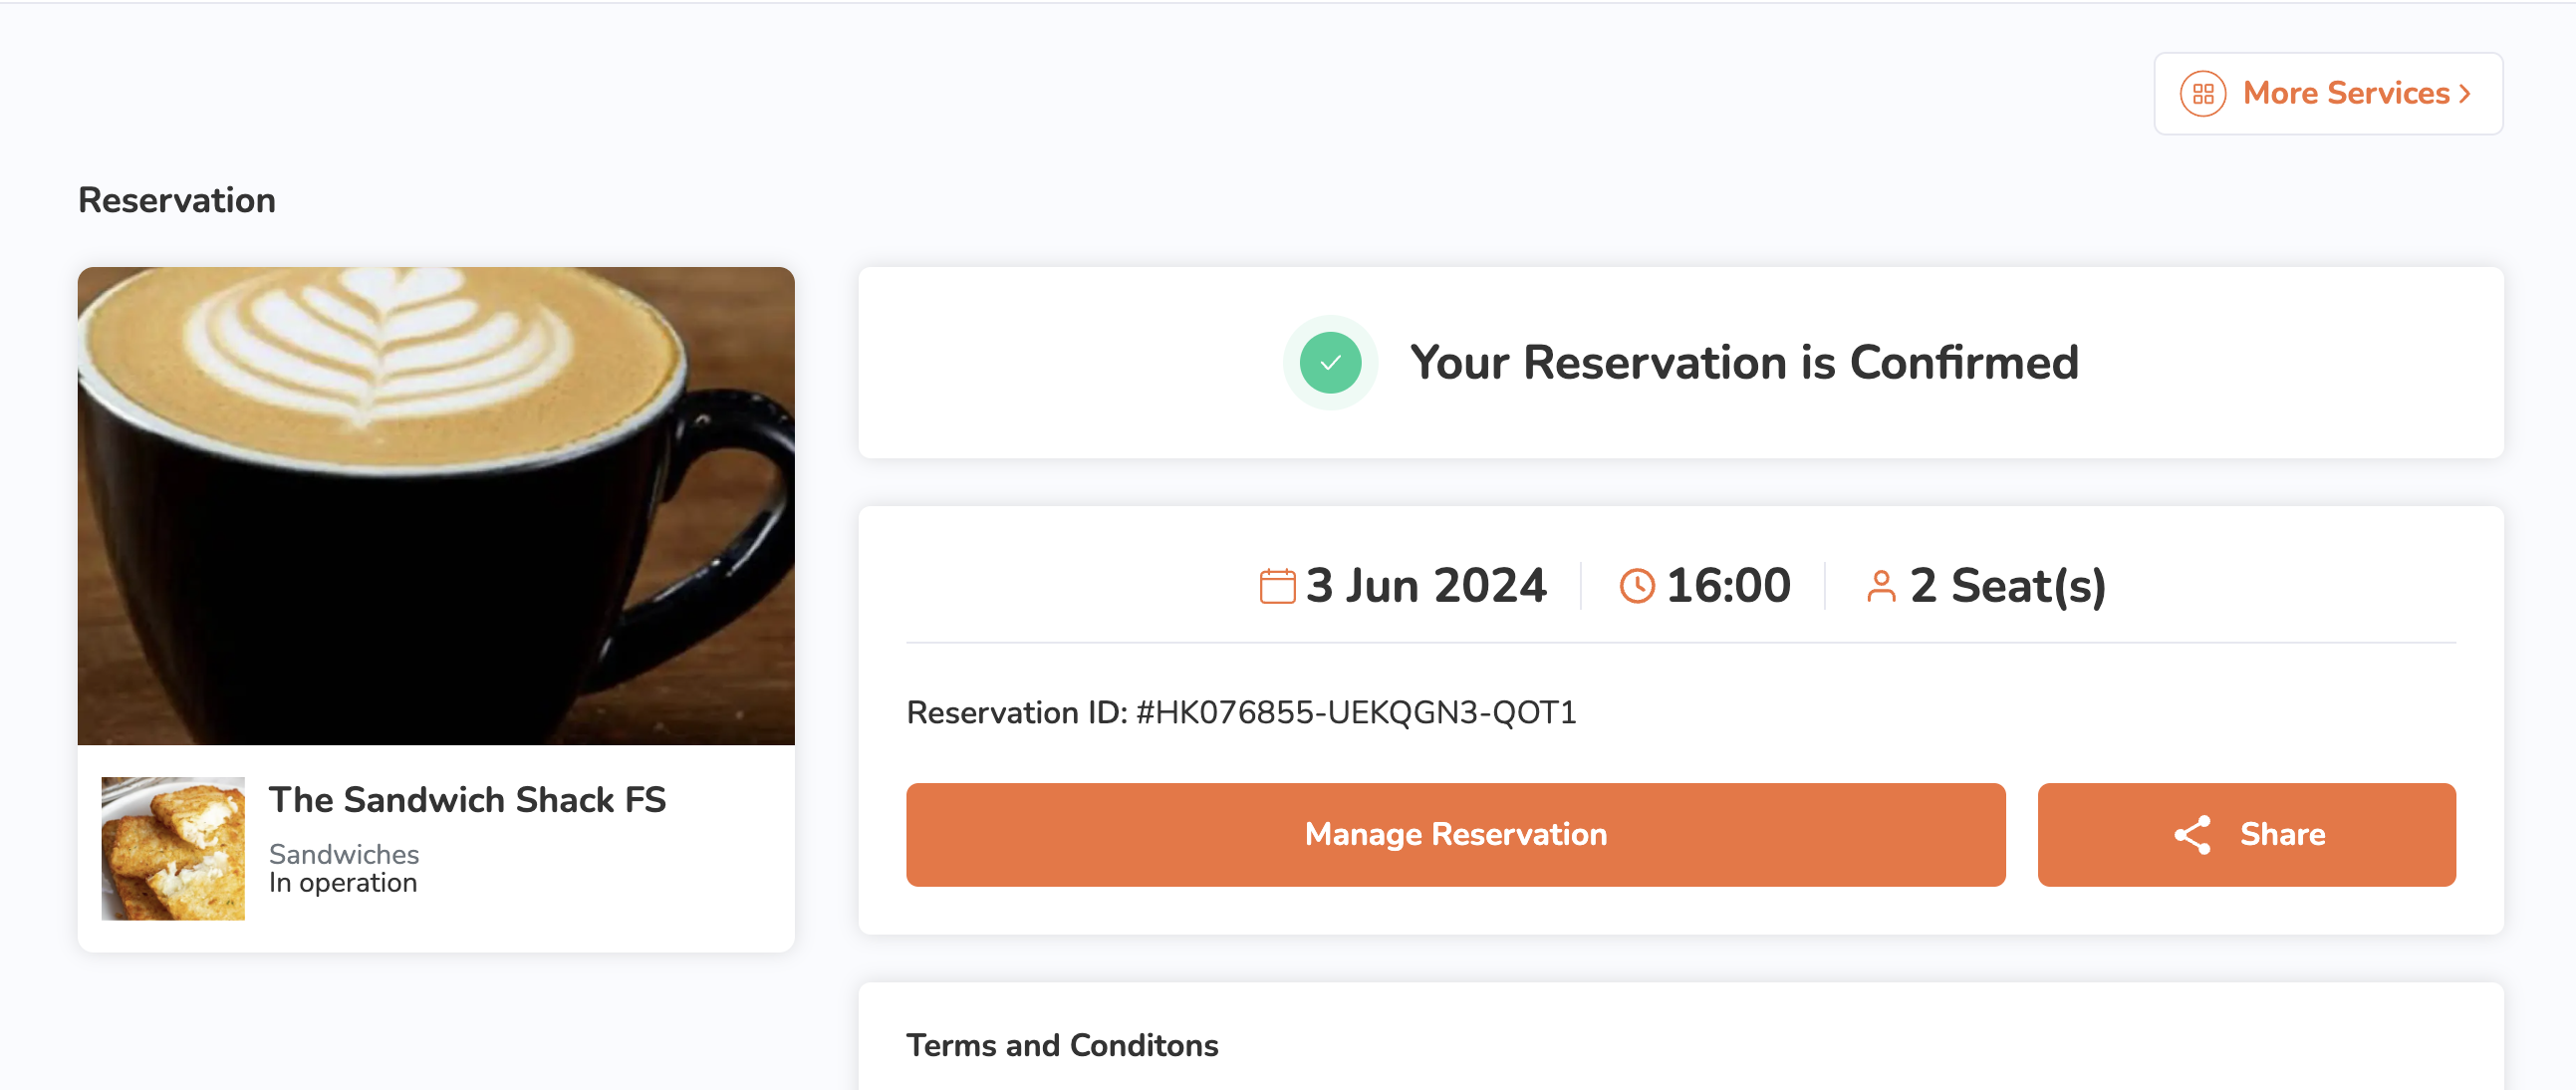
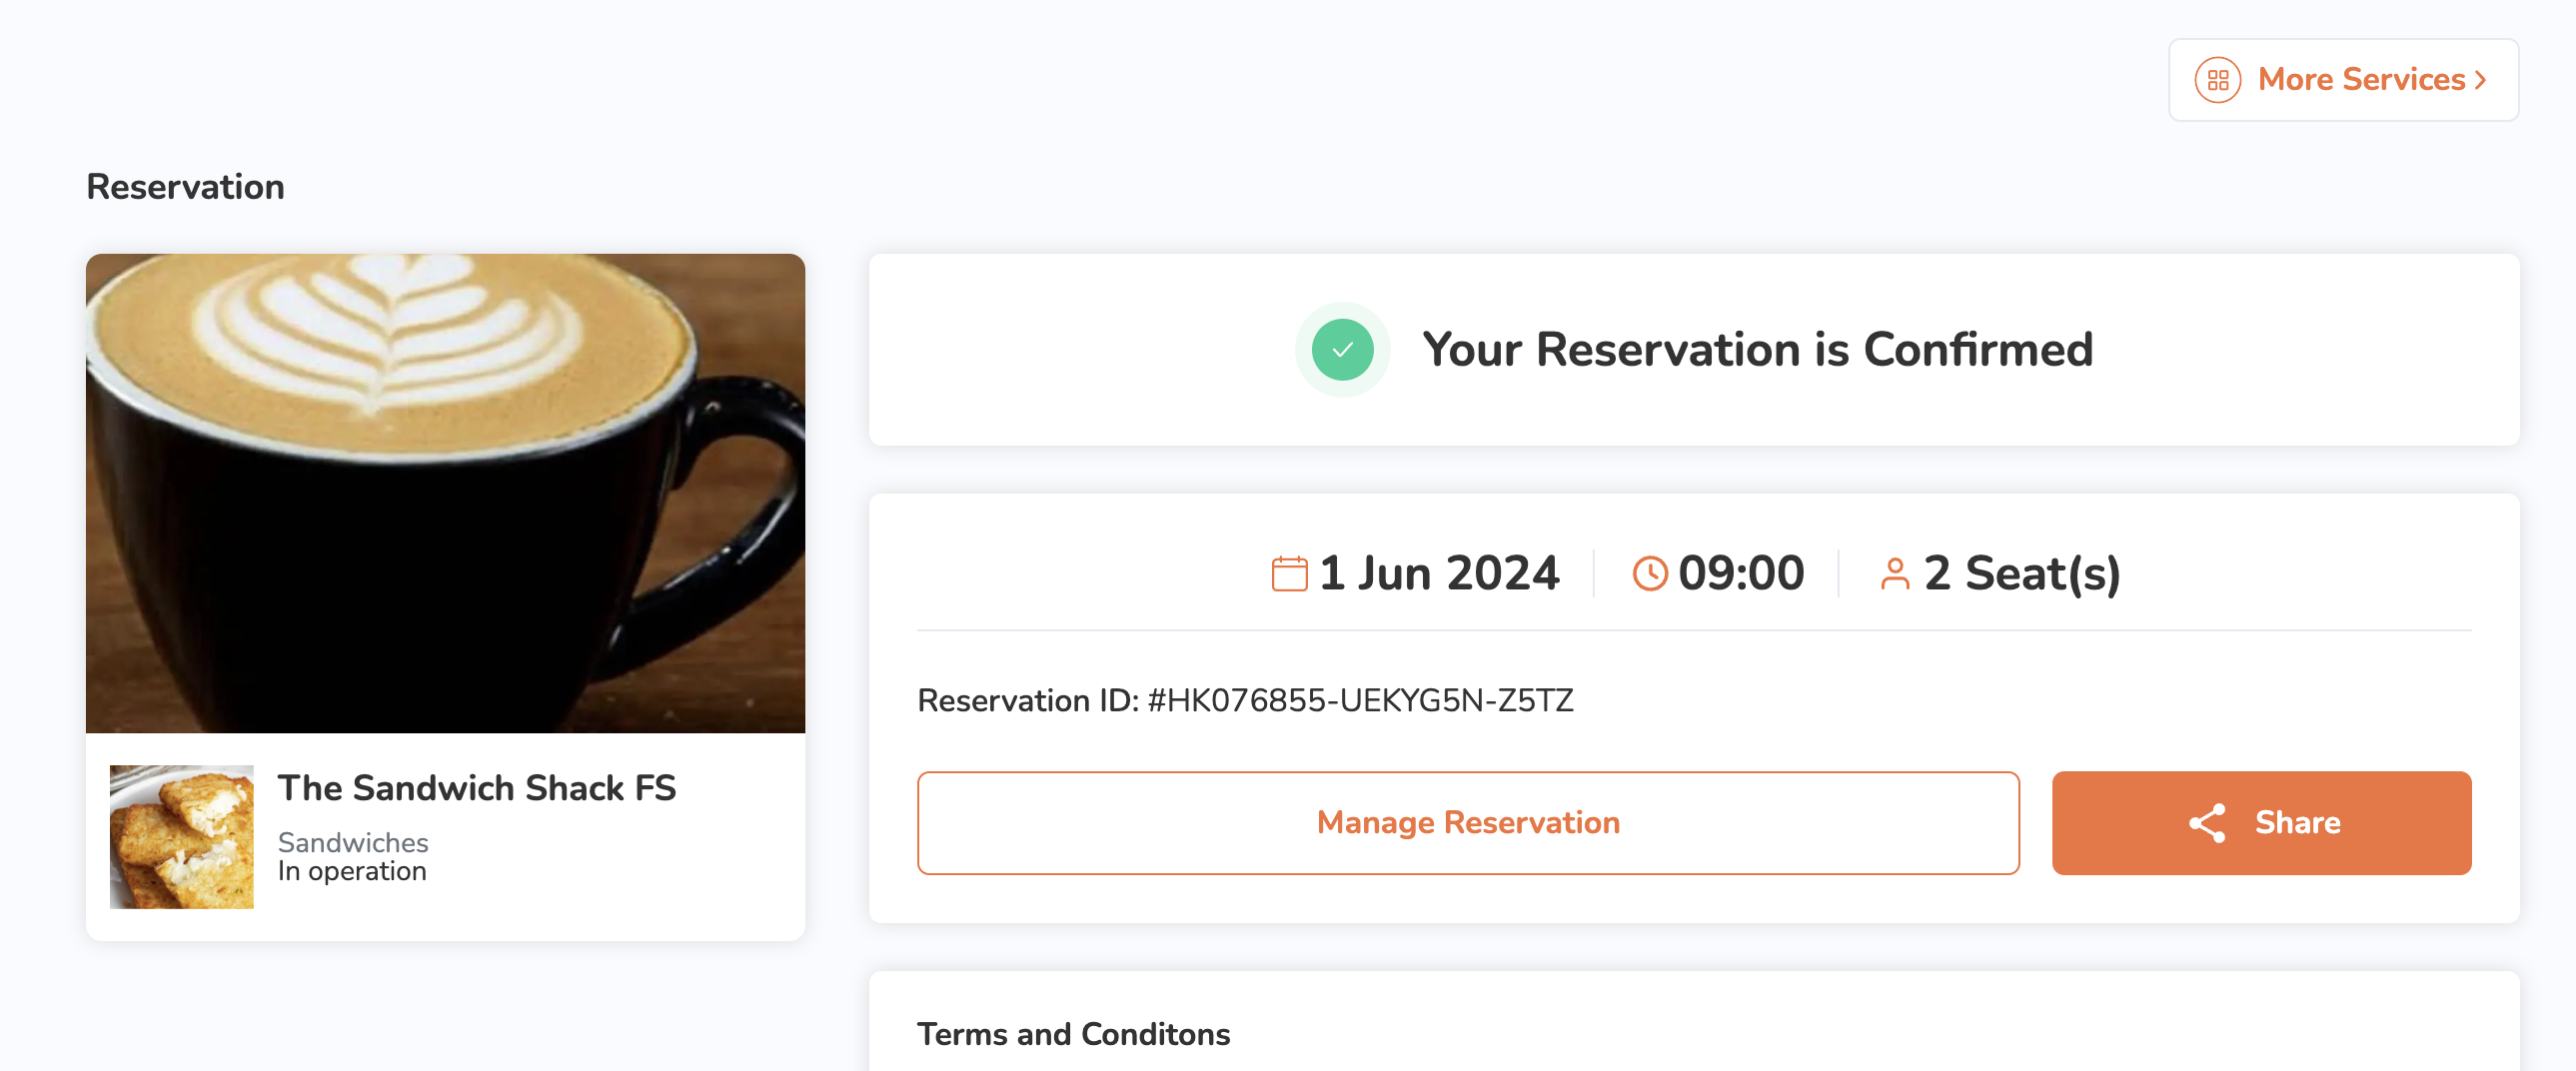
Once your reservation is confirmed, an email confirmation will be sent to the email address you entered during booking. Additionally, you’ll be directed to a confirmation page where you can find the following reservation details:
- Restaurant’s address
- Reservation date
- Reservation party size
- Reservation time
- Reservation ID
- Note (if available)
- Terms and Conditions (if available)
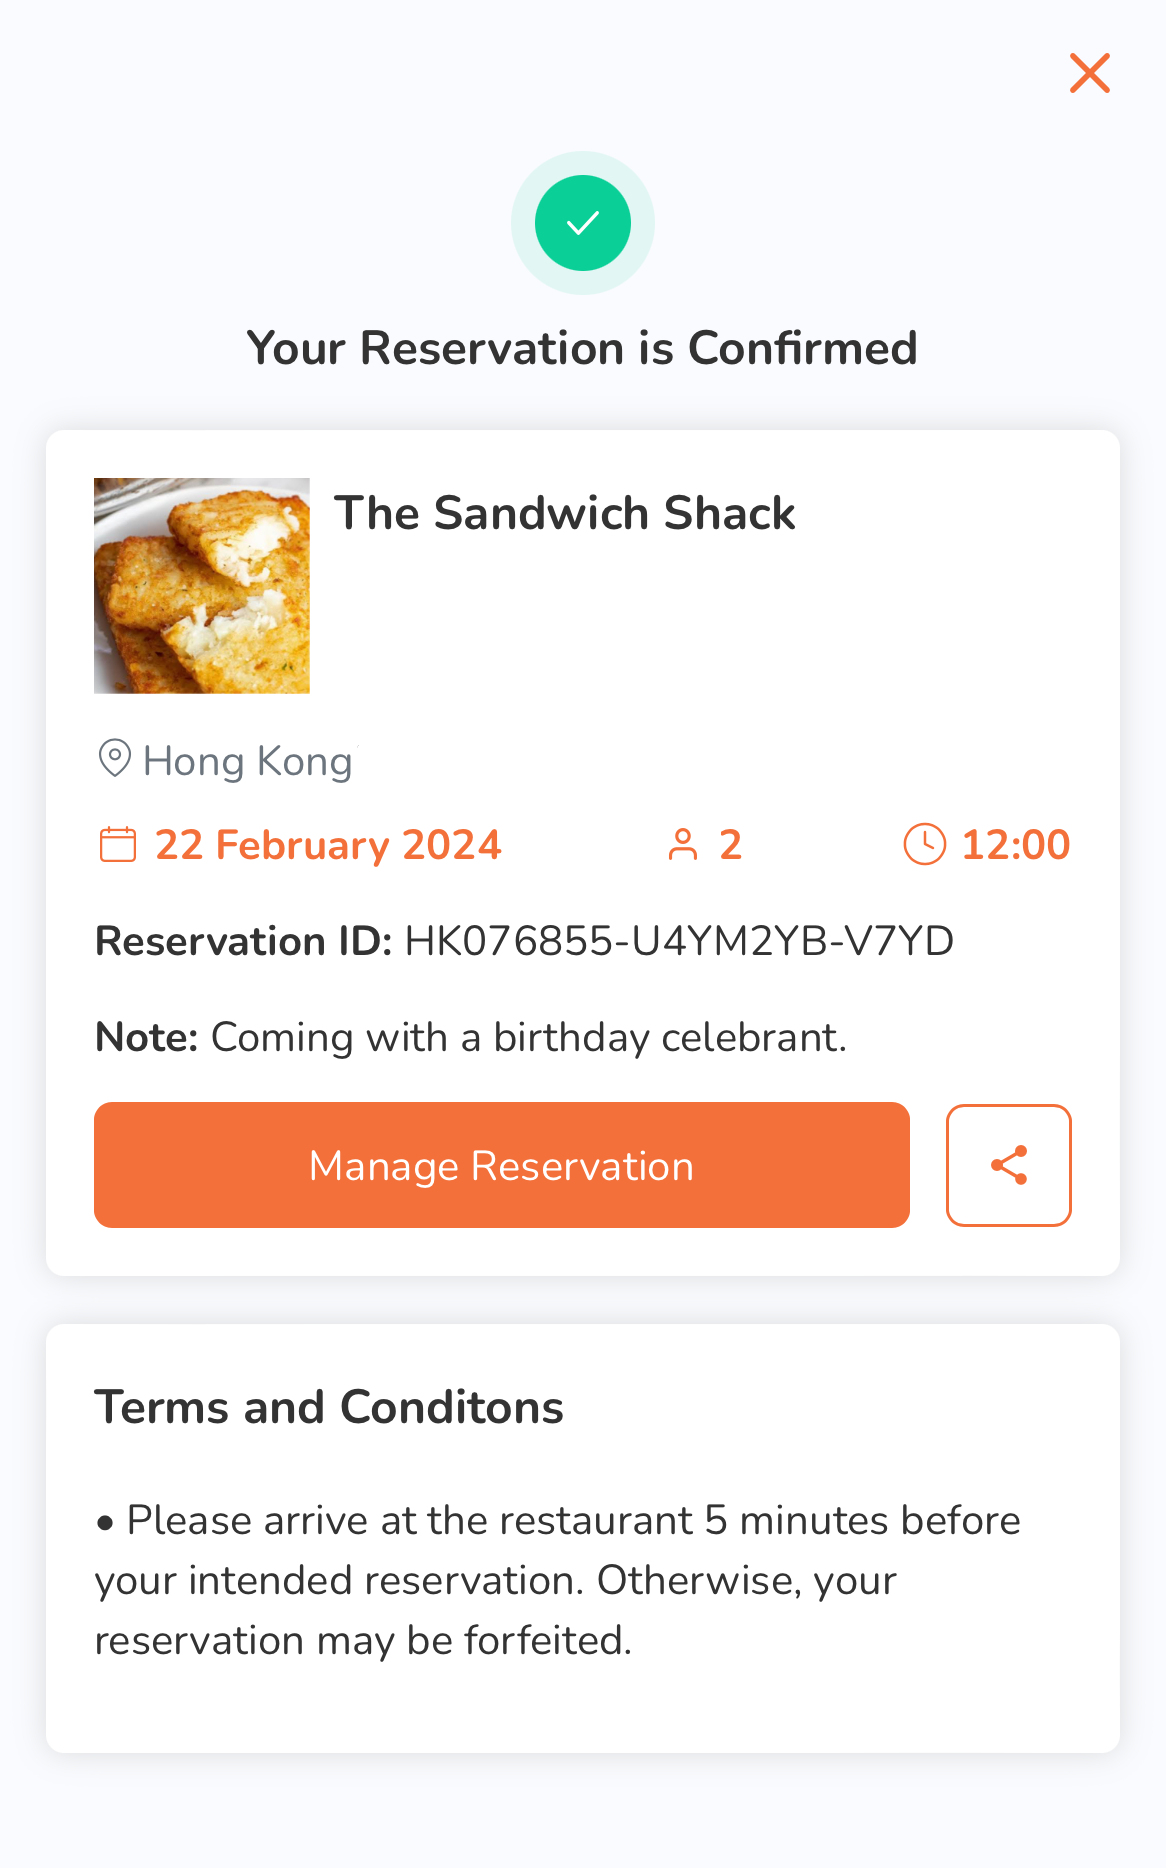 To share the reservation details, tap Share
 ![]() . Then, tap Copy to copy the reservation details to your clipboard. You can also select your preferred messaging app to share the reservation details.
. Then, tap Copy to copy the reservation details to your clipboard. You can also select your preferred messaging app to share the reservation details.
Desktop
- Log in to the restaurant’s website.
- From the options, select Reservation.
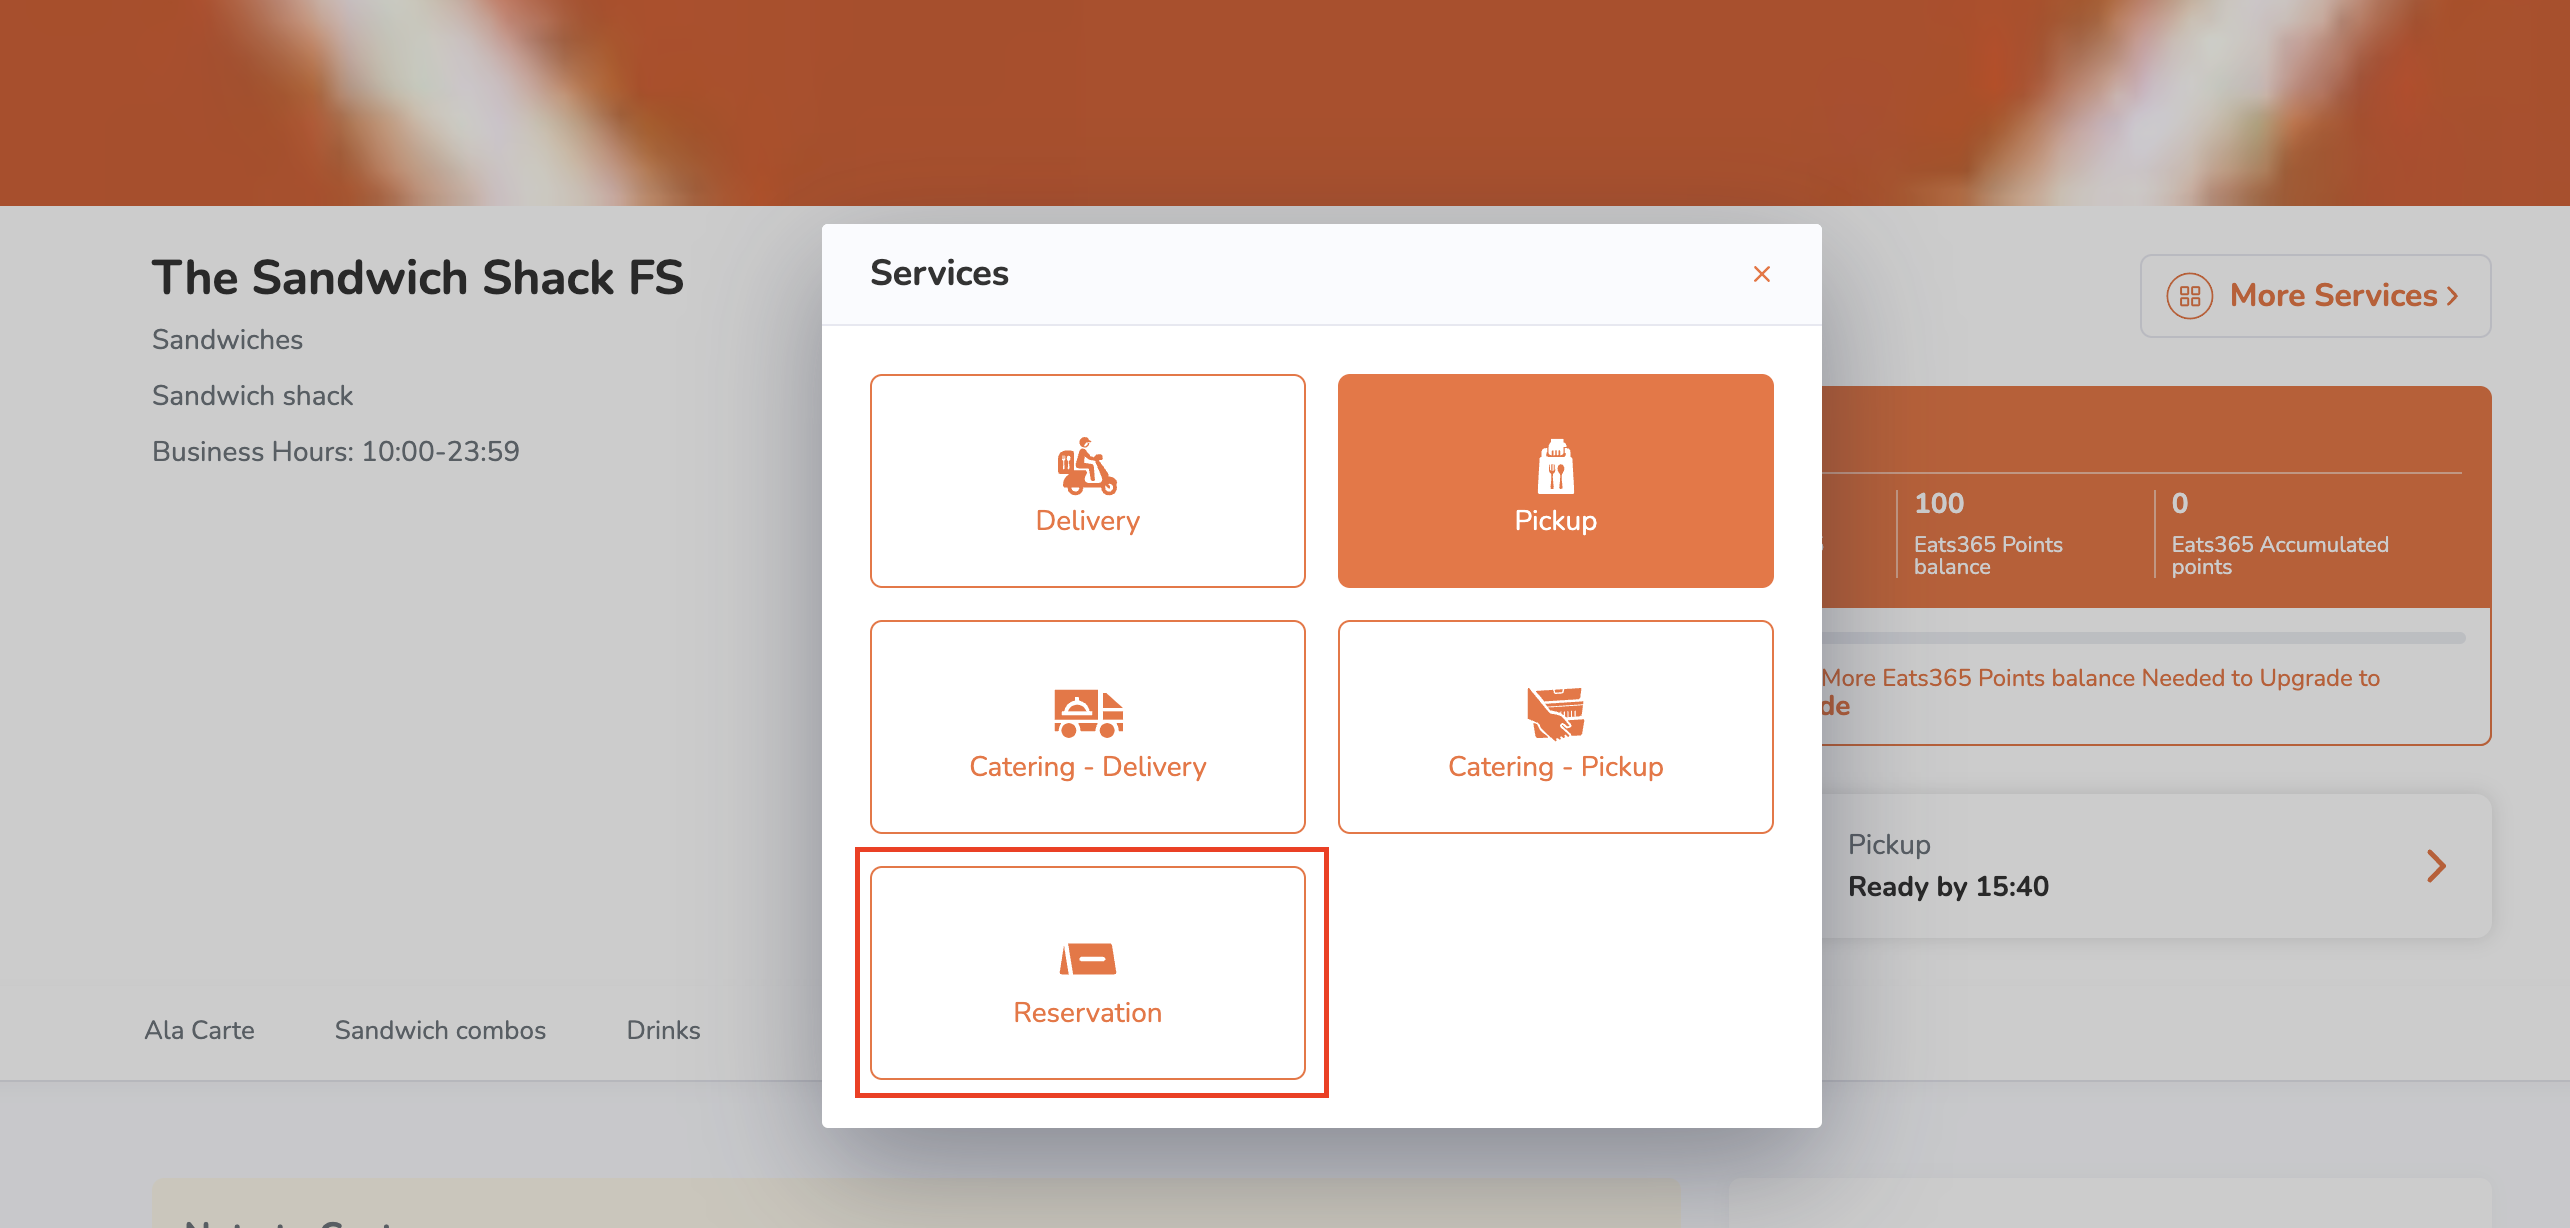
- For single restaurant websites: On the order-taking screen, click on More Services. Then, select Reservation.
- For multi-restaurant websites:
- On the main page, click on the order mode selector. Then, select Reservation.
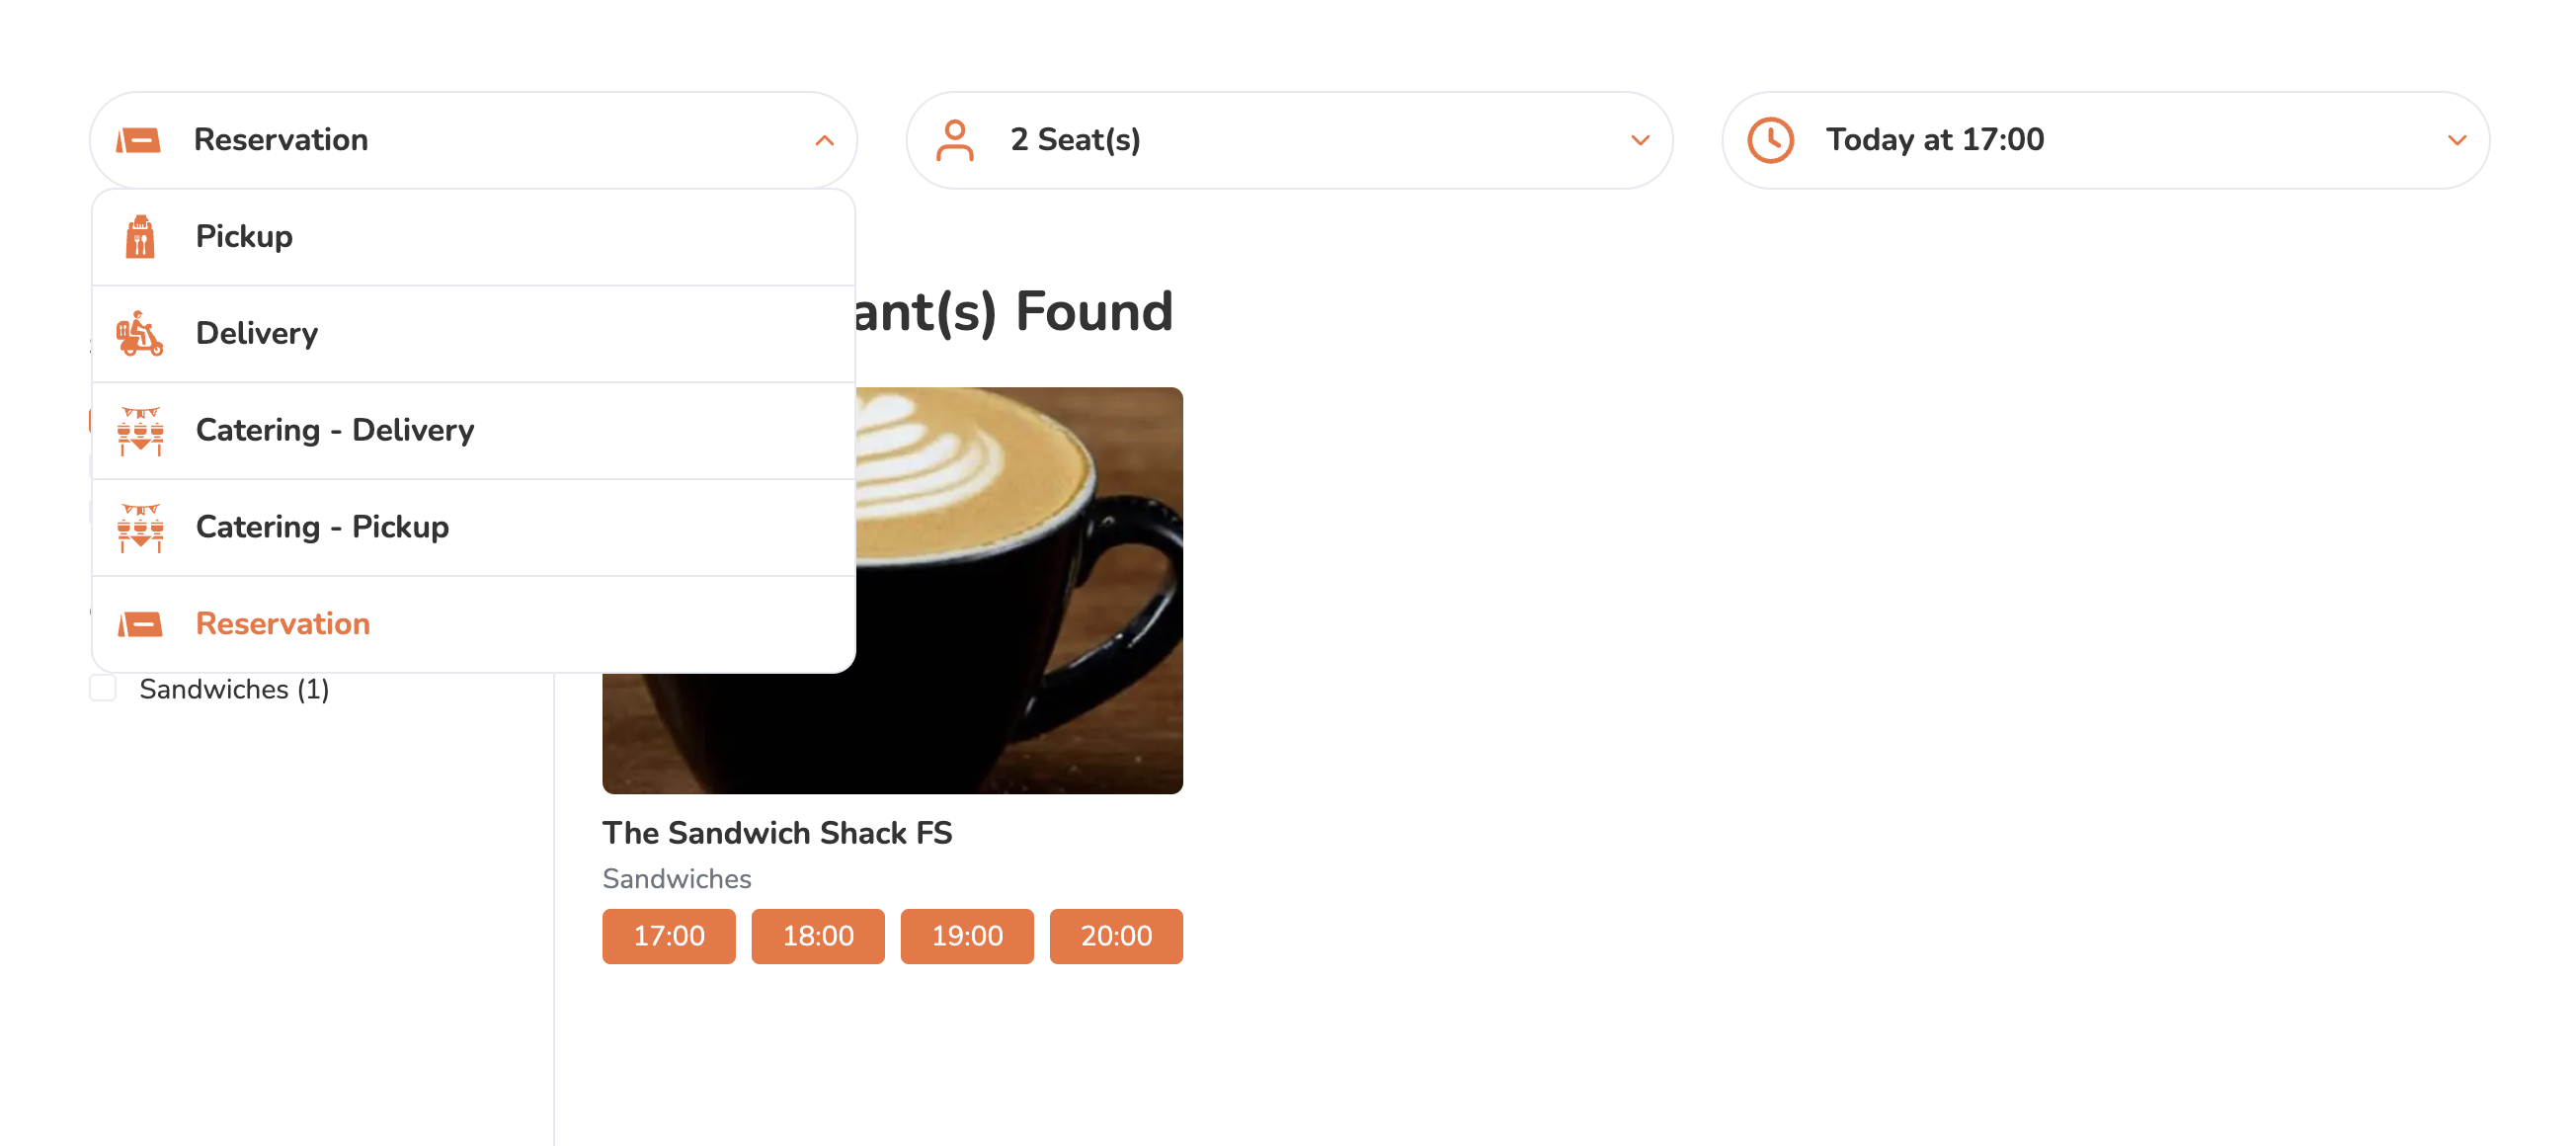
- Choose the restaurant where you want to book a reservation.
- On the main page, click on the order mode selector. Then, select Reservation.
- For single restaurant websites: On the order-taking screen, click on More Services. Then, select Reservation.
- Under Make a Reservation, enter the following reservation details:
- Date
- Party size
- Time
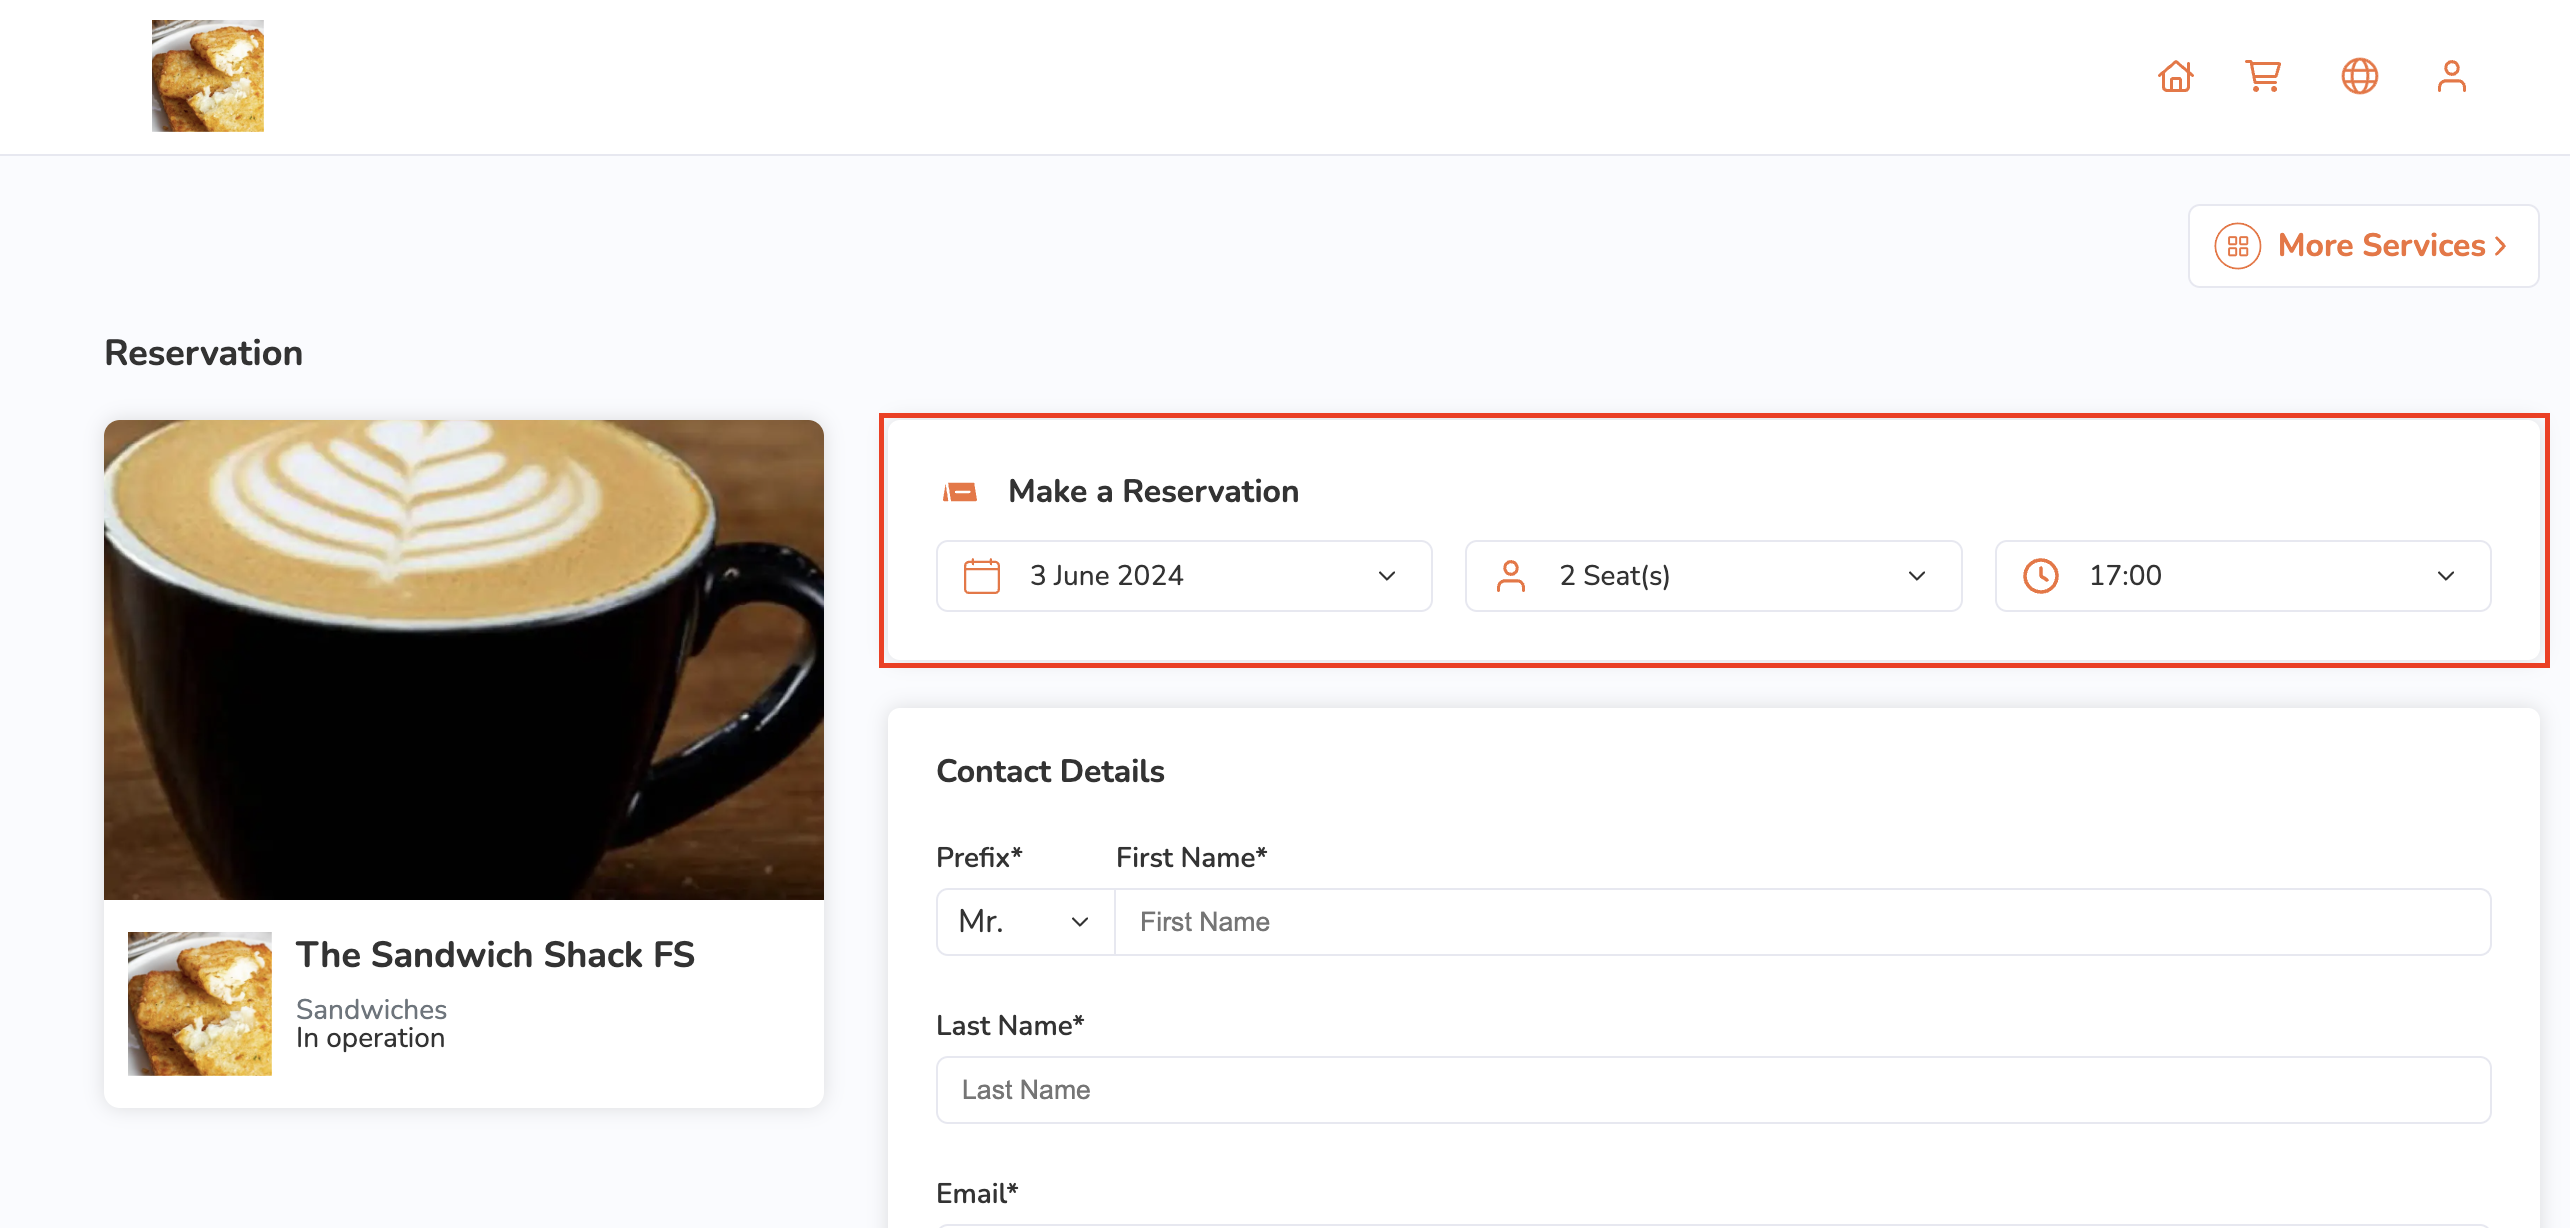
- Under Contact Details, enter the following information:
Important: Once your reservationis confirmed, you can no longer change your contact information.- Prefix
- First Name
- Last Name
- Email address
- Phone number
- (Optional) Under Seating Preference, select your preferred seating option.
- (Optional) To add a note about your reservation, under Note, enter additional remarks for your reservation.
- If available, under Terms and Conditions, check the restaurant’s reservation Terms and Conditions before proceeding with the booking.
- Once done, click on Book Now to confirm the reservation.
 Once your reservation is confirmed, an email confirmation will be sent to the email address you entered during booking. Additionally, you’ll be directed to a confirmation page where you can find the following reservation details:
- Restaurant’s address
- Reservation date
- Reservation party size
- Reservation time
- Reservation ID
- Note (if available)
- Terms and Conditions (if available)
To share the reservation details, click on Share ![]() . Then, click on Copy to copy the reservation details to your clipboard. You can also select your preferred messaging app to share the reservation details.
. Then, click on Copy to copy the reservation details to your clipboard. You can also select your preferred messaging app to share the reservation details.
Manage an online reservation
Depending on the restaurant’s configured reservation settings, you can still make changes to your reservation even after your online reservation has been confirmed.
Modify an online reservation
To make changes to your online reservation, follow the steps below:
Mobile
- Log in to the restaurant’s website.
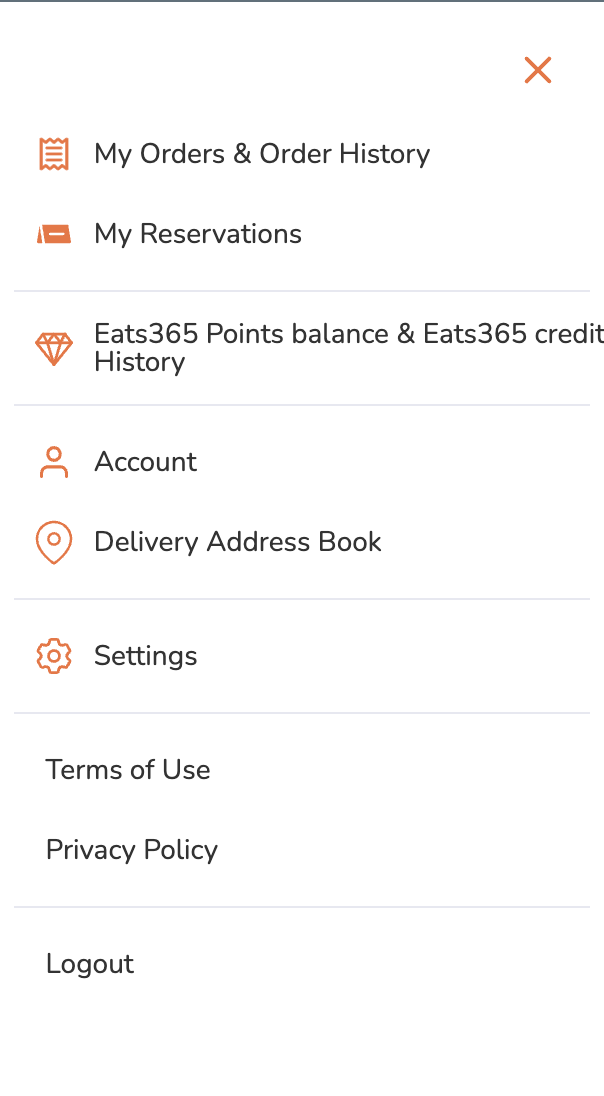
- At the top right, tap Account
 . Then, tap My Reservations.
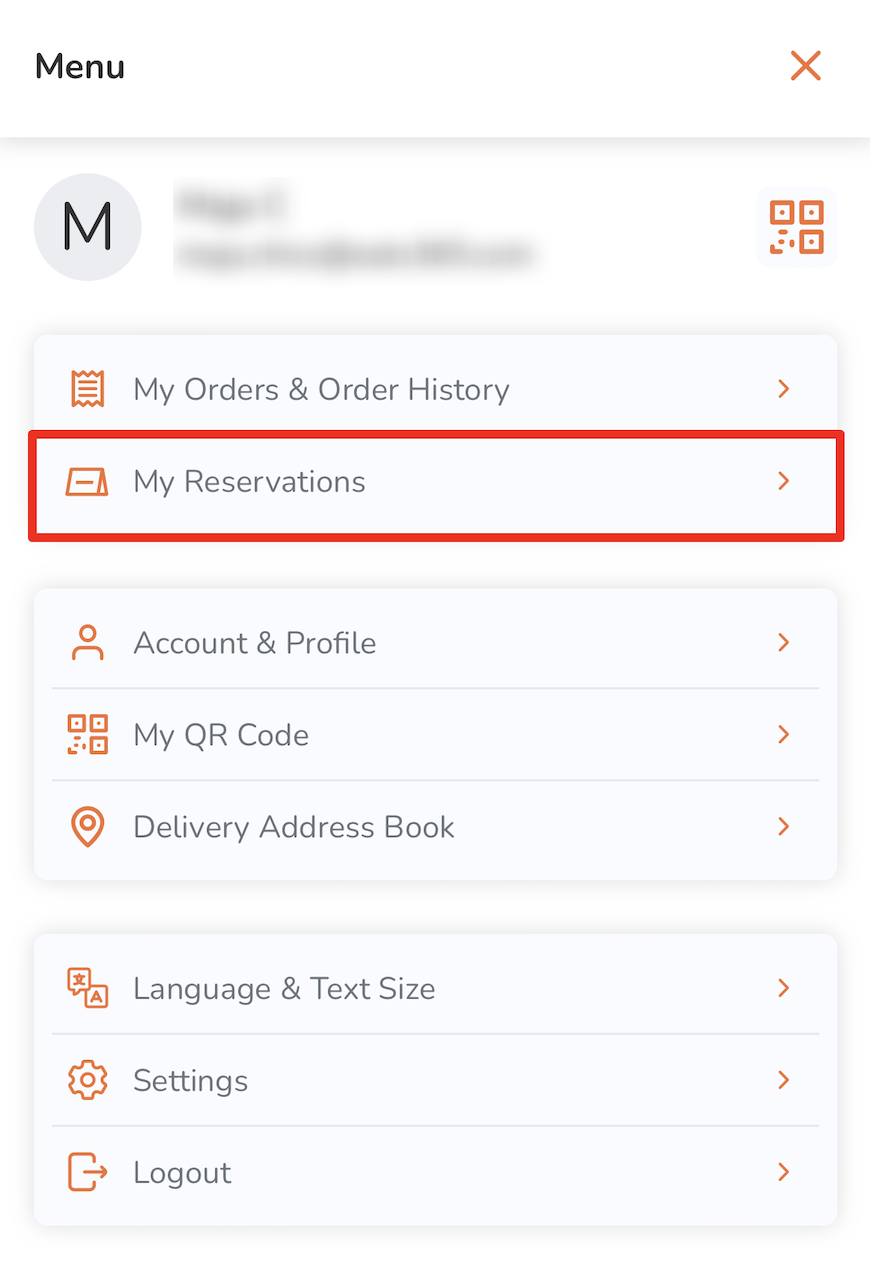
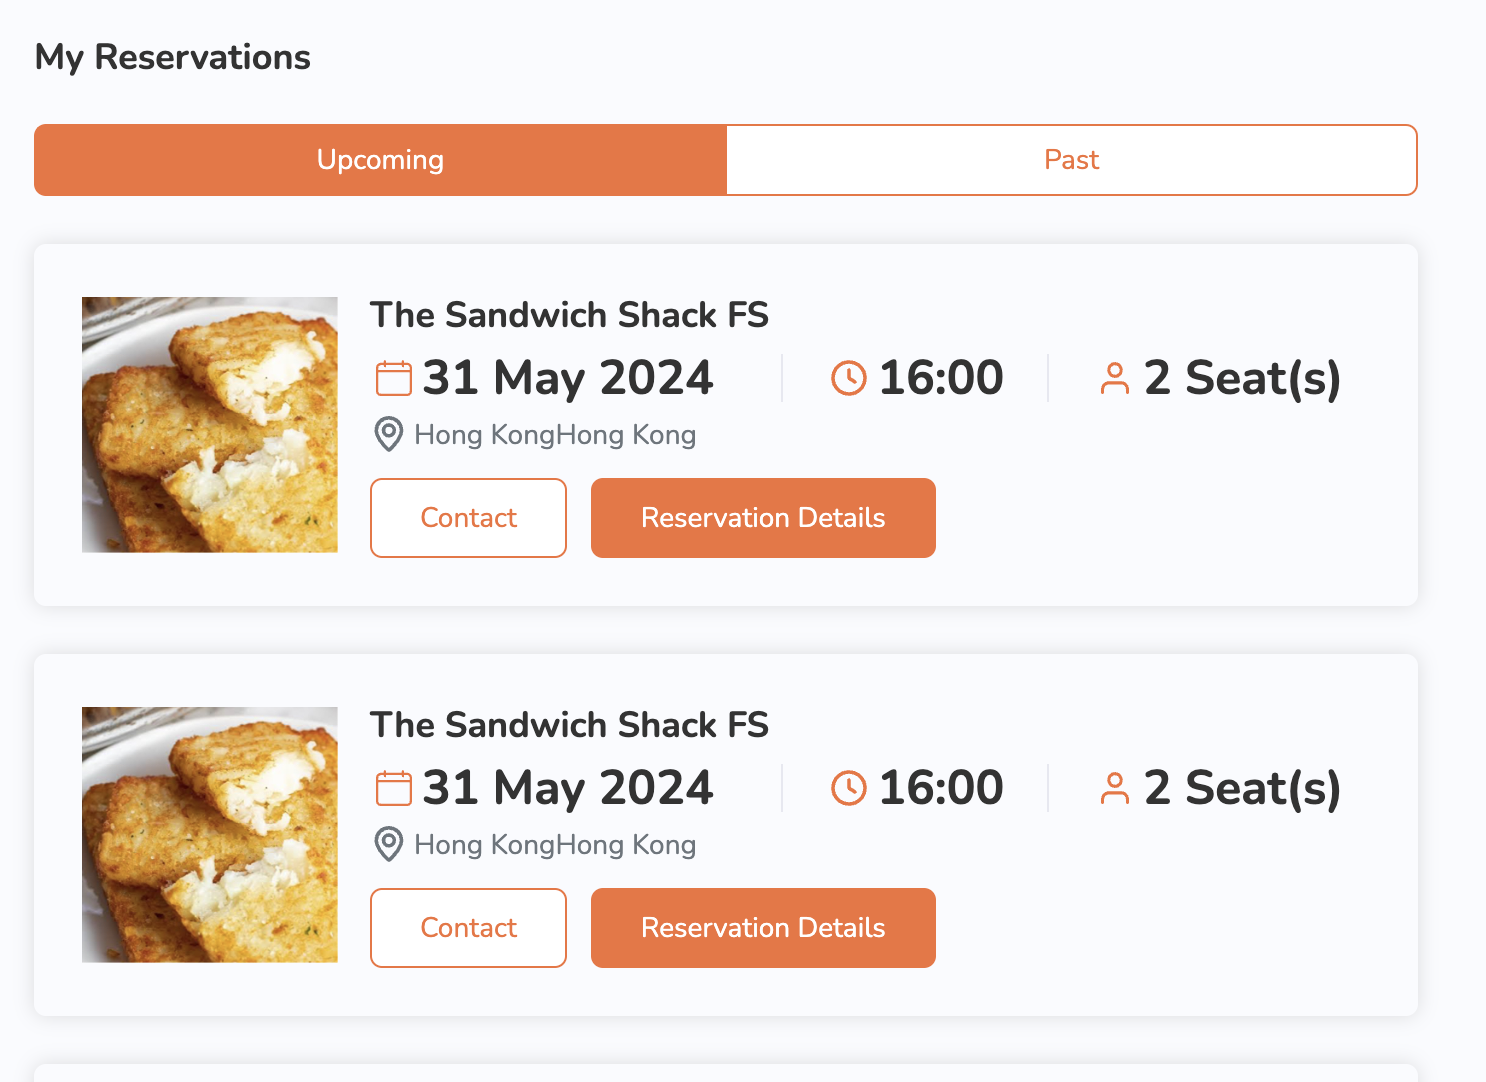
- Under the reservation that you’d like to edit, tap Reservation Details.

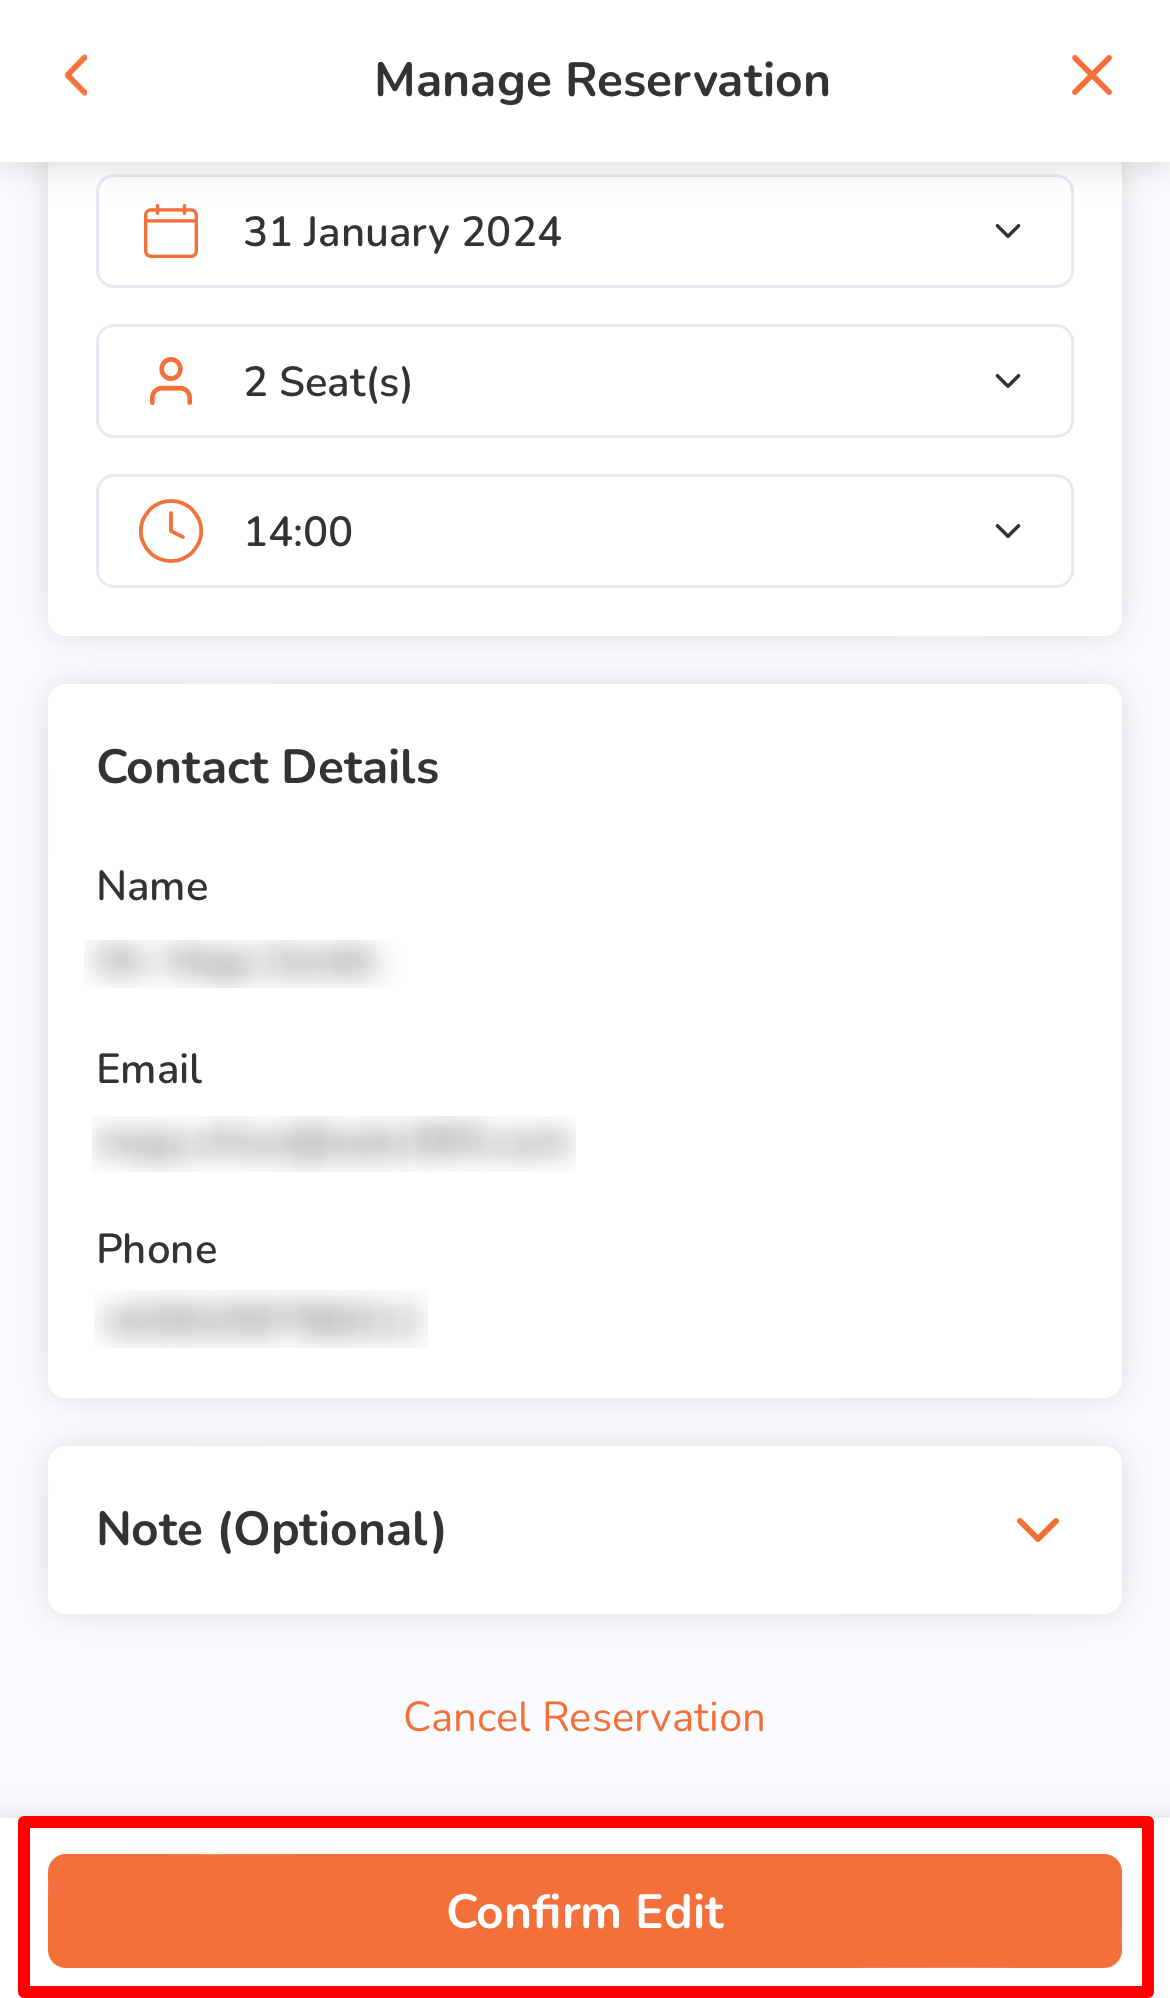
- On the confirmed reservation, tap Manage Reservation.
Note: If you’re attempting to modify the reservation within 24 hours prior to your confirmed booking time, the Manage Reservation button will be disabled (greyed out).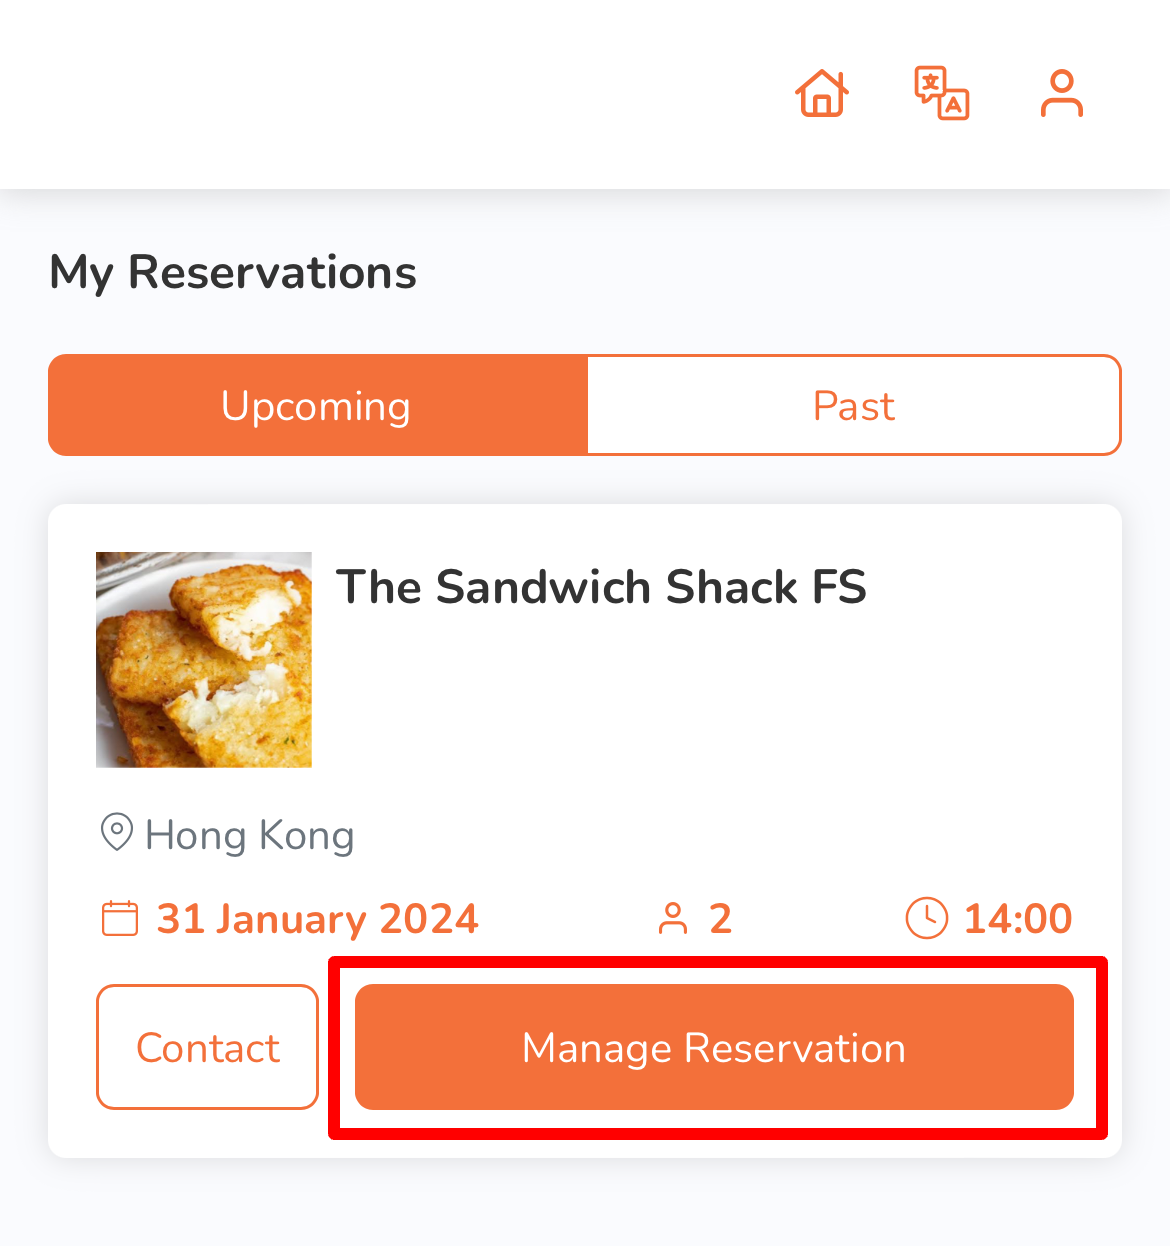
- Apply your changes.
Note: The contact details can no longer be edited for confirmed reservations. - Once done, tap Confirm Edit.
Desktop
- Log in to the restaurant’s website.
- At the top right, click on Account . Then, click on My Reservations.
- Under the reservation that you’d like to edit, click on Reservation Details.
- On the confirmed reservation, click on Manage Reservation. Note: If you’re attempting to modify the reservation within 24 hours prior to your confirmed booking time, the Manage Reservation button will be disabled (greyed out).
- Apply your changes.
Note: The contact details can no longer be edited for confirmed reservations. - Once done, click on Edit Reservation.
Cancel an online reservation
To cancel your online reservation, follow the steps below:
Mobile
- Log in to the restaurant’s website.
- At the top right, tap Account . Then, tap My Reservations.
- Under the reservation that you’d like to cancel, tap Reservation Details.
- On the confirmed reservation, tap Manage Reservation.
Note: If you’re canceling the reservation within 24 hours prior to your confirmed booking time, the Manage Reservation button will be disabled (greyed out).
- At the bottom, tap Cancel Reservation.
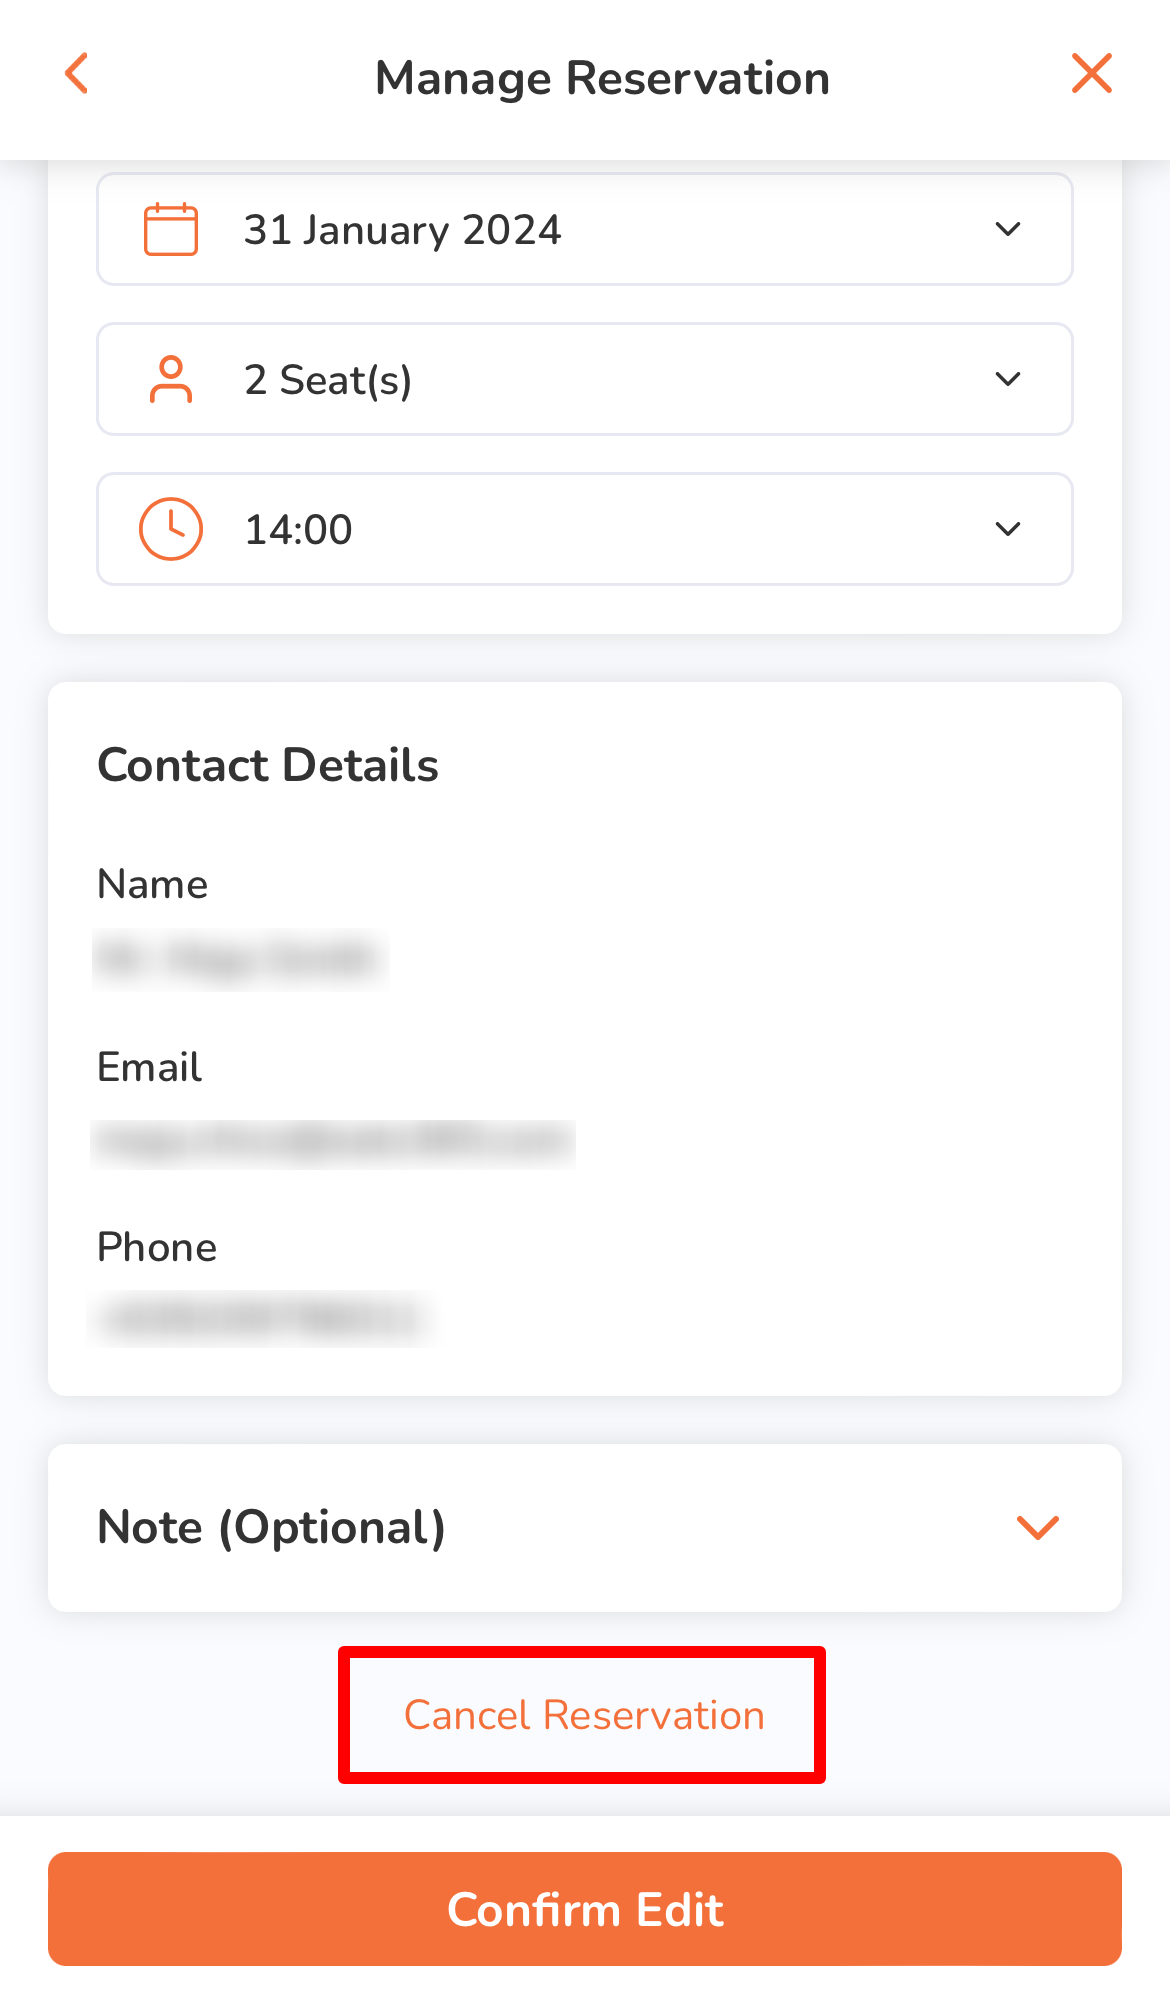
- Tap Cancel Reservation to confirm the cancellation.
Desktop
- Log in to the restaurant’s website.
- At the top right, click on Account . Then, click on My Reservations.
- Under the reservation that you’d like to cancel, click on Reservation Details.
- On the confirmed reservation, click on Manage Reservation. Note: If you’re canceling the reservation within 24 hours prior to your confirmed booking time, the Manage Reservation button will be disabled (greyed out).
- At the bottom, click on Cancel Reservation.
Contact the restaurant
To call the restaurant’s phone number, follow the steps below:
- Log in to the restaurant’s website.
- At the top right, tap Account . Then, tap My Reservations.
- Under the reservation details, tap Contact to initiate a call to the restaurant.