 Eats365 Products
 Merchant Guide
 Modules
 Membership
 Integrations
 Hardware
 Staff Operations
 Roles & Permissions
 Payments
 Reports
 What’s New
 Release Notes
 Troubleshooting
 Simulators
 Glossary
 Troubleshooter
 System Status
Ticket Kiosk
Table of Contents
Configure Queue Ticket Kiosk settings
Learn how to customize your settings for the Queue Ticket Kiosk.
Changing the settings on the Queue Ticket Kiosk allows you to customize the app’s layout and behavior based on your preferences. You can change the Ticket Kiosk settings directly on the app.
In this article, you’ll learn how to configure the Queue Ticket Kiosk to your preferred settings.
Change general settings
iOS
To configure the Ticket Kiosk’s settings, follow the steps below:
- On your iPad, open the Ticket Kiosk app. The app opens up to the Ticket Kiosk settings.
- Tap General Settings.
- Choose a setting, then change the options according to your preferences. The changes automatically apply to the Ticket Kiosk.
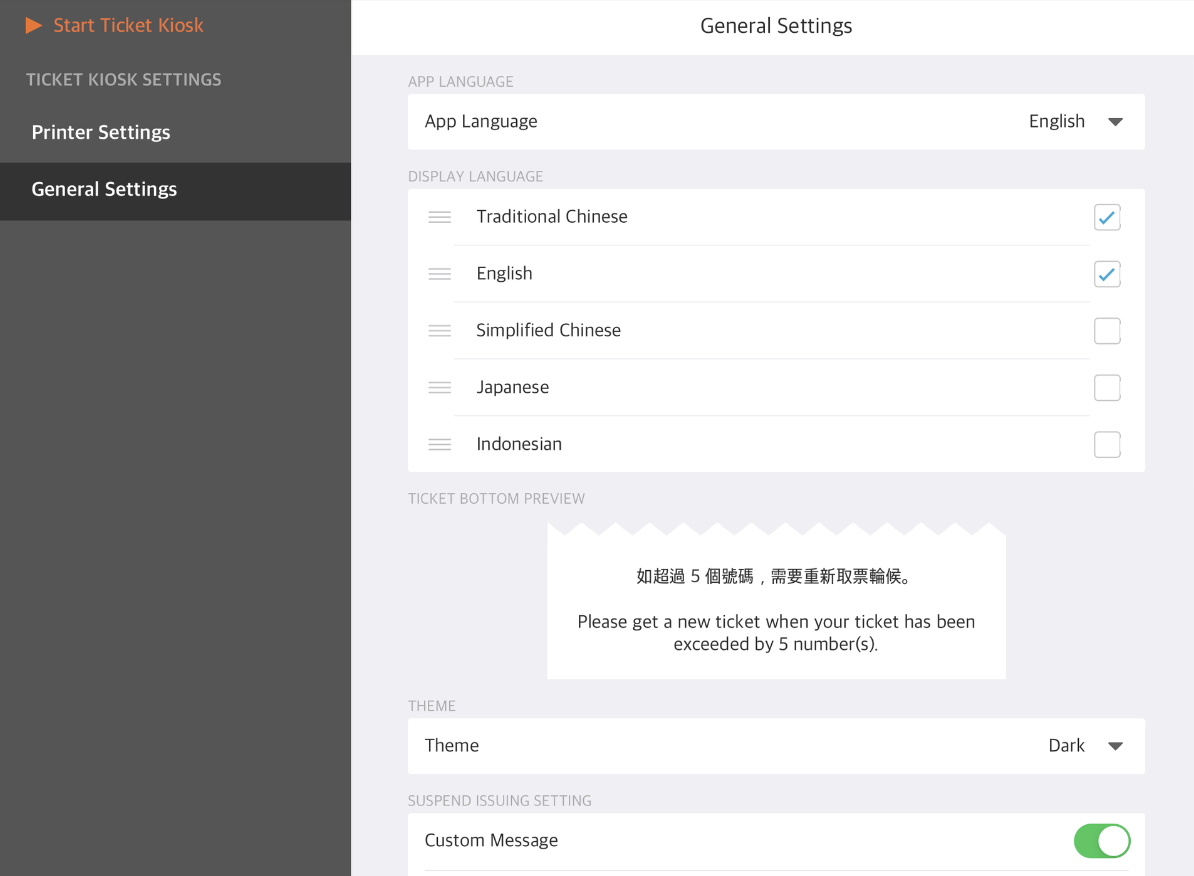
You can configure the following settings on the Ticket Kiosk:
App Language
Set the default app language to your preferred language.
Display Language
Select the languages that you want to appear on the Ticket Kiosk display.
Theme
Choose if you want the Ticket Kiosk theme to use Dark mode or Light mode.
Suspend issuing setting
Create a custom message that would appear on the Ticket Kiosk display when ticket issuing has been suspended.
Enable Announcement
When enabled, the Ticket Kiosk announces the next ticket number. From this setting, you may also configure the following:
- Volume - adjust the announcement’s volume.
- Play Chime - when enabled, the chime plays before announcing the ticket number.
- Play Greeting - when enabled, a greeting is played before announcing the next ticket number.
- Announcement language - select the language to be used during announcements.
Tip: You can choose to play the announcement in multiple languages.
Android
The Queue Ticket Kiosk on Android is typically set up as a standalone terminal that customers can use to get queuing tickets. To configure its settings, follow the steps below:
- On the queuing tickets screen, tap the Eats365 logo six times.

- Enter the passcode.
 Tip: If you haven’t set up a passcode for the Ticket Kiosk, the default passcode is 000000. To change the passcode, use the Merchant Portal.
- Choose a setting, then change the options according to your preferences. The changes automatically apply to the Ticket Kiosk.

You can configure the following settings on the Ticket Kiosk:
System Language
Set the default app language to your preferred language.
Display Language
Select the languages that you want to appear on the Ticket Kiosk display.
Printer Setting
Connect the Queue Ticket Kiosk to a printer. You can connect the Kiosk to an external printer or a printer that’s built-in with the Kiosk. To connect a printer, follow the steps below:
- If you have a built-in printer with the Kiosk, tap Masung. If you have a separate printer, tap Epson.

- Tap Scan.

- Select the preferred printer. Then, tap Connect.
Suspend issuing setting
Create a custom message that would appear on the Ticket Kiosk display when ticket issuing has been suspended.
Announcements
When enabled, the Ticket Kiosk announces the next ticket number. From this setting, you may also configure the following:
- Volume - adjust the announcement’s volume.
- Play Chime - when enabled, the chime plays before announcing the ticket number.
- Play Greeting - when enabled, a greeting is played before announcing the next ticket number.
- Calling language - select the language to be used during announcements.
Tip: You can choose to play the announcement in multiple languages.
System Setting
Configure Android settings. By default, the navigation buttons such as the back, home, and recent apps, are disabled when running the Queue Kiosk. "System Setting" allows you to directly open the Android settings page to view and manage the device’s settings.
Upload Log
Send a diagnostics log to Eats365 to help identify issues on the Queue Ticket Kiosk.
DeleteChange shared settings
Shared settings are functions that are applied across all Queue Ticket Kiosks. You can configure shared settings in the Merchant Portal.
To configure the Ticket Kiosk’s shared settings, follow the steps below:
Merchant Portal (Classic Theme)
- Log in to the Merchant Portal.
- On the left panel, click on Advanced Settings.
- Under "Modules," select Queue kiosk. Then, click on Shared Settings.
- Choose a setting, then change the options according to your preferences.
- At the top right, click on Save to confirm.
Merchant Portal 2.0
- Log in to the Merchant Portal.
- On the left panel, click on Modules.
- Select Queue kiosk. Then, click on Shared Settings.
- Choose a setting, then change the options according to your preferences.

- At the top right, click on Save.
You can configure the following options for all Ticket Kiosk devices:
Show Total Number of Tickets Currently Waiting
Display the total number of customers currently in queue.

Show Custom Text
Create a custom message that you want to appear on the Queue Ticket Kiosk display.

Reset Passcode
Change the Ticket Kiosk passcode.