All

Contact Us

If you still have questions or prefer to get help directly from an agent, please submit a request.
We’ll get back to you as soon as possible.

Please fill out the contact form below and we will reply as soon as possible.

    Login
English (US)
English (US)
Mandarin
Cantonese
  • Home
  • Modules

mPOS

All Product

Contact Us

If you still have questions or prefer to get help directly from an agent, please submit a request.
We’ll get back to you as soon as possible.

Please fill out the contact form below and we will reply as soon as possible.

    • mPOS
        • Set up and install mPOS
        • Configure mPOS settings
        • Manage orders in the mPOS app
        • Manage tables in the mPOS app
    • PhotoMenu
        • Set up and install PhotoMenu
        • Configure PhotoMenu settings
        • Place orders on the PhotoMenu
        • Set up PhotoMenu as a mobile or stationary eMenu
        • Use Service Call on PhotoMenu
    • Ticket Kiosk
        • Set up and install Queue Ticket Kiosk
        • Issue queuing tickets from the Queue Ticket Kiosk
        • Configure Queue Ticket Kiosk settings
    • eSignage
        • Set up and install eSignage
        • Configure eSignage settings
    • Kitchen Display System
        • Set up and install Kitchen Display System
        • Configure Kitchen Display System settings
        • Manage orders on the Kitchen Display System
    • Customer Facing Display
        • Set up and install Customer Facing Display
        • Configure Customer Facing Display settings
    • Expedite Display
        • Set up and install Expedite Display
        • Configure Expedite Display settings
        • Perform basic expedite operations
    • Eats365 Biz and Biz Lite
        • Set up and install Eats365 Biz and Eats365 Biz Lite
        • Configure Eats365 Biz settings
        • Manage online orders on the Eats365 Biz Lite
        • Reset Eats365 Biz
        • Compare Eats365 Biz and Eats365 Biz Lite
        • Configure Eats365 Biz Lite settings
        • Place and manage orders on the Eats365 Biz
    • Self Order Kiosk
        • Set up and install Self Order Kiosk
        • Place an order on Self Order Kiosk
        • Configure Self Order Kiosk (iOS) settings
        • Set Kivo as the Self Order Kiosk default screen
        • Configure Self Order Kiosk (Android) settings
        • Process a payment return on the Self Order Kiosk
    • Pay Station
        • Set up and install Pay Station
        • Pay using Pay Station
        • Configure Pay Station settings
    • Dynamic Digital Menu
        • Manage the menu on the Dynamic Digital Menu
    • Branded Online Store
        • Manage Branded Online Store preferences
        • Set up SMS Notification
        • Book a reservation using restaurant website
        • Change password on the branded online store
        • Place orders on the branded online store
        • Delete an account on the branded online store
        • Log in and log out of the branded online store
        • Sign up on the branded online store
        • Manage orders on the branded online store
        • Set up a Delivery Address Book on the branded online store
        • Secure member credit payment on the branded online store
        • Pay using member credits on the branded online store
        • Purchase member credit using the branded online store​
        • Join a restaurant's loyalty program

Table of Contents

Manage orders in the mPOS app

Learn how to add, edit, remove, and customize orders in the mPOS app.

The mPOS module acts as a mobile POS terminal that wait staff can use to take tableside orders and process payments.

In this article, you’ll learn how to add, edit, remove, and customize orders in the mPOS app.

Order Management

Use the mPOS to take and modify customer orders.

Add items to an order

To add items to an order, follow the steps below:

  1. Open the mPOS app.
  2. Select a table and enter the party size. Tap Confirm to proceed.
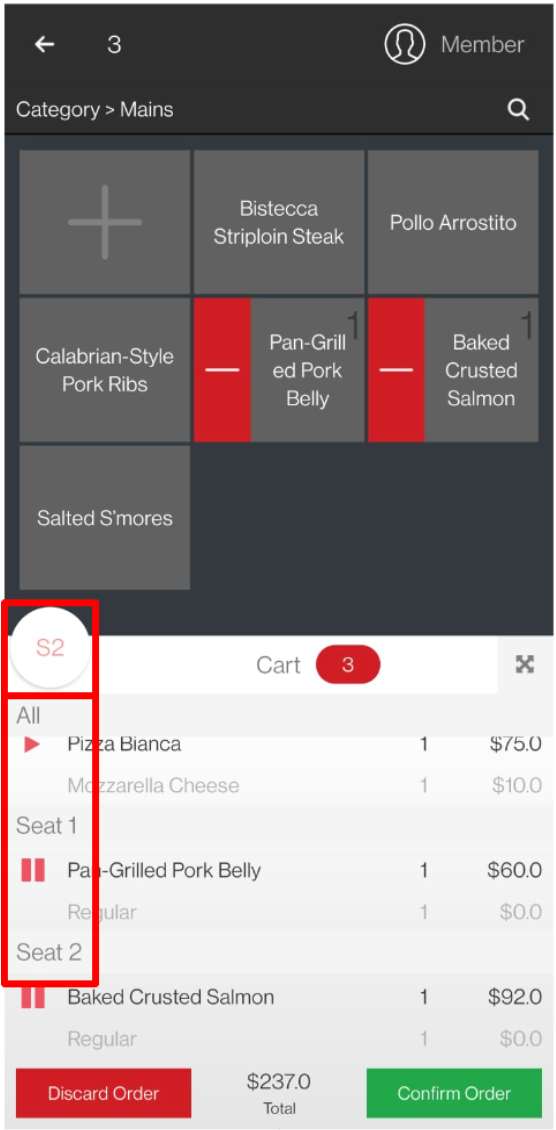
  3. If you’ve enabled Order Display By Seat, tap the seat option to change the seat to the appropriate seat number.
  4. On the order-taking screen, select the Items and applicable Modifiers that you want to add to the customer's order.
    Note: If you’ve enabled Quick Mode, tap and hold on an Item to display the Modifiers page. For more information on how to enable or disable Quick Mode, refer to Configure mPOS settings.
  5. When you’ve completed adding the Items to the customer’s Cart, tap Confirm Order.
Delete

Important: Once an order has been confirmed, you can no longer make changes to an Item, modify its quantity, or delete them from the mPOS app. If you need to edit a confirmed order, you must do so in a POS terminal.

Place a Combo Item order

Combo Item orders can be placed through the mPOS app. To configure Combo menu Items, refer to Set up and manage a Combo Item.

To add a Combo Item, follow the steps below:
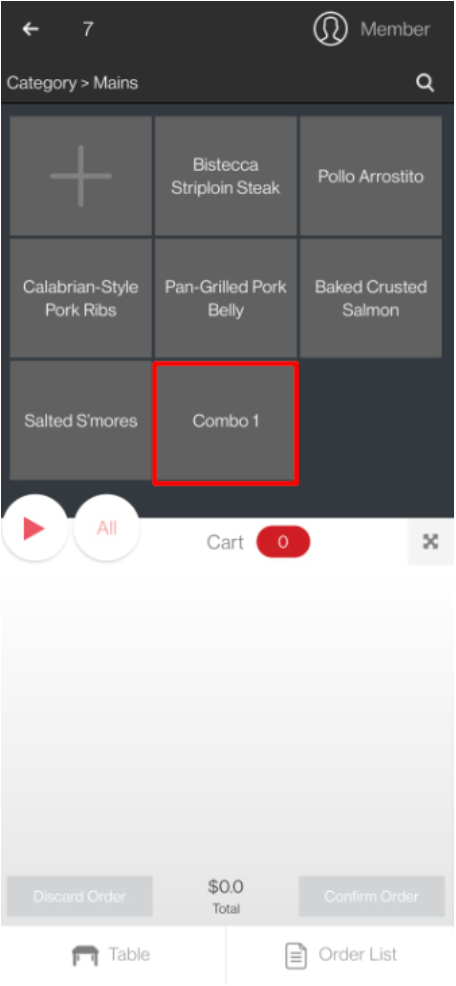
  1. From the order-taking screen, choose a Combo Item.
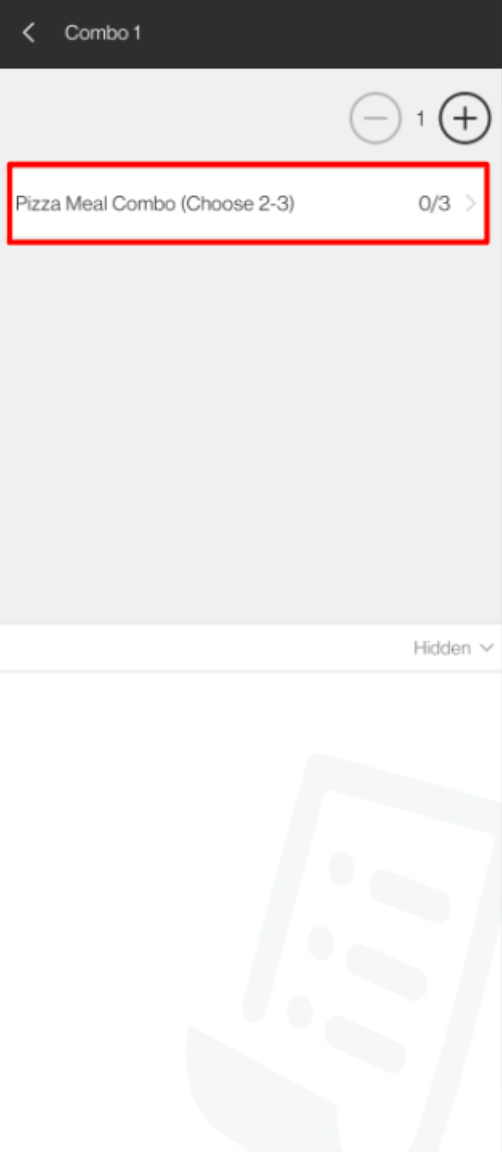
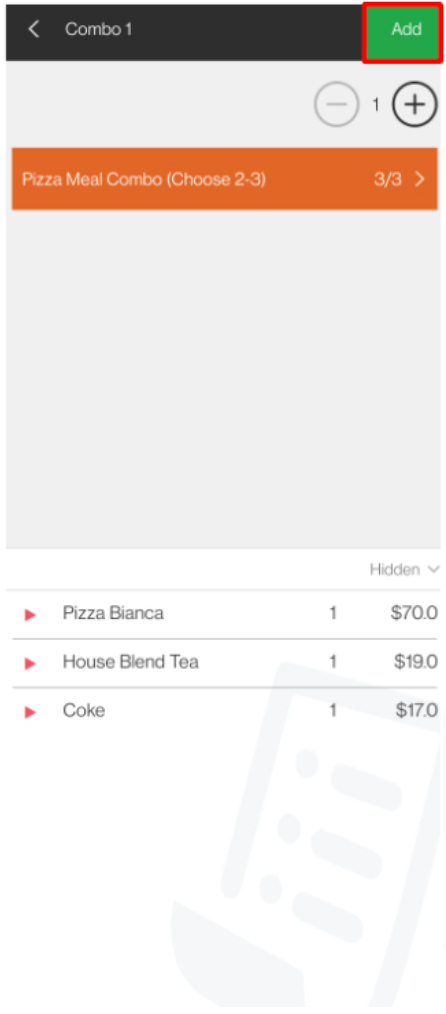
  2. Select a Combo Item option, then choose from the available menu Items included in the Combo.
  3. To review the selected menu Items that have been added to the Combo, tap Next.
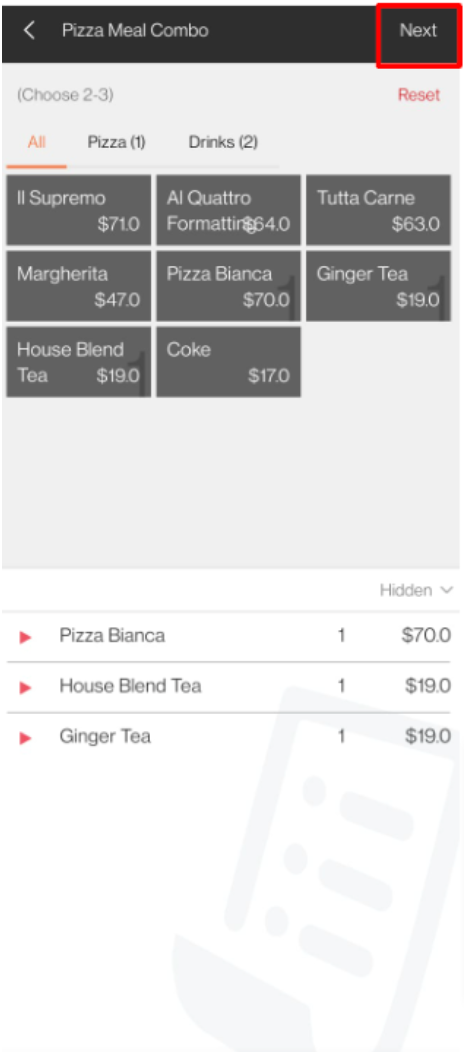
  4. Tap Add to confirm.

Change Item Quantity

Depending on whether you’ve enabled Quick Mode in the mPOS settings, the method to change a menu Item’s quantity can change based on the selected setting. For more information on how to enable or disable Quick Mode, refer to Configure mPOS settings.

Delete

Important: You can only adjust an Item’s quantity if the order hasn’t been confirmed.

Change Quantity from the order-taking screen

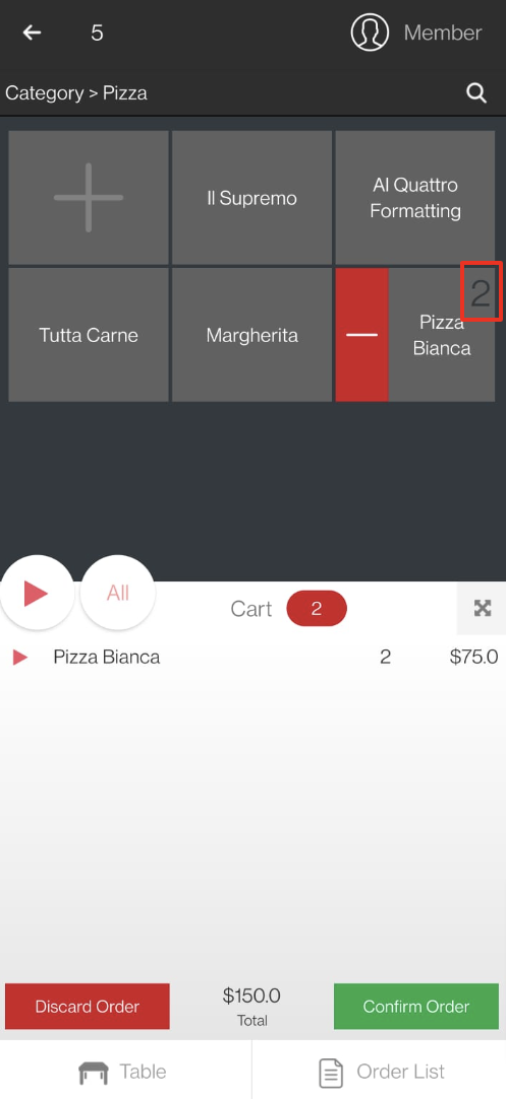
If Quick Mode is enabled, you can modify an Item’s quantity directly from the order-taking screen.

To modify the quantity, from the order-taking screen, tap on a menu Item to add one increment of that Item to the Cart. To decrease the quantity, tap the minus symbol  beside the selected menu Item.

Delete

Tip: The number of times the menu Item is selected is displayed at the top right of the menu Item.

Change Quantity from the Modifiers screen

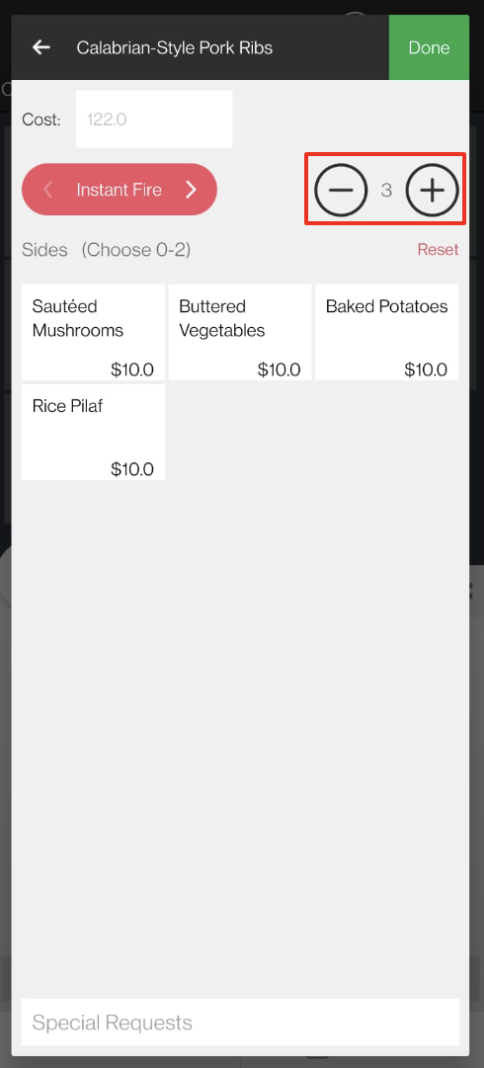
If Quick Mode is disabled, you can modify an Item’s quantity from the Modifiers screen.

To modify the quantity, from the Modifiers screen, tap add  to increase the quantity and tap minus  to decrease the quantity.

Search Item by Product Code

Use an Item’s Product Code or Stock Keeping Unit (SKU).

Delete

Tip: An Item’s SKU can be found in the Menu Setup settings. For more information, refer to Set up and manage a Single Item.

To find an Item using the Product Code, follow the steps below:

  1. At the top right of the order-taking screen, tap Search .
  2. Use the keypad to enter the Product Code.
  3. Tap Add . The Item is added automatically to the cart.
  4. If the Item has Modifiers, the screen prompts you to select the Item’s Modifiers. At the top right, tap Done.

Add a member to an order

To include members in an order, follow the steps below:

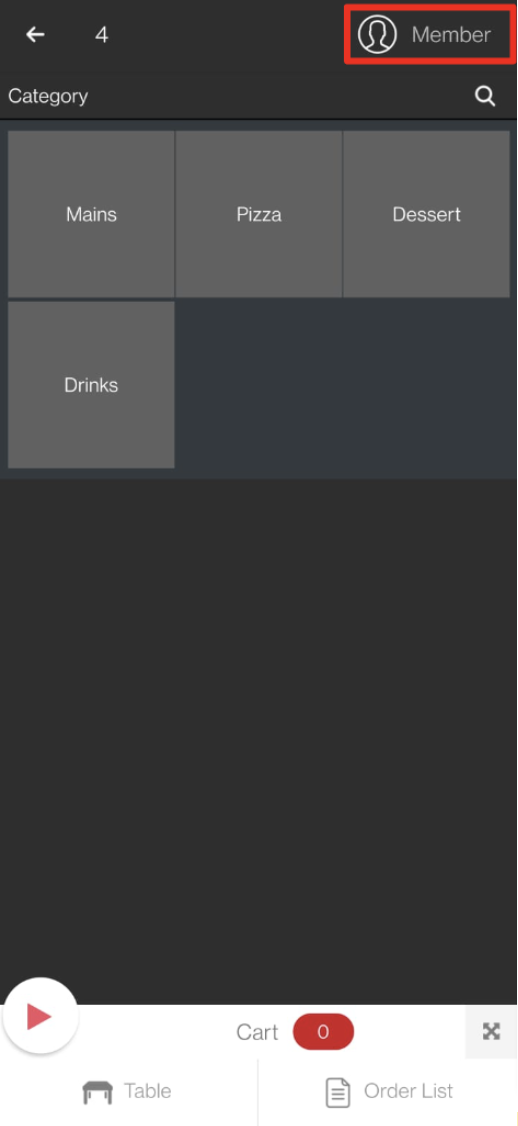
  1. At the top right of the order-taking screen, tap Member .
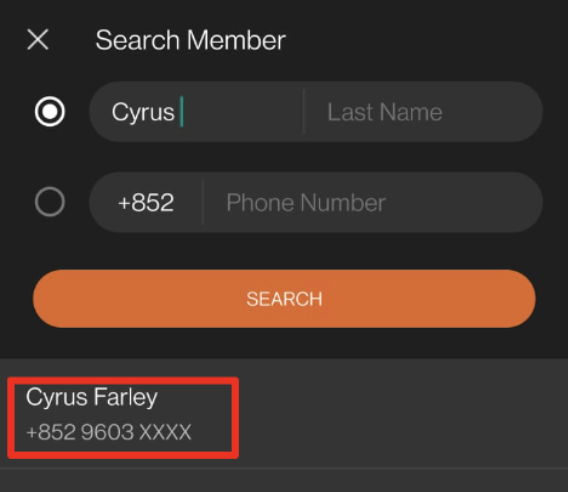
  2. To find a member’s record, enter the member’s First or Last Name, or Phone Number. Then, tap Search.
  3. From the search results, tap the member record. The Member Overview appears on the screen.
  4. Confirm if the selected record matches the member’s details.
  5. To add the member to the order, tap Add to Order. 
    Tip: This option changes to Remove from Order once a member has been added.
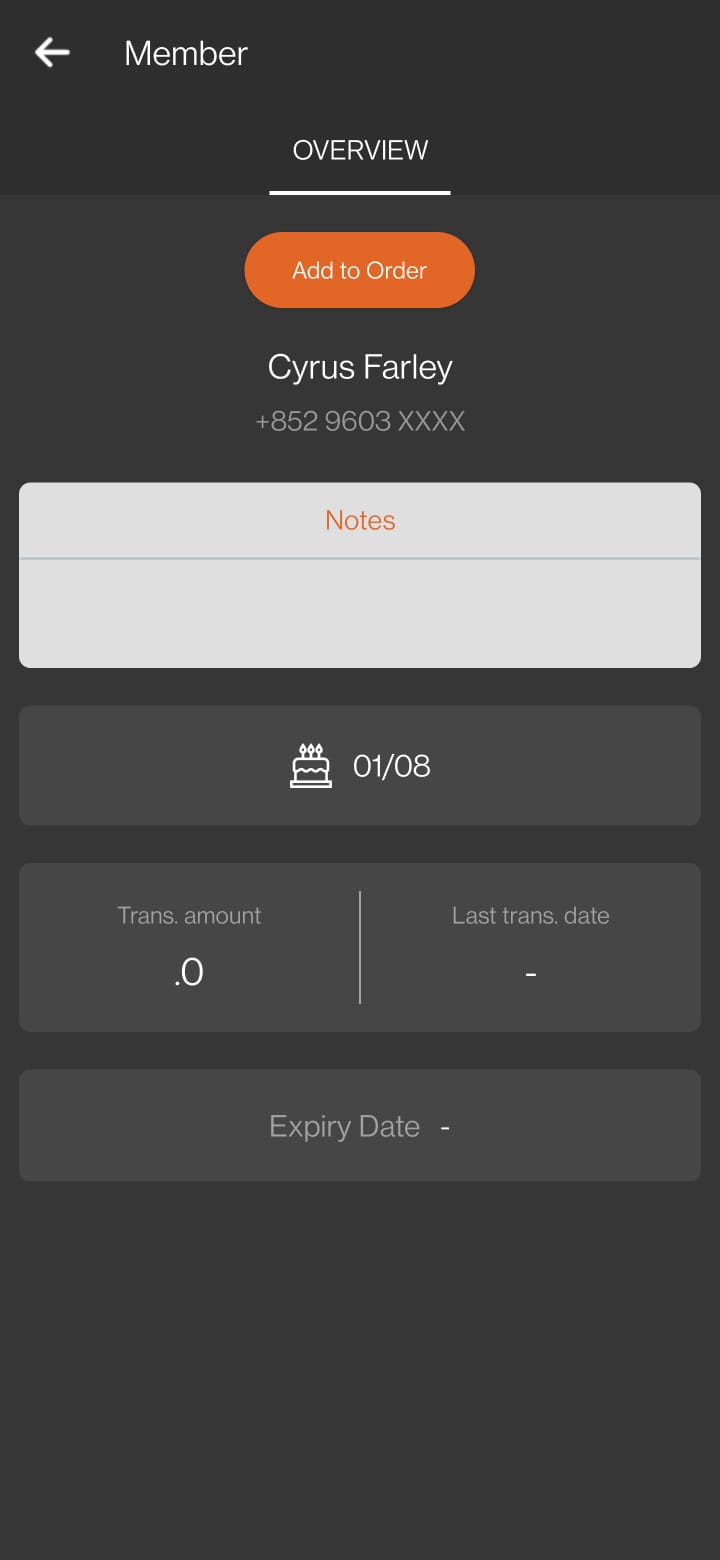
  6. Tap Back  to return to the order-taking screen.

Once a member has been added to an order, the member’s name is displayed at the top right of the order-taking screen to indicate that the order is now associated with the member.

Table Management

Use the mPOS to split tables and transfer orders to another table.

Transfer order to another table

To transfer a customer to a different table, follow the steps below:

  1. Tap on a table with an existing order, then at the top right, tap Transfer. 
  2. Select a pending order, then choose a table that can accommodate the total number of people in the party.
    Note: Selecting an already occupied table creates a split table automatically.
  3. Tap Transfer to confirm. A prompt appears stating that the request has been submitted. The order is transferred to the selected table shortly afterward.

Split a Table

To split a table, follow the steps below:

  1. Tap on a table with an existing order, then at the top right, tap +.
  2. Enter the party size to be seated, then tap Confirm.
  3. Proceed in taking the customer’s orders, then tap Confirm Order.

The table automatically creates a split and is represented by having a two-toned shade. Tap on the table to display all active orders.

Clear a table

Once a table’s bill has been settled, the table’s status will turn green. This indicates that the table can be cleared. To clear a table, follow the steps below:

  1. Open the mPOS app.
  2. On the table map screen, tap the table you’d like to mark as clear. This is indicated by the color green.
  3. To clear the table, tap Done.
mpos orders mpos app place orders on the mpos app change quantity manage mpos orders

Was this article helpful?

Yes
No
Give feedback about this article

Related Articles

  • Change order quantities
  • Remove items from an order
  • Add items to an order (Full Service)
            • Products
              • POS
              • mPOS
              • Eats365 Biz
              • Eats365 Marketplace
              • Branded Online Store
              • Kitchen Display System
              • Expedite Display
              • Scan-to-Order (BYOD)
              • Self-Service Kiosk
              • PhotoMenu
              • Queue Kiosk
              • Dynamic Digital Menu
              • Queue Display
              • Pickup Display
              • Customer Facing Display
            • Solutions
              • Online Ordering
              • Contactless Dining
              • Front of House
              • Guest Retention
              • Back of House
              • Back Office (Store End)
              • Multi-brand/Location Management (Enterprise)
              • Paperless Operation Experience
              • Payment
            • Restaurant Types
              • Quick Service Restaurant
              • Full Service Restaurant
              • Bars
              • Food Court
              • Cloud Kitchen
              • Food Retail
              • Self-service Restaurant
              • Enterprise
              • All-You-Can Eat (Buffet)
            • Resources
              • Eats365 Knowledge Base
              • Blog
              • Supported Hardware
            • Company
              • About Us
              • Success Stories
              • Referrals
            • Get In Touch
            • Contact Us
              • Eats365, Inc.
              • Sales info@eats365.com
              • Support support@eats365.com
        • Contact Us
          • Eats365, Inc.
          • info@eats365.com
          • www.eats365pos.com
        • Get In Touch
          • Apple Mobility Partner
            twitter facebook eats365 linkedin
        • eats365
          © 2023 Eats365 Incorporated. All rights reserved.

Knowledge Base Software powered by Helpjuice

Expand