 Eats365 Products
 Merchant Guide
 Modules
 Membership
 Integrations
 Hardware
 Staff Operations
 Roles & Permissions
 Payments
 Reports
 What’s New
 Release Notes
 Troubleshooting
 Simulators
 Glossary
 Troubleshooter
 System Status
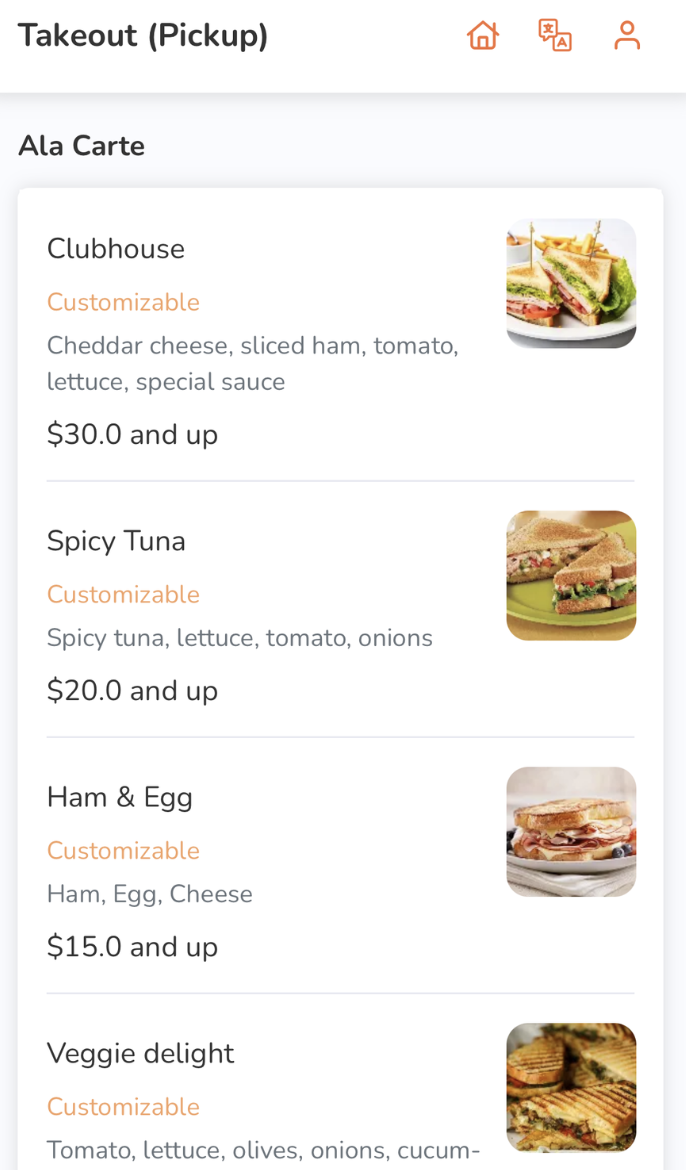
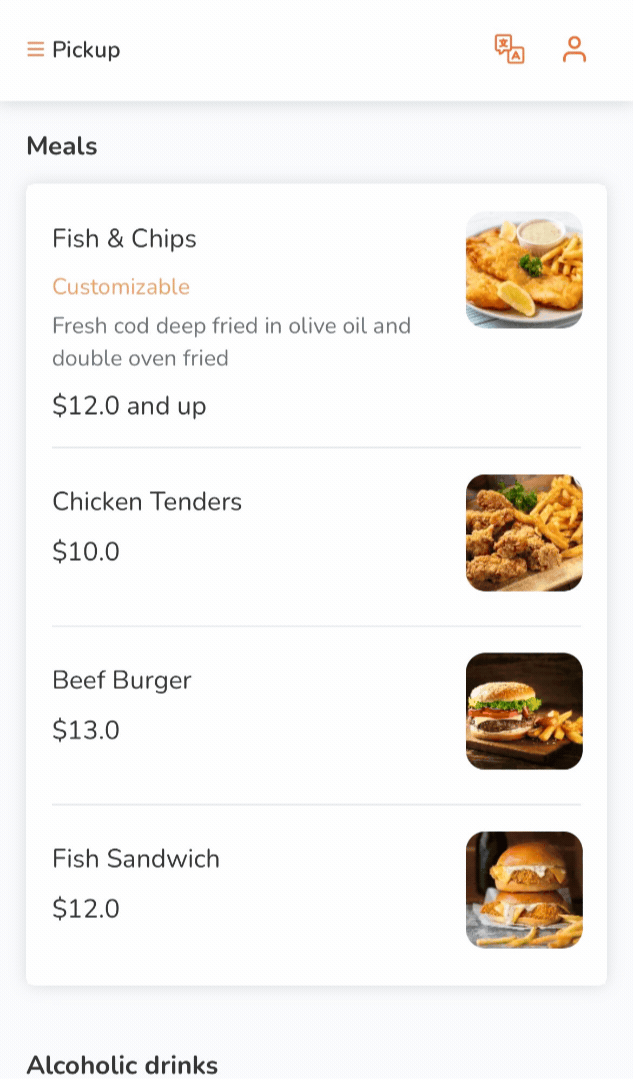
Branded Online Store
Table of Contents
Manage Branded Online Store preferences
Learn how to set up your preferred settings for your Branded Online Store on the Merchant Portal.

In this article, you’ll learn how to configure your Branded Online Store’s settings.
Change general Branded Online Store preferences
To configure your Branded Online Store’s general settings, follow the steps below:
Merchant Portal 2.0
- Log in to the Merchant Portal.
- On the left panel, click on Modules, then click on Branded Online Store.
- Select General.
- To enable your preferred settings, toggle the switch
 next to the setting that you want to turn on.
 - At the top right, click on Save to confirm.
You can toggle or configure the following options for your Branded Online Store:
Cover Image For Desktop
Cover Image
Sets the cover photo of your Branded Online Store's desktop version.

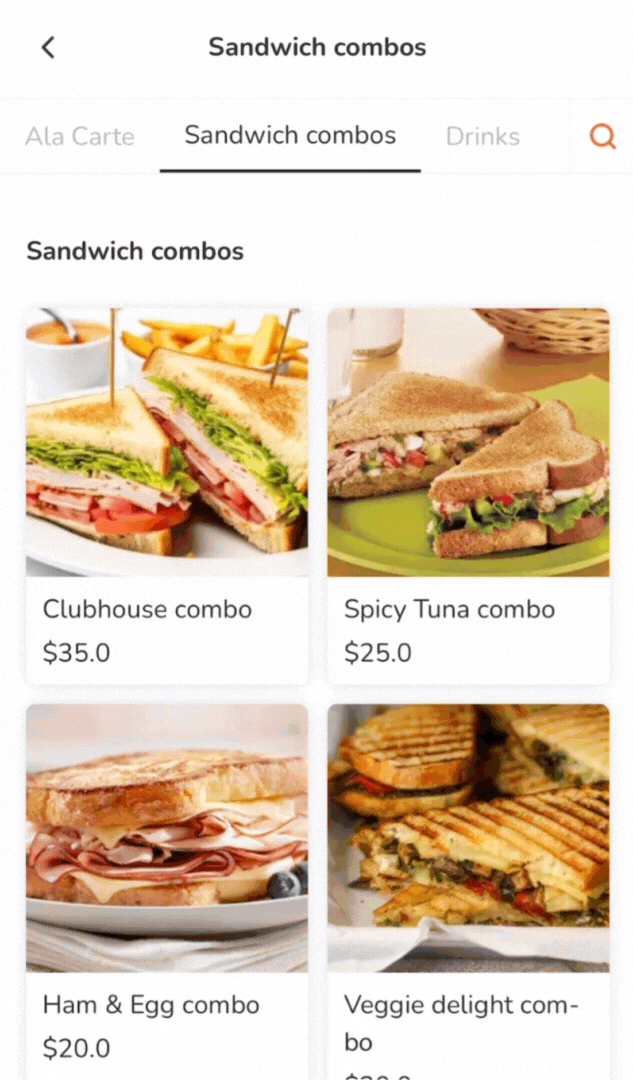
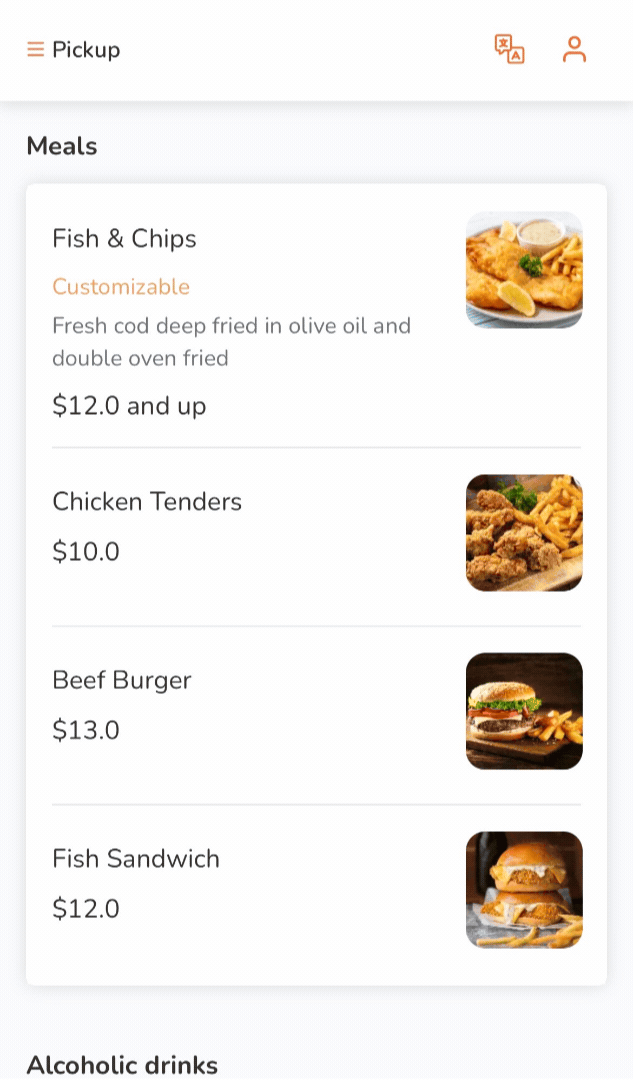
Menu Display
Show Sold-out Item
Allows customers to know if a particular menu item is sold out. When enabled, the item will be tagged as “Sold Out.” If disabled, the item won’t show up on the menu.

Show Sold-out Modifier
Allows customers to know if a particular item modifier is sold out. When enabled, the item will be tagged as “Sold Out.” If disabled, the modifier won’t show up as an option for an item on the menu.

Show Item Price for Free Dine-in Items
Displays the item price for free dine-in items (0 value). When disabled, the “0” price is hidden.

Show Item Price for Free Takeout Items
Displays the item price for free takeout items (0 value). When disabled, the “0” price is hidden.
Display Price In Shop Items
Shows "Priced in Shop" items on the Branded Online Store.

Display Price by Barcode (Weight) Items
Shows “Priced by weight” items on the Branded Online Store.

Display Price by Barcode (Amount) Items
Shows “Priced by amount” items on the Branded Online Store.
Display Item Special Request entered by Merchant devices (e.g. POS)
Shows special request remarks entered through Merchant devices such as the POS on the Branded Online Store.
Show item details for single item
Prompts the item details and allows the customer to add the item to their cart. When disabled, selecting a single item with no modifiers will add it to the cart automatically.

Show item details for combo option
Prompts the item details and allows the customer to add the item to their cart. When disabled, selecting a single item with no modifiers will add it to the cart automatically.

Show Menu Tag in Combo Option
Displays menu tags on the combo option selection screen.
| Enabled | Disabled |
 |
 |
Collapse Modifiers and Combo Options when more than 5 Choices
Hides modifiers and combo options in a collapsible View More button if there are more than 5 set choices for modifiers or combo options.

Placing Order
Allow user to place order with remarks
Allows customers to add additional remarks when they add a menu item to their order.

Allow user to input item quantity
Allows customers to enter the quantity of their desired item.

Show Quantity for Combo Item (Mobile Only)
Allows customers to specify the quantity of a combo item before adding it to their shopping cart.
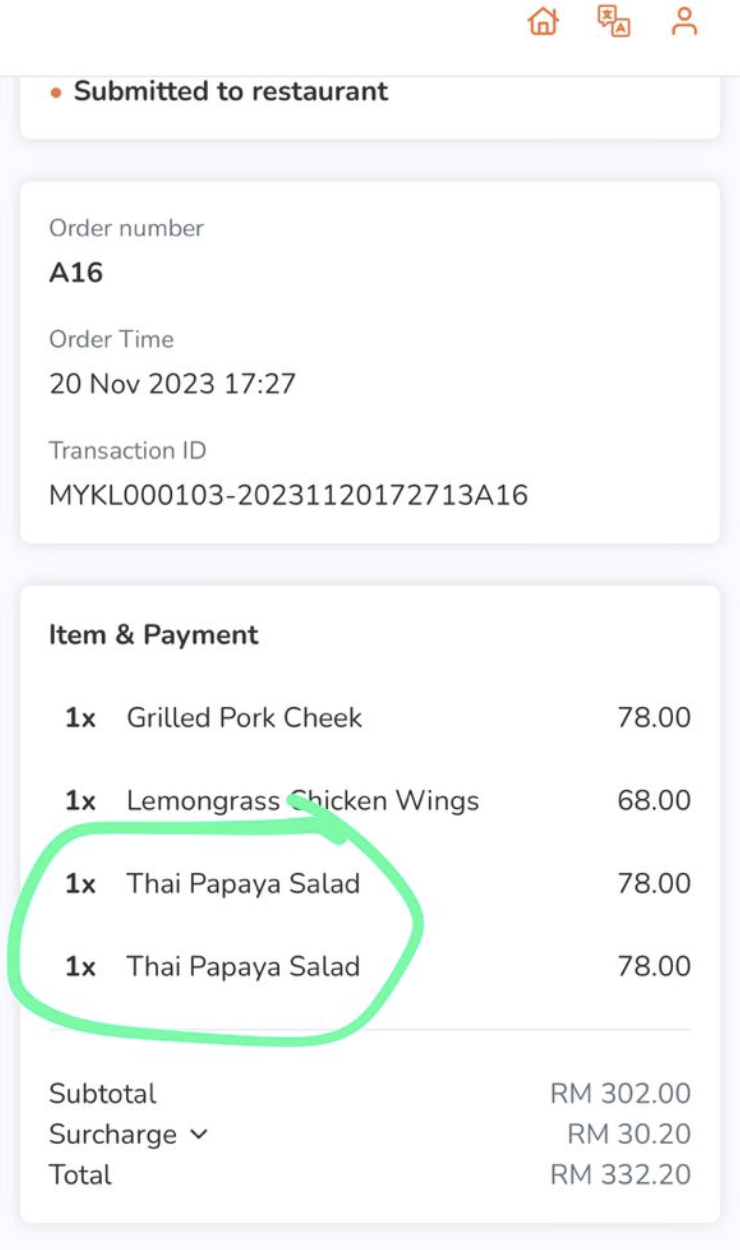
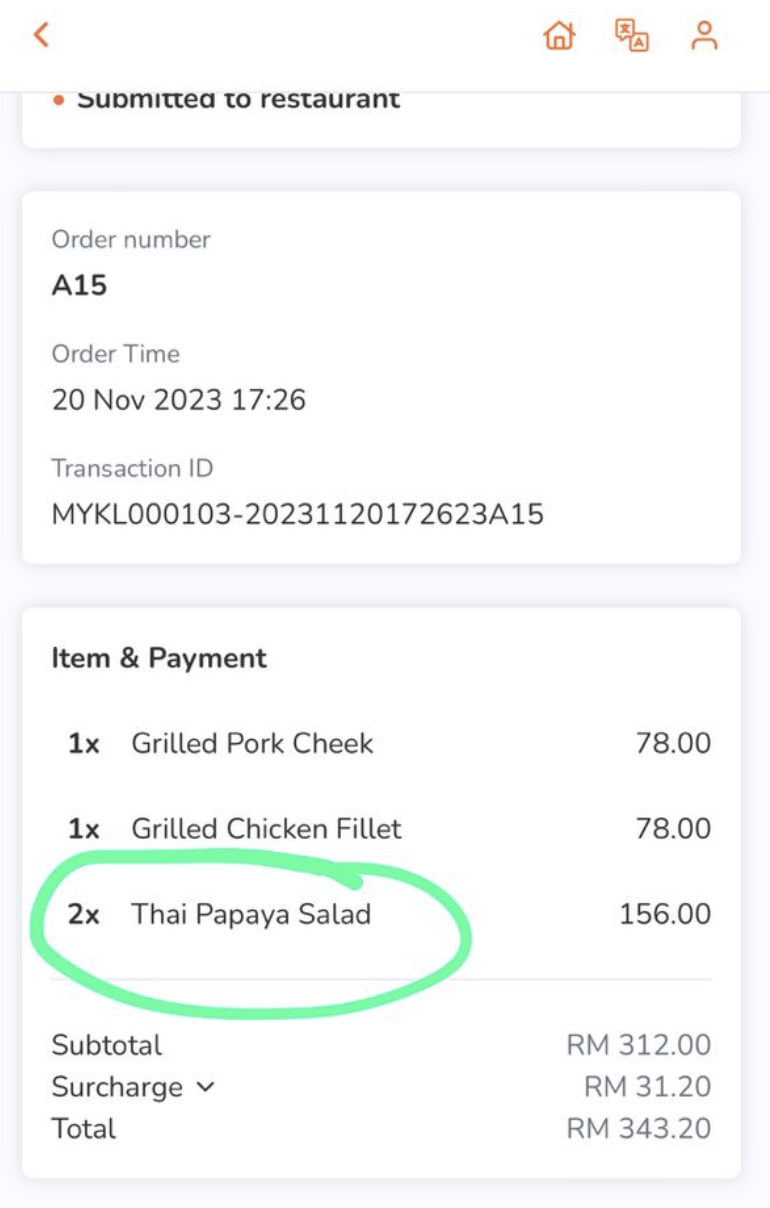
Split Single Item when Quantity more than One
When enabled, adding multiple instances of the same item will appear as separate items in the order. For example, if you add one “Thai Papaya Salad” to the order and then add another Thai Papaya Salad to the same order later on, the order will display the items as separate items.
When disabled, the quantity indicator will adjust based on the quantity you set.
| When enabled | When disabled |
 |
 |
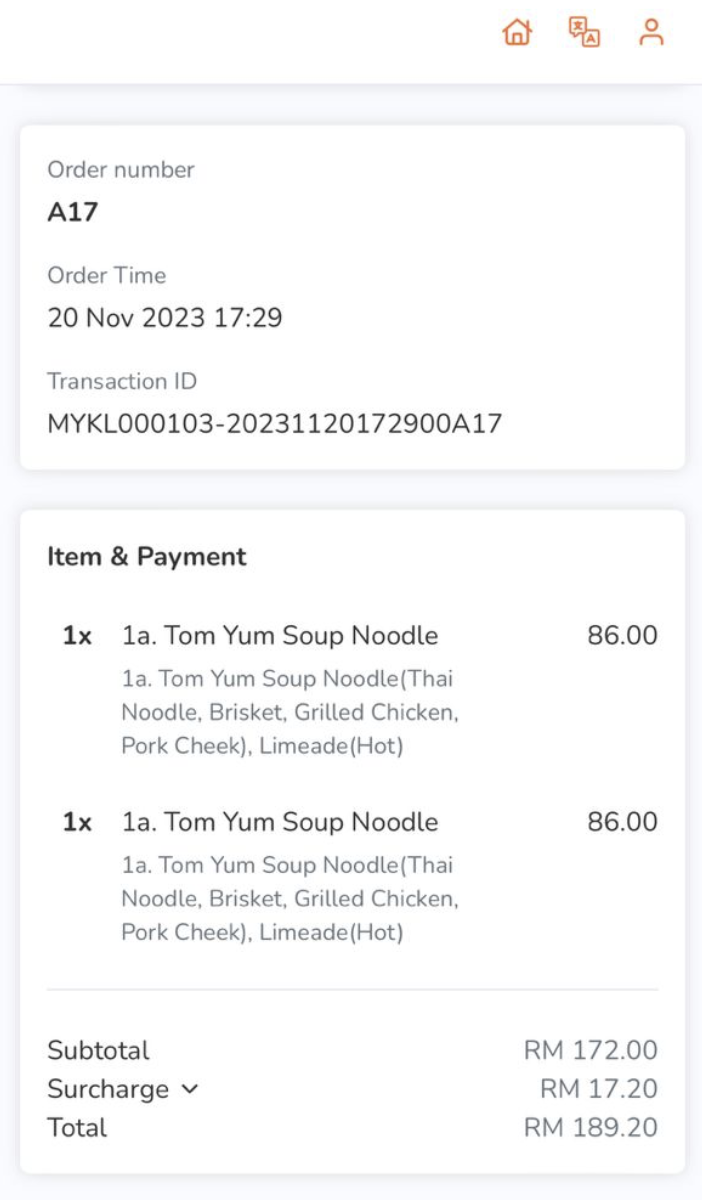
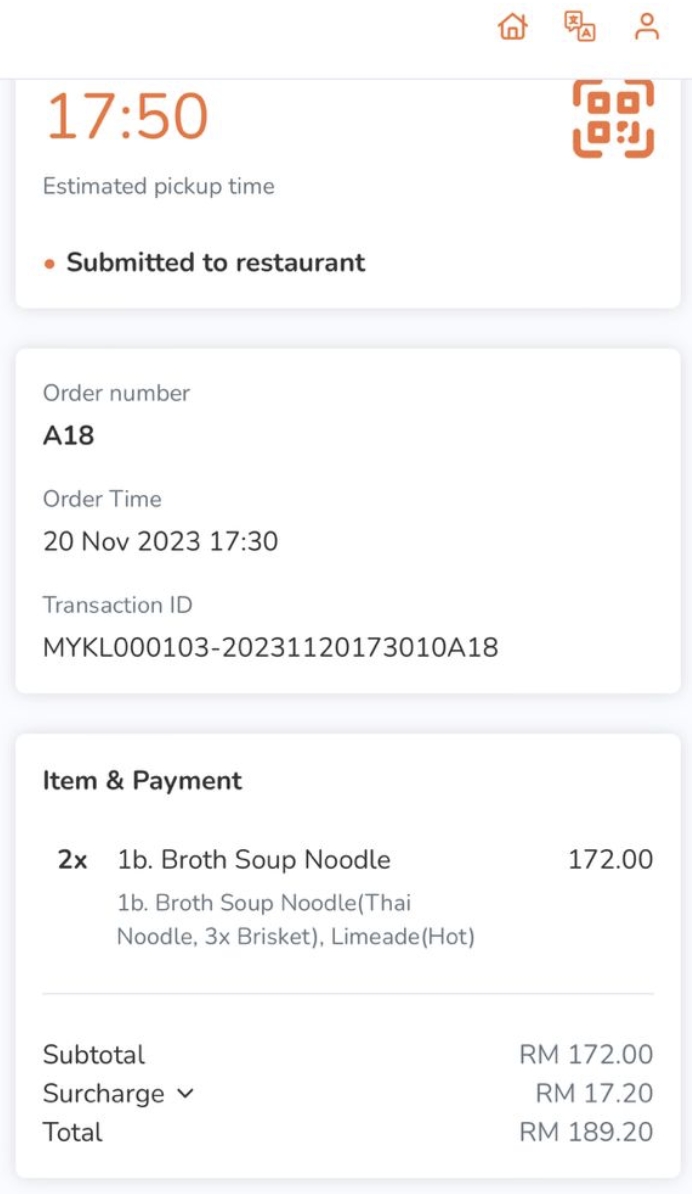
Split Combo Item when Quantity more than One
When enabled, adding multiple instances of the same item will appear as separate items in the order. For example, if you add one “Tom Yum Soup Noodle” to the order and then add another Tom Yum Soup Noodle to the same order later on, the order will display the items as separate items.
When disabled, the quantity indicator will adjust based on the quantity you set.
| When enabled | When disabled |
 |
 |
Show Invoice Request
Allows customers ordering through your restaurant's Branded Online Store website to enter their tax invoice information. You can process the order's tax invoice or let the POS issue it automatically after End Day is performed.
Show Cutlery Request
When enabled, the option to add cutlery in the order will be displayed.
Enable Auto Select Next Combo Option
When enabled, the screen automatically scrolls down to the next item included in the combo option after an option has been selected.
Order Summary
Hide Zero Amount Non Sales Item
Removes non-sales items with zero amount from the receipt.
DeleteDiscount
Show Promotion and Coupon
Allows available discounts to proactively appear on the "Promotions" section of the Branded Online Store.

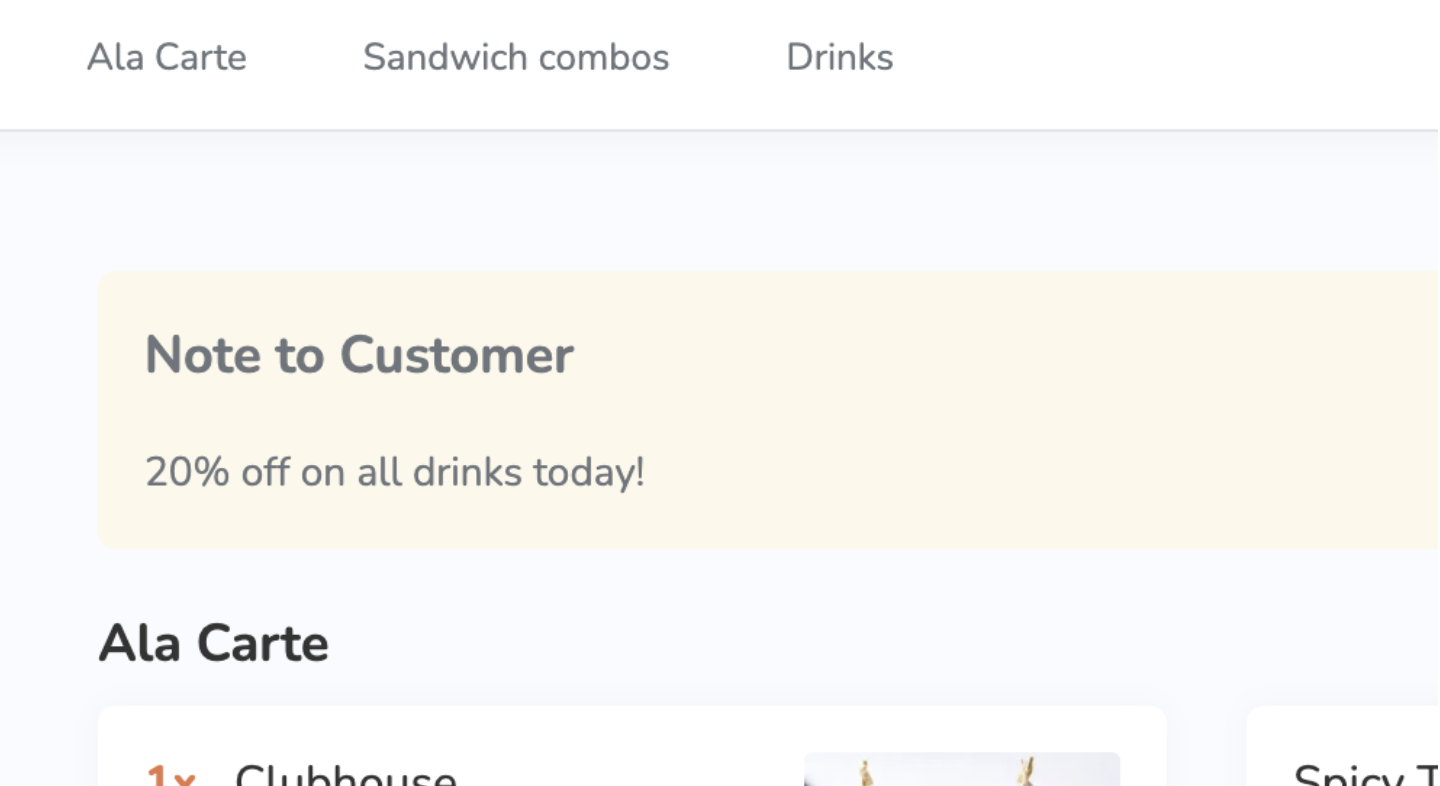
Ordering Information
Default
Displays a note on your Branded Online Store that is visible on all dining types.
If you have a multi-language online store, you can post a different note per language. To add more languages, click on Add Language.
Ordering Information by Dining Type
Displays a targeted note on your Branded Online Store depending on the dining type selected. For example, if you add a note for “Dine-in”, then the message you enter will be visible to Dine-in customers.
You can choose from the following dining types:
- Dine-in
- Pickup
- Delivery
- Catering (Pickup)
- Catering (Delivery)
- Dine-in (All You Can Eat Menu)
Payment Method
Sequence
Select the order of how payment methods appear on the Branded Online Store. You can choose from the following options:
- System default - Follows the system-generated order for payment methods.
-
Custom - Allows you to reorder the payment methods in your preferred sequence.
Tip: To reorder a payment method, click on the Reorder icon next to the payment method that you want to move. Then, drag the payment method to your preferred placement.
Merchant Portal (Classic Theme)
- Log in to the Merchant Portal.
- On the left panel, click on Restaurant Settings, then select Online Ordering.
- To enable your preferred settings, toggle the switch
 next to the setting that you want to turn on.
 - At the top right, click on Save to confirm.
You can toggle or configure the following options for your Branded Online Store:
Menu Page Banner Image for Desktop
Menu Page Banner Image for Desktop
Sets your Branded Online Store’s menu page banner image.
Online Ordering
Allow user to place order with remarks
Allows customers to add additional remarks when they add a menu item to their order.
Show item details for single item
Prompts the item details and allows the customer to add the item to their cart. When disabled, selecting a single item with no modifiers will add it to the cart automatically.
Show item details for combo option
Prompts the item details and allows the customer to add the item to their cart. When disabled, selecting a combo item with no modifiers will add it to the cart automatically.
Show Sold-out Item
Allows customers to know if a particular menu item is sold out. When enabled, the item will be tagged as “Sold Out.” If disabled, the item won’t show up on the menu.
Show Sold-out Modifier
Allows customers to know if a particular item modifier is sold out. When enabled, the item will be tagged as “Sold Out.” If disabled, the modifier won’t show up as an option for an item on the menu.
Allow user to input item quantity
Allows customers to enter the quantity of their desired item.
Show Item Price for Free Takeout Items
Displays the item price of free takeout items (0 value). When disabled, the “0” price is hidden.
Show Item Price for Free Dine-in Items
Displays the item price of free dine-in items (0 value). When disabled, the “0” price is hidden.
Display Price In Shop Items
Shows "Priced in Shop" items on the Branded Online Store.
Display Price by Barcode (Weight) Items
Shows “Priced by weight" items on the Branded Online Store.
Display Item Special Request entered by Merchant devices (e.g. POS)
Shows special request remarks entered through Merchant devices such as the POS on the Branded Online Store.
Display Price by Barcode (Amount) Items
Shows “Price by amount" items on the Branded Online Store.
Show Quantity for Combo Item for Mobile
Allows customers to specify the quantity of a Combo Item before adding it to their shopping cart.
Split Single Item in Multi Quantity Item
When enabled, adding multiple instances of the same item will appear as separate items in the order. For example, if you add one “Thai Papaya Salad” to the order and then add another Thai Papaya Salad to the same order later on, the order will display the items as separate items.
When disabled, the quantity indicator will adjust based on the quantity you set.
| When enabled | When disabled |
|
|
Split Combo Item in Multi Quantity Item
When enabled, adding multiple instances of the same item will appear as separate items in the order. For example, if you add one “Tom Yum Soup Noodle” to the order and then add another Tom Yum Soup Noodle to the same order later on, the order will display the items as separate items.
When disabled, the quantity indicator will adjust based on the quantity you set.
| When enabled | When disabled |
|
|
Enable Auto Select Next Combo Option
When enabled, the screen automatically scrolls down to the next item included in the combo option after an option has been selected.
Order Summary
Hide Zero Amount Non Sales Item
Removes non-sales items with zero amount from the receipt.
DeleteOrdering Information
General
Displays a note on your Branded Online Store that is visible on all dining types.
Ordering Information by Dining Type
Displays a targeted note on your Branded Online Store depending on the Dining Type selected. For example, if you add a note for “Dine-in”, then the message you enter will be visible to Dine-in customers.
You can choose from the following Dining Types:
- Dine-in
- Dine-in (All You Can Eat Menu)
- Pickup
- Delivery
- Catering (Pickup)
- Catering (Delivery)
Change Branded Online Store user interface preferences
To configure your Branded Online Store’s user interface settings, follow the steps below:
- Log in to the Merchant Portal.
- On the left panel, click on Modules, then click on Branded Online Store.
- Select Ordering Site Settings.
- Next to the Branded Online Store that you want to configure, click on Edit
 .
. - To enable your preferred settings, toggle the switch next to the setting that you want to turn on.
- At the top right, click on Save to confirm.
You can toggle or configure the following options to set for your Branded Online Store’s user interface:
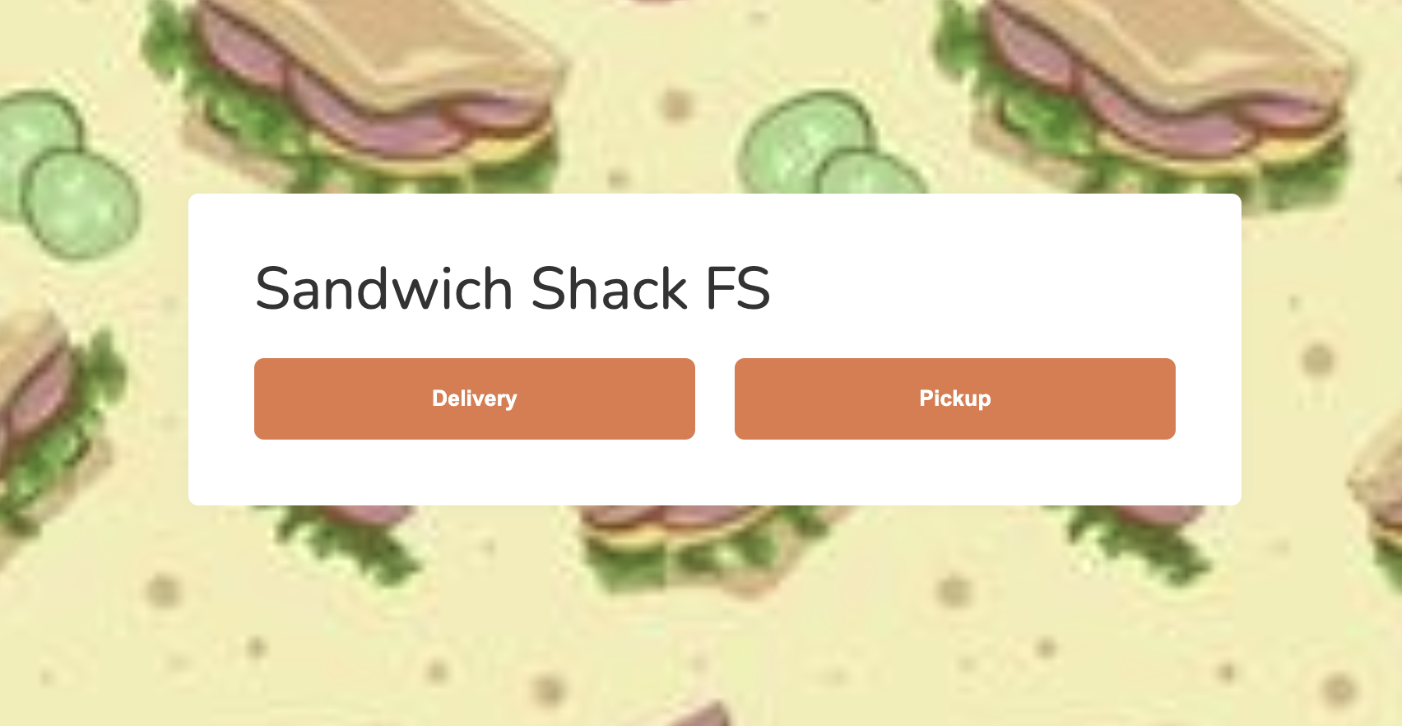
Landing Page
Show Landing Page
Displays your restaurant’s Branded Online Store landing page.
Branded Web Landing Page Style
Sets how service buttons (Pickup, Delivery, Reservation, and more) appear on your Branded Online Store website.
-
Simplified: The home page interface features a streamlined and intuitive design, primarily adhering to your restaurant’s default settings.

-
FlexiLayout: The home page interface is more expandable with customizable service option buttons and a media section for posting images and YouTube videos.

Service Options (For FlexiLayout page style only)
Sets the service types that can be selected on your Branded Online Store website’s home page. This only applies if “FlexiLayout” is selected as the Branded Web Landing Page Style.
To configure your Service Options preferences, follow the steps below:
- Click on the Service Options drop-down list and select which of your restaurant’s supported service types you’d like to be available on your Branded Online Store.

- Once all applicable service options have been selected, click on Go to Layout Design Editor.

- Modify the service option buttons’ appearance on your website. You can customize the following:
- Placement: Drag the service option you’d like to move to your desired placement within the box.

- Size and shape: Hover your mouse over the button you’d like to resize. Click and hold on Resize
 and drag it within the editor until you reach your preferred dimensions.
 Important: When resizing or changing the dimensions of buttons, ensure that the bottom spacing is even to avoid errors.
- Image: Hover your mouse cursor to the bottom of the option’s box frame until an icon appears. Then, click on Upload
 .
.
- To remove an image, hover your mouse cursor to the bottom of the option’s box frame until an icon appears. Then, click on Delete
 .
.
- To remove an image, hover your mouse cursor to the bottom of the option’s box frame until an icon appears. Then, click on Delete
- Placement: Drag the service option you’d like to move to your desired placement within the box.
Mobile
Show Restaurant Logo
Displays your restaurant’s logo on your restaurant’s mobile app.
Show Restaurant Name
Displays your restaurant’s name on your restaurant’s mobile app.
Background Image
Sets your Branded Online Store’s landing page background image.
Display Promotion Image
Allows you to place a promotional banner at the bottom of your restaurant’s landing page.
URL for Landing Page Promotion Area
Sets the website where customers will be directed to when they tap the promotional banner.
DeleteDesktop
Cover Image for Desktop
Sets the cover photo for your Branded Online Store's desktop version.
Background Image
Sets your Branded Online Store’s landing page background image.
Theme Editor
Colour Setup Assistant
Allows you to customize your Branded Online Store’s color scheme.
Basic Mode
- Choose from the following themes:
- Default
- Light
- Dark
- Earth Tone
- Then, specify the colors of the following user interface elements:
- Button Colour
- Accent Colour
- Main Text Colours
- Description Text Colour
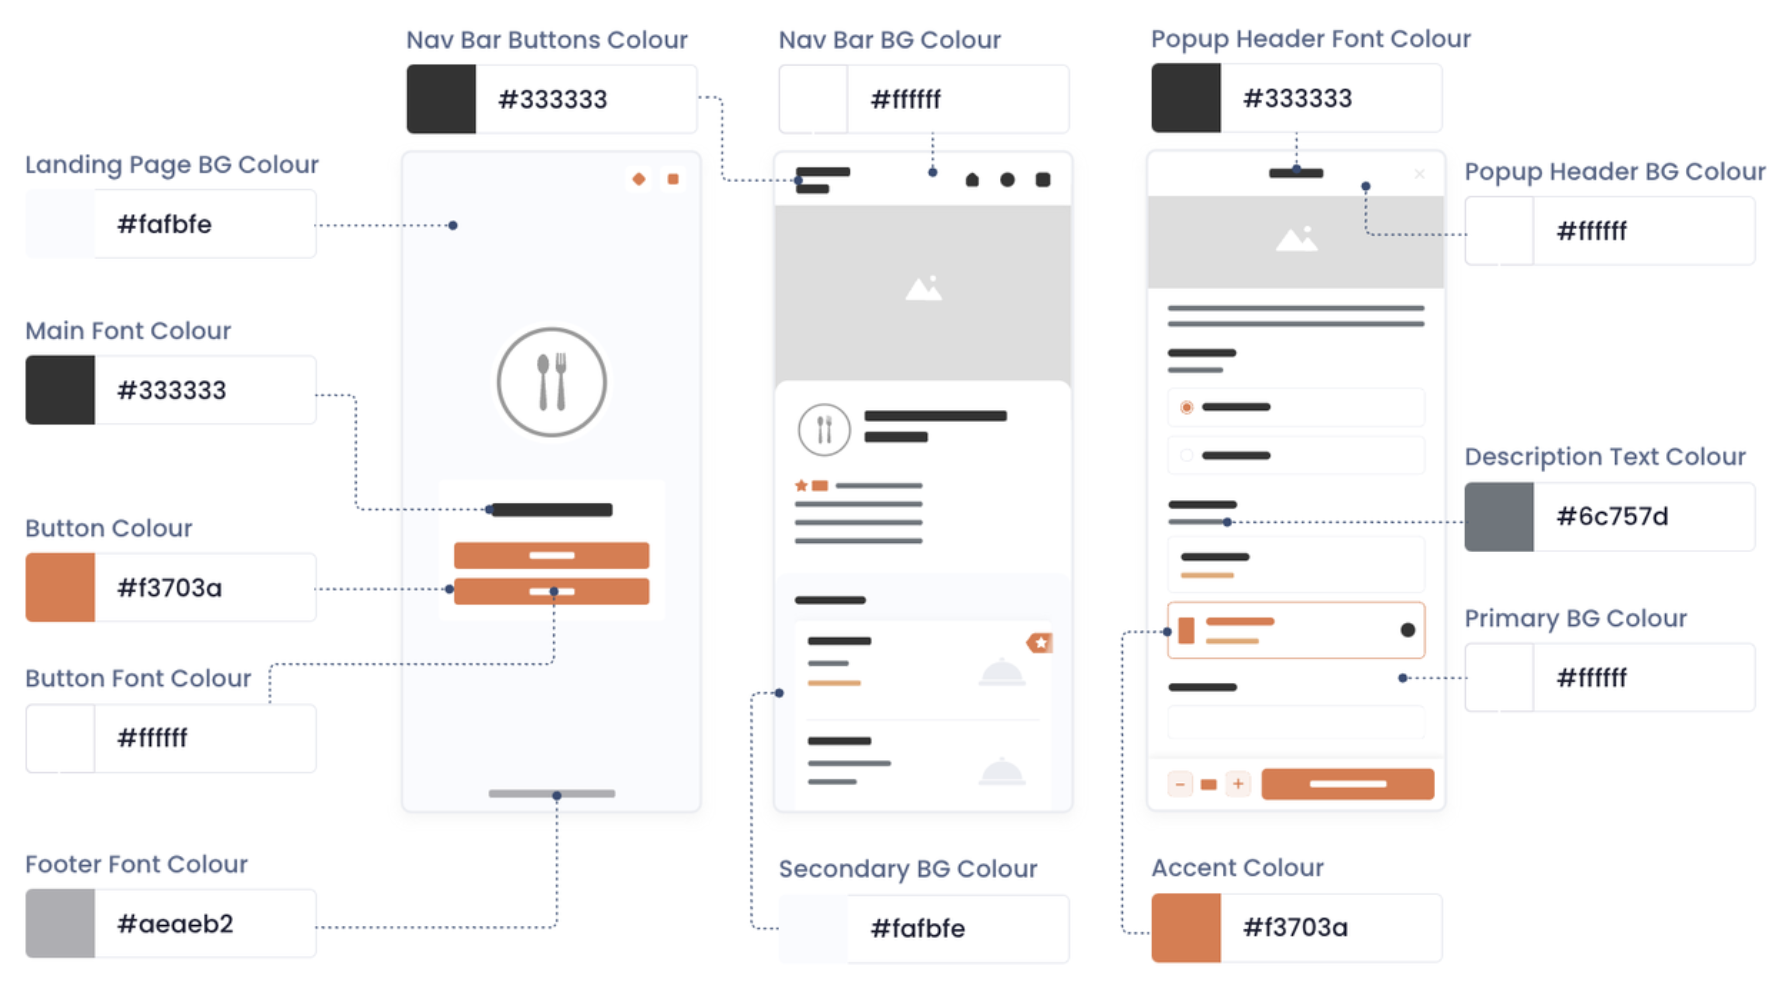
Advanced Mode
Specify the colors of the following UI elements in your online store:
- Landing Page BG Colour
- Main Font Colour
- Button Colour
- Button Font Colour
- Footer Font Colour
- Nav Bar Buttons Colour
- Nav Bar BG Colour
- Secondary BG Colour
- Popup Header Font Colour
- Accent Colour
- Popup Header BG Colour
- Description Text Colour
- Primary BG Colour
Refer to the image below to know which area of the user app will be affected if you change the UI setting.
If you prefer to customize all the colors that will be used on your Branded Online Store manually, enter the Hex Codes of the following app or website UI elements:
- Accent Colour
- Tint Color
- Navigation Bar
- Primary Background Colour
- Primary Button Colour
- Primary Font Colour
- Secondary Font Colour
- Secondary Background Colour
- Main Background / Font
- Primary Background Colour
- Secondary Background Colour
- Primary Font Colour
- Secondary Font Colour
- Button
- Active Button Colour
- Active Button Font Colour
- Active Button Border Colour
- Inactive Button Colour
- Inactive Button Font Colour
- Inactive Button Border Colour
- Disabled Status
- Disabled Background Colour
- Disabled Text Colour
- Search Bar
- Search Bar Colour
- Search Bar Placeholder Colour
- Input Field
- Input Field Colour
- Input Field Text Colour
- Mobile Landing Page
- Mobile Landing Page Background Colour
- Mobile Landing Page Footer Colour
- Mobile Landing Page Shop Name Colour
- Desktop Landing Page
- Desktop Landing Page Background Colour
- Membership
- Membership Font Colour
- Membership Button Font Colour
- Membership Button Colour
- Notification
- Notification Background Color
- Notification Text Color
- Notification Border Color
- Others
- Separator Colour
- Positive Colour
- Warning Message Colour
- Customizable Tag Colour
- Negative Colour
Media Section
You can include a media section in your Branded Online Store homepage to showcase your restaurant’s menu items, special offers, promotional videos, and more.

To set up your website’s media section, follow the steps below:
- Enable Show Media Section.

- Under “Section Name and Description,” enter a name and description for the media section. The name and description will both appear on your website.

- Under “Cover Image for Mobile” or “Cover Image for Desktop,” click on the + Add New Media drop-down list and choose the media type you’d like to add.
 Note: When you add multiple instances of media, they will be displayed in a media frame that your customers can browse through.
-
Images: Enter a name for the image, then at the top right of the image box, click on Browse
 and select an image file.
-
YouTube Video: Enter a name for the video, then enter the YouTube video ID or URL.

-
Images: Enter a name for the image, then at the top right of the image box, click on Browse
- On the “Add New Media” prompt, click on Save.
Look & Feel
Menu Item Display Style
Select from the following display style options:
-
List View
-
Gallery View
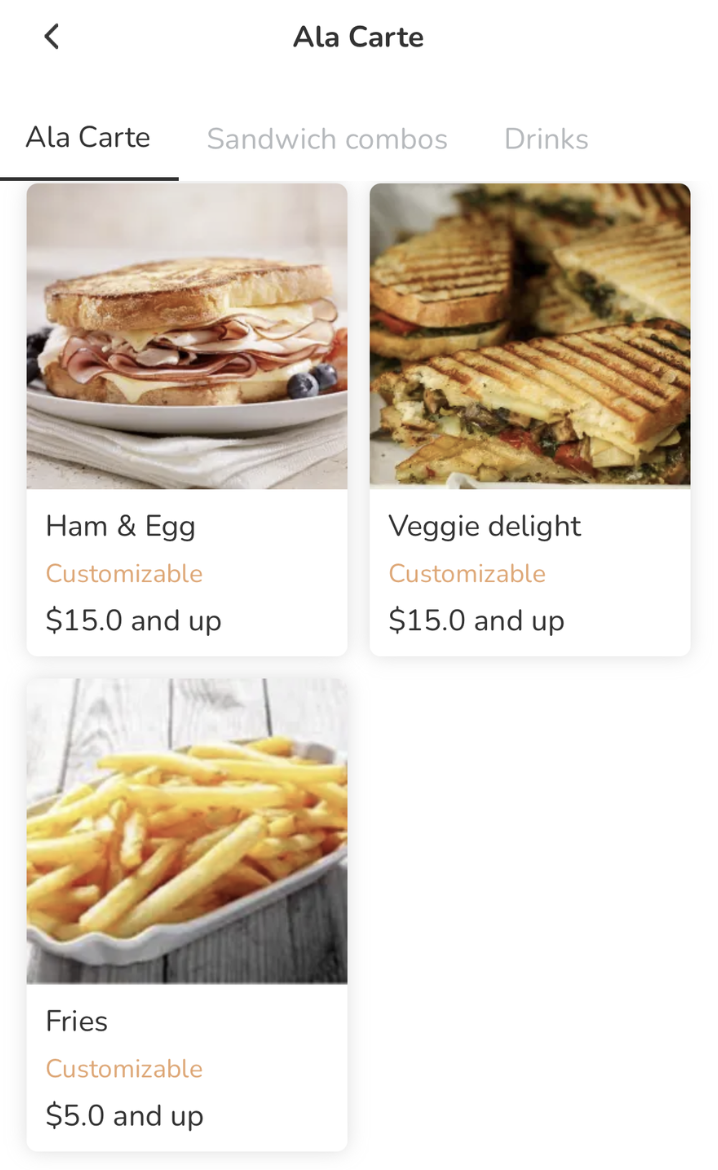
-
Compact

Enable Continuous Scrolling
Sets your user app’s menu page to show all categories in one scroll.
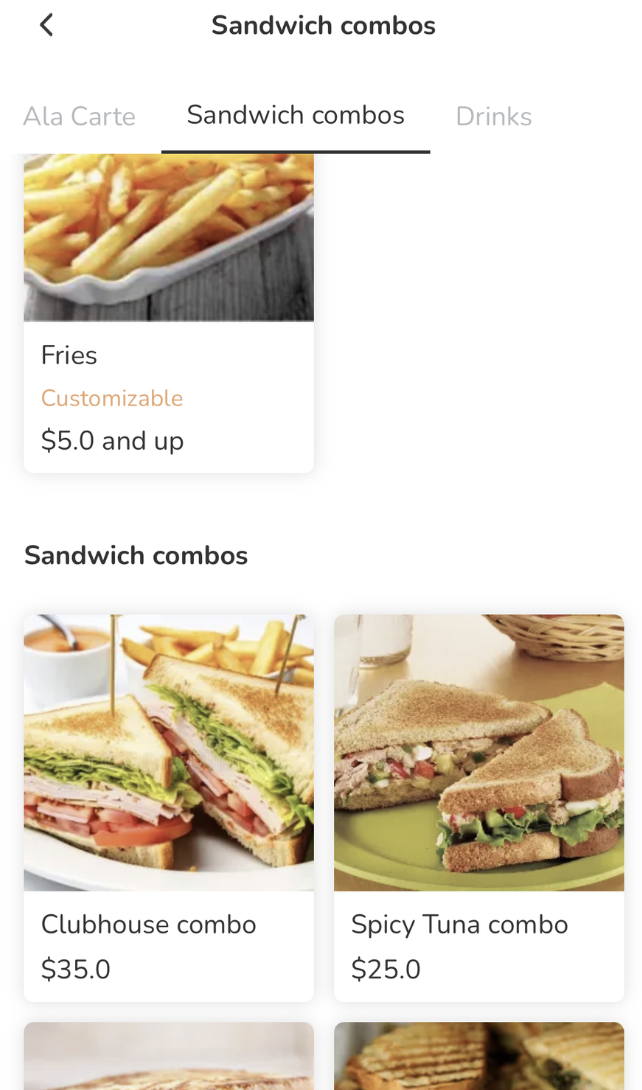
Combo Option Display Style
Select from the following display style options:
-
List View

-
Gallery View

Show Large Image for Recommended Item
Displays recommended items in a larger format than items that are not tagged as recommended.

To set an item as recommended, refer to the Single Item, Combo Item, and Catering Item creation articles.
DeleteMobile
Menu Page Background Image
Allows you to set the background image of your mobile app’s menu page.
DeleteDesktop
Menu Page Background Image
Allows you to set the background image of your website’s menu page.
DeleteOrdering
Enable Static QR Code
Allows ordering through Static QR Code.
Require Party Size Input
Sets the Branded Online Store to ask for the party size when customers order through QR Code.
Enable Apply Discount Code
Allows customers to apply a discount to their order by entering a discount code.

Enable Redeem Discount Coupon
Allows customers to apply a discount coupon to their order by entering the coupon's serial number or scanning the coupon's QR code or barcode. If the coupon is valid, the system applies it to the order.

Enable Item Search
Allows customers to search for the items that they want to order by entering the item in a search field.
| Mobile | Desktop |
 |
 |
Enable View Only Menu Mode
When enabled, customers will be able to view menu items including their prices, but won't be able to place their order.
| Enabled | Disabled |
 |
 |
Enable Takeout Re-order
When enabled, the customer's three most recent takeout (pickup and delivery) orders within the last 6 months are displayed on the Branded Online Store's menu page for easy duplication. The "Reorder" function allows customers to easily add a past order's items to their current cart, including the order's selected modifiers and combo options. They can modify the added items or remove unwanted items depending on their intended order.

When a reordered item is sold out, an error message will appear on the checkout page.

Customize Dining Mode Options
When enabled, you can customize the Branded Online Store to only display selected dining modes.

Select Dining Modes to Show
The dining mode you select will appear on the Branded Online Store, while those not selected will be hidden or won't be available to use.

Registered Users
Enable User Module
Allows customers to log in to your website.
Show My QR Code
Allows customers to generate a QR Code that displays their account information when scanned. Customers must first log in to their account on the website to show the QR Code.
Show Secure Passcode
When enabled, customers can set up a passcode which they’ll need to enter when using member credits to pay for online orders.
Disable Unverified User Checkout
Limits checkout to verified users only. Customers without an account won’t be able to check out.
DeleteGuest Checkout
Enable Guest Checkout
Allows customers to order as a guest on the Branded Online Store without creating an account.
Enable Guest Queuing
Allows customers to get queuing tickets on the Branded Online Store without creating an account.
Enable Guest Reservation
Allows customers to book reservations on the Branded Online Store without creating an account.
Do Not Require Email Address for Non-Scan-To-Order
When enabled, customers won’t be required to enter their email address at the checkout page when ordering for Pickup or Delivery.
Hide Email Input Field
When enabled, the email address field won't appear on the checkout page of the branded online store.
Do Not Require Phone# for Online Ordering
When enabled, customers won’t be required to enter their phone number at the checkout page.
Hide Phone# Input Field
When enabled, the phone number field won't appear on the checkout page of the branded online store.
Do Not Require Guest Name for Online Ordering
When enabled, customers won’t be required to enter a name at the checkout page.
Hide Guest Name Input Field
When enabled, the guest name field won't appear on the checkout page of the branded online store.
DeleteWeb App Language
Preferred Language
Allows you to choose a default display language for your restaurant’s website. Once configured, the selected language will be used as the default language, overriding the customer’s device or browser language settings.
Exclude Language
Allows you to control which languages are available on your website. Disabling a language prevents customers from accessing your website in that language.
By default, all supported languages are available on the Branded Online Store. However, you can configure this setting to customize the supported languages on your website.

Mobile
Swipe to Delete Takeout Items
Allows customers to swipe on an item to delete it from their cart.
Swipe to Delete Dine-in Items
Allows customers to swipe on an item to delete it from their cart.
Item Details Page Appear Effect
Allows you to choose the animation effect for how the item details page appears when an item is selected.
| Slide Left | Slide Up |
 |
 |
Enable Payment Redirection
Allows you to redirect customers to a configured platform after performing payment on your restaurant's Branded Online Store website. To set this up, contact Eats365 support.
DeleteCustom Notice (Dine-in)
Enable Customer Notice
Allows you to show a custom message to customers when they start ordering for dine-in.
You can create a custom notice per language by adding the notice information in each language.

Customized Message
Custom Message for Online Ordering Suspended
Allows you to personalize the message displayed on your website when online ordering is unavailable for your restaurant. The suspension message is displayed on the shop's home and checkout pages.
To learn how to manage your restaurant's online ordering status, refer to Manage online ordering status on the Eats365 POS.
When "Custom Message for Online Ordering Suspended" is enabled, enter the custom message in the "Suspend Message" field. You can configure the custom message function in all the available languages that apply to your restaurant.
| Home page | Checkout page |
 |
 |
Custom Message for Restaurant going Offline
Allows you to personalize the message displayed on your website when your restaurant is offline based on your "Online Ordering Suspension Mechanism" preference. The offline message shows on the shop's home and checkout pages.
When "Custom Message for Restaurant going Offline" is enabled, enter the custom message in the "Offline Message" and "Offline Message Description" fields. You can configure the custom message function in all the available languages that apply to your restaurant.
| Home page | Checkout page |
 |
 |
Custom Mobile App Icon
Enable this setting to use a customized icon for your branded online store's mobile app. To learn how to create a mobile app shortcut of your website, refer to Add branded online store shortcut on mobile homescreen.

Mobile Display Image Ads
When the Mobile Display Image Ads function is enabled, you can proactively surface marketing images on your restaurant website's Landing Page and Menu Page in a carousel format.
| Landing Page | Menu Page |
 |
 |
|
Best Used For:
|
Best Used For:
|
Mobile Landing Page Image Display Ads
- Enable the "Mobile Landing Page Image Display Ads" setting.

- Upload up to 5 images.

- Required format: png, jpg, jpeg
- Recommended ratio: 3:4
-
Recommended dimension: 280 x 373px
Tip: Once you've selected an image, you can also adjust how it fits in the frame by dragging the whole frame or adjusting the frame coverage using the corners.![[Pointing to the frame corners] Adjust the frame coverage using any of the four corner dots [Pointing to the inside of the frame] Click anywhere in the frame and drag it to your preferred position](https://static.helpjuice.com/helpjuice_production/uploads/upload/image/13939/6476772/MP2_BOS_landing_page_image_ads_crop_image.png)
- For each uploaded image, click on the Destination drop-down menu to define the action that occurs when a customer taps the ad.

- None: The image is static and can't be clicked.
- URL (Same tab): Redirects the customer to a specific website link within the same browser window. Enter the destination URL in the field.
- URL (New tab): Opens the website link in a new browser tab, keeping the original ordering site open in the background. Enter the destination URL in the field.
Mobile Menu Page Image Display Ads
- Enable the "Mobile Menu Page Image Display Ads" setting.

- Upload up to 5 images.

- Required format: png, jpg, jpeg
- Recommended ratio: 3:4
-
Recommended dimension: 280 x 373px
Tip: Once you've selected an image, you can also adjust how it fits in the frame by dragging the whole frame or adjusting the frame coverage using the corners.![[Pointing to the frame corners] Adjust the frame coverage using any of the four corner dots [Pointing to the inside of the frame] Click anywhere in the frame and drag it to your preferred position](https://static.helpjuice.com/helpjuice_production/uploads/upload/image/13939/6476777/MP2_BOS_menu_page_image_ads_crop_image.png)
- For each image, click on the Destination drop-down and select the action that will happen upon tapping the image ad.

- None: The image is static and can't be clicked.
- URL (Same tab): Redirects the customer to a specific website link within the same browser window. Enter the destination URL in the field.
- URL (New tab): Opens the website link in a new browser tab, keeping the original ordering site open in the background. Enter the destination URL in the field.
-
Menu Category: Links the ad directly to a category. Click on Browse and select your preferred destination category in the list.
Note: To show the ad image even when the category is unavailable, tick the checkbox .
. -
Menu Item: Links the ad directly to an item. Click on Browse and expand
 the categories to select your preferred destination item in the list.
Note: To show the ad image even when the item is unavailable, tick the checkbox.