 Eats365 Products
 Merchant Guide
 Modules
 Membership
 Integrations
 Hardware
 Staff Operations
 Roles & Permissions
 Payments
 Reports
 What’s New
 Release Notes
 Troubleshooting
 Simulators
 Glossary
 Troubleshooter
 System Status
Expedite Display
Table of Contents
Perform basic expedite operations
Learn how to use the Expedite Display to perform basic expedite operations.
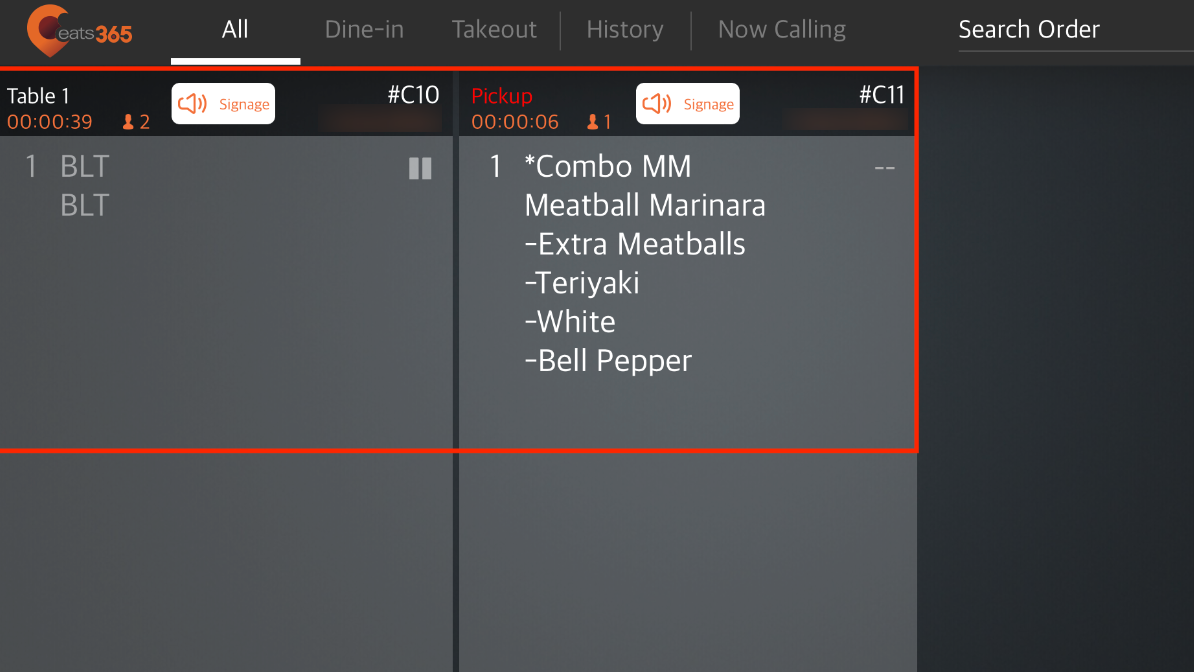
The Eats365 Expeditor module leverages the Expedite Display to improve kitchen workflow and order management. This display provides kitchen packers and expeditors with the following key features:
- Centralized Order View: The display consolidates all order information, offering a clear overview of order status and eliminating the need to manage multiple paper tickets.
- Itemized Breakdown: Each order is broken down by item, including quantities and modifications. This allows for quick and accurate order preparation.
- Time Tracking: The display monitors how long an item has been ready, aiding in prioritization and preventing food from being served cold.
- Efficient Item Marking: Staff can easily mark items as completed, facilitating seamless order assembly and coordination.
In this article, you’ll learn about how to use the Expedite Display to perform basic expedite operations.
Check orders
When paired with the Eats365 POS, all orders placed on the Eats365 POS and its modules are displayed on the Expedite Display.
To check for orders, open the Eats365 Expedite app. By default, the Expedite Display screen shows all placed orders regardless of service type. To filter orders per service type, tap the Dine-in tab or Takeout tab.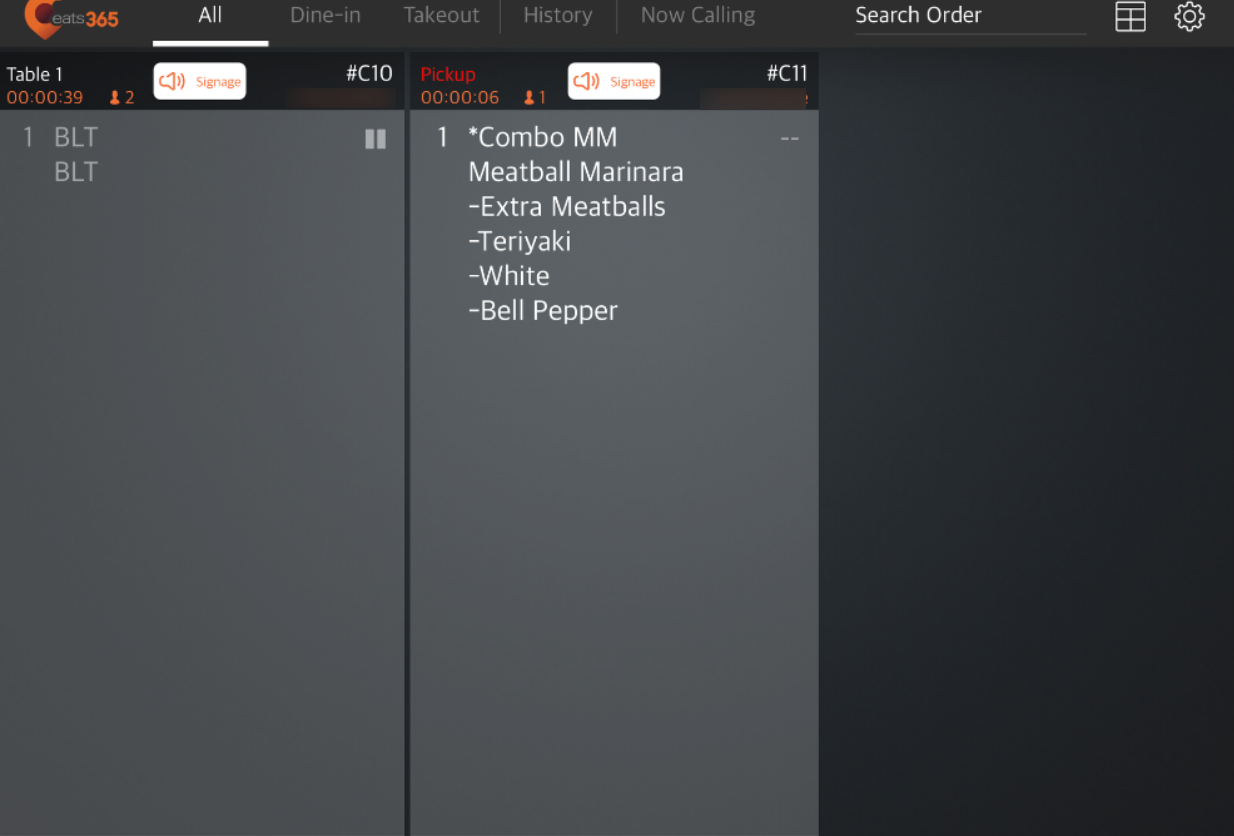
You can also search for orders manually by entering the order number in the "Search Order" field.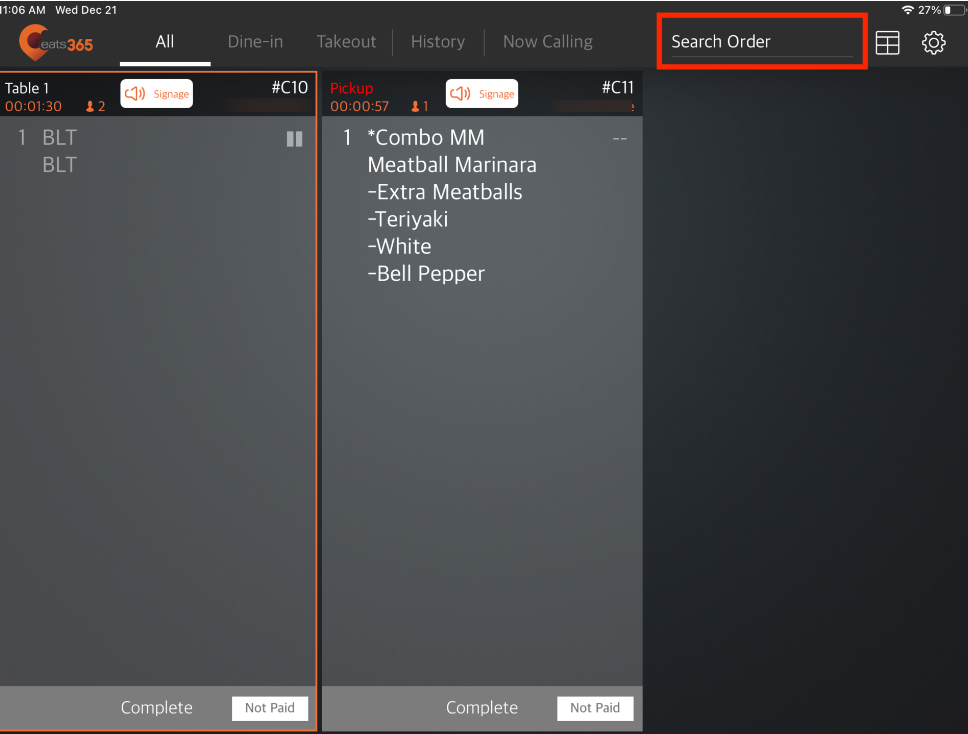
All orders are displayed with the following information:
Service type indicator
- For Dine-In orders, the customer’s table number appears.
- For Takeout orders, a Pickup tag appears.
Note: If "Display Takeout Order in Red" is enabled, the Pickup tag font is displayed in red.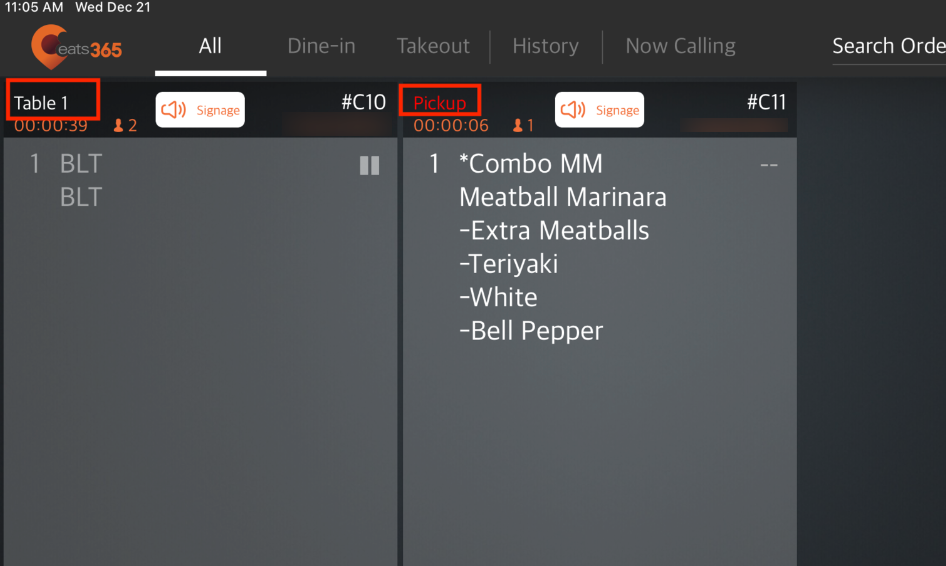
Order details
The Expedite Display shows the order details, which include:
- Item name
- Item quantity
- Item modifiers
- Party size
- Order number
Timer Alert
The Expedite Display includes a timer that tracks how long an order has been placed. Additionally, it alerts the kitchen expeditors when an order exceeds a set time limit. This alert comes in the form of a color indicator that changes based on how long the order has been in the system. You can turn on the timer alert from the Expedite Display settings.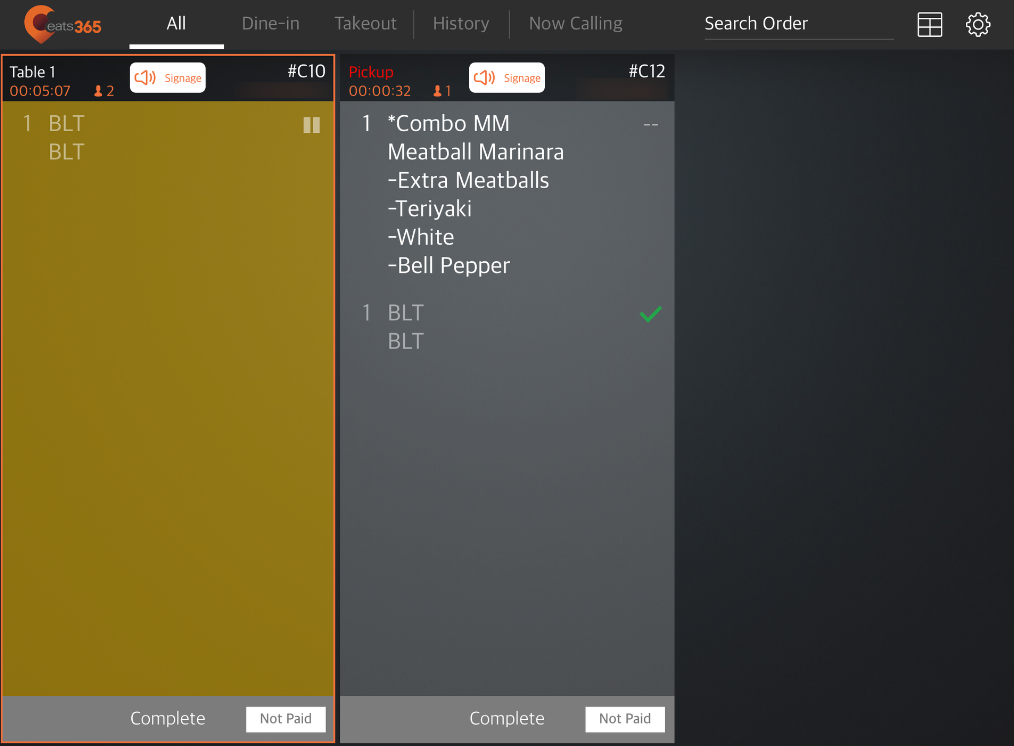
Complete an order
Once an Item is ready for pickup, you can tap Complete to remove the order from the list of pending items on the Expedite Display and call the order on the Pickup Display or on the pager.
To complete an order, follow the steps below:
- From the Expedite Display screen, select the order that you want to complete.
Tip: By default, the Expedite Display screen shows all placed orders regardless of service type. To filter orders per service type, tap the Dine-in tab or Takeout tab. - Check all the items included in the order.
- When an item has been packed or prepared, tap an Item to mark it as ready.
Note: Marked items are clearly indicated with a green check mark.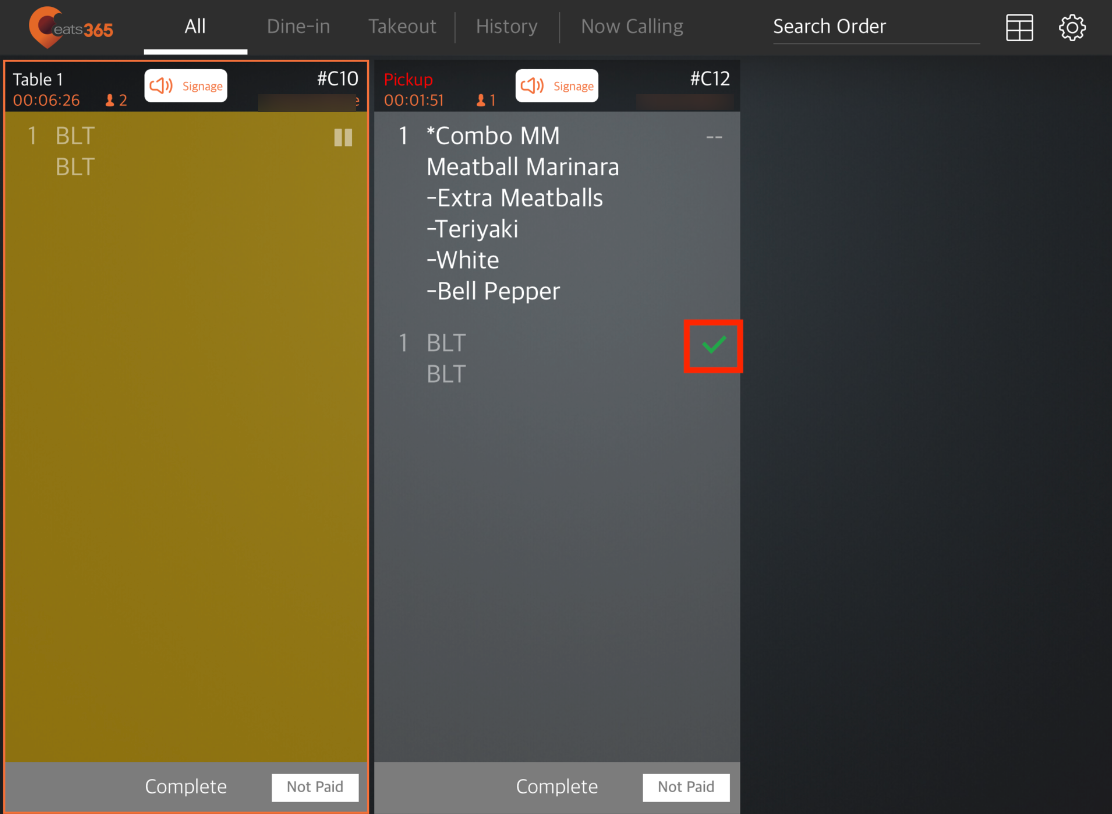
- Once all the items have been prepared, at the bottom of the order, tap Complete.
Note:- If "Complete order only if all item" is ticked is enabled, you won’t be able to tap the Complete button unless all items have been marked as ready.
- If "Auto Complete Order" is enabled, you no longer need to tap Complete. The order will automatically be completed after all items have been marked as ready.
Restore an order
After you’ve completed an order, the order gets removed from the Expedite Display order list. If you need to restore the order for any reason, follow the steps below:
- On your iPad, open the Eats365 Expedite app.
- Tap History.
Note: The Expedite Display keeps all completed orders on the History page until the restaurant’s end of day. - Select the order that you want to restore. Then, at the bottom, tap Restore. The order moves back to the Expedite Display order list.
Call an order
The Expedite Display can easily call for an order when the order is ready for pickup. The Expedite Display can be used together with a Pickup Display or a pager to call orders. Once a number is called, the pager rings if the restaurant uses pagers, or the number shows up on the Pickup Display if an eSignage is paired with the Eats365 POS.
To call an order, follow the steps below:
- Locate the order on the Expedite Display screen. You can look for the order by navigating the orders on the screen or by entering the order ID in the "Search Order" field.
Tip: By default, the Expedite Display screen shows all placed orders regardless of service type. To filter orders per service type, tap the Dine-in tab or Takeouttab.- If you have a barcode scanner connected, you can scan the QR code printed on the kitchen ticket to easily locate the order. Once found, the order will be highlighted to help you locate it on the screen.
 Note: If the scanned order doesn't match the language of the keyboard currently set on the iPad where the Expedite Display installed, a prompt will let you know that your iPad's keyboard language must be changed. It will also indicate the scanned order number. Additionally, the Expedite Display does not accept special characters.
- If you have a barcode scanner connected, you can scan the QR code printed on the kitchen ticket to easily locate the order. Once found, the order will be highlighted to help you locate it on the screen.
- Check that all Items in the order are complete.
- To call an order, you can do any of the following:
- At the top of the order list, tap the "Call Order Number" button.
Note: The Call Order Number button must be enabled for the button to appear. To learn more, refer to Configure Expedite Display settings.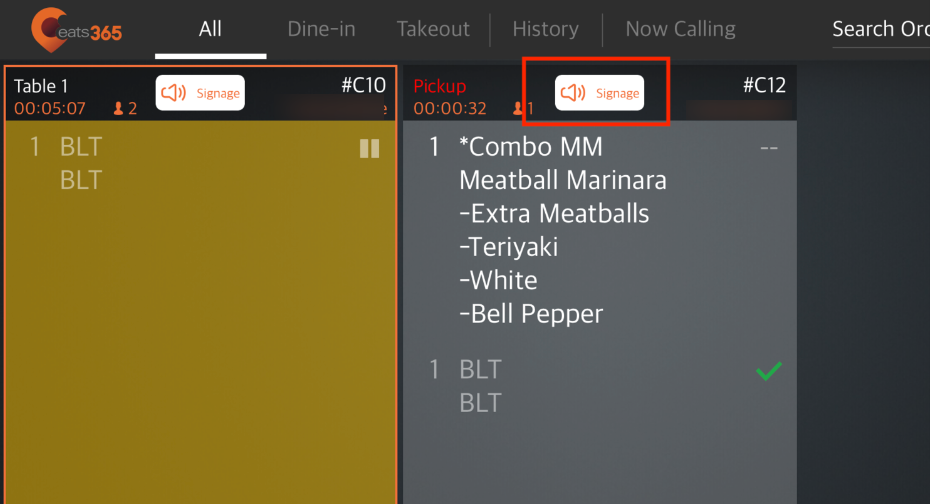
- Follow the steps to complete an order. Once an order is complete, the order automatically gets called.
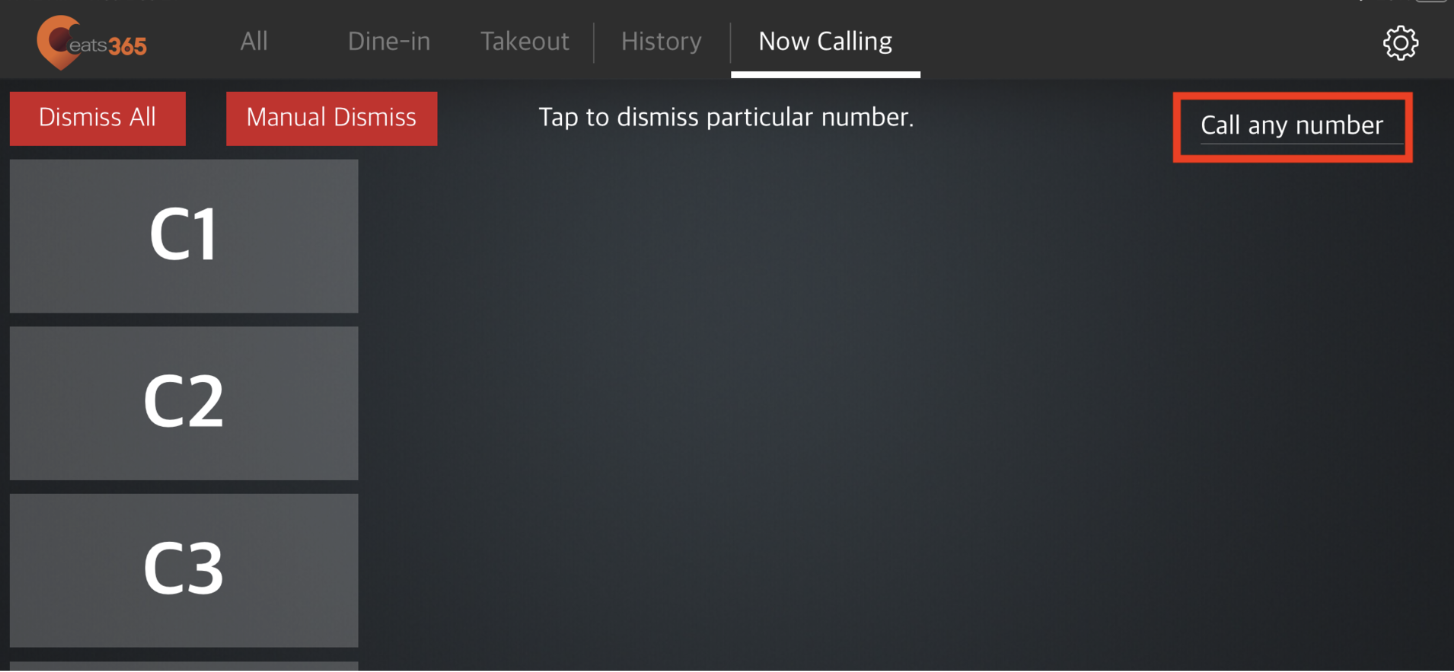
- At the top of the screen, tap Now Calling. On the "Now Calling" screen, tap Call any number. Then, enter the number that you want to call.
- At the top of the order list, tap the "Call Order Number" button.
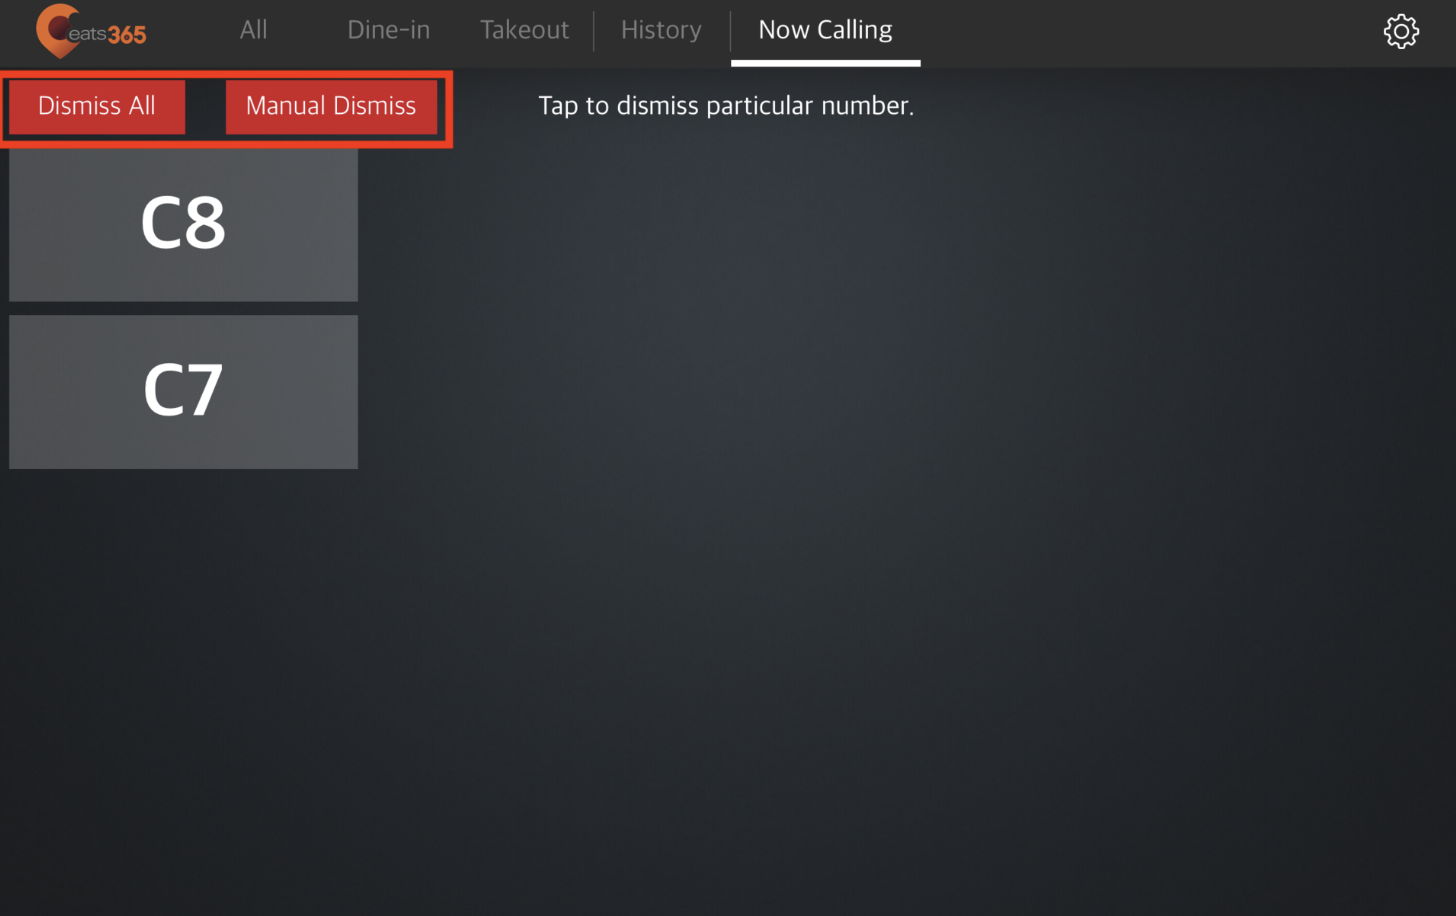
Dismiss orders
Once an order has been called and picked up by the customer, you can dismiss the order to remove it from the Pickup Display.
To dismiss an order, follow the steps below:
- Open the Eats365 Expedite app.
- Tap Now Calling.
- To dismiss an order, you can do either of the following:
- Tap the order number that you want to dismiss.
- Tap Manual Dismiss. Then, enter the order number that you want to dismiss.
- To dismiss all orders, tap Dismiss All.
Re-call an order
If you need to call the number again for any reason, you can re-call the number from the order history.
To re-call an order, follow the steps below:
- Open the Eats365 Expedite app.
- Tap History.
- Select the order that you want to re-call. Then, at the bottom, tap Re-call.
