Eats365 Products
 Merchant Guide
 Modules
 Membership
 Integrations
 Hardware
 Staff Operations
 Roles & Permissions
 Payments
 Reports
 What’s New
 Release Notes
 Troubleshooting
 Simulators
 Glossary
 Troubleshooter
 System Status
Eats365 Biz and Biz Lite
Table of Contents
Manage orders on the Eats365 Biz
Learn how to use the Eats365 Biz to accept and reject orders.
The Eats365 Biz efficiently manages your restaurant operations, by allowing you to place customer orders, process payments seamlessly, and manage all online orders from your restaurant’s online channels, which include your restaurant’s Branded Online Store (dine-in, pickup, and delivery), Eats365 Marketplace (pickup and delivery), and third-party online ordering platforms (pickup and delivery). From the Eats365 Biz app, you can do the following:
Eats365 Biz and Biz Lite
- Accept or reject orders
- Update order statuses
- Adjust estimated finishing times
- Process payments
- Print receipts
Eats365 Biz only
In this article, you'll learn how to manage online and offline orders on the Eats365 Biz.
Manage orders
Accept an online order
To accept an immediate online order, follow the steps below:
- Open the Eats365 Biz app.
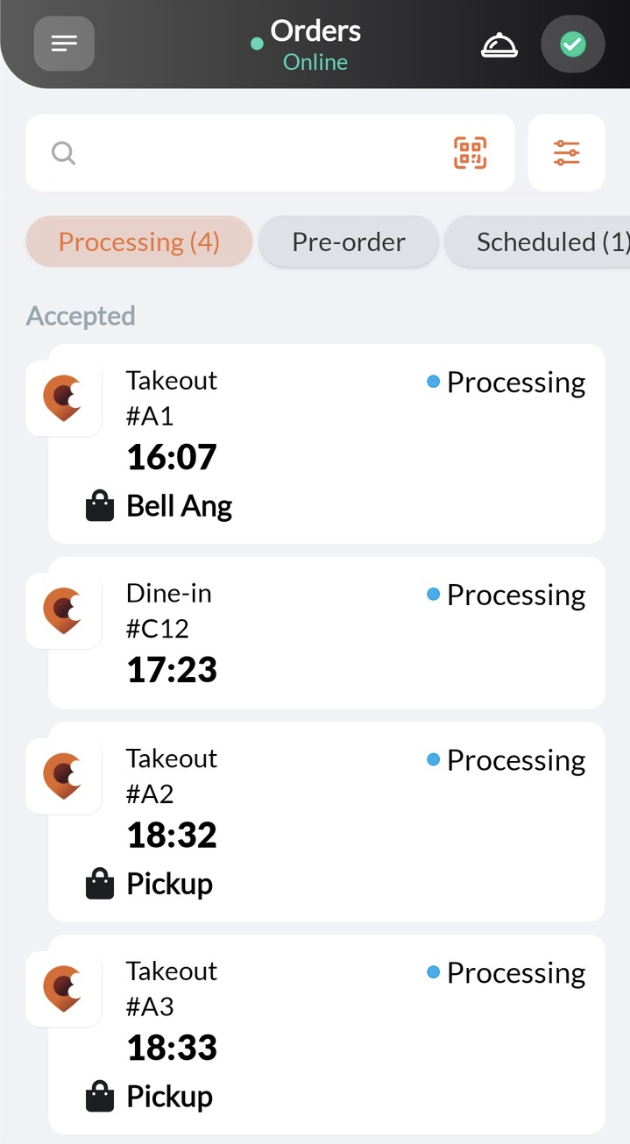
- On the "Orders" page, tap the new order. The screen shows the order details.

- At the bottom, tap Accept.

- Select To payment to accept the order and require payment, or Accept to accept the order without payment.
Note: If you choose “To payment,” you must select a payment method.
Accept paid orders automatically
If you have “Auto Accept Paid Order” enabled, the system will automatically process all fully paid orders without requiring manual confirmation.
To turn on "Auto Accept Paid Order," follow the steps below:
- Log in to the Merchant Portal.
- On the left panel, click on Restaurant Settings. Then, click on Takeout.
- Click on Online Ordering.
- Turn on Allow Pickup Order
 or Allow Delivery Order .
- Turn on Auto Accept Paid Order .
- At the top right, click on Save to confirm.
Accept an online pre-order
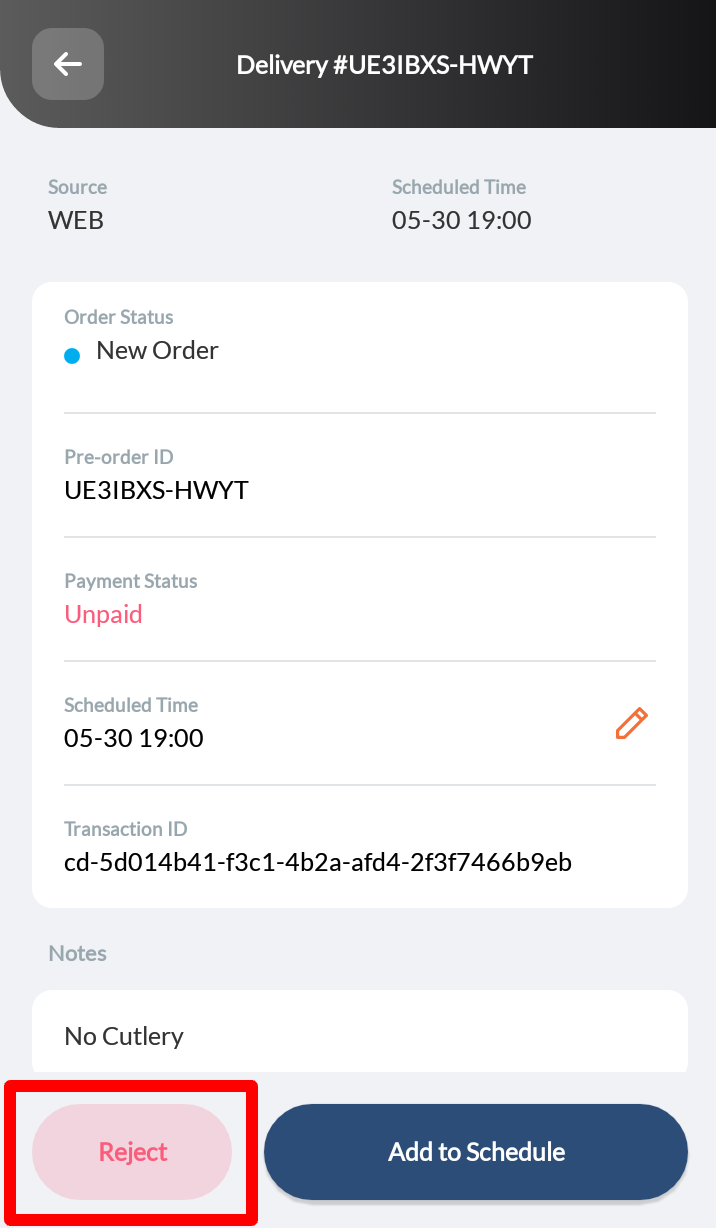
To accept online pre-orders, follow the steps below:
- Open the Eats365 Biz app.
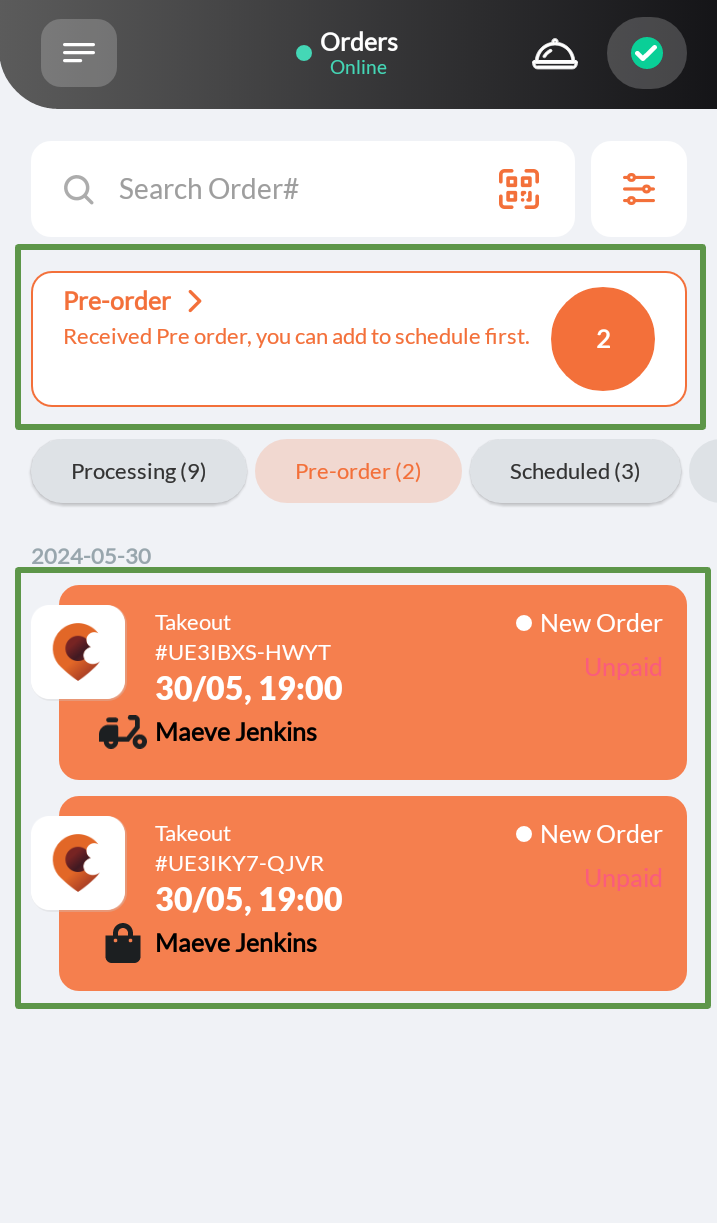
- On the "Orders" page, tap the Pre-order tab.
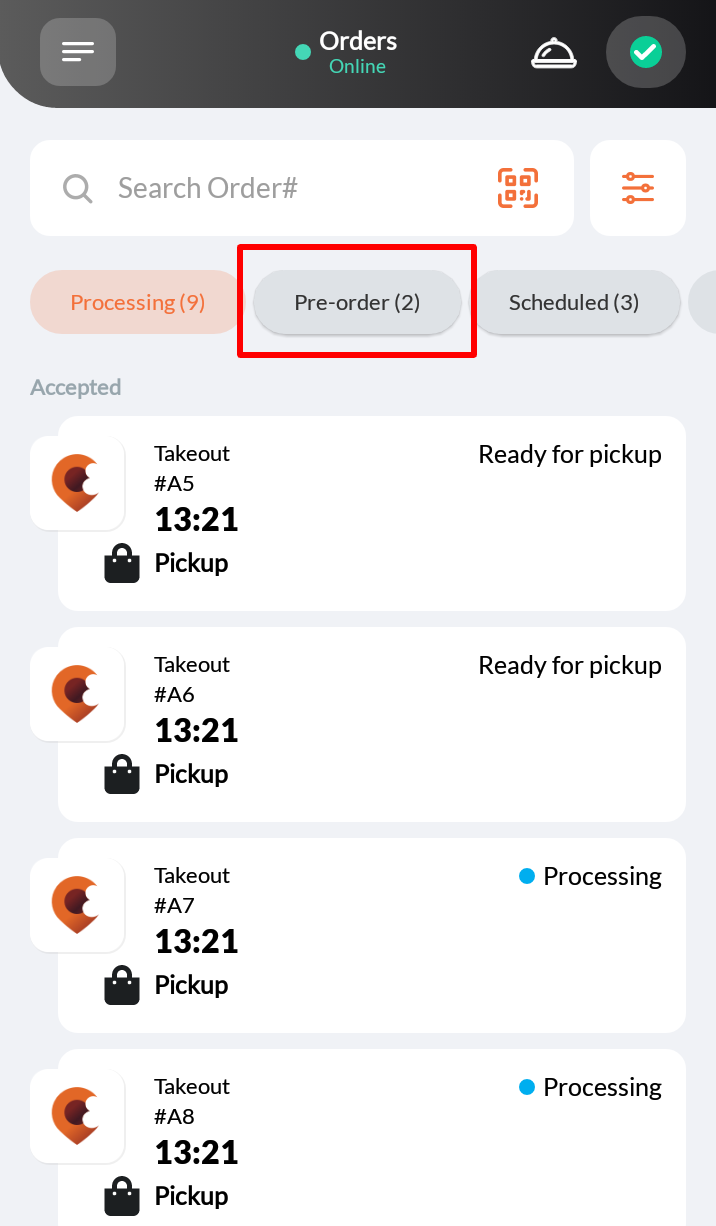
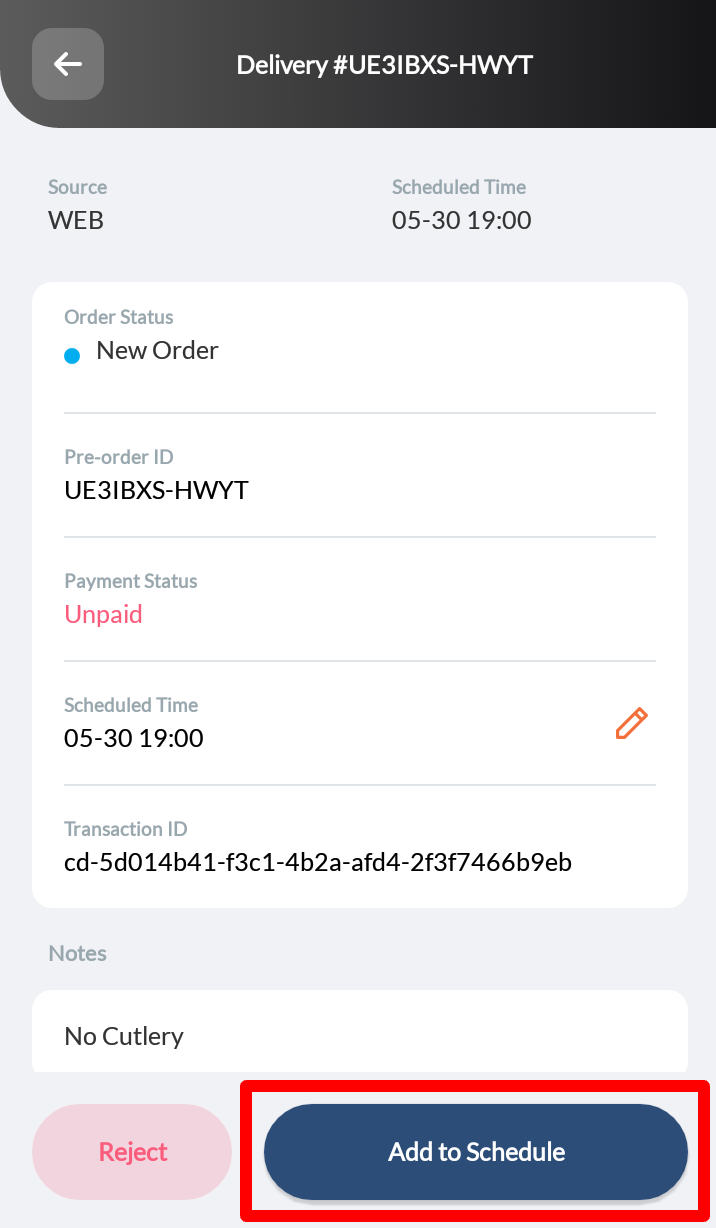
- At the top, you can tap the Pre-order prompt to go through all pending pre-orders, or tap the pre-order you’d like to accept. The screen shows the order details.
- At the bottom right, tap Add to Schedule to add the pre-order to the Scheduled tab. When the scheduled day and time arrive, you must confirm the scheduled order to proceed with preparation.
Reject an online order
To reject an immediate online order, follow the steps below:
- Open the Eats365 Biz app.
- On the "Orders" page, tap the new order. The screen shows the order details.
- At the bottom left, tap Reject. Then, enter a reason.
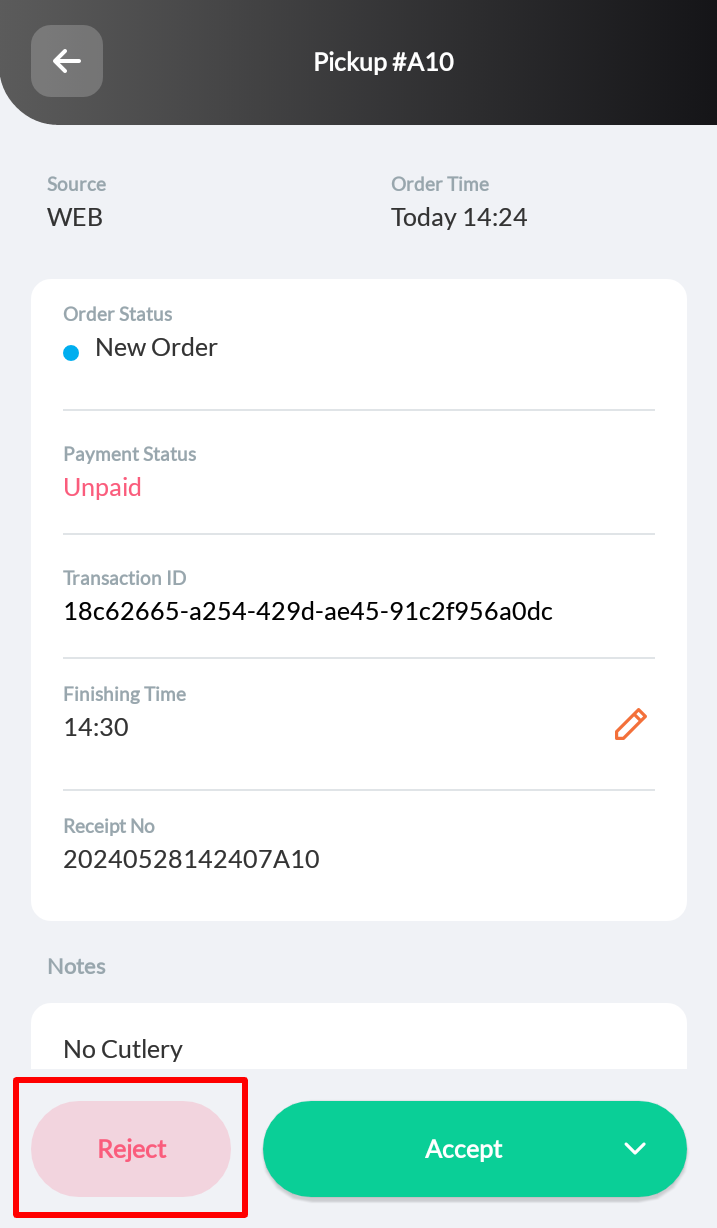
- Tap Done to confirm.
Reject an online pre-order
To reject online pre-orders, follow the steps below:
- Open the Eats365 Biz app.
- On the "Orders" page, tap the Pre-order tab.
- At the top, you can tap the Pre-order prompt to go through all pending pre-orders, or tap the pre-order you’d like to reject. The screen shows the order details.
- At the bottom left, tap Reject, then enter a reason.
- Tap Done to confirm.
Confirm a scheduled order
Scheduled orders are pre-orders placed in advance. When the scheduled day and time arrive, you must first confirm the order to begin processing. Once confirmed, the system prints the confirmation receipt.
To confirm a scheduled order for preparation, follow the steps below:
- Open the Eats365 Biz app.
- On the "Orders" page, tap the Scheduled tab.
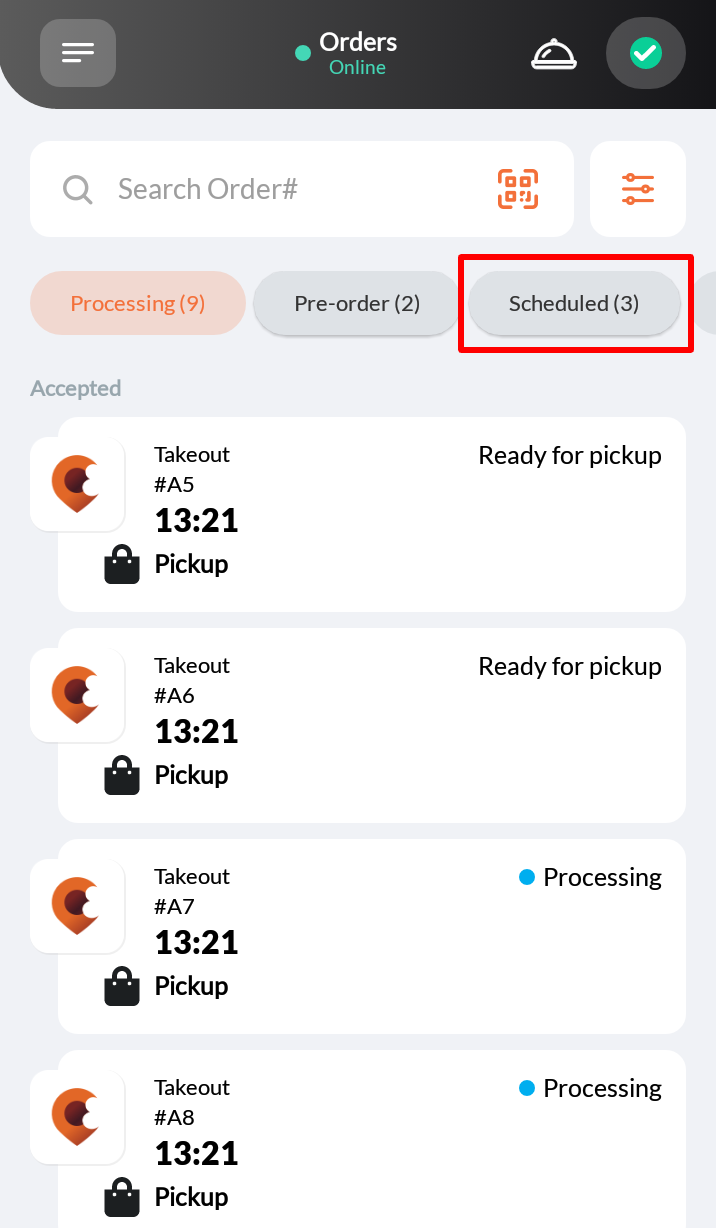
- At the top, you can tap the "Scheduled Order" prompt to go through all scheduled orders that require confirmation, or tap the scheduled order you’d like to accept. The screen shows the order details.
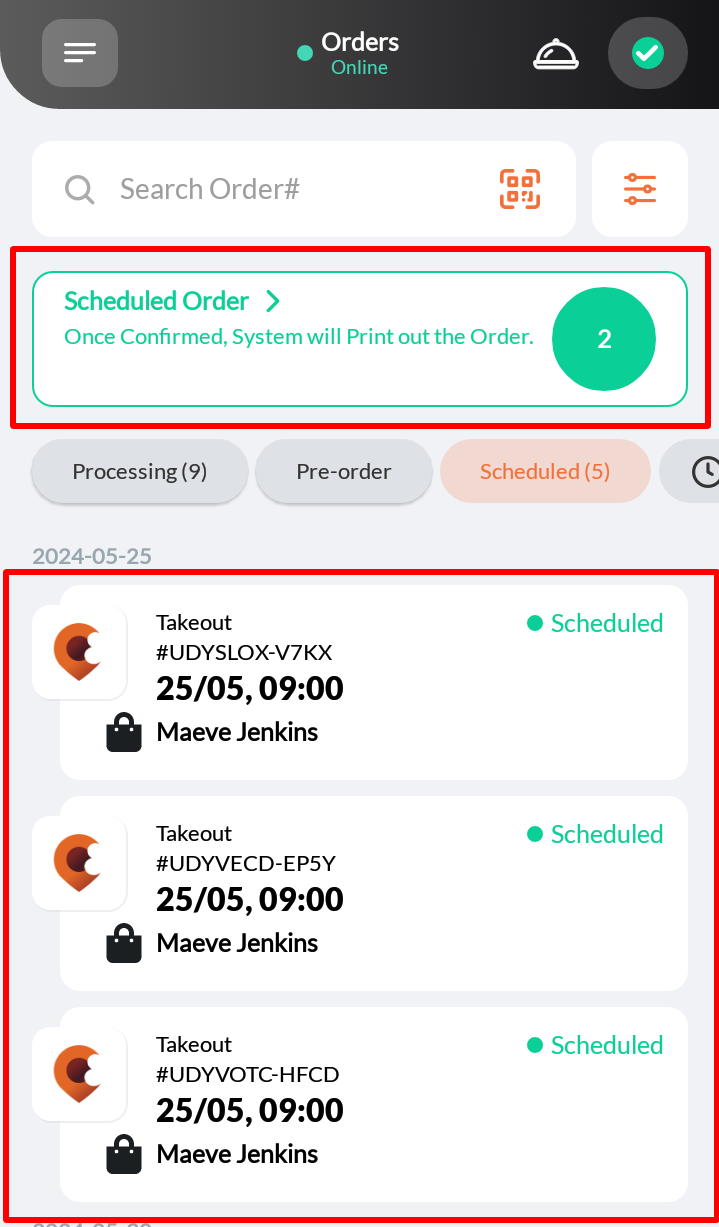
- At the bottom, tap Confirm. This prints the confirmation receipt for the order.
Cancel a scheduled order
To cancel a scheduled online order, follow the steps below:
- Open the Eats365 Biz app.
- On the "Orders" page, tap the Scheduled tab.
- At the top, you can tap the “Scheduled Order” prompt to go through all pending pre-orders, or tap the pre-order you’d like to cancel. The screen shows the order details.
- At the bottom left, tap Void, then enter a reason.
- Tap Done to confirm.
Cancel an order
Orders placed on the Eats365 Biz can still be cancelled as long as the order remains unpaid.
To cancel an order, follow the steps below:
- Open the Eats365Biz app.
- On the "Orders" page, select Processing.

- Select the order that you want to cancel.
- At the top right, tap Cancel. A prompt appears to confirm order cancellation.

- Tap Confirm to proceed.

Change an order's status
Once the payment has been settled for an order, you can then update the order’s status to ready for pickup or delivery.
To change an order’s status, follow the steps below:
- Open the Eats365 Biz app.
- On the "Orders" page, tap the order that you want to change the status of. The screen shows the order details.
Tip:- If multiple orders are available, you can search for them directly from the search bar. To filter your search further, tap Filter
 beside the search bar.
- To change the order view, tap the available order view options or tap Order History
 .
.
- If multiple orders are available, you can search for them directly from the search bar. To filter your search further, tap Filter
- To change the order status, you can do any of the following:
- Under “Order Status,” tap Edit
 . Then, change the order status to Ready for pickup or Ready to deliver.
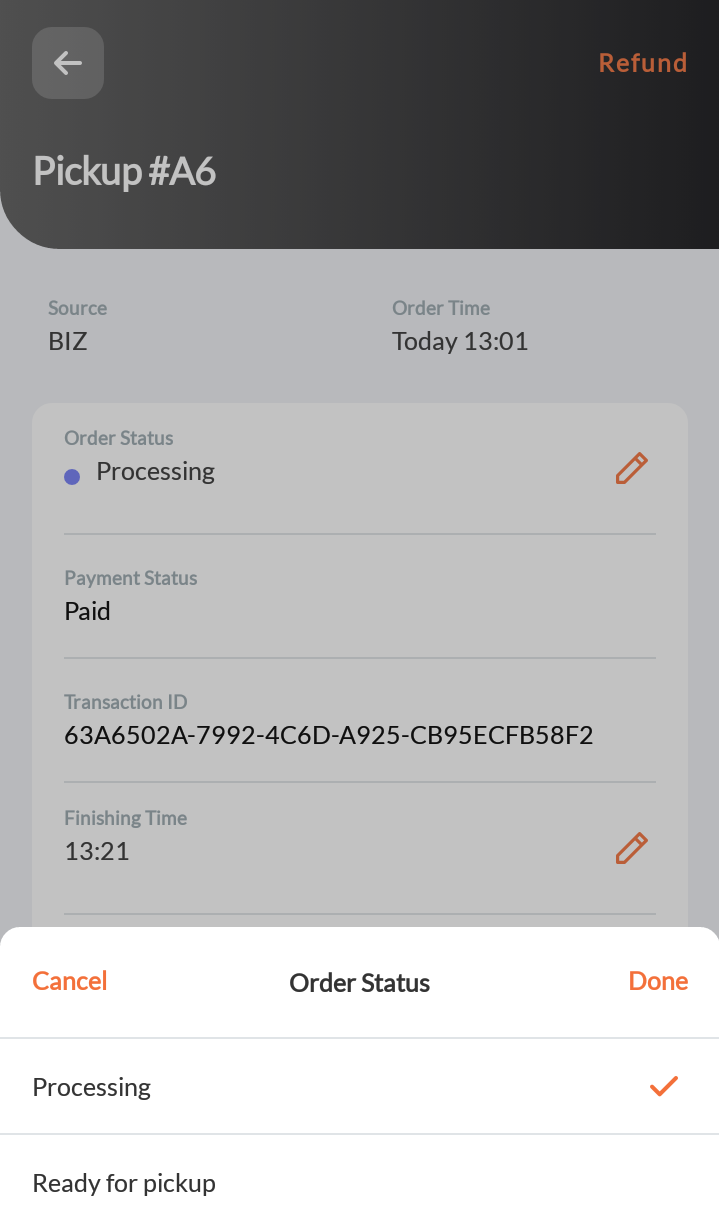
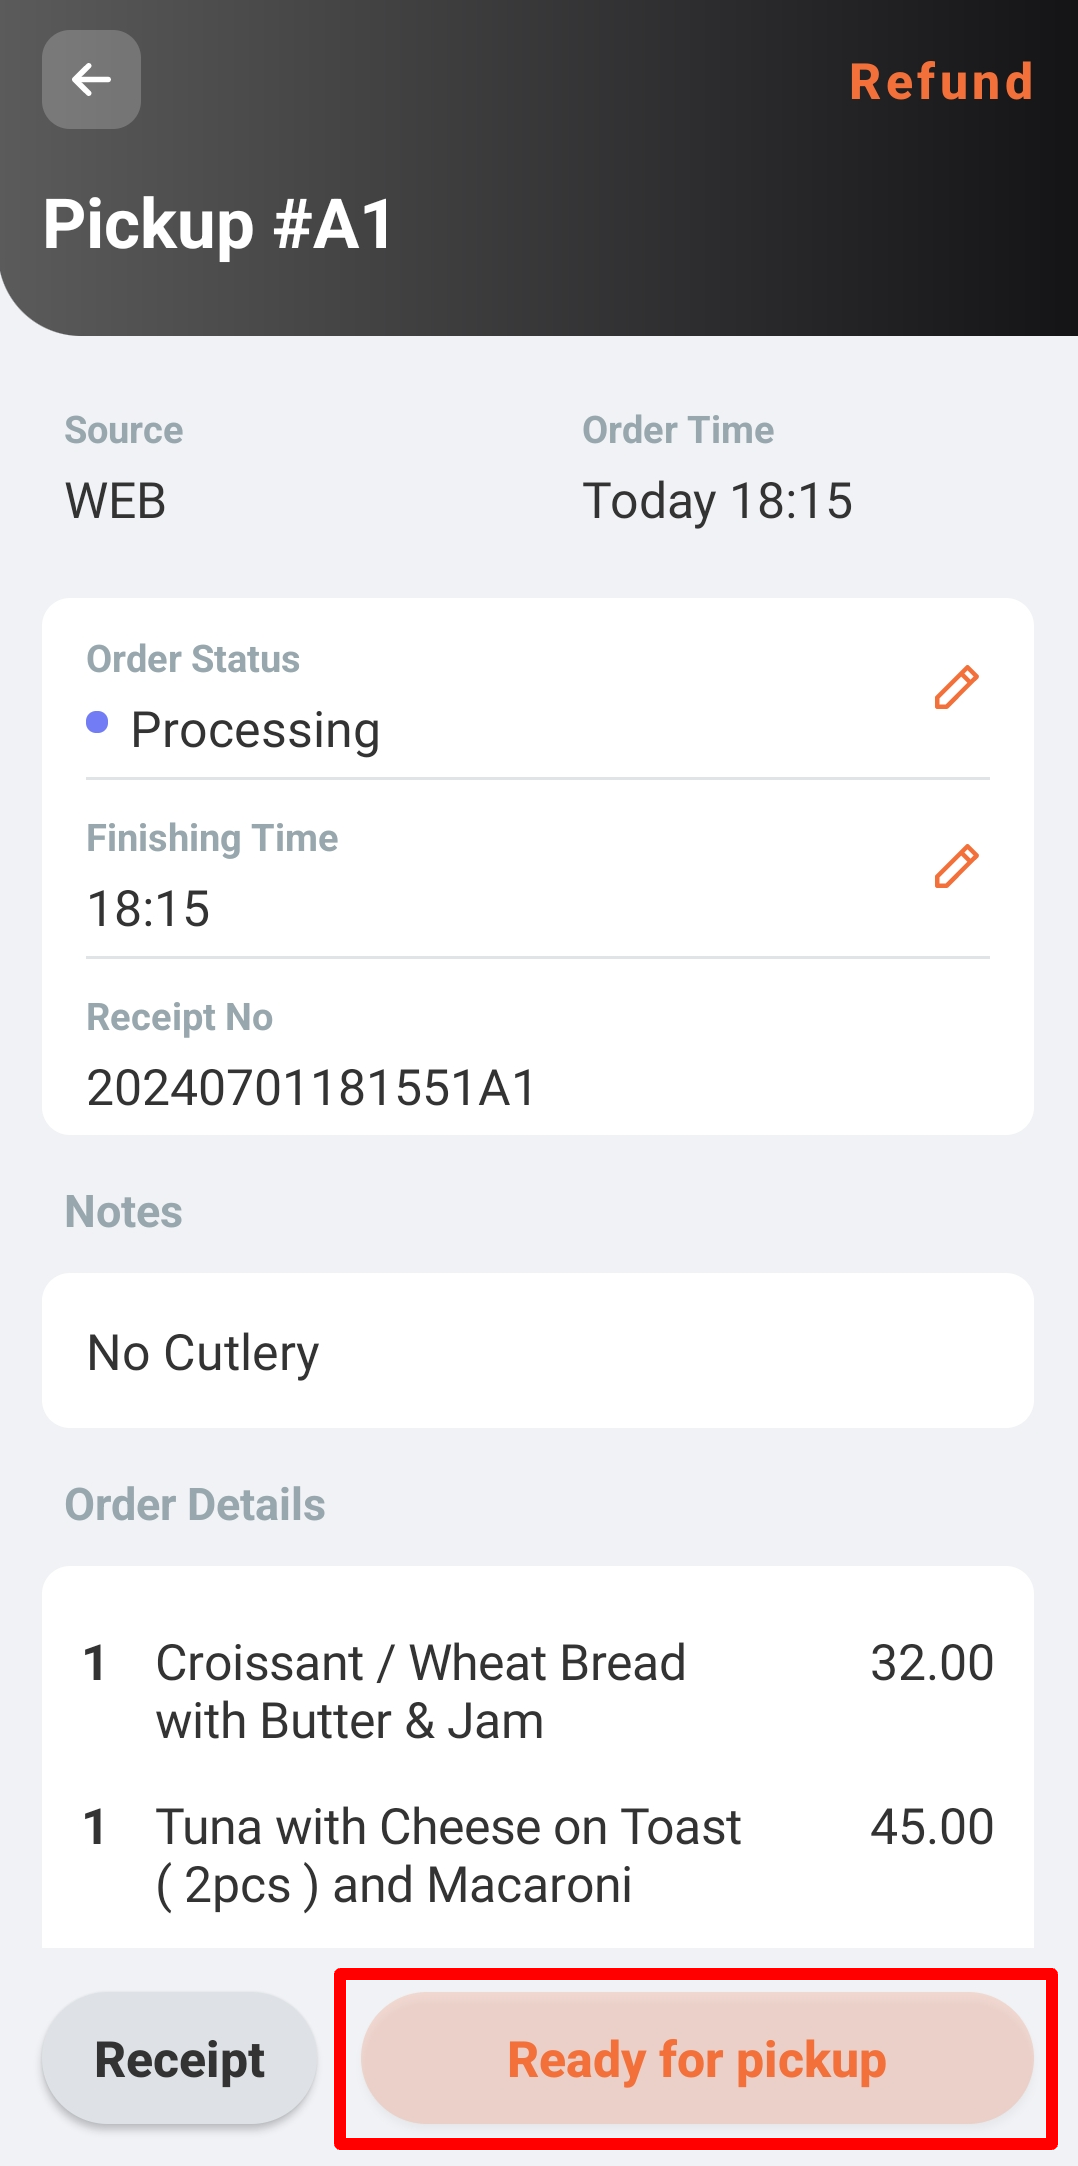
- At the bottom, tap Ready for pickup or Ready to deliver.
- Under “Order Status,” tap Edit
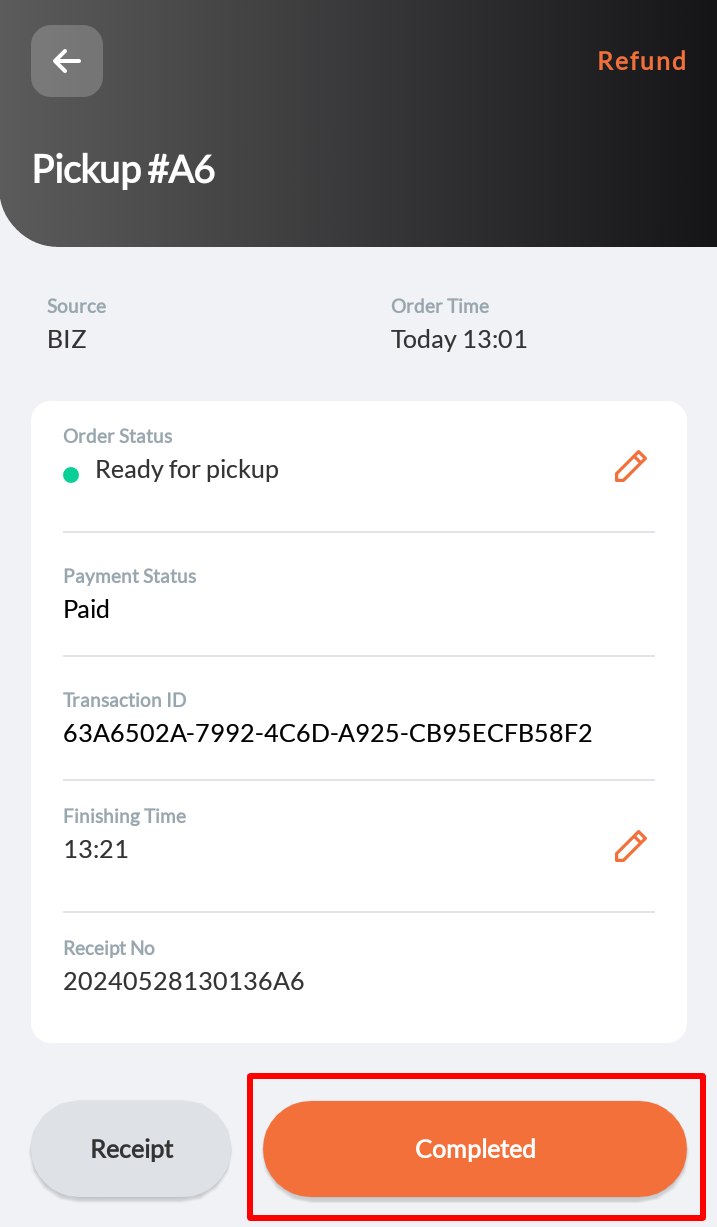
- Once the order status has been changed, the customer is notified that their order is now ready for pickup or delivery.
- Once the order has been picked up by the customer or delivery person, tap Completed or change the order status to “Completed.”
Adjust the finishing time
In some cases, the default estimated finishing time might not be enough to complete a customer’s order. In such cases, you can adjust the “Finishing Time” of the order.
To adjust the Finishing Time, follow the steps below:
- Open the Eats365 Biz app.
- On the "Orders" page, tap the order that you want to adjust the finishing time for. The screen shows the order details.
Tip:- If multiple orders are available, you can search for them directly from the search bar. To filter your search further, tap Filter beside the search bar.
- To change the order view, tap the available order view options or tap Order History .
- If multiple orders are available, you can search for them directly from the search bar. To filter your search further, tap Filter
- To adjust the estimated finishing time, next to “Finishing Time,” tap Edit . Then, enter a new time.
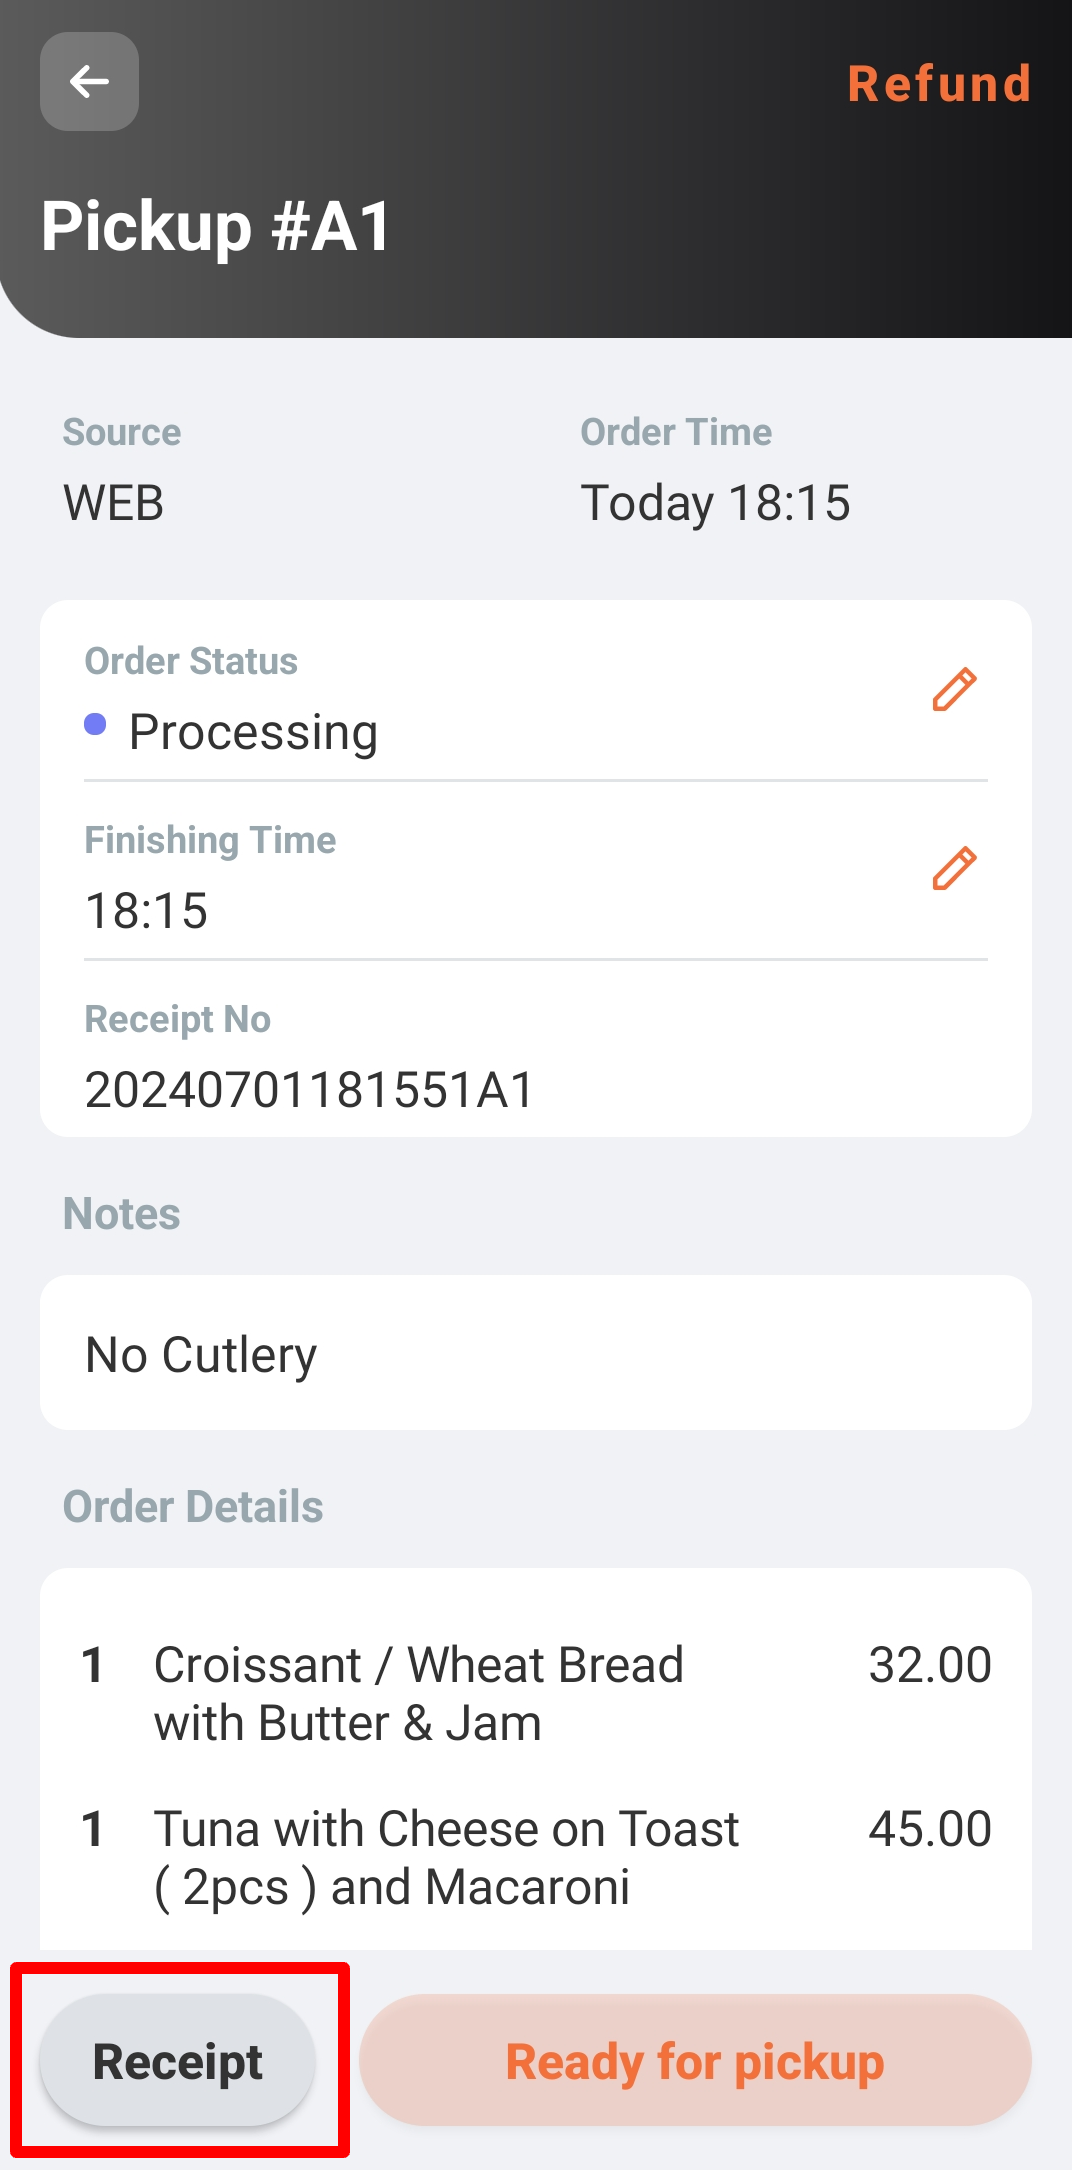
Print receipts
The Eats365 Biz can print receipts for orders placed through the Eats365 Biz or your restaurant’s online channels.
To print receipts, follow the steps below:
- Open the Eats365 Biz app.
- On the "Orders" page, tap the order which you want to print a receipt.
Tip:- If multiple orders are available, you can search for them directly from the search bar. To filter your search further, tap Filter beside the search bar.
- To change the order view, tap the available order view options or tap Order History .
- If multiple orders are available, you can search for them directly from the search bar. To filter your search further, tap Filter
- At the bottom, tap Receipt.