Expedite Display
Table of Contents
Perform basic expedite operations
Learn how to use the Expedite Display to perform basic expedite operations.
The Expedite Display gives kitchen packers and restaurant expeditors a tool that efficiently manages their tasks and improves kitchen workflow.
The Expedite Display can be used to perform the following basic operations:
- Check orders
- Complete an order
- Call an order
- Dismiss orders
- Re-call an order
In this article, you’ll learn about how to use the Expedite Display to perform basic expedite operations.
Check orders
When paired with the Eats365 POS, all orders placed on the Eats365 POS and its Modules show up on the Expedite Display.
To check for orders, on your iPad, open Eats365 Expedite. By default, the Expedite Display screen shows all placed orders regardless of service type. To filter orders per service type, tap the Dine-in tab or Takeout tab.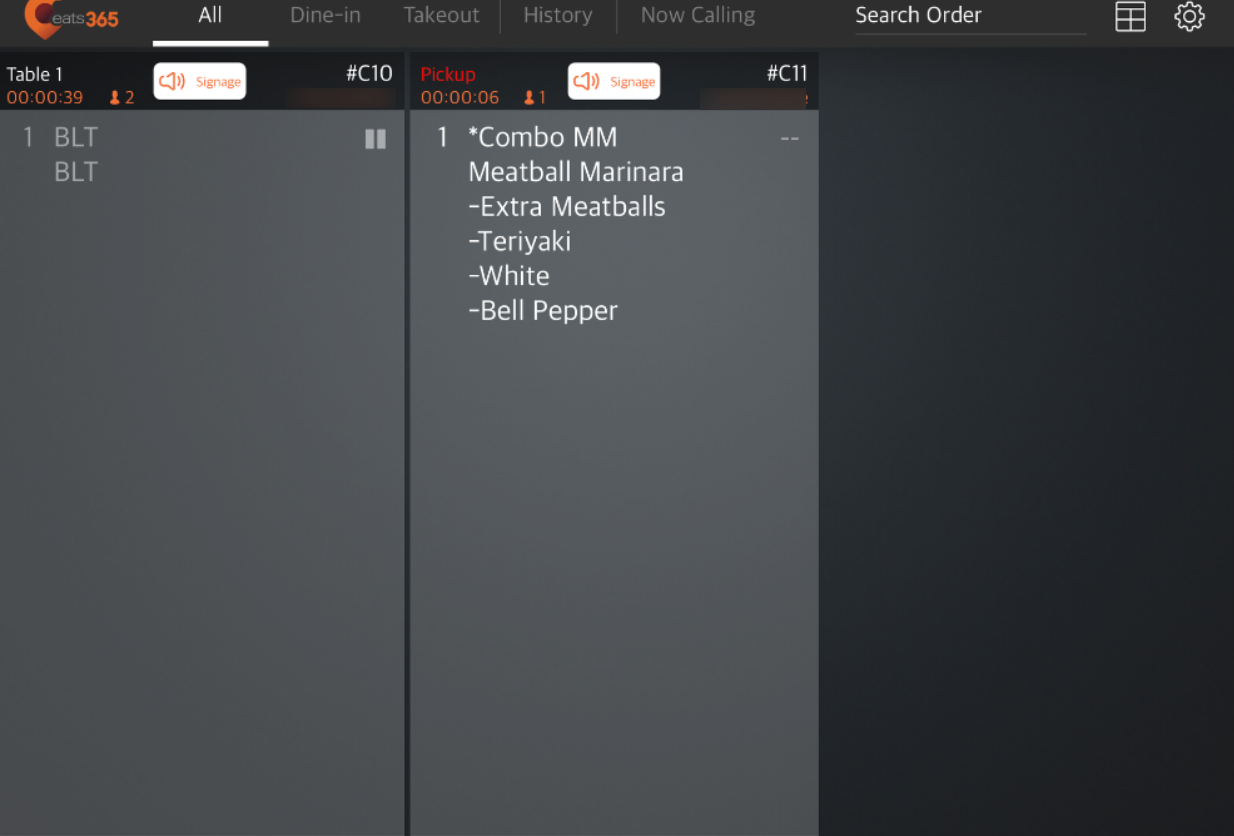
You can also search for orders manually by entering the order number in the Search Order field.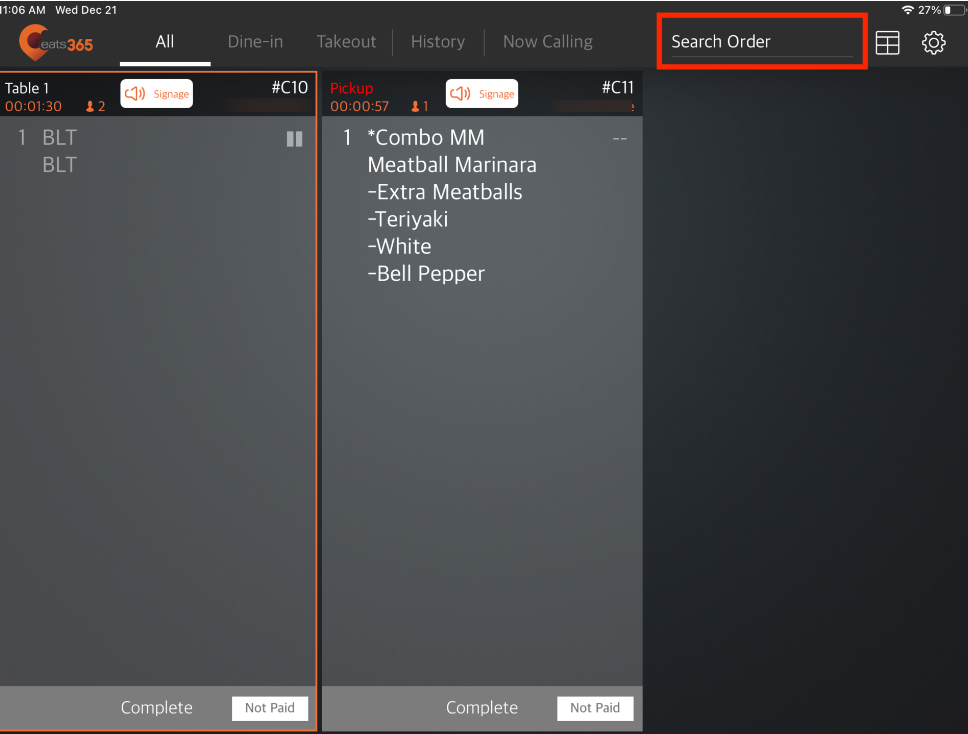
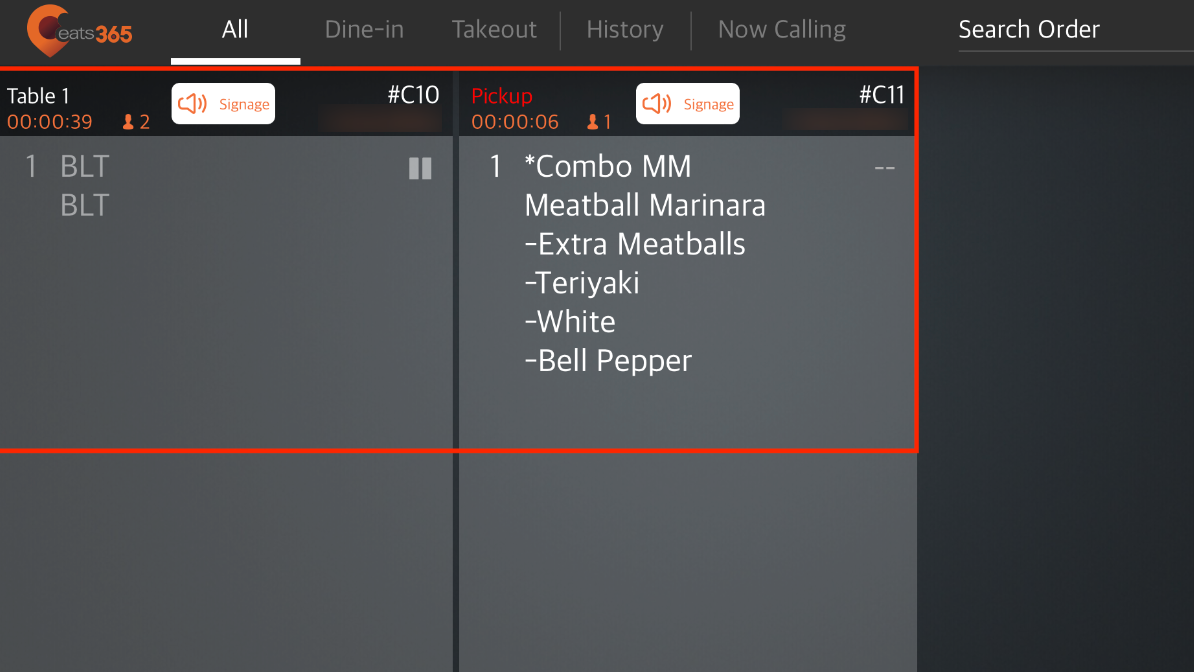
All orders are displayed with the following information:
Service type indicator
- For Dine-In orders, the customer’s table number appears.
- For Takeout orders, a Pickup tag appears.
Note: If Display Takeout Order in Red is enabled, the Pickup tag font is displayed in red.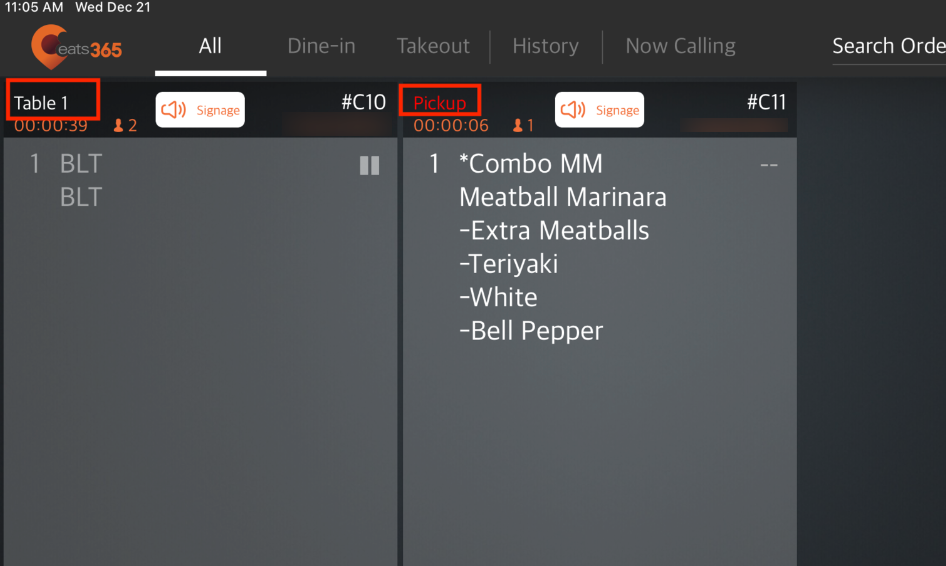
Order details
The Expedite Display shows the order details, which include:
- Item name
- Item quantity
- Item modifiers
- Party size
- Order number\
Timer Alert
The Expedite Display includes a timer to show how long ago an order was placed. Aside from the timer, the Expedite Display can also alert the kitchen expeditors when an order has been in the system for a set amount of time. The alert comes in the form of a color indicator that changes depending on how long ago the order was placed. You can turn on the timer alert from the Expedite Display settings.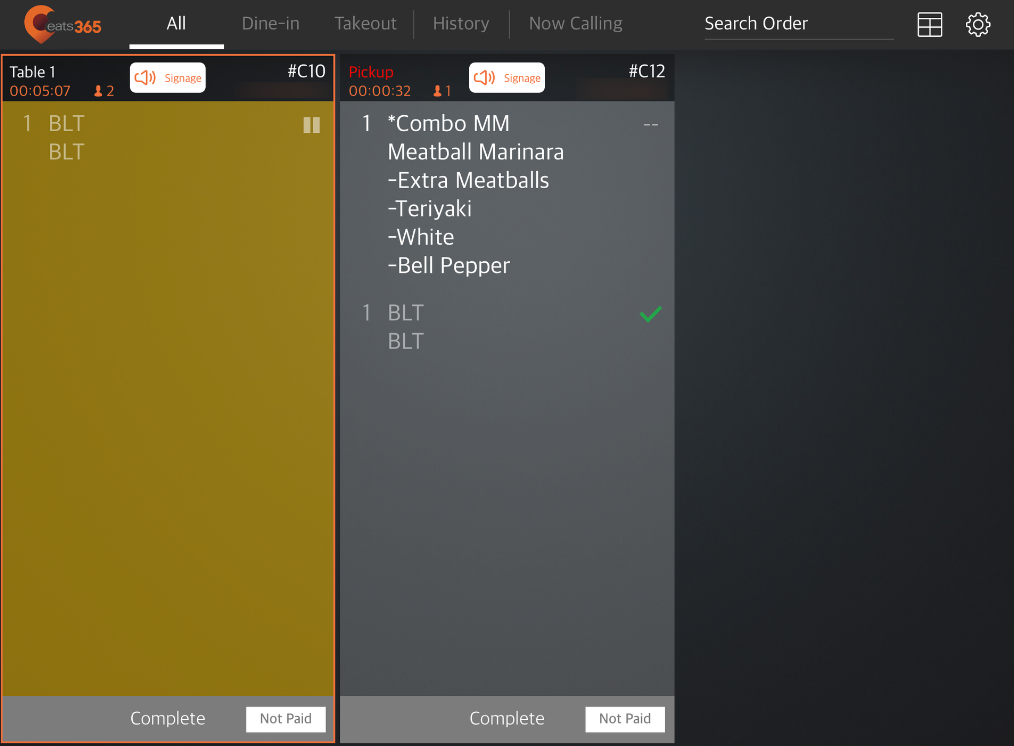
Complete an order
Once an Item is ready for pickup, you can tap Complete to remove the order from the list of pending items on the Expedite Display and call the order on the Pickup Display or on the pager.
To complete an order, follow the steps below:
- From the Expedite Display screen, select the order that you want to complete.
Tip: By default, the Expedite Display screen shows all placed orders regardless of service type. To filter orders per service type, tap the Dine-in tab or Takeout tab. - Check all Items included in the order.
- When an Item has been packed or prepared, tap an Item to mark it as ready.
Note: Marked items are clearly indicated with a green check mark.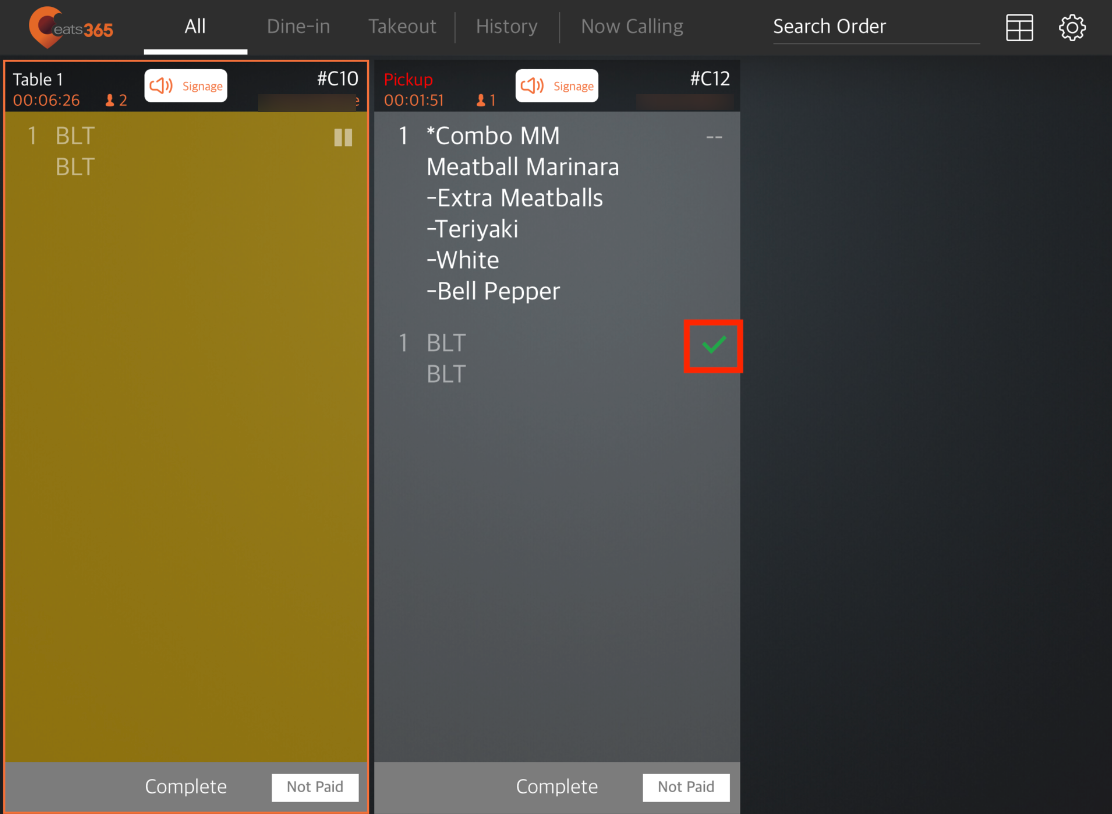
- At the bottom of the order, tap Complete.
Restore an order
Once you complete an order, the order gets removed from the Expedite Display order list. If you need to restore the order for any reason, follow the steps below:
- On your iPad, open Eats365 Expedite.
- Tap History.
Note: The Expedite Display keeps all completed orders on the History page until the restaurant’s end of day. - Select the order that you want to restore. Then, at the bottom, tap Restore. The order moves back to the Expedite Display order list.
Call an order
The Expedite Display can easily call for an order when the order is ready for pickup. The Expedite Display can be used together with a Pickup Display or a pager to call orders. Once a number is called, the pager rings if the restaurant uses pagers, or the number shows up on the Pickup Display if an eSignage is paired to the Eats365 POS.
To call an order, follow the steps below:
- From the Expedite Display screen, select the order that you want to complete.
Tip: By default, the Expedite Display screen shows all placed orders regardless of service type. To filter orders per service type, tap the Dine-in tab or Takeout tab. - Check that all Items in the order are complete.
- To call an order, you can do any of the following:
- At the top of the order list, tap the Call Order Number button.
Note: The Call Order Number button must be enabled for the button to appear. To learn more, refer to Configure Expedite Display settings.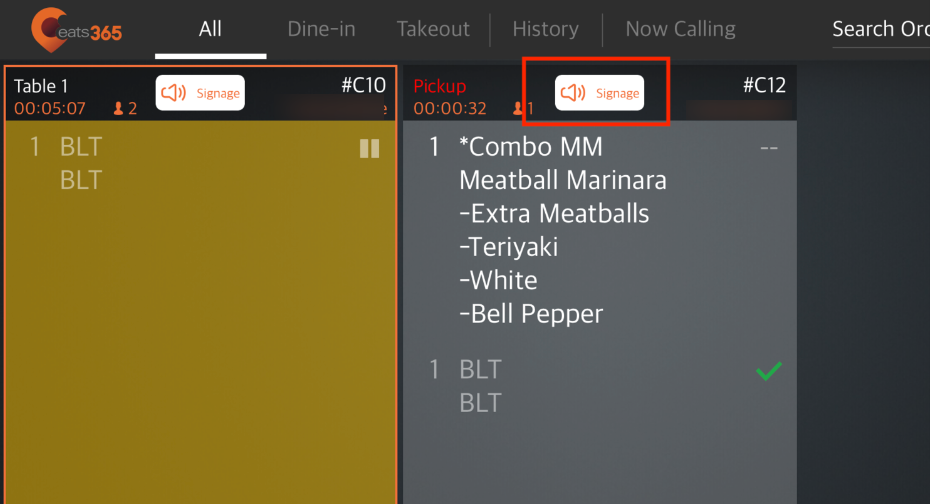
- Follow the steps to complete an order. Once an order is complete, the order automatically gets called.
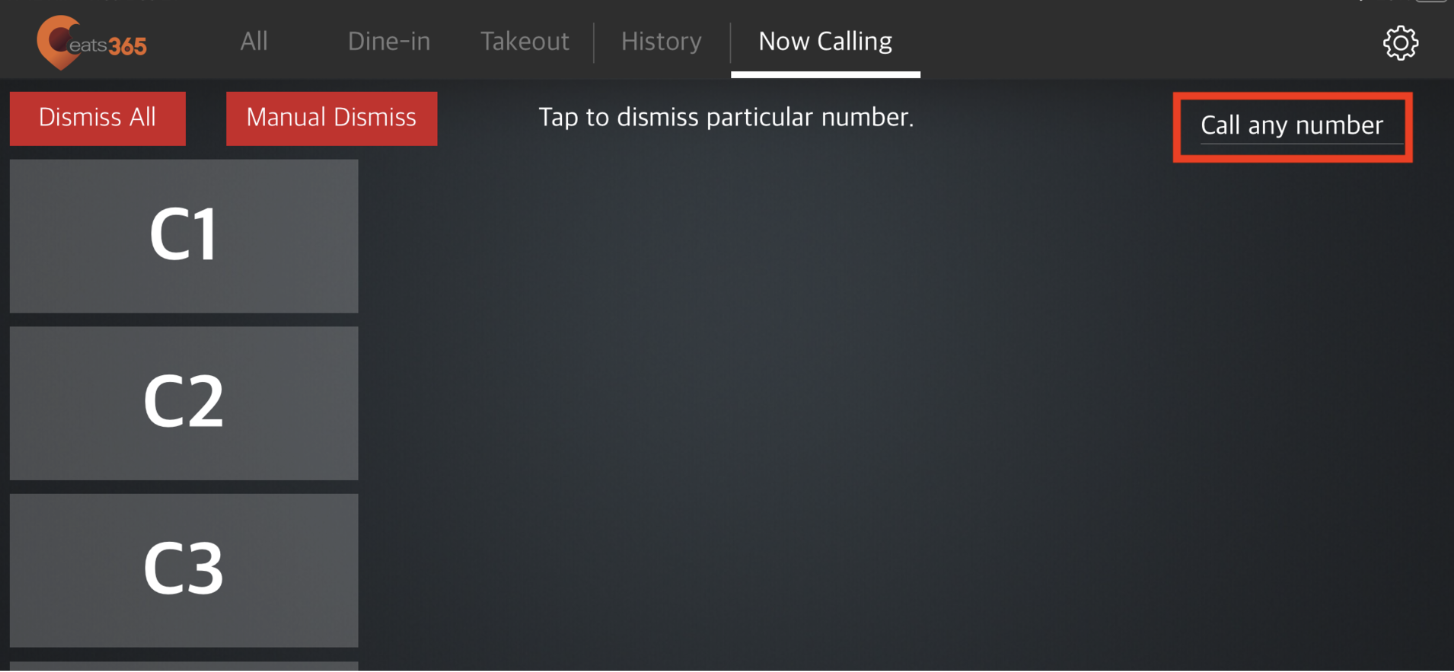
- At the top of the screen, tap Now Calling. On the Now Calling screen, tap Call any number. Then, enter the number that you want to call.
- At the top of the order list, tap the Call Order Number button.
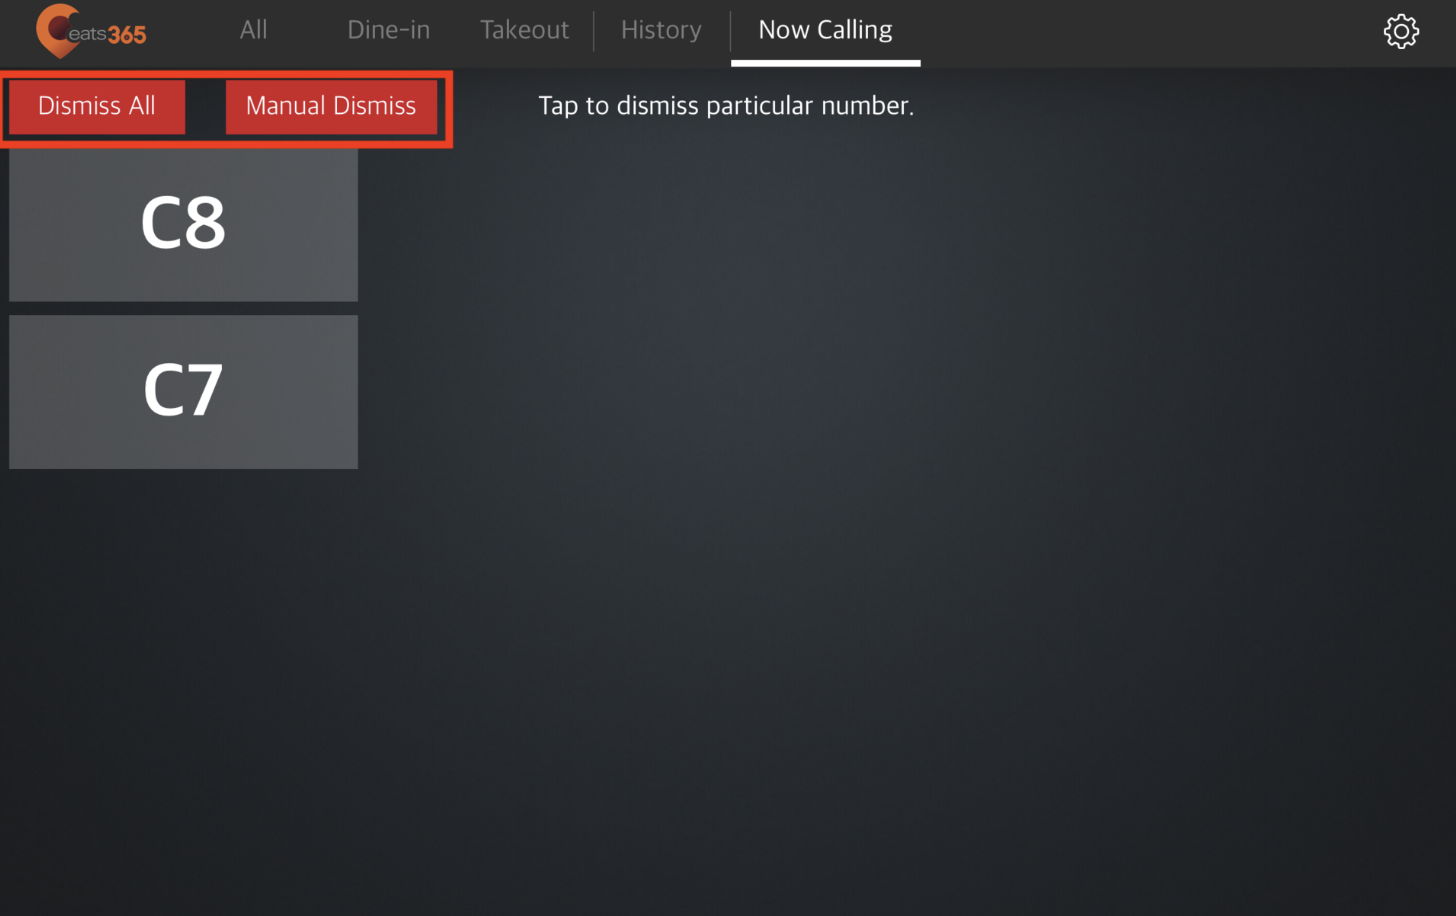
Dismiss orders
Once an order has been called and picked up by the customer, you can dismiss the order to remove it from the Pickup Display.
To dismiss an order, follow the steps below:
- Open Eats365 Expedite.
- Tap Now Calling.
- To dismiss an order, you can do either of the following:
- Tap the order number that you want to dismiss.
- Tap Manual Dismiss. Then, enter the order number that you want to dismiss.
- To dismiss all orders, tap Dismiss All.
Re-call an order
If you need to call the number again for any reason, you can re-call the number from the order history.
To re-call an order, follow the steps below:
- Open Eats365 Expedite.
- Tap History.
- Select the order that you want to re-call. Then, at the bottom, tap Re-call.
