PhotoMenu
Table of Contents
Configure PhotoMenu settings
Learn how to customize settings for the PhotoMenu.
Changing the settings on the PhotoMenu allows you to customize the app’s layout and behavior based on your preferences. You can modify individual or shared PhotoMenu settings on the Eats365 POS or on the Merchant Portal.
In this article, you’ll learn how to configure the PhotoMenu to your preferred settings.
Change individual PhotoMenu settings
To change specific settings on a PhotoMenu device, follow the steps below:
Eats365 POS
- Log in to the Eats365 POS.
- At the top left, tap Settings
 .
. - Under "General," tap Device Pairing. Then, tap Photo Menu.
- Under "Paired Device," tap the paired PhotoMenu device.

- Choose a setting, then change the options according to your preferences.

- At the top right, tap Save.
Default Language
Set the default language to your preferred language.
Menu Design Theme
Select from the available menu design themes.
Show Category by Default
The PhotoMenu defaults to category view.
Hide Sold Out Items
Removes sold-out items from the menu.
Display Subtotal
Shows the subtotal of ordered items.
Fixed Table Number
Assign a specific PhotoMenu to a table number.
Hide Item Price
When turned on, the Item Price won’t show on the PhotoMenu.
Table Number
Select the table number that you want to assign to the PhotoMenu.
Override Shared Settings
When enabled, you can override the media source set under Shared Settings. You can display media specific to the individual PhotoMenu.
DeleteMerchant Portal (Classic Theme)
- Log in to the Merchant Portal.
- On the left panel, click on Advanced Settings.
- Under "Modules," select eMenu. Then, click on License.
- Next to the PhotoMenu you’d like to configure, click on Edit
 .
. - Choose a setting, then change the options according to your preferences.
- At the top right, click on Save.
You can change the following options for your selected PhotoMenu device:
Theme
Select from the available menu design themes.
Show Category
The PhotoMenu defaults to category view.
Hide Soldout Items
Removes sold-out items from the menu.
Display Subtotal
Shows the subtotal of ordered items.
Hide Item Price
When turned on, the item price won’t show on the PhotoMenu.
Table
Select the table number that you want to assign to the PhotoMenu.
Show Item Price for Free Items
When disabled, the PhotoMenu will not display the price of items that are priced as zero (0). This setting is ideal for All You Can Eat menus where the unlimited items are not priced individually.
Default Language
Set the default language to your preferred language.
DeleteMerchant Portal 2.0
- Log in to the Merchant Portal.
- On the left panel, click on Modules.
- Select eMenu. Then, click on License.
- Next to the PhotoMenu you’d like to configure, click on Edit
 .
. - Choose a setting, then change the options according to your preferences.
- At the top right, click on Save.
You can change the following options for your selected PhotoMenu device:
Theme
Select from the available menu design themes.
Show Category
The PhotoMenu defaults to category view.
Hide Soldout Items
Removes sold-out items from the menu.
Display Subtotal
Shows the subtotal of ordered items.
Hide Item Price
When turned on, the item price won’t show on the PhotoMenu.
Table
Select the table number that you want to assign to the PhotoMenu.
Show Item Price for Free Items
When disabled, the PhotoMenu will not display the price of items that are priced as zero (0). This setting is ideal for All You Can Eat menus where the unlimited items are not priced individually.
Default Language
Set the default language to your preferred language.
DeleteChange shared PhotoMenu settings
Eats365 POS
To change shared settings on all PhotoMenu devices, follow the steps below:
- Log in to the Eats365 POS.
- At the top left, tap Settings
 .
. - Under "General," tap Device Pairing. Then, tap Photo Menu.
- Under "Shared Settings," choose a setting, then change the options according to your preferences.

- At the top right, tap Save to confirm.
You can change the following options for all PhotoMenu devices:
Shared settings
Auto Accept Order
Turn on if you want orders that are sent to the Eats365 POS from the PhotoMenu to be automatically accepted. Once the order has been accepted, receipts and tickets will be printed automatically.
Media Source
Select if you want to display existing item images on shuffle or show custom content when the PhotoMenu is idle.
Reset Passcode
Change the PhotoMenu passcode.
Media
Showcased Promotional Media
Select the custom content that you want to appear on the PhotoMenu. You can choose from the available Text, Images, and Videos that are uploaded to a Media Group.
Merchant Portal (Classic Theme)
To change shared settings on all PhotoMenu devices, follow the steps below:
- Log in to the Merchant Portal.
- On the left panel, click on Advanced Settings.
- Under "Modules," select eMenu. Then, click on Shared Settings.
- Choose a setting, then change the options according to your preferences.
- At the top right, click on Save to confirm.
You can change the following options for all PhotoMenu devices:
Shared Settings
Auto Accept Order
Turn on if you want orders that are sent to the Eats365 POS from the PhotoMenu to be automatically accepted. Once the order has been accepted, receipts and tickets will be printed automatically.
Display Meal Time Until and Order Time Remains count down
When enabled, the PhotoMenu displays how much time is left until the order time is finished and what time the meal time will be over.
Order Creation is required when ordering with eMenu
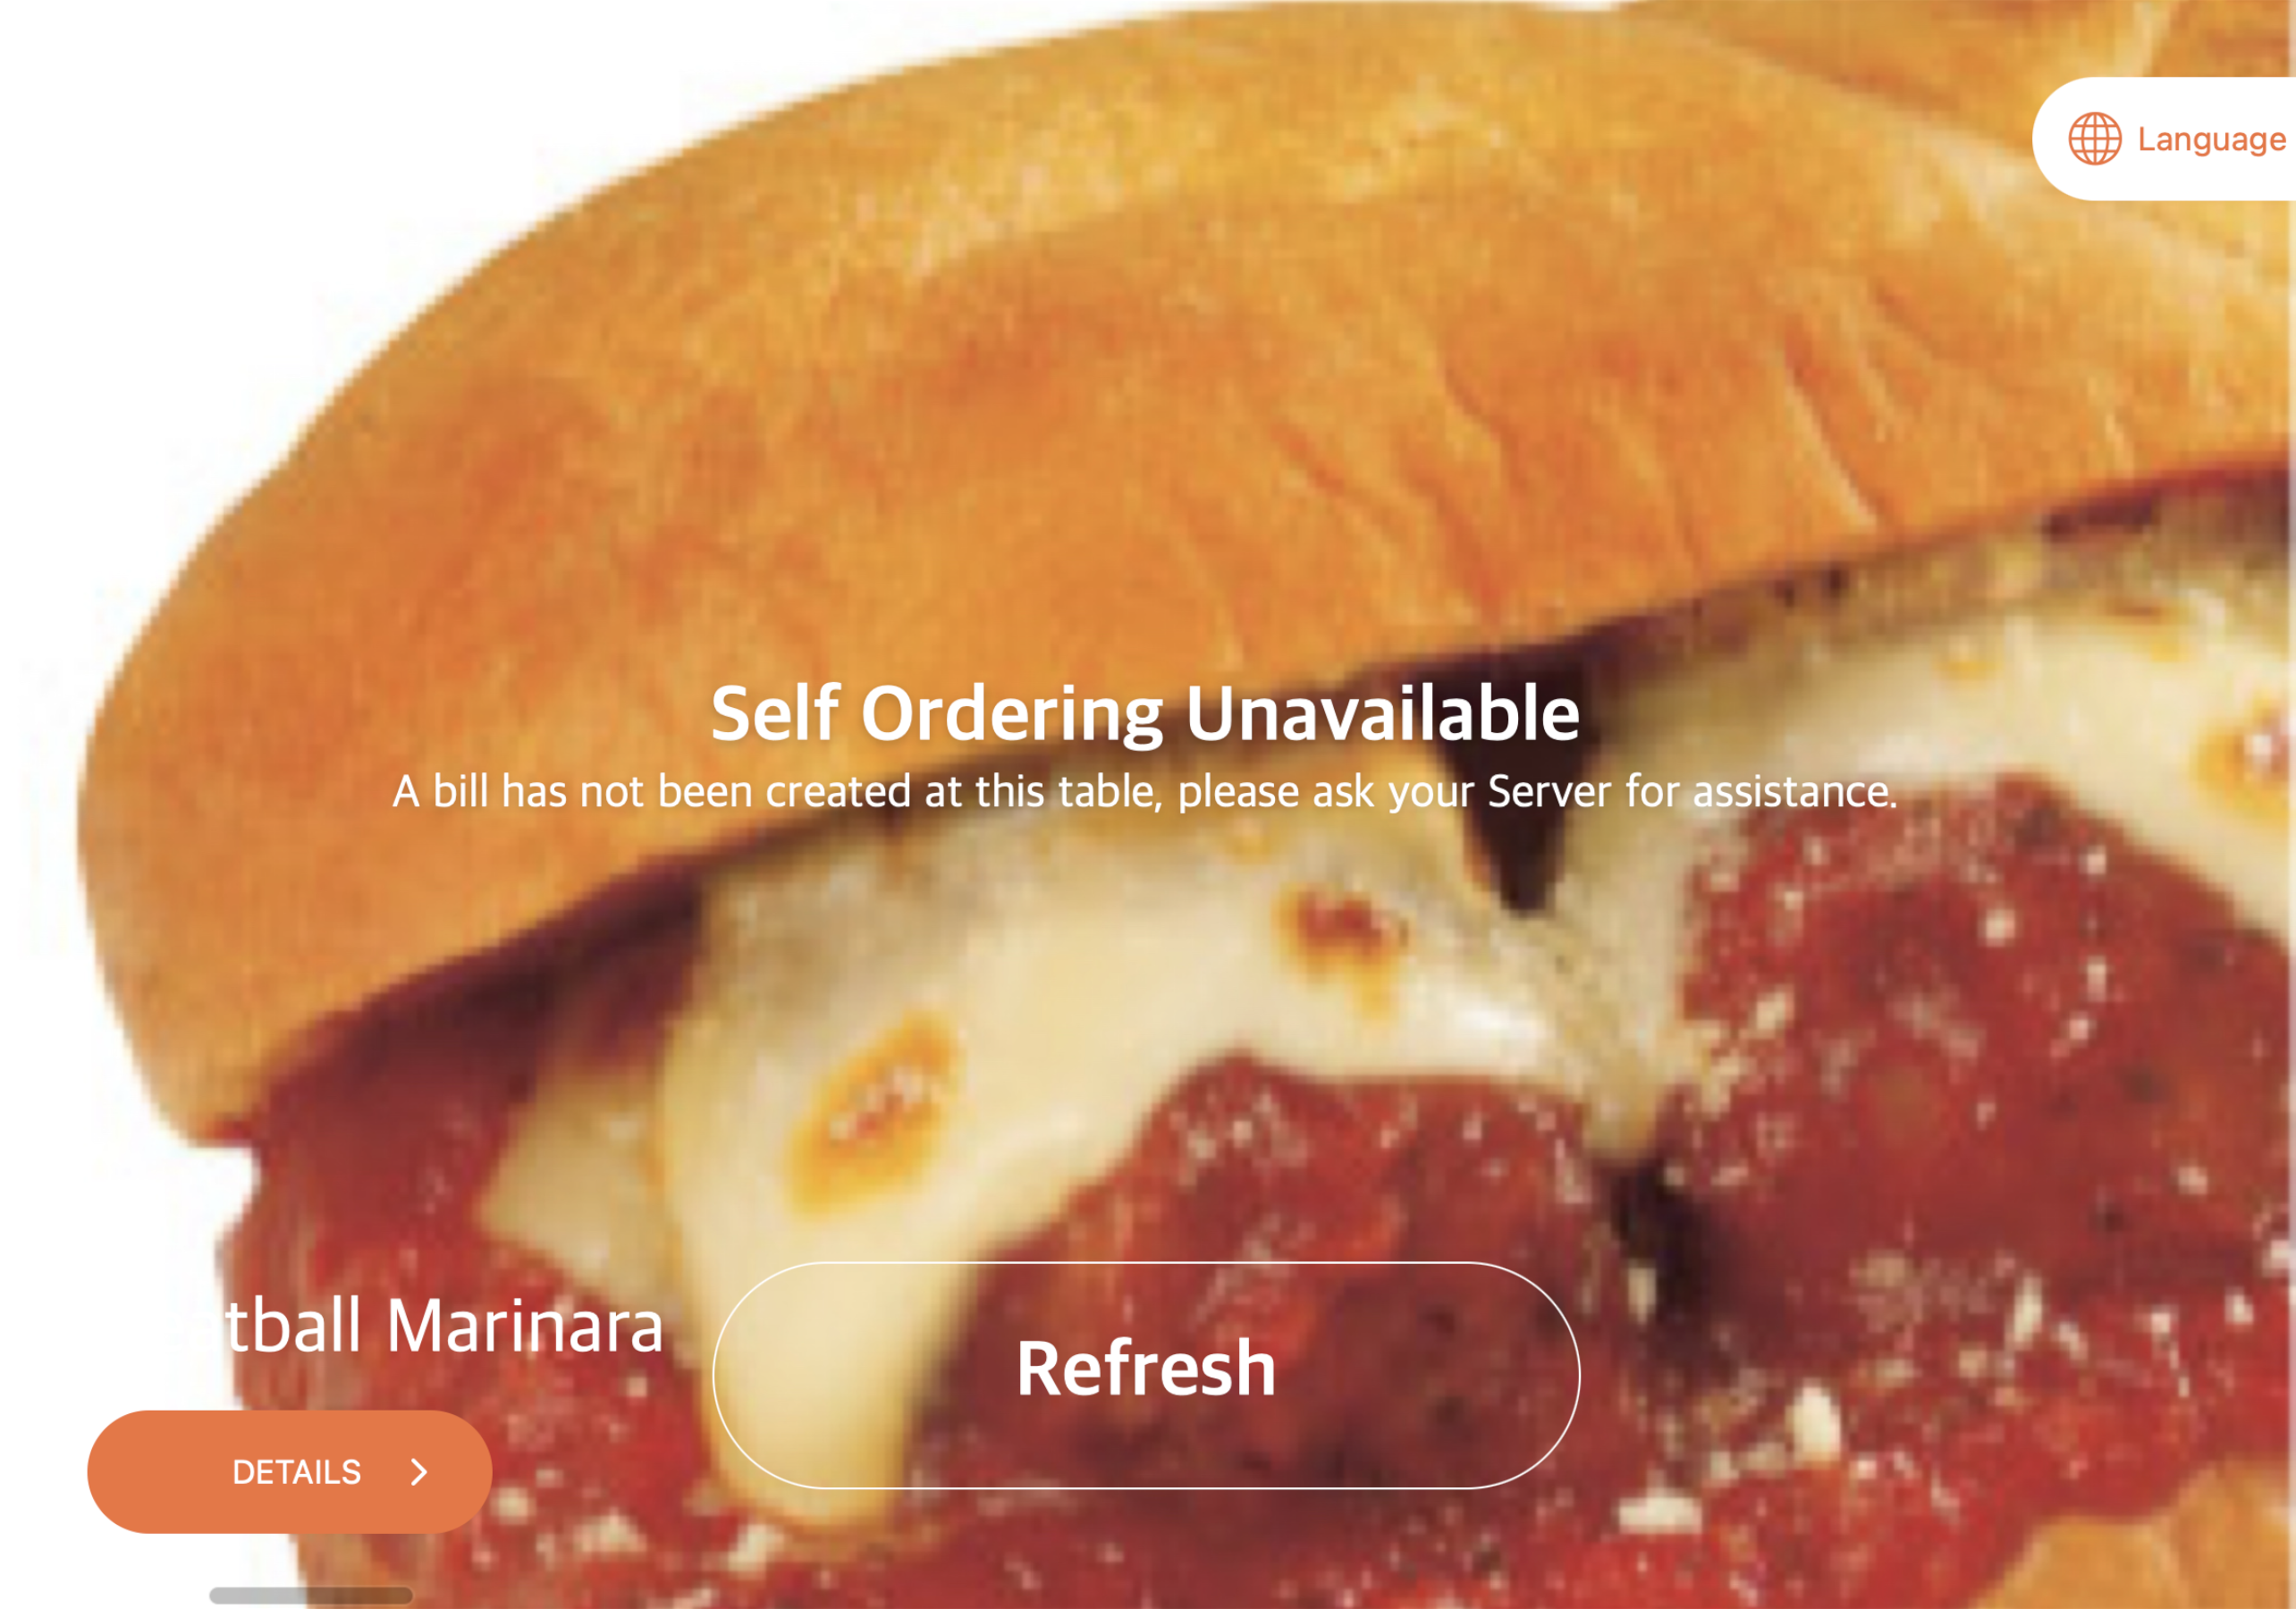
When enabled, customers will be unable to place an order on the PhotoMenu until a bill is created for their table using the POS.
If the PhotoMenu is assigned to a particular table and a customer tries to order before a bill is created, the following message will be displayed:
 If the PhotoMenu is not assigned to a particular table, table numbers will not be available to select until an order has been created for that table.
Media Group
Select if you want to display existing item images on shuffle or show custom content.
Reset Passcode
Change the PhotoMenu passcode.
Media
Showcased Media Group
Select the custom content that you want to appear on the PhotoMenu. You can choose from the available Text, Images, and Videos that are uploaded to a Media Group.
Merchant Portal 2.0
- Log in to the Merchant Portal.
- On the left panel, click on Modules.
- Select eMenu. Then, click on Shared Settings.
- Choose a setting, then change the options according to your preferences.

- At the top right, click on Save to confirm.
You can change the following options for all PhotoMenu devices:
Shared Settings
Auto Accept Order
Turn on if you want orders that are sent to the Eats365 POS from the PhotoMenu to be automatically accepted. Once the order has been accepted, receipts and tickets will be printed automatically.
Display Meal Time Until and Order Time Remains count down
When enabled, the PhotoMenu displays how much time is left until the order time is finished and what time the meal time will be over.
Order Creation is required when ordering with eMenu
When enabled, customers will be unable to place an order on the PhotoMenu until a bill is created for their table using the POS.
If the PhotoMenu is assigned to a particular table and a customer tries to order before a bill is created, the following message will be displayed:

If the PhotoMenu is not assigned to a particular table, table numbers will not be available to select until an order has been created for that table.
Reset Passcode
Change the PhotoMenu passcode.
Media
Media Display Mode
Select if you want to display existing Item images on shuffle or show custom content.
Included Media
If you selected "Custom Upload" as the Media Display Mode, you can select the Media Group(s) you’ve previously set up.
Set up Service Call
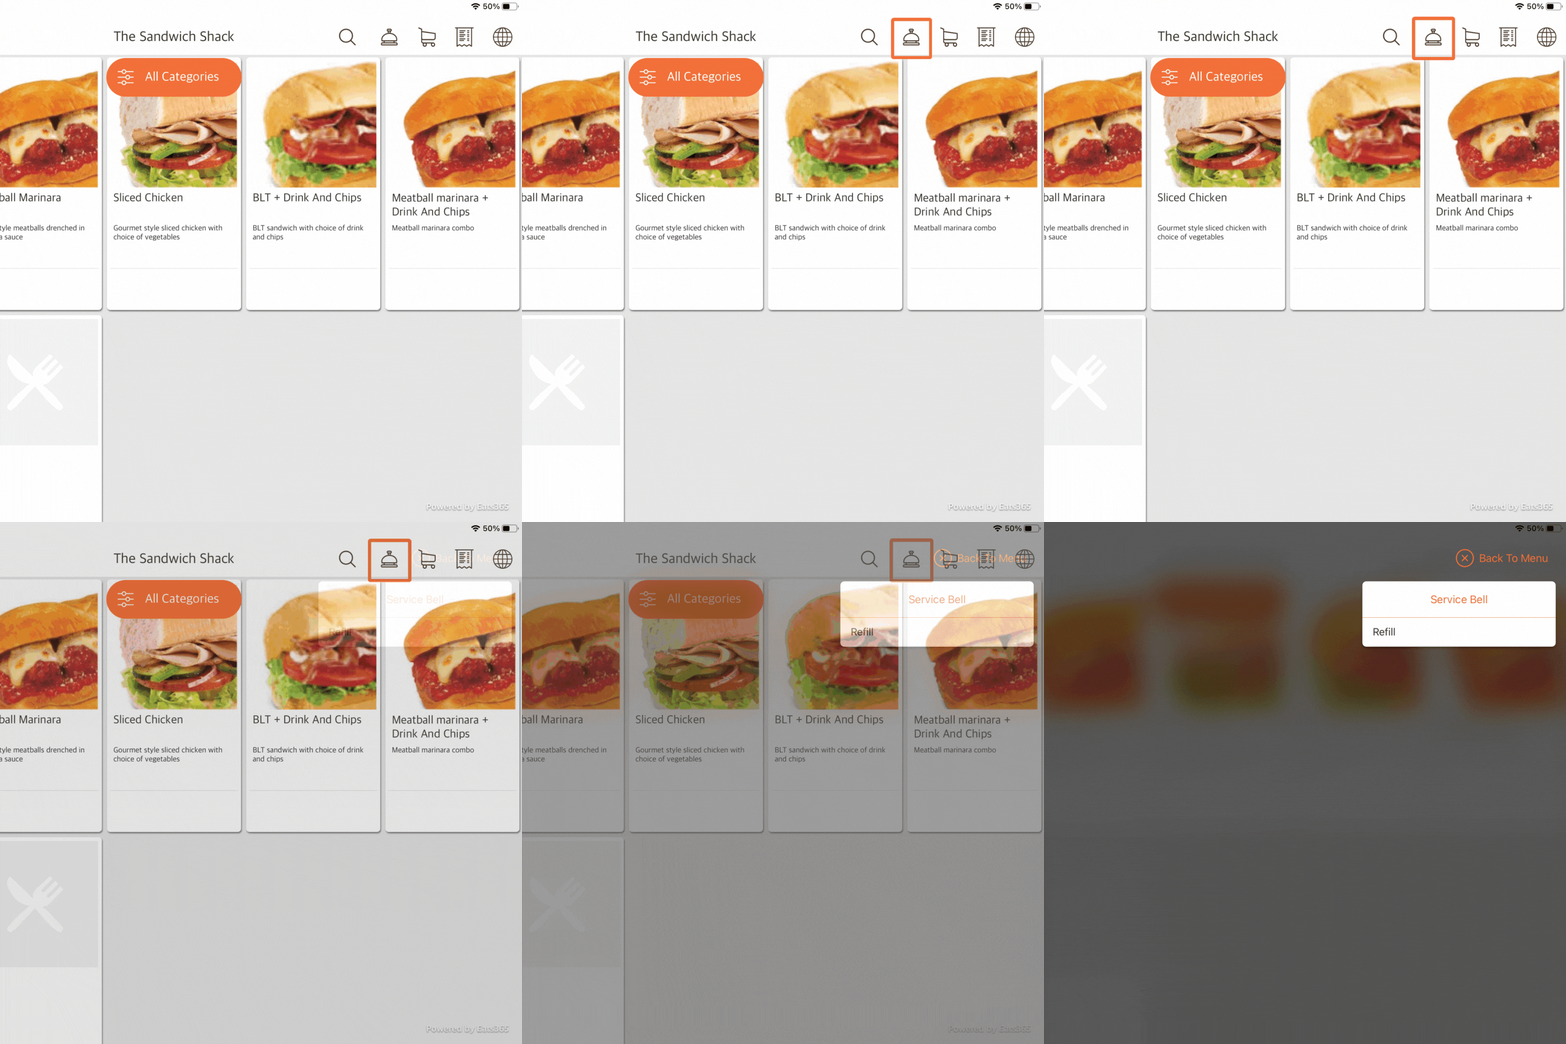
Service Call allow customers to quickly choose the type of service that they need. When enabled, customers can simply tap the bell icon ![]() on the PhotoMenu. A prompt appears on the POS to notify staff when a service call for a table is needed.
on the PhotoMenu. A prompt appears on the POS to notify staff when a service call for a table is needed.

To enable Service Call, follow the steps below:
Eats365 POS
- Log in to the Eats365 POS.
- At the top left, tap Settings
 .
. - Under "Advanced Settings," tap System Preferences.
- Under "Other Settings," tap Service Call.

- At the top right, tap Add Service Call.

- Enter a Service Call name.
- At the top right, tap Save to confirm.
Merchant Portal (Classic Theme)
- Log in to the Merchant Portal.
- On the left panel, click on Advanced Settings, then System Preferences.
- Under "System Preferences," click on General.
- At the top, click on the Operation Preferences tab.
Tip: Click on the left and right arrows to navigate between the different tabs. - Under "Service Call," click on Add New.
- Enter a Service Call name.
- At the top right, click on Save to confirm.
Merchant Portal 2.0
- Log in to the Merchant Portal.
- On the left panel, click on Advanced Settings, then System Preferences.
- Select Operation Preferences.
- Under "Service Call," click on Add New.

- Enter a Service Call name.
- At the top right, click on Save to confirm
 .
.