Restaurant Settings
Table of Contents
Set up and manage Media Group
Learn how to create a media group and upload custom content on the Merchant Portal.
Media Group allows you to upload custom images, videos, or text that can be used on different Eats365 modules, such as the PhotoMenu, Customer Facing Display, and eSignage. You can create a Media Group to show customized content, such as special promotions during holidays, or exclusive menu items at specific times of the day.
In this article, you’ll learn how to upload different types of media, as well as, manage existing Media Groups.
Create a Media Group
To create a Media Group, follow the steps below:
Merchant Portal (Classic Theme)
- Log in to the Merchant Portal.
- On the left panel, click on Restaurant Settings. Then, select Media Group.
- Click on +Add Group.
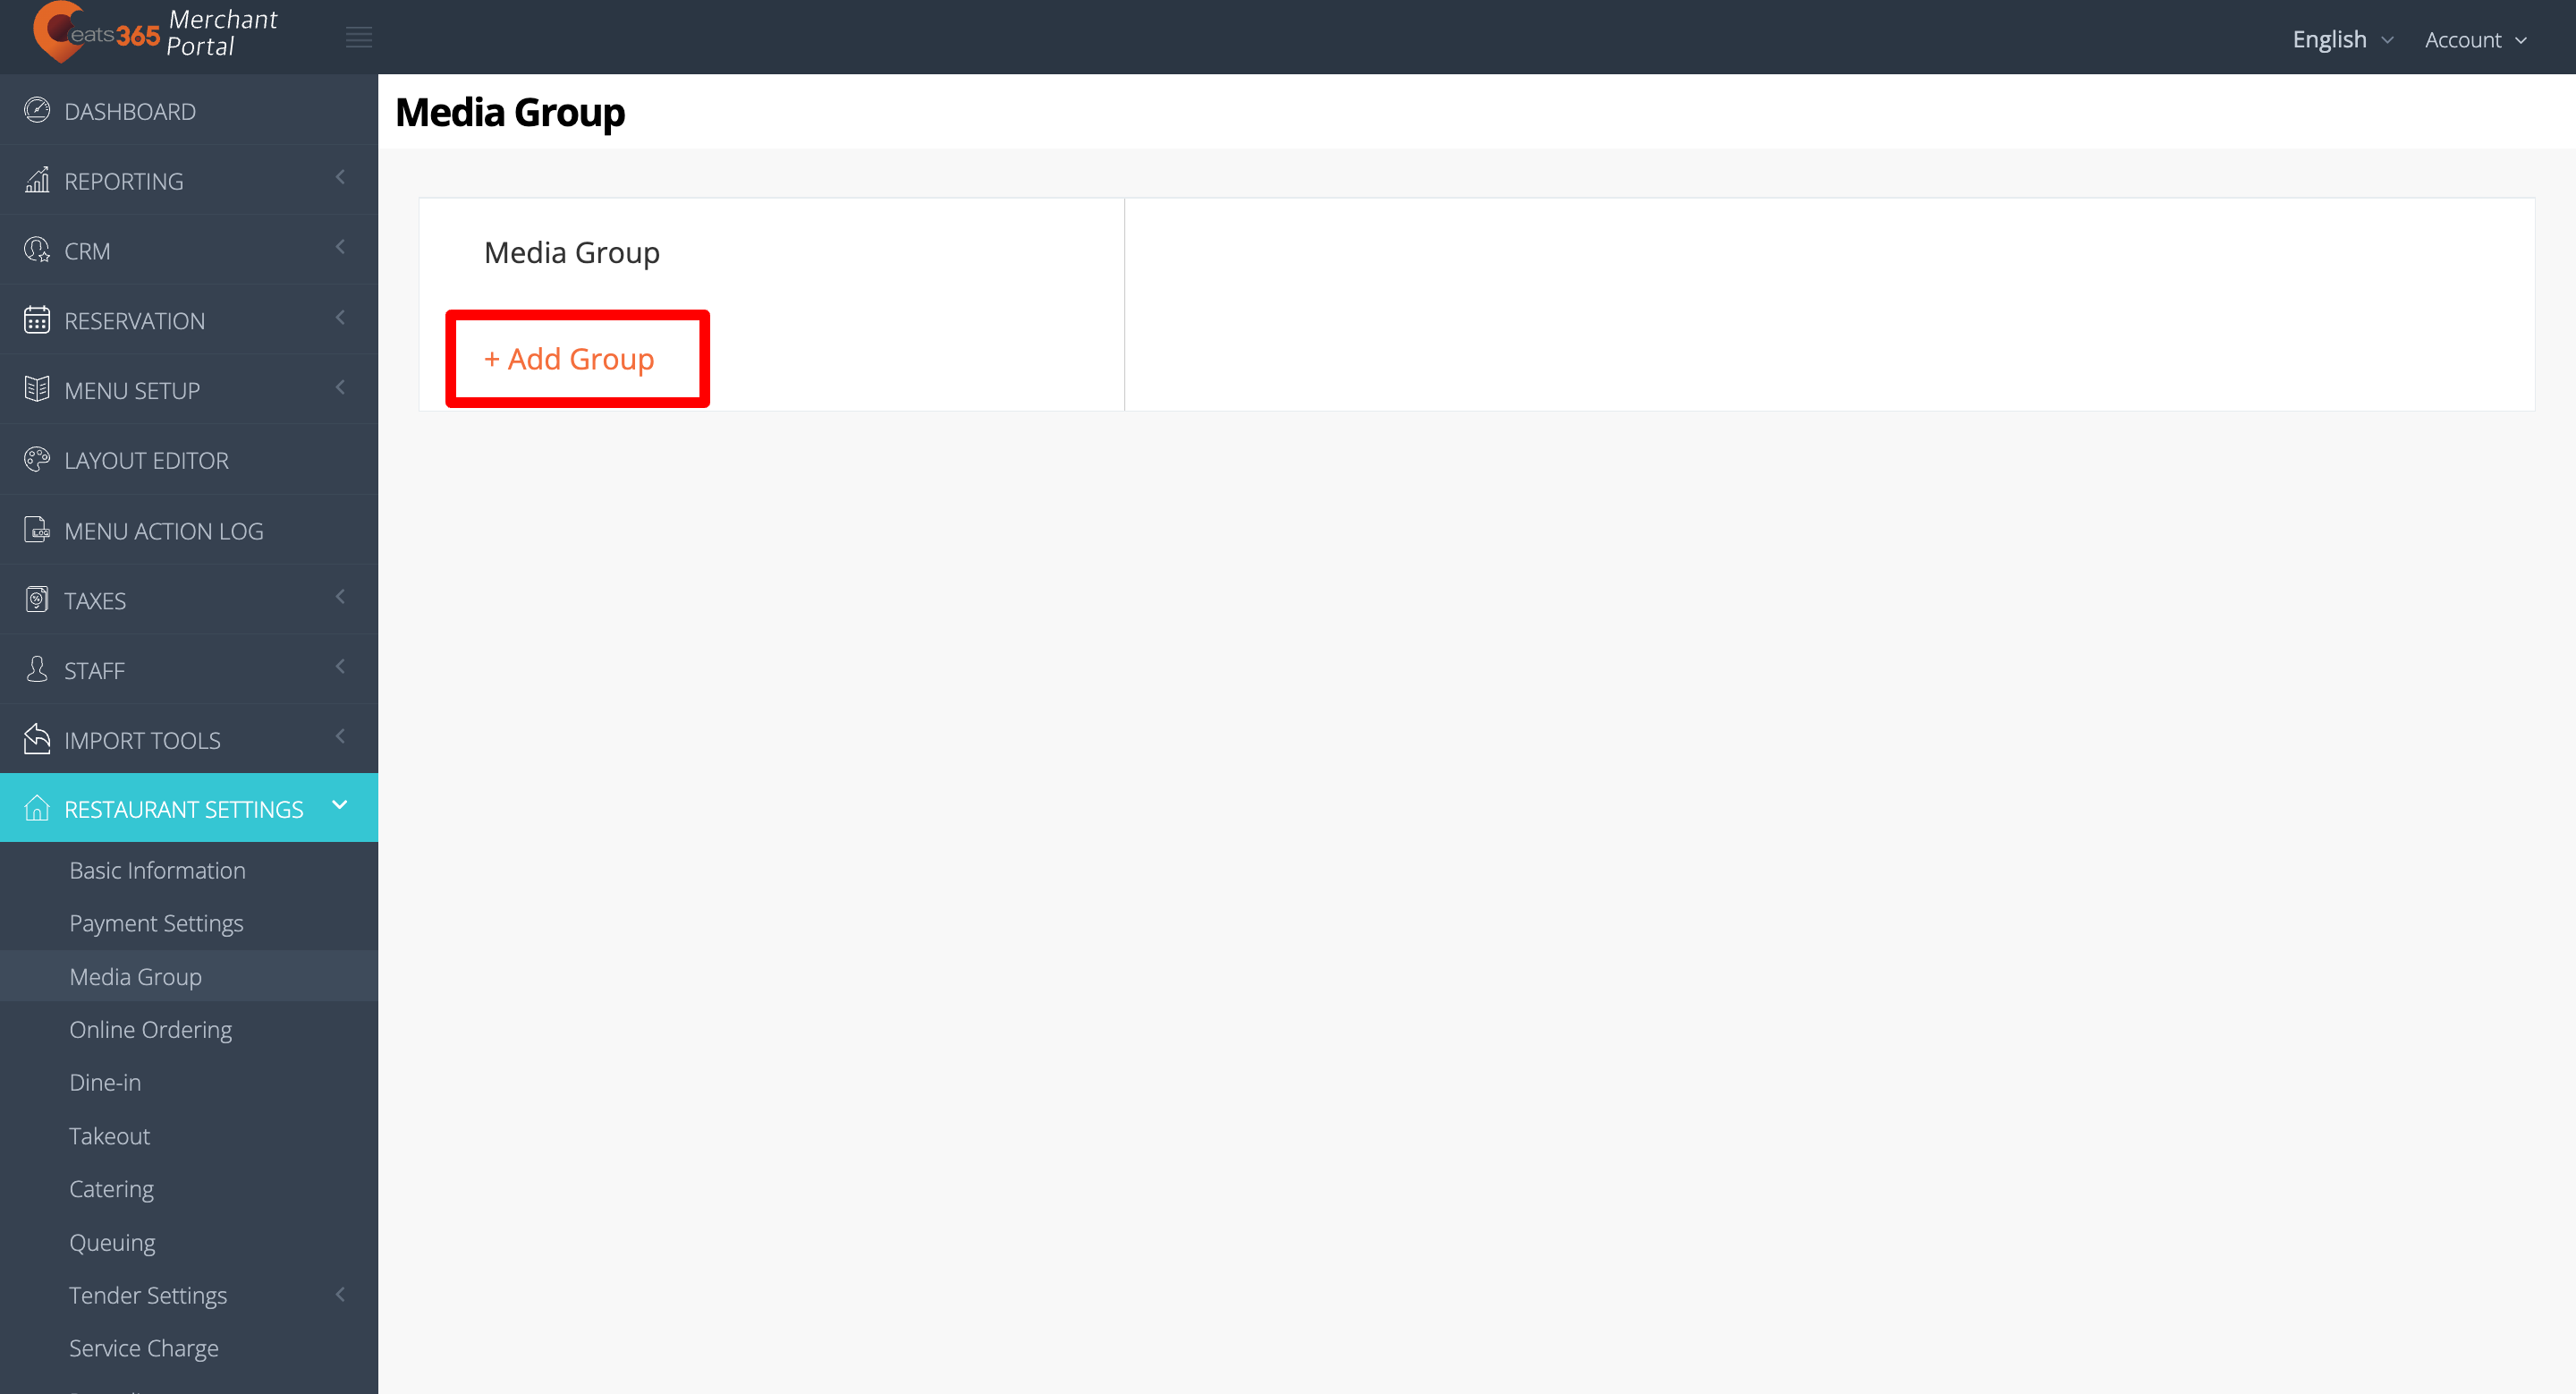
- On the blank field, add the Media Group name. Then, click on Save to confirm the name. The screen redirects to the Media Group list.

- Select your newly-created Media Group from the list.
- To upload custom content to the Media Group, click on Add Media.
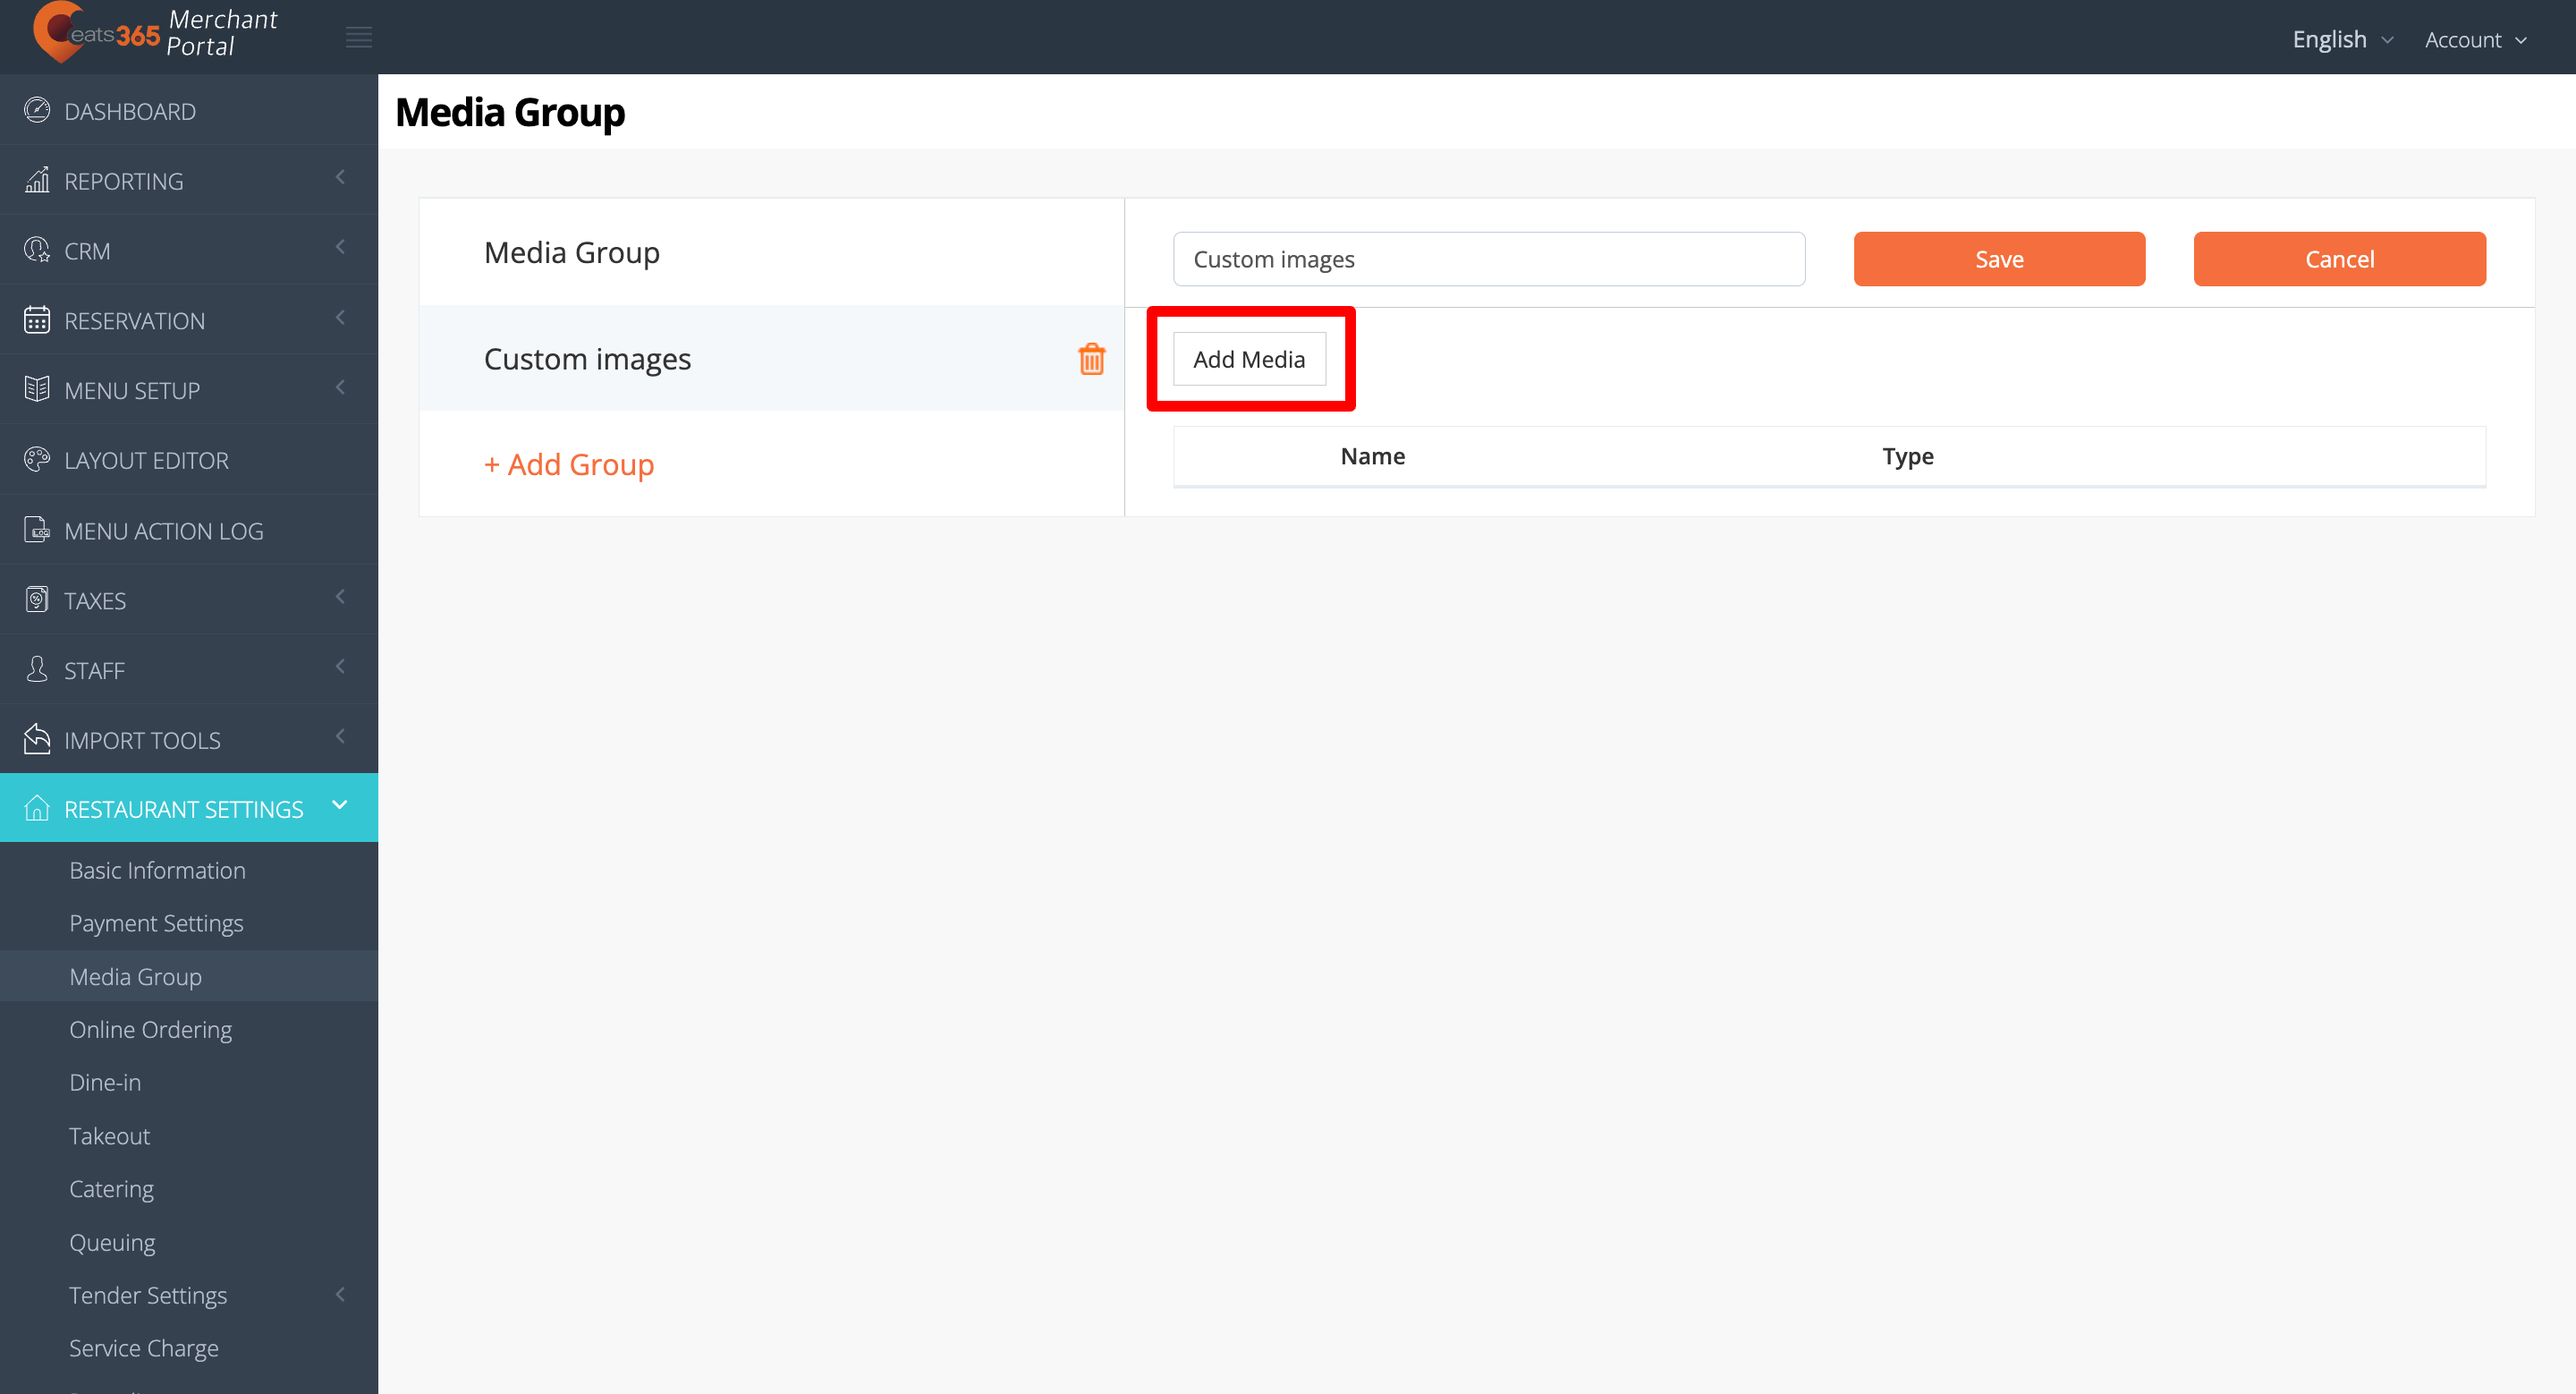
- Next to the Name field, enter the name that you want to use for your custom upload.
- Next to the Type field, select the type of media that you want to upload. You can choose from the available media types:
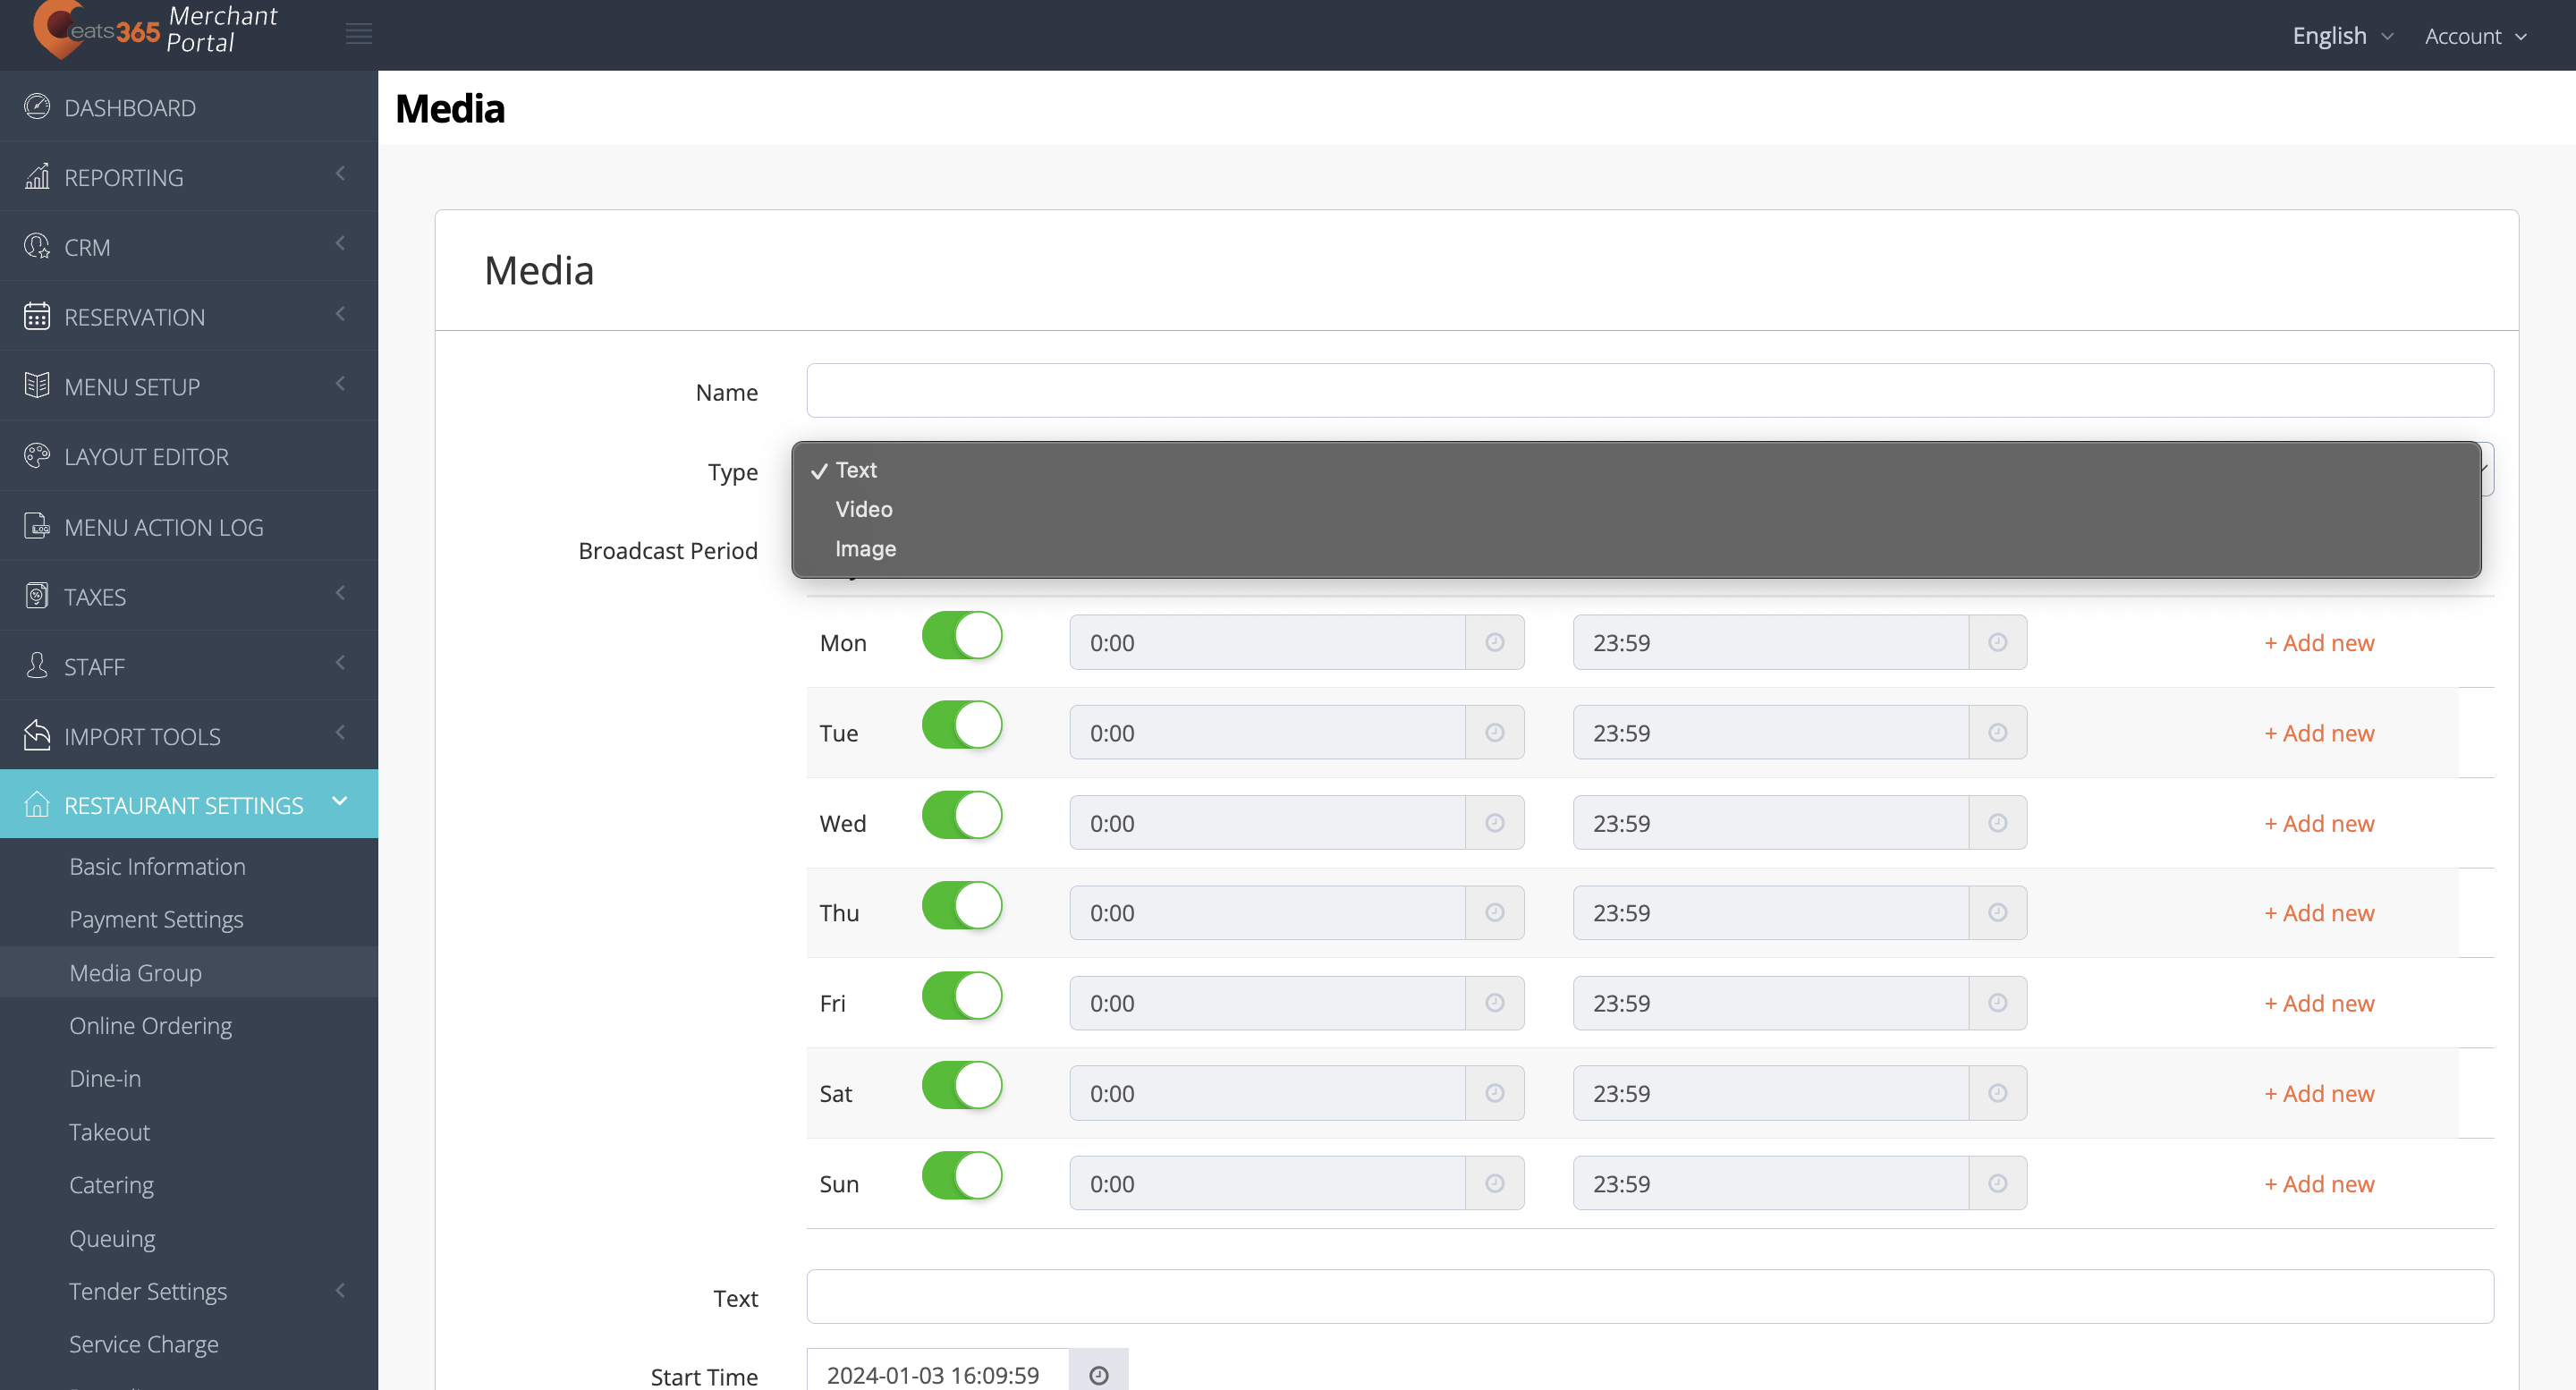
- Text
- Video
- Image
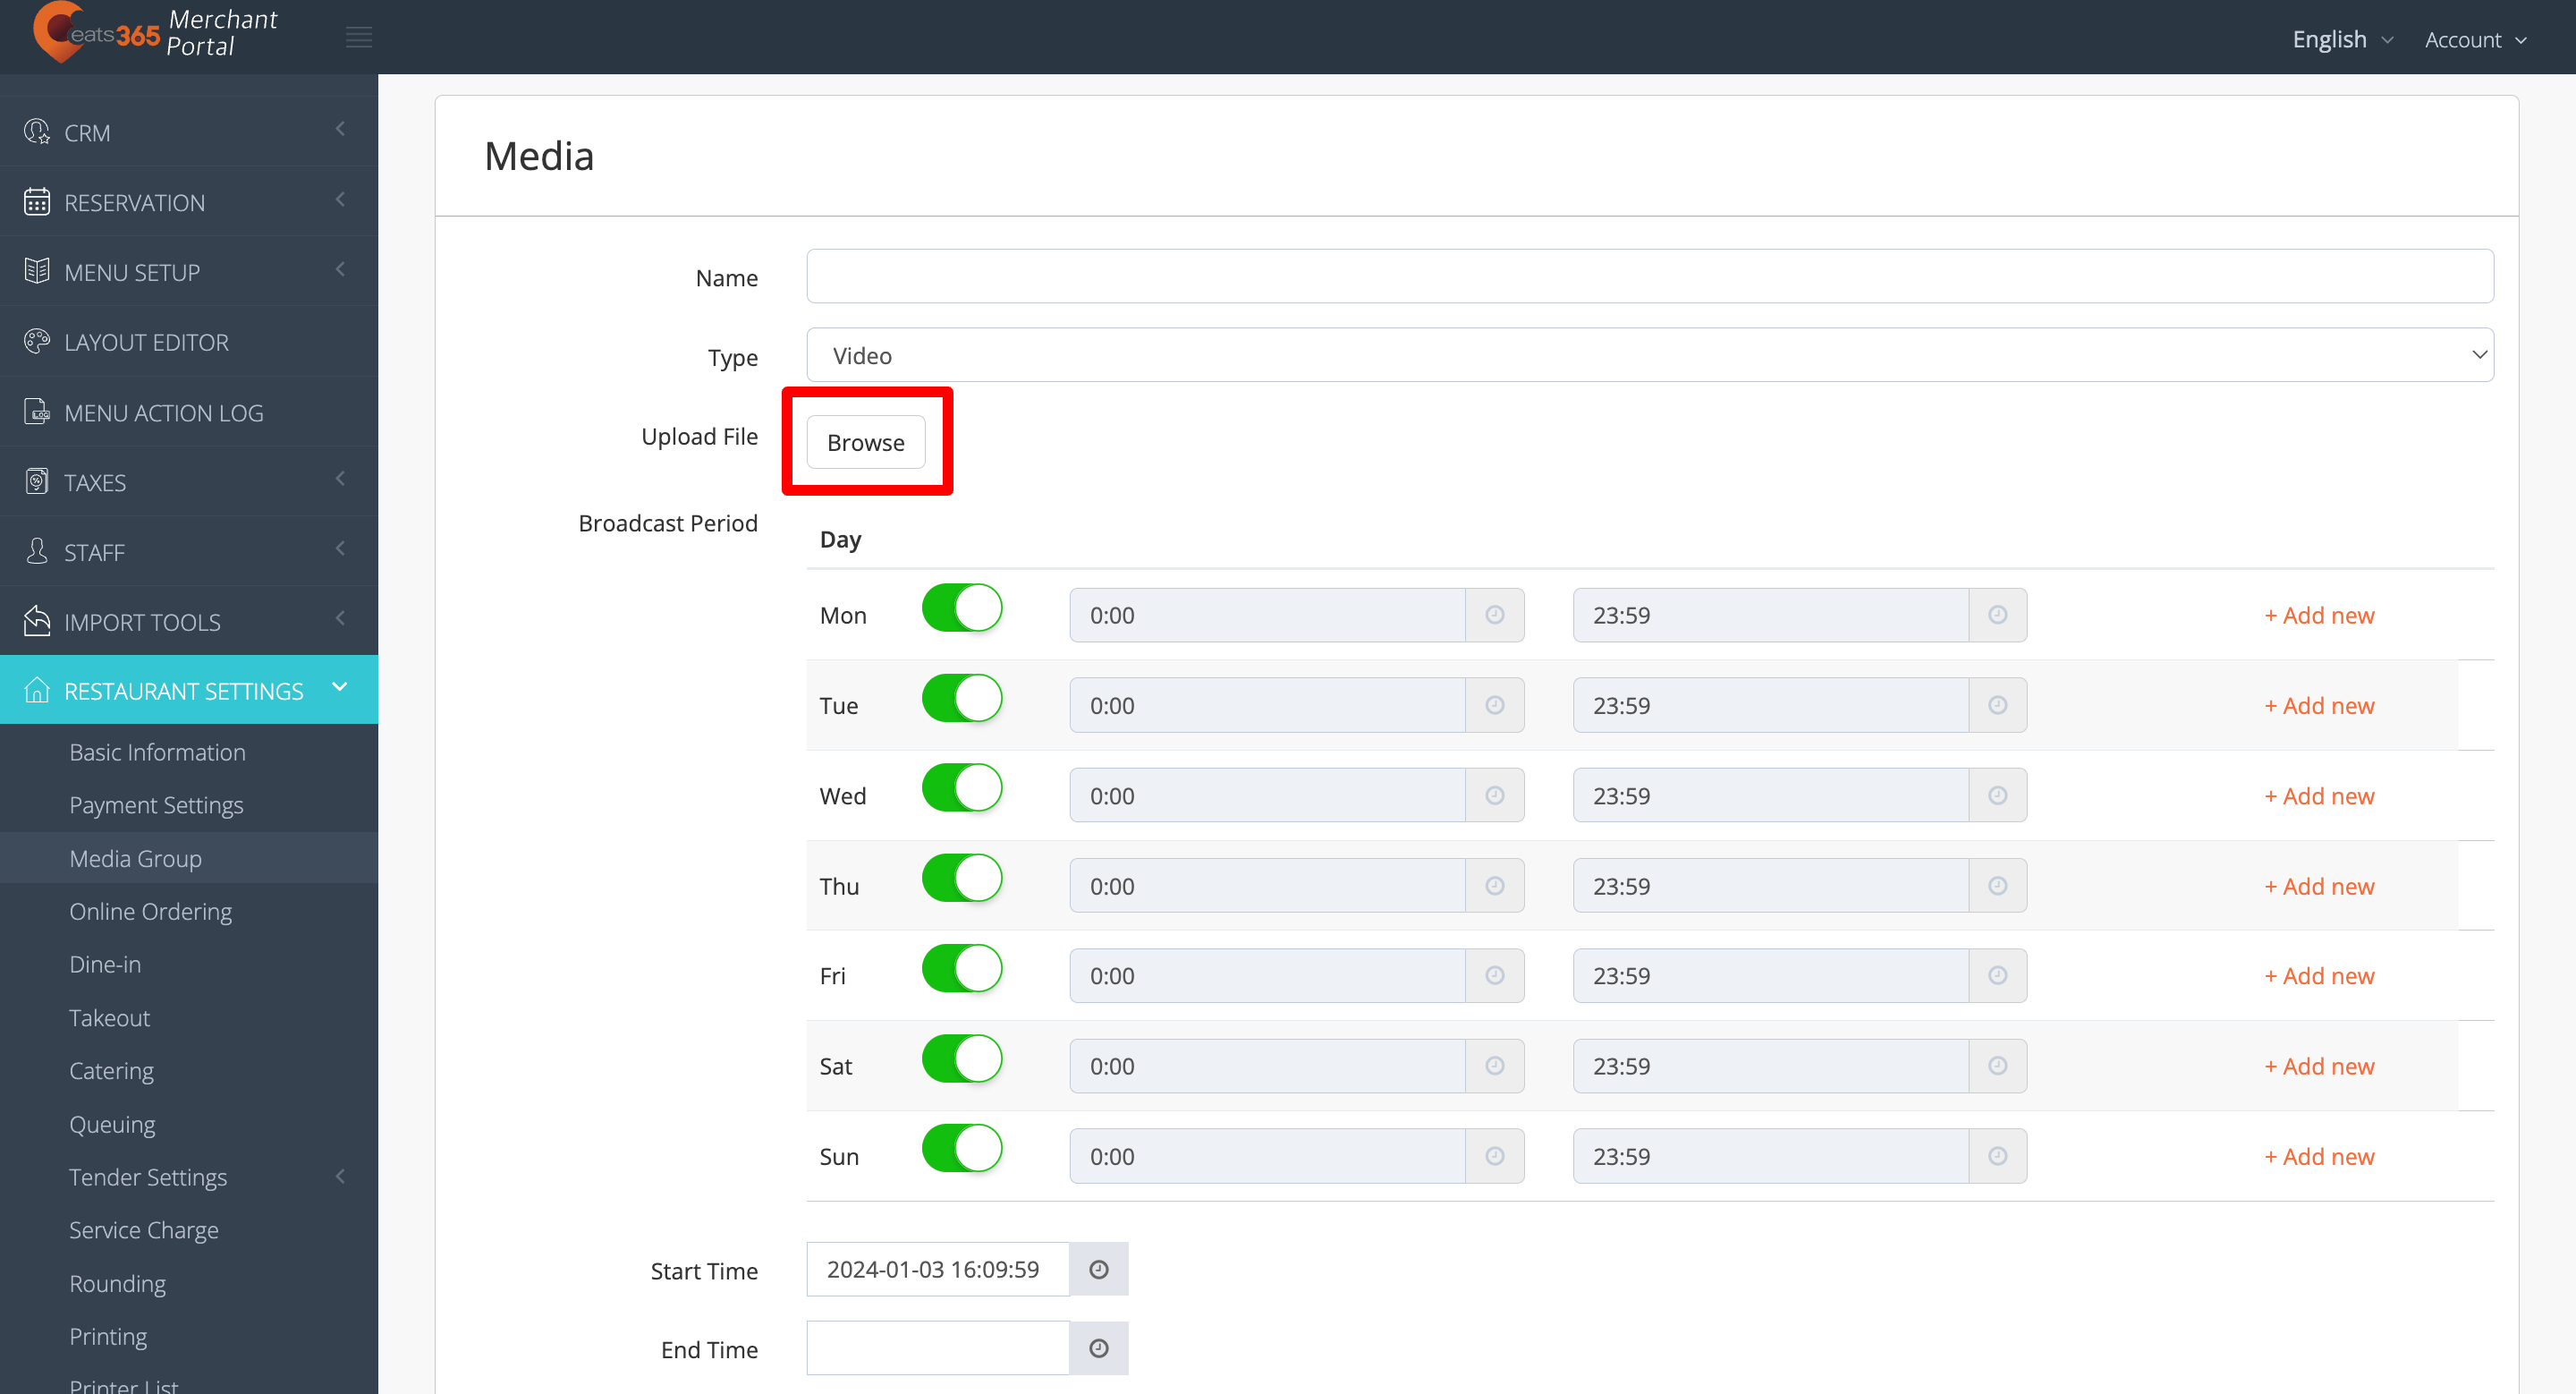
- Upload the media.
- If you are uploading a video or image, next to Upload File, click on Browse. Then, select the video or image that you want to upload.
- If you want to display a text message, scroll down and look for the Text field. Then, enter the message that you want to show.
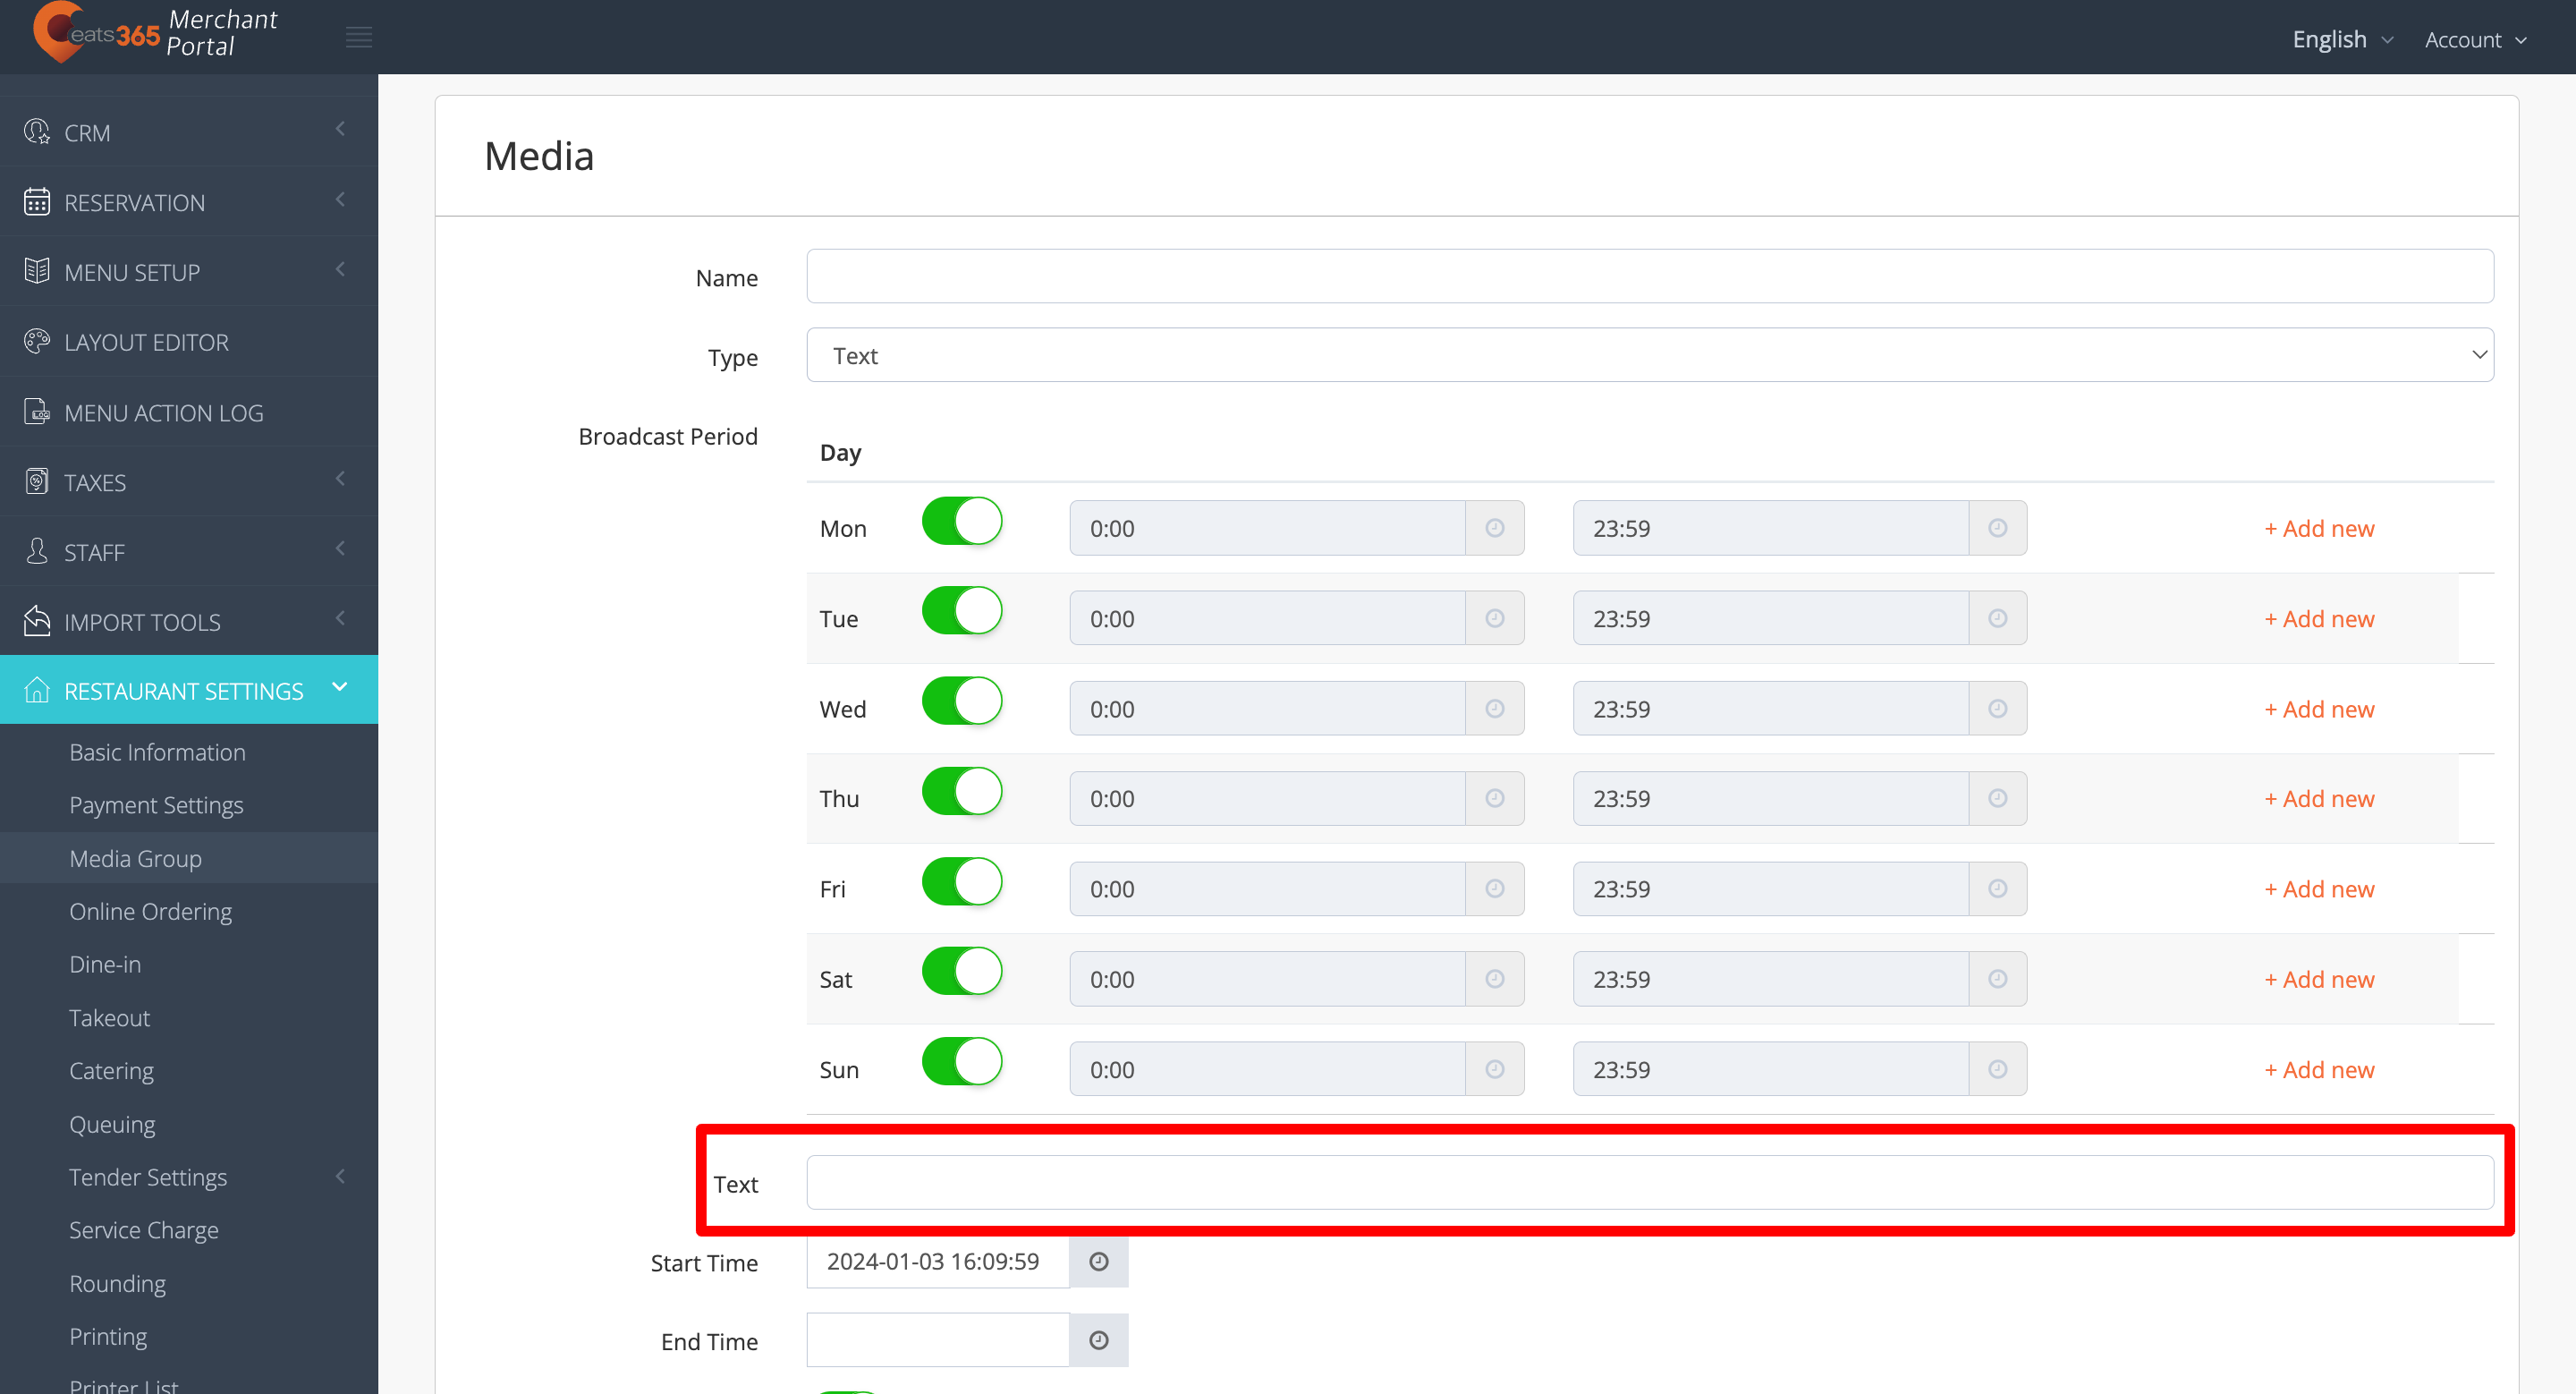 Note: Creating a custom text is only available on eSignage.
- If you are uploading a video or image, next to Upload File, click on Browse. Then, select the video or image that you want to upload.
- To set a time when the custom upload appears, under Broadcast Period, set the day and time.
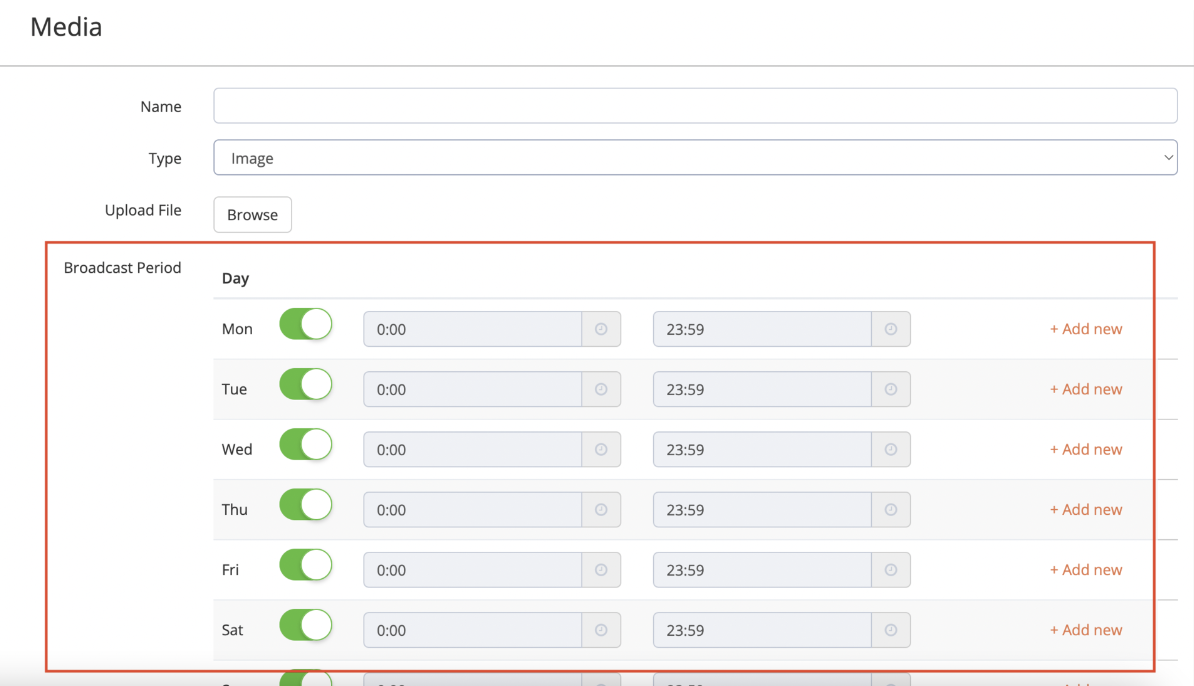
- Set the Start Time and End Time when the media is available.
Tip: If you want the media to show on the PhotoMenu, Customer Facing Display, or eSignage indefinitely, you can choose to skip adding an End Time. - If you’re uploading an image, select the Display Duration (in minutes).
- Toggle Enable
 to turn on the Media Group function.
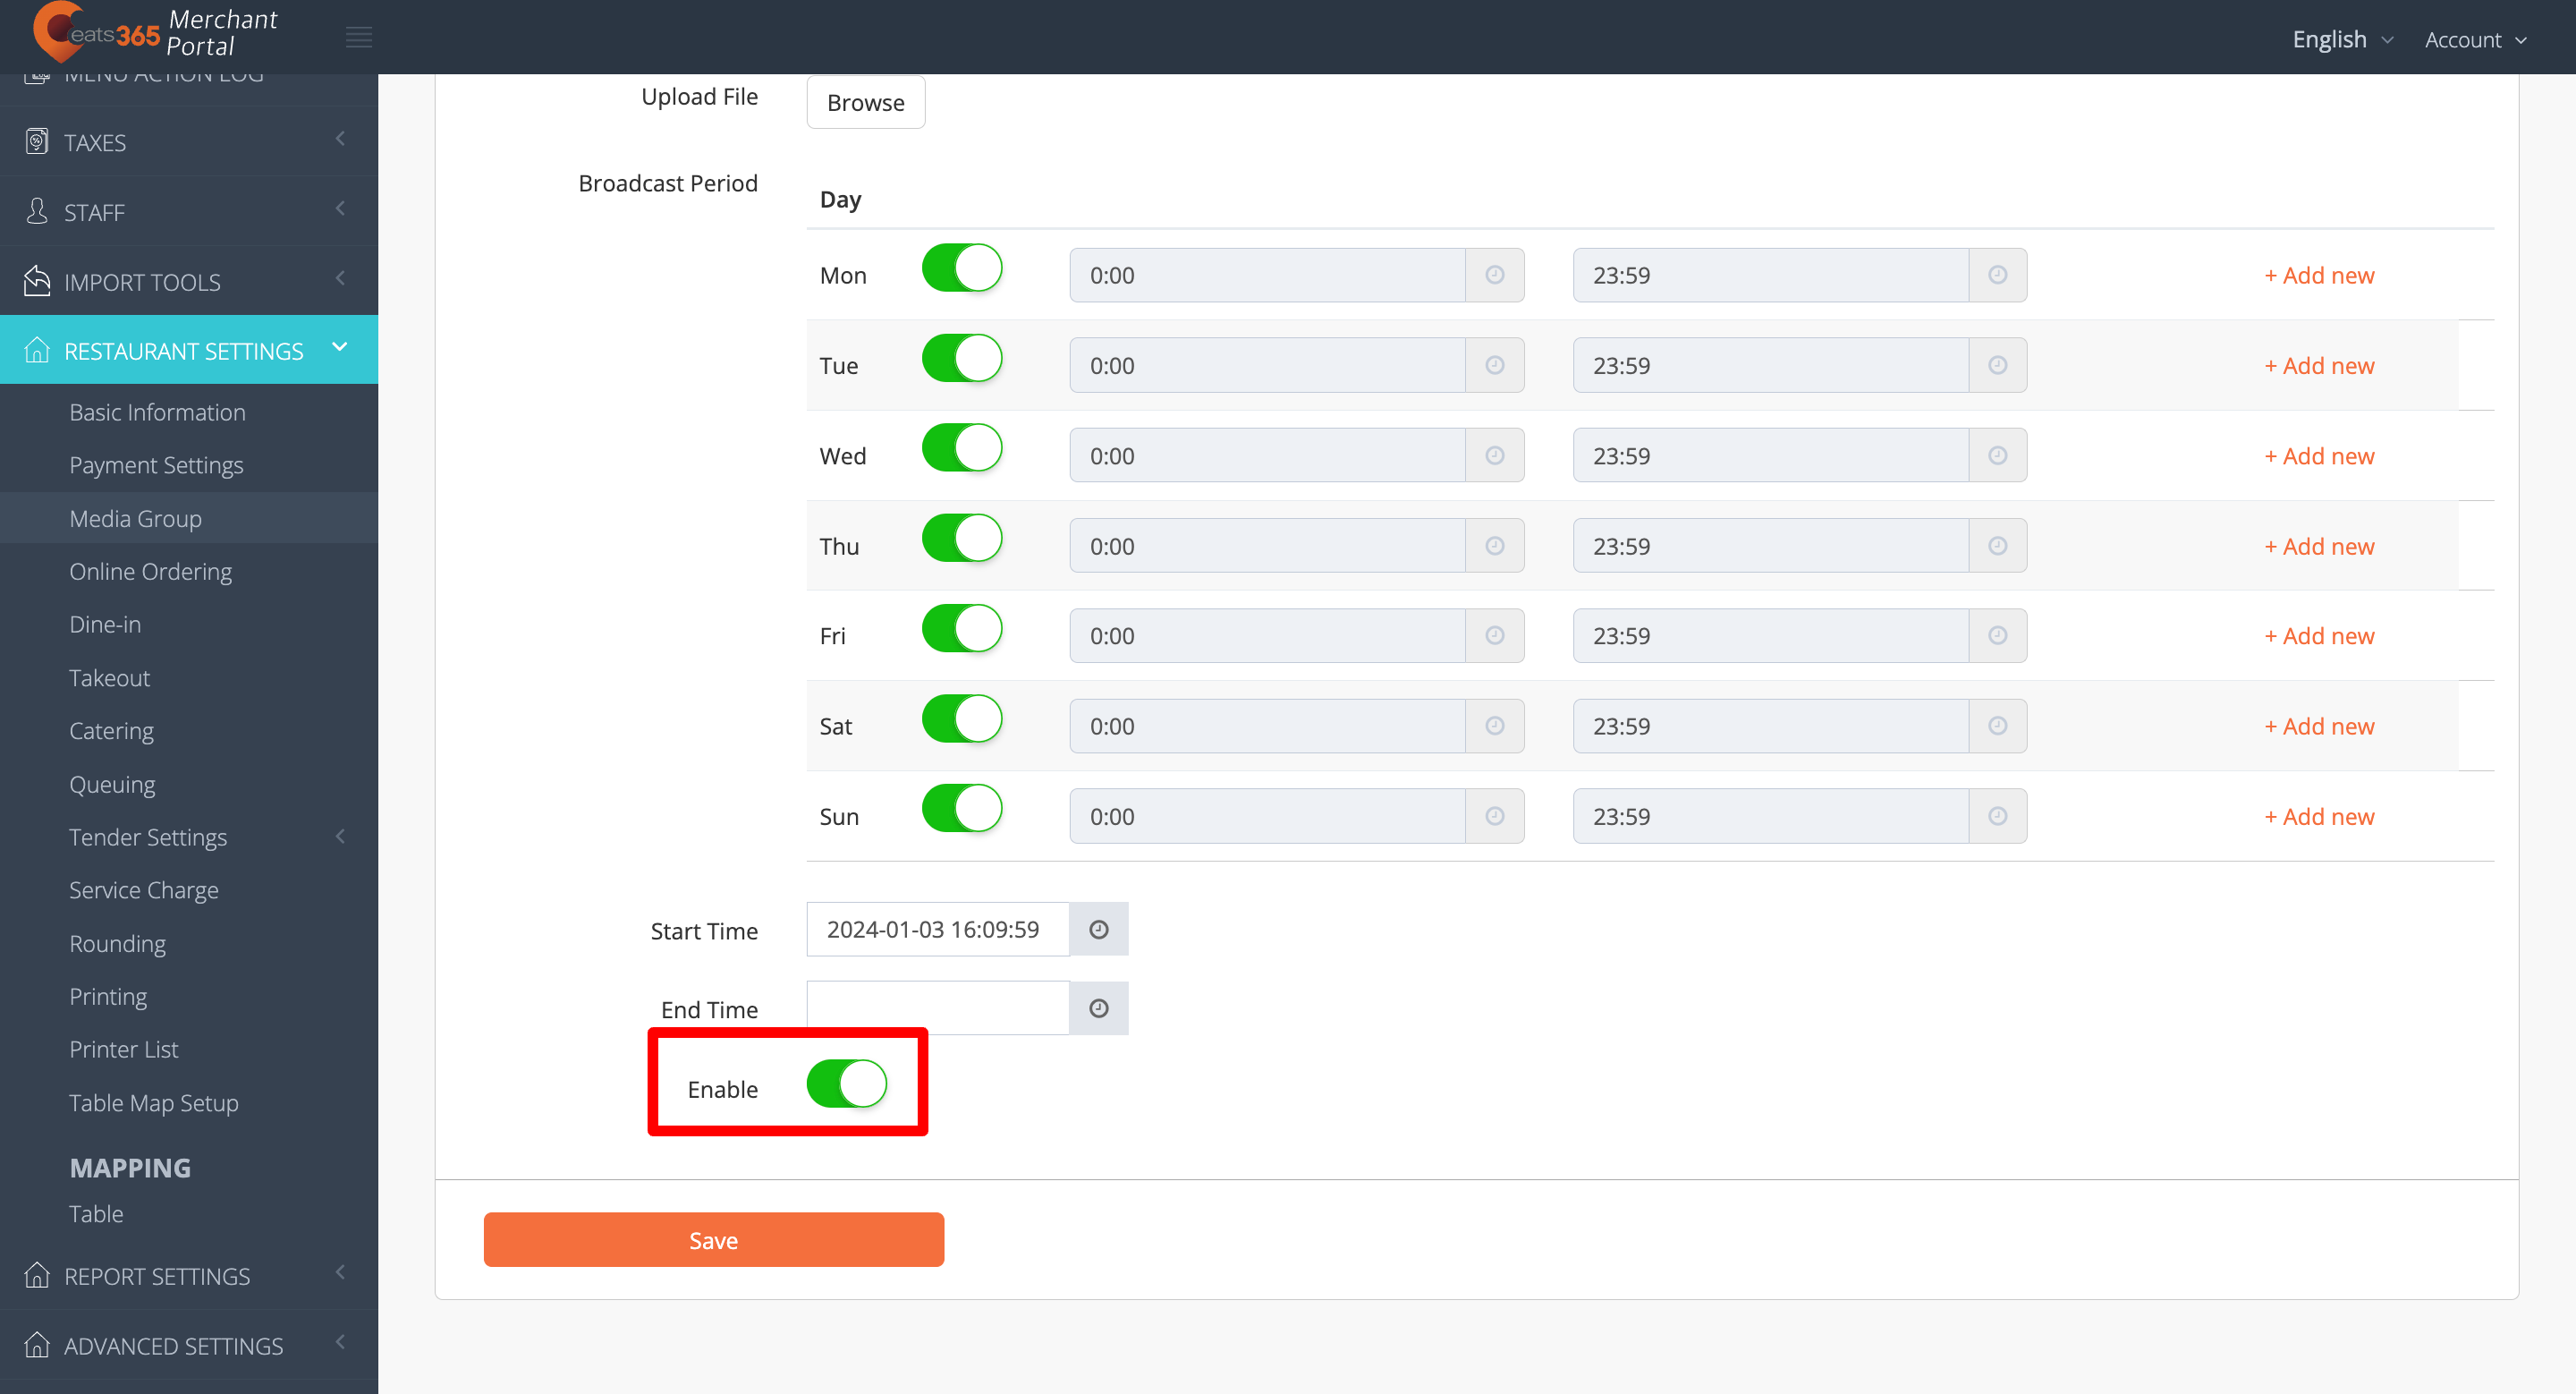
- Click on Save to confirm.
- To add more media, repeat steps 5 to 14.
Merchant Portal 2.0
- Log in to the Merchant Portal.
- On the left panel, click on Restaurant Settings. Then, select Media Promotion.
- Click on +Add New.
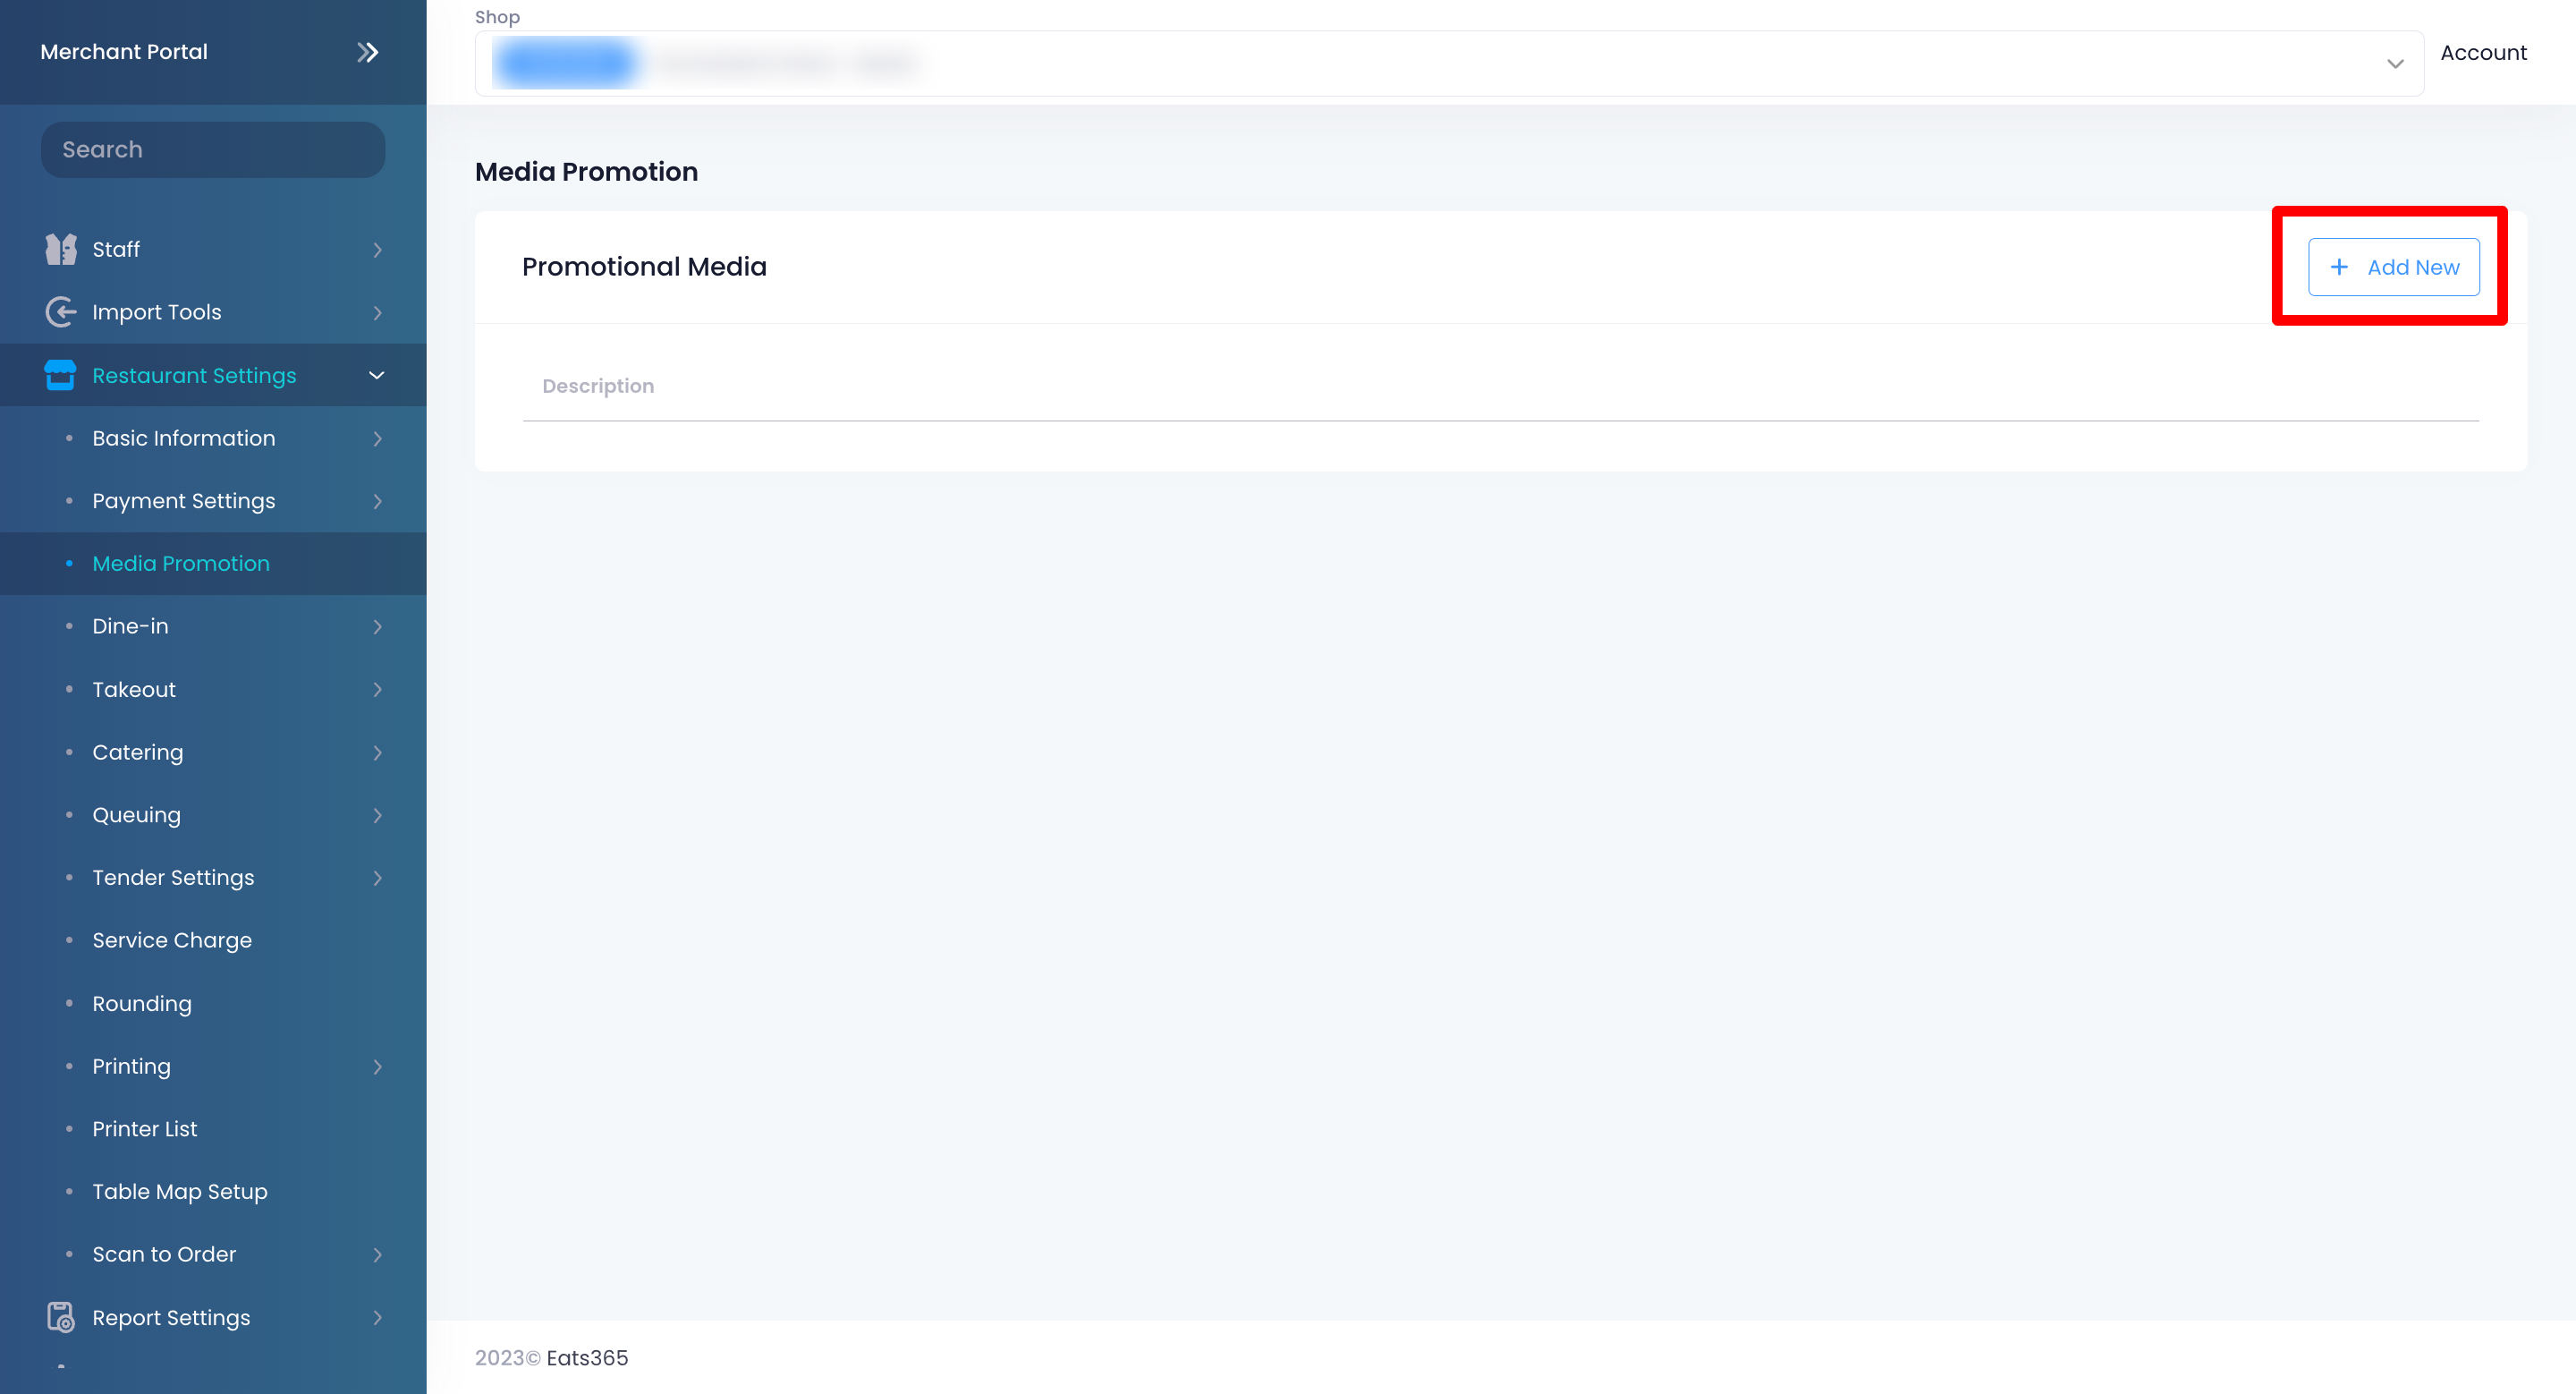
- On the blank field, add the Media Group name. Then, click on Save
 to confirm the name.
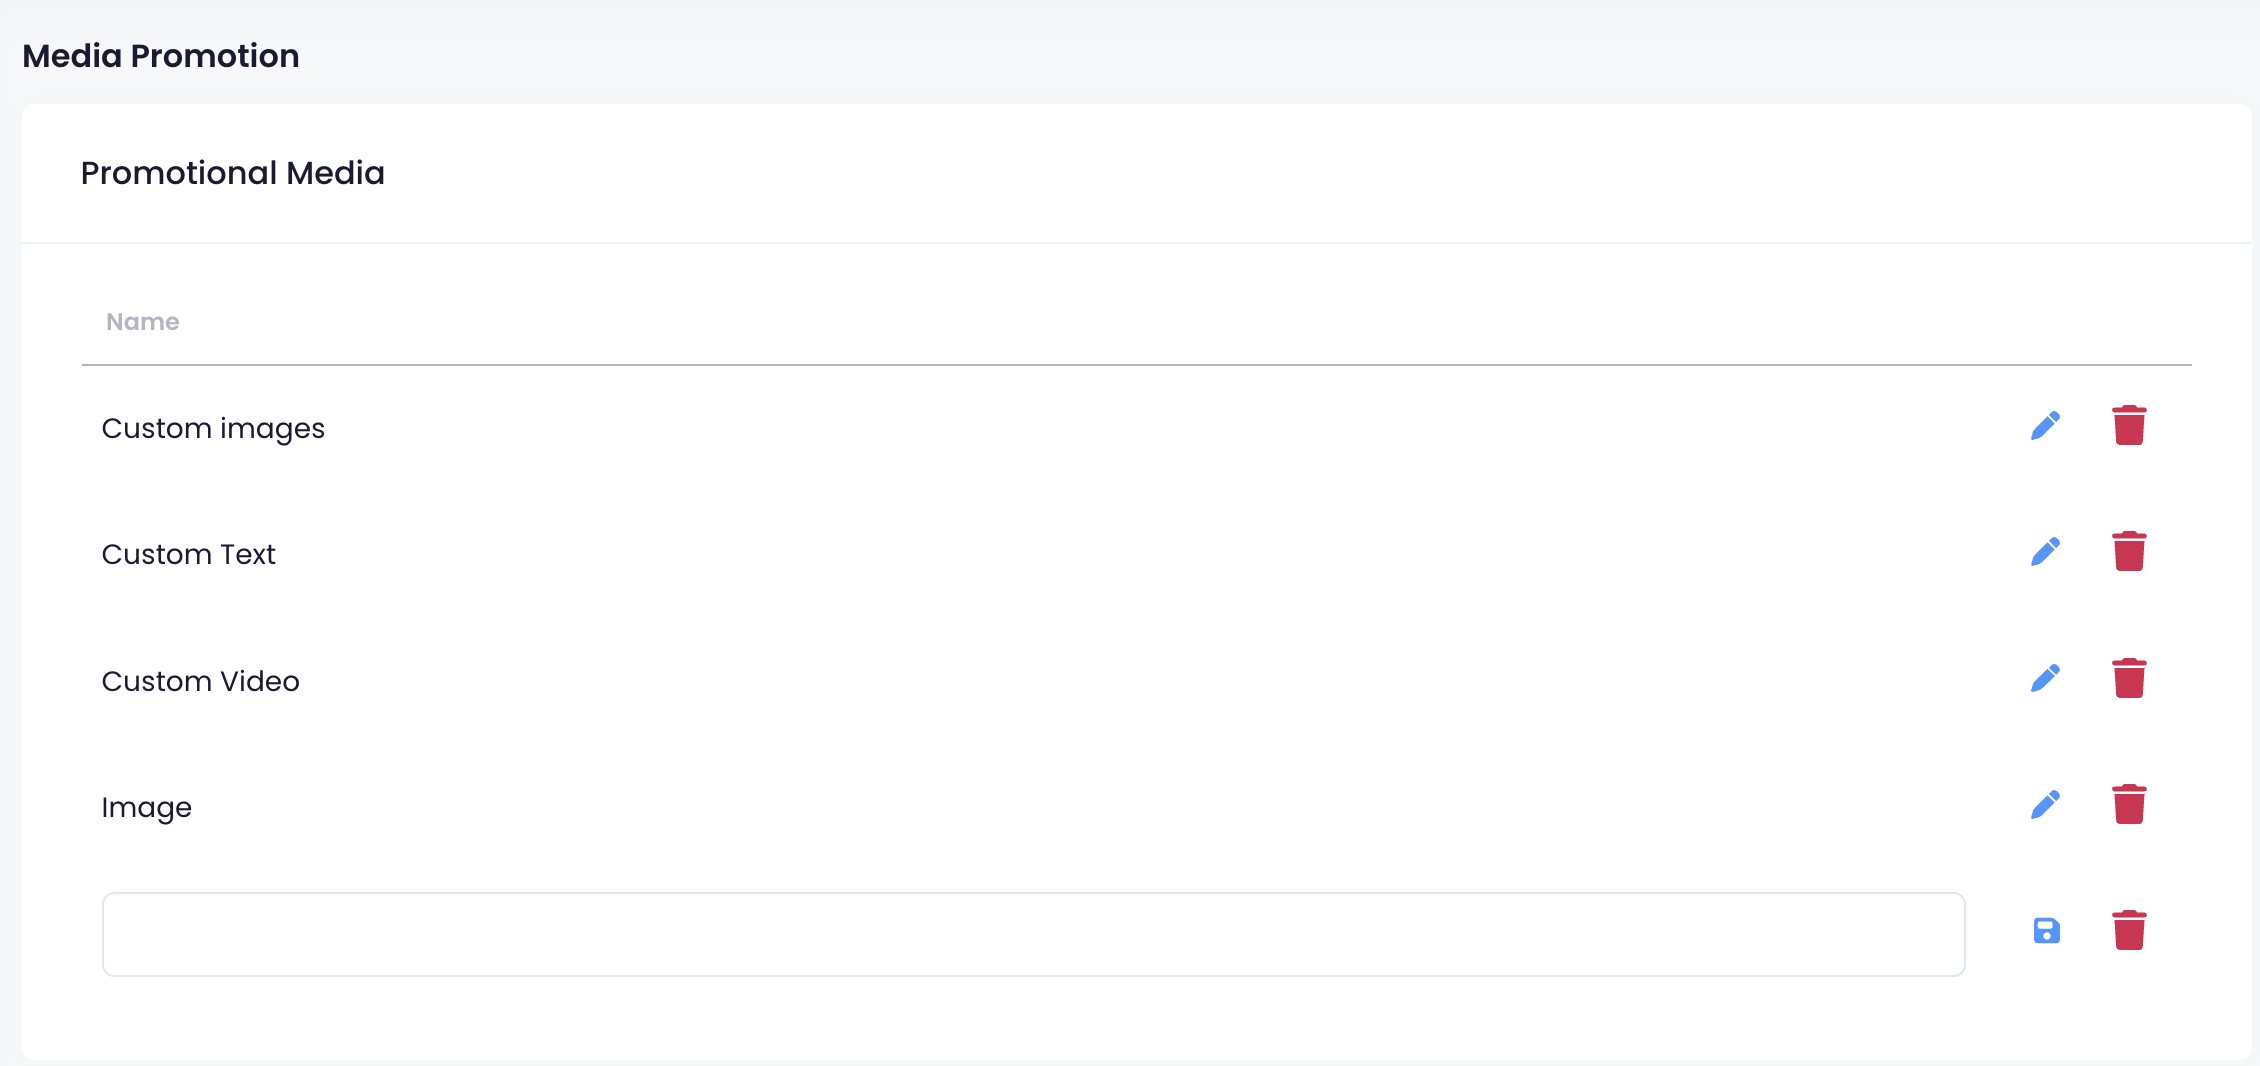
- Select your newly-created Media Group from the list. Then, click on Edit
 .
.
- To upload custom content to the Media Group, click on +Add New.
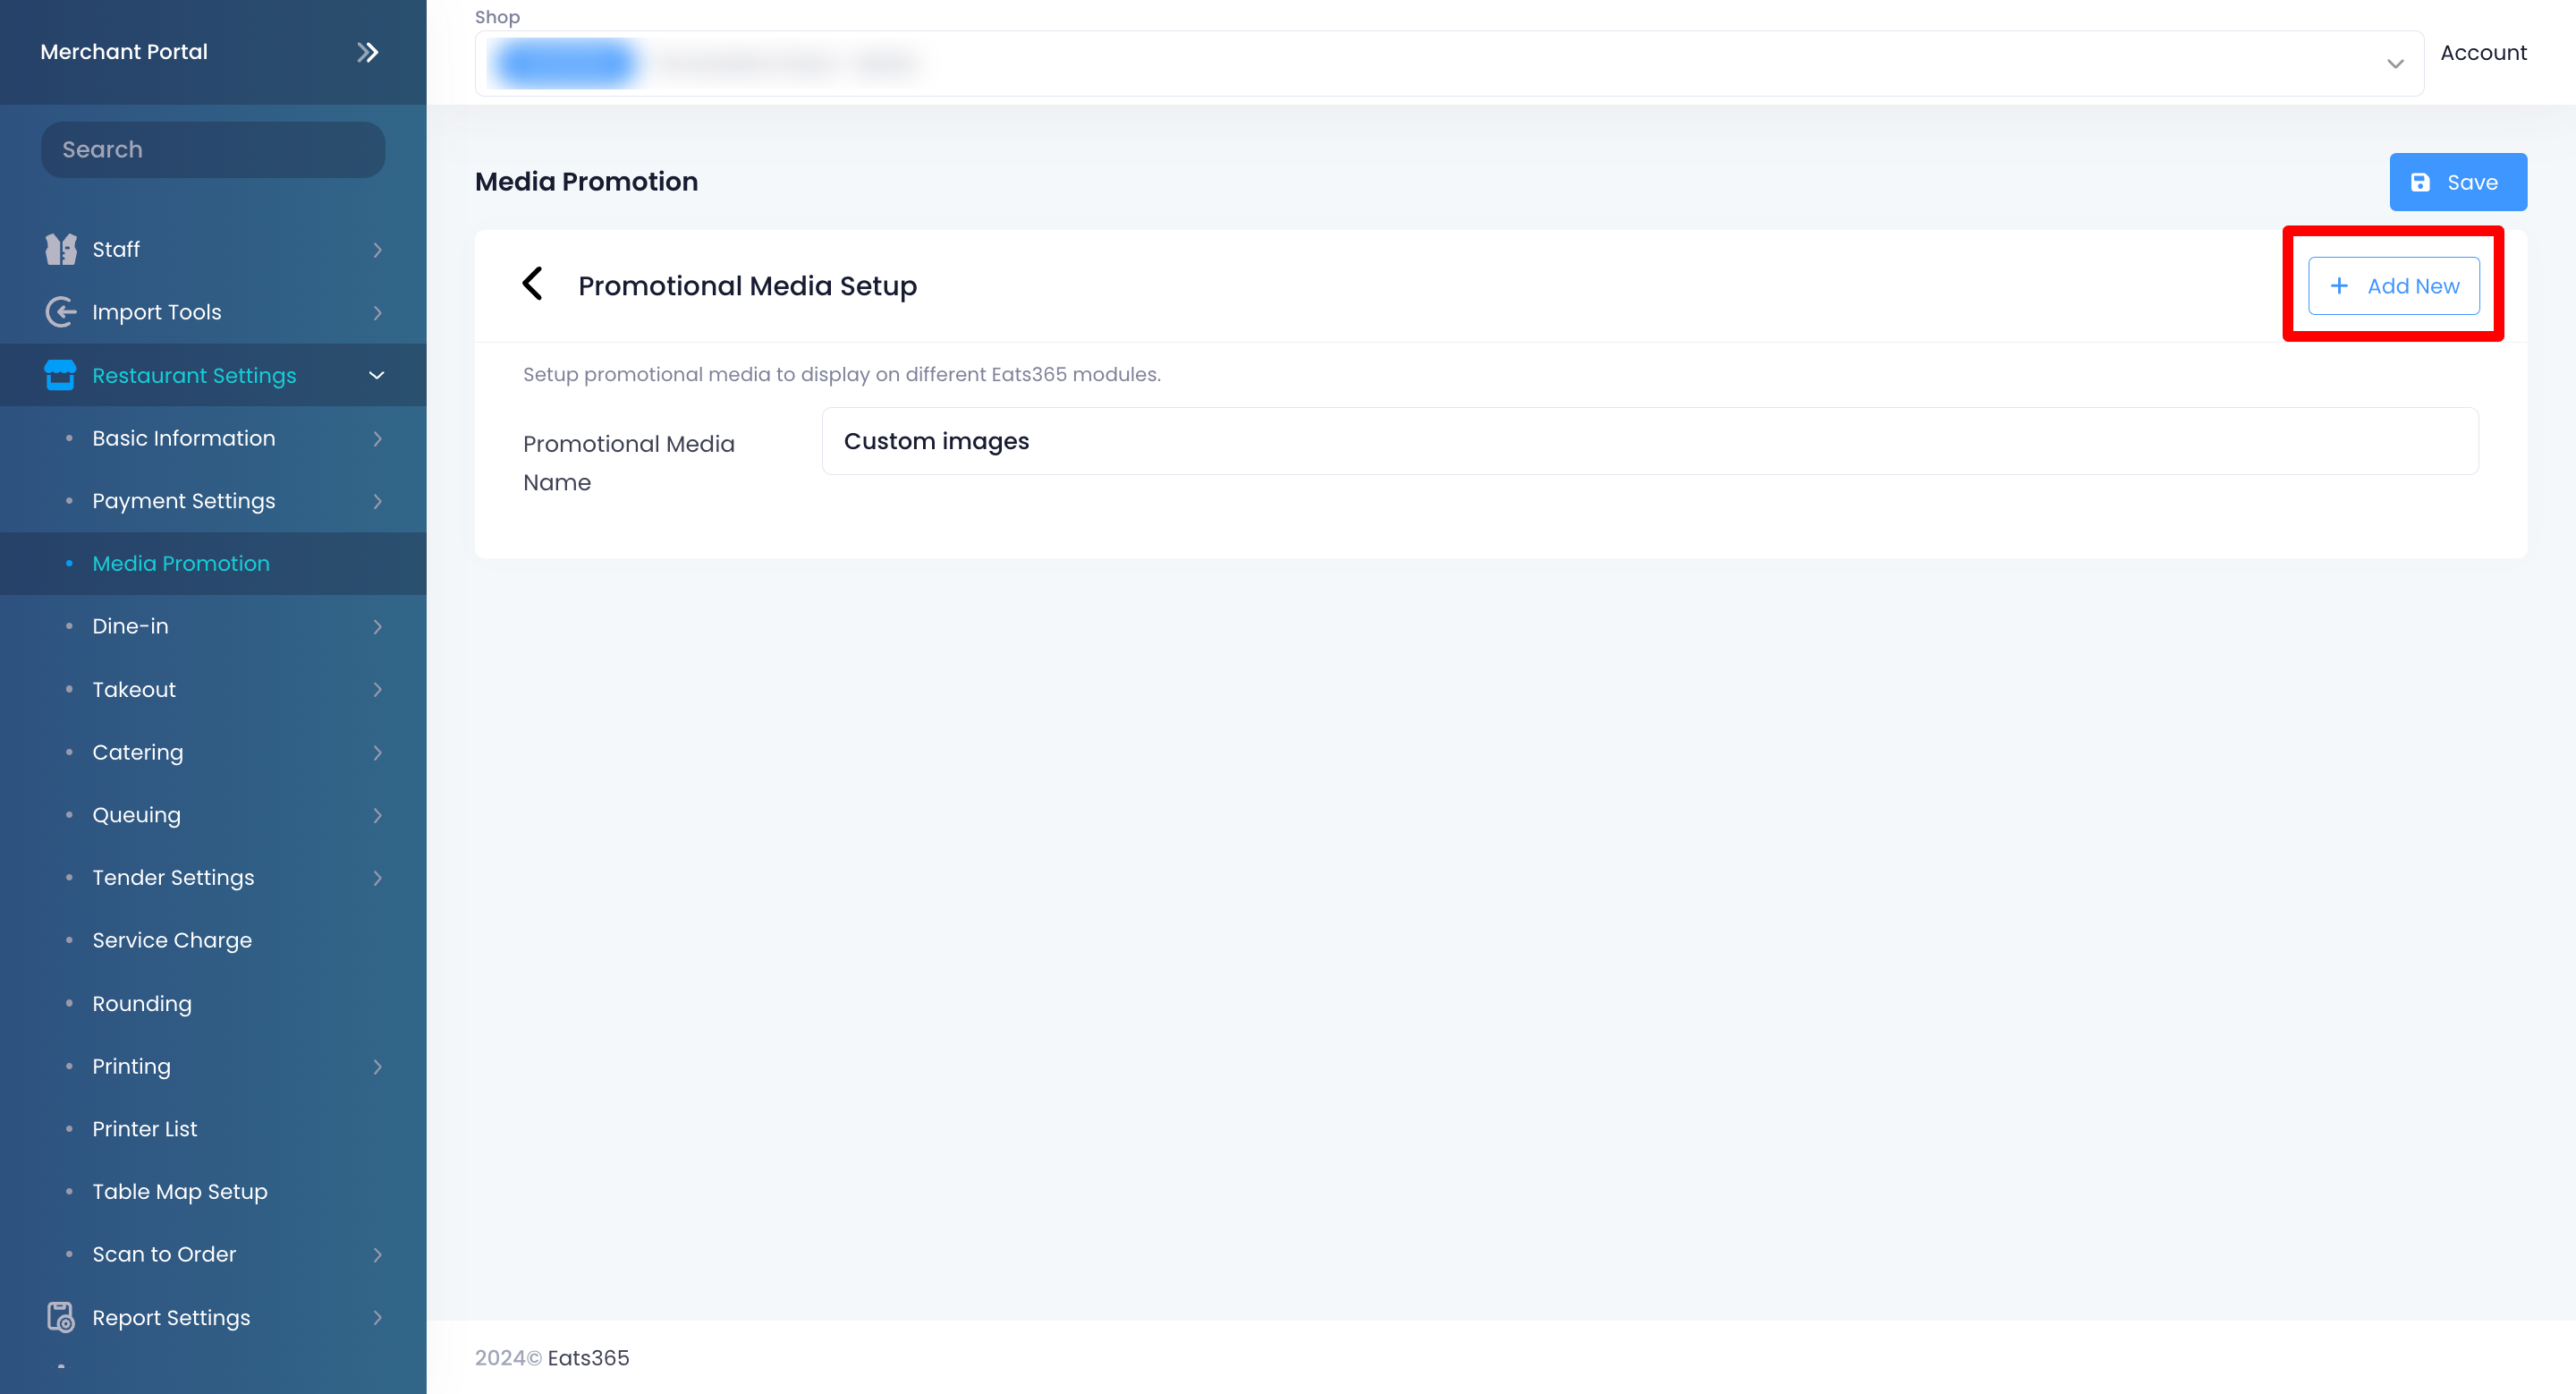
- Toggle Enable
 to turn on the Media Group function.
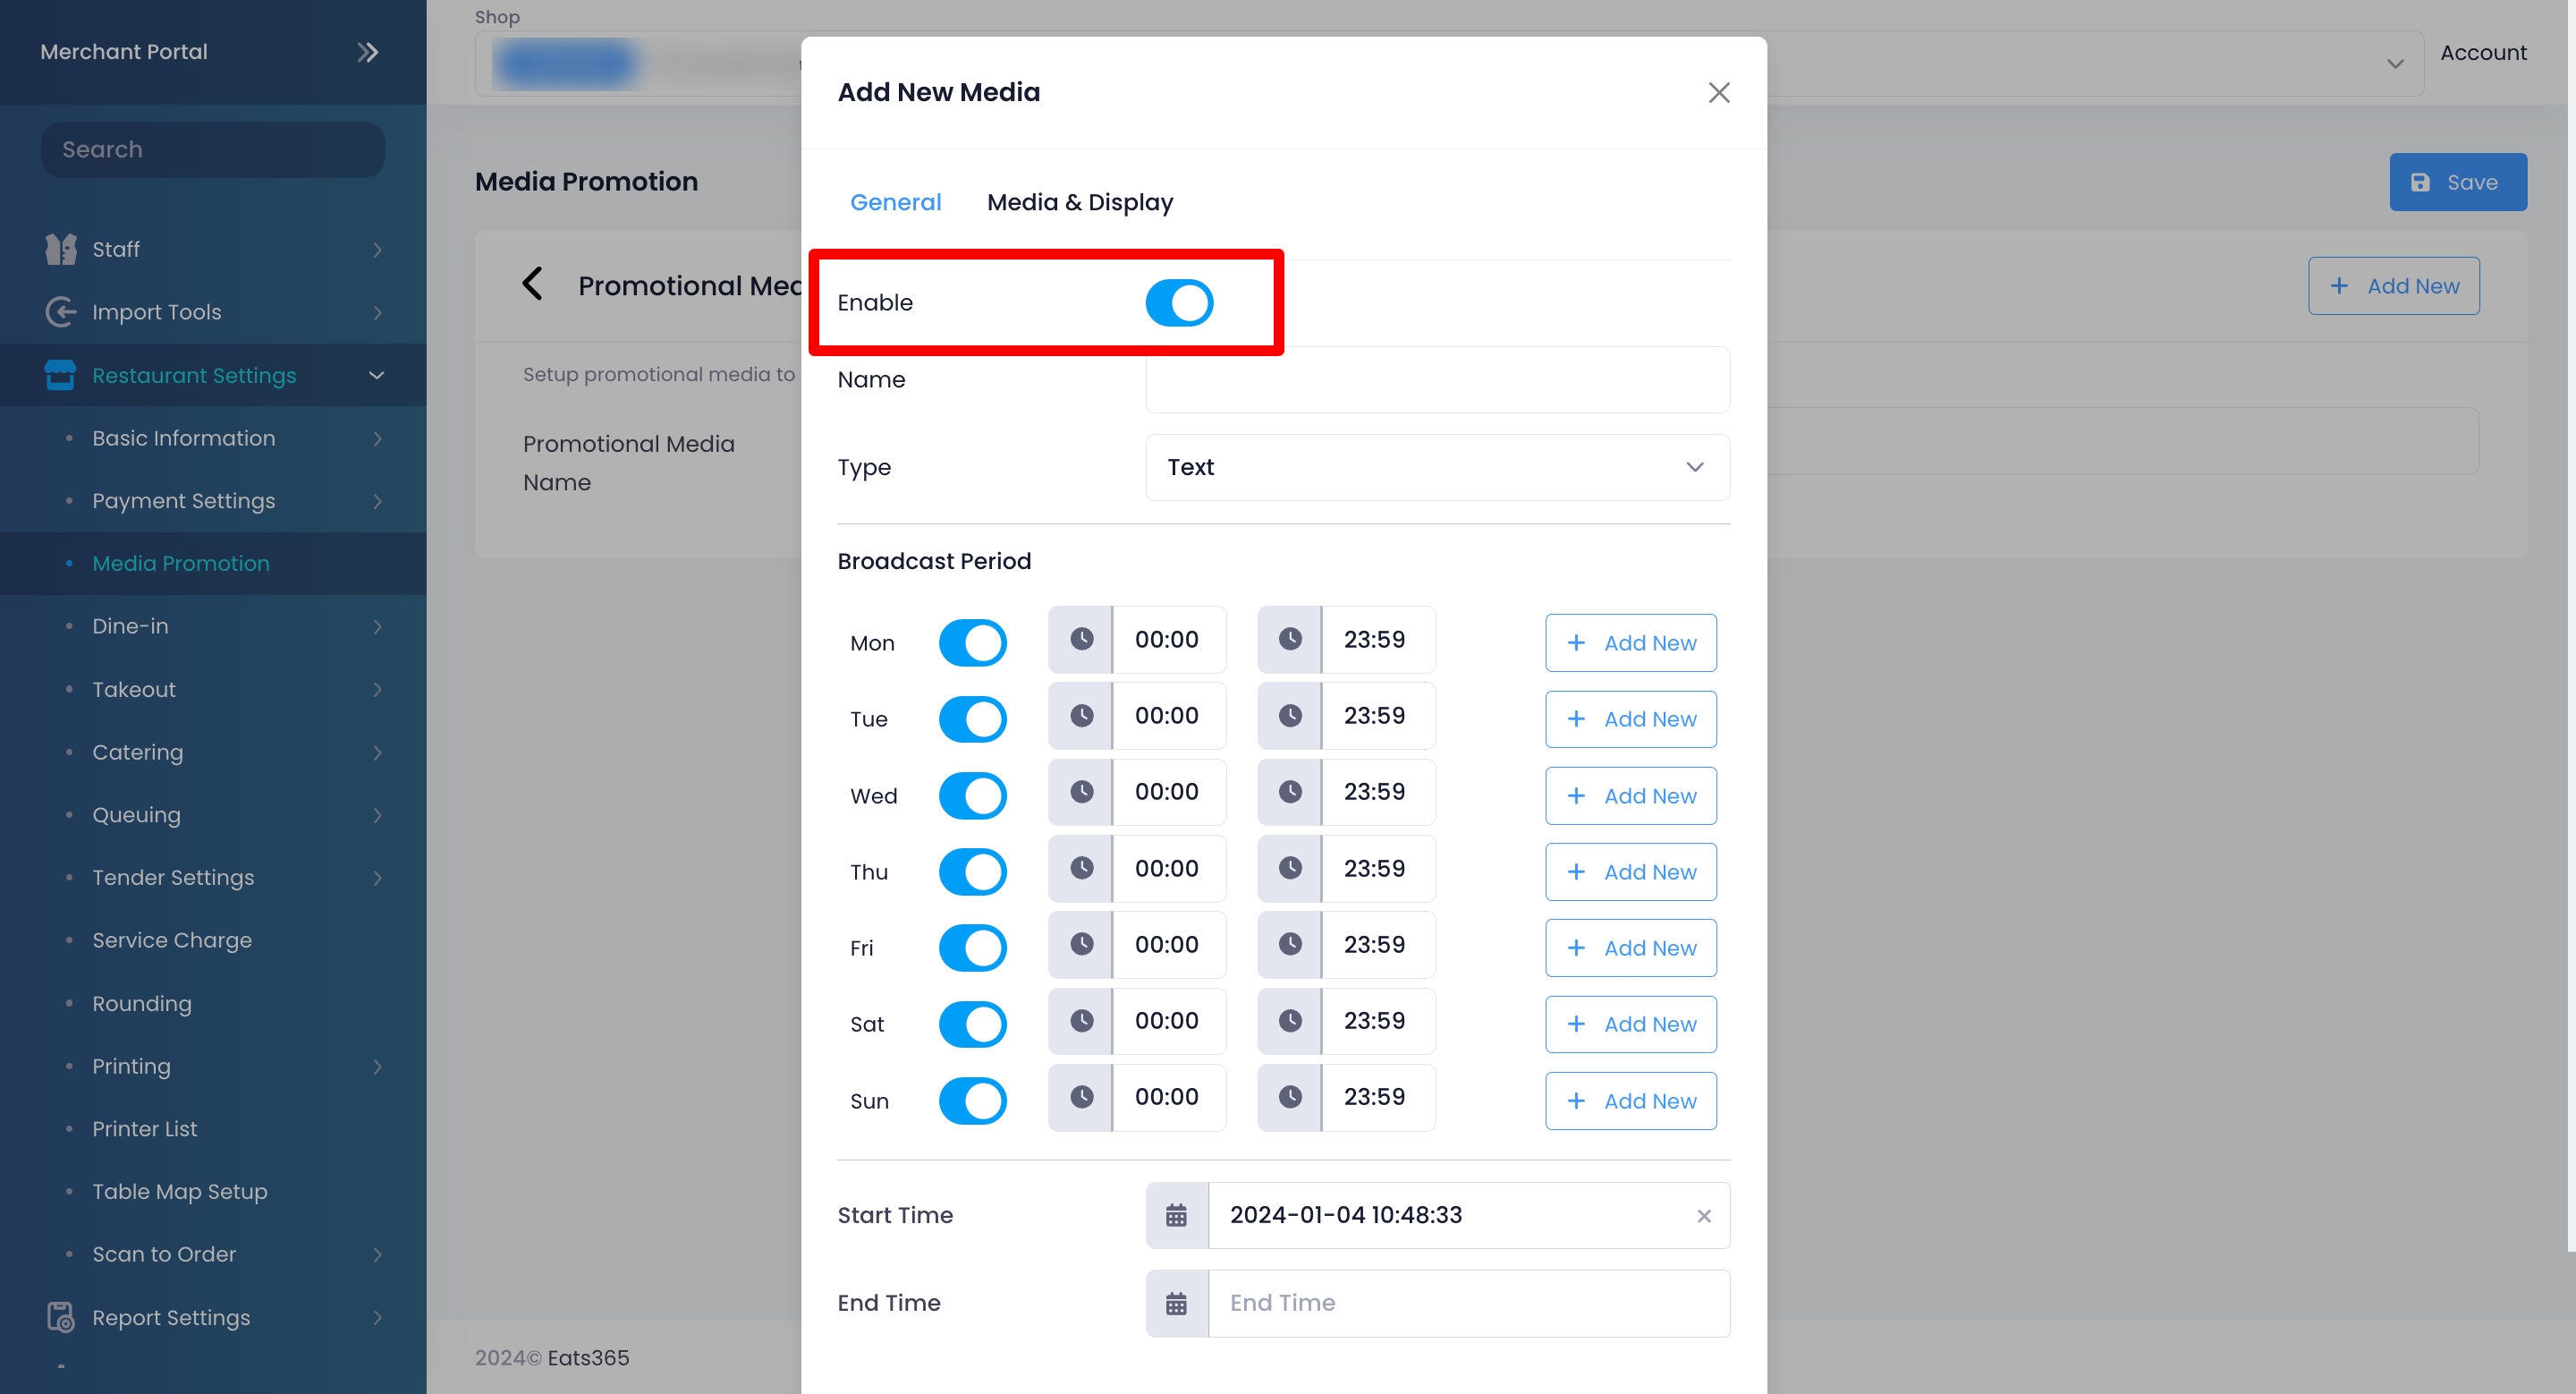
- Next to the Name field, enter the name that you want to use for your custom upload.
- Next to the Type field, select the type of media that you want to upload. You can choose from the available media types:
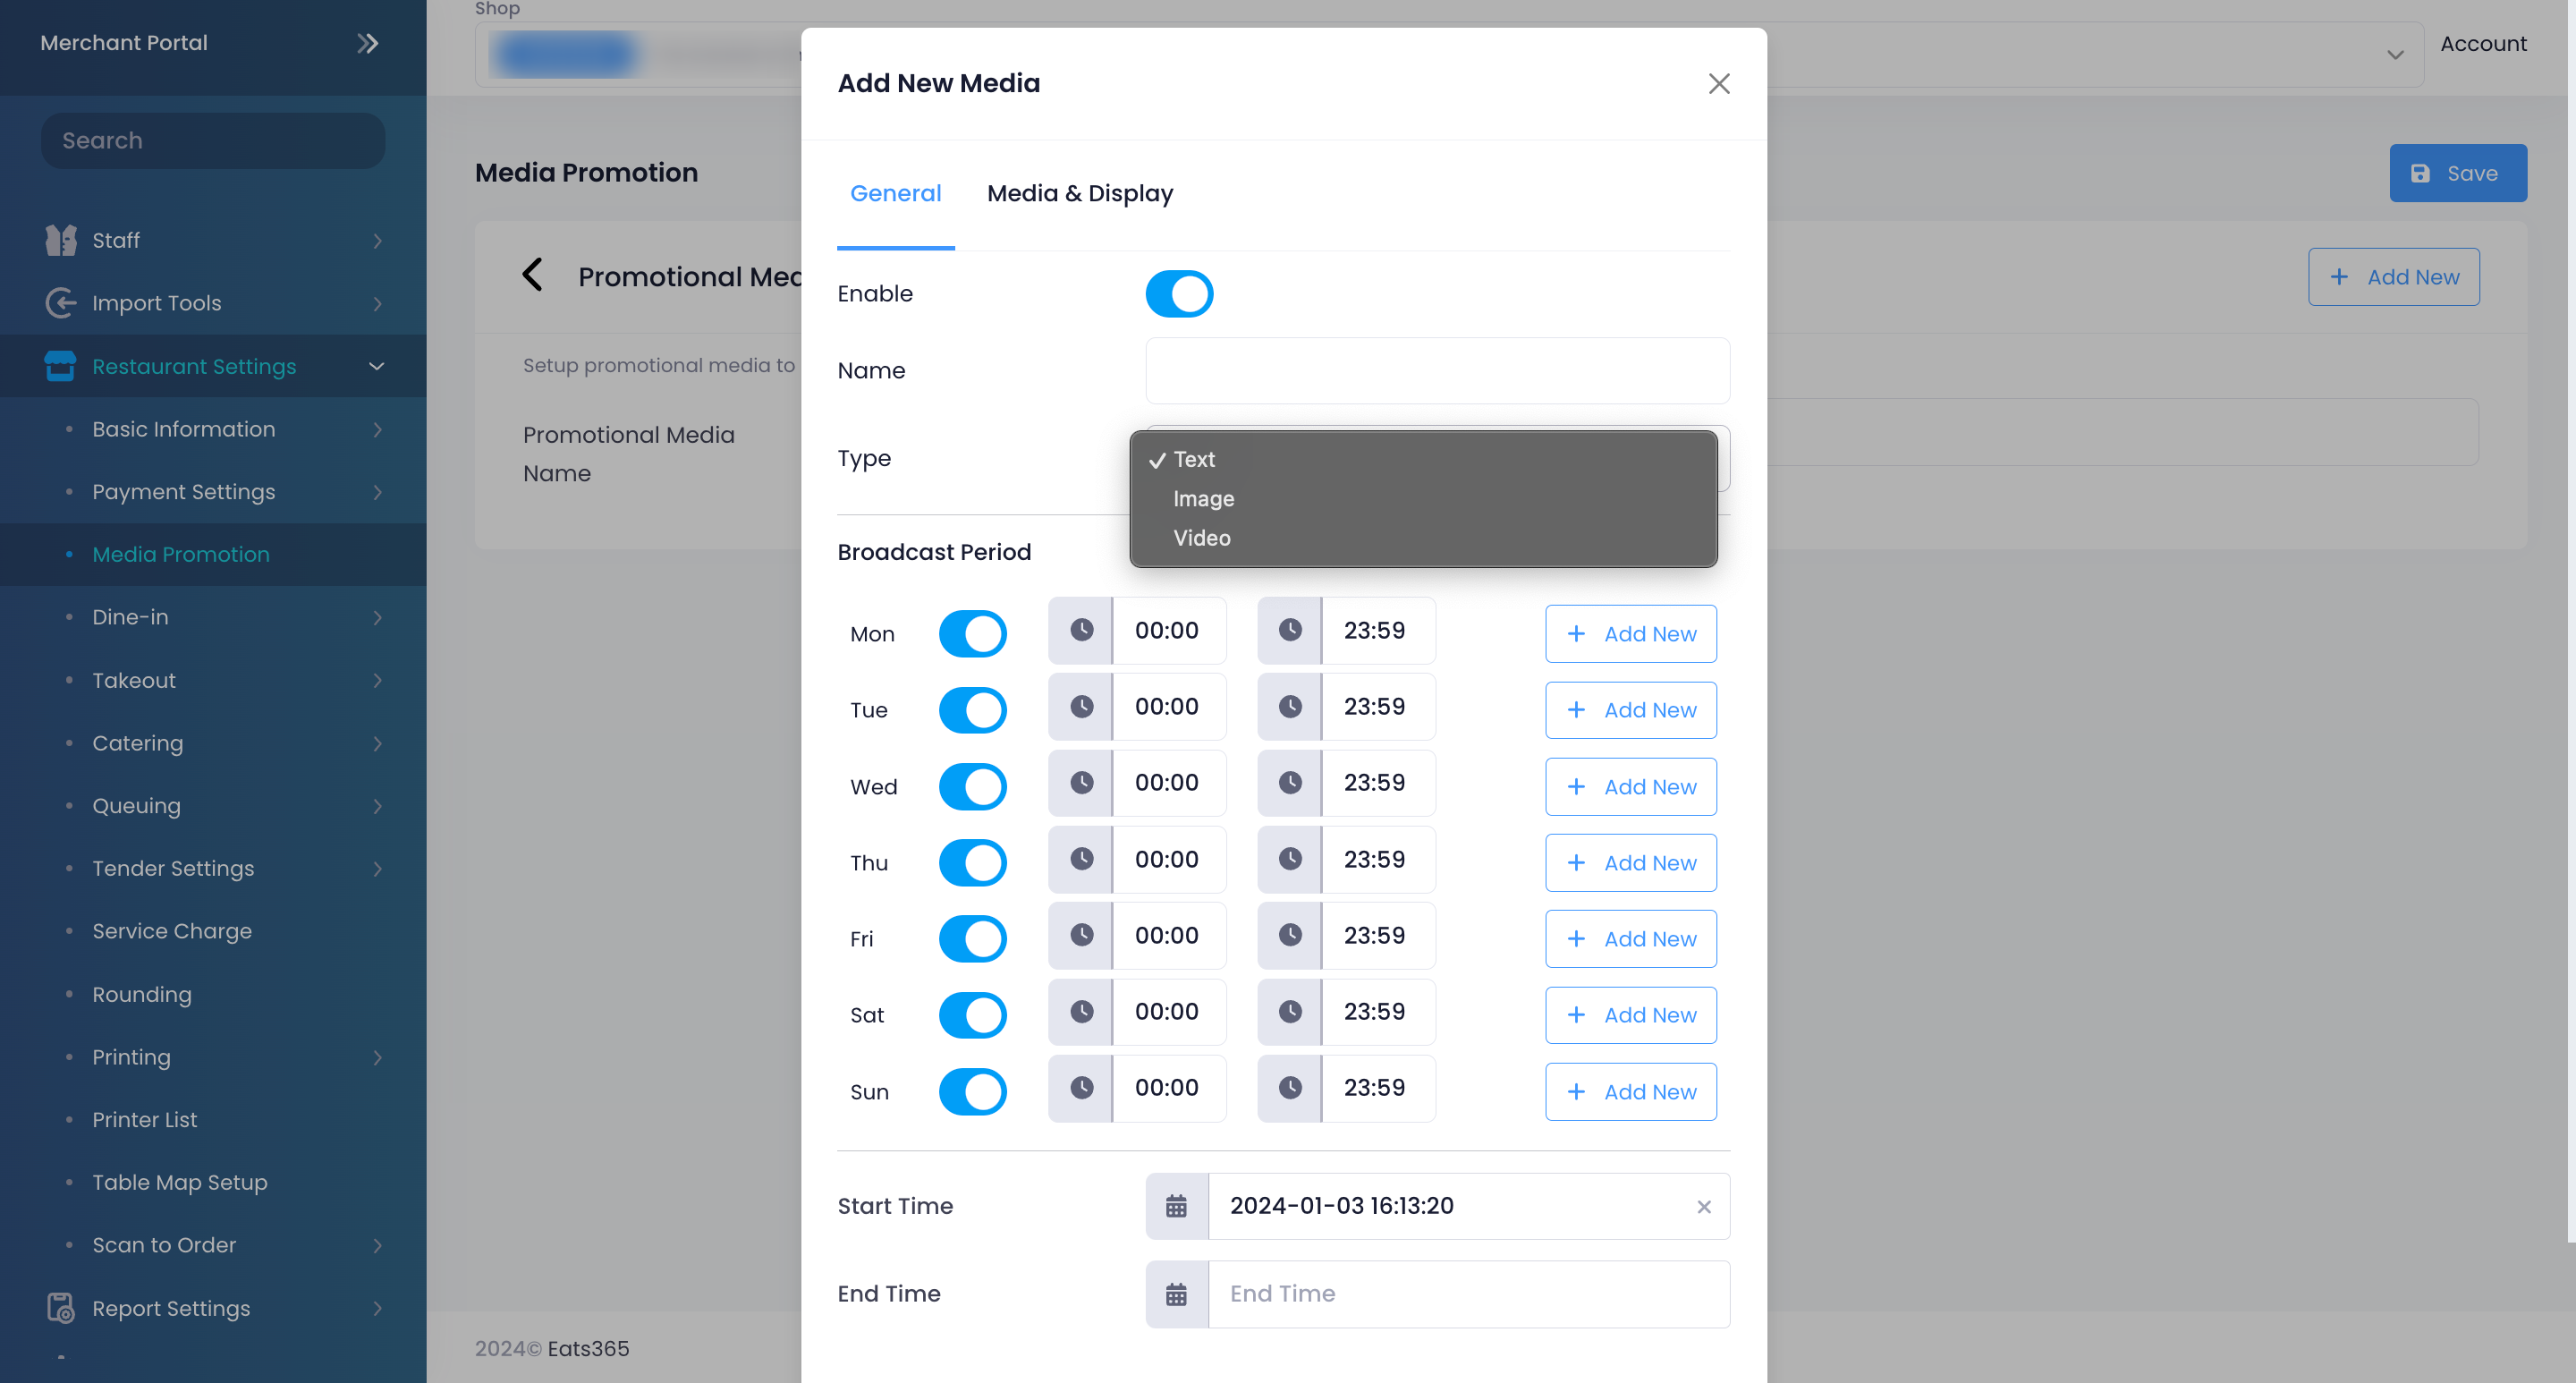
- Text
- Video
- Image
- To set a time when the custom upload appears, under Broadcast Period, set the day and time.
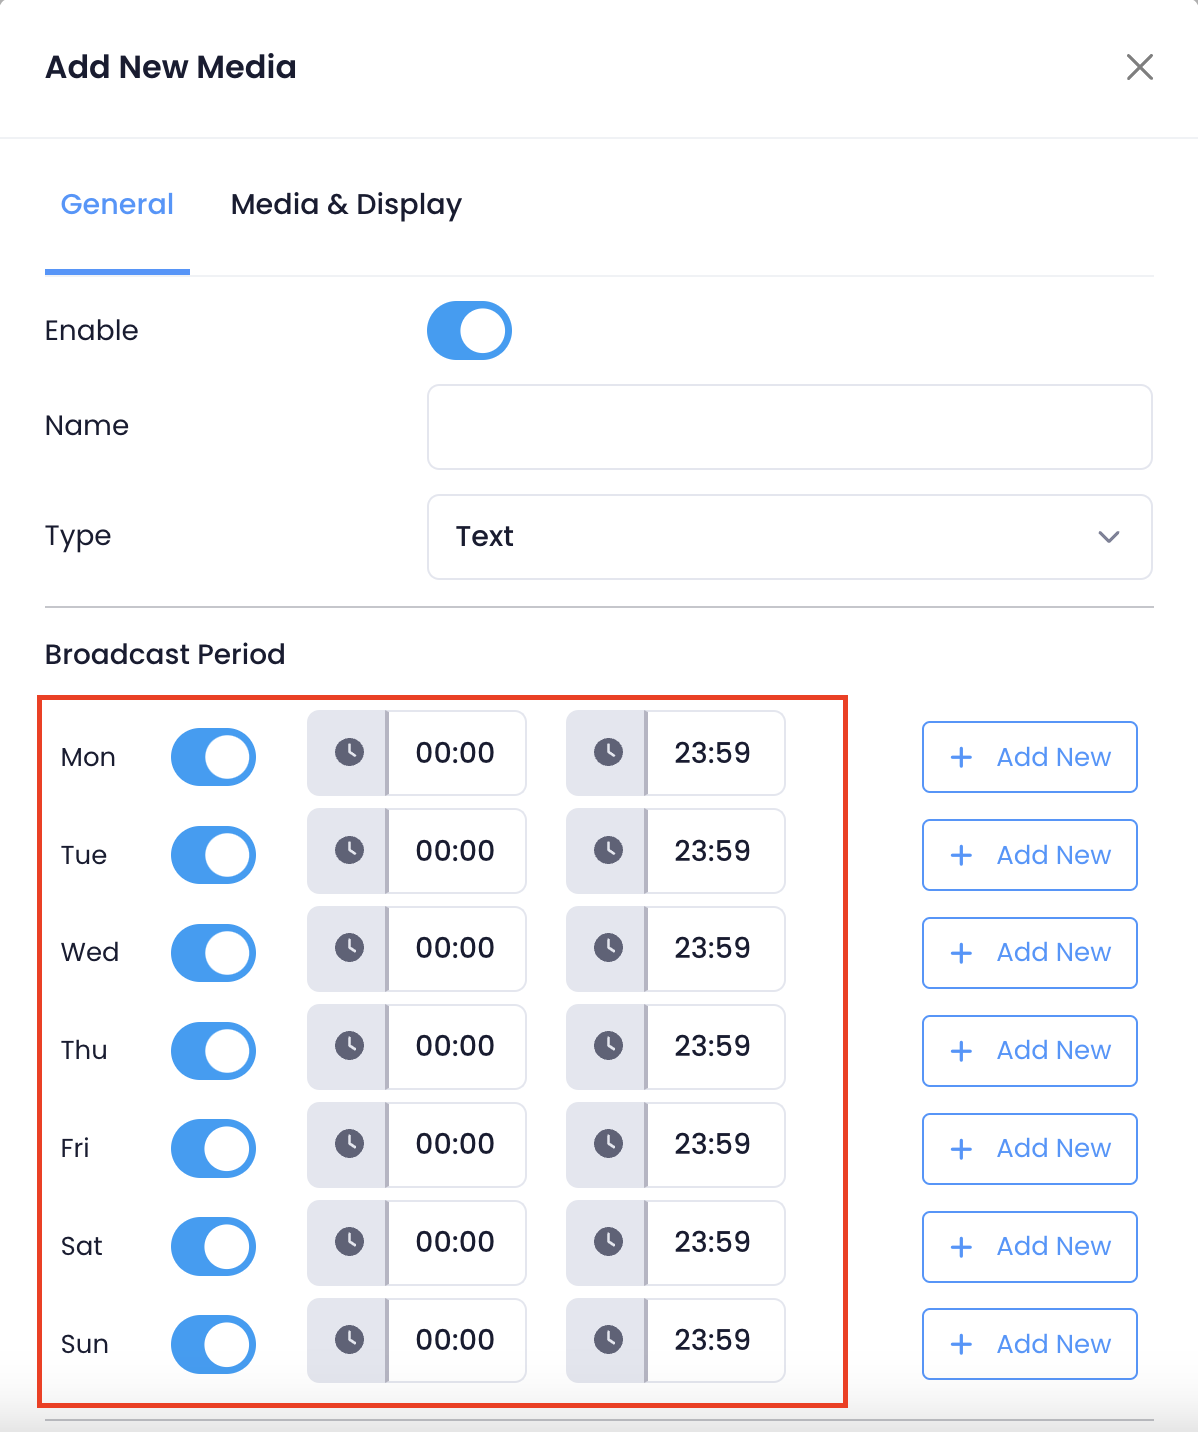
- Set the Start Time and End Time when the media is available.
Tip: If you want the media to show on the PhotoMenu, Customer Facing Display, or eSignage indefinitely, you can choose to skip adding an End Time. - To upload a media, click on Media & Display.
- If you are uploading an image, next to Media File Upload, click on Select Images. Then, select the image that you want to upload.
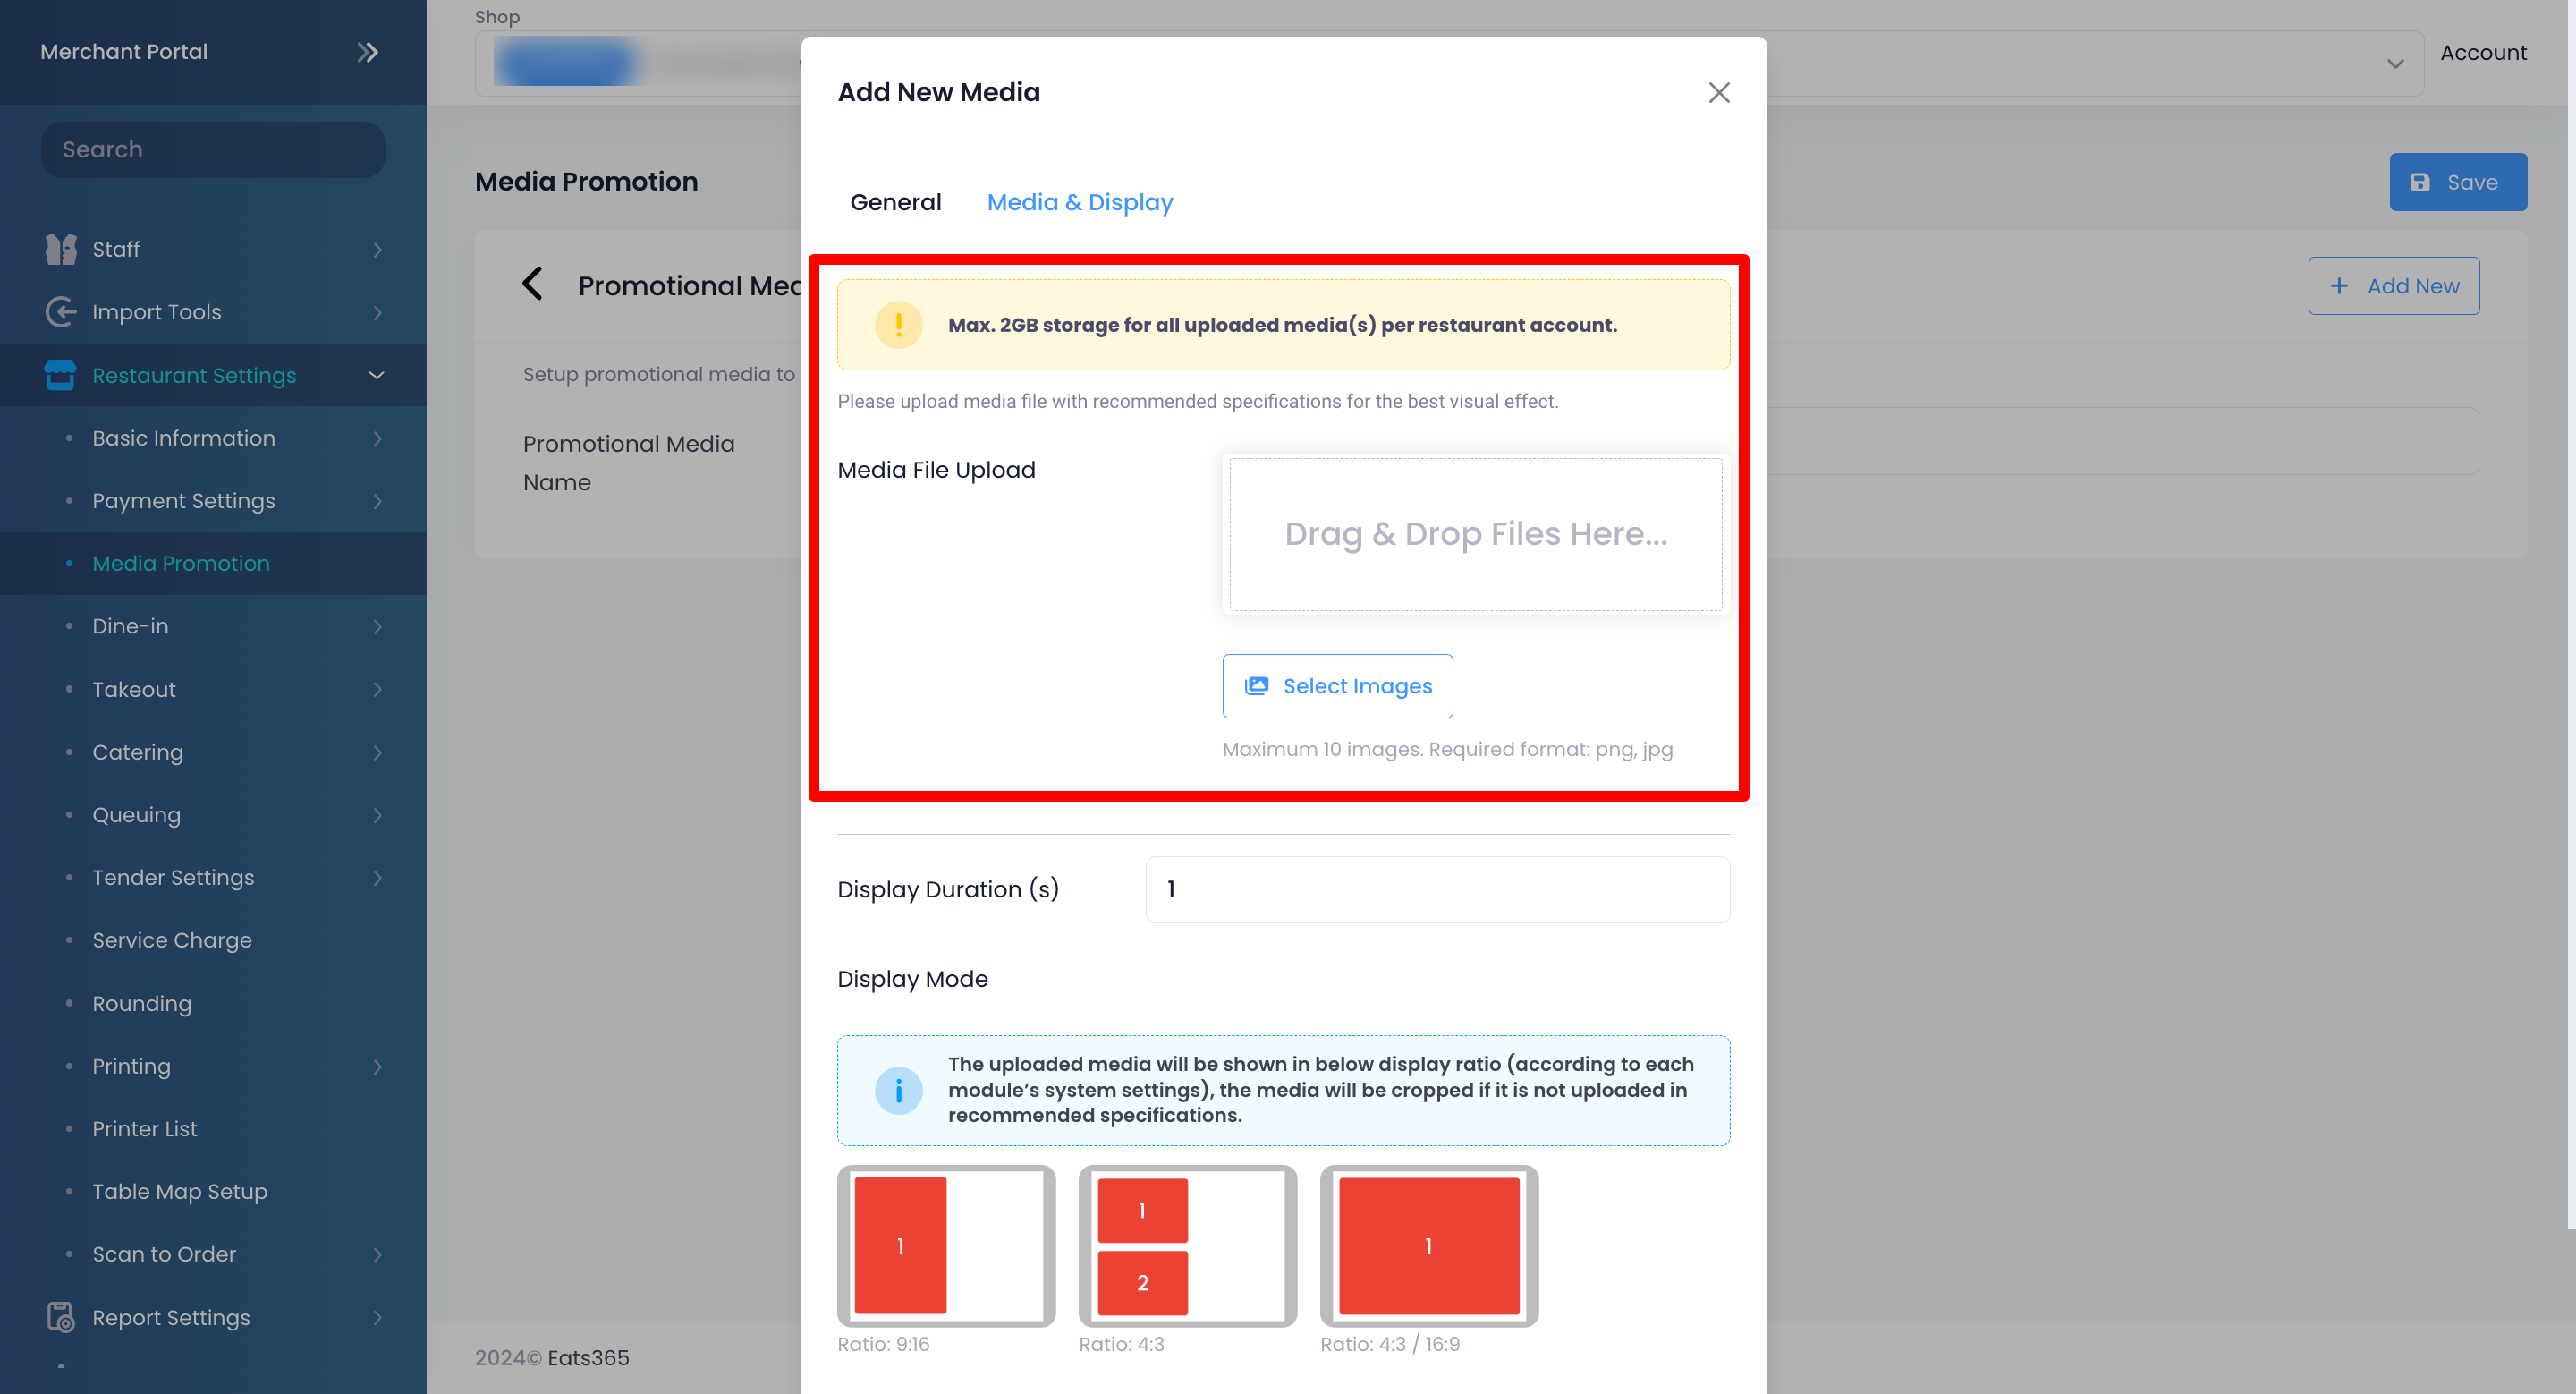 Tip: You can choose up to 10 images to upload.
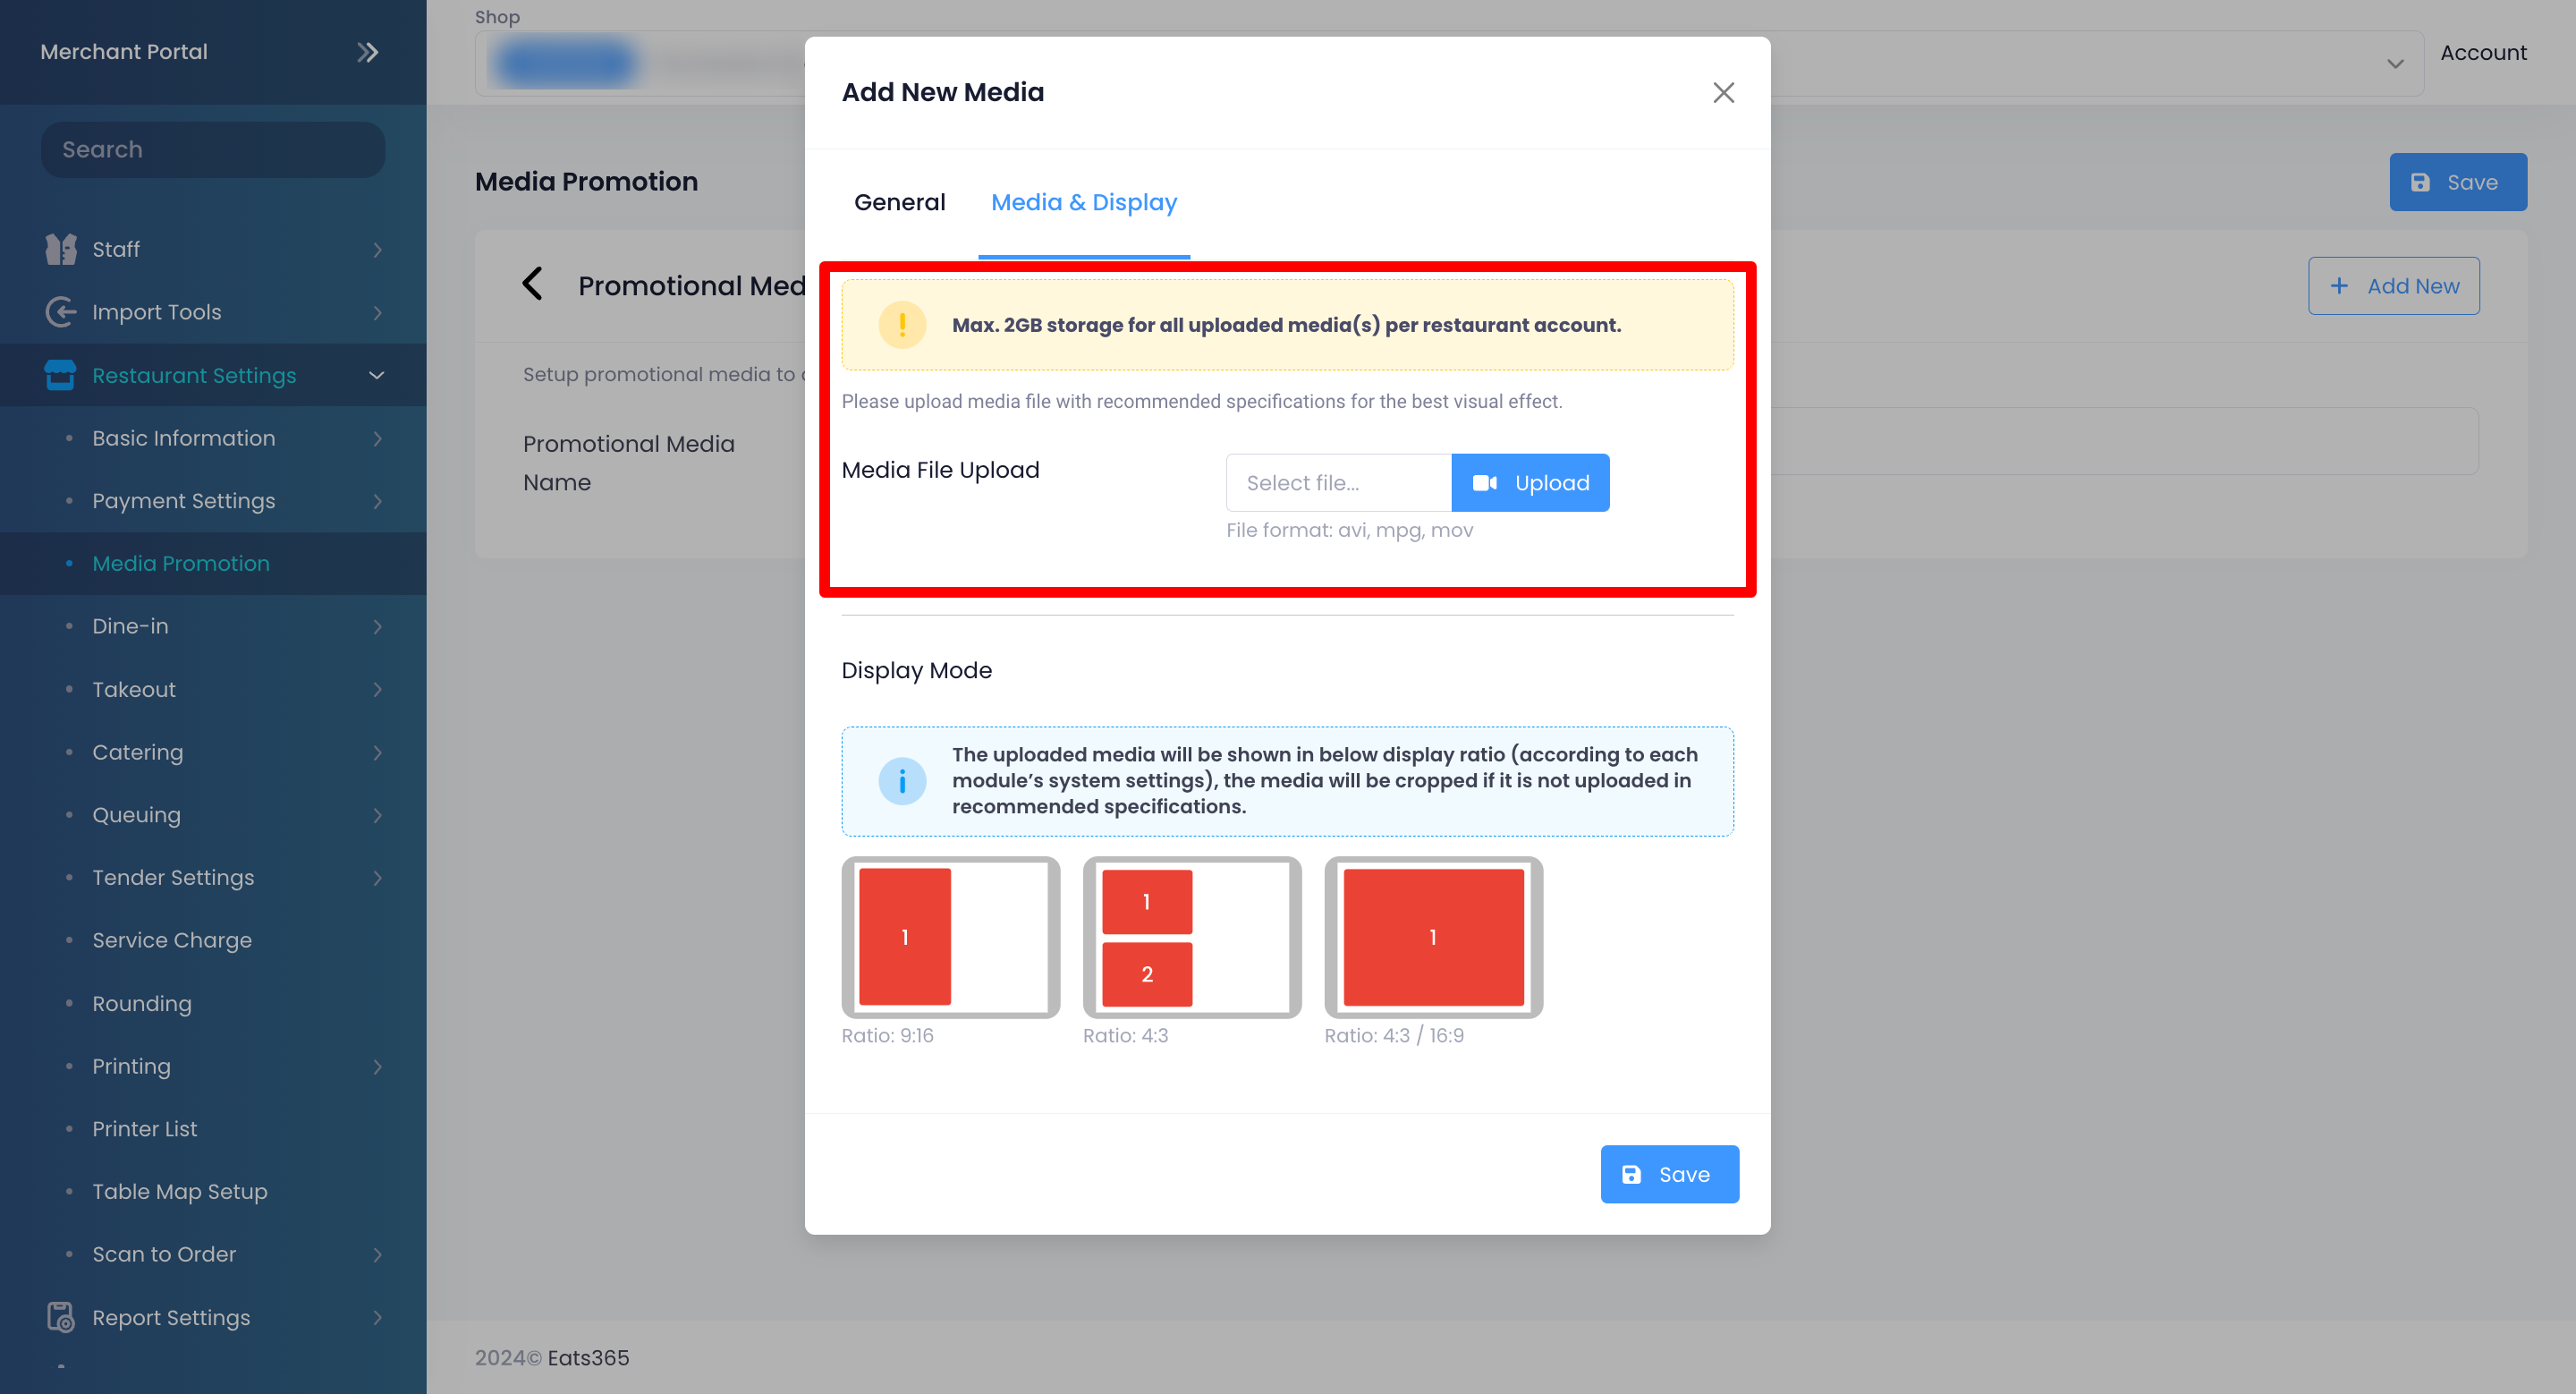
 - If you are uploading a video, next to Media File Upload, click on Select File. Select the video that you want to upload, then click on Upload.
- If you want to display a text message, enter the message that you want to show.
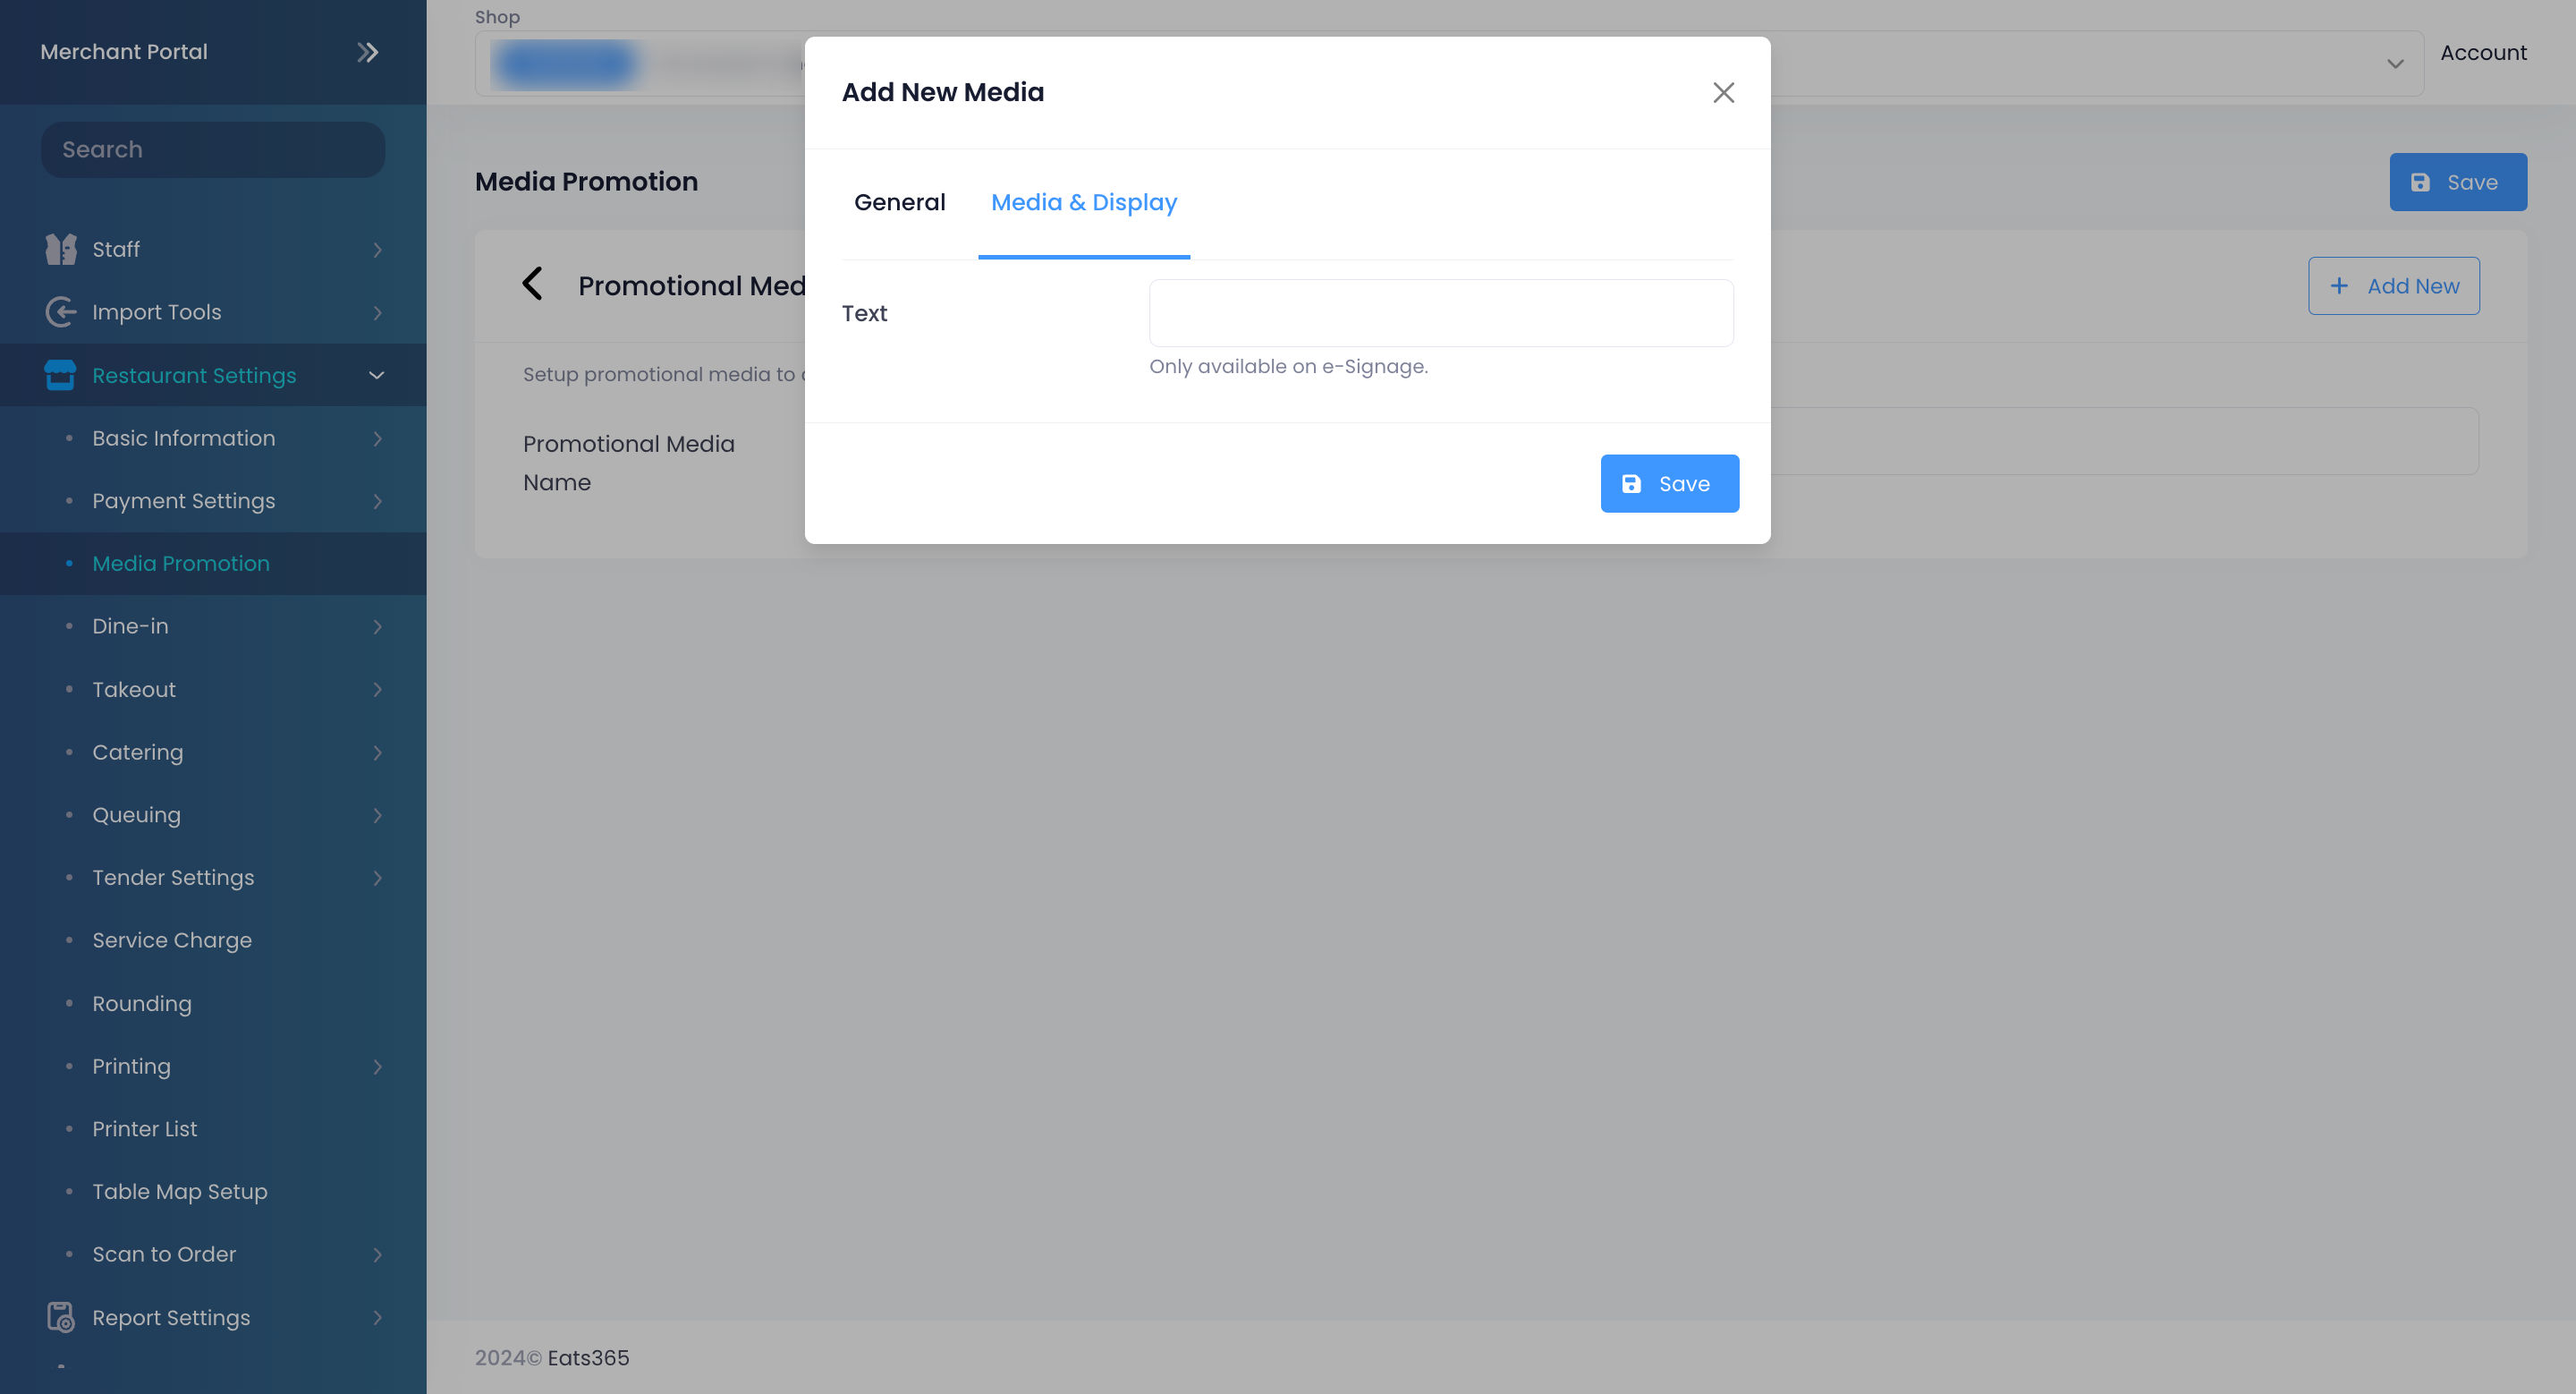 Note: Creating a custom text is only available on eSignage.
- If you are uploading an image, next to Media File Upload, click on Select Images. Then, select the image that you want to upload.
- If you’re uploading an image, select the Display Duration (in minutes).
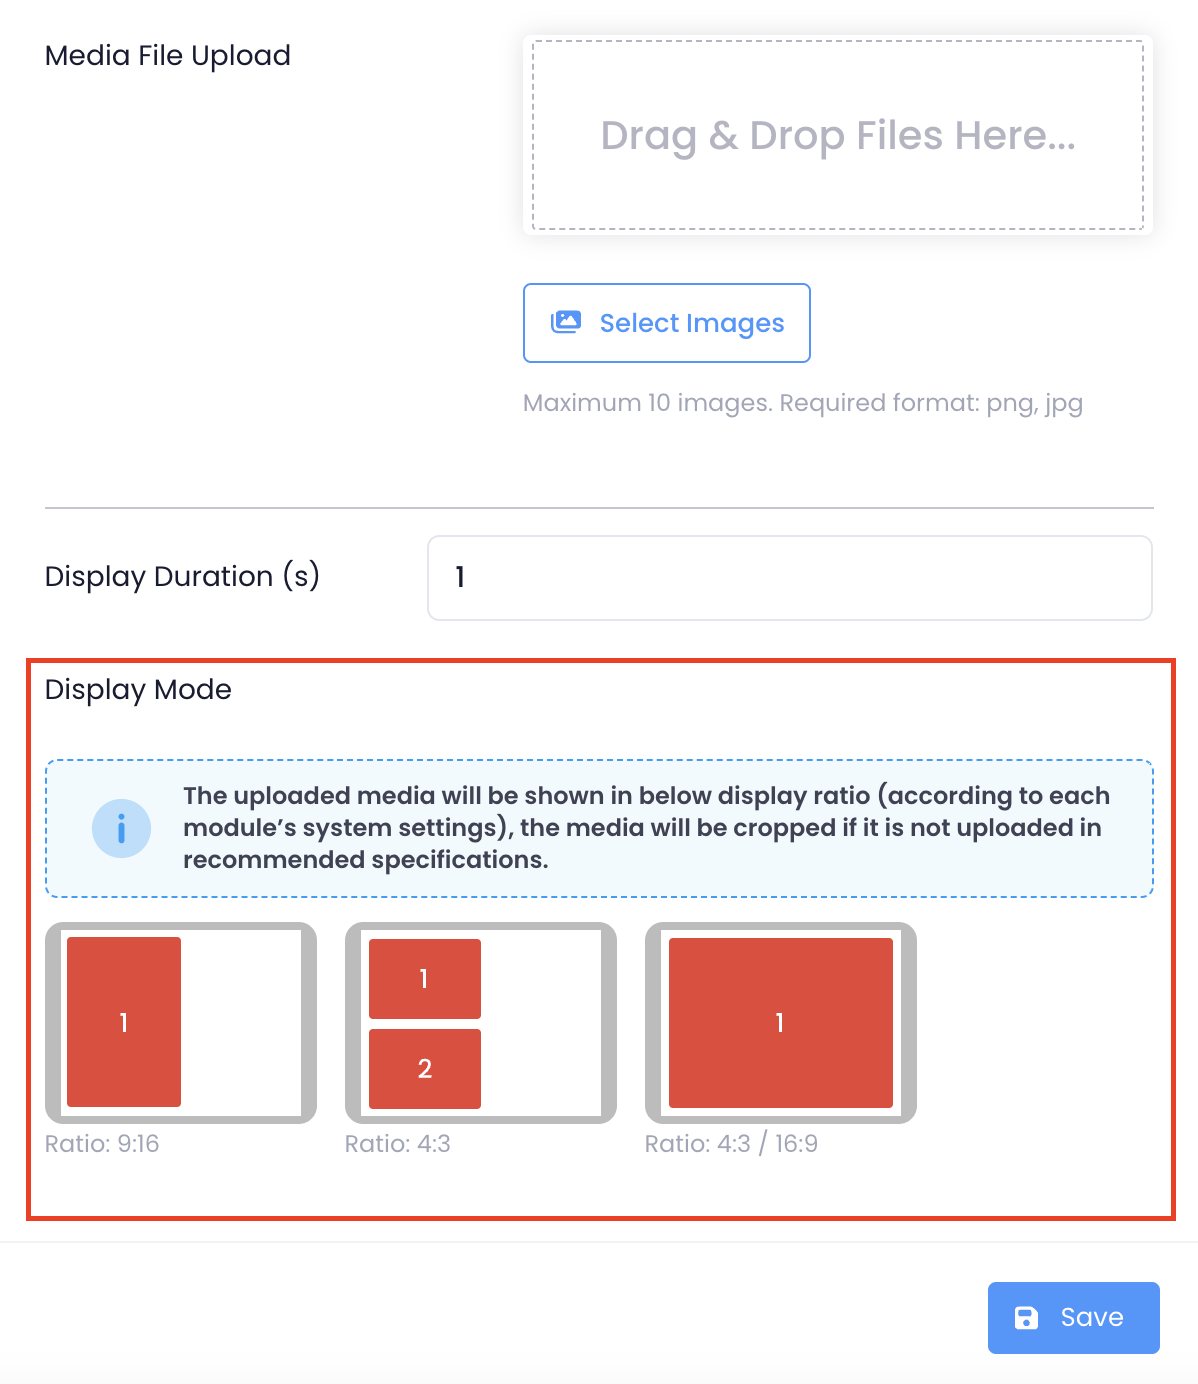
- If you’re uploading a video or an image, under Display Mode, select how you want the video or image to be shown. You can choose from the available Display Ratio.
- Click on Save to confirm.
- To add more media, repeat steps 6 to 15.
Manage Media Group
Modifying an existing Media Group allows you to add or remove uploaded videos, images, and text, change the Broadcast Period, and update the Start and End Time of a media.
Edit Media Group
To modify a Media Group, follow the steps below:
Merchant Portal (Classic Theme)
- Log in to the Merchant Portal.
- On the left panel, click on Restaurant Settings. Then, select Media Group.
- Select the Media Group with the media that you want to update.
- Click on the media that you want to update.
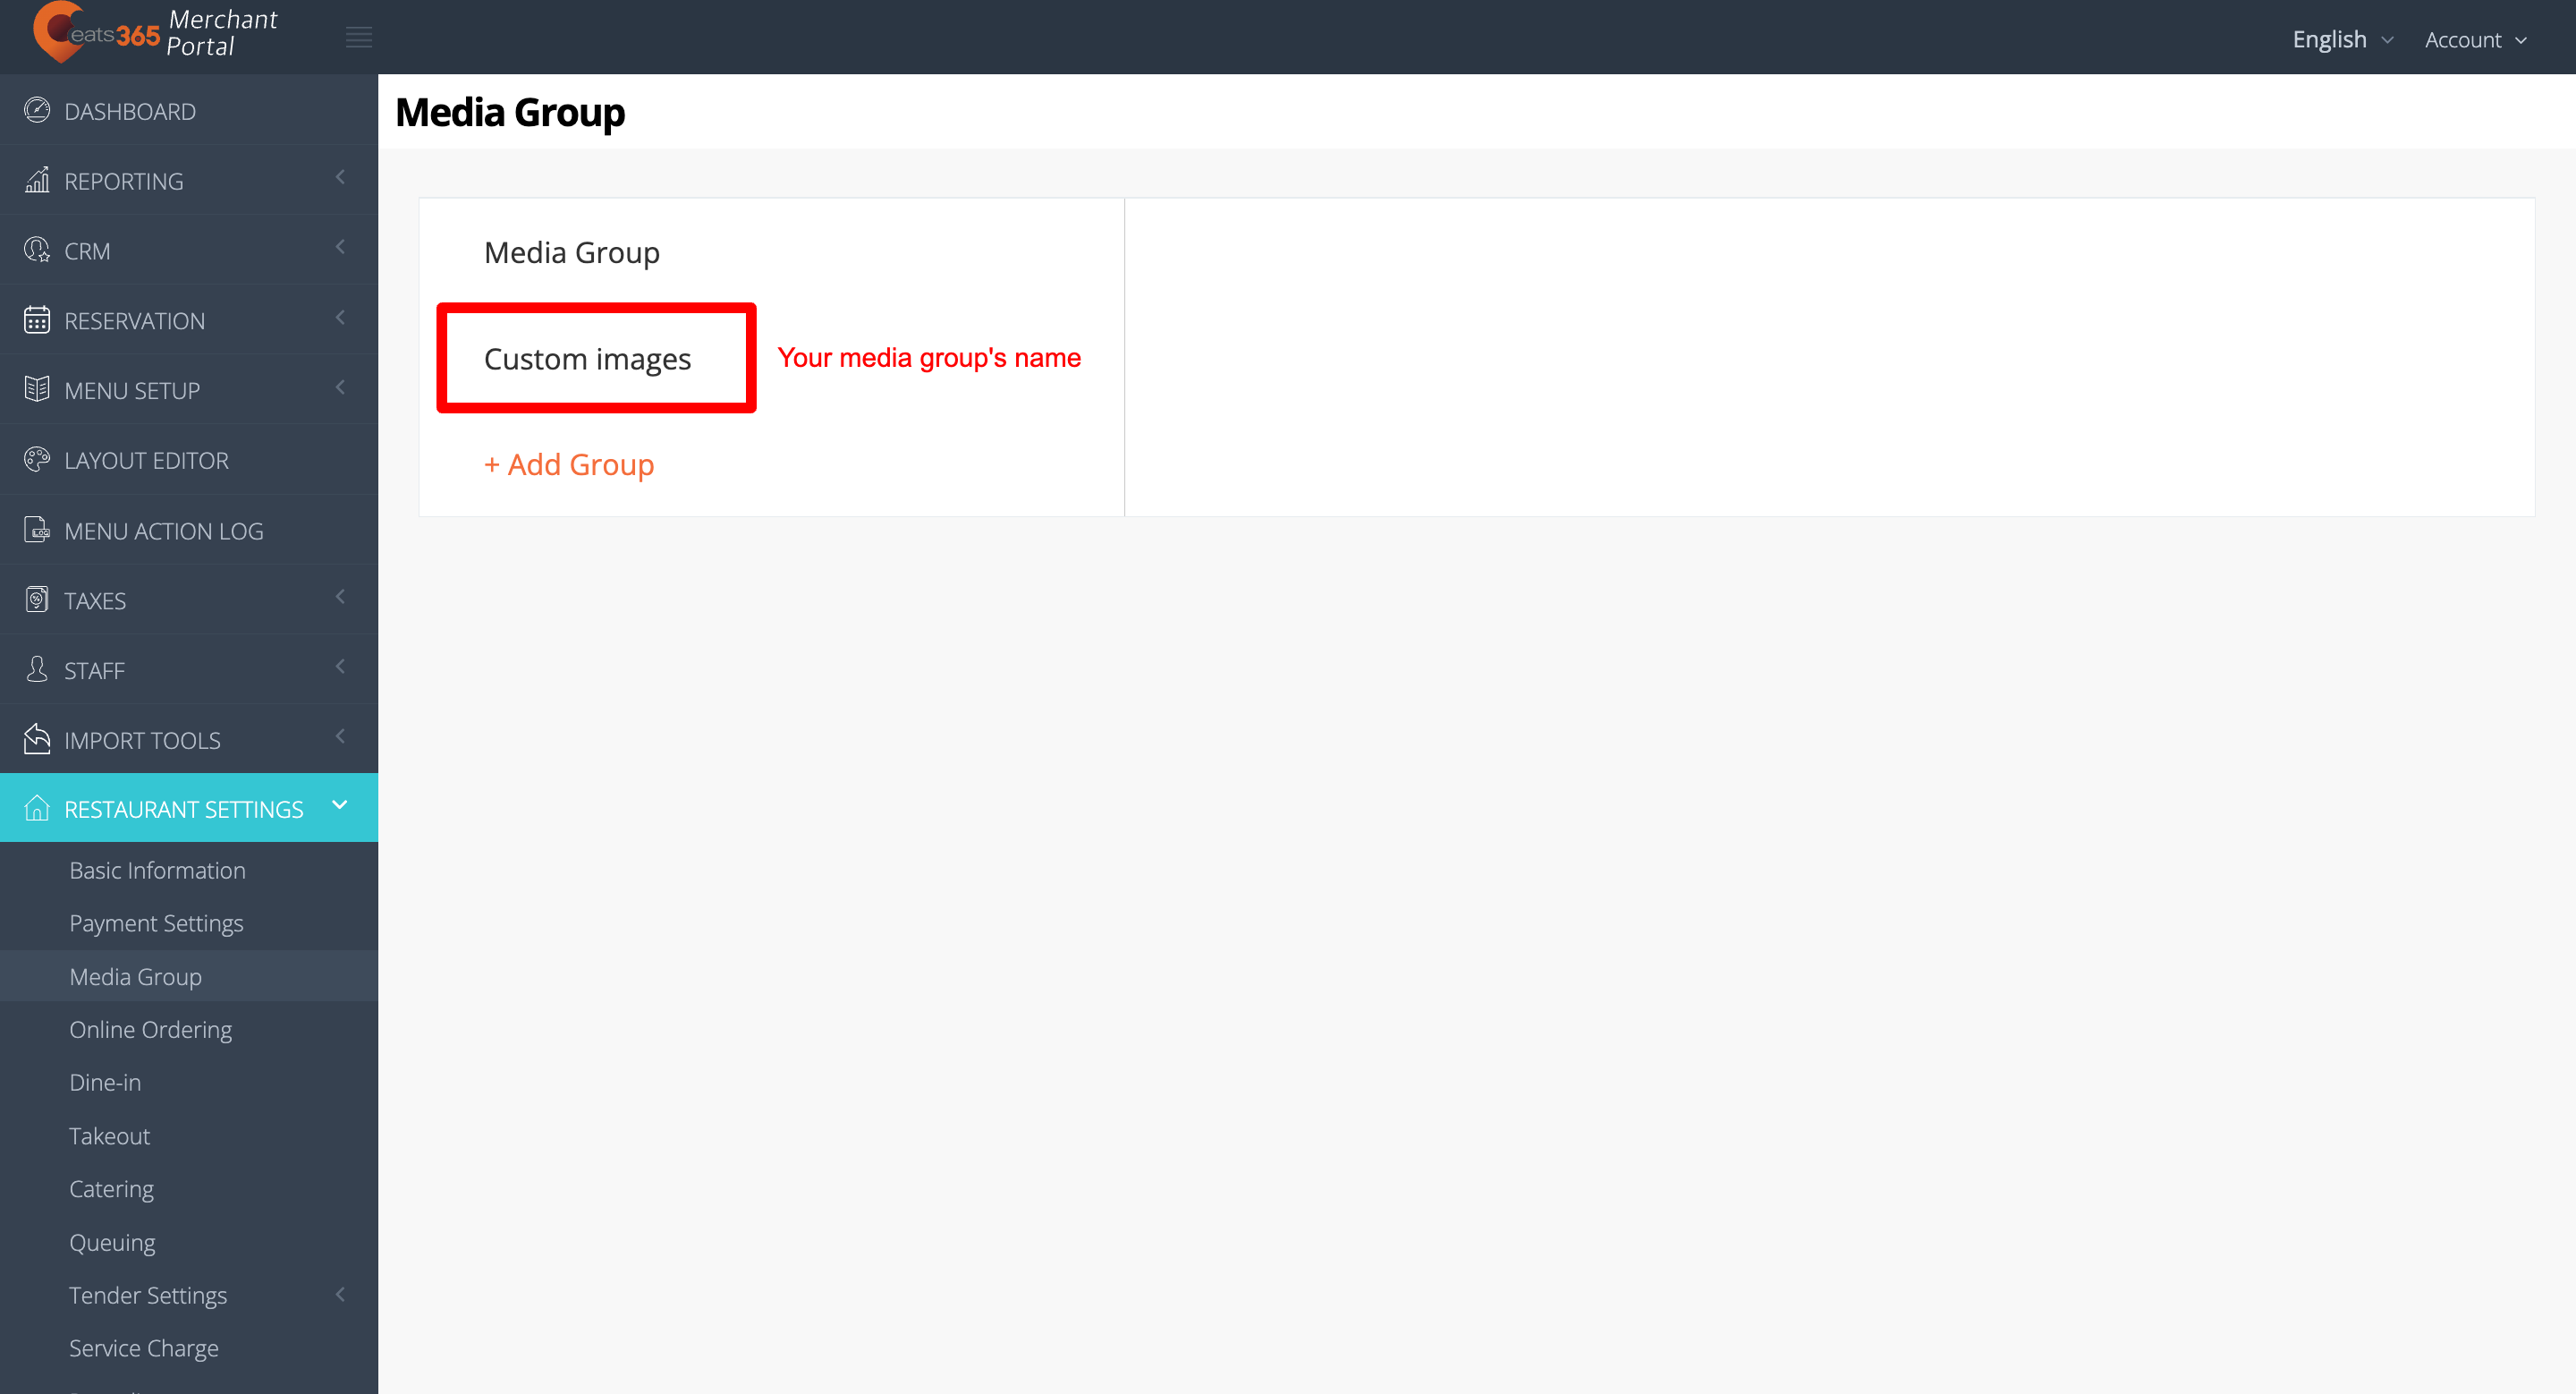
- Update the media's settings.
Note: You can’t replace uploaded videos and images. If you want to upload a new video or image, you must add a new media file instead. - Click on Save to confirm.
Merchant Portal 2.0
- Log in to the Merchant Portal.
- On the left panel, click on Restaurant Settings. Then, select Media Promotion.
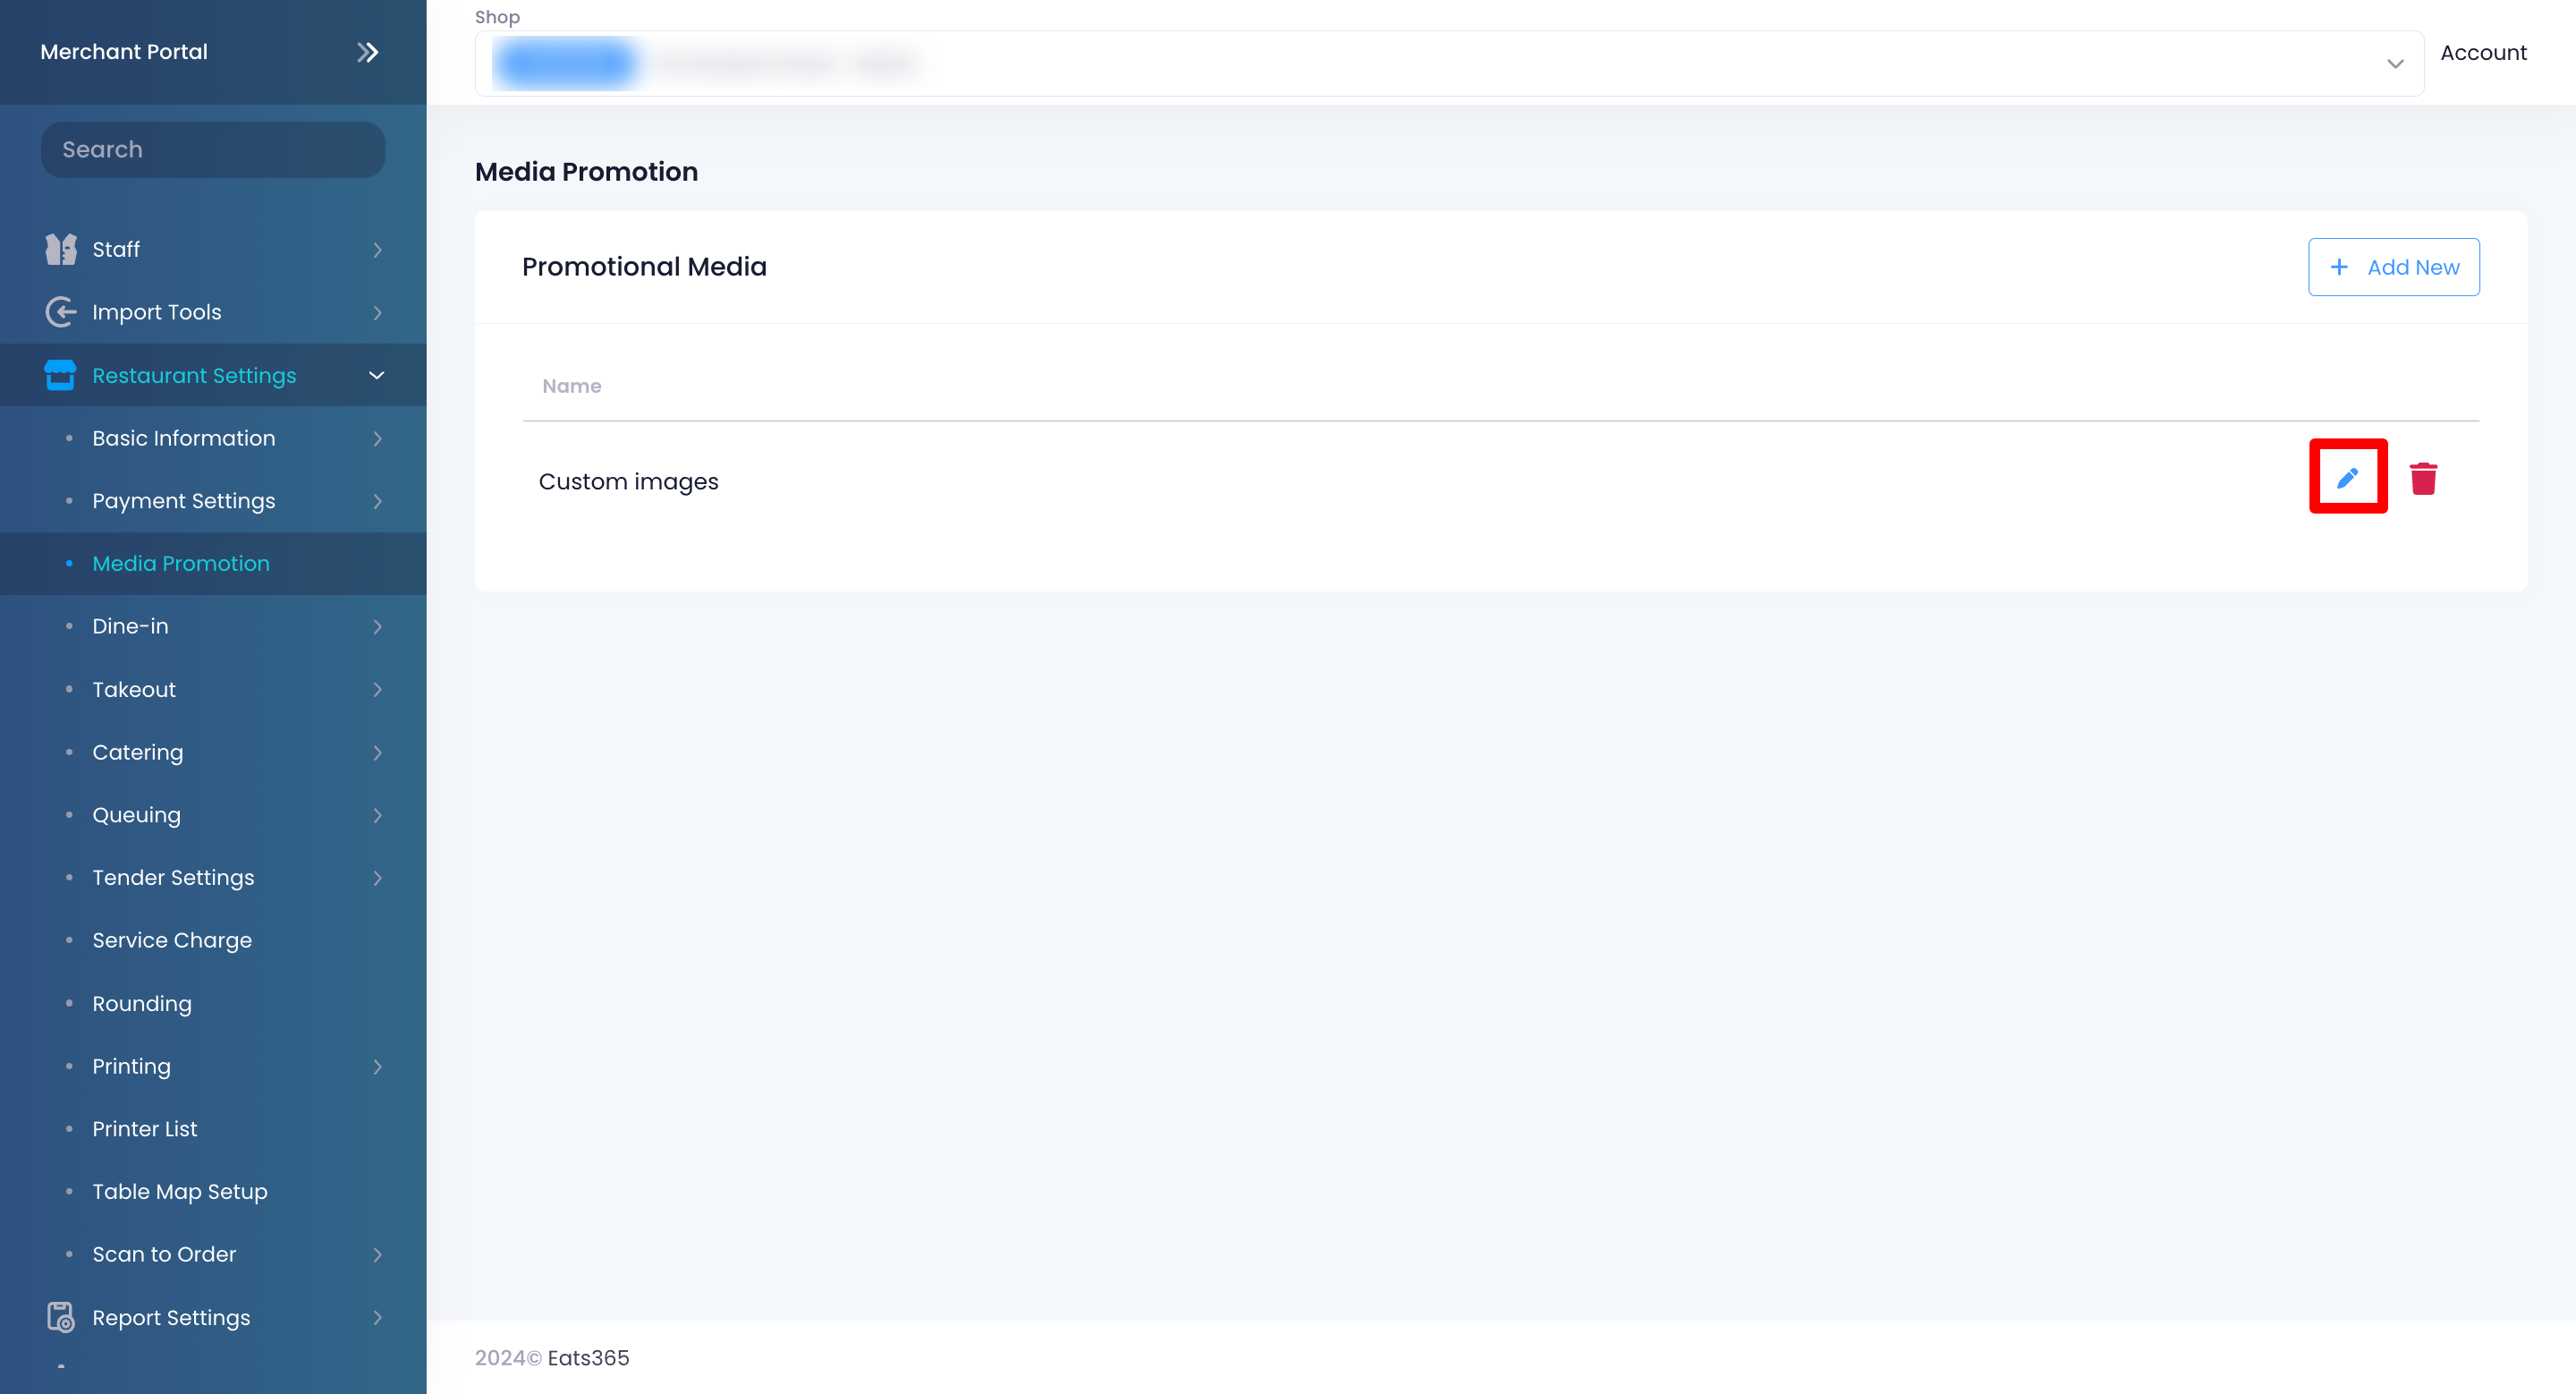
- Next to the Media Group with the media that you want to update, click on Edit
 .
.
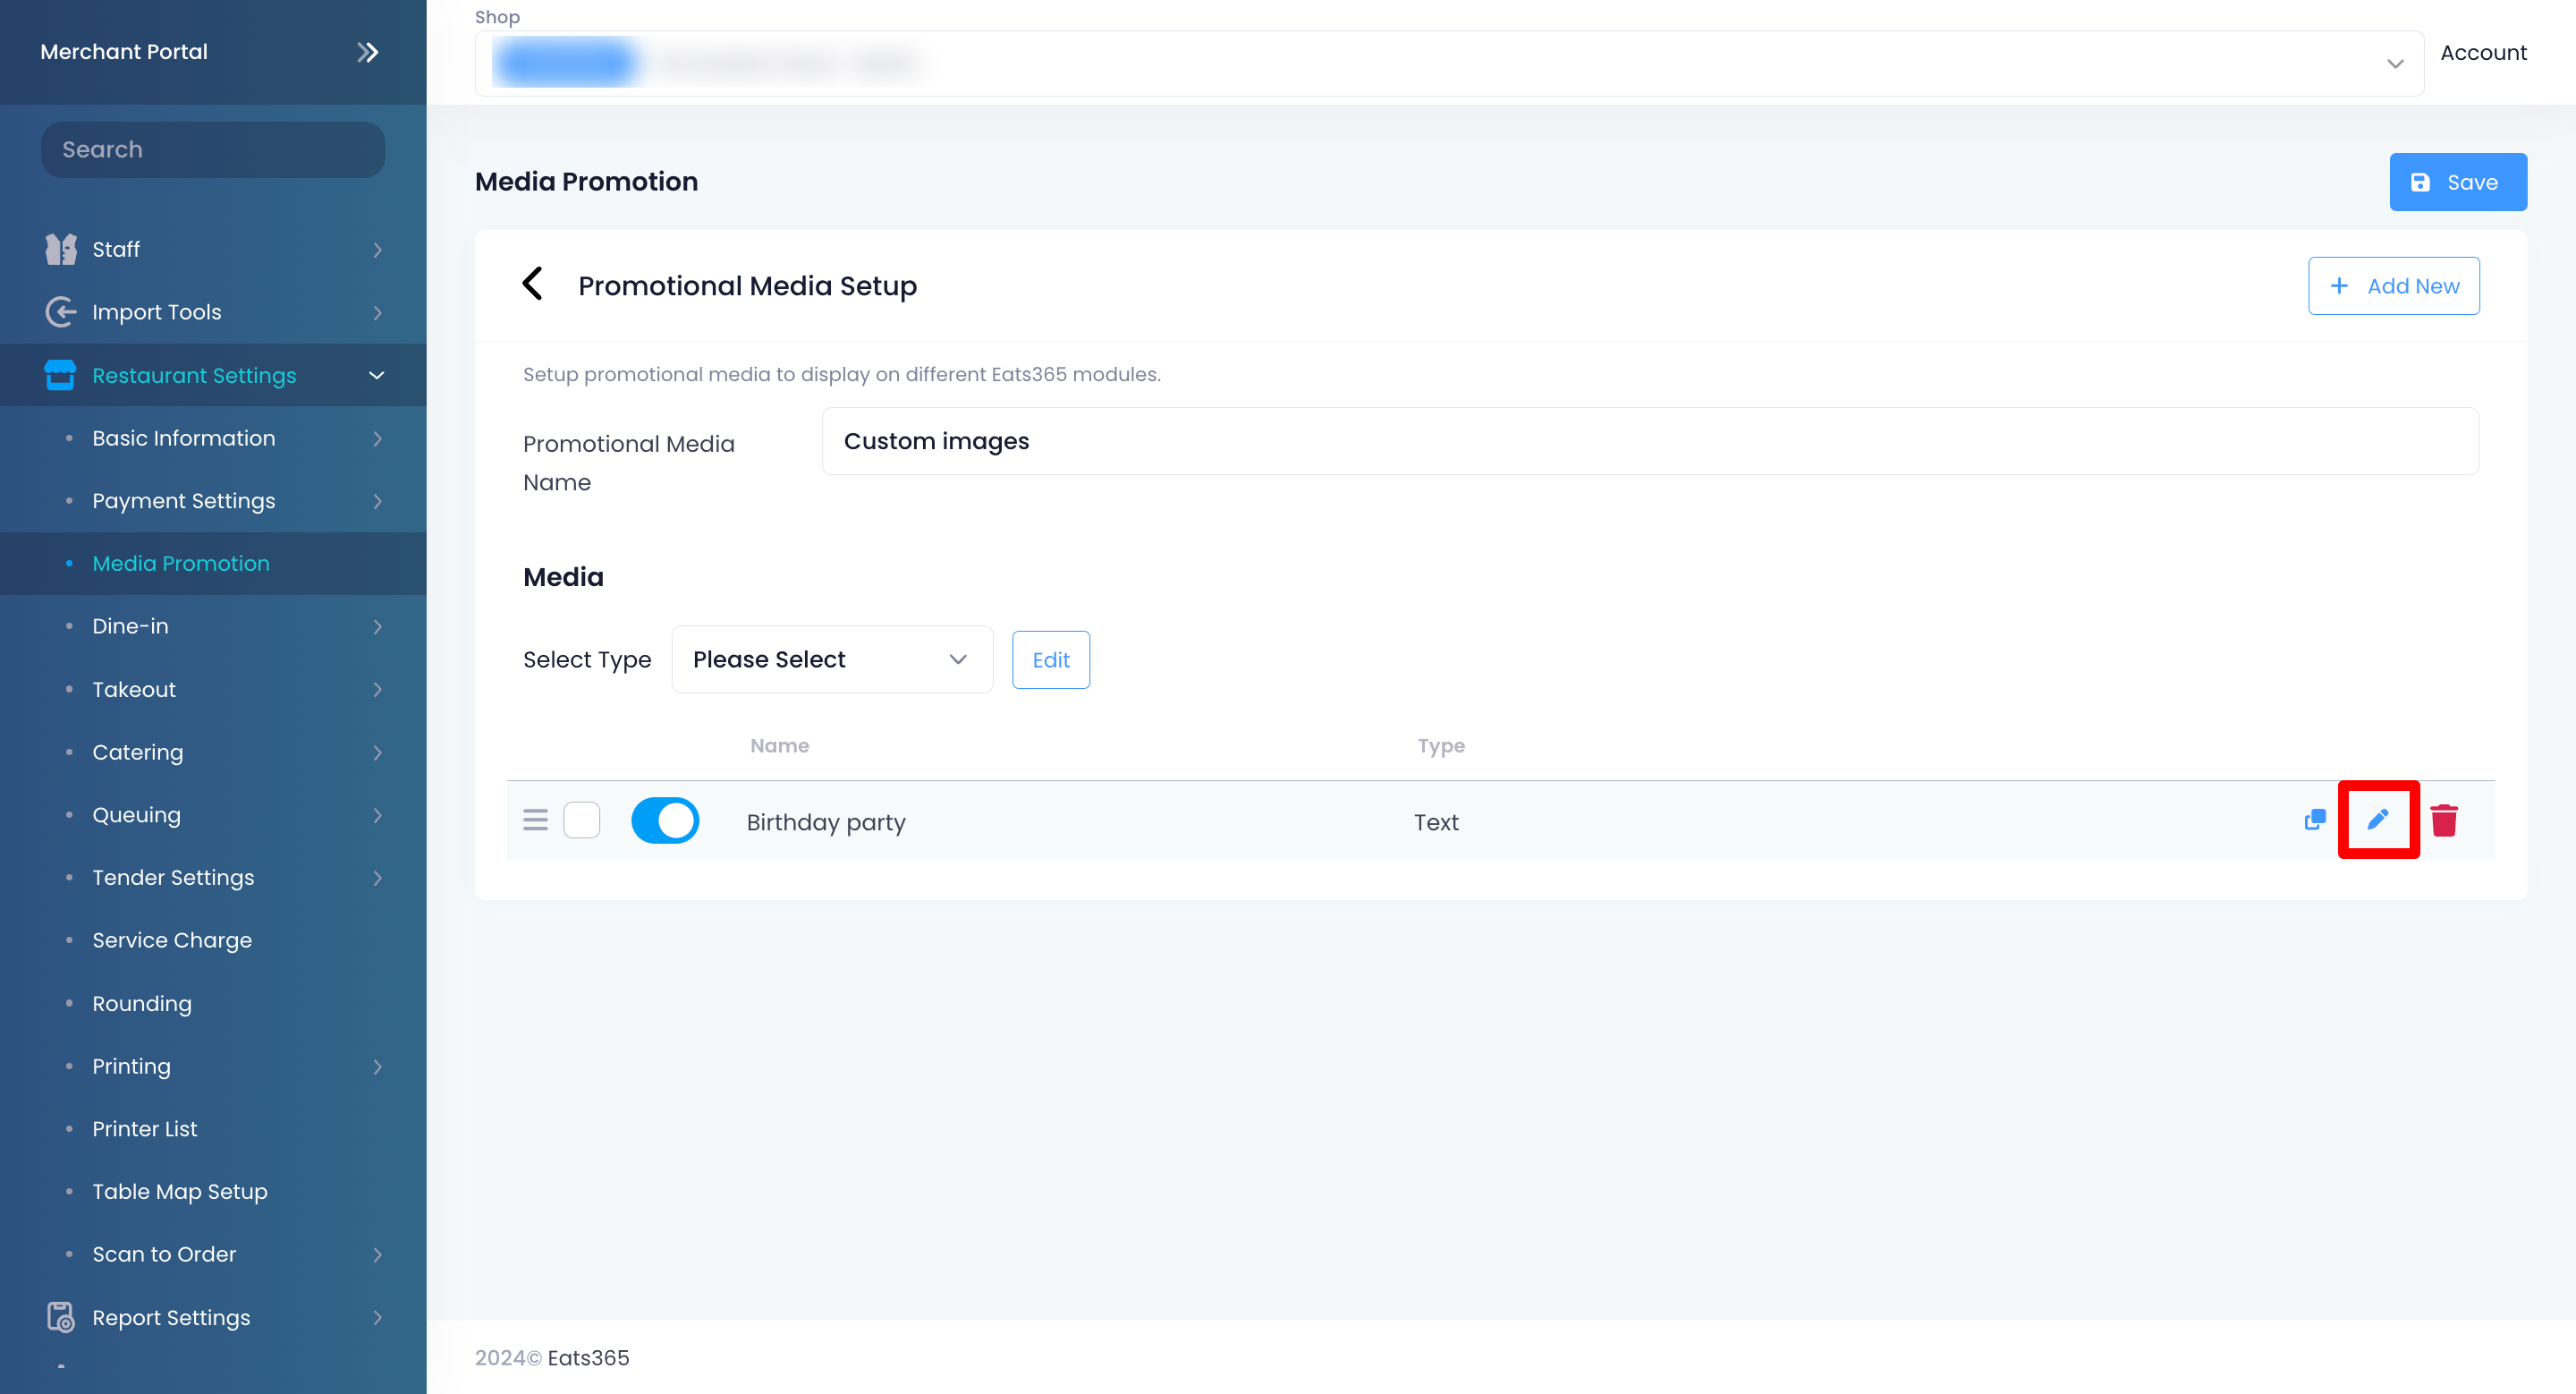
- Under Media, select the media that you want to edit. Click on Edit
 .
.
- Update the media's settings.
Note: You can’t replace uploaded videos and images. If you want to upload a new video or image, you must add a new media file instead. - Click on Save to confirm.
Bulk edit Media Group
You can modify Media Group content simultaneously on Merchant Portal 2.0.
To perform a bulk edit, follow the steps below:
- Log in to the Merchant Portal.
- On the left panel, click on Restaurant Settings. Then, select Media Promotion.
- Select the Media Group with the media that you want to update. Then, click on Edit
 .
.
- Under Media, click on the checkbox
 next to the media that you want to edit in bulk.
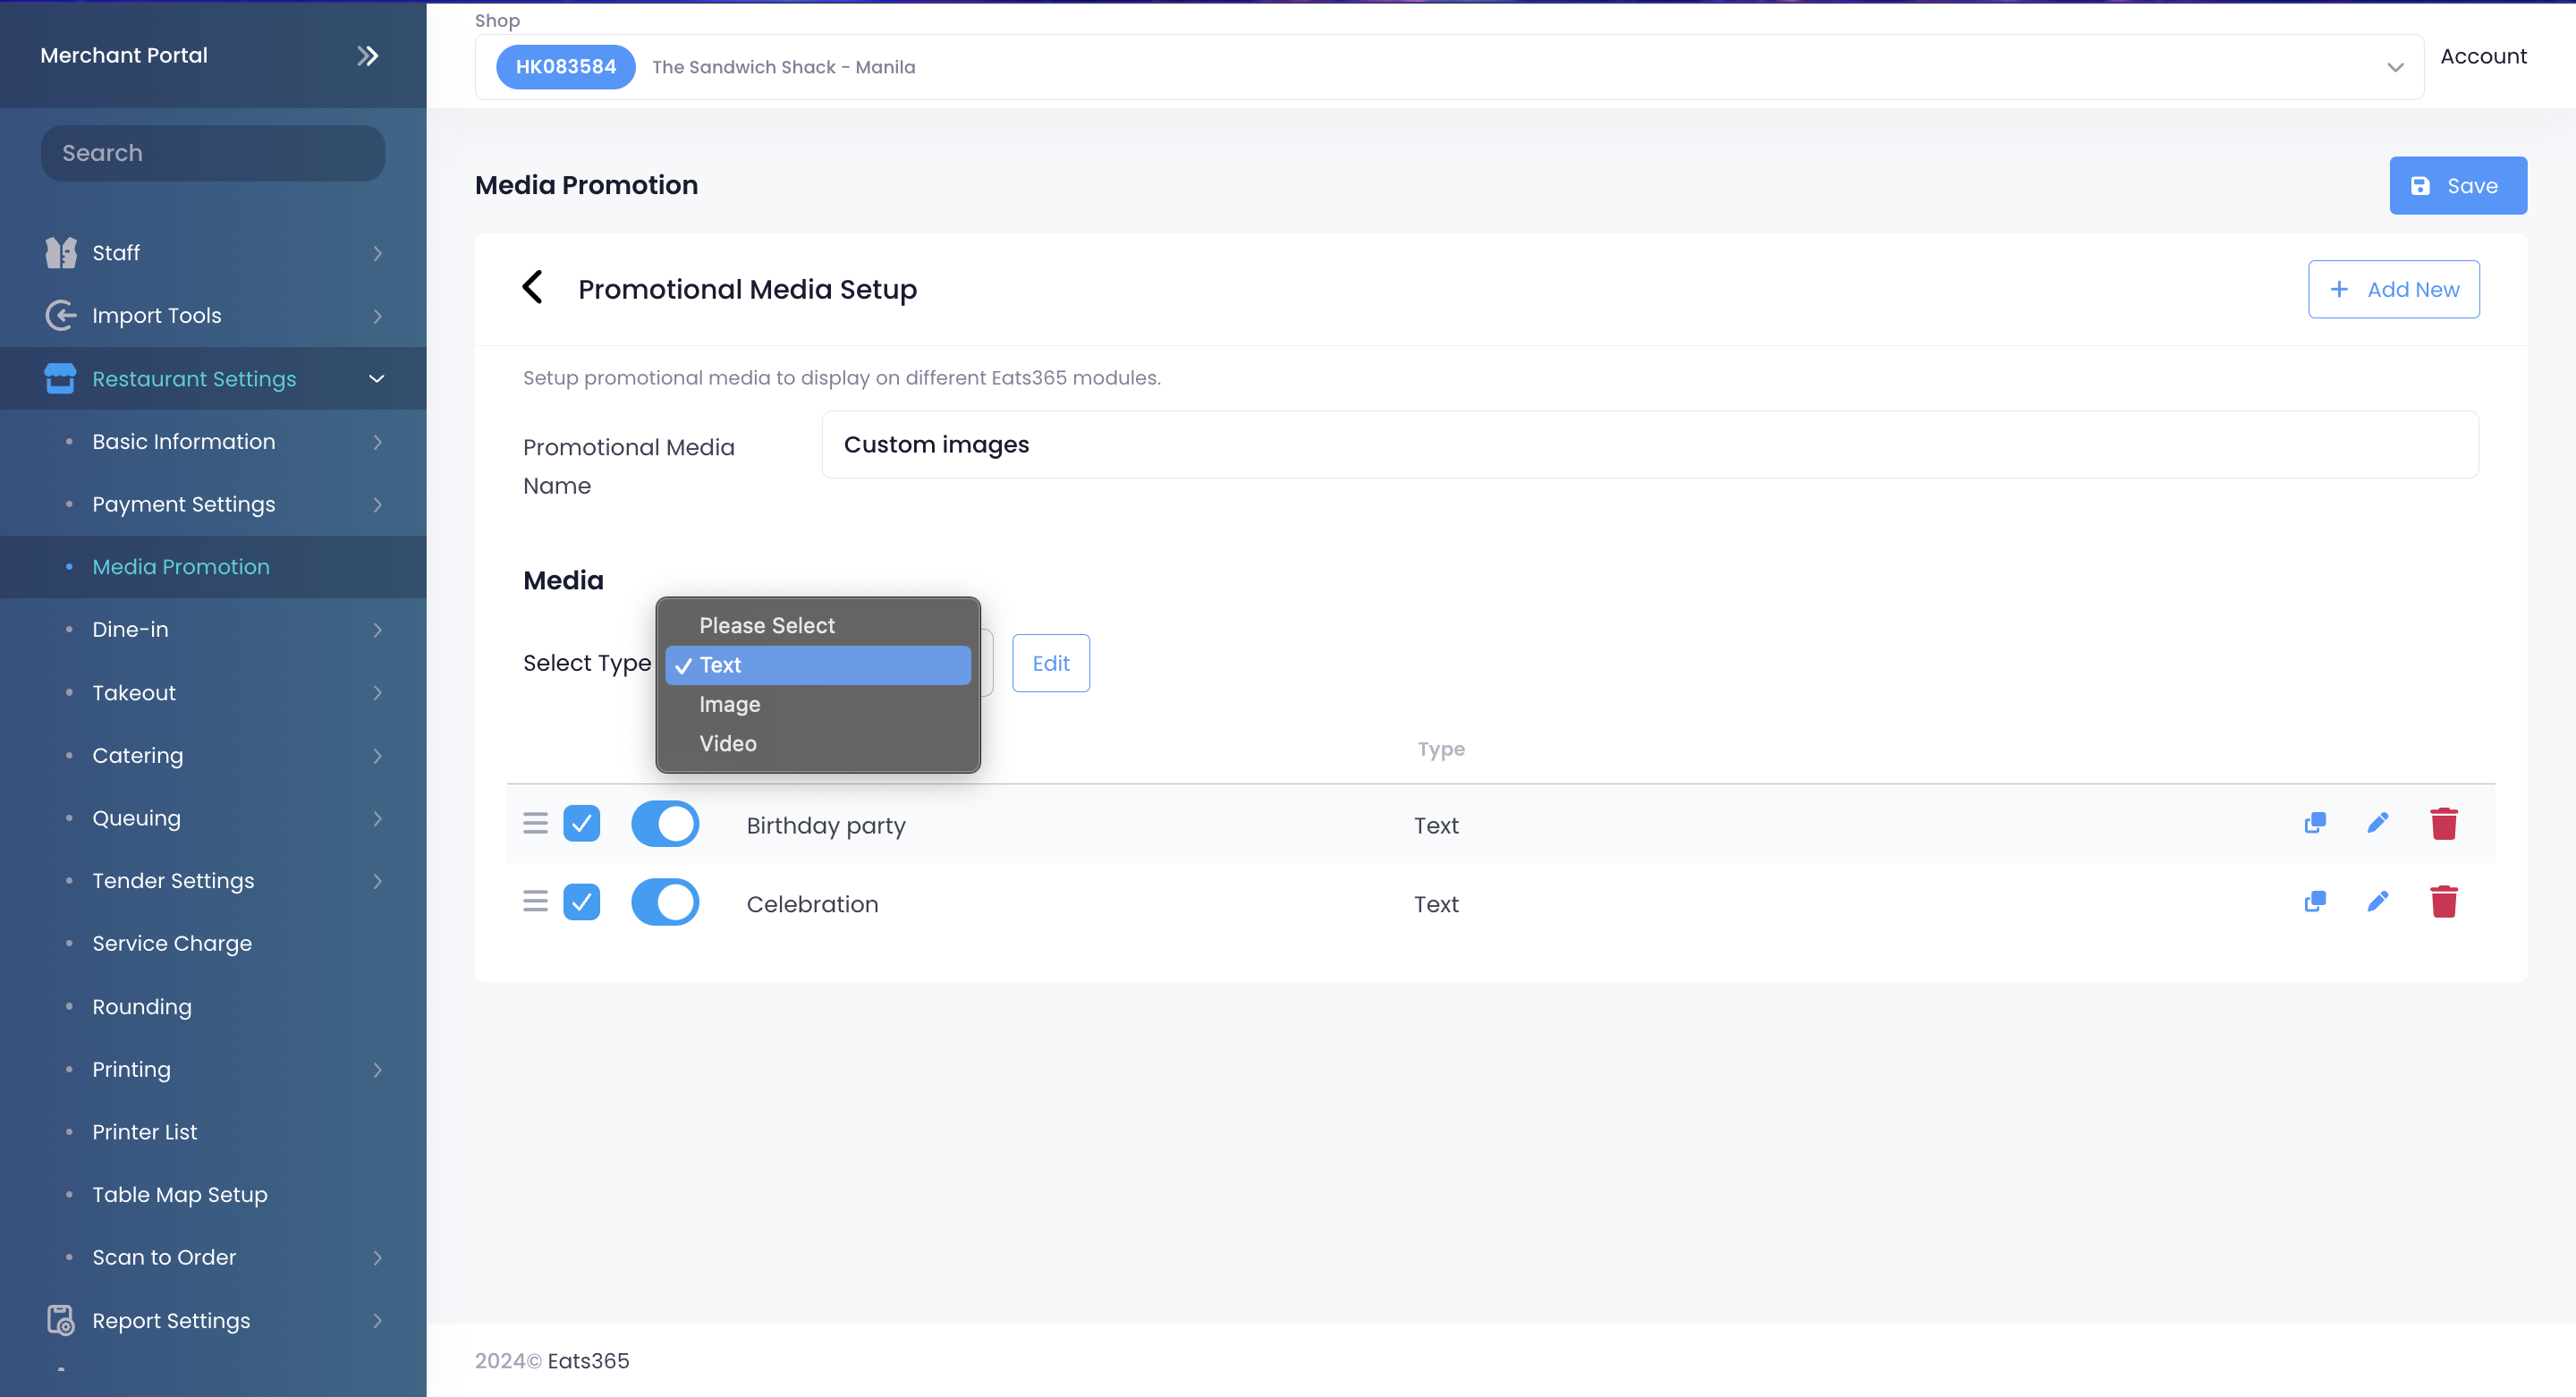
 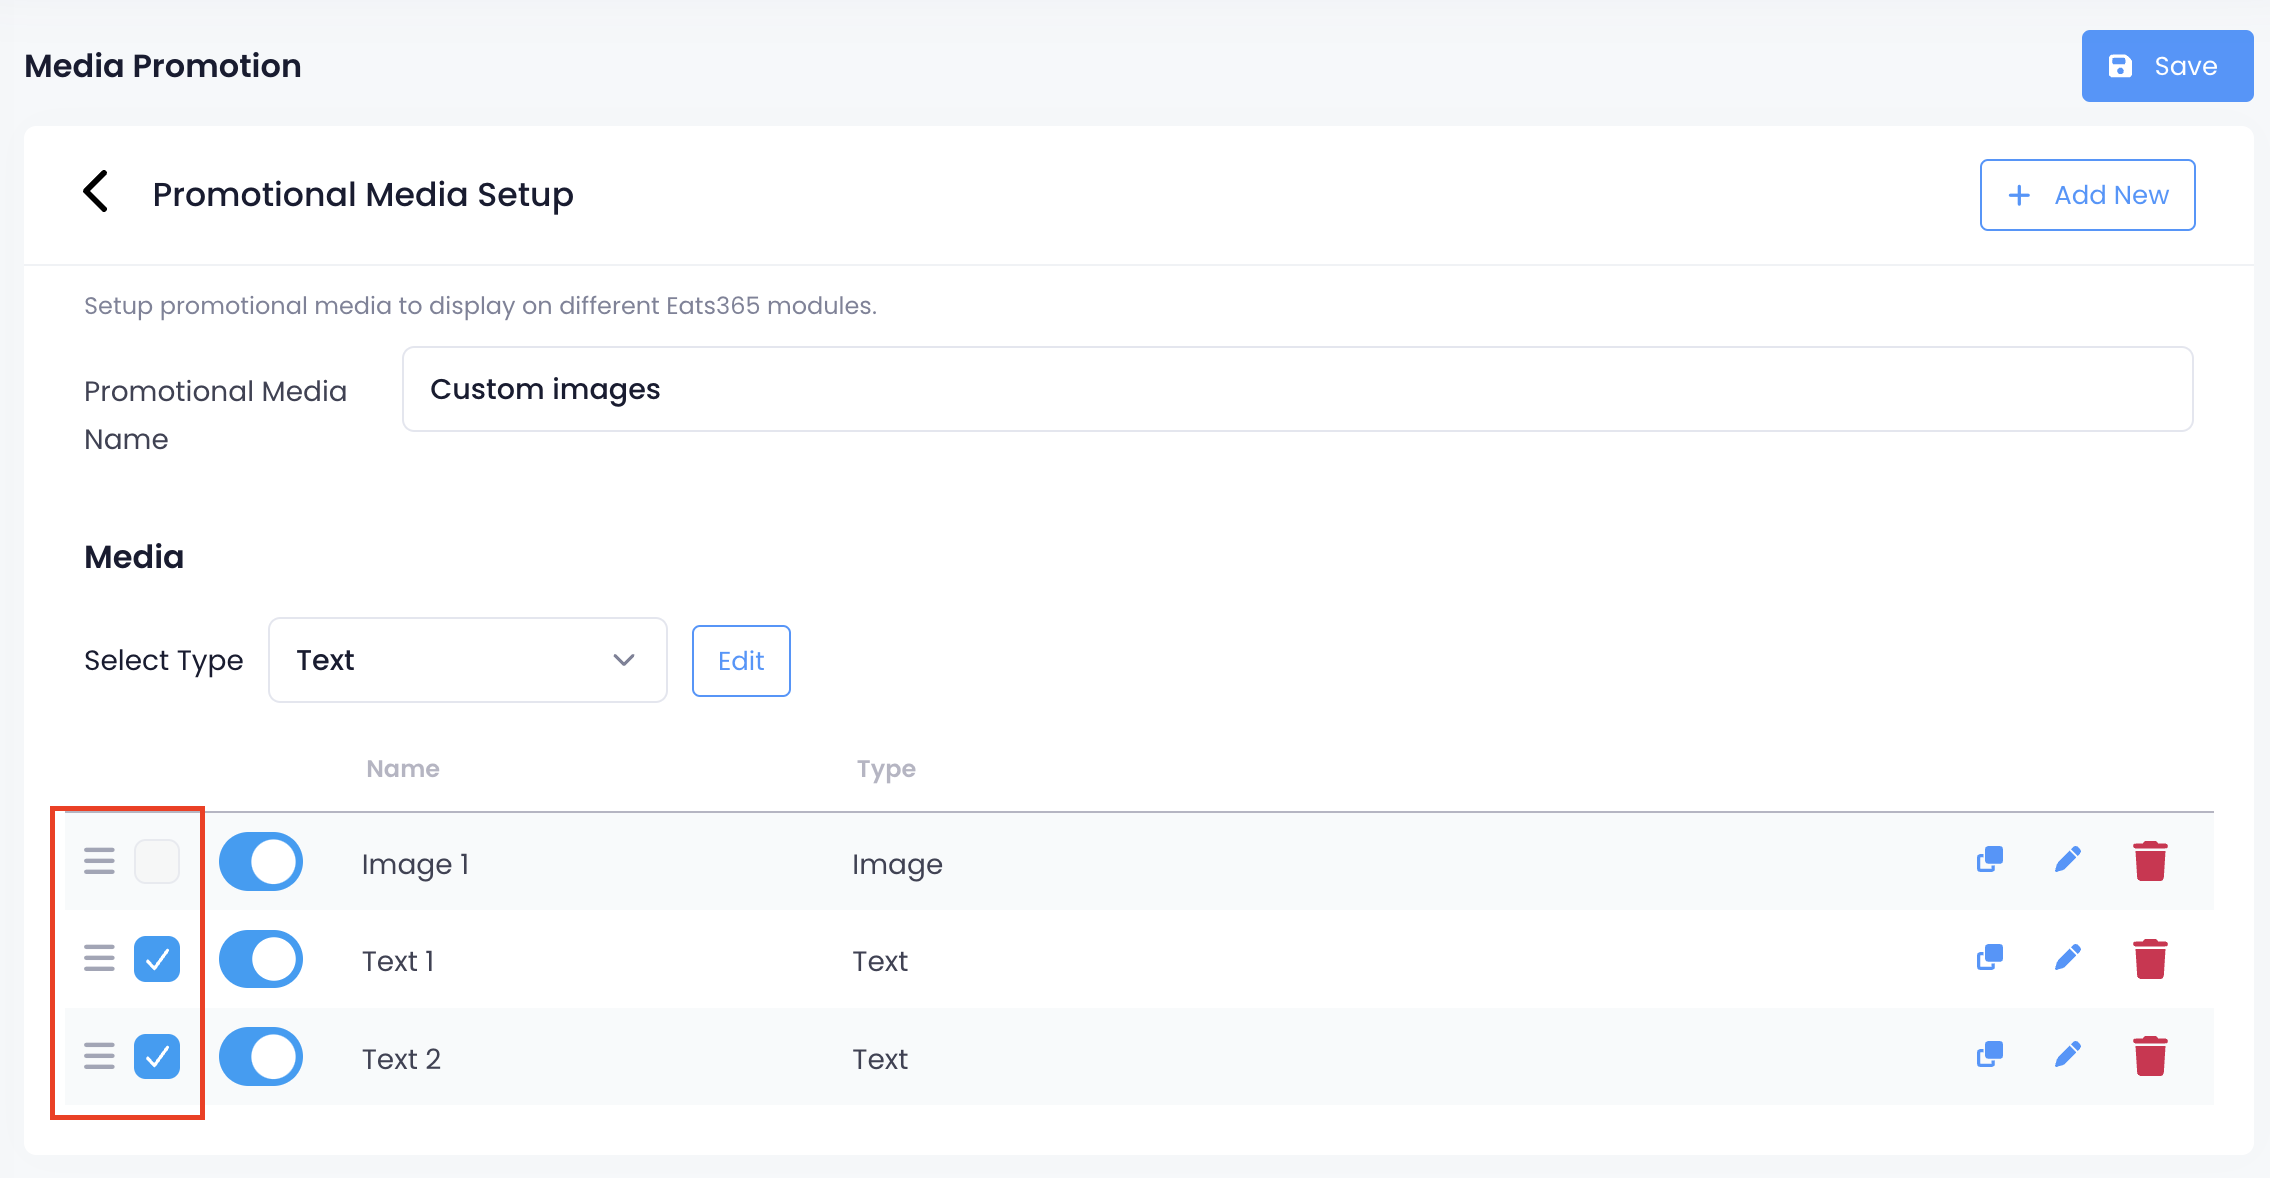 Tip: You can only do bulk edits on the same media type. To select all media under the same media type simultaneously, click on the drop-down list then select a media type.
- Click on Edit.
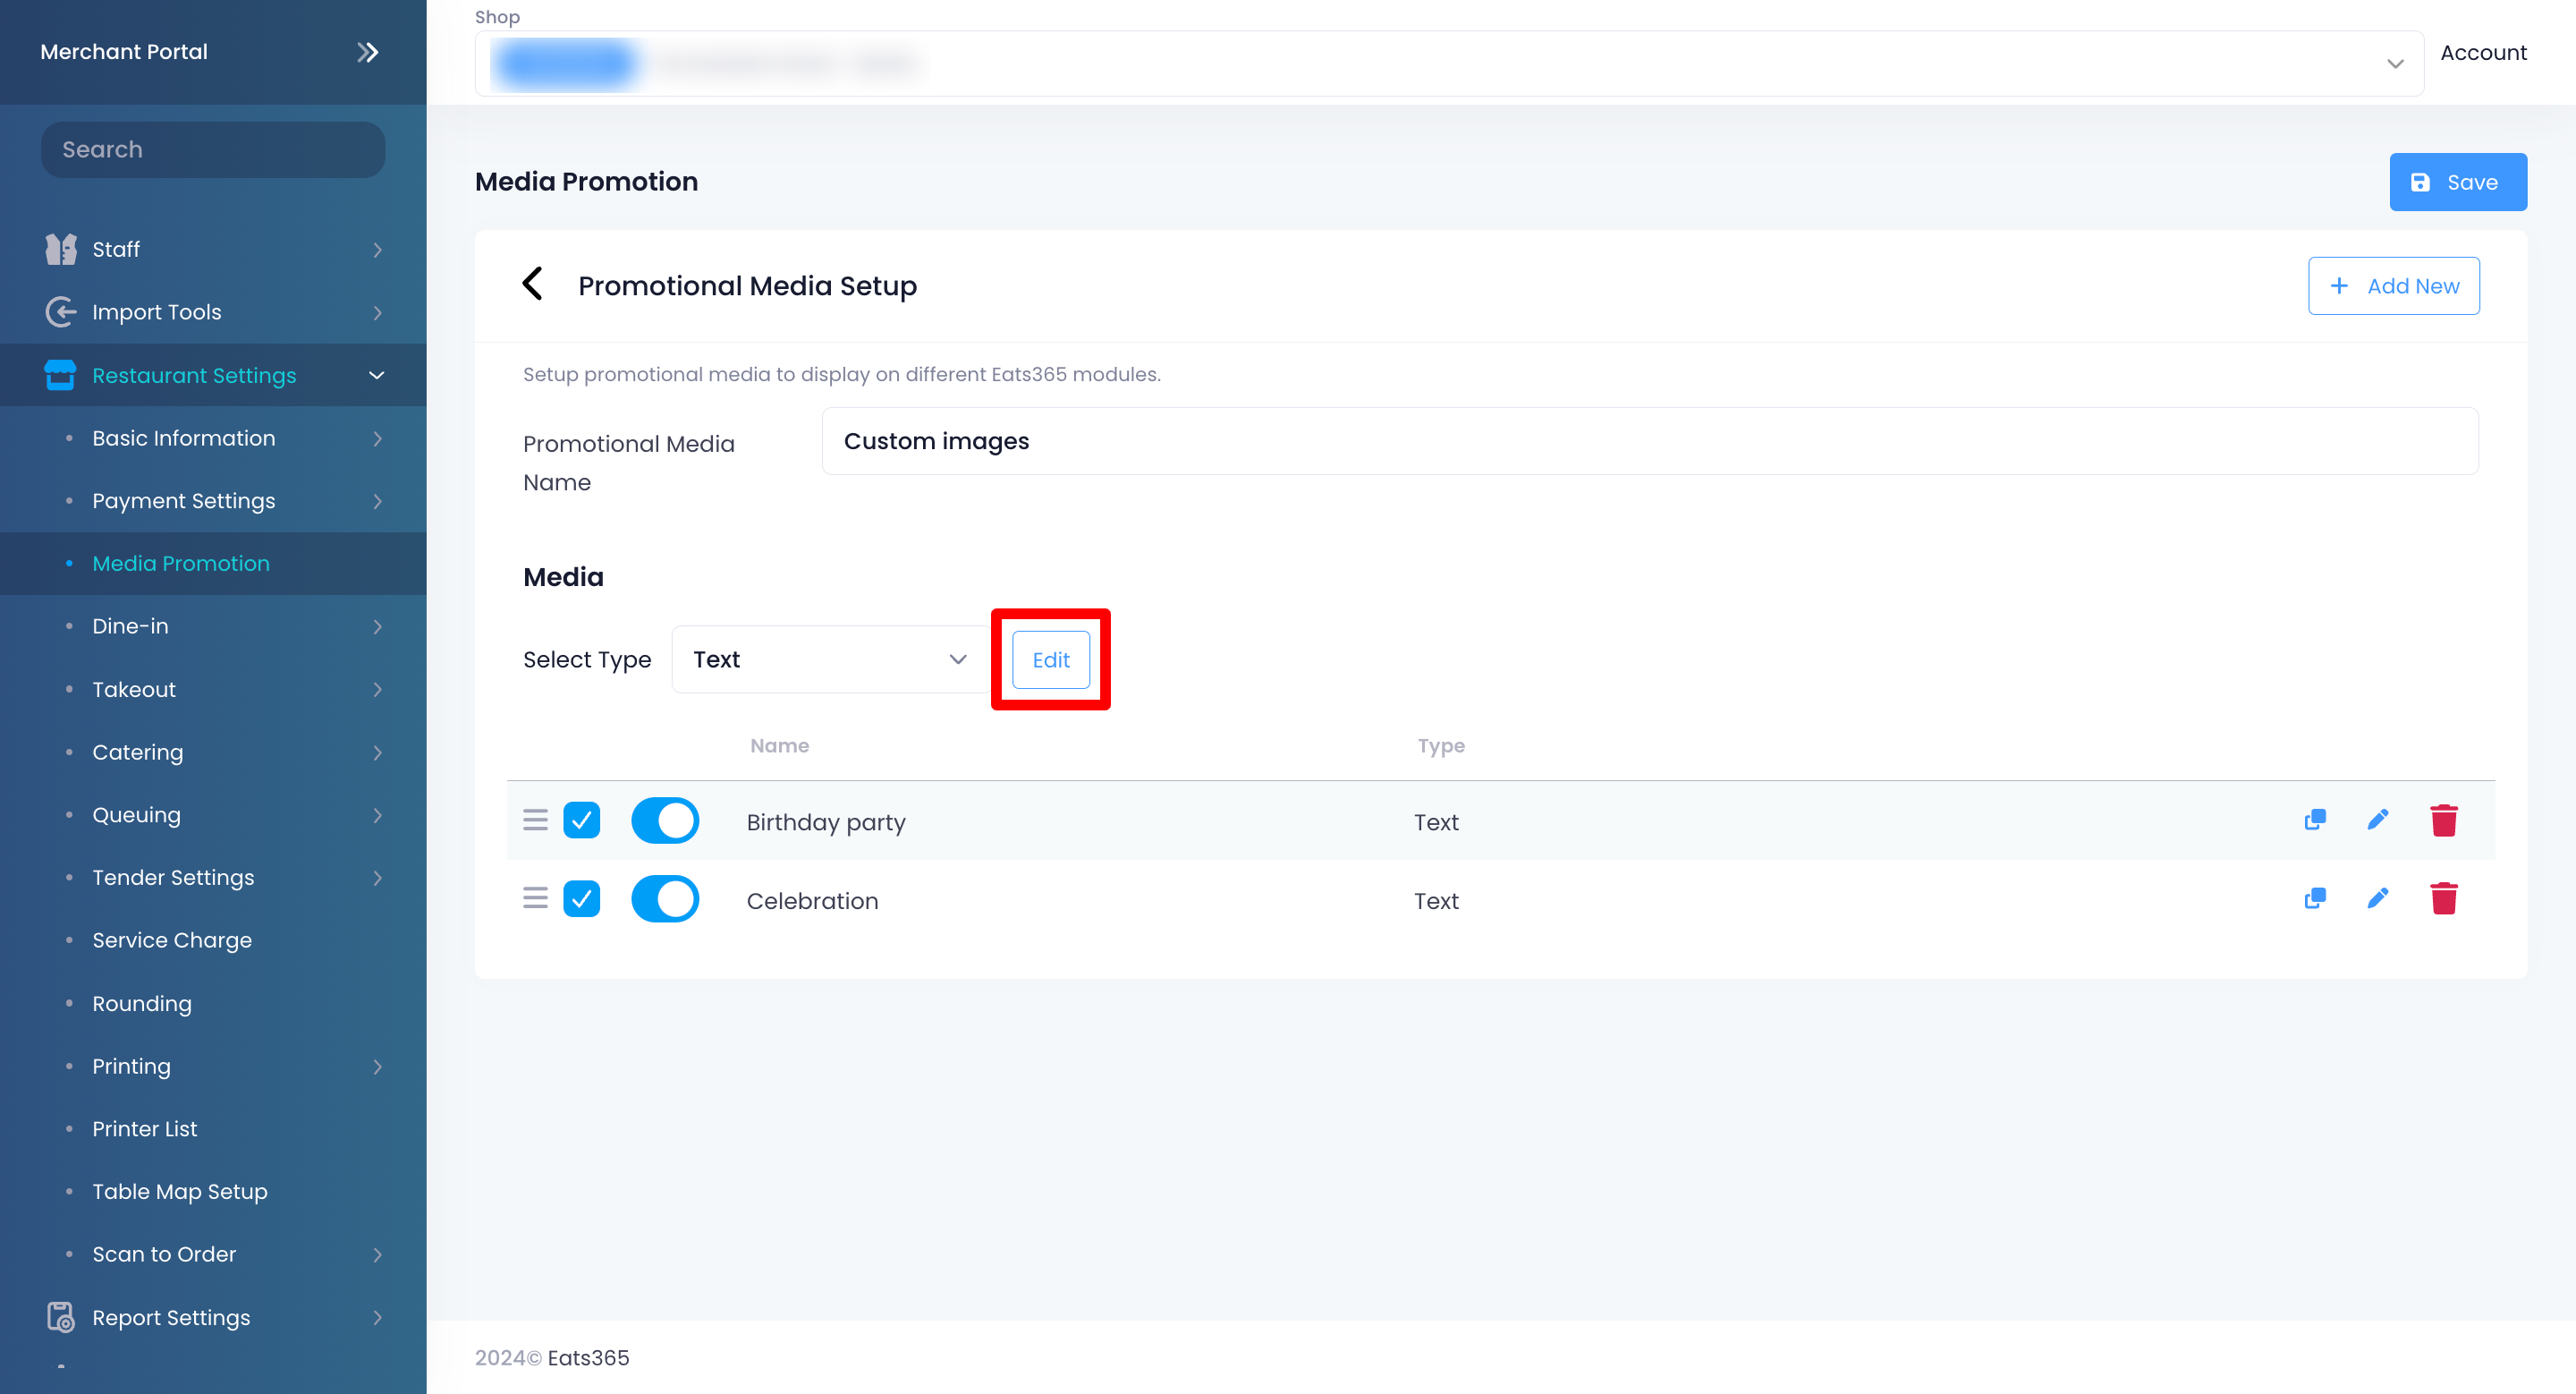
- Update the media's settings. You can perform bulk editing on the following settings:
- Toggle Enable to turn on or off the Media Group function.
- Broadcast Period - Choose the day and time when you want the content to be broadcasted on the Customer Facing Display, PhotoMenu, or eSignage.
- Start Time and End Time - Set the beginning and ending time when the content will be available.
- Display Duration - Update the Display Duration (in minutes).
- Click on Save to confirm.
Delete Media Group
To delete a Media Group, follow the steps below:
Merchant Portal (Classic Theme)
- Log in to the Merchant Portal.
- On the left panel, click on Restaurant Settings. Then, select Media Group.
- Select the Media Group that you want to delete.
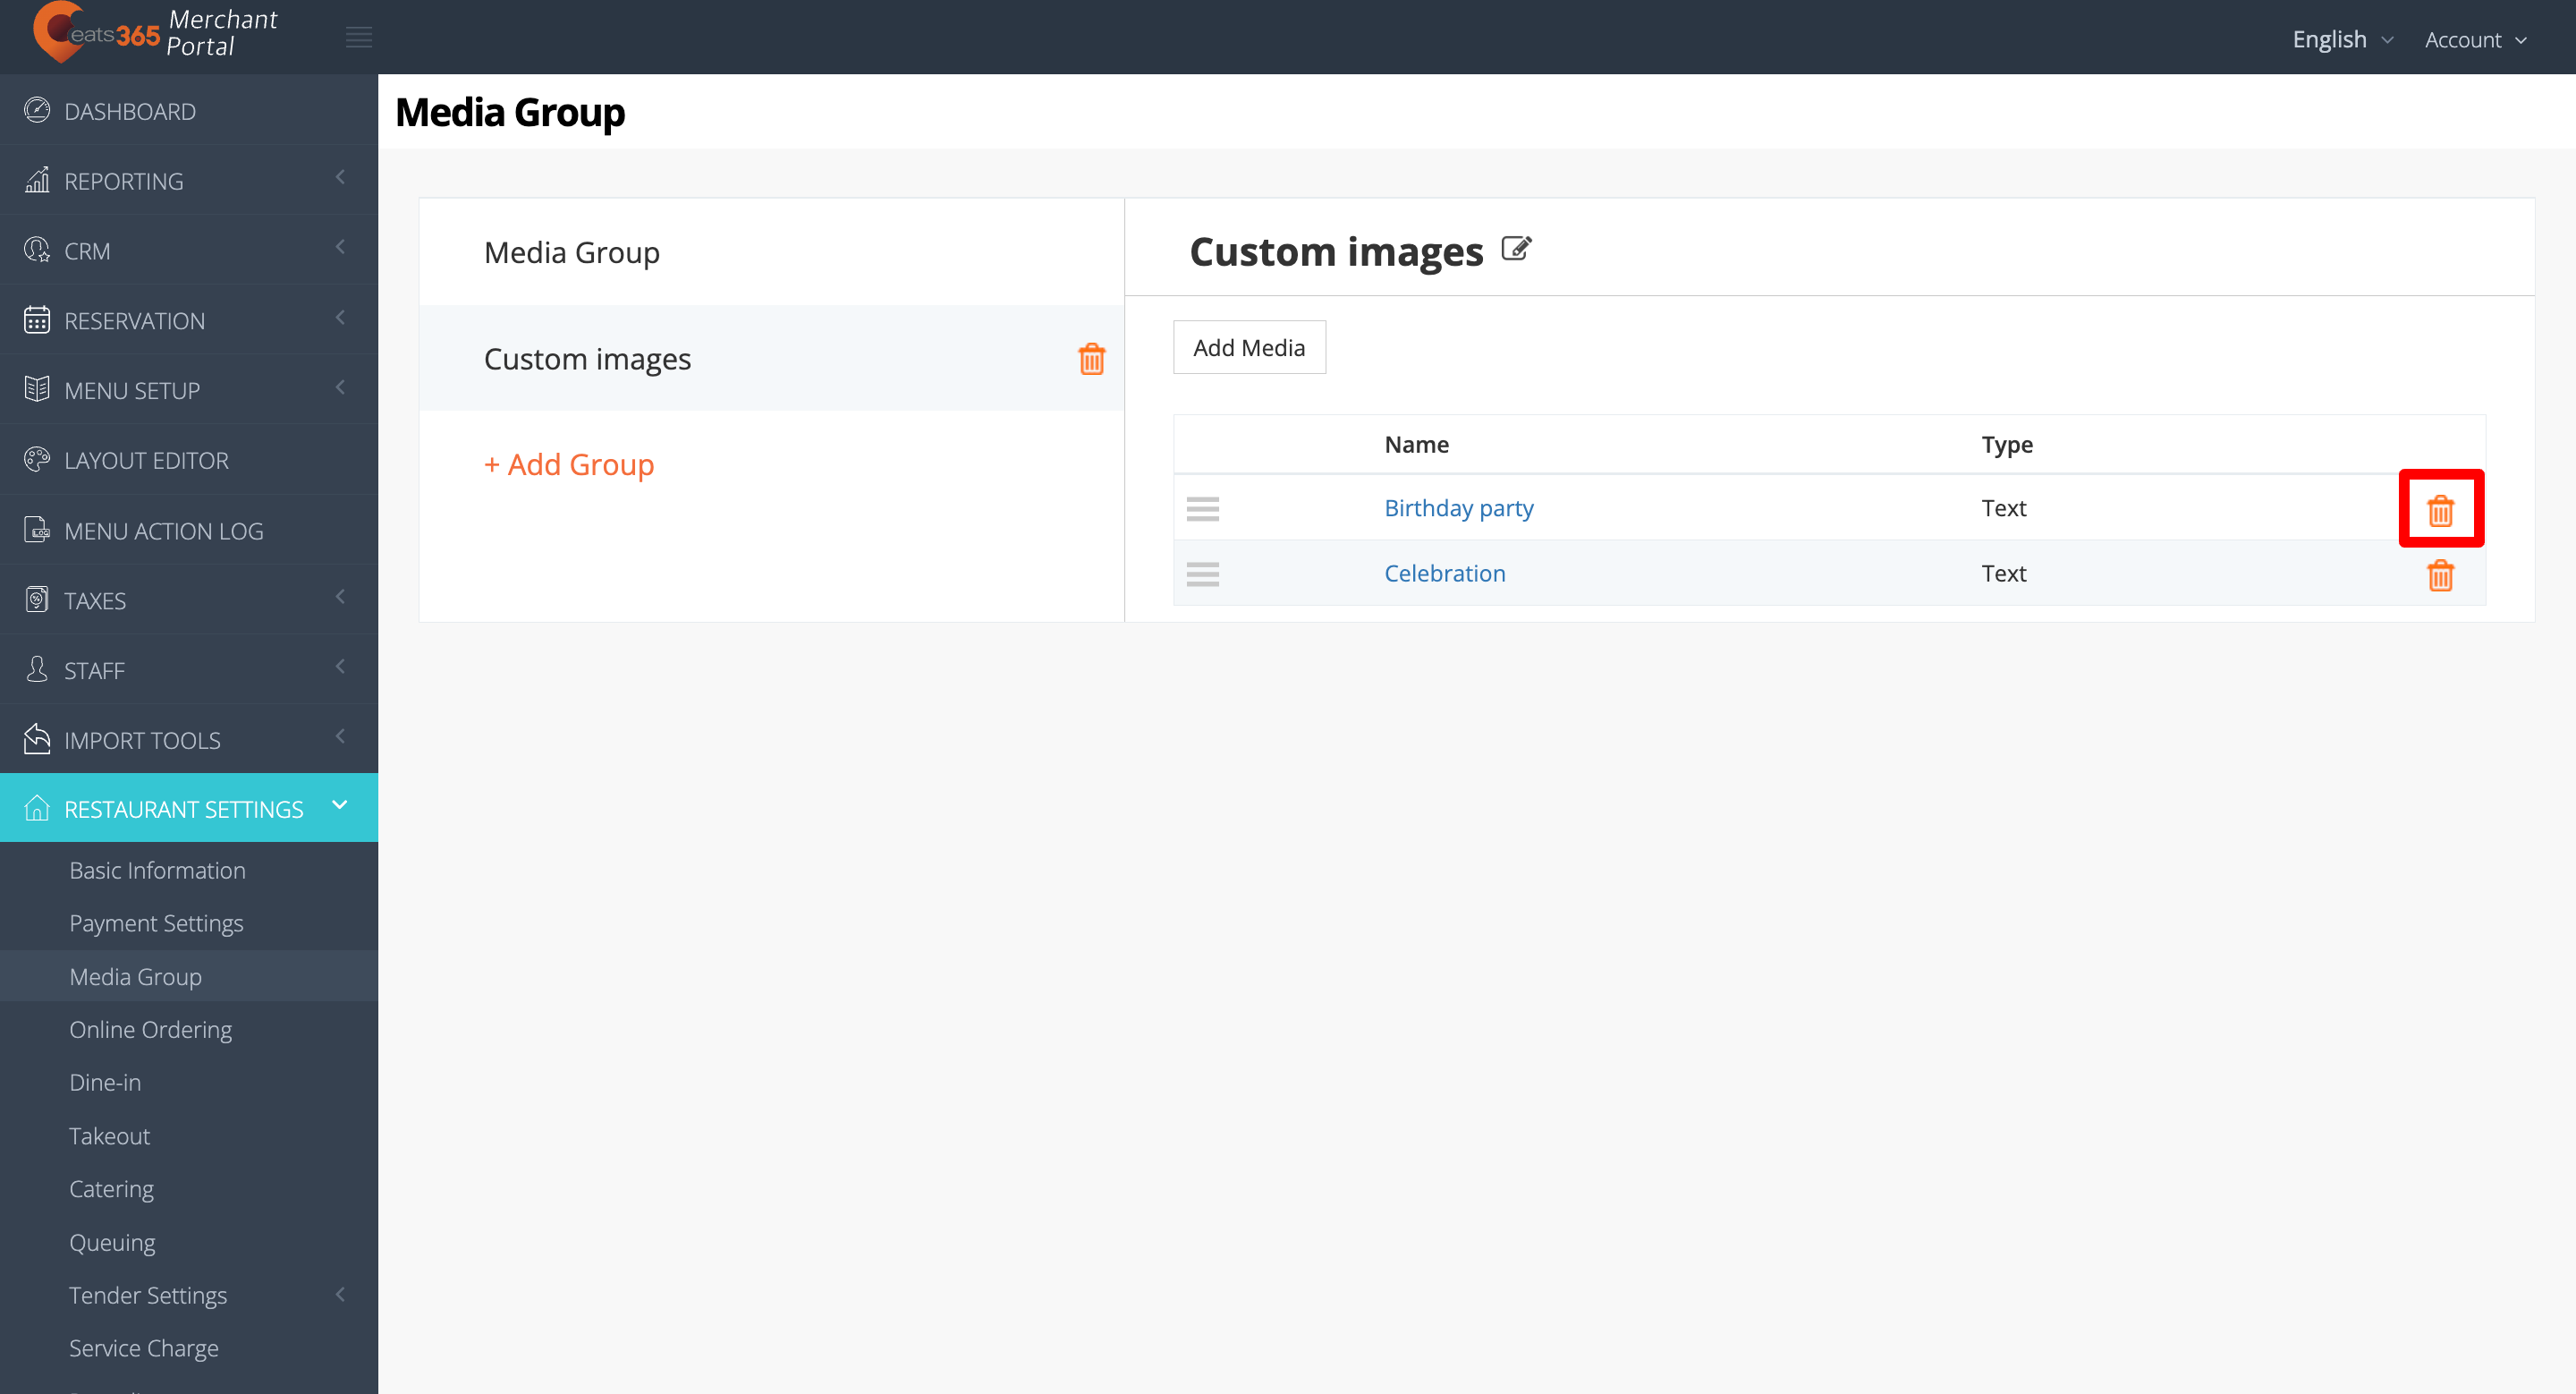
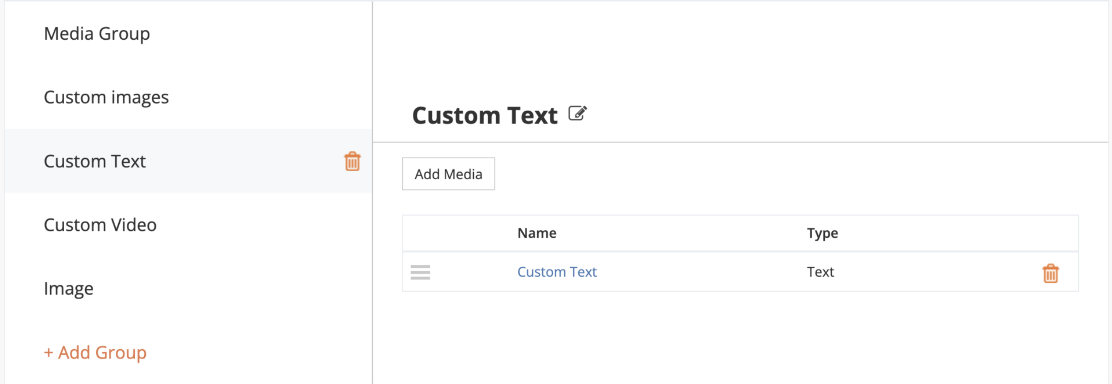
- If the Media Group isn't empty, delete all media first. To delete, next to the existing media, click on Delete
 .
.
- Next to the Media Group name, click on Delete
 .
.
Merchant Portal 2.0
- Log in to the Merchant Portal.
- On the left panel, click on Restaurant Settings. Then, select Media Promotion.
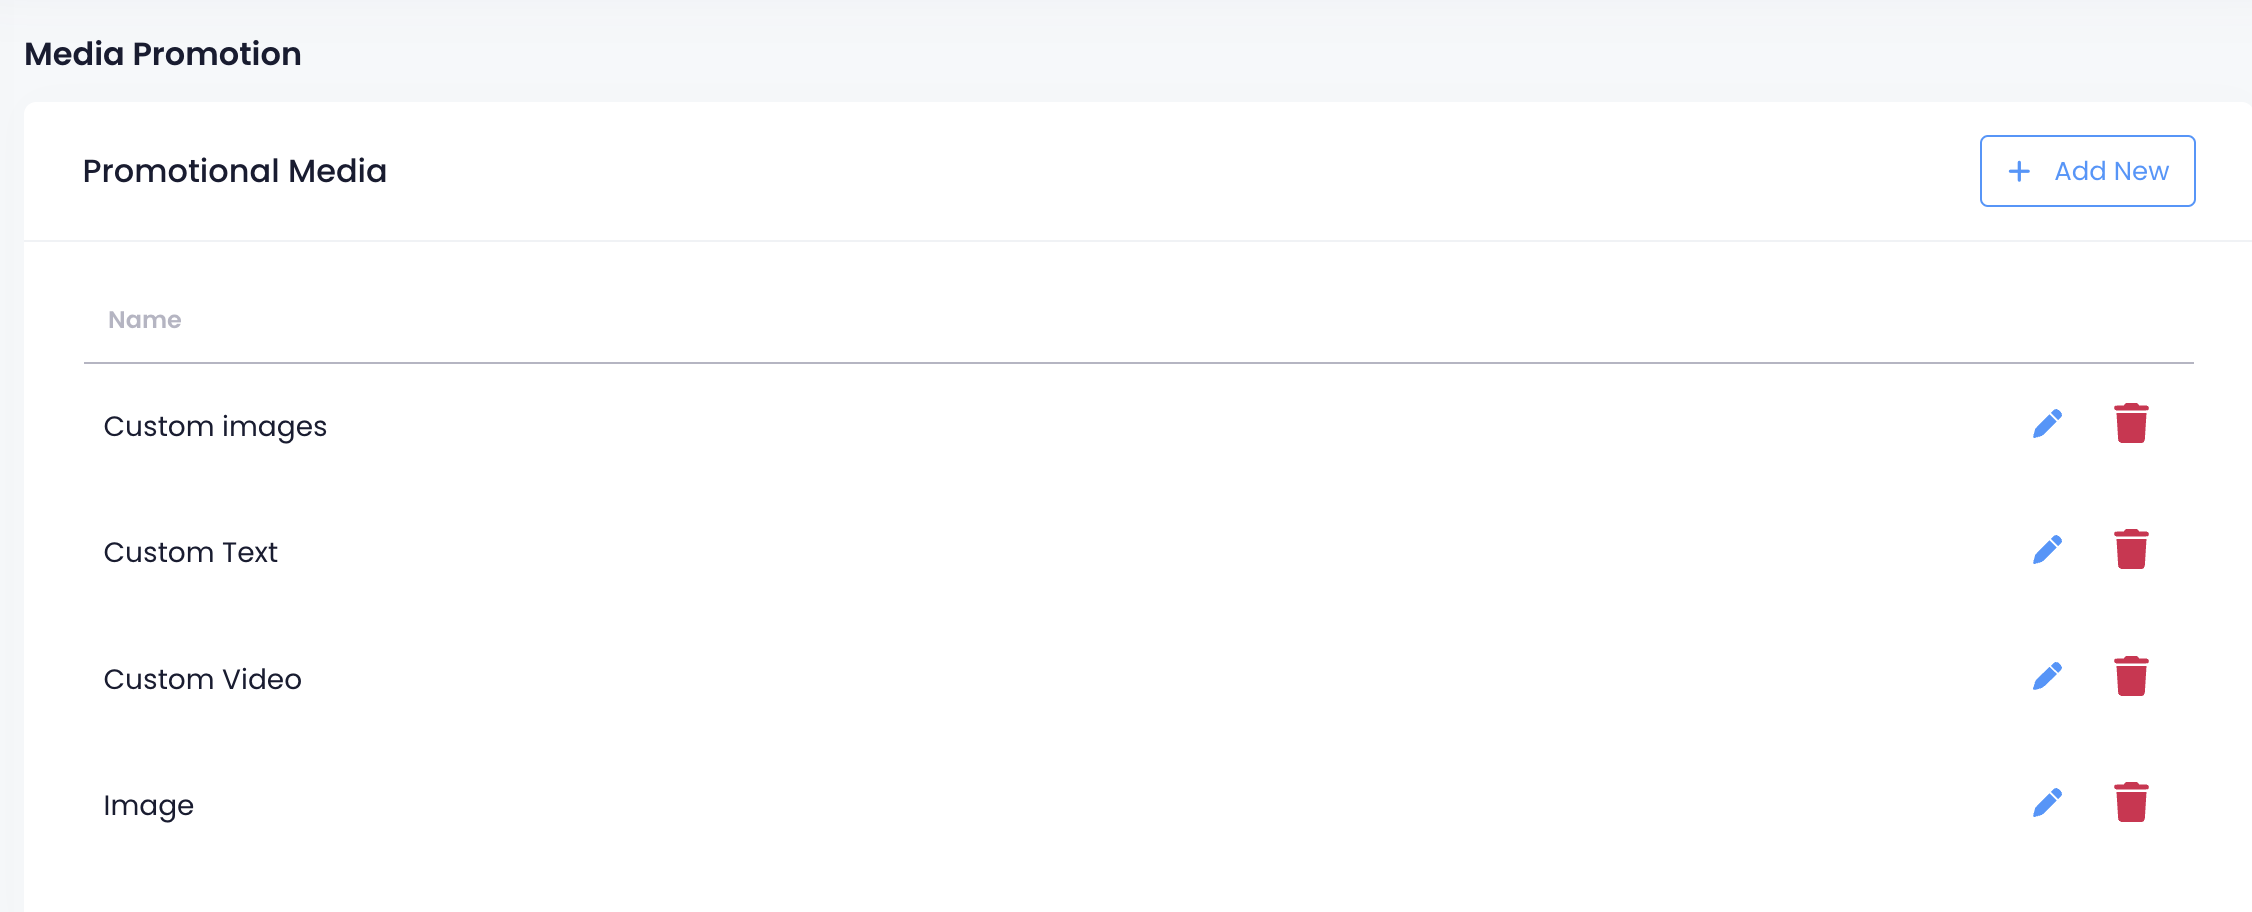
- Select the Media Group that you want to delete. Next to the Media Group name, click on Delete
 .
.
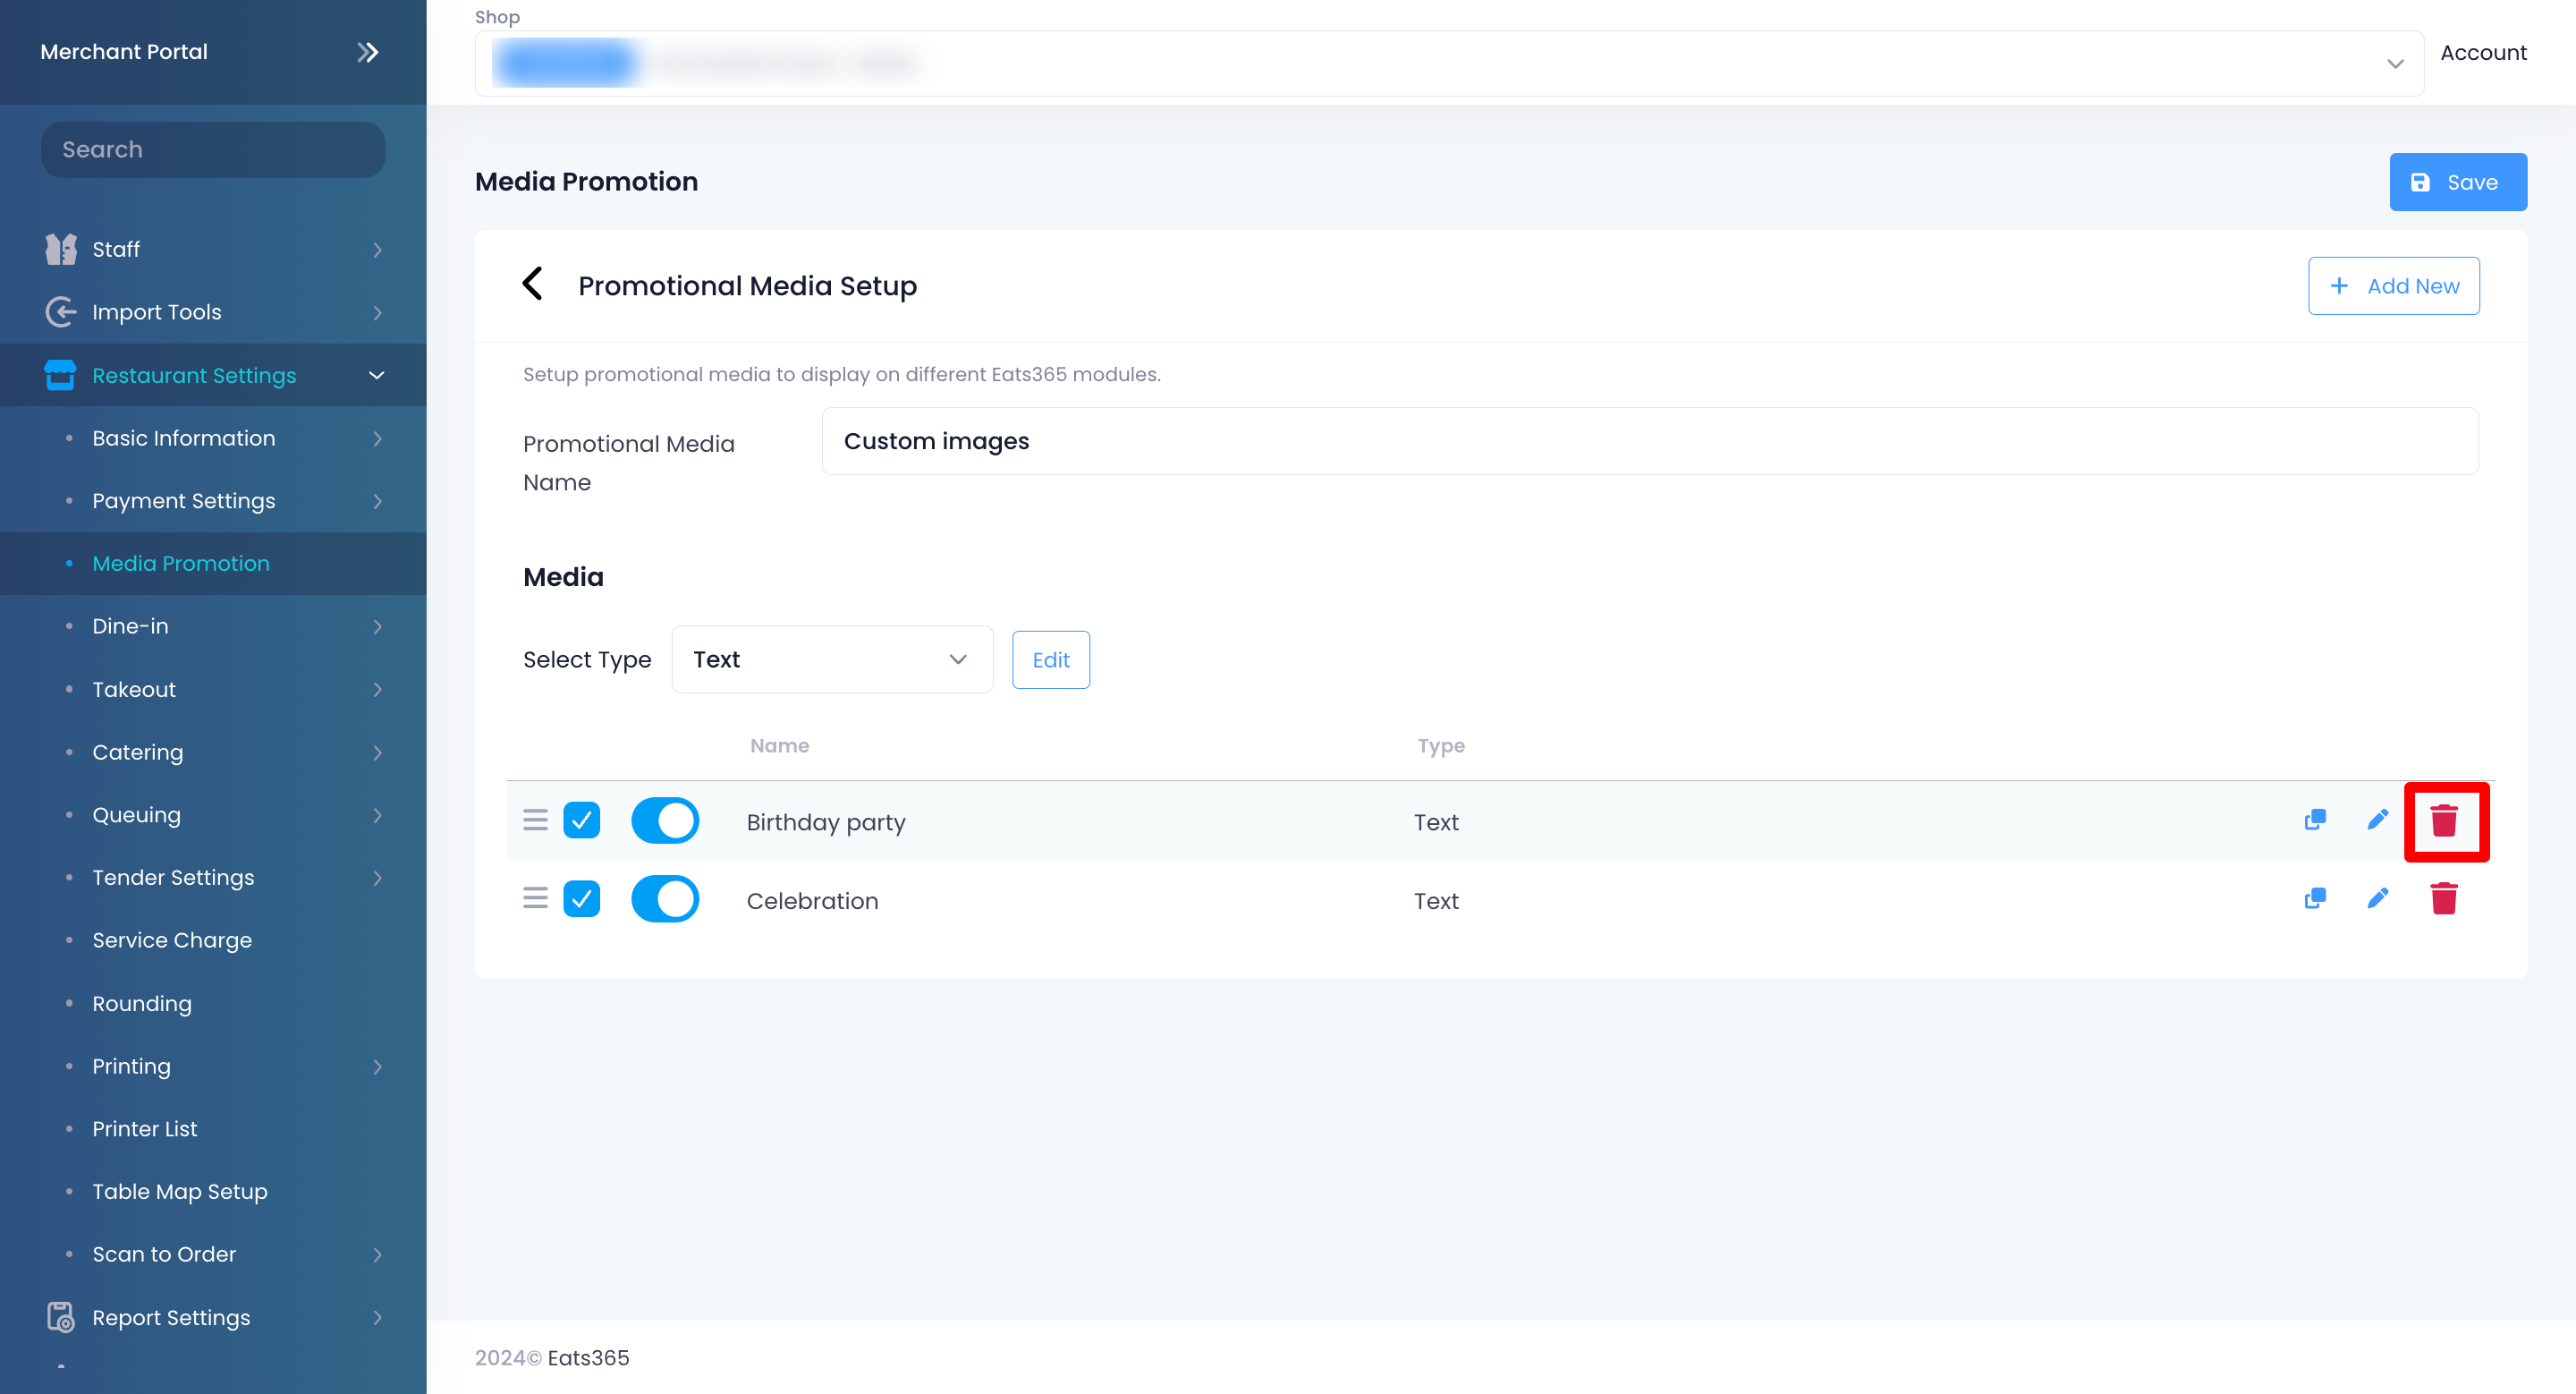
- If the Media Group isn’t empty, delete all media first. To delete, click on Edit
 . Under Media, select the media that you want to remove then click on Delete
 .
. .
.
Reorder media in a Media Group
Videos, images, and text that belong to a Media Group can be arranged to appear in the sequence of your choice.
To reorder media in a Media Group, follow the steps below:
Merchant Portal (Classic Theme)
- Log in to the Merchant Portal.
- On the left panel, click on Restaurant Settings. Then, select Media Group.
- Select the Media Group with the media that you want to reorder.
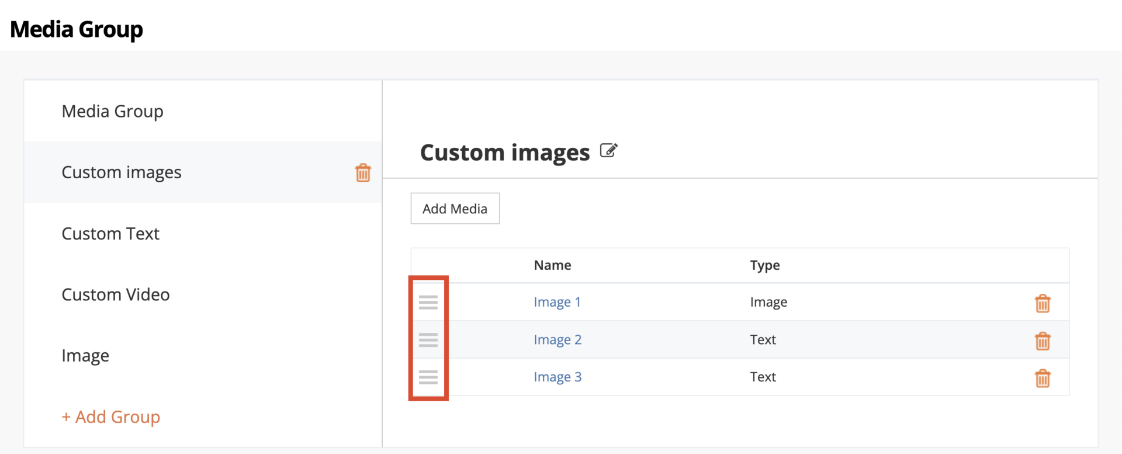
- Select the media that you want to reorder. Then, click and hold on Reorder
 . Drag the media in the order in which you want it to appear.
Merchant Portal 2.0
- Log in to the Merchant Portal.
- On the left panel, click on Restaurant Settings. Then, select Media Promotion.
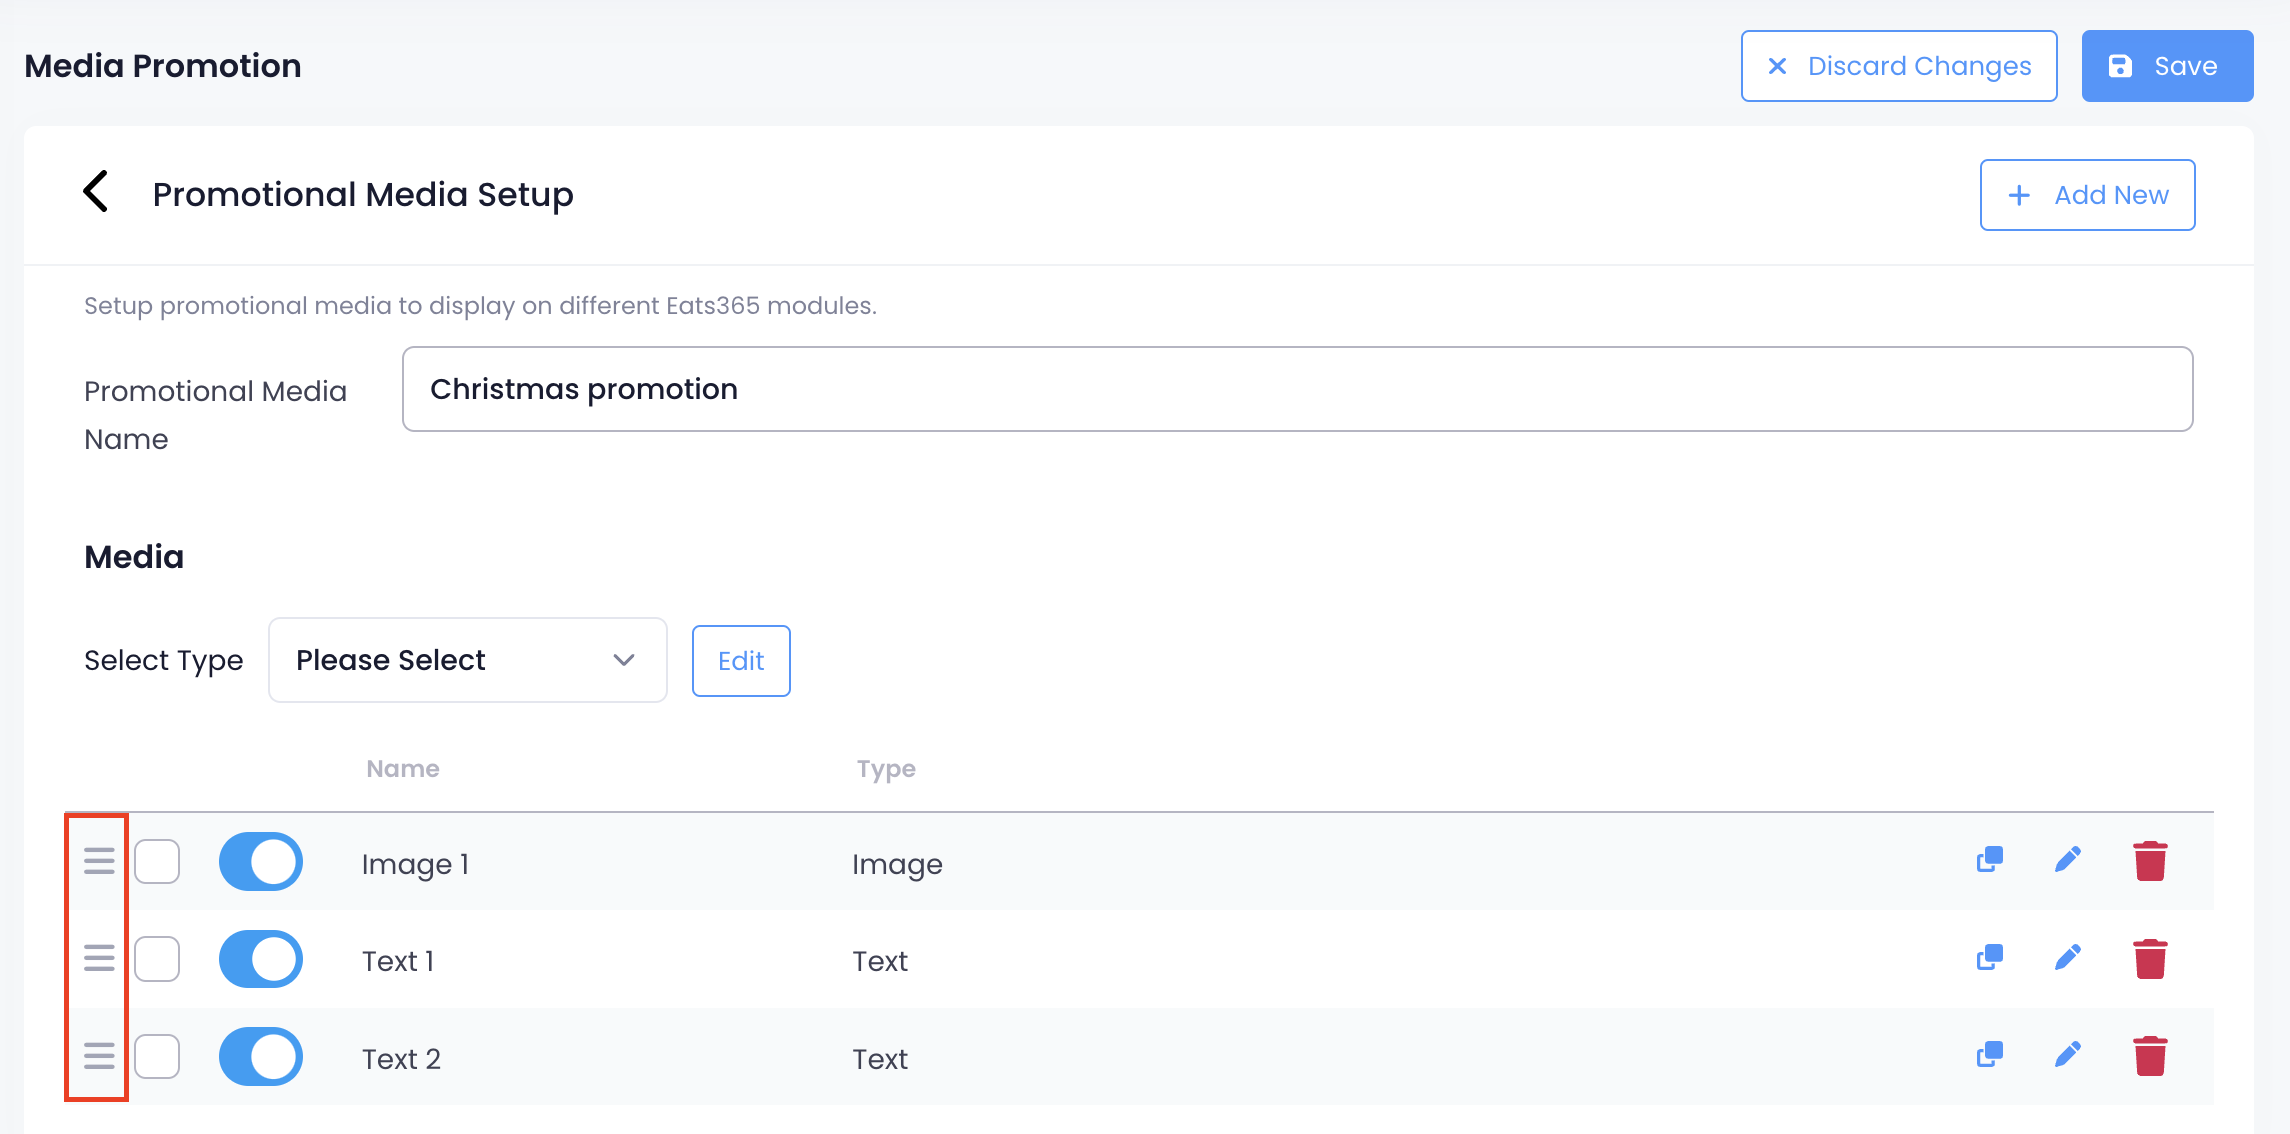
- Select the Media Group with the media that you want to reorder. Then, click on Edit
 .
. - Next to the media that you want to reorder, click and hold on Reorder
 . Drag the media in the order in which you want it to appear.
 Eats365 Products
 Merchant Guide
 Modules
 Membership
 Integrations
 Hardware
 Staff Operations
 Roles & Permissions
 Payments
 Reports
 What’s New
 Release Notes
 Troubleshooting
 Simulators
 Glossary
 Troubleshooter
 System Status