Import Tools
Table of Contents
How to use Import Tools
Learn how to use Import Tools on the Merchant Portal to perform bulk operations in your restaurant.
To save time when setting up your restaurant, you can use Import Tools to import restaurant information, such as Single Items, Product Names, and more, in bulk.
In this article, you’ll learn how to perform bulk imports.
Bulk Import for a Single Item
To perform a bulk import for a Single Item, follow the steps below:
Merchant Portal (Classic Theme)
- Log in to the Merchant Portal.
- On the left panel, click on Import Tools, then click on Bulk Import for Single Item.
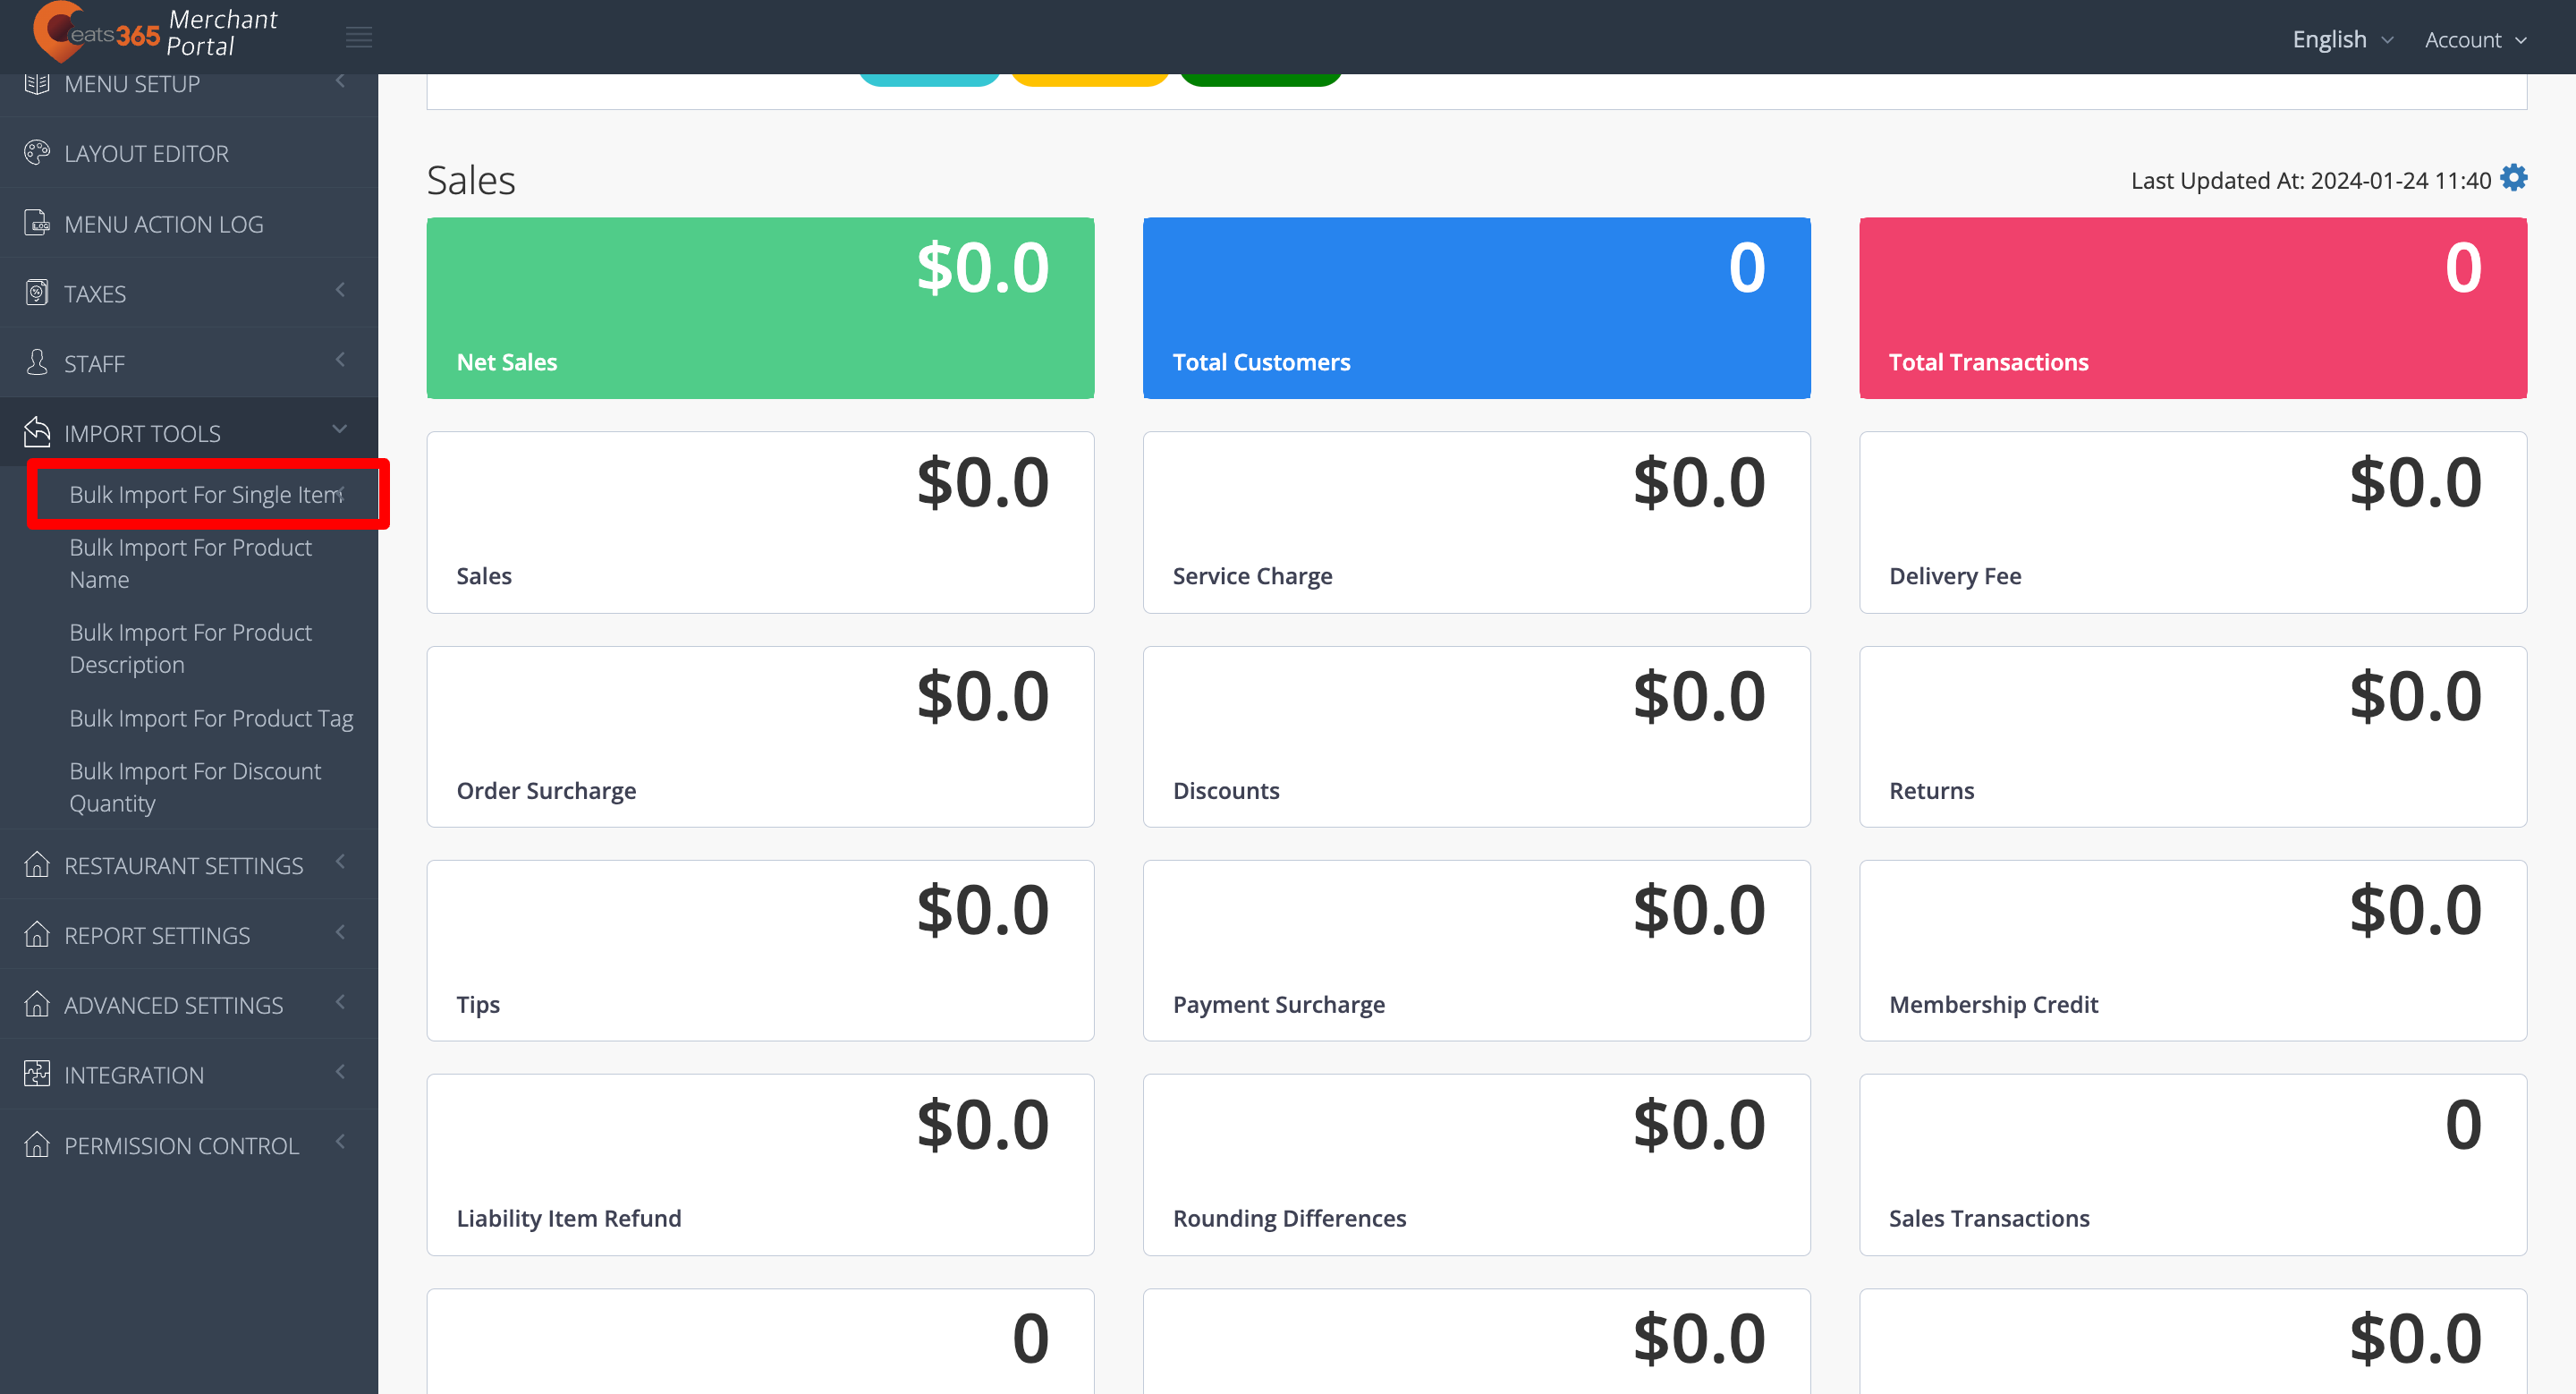
- Select where you want to import the Single Item. You can choose from Dine & Takeout or Catering.

- At the top right, click on Add new task.
- Choose from the following operations:
- Add to Menu
- Edit Menu
- Delete from Menu
- After choosing an operation, click on download template.
- To modify the template, enter the data in all of the relevant fields in the Excel file.
- Add to Menu
- Sheets titled Category, KitchenStation, and ItemType are only used for reference and don’t need to be modified.
- The Optional Modifiers used in the SingleItem sheet should be selected from the ModifierGroup sheet.
- At least one modifier value must be provided in ModifierValue for every modifier group defined in ModifierGroup.
- Edit Menu
- Ensure that itemIDs and itemNames match to avoid errors.
- Modifications made in the KitchenStation and ItemType sheets are only for reference, and any changes don’t update the database.
- To enter values for Kitchen Station and Item Type, choose from the list of options inside the cell and don’t enter a value that isn’t in the list.
- To save time, remove the rows that don’t need to be edited.
- Delete from Menu
- The downloaded template contains all of the information for all menu items.
- To delete items in bulk, upload the template containing the records for the menu items you’d like to remove.
Note: A menu item can still be removed even if some fields are missing, as long as the ItemID remains.
- Add to Menu
- (Optional) Enable API User Permission(s).
- To upload your modified template file, click on Choose File. Then, select your modified file.
- At the top right, click on Submit to confirm.
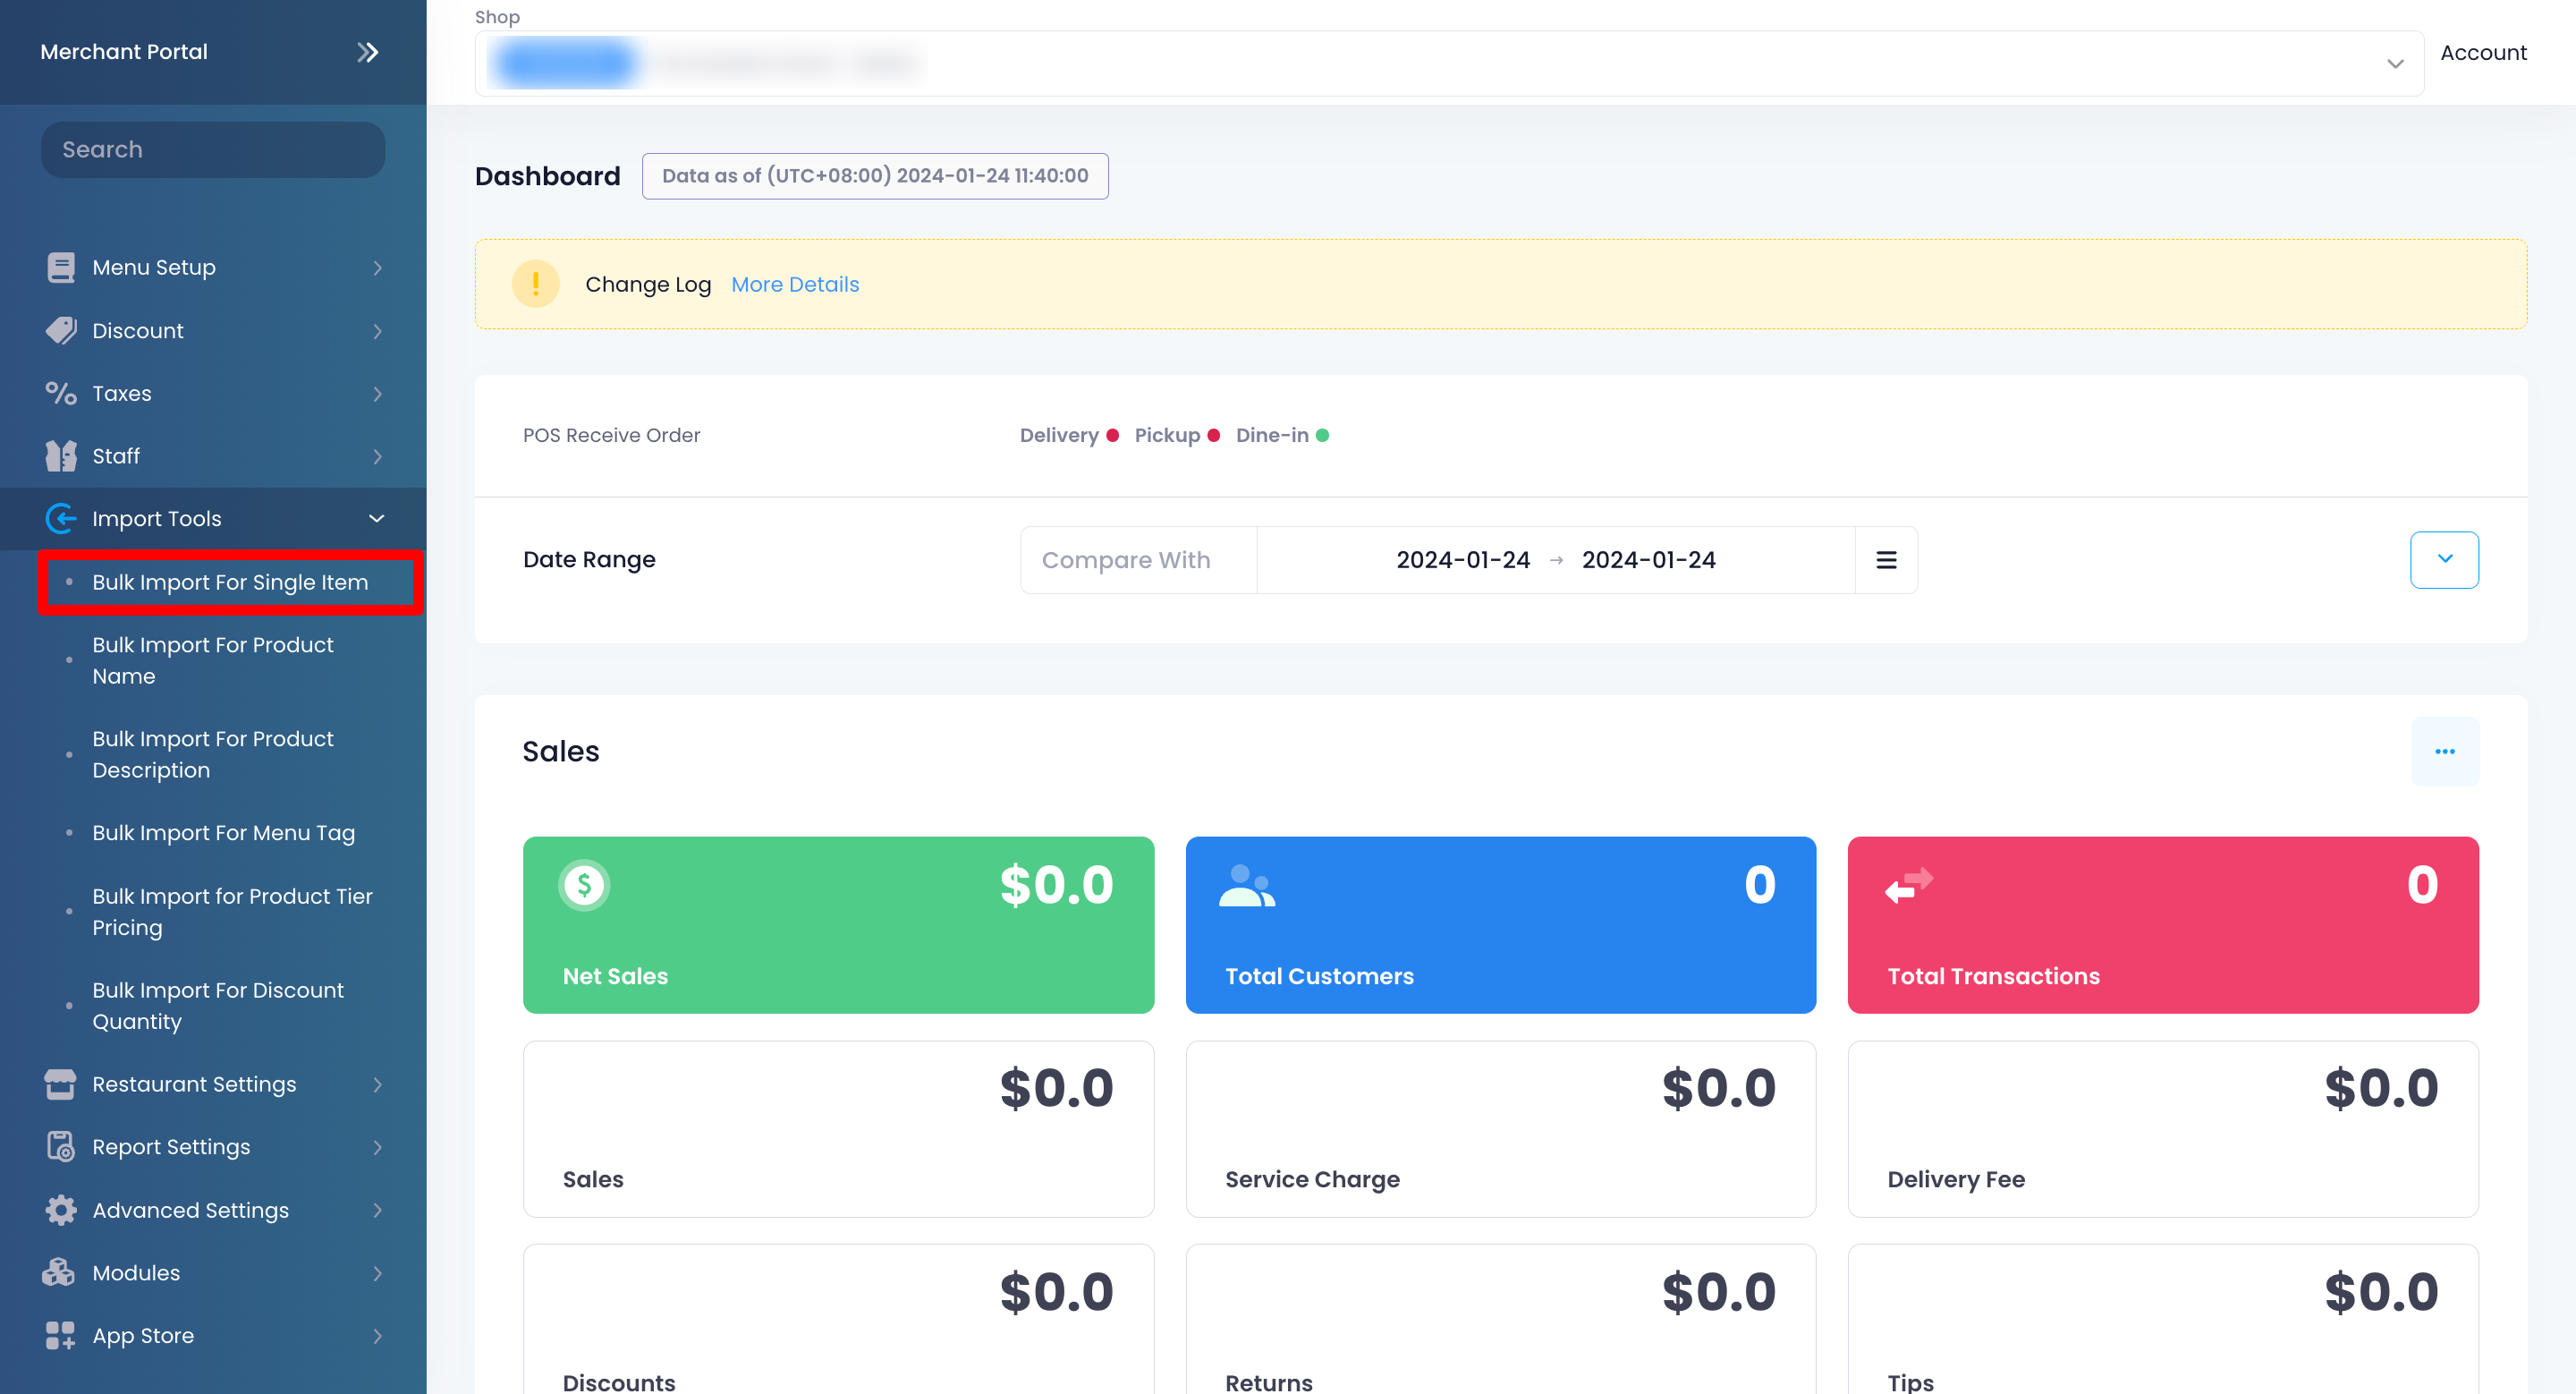
Merchant Portal 2.0
- Log in to the Merchant Portal.
- On the left panel, click on Import Tools, then click on Bulk Import for Single Item.
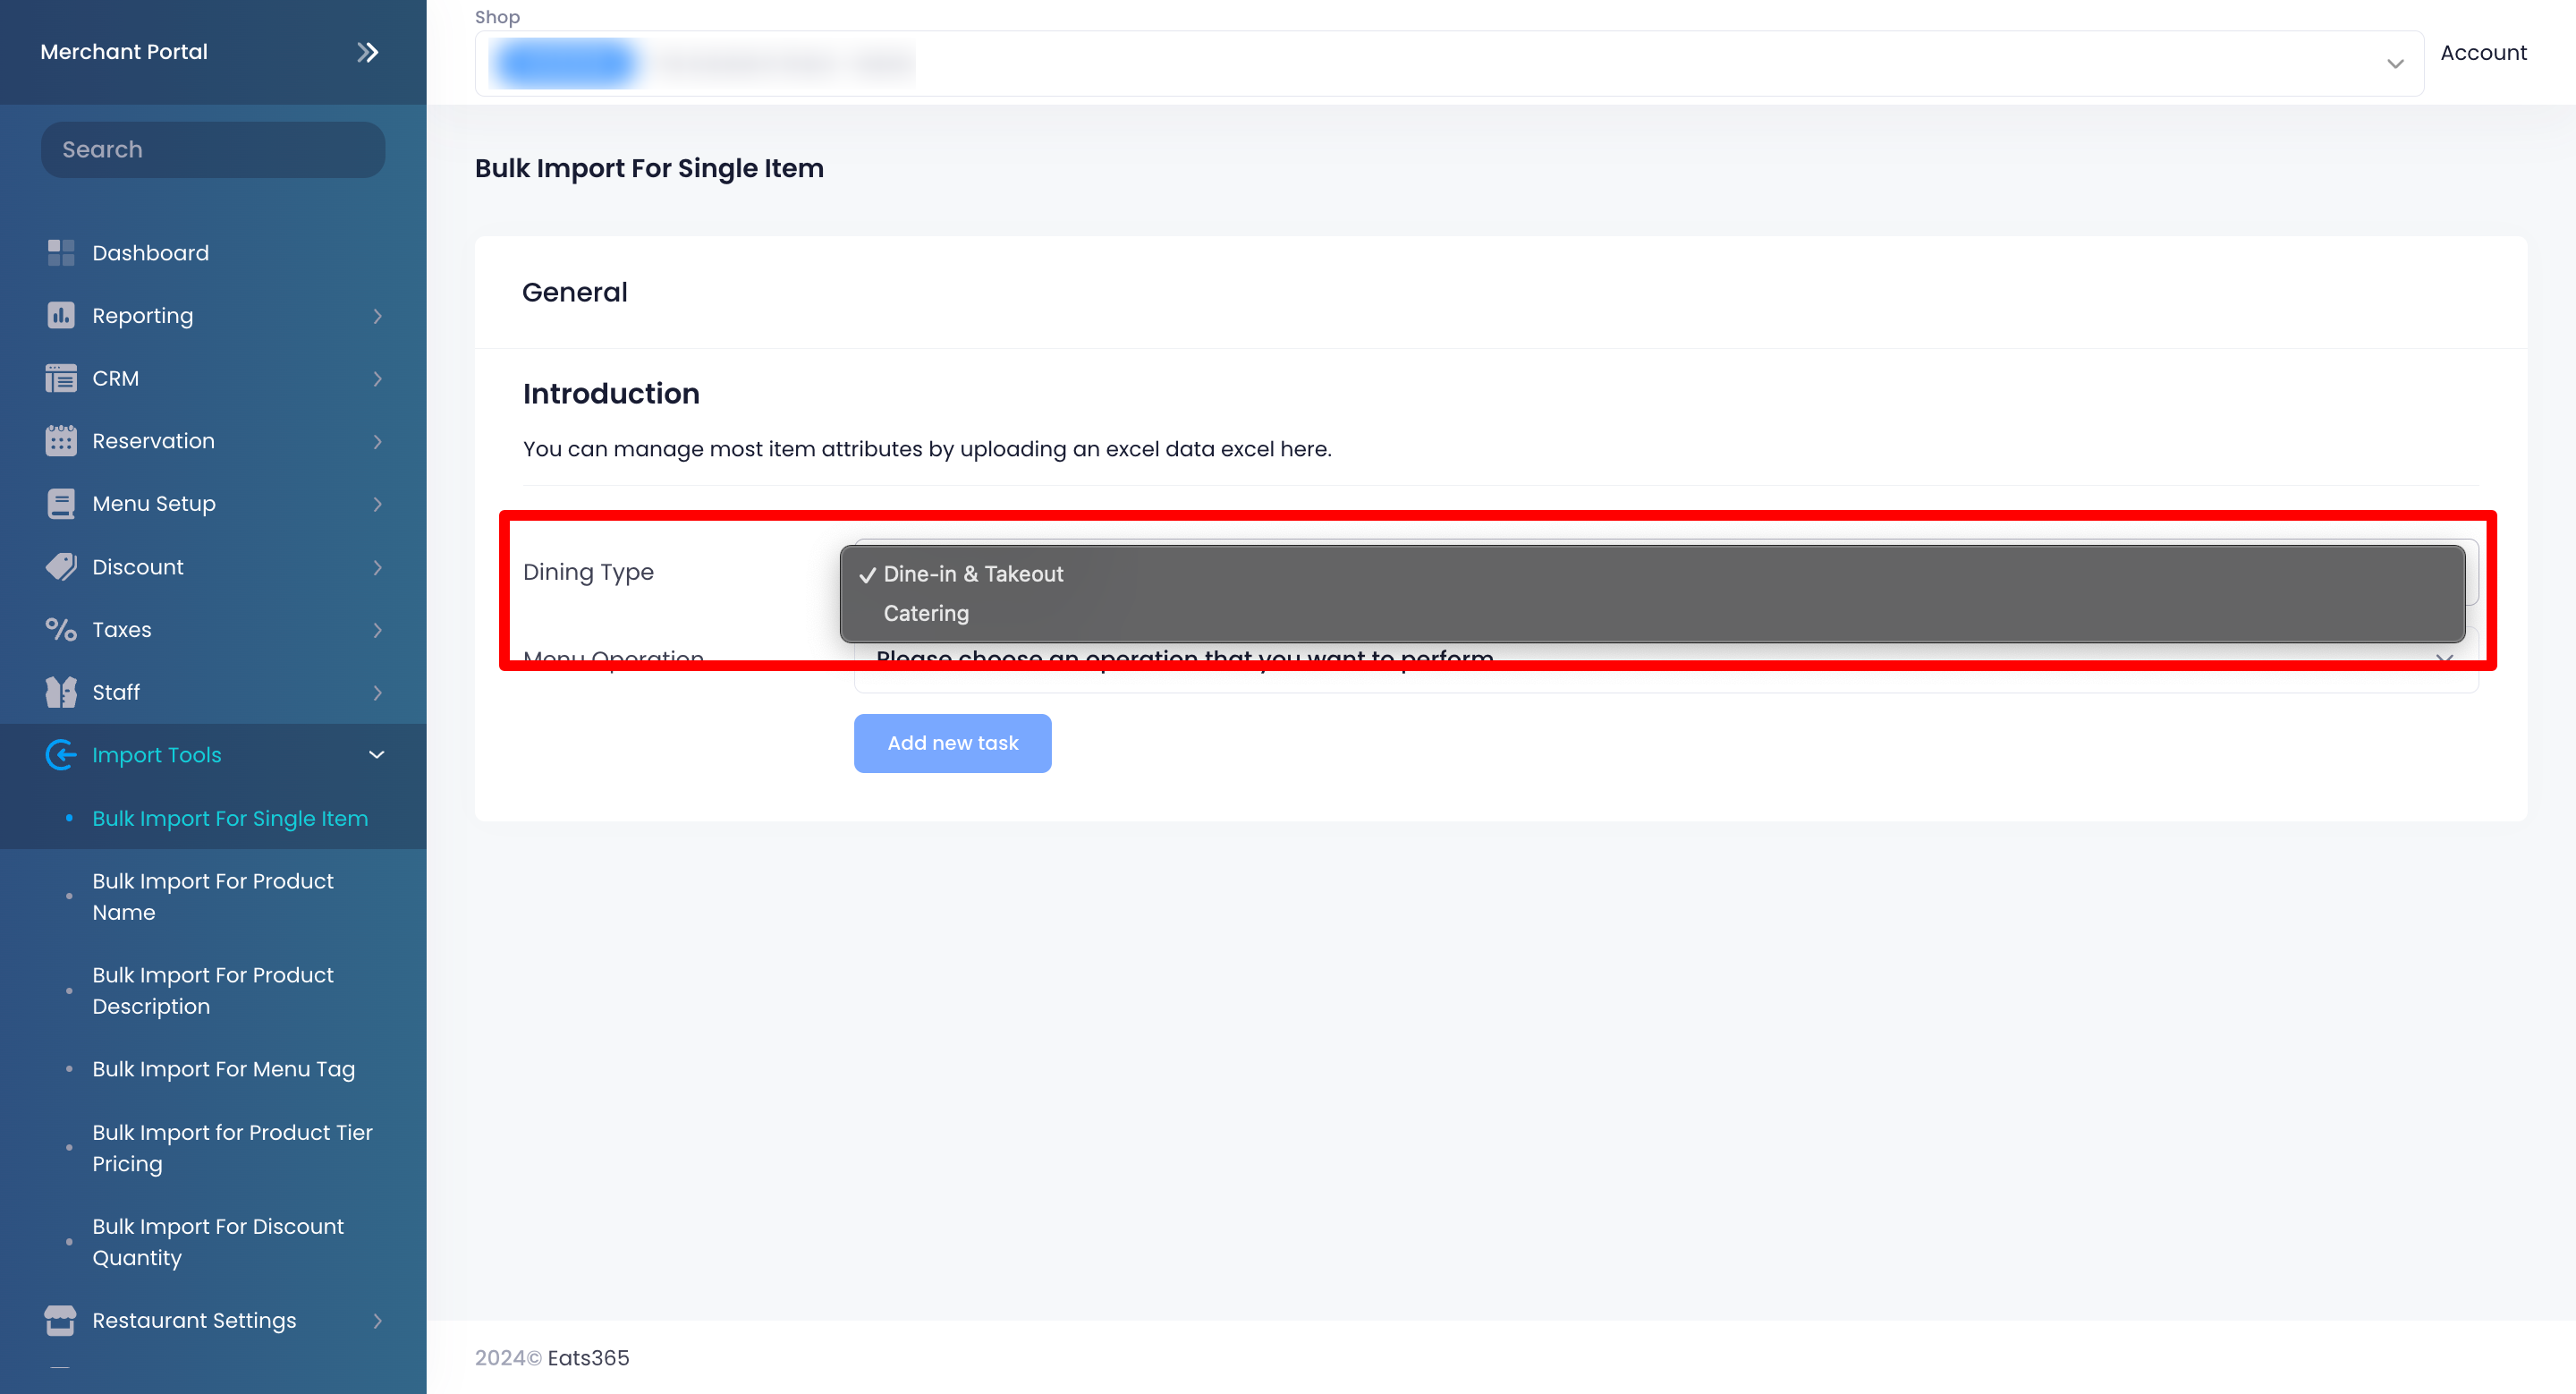
- Select where you want to import the Single Item. You can choose from Dine & Takeout or Catering.
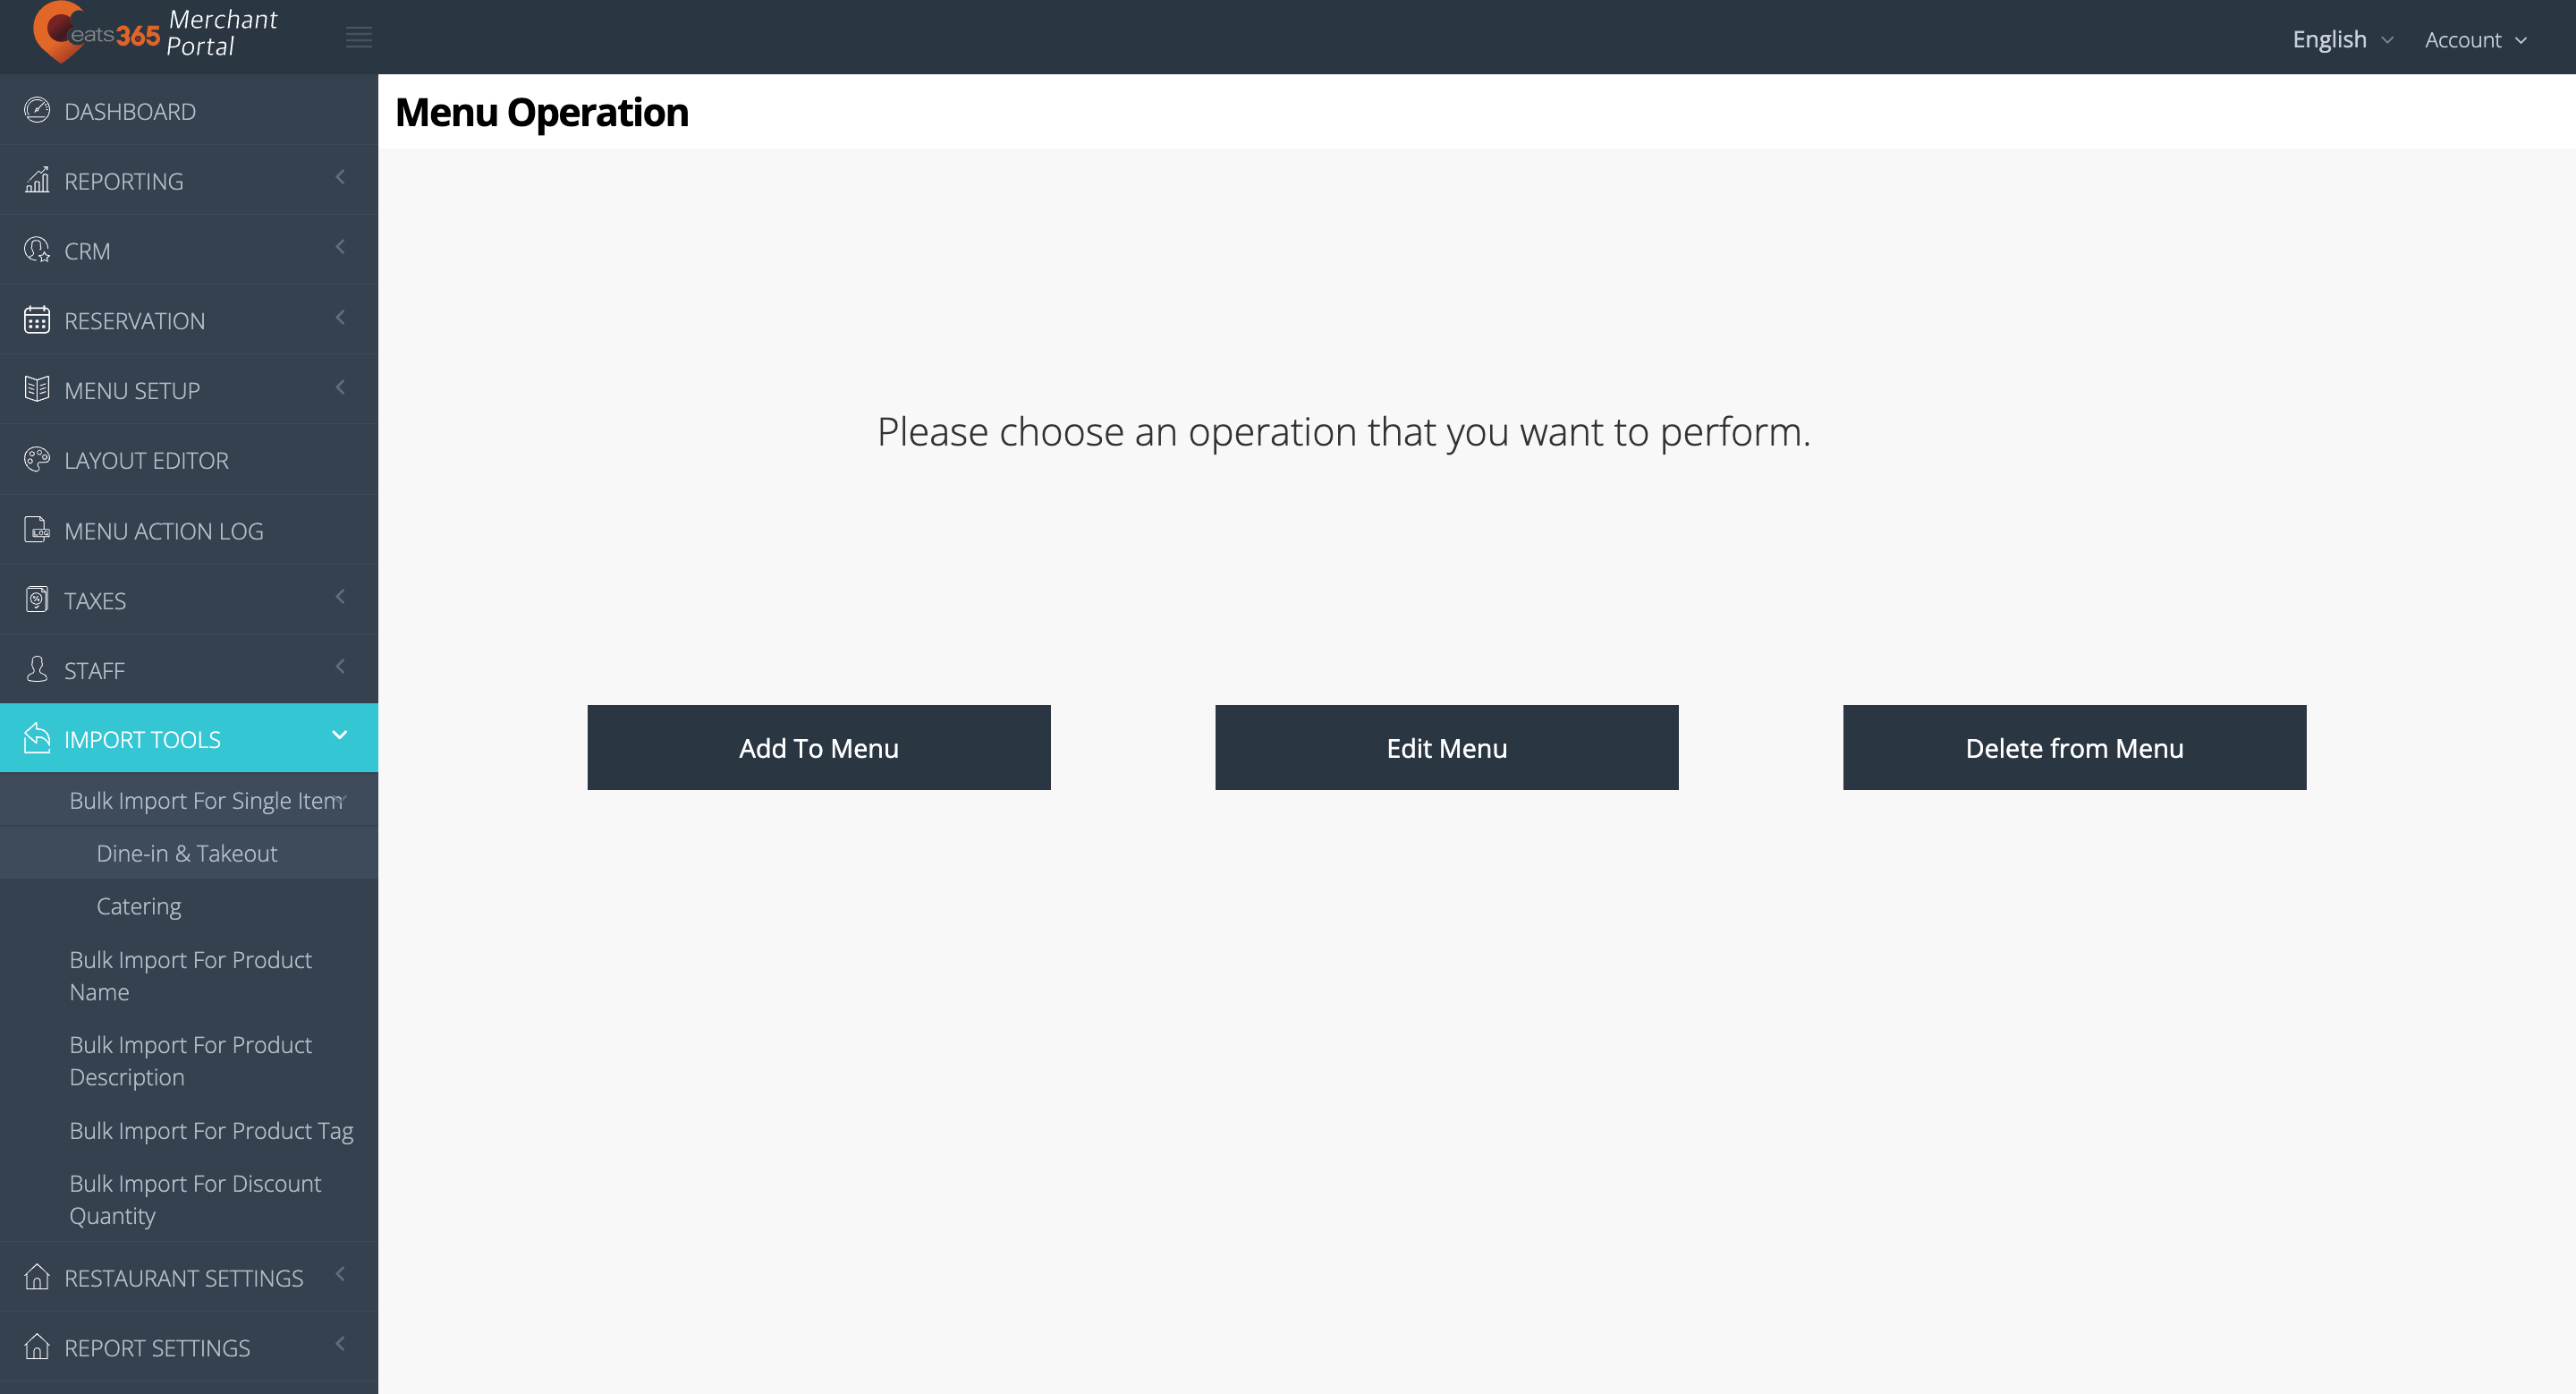
- Next to Menu Operation, choose the operation that you want to perform. You can select from the following operations:

- Add to Menu
- Edit Menu
- Delete from Menu
- Add to Menu
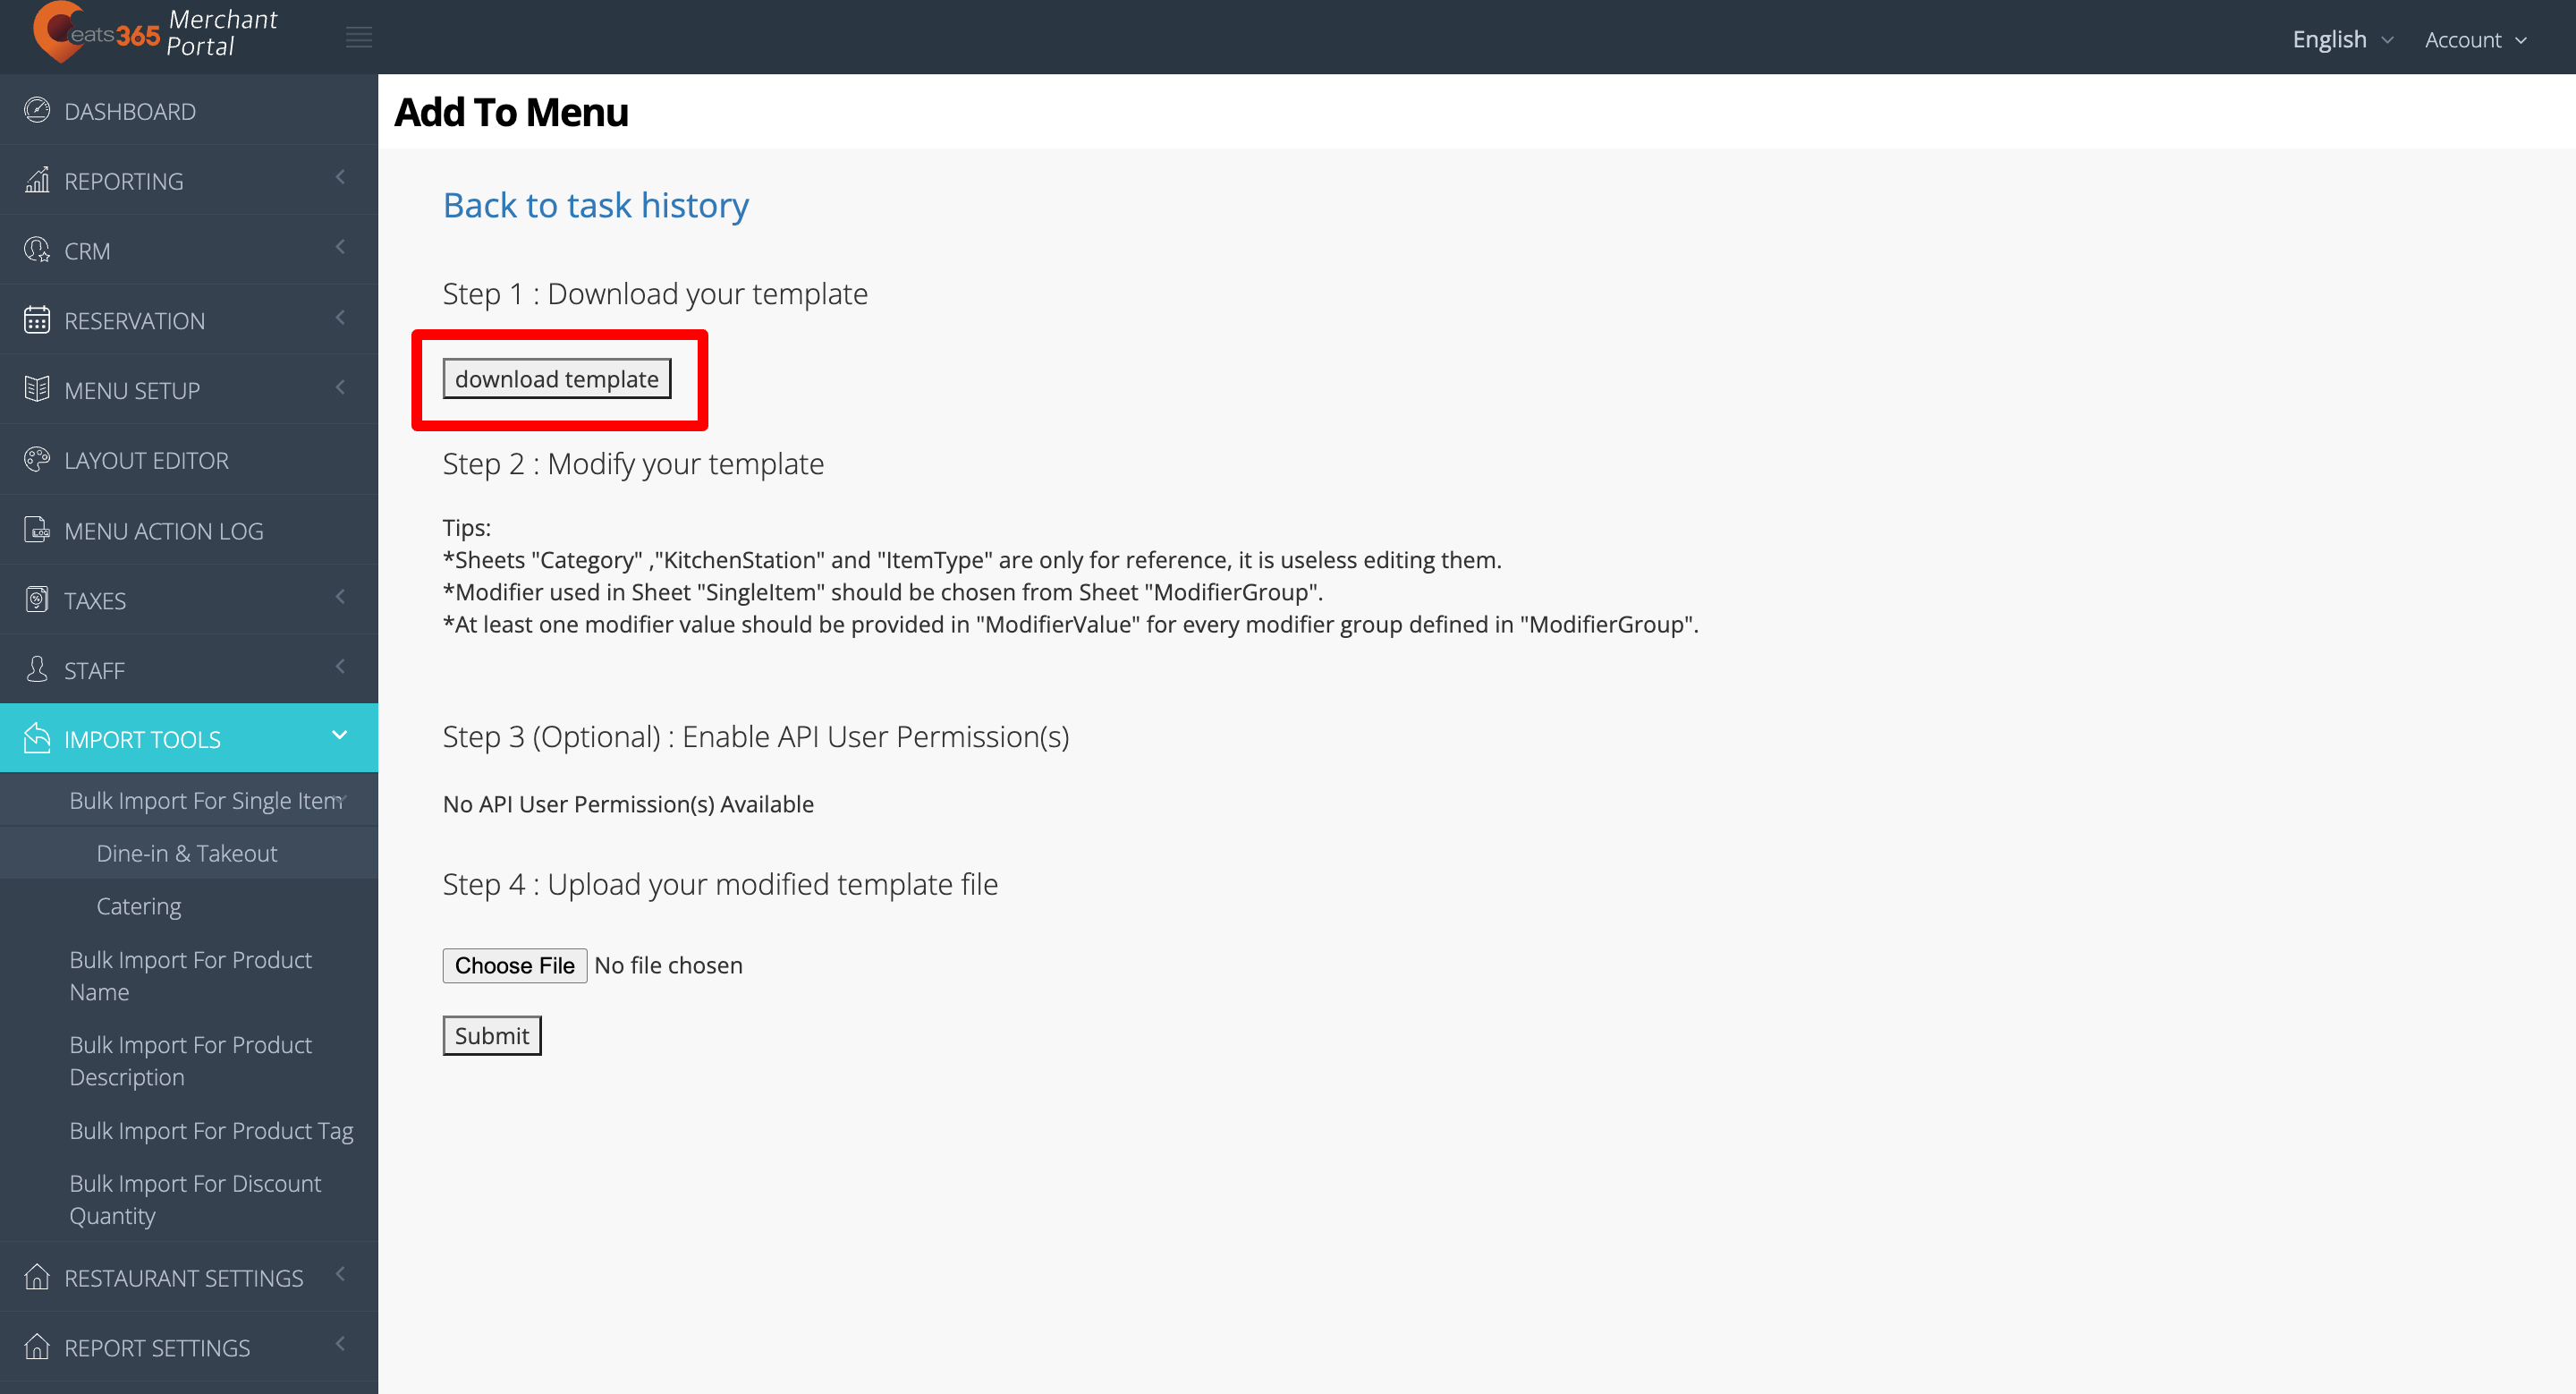
- After choosing an operation, click on download template.

- To modify the template, enter the data in all of the relevant fields in the Excel file.
- Add to Menu
- Sheets titled Category, KitchenStation, and ItemType are only for reference and don’t need to be modified.
- The Optional Modifiers used in the SingleItem sheet should be selected from the ModifierGroup sheet.
- At least one modifier value must be provided in ModifierValue for every modifier group defined in ModifierGroup.
- Edit Menu
- Ensure that itemIDs and itemNames match to avoid errors.
- Modifications made in the KitchenStation and ItemType sheets are only used for reference, and any changes don’t update the database.
- To enter values for Kitchen Station and Item Type, choose from the list of options inside the cell and don’t enter a value that isn’t in the list.
- To save time, remove the rows that don’t need to be edited.
- Delete from Menu
- The downloaded template contains all of the information for all menu items.
- To delete items in bulk, upload the template containing the records for the menu items you’d like to remove.
Note: A menu item can still be removed even if some fields are missing, as long as the ItemID remains.
- Add to Menu
- (Optional) Enable API User Permission(s).
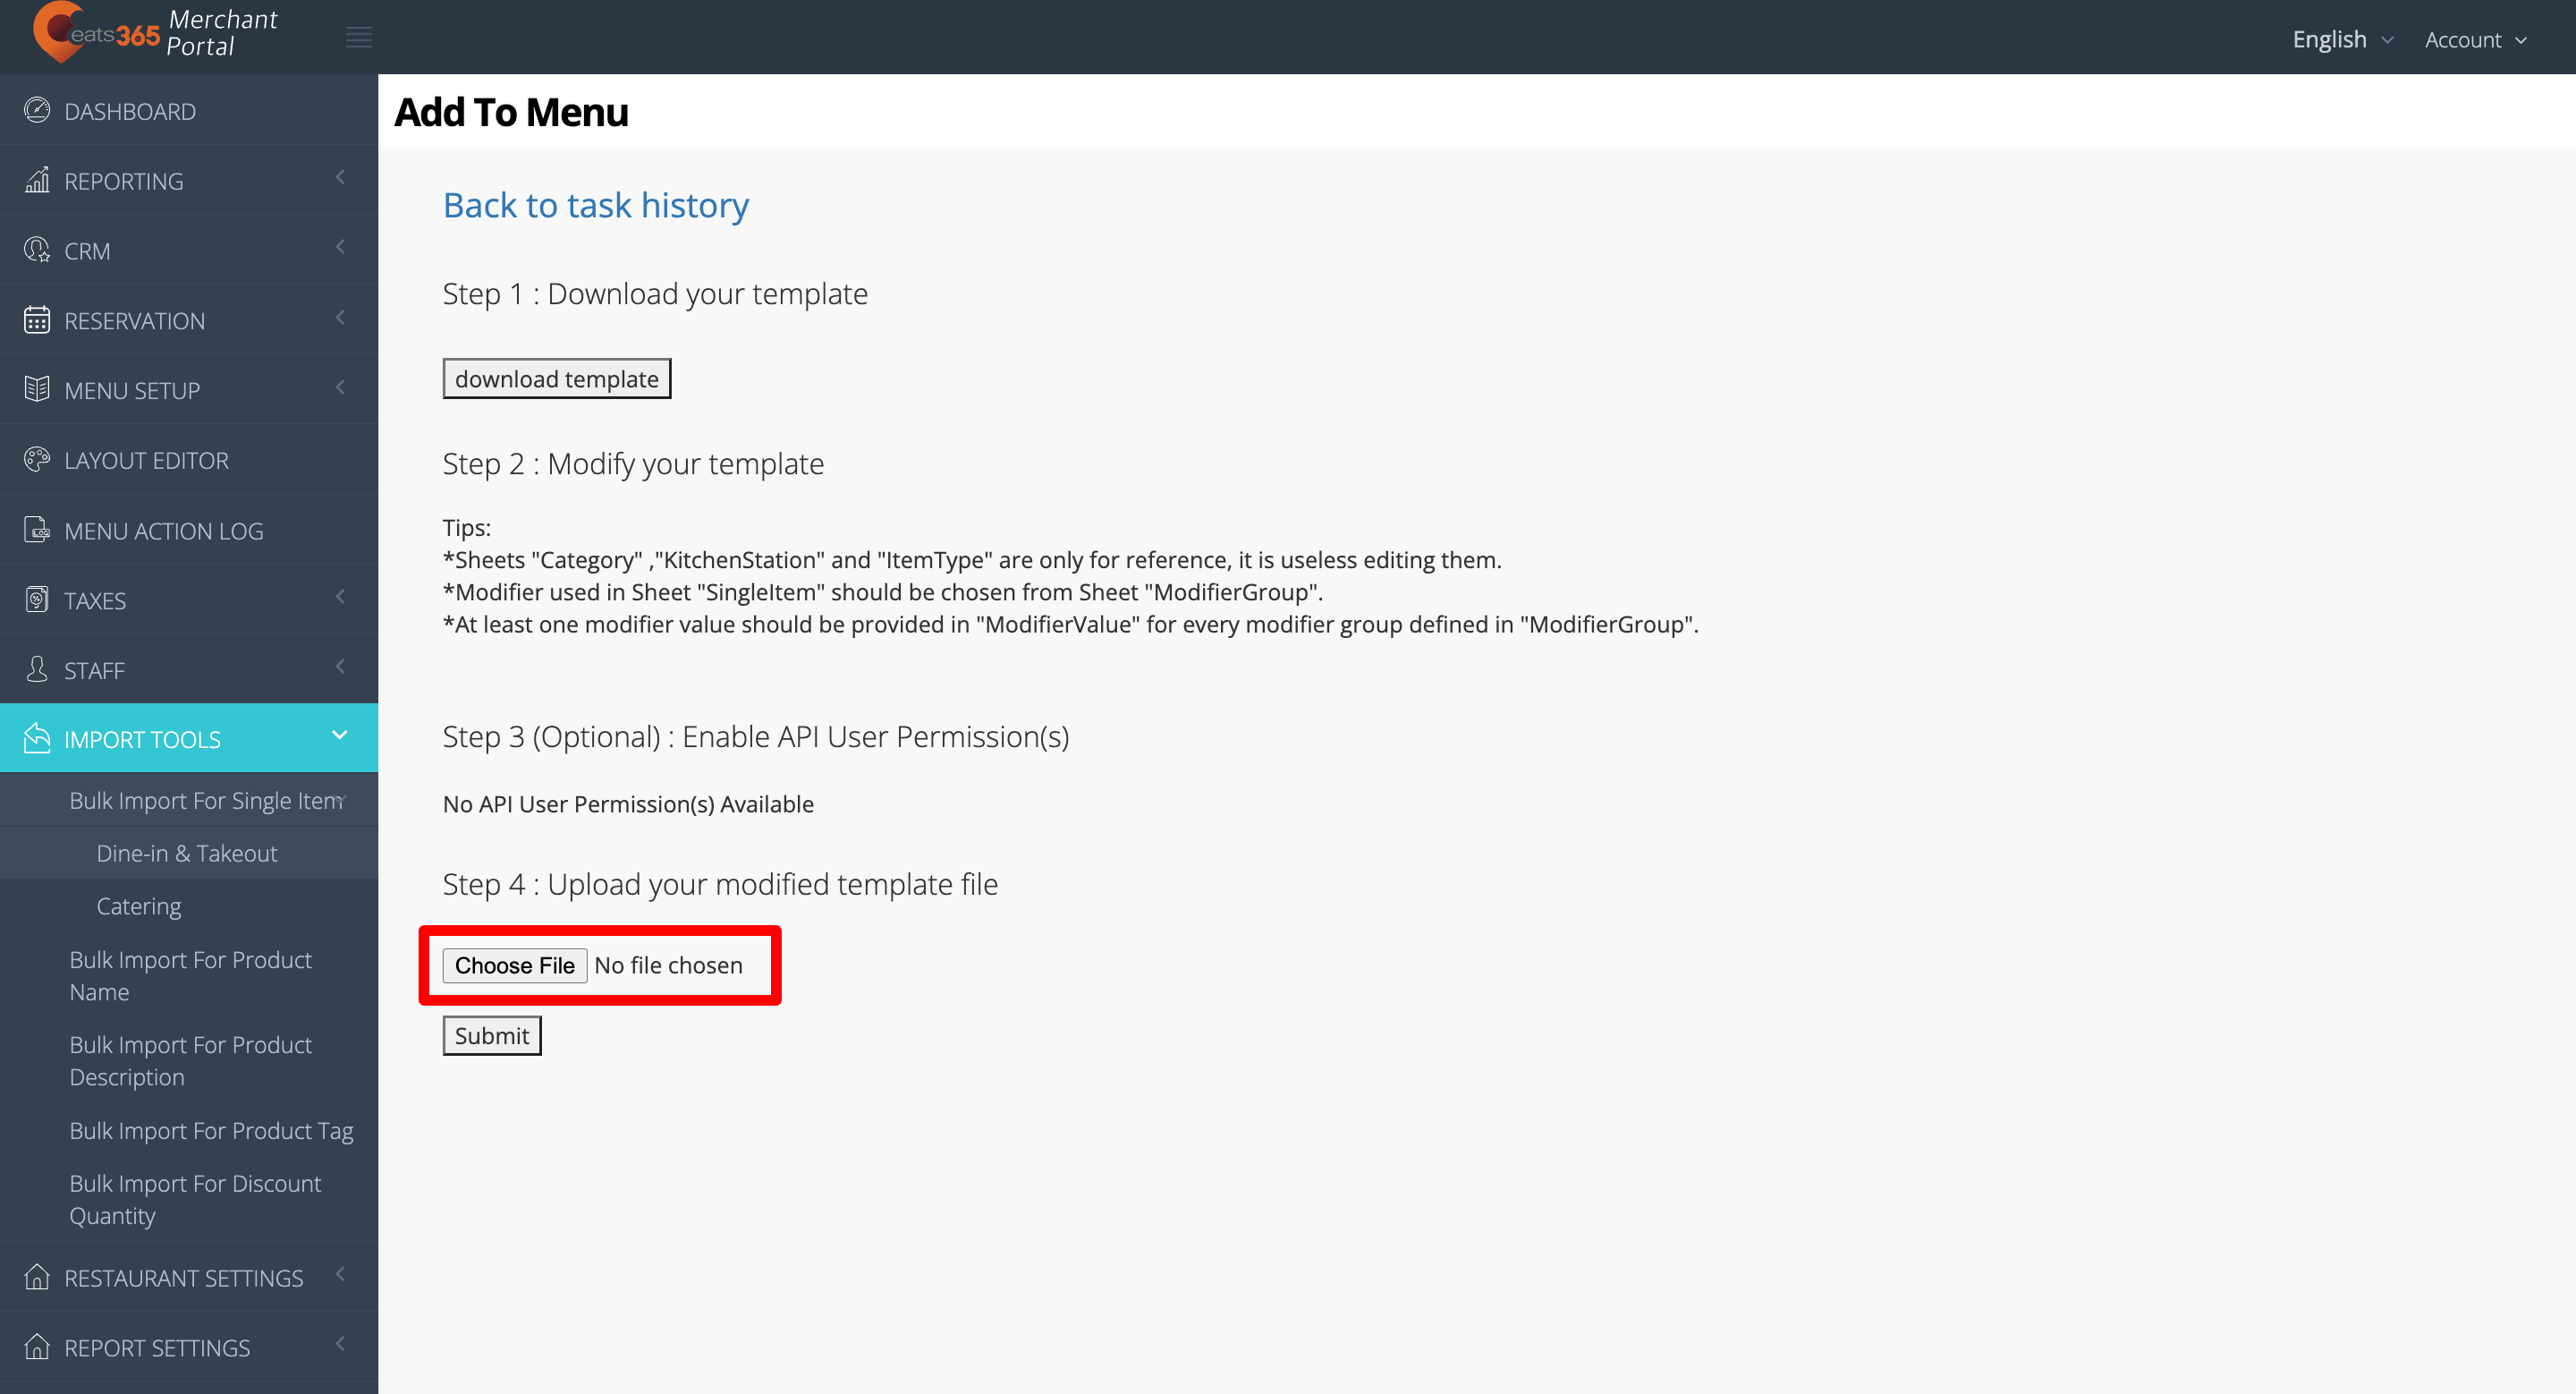
- To upload your modified template file, click on Select File. Then, select your modified file.
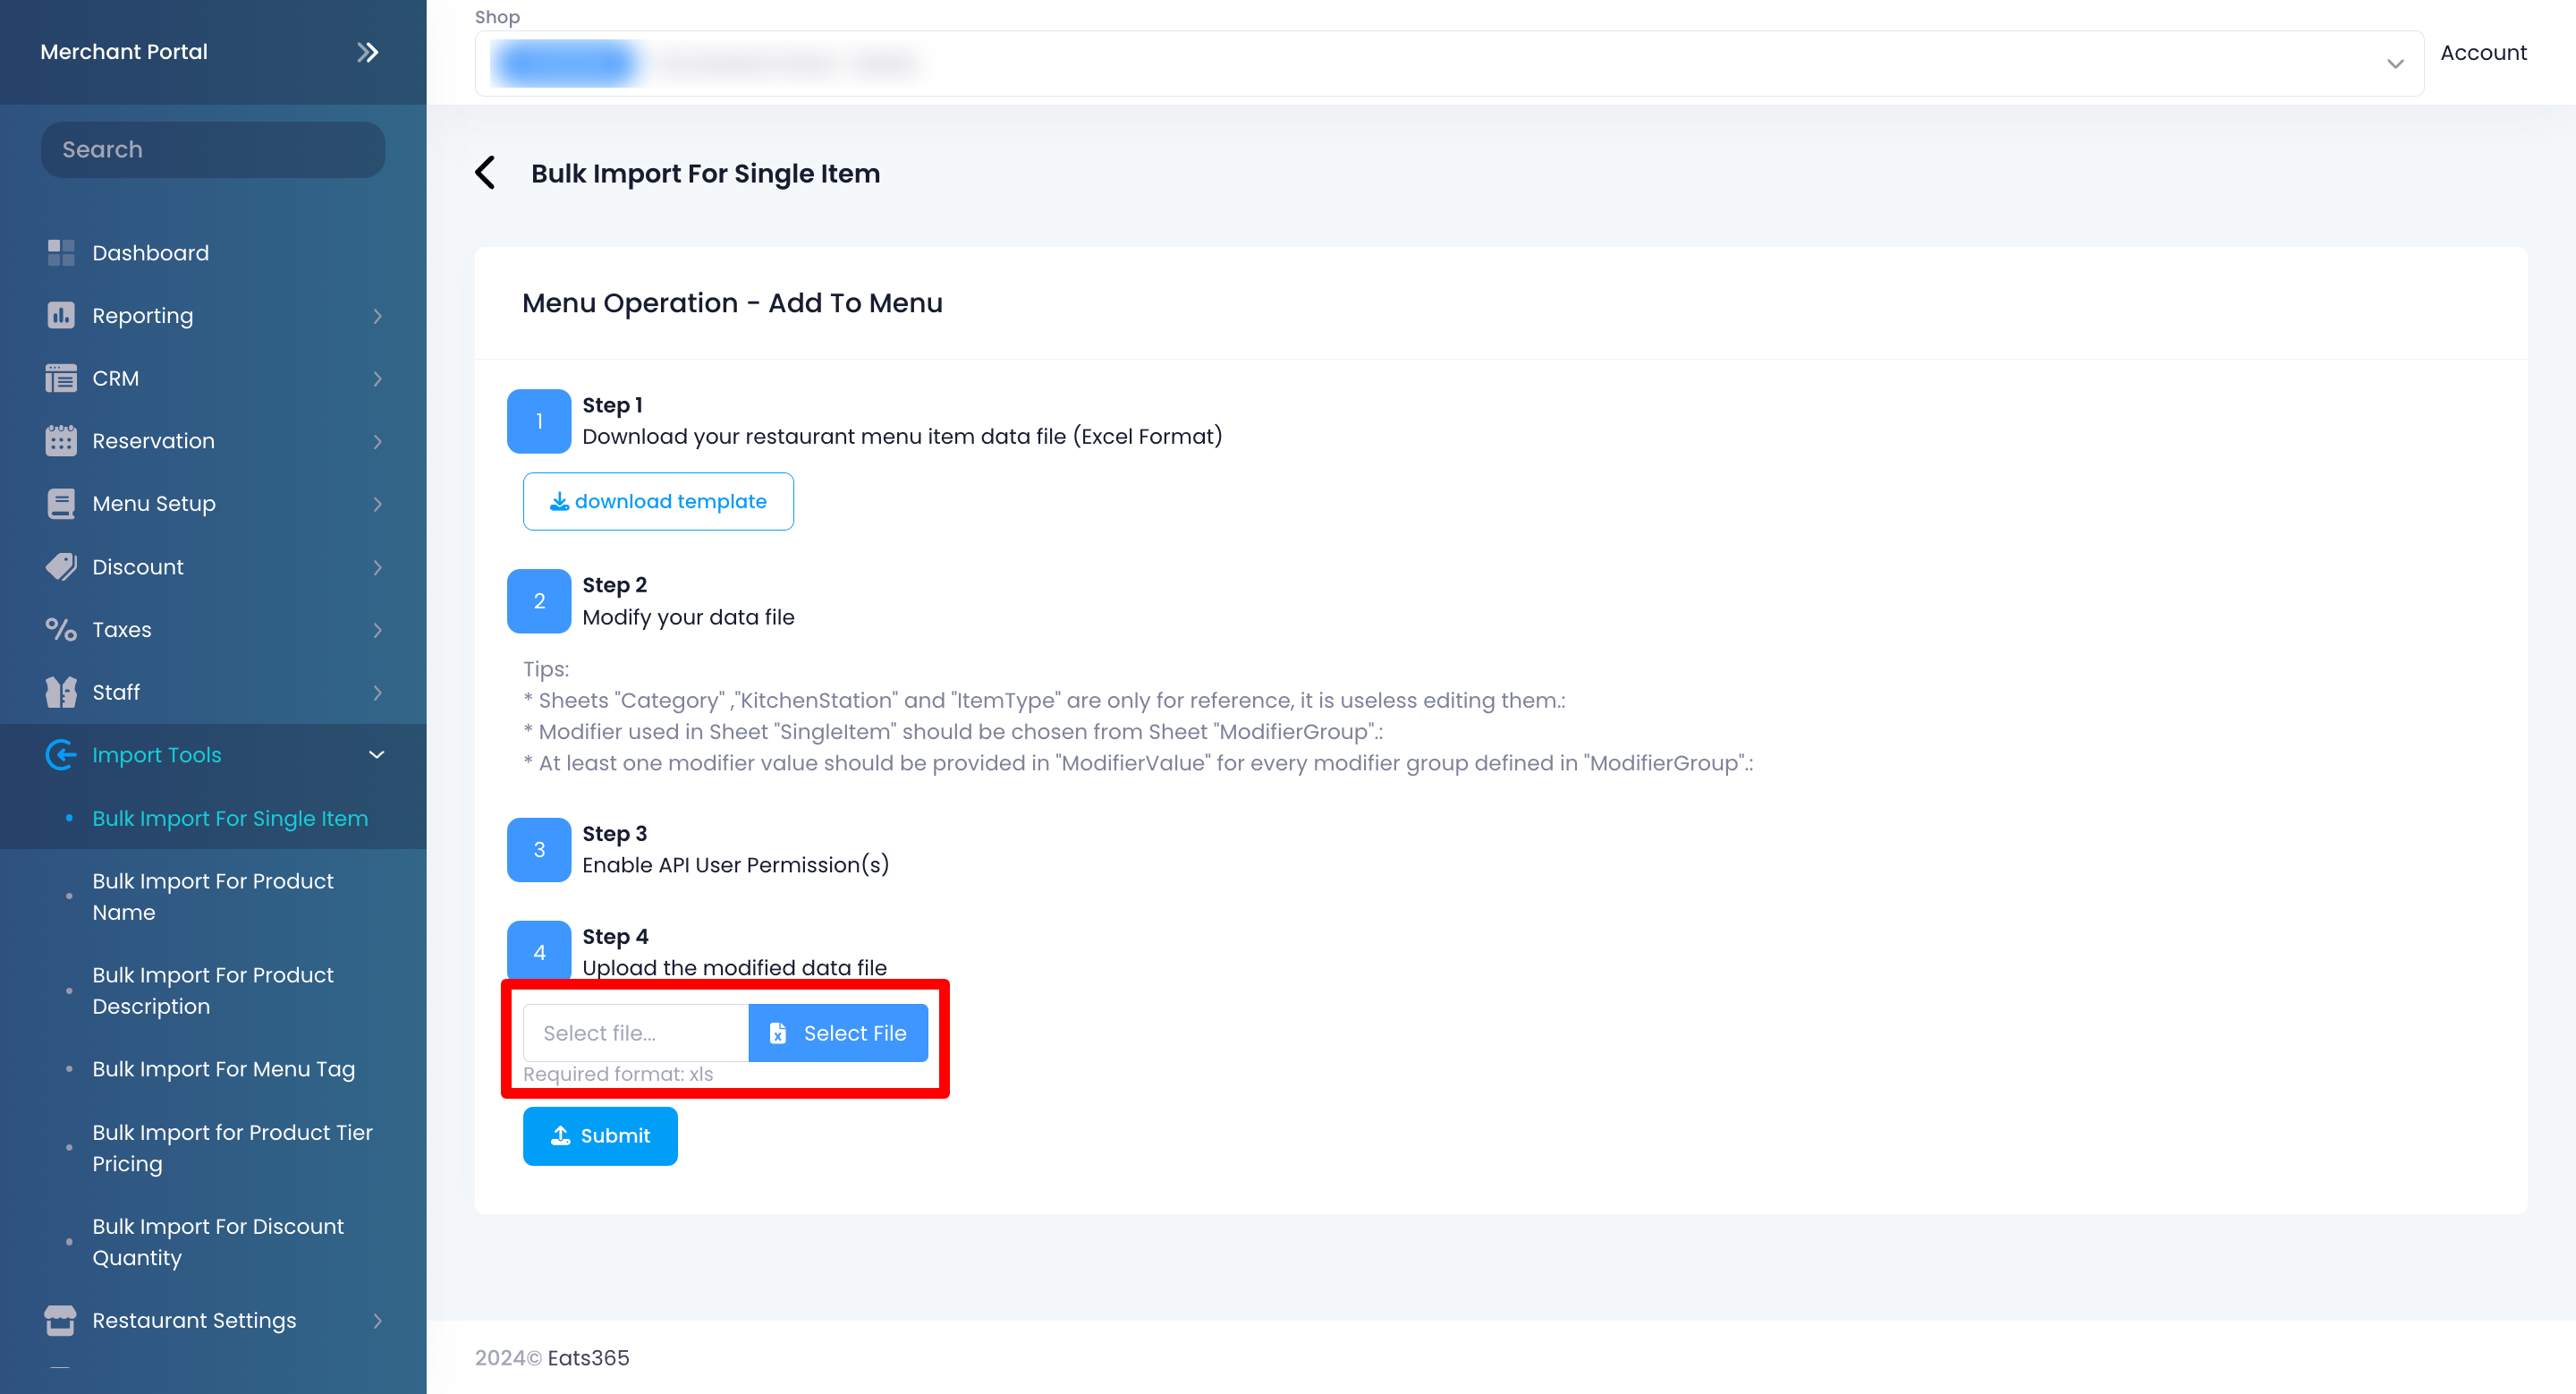
- Click on Submit to confirm.
Bulk Import for Product Name
To perform a bulk import of Product Names, follow the steps below:
Merchant Portal (Classic Theme)
- Log in to the Merchant Portal.
- On the left panel, click on Import Tools, then click on Bulk Import for Product Name.

- At the top right, click on Add new task.
- Click on download template.
- To modify the template, enter the data in all of the relevant fields in the Excel file.
Tips:- Don’t leave the Category field blank.
- Only the languages included in the template are supported.
- To save time, only leave the rows that need to be edited.
- To upload your modified template file, click on Choose File. Then, select your modified file.
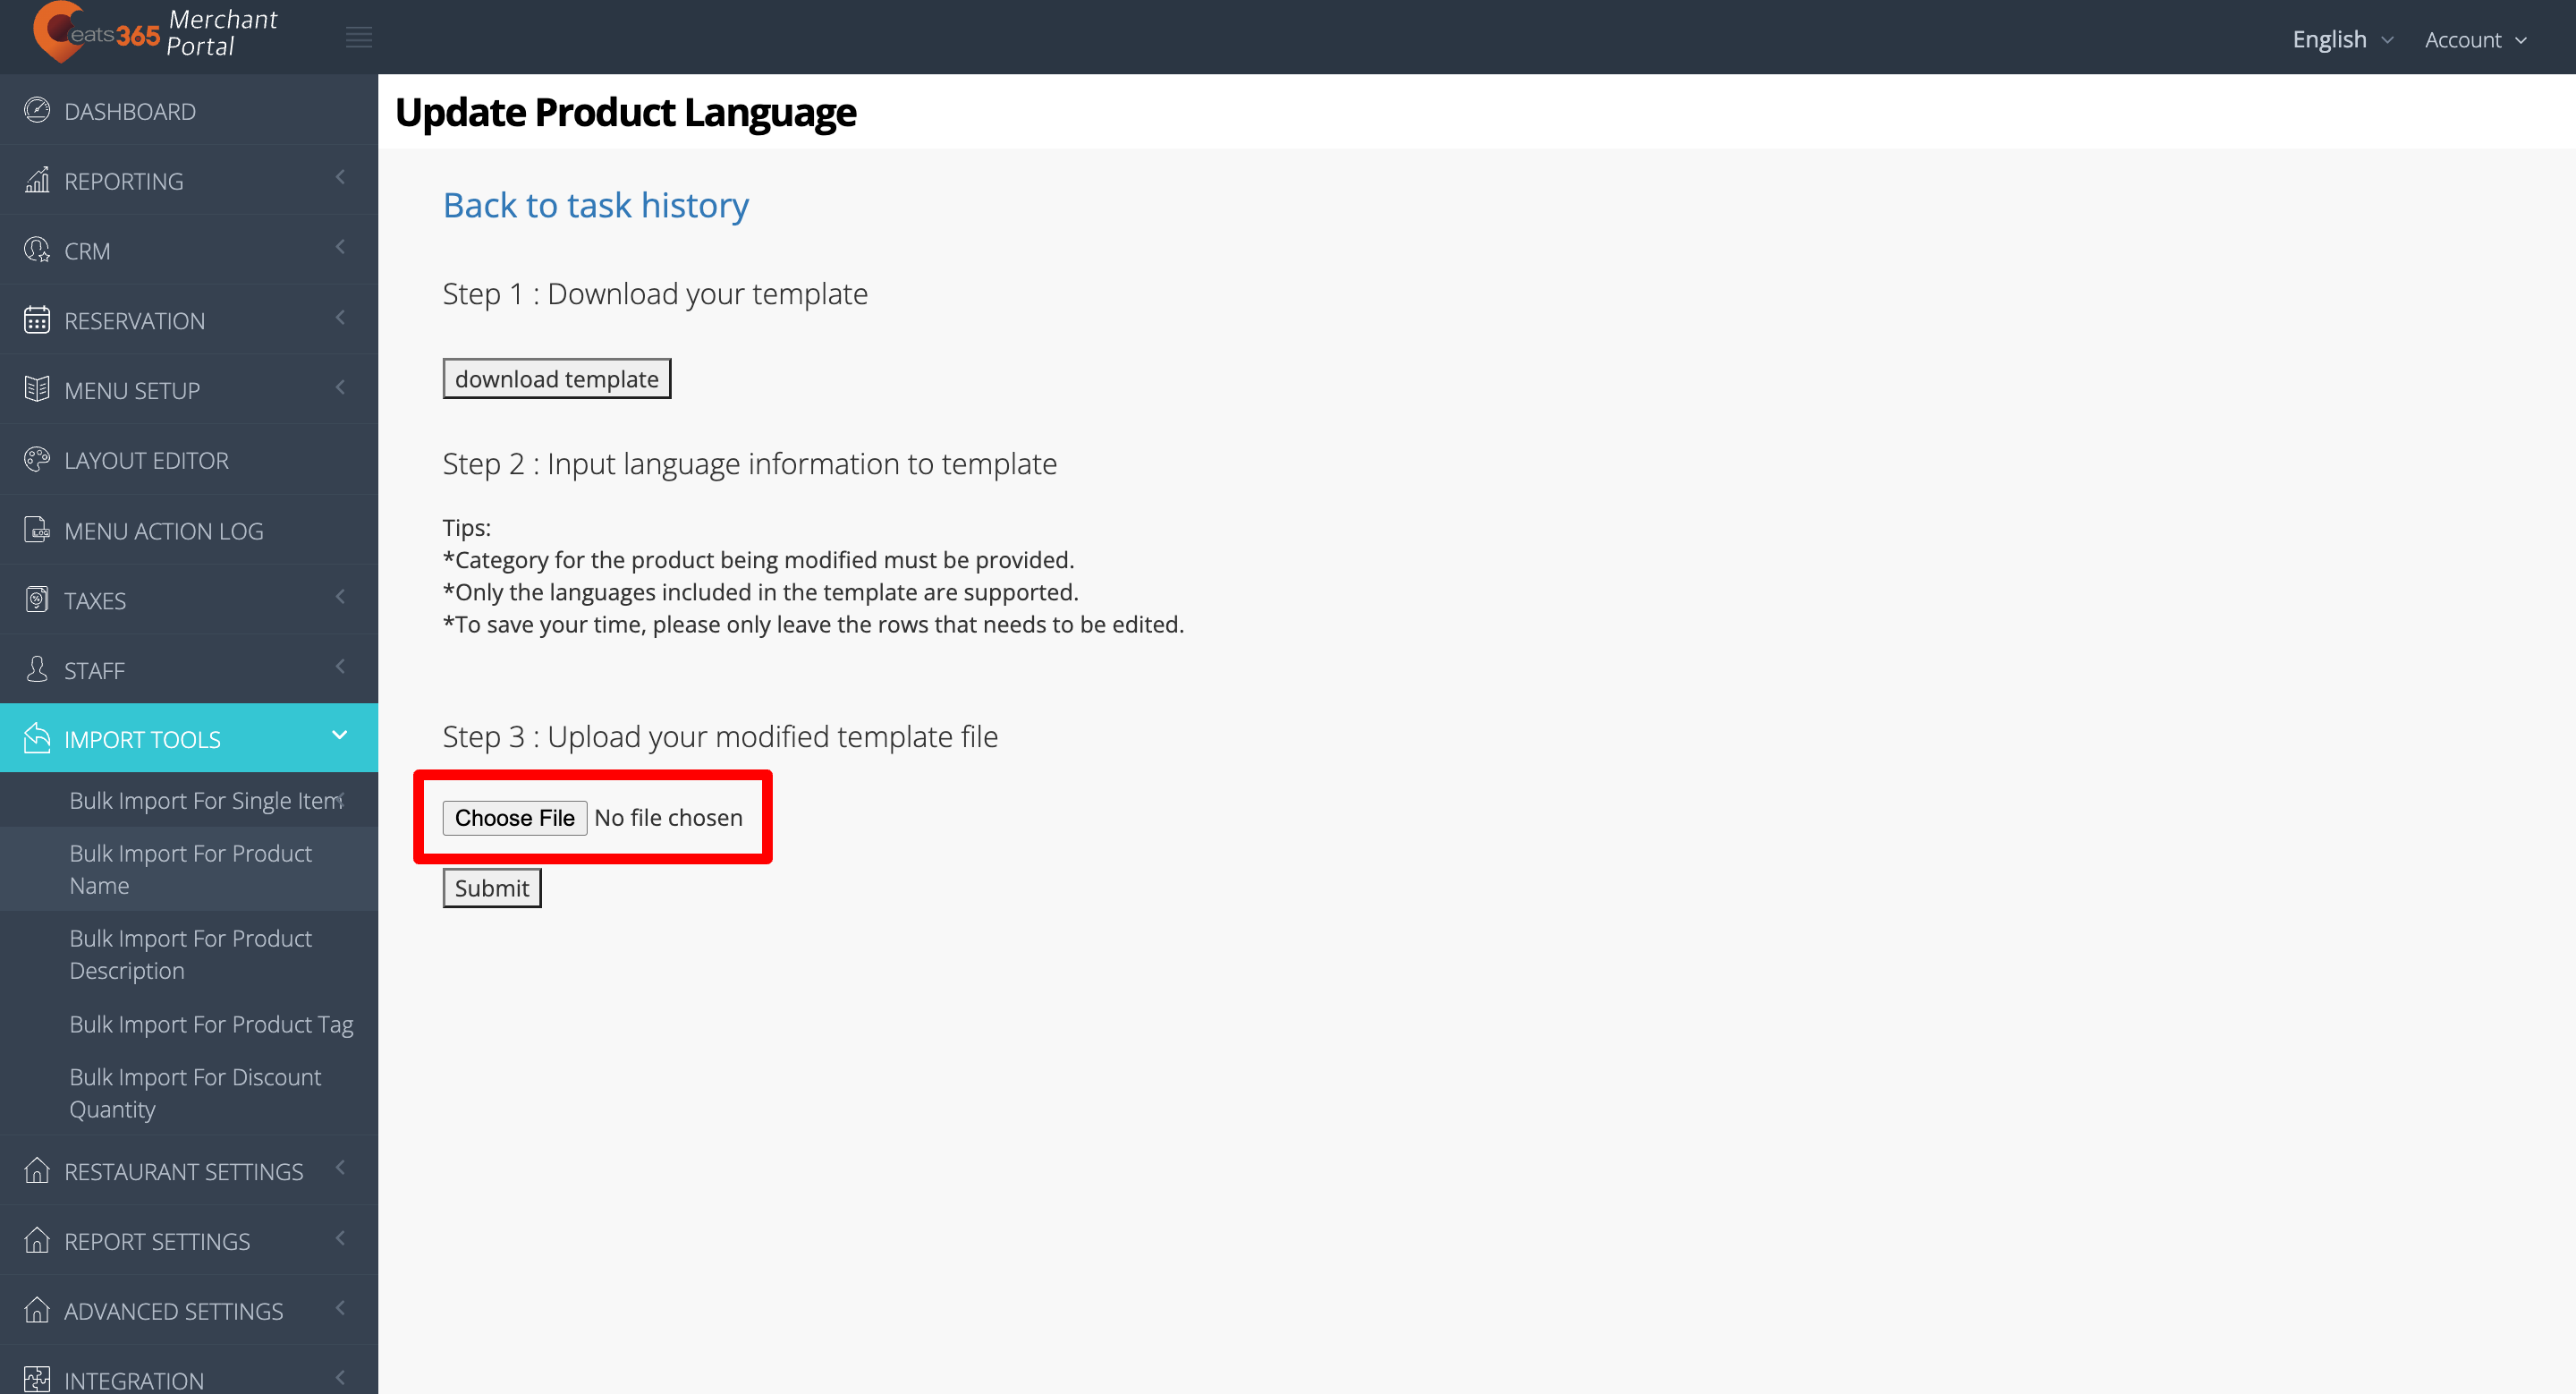
- At the top right, click on Submit to confirm.
Merchant Portal 2.0
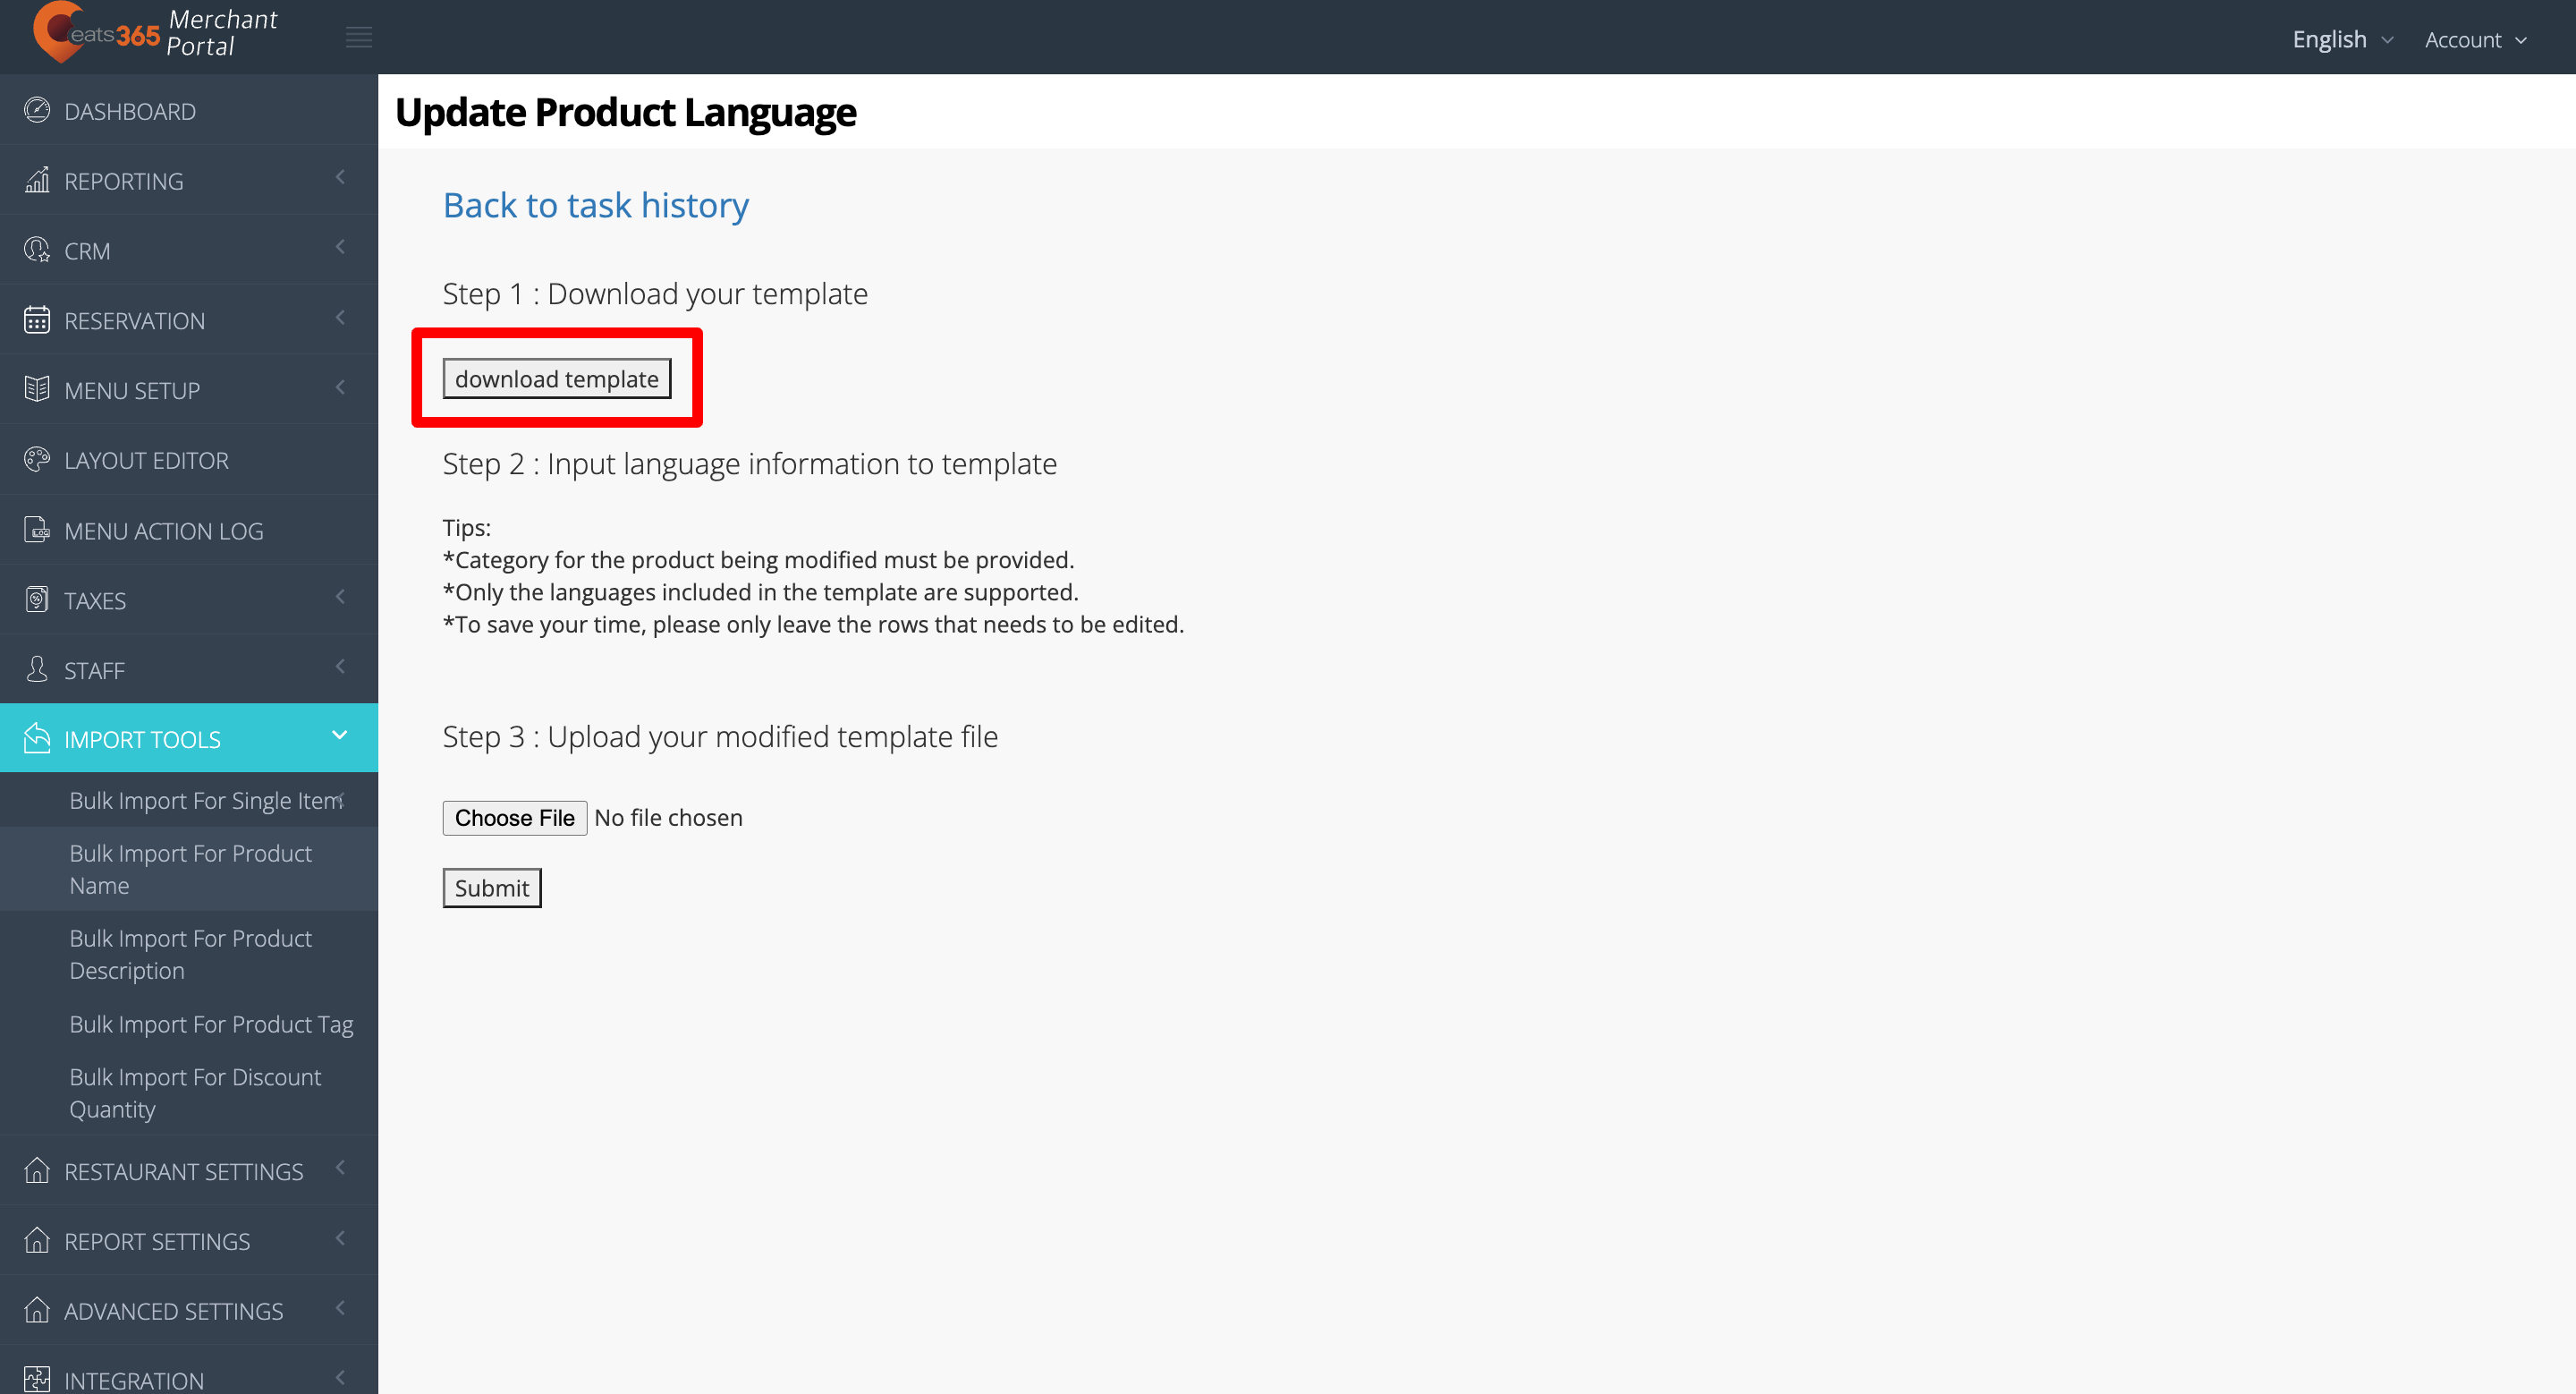
- Log in to the Merchant Portal.
- On the left panel, click on Import Tools, then click on Bulk Import for Product Name.

- At the top right, click on Add new task.
- Click on download template.
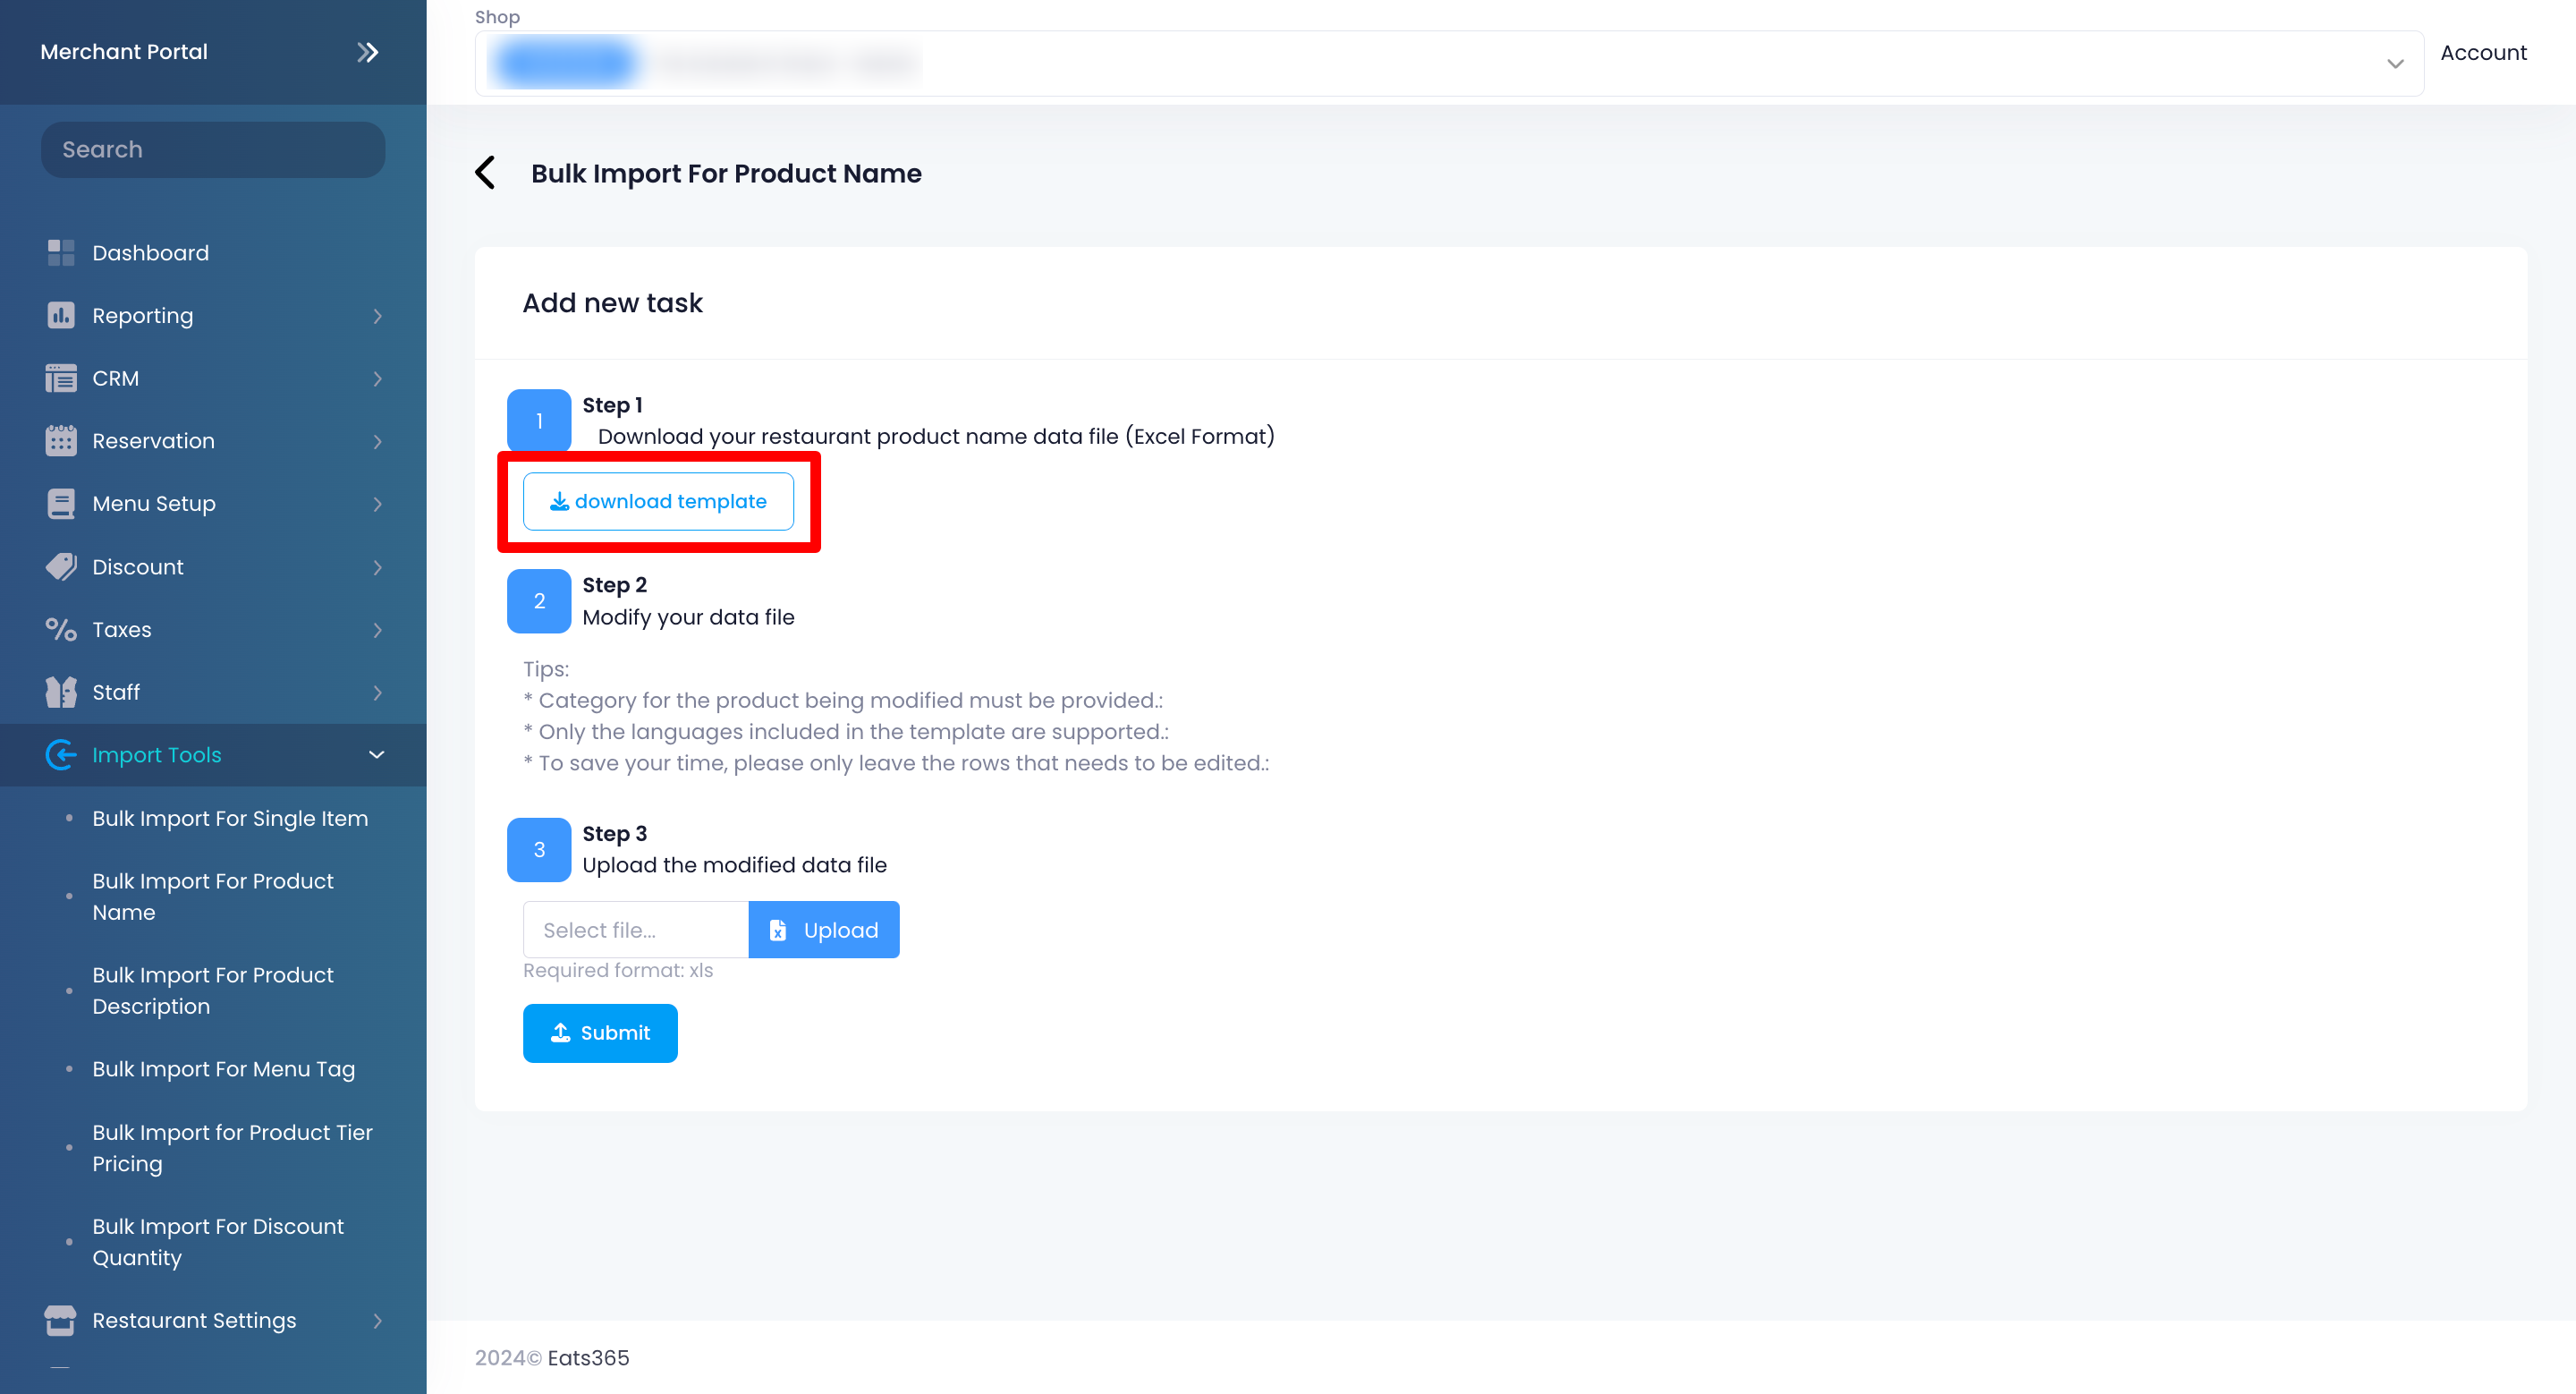
- To modify the template, enter the data in all of the relevant fields in the Excel file.
Tips:- Don’t leave the Category field blank.
- Only the languages included in the template are supported.
- To save time, only leave the rows that need to be edited.
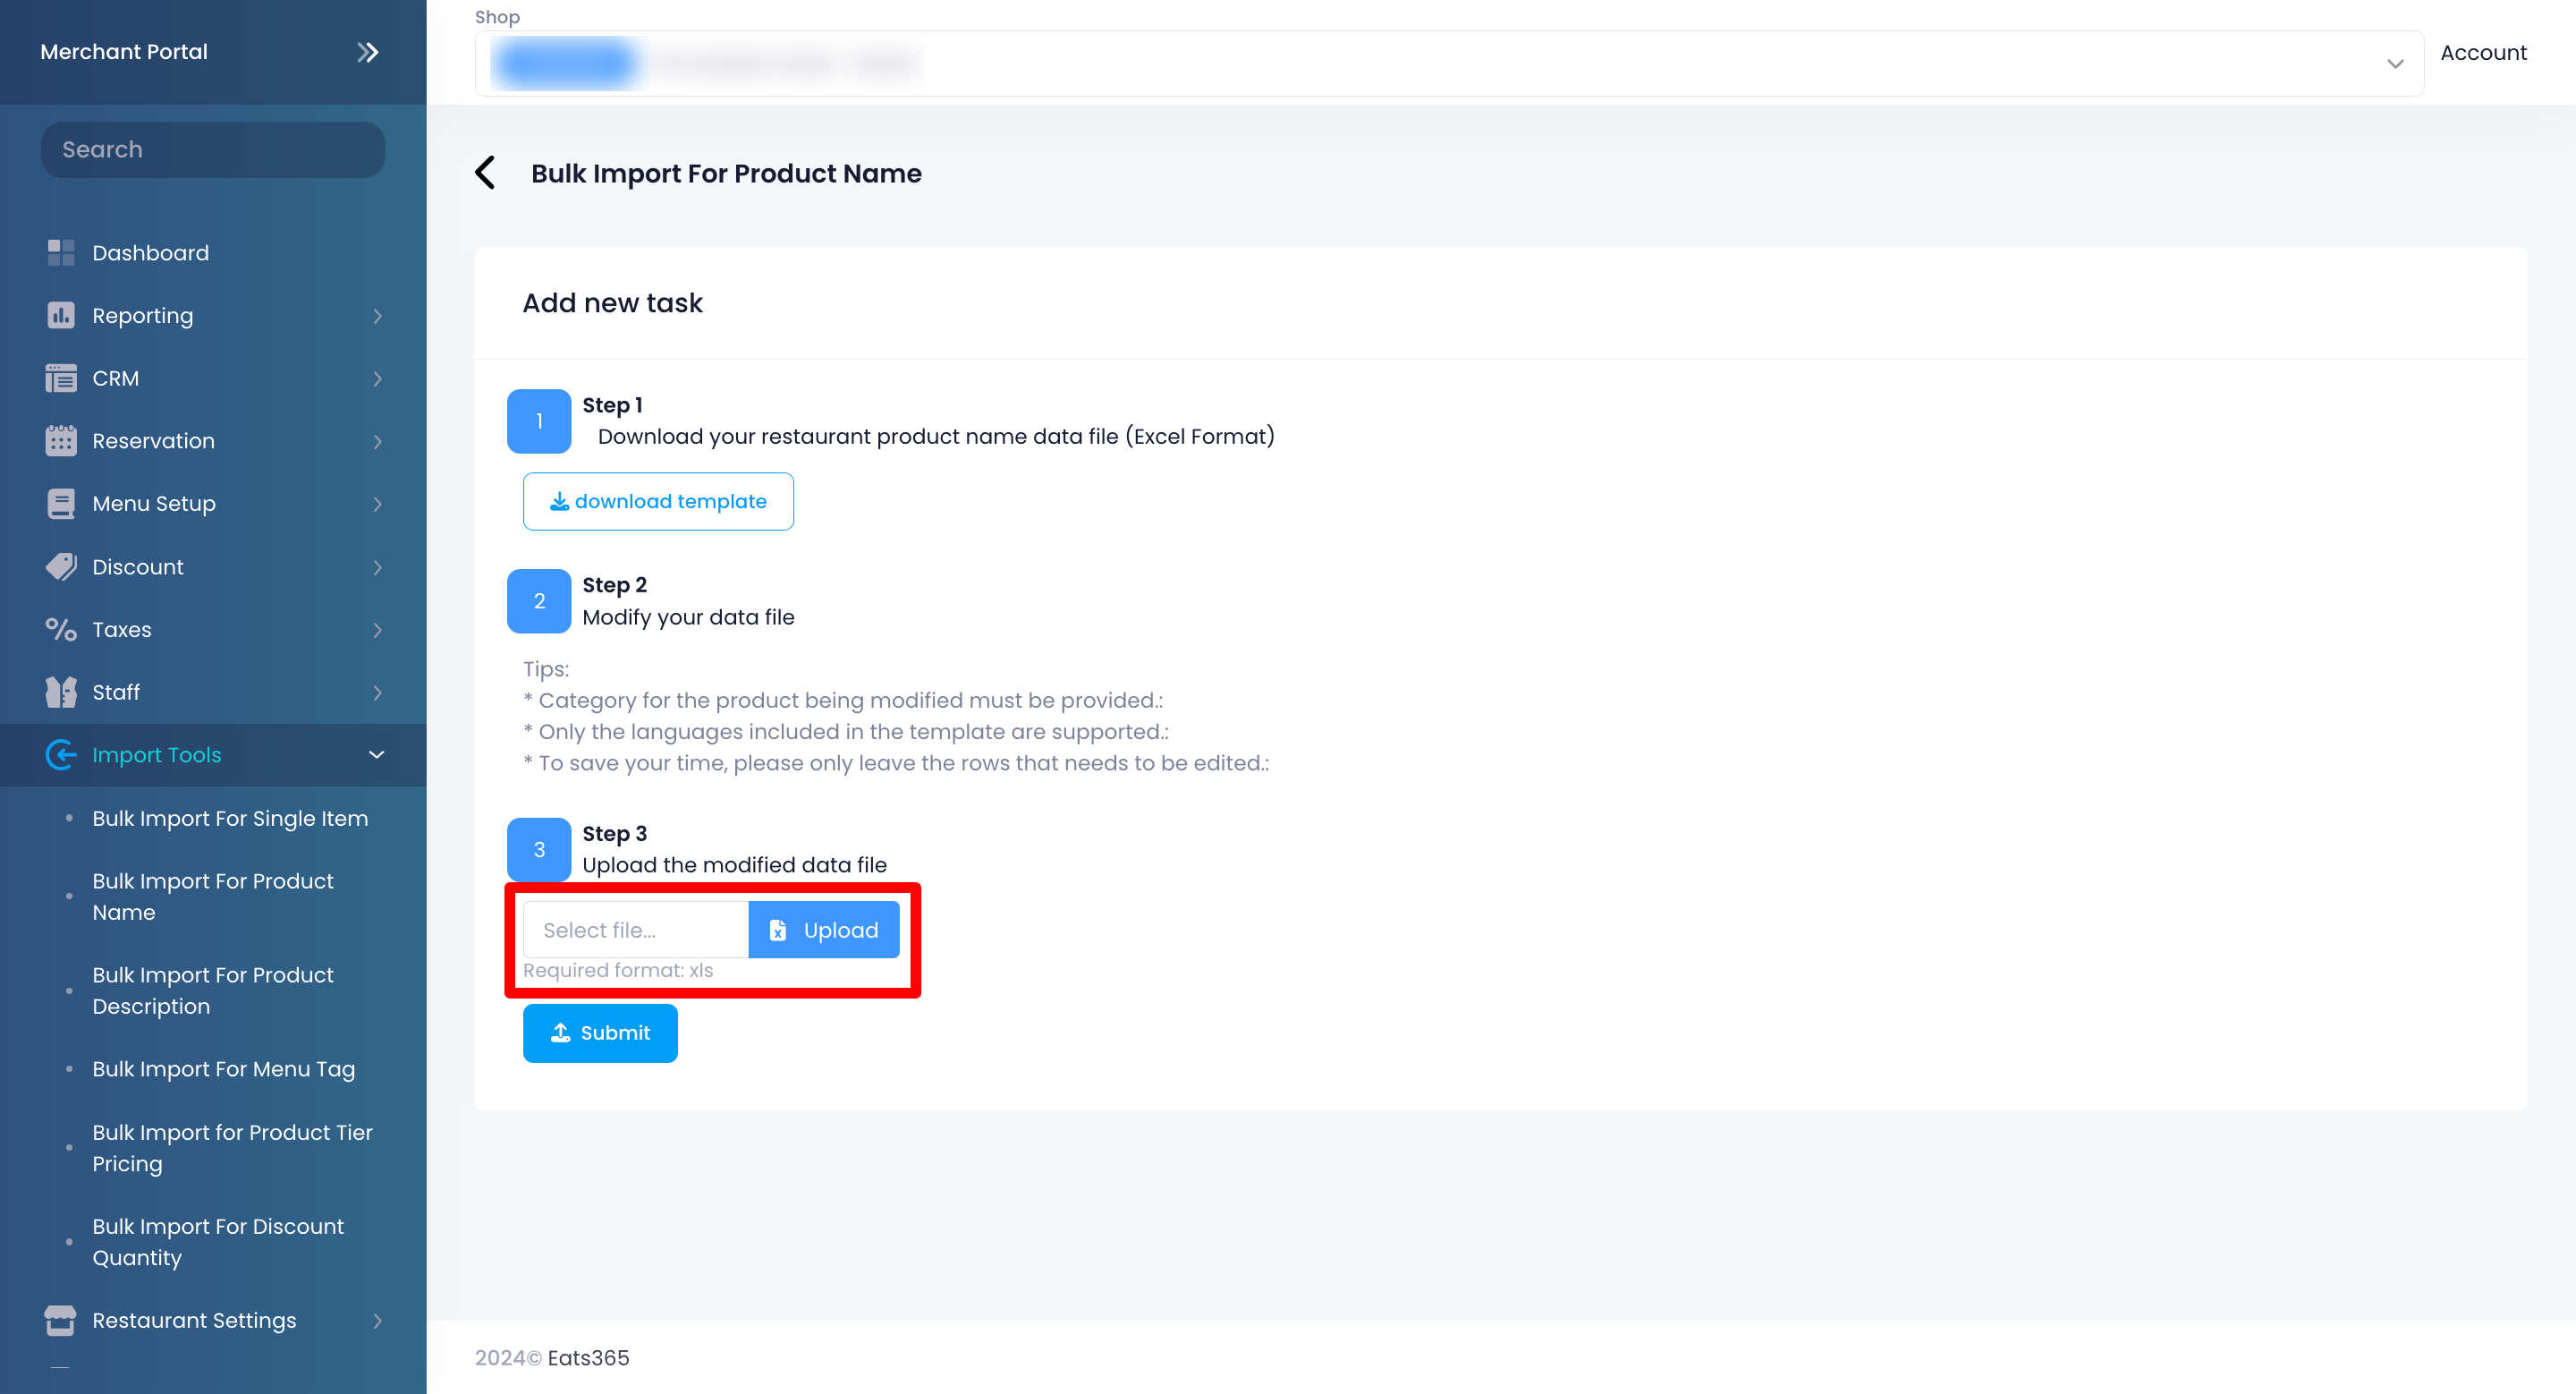
- To upload your modified template file, click on Upload. Then, select your modified file.
- Click on Submit to confirm.
Bulk Import for Product Description
To perform a bulk import of Product Descriptions, follow the steps below:
Merchant Portal (Classic Theme)
- Log in to the Merchant Portal.
- On the left panel, click on Import Tools, then click on Bulk Import for Product Description.

- At the top right, click on Add new task.
- Click on download template.

- To modify the template, enter the data in all of the relevant fields in the Excel file.
Tips:- Don’t leave the Category field blank.
- Only the languages included in the template are supported.
- To save time, only leave the rows that need to be edited.
- To upload your modified template file, click on Choose File. Then, select your modified file.

- At the top right, click on Submit to confirm.
Merchant Portal 2.0
- Log in to the Merchant Portal.
- On the left panel, click on Import Tools, then click on Bulk Import for Product Description.
- At the top right, click on Add new task.
- Click on download template.
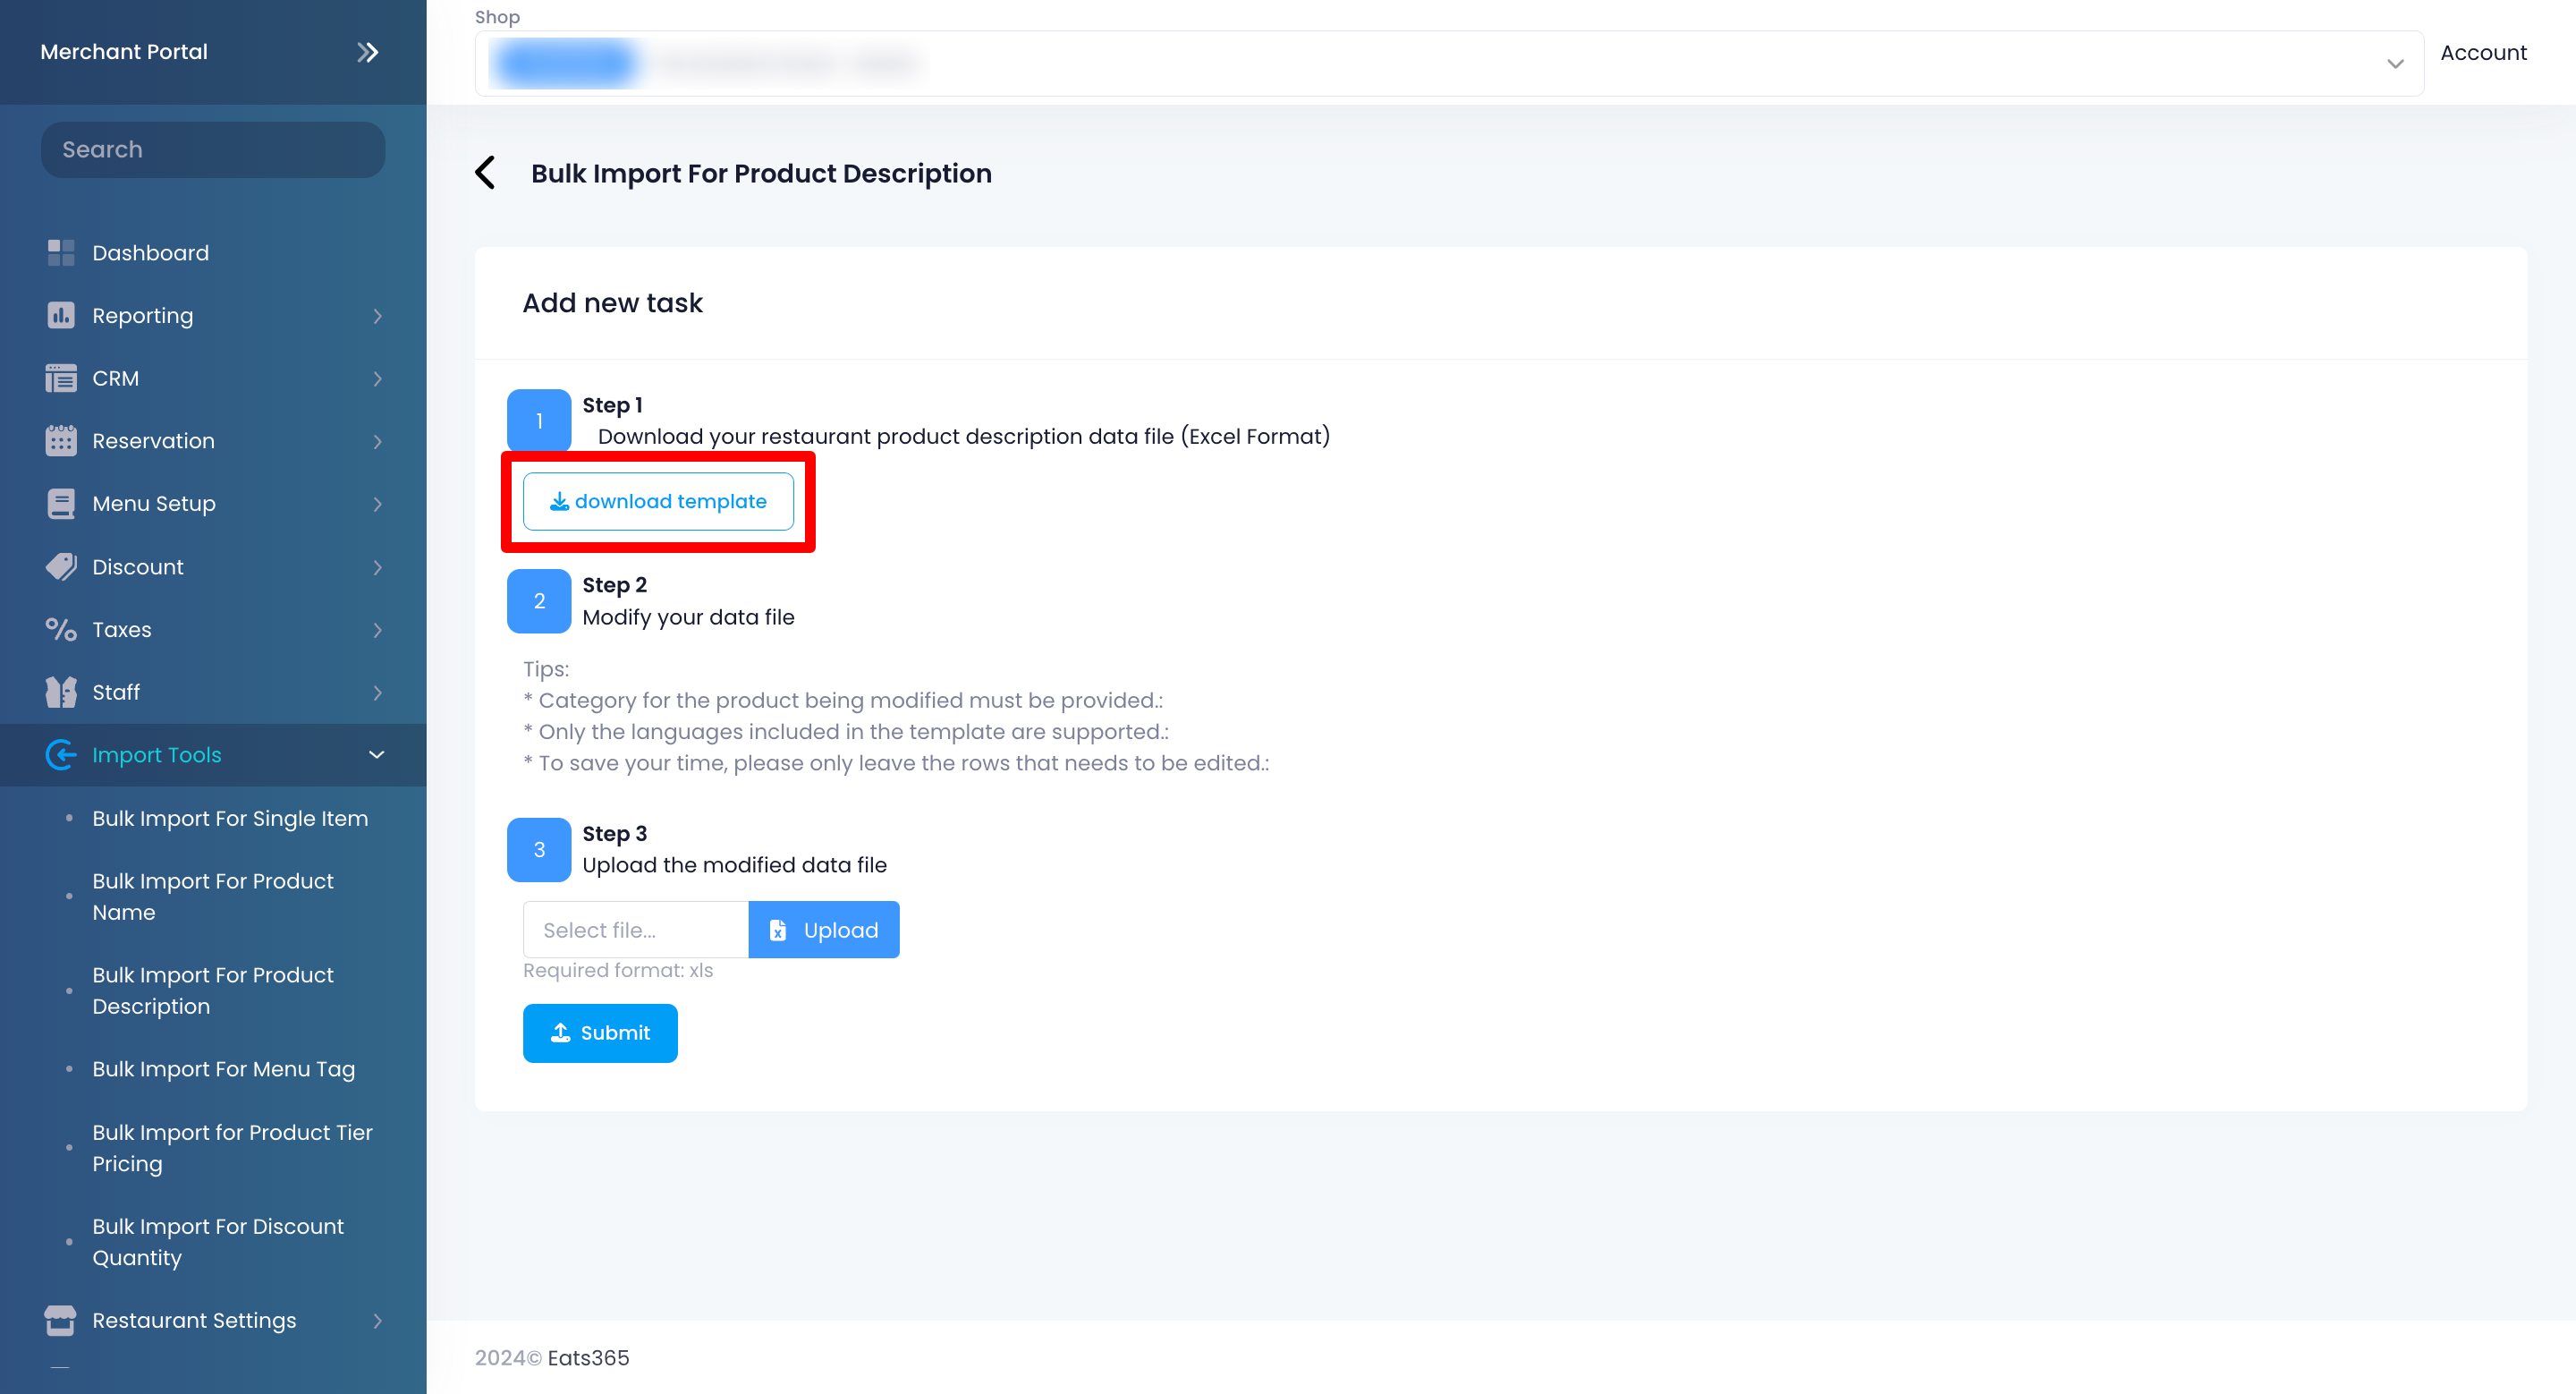
- To modify the template, enter the data in all of the relevant fields in the Excel file.
Tips:- Don’t leave the Category field blank.
- Only the languages included in the template are supported.
- To save time, only leave the rows that need to be edited.
- To upload your modified template file, click on Upload. Then, select your modified file.
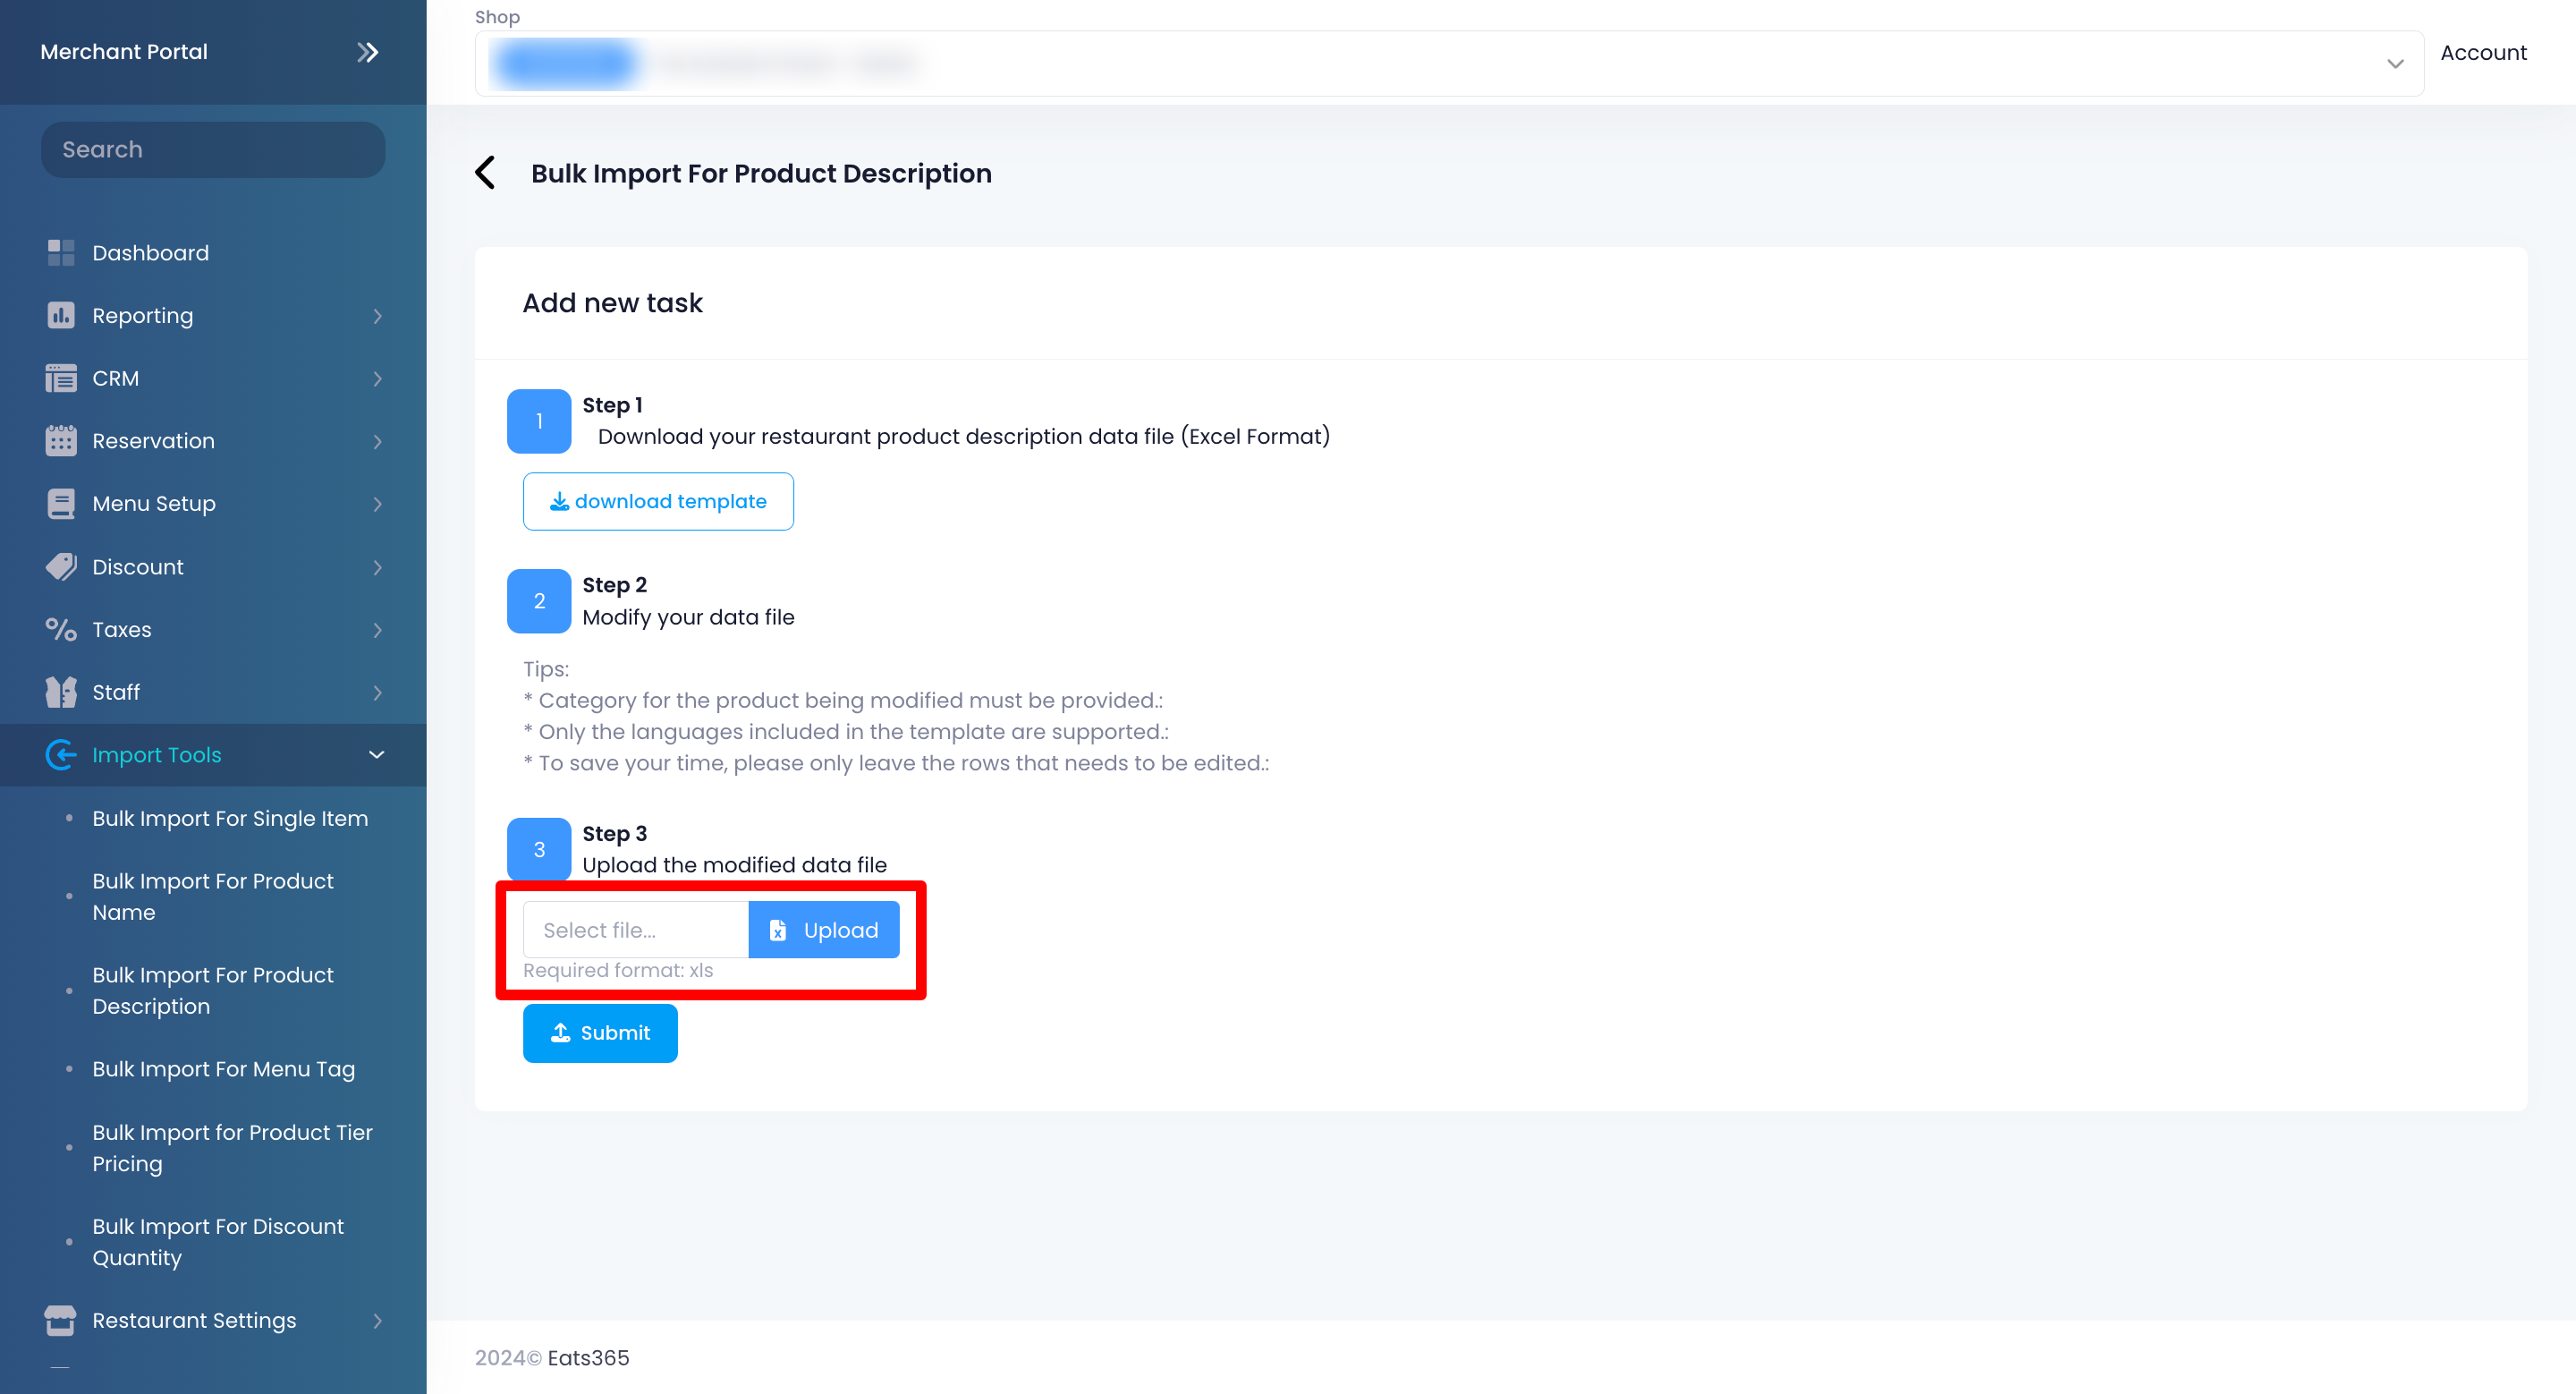
- Click on Submit to confirm.
Bulk Import for Product Tag
To perform a bulk import of Product Tags, follow the steps below:
Merchant Portal (Classic Theme)
- Log in to the Merchant Portal.
- On the left panel, click on Import Tools, then click on Bulk Import for Product Tag.
- At the top right, click on Add new task.
- Click on download template.
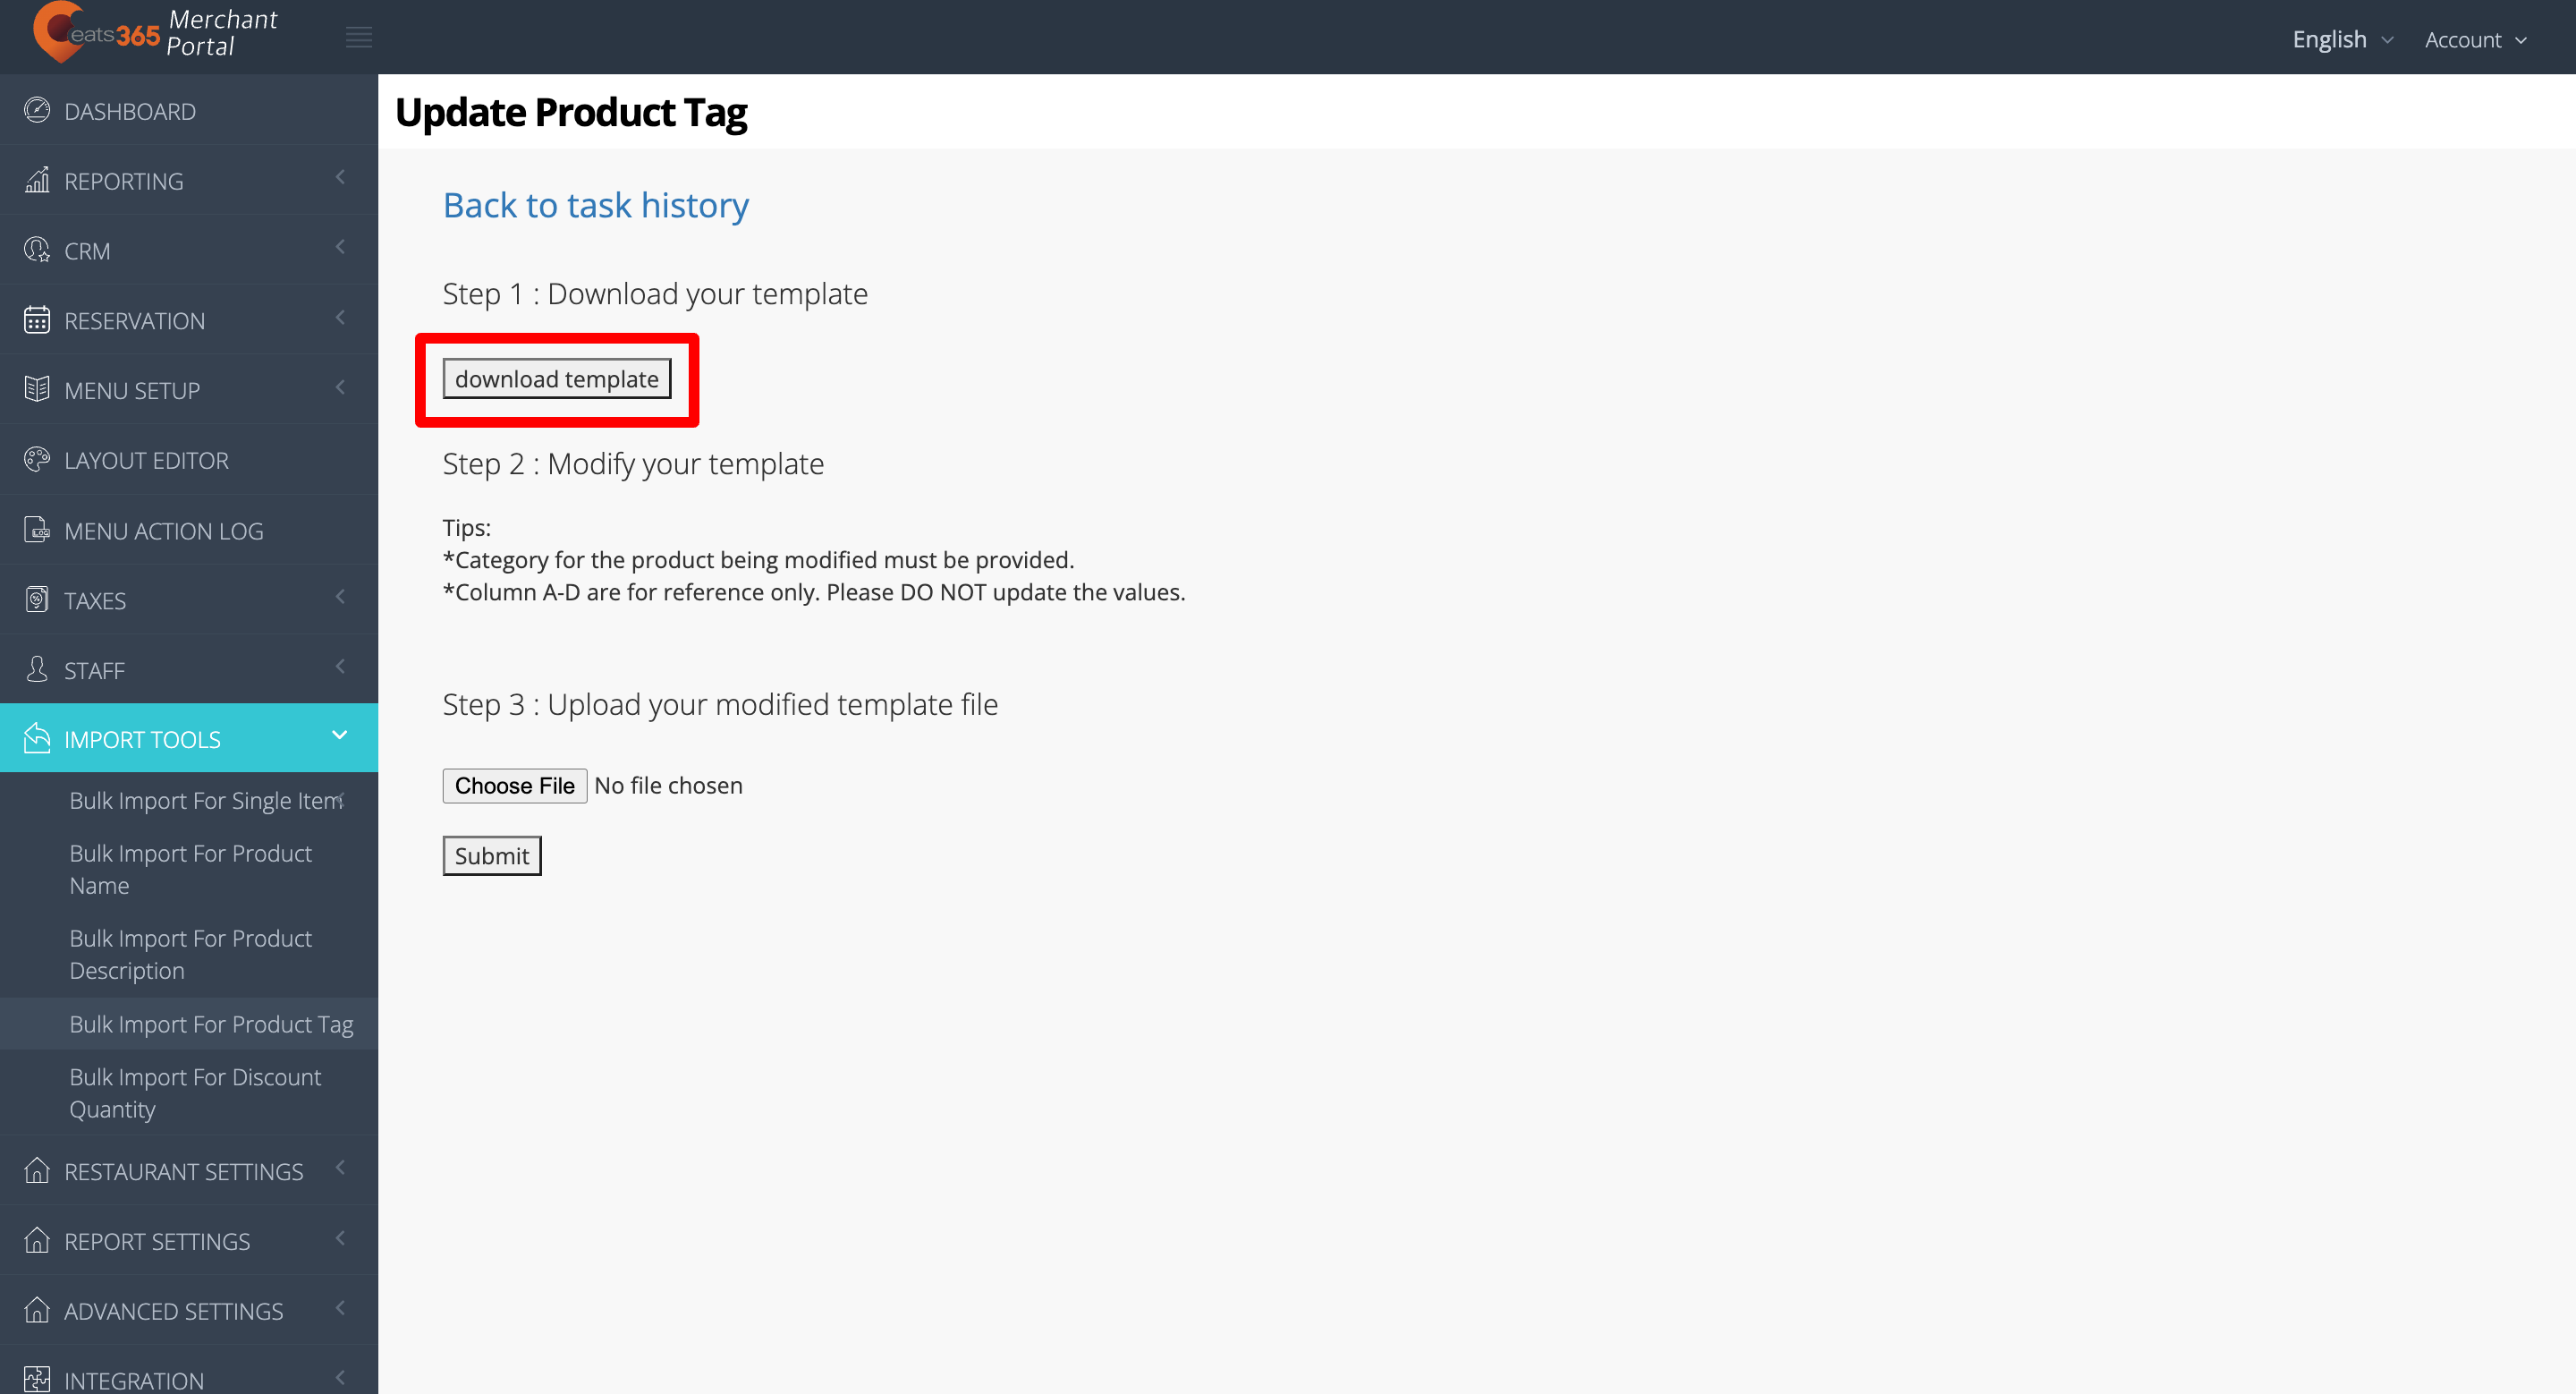
- To modify the template, enter the data in all of the relevant fields in the Excel file.
Tips:- The category for the product being modified is required.
- Columns A to D are for reference only. Do not update the values.
- To upload your modified template file, click on Choose File. Then, select your modified file.

- At the top right, click on Submit to confirm.
Merchant Portal 2.0
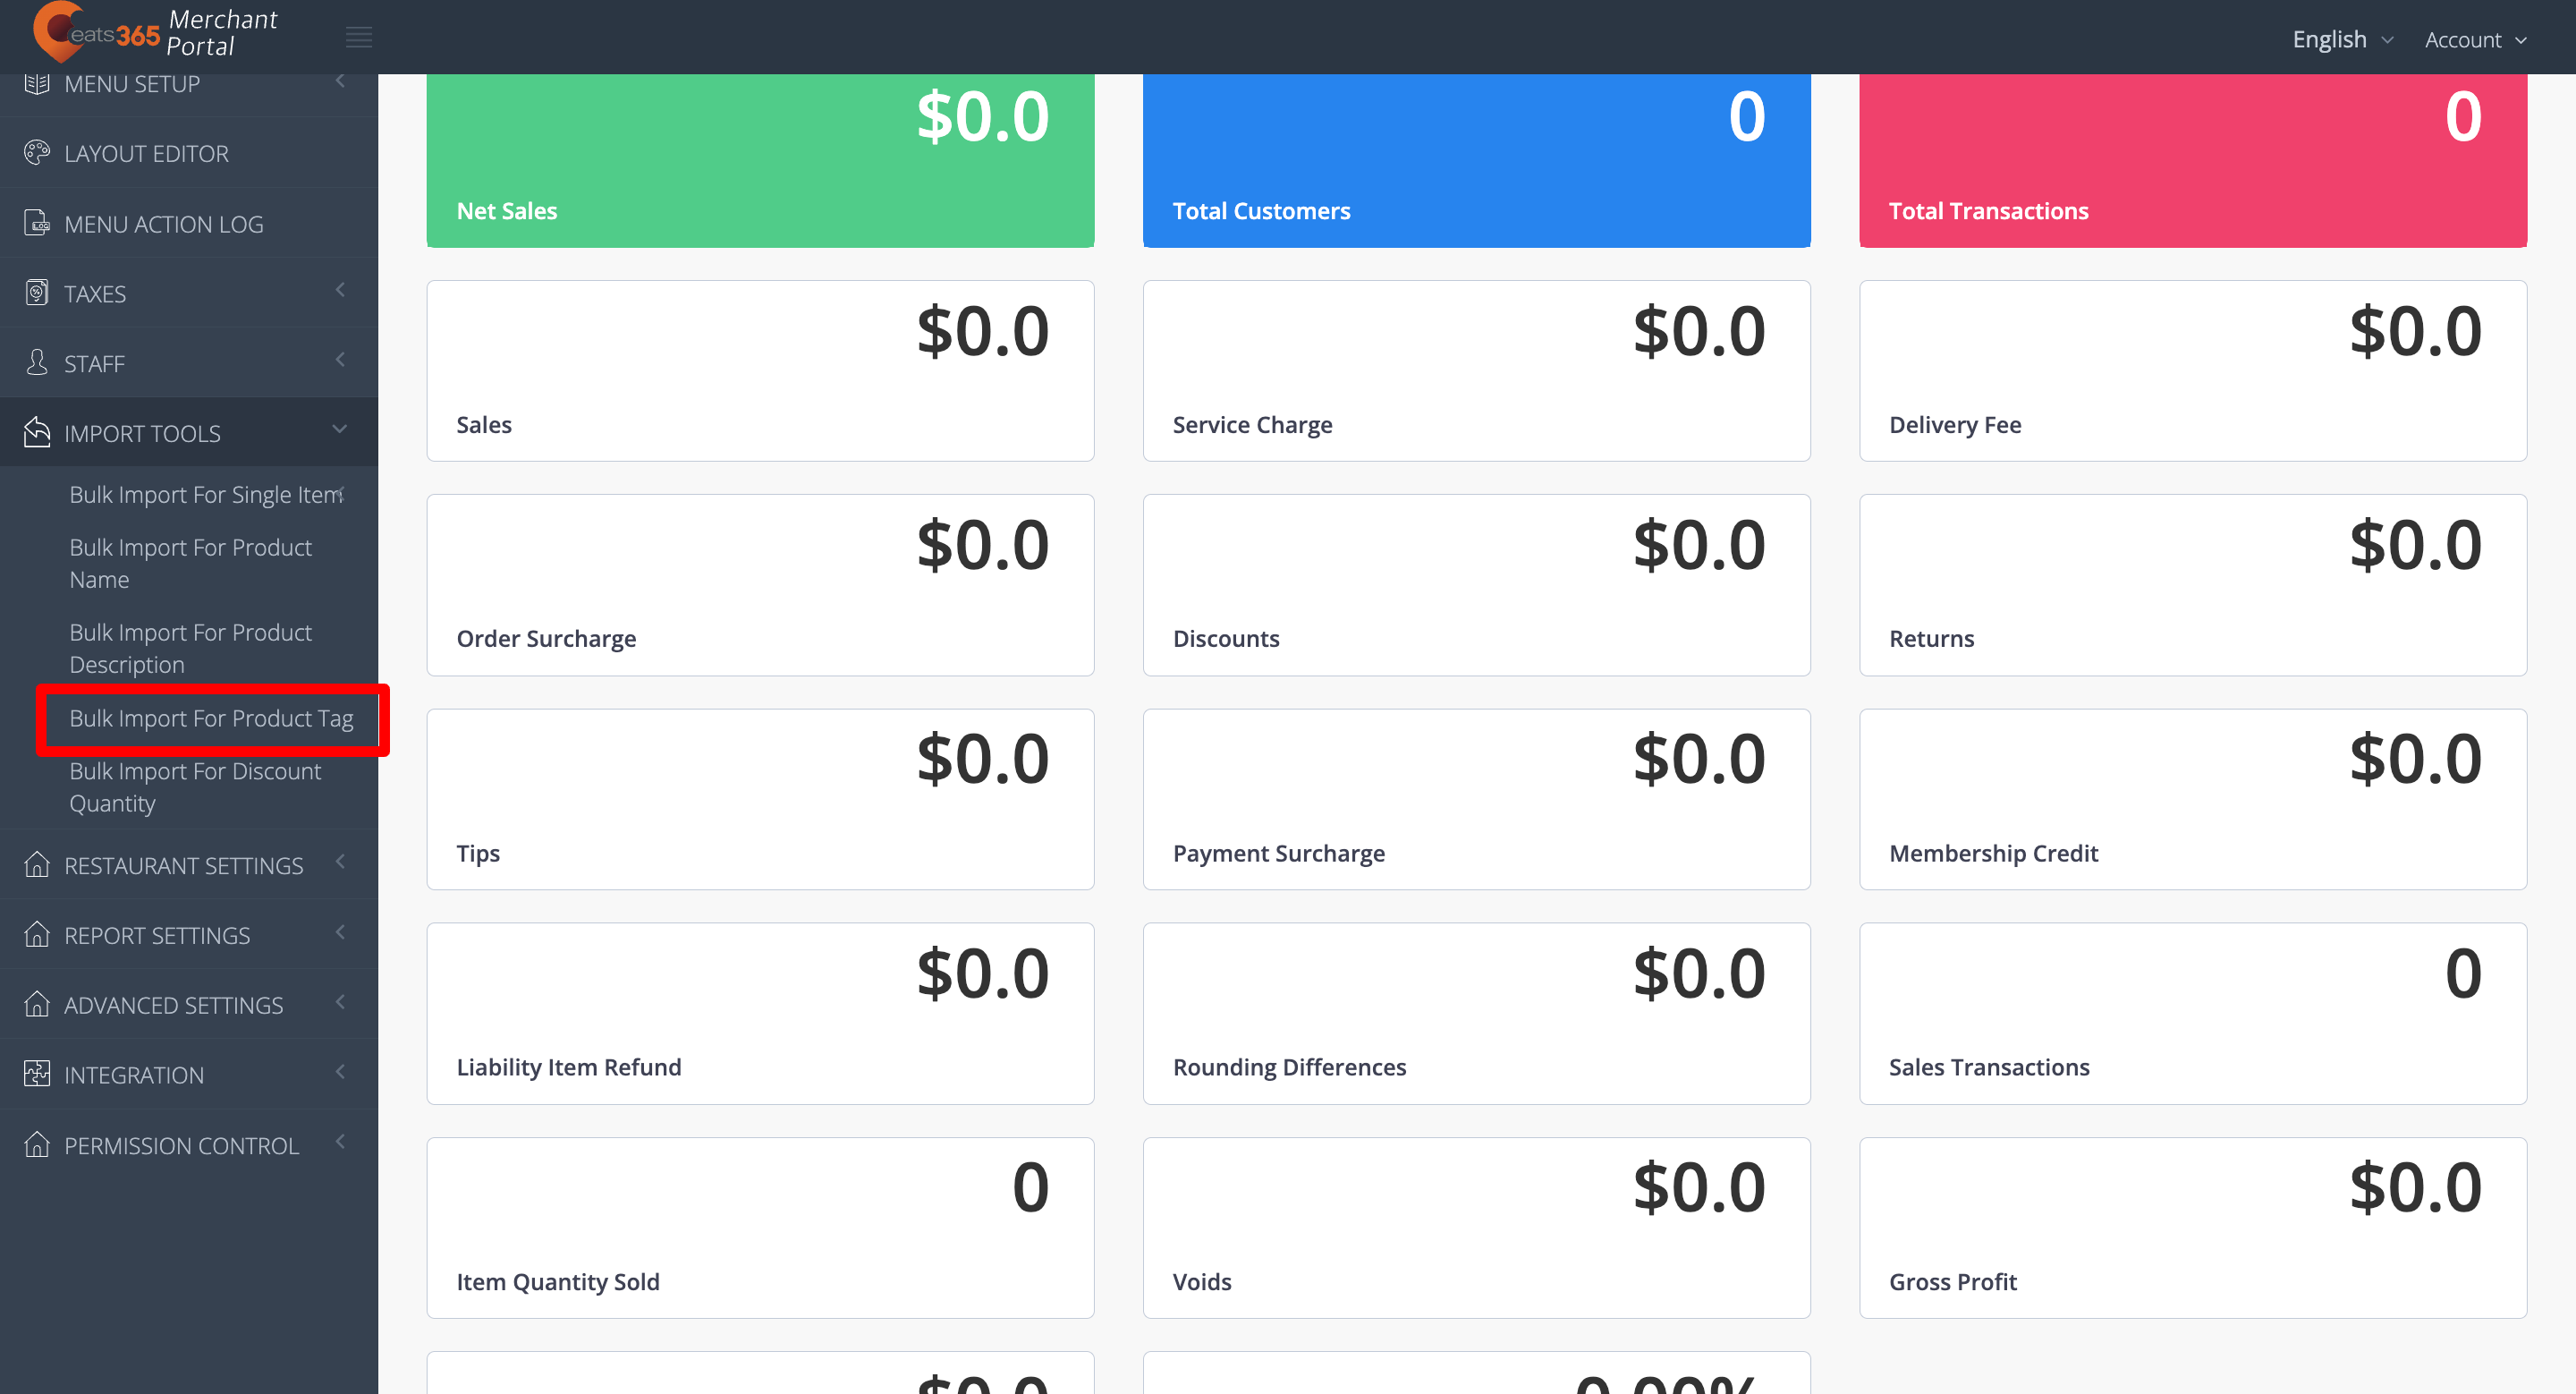
- Log in to the Merchant Portal.
- On the left panel, click on Import Tools, then click on Bulk Import for Menu Tag.
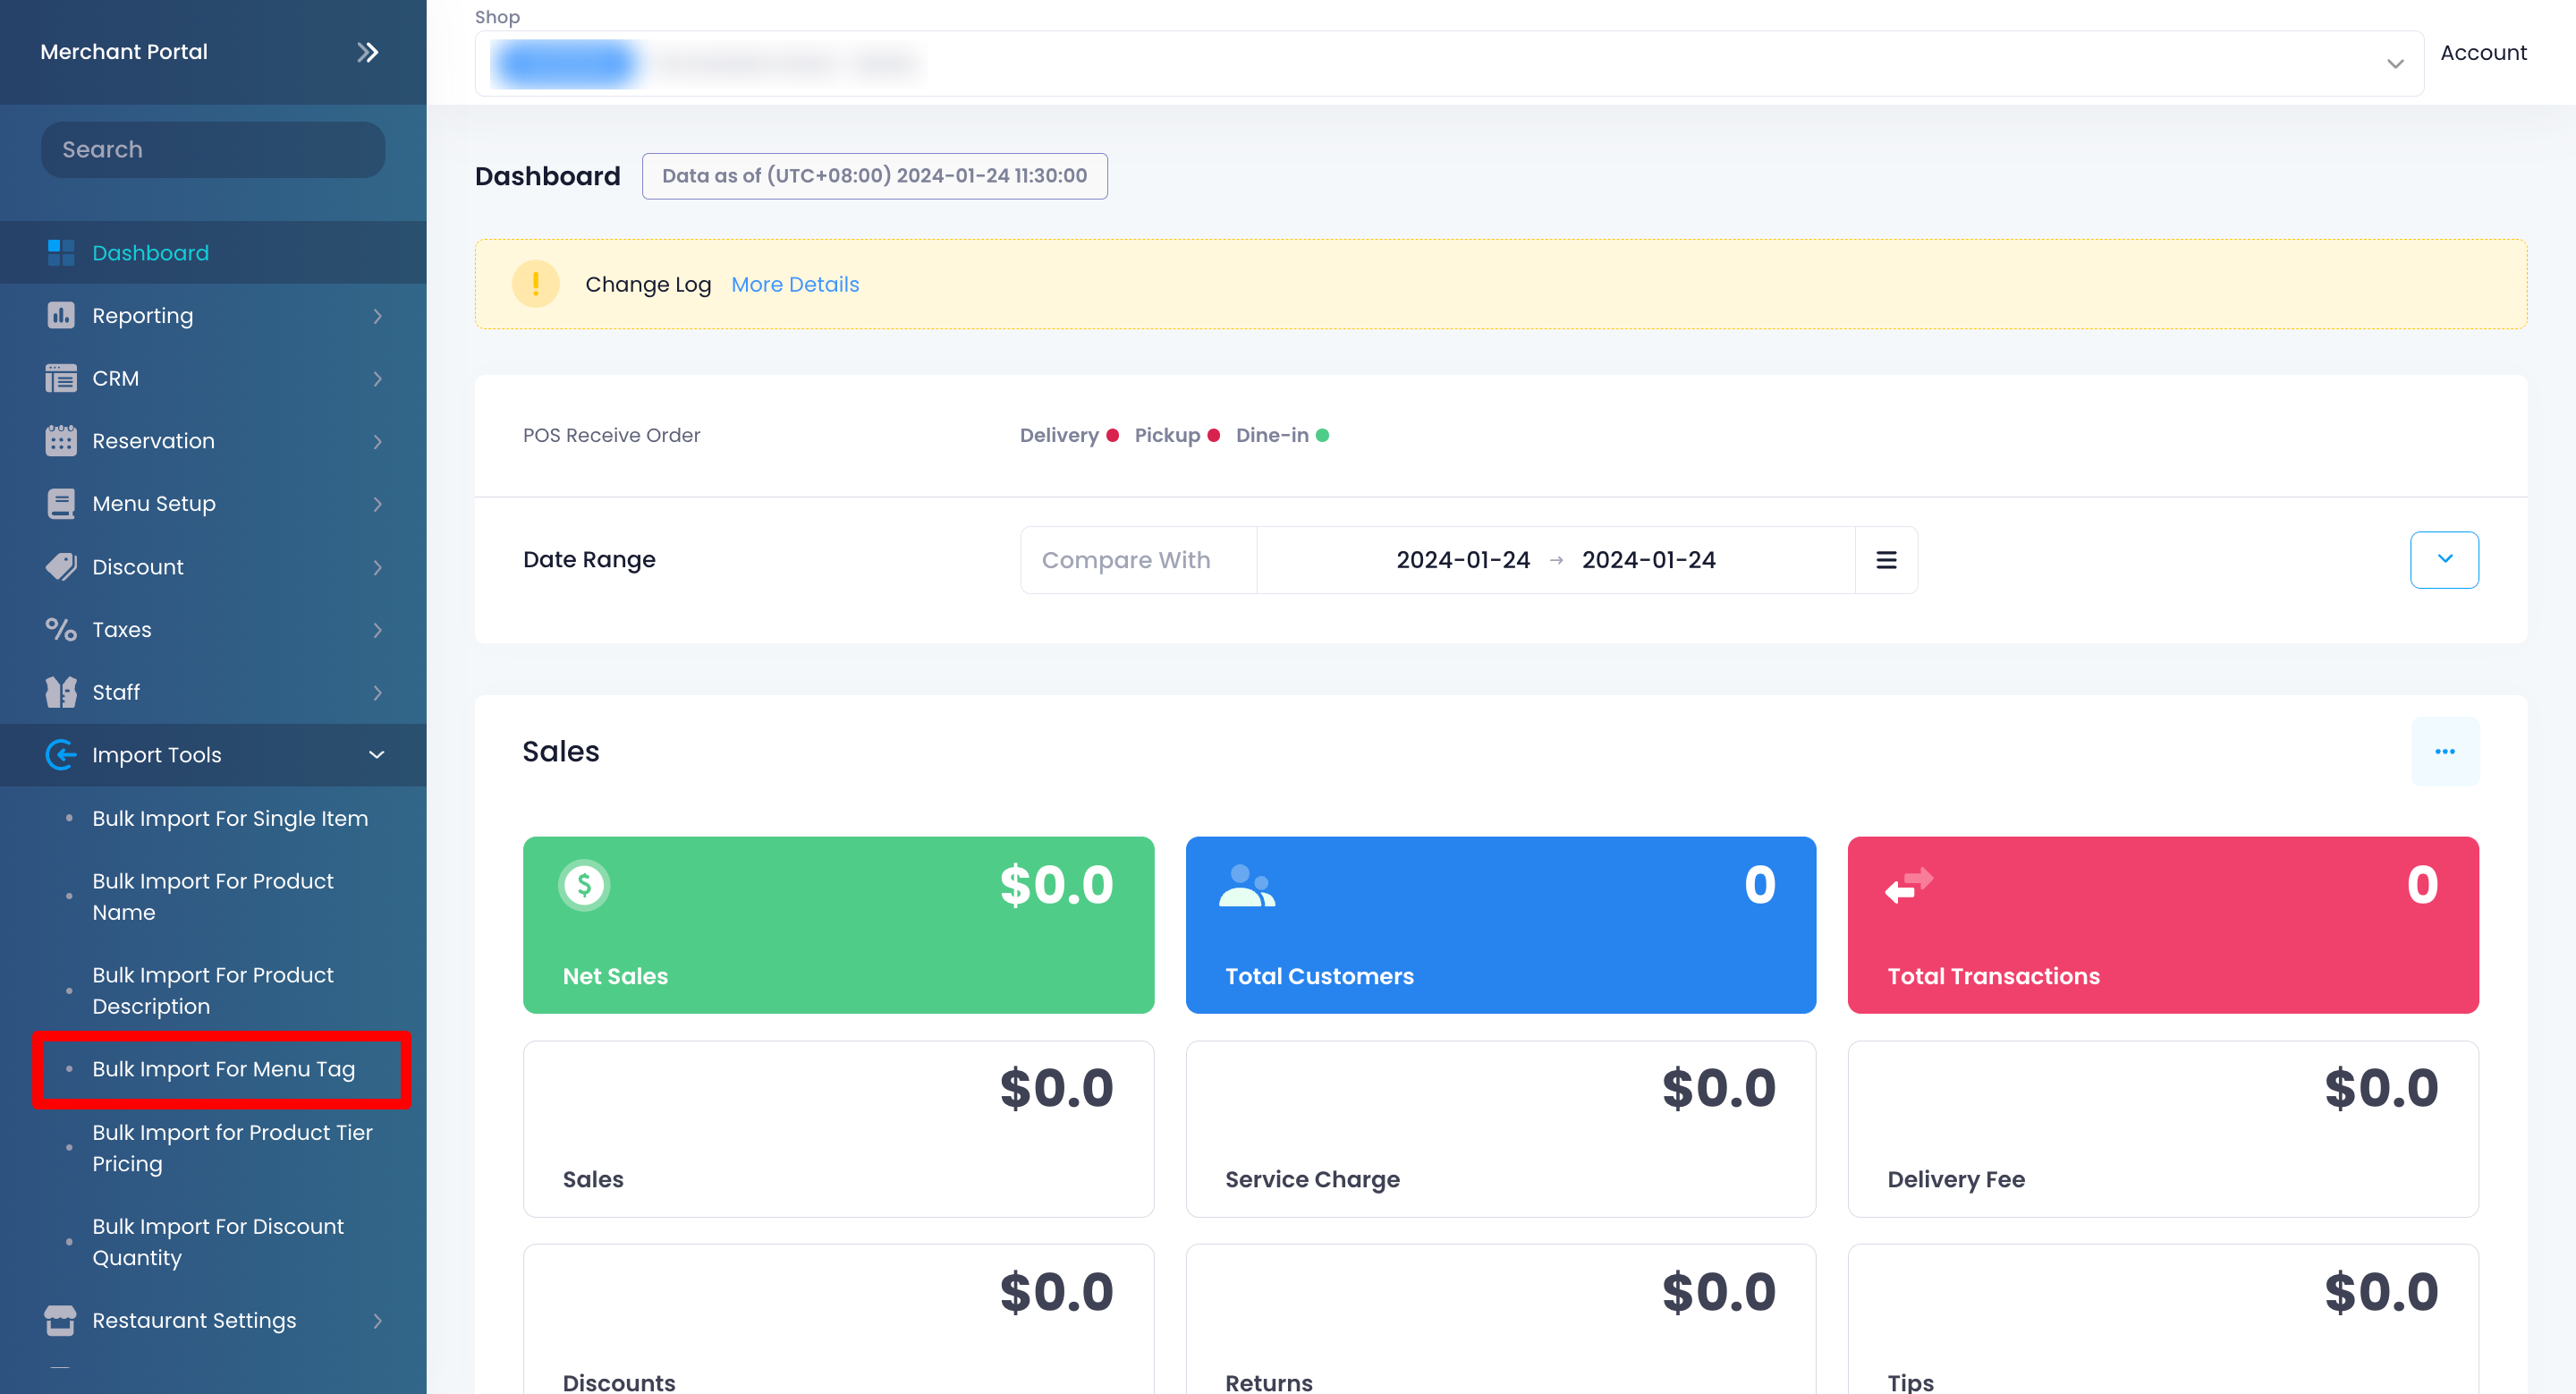
- At the top right, click on Add new task.
- Click on download template.
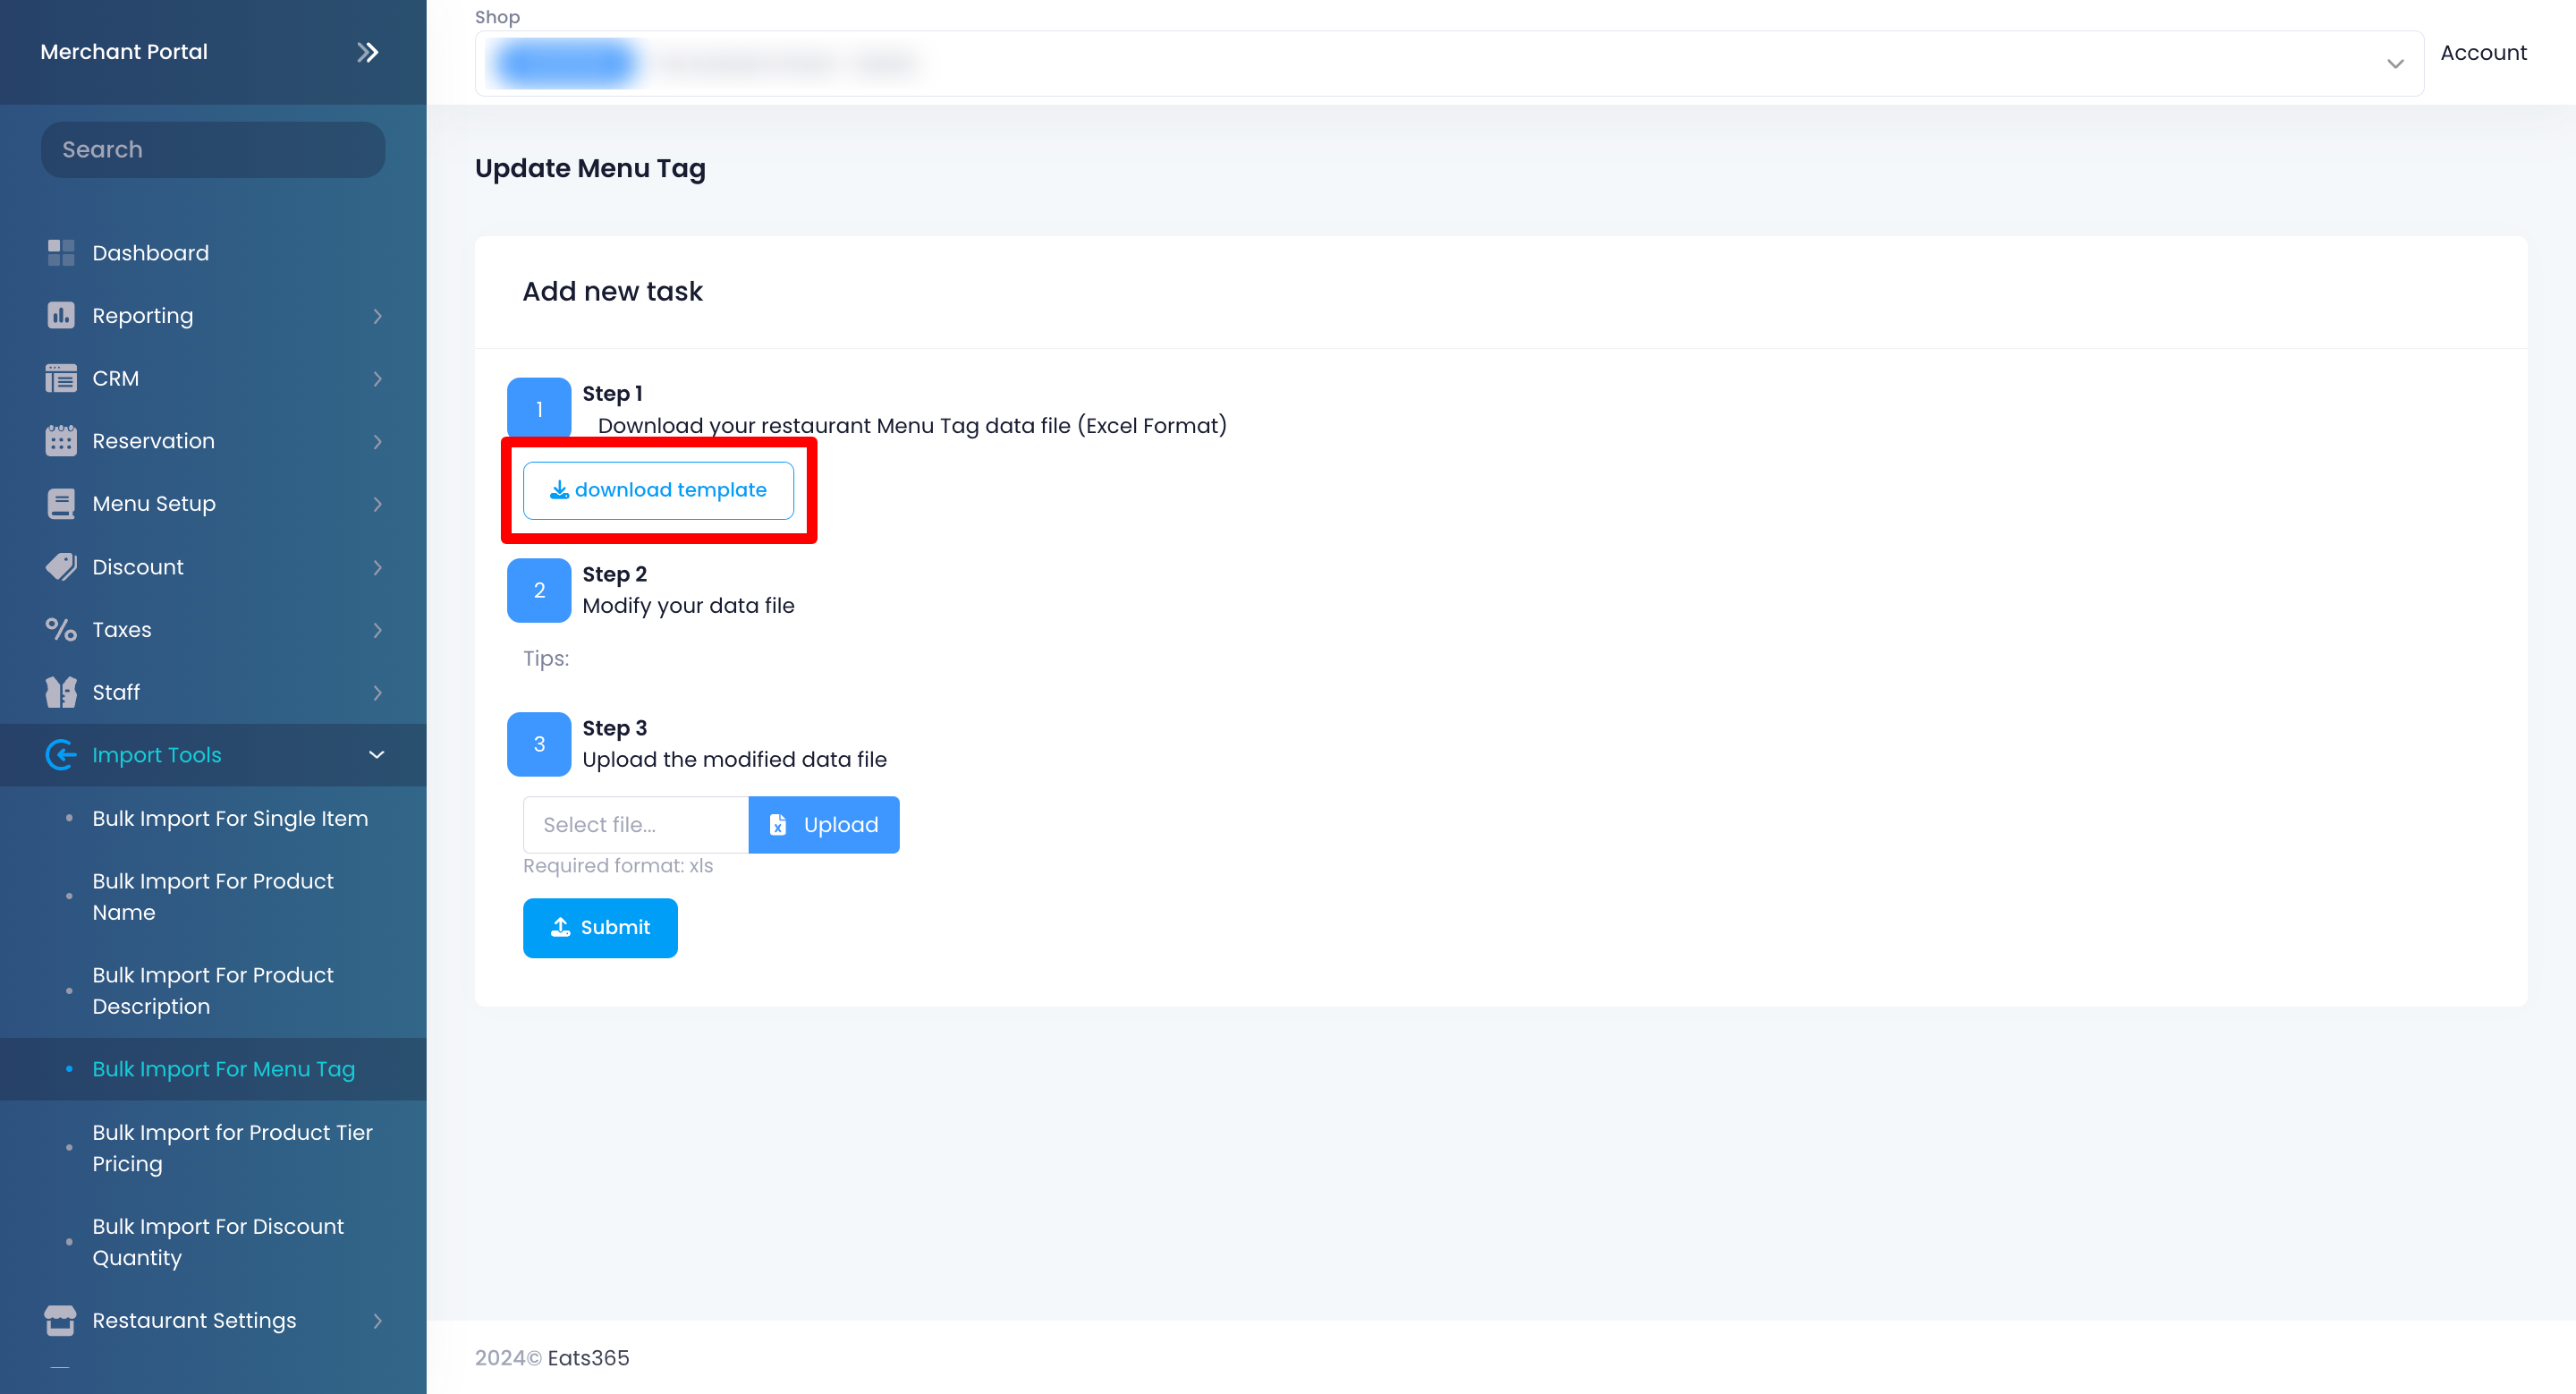
- To modify the template, enter the data in all of the relevant fields in the Excel file.
- To upload your modified template file, click on Upload. Then, select your modified file.
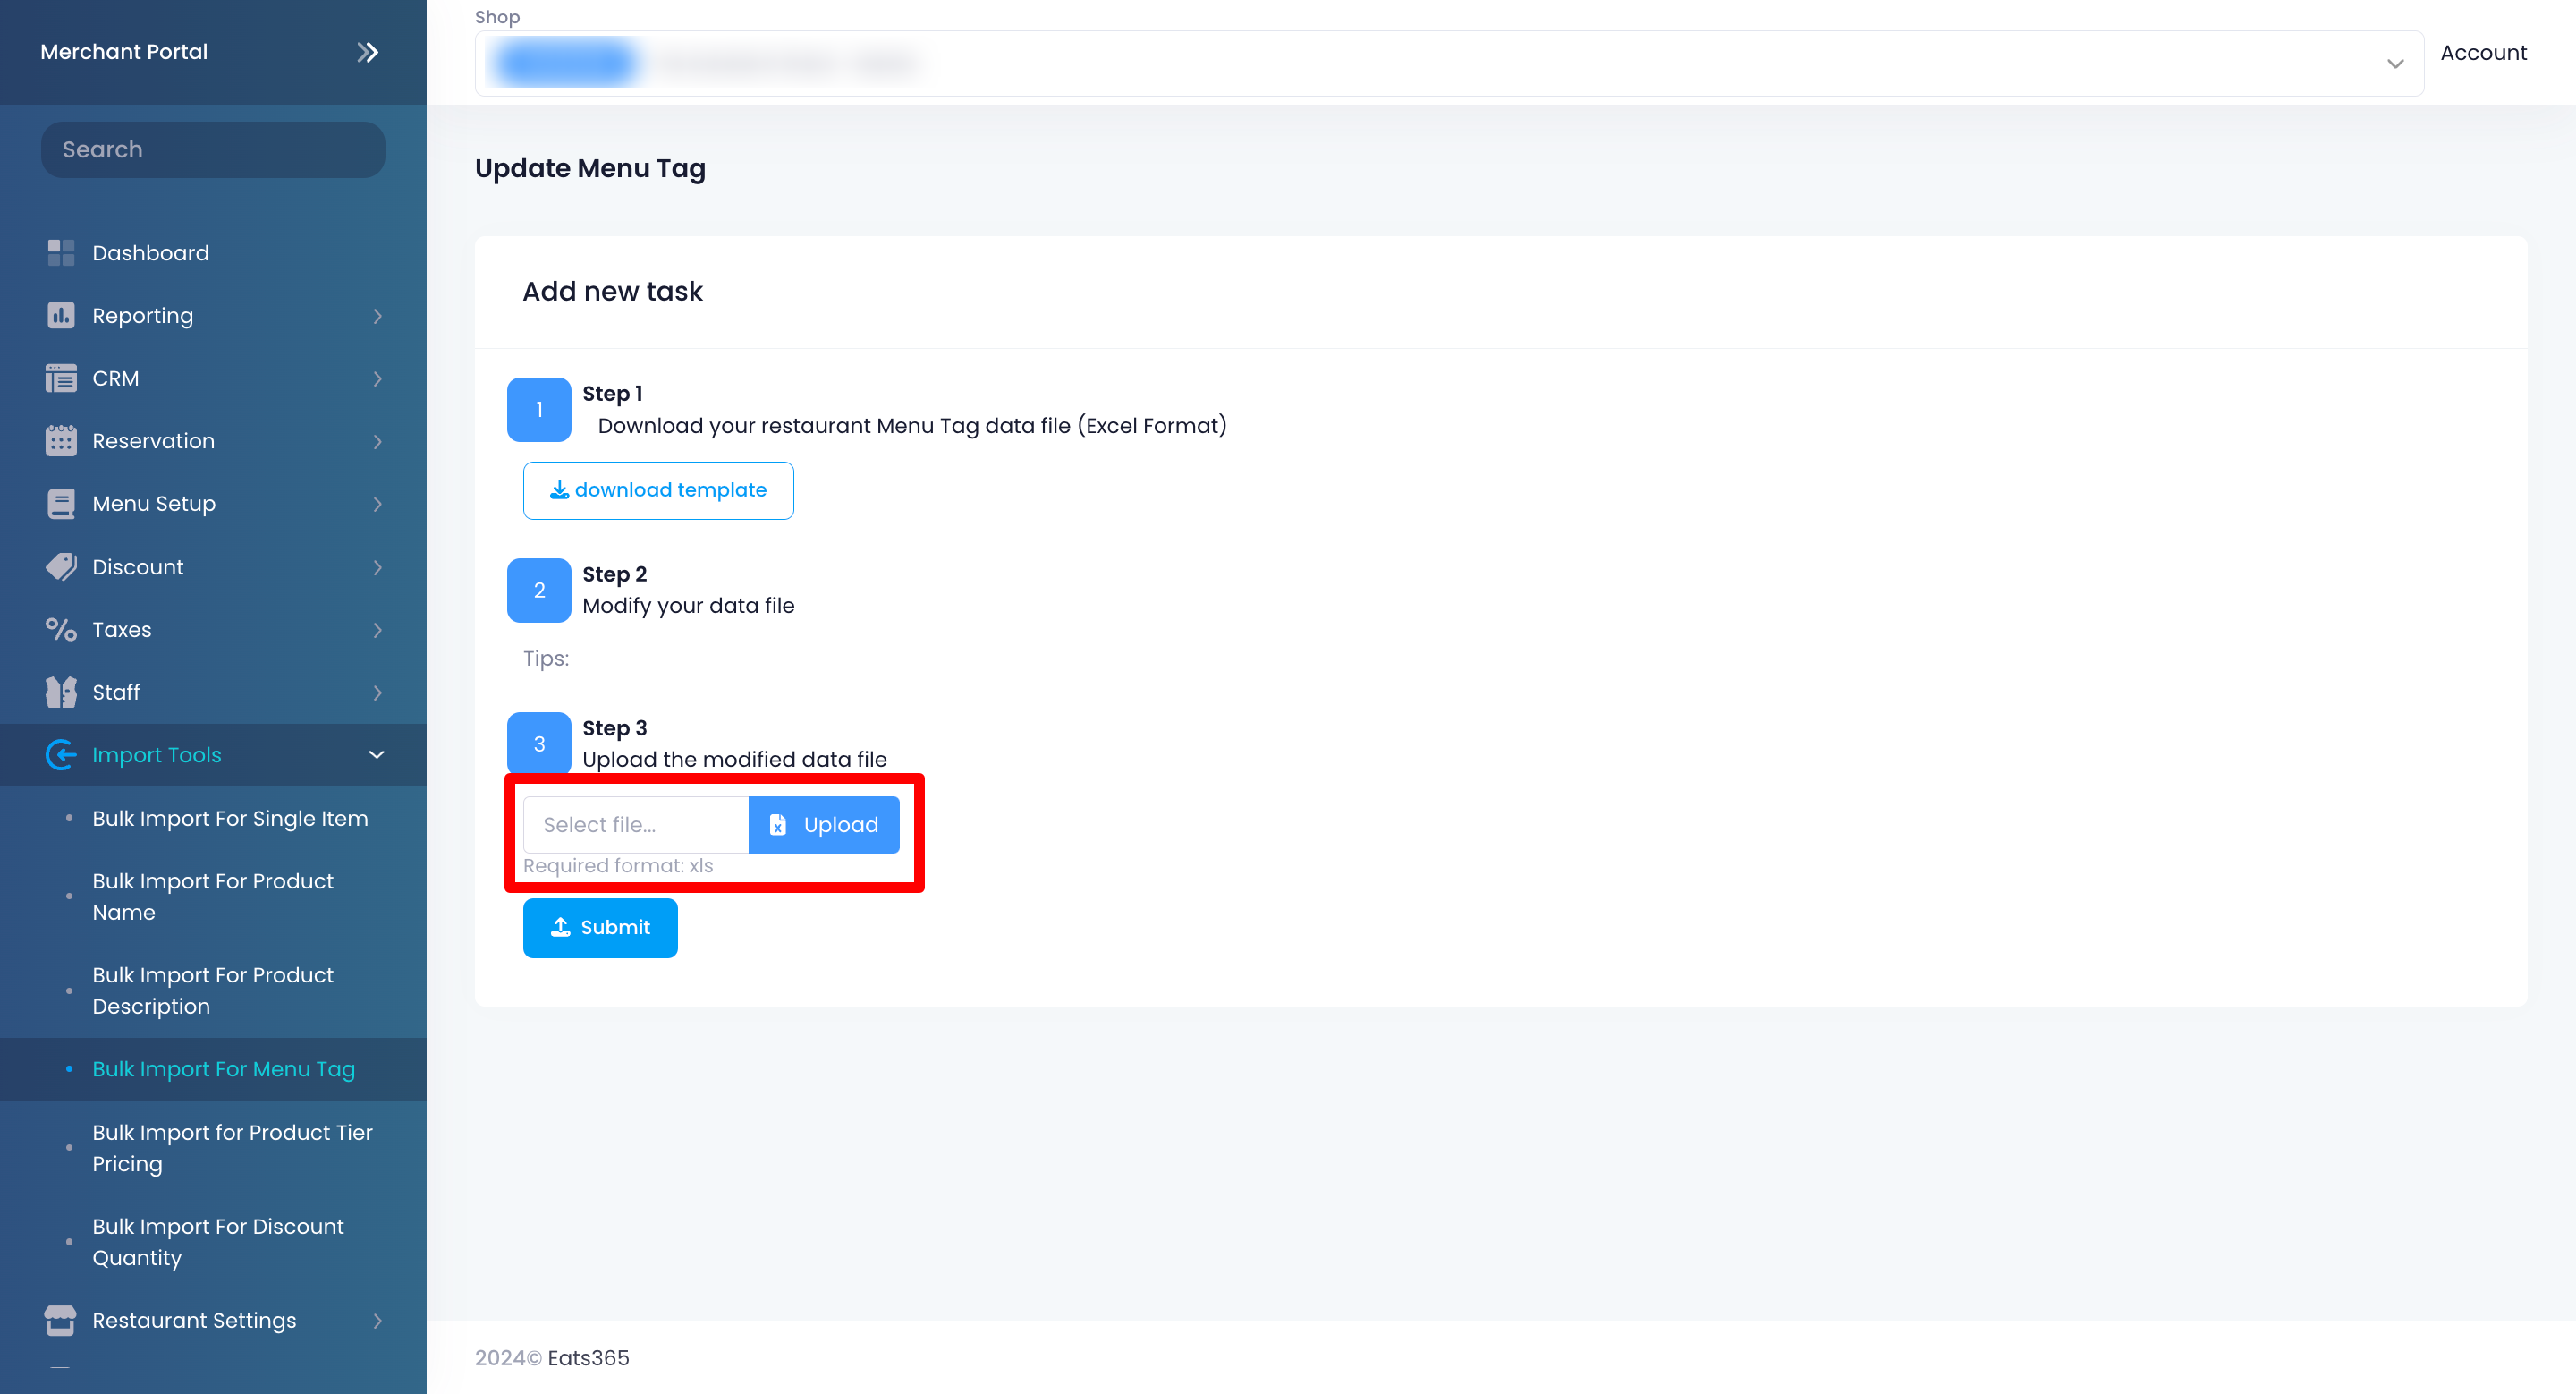
- Click on Submit to confirm.
Bulk Import for Product Tier Pricing
To perform a bulk import for Product Tier Pricing, follow the steps below:
Merchant Portal (Classic Theme)
- Log in to the Merchant Portal.
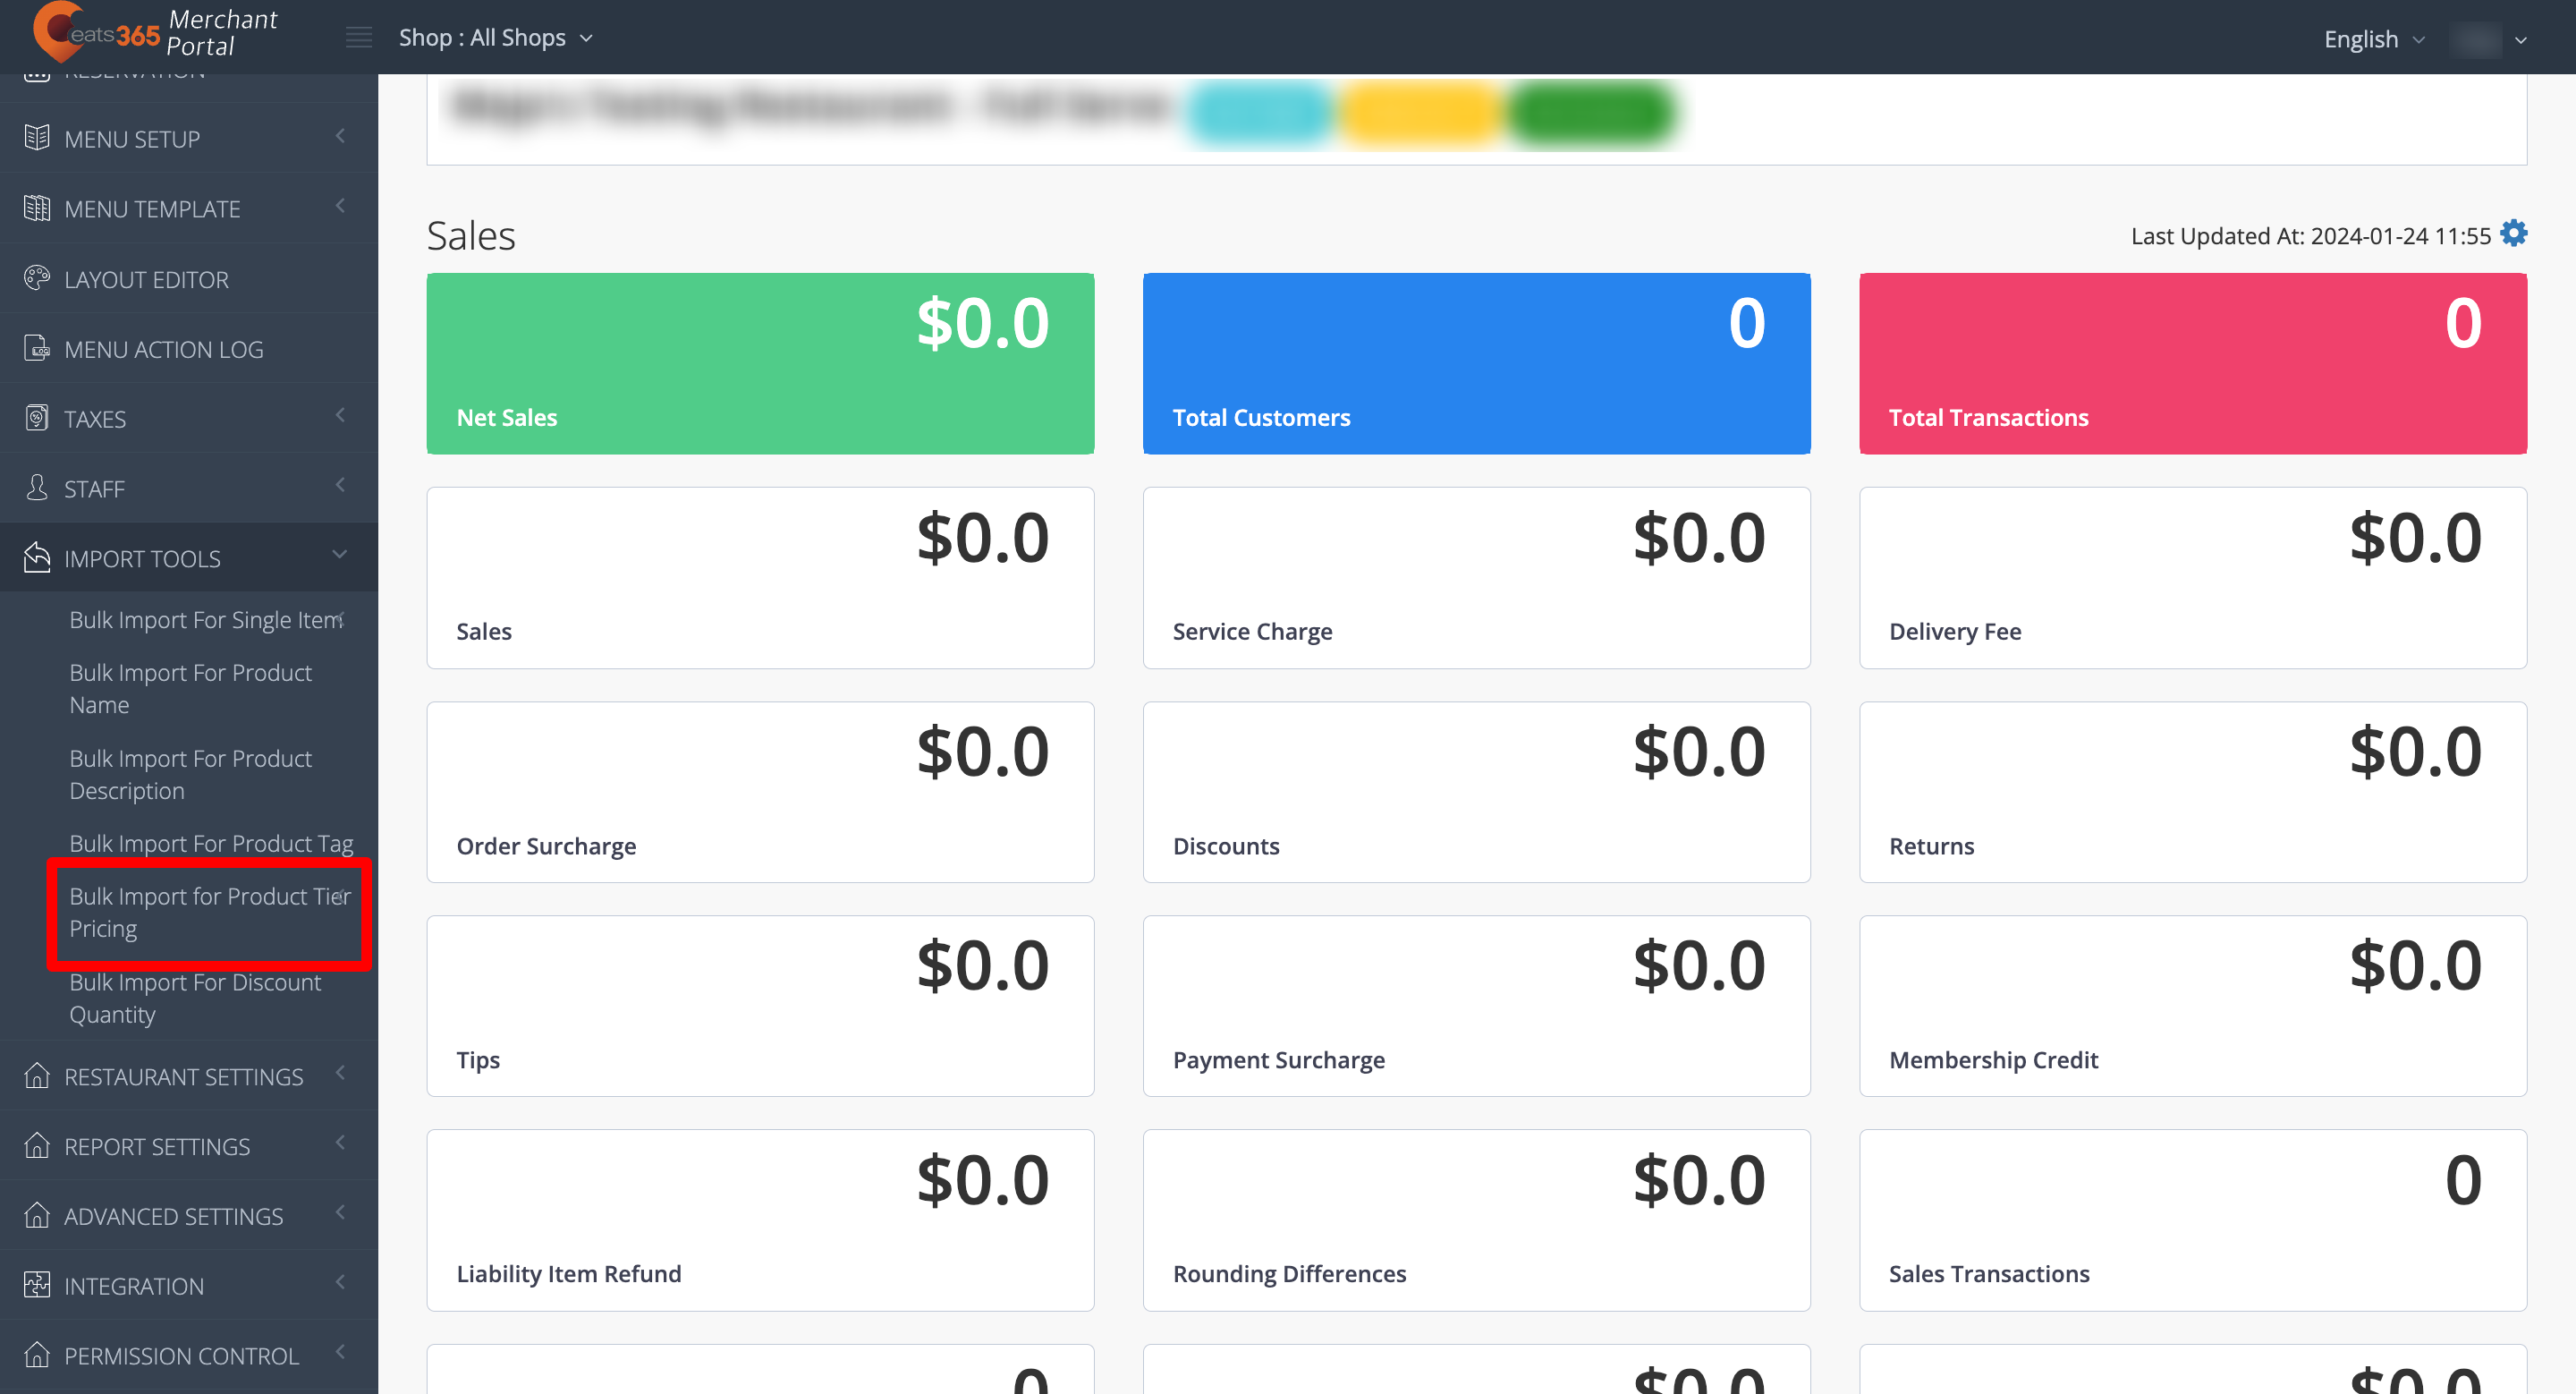
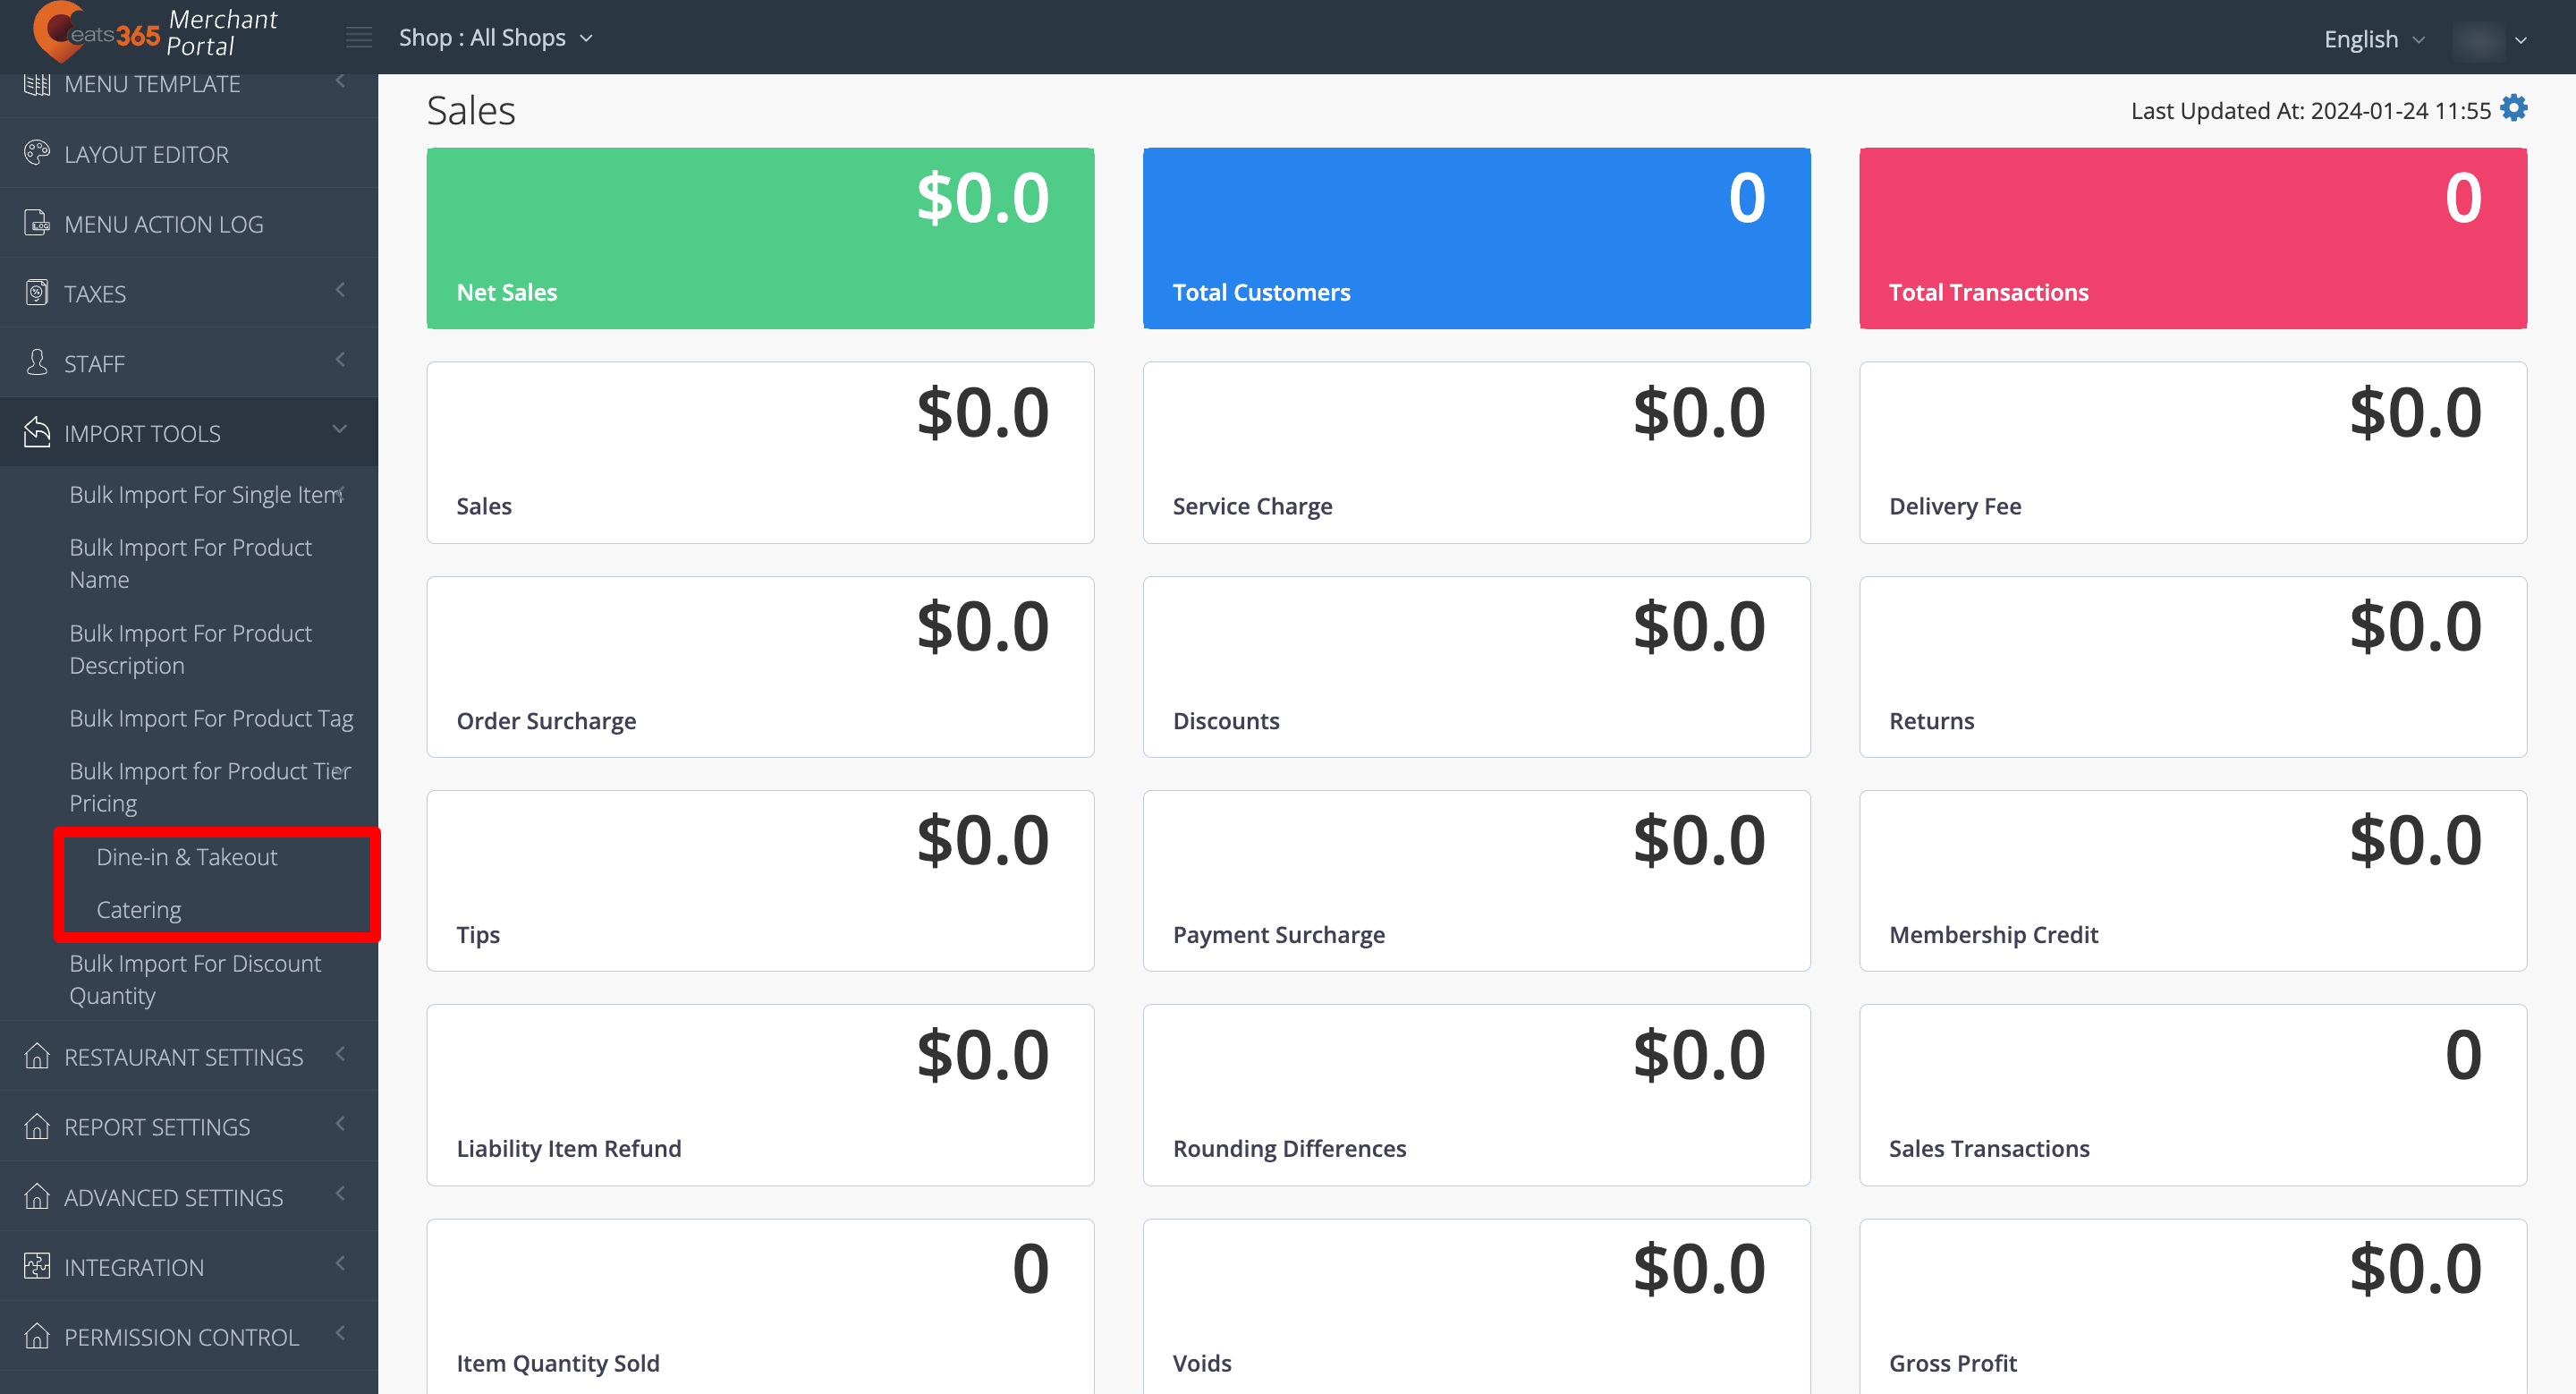
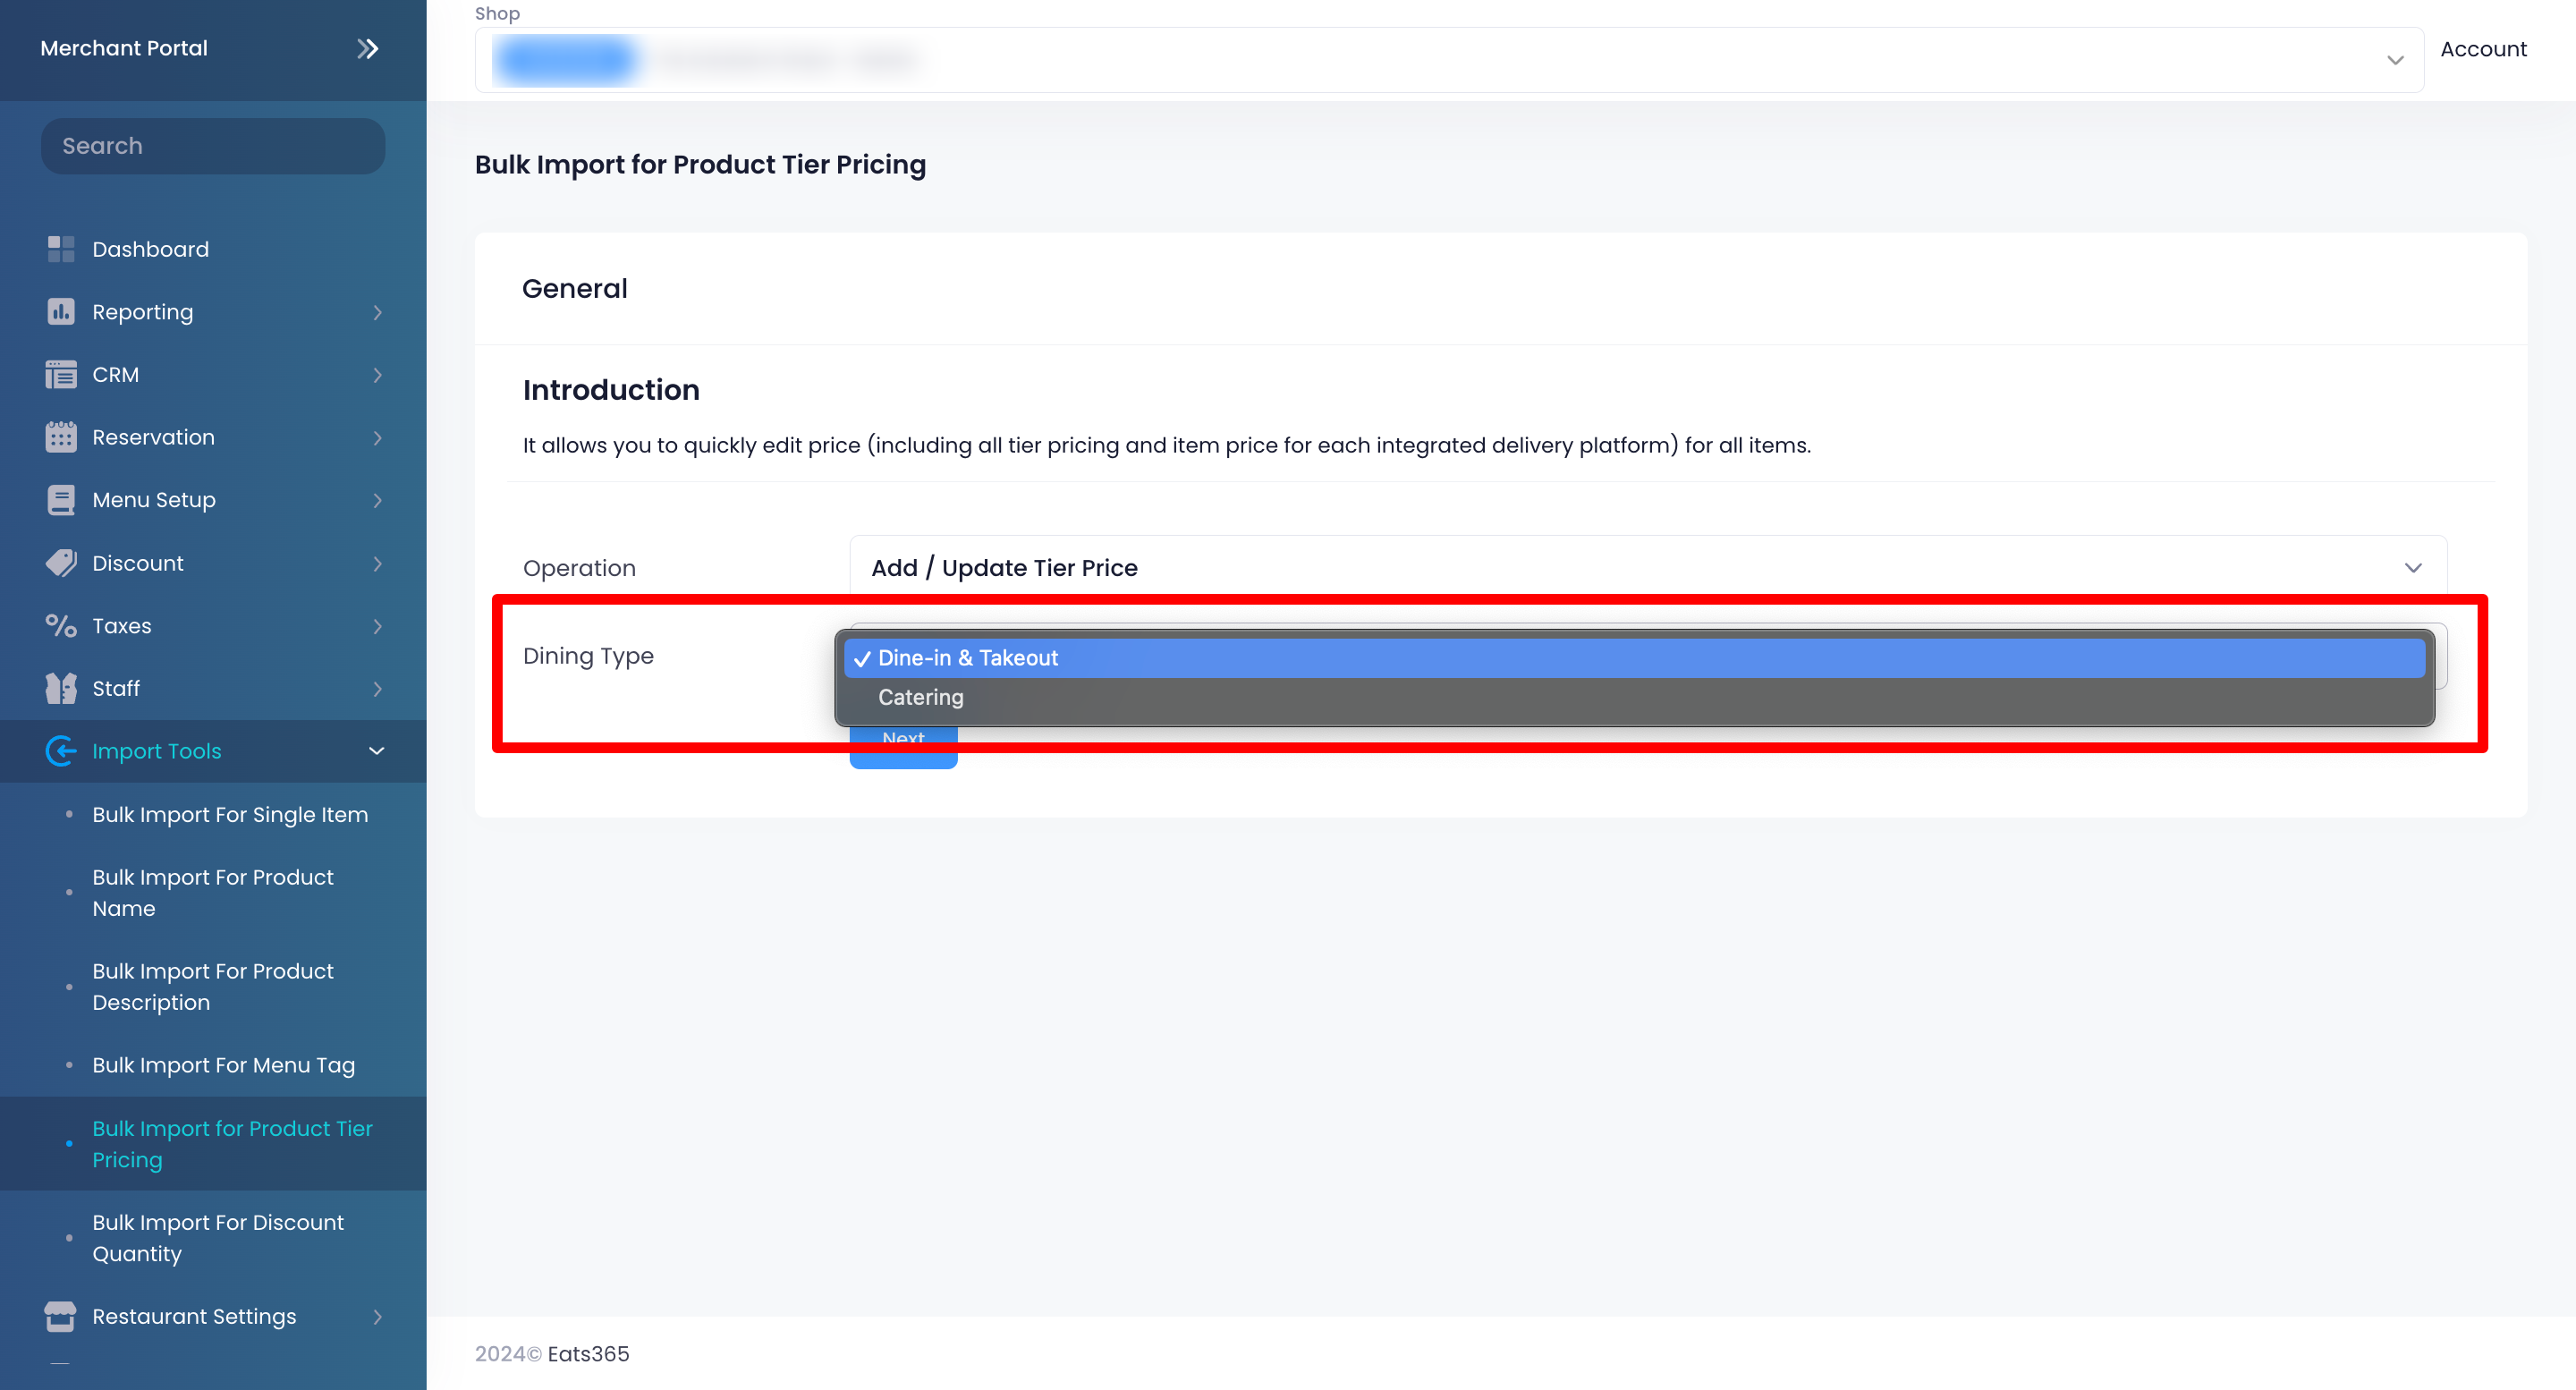
- On the left panel, click on Import Tools, then click on Bulk Import for Product Tier Pricing.
- Select where you want to import the Product Tier Pricing. You can choose from Dine & Takeout or Catering.
- At the top right, click on Add new task.
- Click on download template.
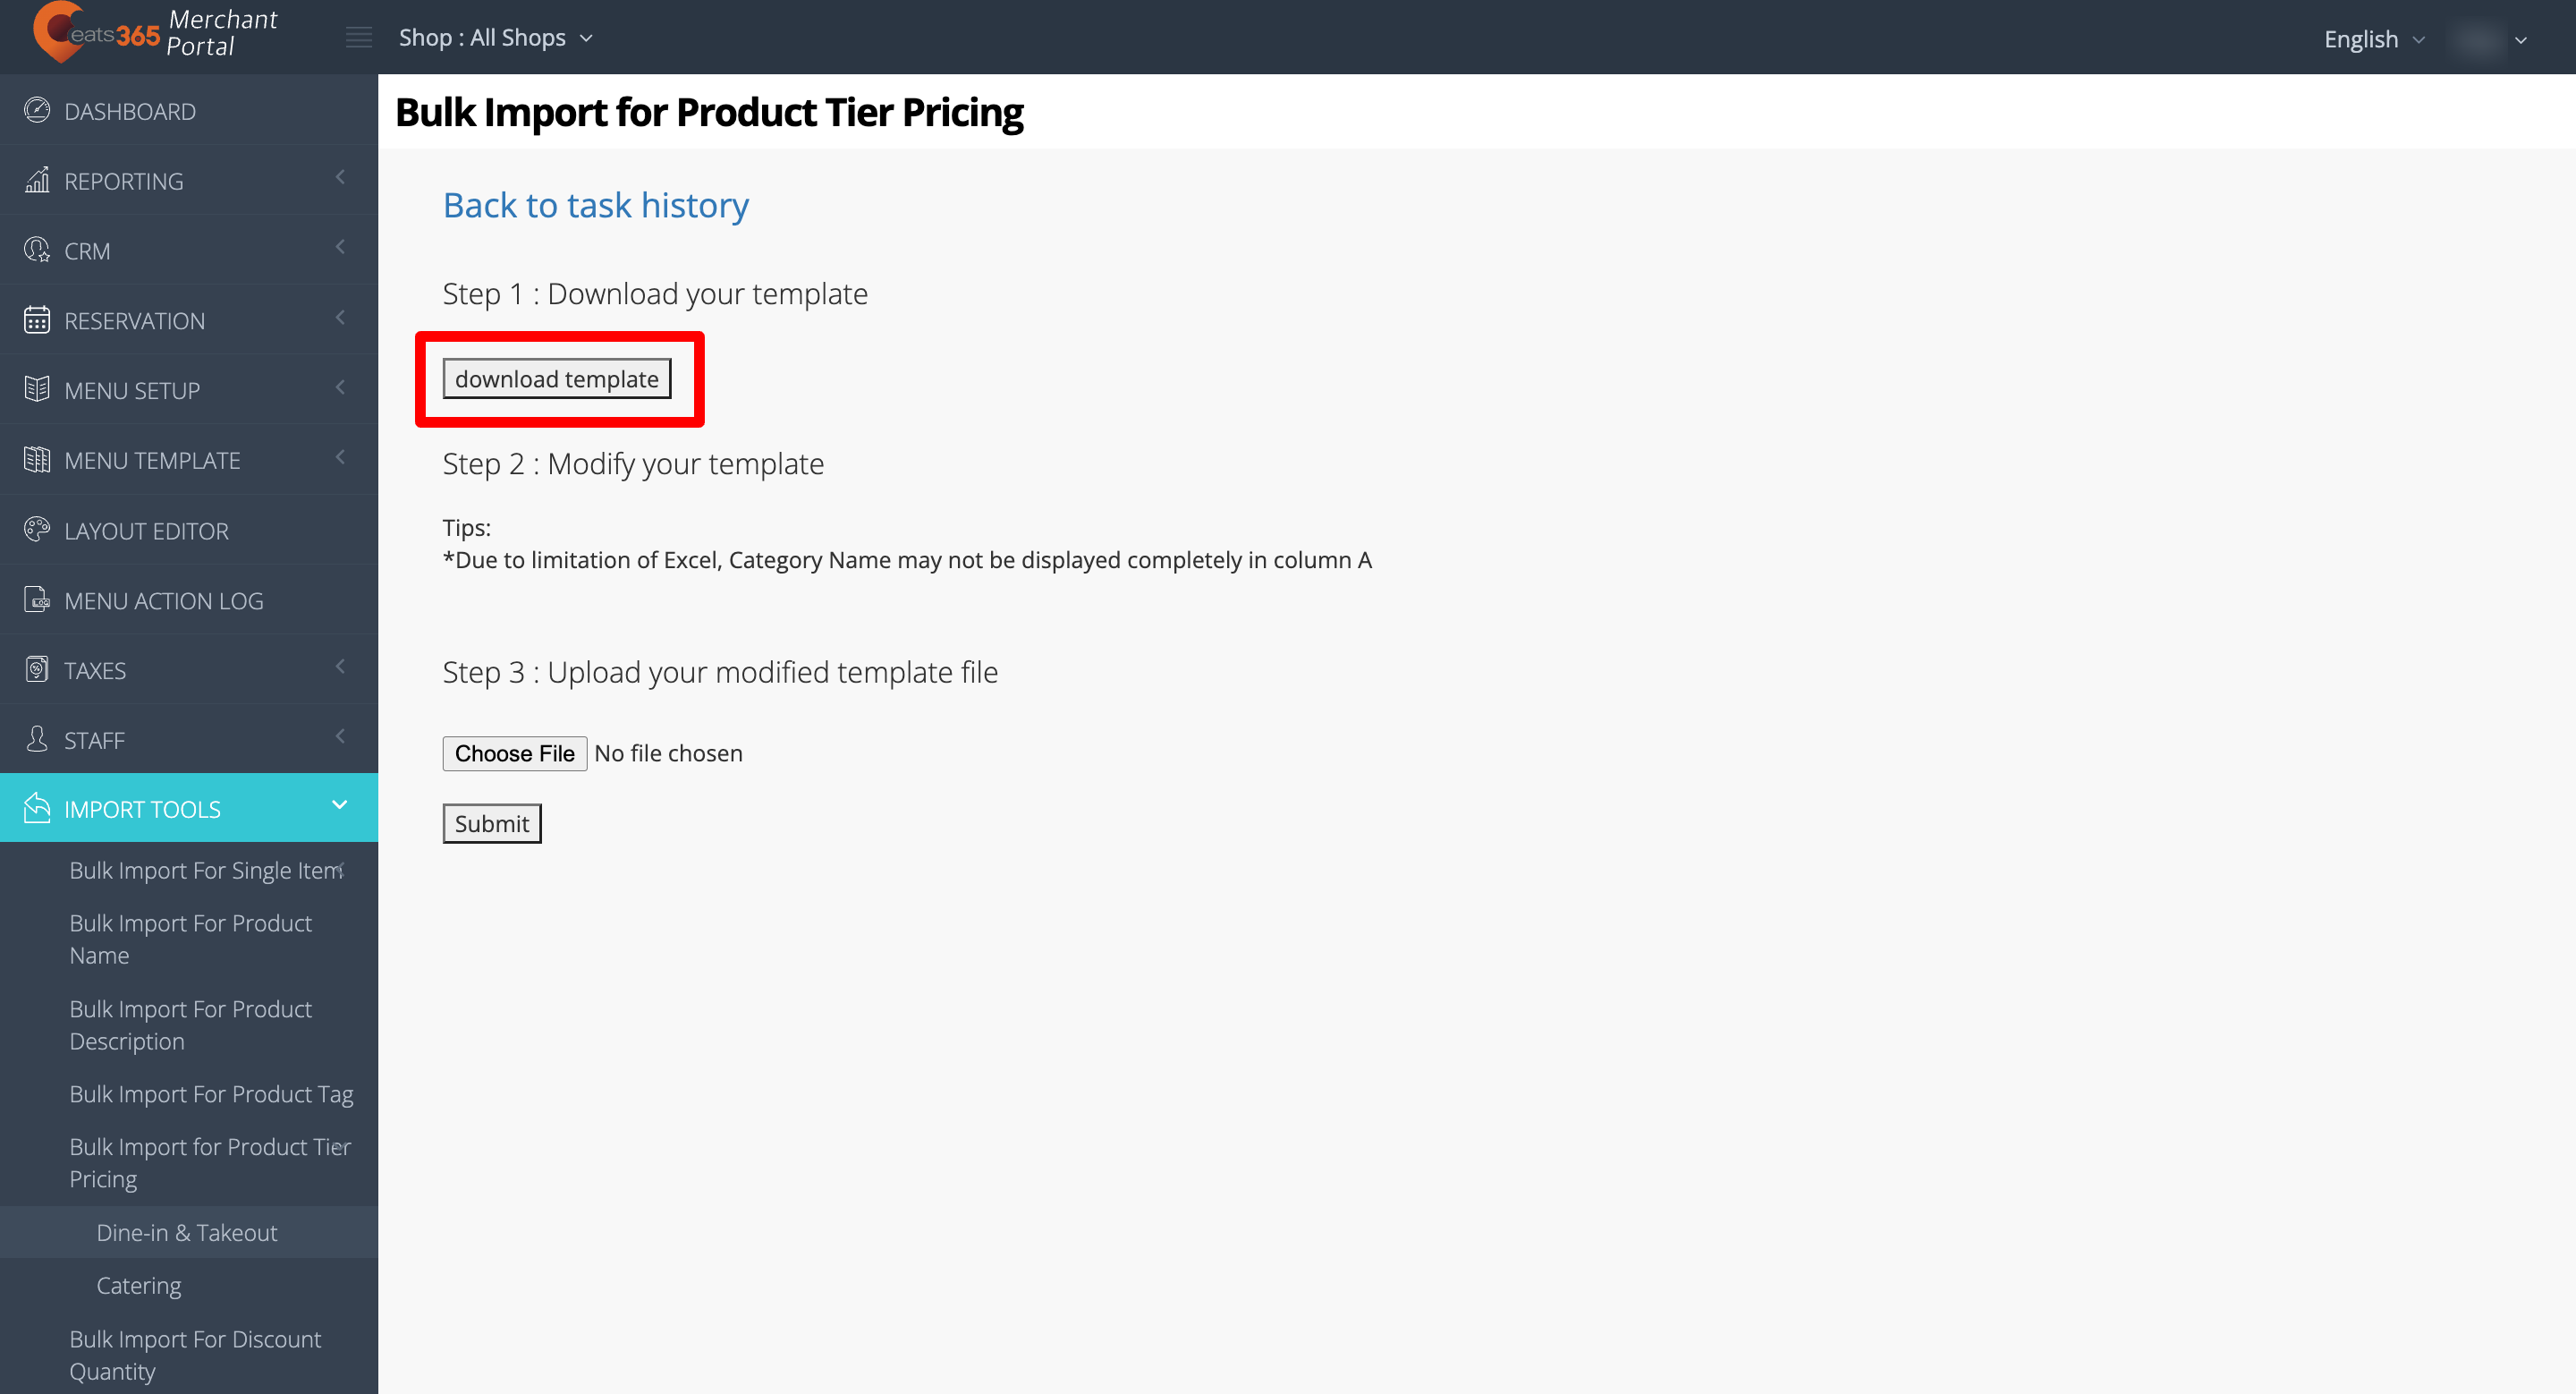
- To modify the template, enter the data in all of the relevant fields in the Excel file.
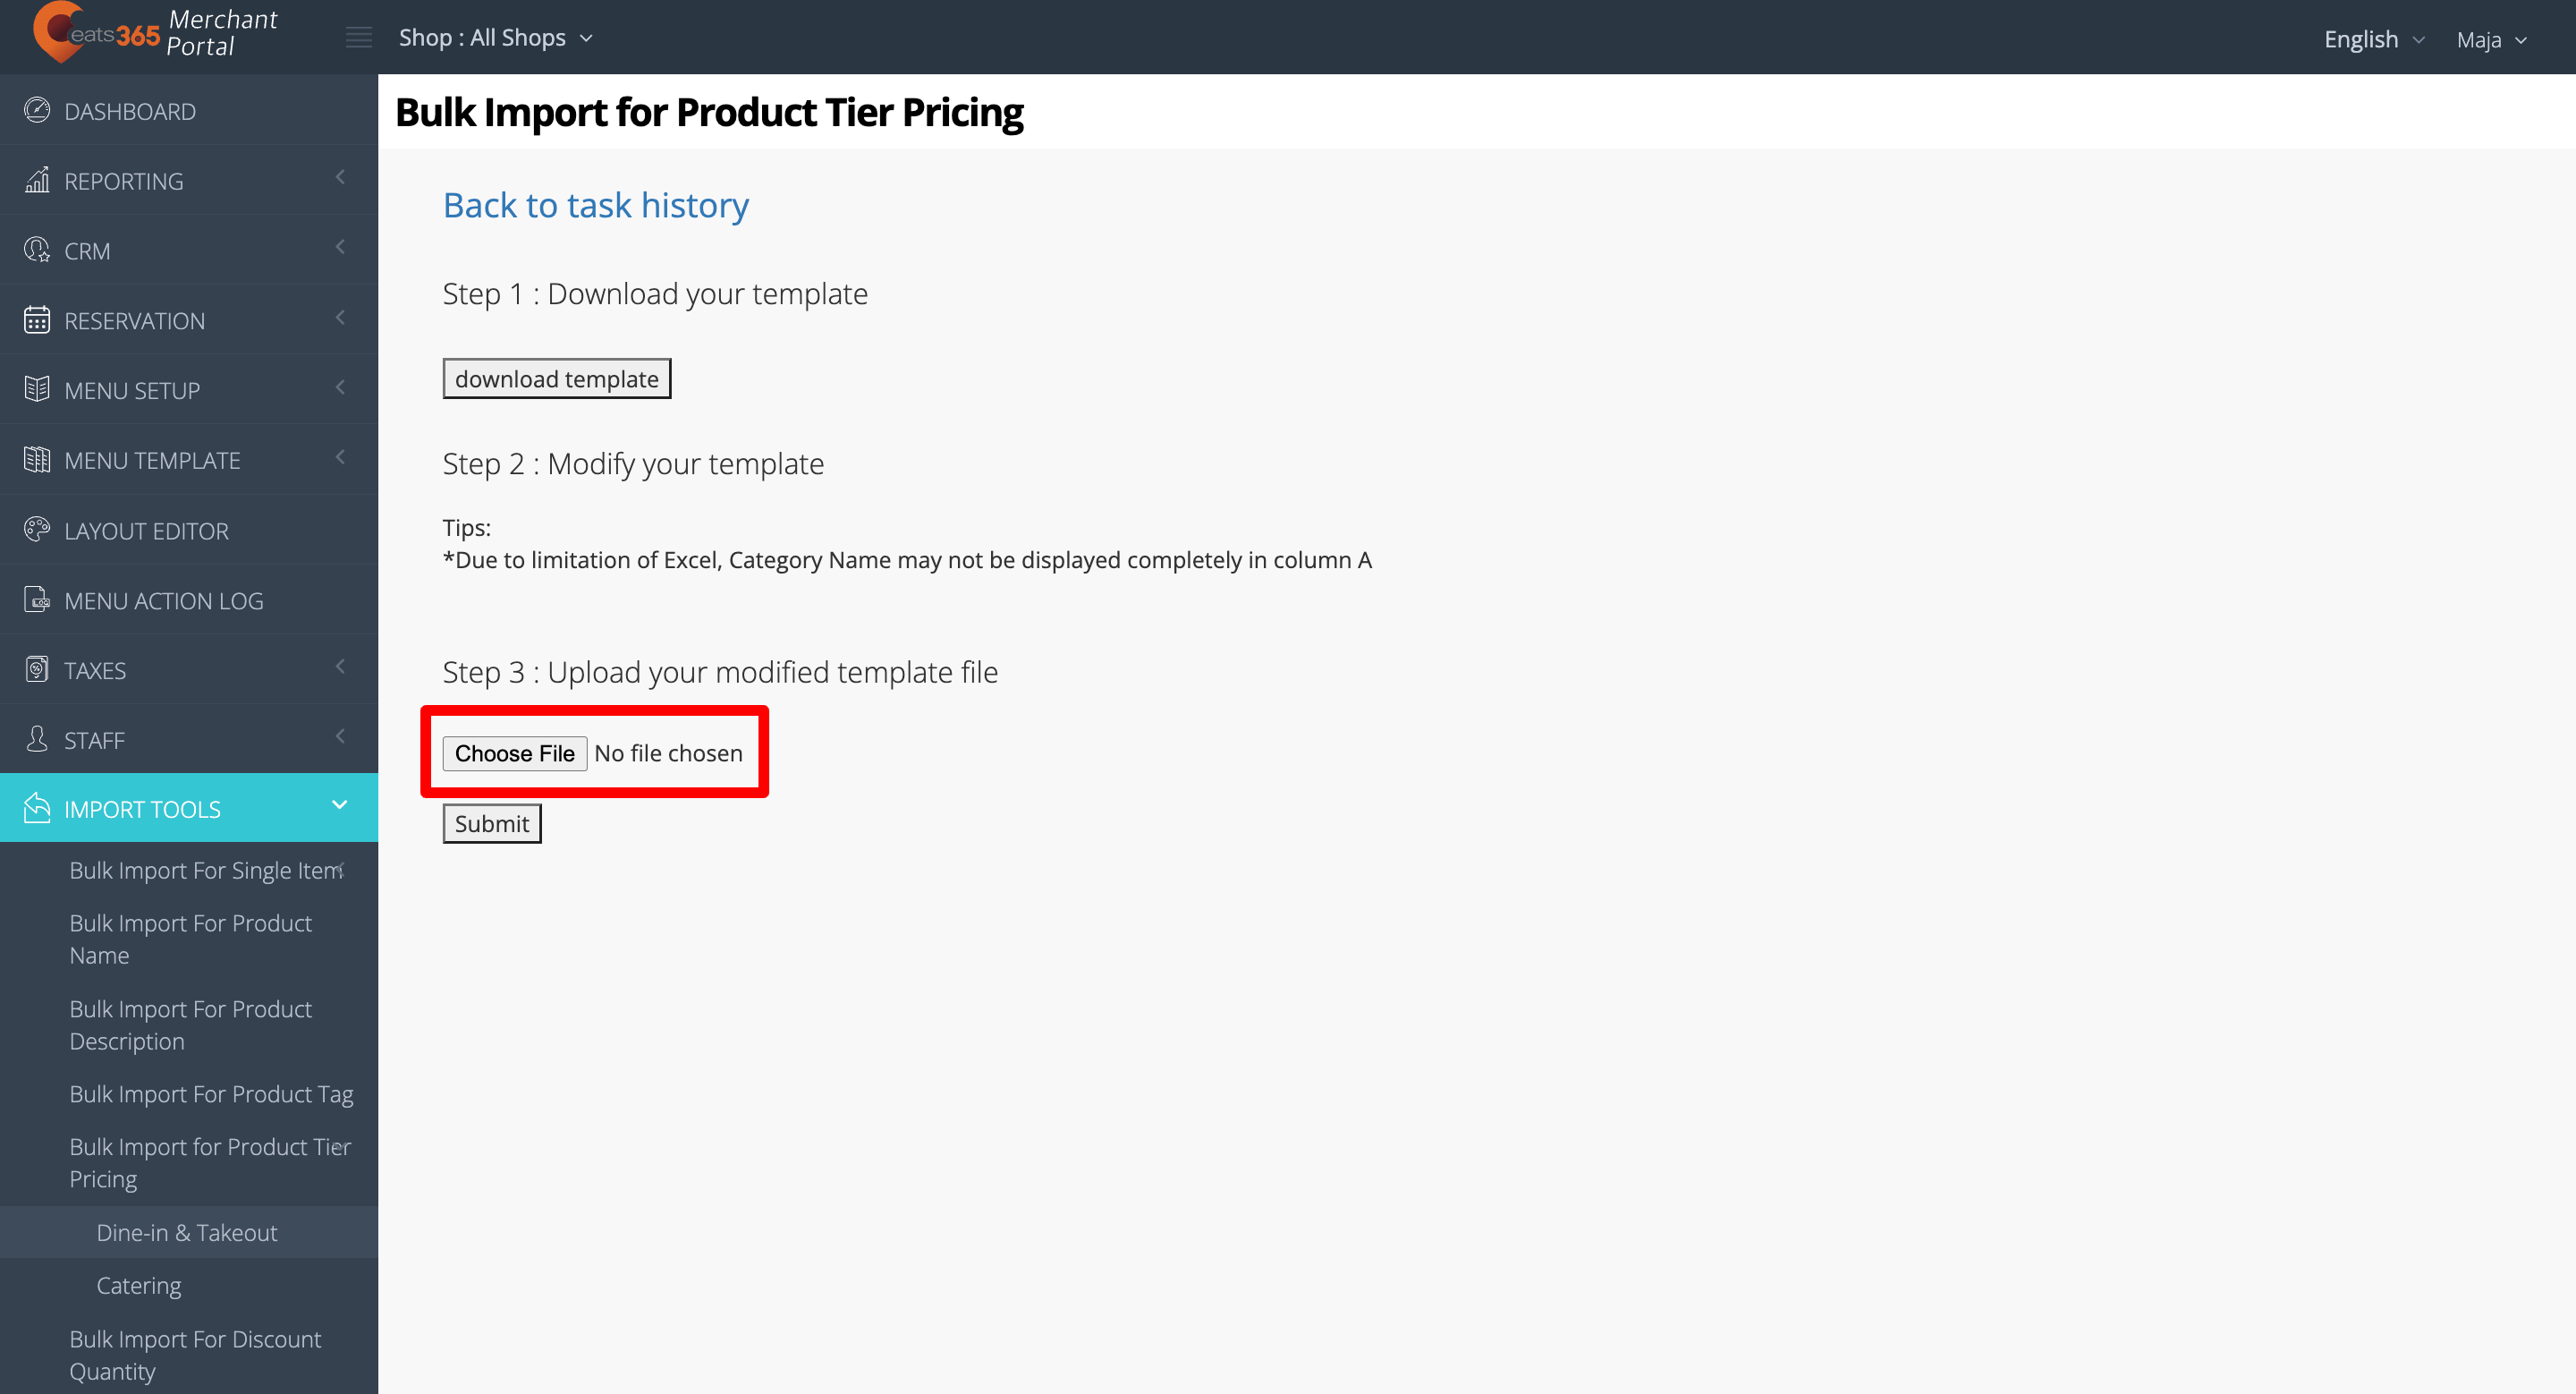
Note: Due to the limitations of Excel, the Category Name may not be displayed entirely in column A. - To upload your modified template file, click on Choose File. Then, select your modified file.
- At the top right, click on Submit to confirm.
Merchant Portal 2.0
- Log in to the Merchant Portal.
- On the left panel, click on Import Tools, then click on Bulk Import for Product Tier Pricing.

- Choose the operation that you want to perform. You can select from the following operations:
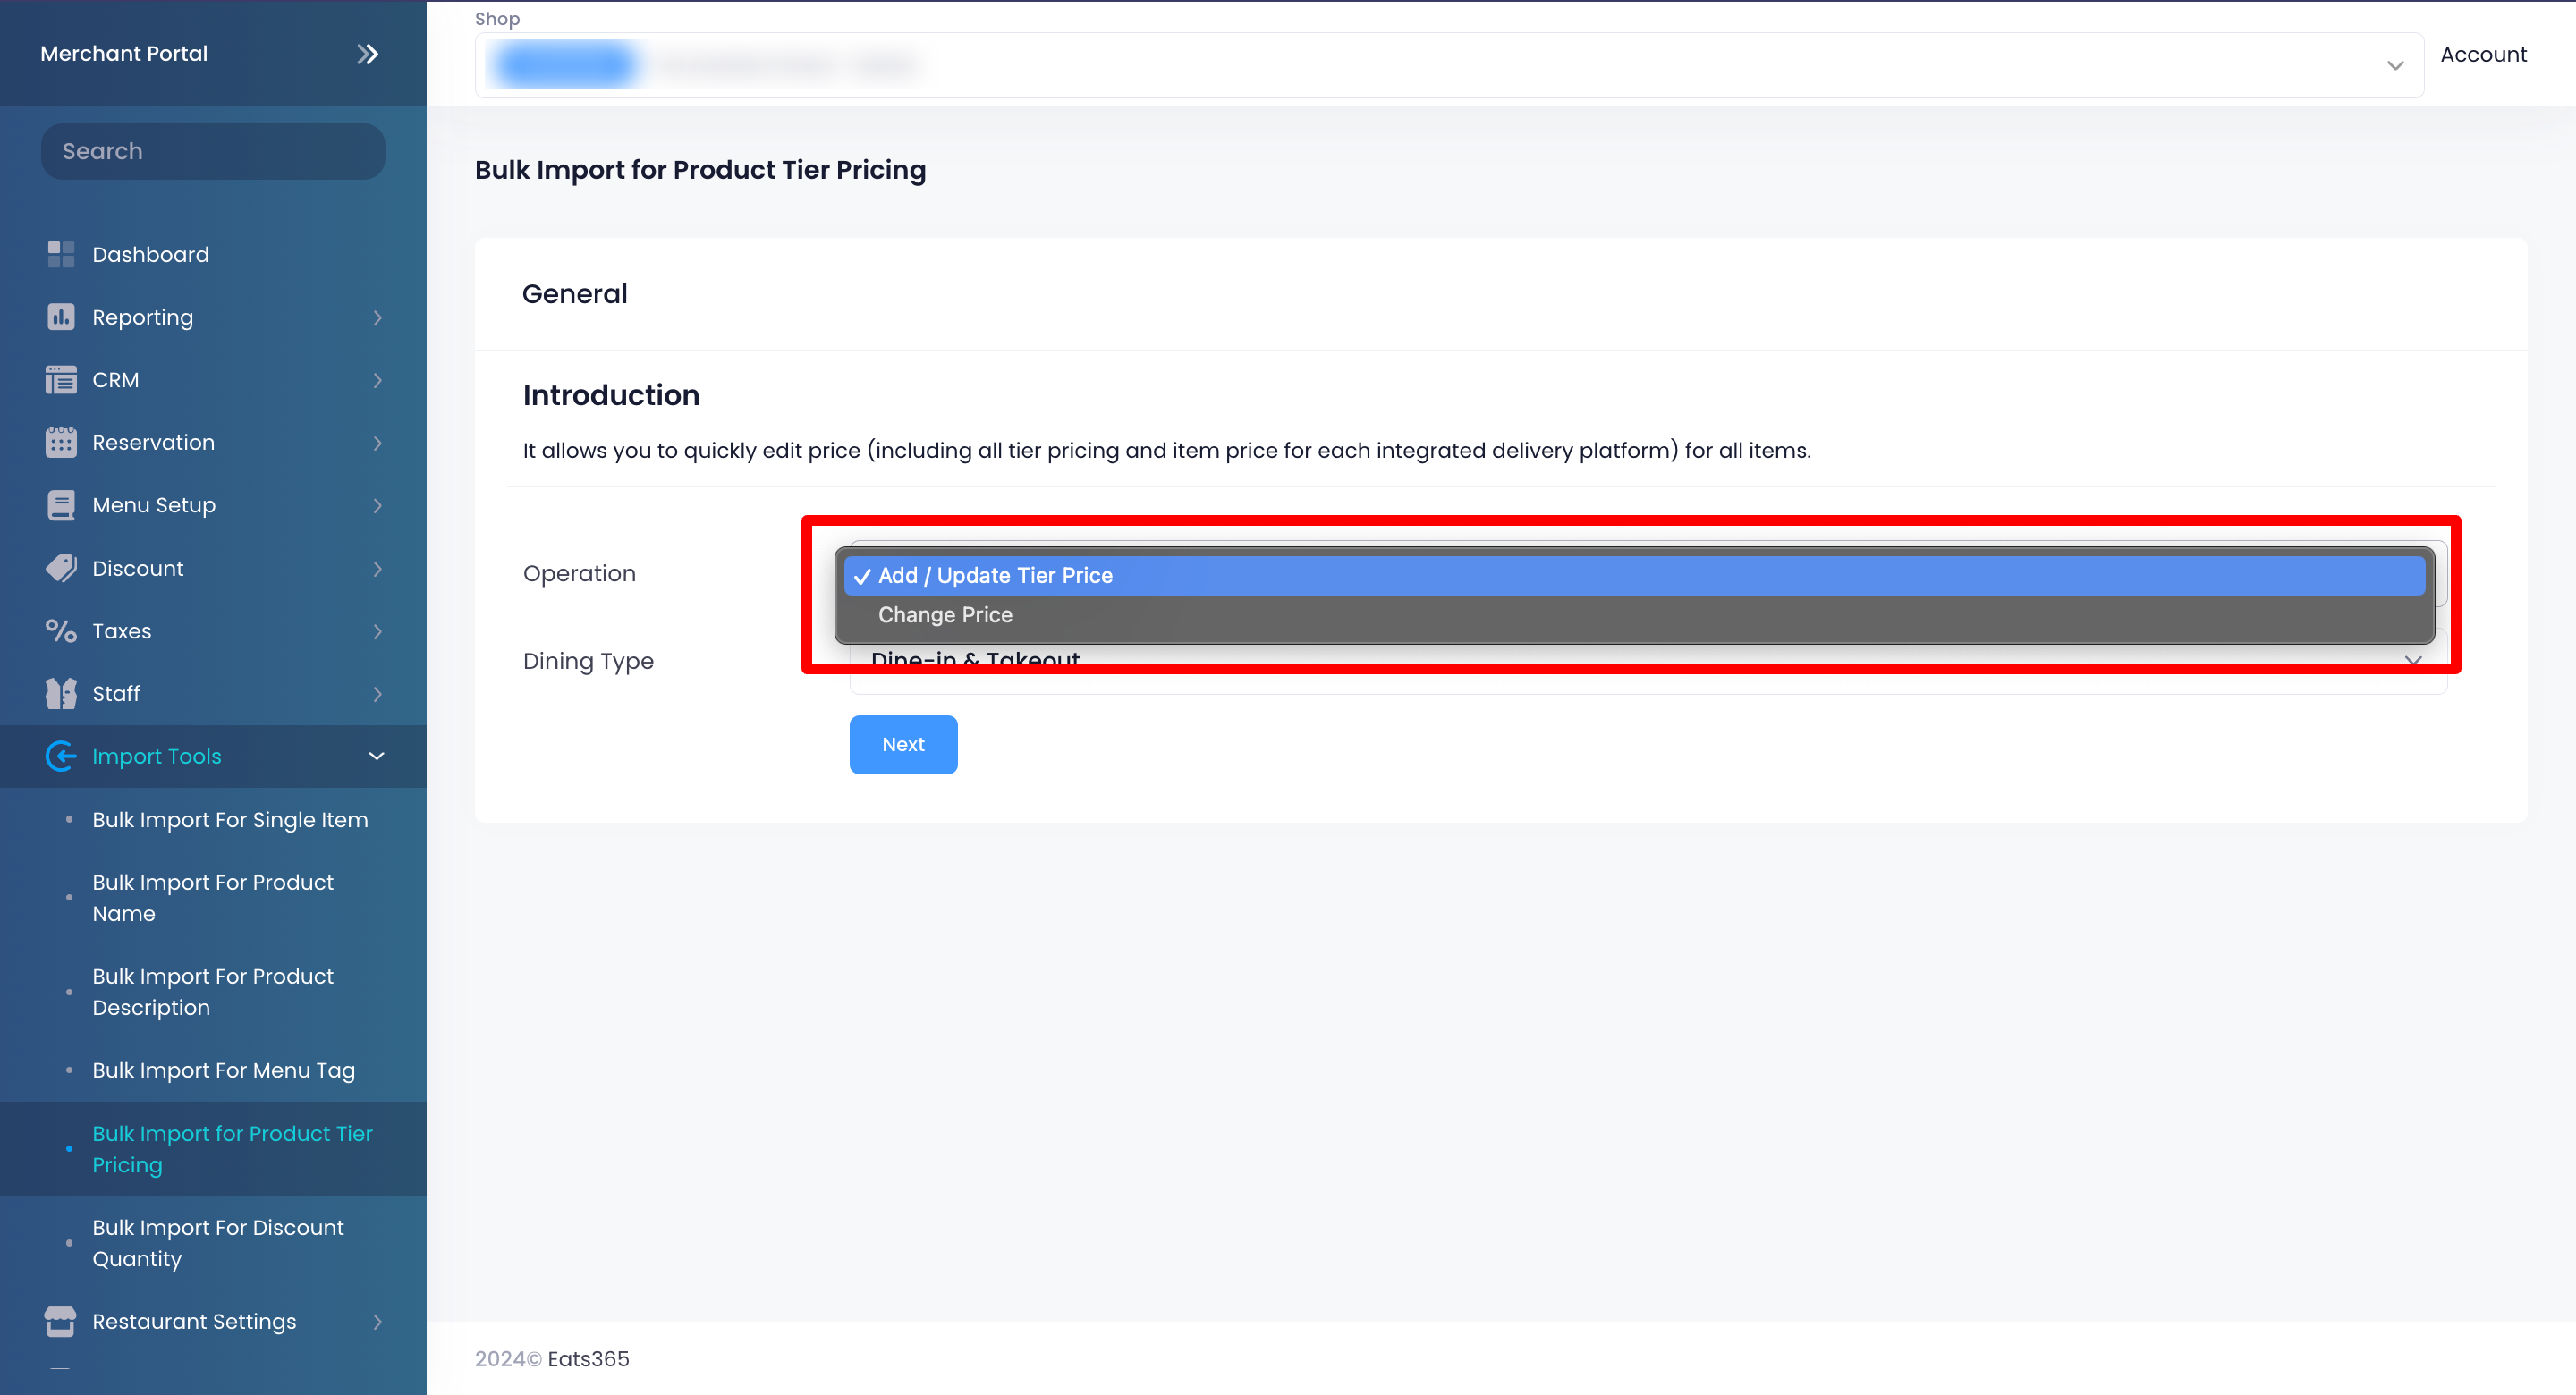
- Add / Update Tier Price
- Change Price
- Select where you want to import the Product Tier Pricing. You can choose from Dine & Takeout or Catering.
- Click on Next.
- For Add/Update Tier Price:
- Select the Category(s) or the specific Item(s) with the Tier Pricing that you want to update and include in the template.
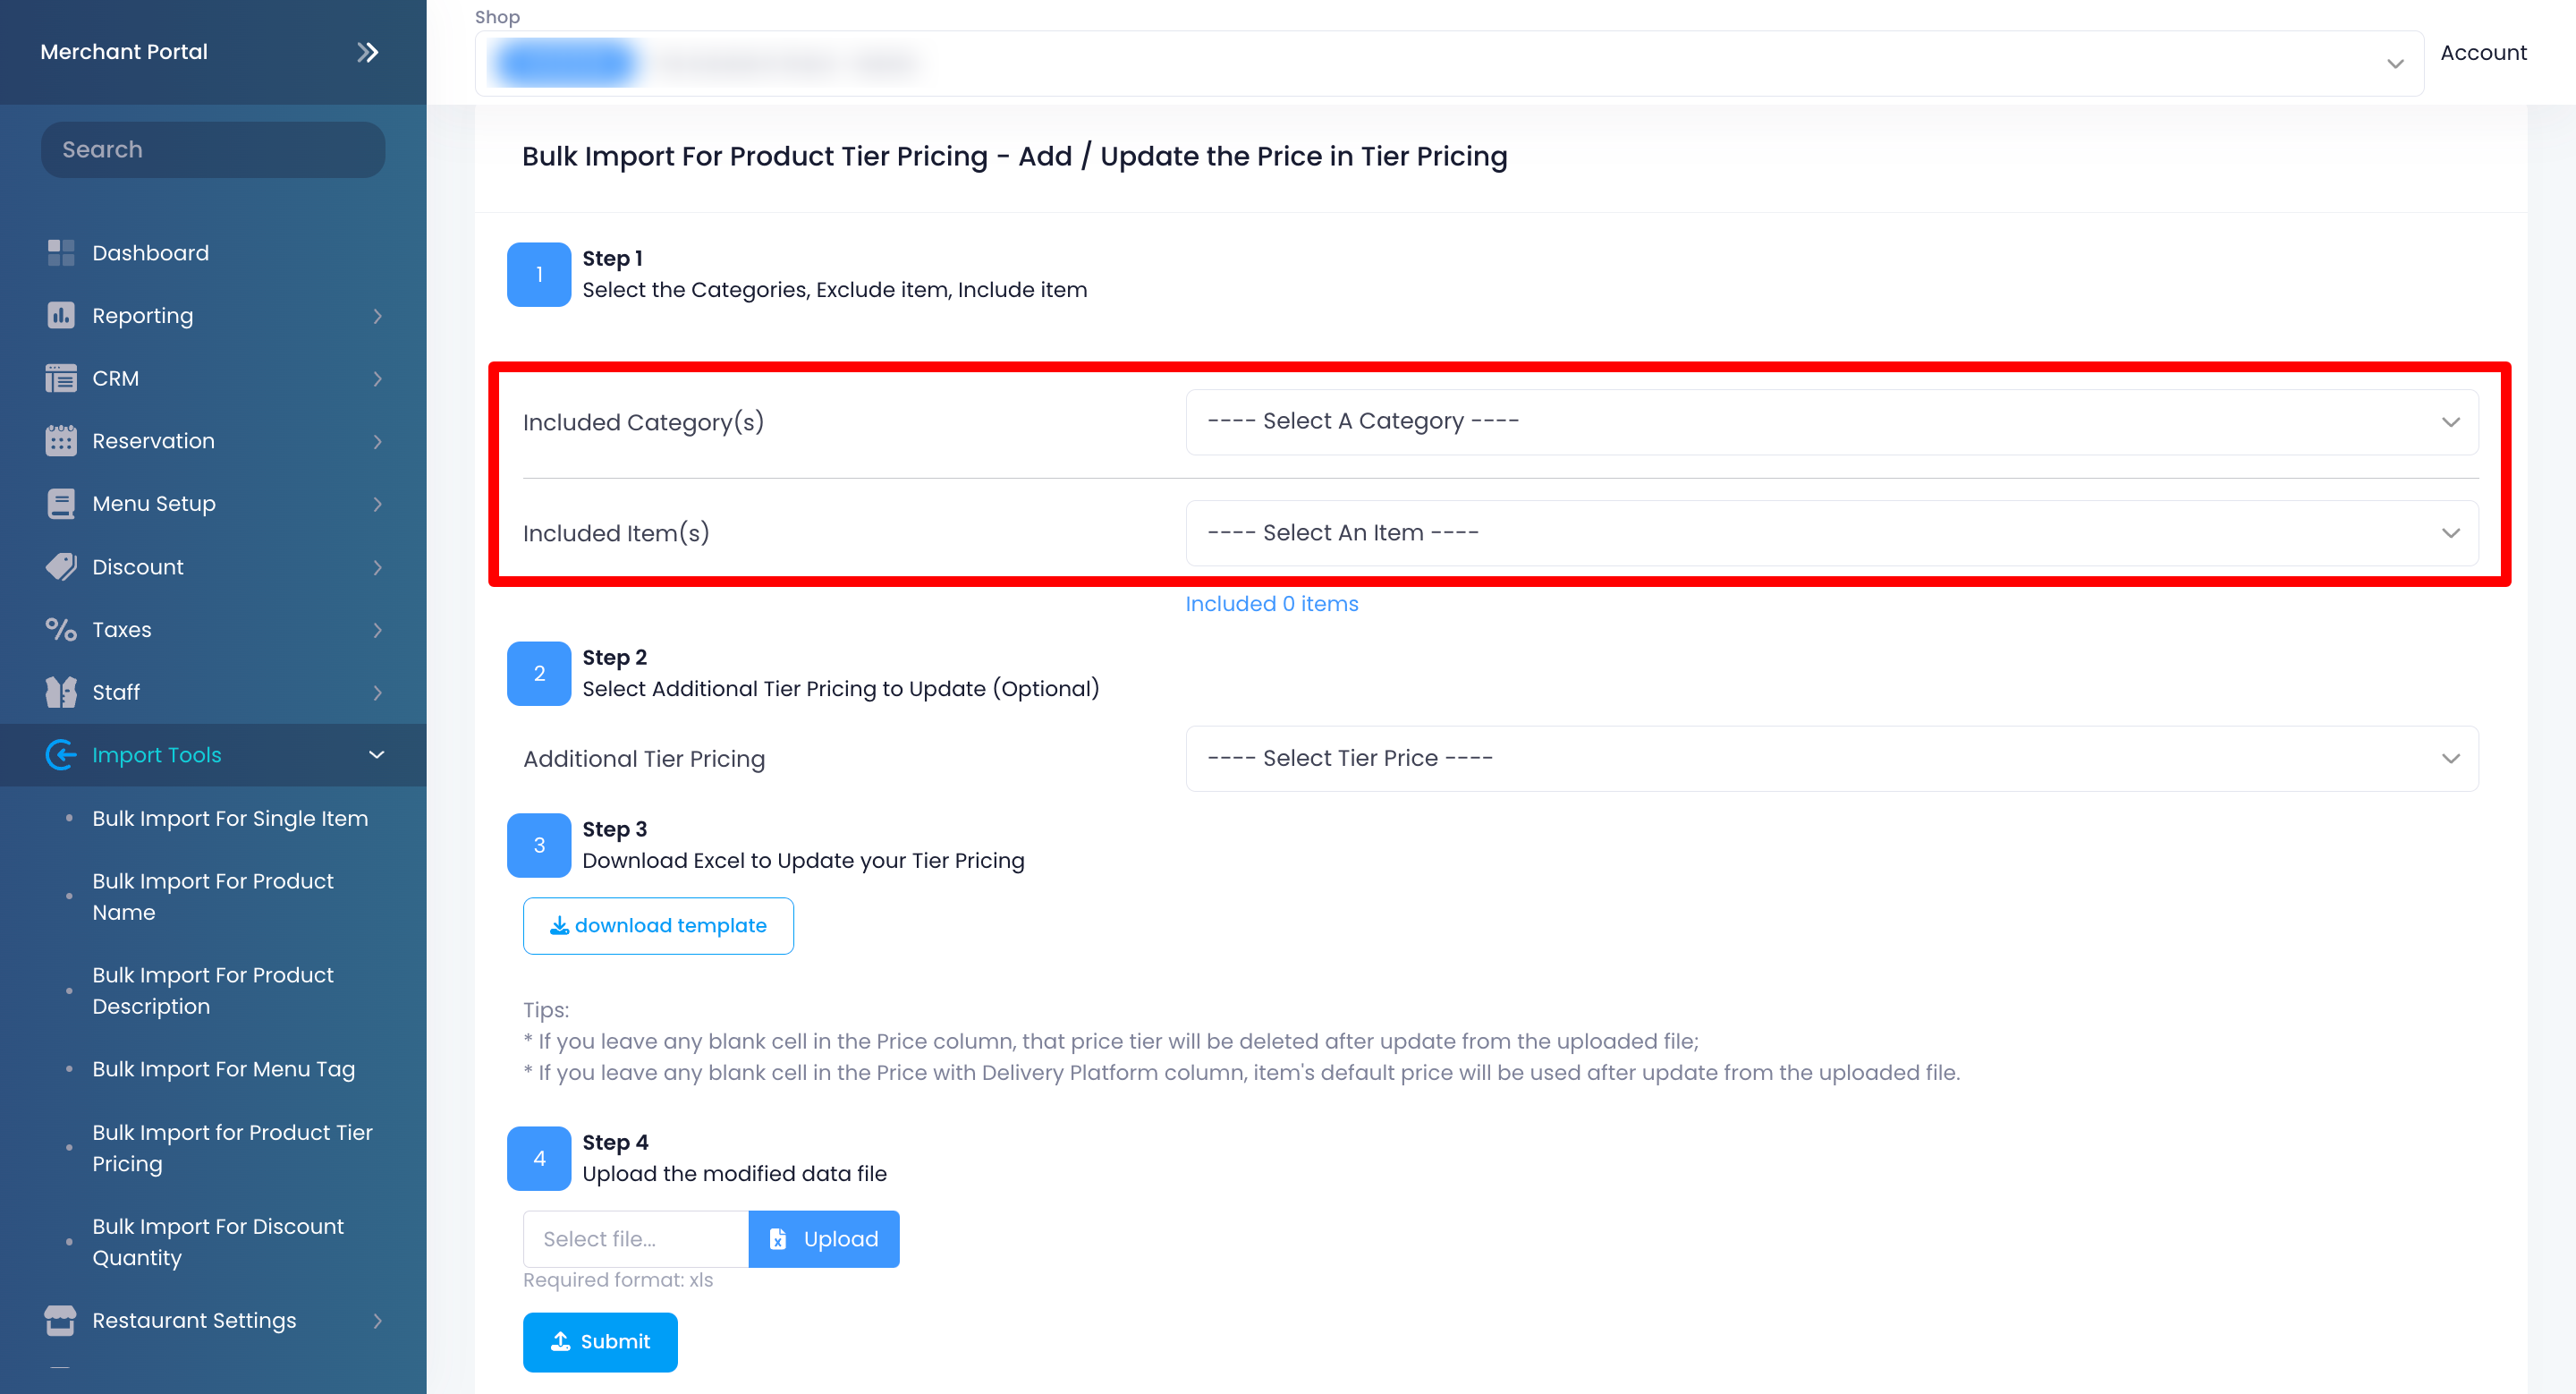
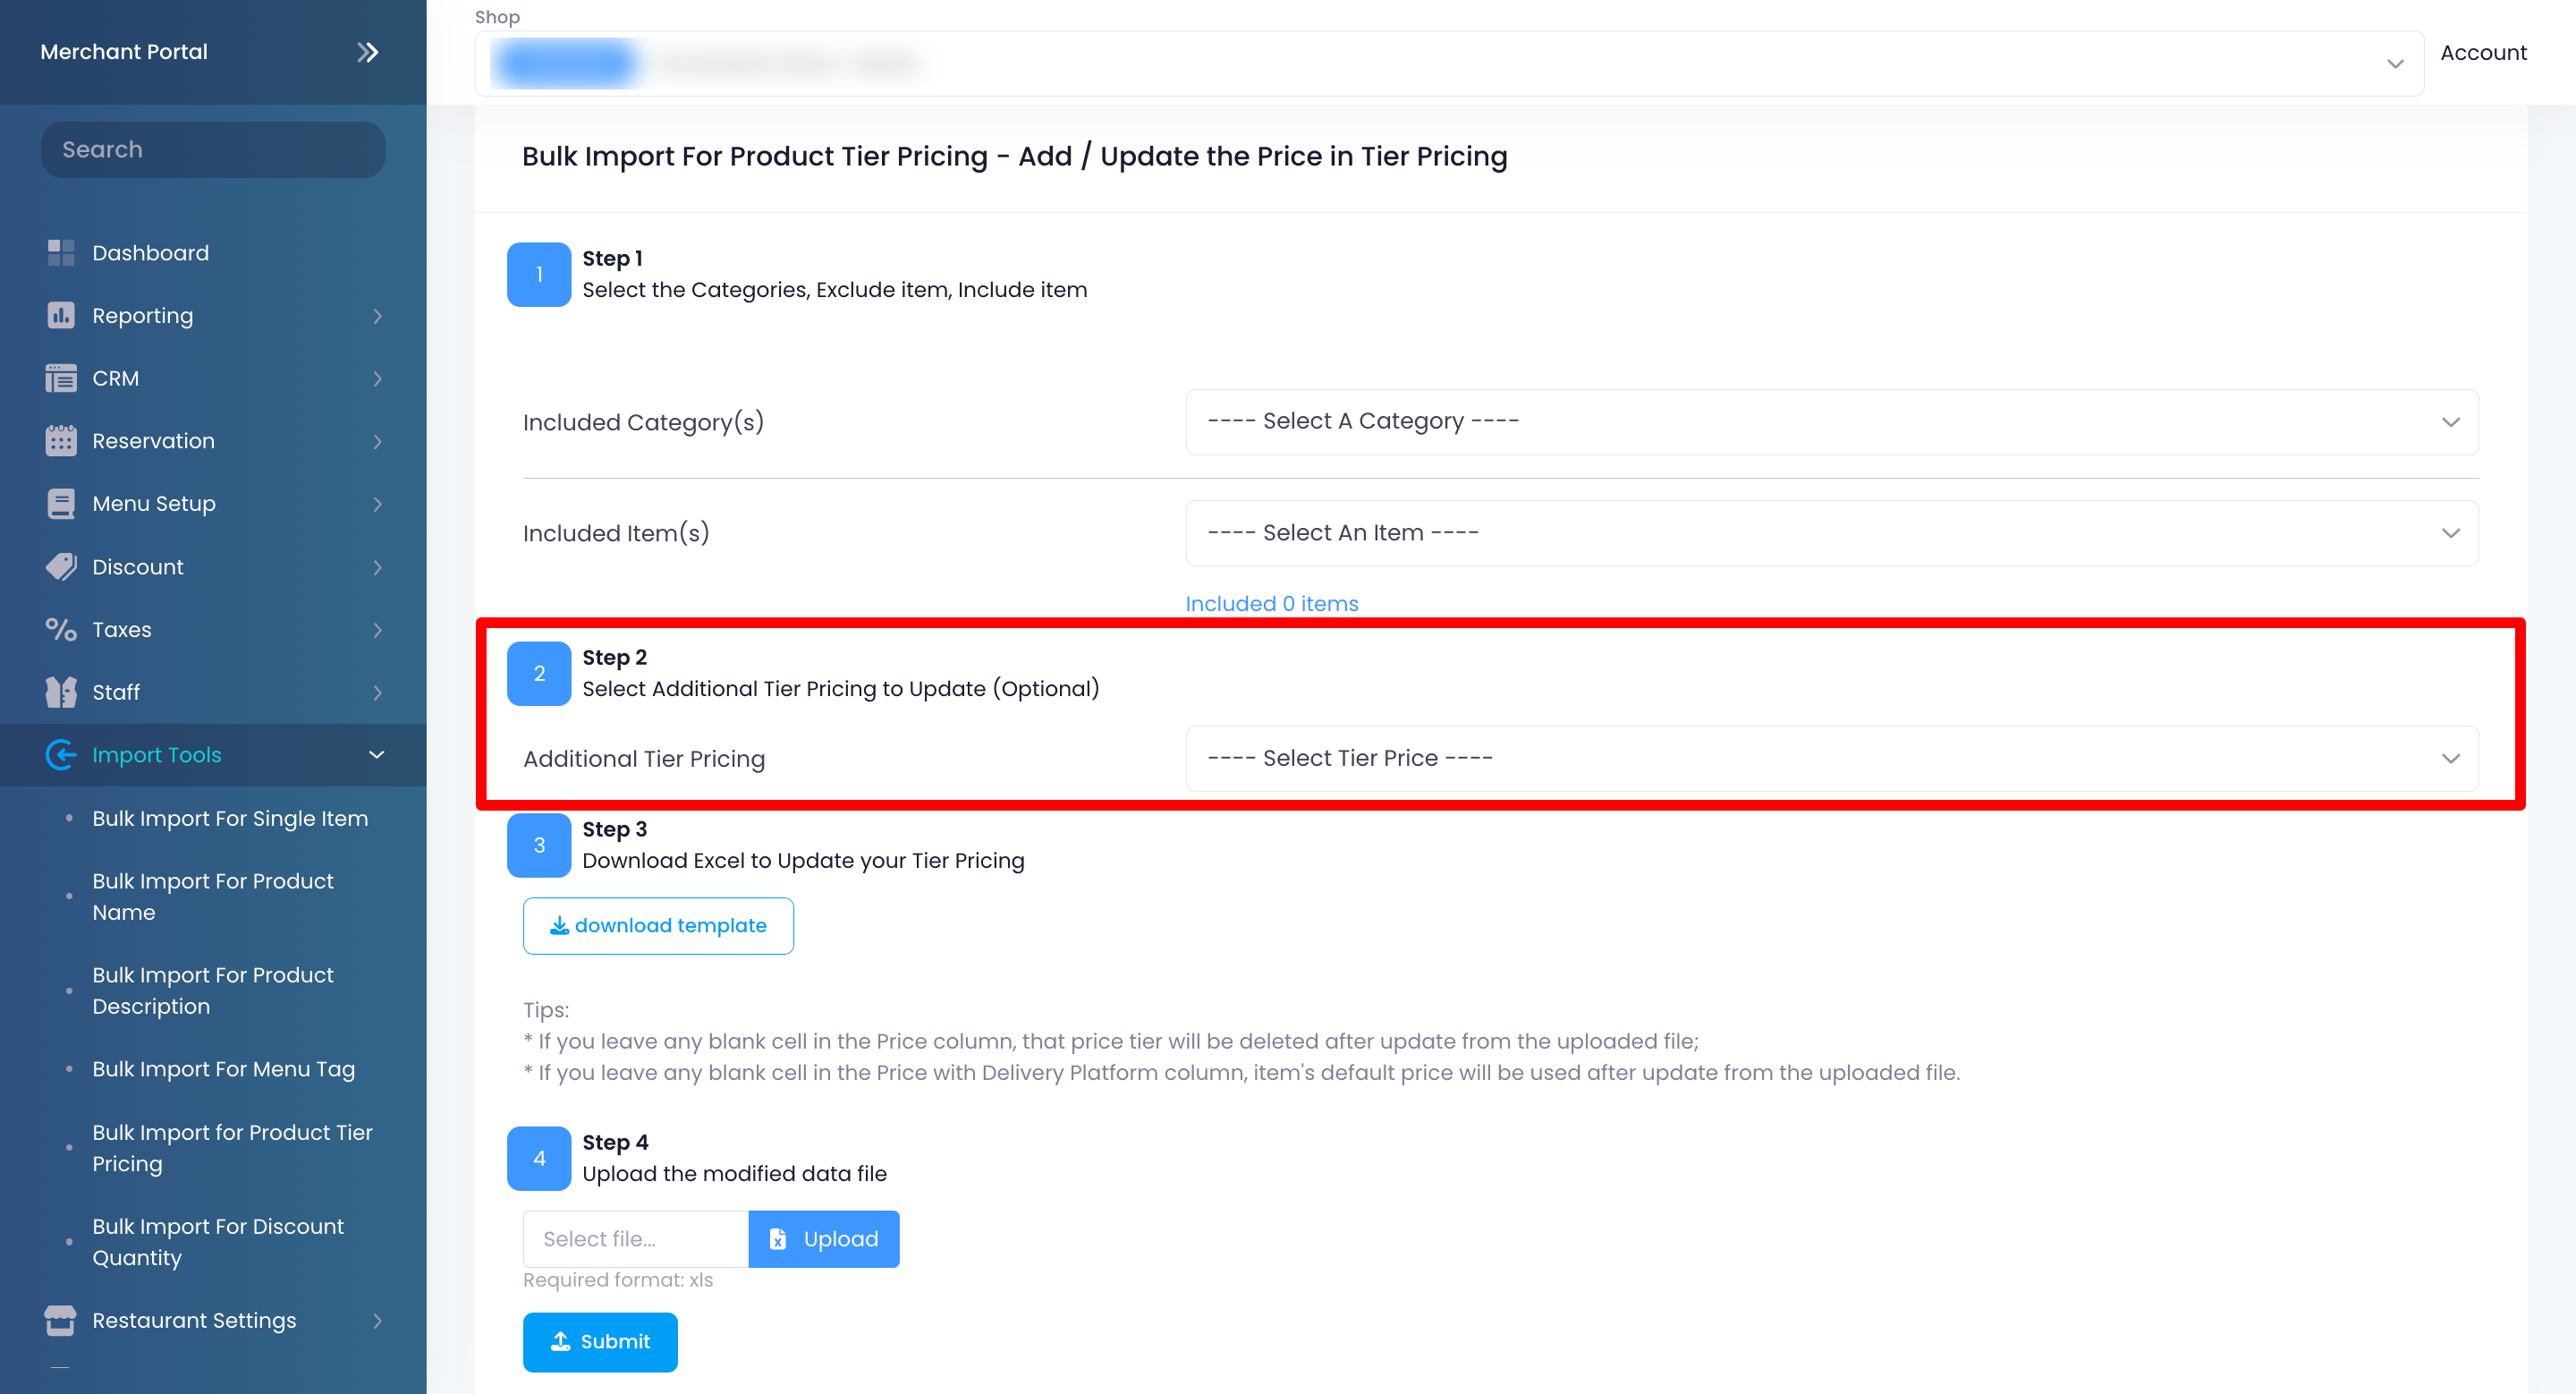
Note: You can exclude specific Menu Items from a particular Category. - (Optional) Select the additional Tier Pricing that you want to update and include in the template.
- Click on download template.
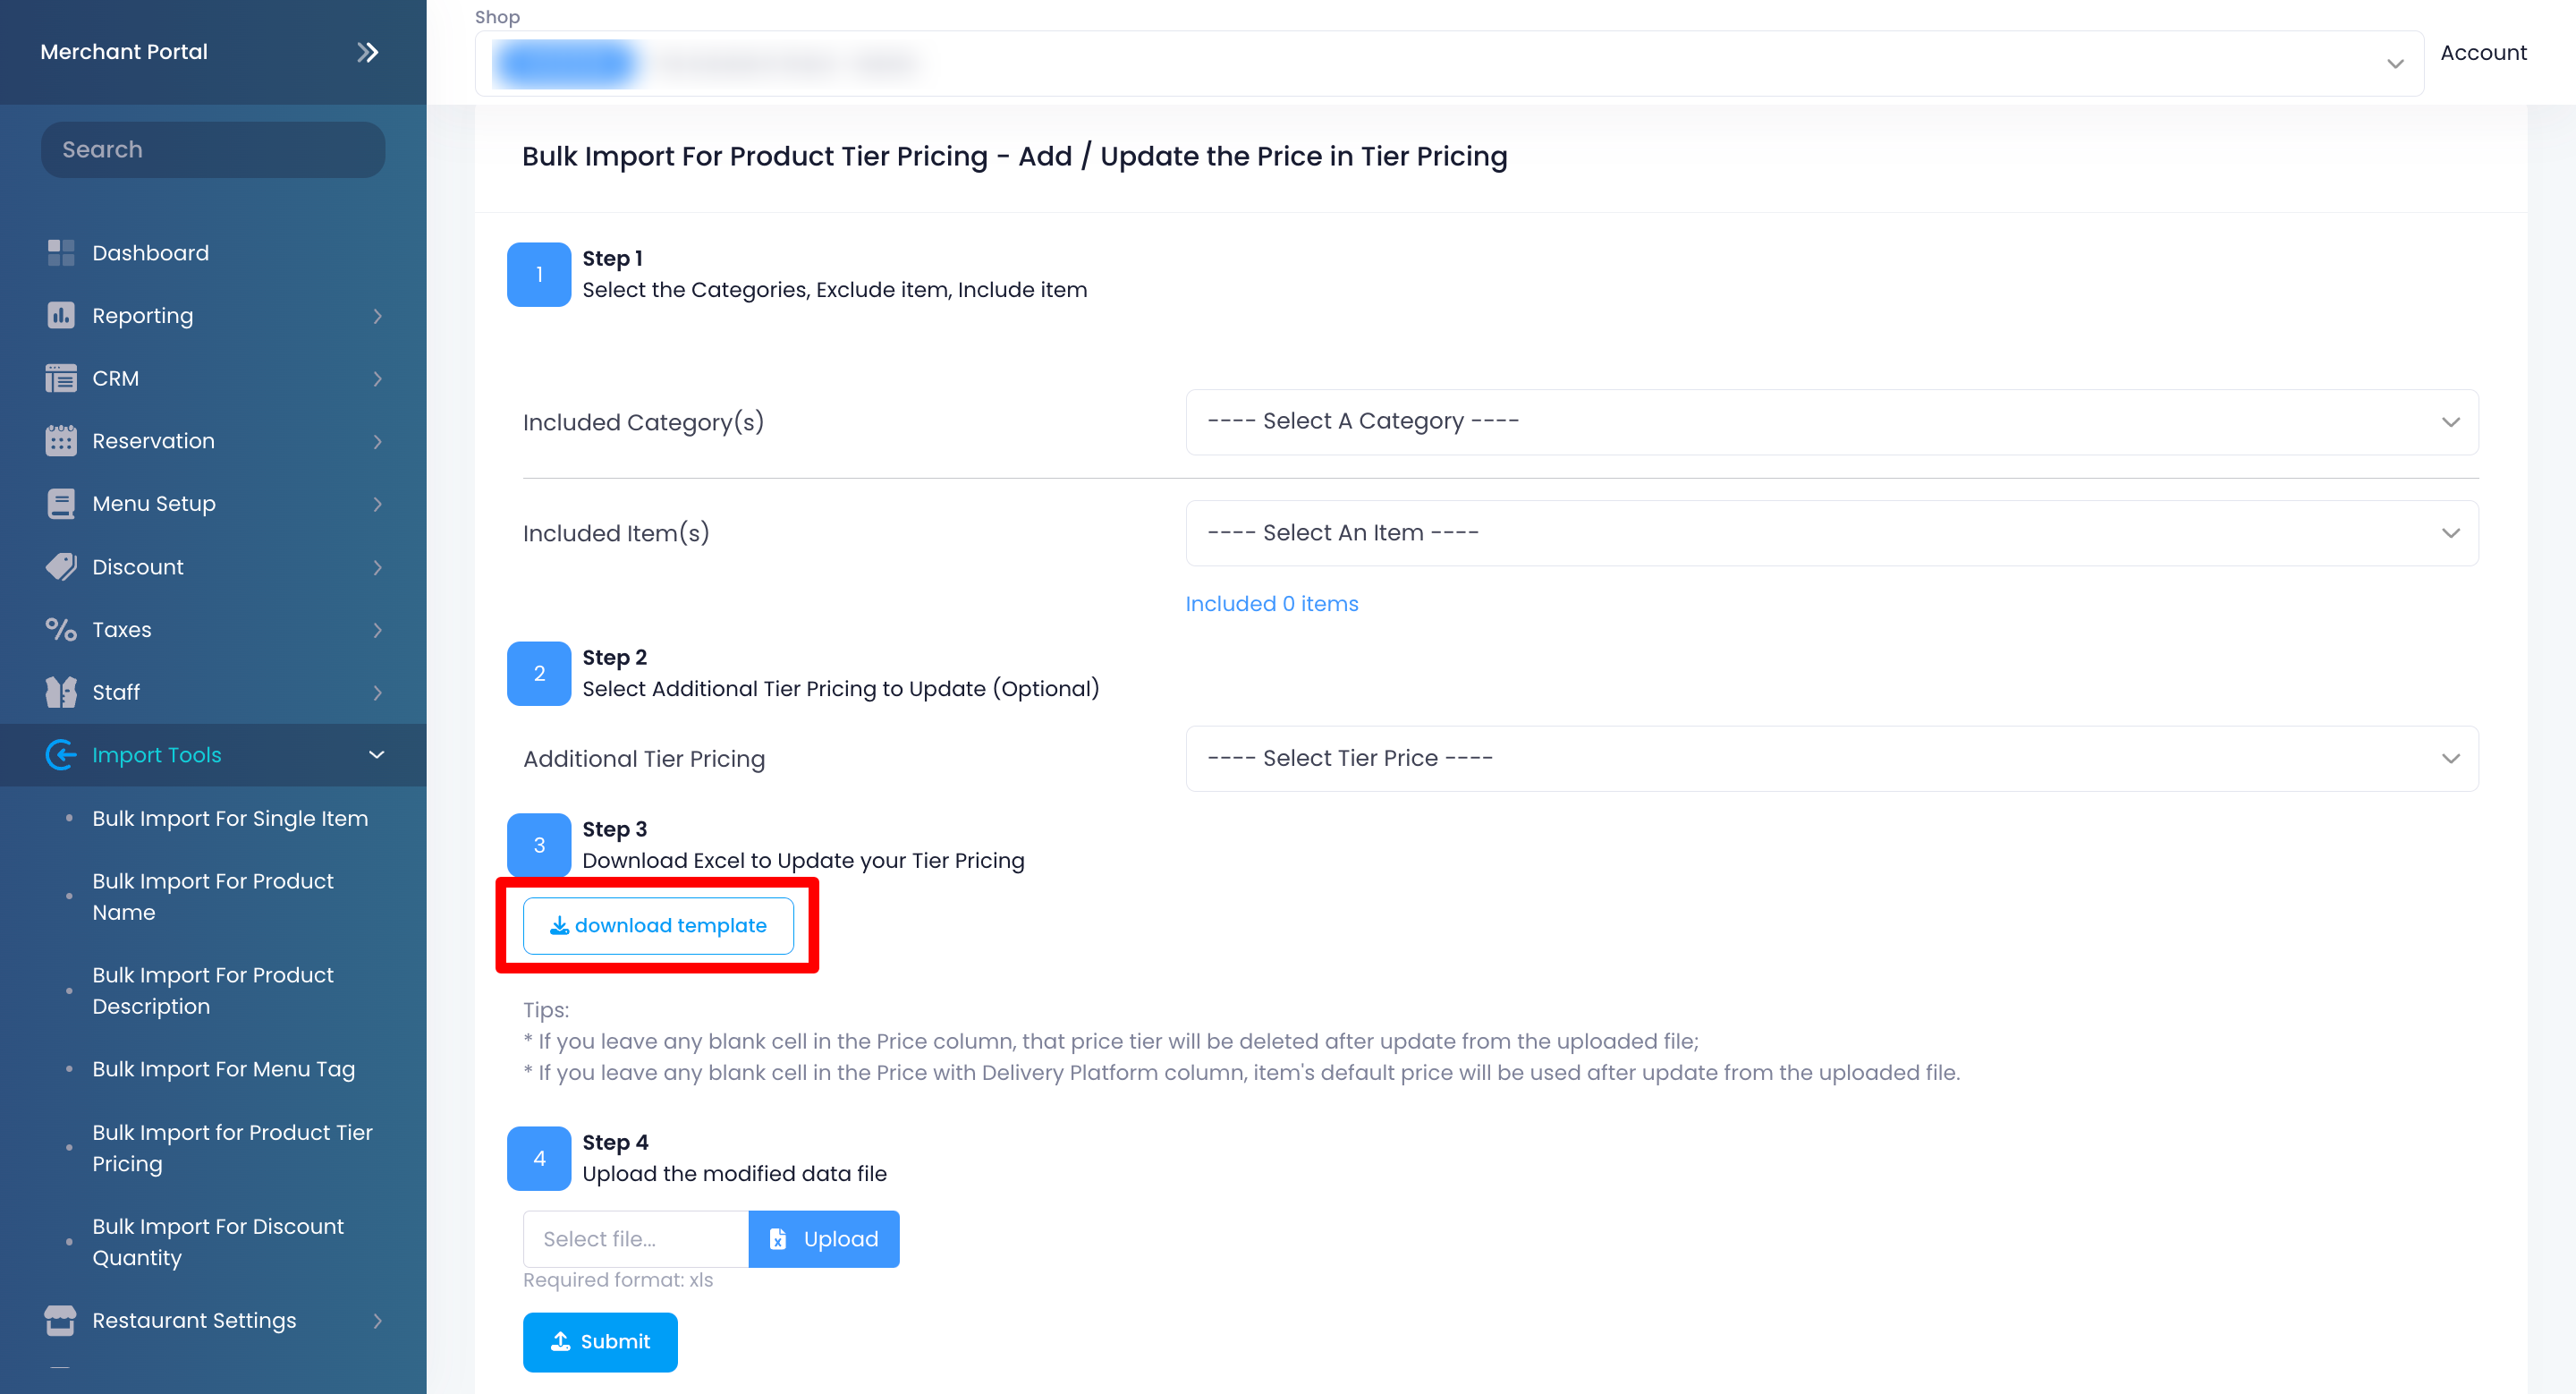
- To modify the template, enter the data in all of the relevant fields in the Excel file.
Tips:- If you leave any blank cell in the Price column, that price tier will be deleted after uploading the modified template file.
- If you leave any blank cell in the Price with Delivery Platform column, the item's default price will be used after uploading the modified template file.
- Select the Category(s) or the specific Item(s) with the Tier Pricing that you want to update and include in the template.
- For Change Price:
- Select the Category(s) and or the specific Item(s) with the Tier Pricing that you want to change and include in the template.
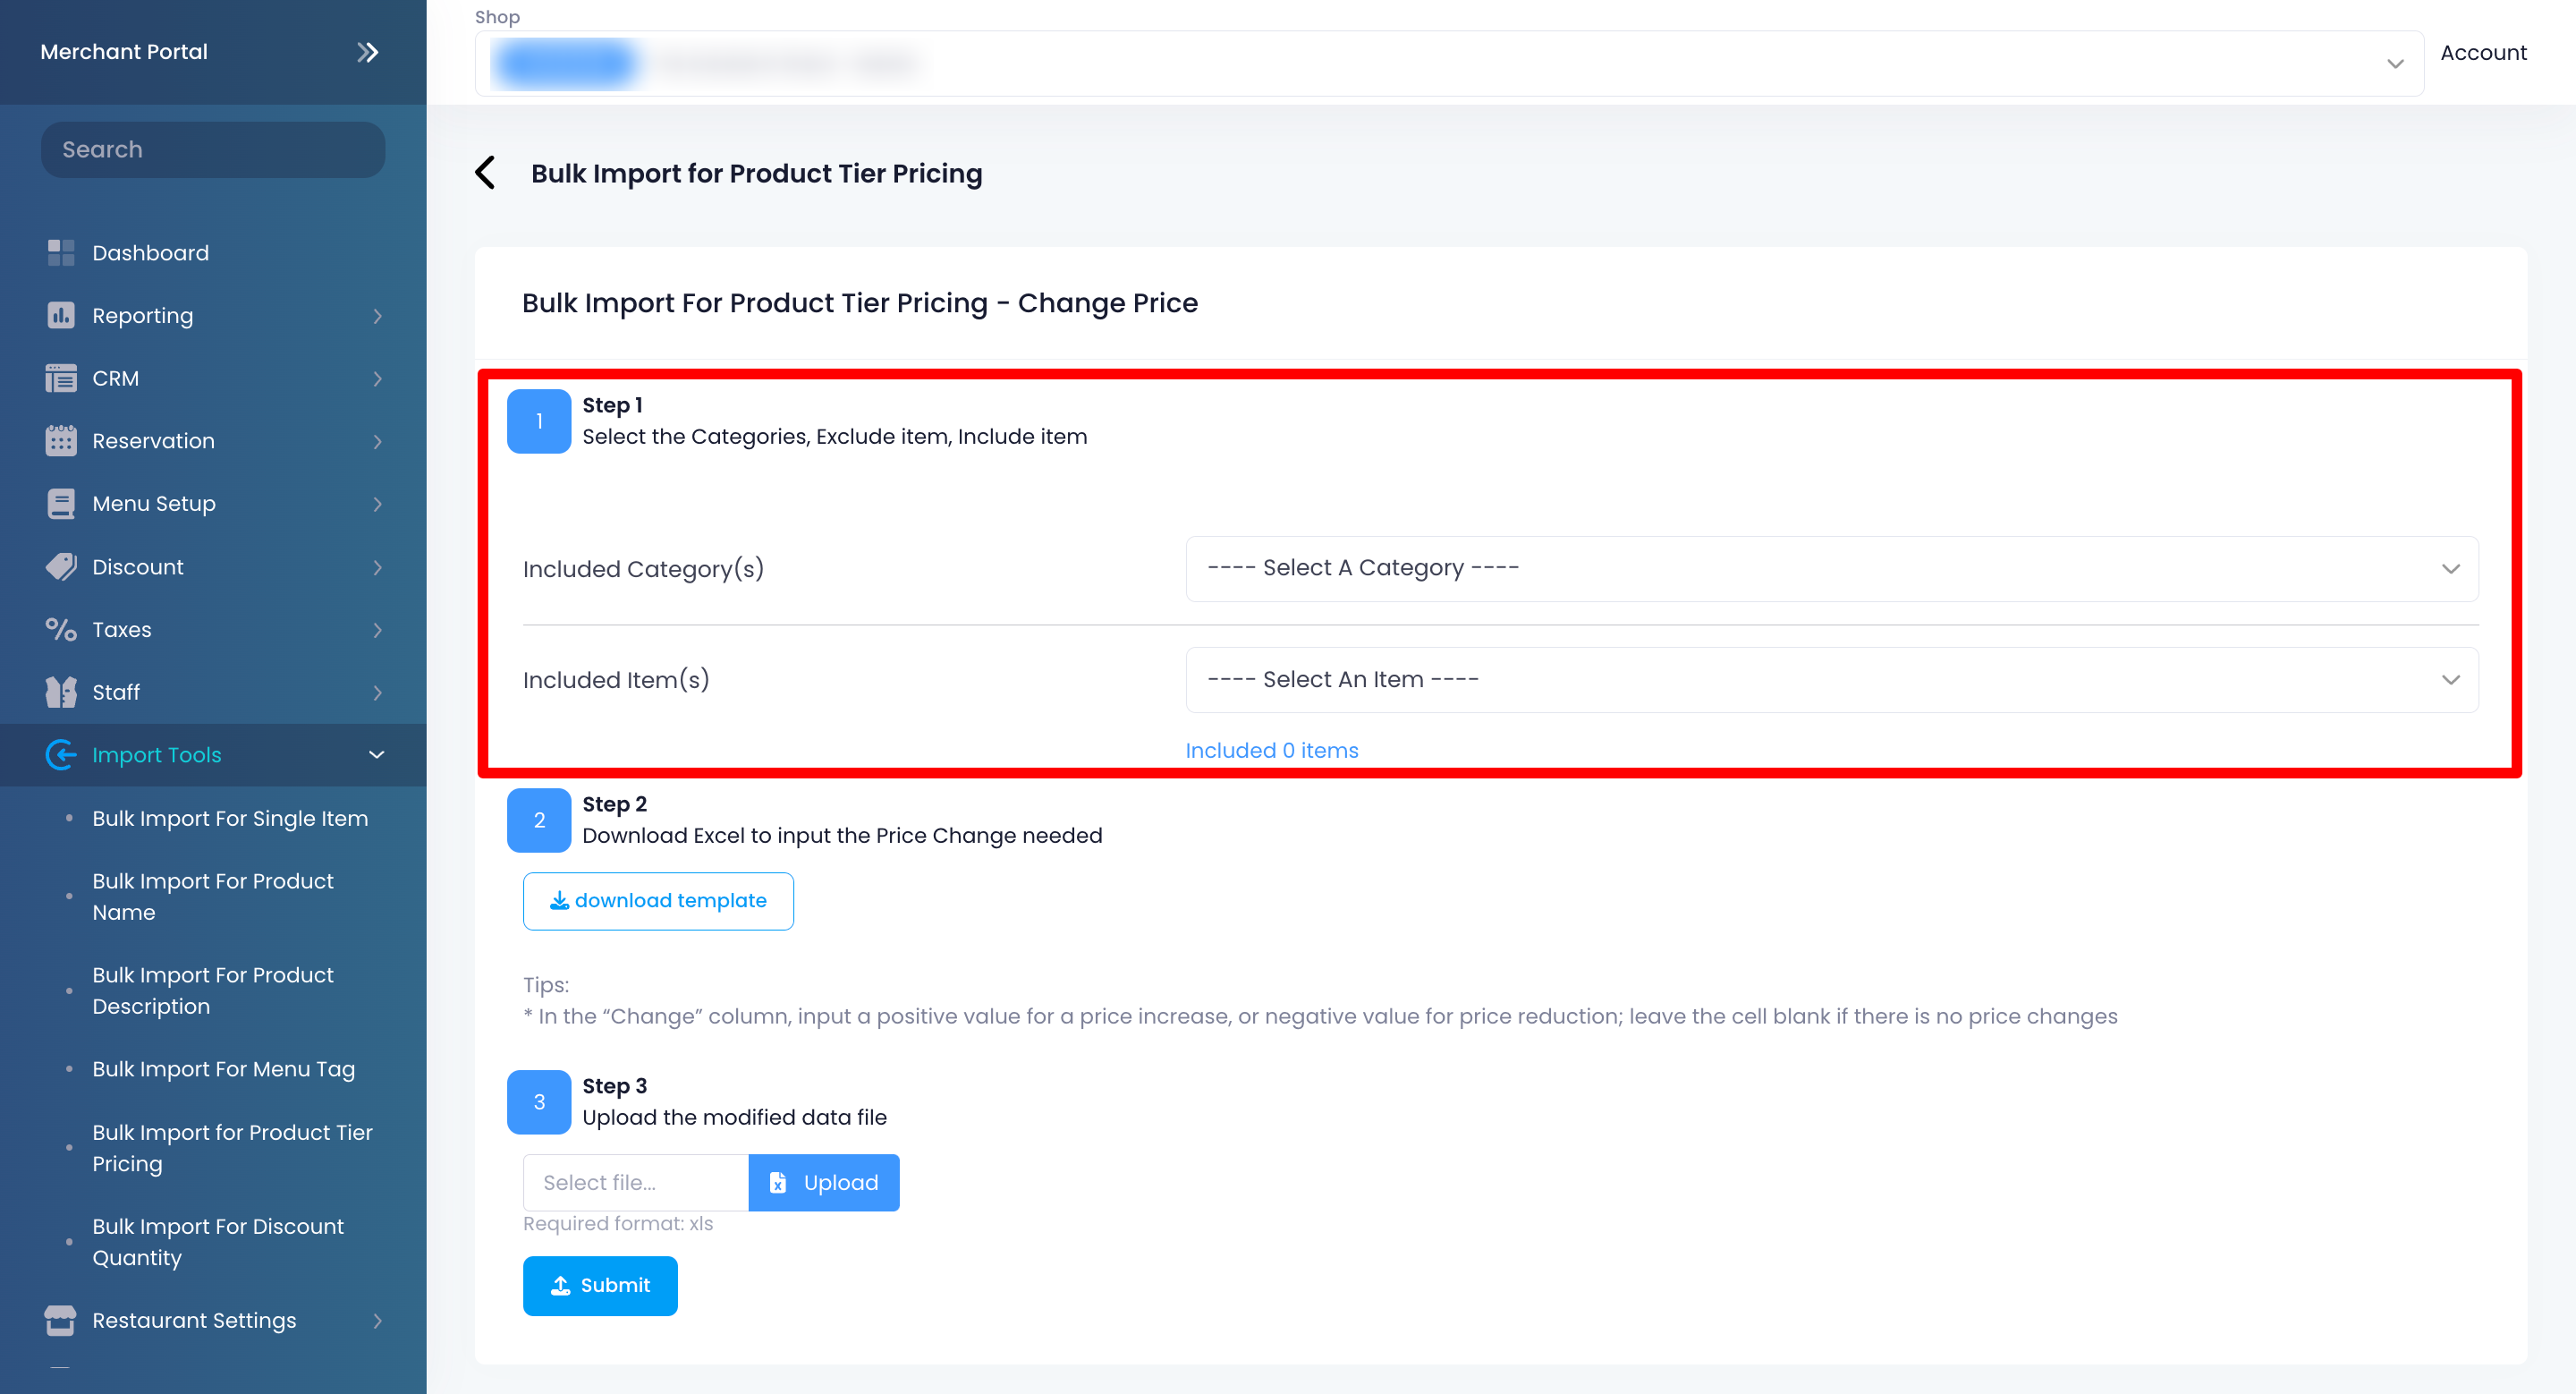
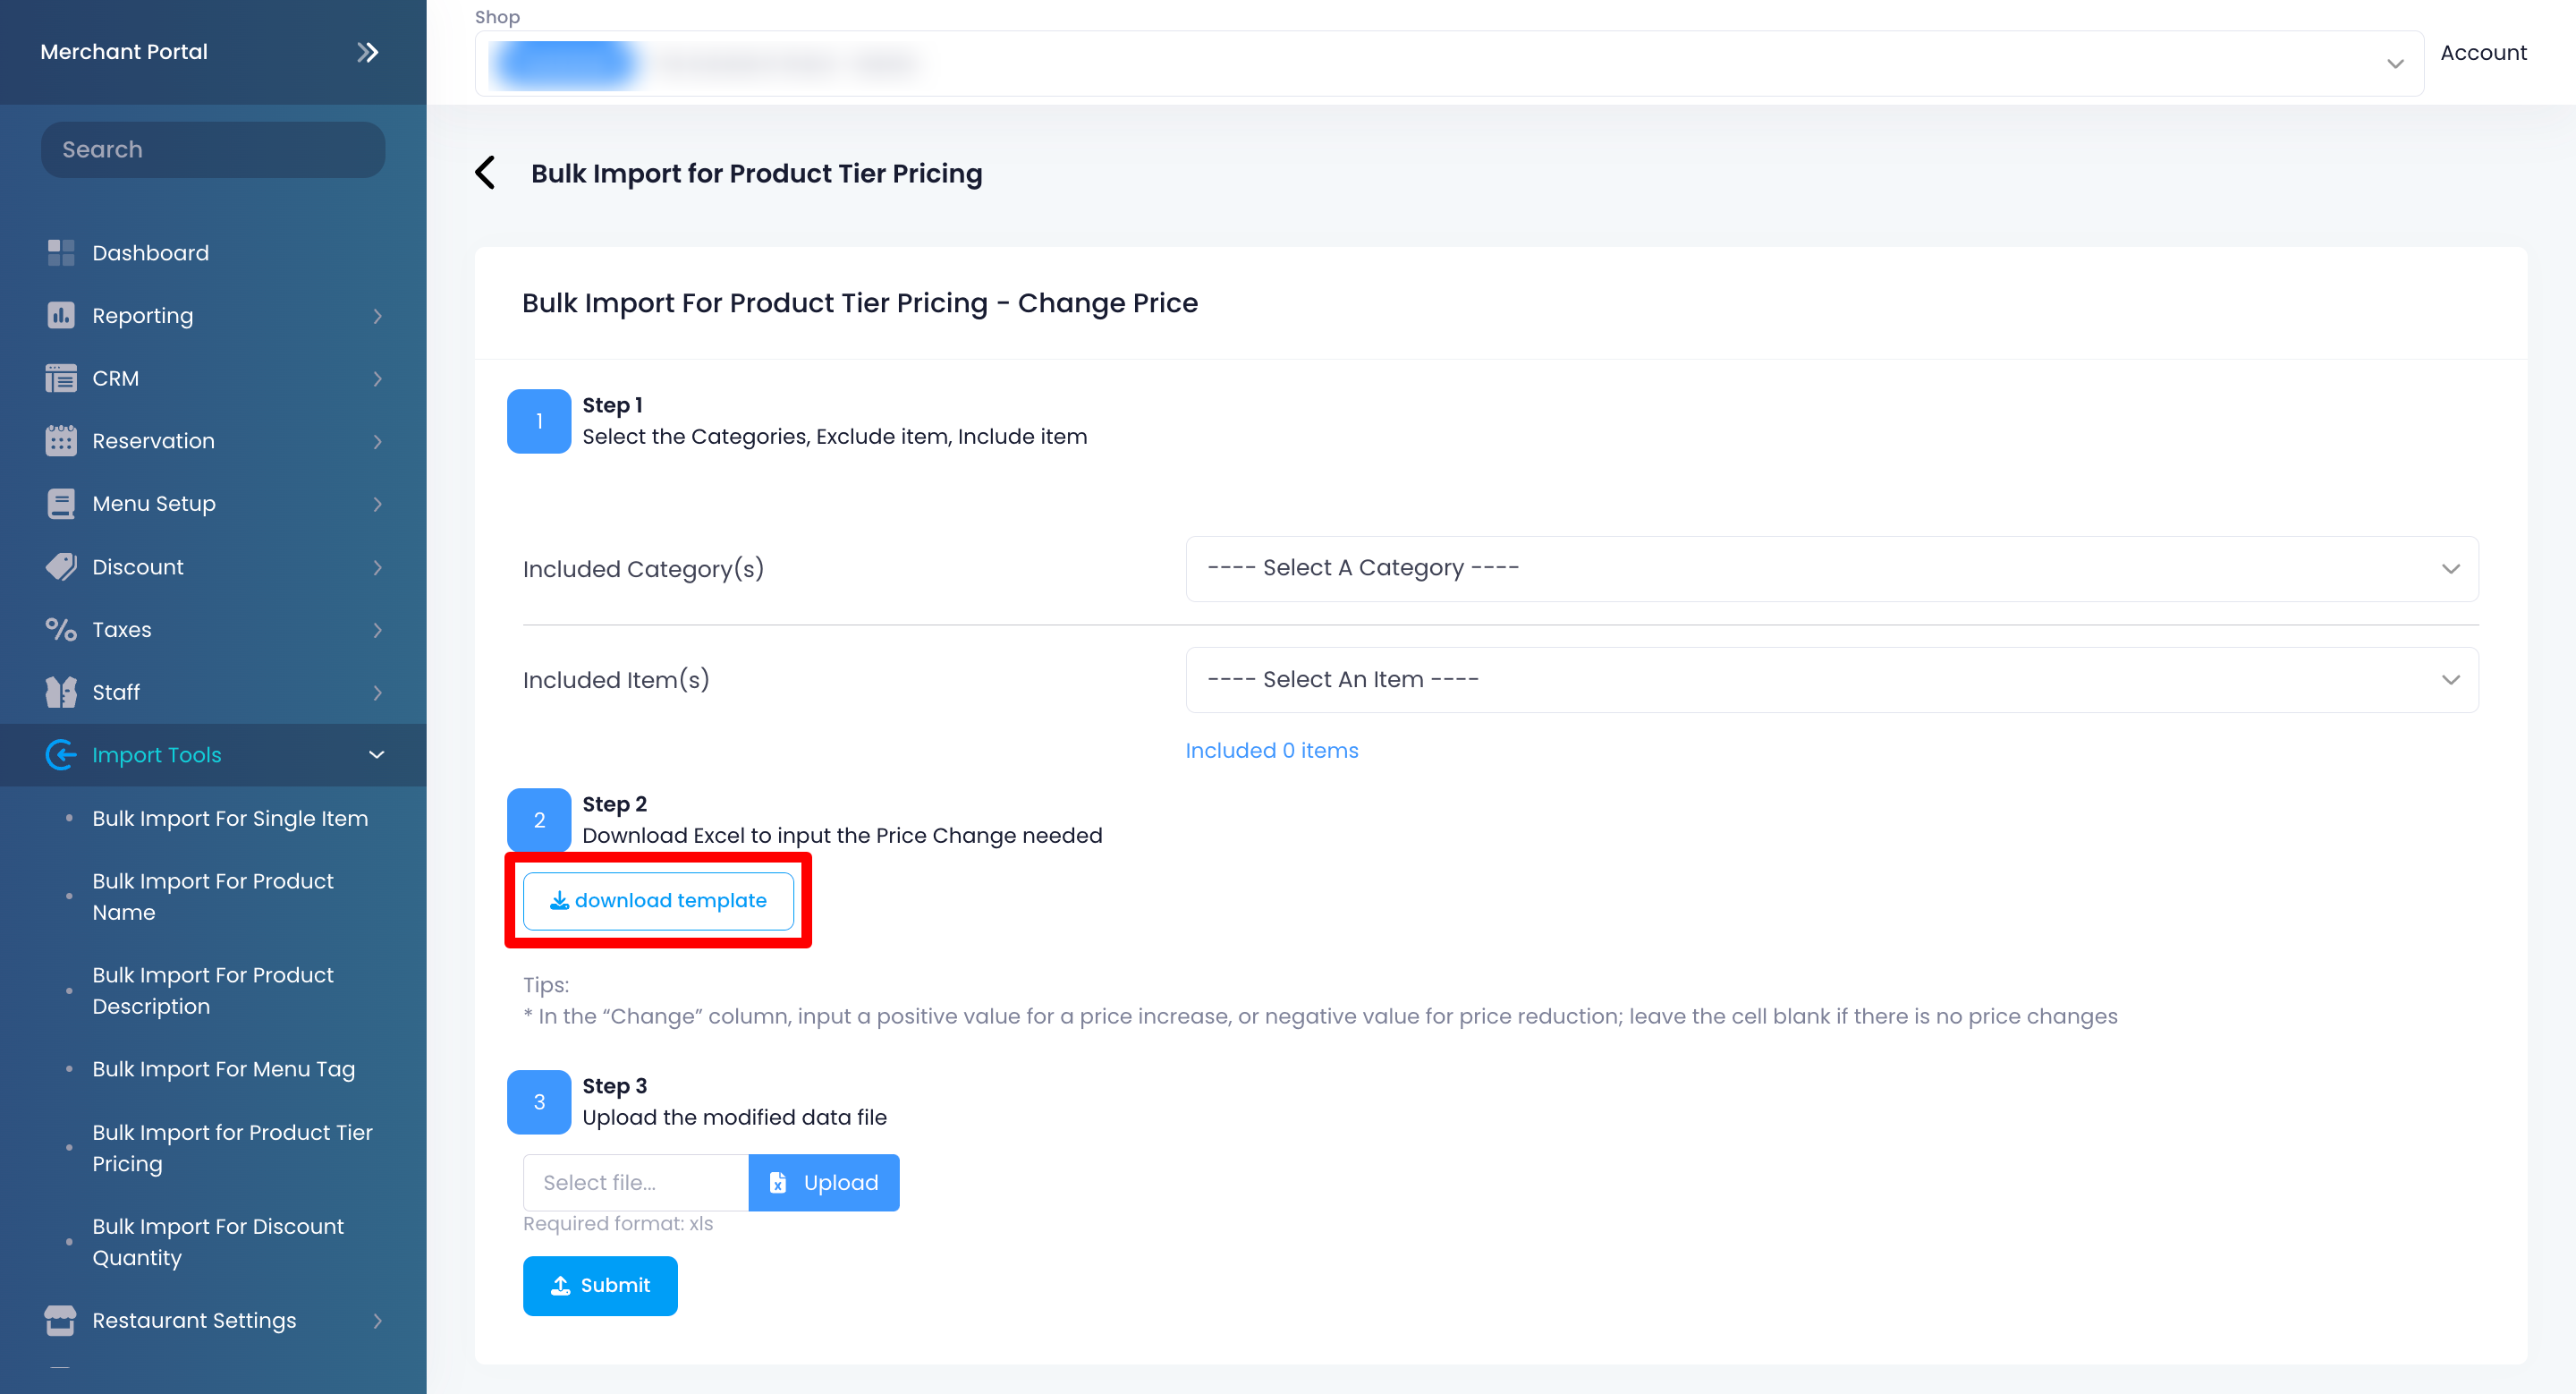
Note: You can exclude specific Menu Items from a particular Category. - Click on download template.
-
To modify the template, enter the Tier Price change under the Change column.
Tips:Enter a positive value for a price increase or a negative value for price reduction. For example, if the original Tier Price is set to “3” and you enter “2” under the Change column, the new Tier Price will be “5.” If you enter “-2,” the new Tier Price will be “1”.
Leave the cell blank if there is no price change.
- Select the Category(s) and or the specific Item(s) with the Tier Pricing that you want to change and include in the template.
To upload your modified template file, click on Upload. Then, select your modified file.
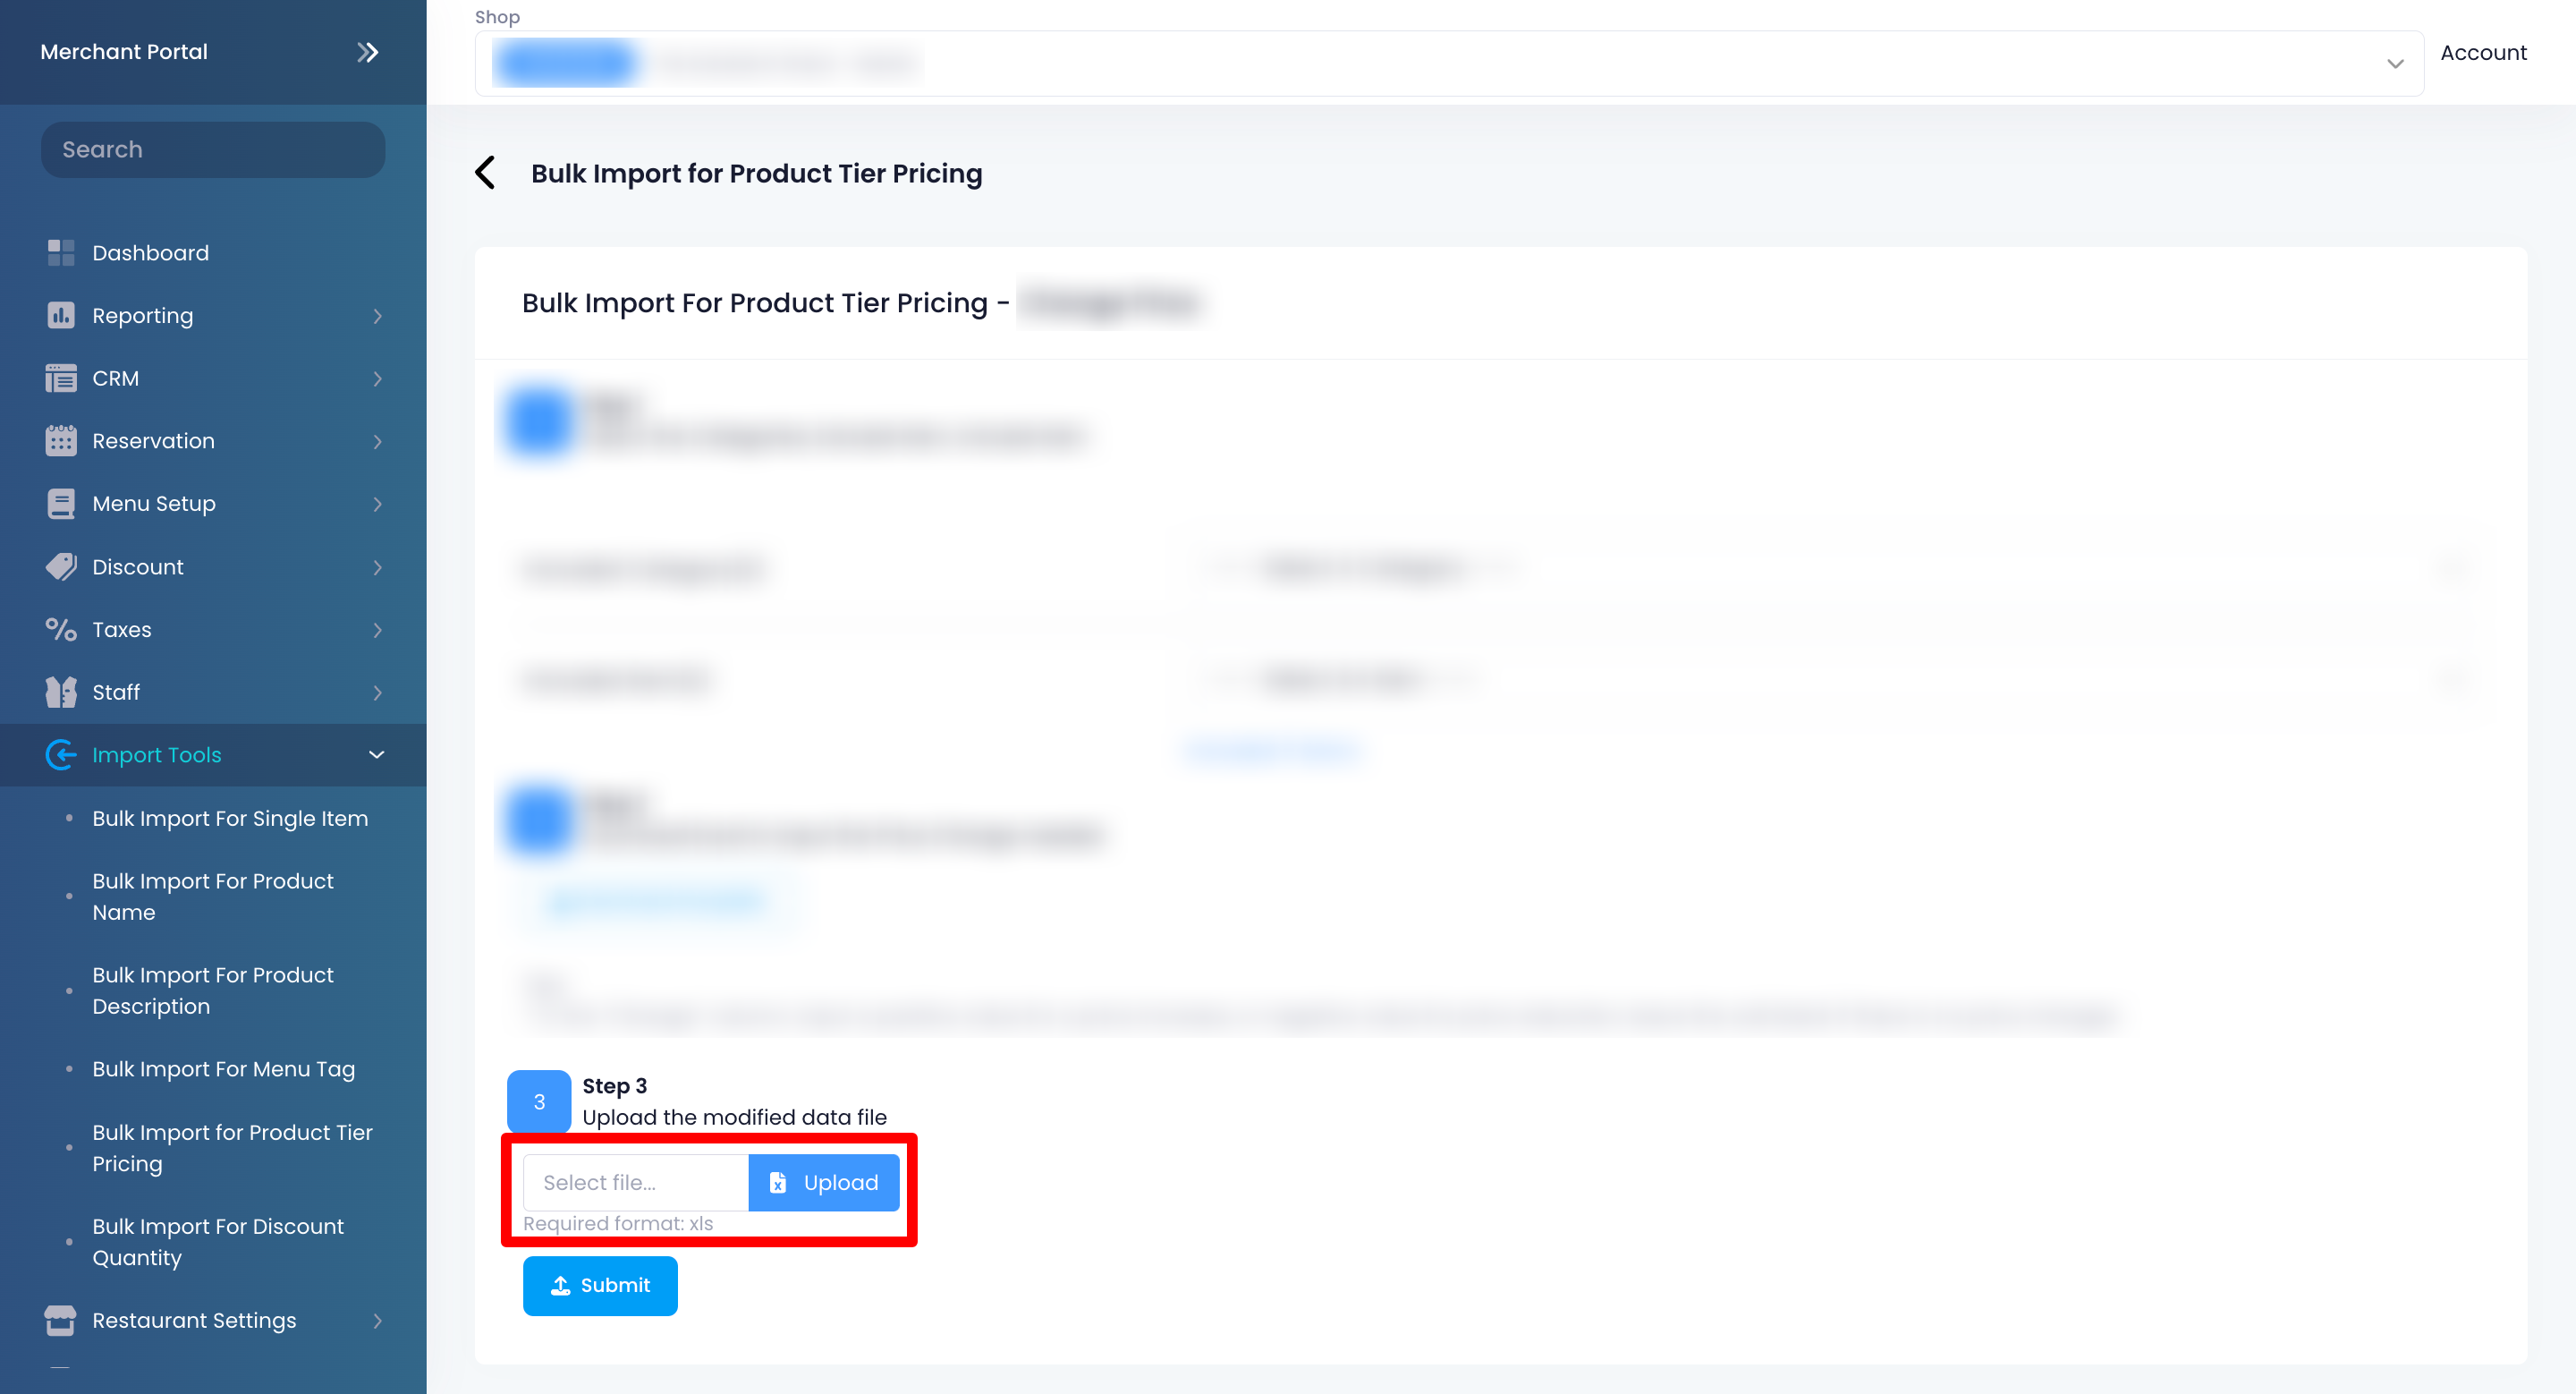
Click on Submit to confirm.
Bulk Import for Discount Quantity
To perform a bulk import for Discount Quantity, follow the steps below:
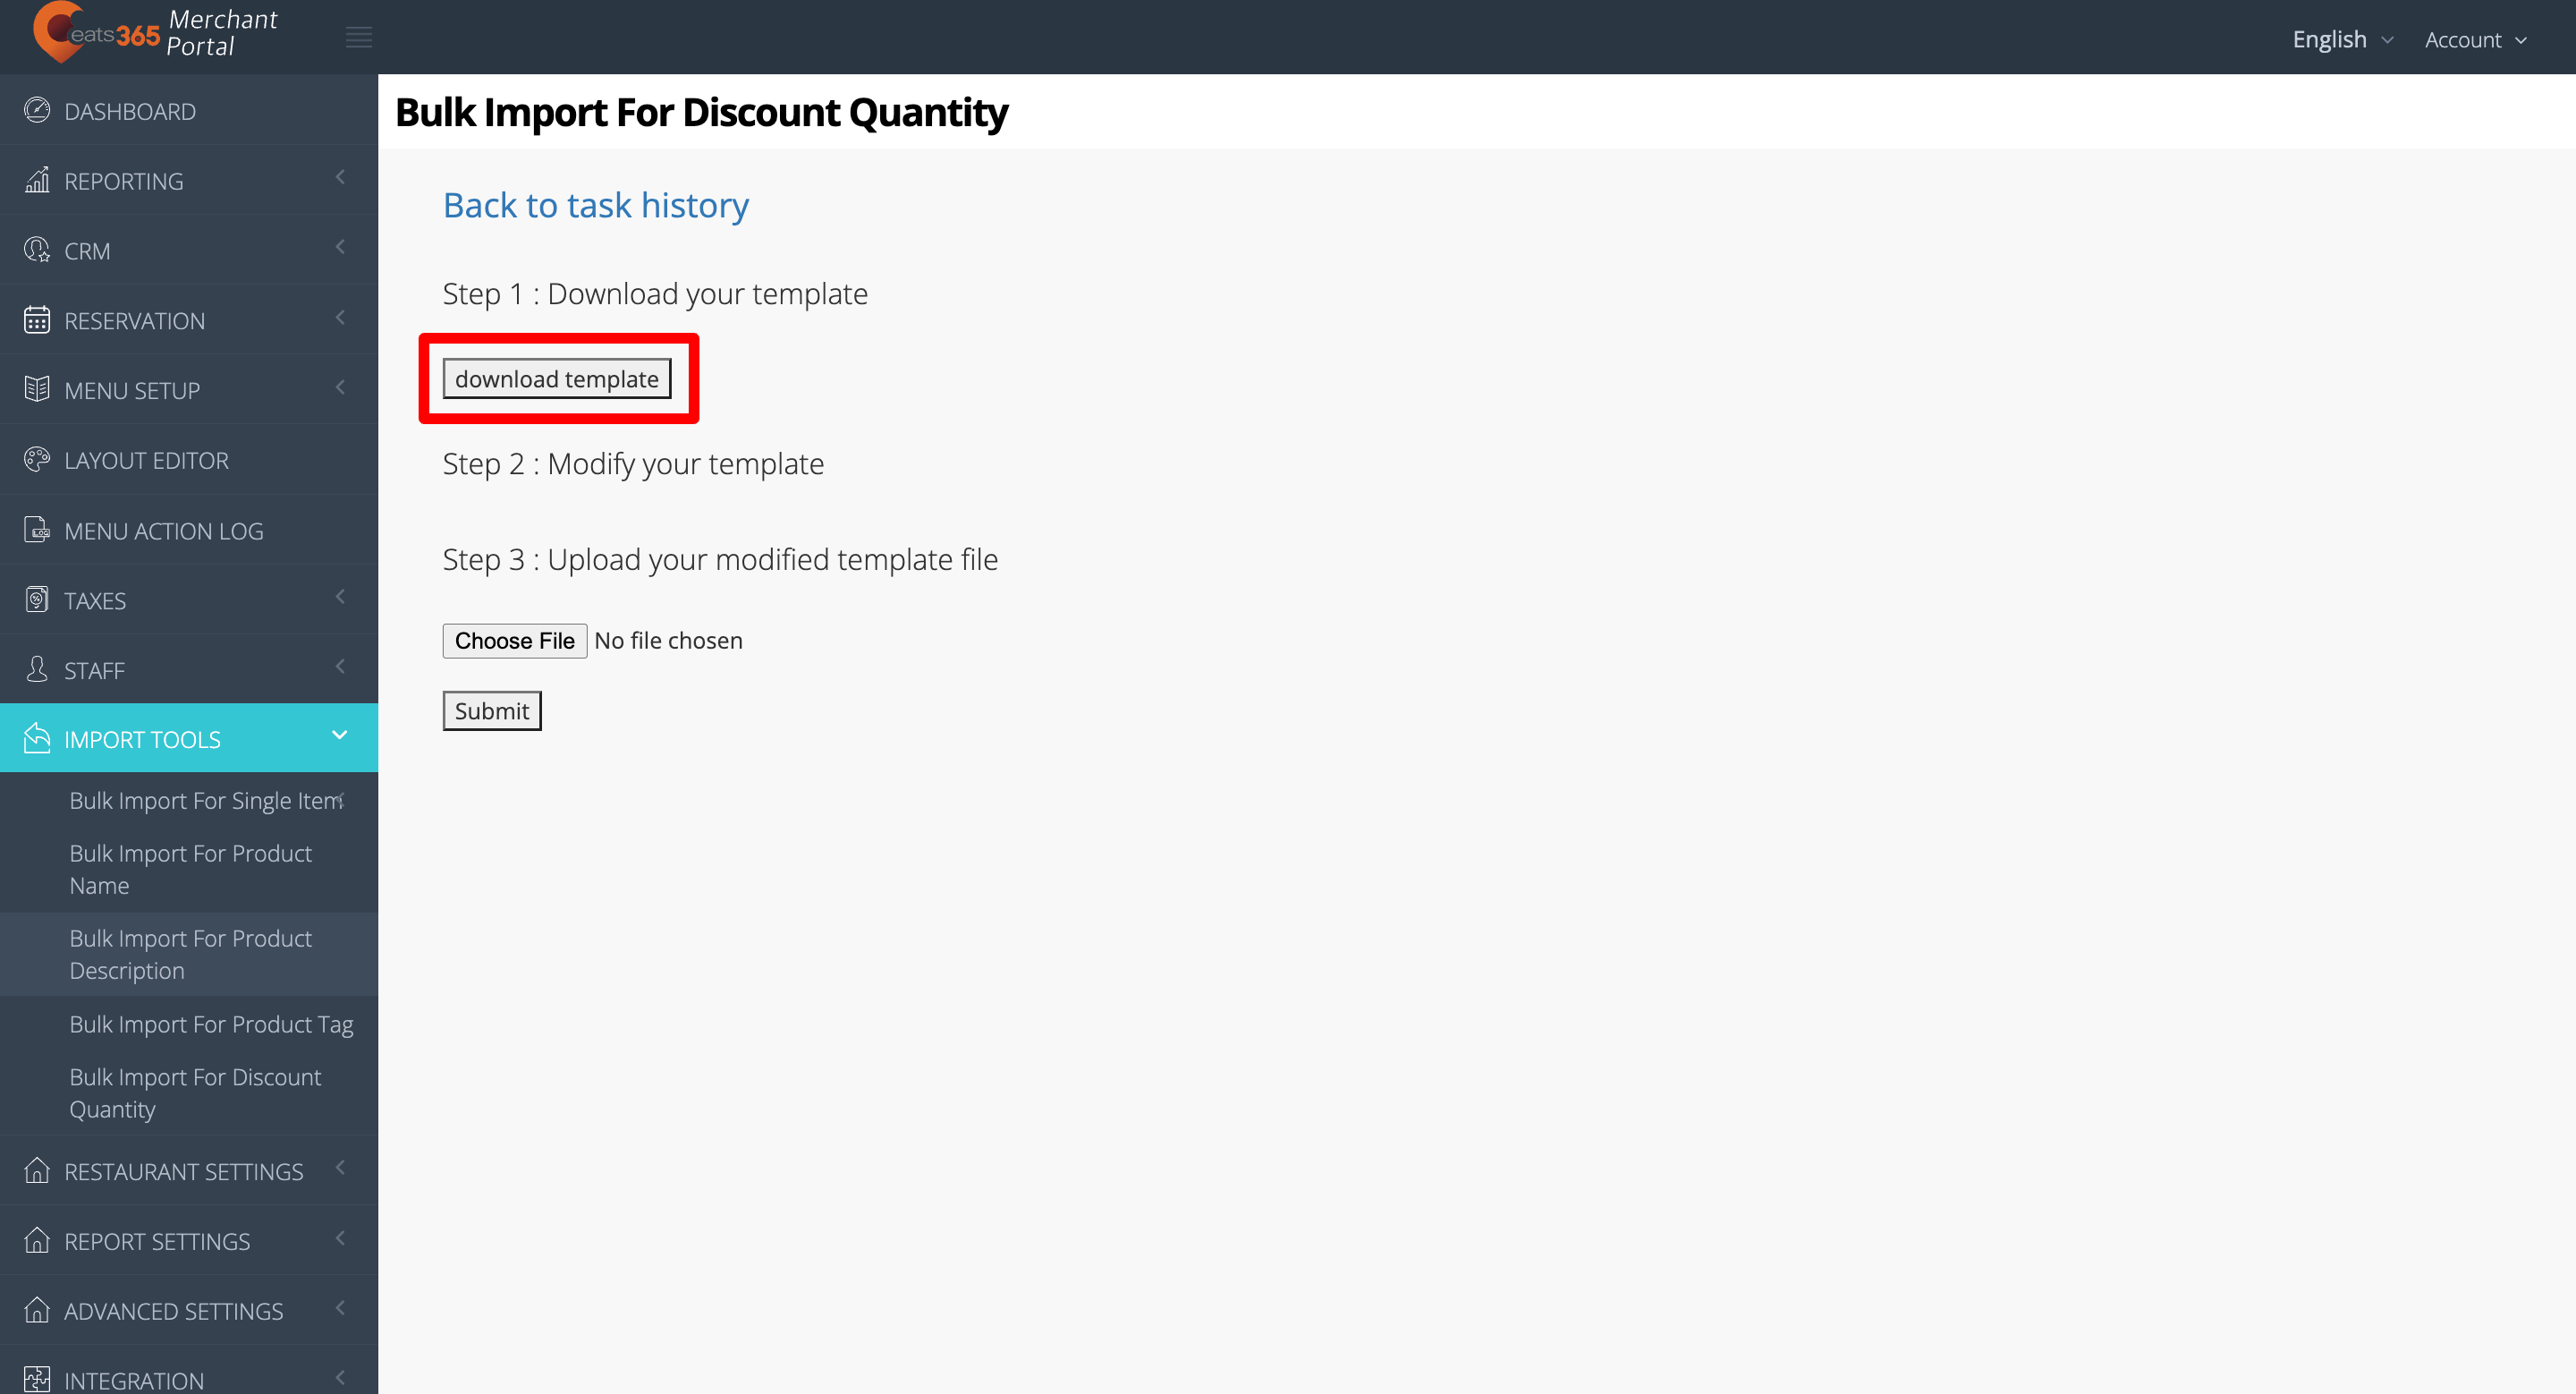
Merchant Portal (Classic Theme)
- Log in to the Merchant Portal.
- From the left panel, click on Import Tools, then click on Bulk Import for Discount Quantity.
- At the top right, click on Add new task.
- Click on download template.
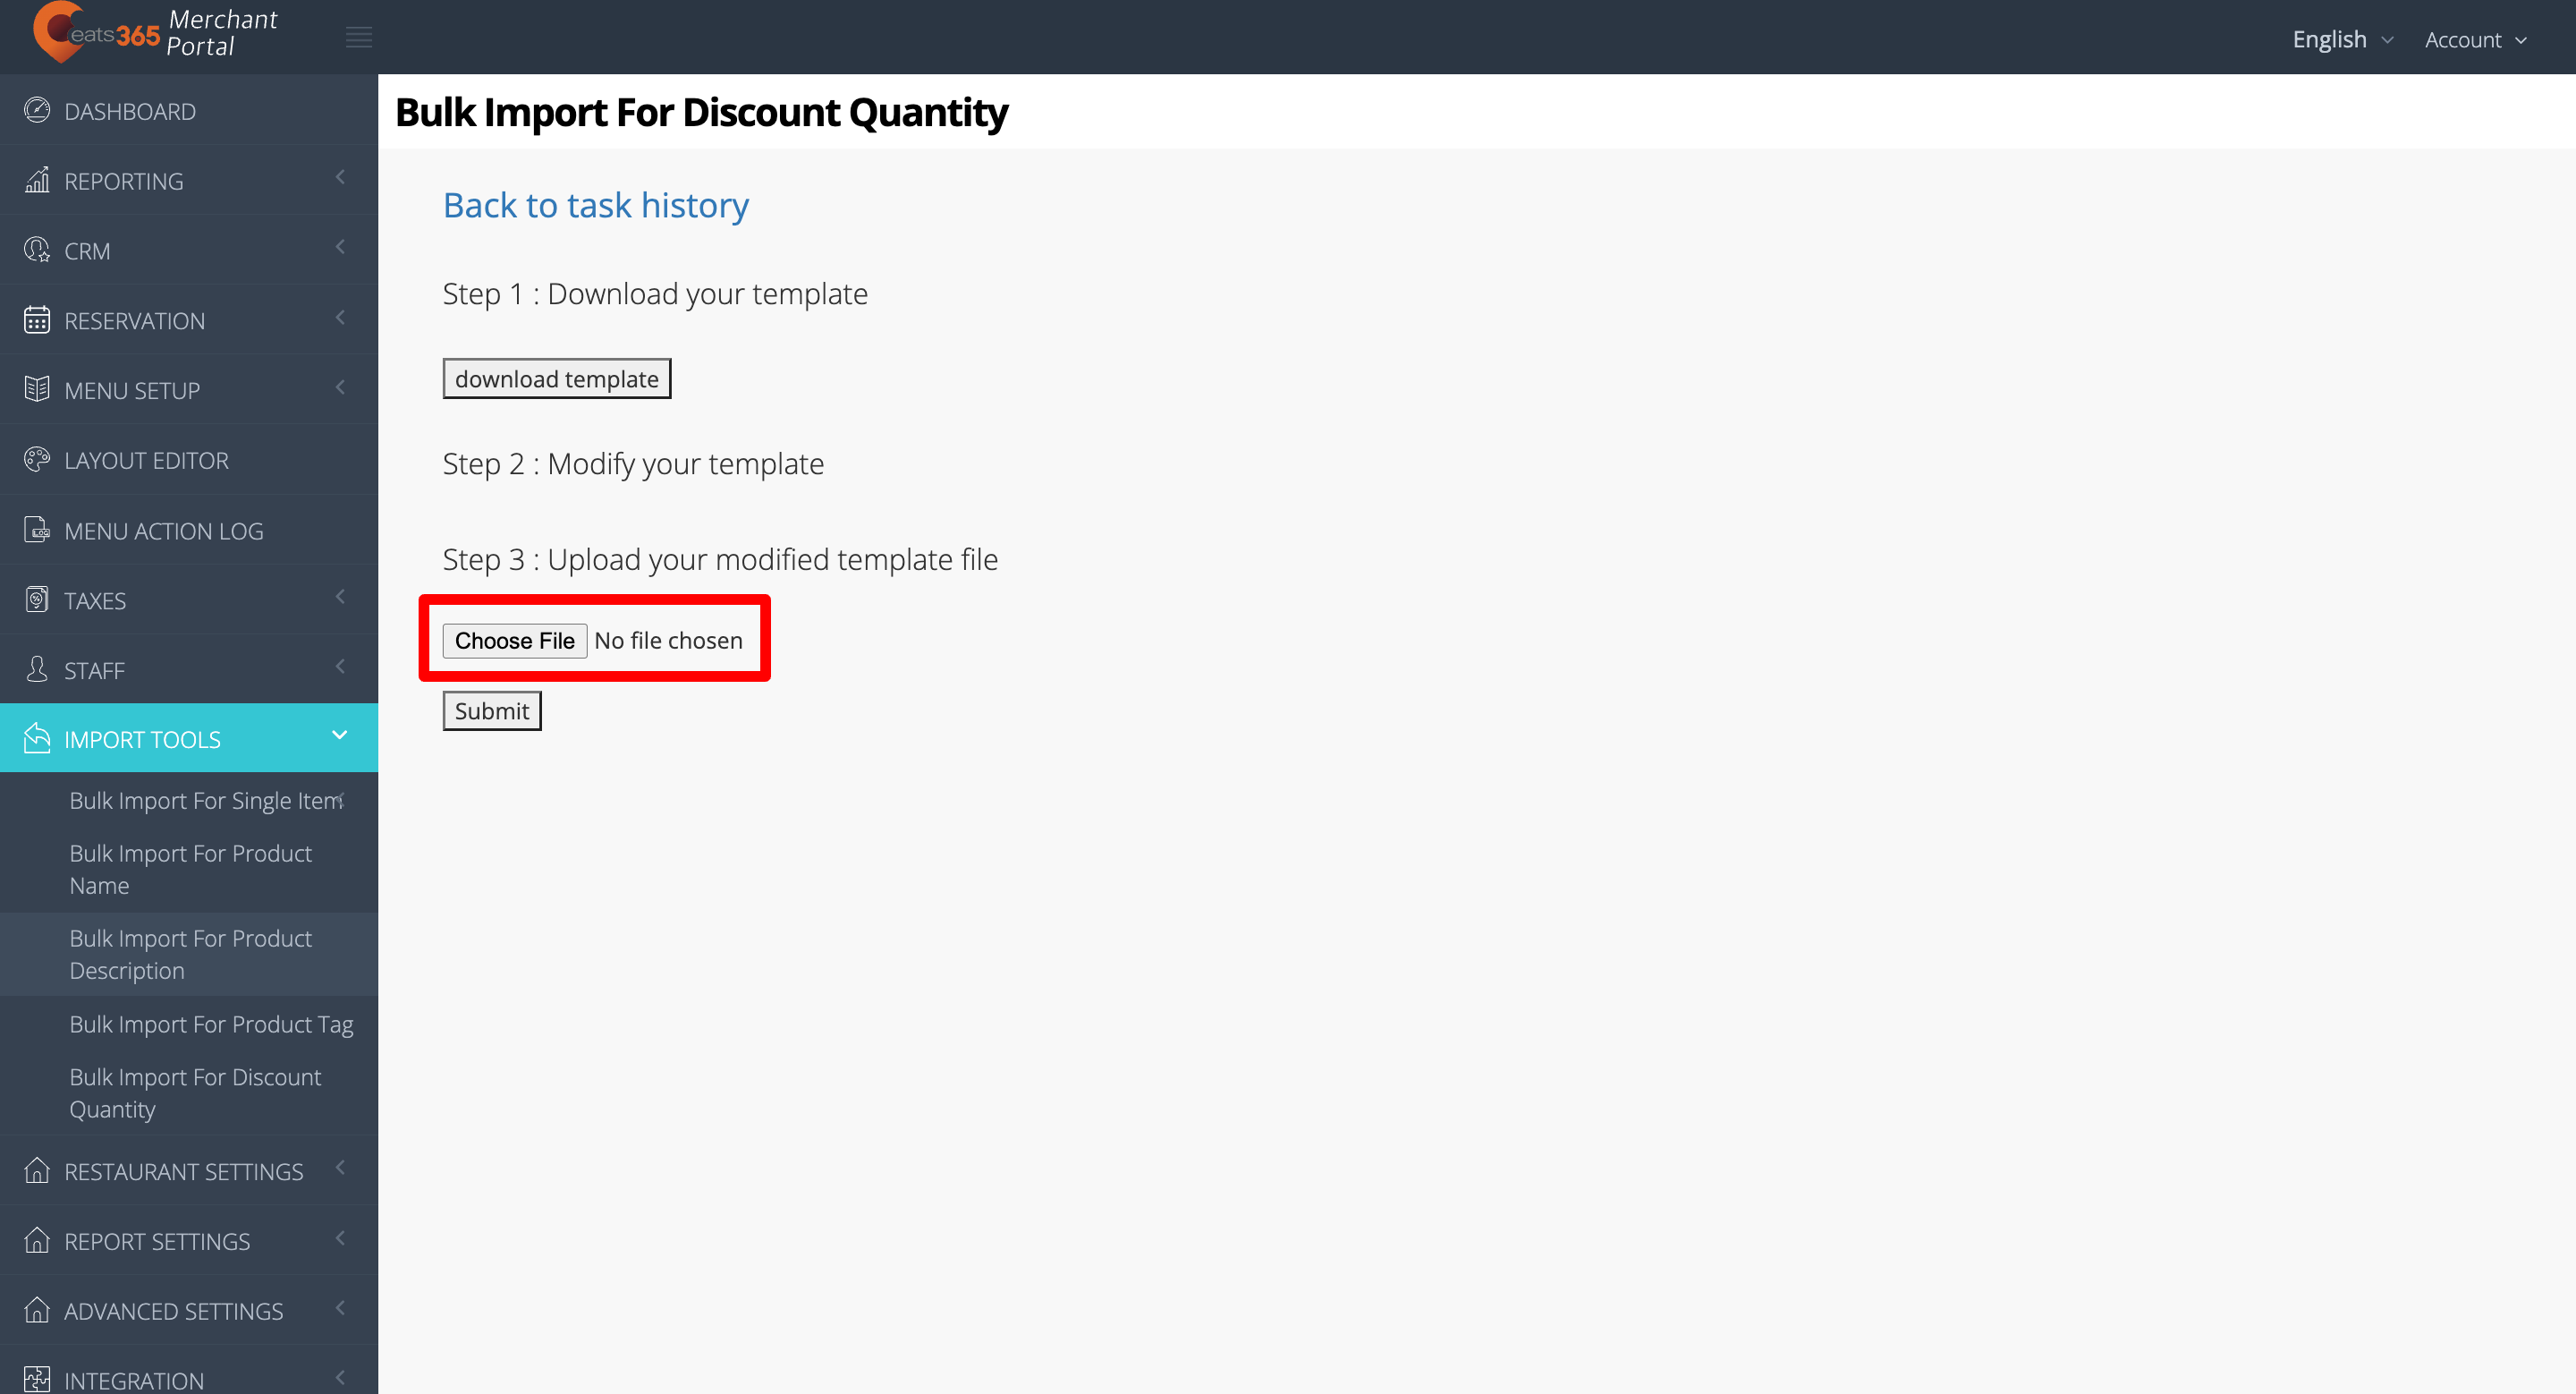
- To modify the template, enter the data in all of the relevant fields in the Excel file.
- To upload your modified template file, click on Choose File. Then, select your modified file.
- At the top right, click on Submit to confirm.
Merchant Portal 2.0
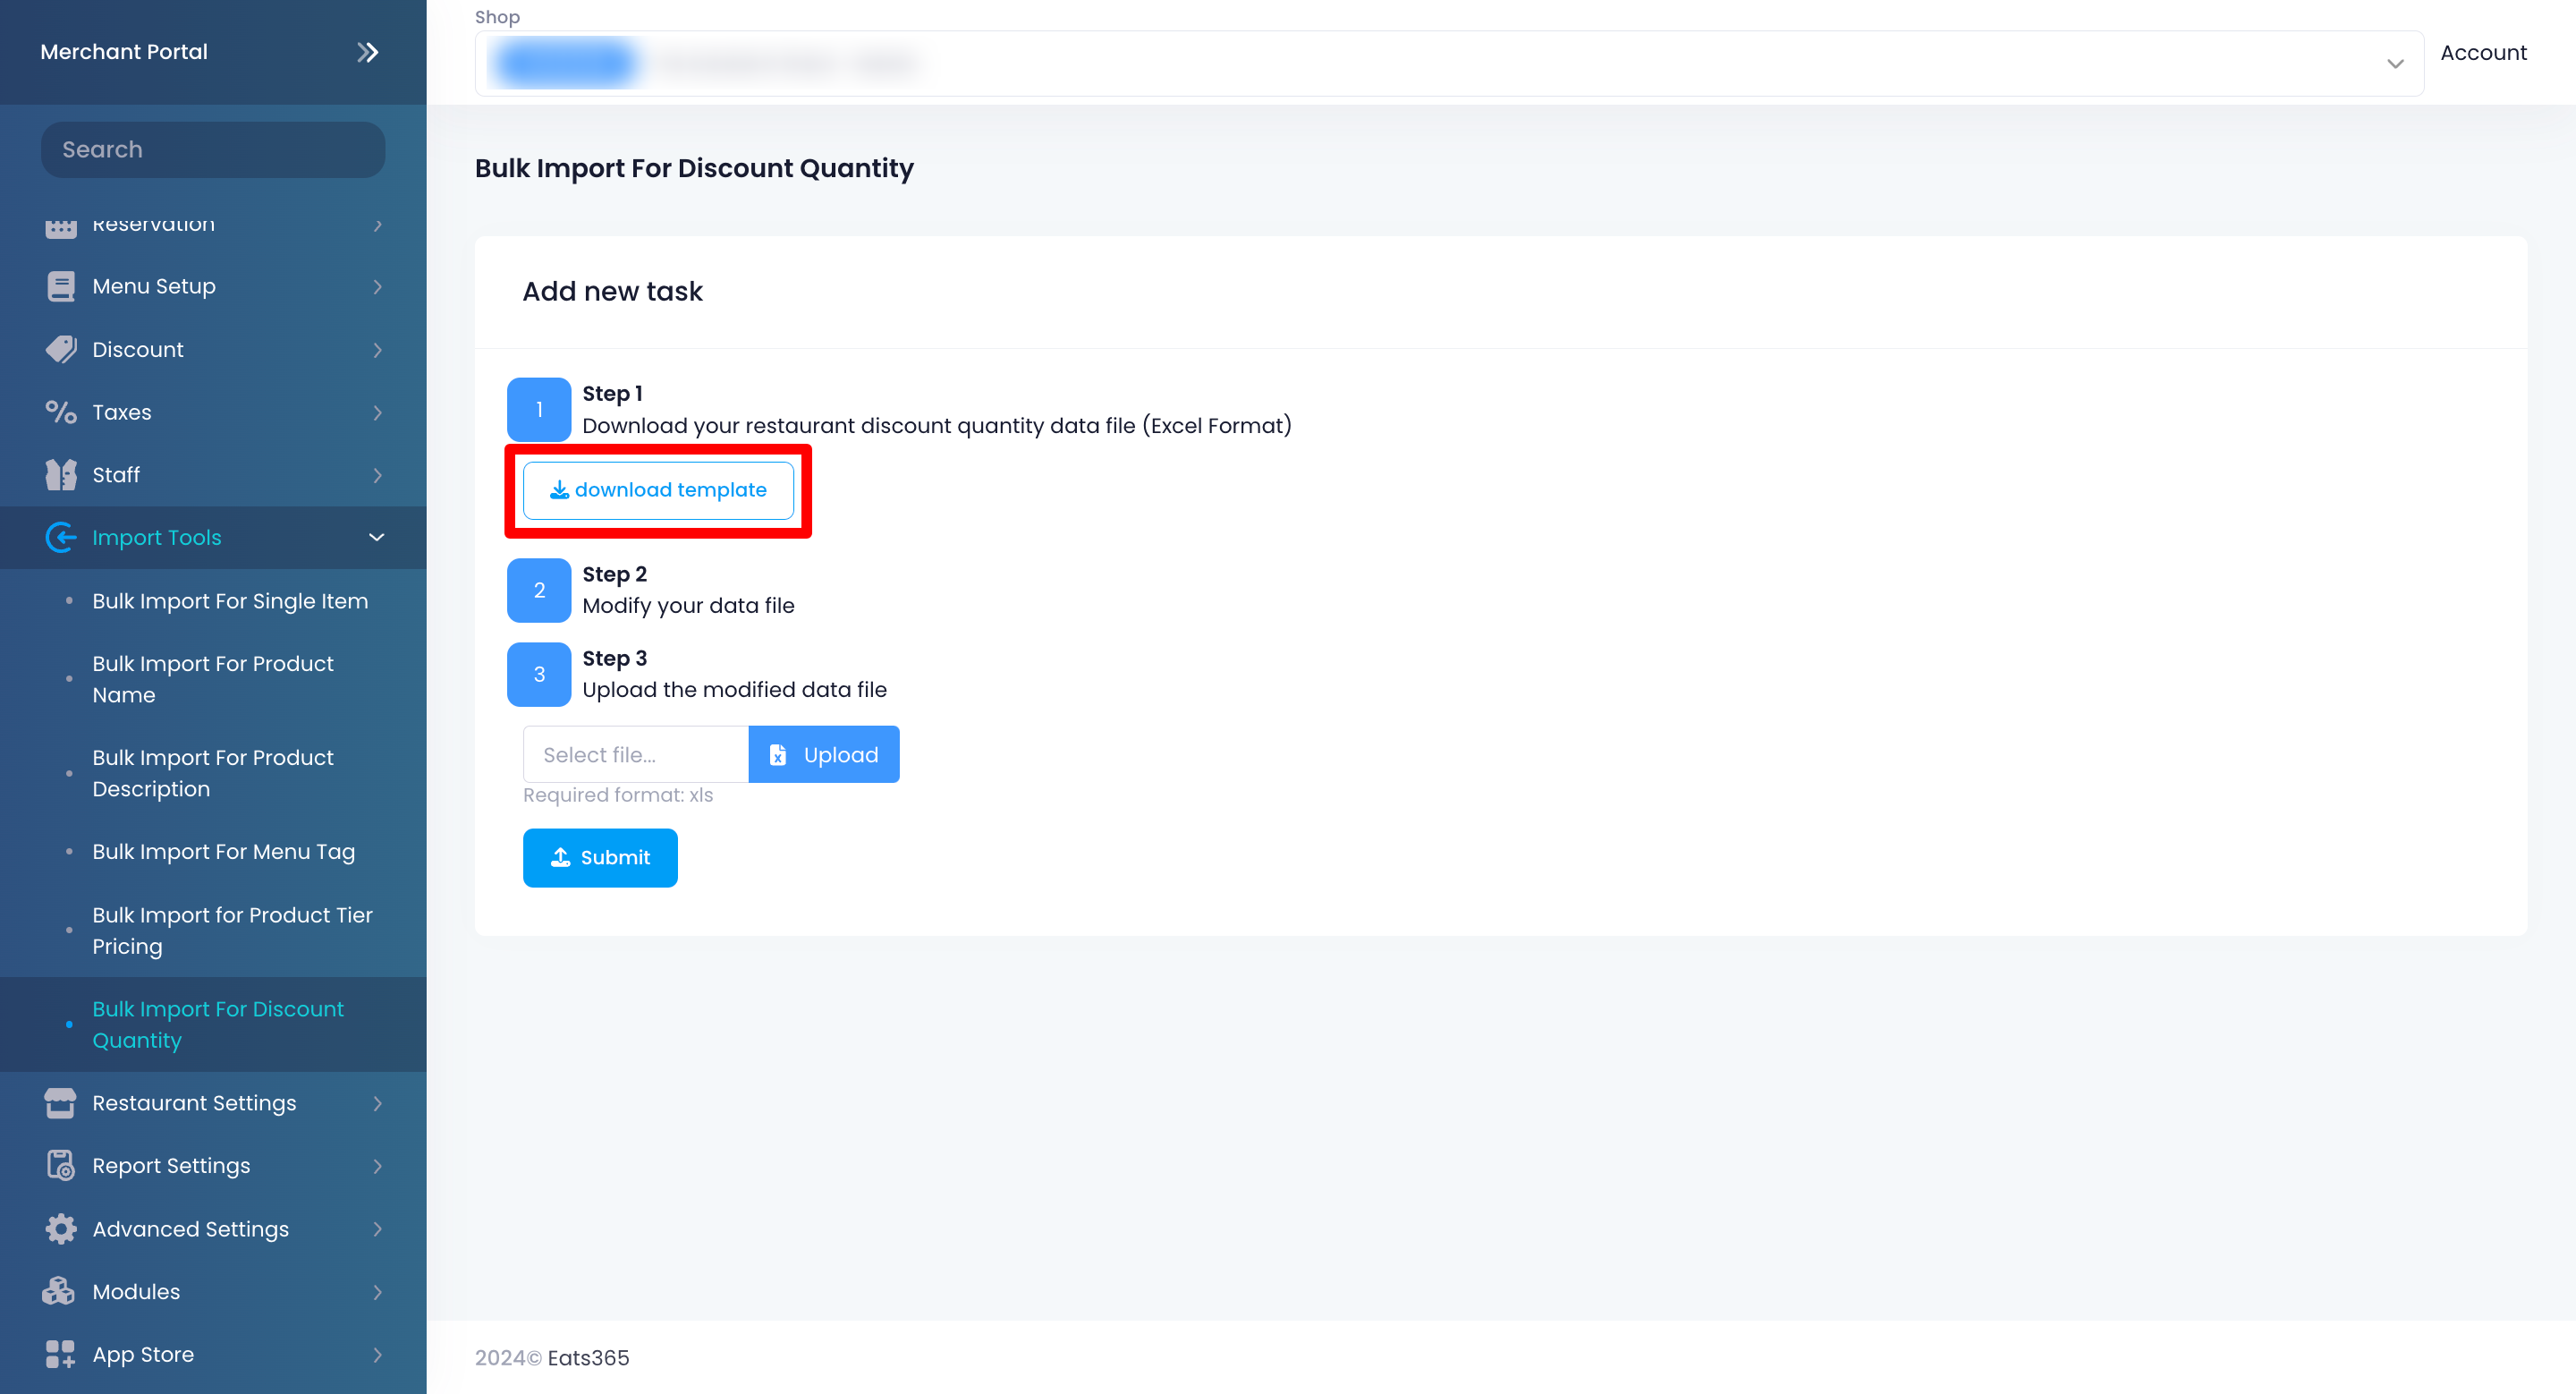
- Log in to the Merchant Portal.
- From the left panel, click on Import Tools, then click on Bulk Import for Discount Quantity.

- At the top right, click on Add new task.
- Click on download template.
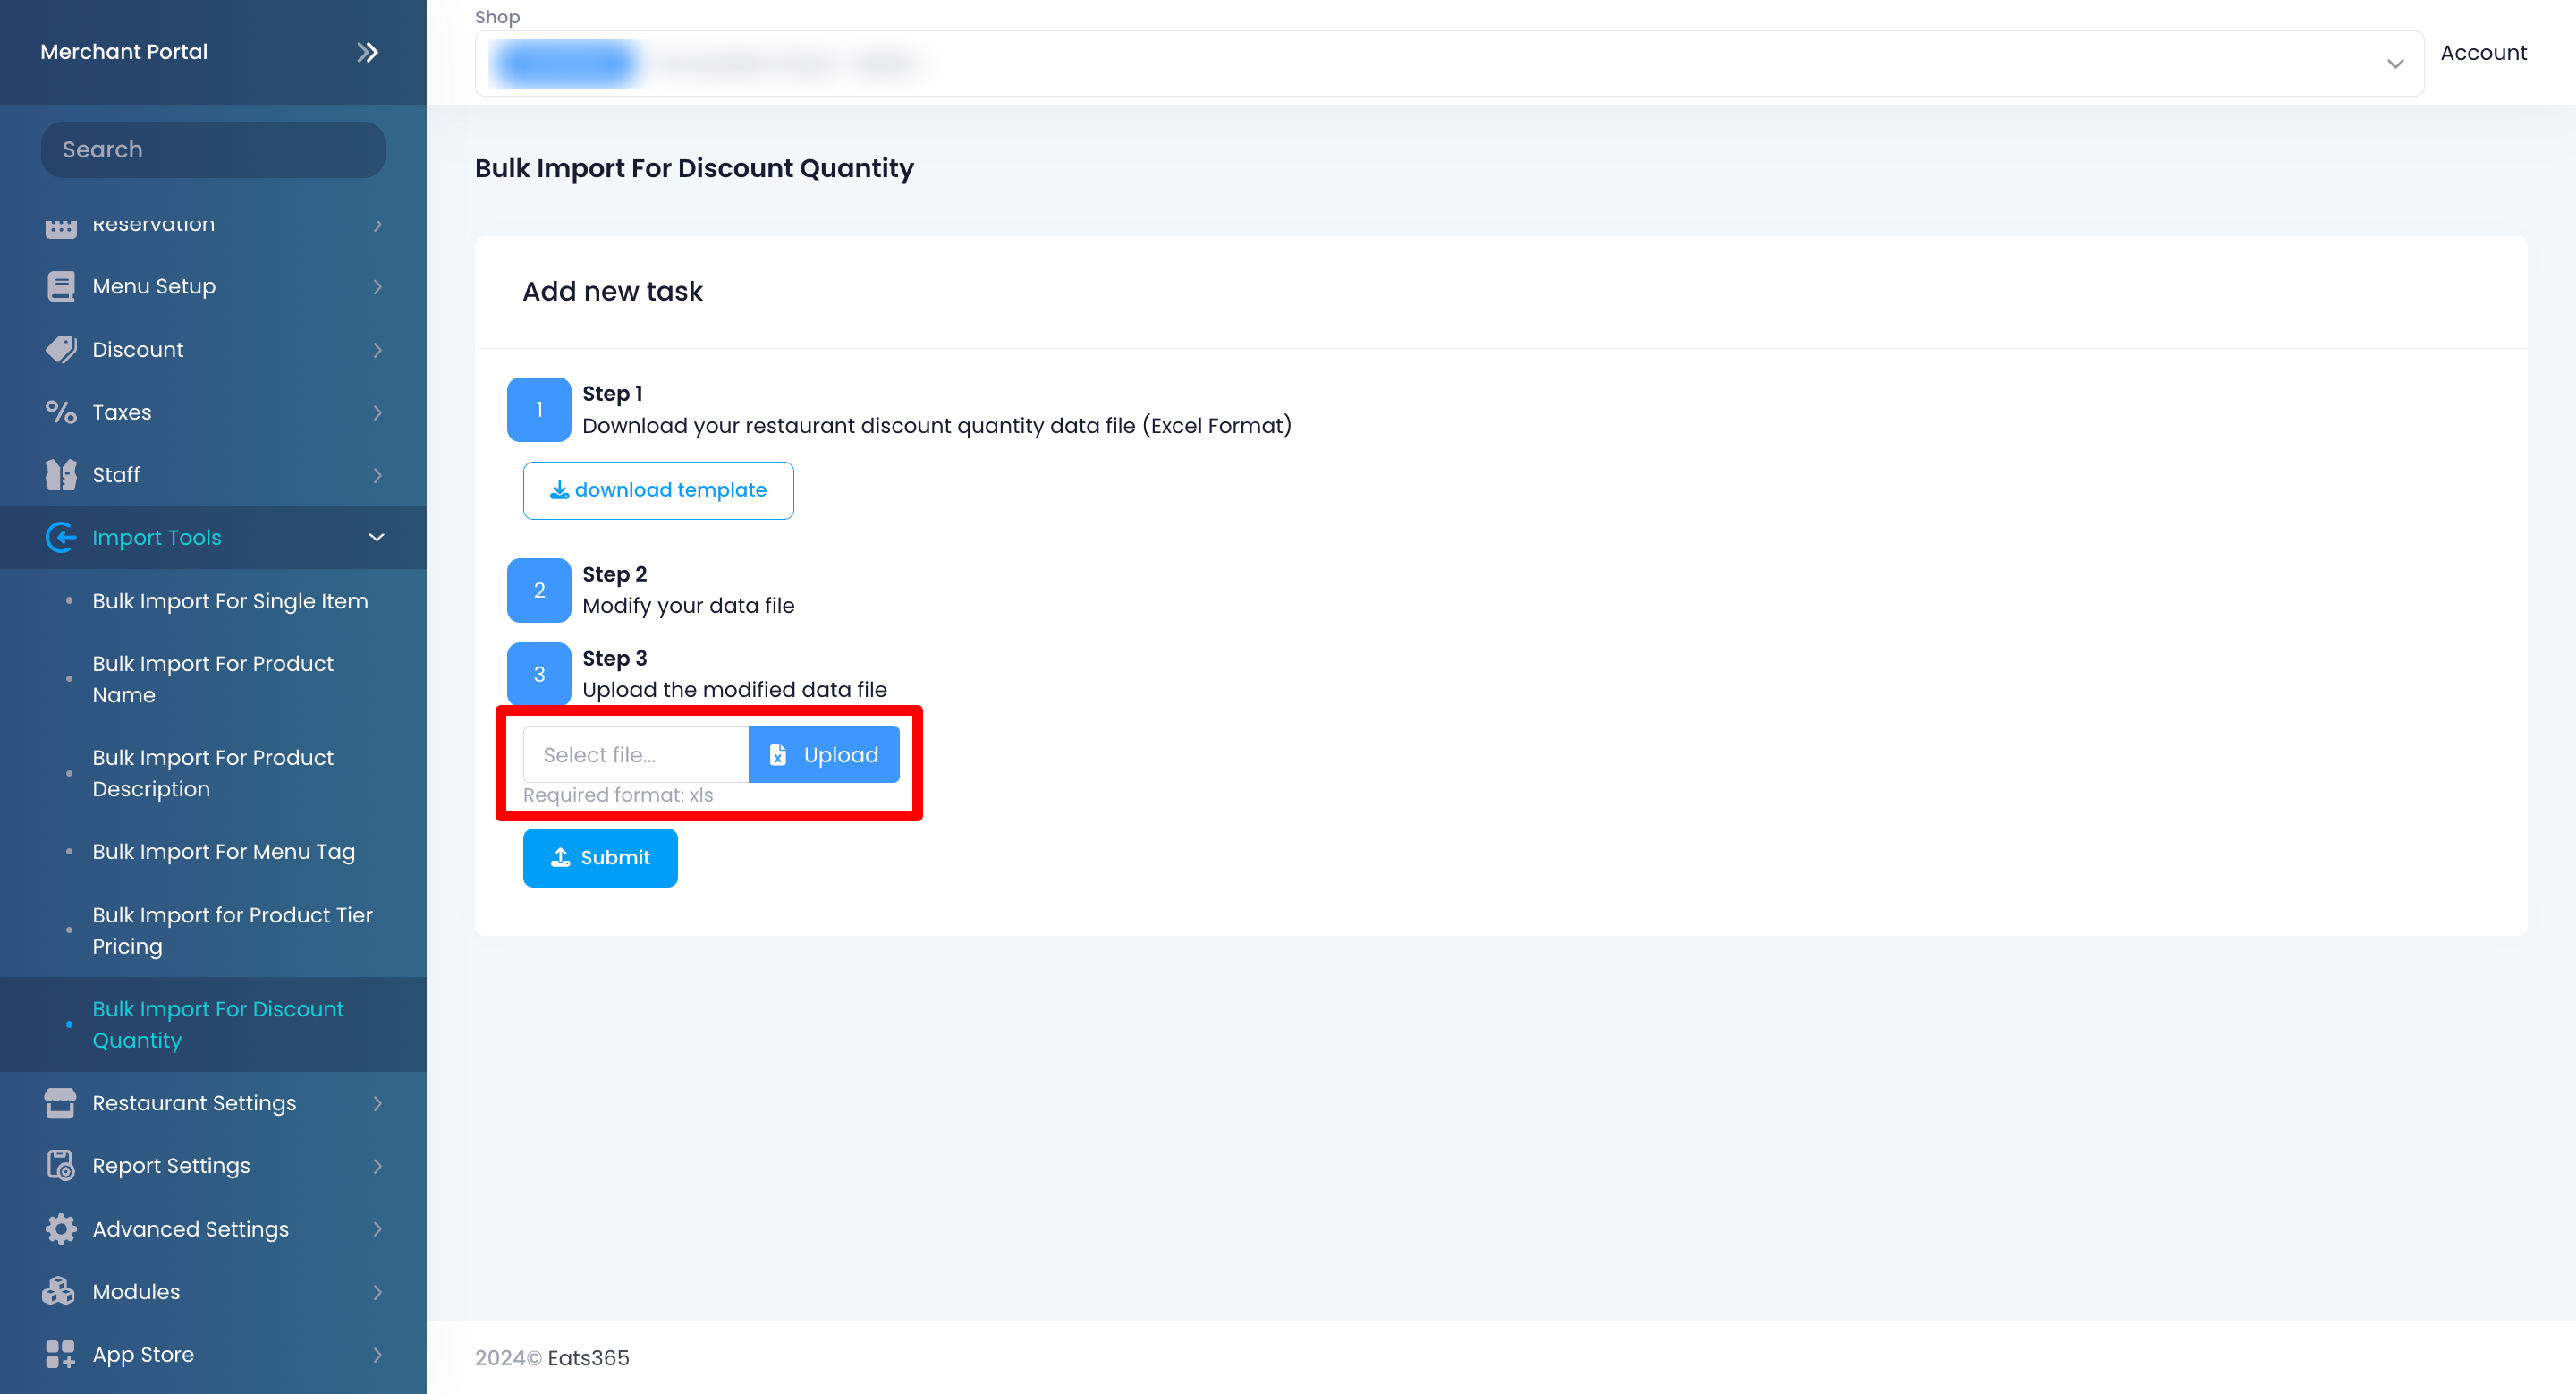
- To modify the template, enter the data in all of the relevant fields in the Excel file.
- To upload your modified template file, click on Upload. Then, select your modified file.
- Click on Submit to confirm.