 Eats365 Products
 Merchant Guide
 Modules
 Membership
 Integrations
 Hardware
 Staff Operations
 Roles & Permissions
 Payments
 Reports
 What’s New
 Release Notes
 Troubleshooting
 Simulators
 Glossary
 Troubleshooter
 System Status
Device Management
All Product
Configure POS to sign out automatically
Learn how to set the POS to sign out automatically using the Eats365 POS and Merchant Portal.
You can configure the Eats365 POS to sign out automatically based on different conditions such as after being idle for a period of time, after processing an order, or after completing a payment. By default, your Auto Sign Out preferences are applied to all POS terminals in your restaurant. However, you can also set individual preferences for each POS to override general Auto Sign Out settings.
Set Auto Sign Out preferences for all POS terminals
To configure Auto Sign Out preferences for all POS terminals in your restaurant, follow the steps below:
Eats365 POS
- Log in to the Eats365 POS.
- At the top left, tap Settings
 .
. - Under Advanced Settings, tap System Preferences.
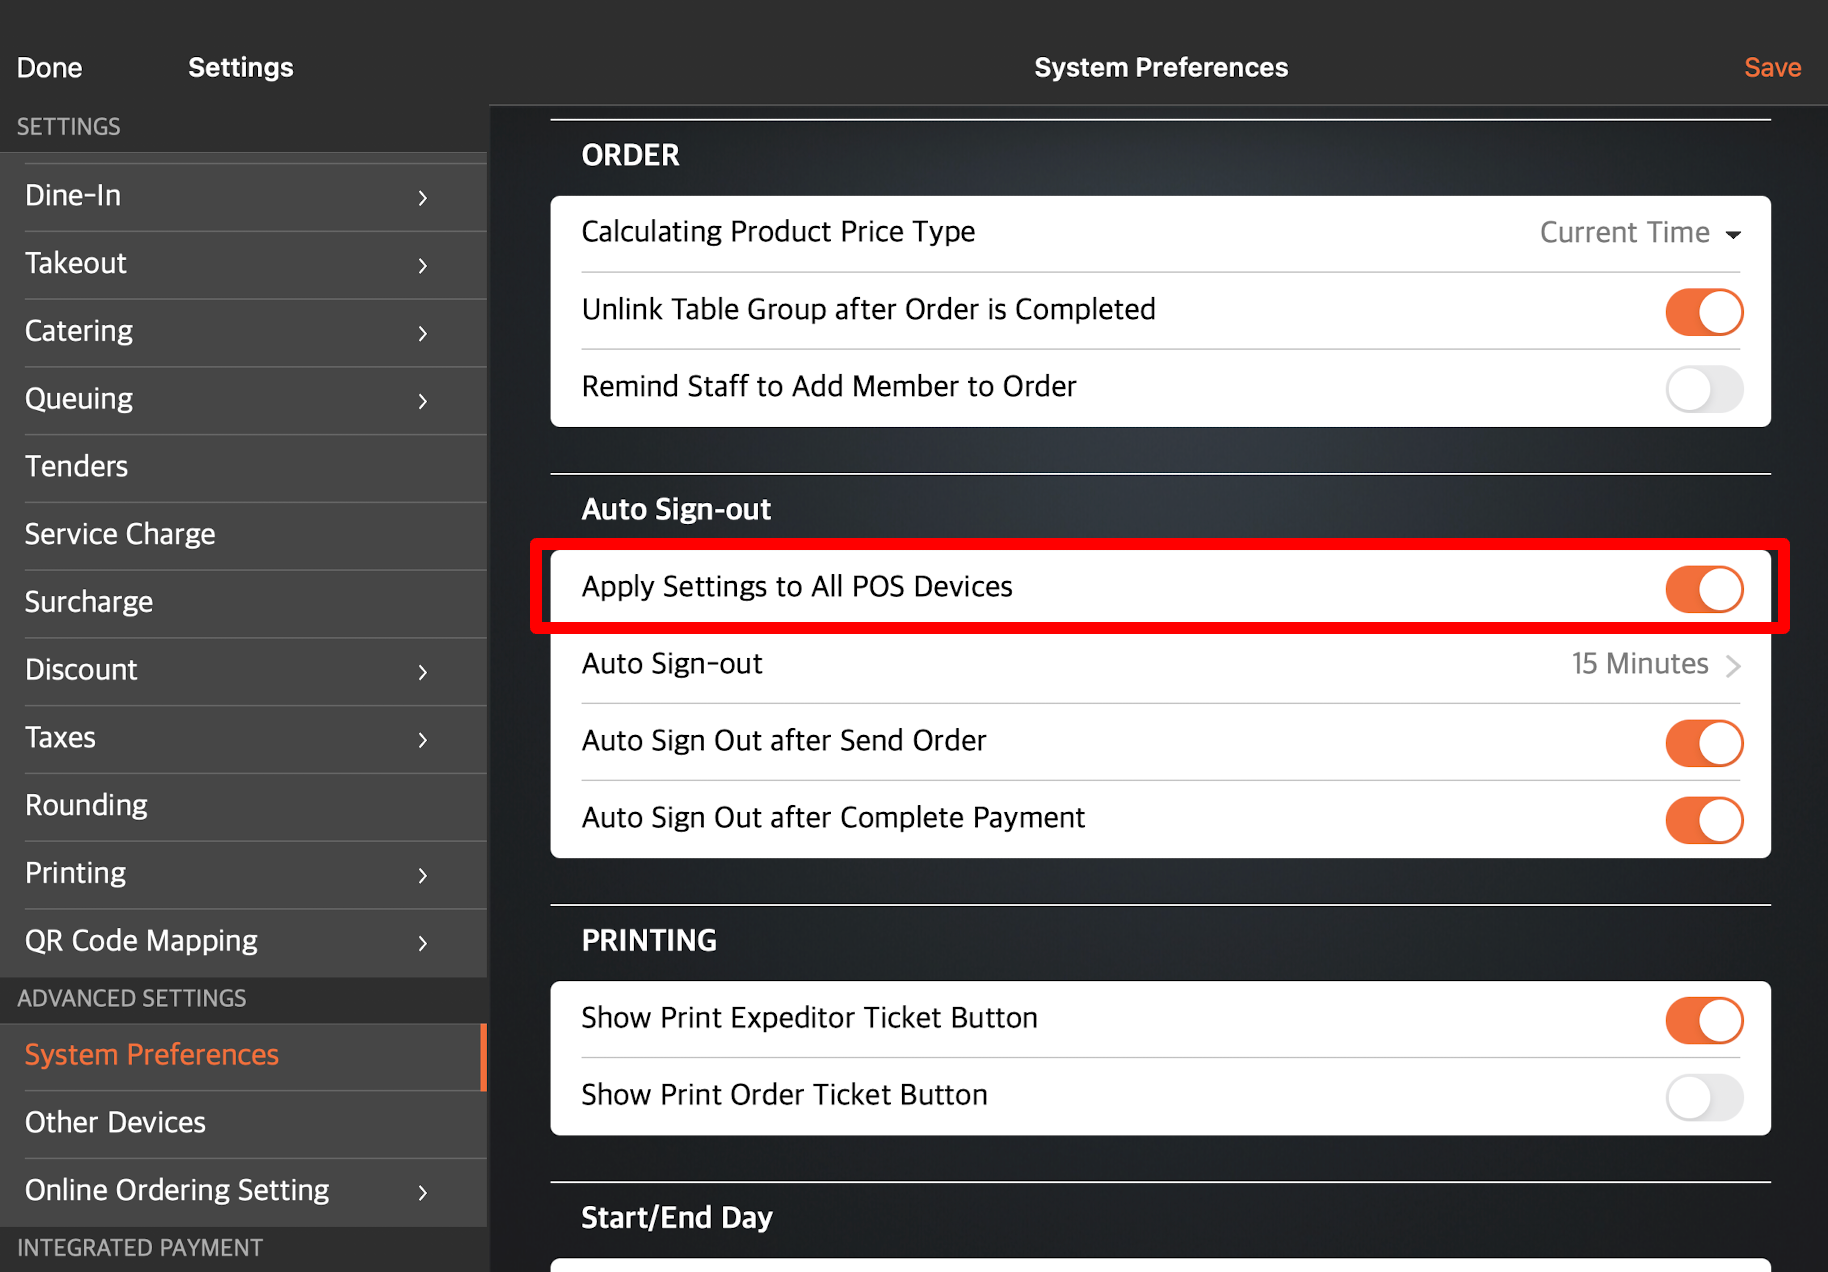
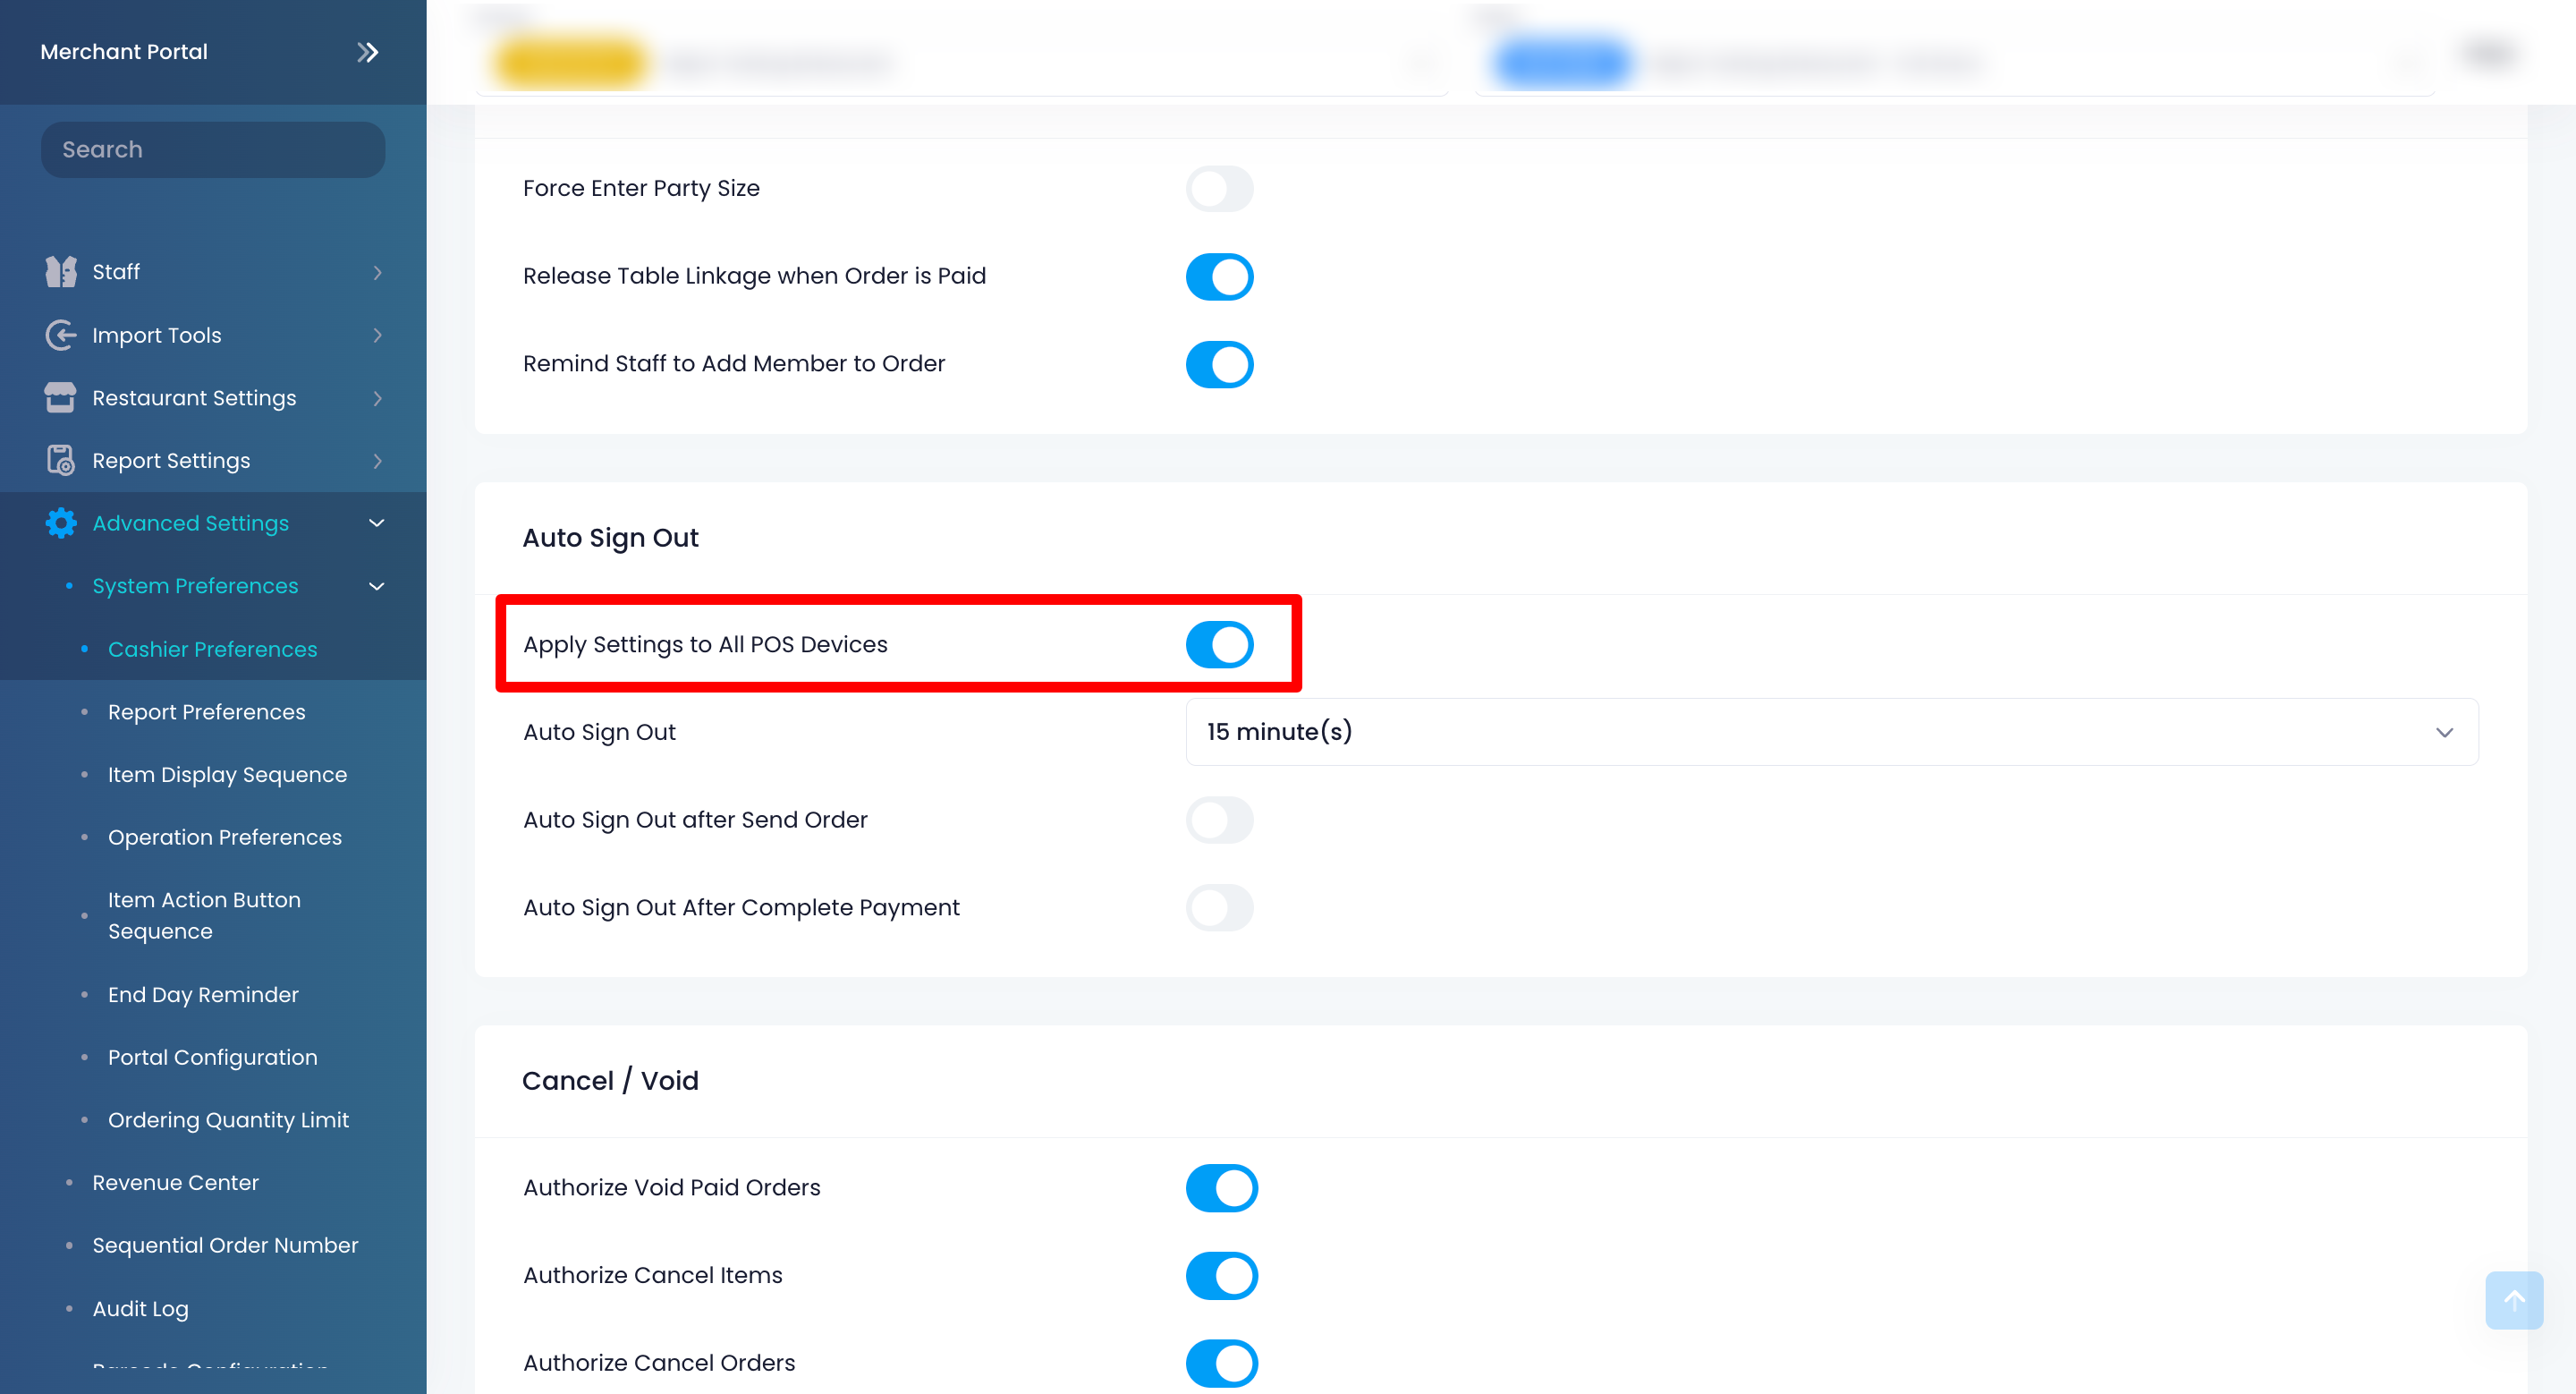
- Under Auto Sign Out, enable Apply Settings to All POS Devices
 .
.
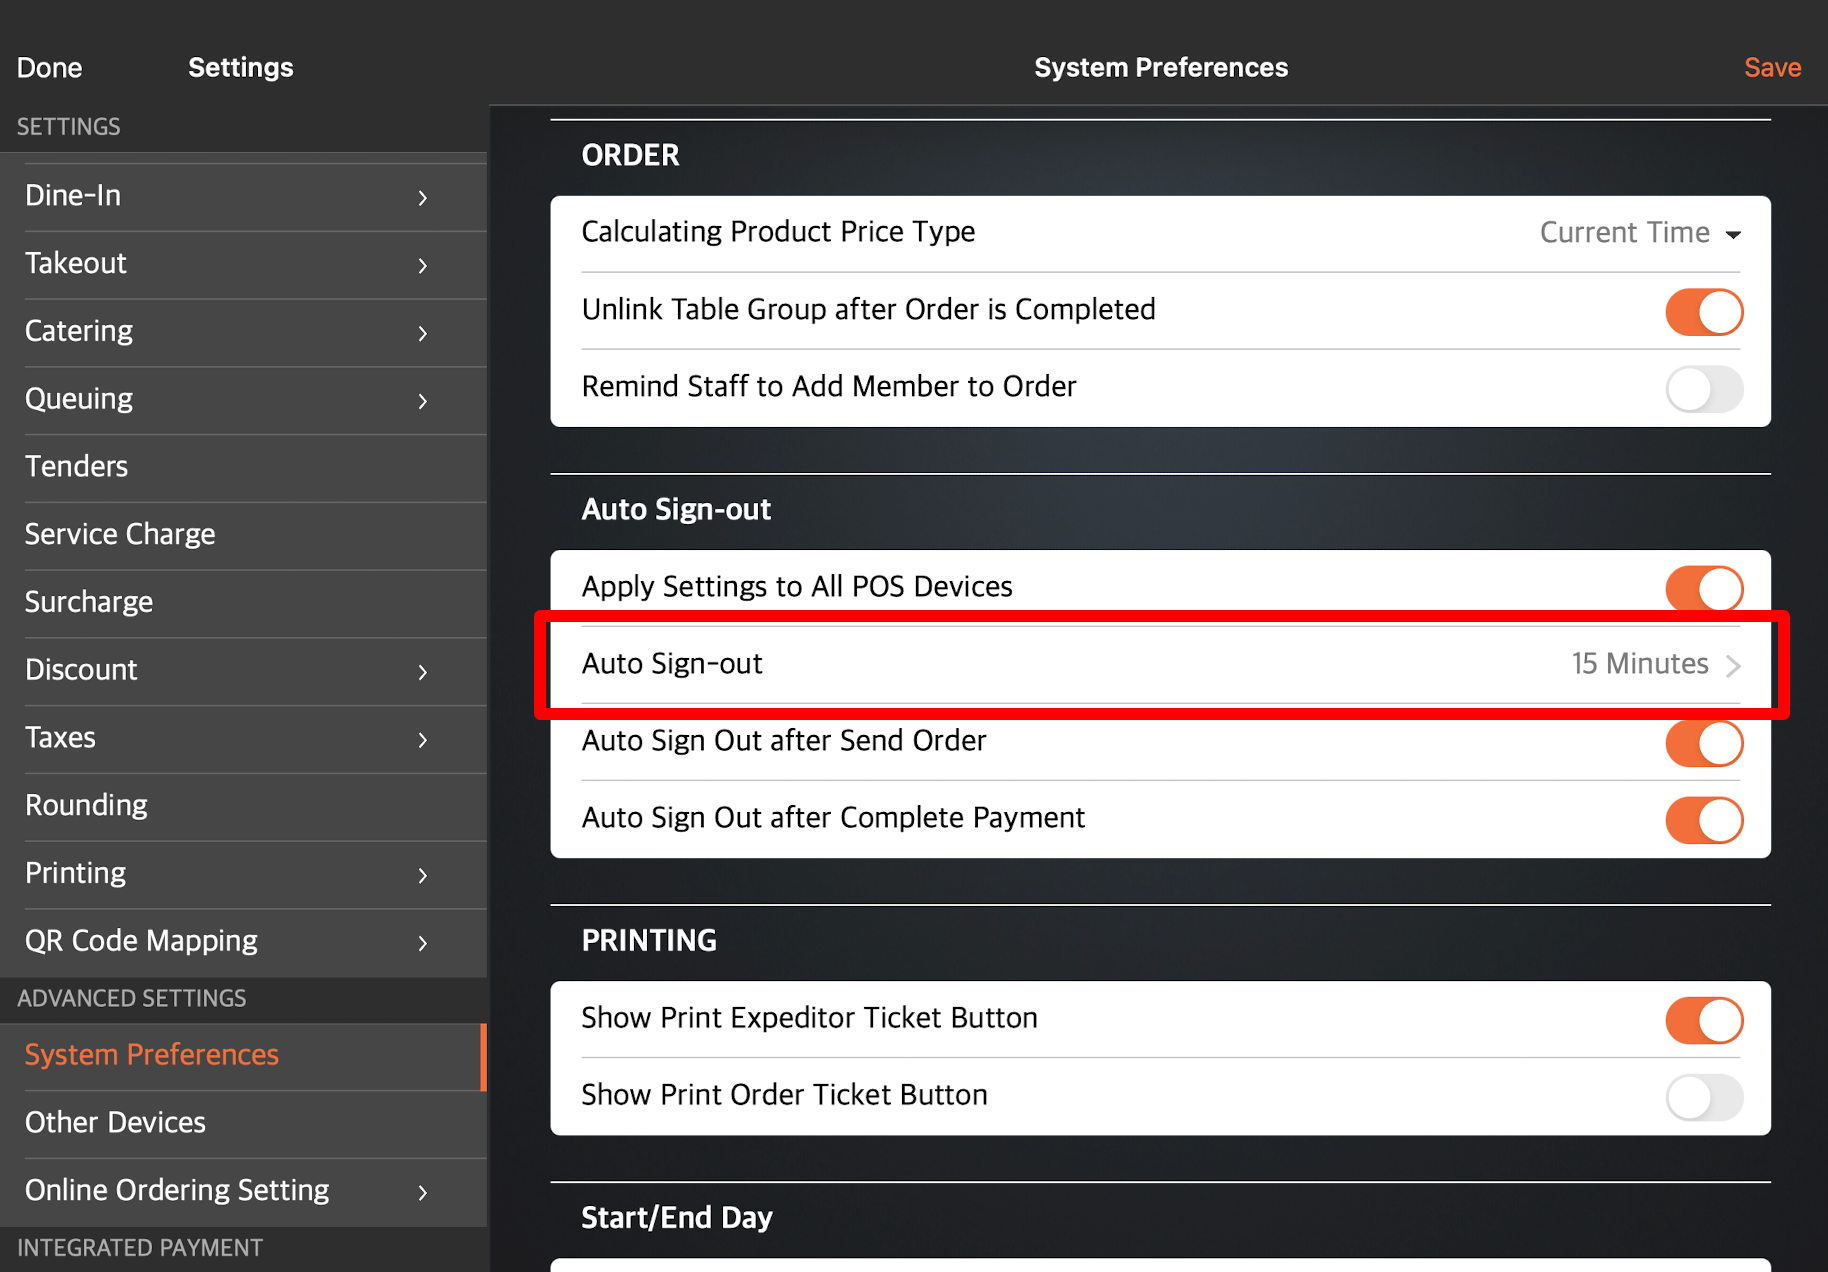
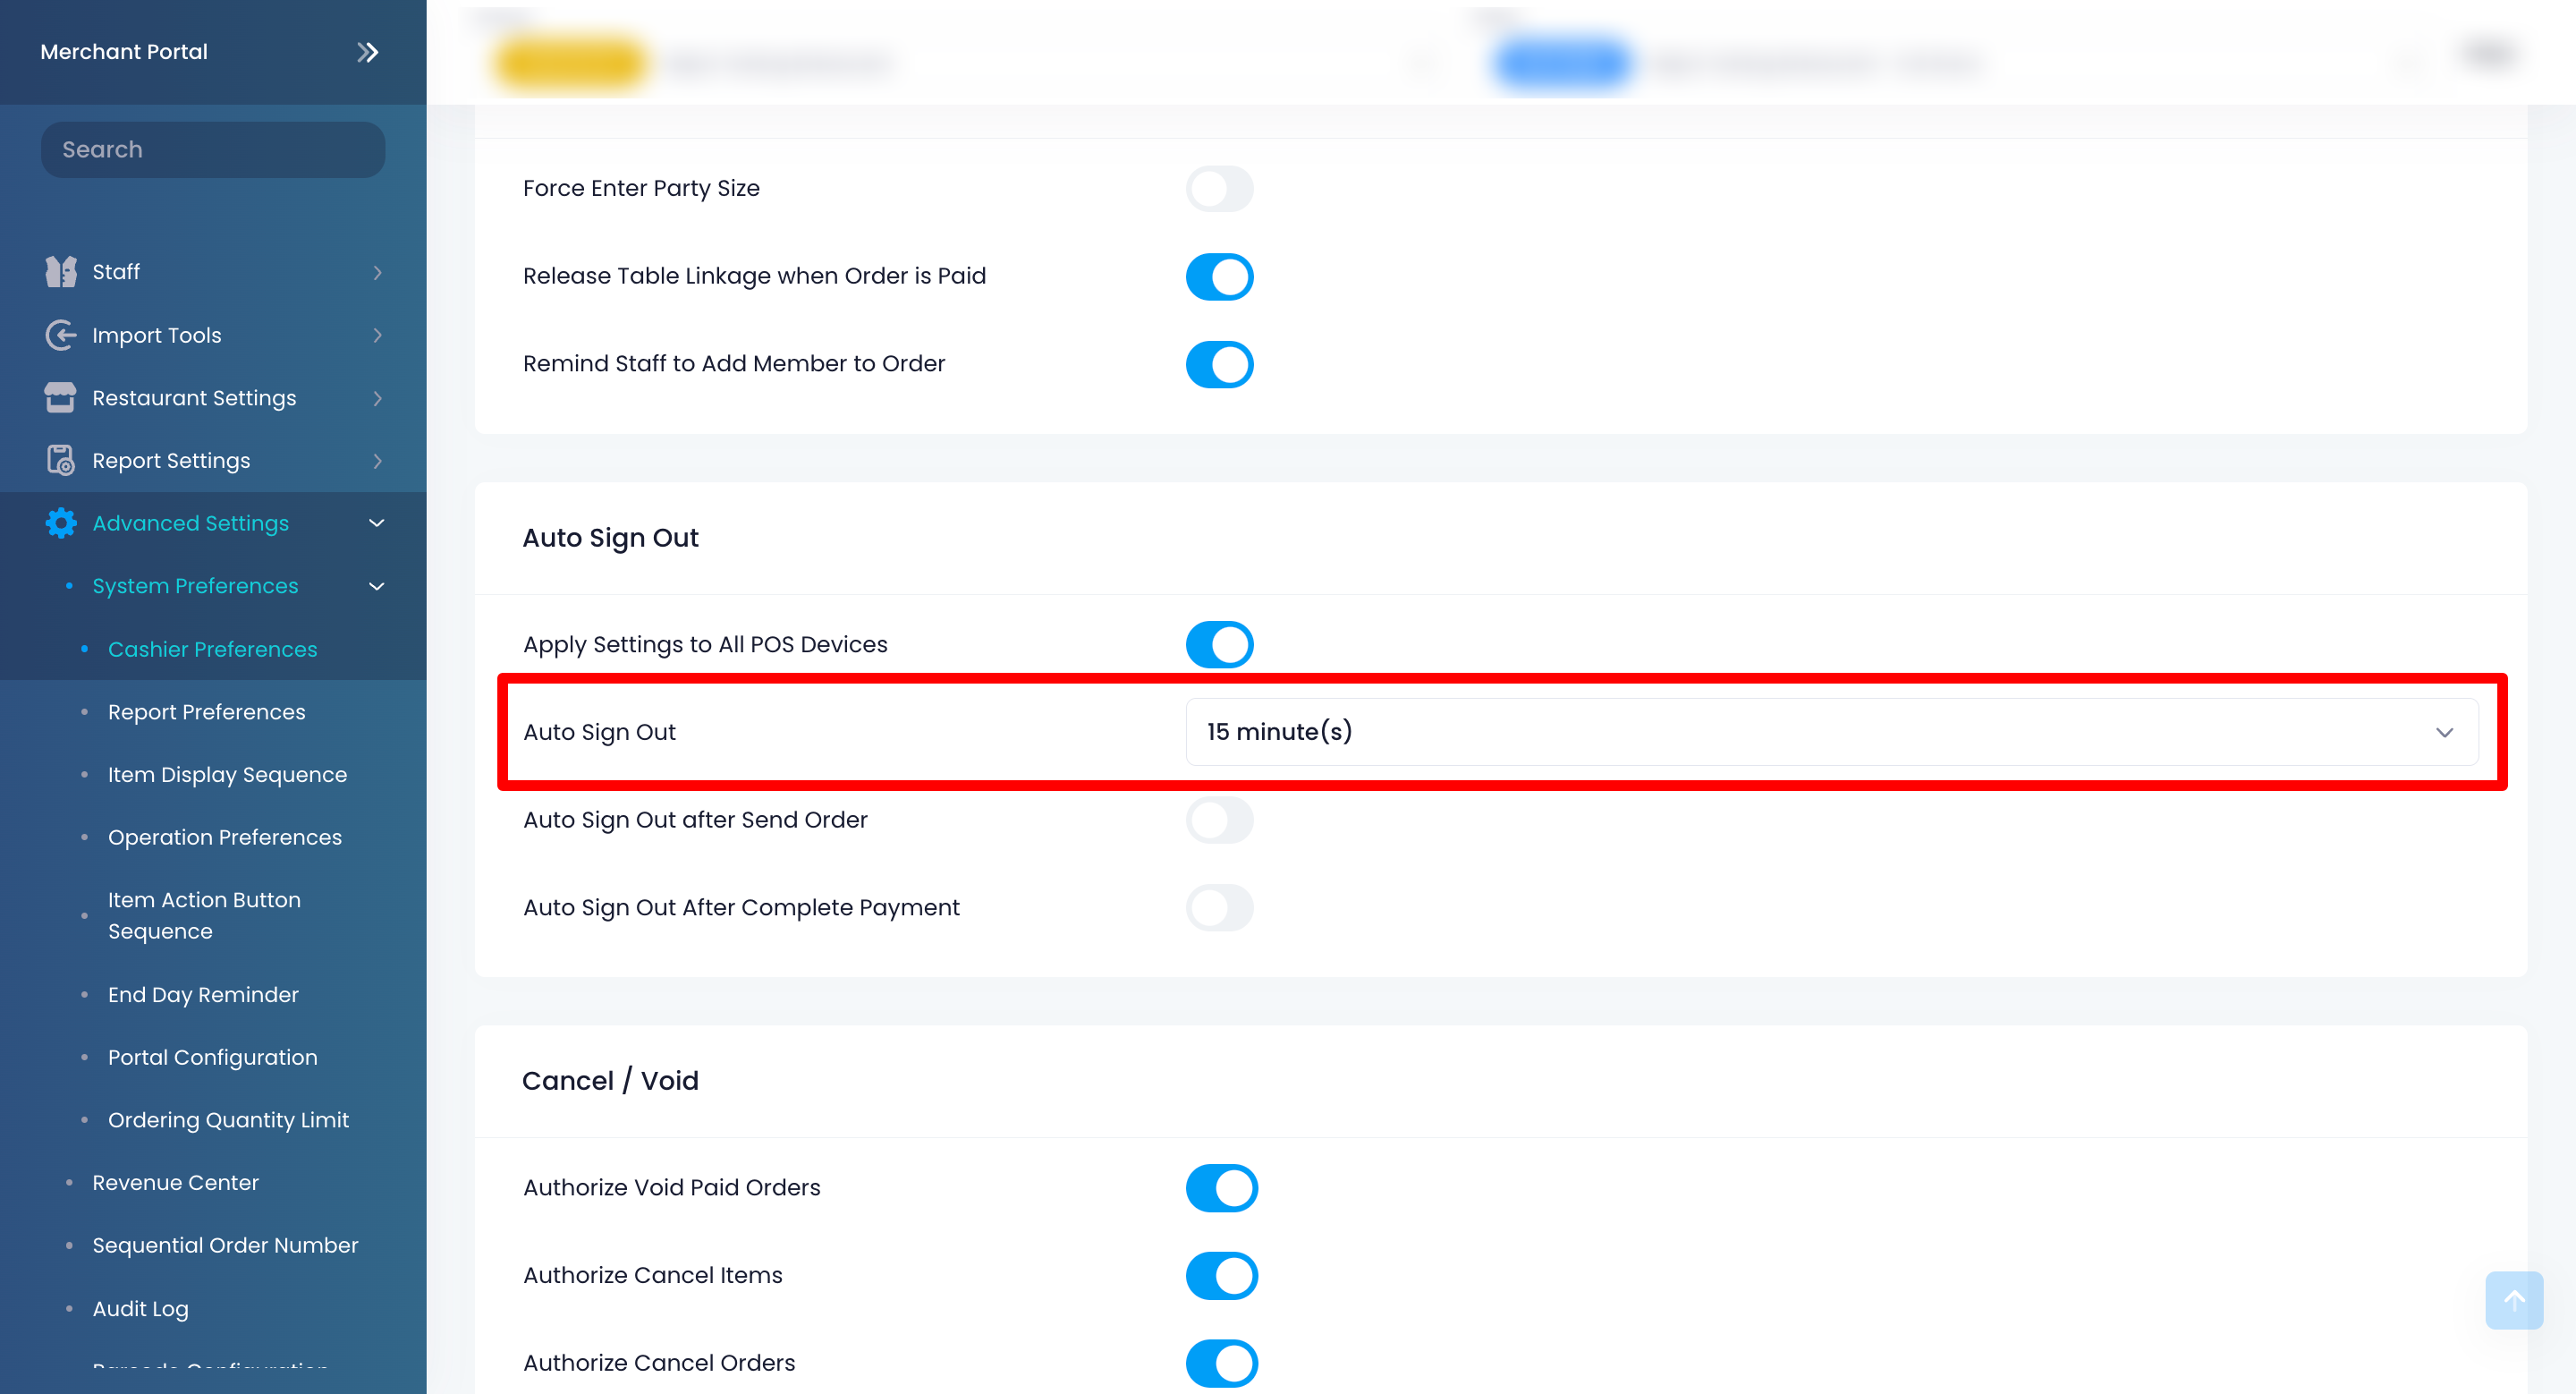
- Tap Auto Sign Out, then choose your preferred allowed idle duration before the POS is logged out automatically.
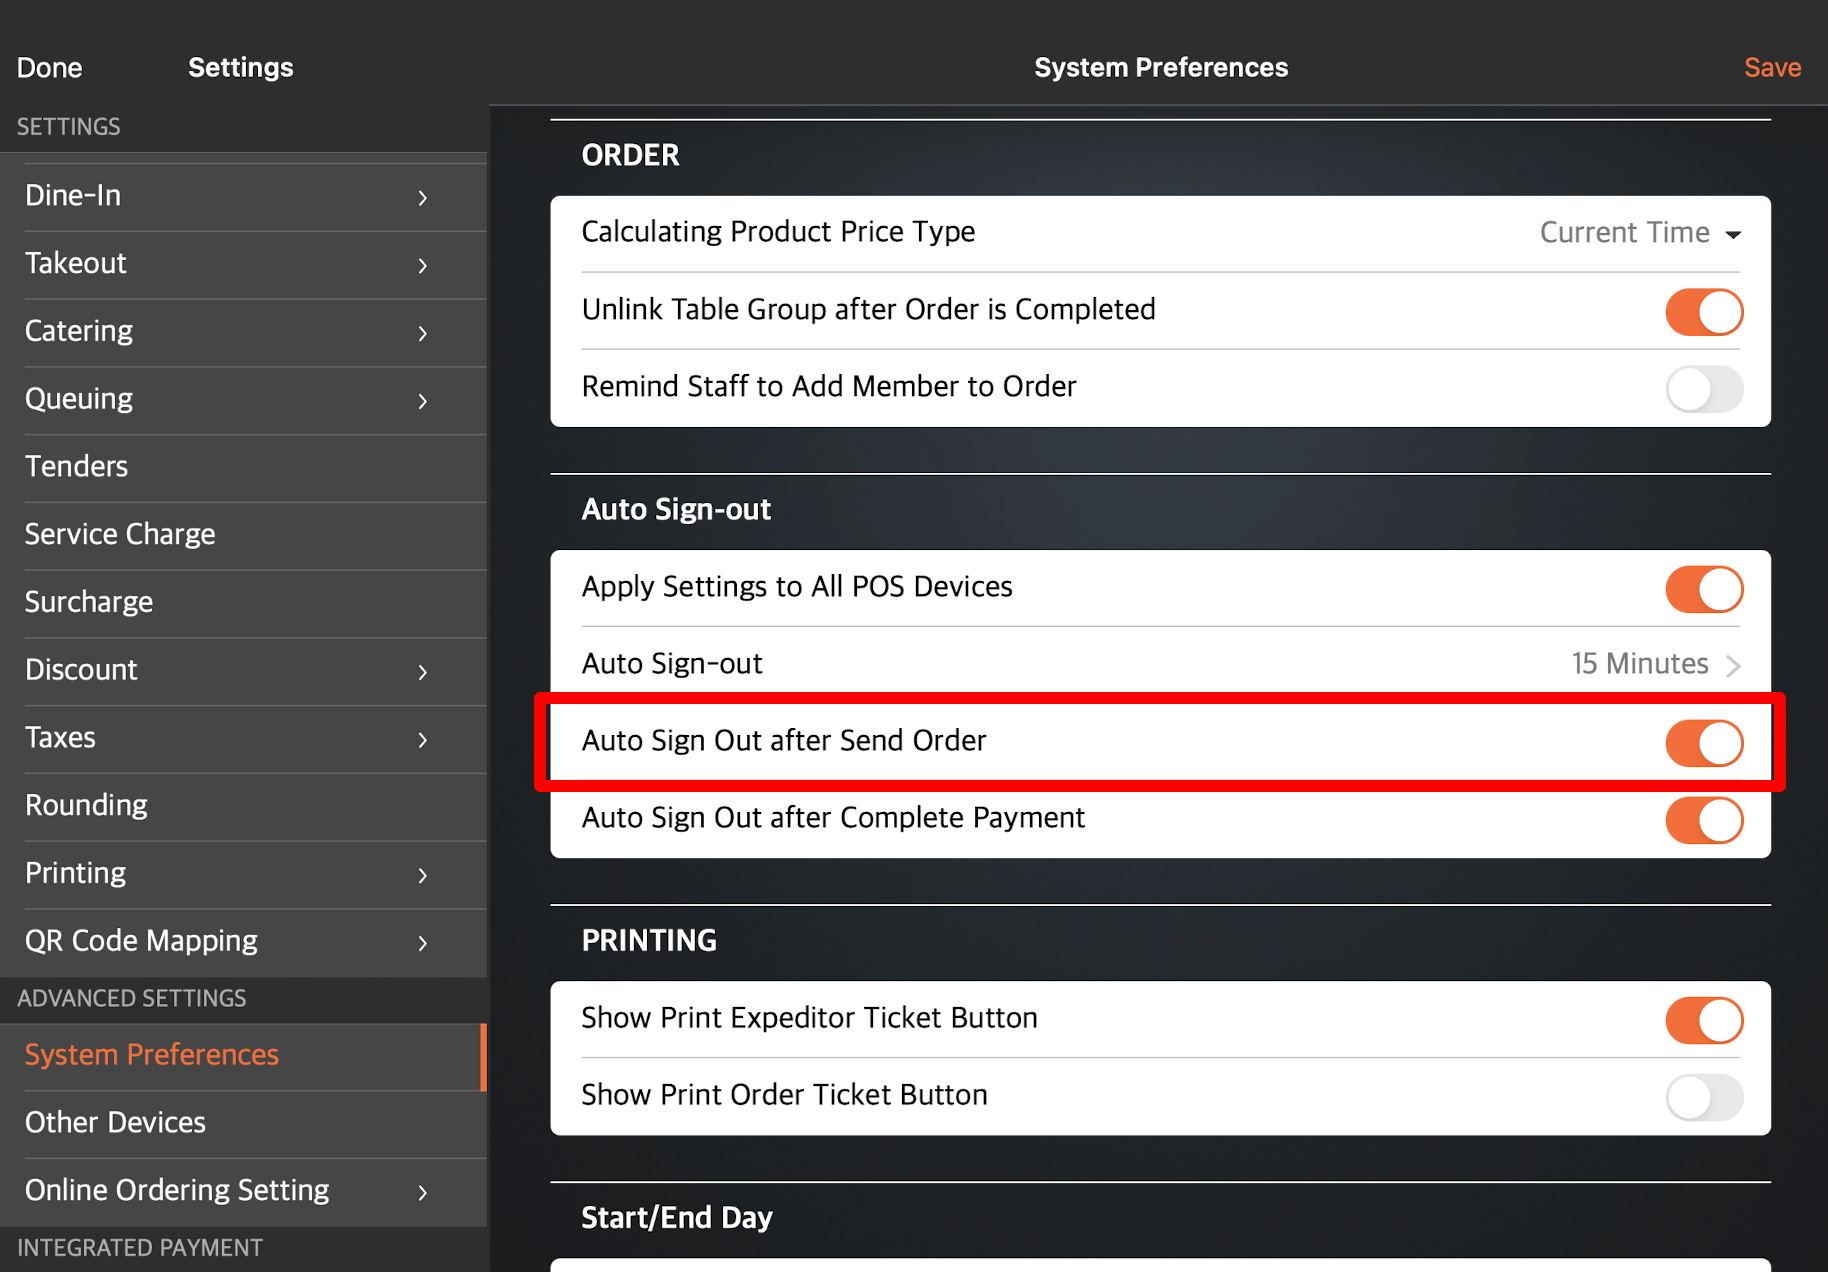
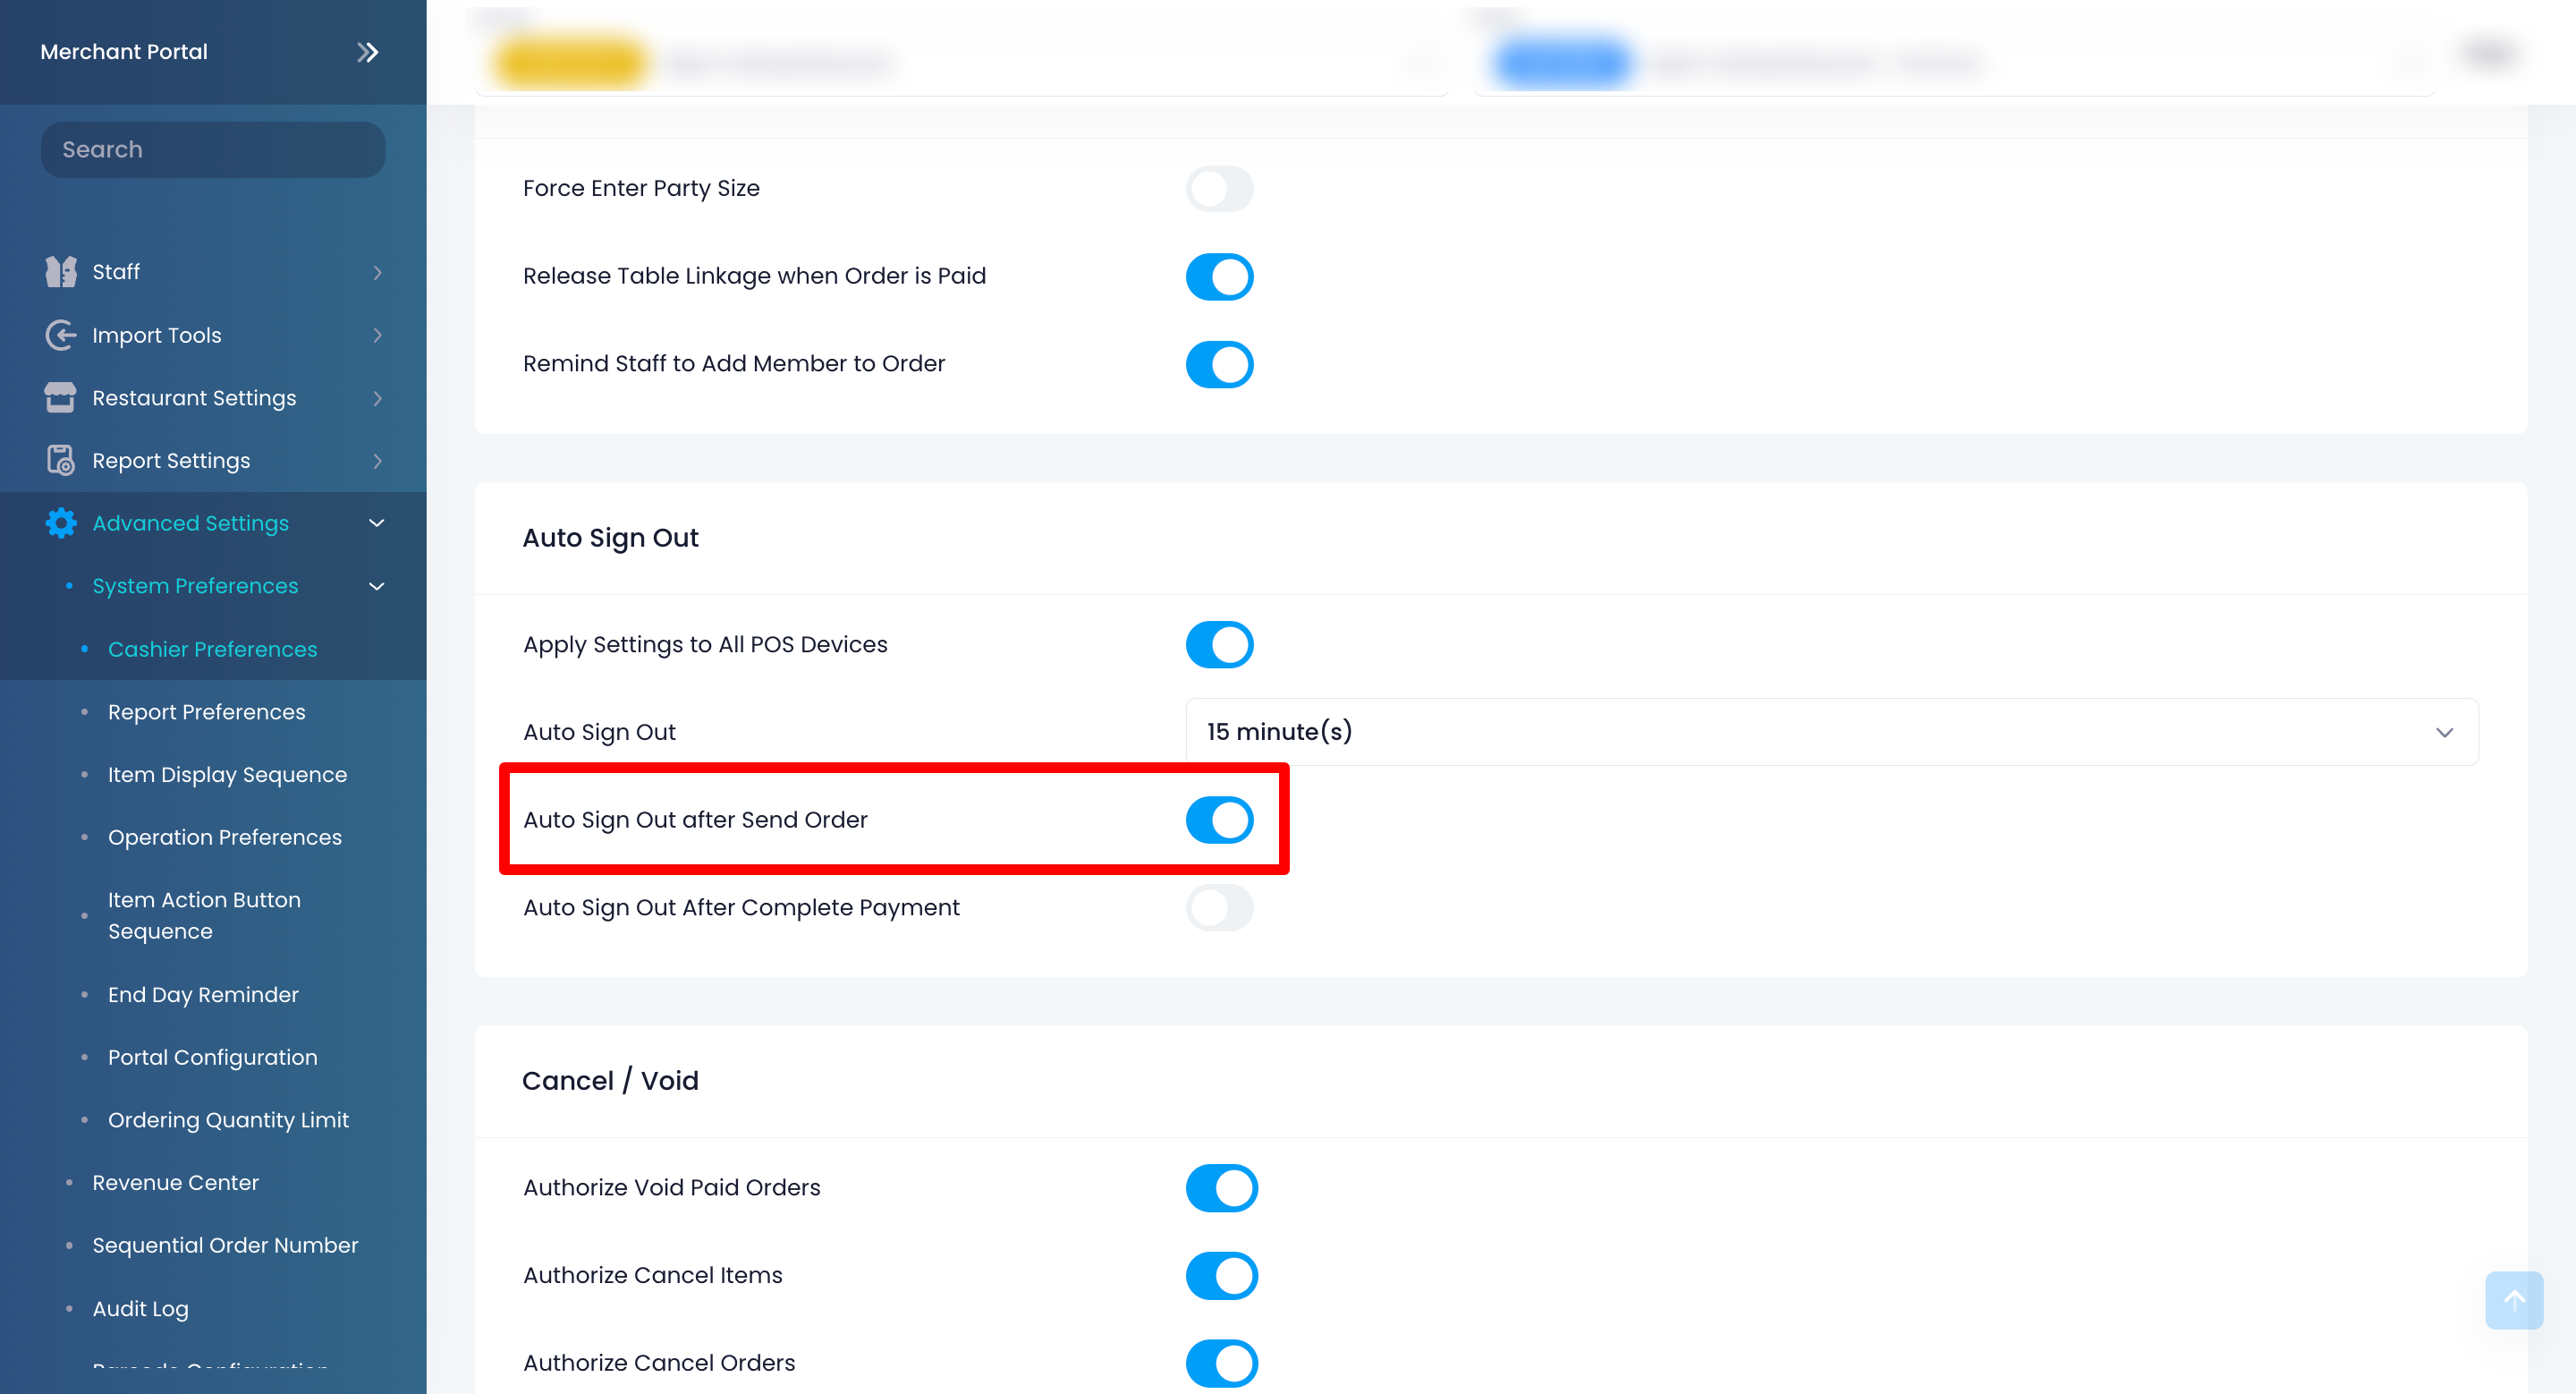
- To set the POS to sign out automatically after a staff member processes an order, turn on Auto Sign Out after Send Order .
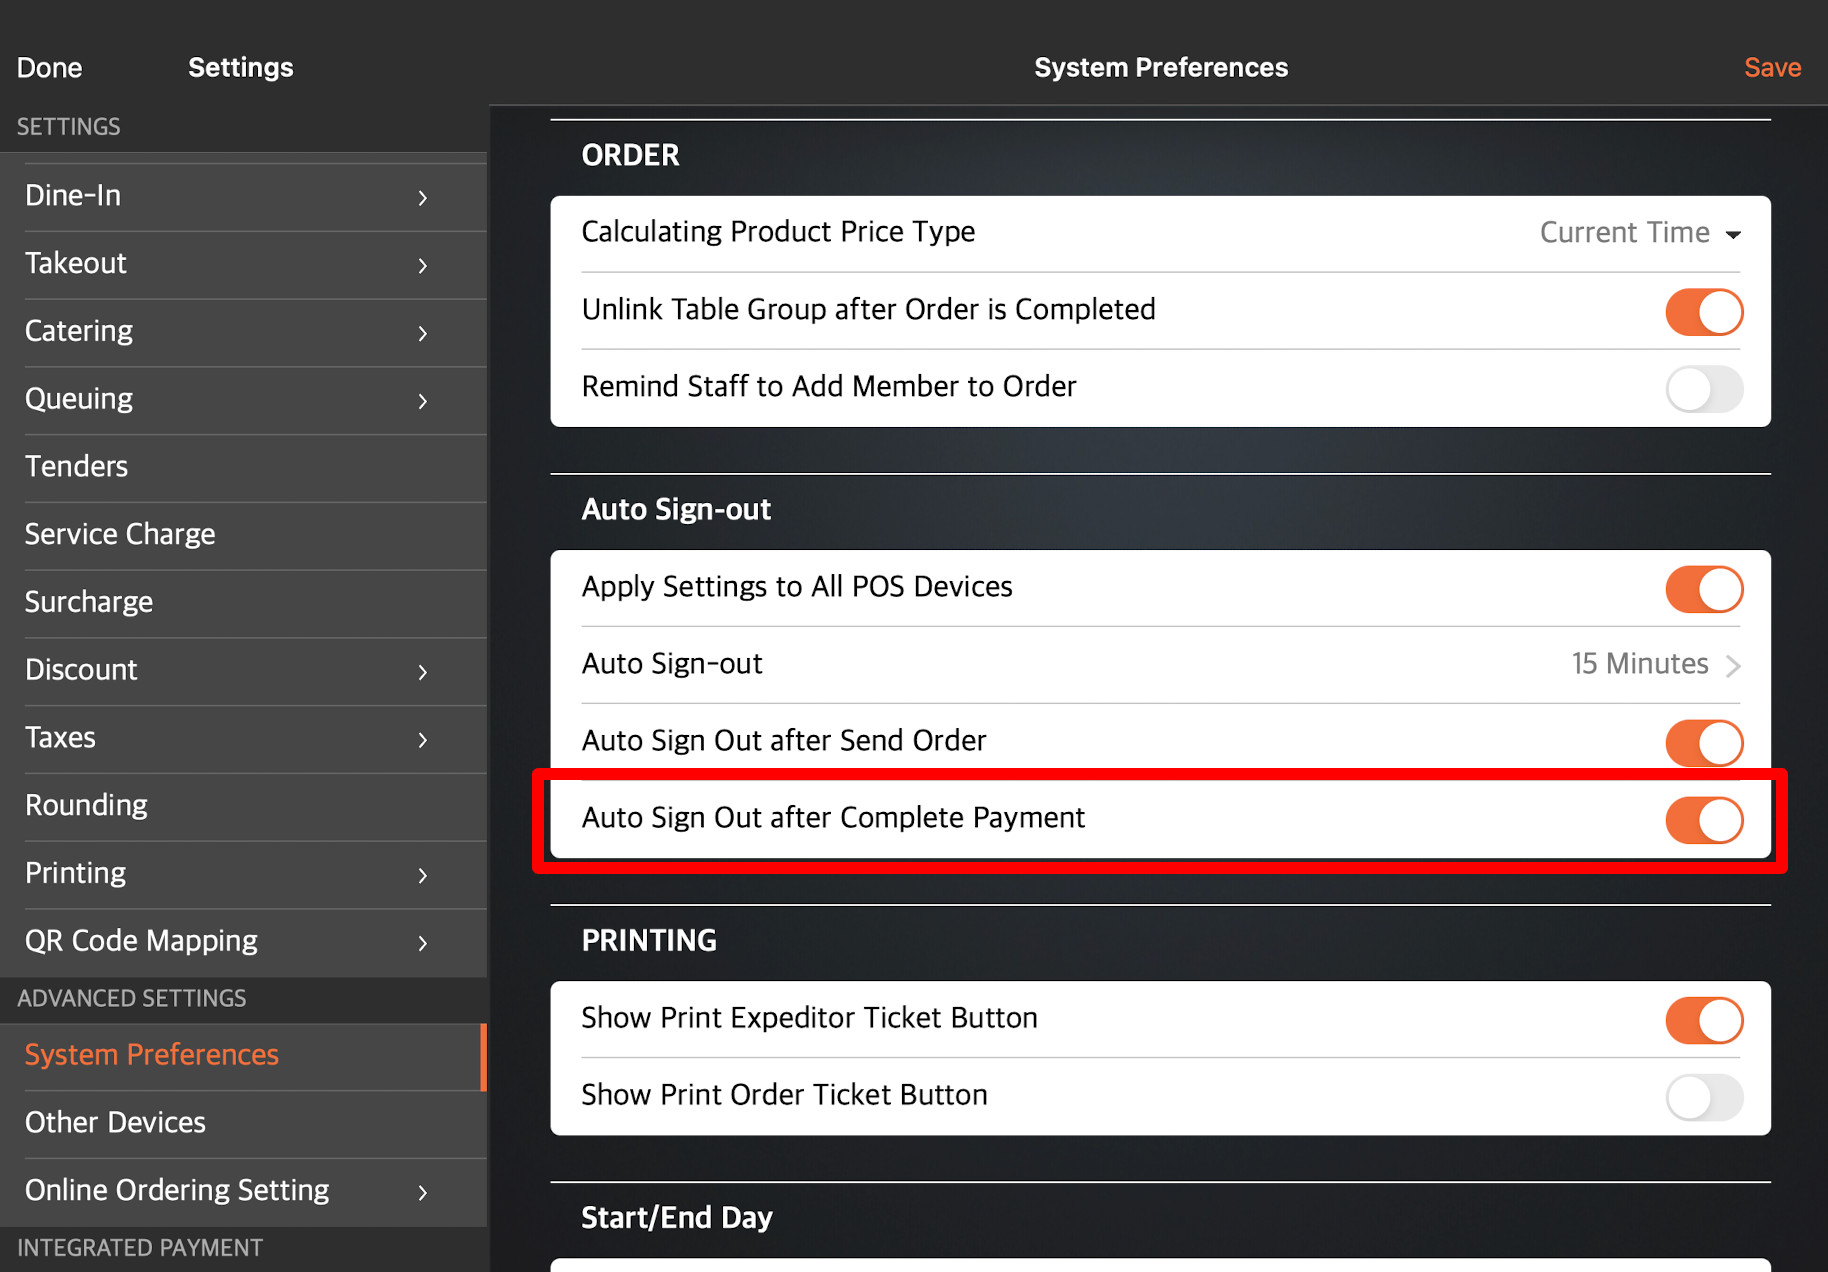
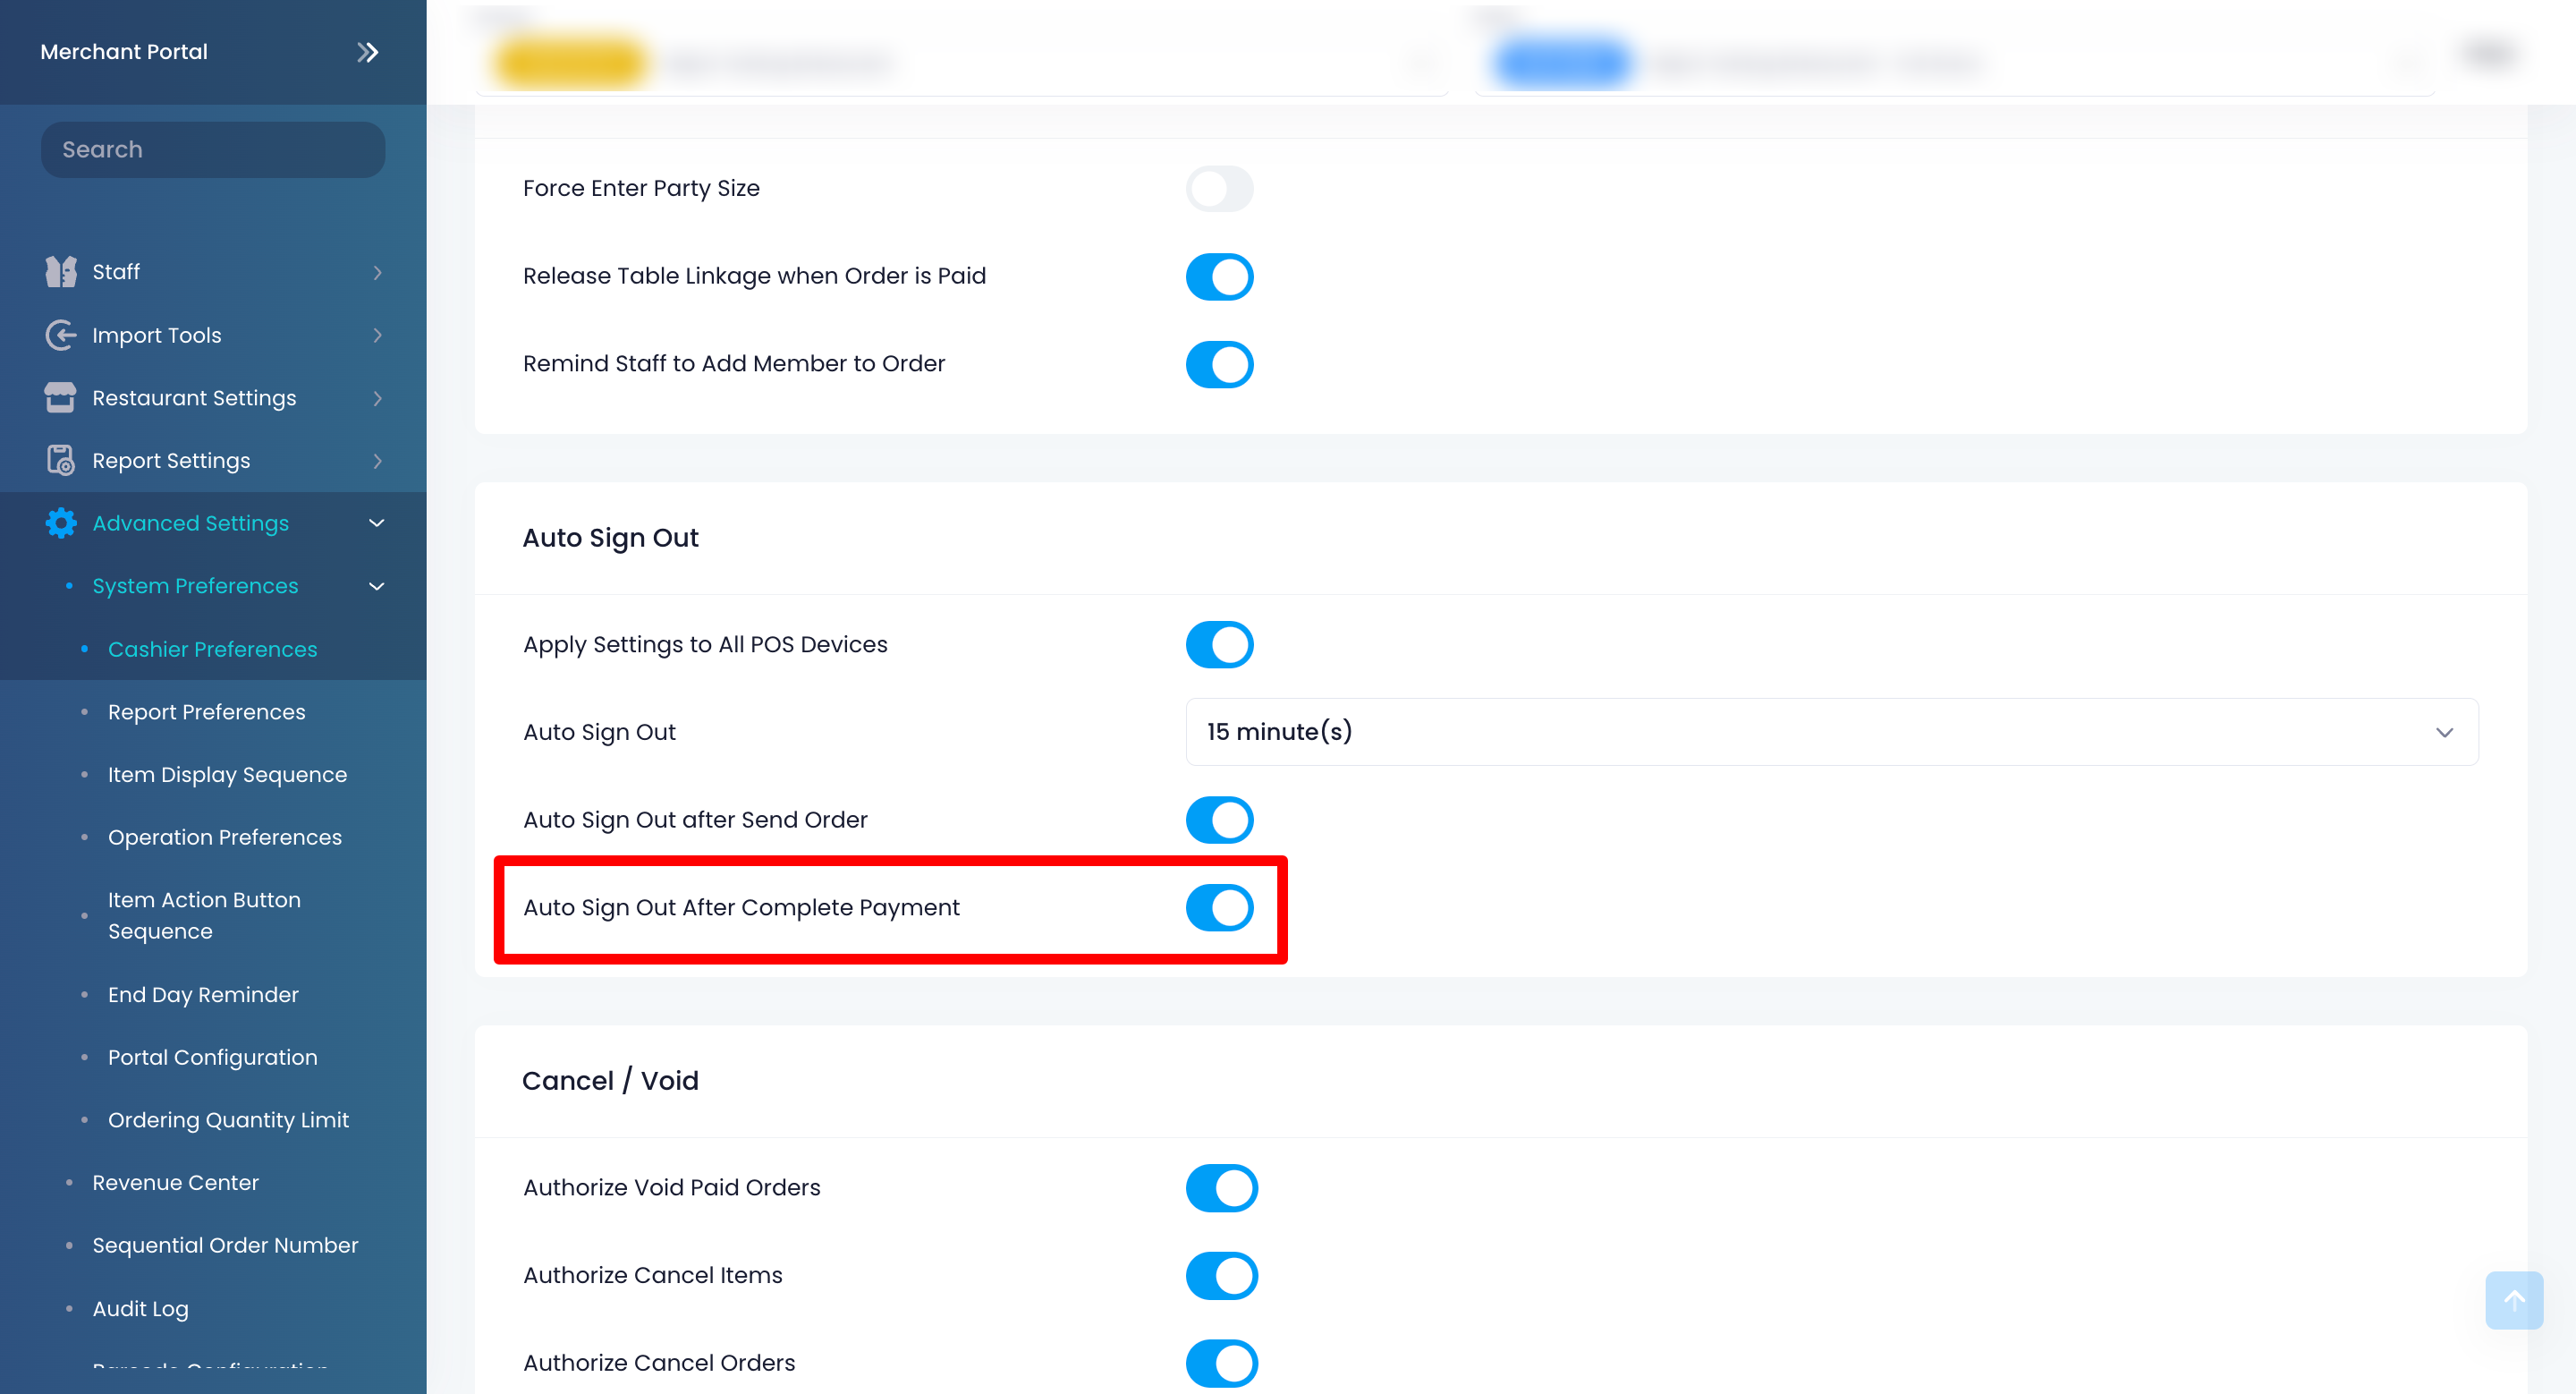
- To set the POS to sign out automatically after a staff member processes a payment, turn on Auto Sign Out after Complete Payment .
- At the top right, tap Save to confirm.
Merchant Portal (Classic Theme)
- Log in to the Merchant Portal.
- On the left panel, click on Advanced Settings, then click on System Preferences.
- Select General.
- Under Auto Sign Out, enable Apply Settings to All POS Devices
 .
. - From the Auto Sign Out drop-down menu, choose your preferred allowed idle duration before the POS is logged out automatically.
- To set the POS to sign out automatically after a staff member processes an order, turn on Auto Sign Out after Send Order .
- To set the POS to sign out automatically after a staff member processes a payment, turn on Auto Sign Out after Complete Payment .
- At the top right, click on Save to confirm.
Merchant Portal 2.0
- Log in to the Merchant Portal.
- From the left panel, click on Advanced Settings, then click on System Preferences.
- Select Cashier Preferences.
- Under Auto Sign Out, enable Apply Settings to All POS Devices
 .
.
- From the Auto Sign Out drop-down menu, choose your preferred allowed idle duration before the POS is logged out automatically.
- To set the POS to sign out automatically after a staff member processes an order, turn on Auto Sign Out after Send Order .
- To set the POS to sign out automatically after a staff member processes a payment, turn on Auto Sign Out after Complete Payment .
- At the top right, click on Save to confirm.
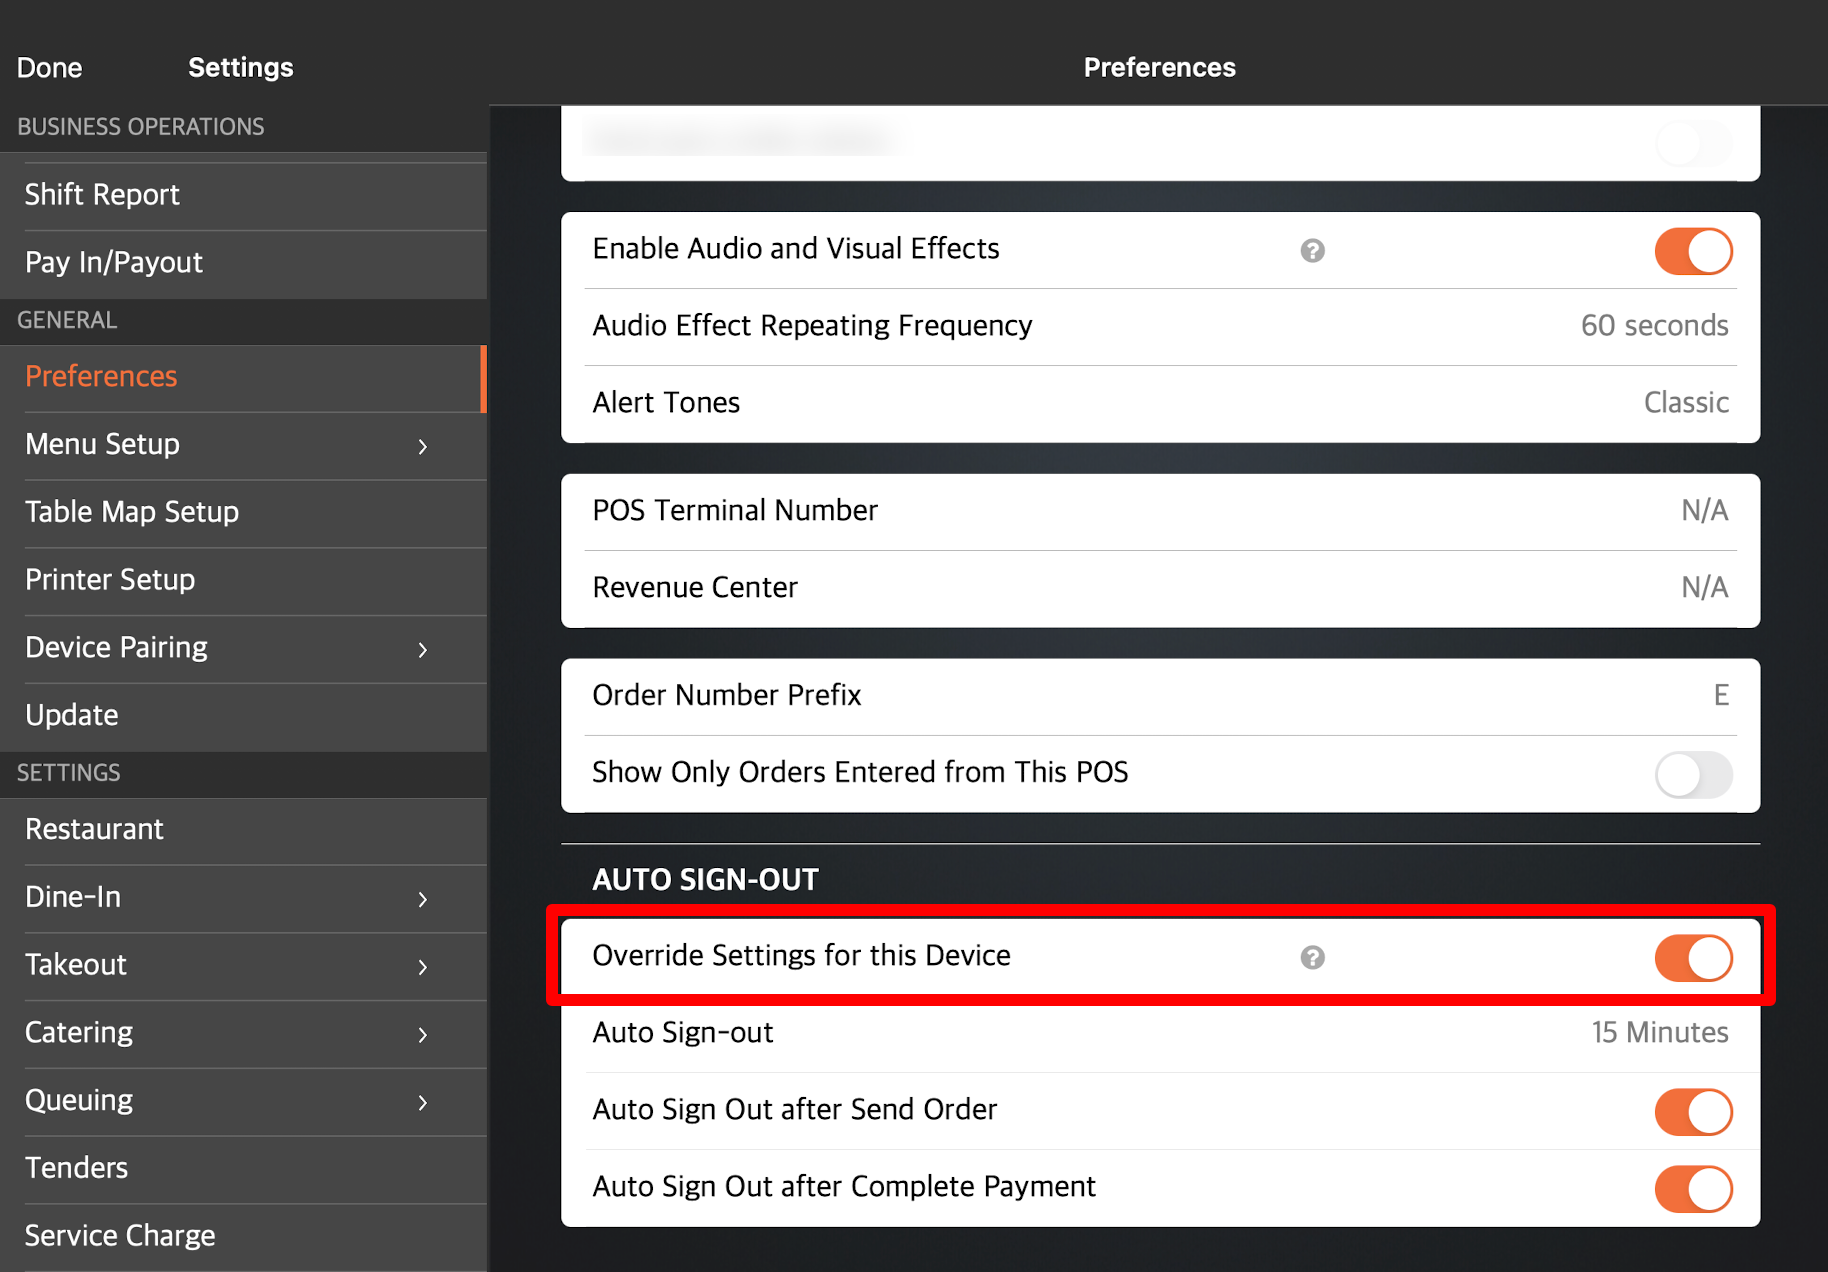
Set individual Auto Sign Out preferences
To configure Auto Sign Out preferences for a particular POS, follow the steps below:
- Log in to the Eats365 POS.
- At the top left, tap Settings .
- Under General, tap Preferences.
- Under Auto Sign Out, enable Override Settings for this Device .
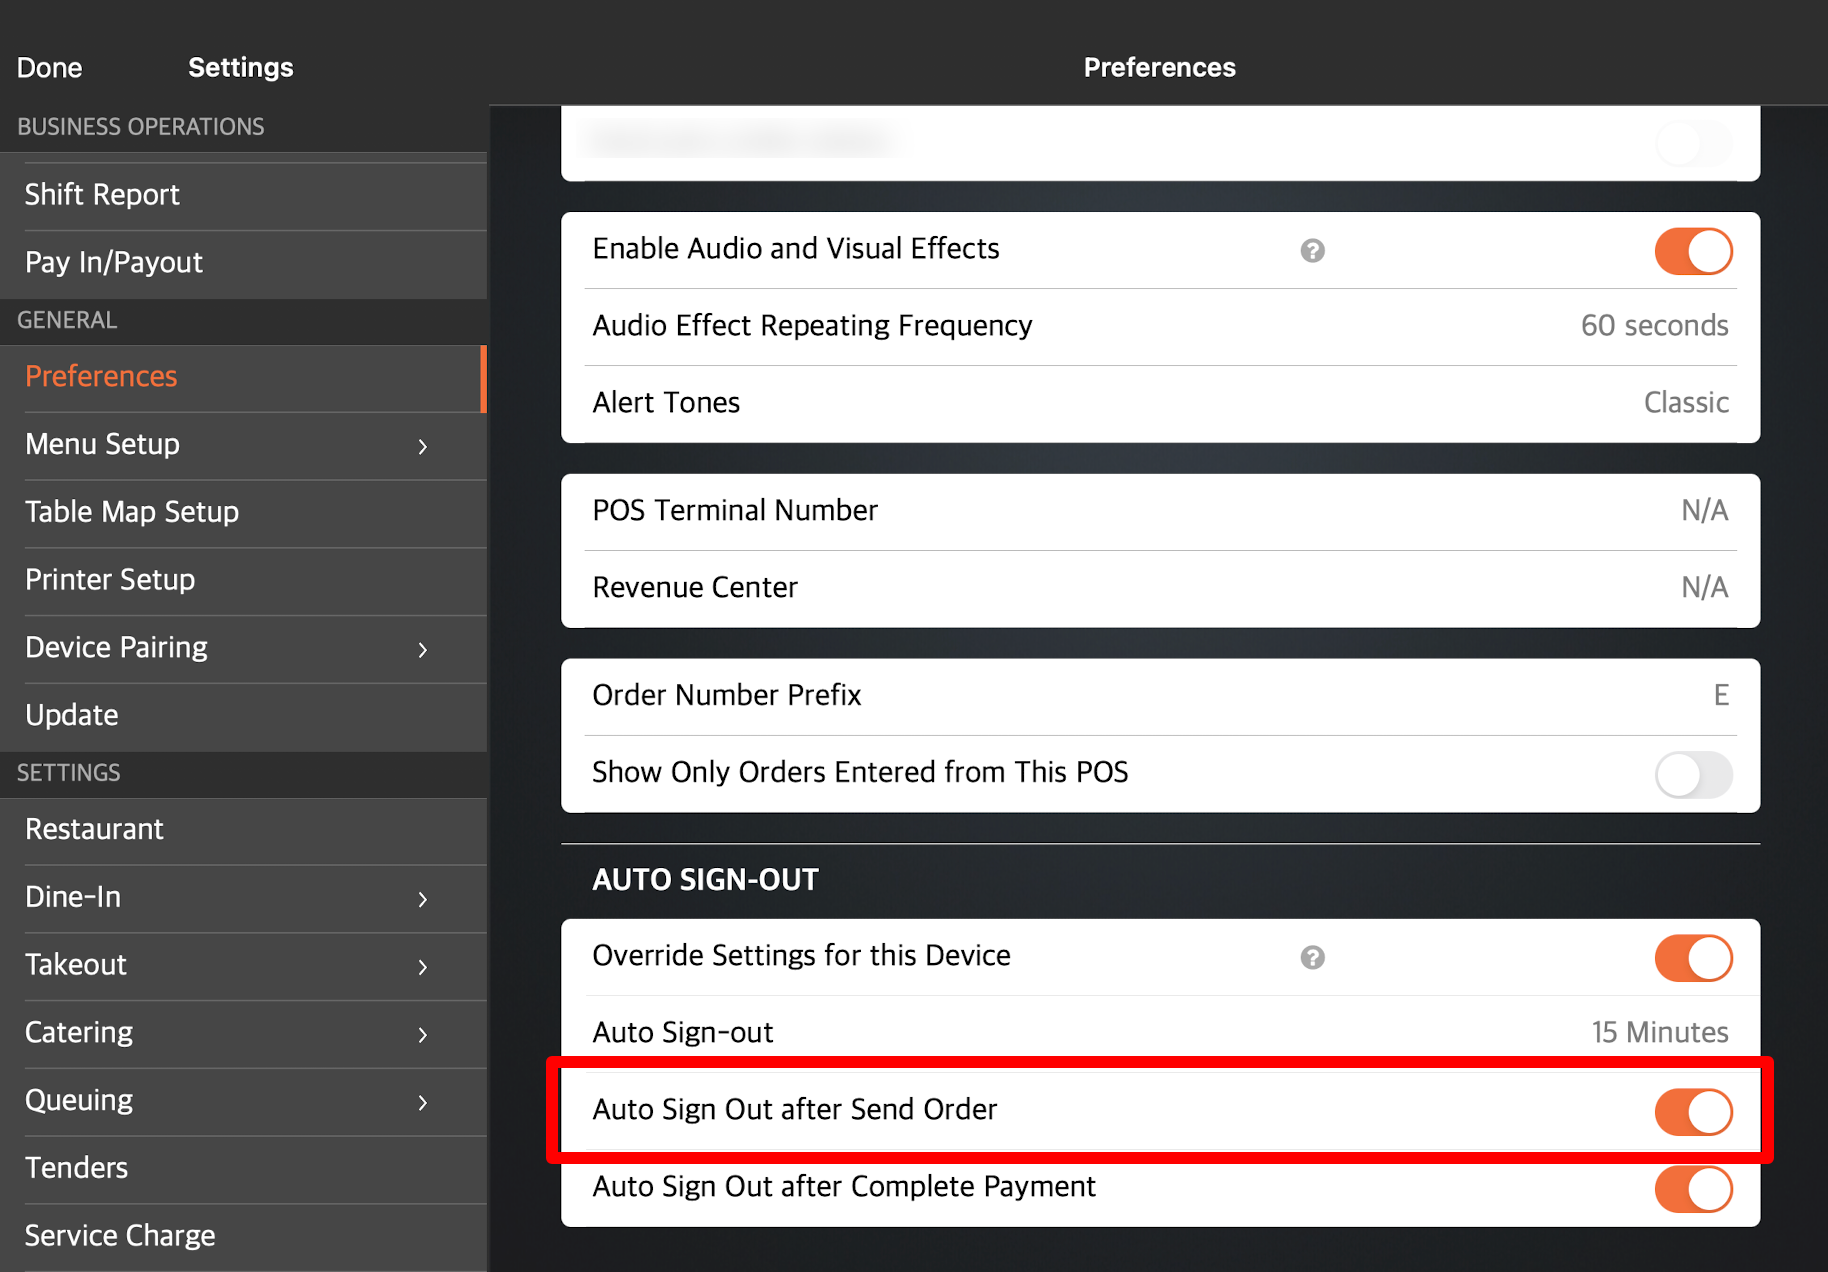
- Tap Auto Sign Out and select the allowed idle duration before the POS is logged out automatically.

- To set the POS to sign out automatically after a staff member processes an order, turn on Auto Sign Out after Send Order .
- To set the POS to sign out automatically after a staff member processes a payment, turn on Auto Sign Out after Complete Payment .
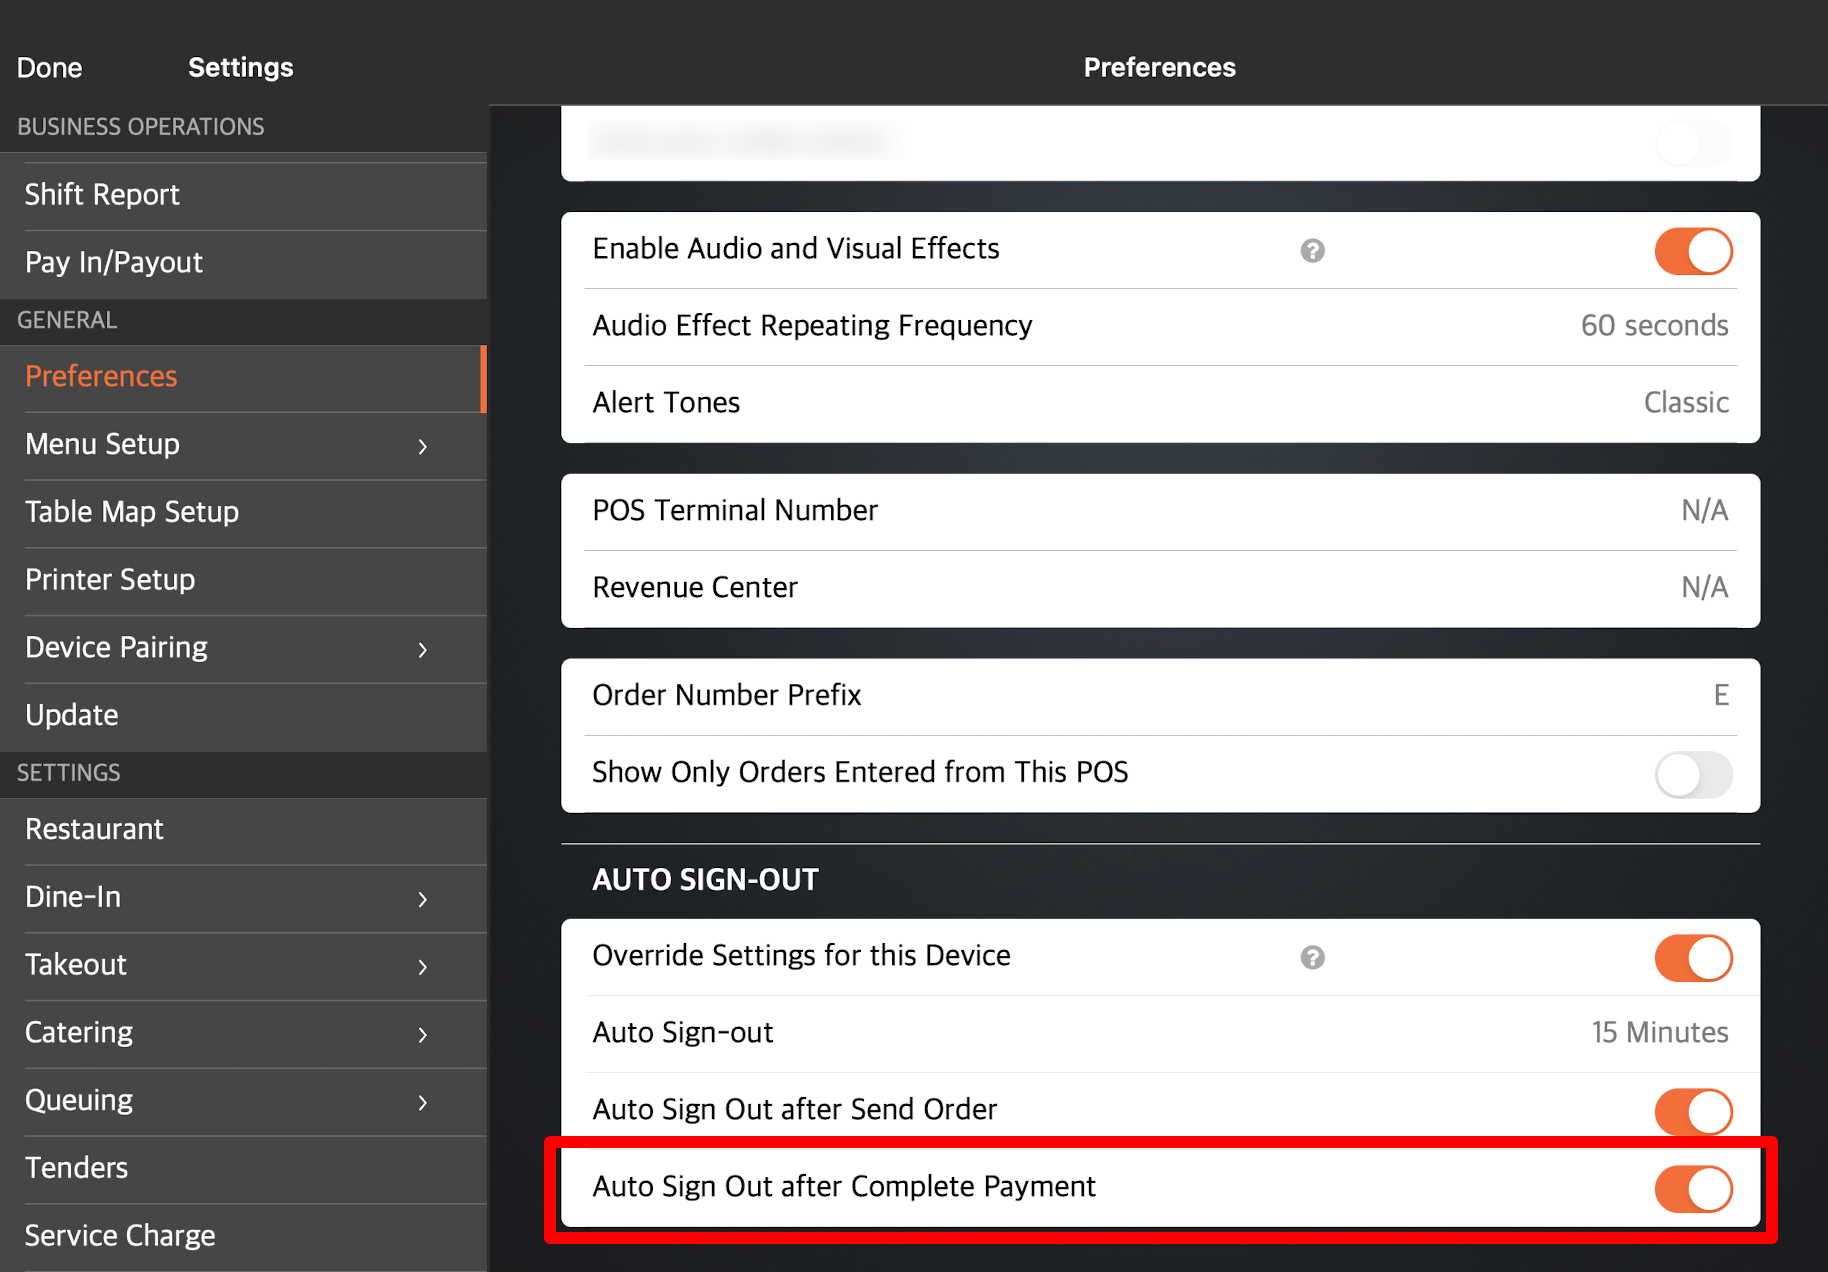
- At the top right, tap Save to confirm.