Menu Setup
Table of Contents
Customize the menu layout
Learn how to change your menu’s layout to how you want it to look on the Eats365 POS.
The Layout Editor allows you to customize your menu’s layout to your preferred order and appearance on the POS.
In this article, you’ll learn how to change your menu’s layout to how you want it to look on the Eats365 POS.
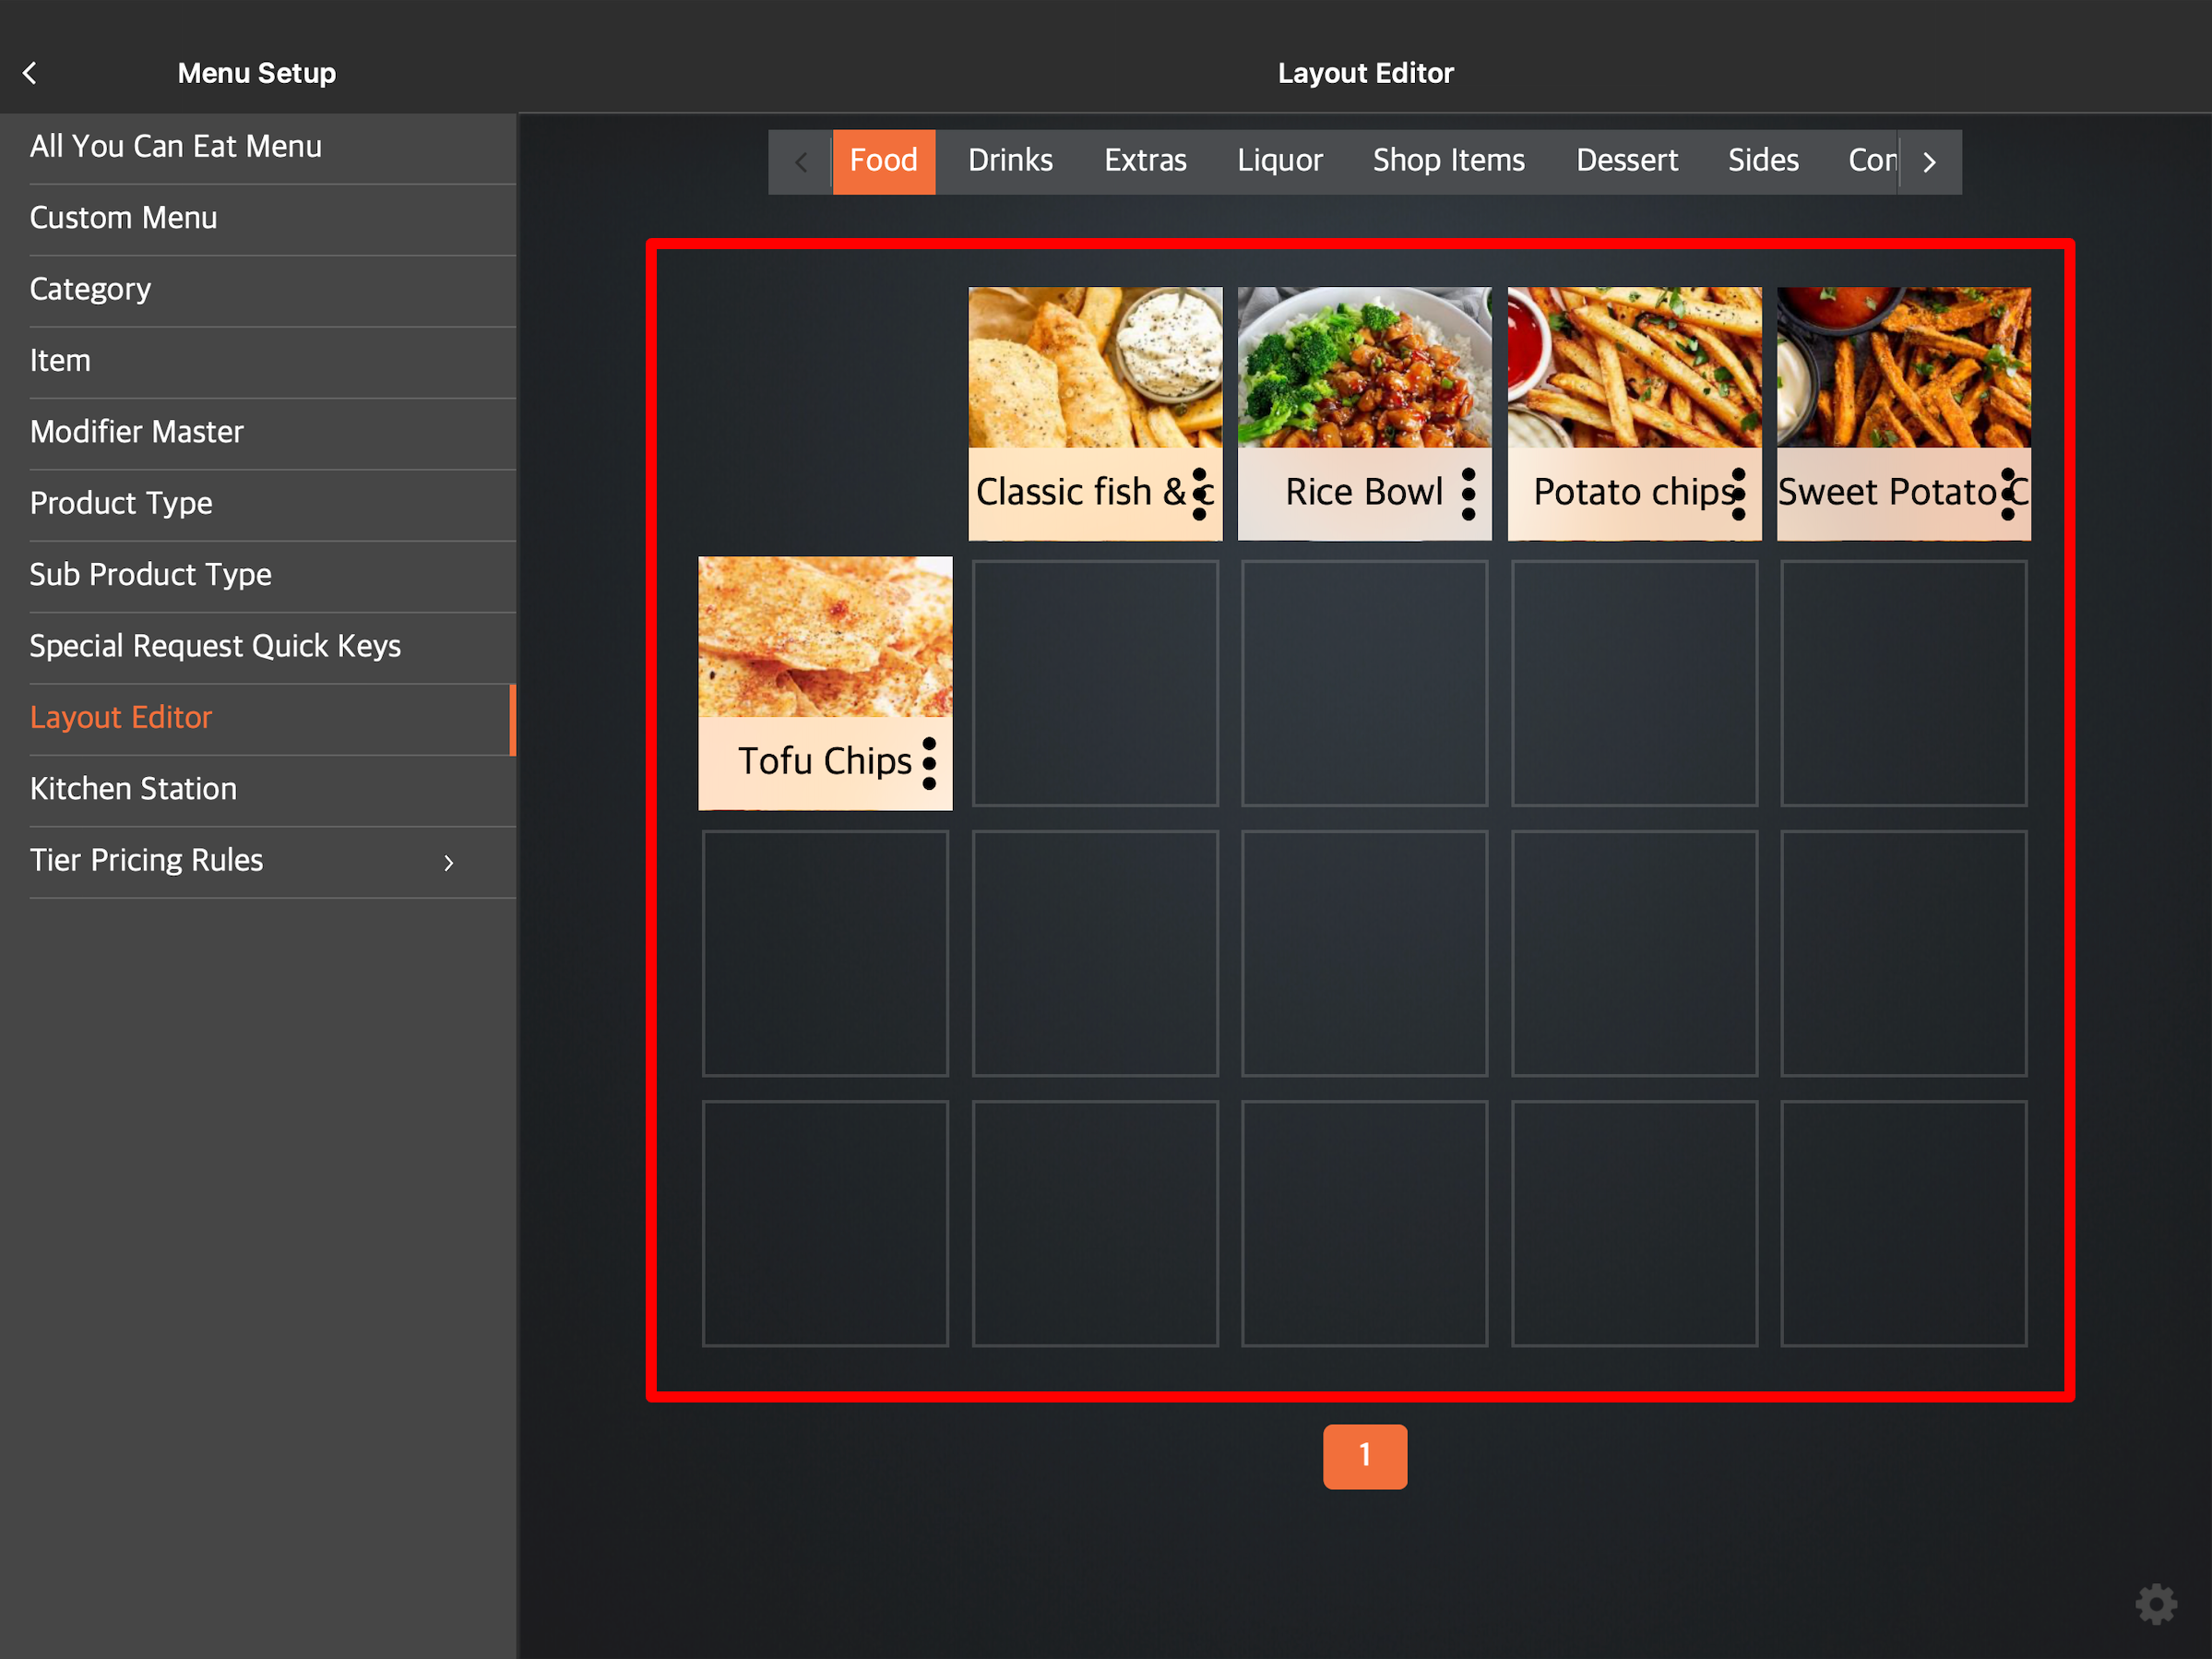
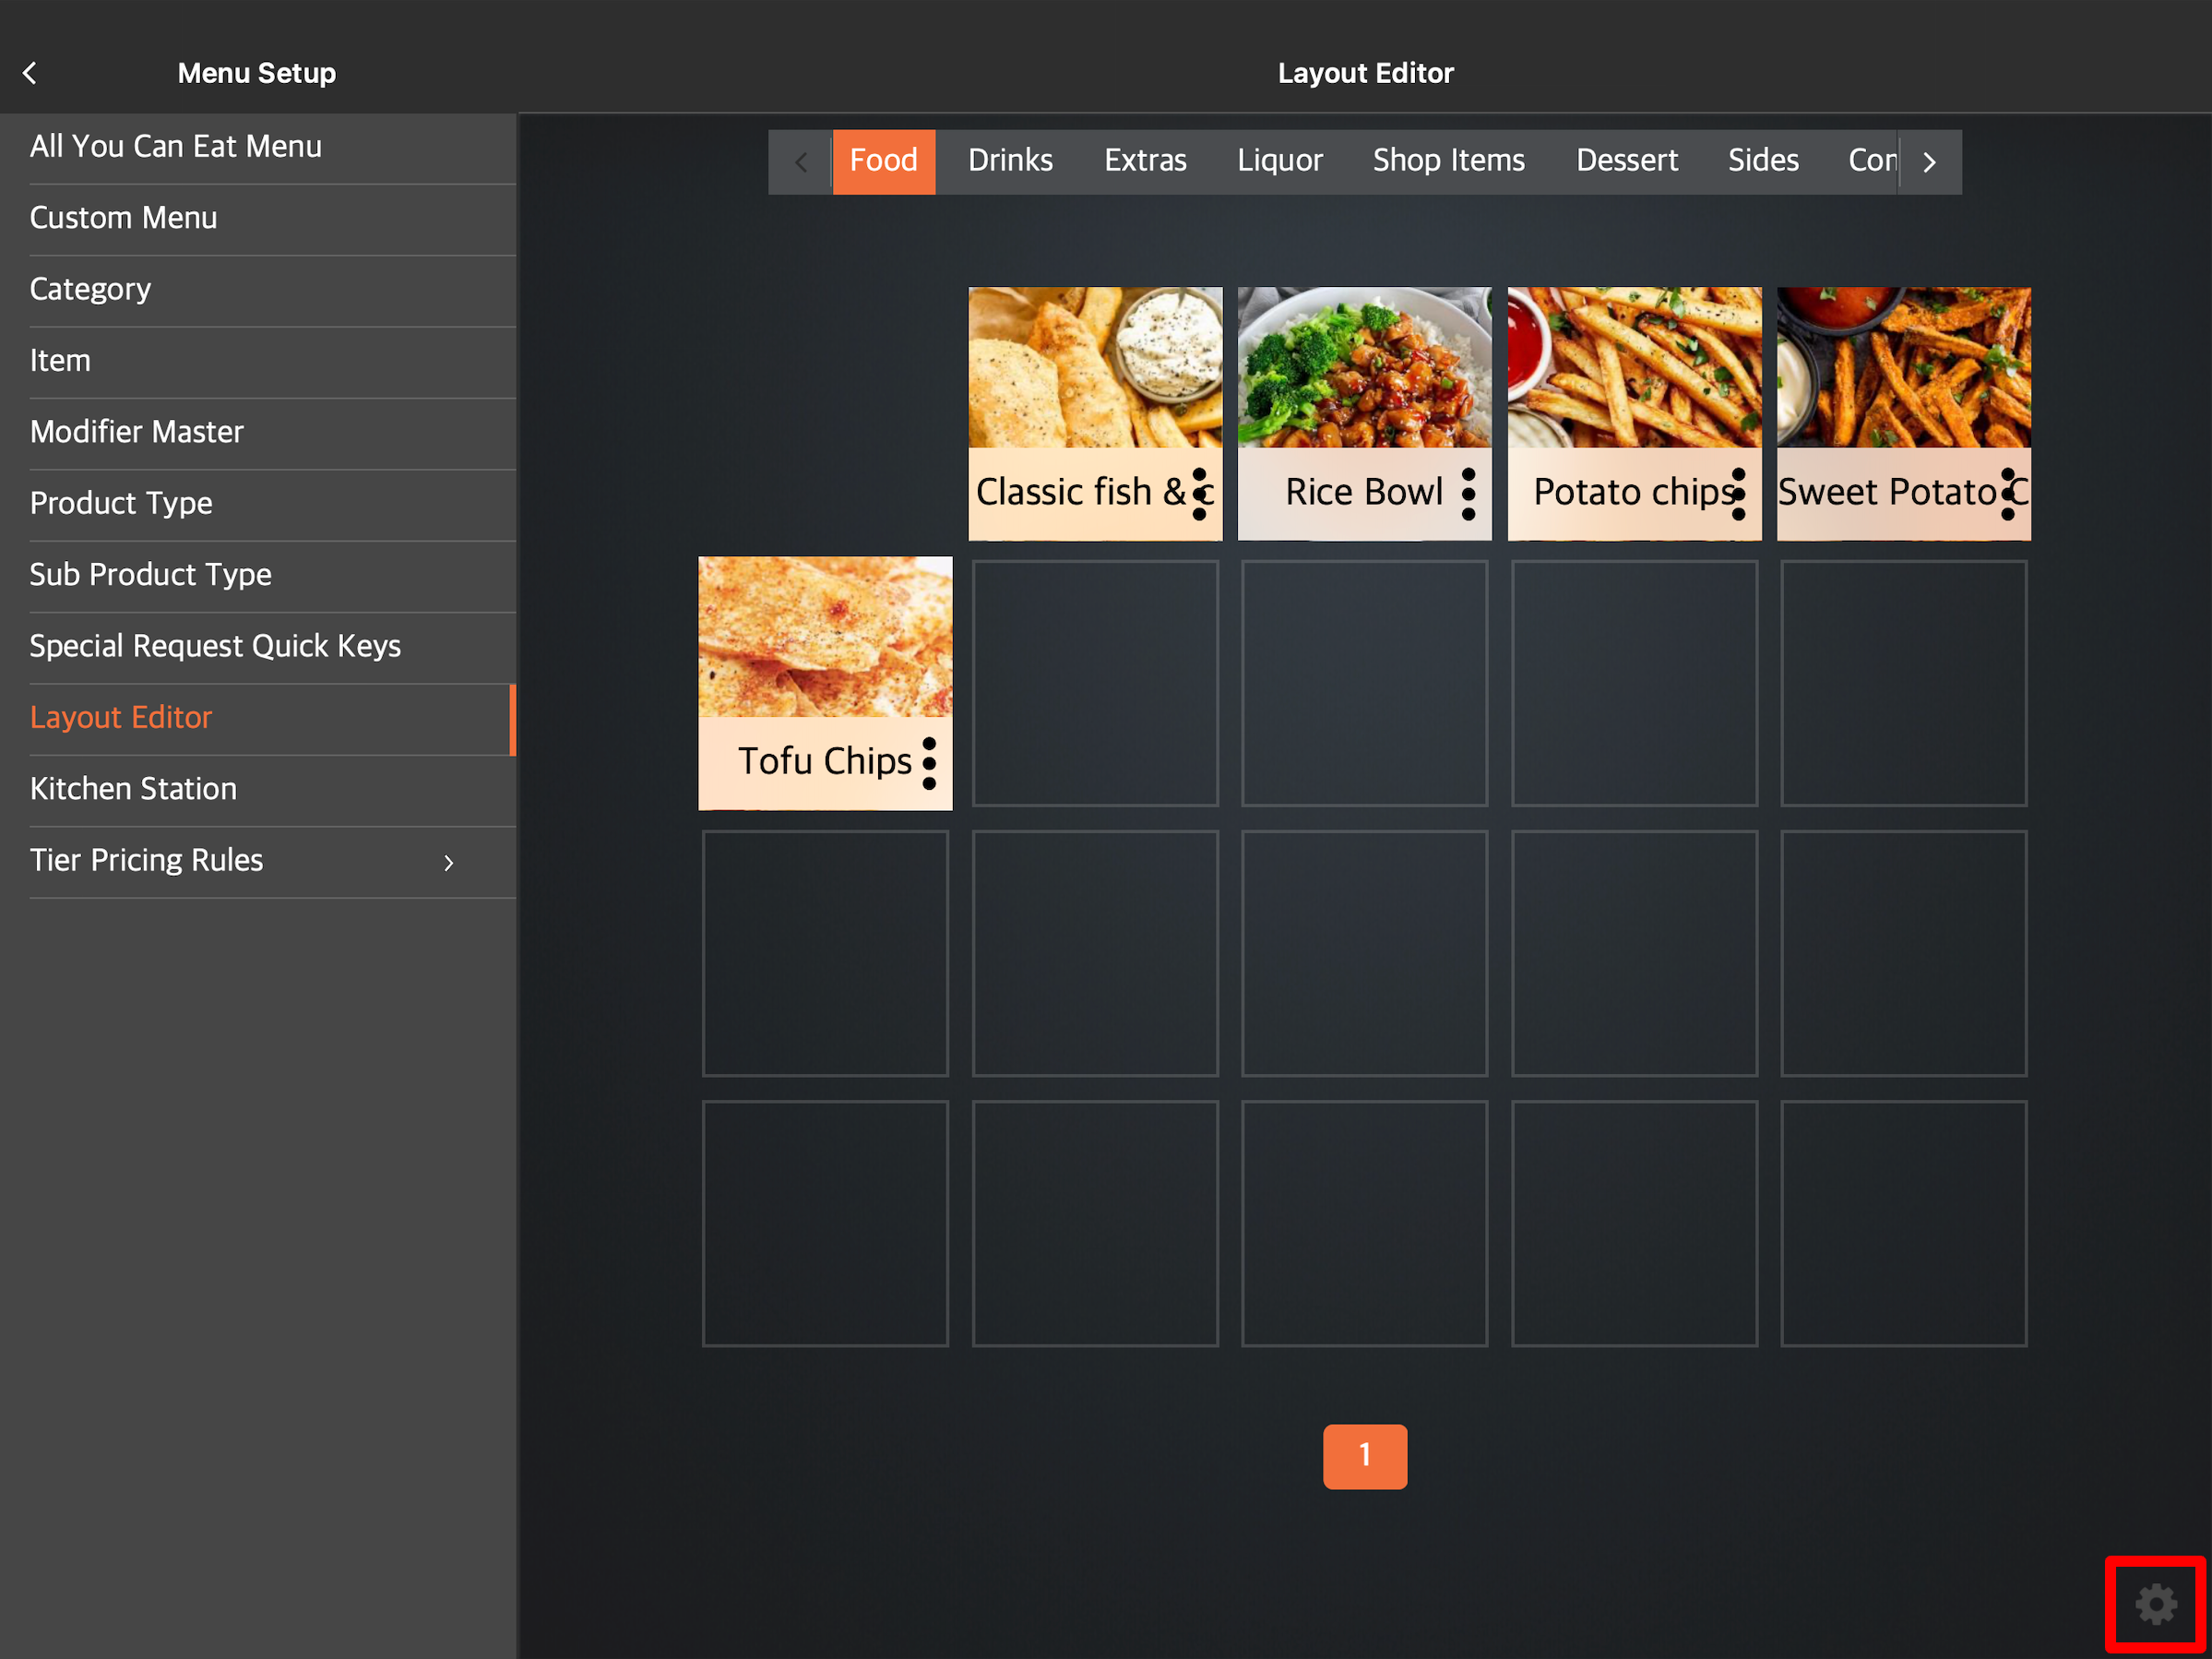
Change item layout order
To change your menu items’ layout to your preferred order, follow the steps below:
Eats365 POS
- Log in to the Eats365 POS.
-
At the top left, tap Settings
 .
.
- Under General, tap Menu Setup, and then select Layout Editor.
-
Tap and hold on the item you want to move. Then, drag the item in the order that you want it to appear.
Merchant Portal (Classic Theme)
- Log in to the Merchant Portal.
- On the left panel, click on Layout Editor.
-
Click and hold on the item you want to move. Then, drag the item in the order that you want it to appear.
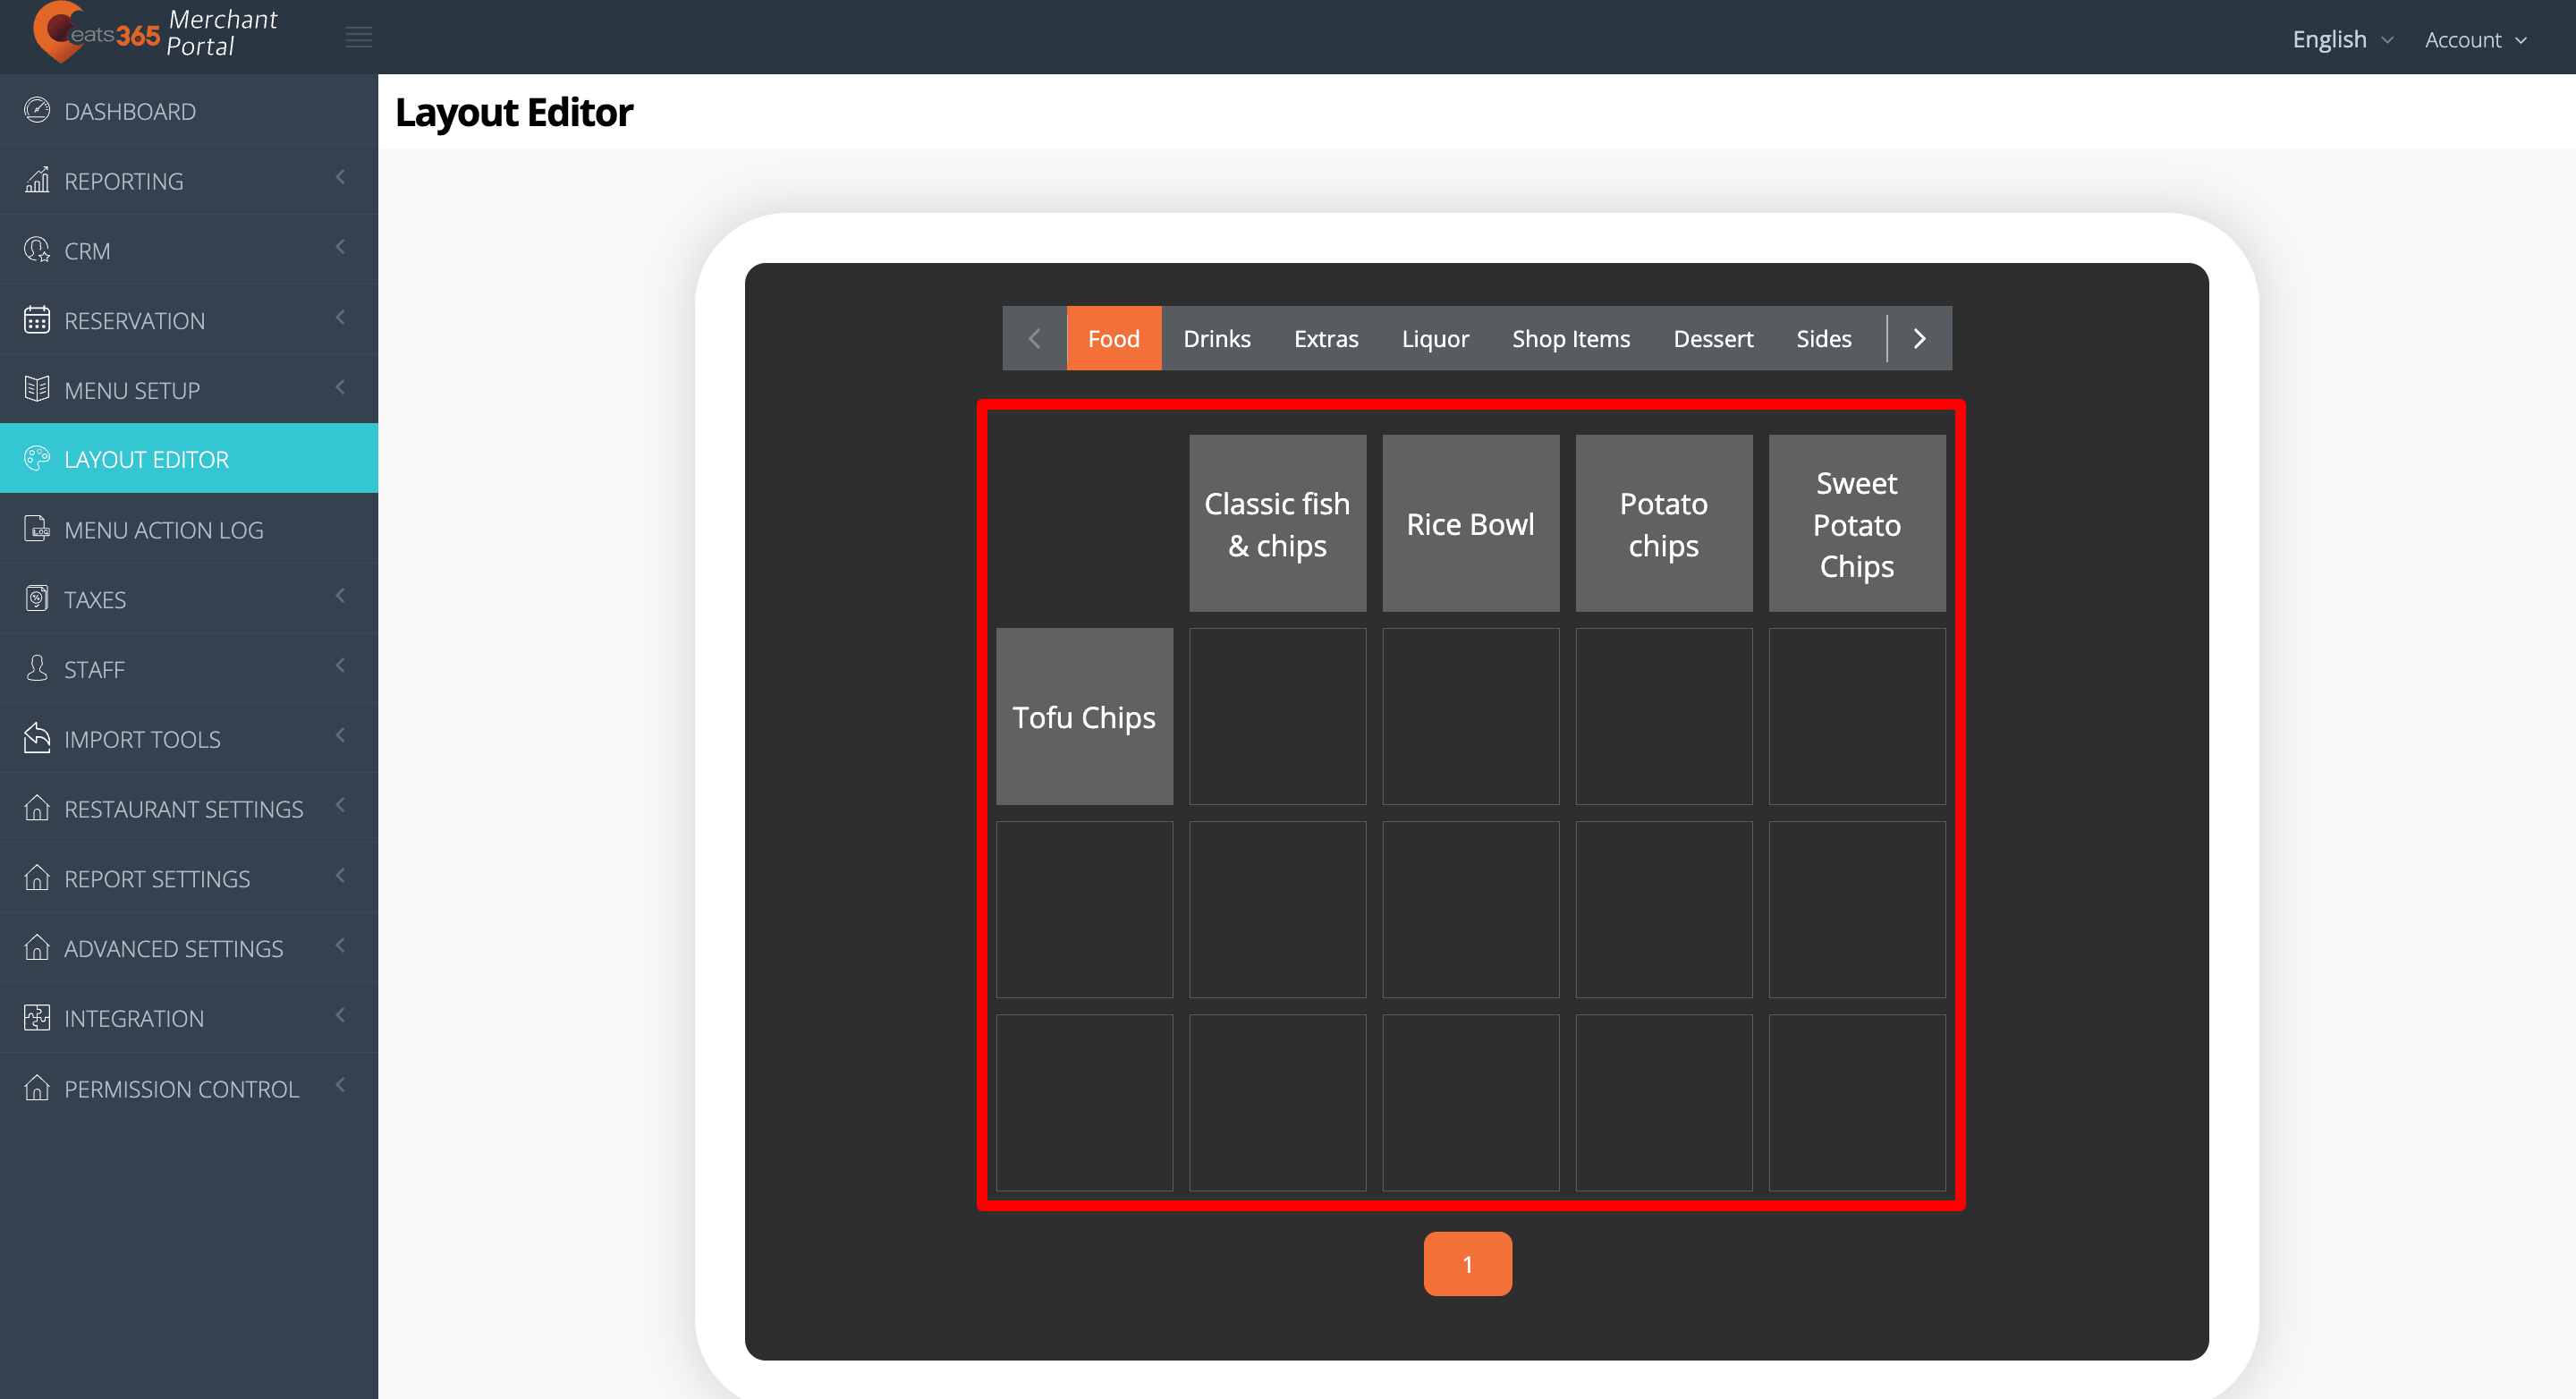
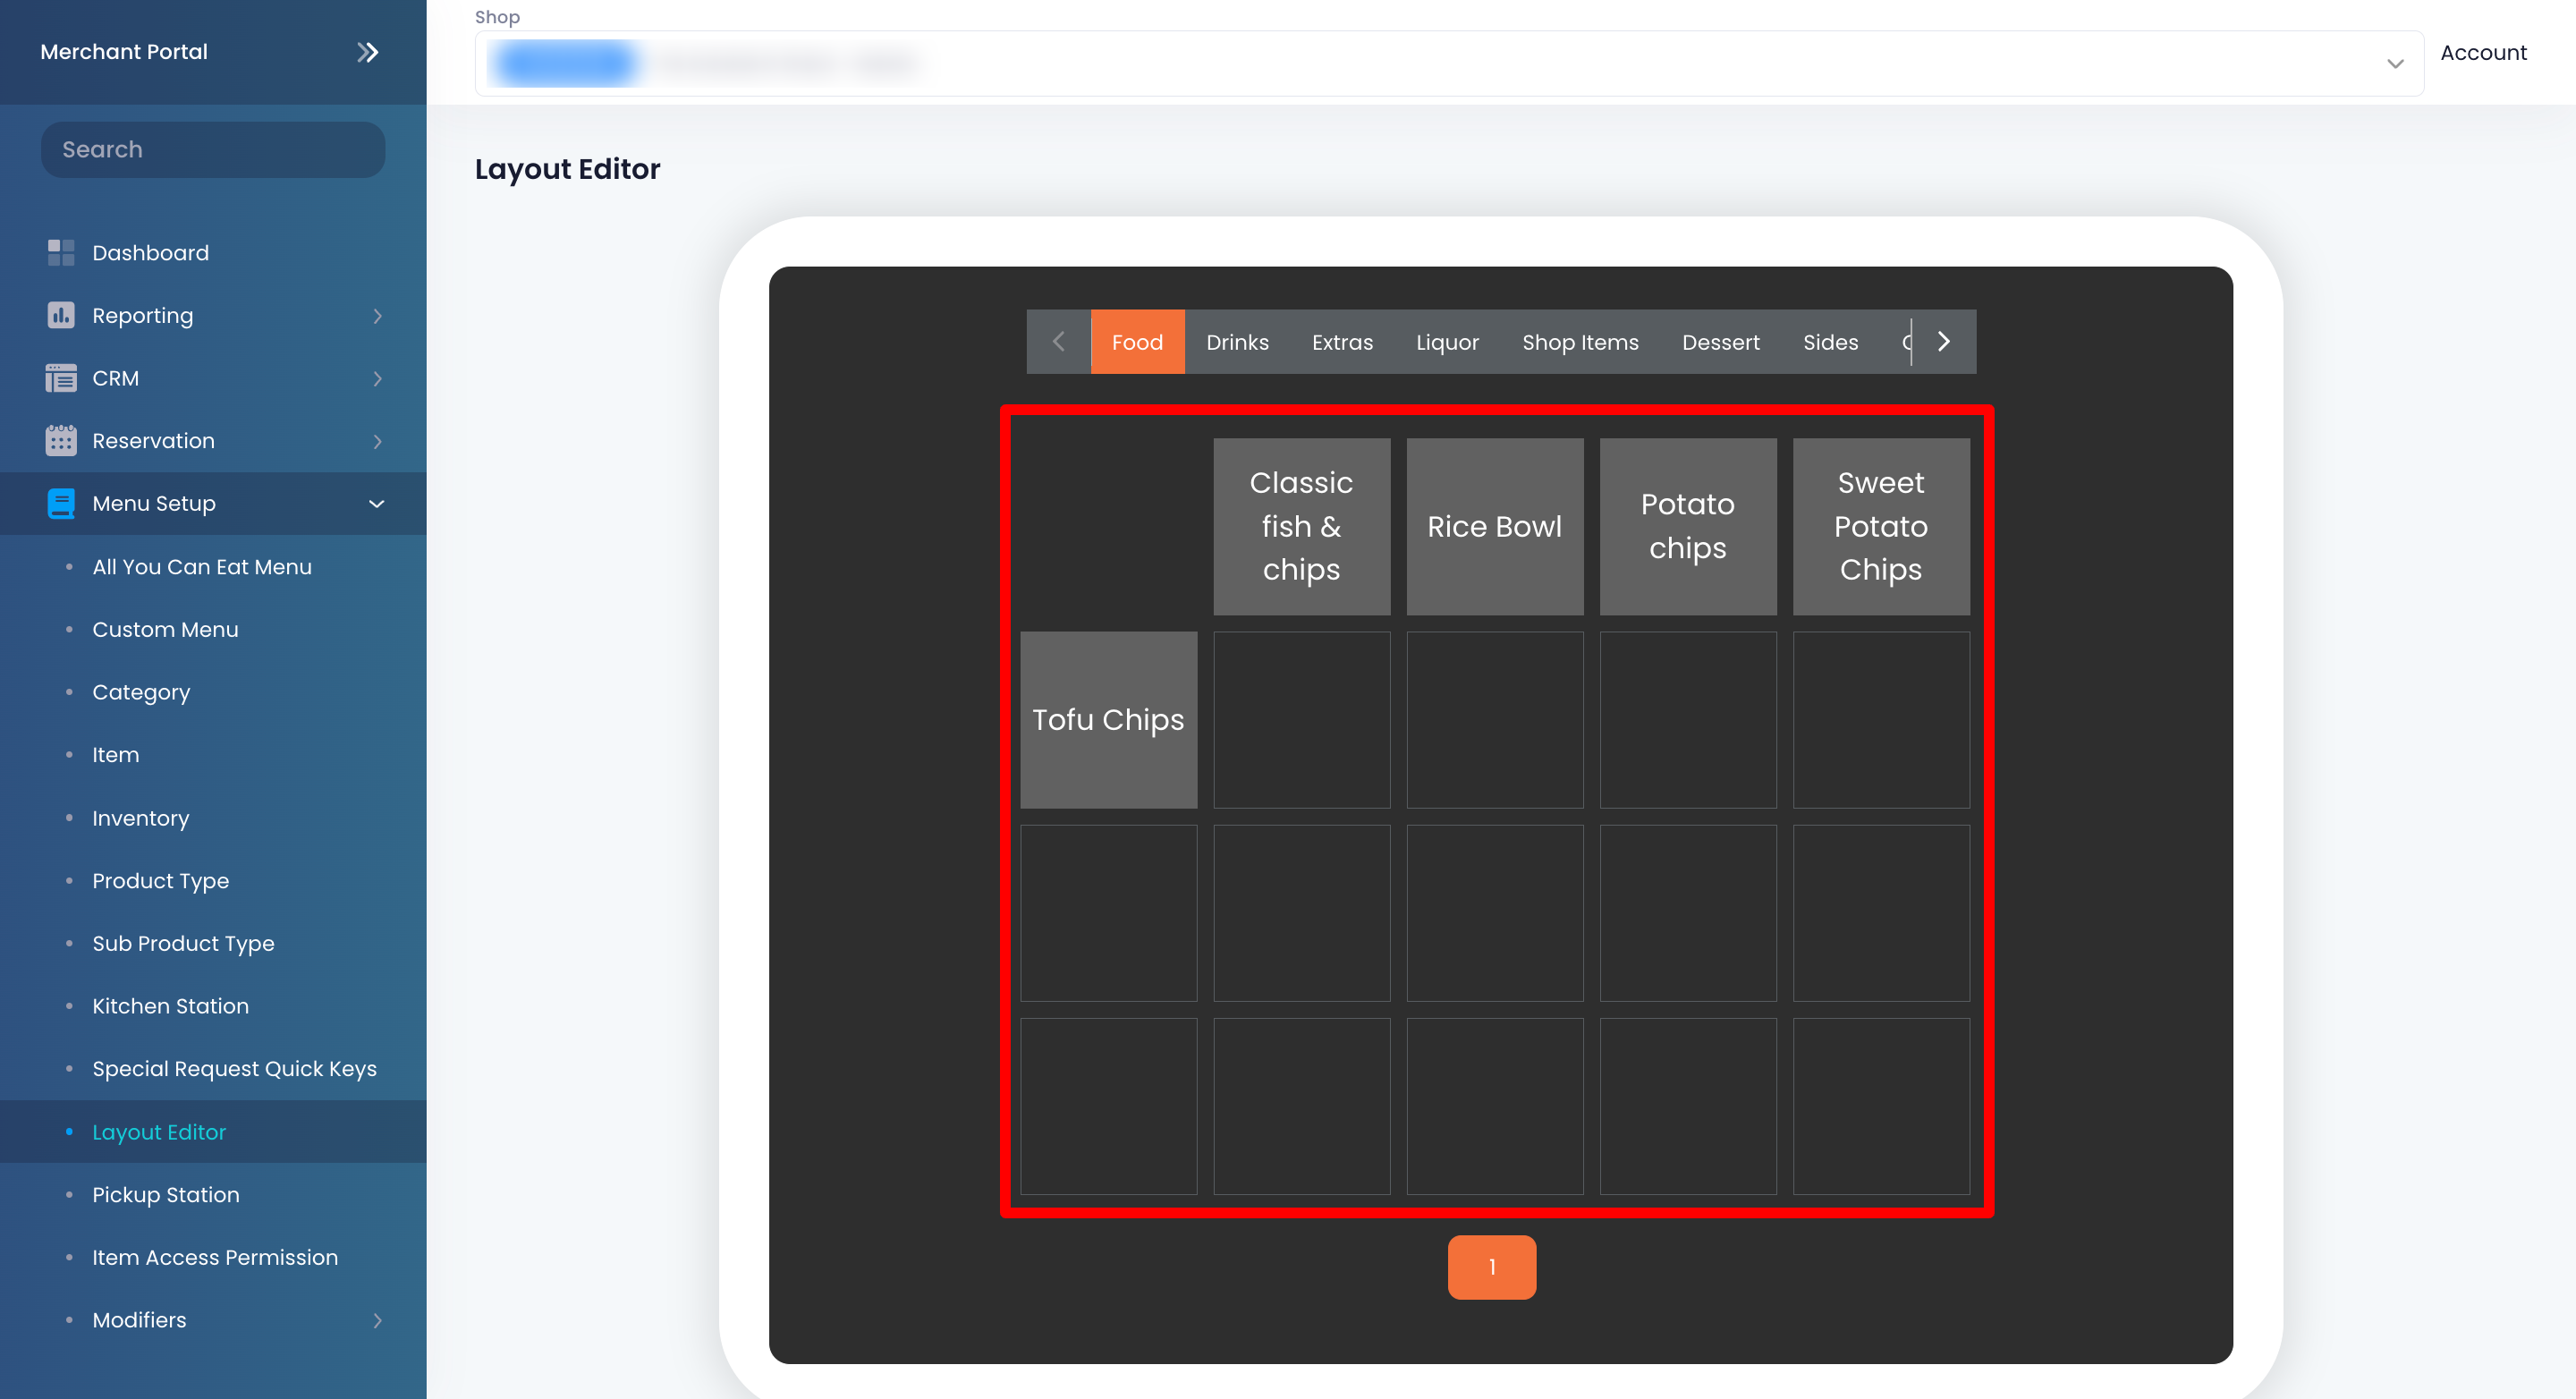
Merchant Portal 2.0
- Log in to the Merchant Portal.
- On the left panel, click on Menu Setup. Then, click on Layout Editor.
- Click and hold on the item you want to move. Then, drag the item in the order that you want it to appear.
Change the Item Key name
If you want to change the Item Key name, follow the steps below:
Eats365 POS
- Log in to the Eats365 POS.
-
At the top left, tap Settings .
- Under General, tap Menu Setup, and then select Layout Editor.
-
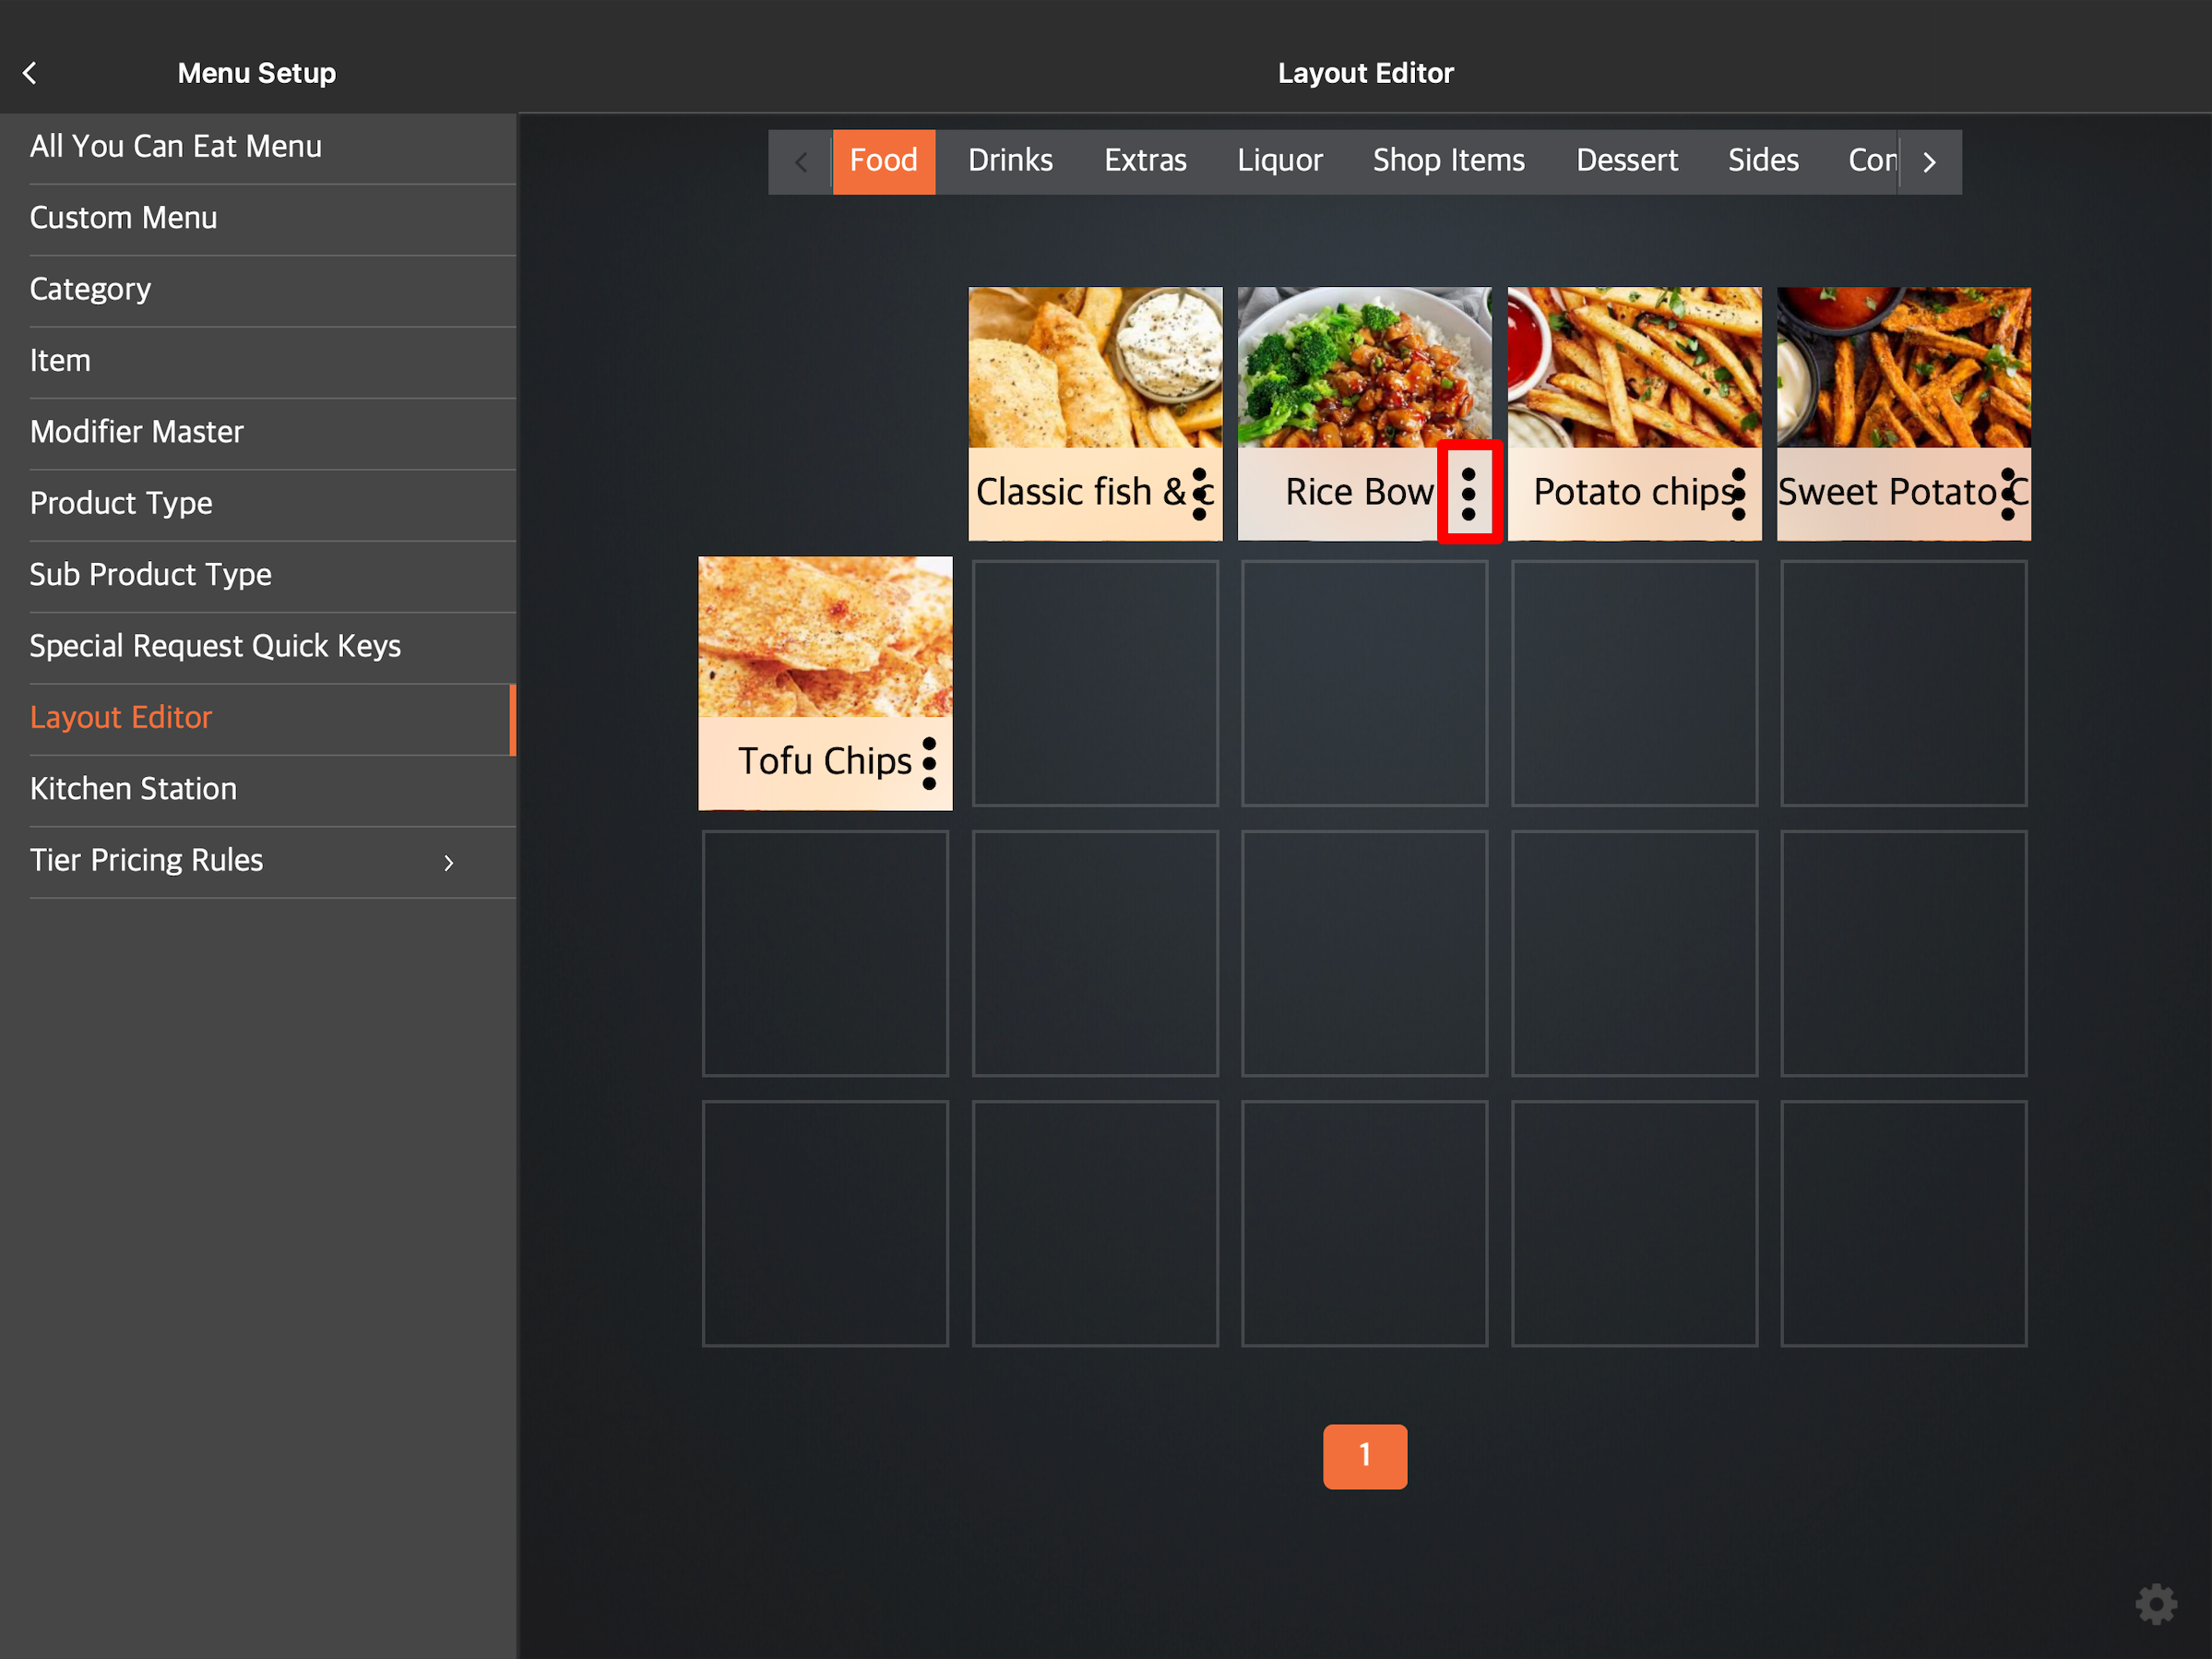
Next to the item that you want to change the name of, tap the three-dot menu
 .
.
-
Under Item Key Name, enter the new Item Key name.
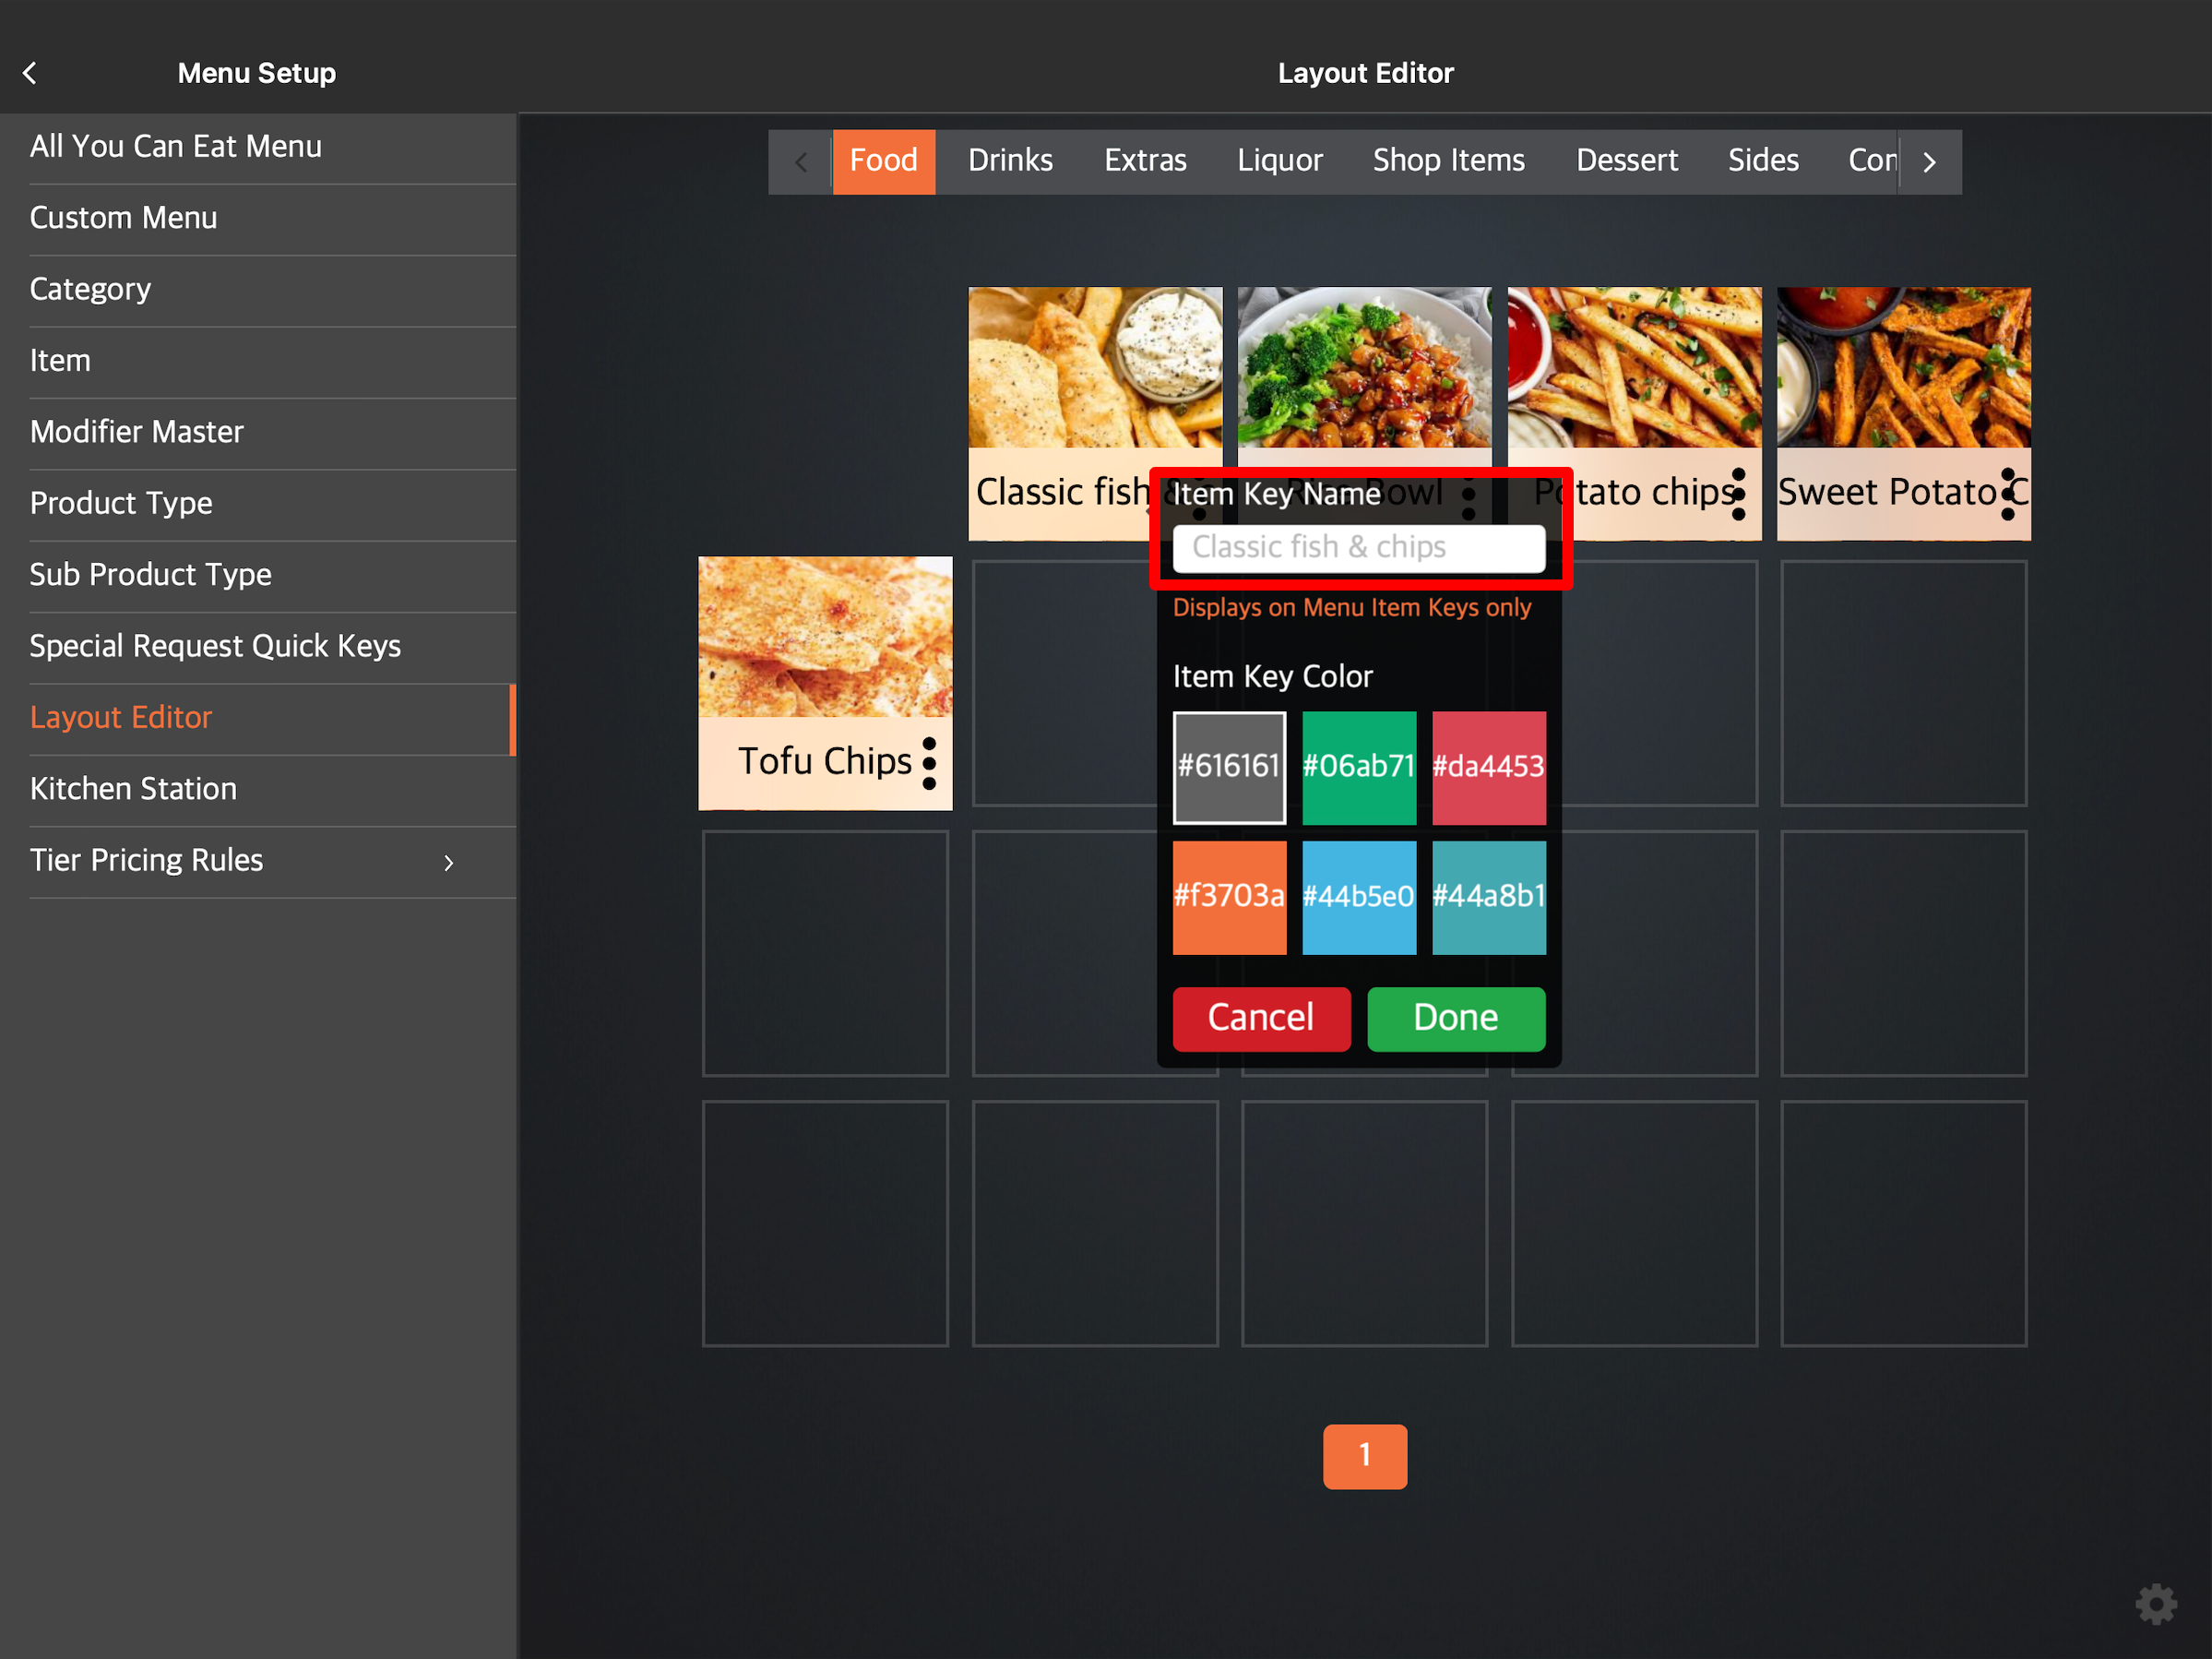
- Tap Done to confirm.
Merchant Portal (Classic Theme)
- Log in to the Merchant Portal.
- On the left panel, click on Layout Editor.
- Click on the item that you want to change the name of.
-
Under Key Name, enter the new Item Key name.
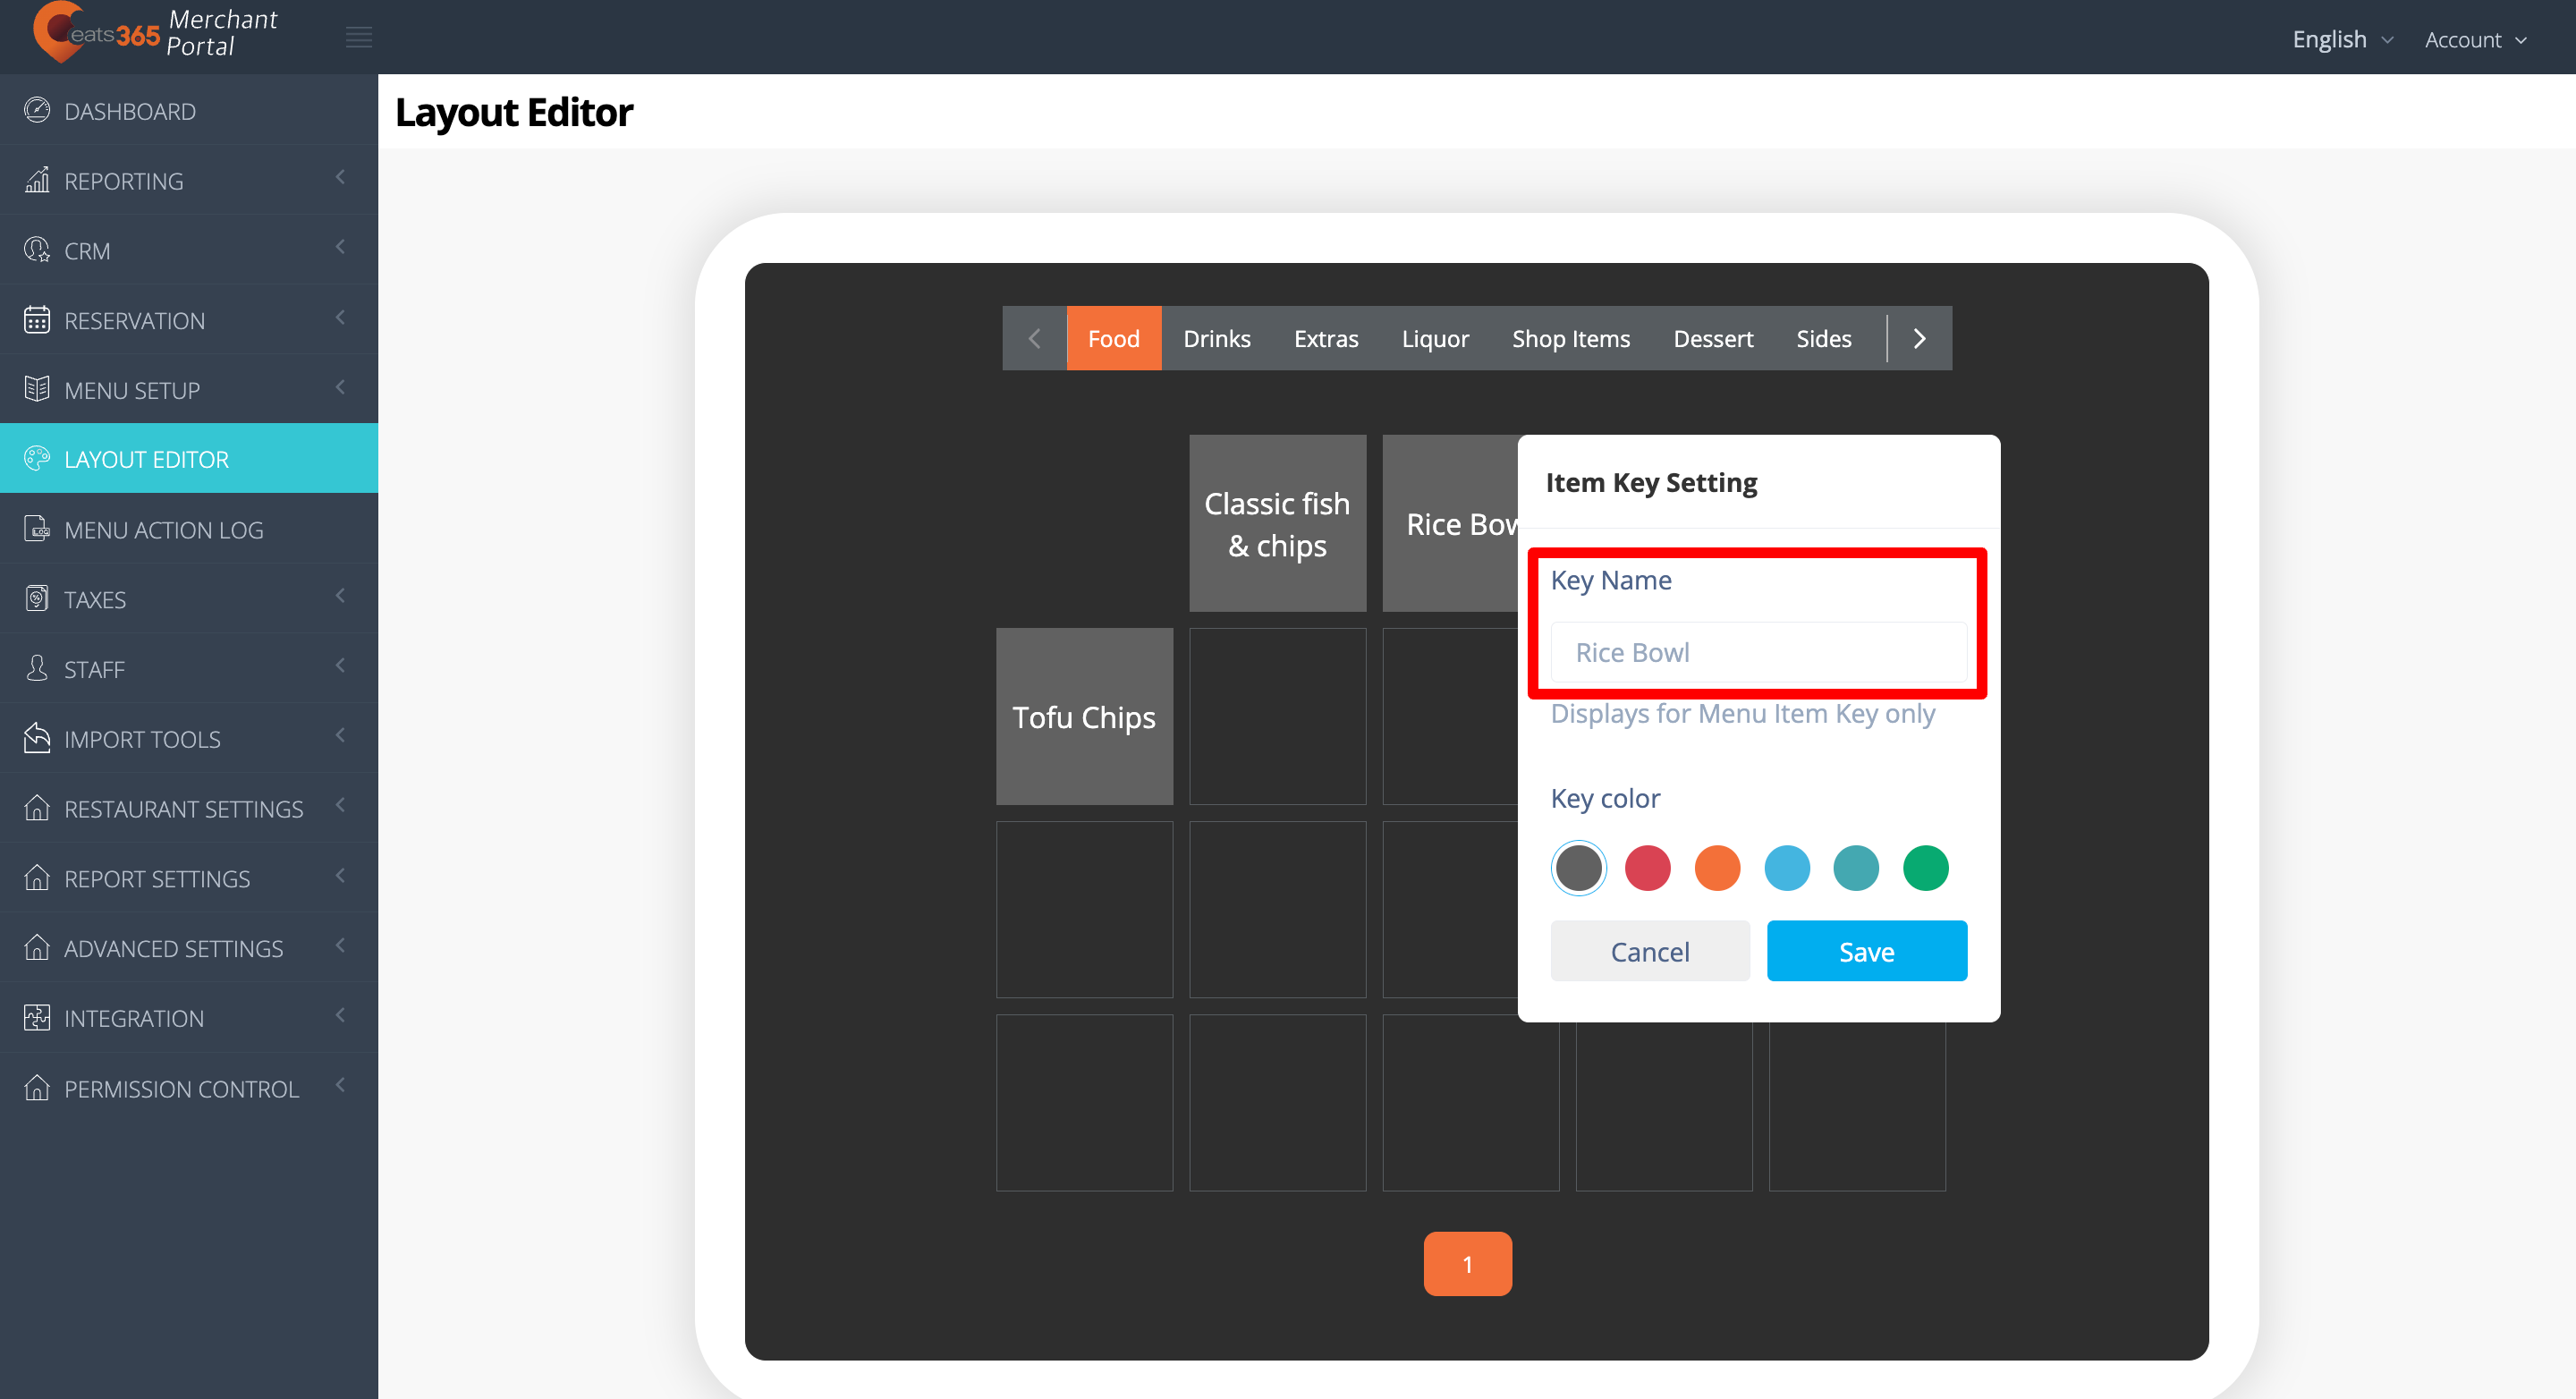
- Click on Save to confirm.
Merchant Portal 2.0
- Log in to the Merchant Portal.
- On the left panel, click on Menu Setup. Then, click on Layout Editor.
- Click on the item that you want to change the name of.
-
Under Key Name, enter the new Item Key name.
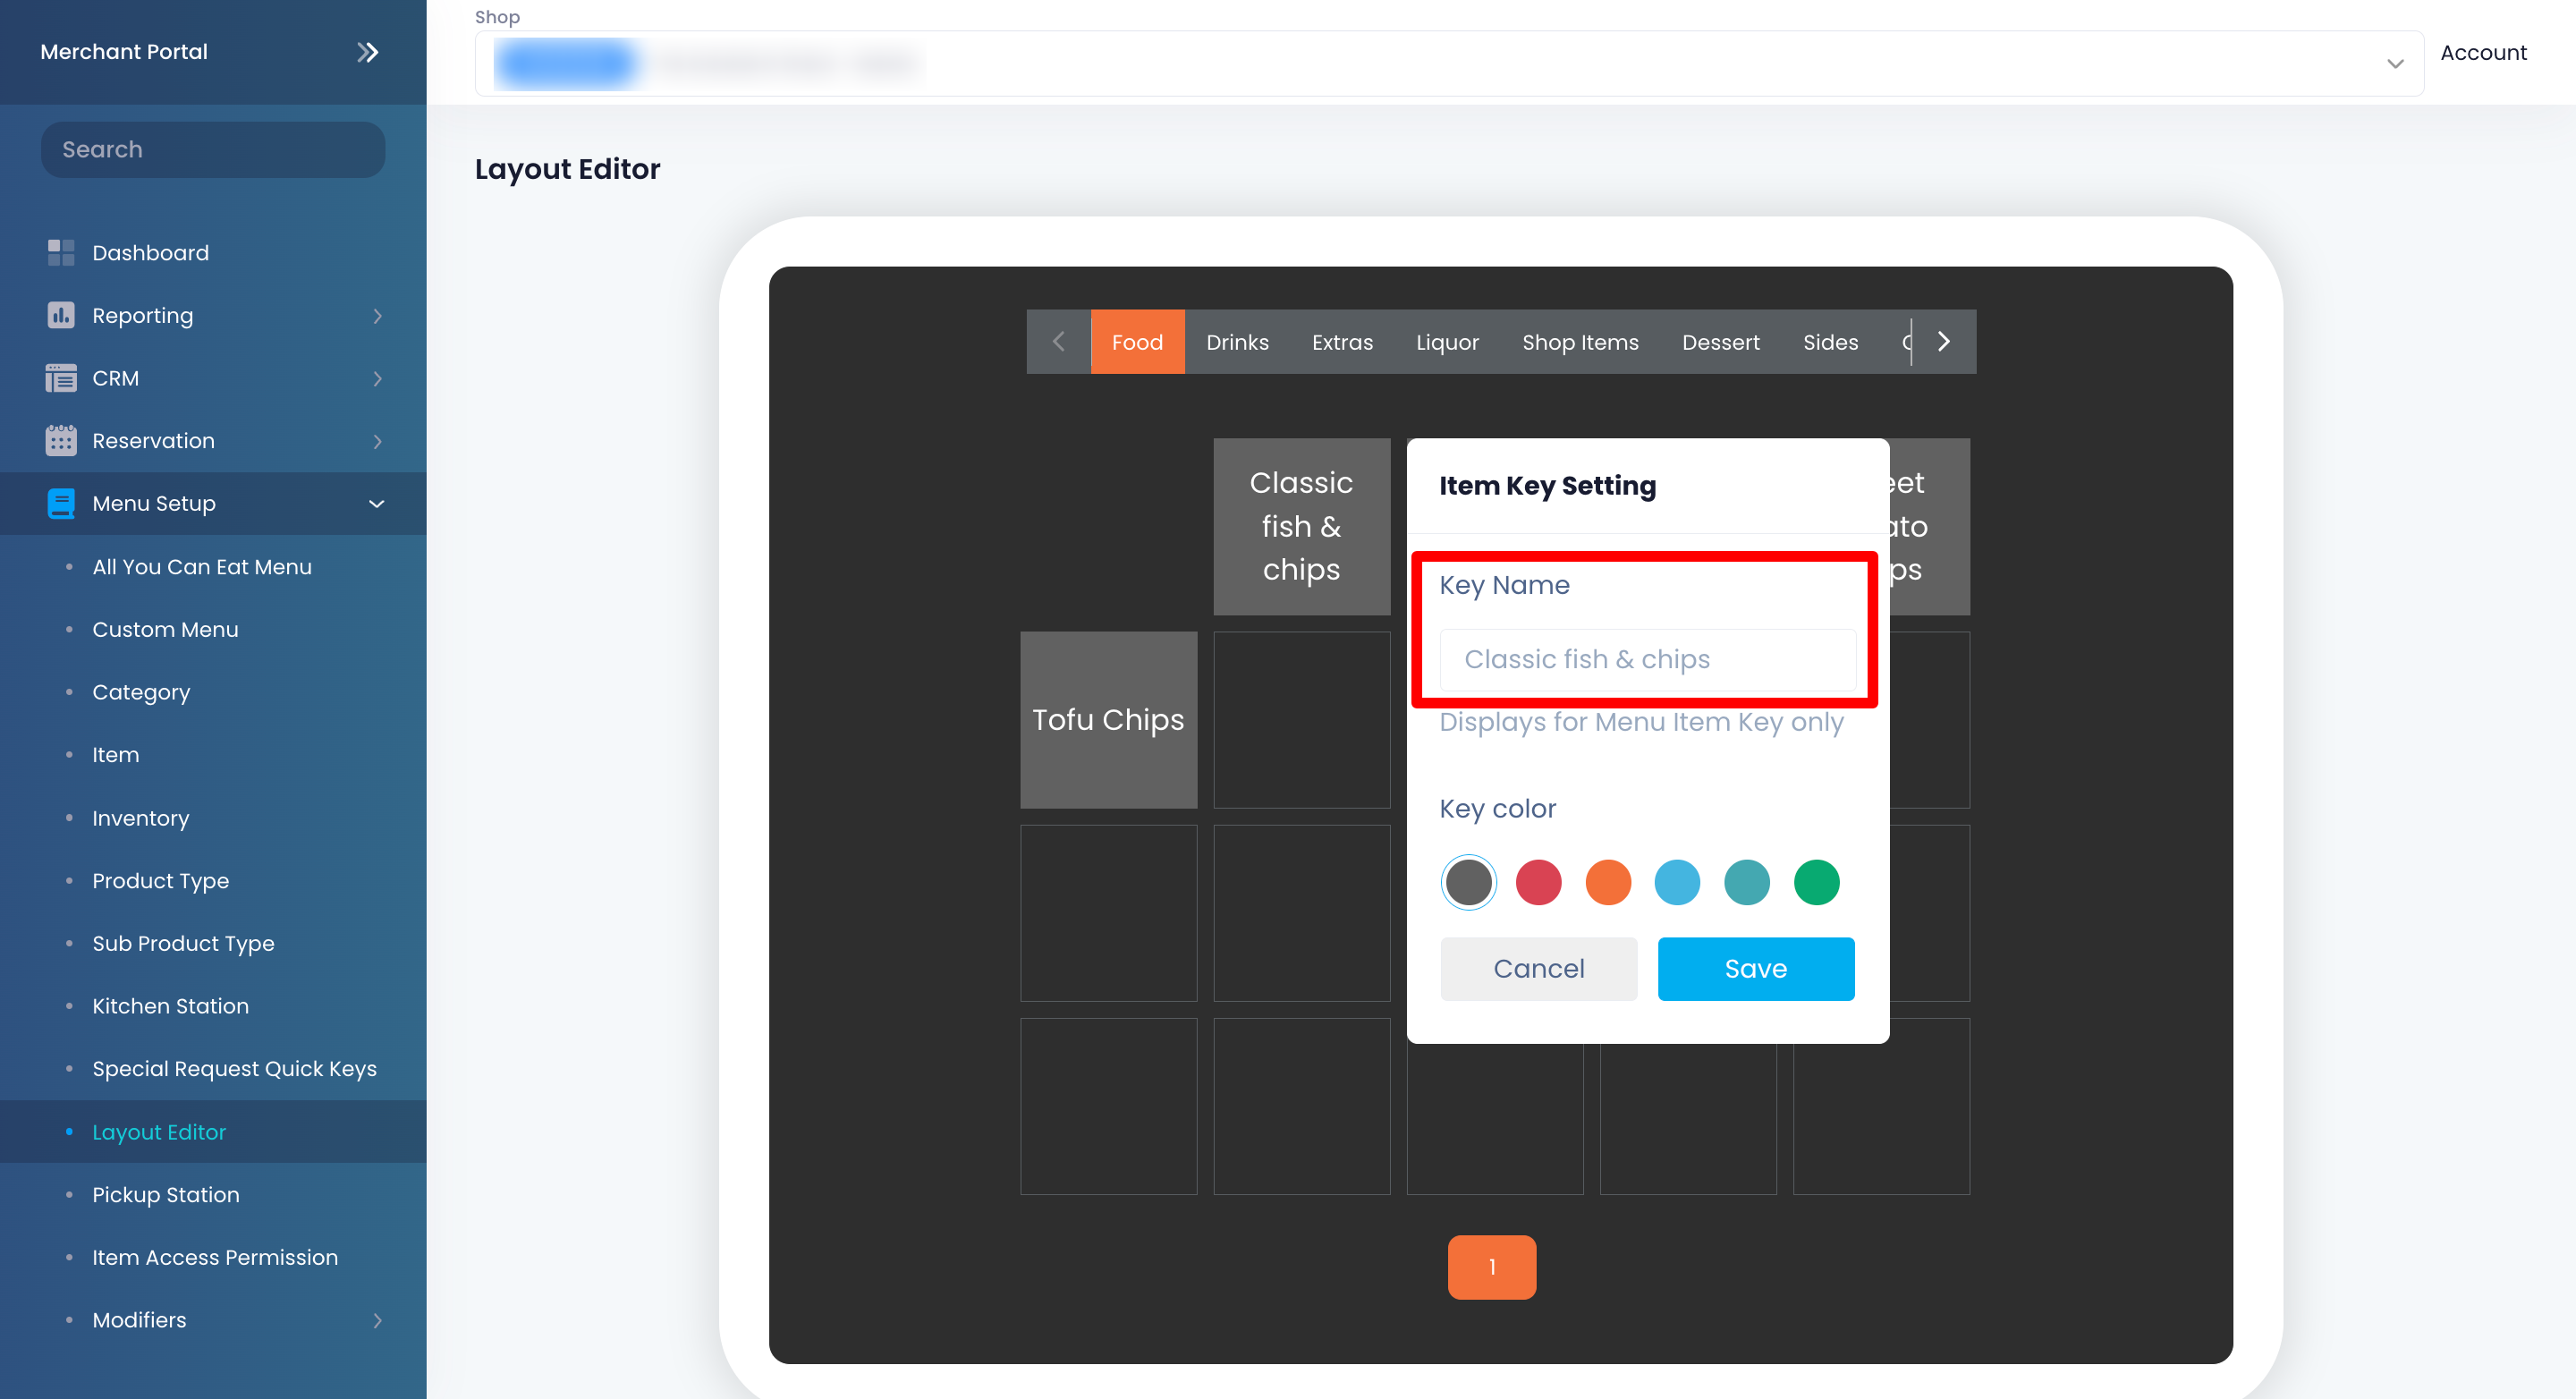
- Click on Save to confirm.
Change the item key color
If you want to customize the Item Key to show a specific color, follow the steps below:
Eats365 POS
- Log in to the Eats365 POS.
-
At the top left, tap Settings .
- Under General, tap Menu Setup, and then select Layout Editor.
-
Next to the item that you want to change the color of, tap the three-dot menu.
-
Under Item Key Color, select the color that you want to assign to the item.

- Tap Done to confirm.
Merchant Portal (Classic Theme)
- Log in to the Merchant Portal.
- On the left panel, click on Layout Editor.
- Click on the item that you want to change the color of.
-
Under Key color, select the color that you want to assign to the item.
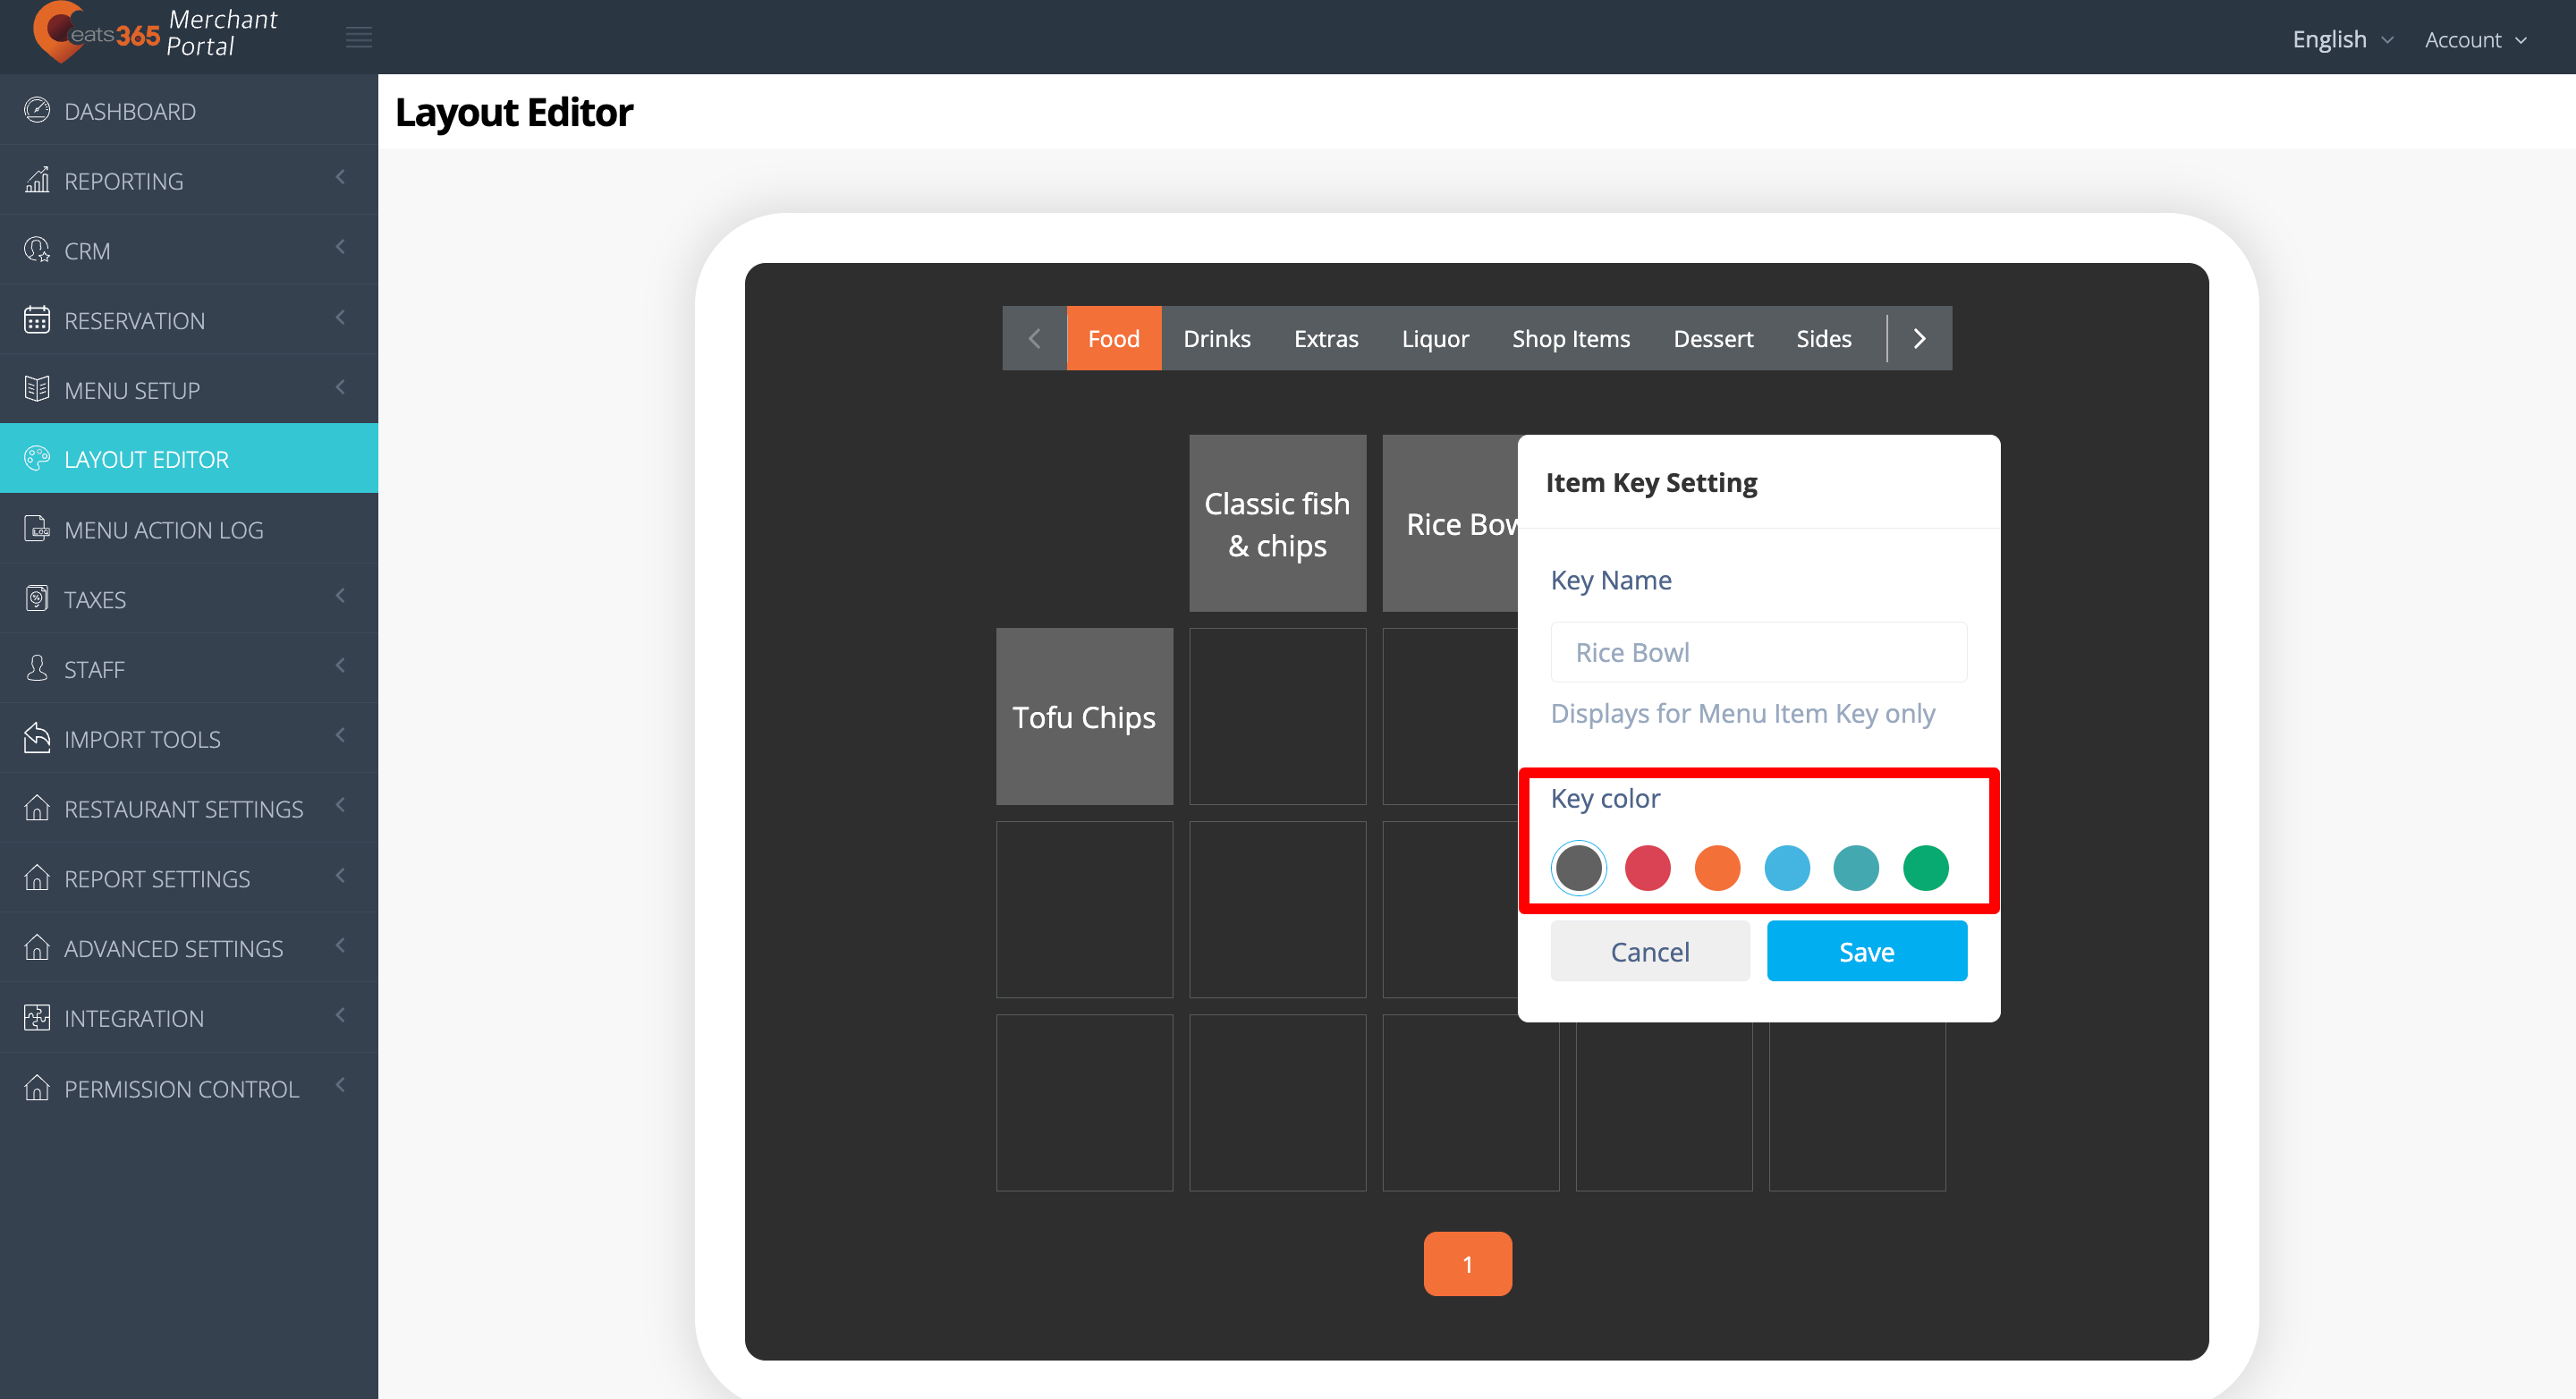
- Click on Save to confirm.
Merchant Portal 2.0
- Log in to the Merchant Portal.
- On the left panel, click on Menu Setup. Then, click on Layout Editor.
- Click on the item that you want to change the color of.
-
Under Key color, select the color that you want to assign to the item.

- Click on Save to confirm.
Adjust item font size
If you want the text on your items to appear smaller or bigger on the POS, follow the steps below:
- Log in to the Eats365 POS.
- At the top left, tap Settings .
- Under General, tap Menu Setup, and then select Layout Editor.
- At the bottom right corner, tap Settings
 .
.
- Next to Font Size, choose the font size that you want. Font size options include S, M, L, and XL.
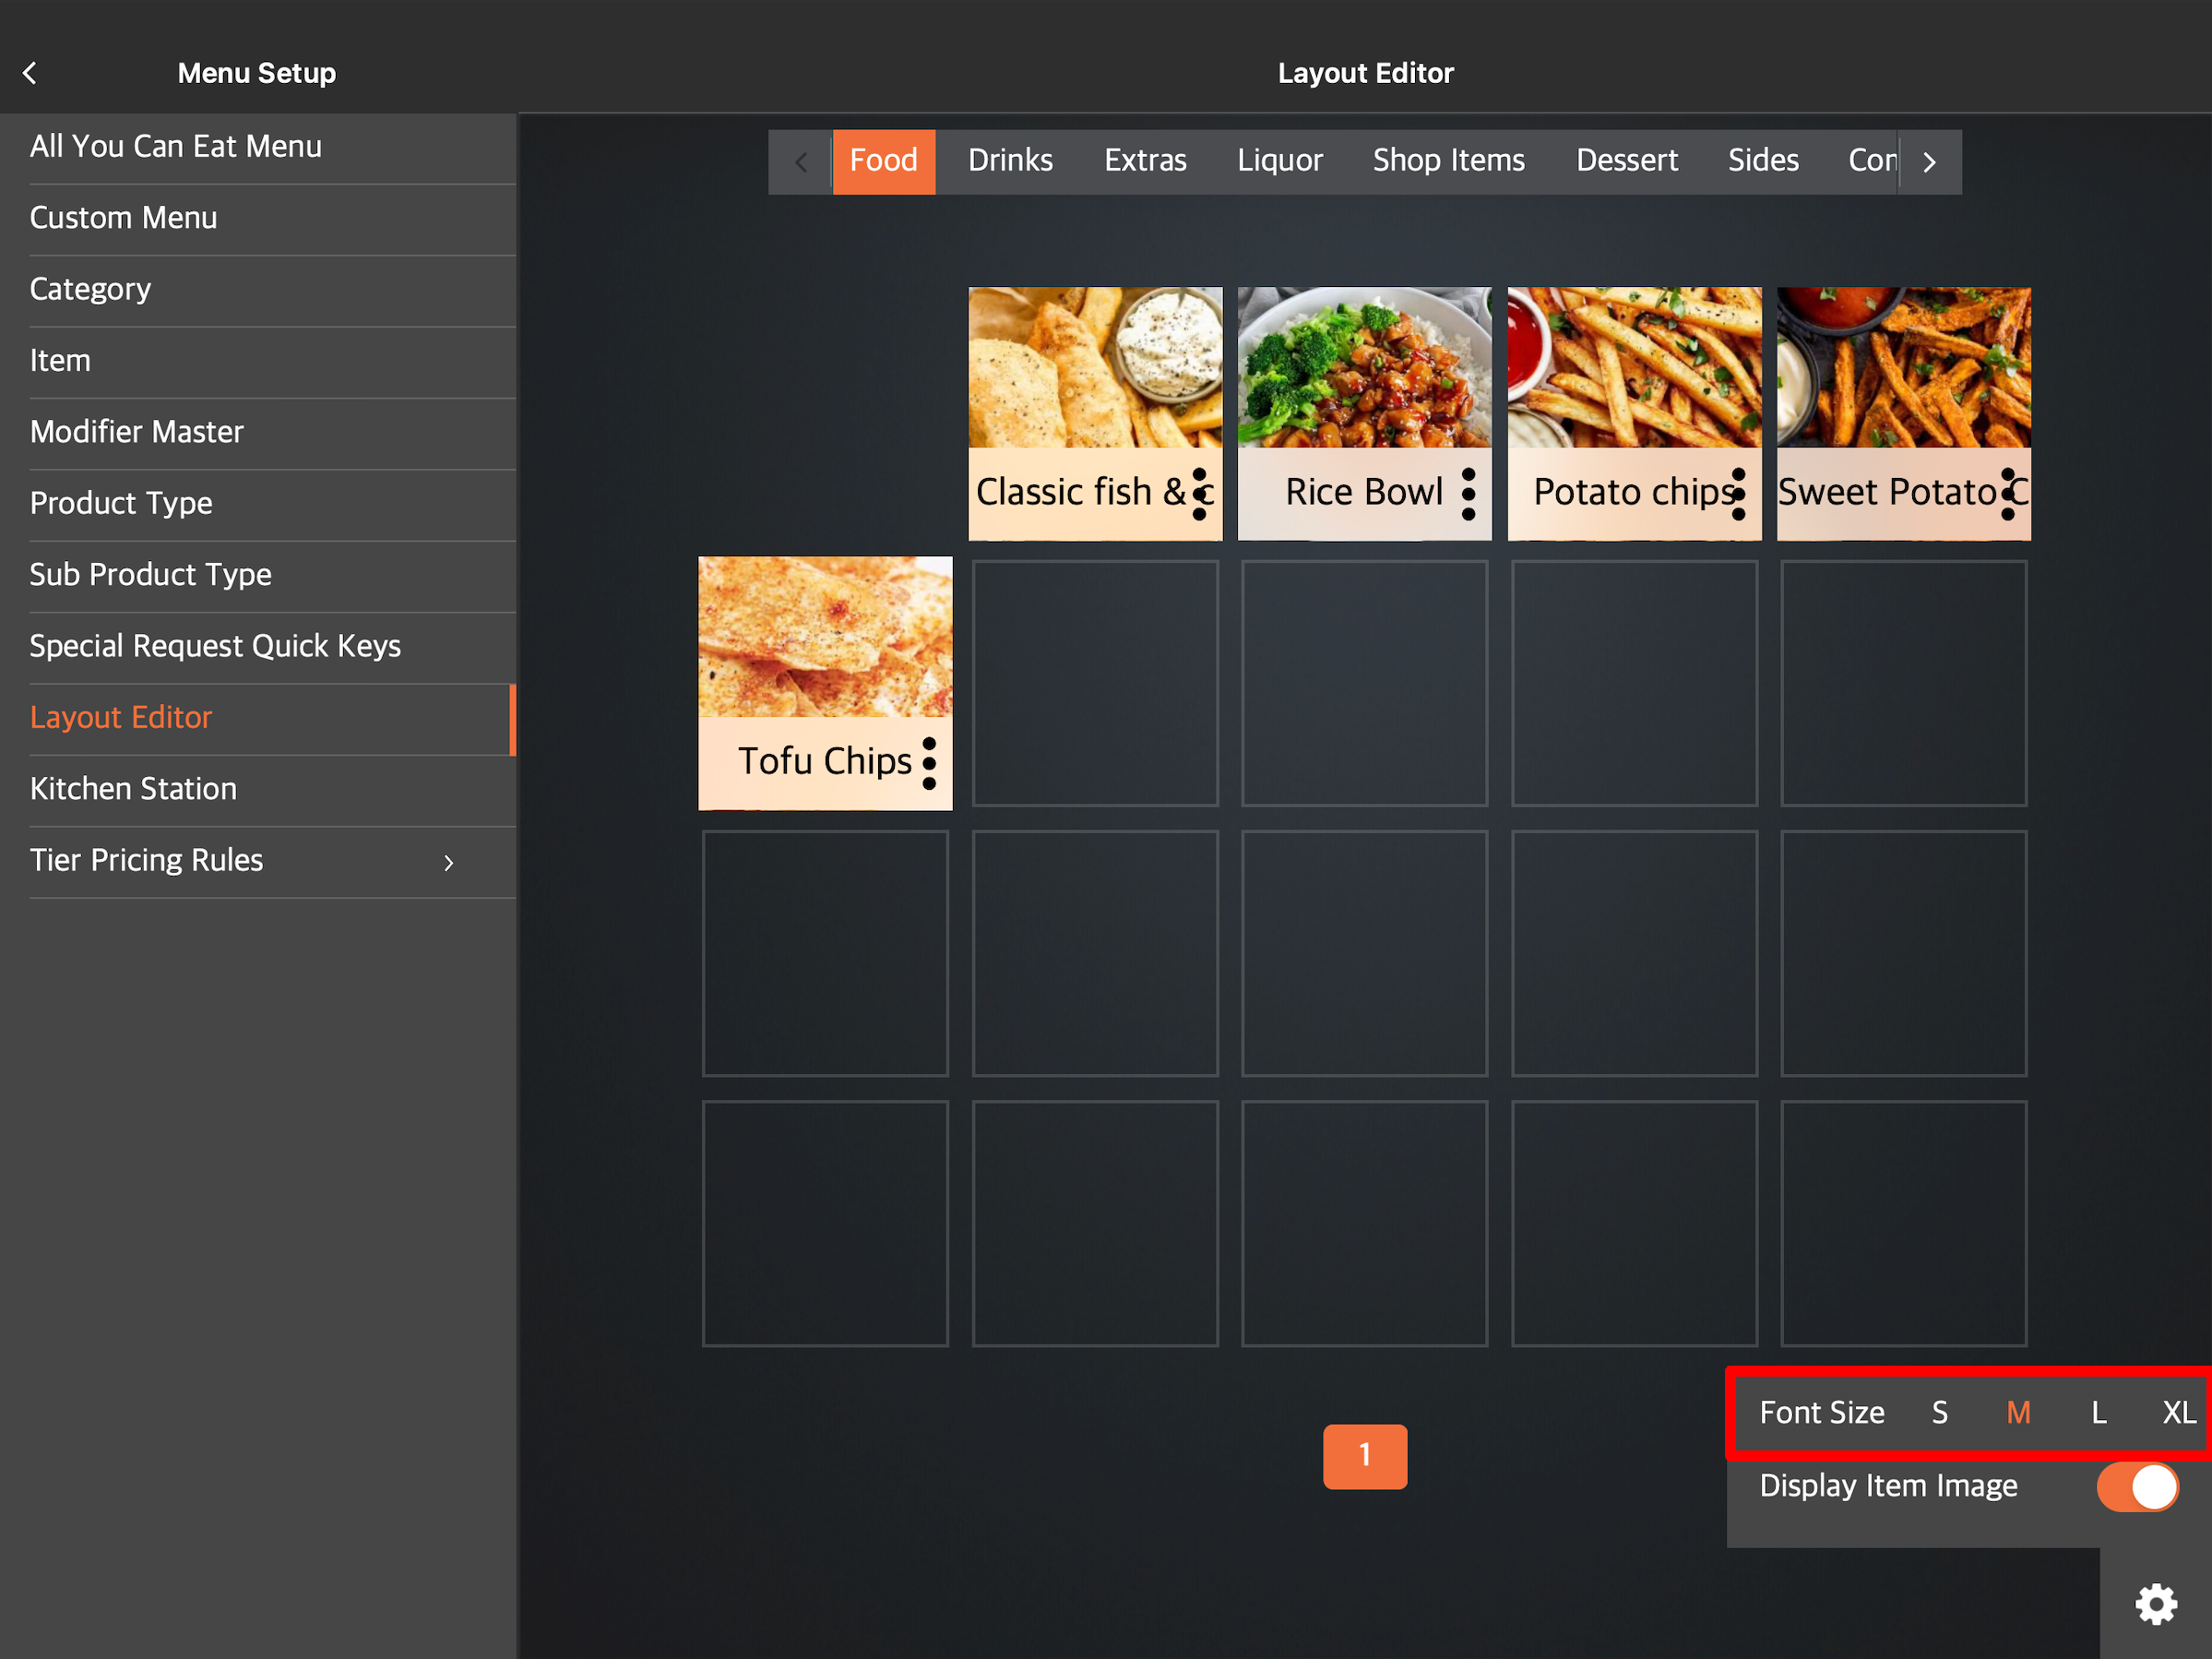
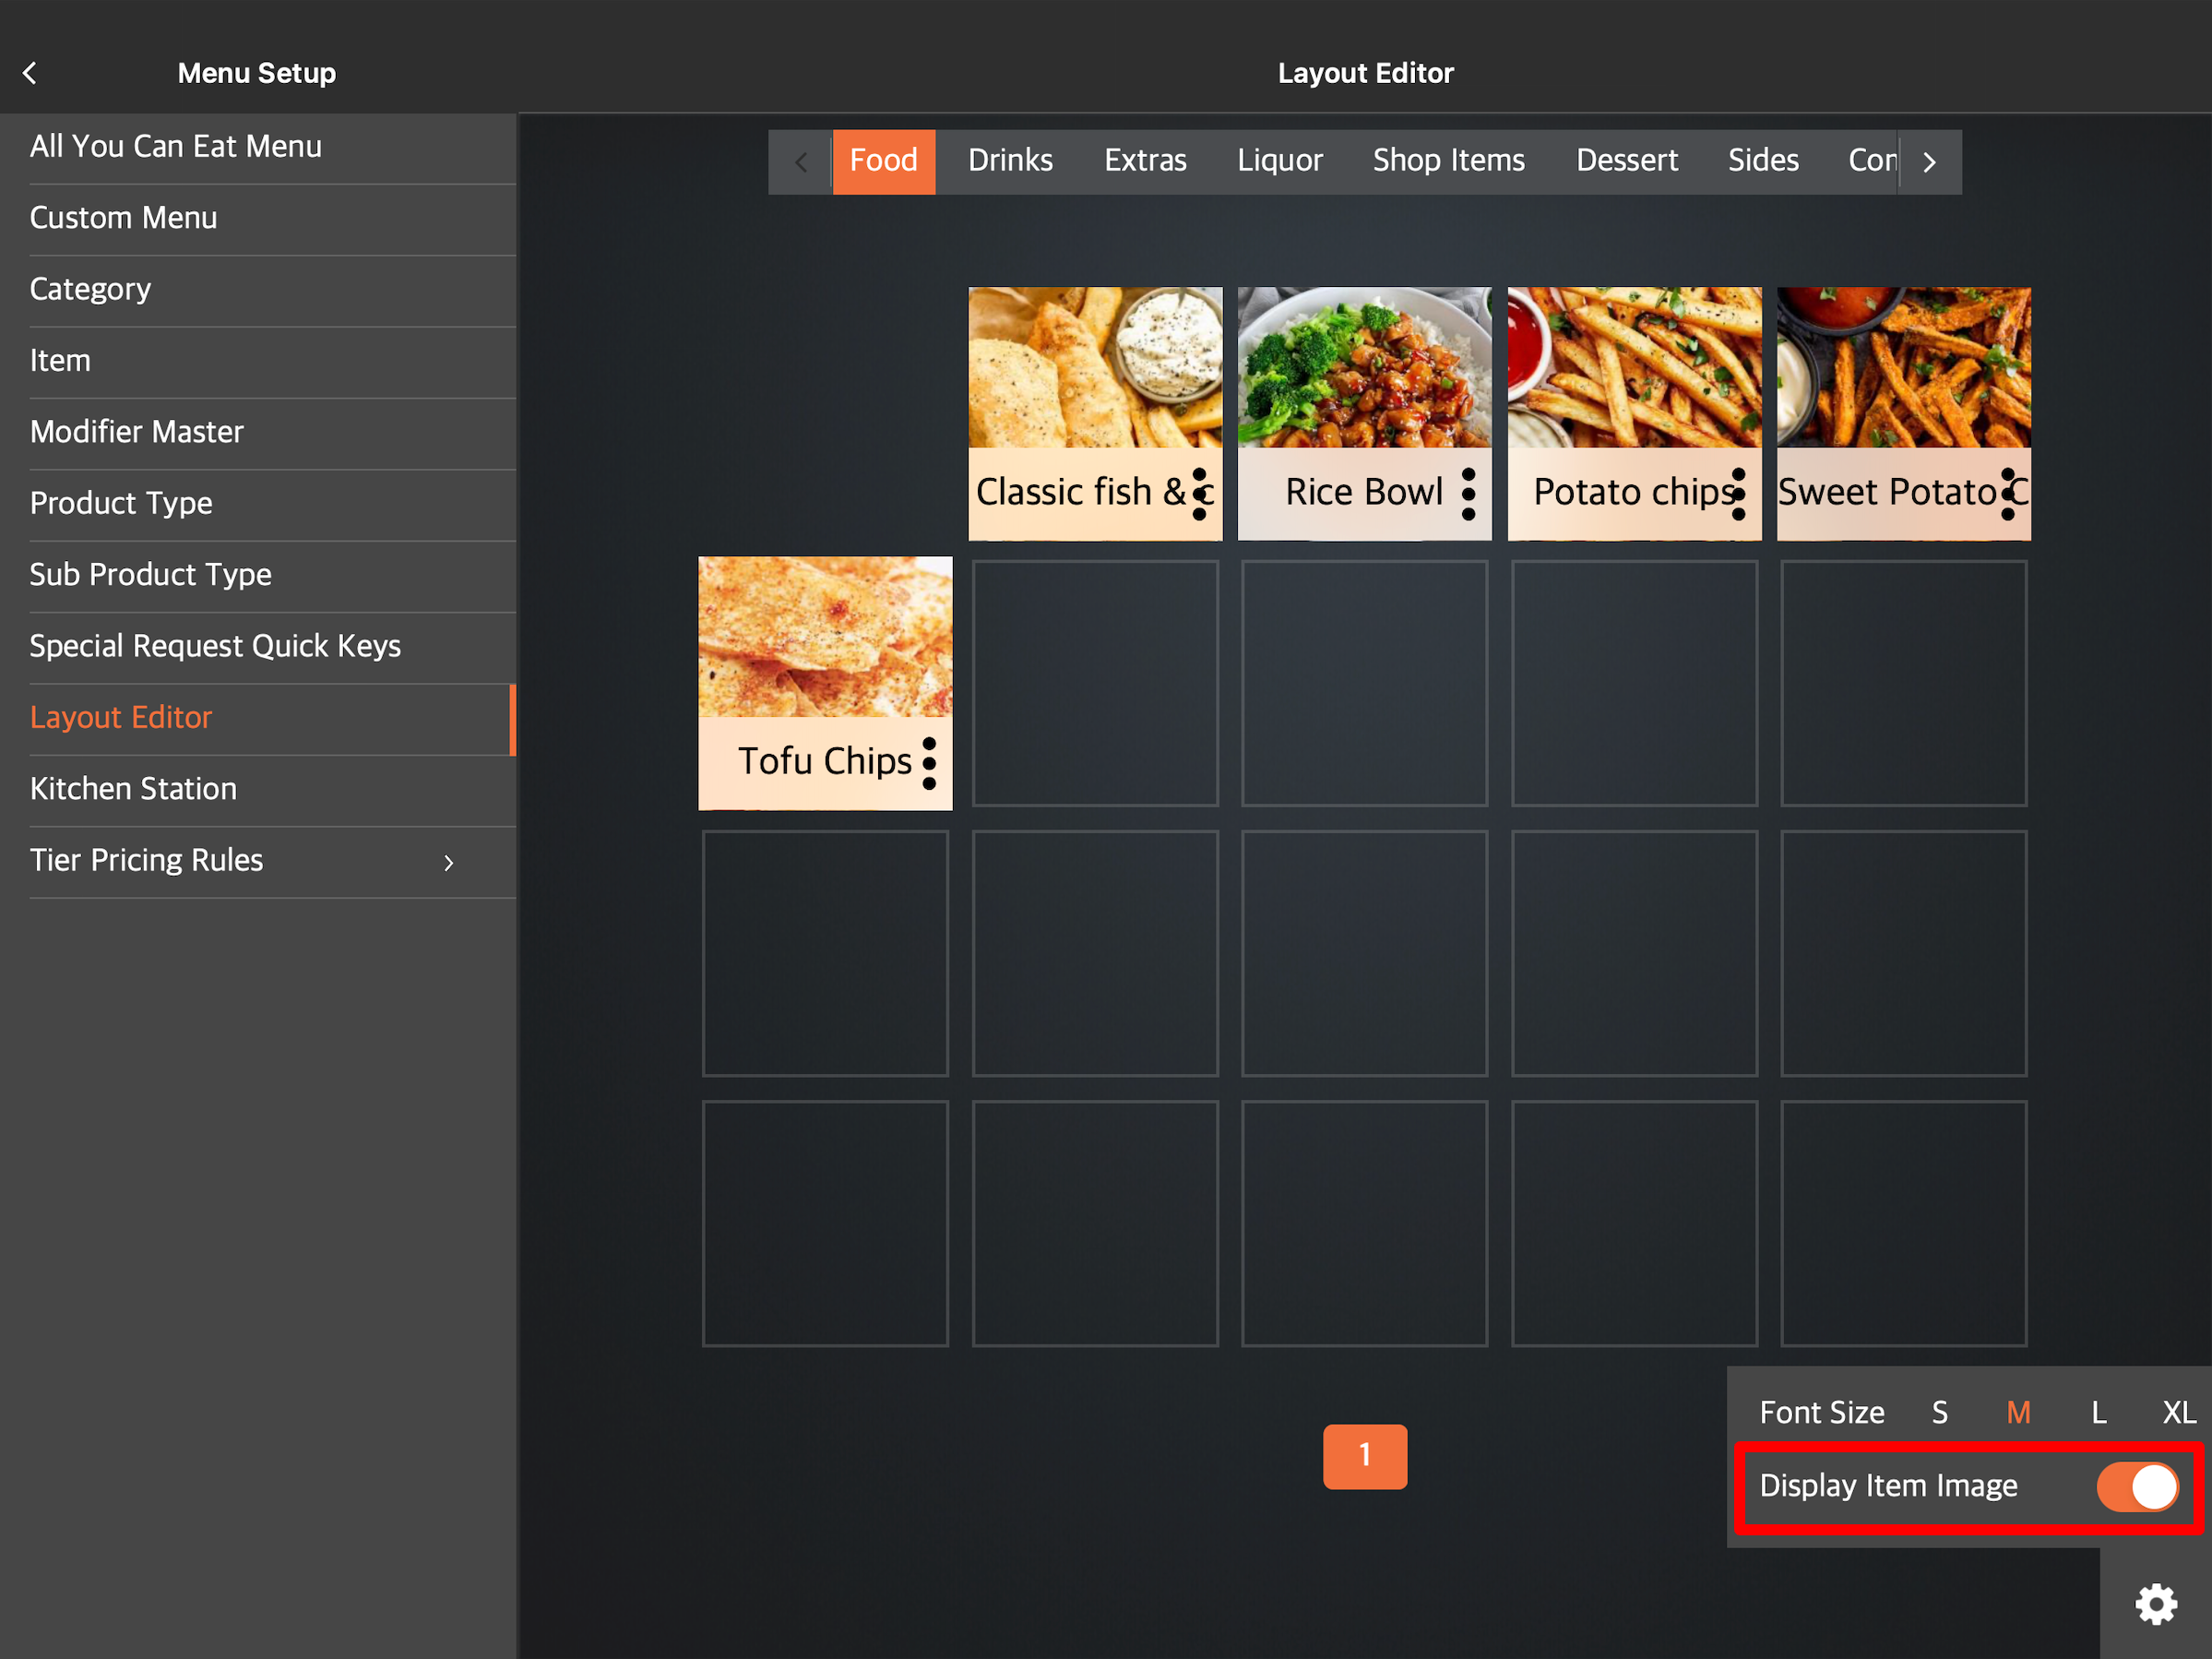
Display item image
If you've added an image to the menu item, the image will appear on the order-taking screen by default. If you don’t want the item image to appear on the POS, you can turn it off in the Layout Editor settings.
To display or hide an item image, follow the steps below:
- Log in to the Eats365 POS.
- At the top left, tap Settings .
- Under General, tap Menu Setup, and then select Layout Editor.
- At the bottom right corner, tap Settings .
- Turn off Display Item Image
 to hide the item image. If you want the item image to appear, turn it back on
  .
.