Eats365 Products
 Merchant Guide
 Modules
 Membership
 Integrations
 Hardware
 Staff Operations
 Roles & Permissions
 Payments
 Reports
 What’s New
 Release Notes
 Troubleshooting
 Simulators
 Glossary
 Troubleshooter
 System Status
Menu Setup
All Product
Table of Contents
Set up and manage Modifier Masters
Learn how to set up and manage Modifier Master settings on the Eats365 POS or Merchant Portal to track modifier inventory.
The Modifier Master allows you to create menu item modifiers that keep track of inventory information and define its preset quantities.
In this article, you’ll learn how to add, edit, or delete a Modifier Master.
You can turn on the following modifier settings to manage modifier inventory:
-
Inventory Tracking: When enabled, you can set the currently available quantity for the modifier. This quantity changes whenever an item that includes the modifier is ordered.
Tip: Turning on Inventory Tracking allows you to monitor modifier inventory and help determine whether some menu options are still available. - Day End Auto Reset: When enabled, all the items undergo inventory reset back to the Preset Quantity when the POS performs the End of Day process.
Add a Modifier Master
To create a Modifier Master, follow the steps below:
Eats365 POS
- Log in to the Eats365 POS.
- At the top left, tap Settings
 .
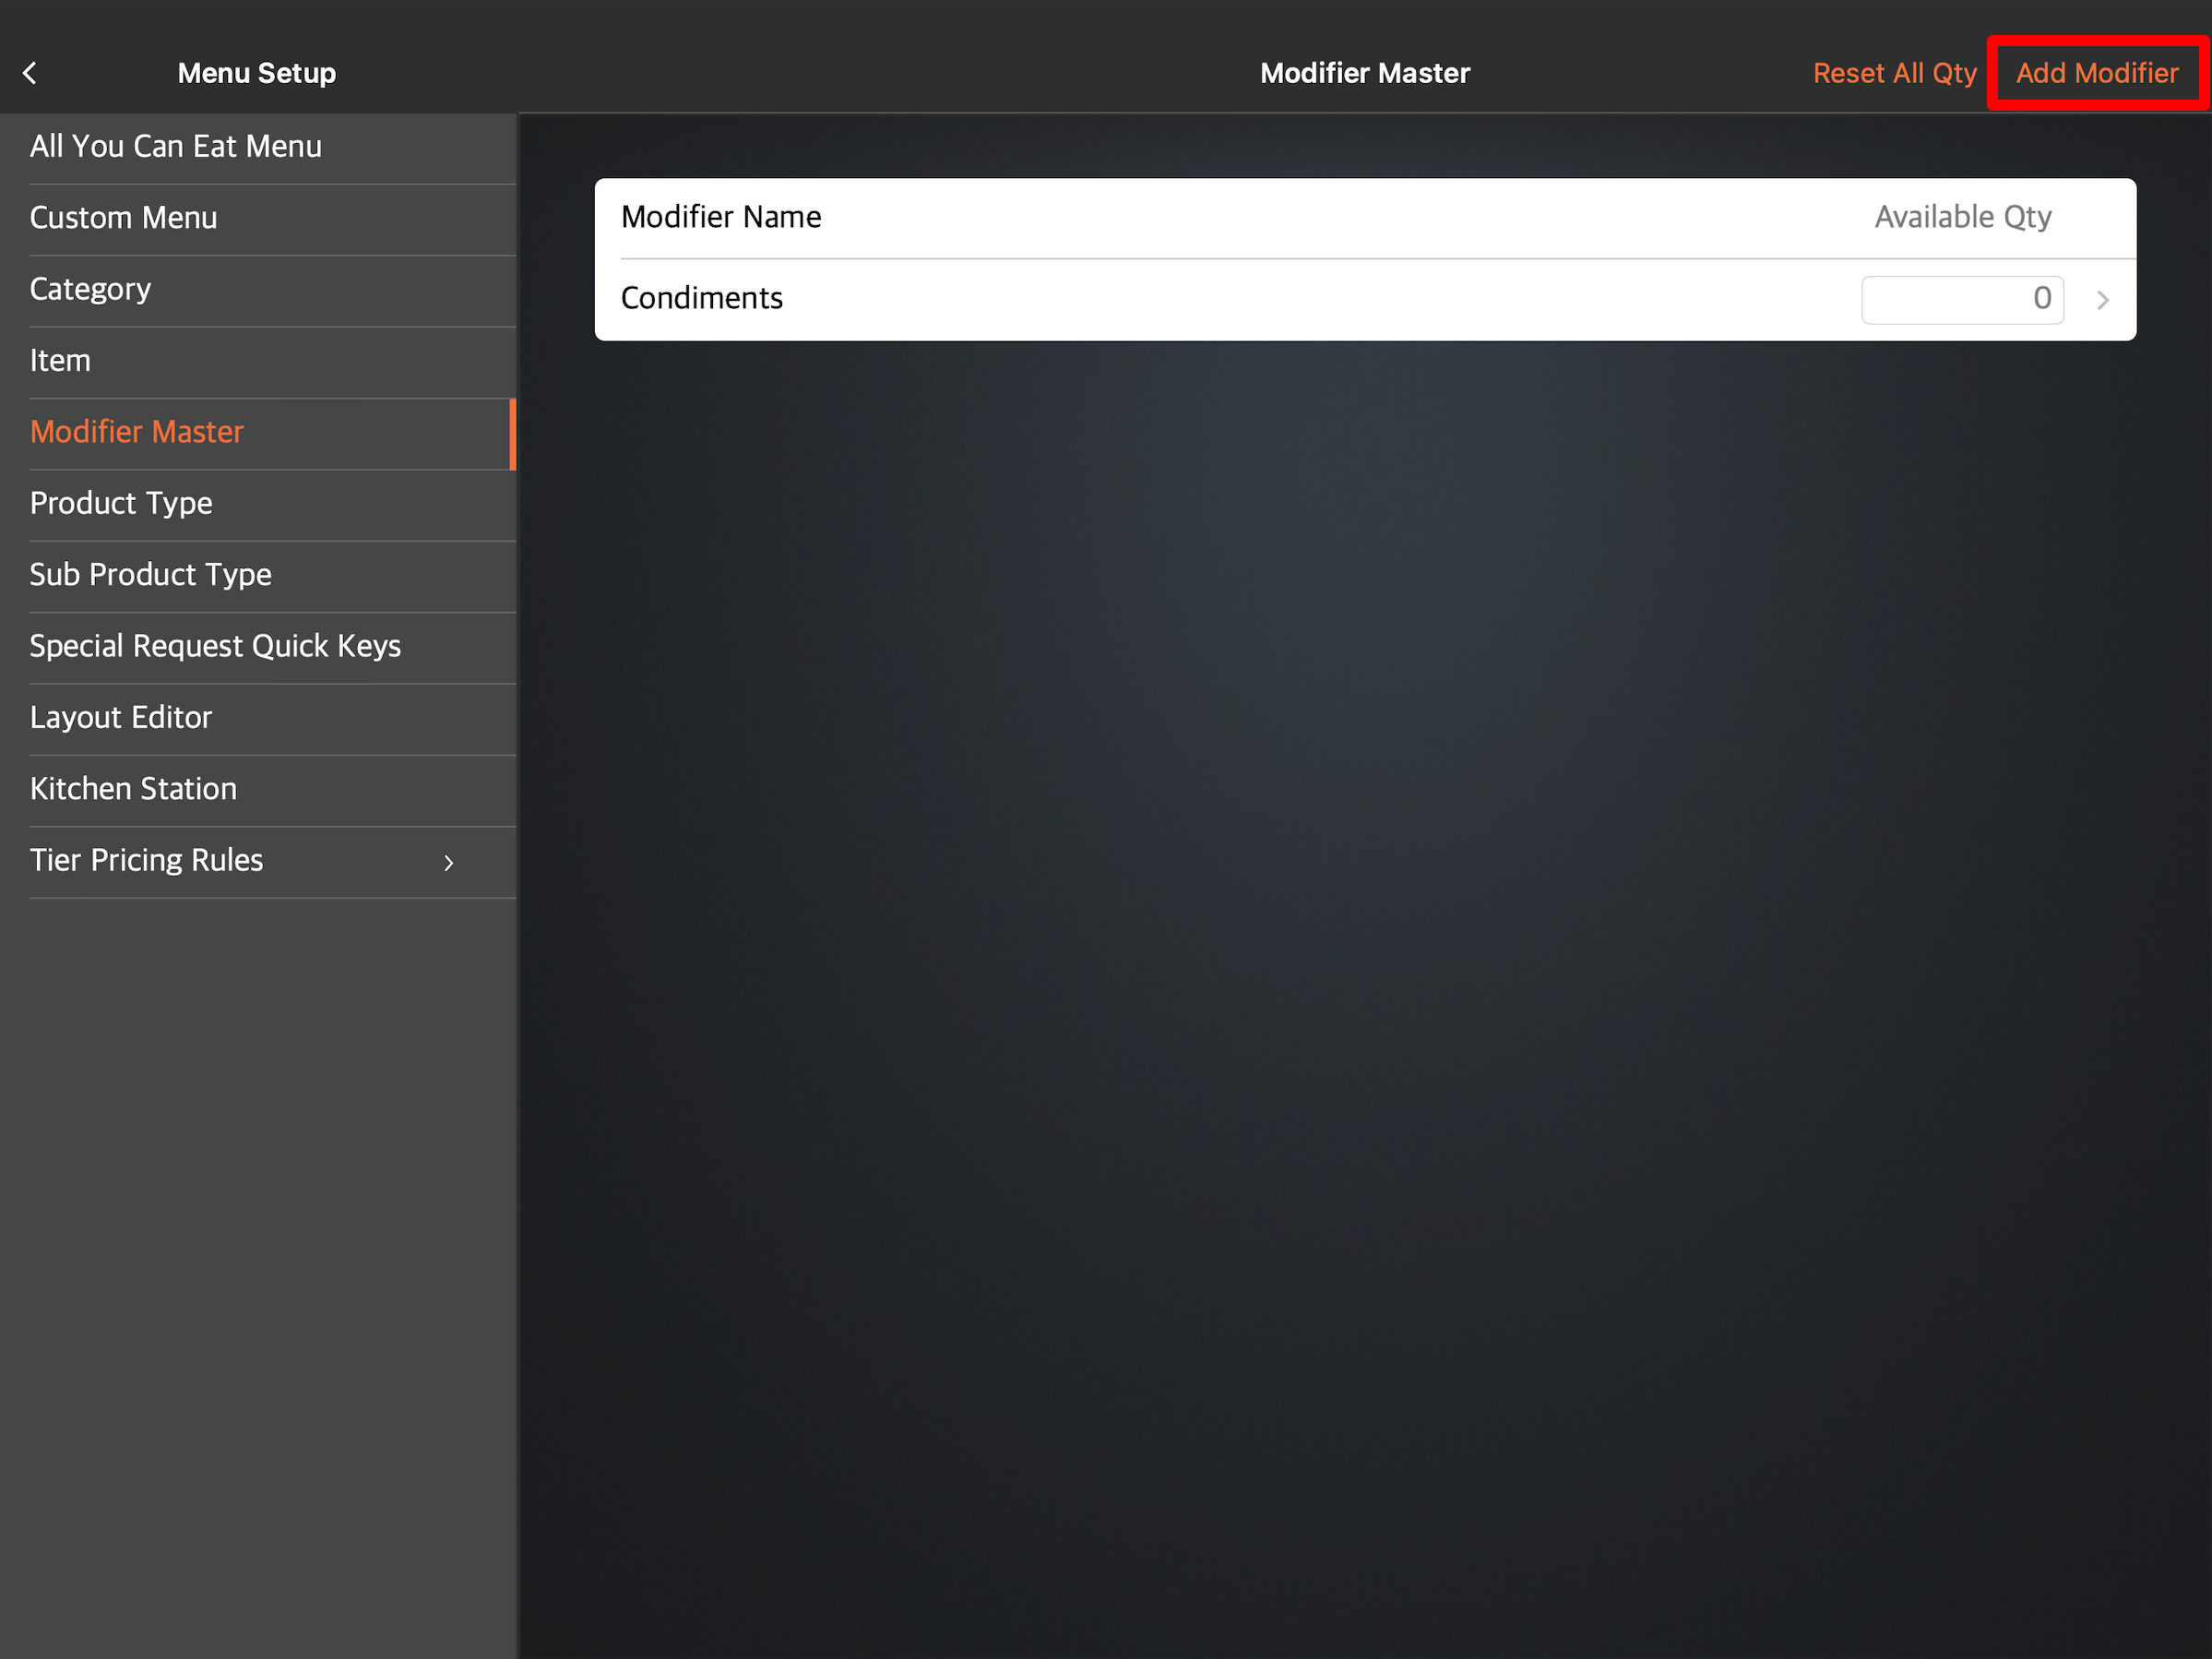
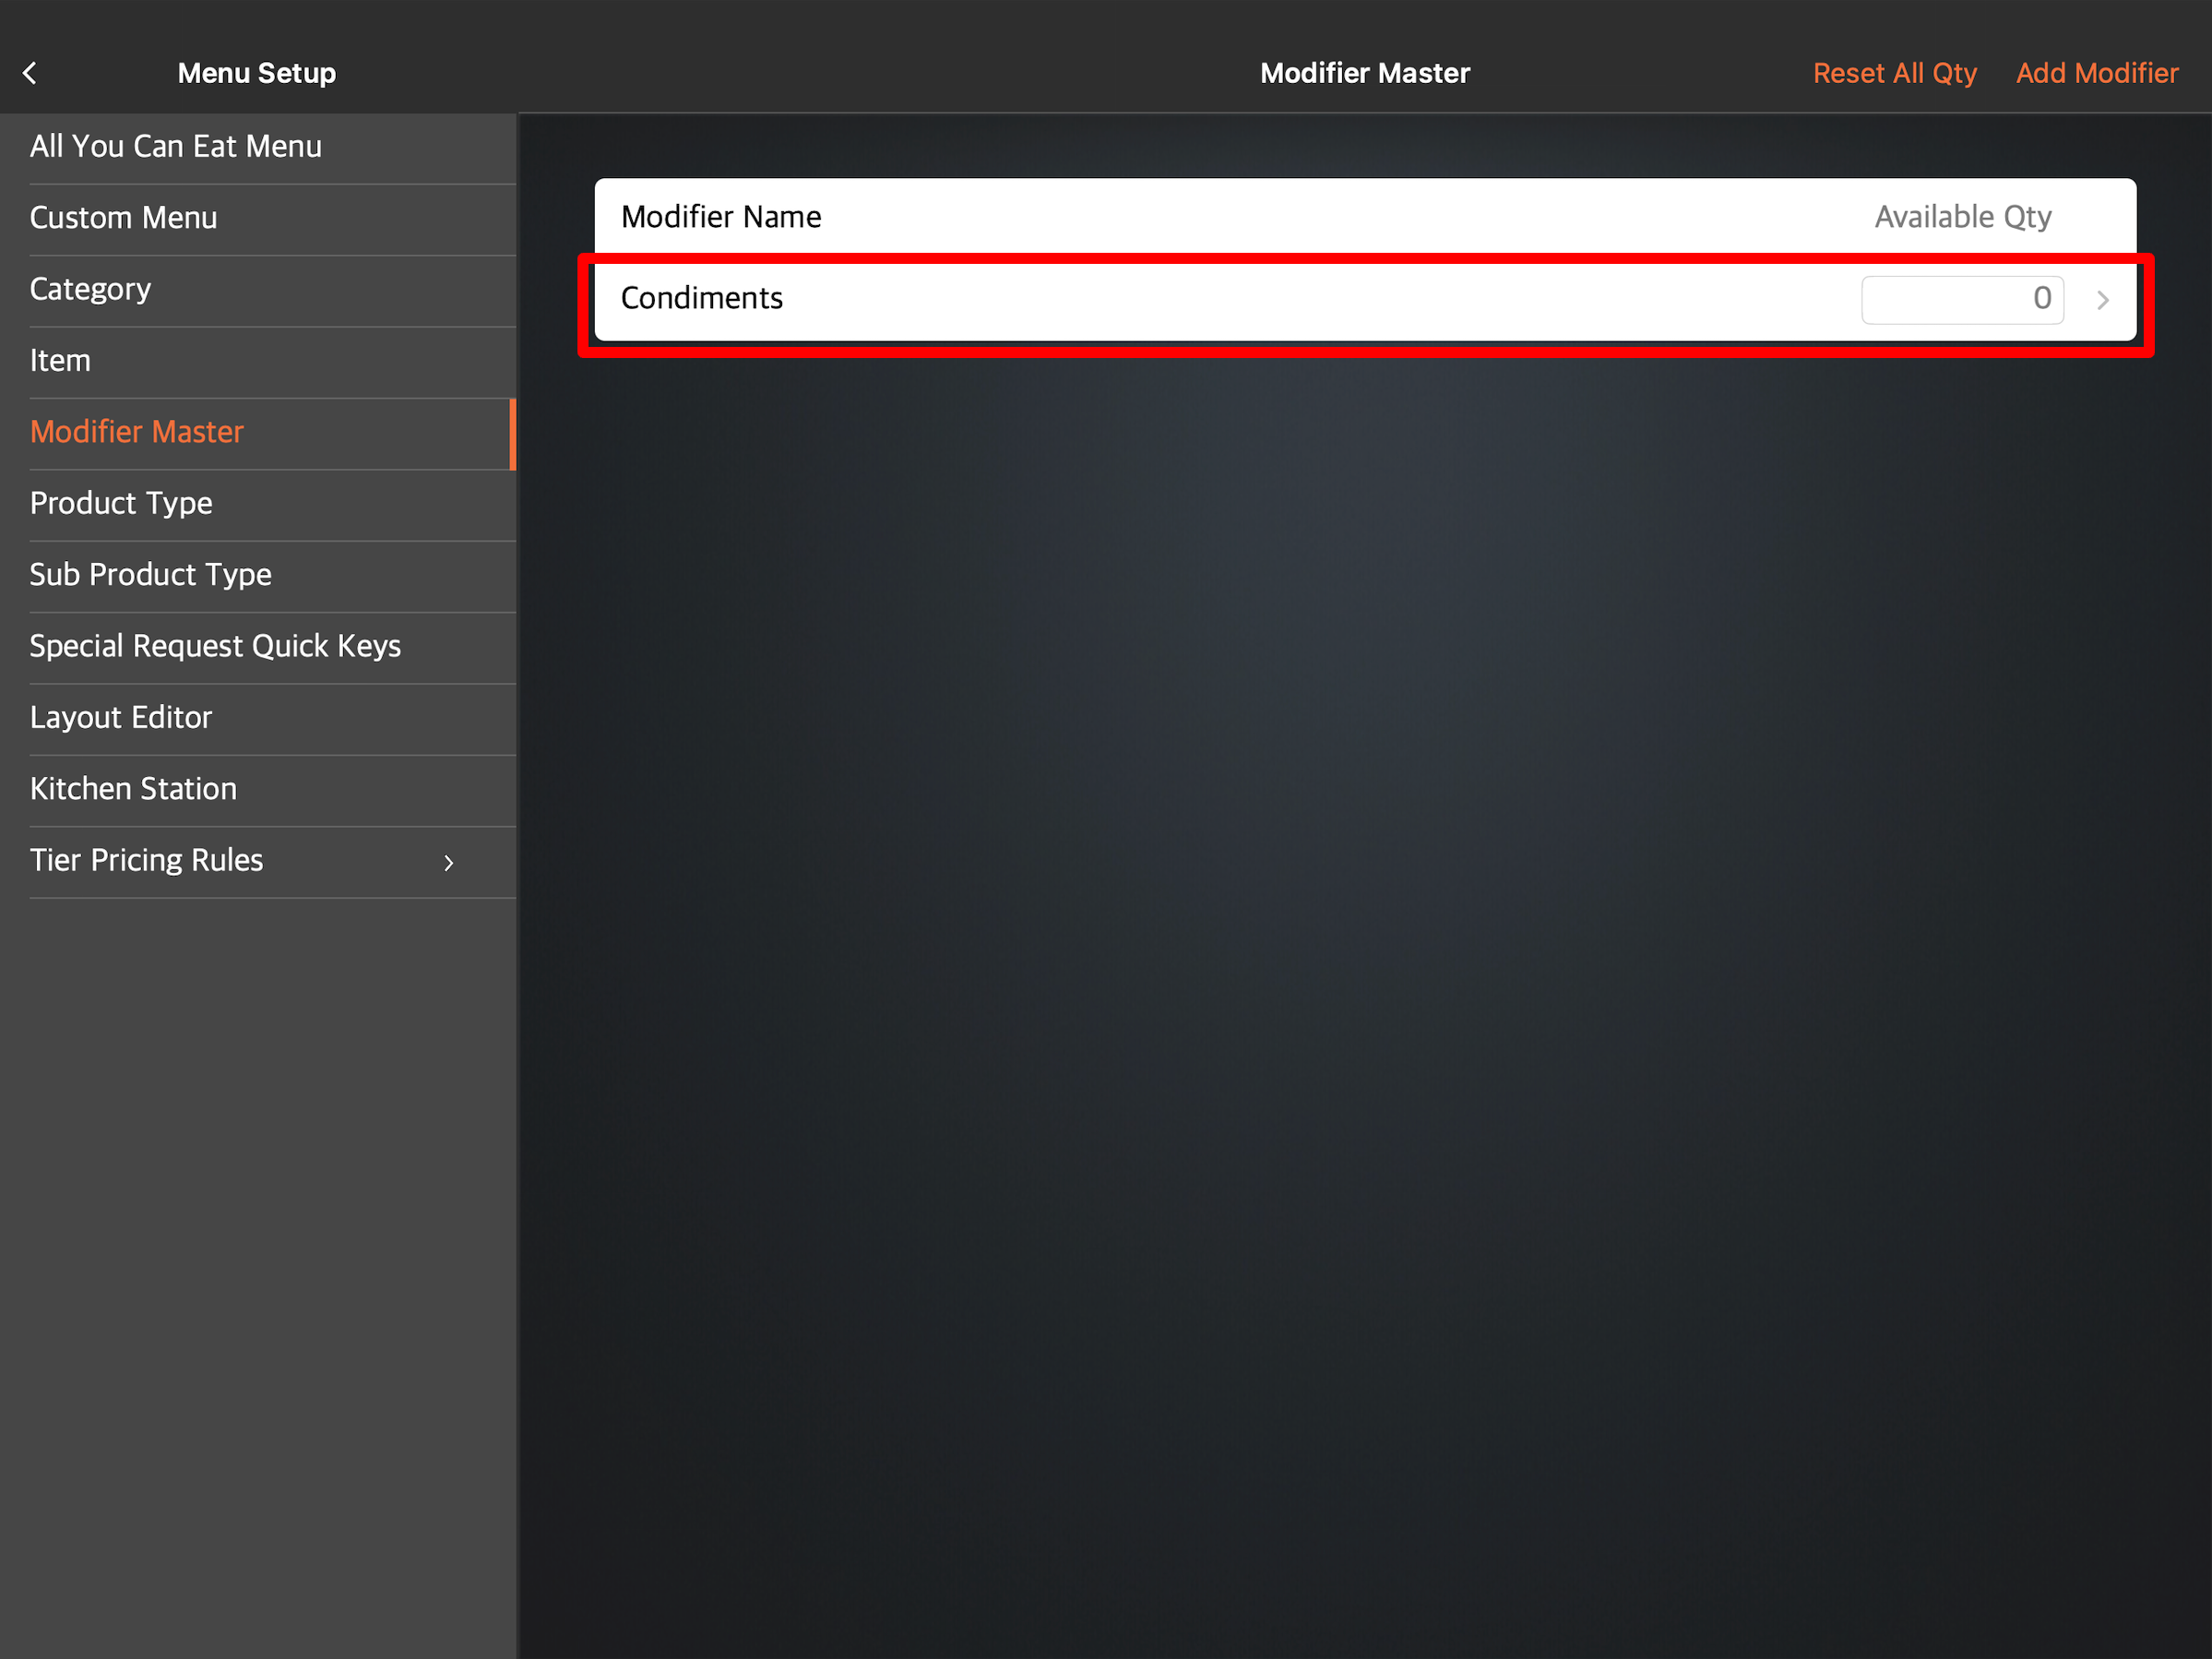
. - Under General, tap Menu Setup, then select Modifier Master.
- At the top right, tap Add Modifier.
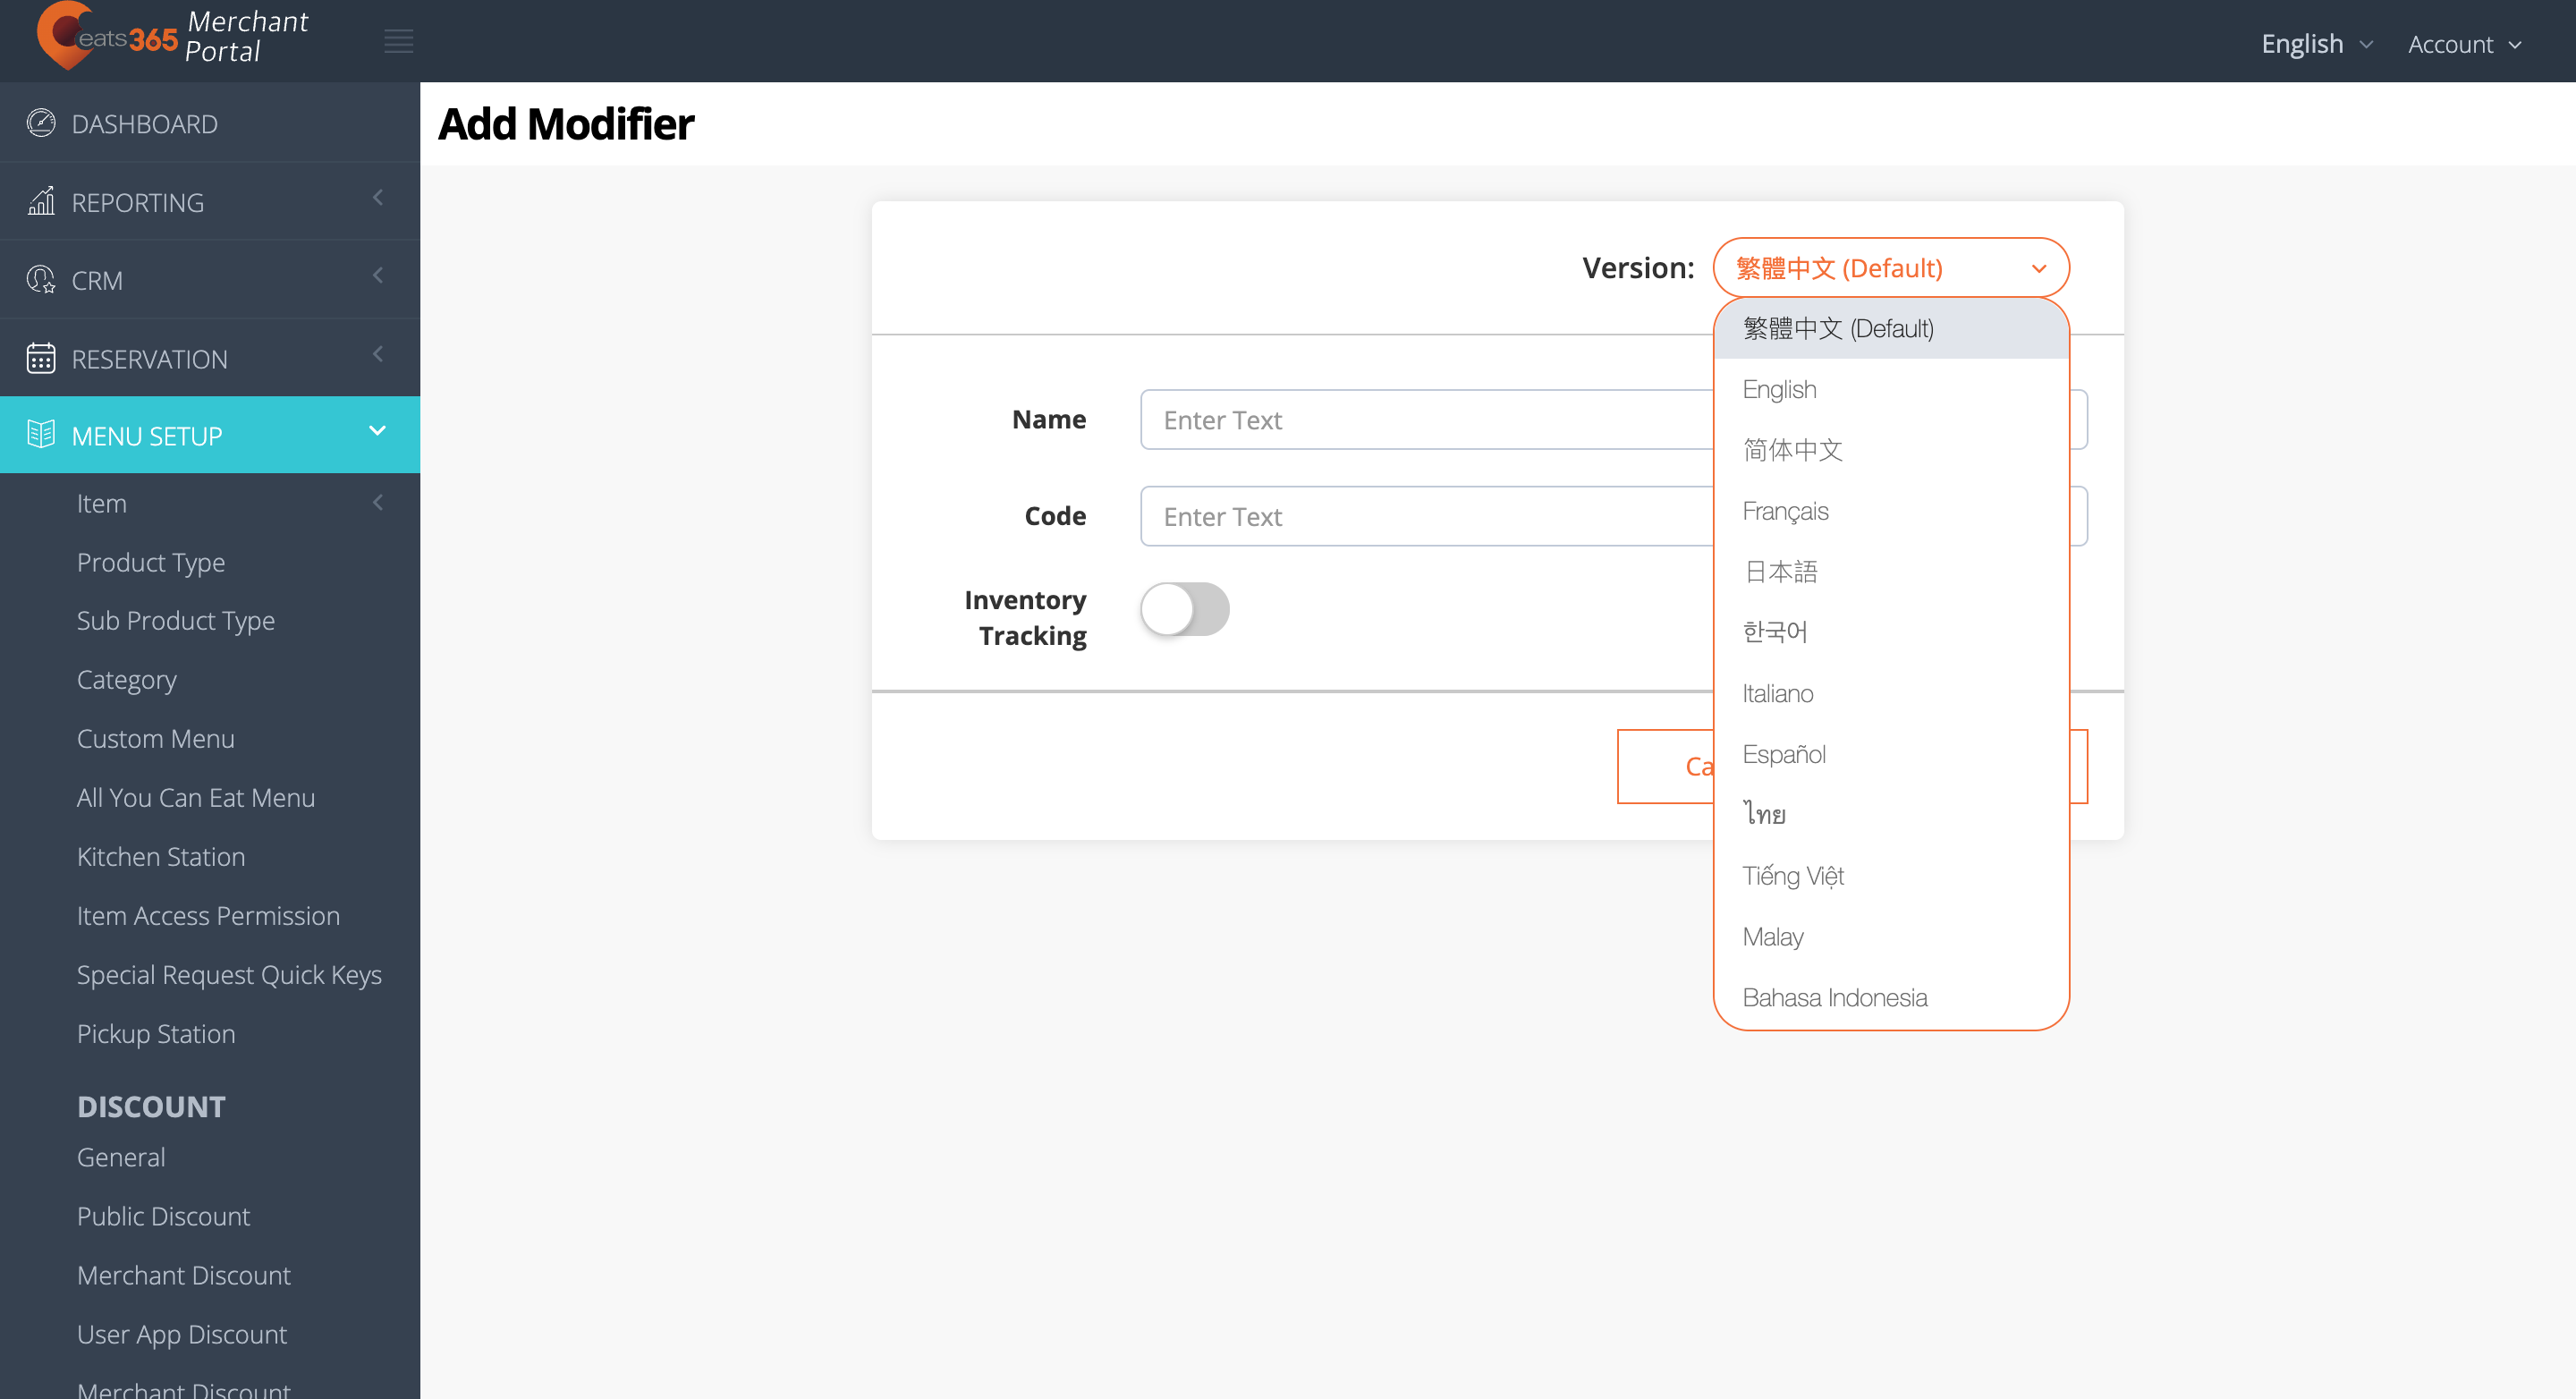
- Select the modifier language.
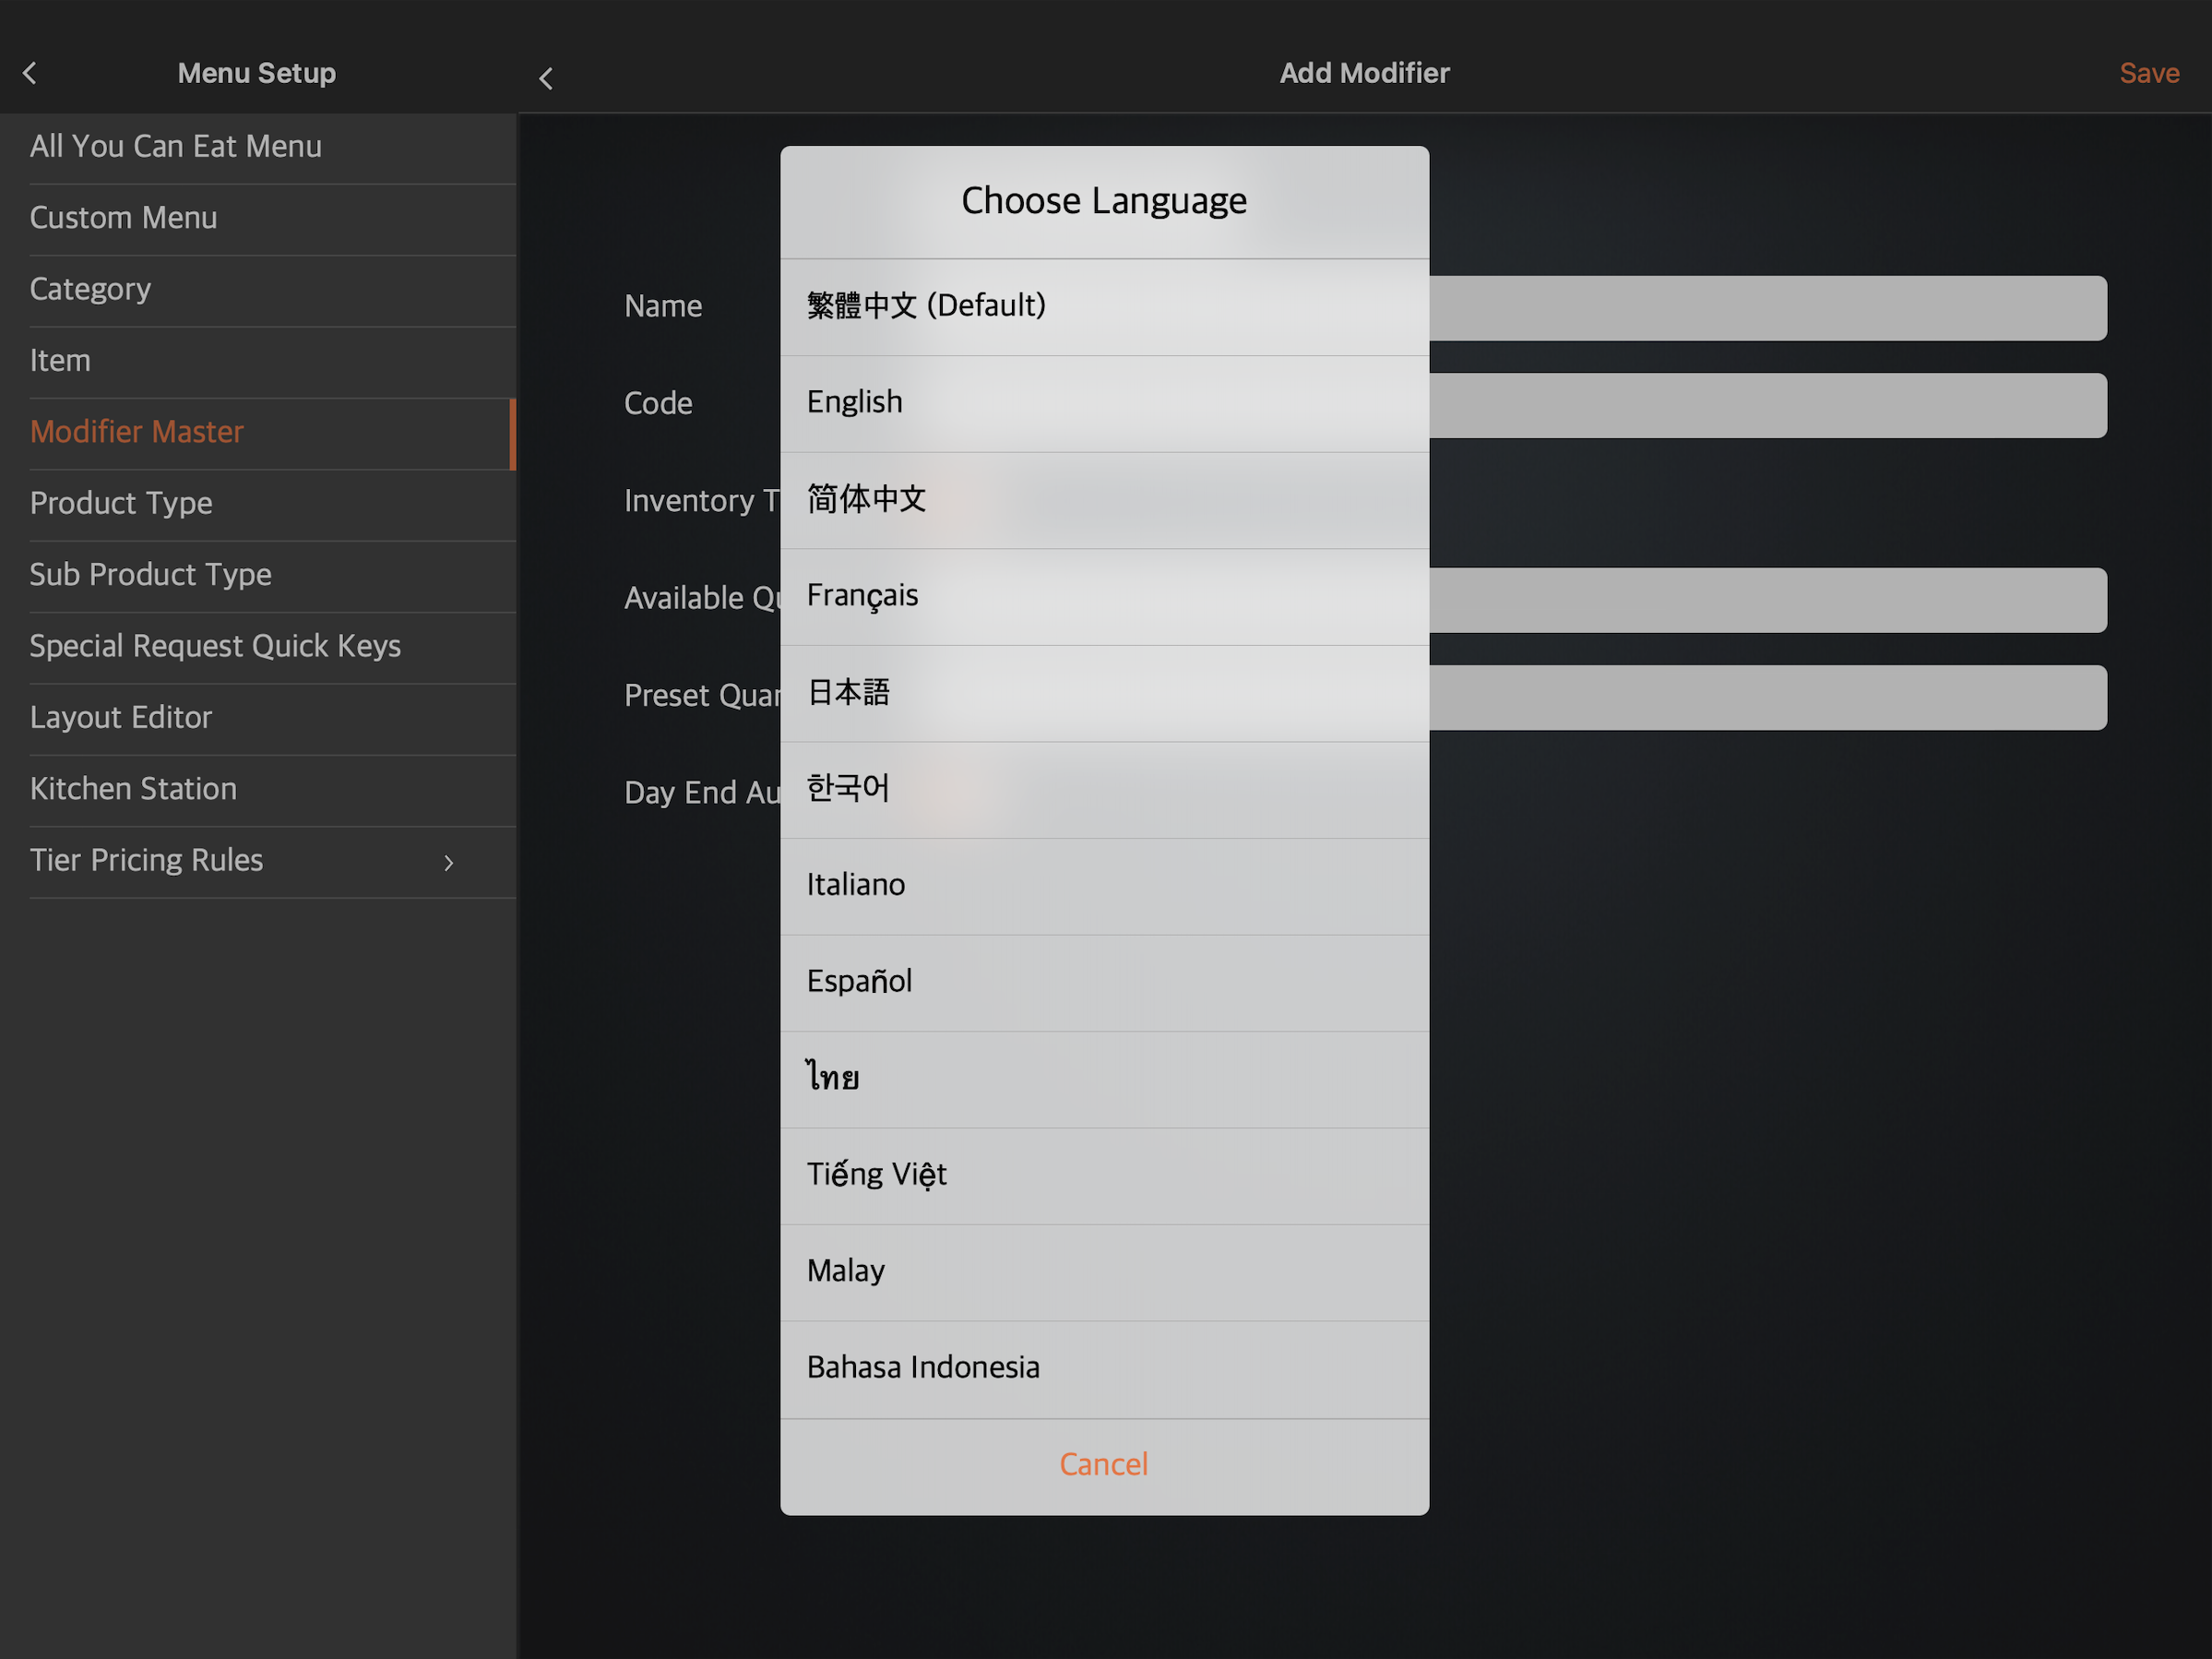 Note: You must enter a default name for the modifier. The name becomes available in the language the POS app is using. To add another name in a different language, tap the language drop-down list and select your preferred language. Then, enter the alternate name in that language.
 - Enter your preferred modifier Name and Code.
- Turn on Inventory Tracking
 and enter the values for Available Quantity and Preset Quantity.
 - To automatically reset the modifier quantity upon performing End of Day, turn on Day End Auto Reset .
- Tap Save to confirm.
Merchant Portal (Classic Theme)
- Log in to the Merchant Portal.
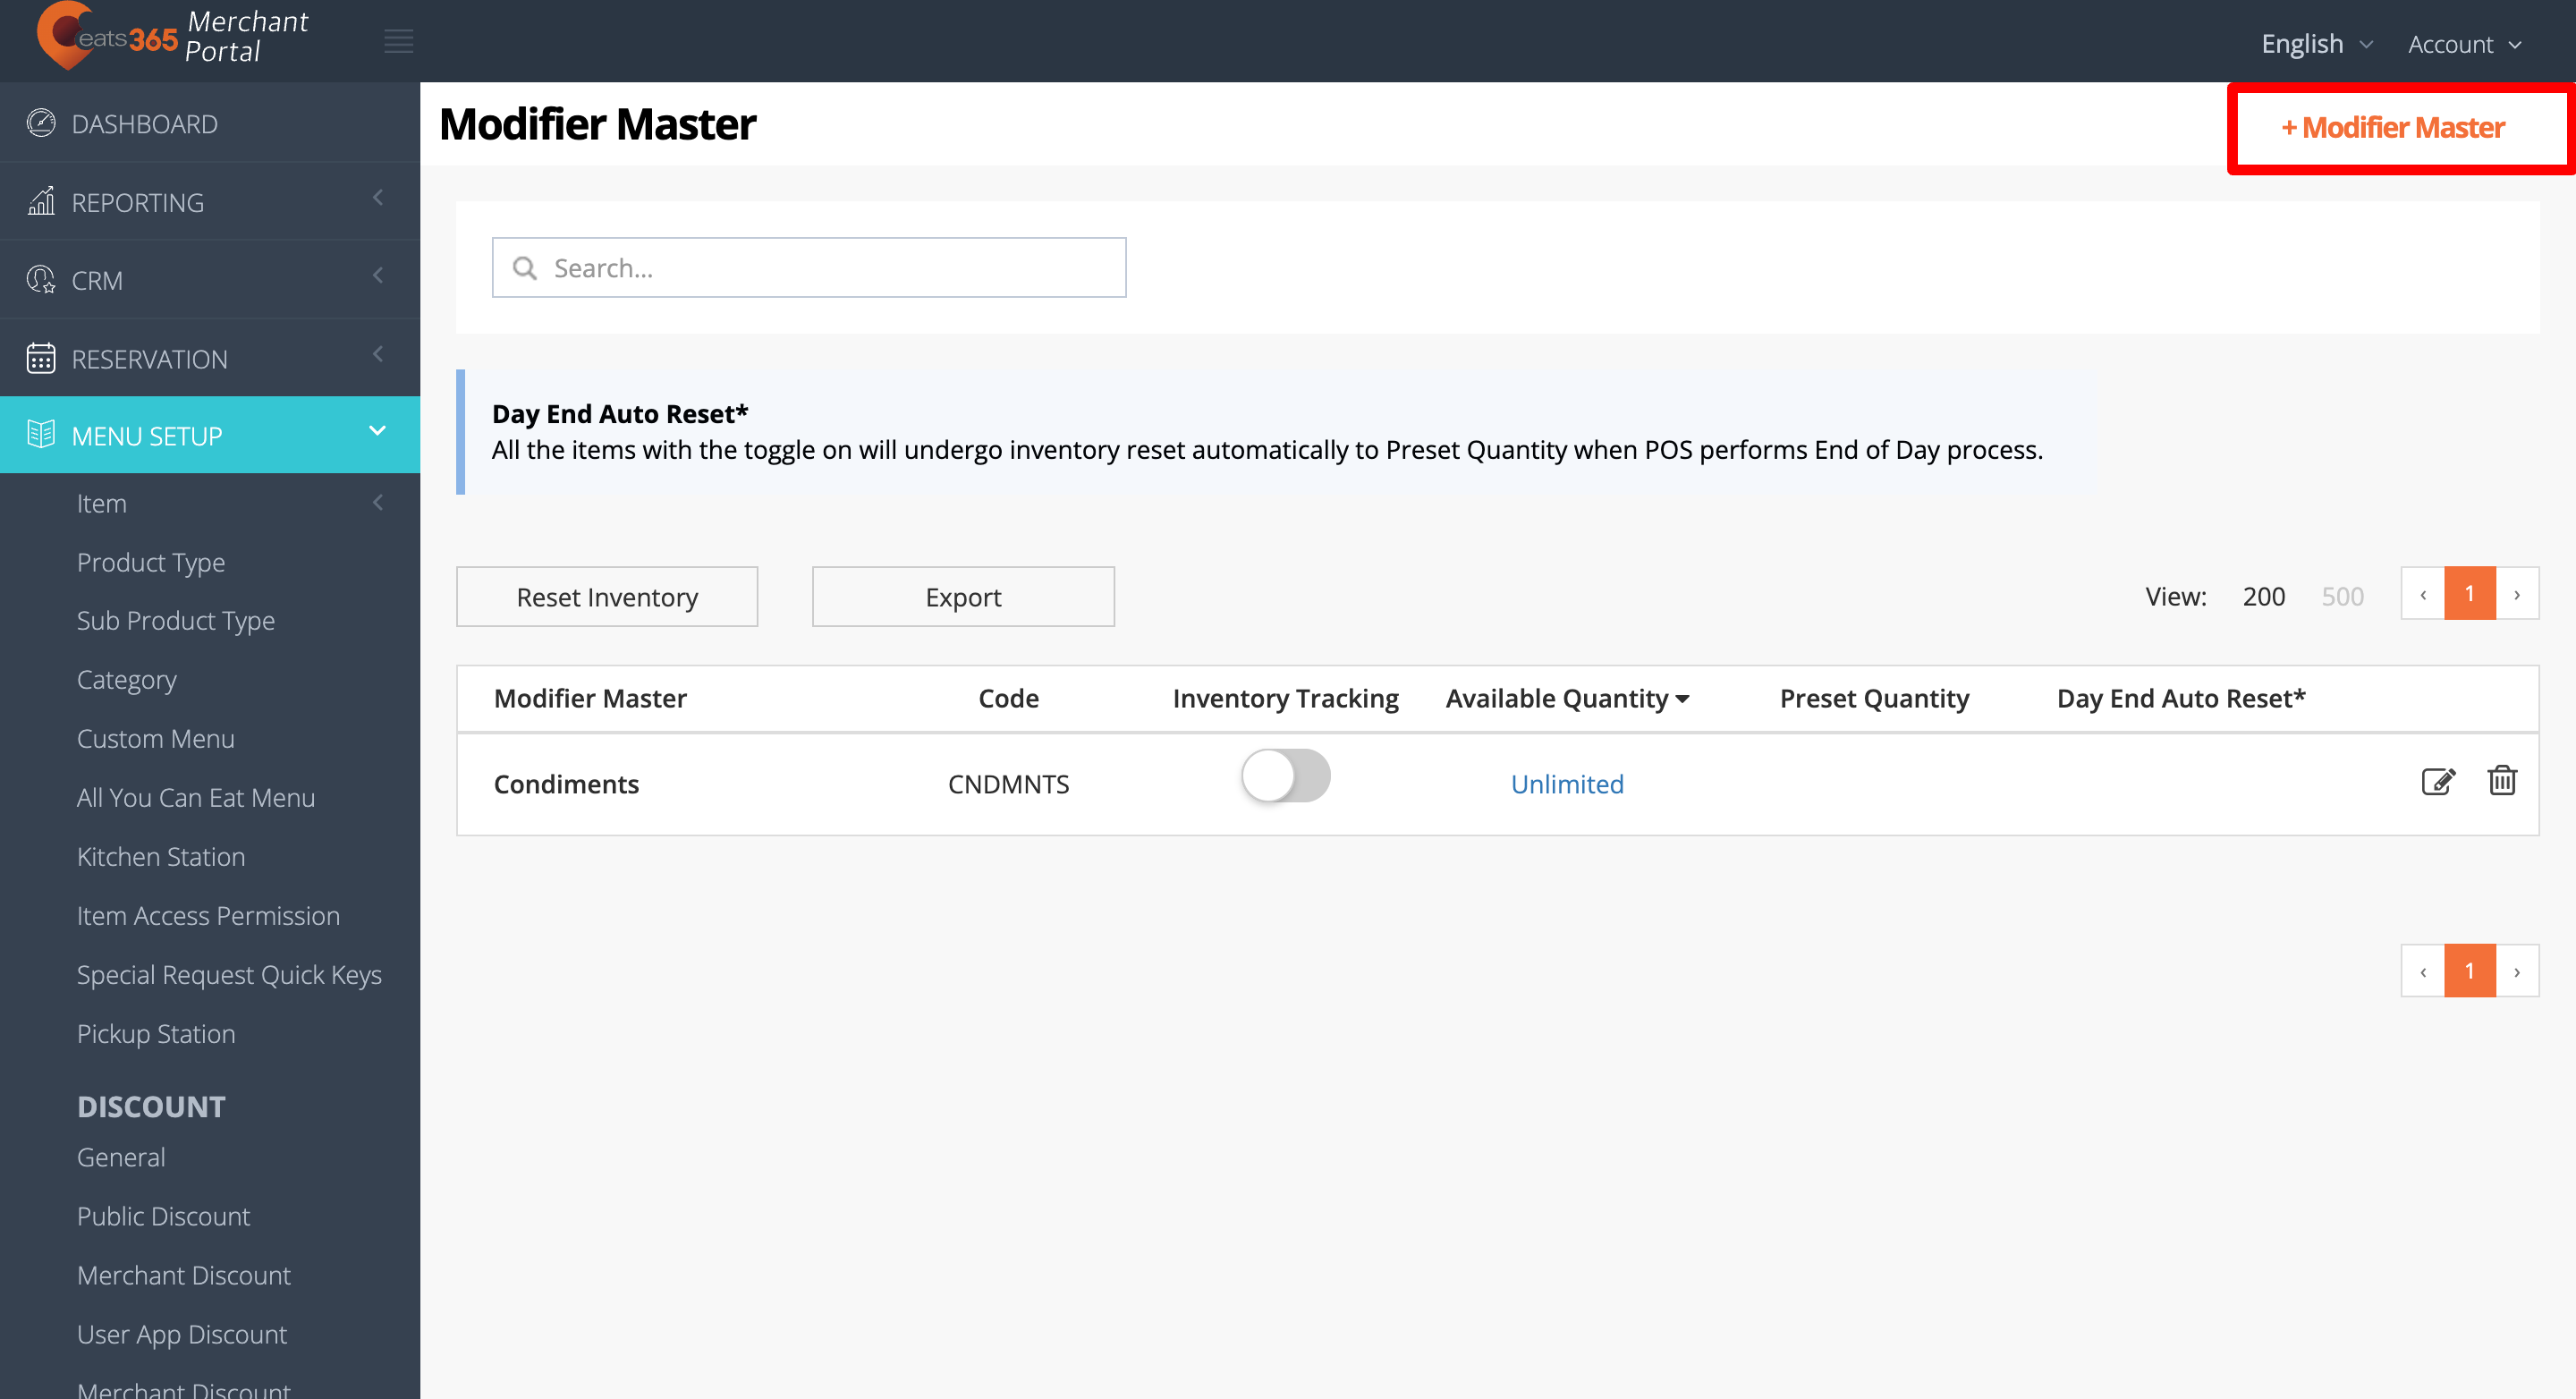
- On the left panel, click on Menu Setup.
- Under Modifiers, select Modifier Master.
- At the top right, click on +Modifier Master.
- Select the modifier language.
 Note: You must enter a default name for the modifier. The name becomes available in the language the POS app is using. To add another name in a different language, tap the language drop-down list and select your preferred language. Then, enter the alternate name in that language.
 - Enter your preferred modifier Name and Code.
- Turn on Inventory Tracking and enter the values for Available Quantity and Preset Quantity.
- To automatically reset the modifier quantity upon performing End of Day, turn on Day End Auto Reset.
- Click on Save to confirm.
Merchant Portal 2.0
- Log in to the Merchant Portal.
- On the left panel, click on Menu Setup.
- Click on Modifiers, then select Modifier Master.
- At the top right, click on +Modifier Master.

- Enter the Modifier Master name per language.
Note: You must enter a default name for the modifier. The name becomes available in the language the POS app is using. To add more languages, click on Add Language.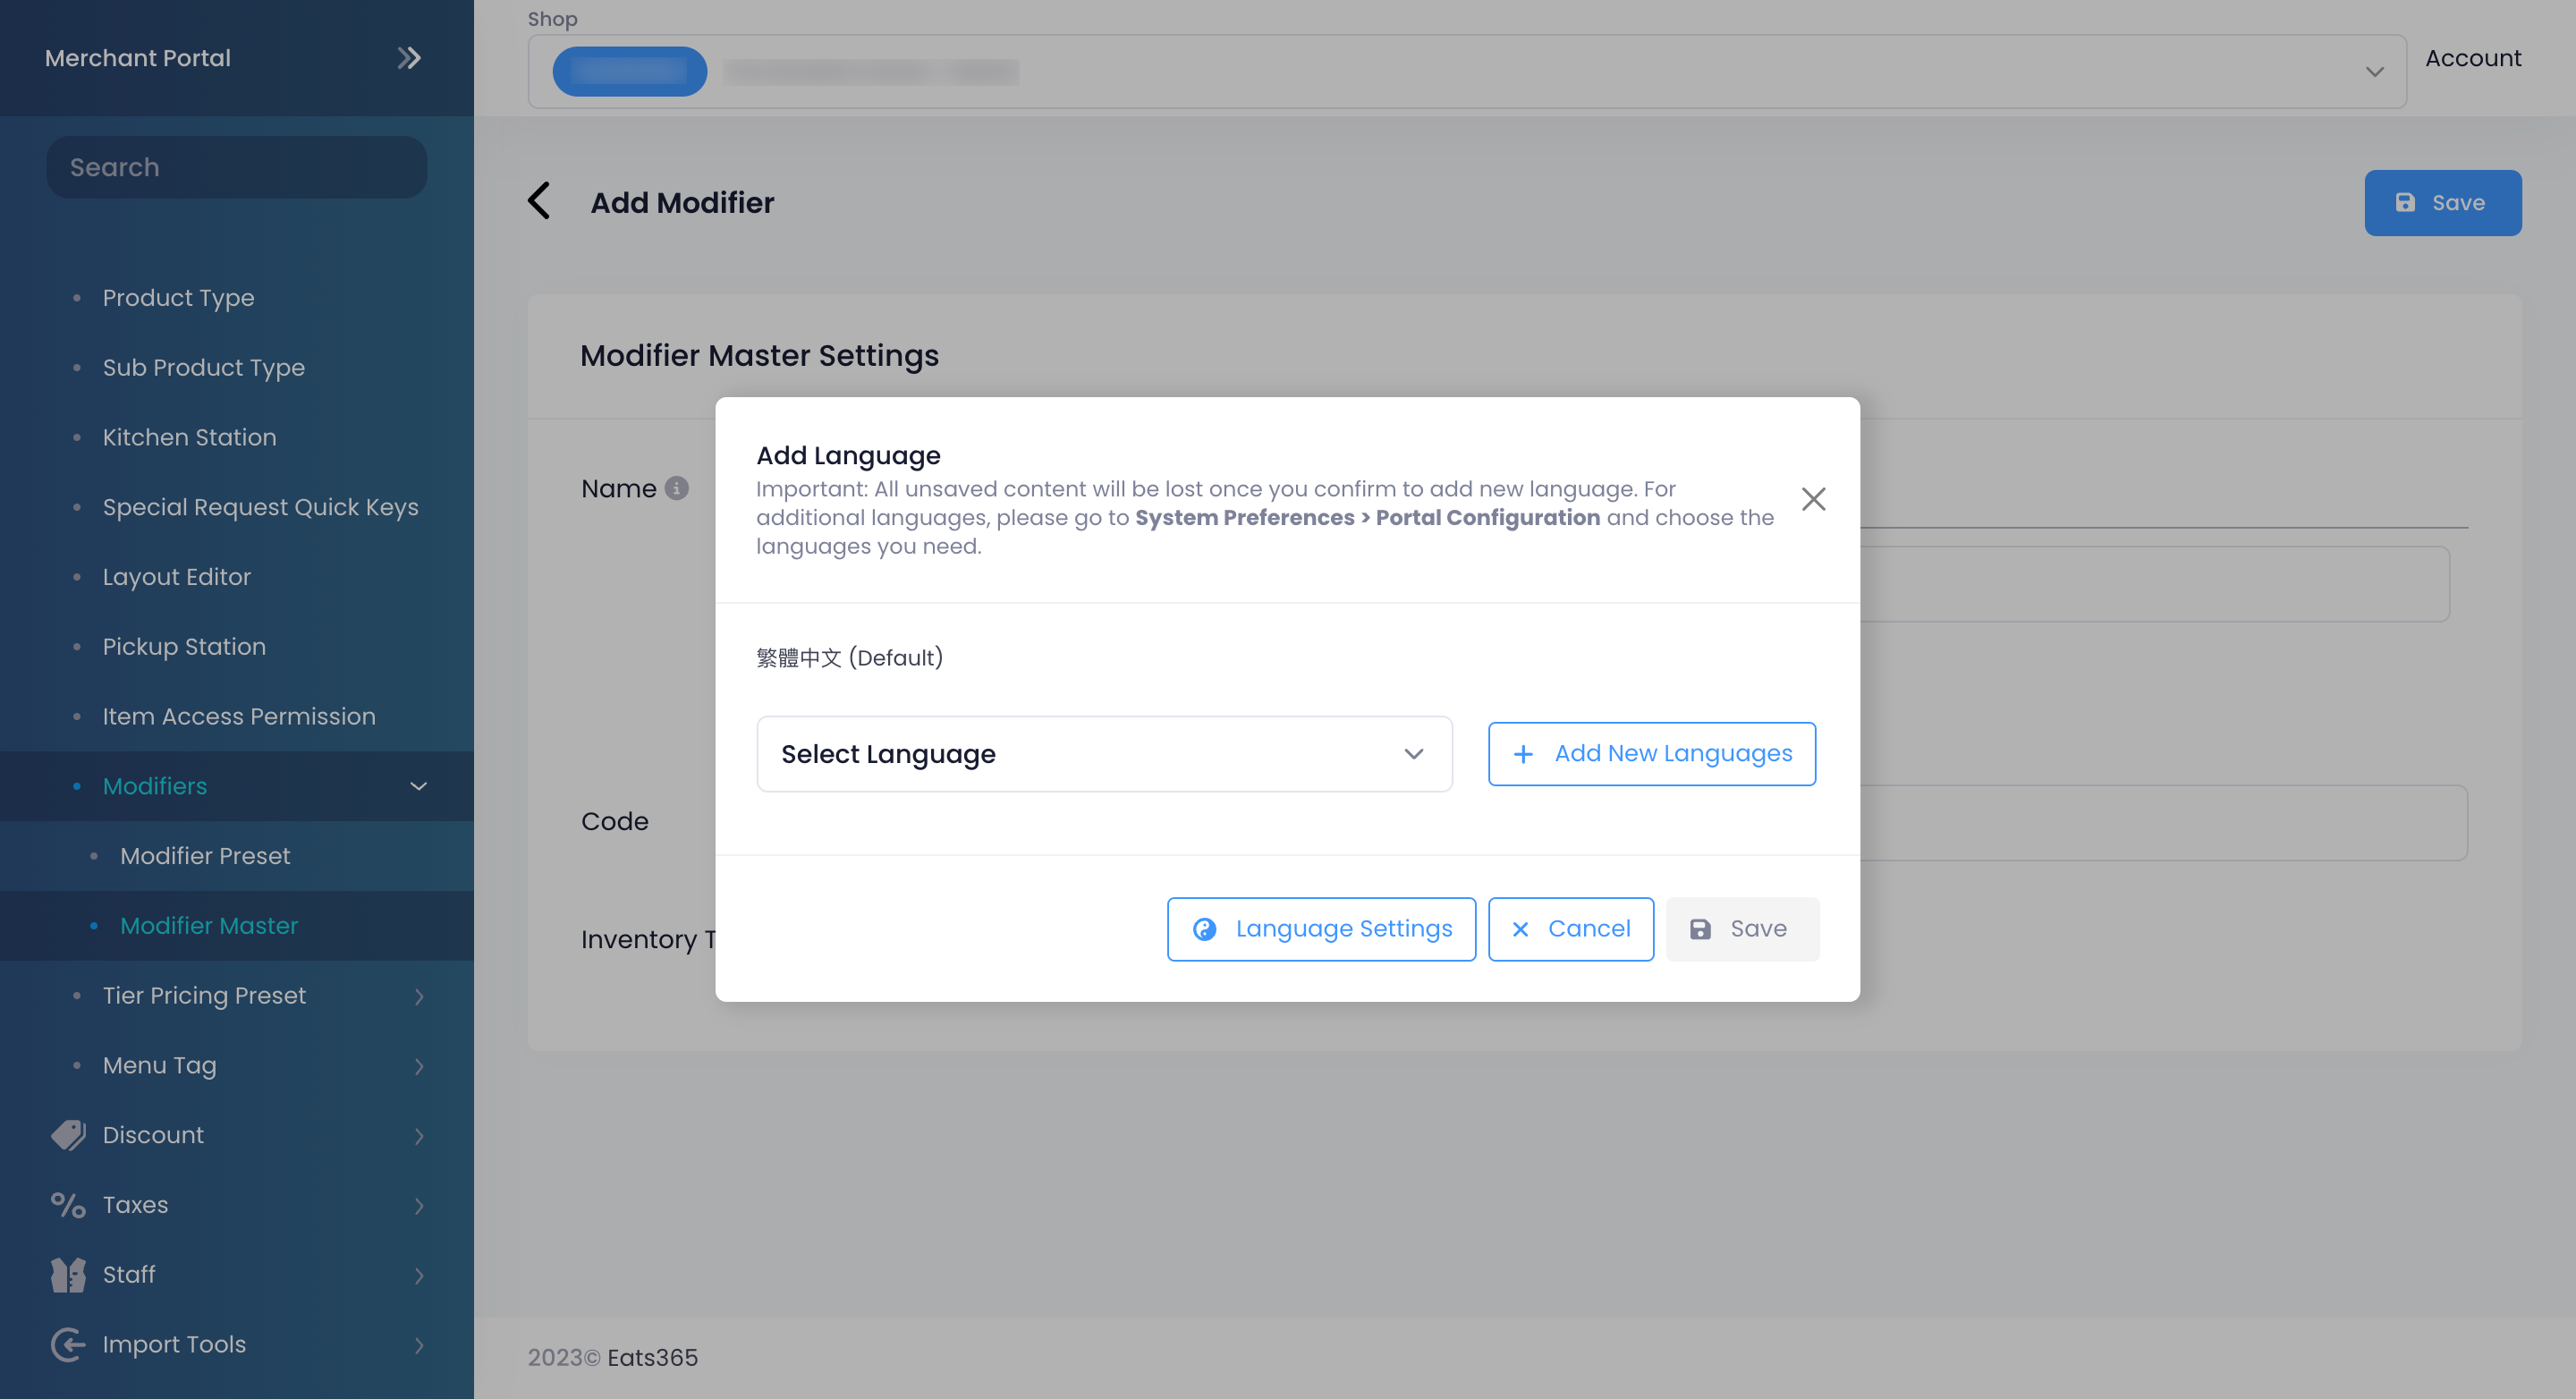
- Enter the Modifier Code.
- Turn on Inventory Tracking
 and enter the values for Available Quantity and Preset Quantity.
 - To automatically reset the modifier quantity upon performing End of Day, turn on Day End Auto Reset .
- Click on Save to confirm.
Edit a Modifier Master
To modify a Modifier Master, follow the steps below:
Eats365 POS
- Log in to the Eats365 POS.
- At the top left, tap Settings .
- Under General, tap Menu Setup, then select Modifier Master.
- Tap the Modifier Master that you want to edit.
- Update the Modifier Master.
- Tap Save to confirm.
Merchant Portal (Classic Theme)
Update Modifier Master settings from the Edit option
- Log in to the Merchant Portal.
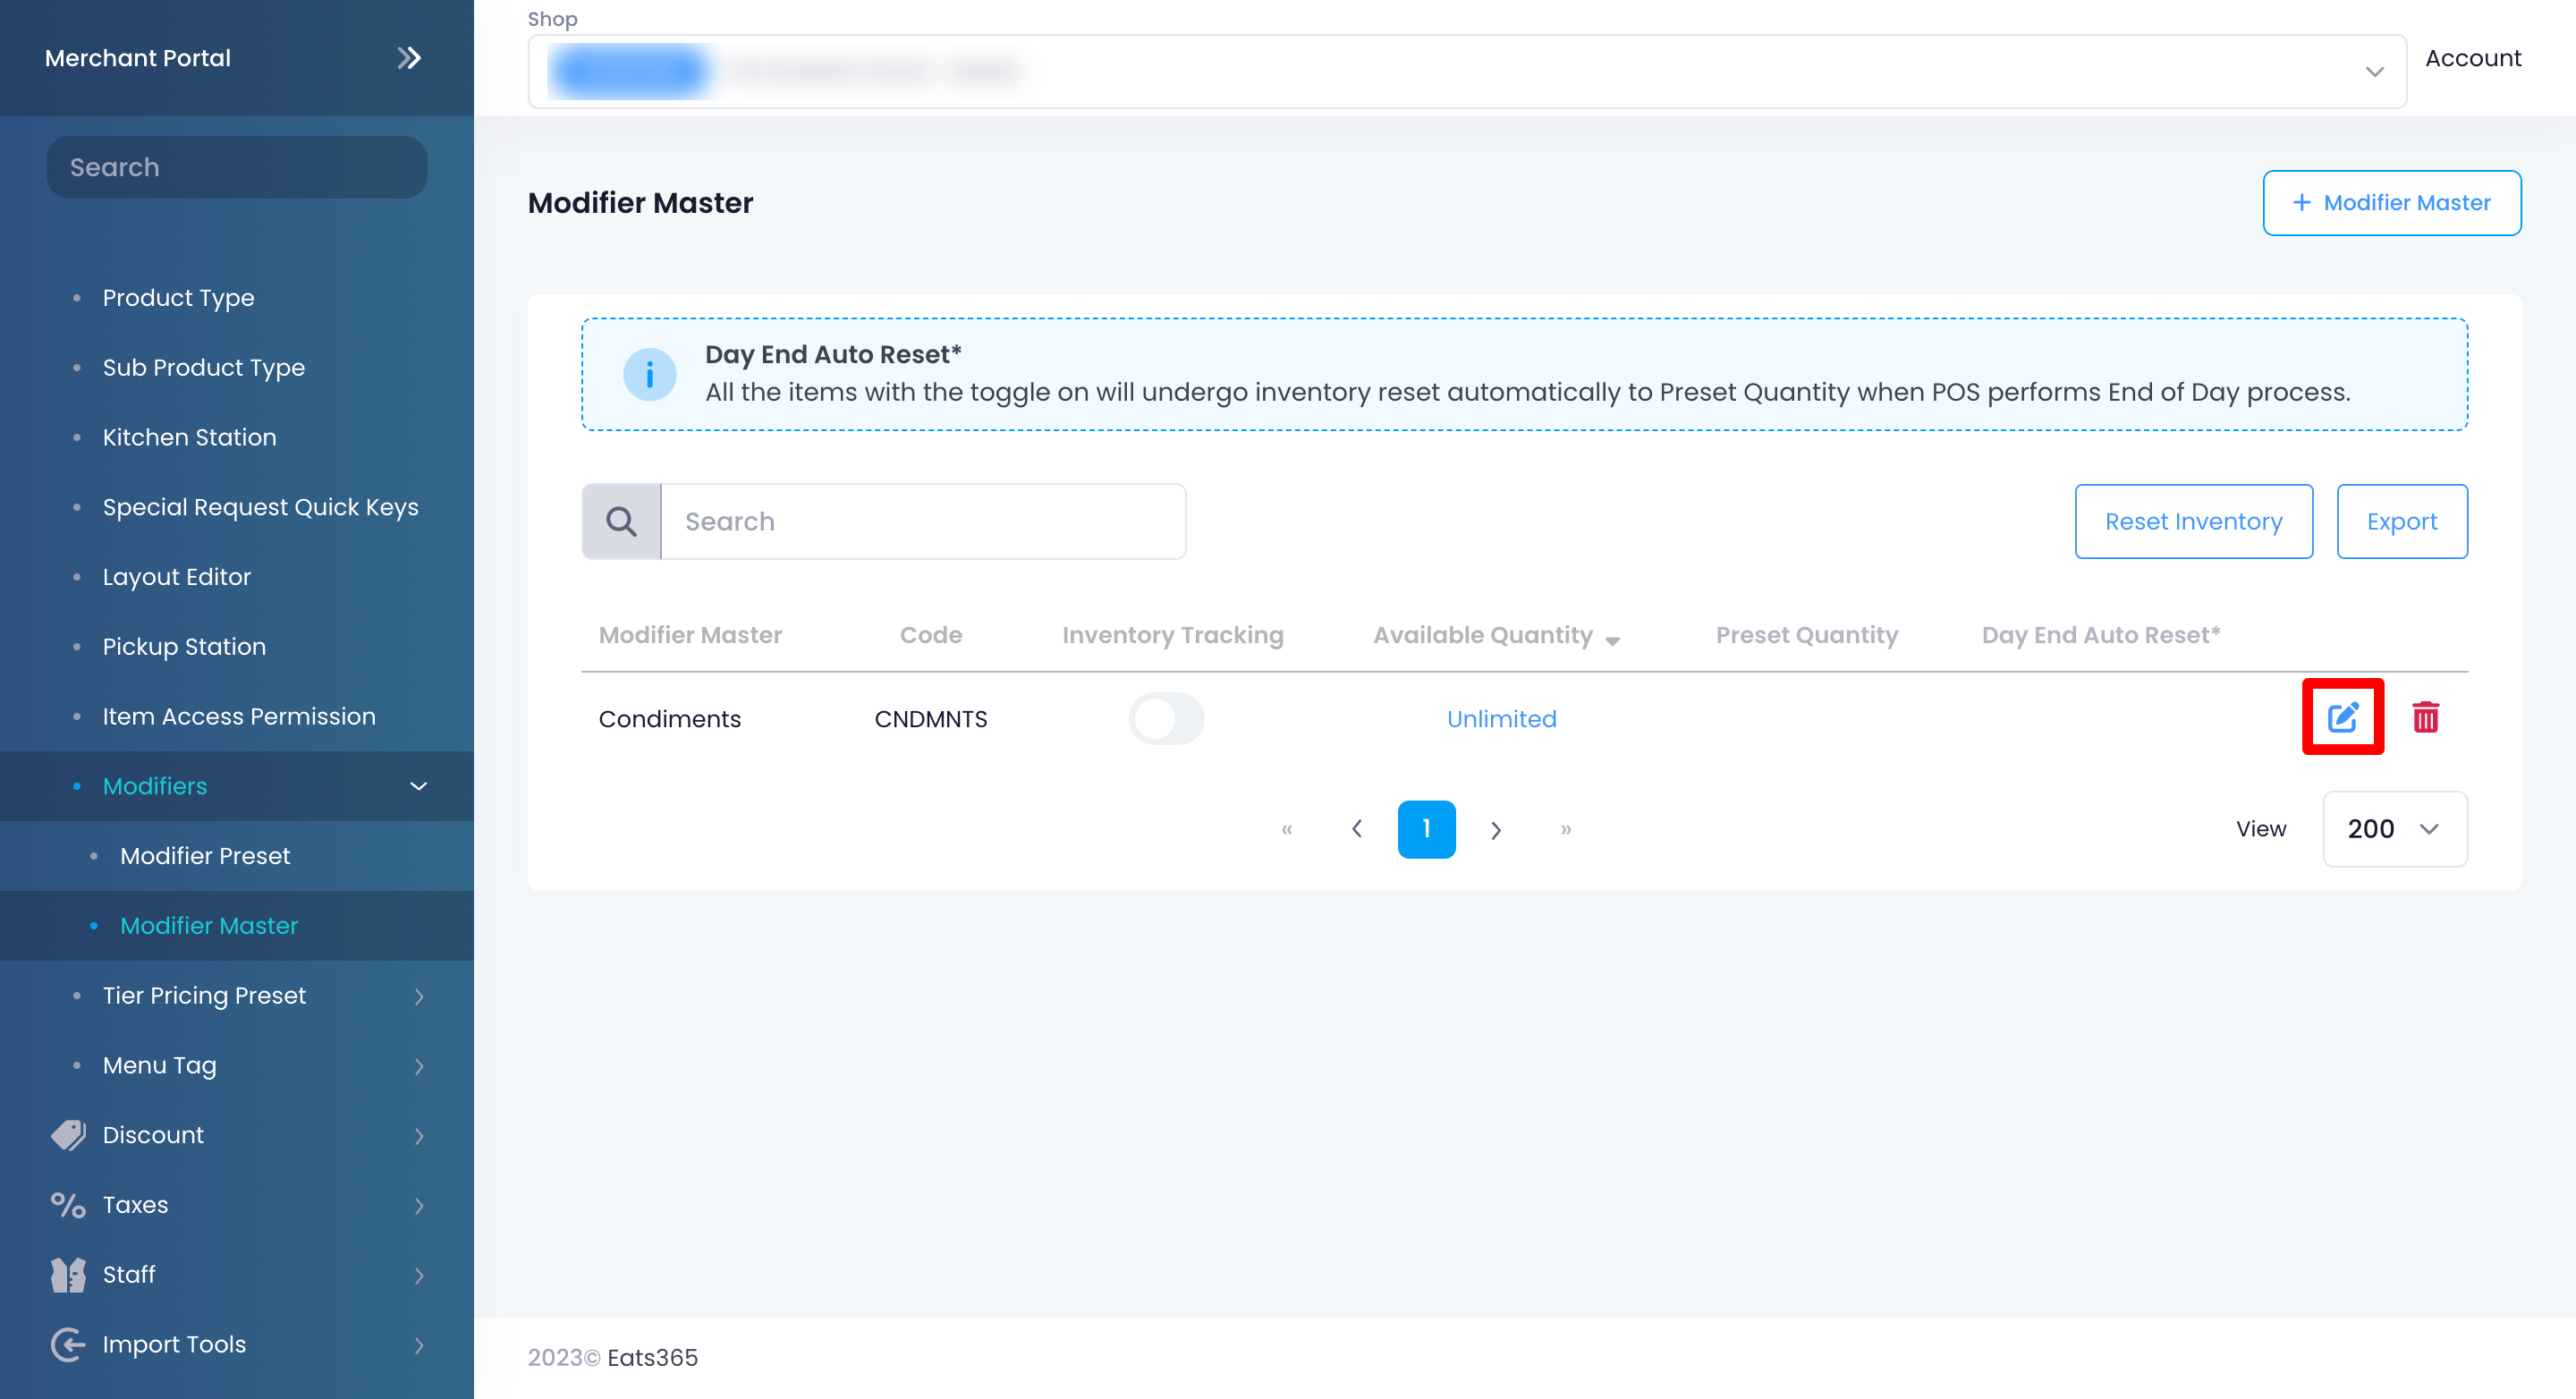
- On the left panel, click on Menu Setup, then select Modifier Master.
- Next to the Modifier Master that you want to edit, click on Edit
 .
.
- Update the Modifier Master.
- Click on Save to confirm.
Update Modifier Master Settings from the Modifier Master page
- Log in to the Merchant Portal.
- On the left panel, click on Menu Setup, then select Modifier Master.
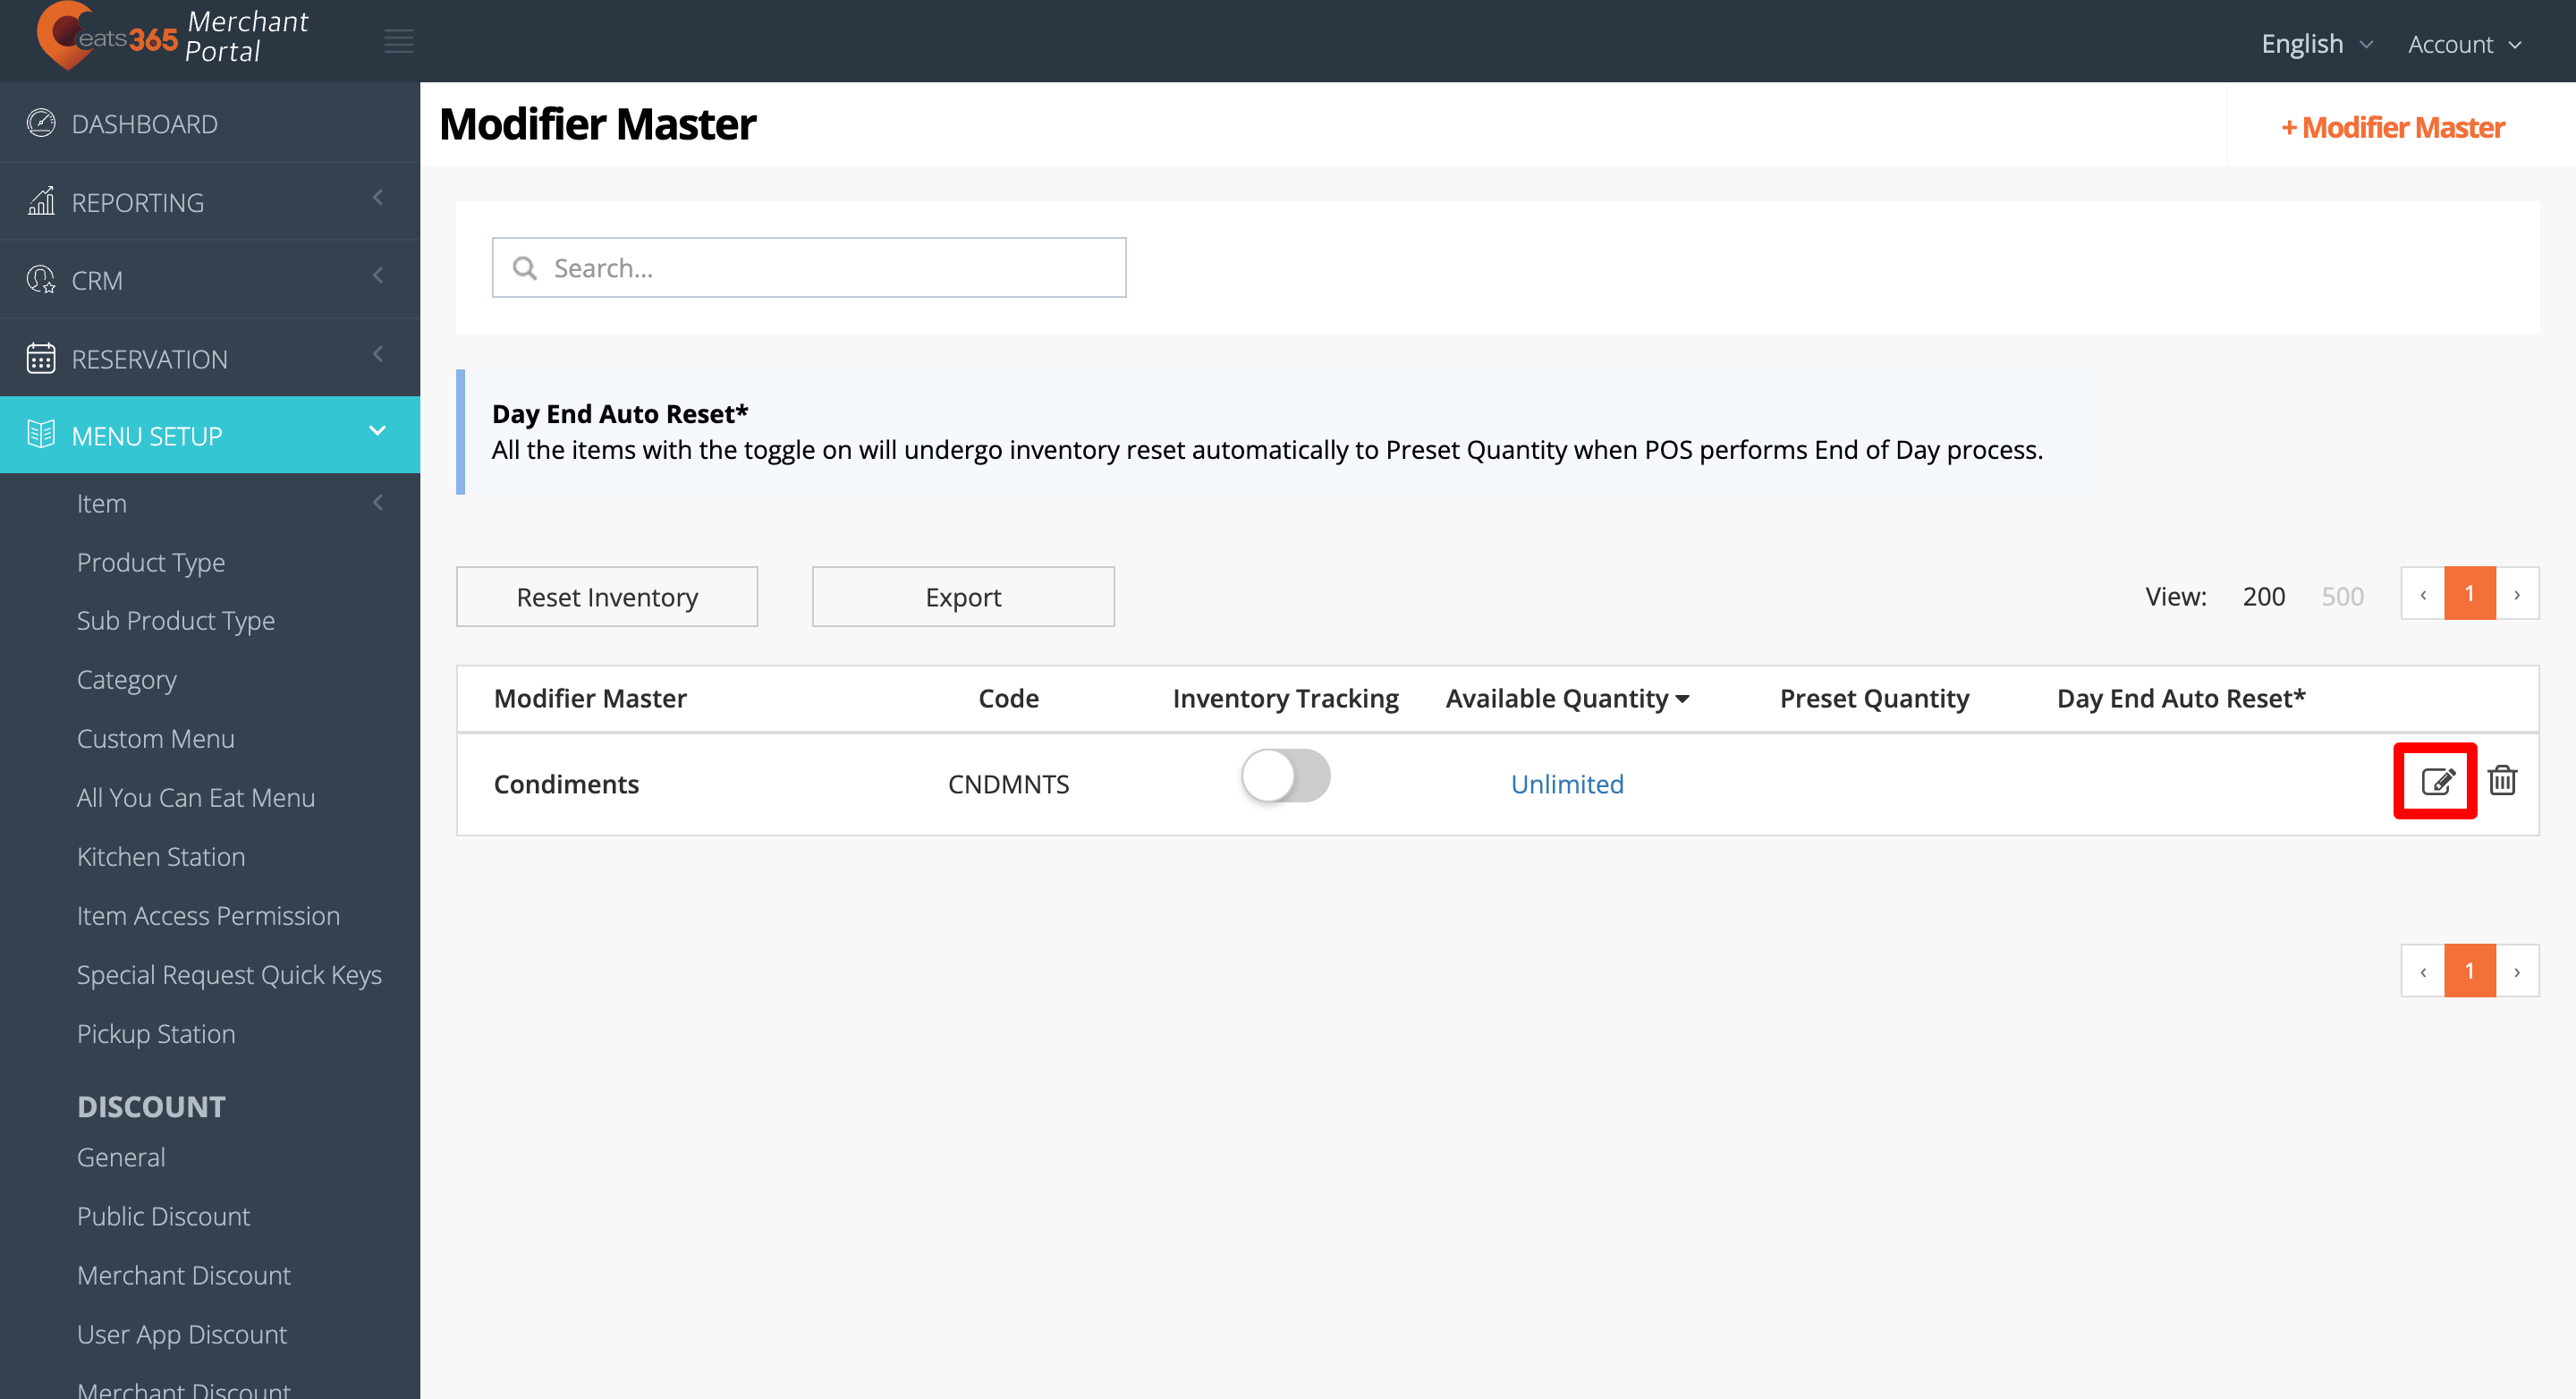
- Use the Modifier Master page to toggle inventorysettings:
- Enable or disable Inventory Tracking and Day End Auto Reset.
Switch the toggle on to enable the function or switch the toggle off
  to disable the function.
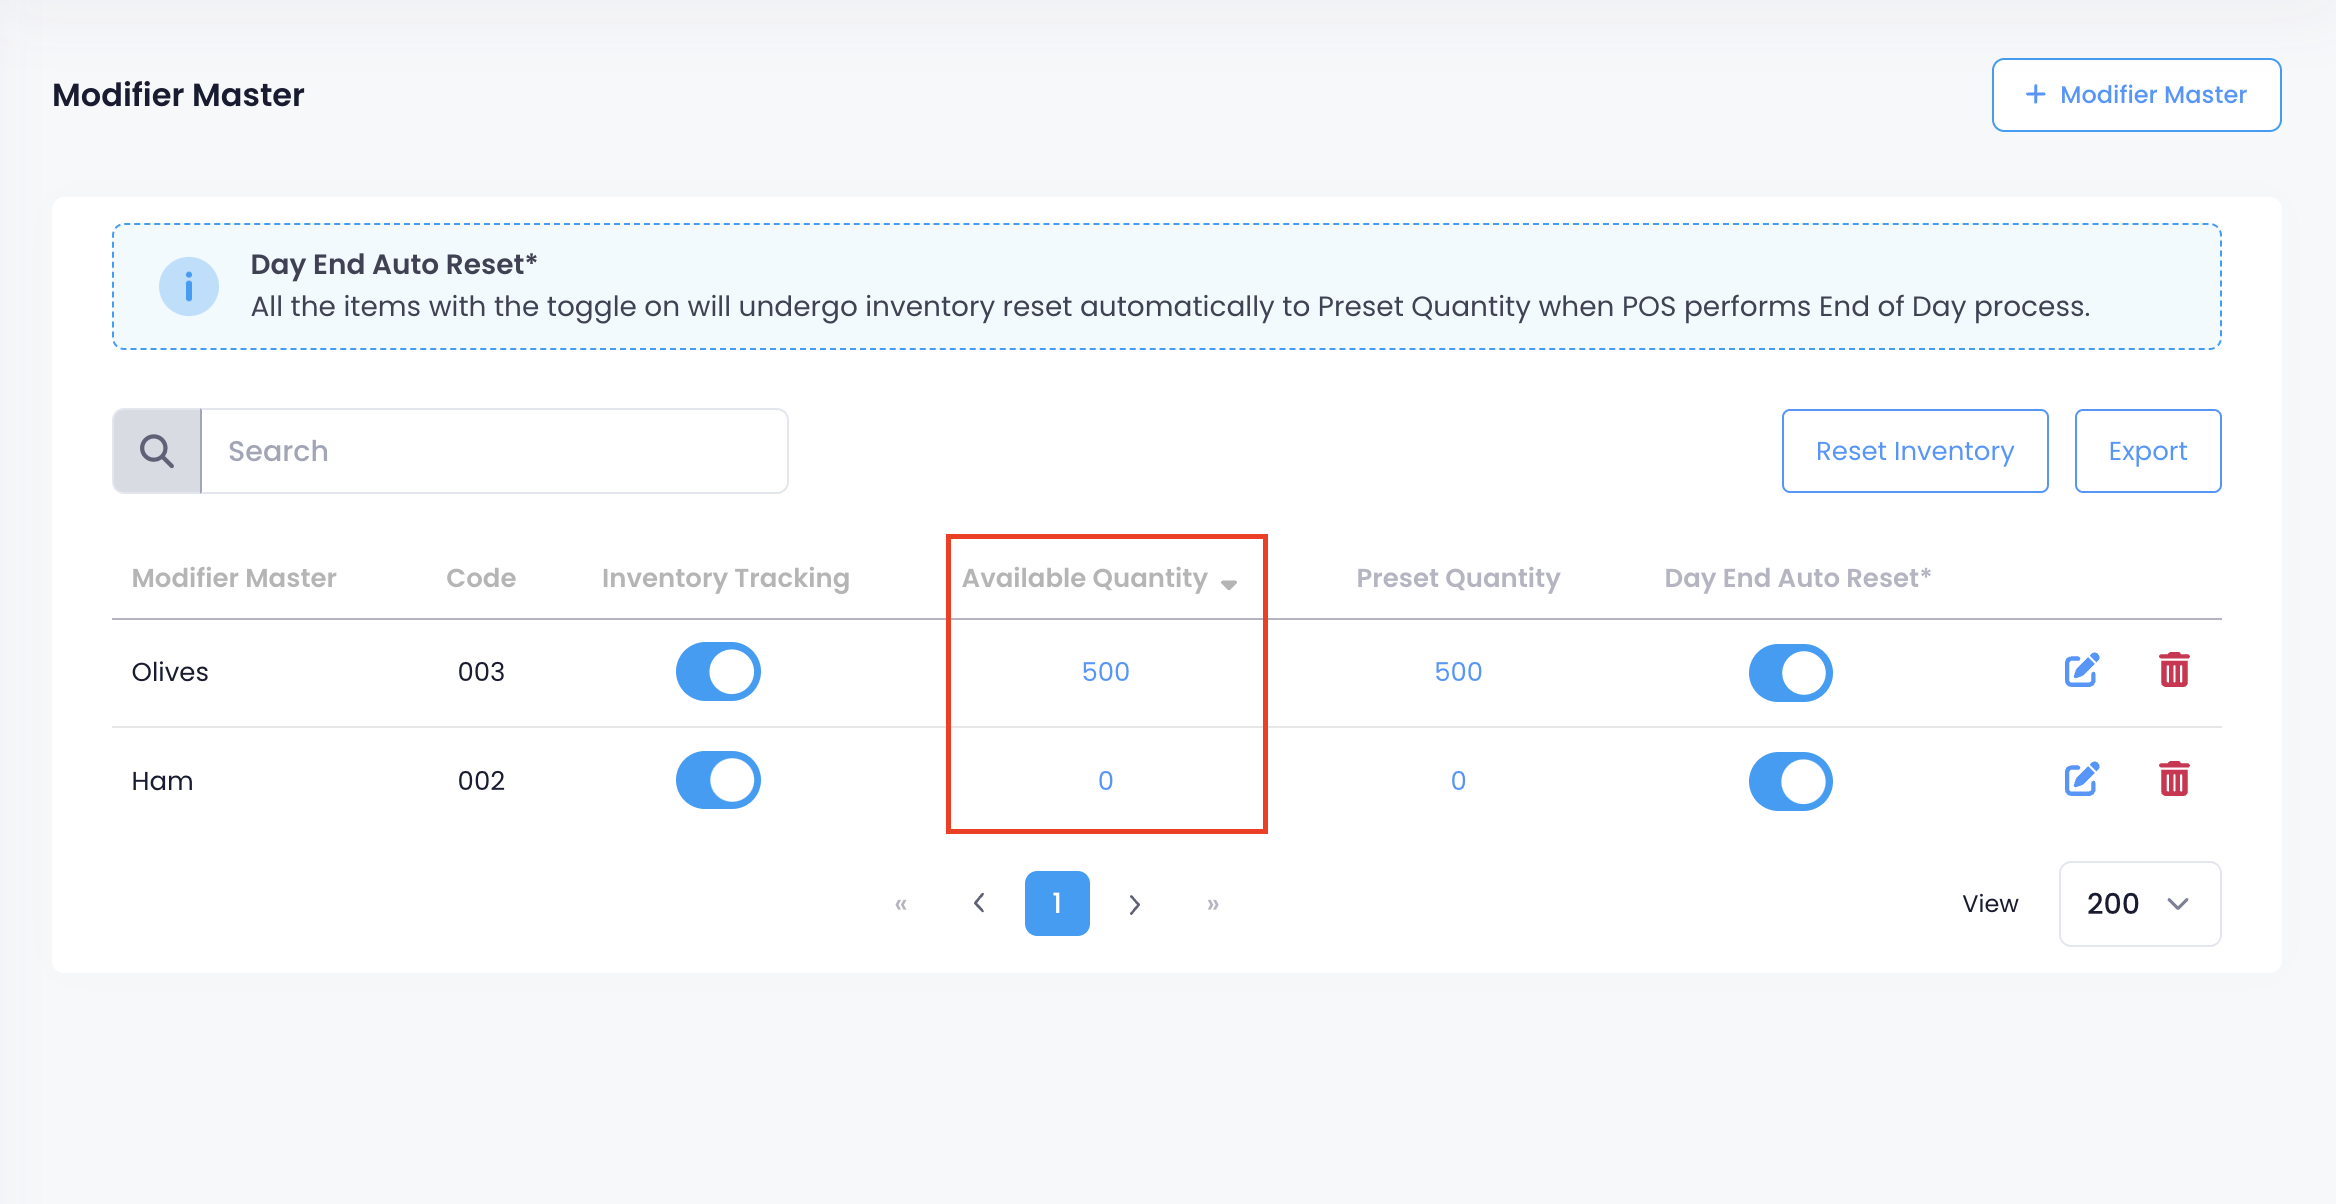
- Change Available Quantity.
To change the Available Quantity of modifiers from the Modifier Masterpage, follow the steps below:- Click on the Available Quantity value from the Modifier Master.

- Enter the new Available Quantity value, then choose whether the value will add or replace the current quantity value.
- Add: Adds the value entered to the existing Available Quantity.
-
Replace: Updates the Available Quantity to the value entered.

- Click on Save to confirm.
- Click on the Available Quantity value from the Modifier Master.
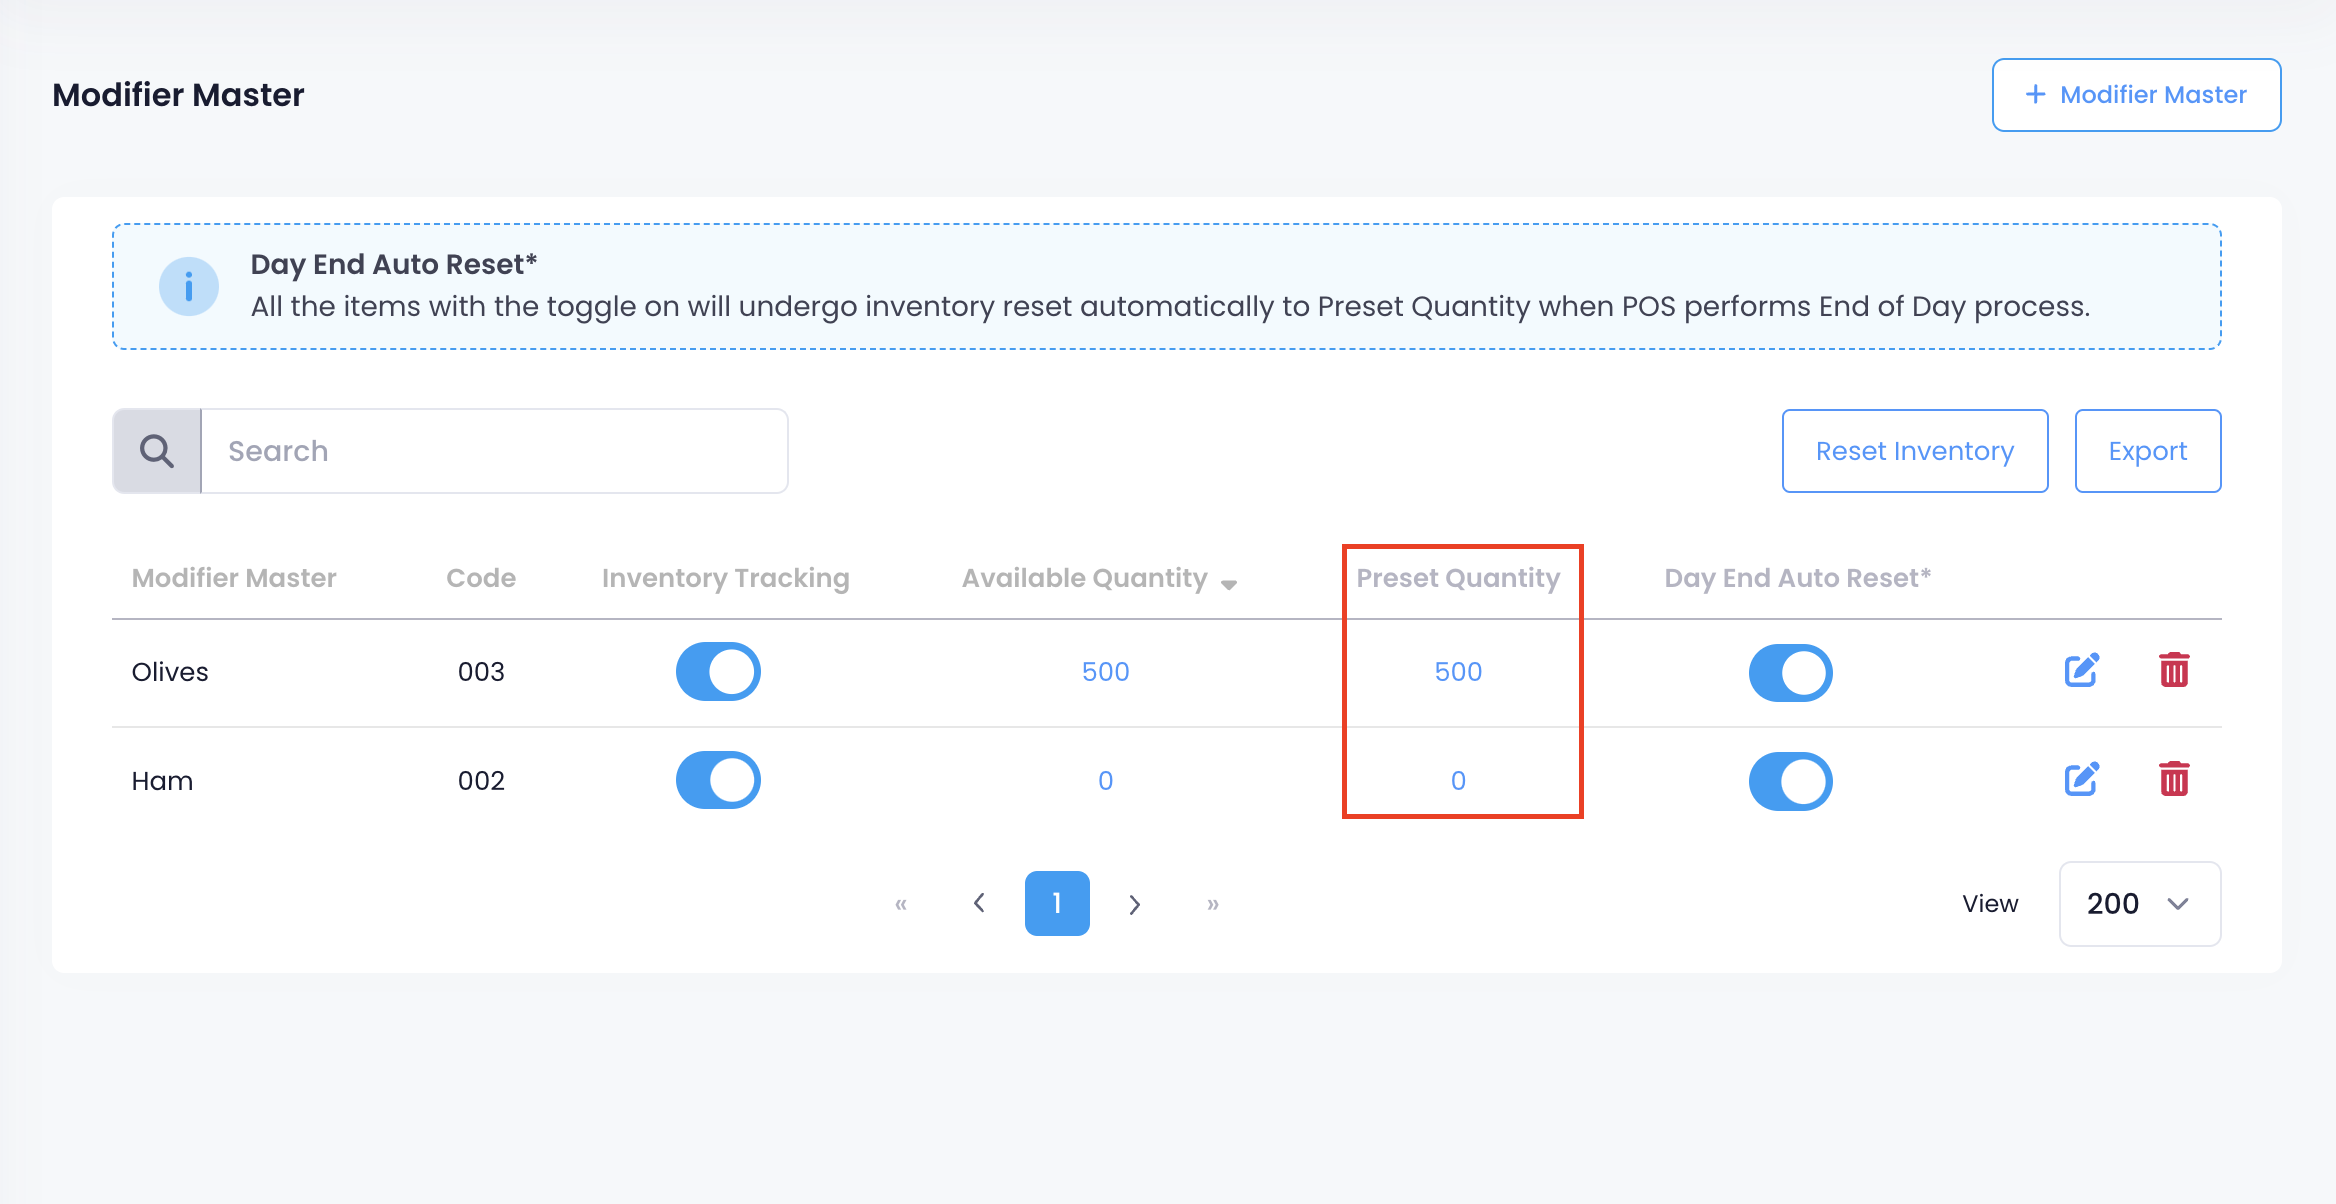
- Change Preset Quantity.
You can change the Preset Quantity of modifiers from the Modifier Masterpage.- Click on the Preset Quantity value from the Modifier Master.

- Enter the updated Preset Quantity, then click on Save to confirm.

- Click on the Preset Quantity value from the Modifier Master.
- Enable or disable Inventory Tracking and Day End Auto Reset.
Merchant Portal 2.0
Update Modifier Master settings from the Edit option
- Log in to the Merchant Portal.
- On the left panel, click on Menu Setup.
- Click on Modifiers, then select Modifier Master.
- Next to the Modifier Master that you want to edit, click on Edit
 .
.
- Update the Modifier Master.
- Click on Save to confirm.
Update Modifier Master Settings from the Modifier Master page
- Log in to the Merchant Portal.
- On the left panel, click on Menu Setup.
- Click on Modifiers, then select Modifier Master.
- Use the Modifier Master page to toggle inventorysettings:
- Enable or disable Inventory Tracking and Day End Auto Reset.
Switch the toggle on to enable the function or switch the toggle off to disable the function.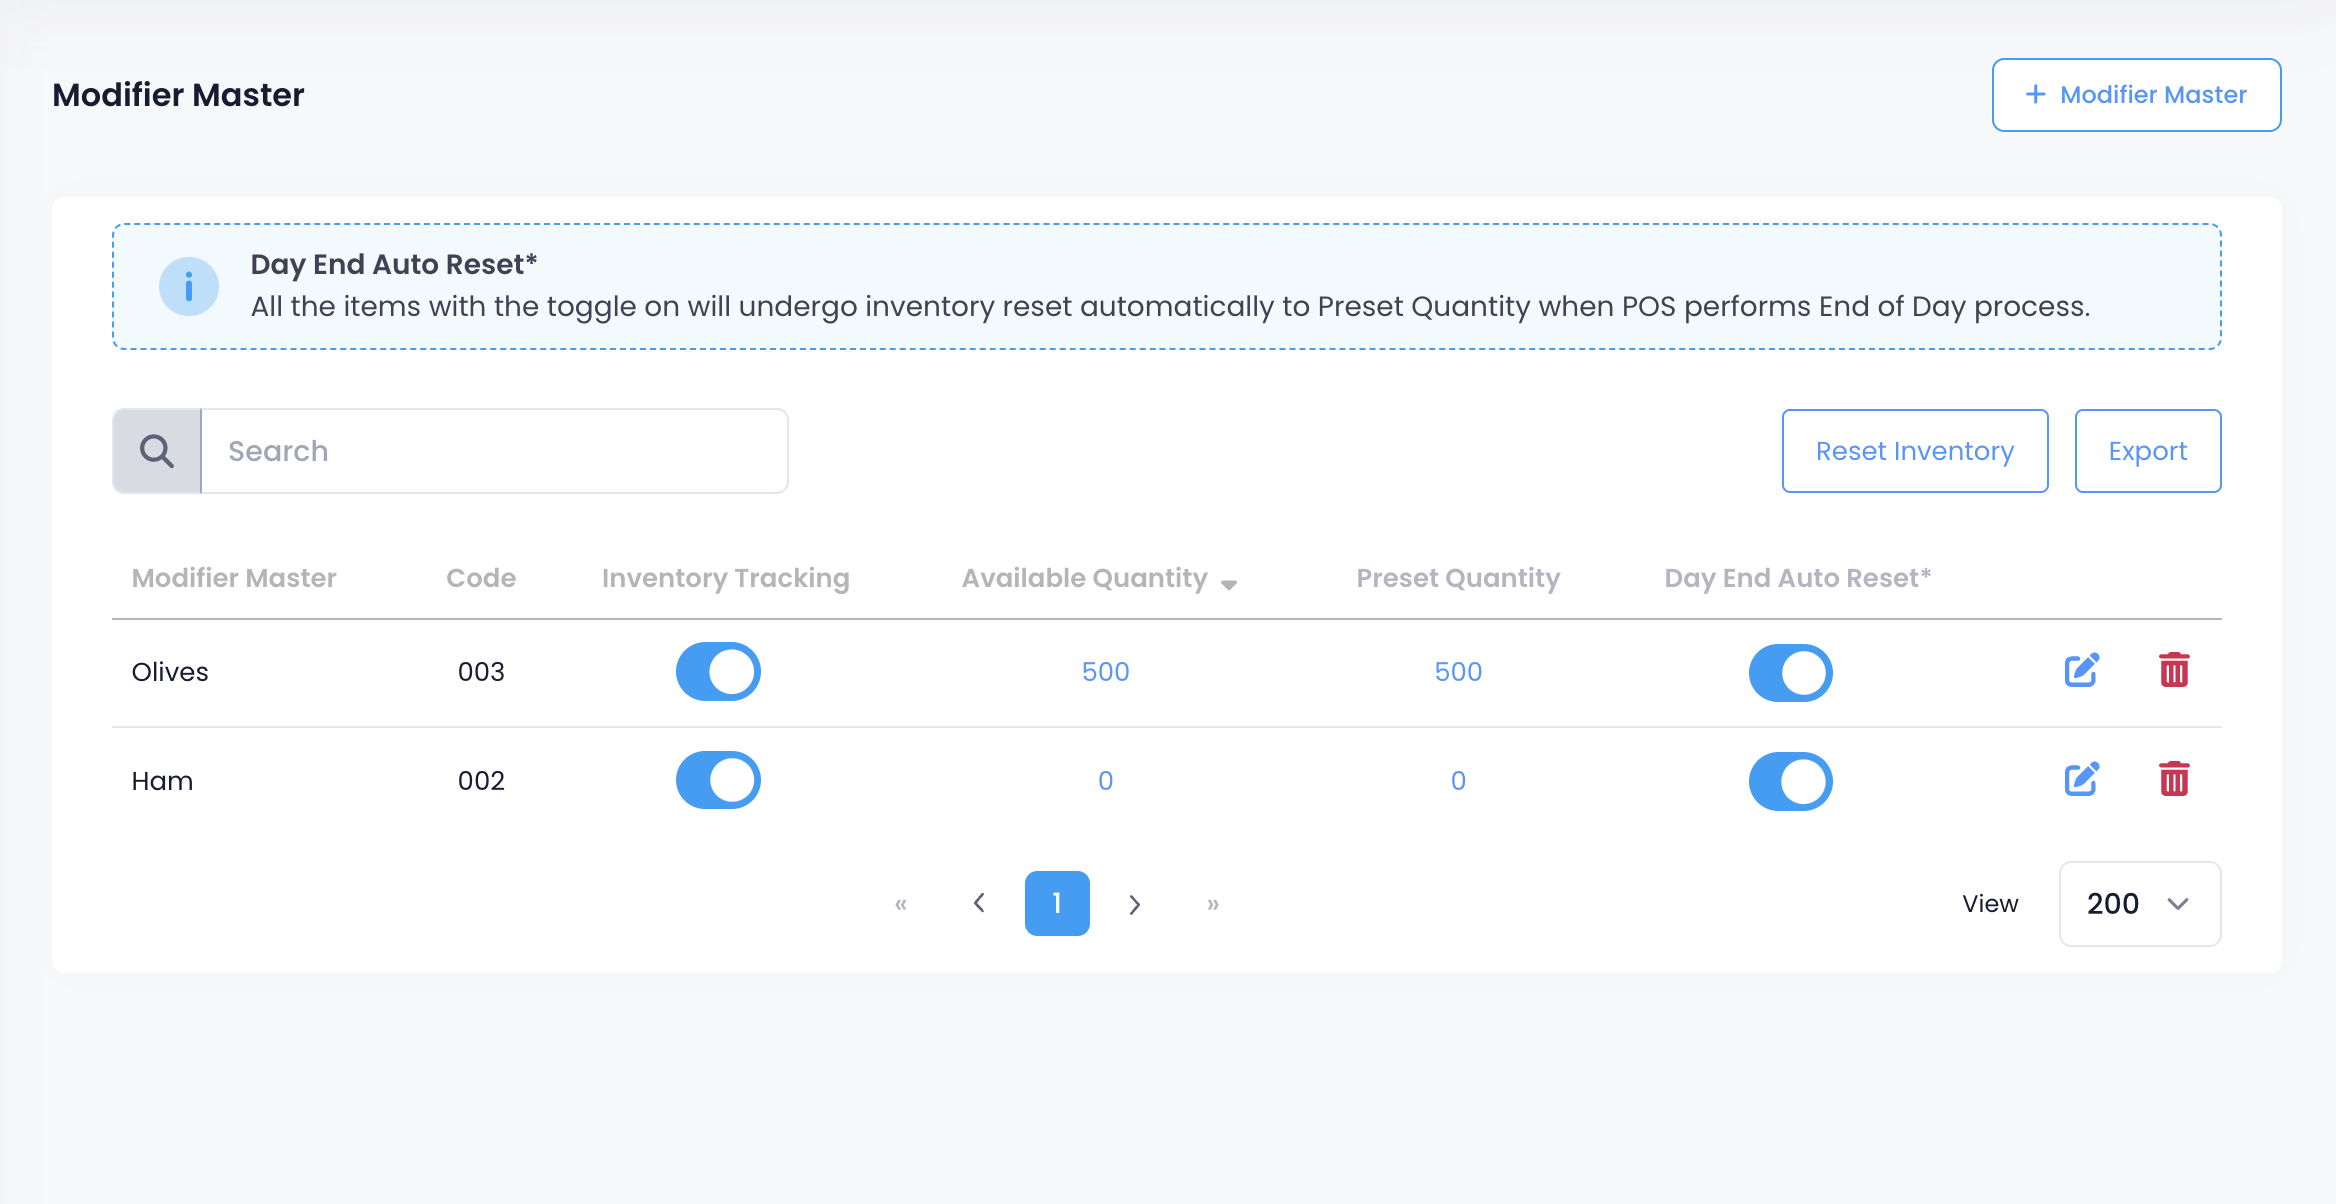
- Change Available Quantity.
To change the Available Quantity of modifiers from the Modifier Masterpage, follow the steps below:- Click on the Available Quantity value from the Modifier Master.
- Enter the new Available Quantity value, then choose whether the value will add or replace the current quantity value.
- Add
 : Adds the value entered to the existing Available Quantity.
 - Replace
 : Updates the Available Quantity to the value entered.
- Add
- Click on Save to confirm.
- Click on the Available Quantity value from the Modifier Master.
- Change Preset Quantity.
You can change the Preset Quantity of modifiers from the Modifier Masterpage.- Click on the Preset Quantity value from the Modifier Master.
- Enter the updated Preset Quantity, then click on Save
 to confirm.
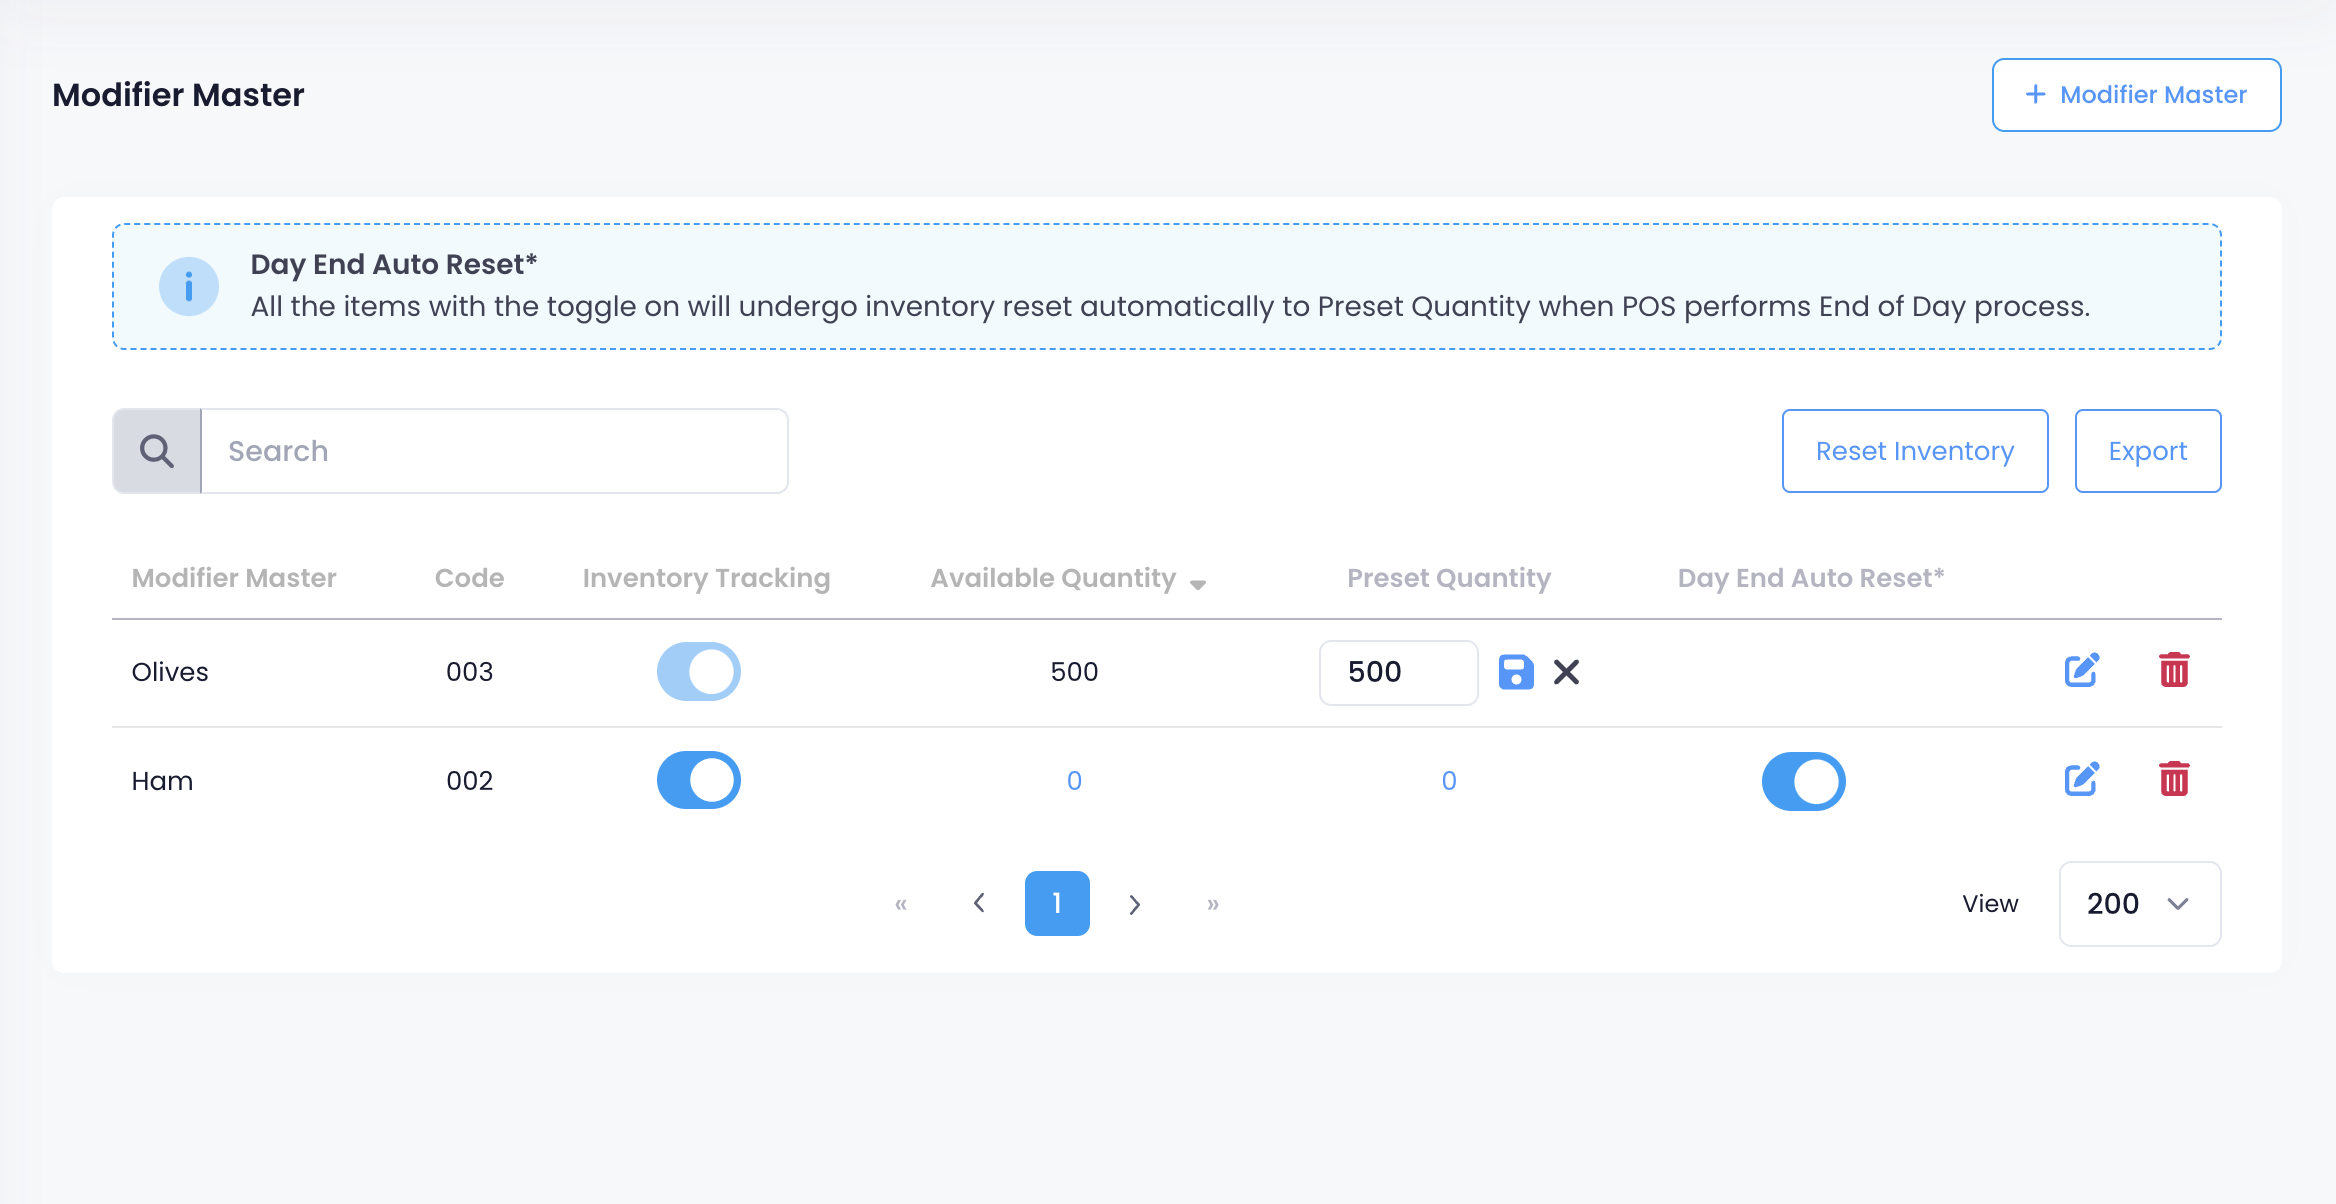
- Click on the Preset Quantity value from the Modifier Master.
- Enable or disable Inventory Tracking and Day End Auto Reset.
Delete a Modifier Master
To remove a Modifier Master, follow the steps below:
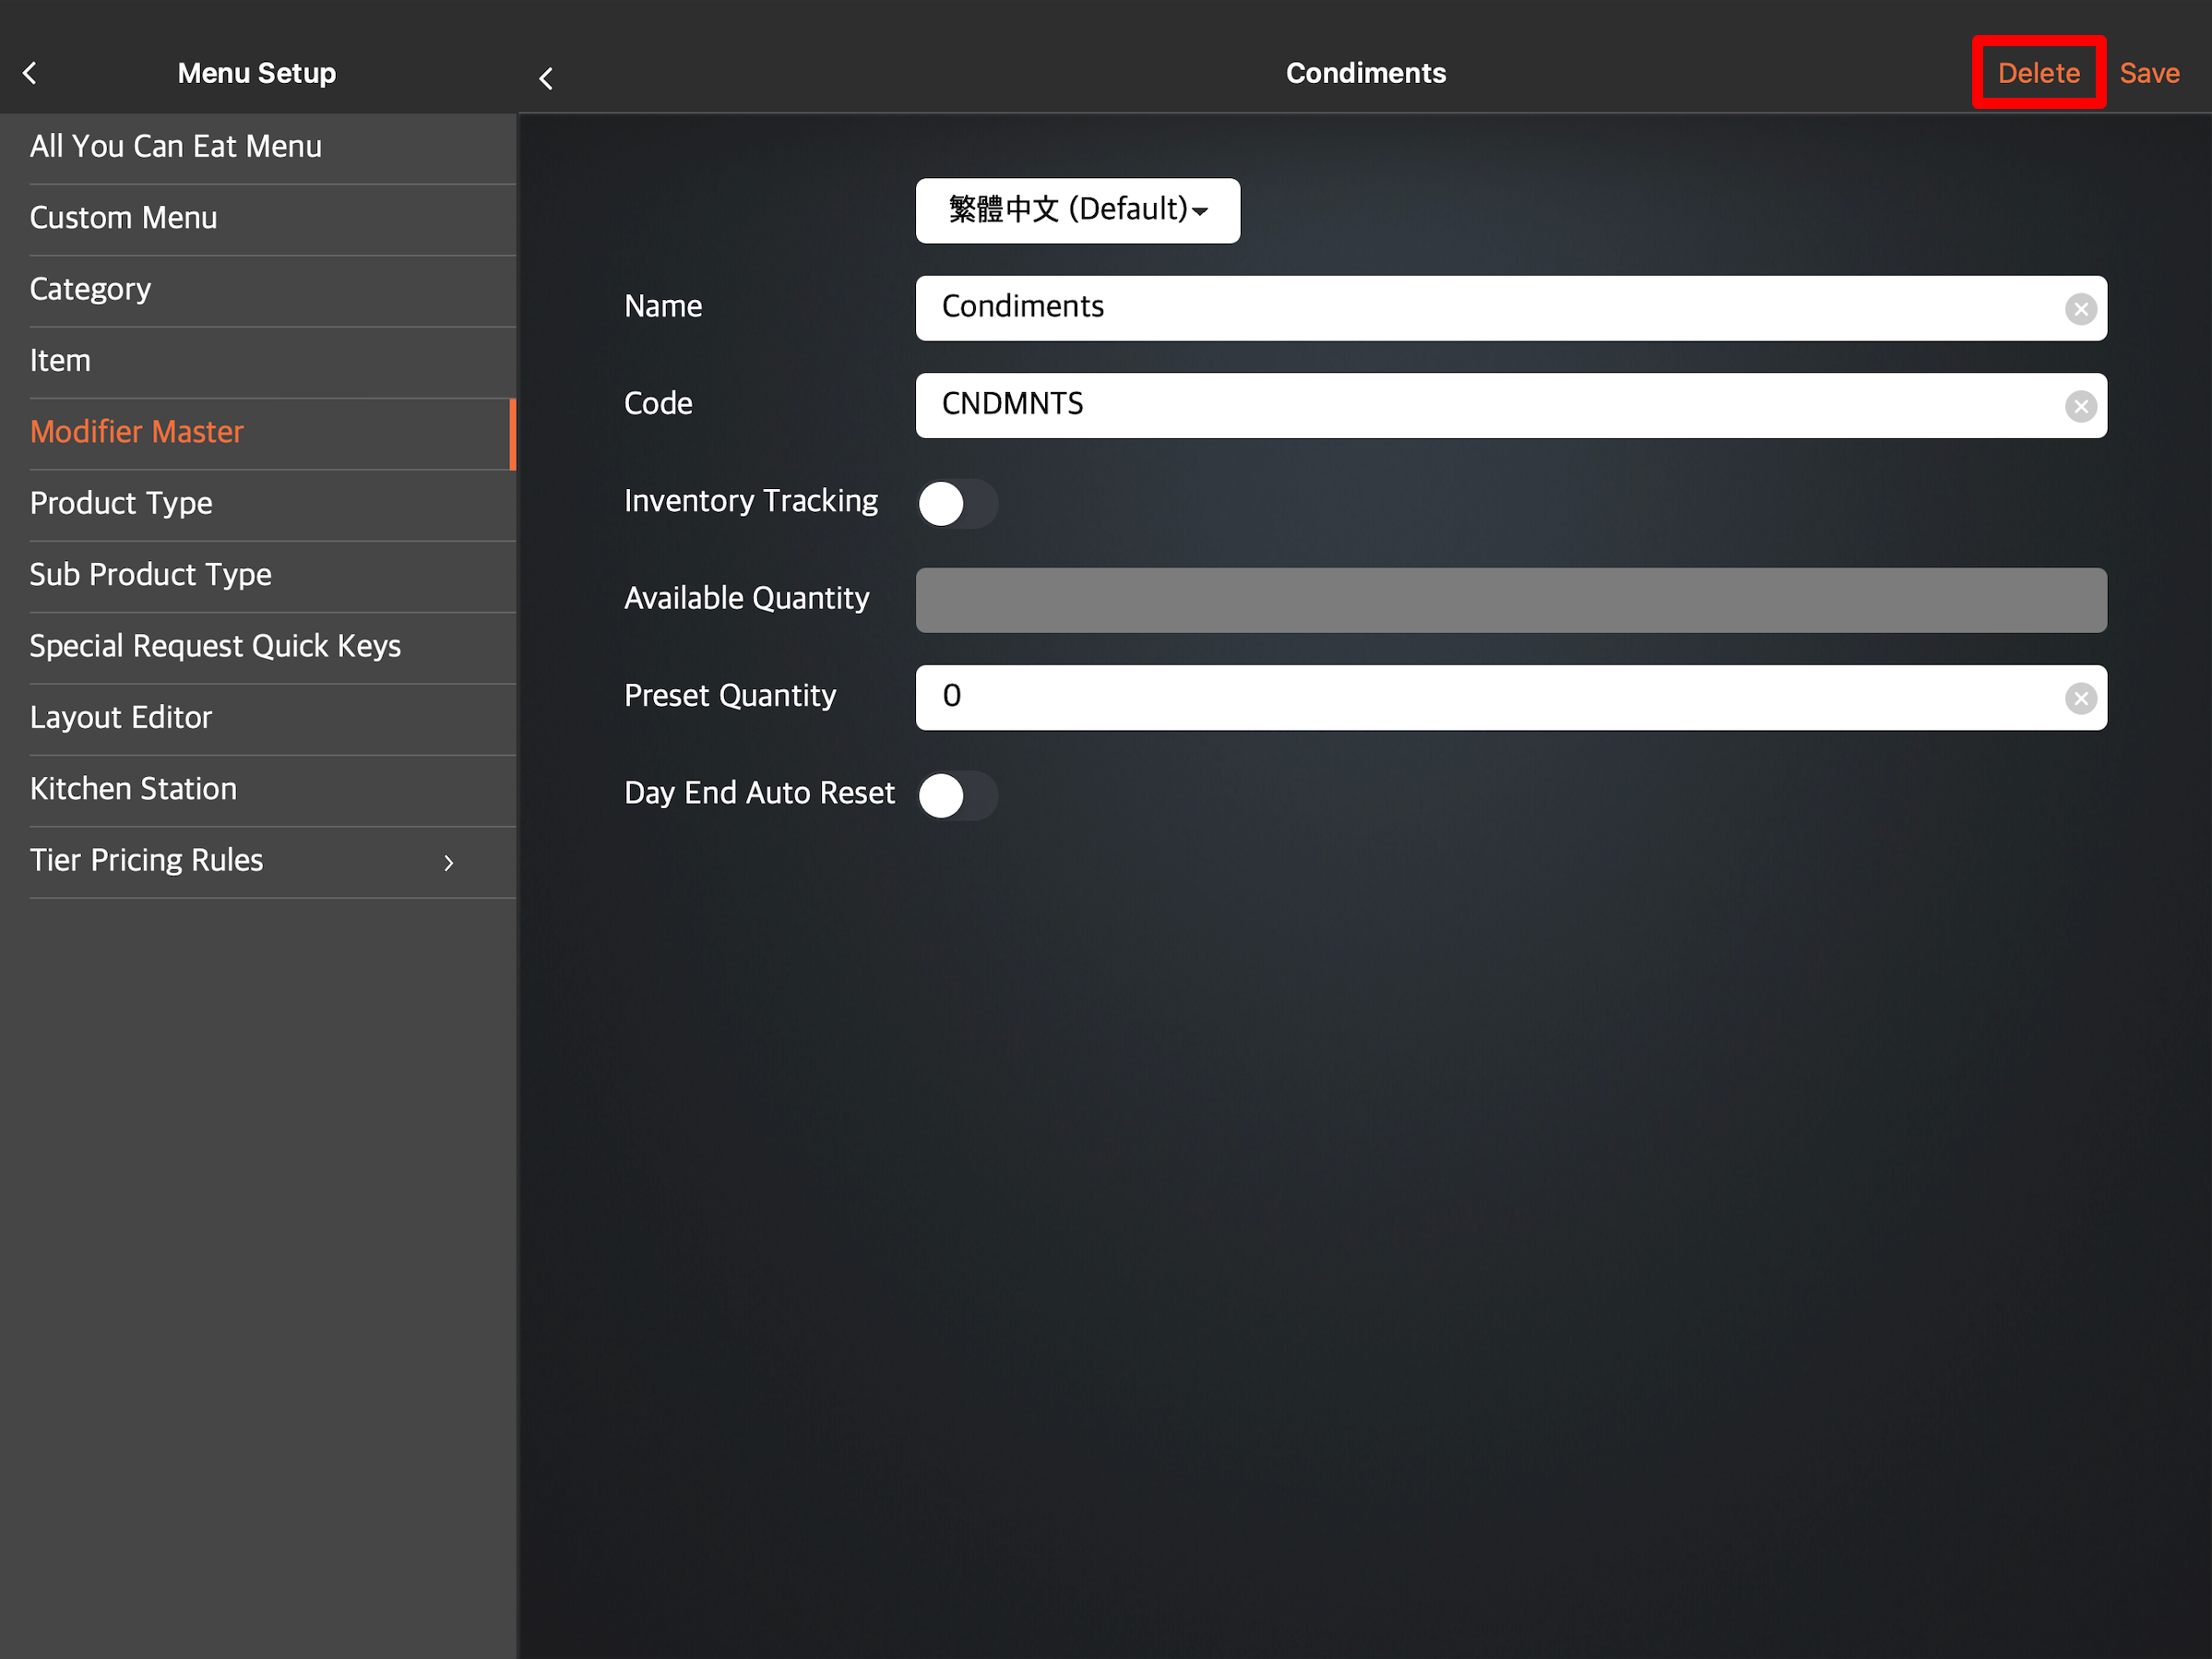
Eats365 POS
- Log in to the Eats365 POS.
- At the top left, tap Settings .
- Under General, tap Menu Setup, then select Modifier Master.
- Tap the Modifier Master that you want to delete.
- At the top right, tap Delete.
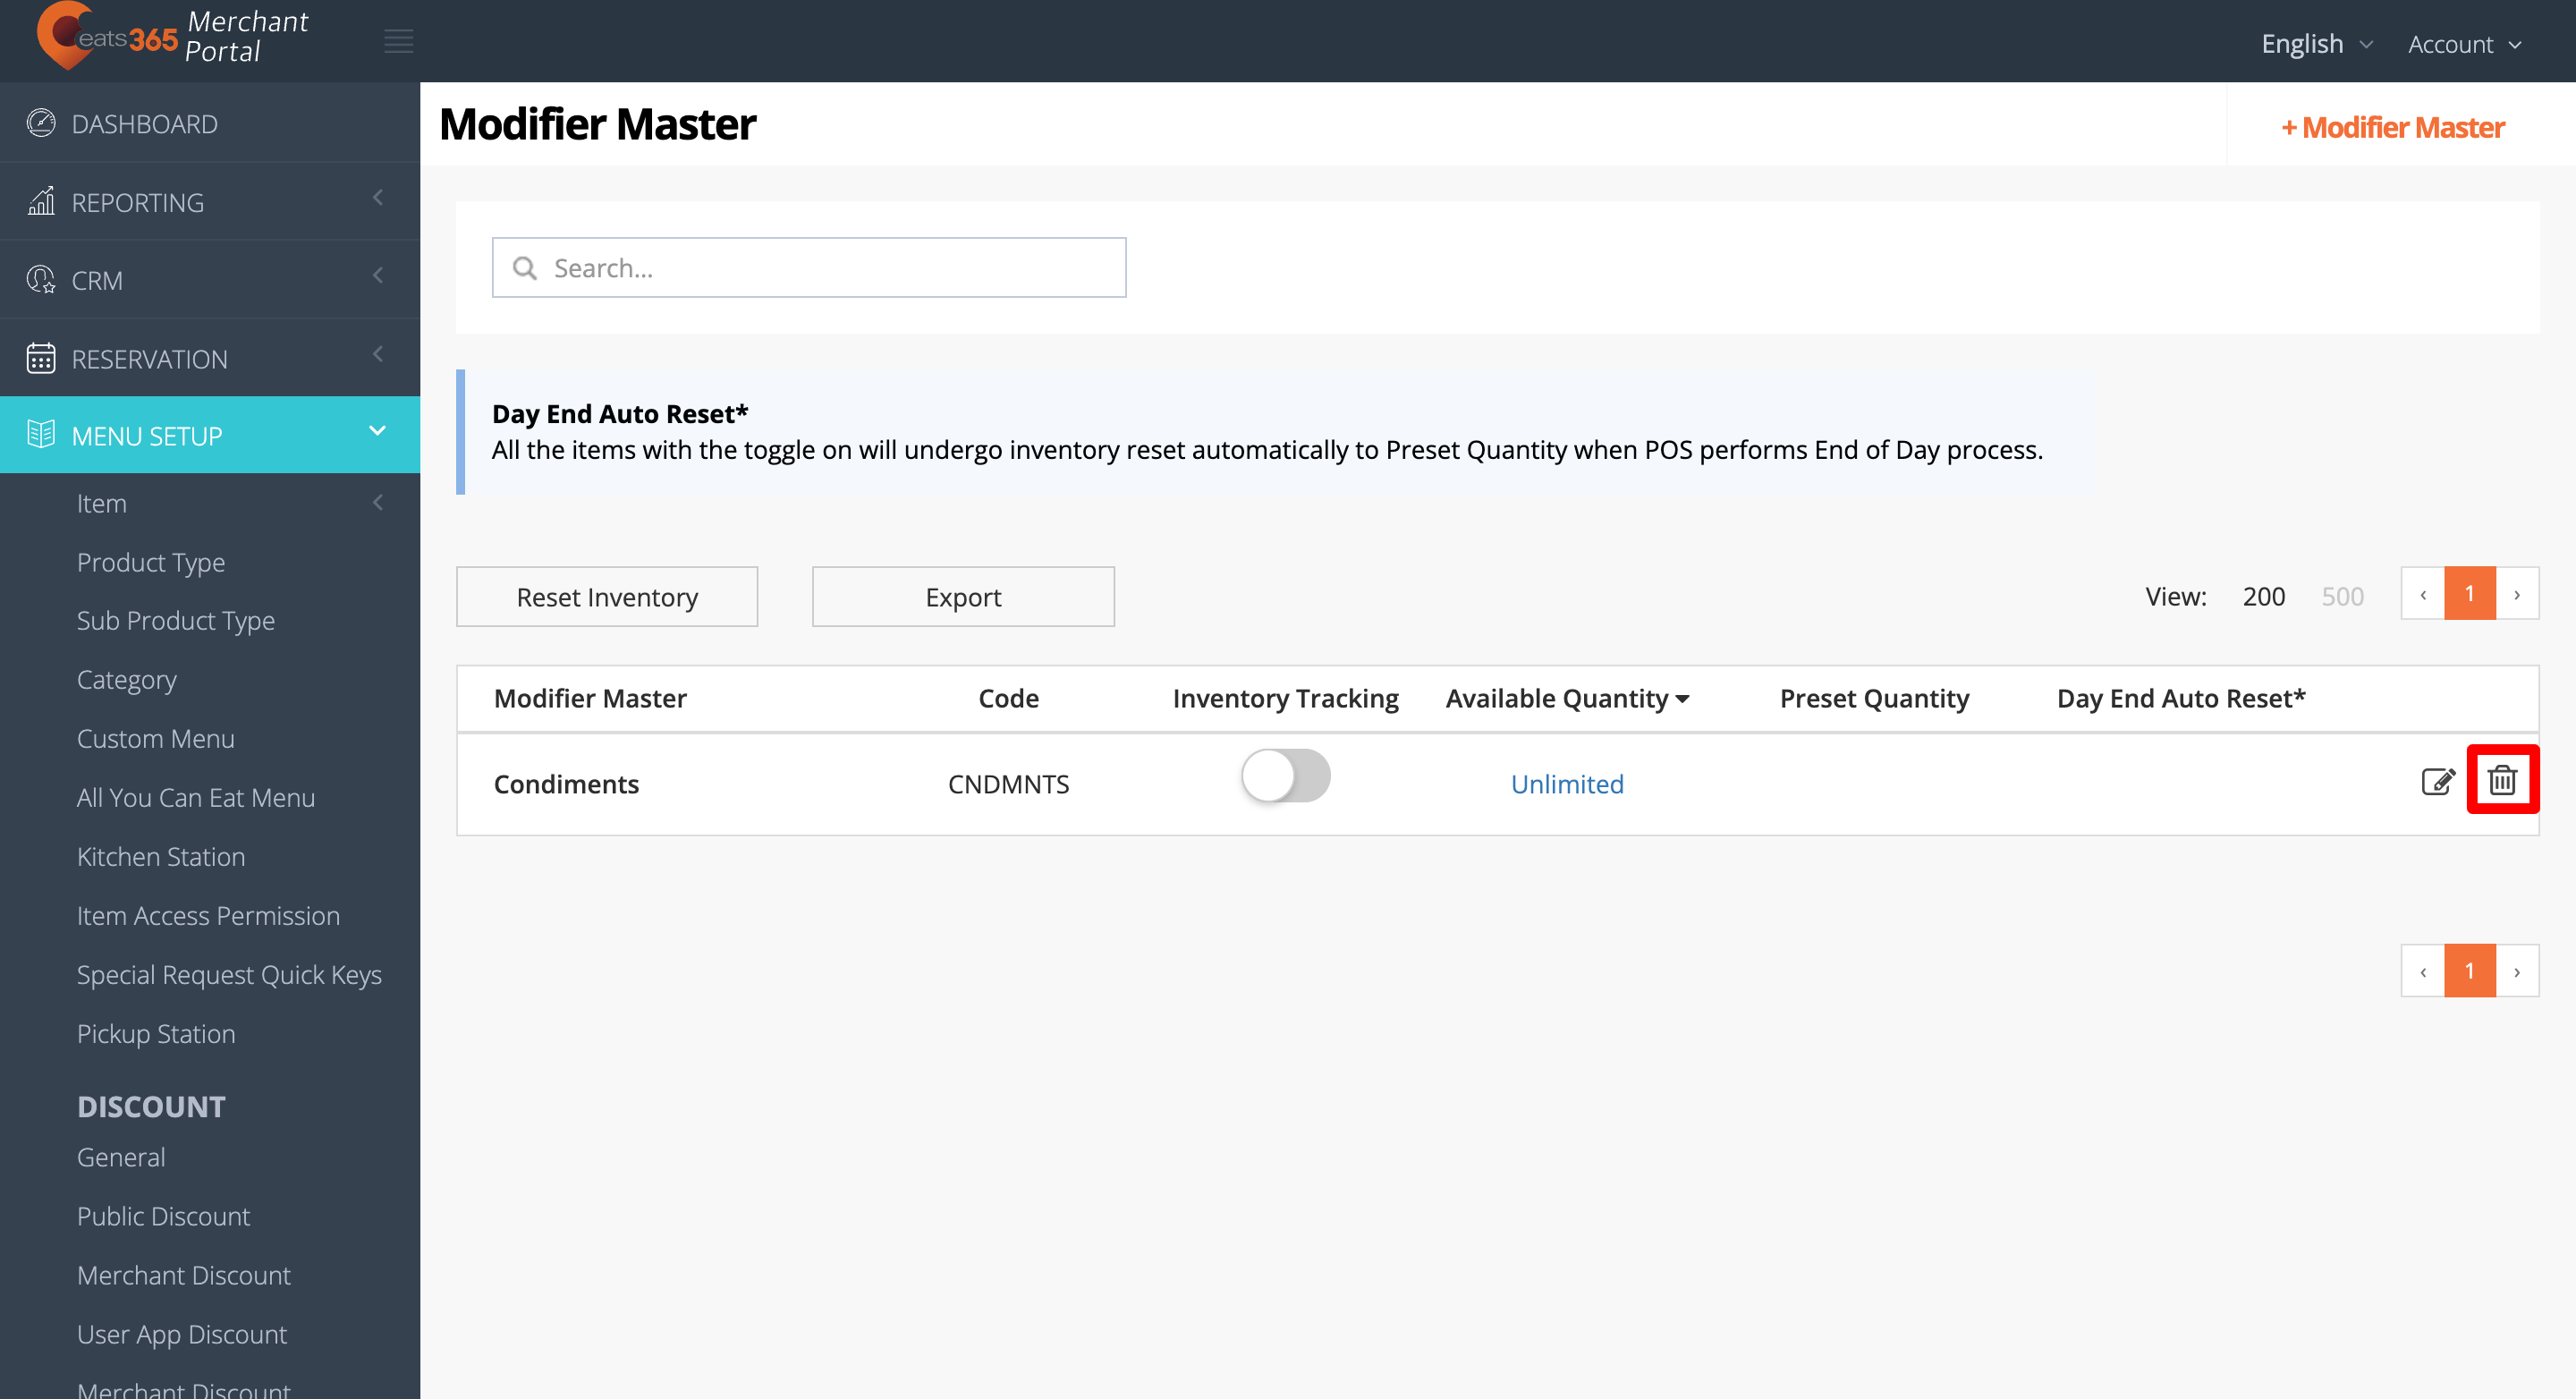
Merchant Portal (Classic Theme)
- Log in to the Merchant Portal.
- On the left panel, click on Menu Setup, then select Modifier Master.
- Next to the Modifier Master that you want to delete, click on Delete
 .
.
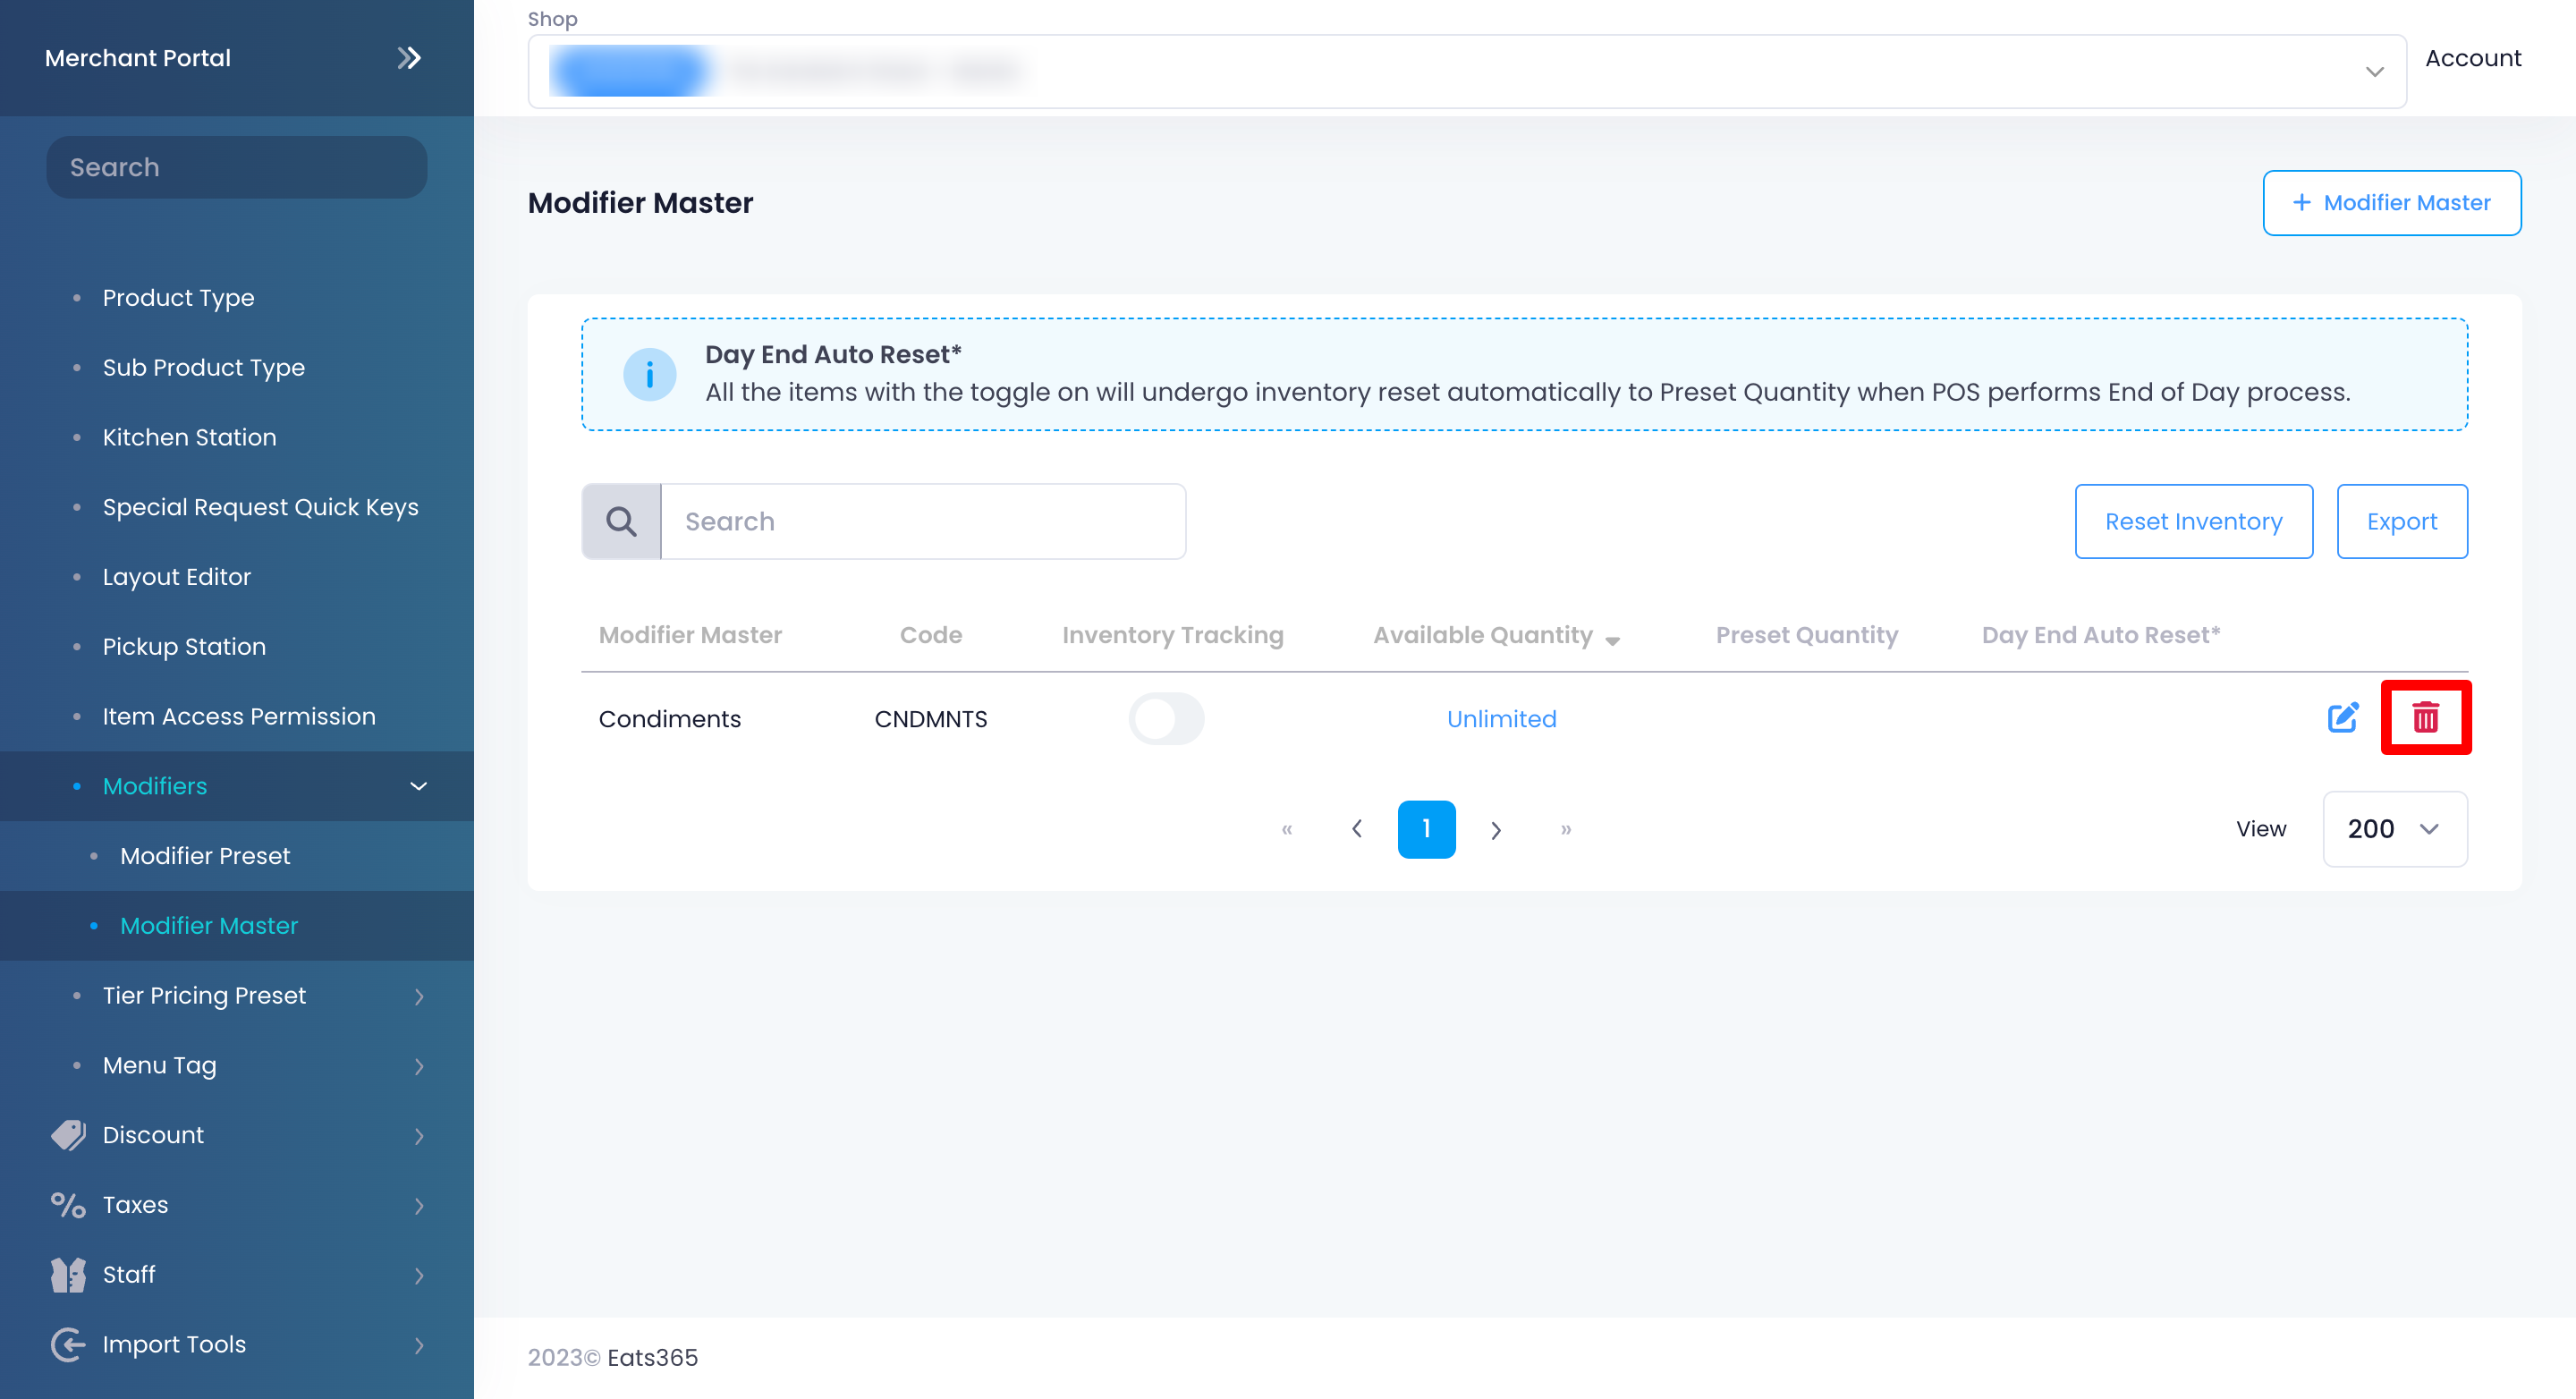
Merchant Portal 2.0
- Log in to the Merchant Portal.
- On the left panel, click on Menu Setup.
- Click on Modifiers, then select Modifier Master.
- Next to the Modifier Master that you want to delete, click on Delete
 .
.
Reset Modifier Master Quantity
To reset a Modifier Master, follow the steps below:
Eats365 POS
- Log in to the Eats365 POS.
- At the top left, tap Settings .
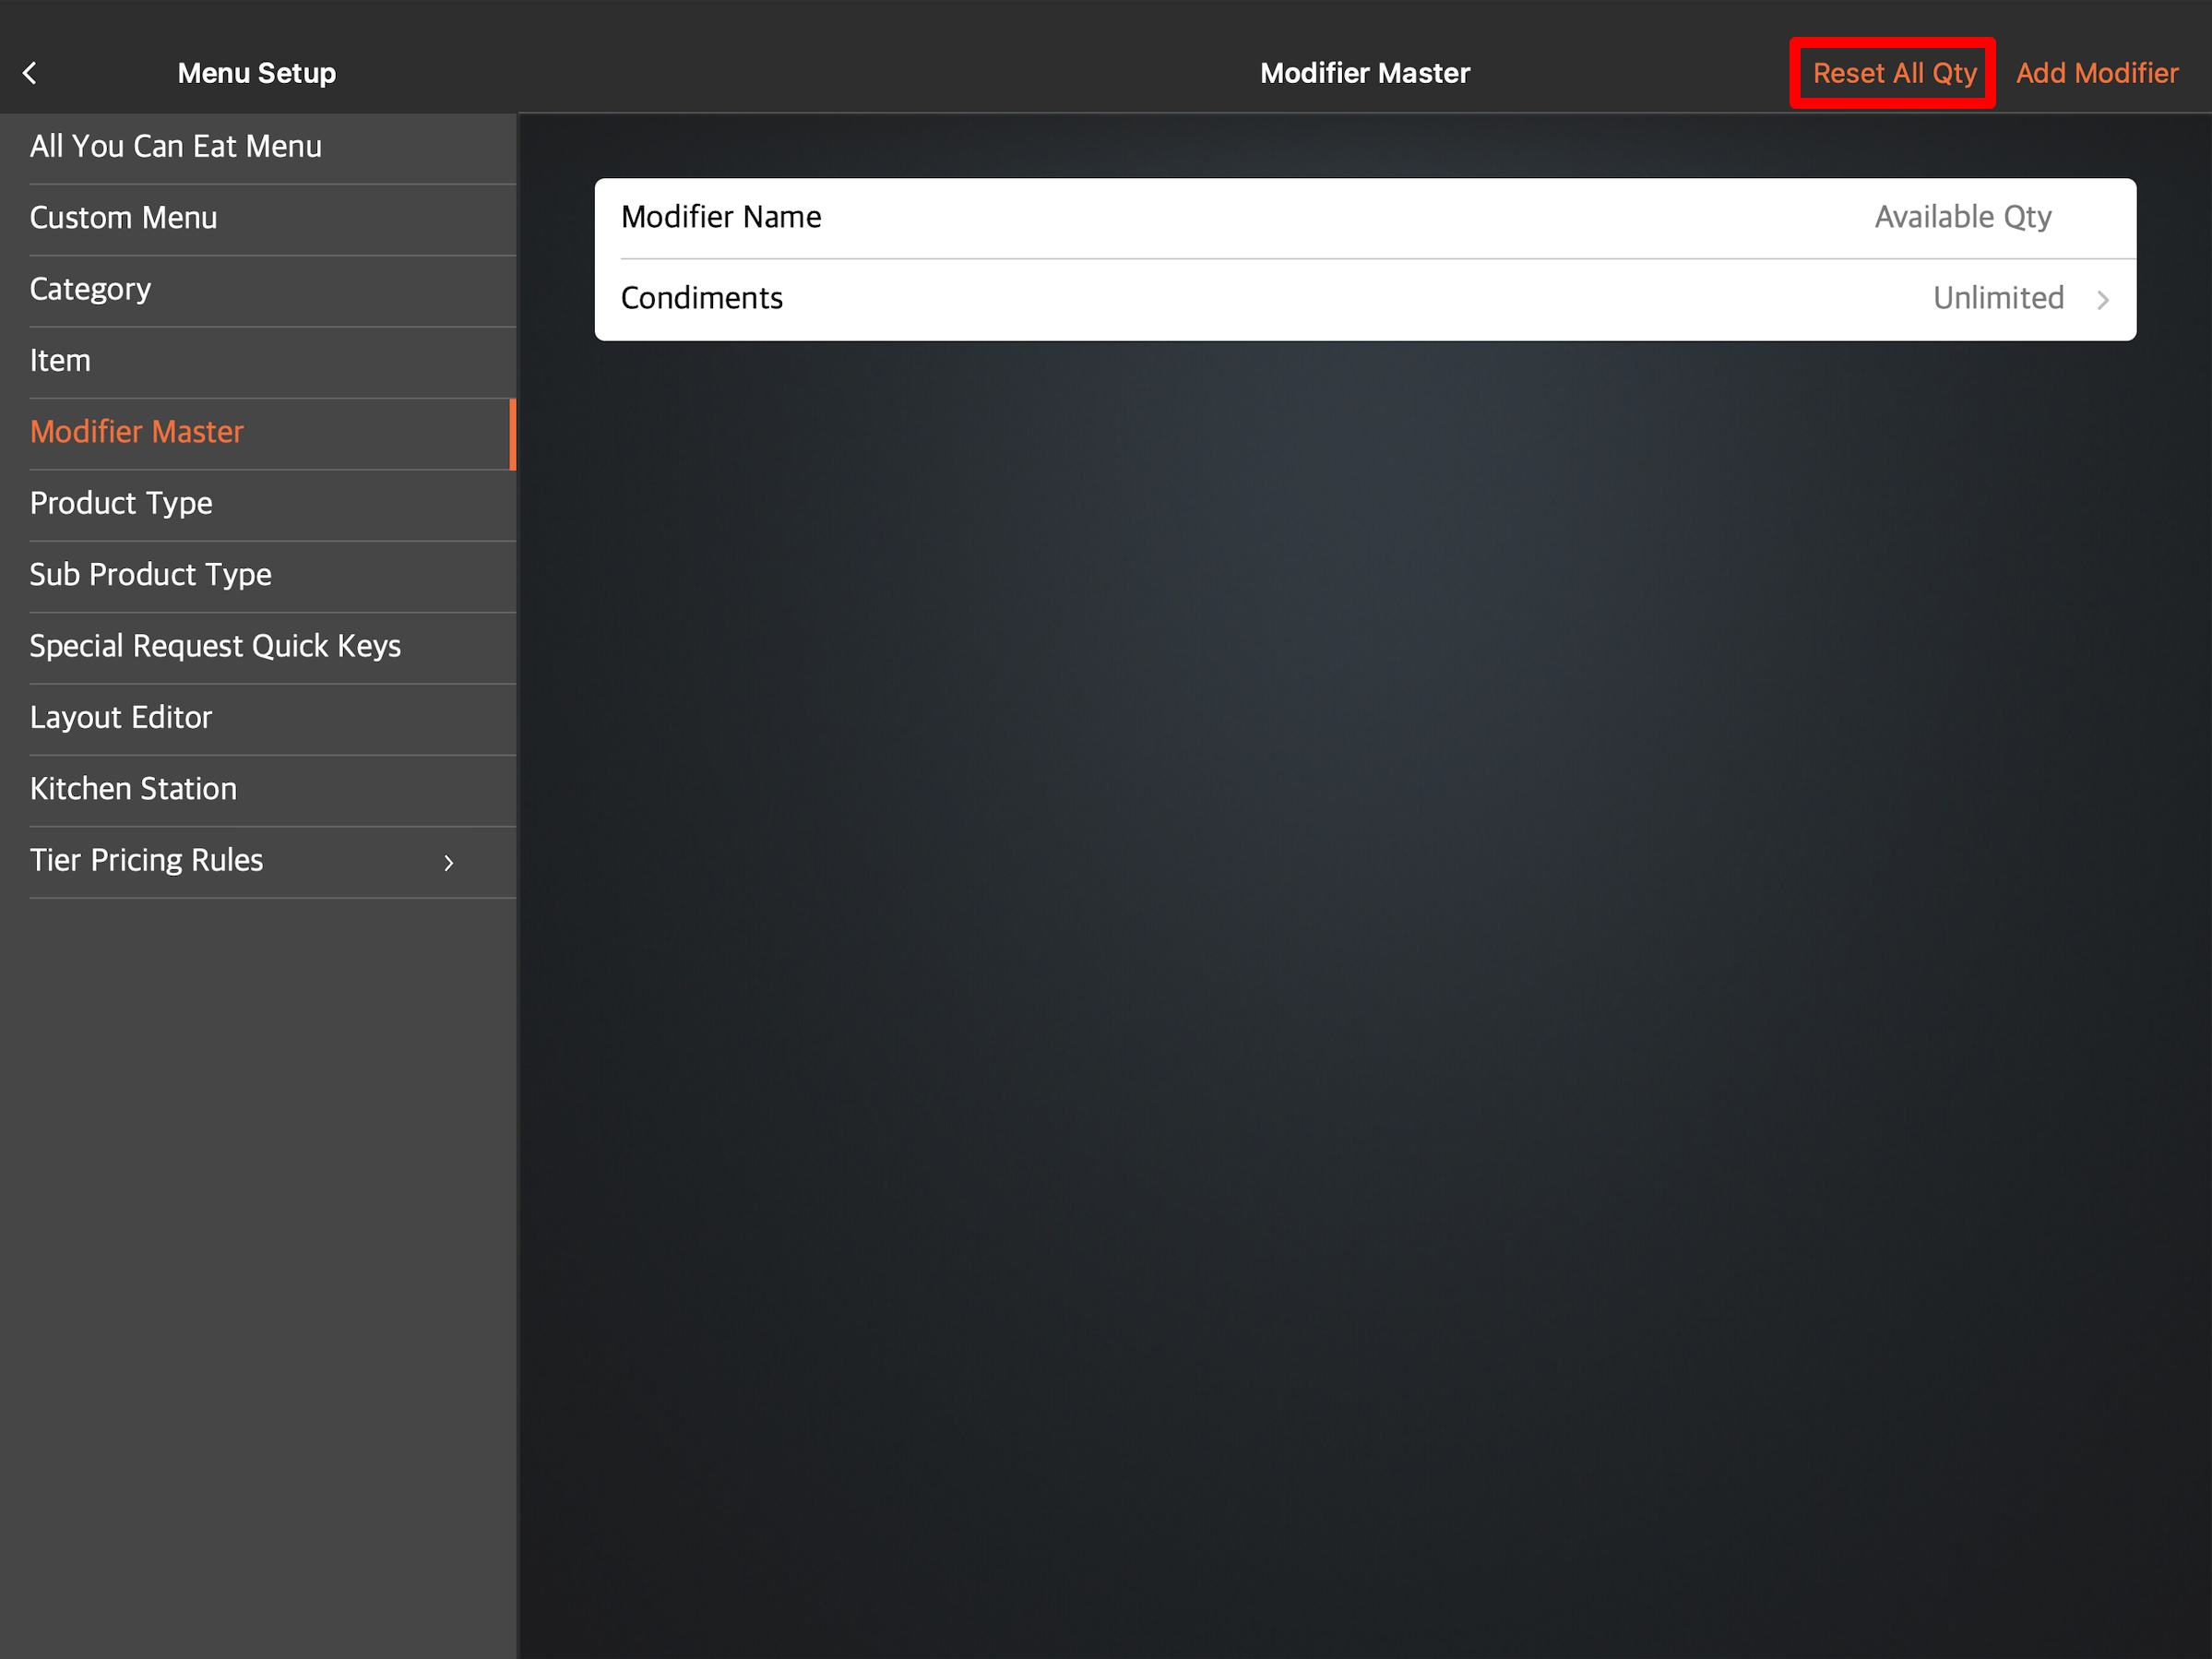
- Under General, tap Menu Setup, then select Modifier Master.
- At the top right, tap Reset All Qty.
Merchant Portal (Classic Theme)
- Log in to the Merchant Portal.
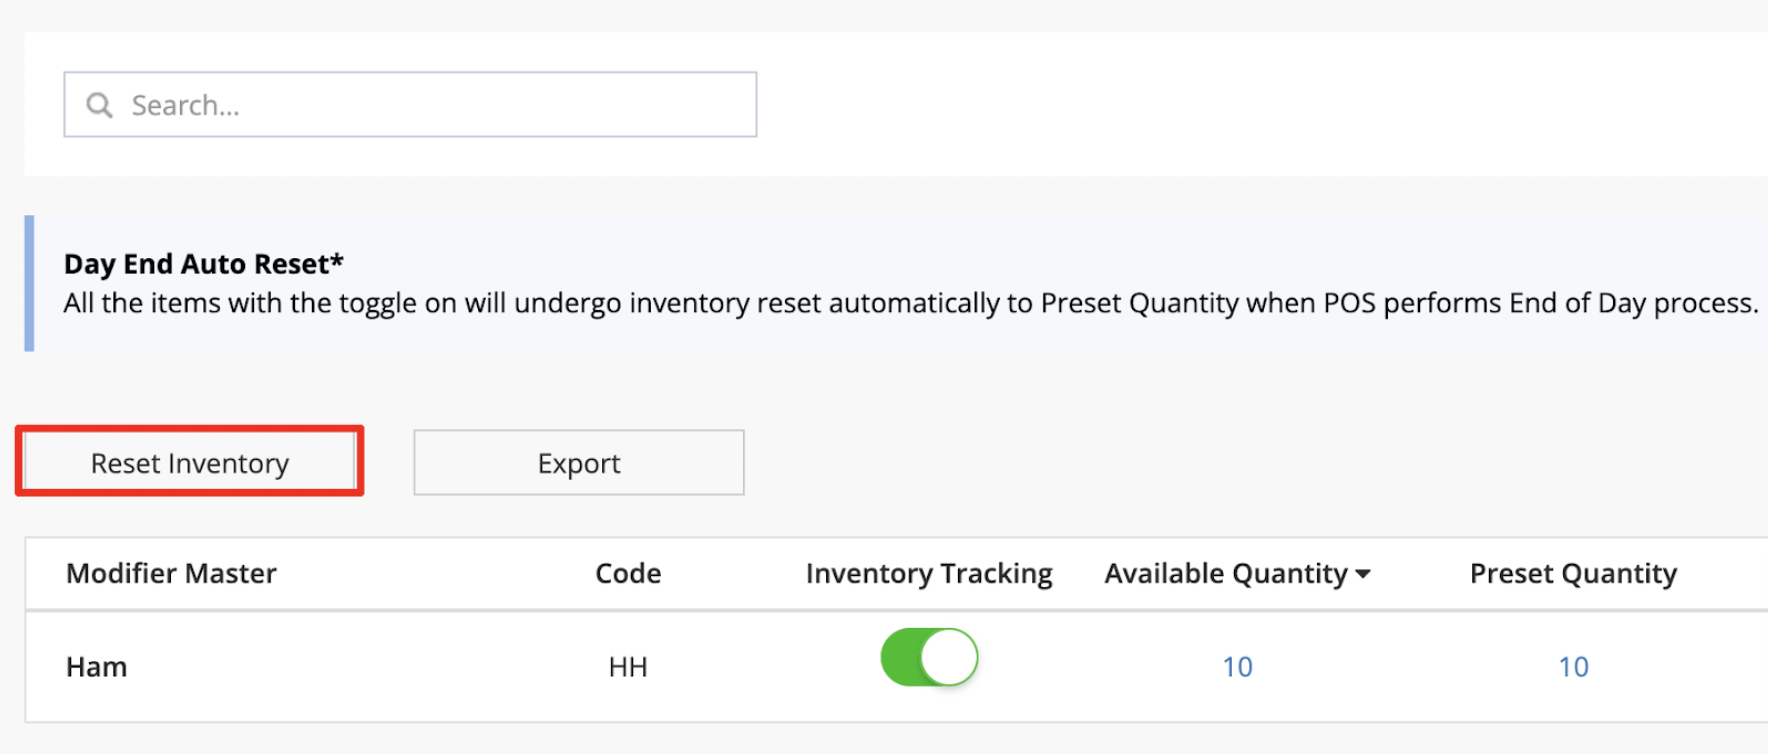
- On the left panel, click on Menu Setup, then select Modifier Master.
- Click on Reset Inventory.
Merchant Portal 2.0
- Log in to the Merchant Portal.
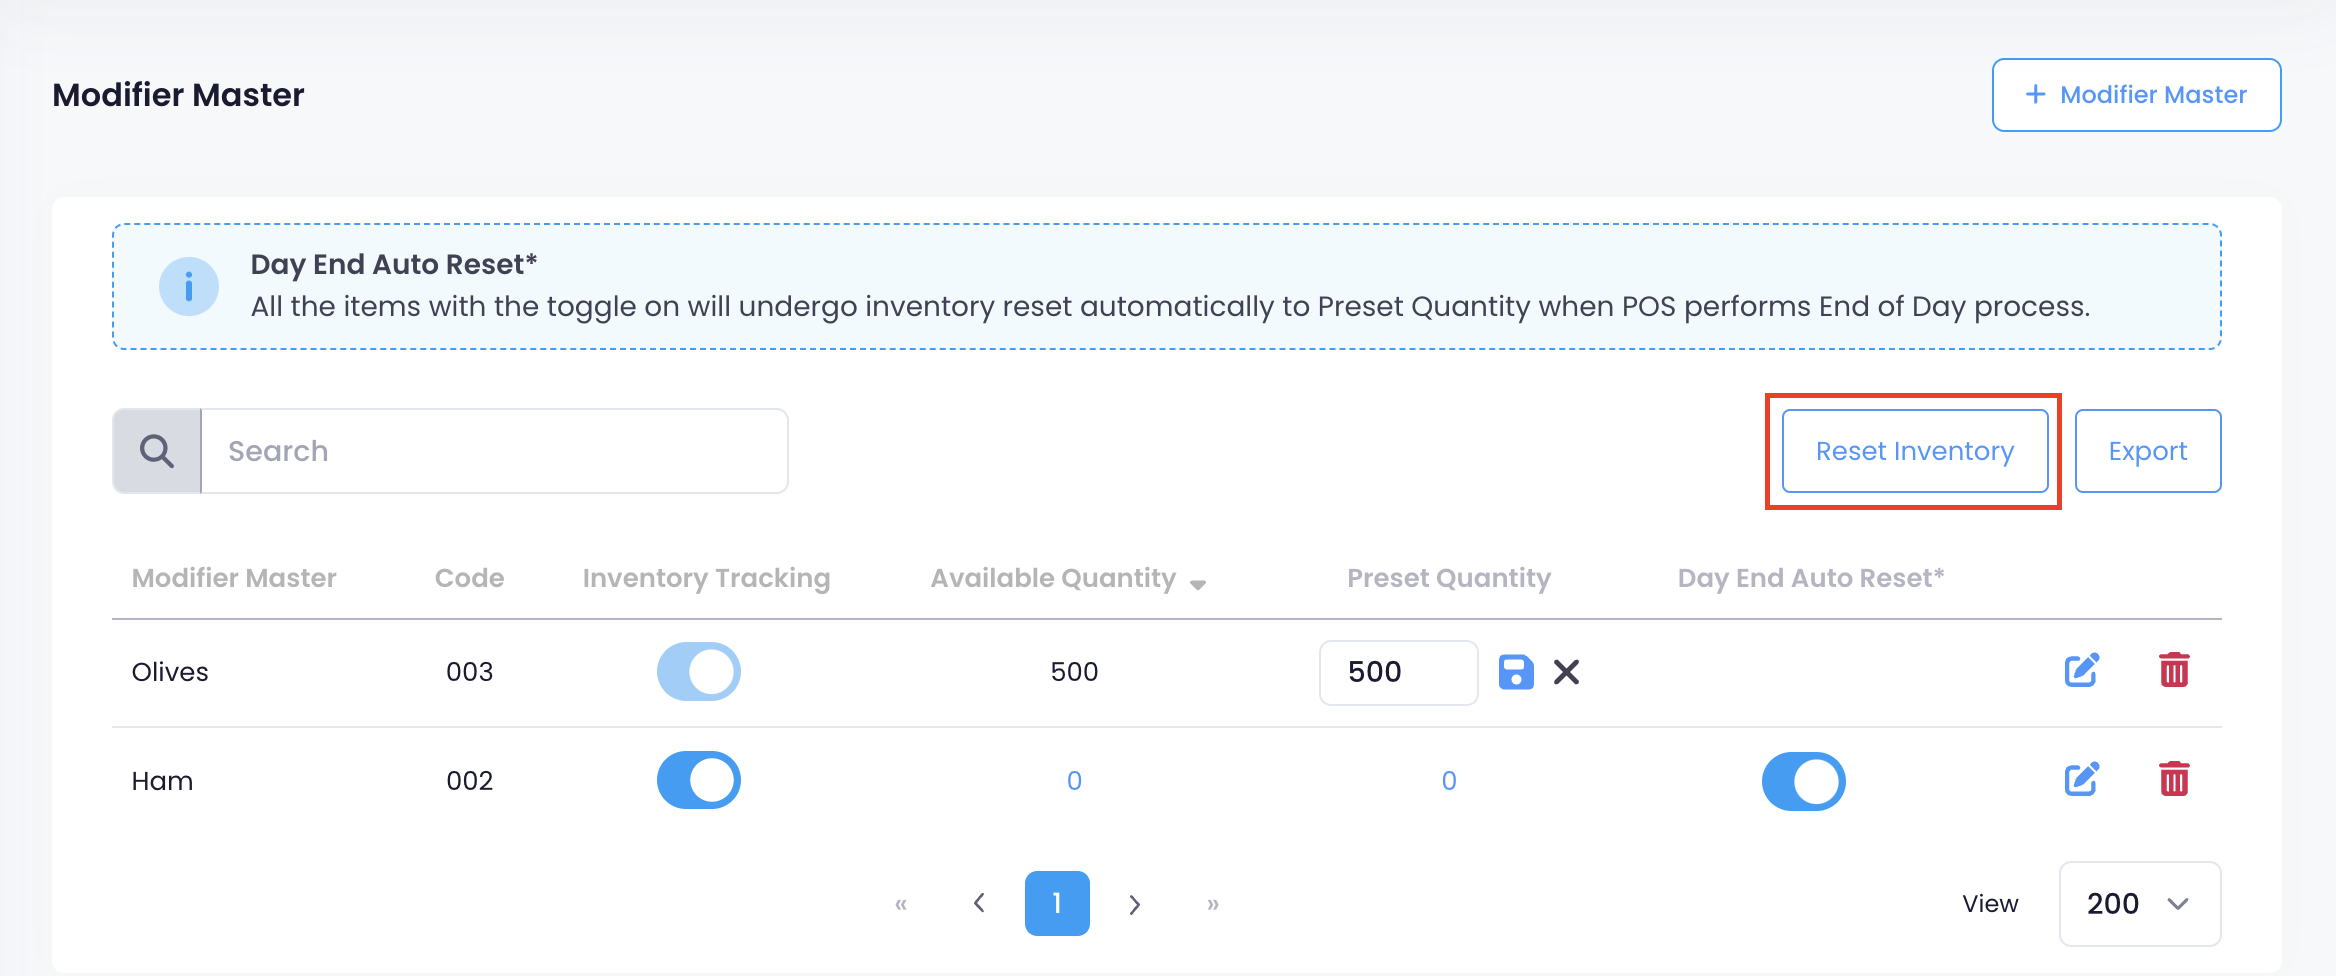
- On the left panel, click on Menu Setup.
- Click on Modifiers, then select Modifier Master.
- Click on Reset Inventory.
Export a Modifier Master
To export a Modifier Master, follow the steps below:
Merchant Portal (Classic Theme)
- Log in to the Merchant Portal.
- On the left panel, click on Menu Setup, then select Modifier Master.
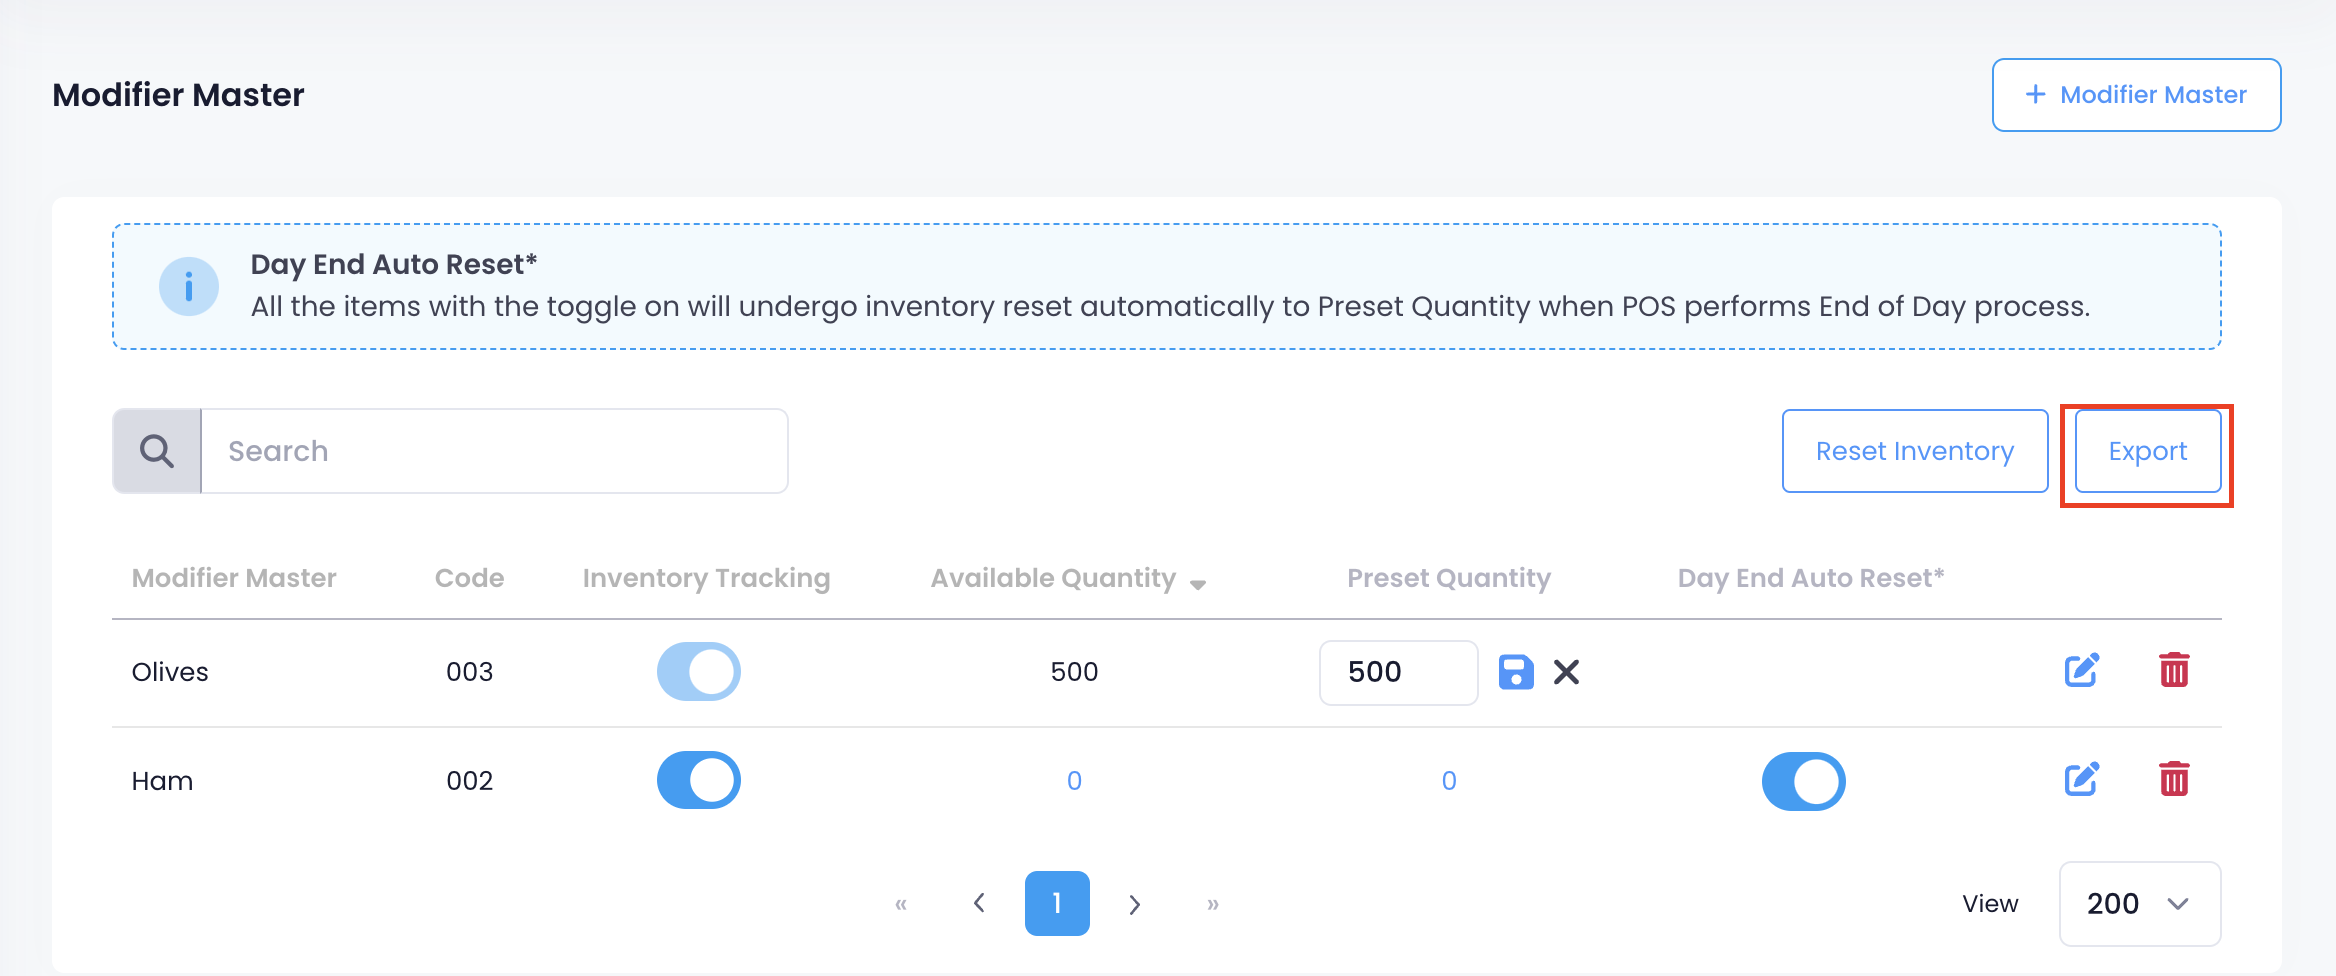
- Click on Export.

Merchant Portal 2.0
- Log in to the Merchant Portal.
- On the left panel, click on Menu Setup.
- Click on Modifiers, then select Modifier Master.
- Click on Export.