Queuing Settings
Table of Contents
Set up Queuing
Learn how to configure queuing settings on the Eats365 POS or on the Merchant Portal.
The Queuing function on the Eats365 POS enables your restaurant to issue queuing tickets to accommodate waiting customers. This queuing system also lets your customers know their position in line, so they are aware of how long they have to wait until a table becomes available.
In this article, you’ll learn about how to set up Queuing before you start issuing tickets.
Set up Queuing
To set up Queuing, follow the steps below:
Eats365 POS
- Log in to the Eats365 POS.
- At the top left, tap Settings
 .
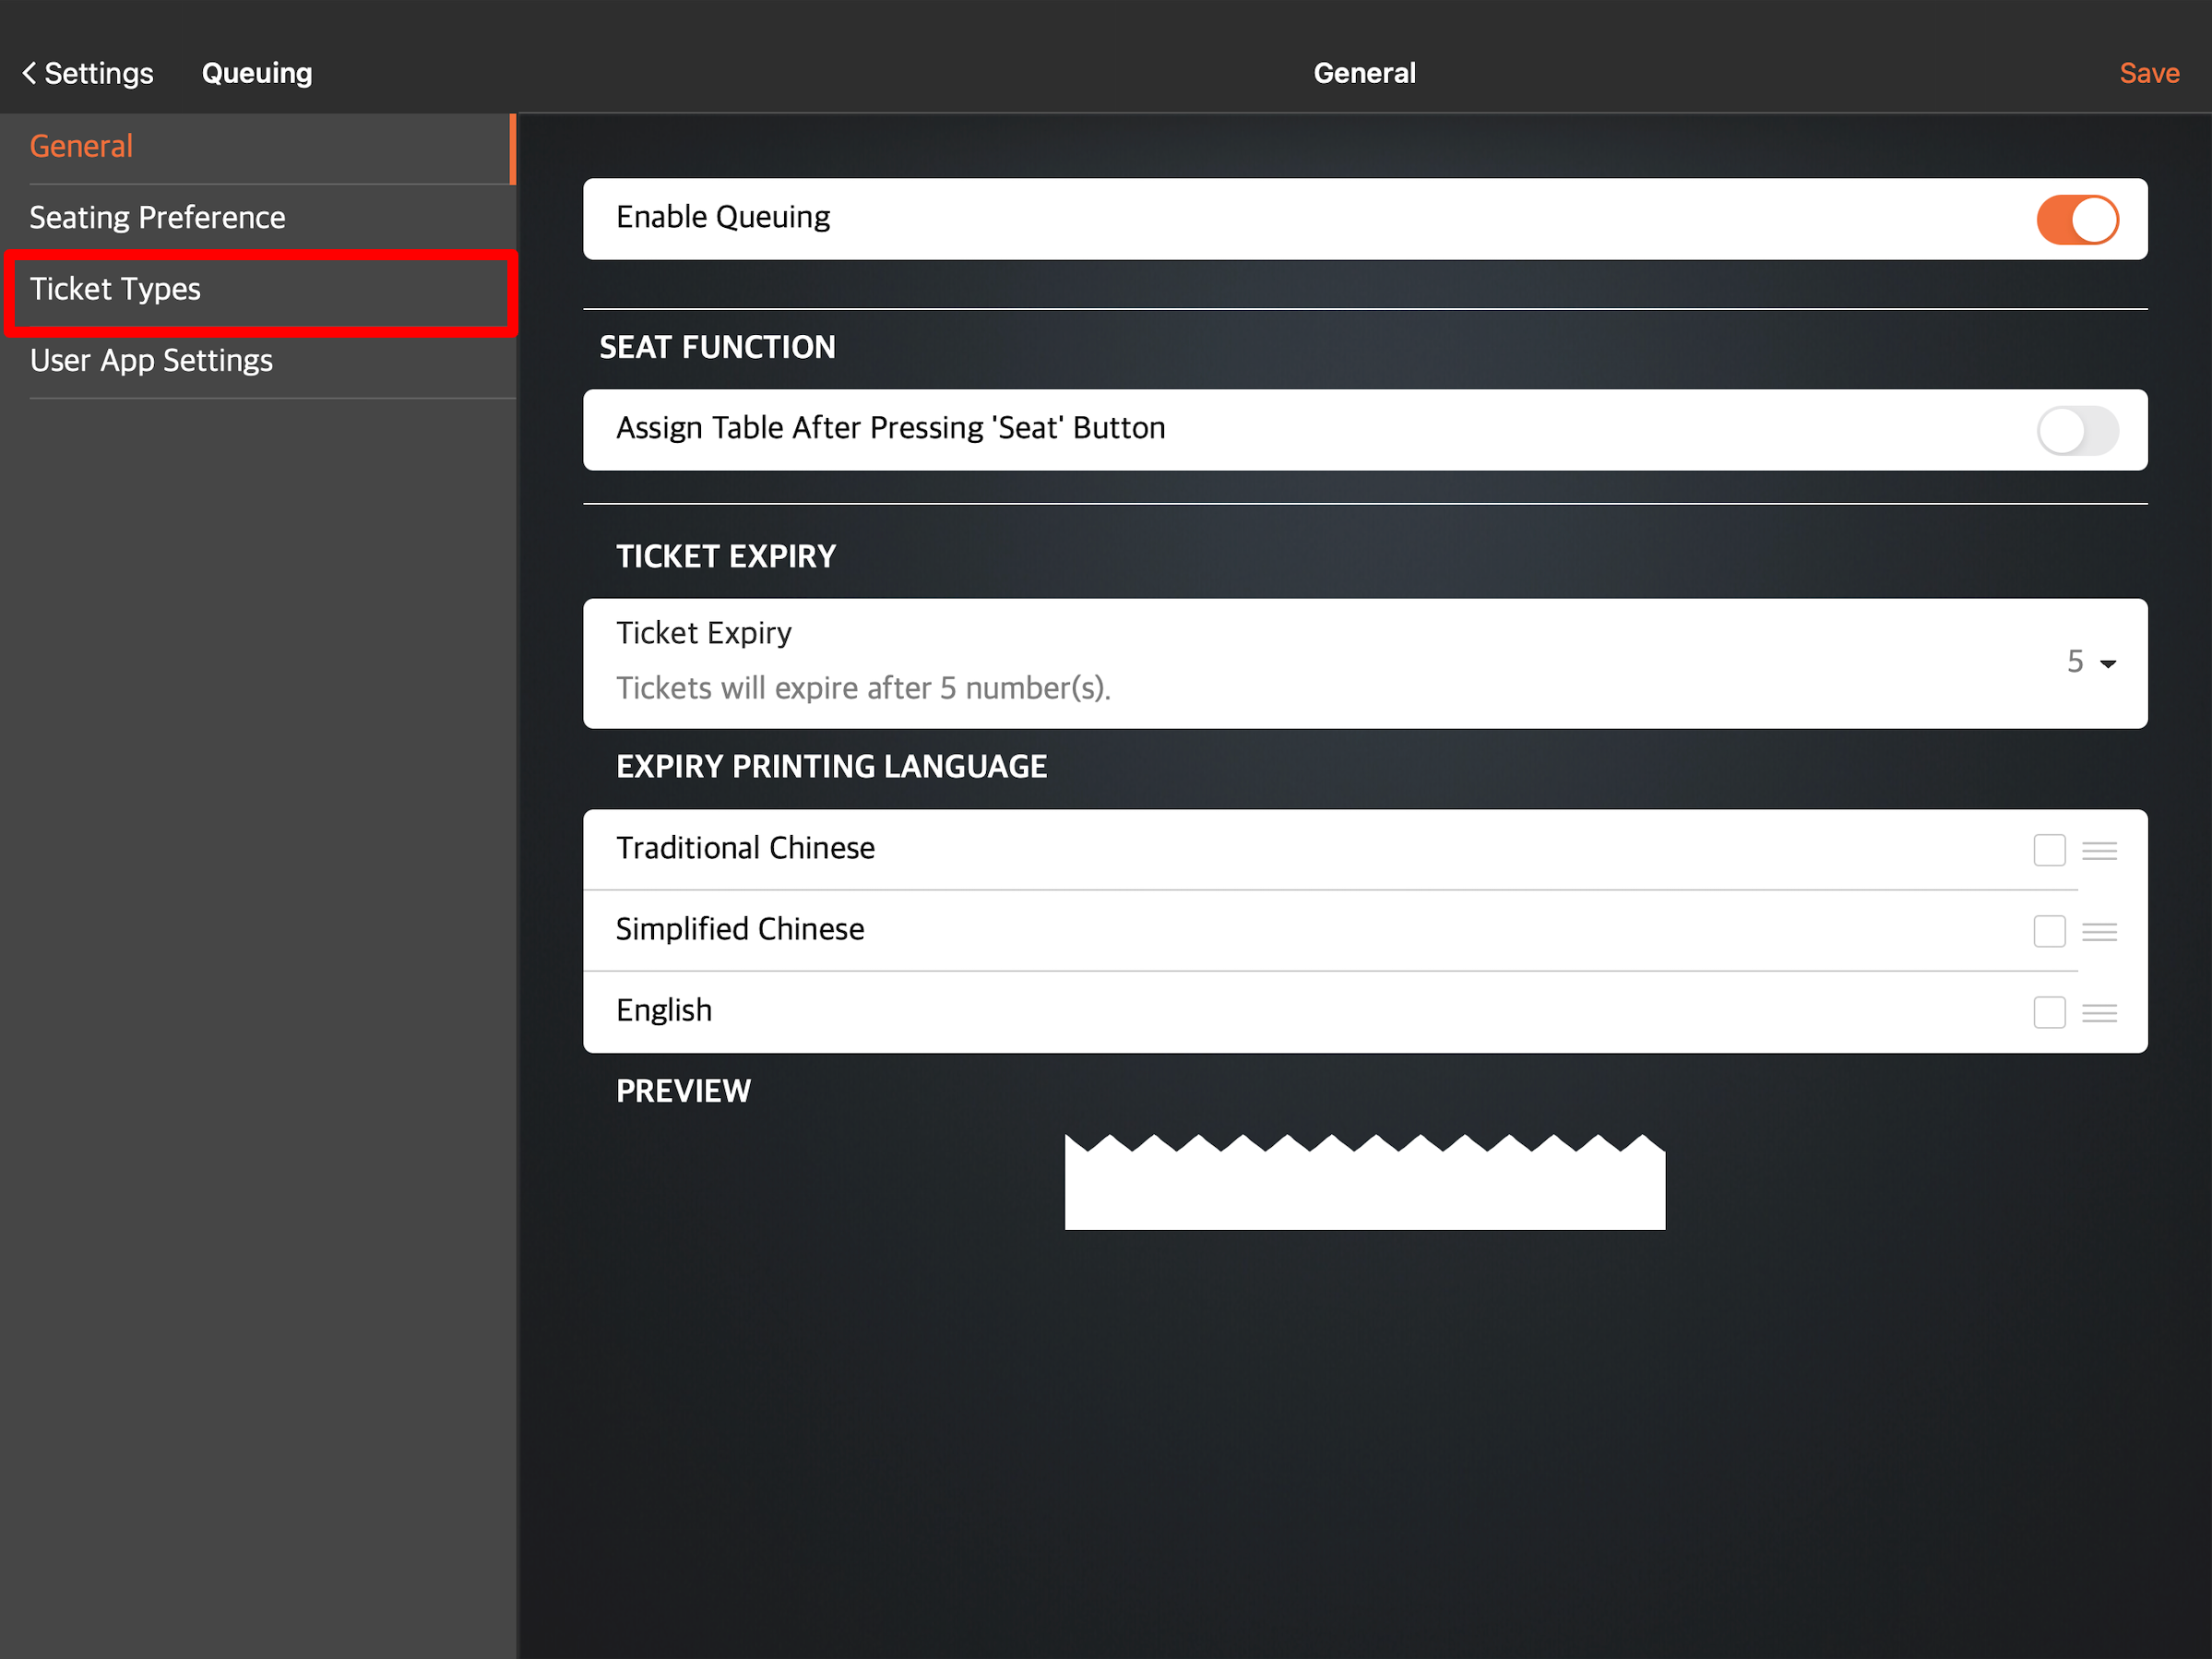
. - Under "Settings," tap Queuing.
- Under "General," turn on Enable Queuing
 .
.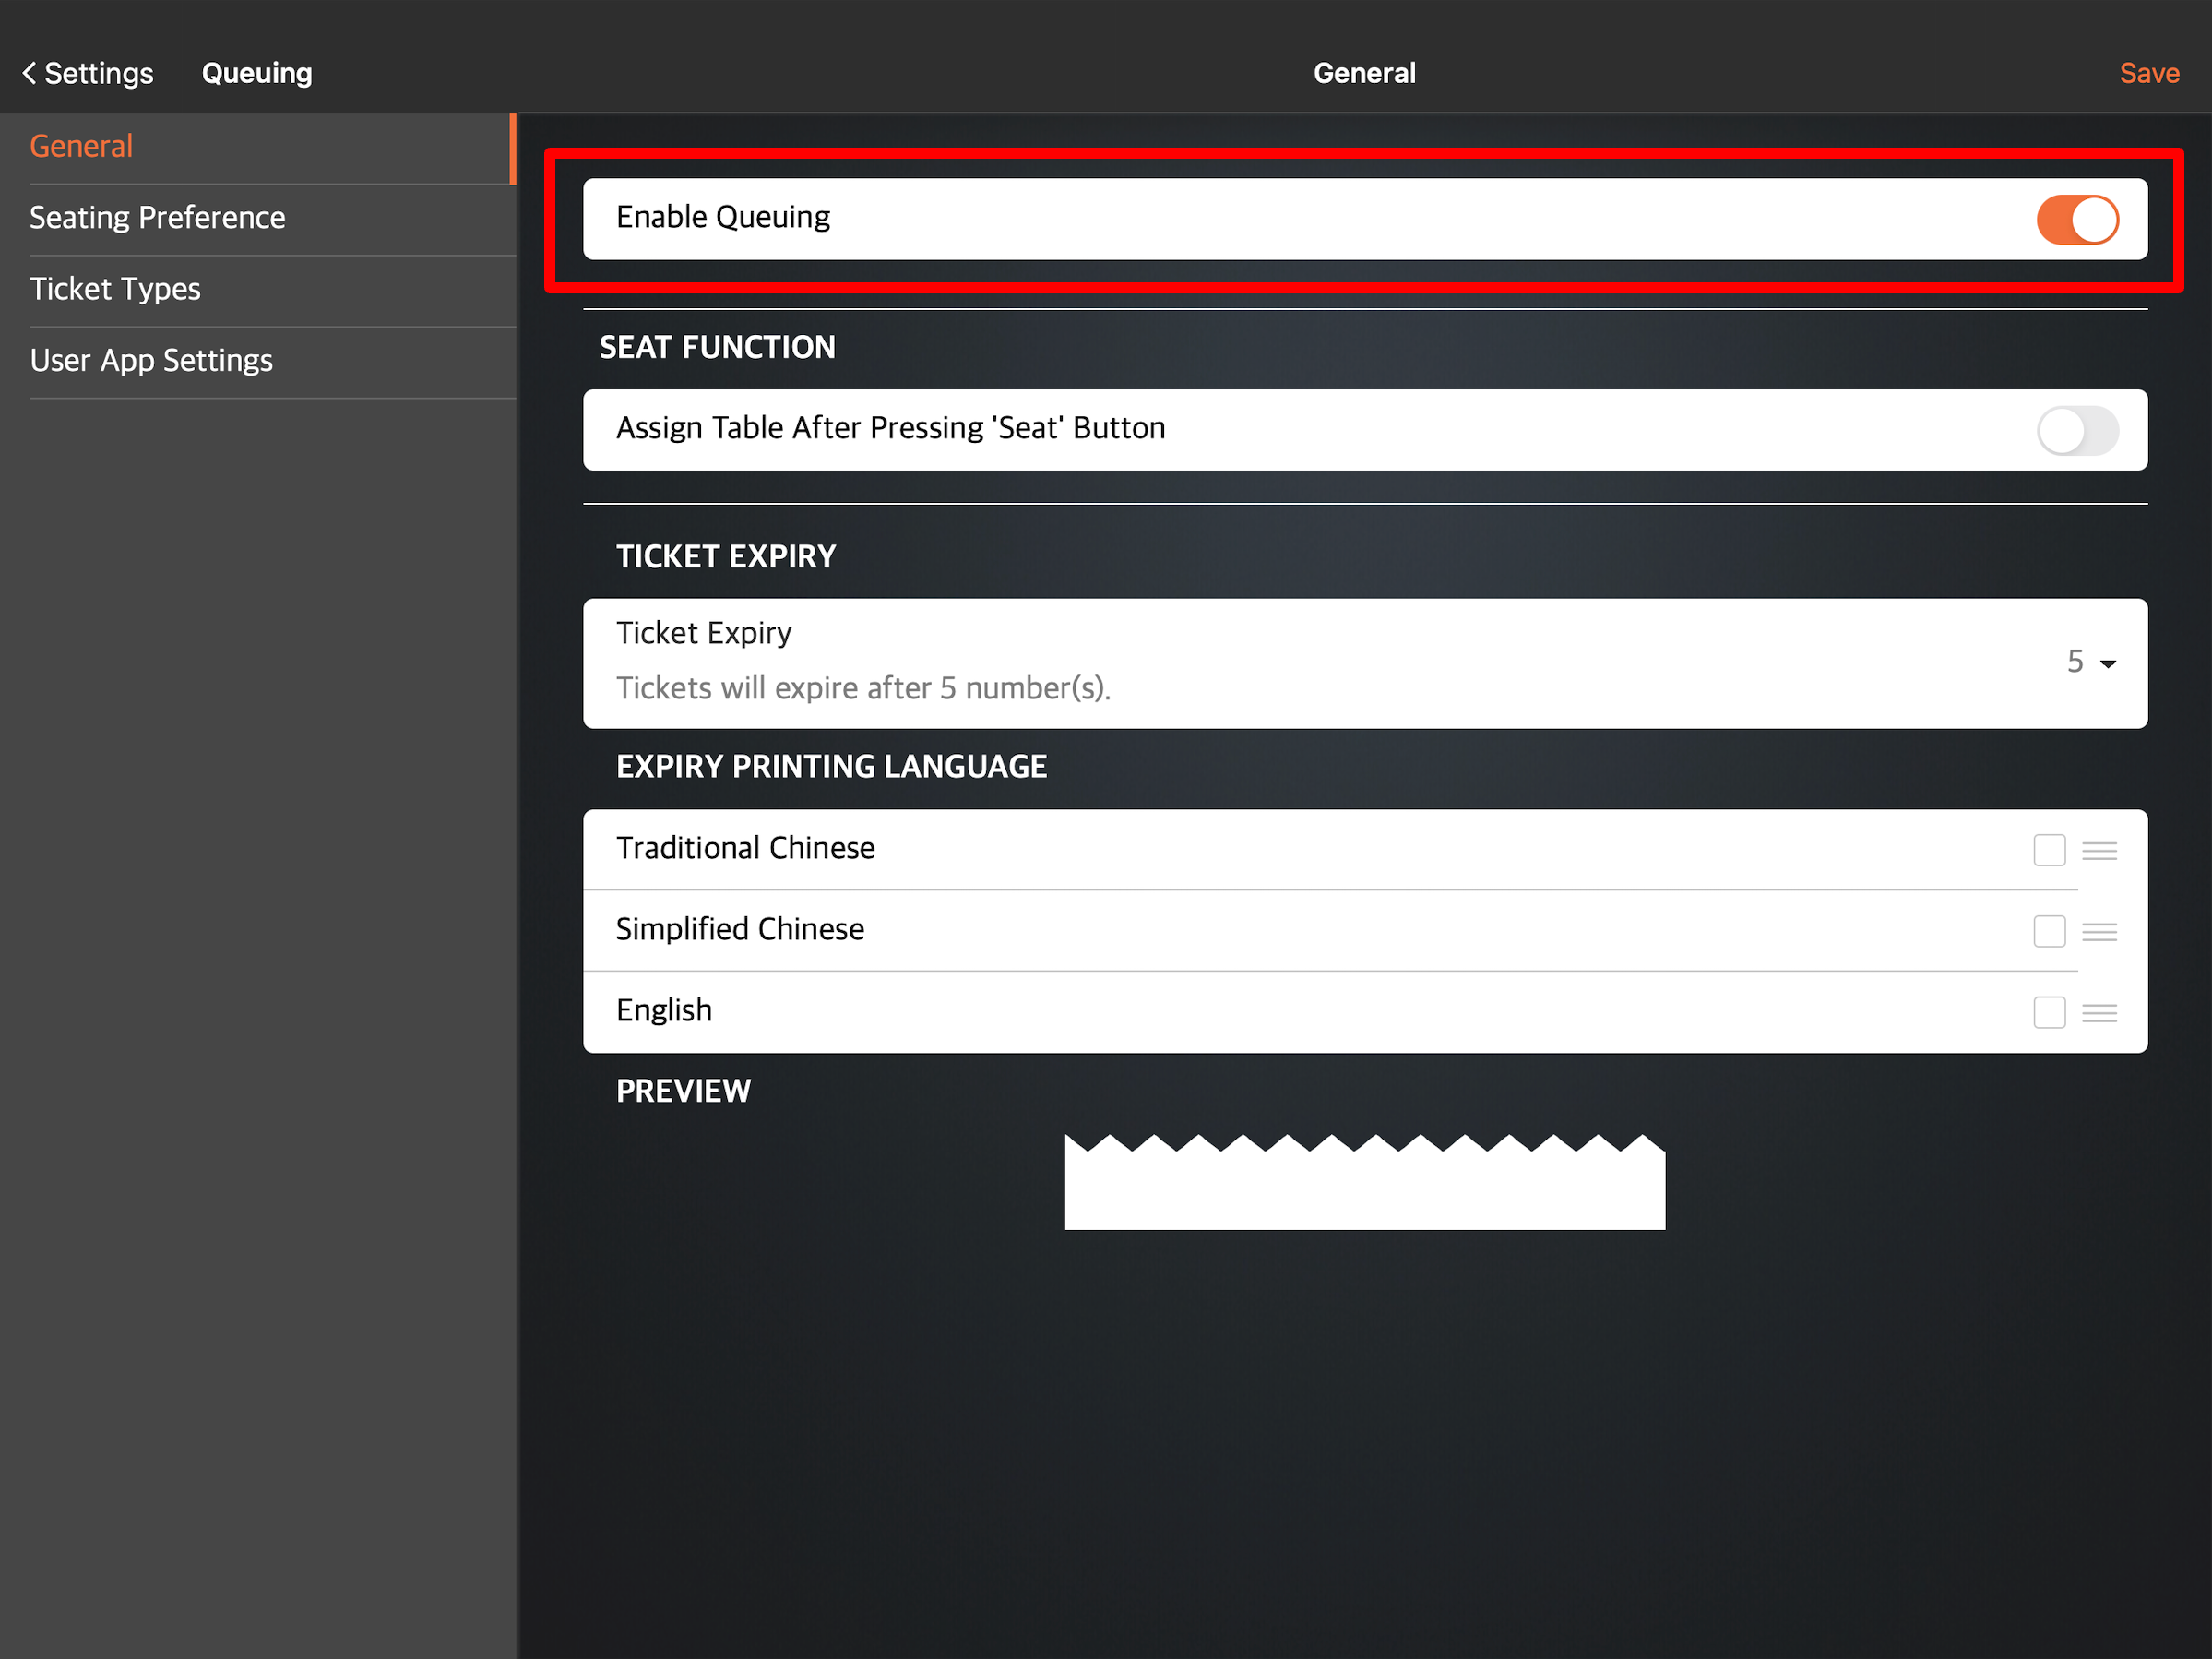
- Once Queuing is enabled, you can then configure the Queuing settings.
- At the top right, tap Save to confirm.
Below is the list of settings that you can configure on the POS:
General
Ticket Time Display
Current Tickets Page Time Display Format
Select how the queuing ticket time appears on the POS. You can choose from the following:
- Elapsed Time - Display how much time has passed (in minutes) since the queuing ticket was issued.
- Obtain Ticket Time - Display the time when the queuing ticket was issued.
| Elapsed Time | Obtain Ticket Time |
 |
 |
History Page Show Ticket First Called Time
Enable this setting to display the time when the queuing ticket was called.
Seat Function
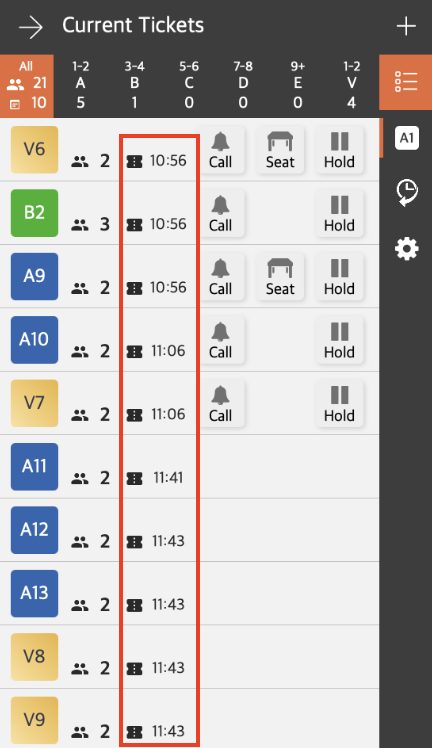
Assign Table After Pressing 'Seat’ Button
Enable this setting to require staff to assign a table to the queuing customer upon tapping the Seat button.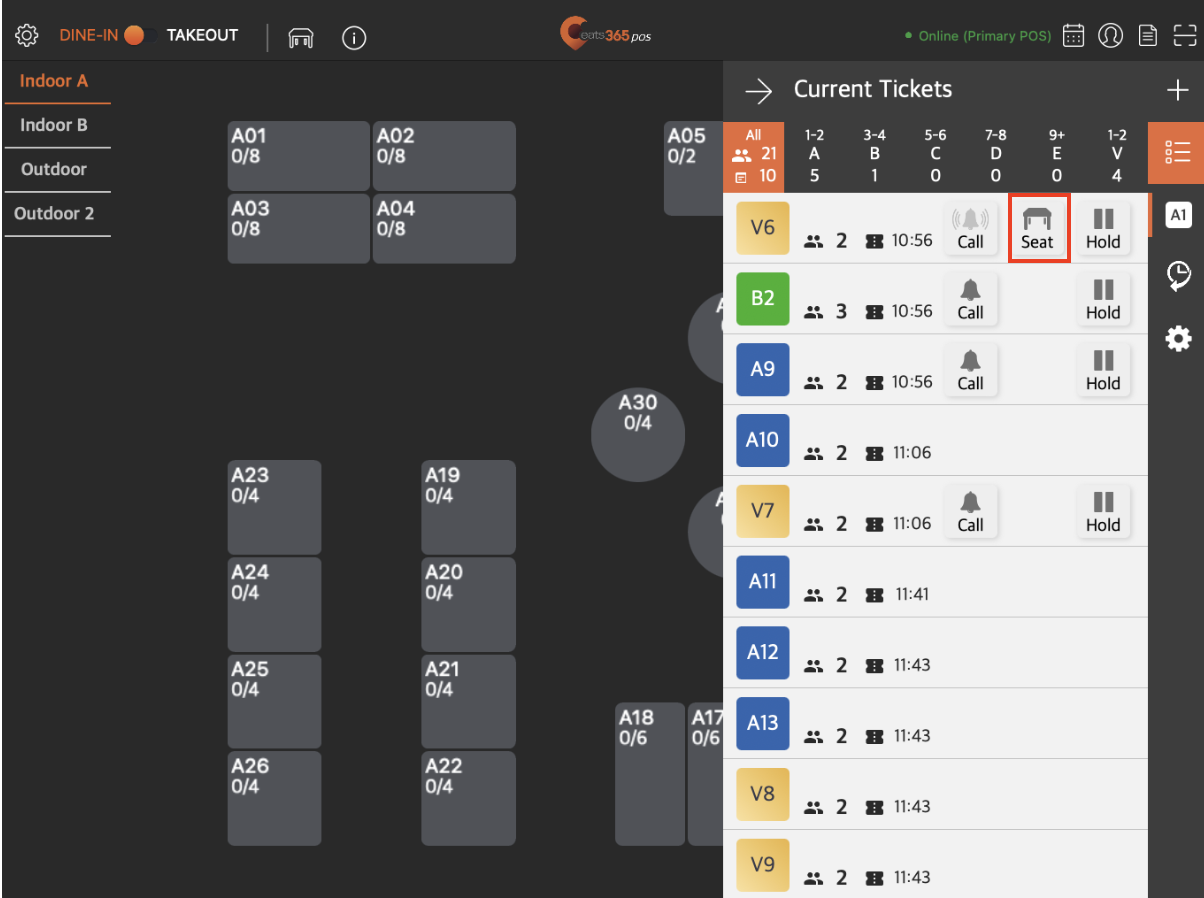
Ticket Expiry
Ticket Expiry
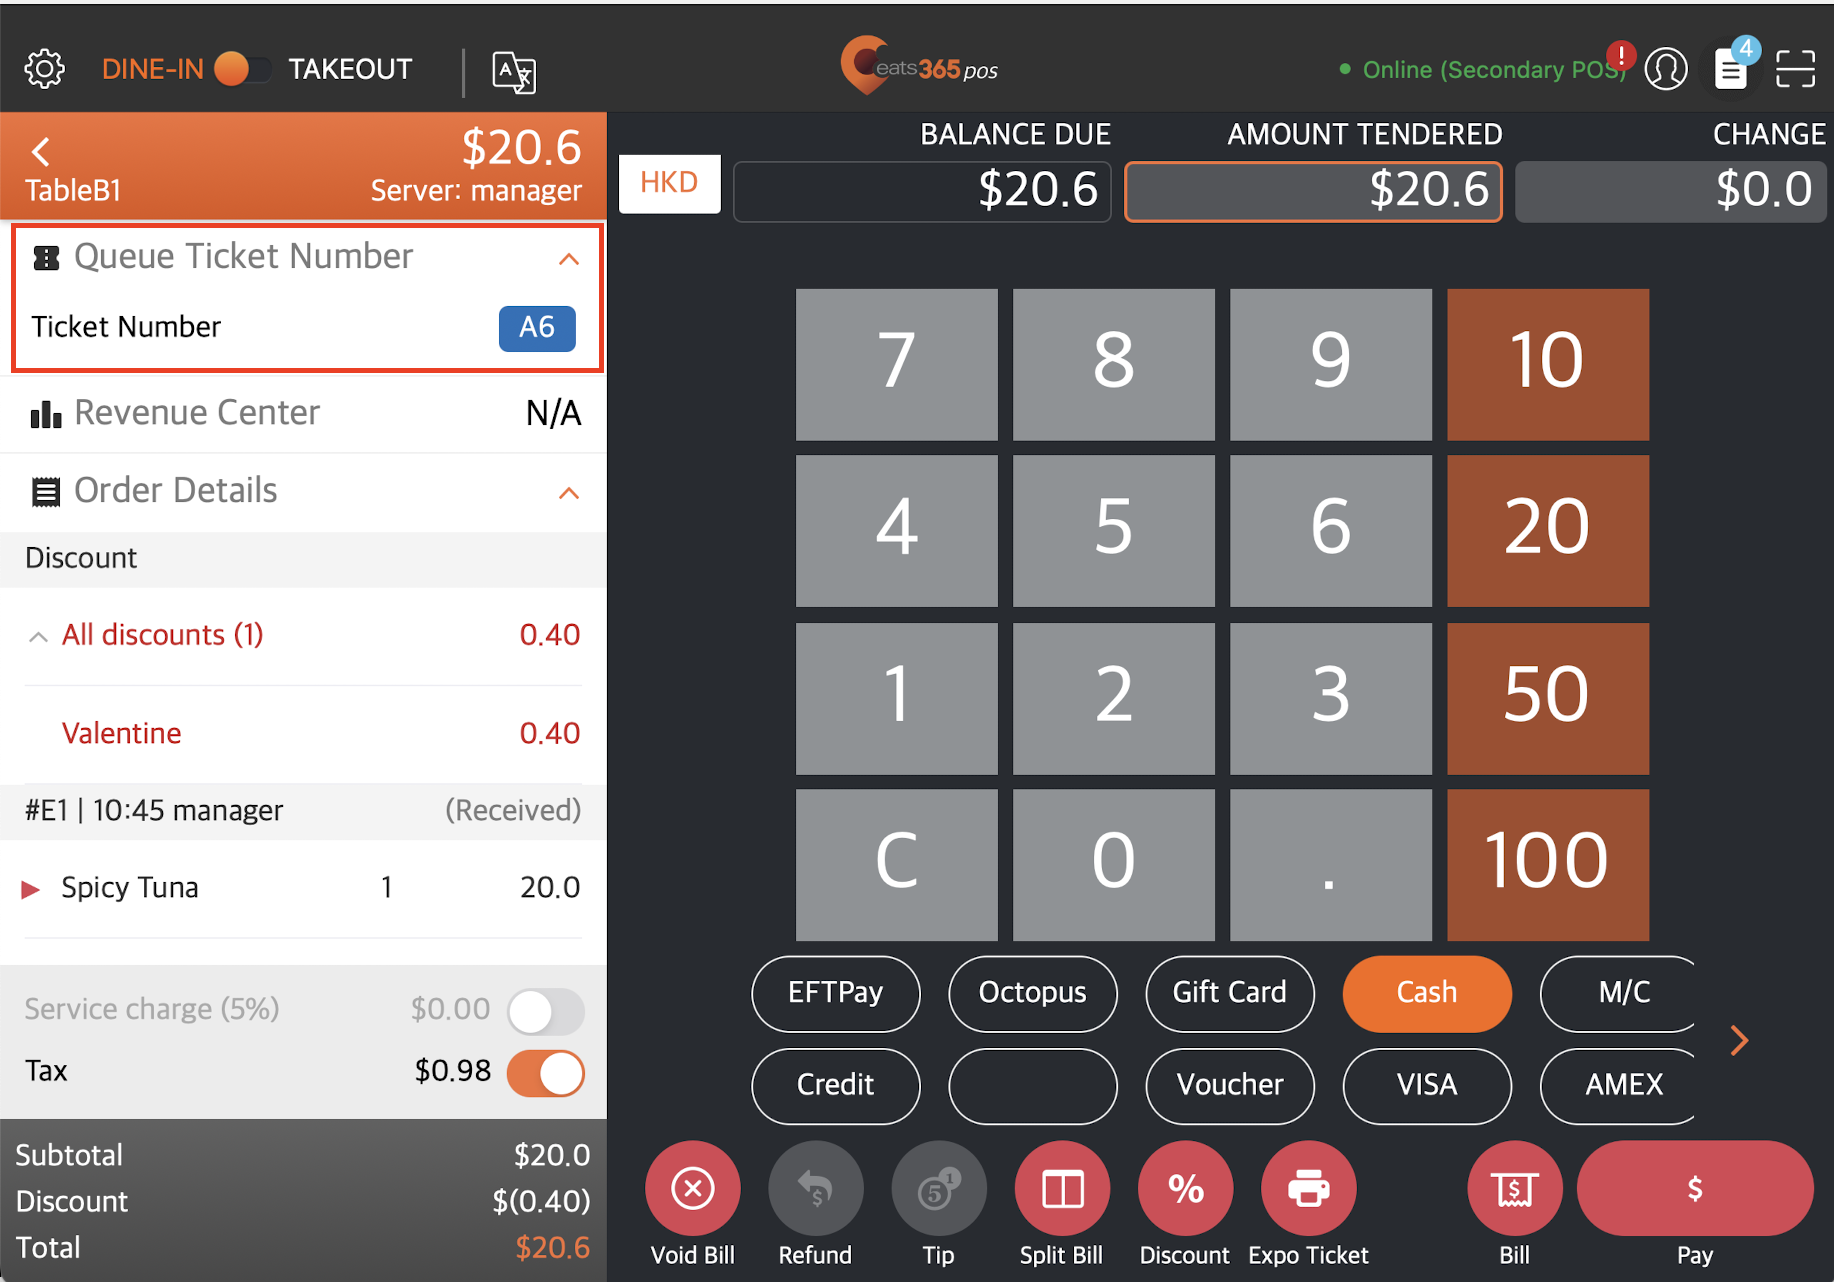
This setting allows you to set the number of queue tickets that can be called before a queuing ticket expires. For example, if the Ticket Expiry is set to “3,” a ticket numbered A2 will expire once A6 has been called.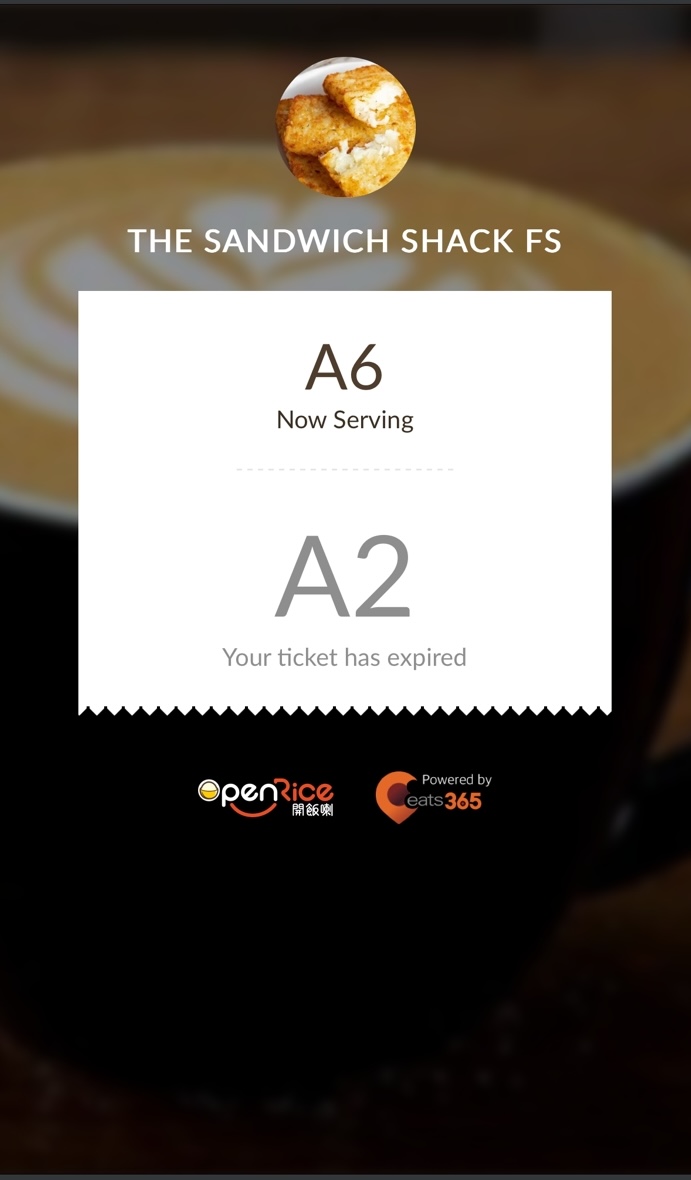
Free Text Above Ticket Expiry Message
Add a text that will appear above the ticket expiry message.
Free Text Below Ticket Expiry Message
Add a text that will appear below the ticket expiry message
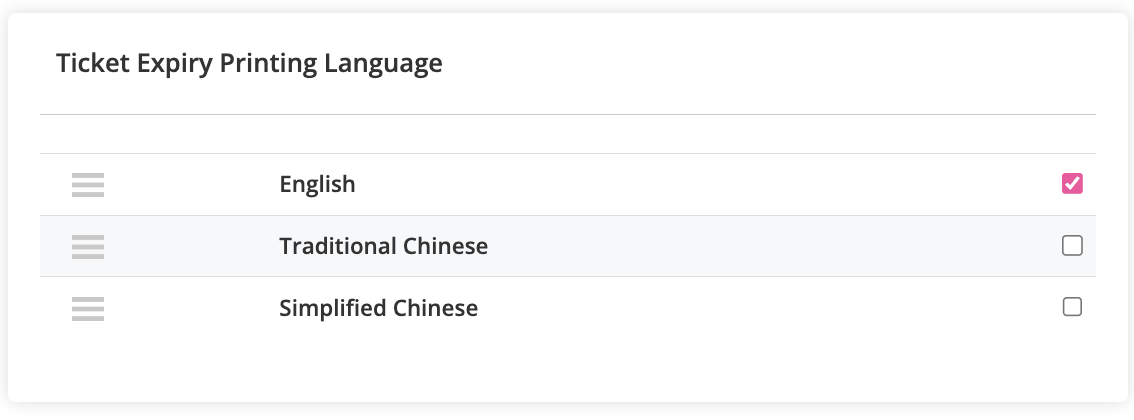
Expiry Printing Language
Choose what language you want the ticket expiry to show.
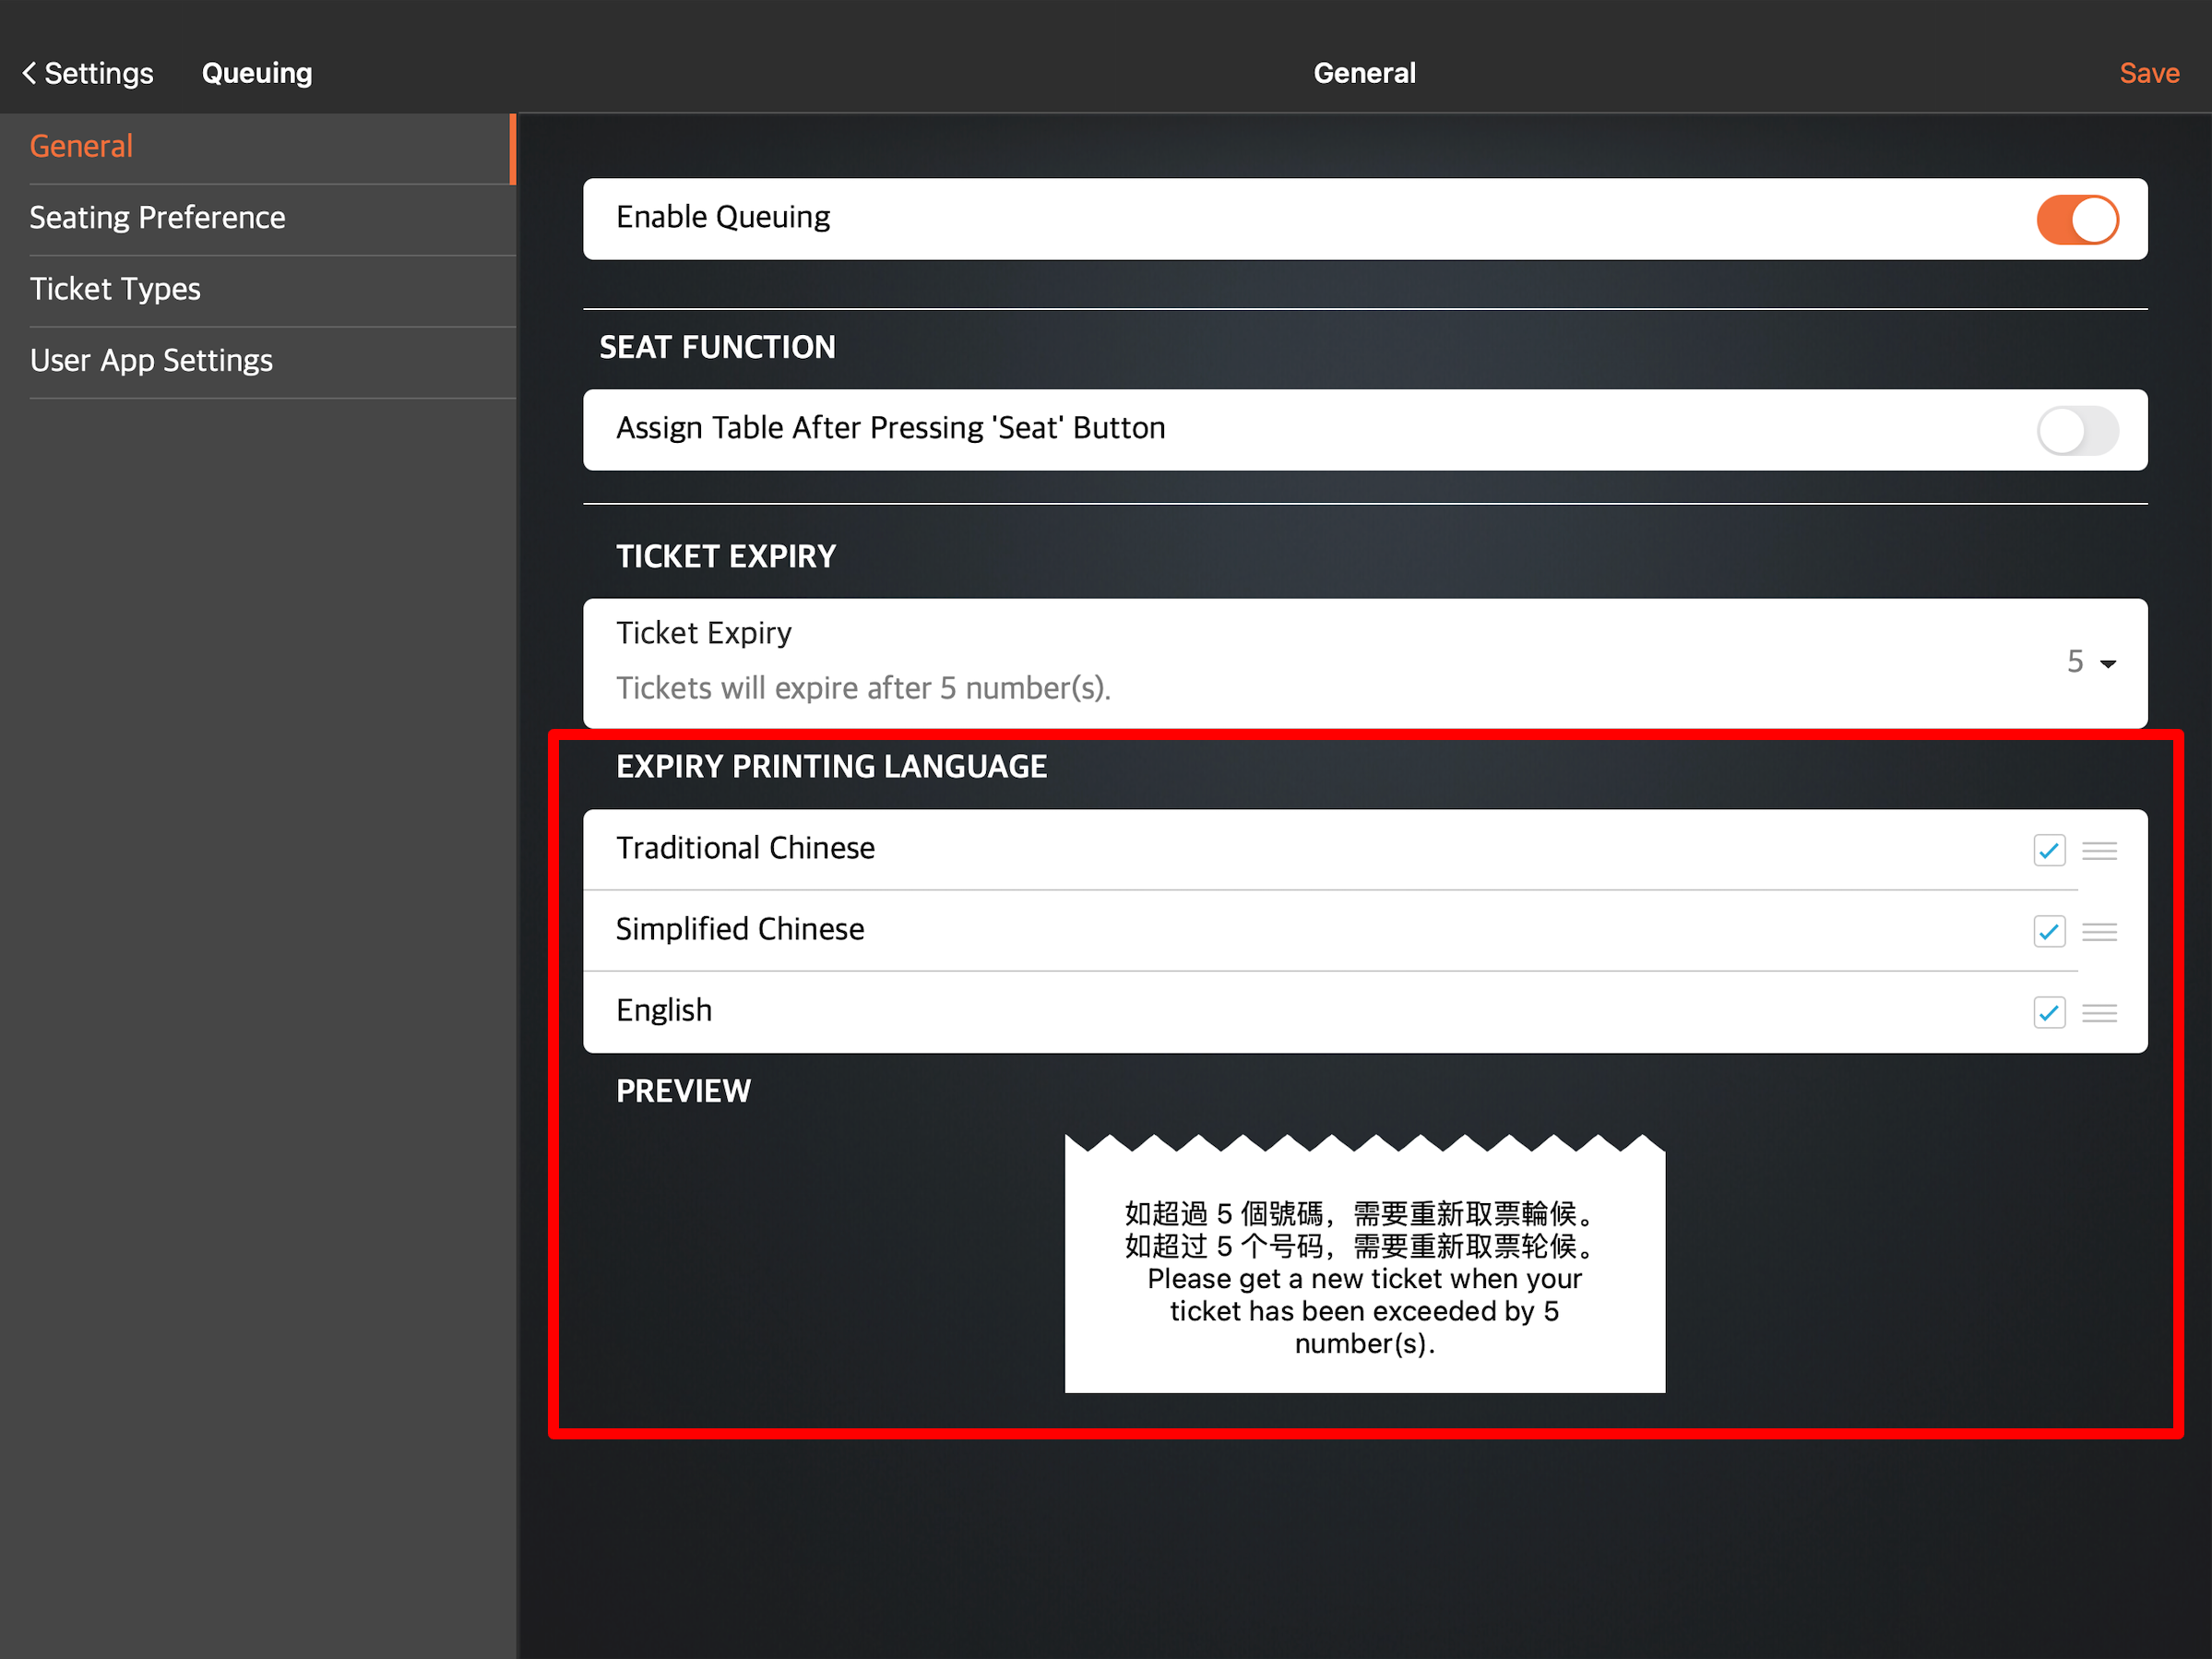
 . Then, drag the language in the order that you want it to appear.
Seating Preference
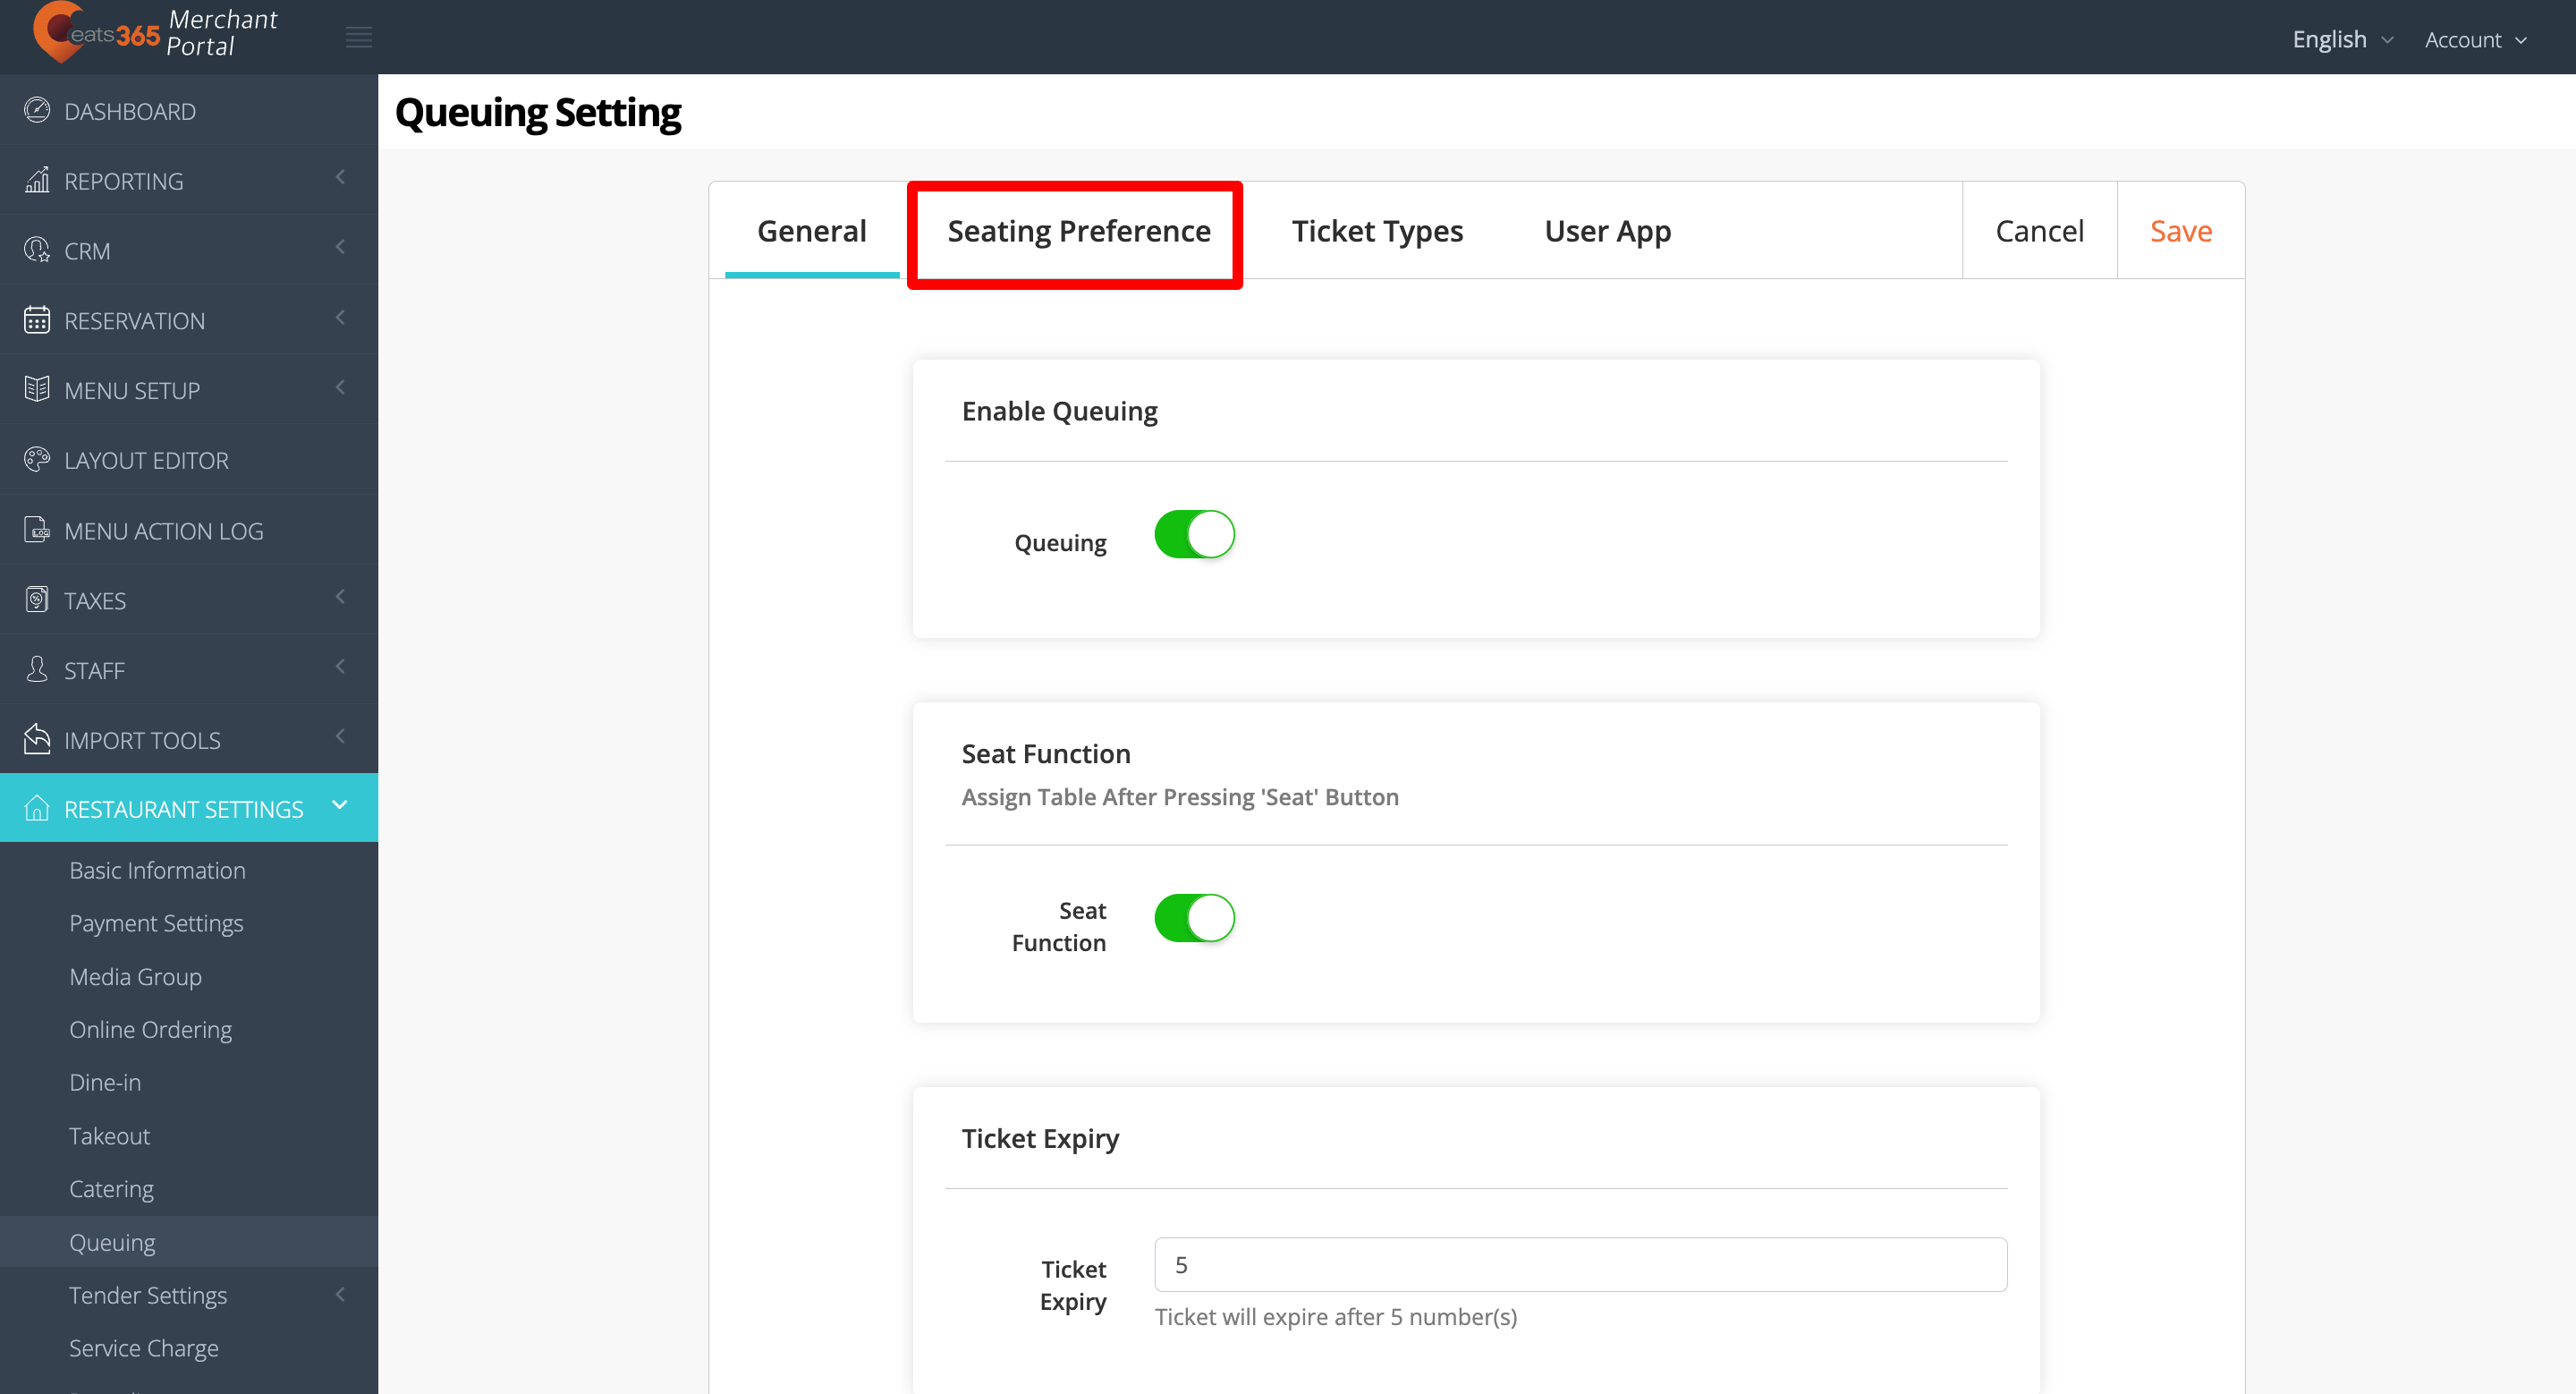
The Seating Preference setting allows you to add seating options for customers. When you add a seating option, customers can choose where they want to sit based on their preference and the options you provide.
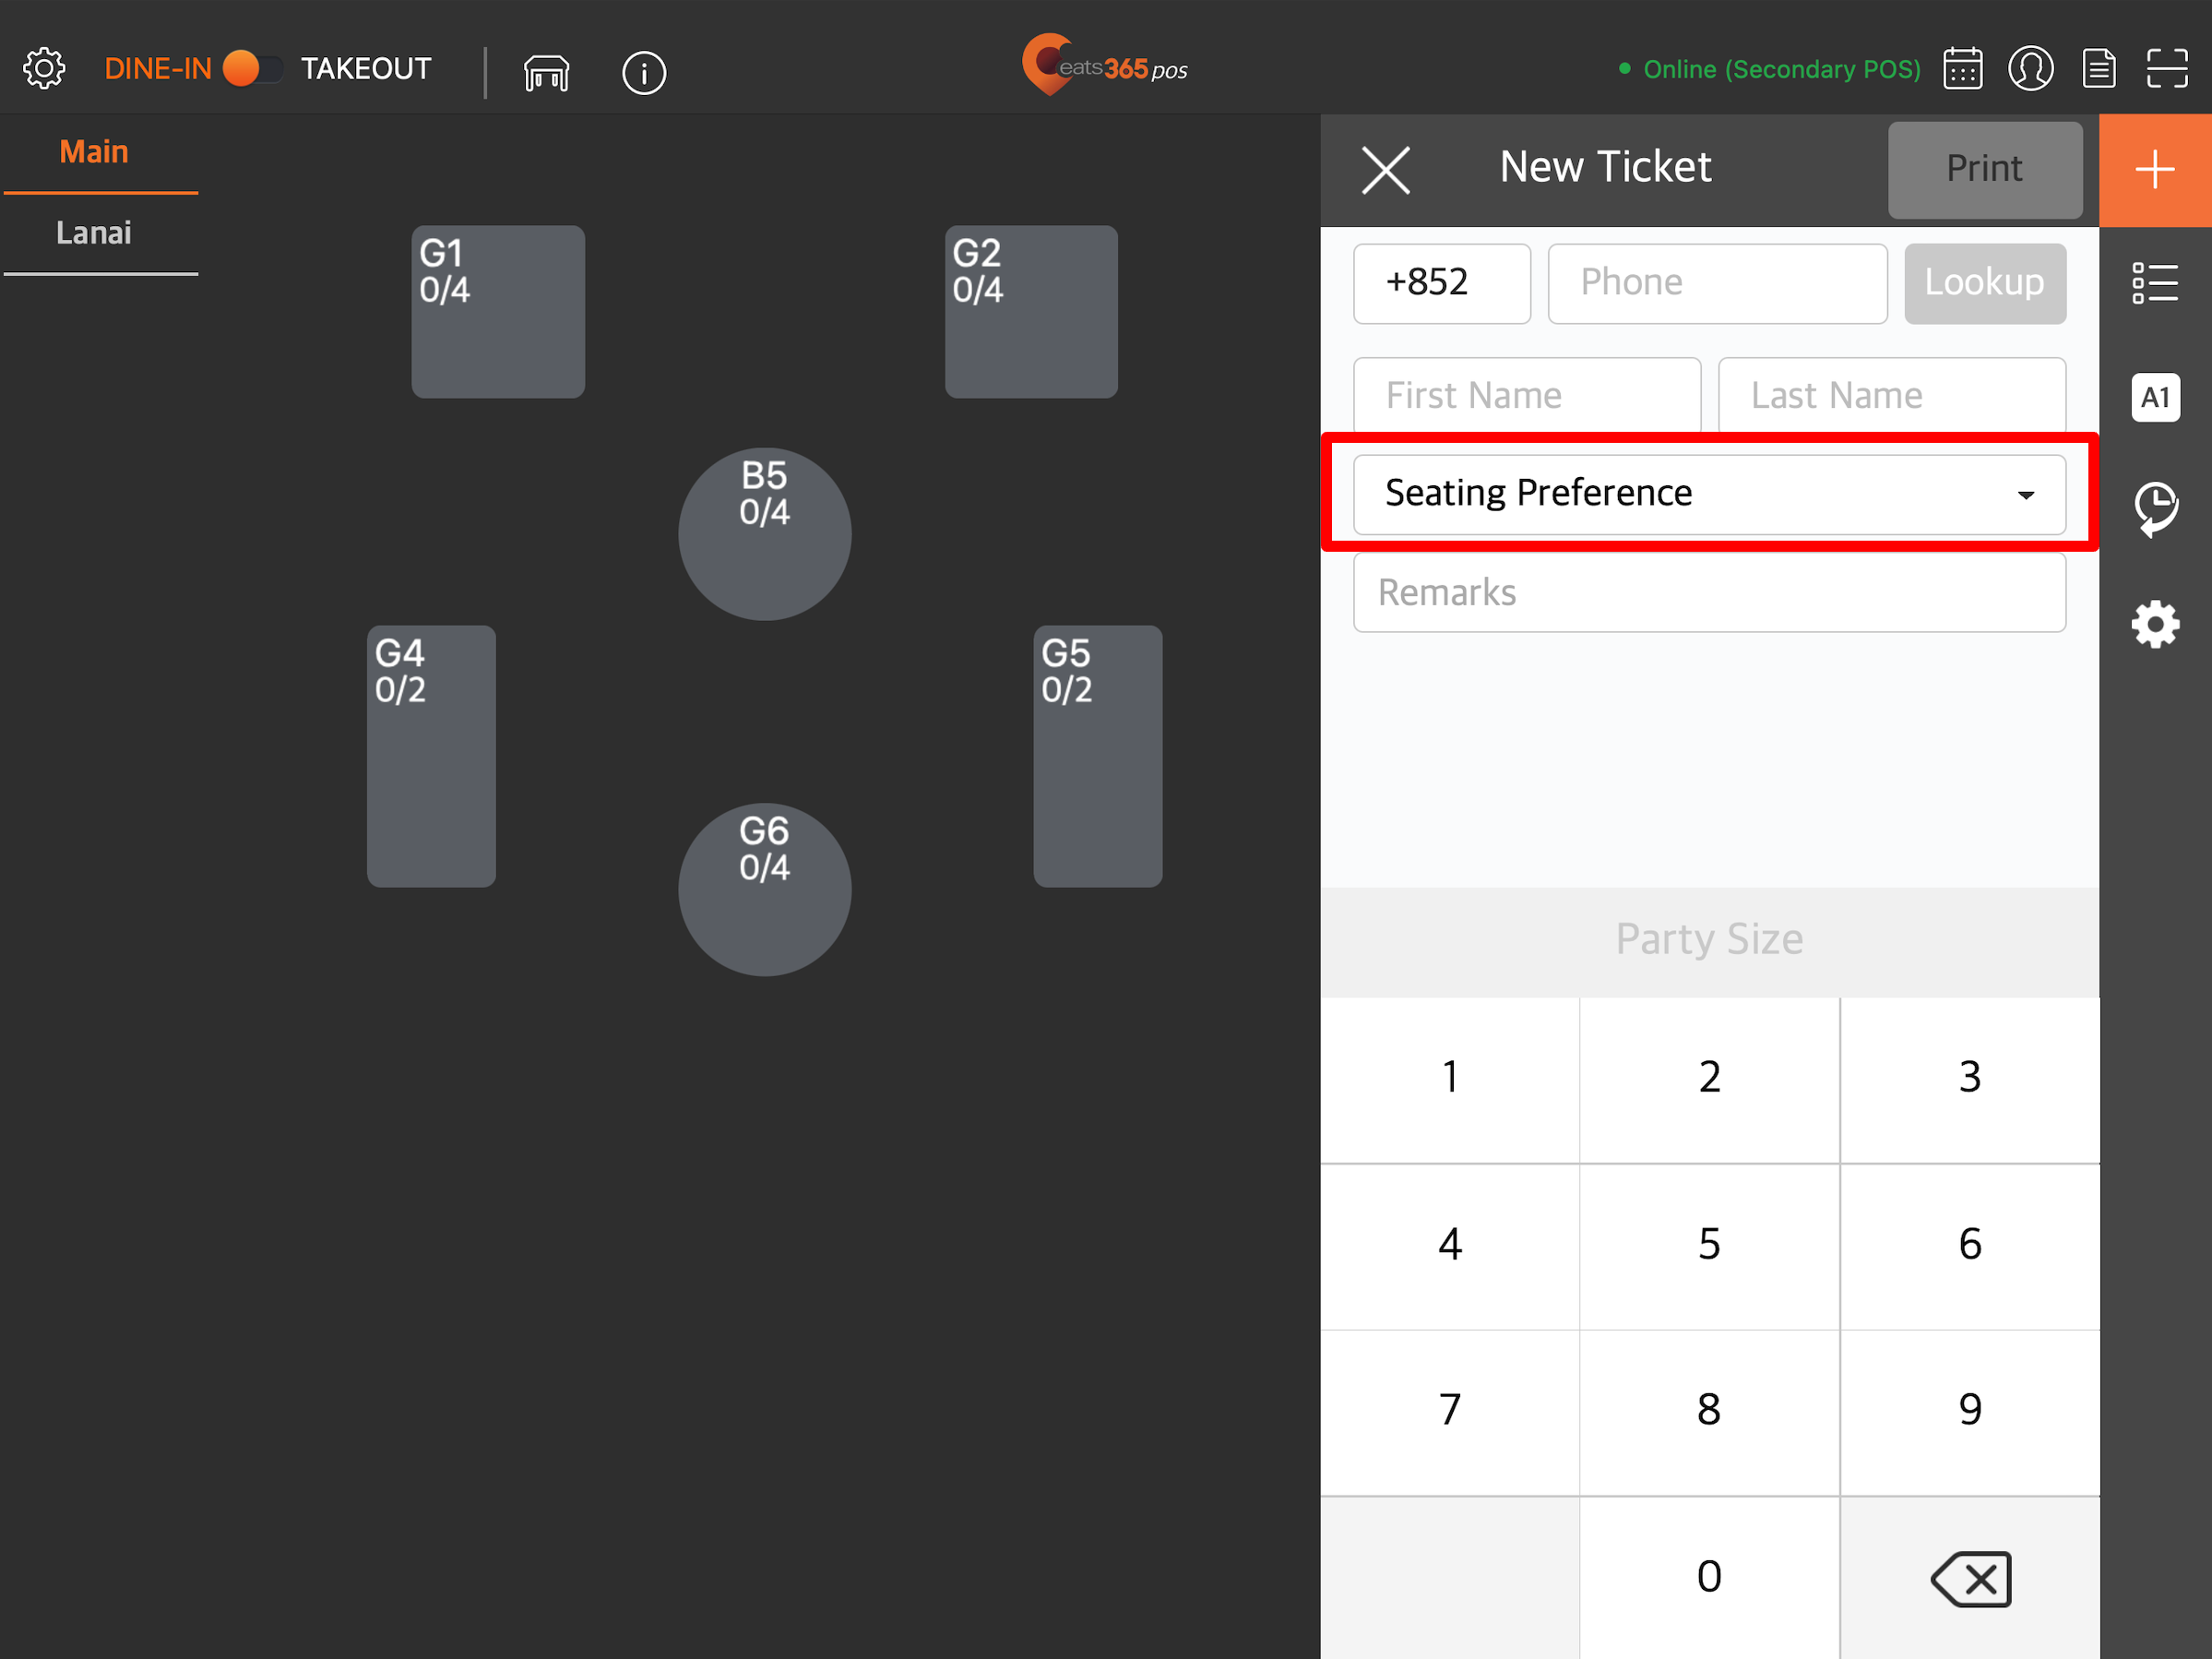
To add a seating option, follow the steps below:
- Log in to the Eats365 POS.
- At the top left, tap Settings .
- Under "Settings," tap Queuing.
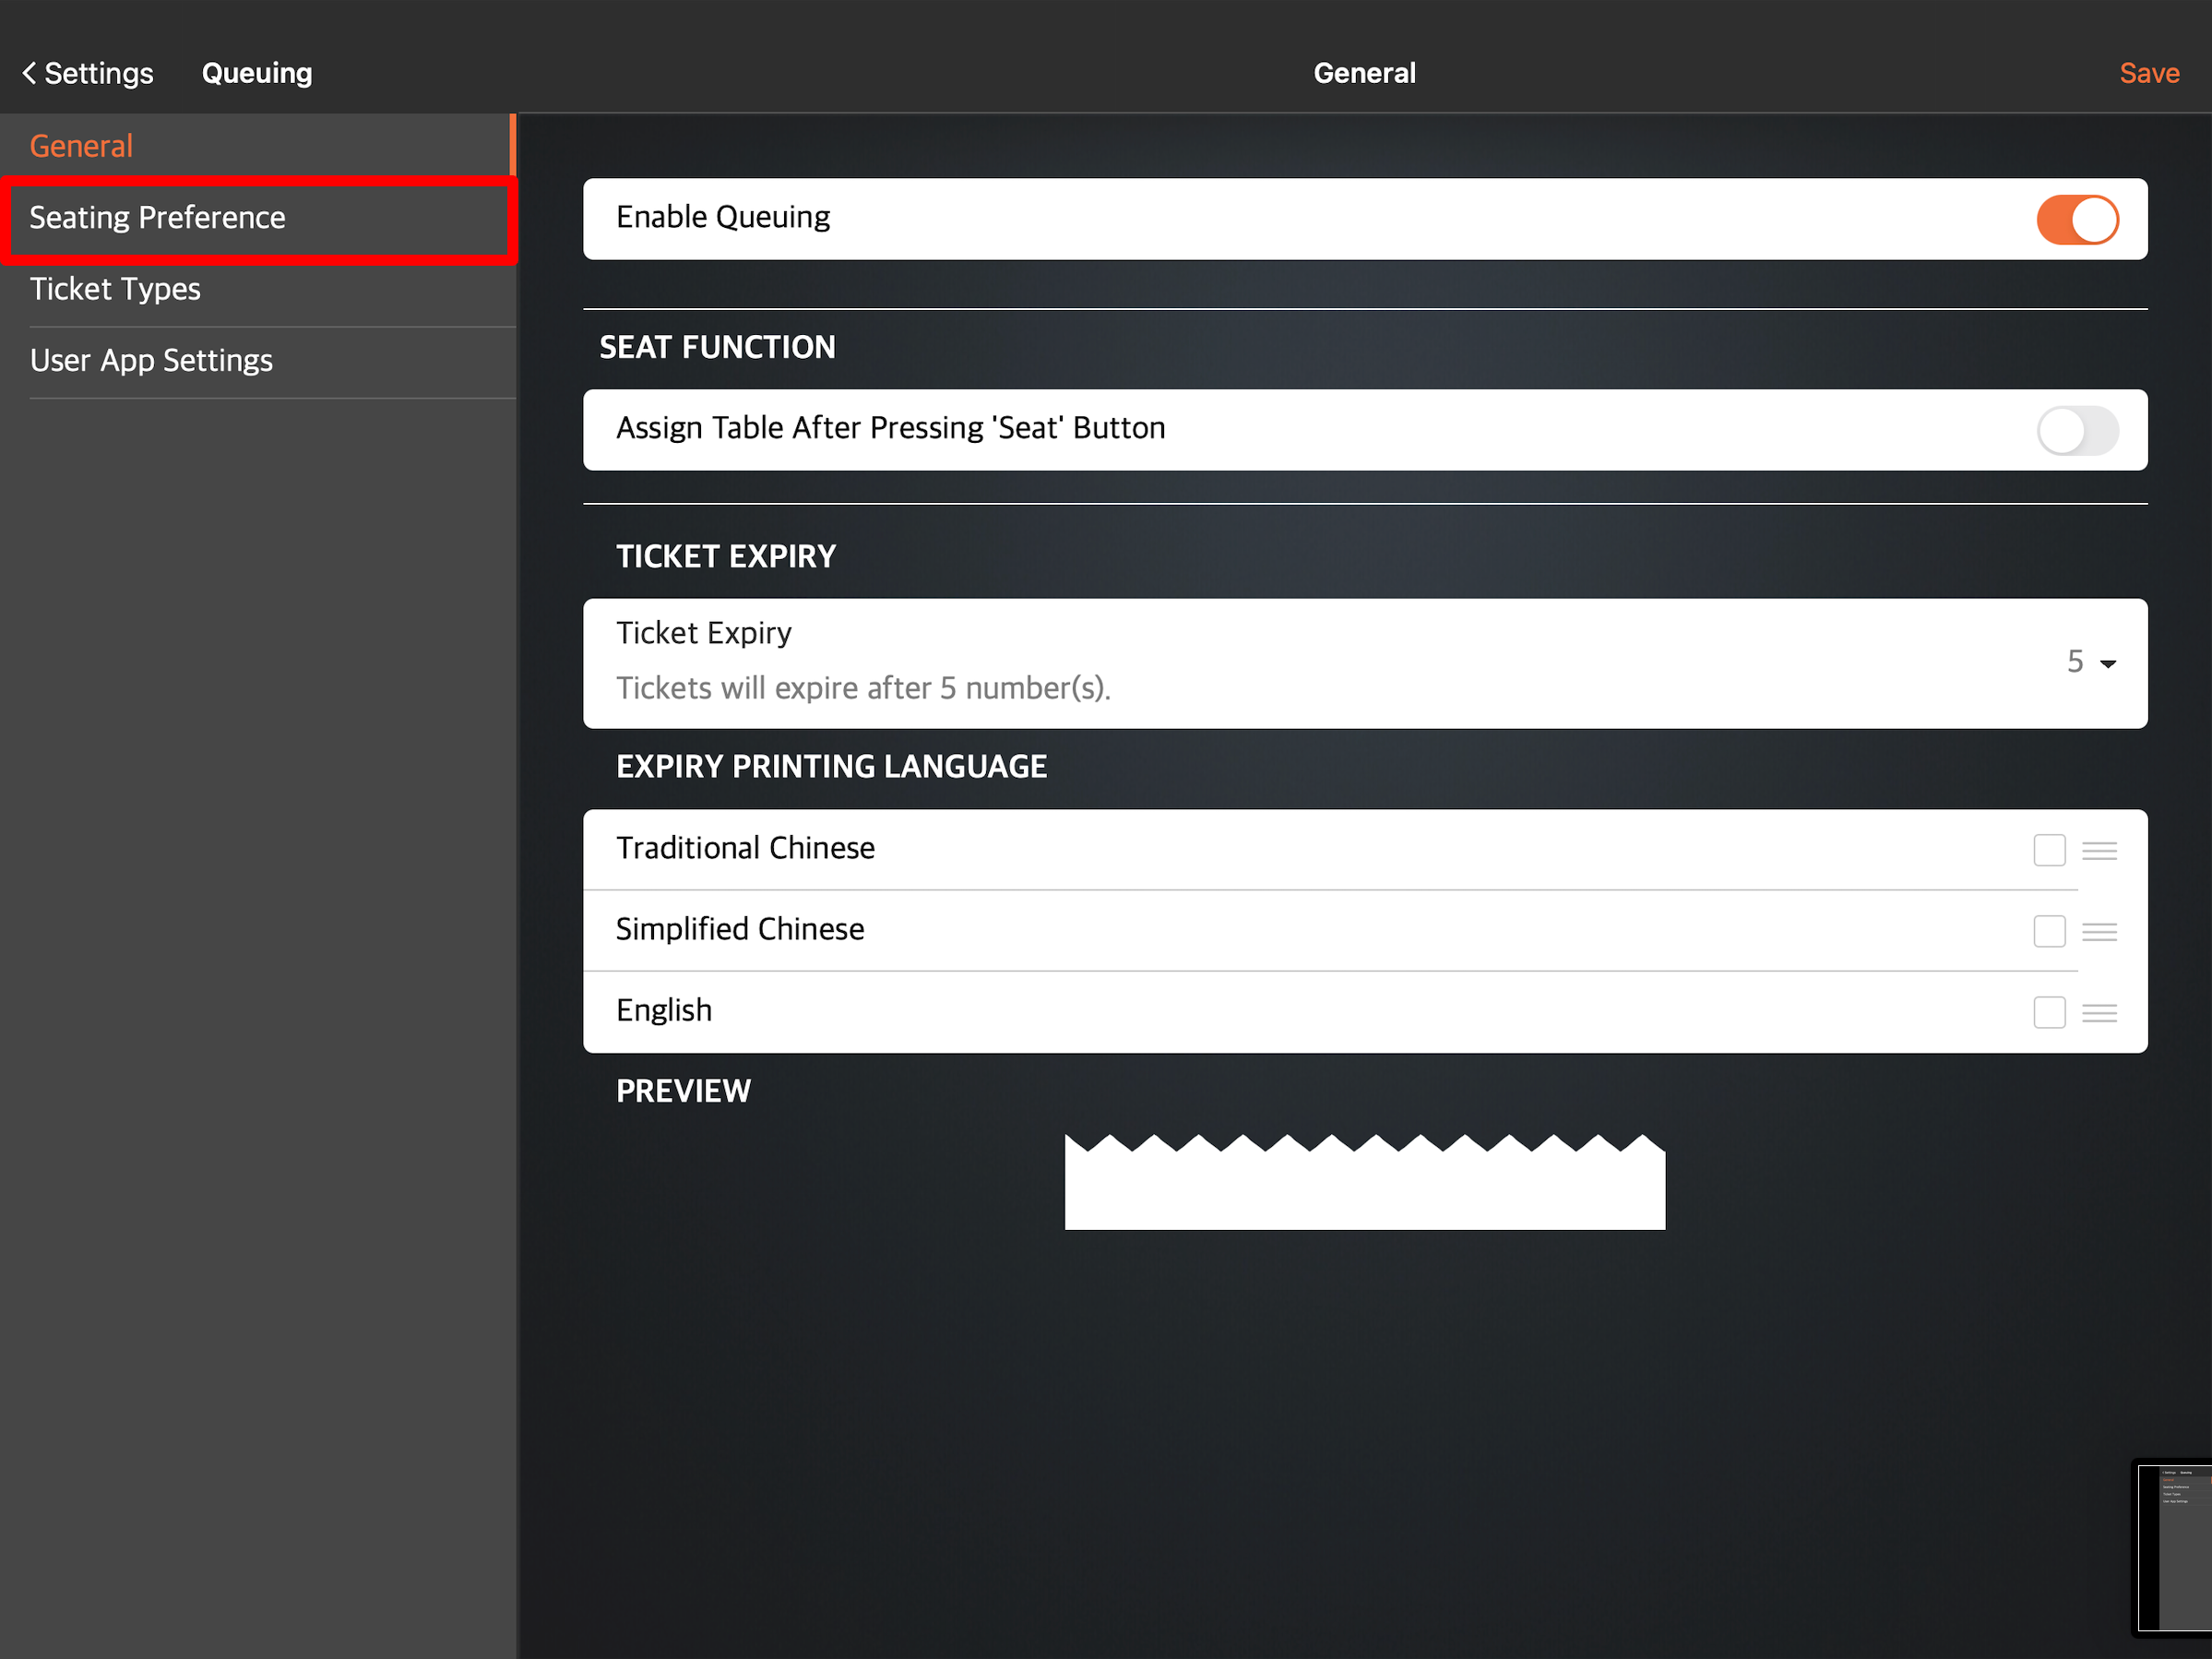
- On the left panel, tap Seating Preference.
- At the top right, tap Add Option, then enter your preferred "Seating Preference Name."
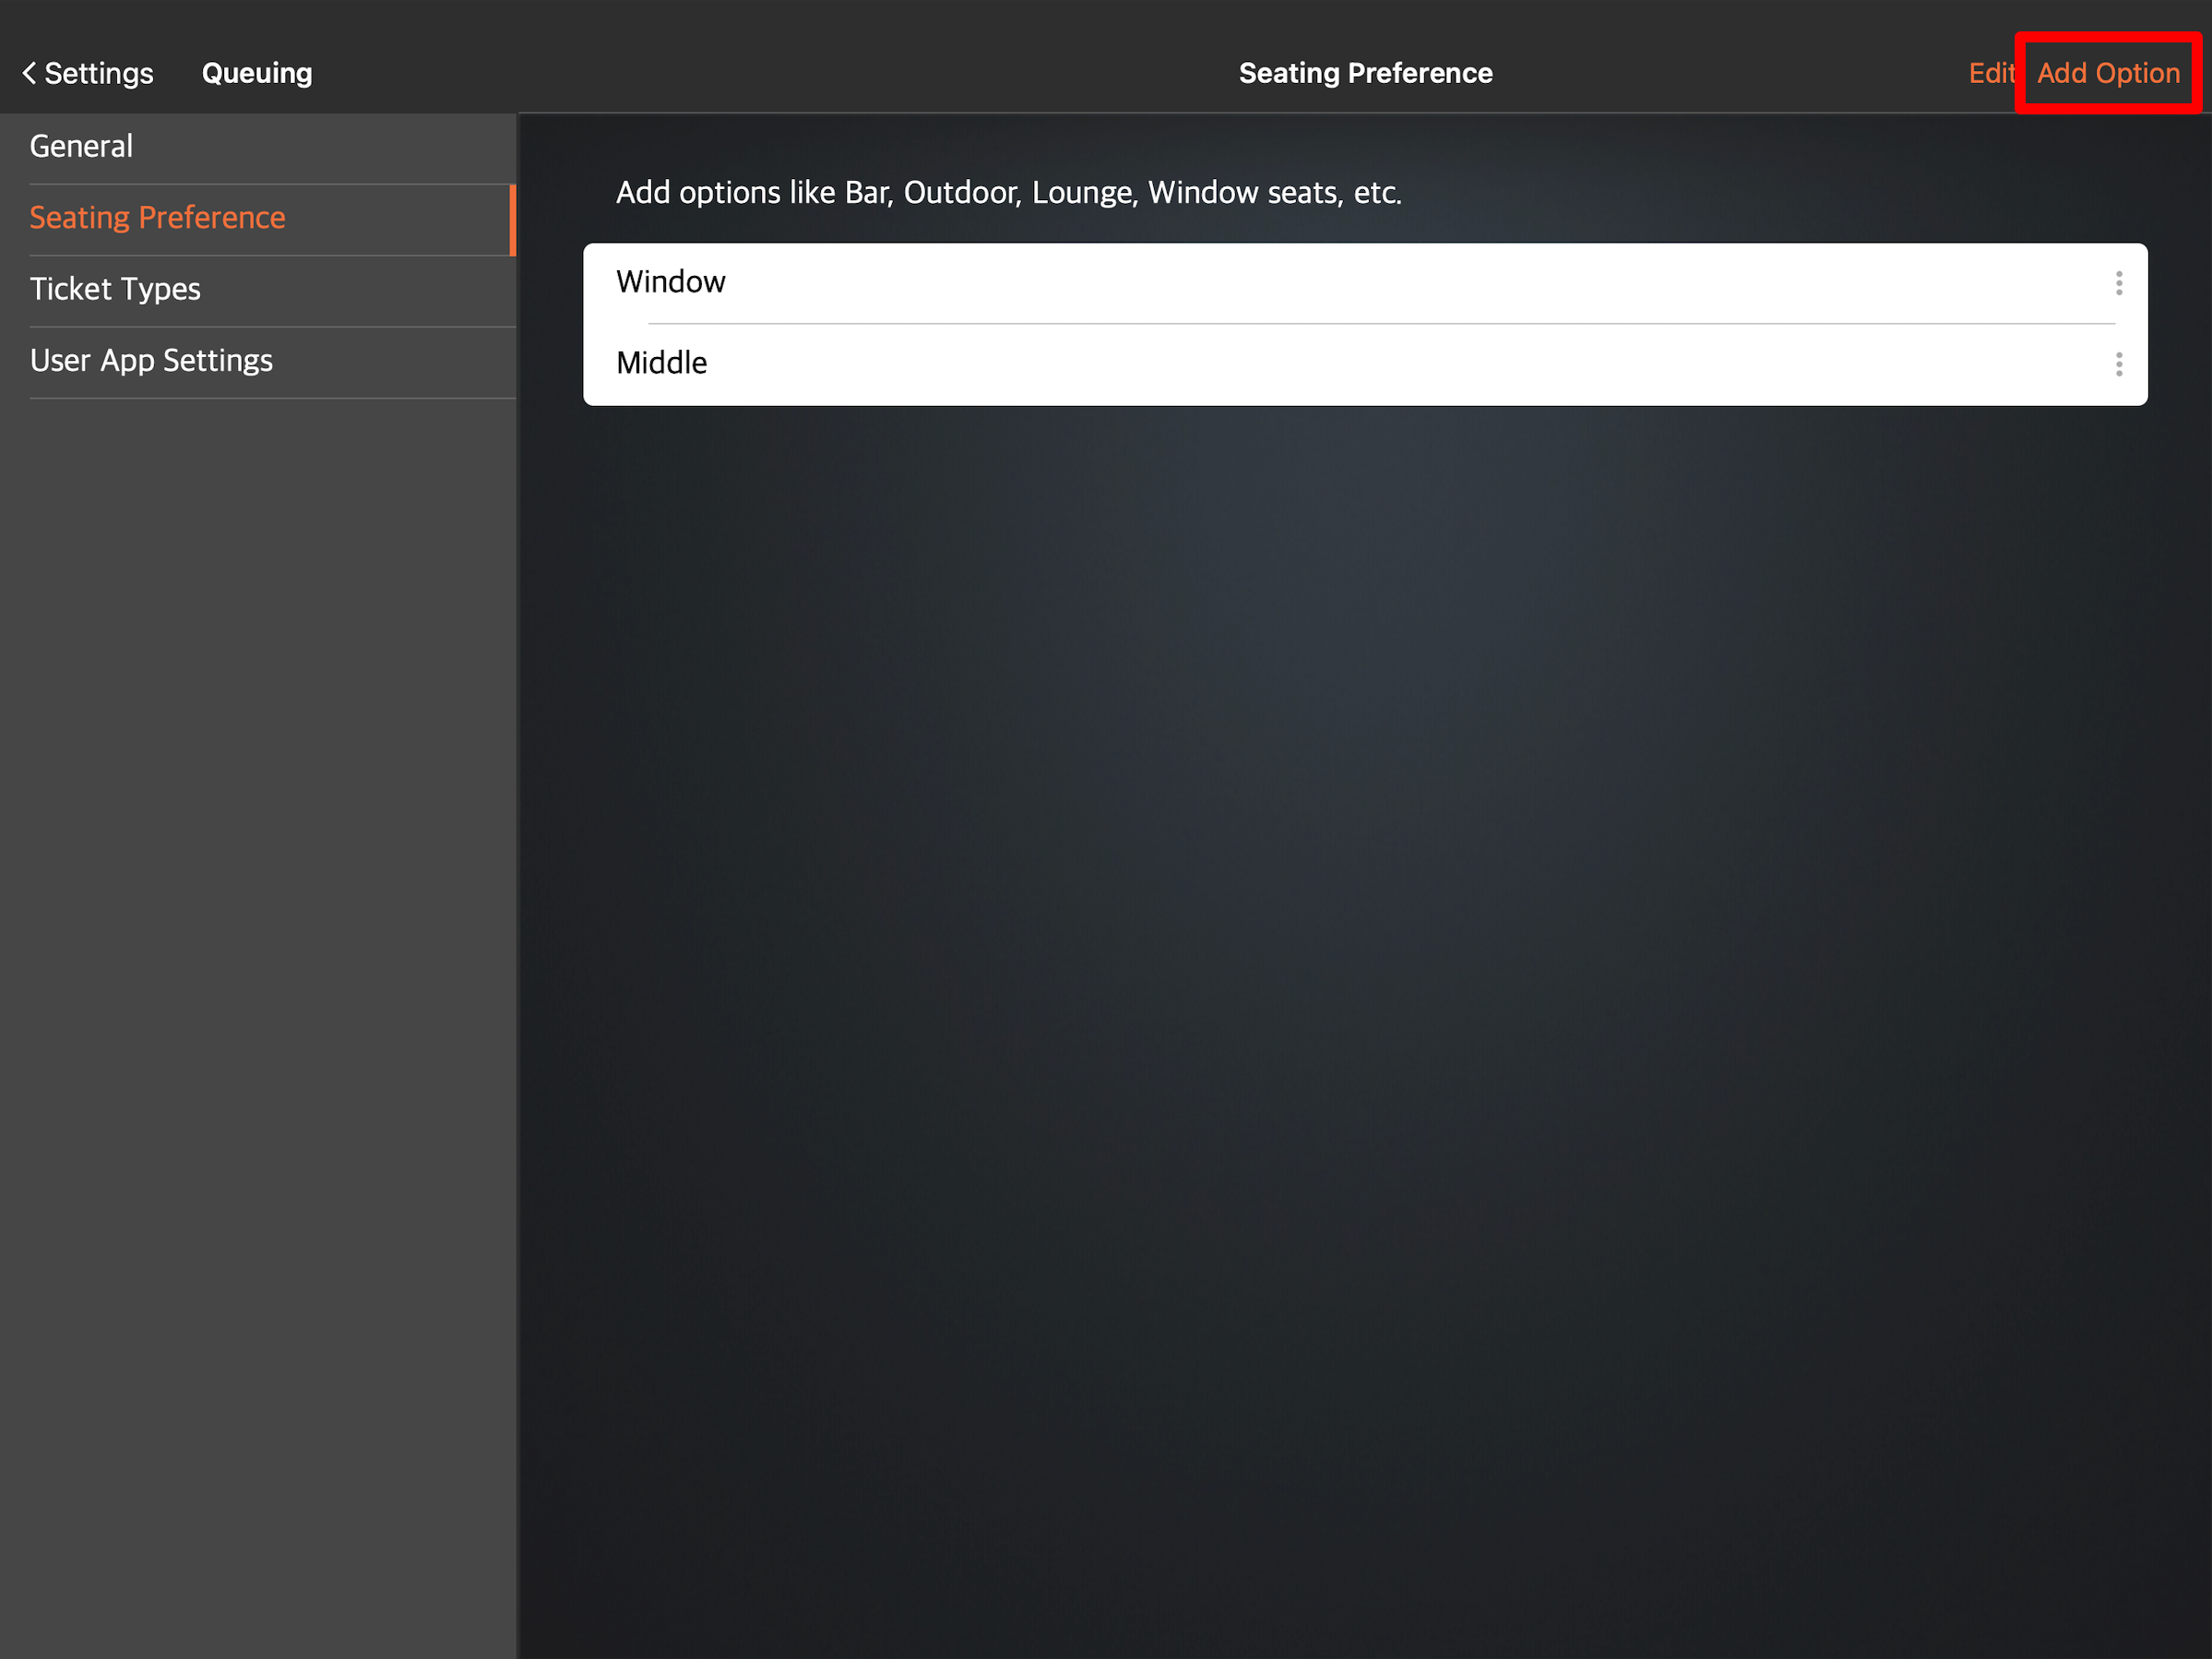
- Tap Save to confirm.
Ticket Types
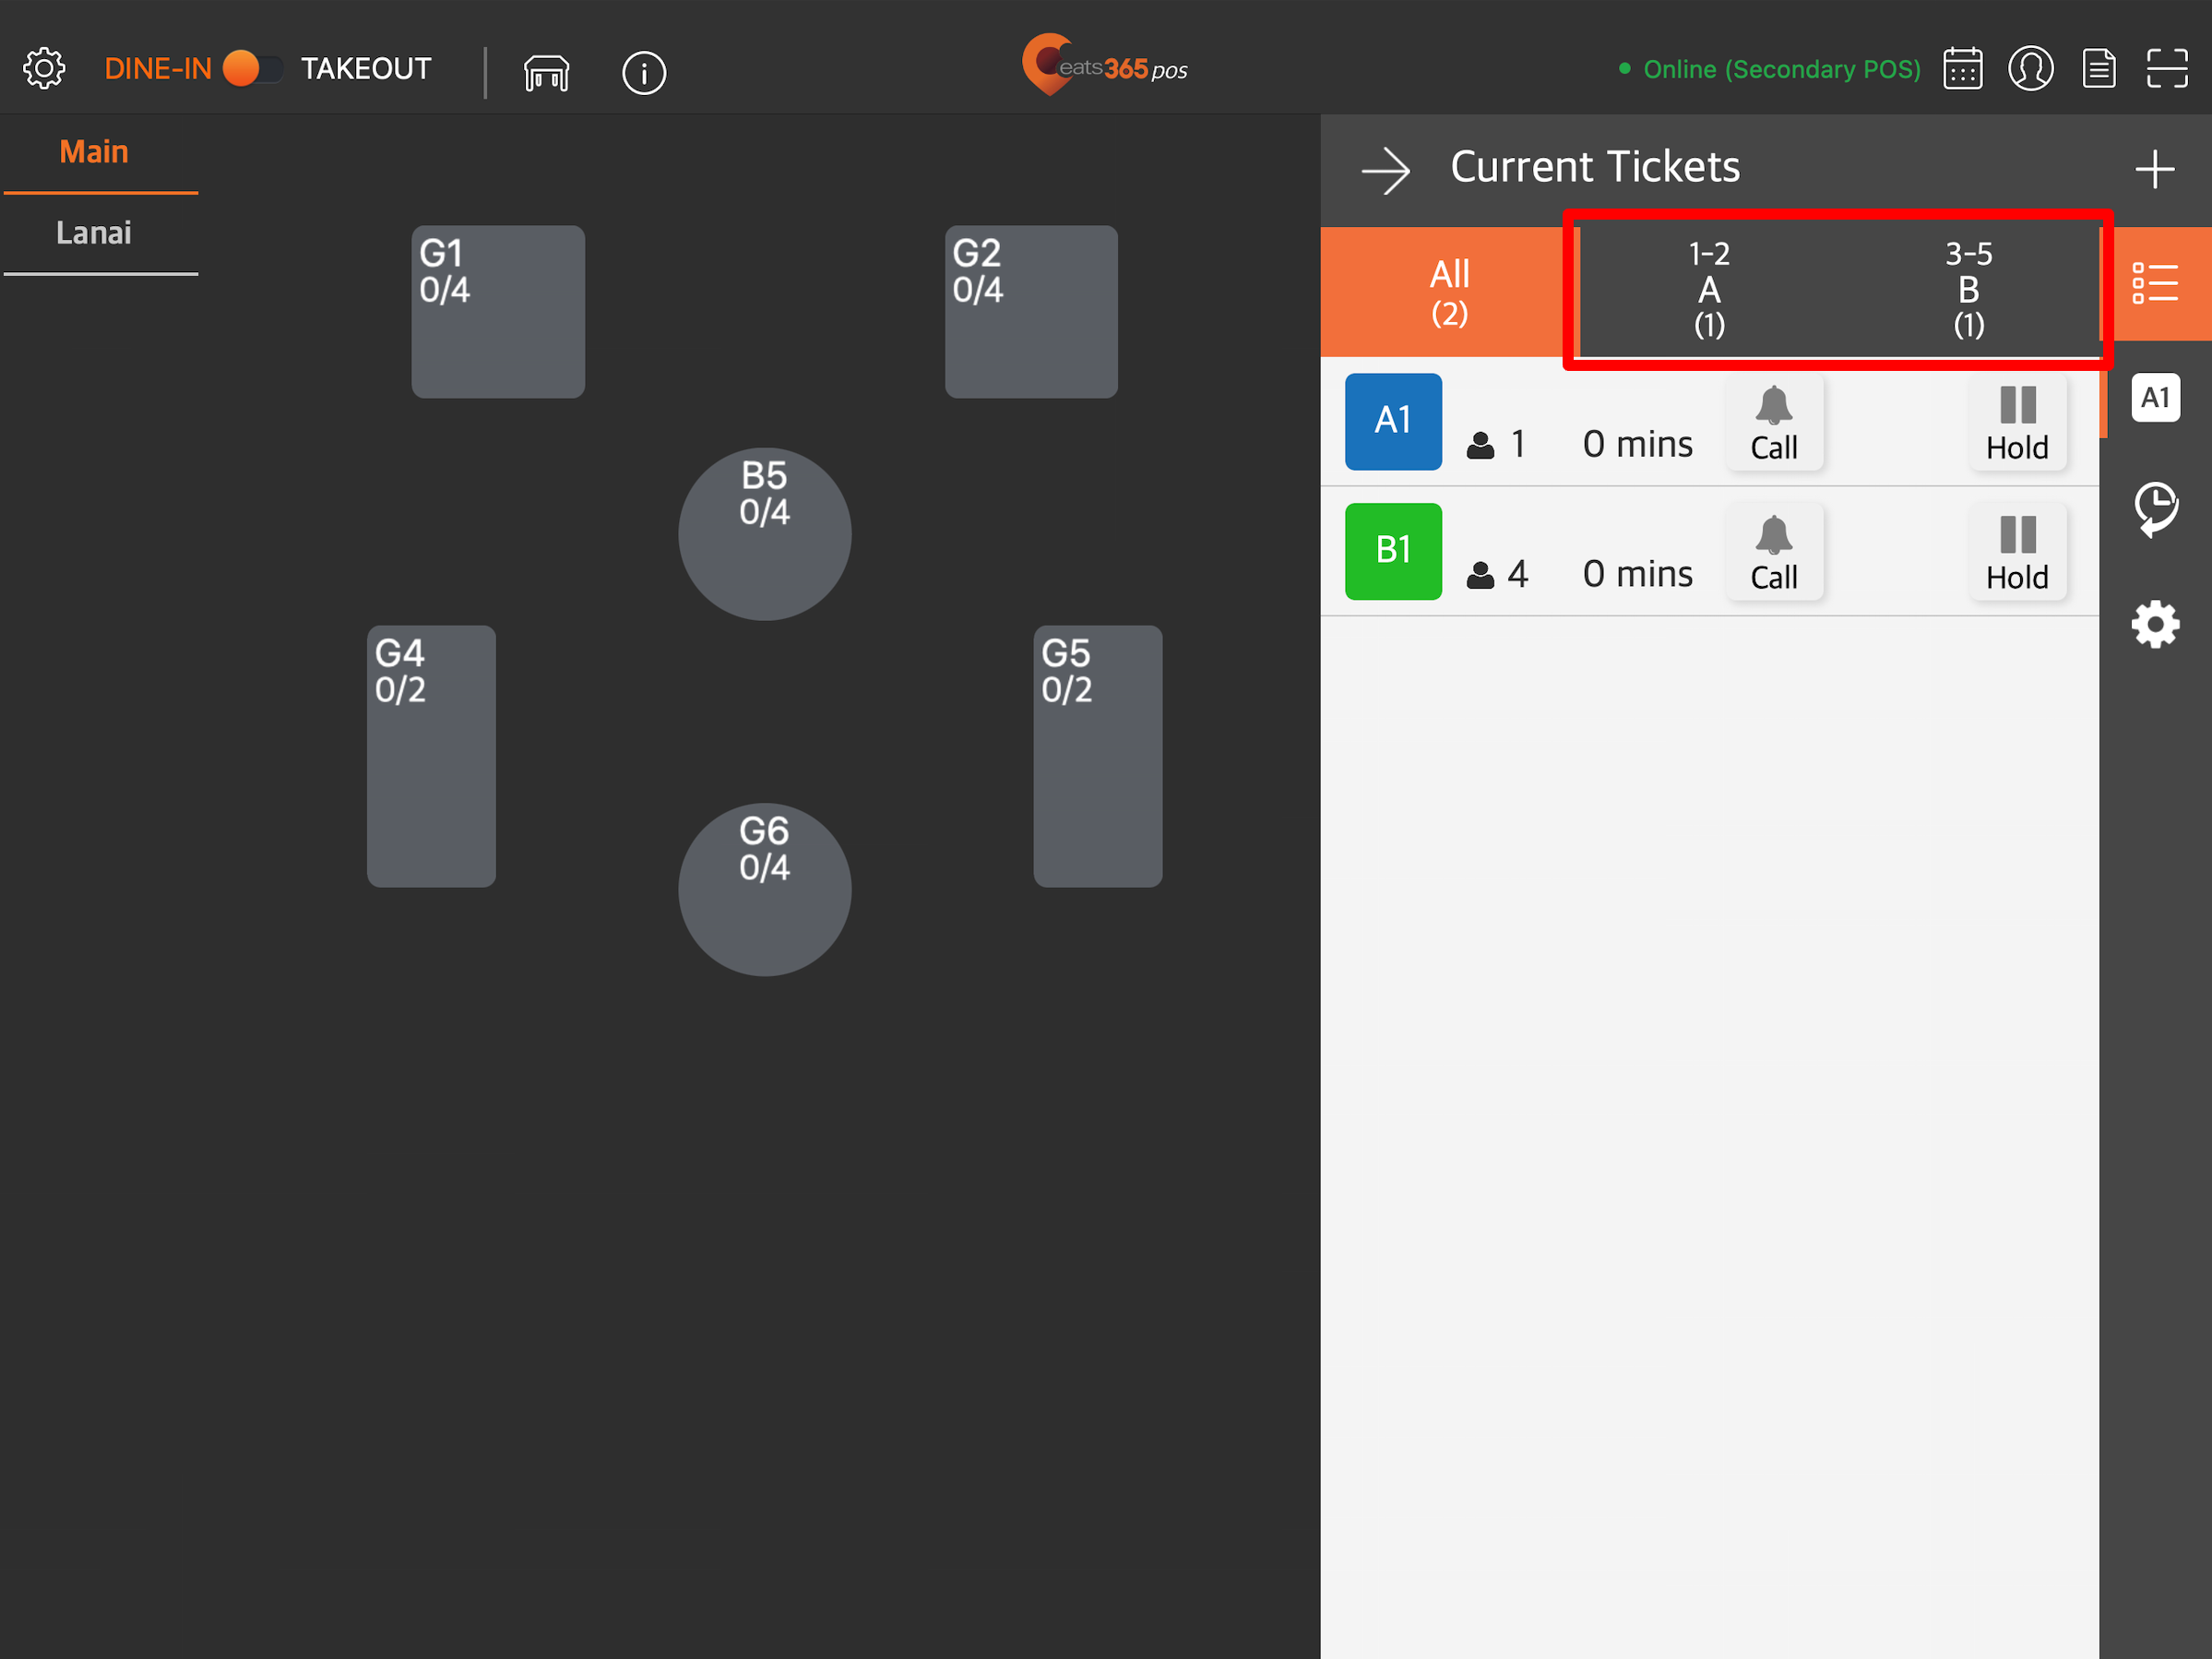
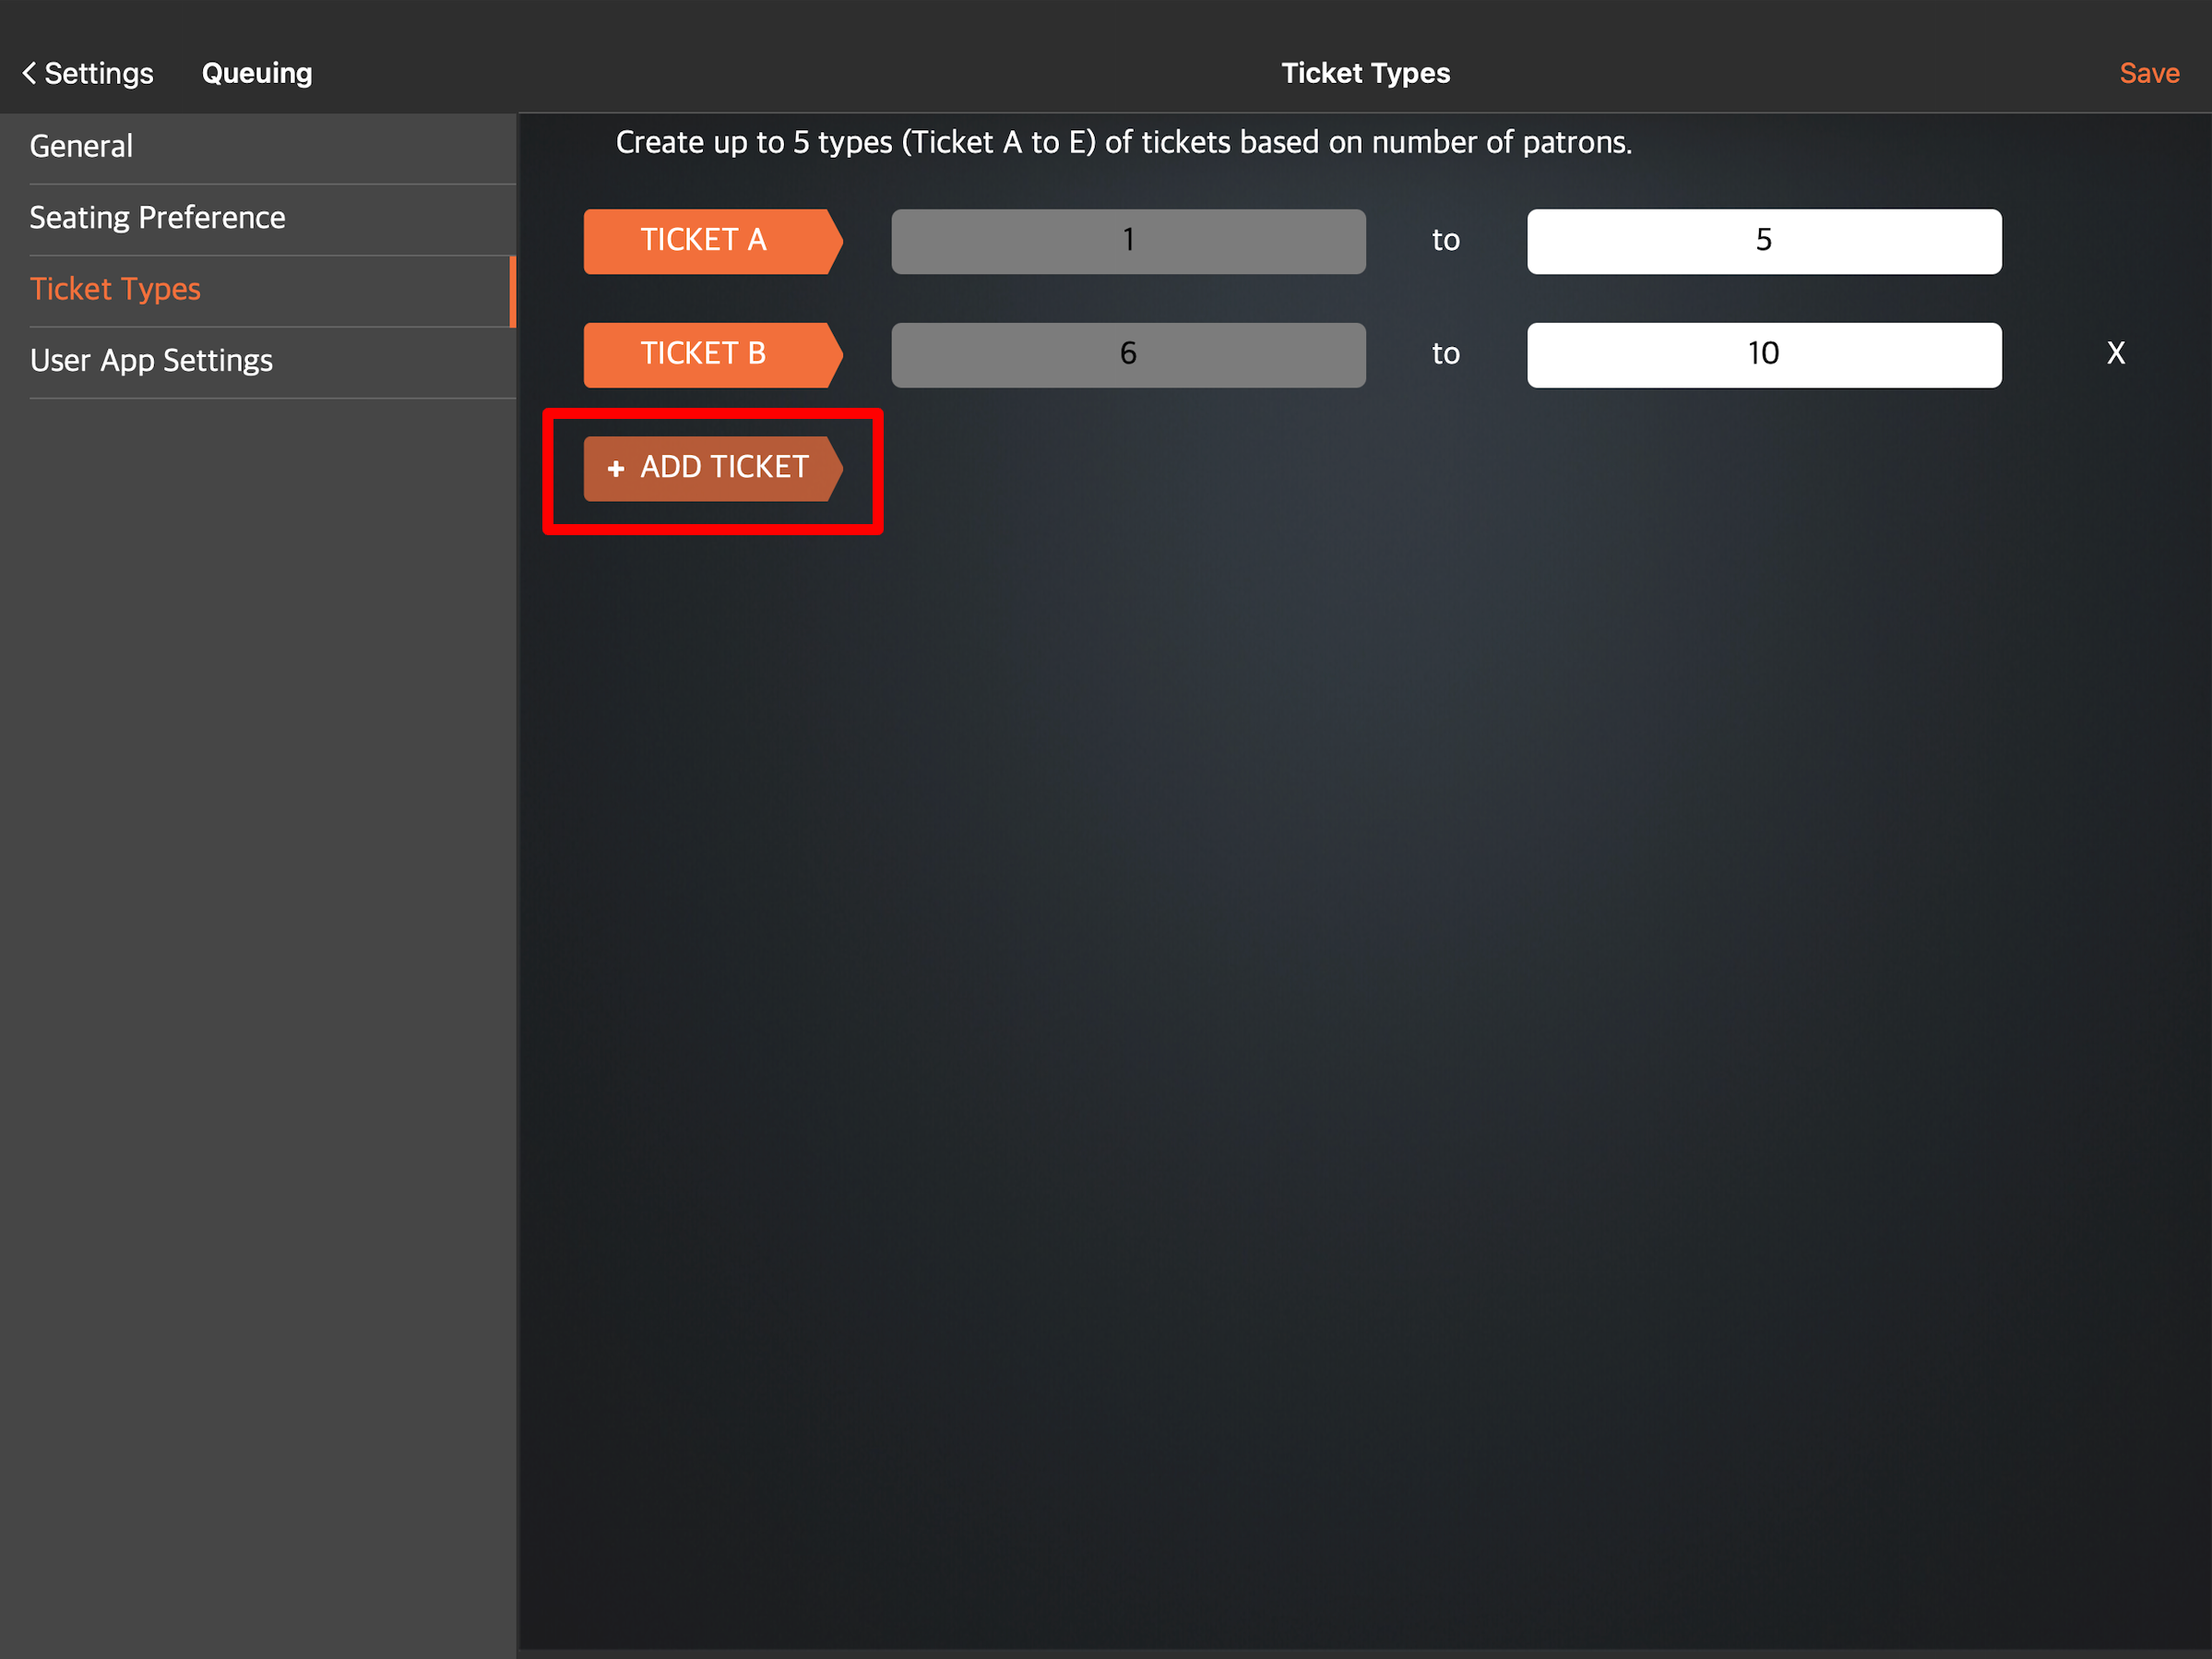
Ticket Types allows you to create queuing ticket presets based on the number of people in a party. You can create up to five ticket types labeled Ticket A to Ticket E. For example, you can set Ticket A to be given out for a party size of 1 to 2 people, and Ticket B for a party size of 3 to 5.
To create a Ticket Type, follow the steps below:
- Log in to the Eats365 POS.
- At the top left, tap Settings .
- Under "Settings," tap Queuing.
- On the left panel, tap Ticket Types.
- Enter the party size number for Ticket A.
- To add another ticket, tap Add Ticket.
- At the top right, tap Save to confirm.
Merchant Portal (Classic Theme)
- Log in to the Merchant Portal.
- On the left panel, click on Restaurant Settings. Then, click on Queuing.
- Under "General," turn on Queuing
 .
.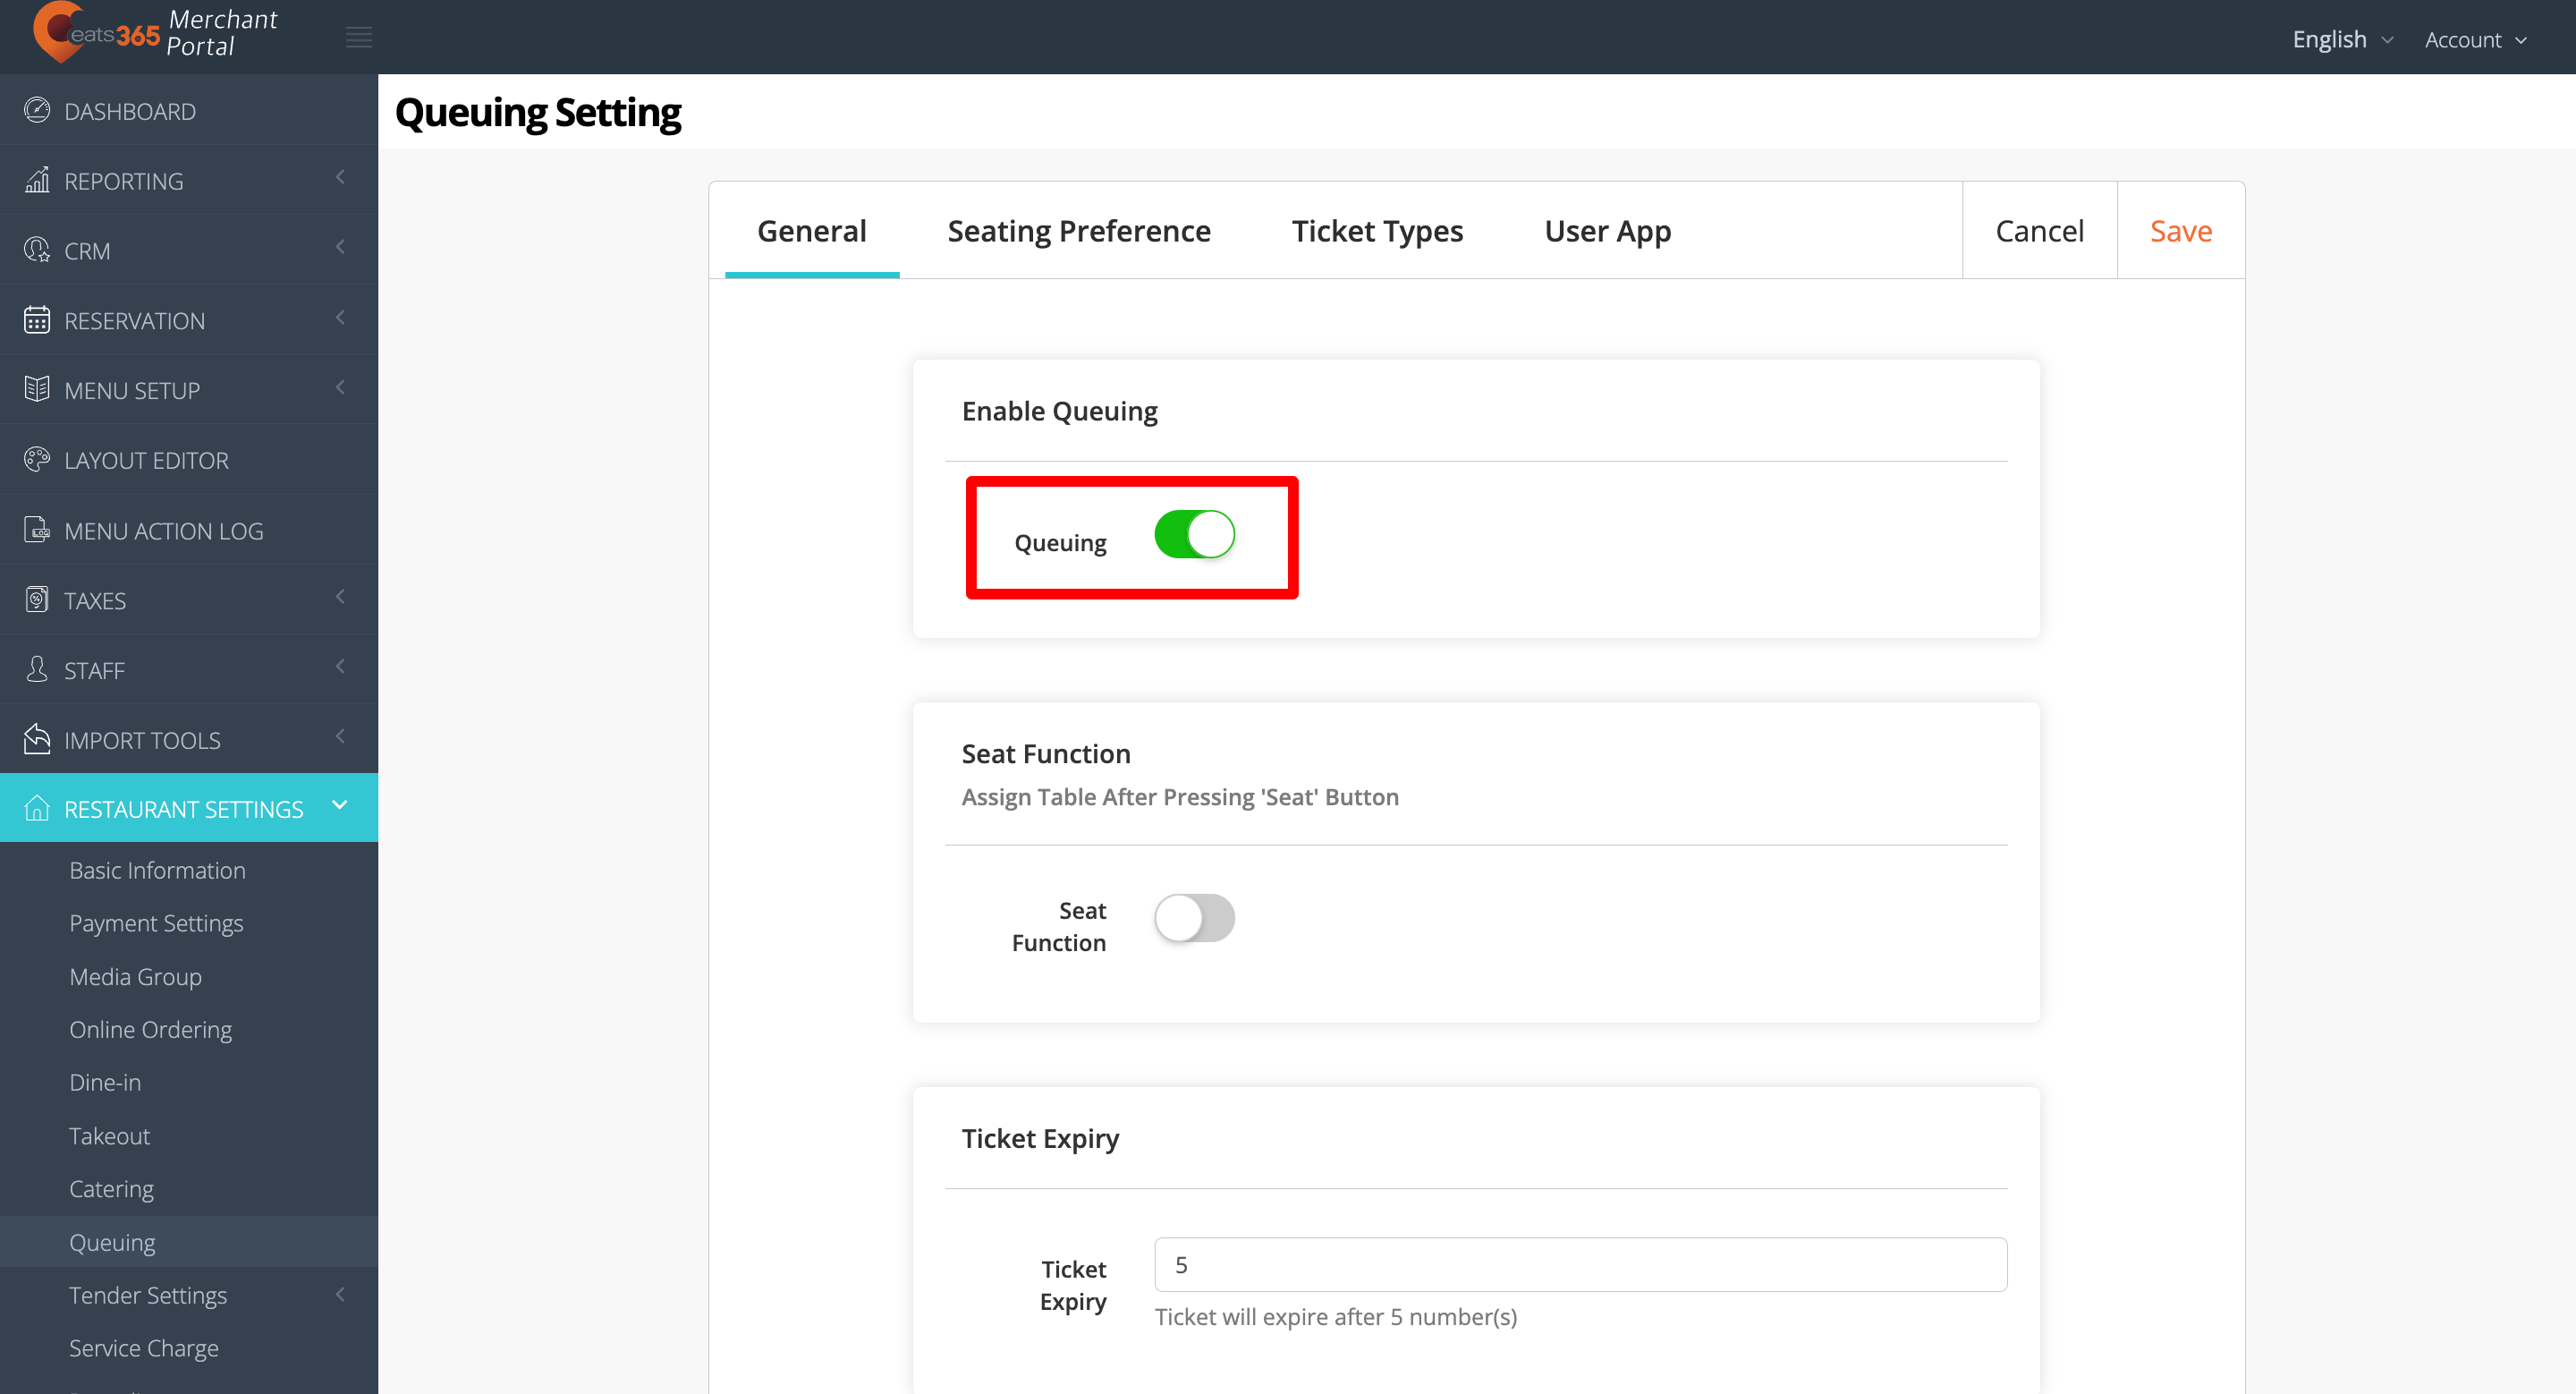
- Once Queuing is enabled, you can then configure the Queuing settings.
- At the top right, click on Save to confirm.
Below is the list of settings that you can configure on the Merchant Portal:
General
Seat Function
Seat Function
Enable this setting to require staff to assign a table to the queuing customer upon tapping the Seat button.
Ticket Expiry
Ticket Expiry
This setting allows you to set the number of queue tickets that can be called before a queuing ticket expires. For example, if the Ticket Expiry is set to “3,” a ticket numbered A2 will expire once A6 has been called.
Ticket Settings
Free text at the bottom of queuing ticket
Add a customized text at the bottom of the queuing ticket.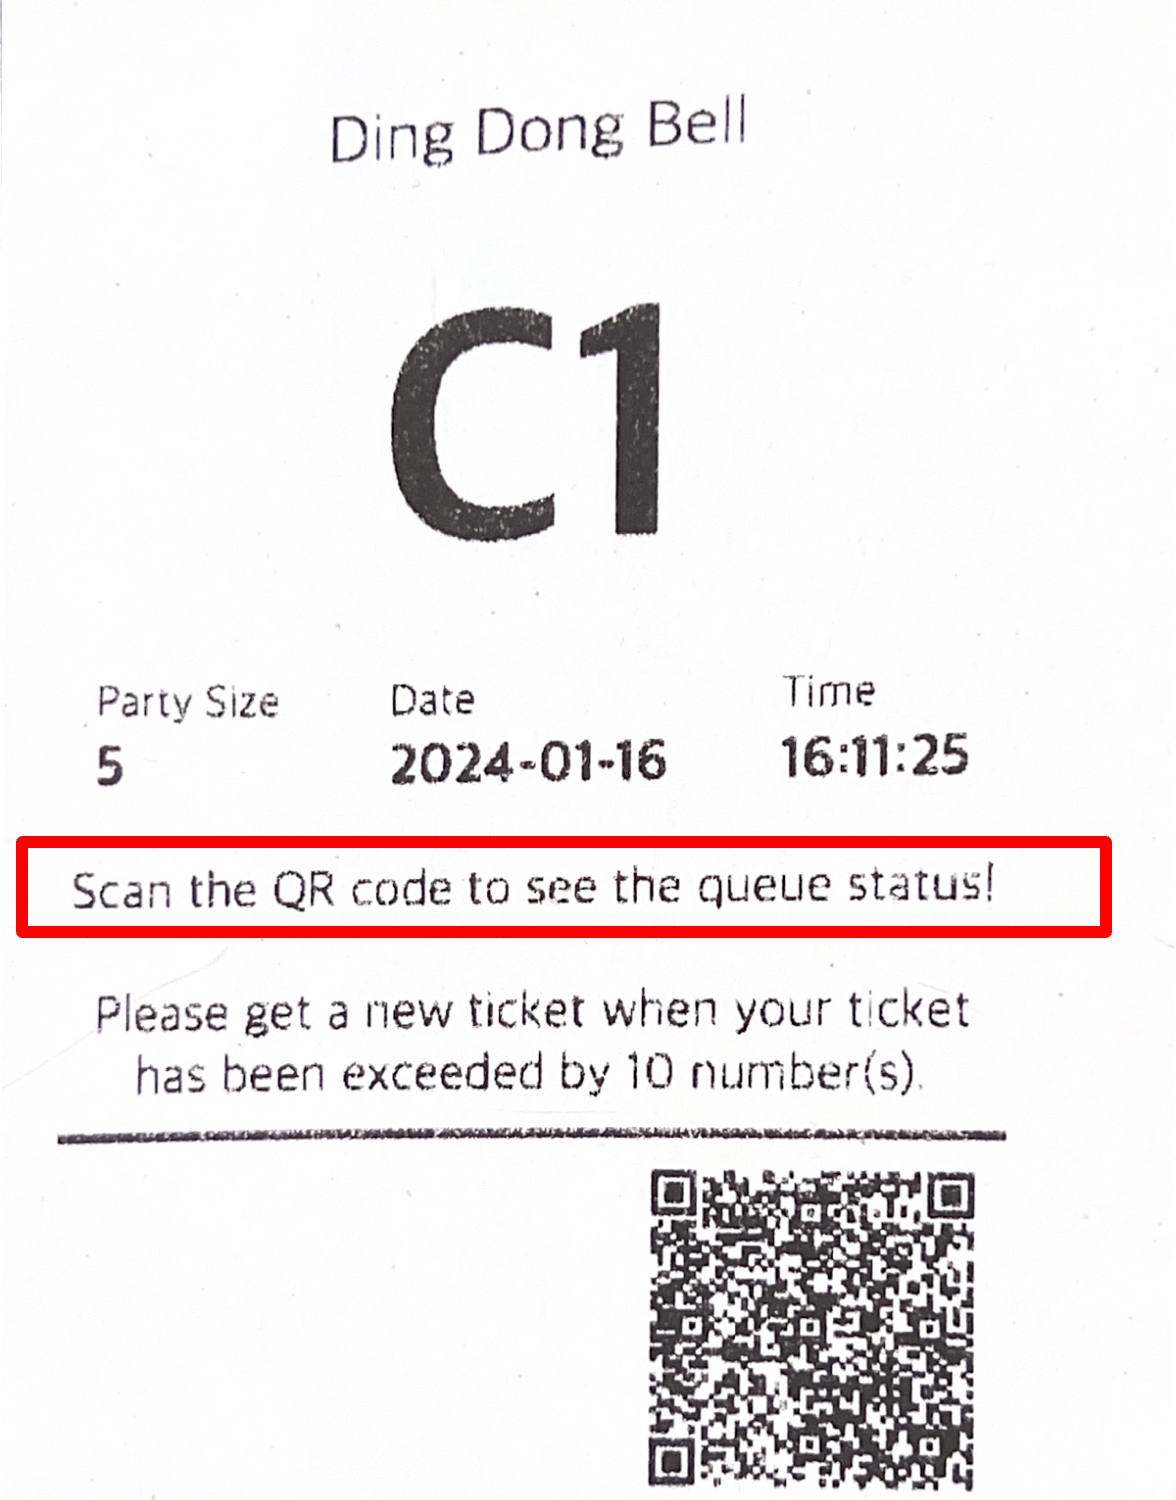
Ticket Time Display
Current Tickets Page Time Display Format
Select how the queuing ticket time appears on the POS. You can choose from the following:
- Elapsed Time - Display how much time has passed (in minutes) since the queuing ticket was issued.
- Obtain Ticket Time - Display the time when the queuing ticket was issued.
| Elapsed Time | Obtain Ticket Time |
|
|
History Page Show Ticket First Called Time
Enable this setting to display the time when the queuing ticket was called.
Ticket Expiry Printing Language
Choose what language you want the ticket expiry to show.
Seating Preference
The Seating Preference setting allows you to add seating options for customers. When you add a seating option, customers can choose where they want to sit based on their preference and the options you provide.
To add a seating option, follow the steps below:
- Log in to the Merchant Portal.
- On the left panel, click on Restaurant Settings. Then, click on Queuing.
- Click on the Seating Preference tab.
- Click on +Add New. Then, add the "Seating Preference Name."

- At the top right, click on Save to confirm.
Ticket Types
Ticket Types allows you to create queuing ticket presets based on the number of people in a party. You can create up to five ticket types labeled Ticket A to Ticket E. For example, you can set Ticket A to be given out for a party size of 1 to 2 people, and Ticket B for a party size of 3 to 5.
To create a Ticket Type, follow the steps below:
- Log in to the Merchant Portal.
- On the left panel, click on Restaurant Settings. Then, click on Queuing.
- Click on the Ticket Types tab.
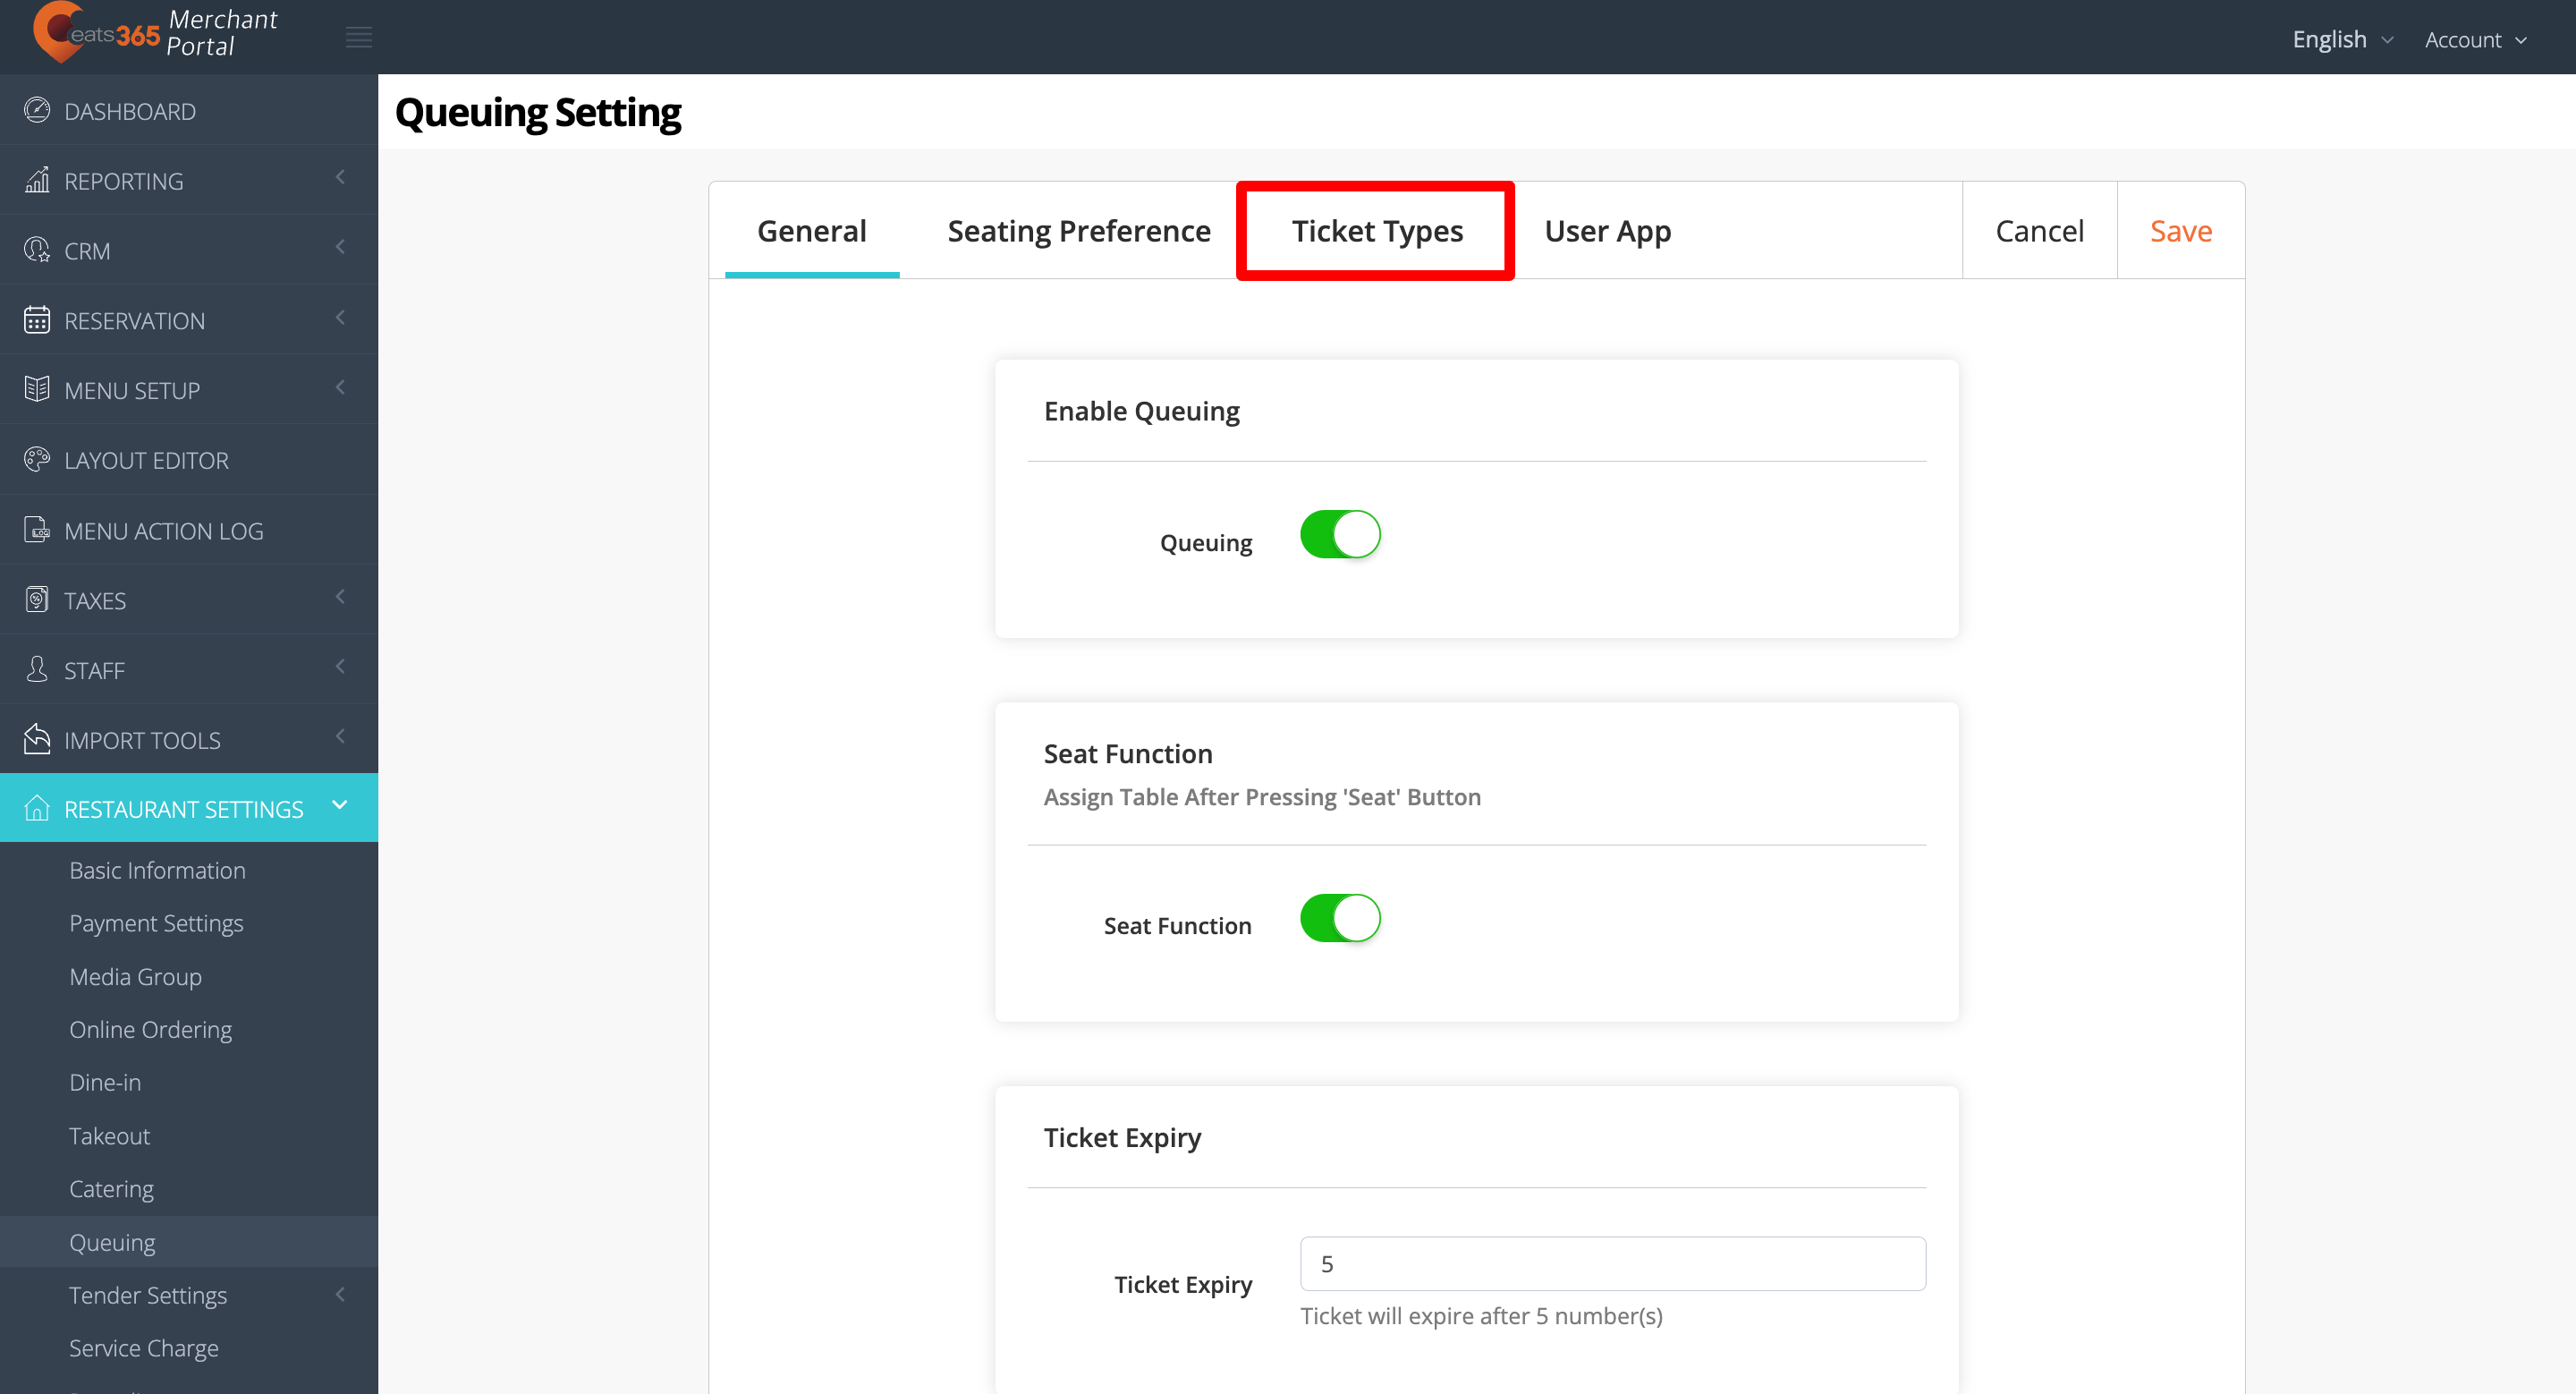
- Enter the party size number for Queuing Ticket A.
- To add another ticket, click on + Ticket Type.
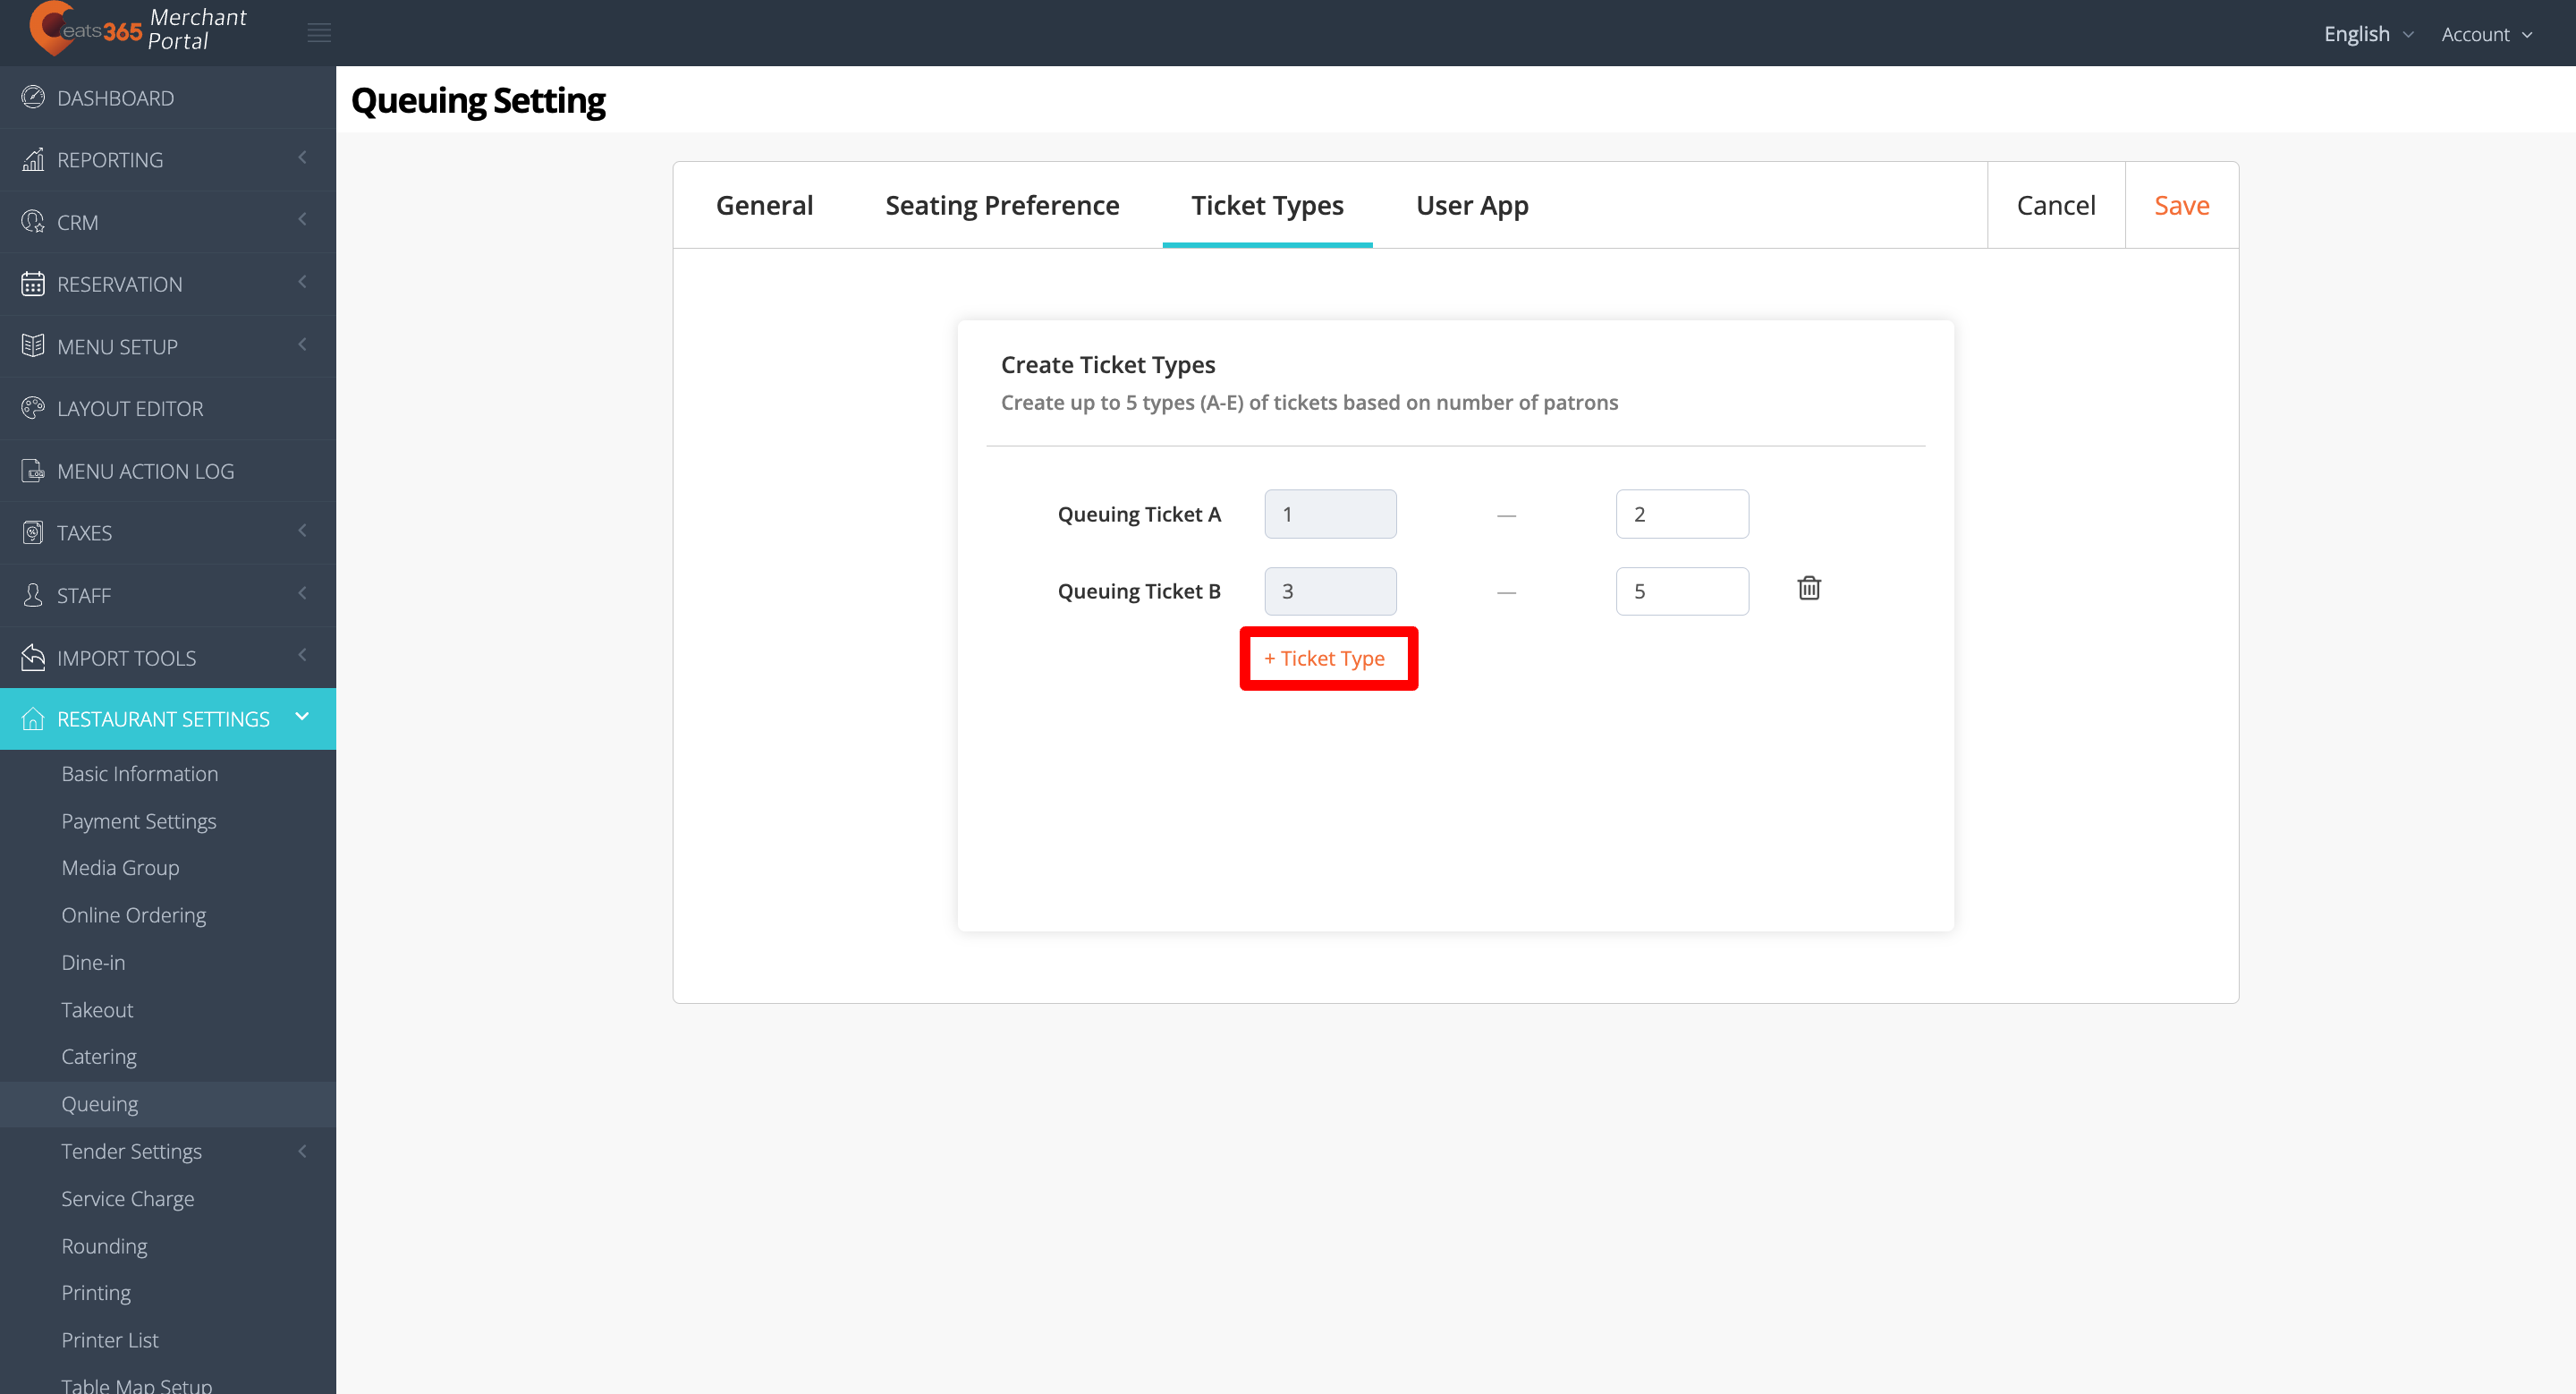
- At the top right, click on Save to confirm.
Merchant Portal 2.0
- Log in to the Merchant Portal.
- On the left panel, click on Restaurant Settings.
- Click on Queuing. Then, select General.
- Toggle on Enable Queuing
 .
.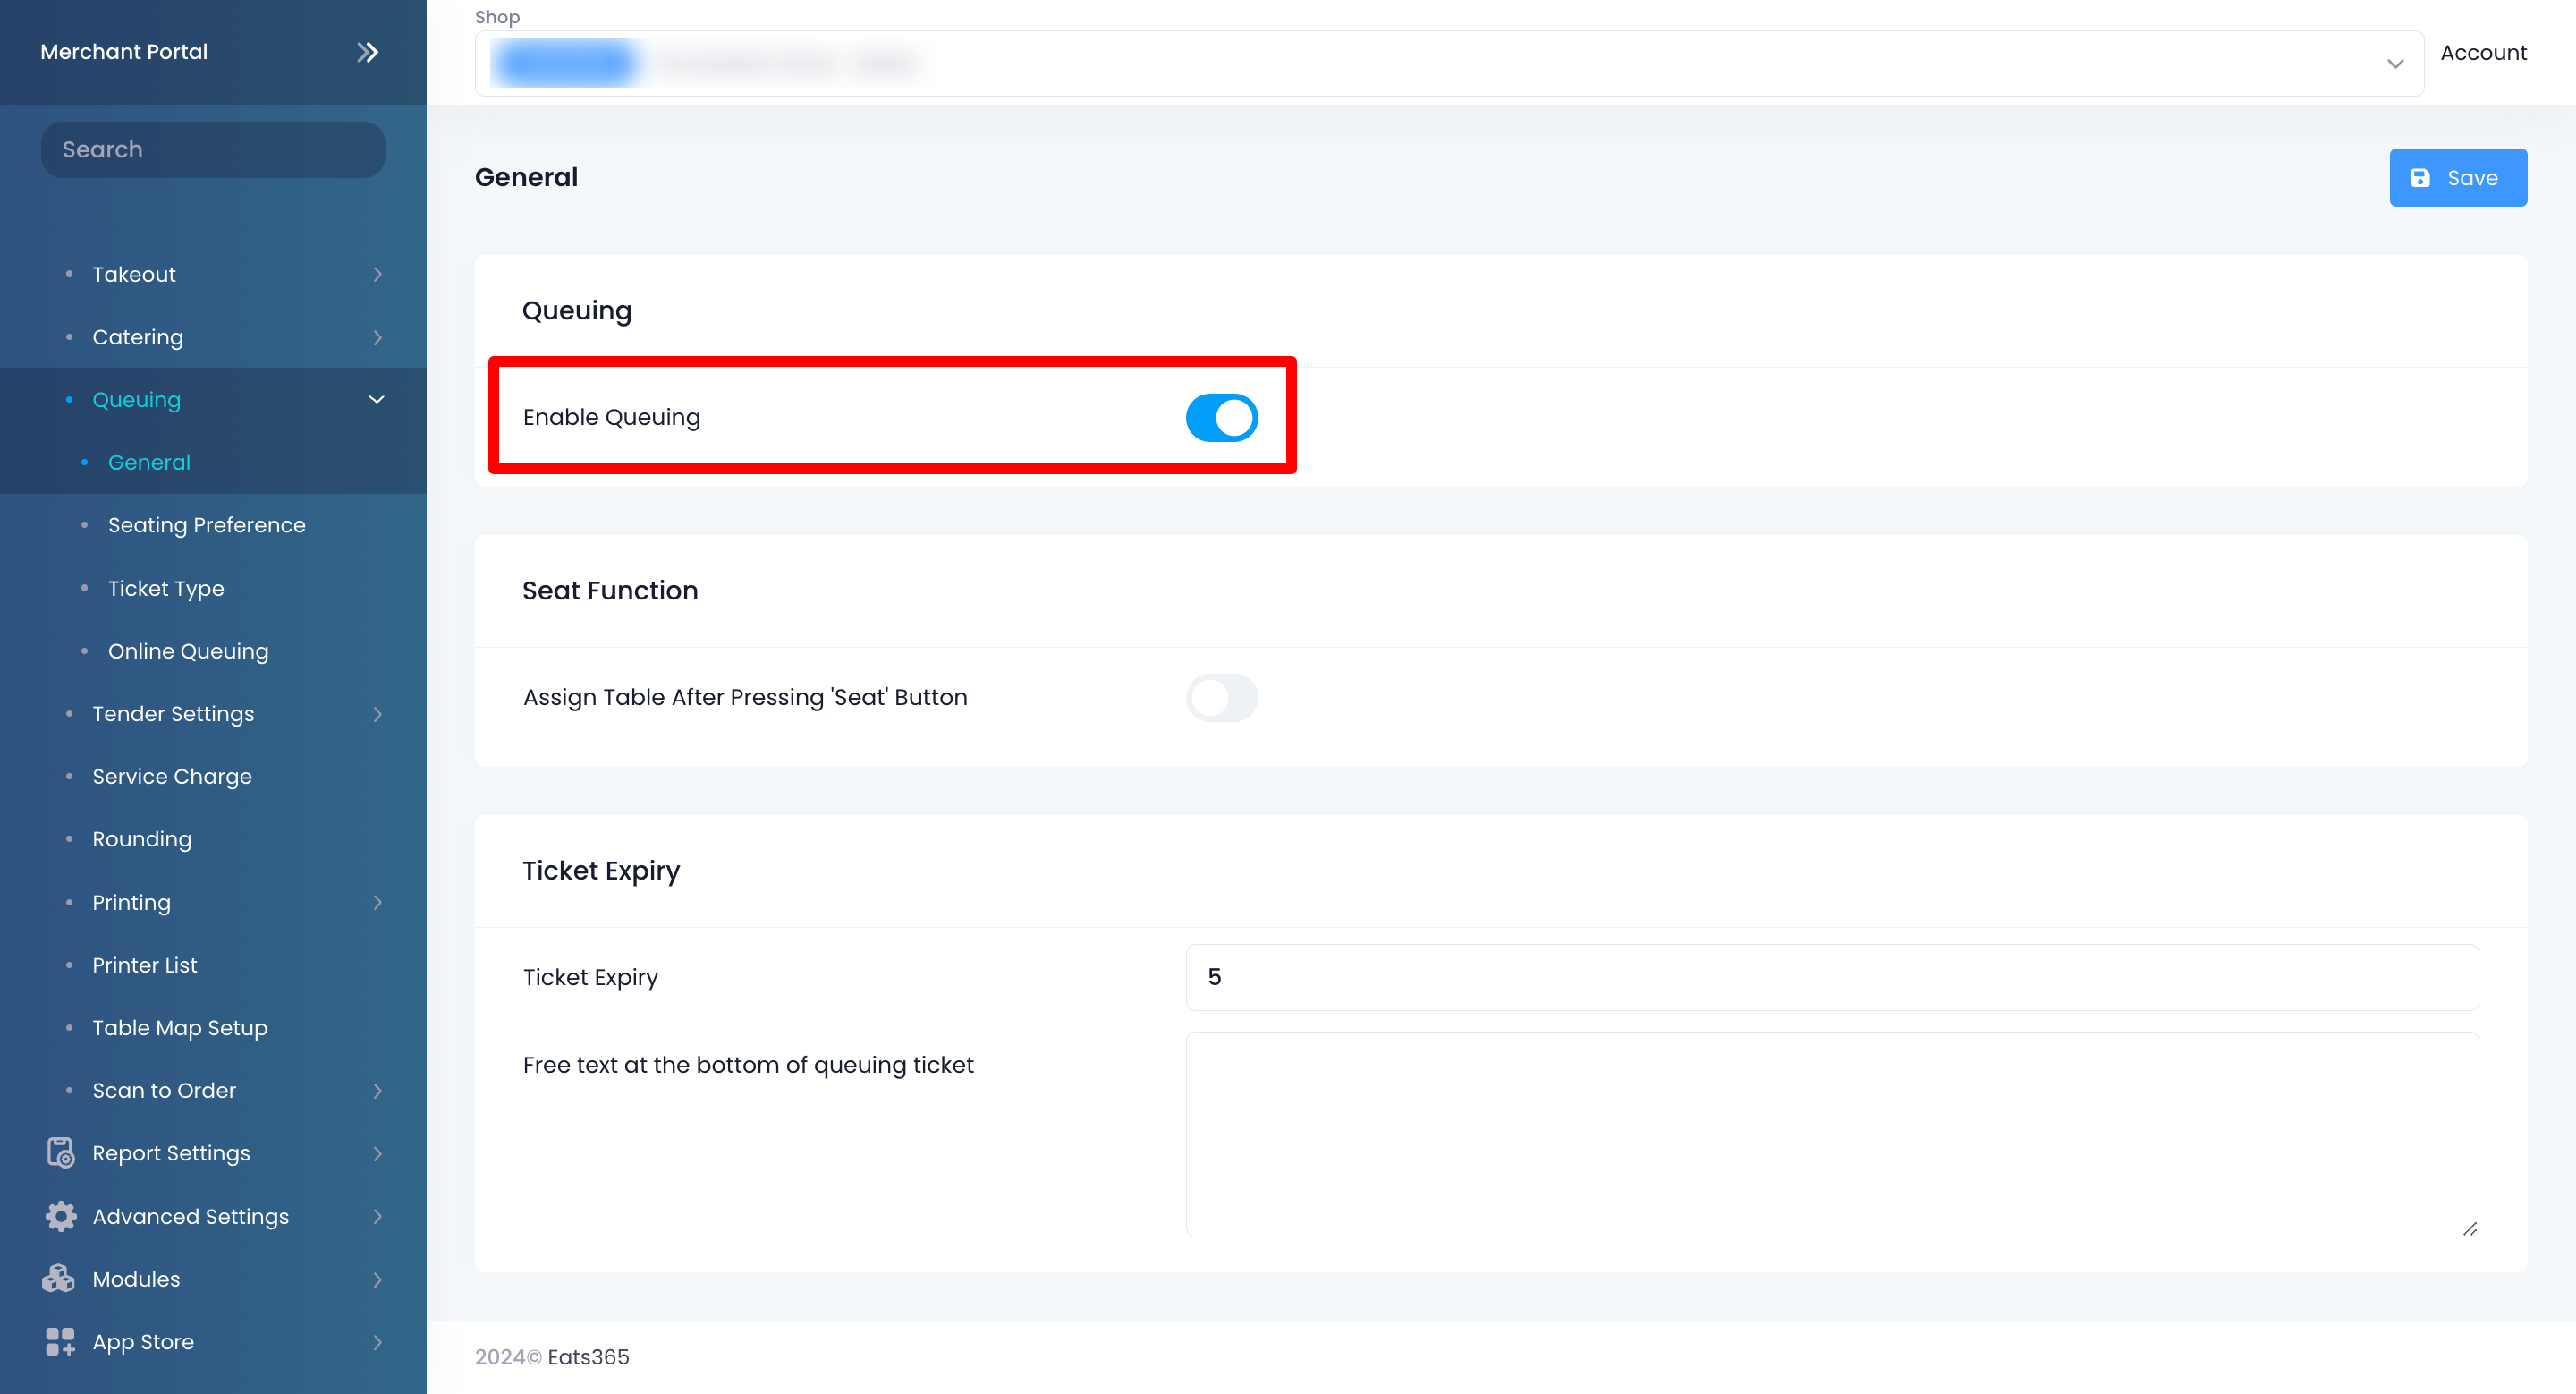
- Once Queuing is enabled, you can then configure the Queuing settings.
- At the top right, click on Save to confirm.
Below is the list of settings that you can configure on the Merchant Portal:
General
Ticket Time Display
Current Tickets Page Time Display Format
Select how the queuing ticket time appears on the POS. You can choose from the following:
- Elapsed Time - Display how much time has passed (in minutes) since the queuing ticket was issued.
- Obtain TicketTime- Display the time when the queuing ticket was issued.
| Elapsed Time | Obtain Ticket Time |
|
|
History Page Show Ticket First Called Time
Enable this setting to display the time when the queuing ticket was called.
Seat Function
Assign Table After Pressing 'Seat' Button
Enable this setting to require staff to assign a table to the queuing customer upon tapping the Seat button.
Custom Message when Suspend Queuing Ticket Issuance
Custom Message Options
Enable this setting to create a custom message that appears on the Queue Ticket Kiosk when queuing ticket issuance is suspended. This could be used during off-peak hours, special events, or when your service is unavailable.
Ticket Expiry
Ticket Expiry
This setting allows you to set the number of queue tickets that can be called before a queuing ticket expires. For example, if the Ticket Expiry is set to “3,” a ticket numbered A2 will expire once A6 has been called.
Free text at the bottom of queuing ticket
Add a customized text at the bottom of the queuing ticket.
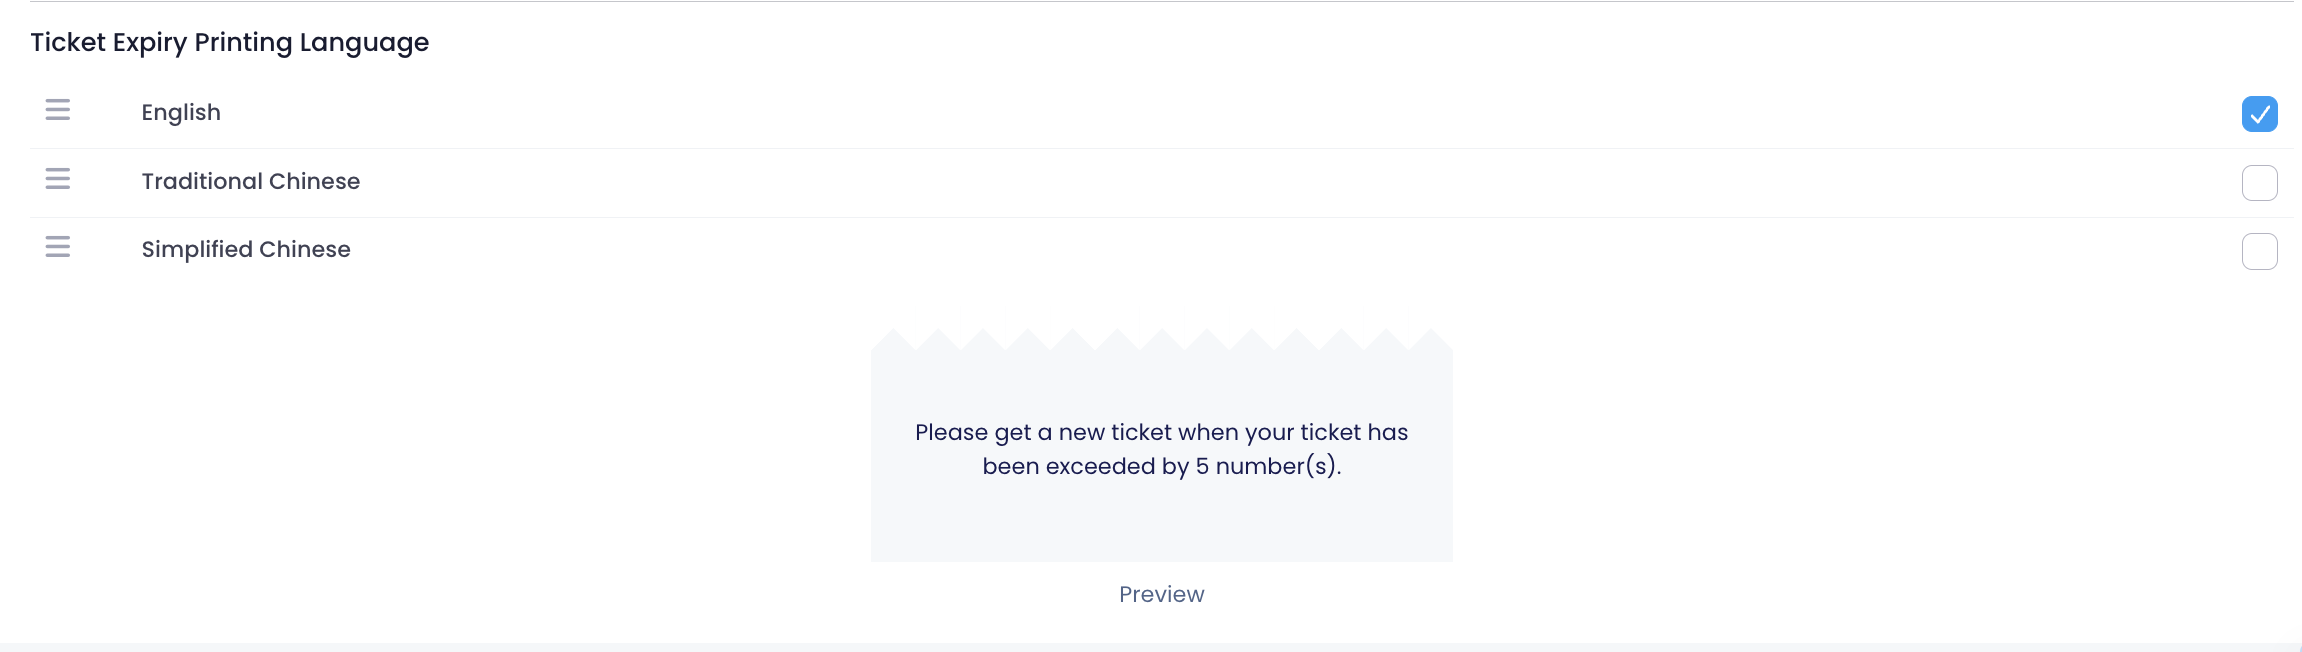
Ticket Expiry Printing Language
Choose what language you want the ticket expiry to show.
Seating Preference
The Seating Preference setting allows you to add seating options for customers. When you add a seating option, customers can choose where they want to sit based on their preference and the options you provide.
To add a seating option, follow the steps below:
- Log in to the Merchant Portal.
- On the left panel, click on Restaurant Settings. Then, click on Queuing.
- Select Seating Preference.
- Click on +Add New. Then, add the "Seating Preference Name."
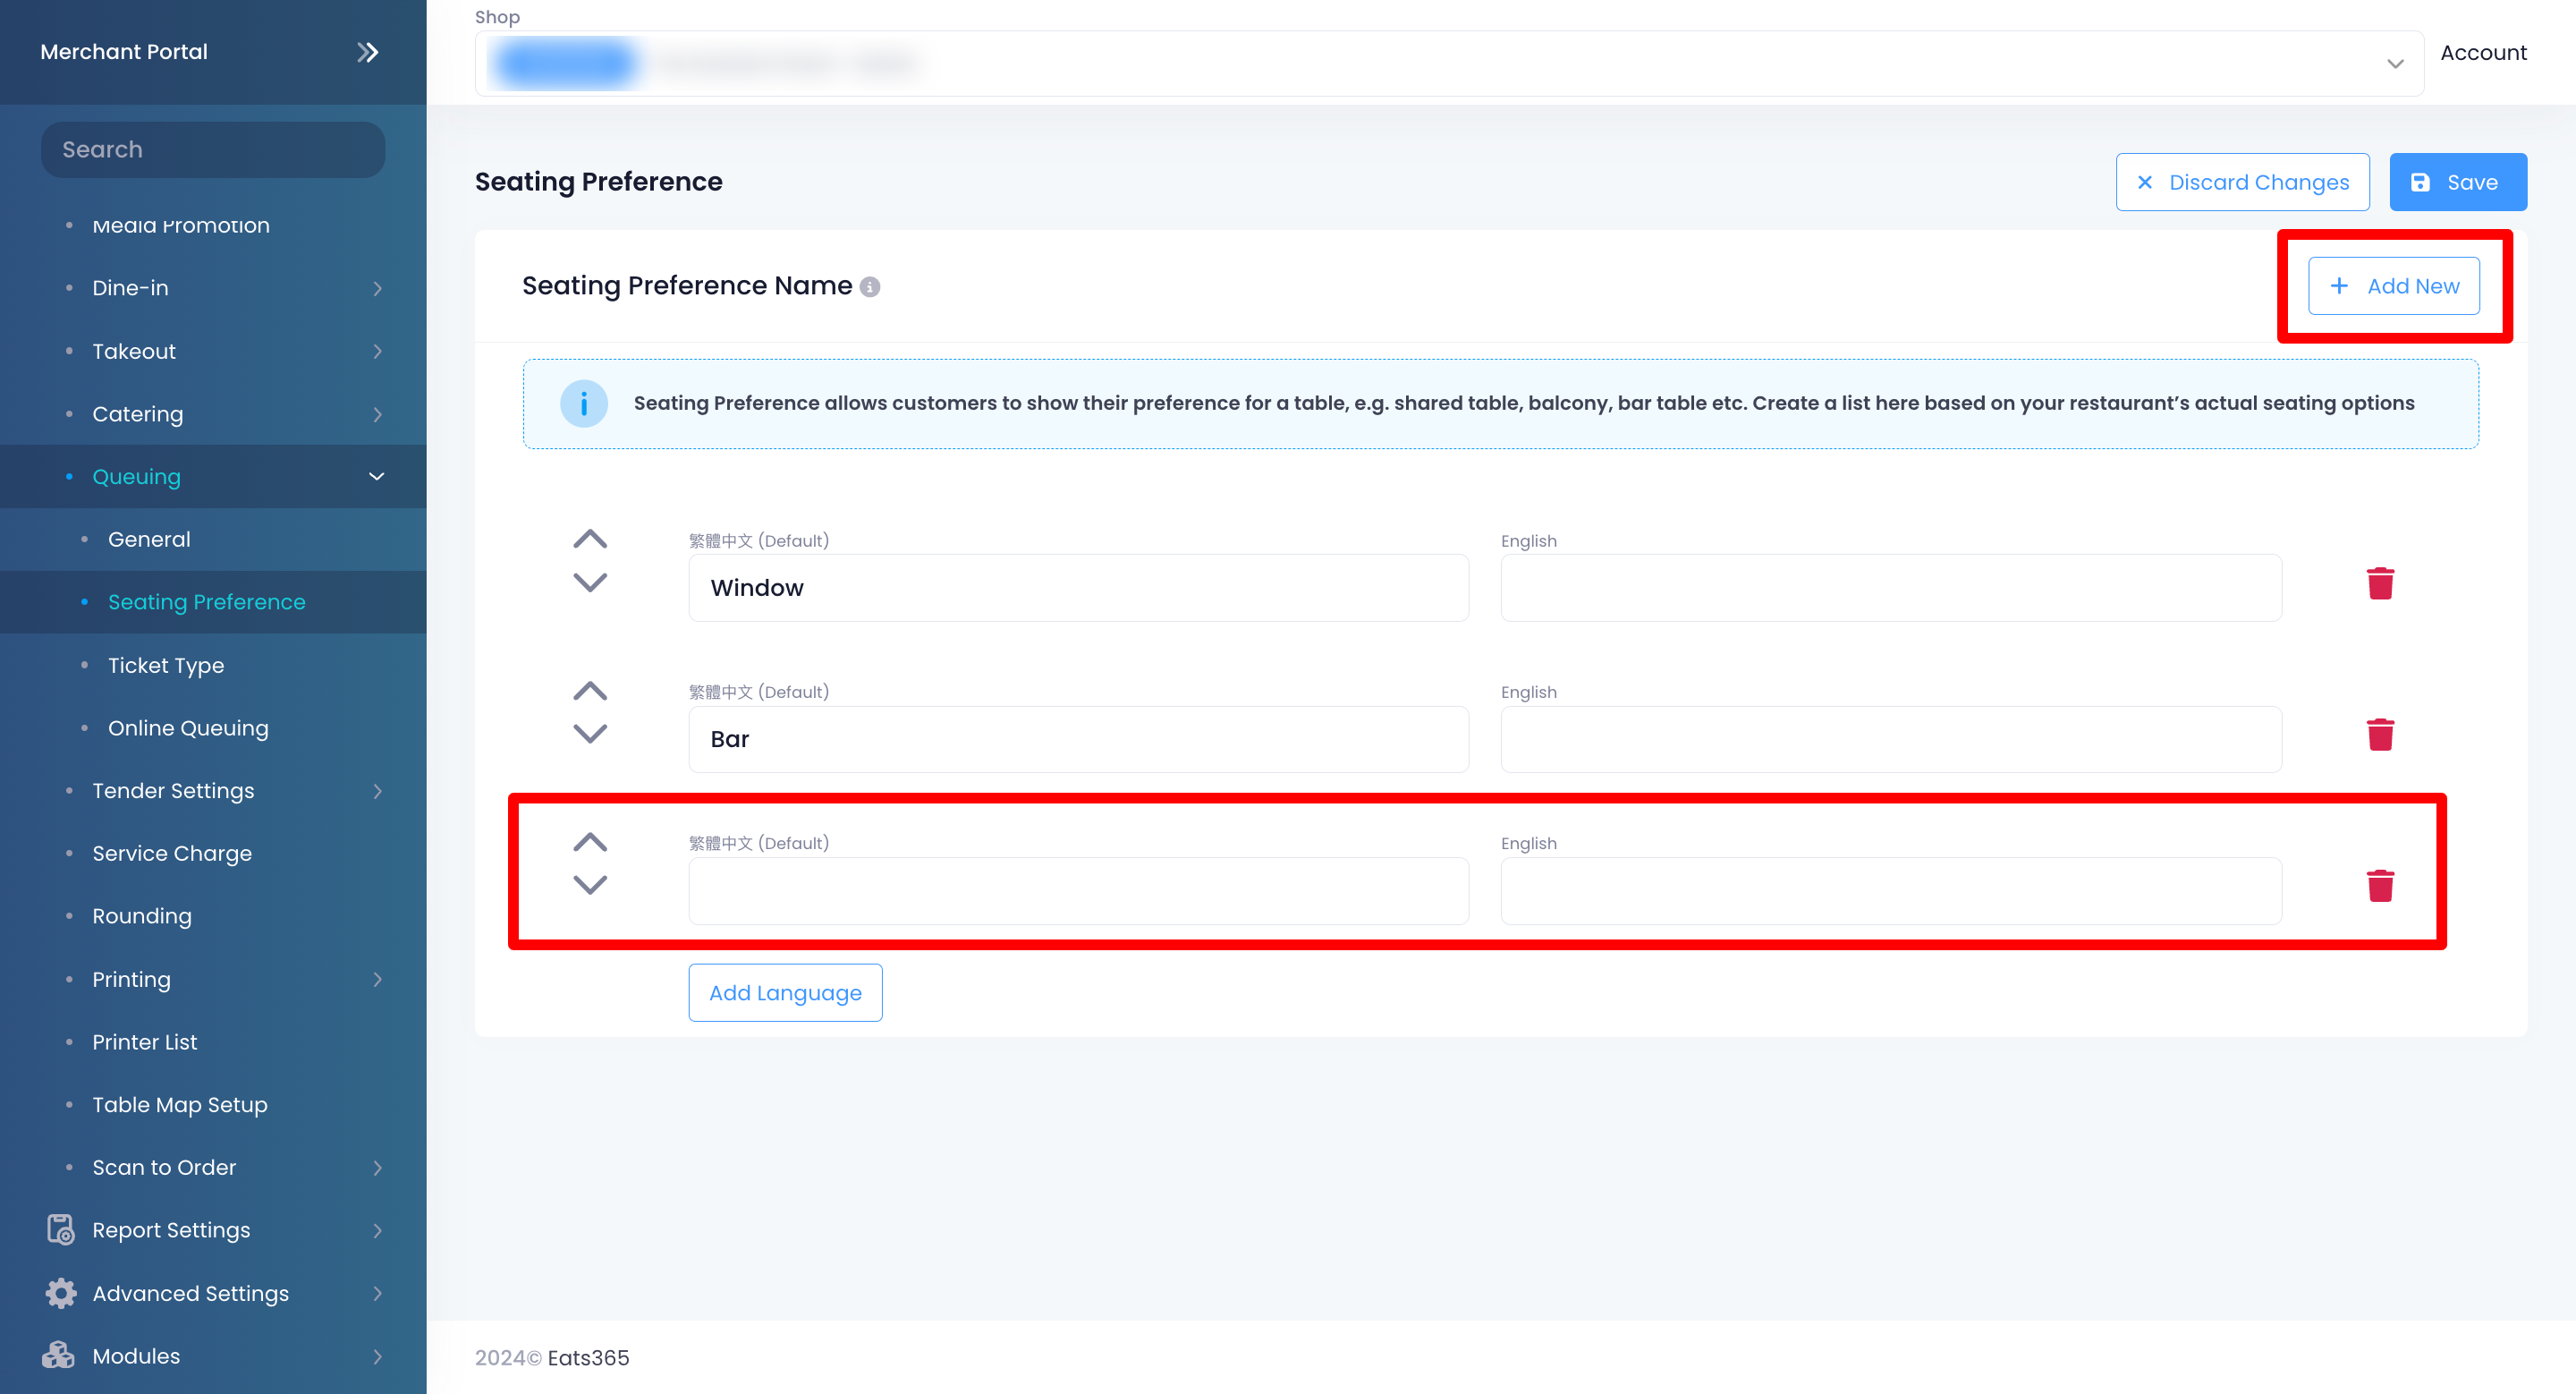
- At the top right, click on Save to confirm.
Ticket Type
Ticket Type allows you to create queuing ticket presets based on the number of people in a party. There are two types of tickets that you can create, such as a normal ticket and a VIP ticket. To learn more about creating VIP queuing tickets, refer to Set up VIP Queuing.
Create a normal ticket type
You can create up to five ticket types labeled Ticket A to Ticket E. For example, you can set Ticket A to be given out for a party size of 1 to 2 people, and Ticket B for a party size of 3 to 5.
To create a Ticket Type, follow the steps below:
- Log in to the Merchant Portal.
- On the left panel, click on Restaurant Settings. Then, click on Queuing.
- Select Ticket Type.
- Enter the party size number for Ticket A.
- To customize the background and text color of the ticket type, toggle Custom Colour . Then, select your preferred background and text color.
- To add another ticket, click on Add New Type.
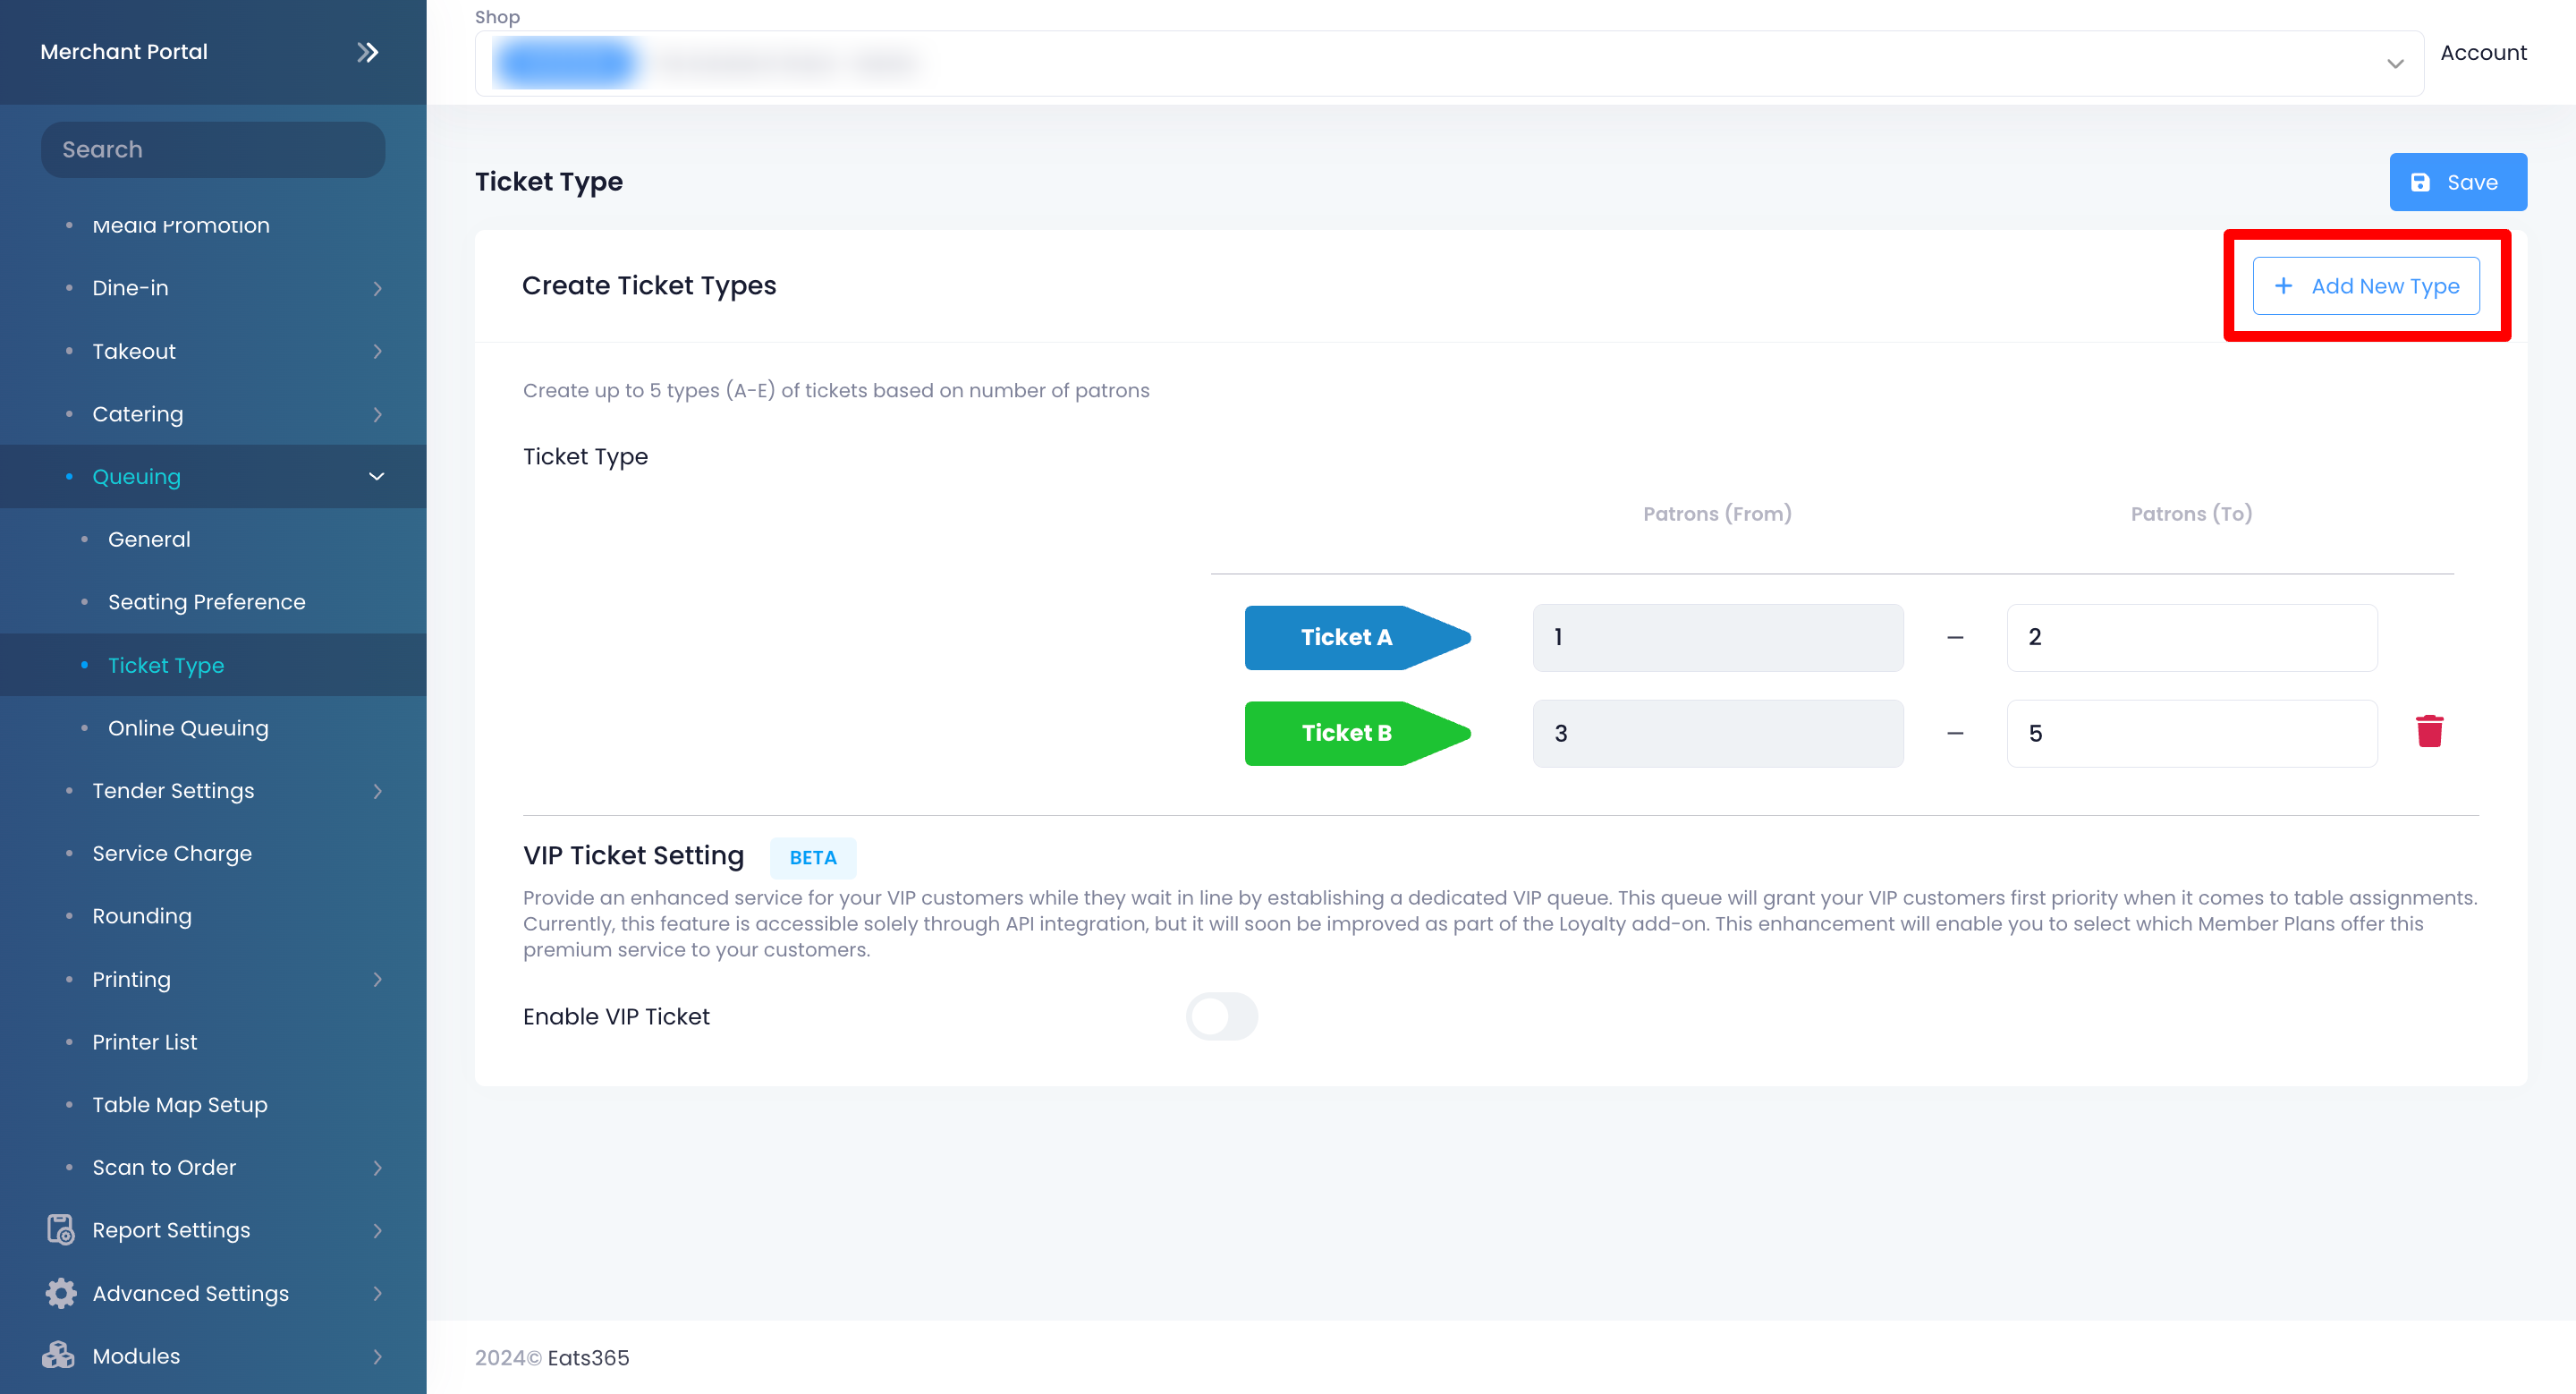
- At the top right, click on Save to confirm.