 Eats365 Products
 Merchant Guide
 Modules
 Membership
 Integrations
 Hardware
 Staff Operations
 Roles & Permissions
 Payments
 Reports
 What’s New
 Release Notes
 Troubleshooting
 Simulators
 Glossary
 Troubleshooter
 System Status
Device Management
Contact Us
If you still have questions or prefer to get help directly from an agent, please submit a request.
We’ll get back to you as soon as possible.
- Explore Eats365 products
- Set up and Installation
- Menu Setup
- Set up and manage a Category (Full Service)
- Set up and manage a Category (Quick Serve)
- Set up and manage a Category (Food Court)
- Set up and manage Product and Sub Product Type
- Set up a Single Item (Full Service)
- Set up a Single Item (Quick Serve)
- Set up a Single Item (Food Court)
- Set up a Combo Item (Full Service)
- Set up a Combo Item (Quick Serve)
- Set up a Combo Item (Food Court)
- Set up Catering Items
- Manage menu items
- Set up and manage a Custom Menu
- Set up a tax-inclusive menu
- Set up and manage Modifiers
- Set up and manage Modifier Masters
- Set up and manage Modifier Presets
- Set up and manage Tier Pricing Rules
- Allocate item sales to different sales categories
- Set up and manage a Kitchen Station
- Set up a Pickup Station
- Set up a Pickup Station (Food Court)
- Customize the menu layout
- Set up and manage Special Request Quick Keys
- Set up and manage Menu Tags
- View and manage Inventory
- Set up courses
- Display supplementary notes for selected modifier combinations
- Table Map Setup
- Restaurant Settings
- Dine-In Settings
- Takeout Settings
- Catering settings
- Queuing Settings
- System Preferences
- Manage General Preferences
- Manage System Preferences (Full Service)
- Manage System Preferences (Quick Serve)
- Manage System Preferences (Food Court)
- Set up and manage Ordering Quantity Limit
- Modify Action Button options
- Set up a Revenue Center
- Enable Sequential Order Number
- Configure Audit Log settings
- Set up pre-checkout item prompts
- Device Management
- Set a primary POS
- Reset the Eats365 POS
- Update the Eats365 POS
- Change POS device name
- Configure POS to sign out automatically
- Maintain restaurant operations using Offline Mode
- Configure POS login preferences
- Available features when in Offline Mode
- Create a home screen shortcut for the Merchant Portal
- Account Management
- Reservation
- Import Tools
- Time Sheets
- Menu Template
- Scan to Order
- All You Can Eat Menu
- Food Court Settings
Table of Contents
Set a primary POS
Learn how to set a primary POS in a multi-POS environment.
Eats365 POS can be installed on multiple supported iPad devices to enable restaurants to configure as many POS terminals as an establishment requires.
The first POS device that gets activated is automatically set as the primary. The primary POS is responsible for processing all orders that don’t originate from the POS itself, like those that come from modules, such as mPOS, PhotoMenu, and Online Orders, as well as print jobs. Meanwhile, succeeding POS devices all become secondary POS terminals.
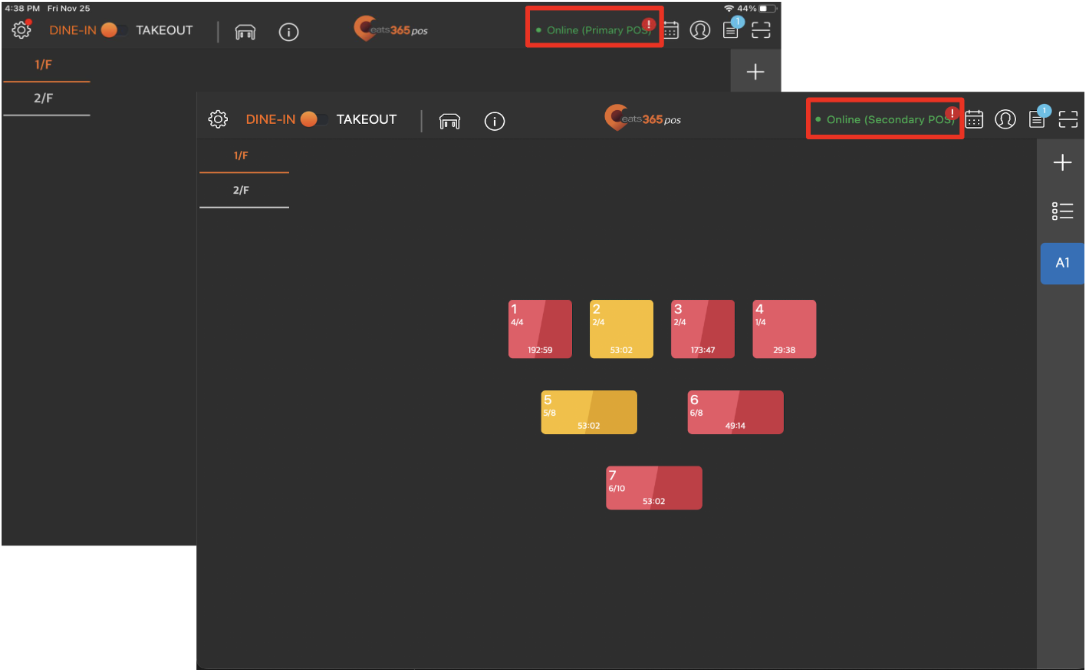
A Primary or Secondary indicator is displayed at the top right of the Table Map screen or the order-taking screen for convenience.
Note: If a primary POS becomes offline, a secondary POS doesn’t automatically become the primary POS. The secondary POS must be set as the primary manually. The only time this process becomes automatic is when a reset is performed on the primary POS. For more information, refer to Reset the Eats365 POS.
Before you start
A multi-POS setup requires the following:
- At least two supported iPad devices
- A POS license for each supported iPad device
- A restaurant license under the Advanced Subscription
Note: Multi-POS is not available under the Basic Subscription. - A stable internet connection
Set a secondary POS as the primary POS
To set a secondary POS as the primary POS, follow the steps below:
- Log in to the Eats365 POS.
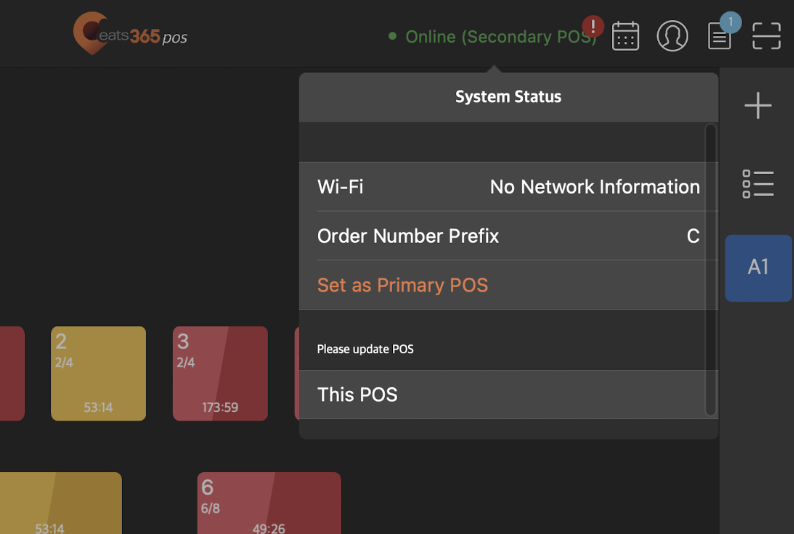
- From the Table Map screen or the order-taking screen, at the top right, tap Online (Secondary POS).
Note: If the POS that you’re trying to modify displays Online (Primary POS), then your POS is already the primary POS. - Tap Set as Primary POS.
Tips:
- It’s recommended to pair Dot Matrix printers to the primary POS. A printer can only be paired to one POS at a time.
- You can configure Order Lock to prevent multiple POS terminals from processing orders for the same customer or table at the same time. For more information, refer to Set up Dine-In settings.