Menu Setup
All Product
Table of Contents
Set up and manage a Category (Full Service)
Learn how to create and manage menu categories for Full Service restaurants on the Eats365 POS or on the Merchant Portal.
"Categories" allow you to place your menu items into groups. You can create categories for different food and item types, and determine where each menu item should fall under.
In this article, you’ll learn how to set up a category, as well as, manage existing categories.
Create a category
To add a category, follow the steps below:
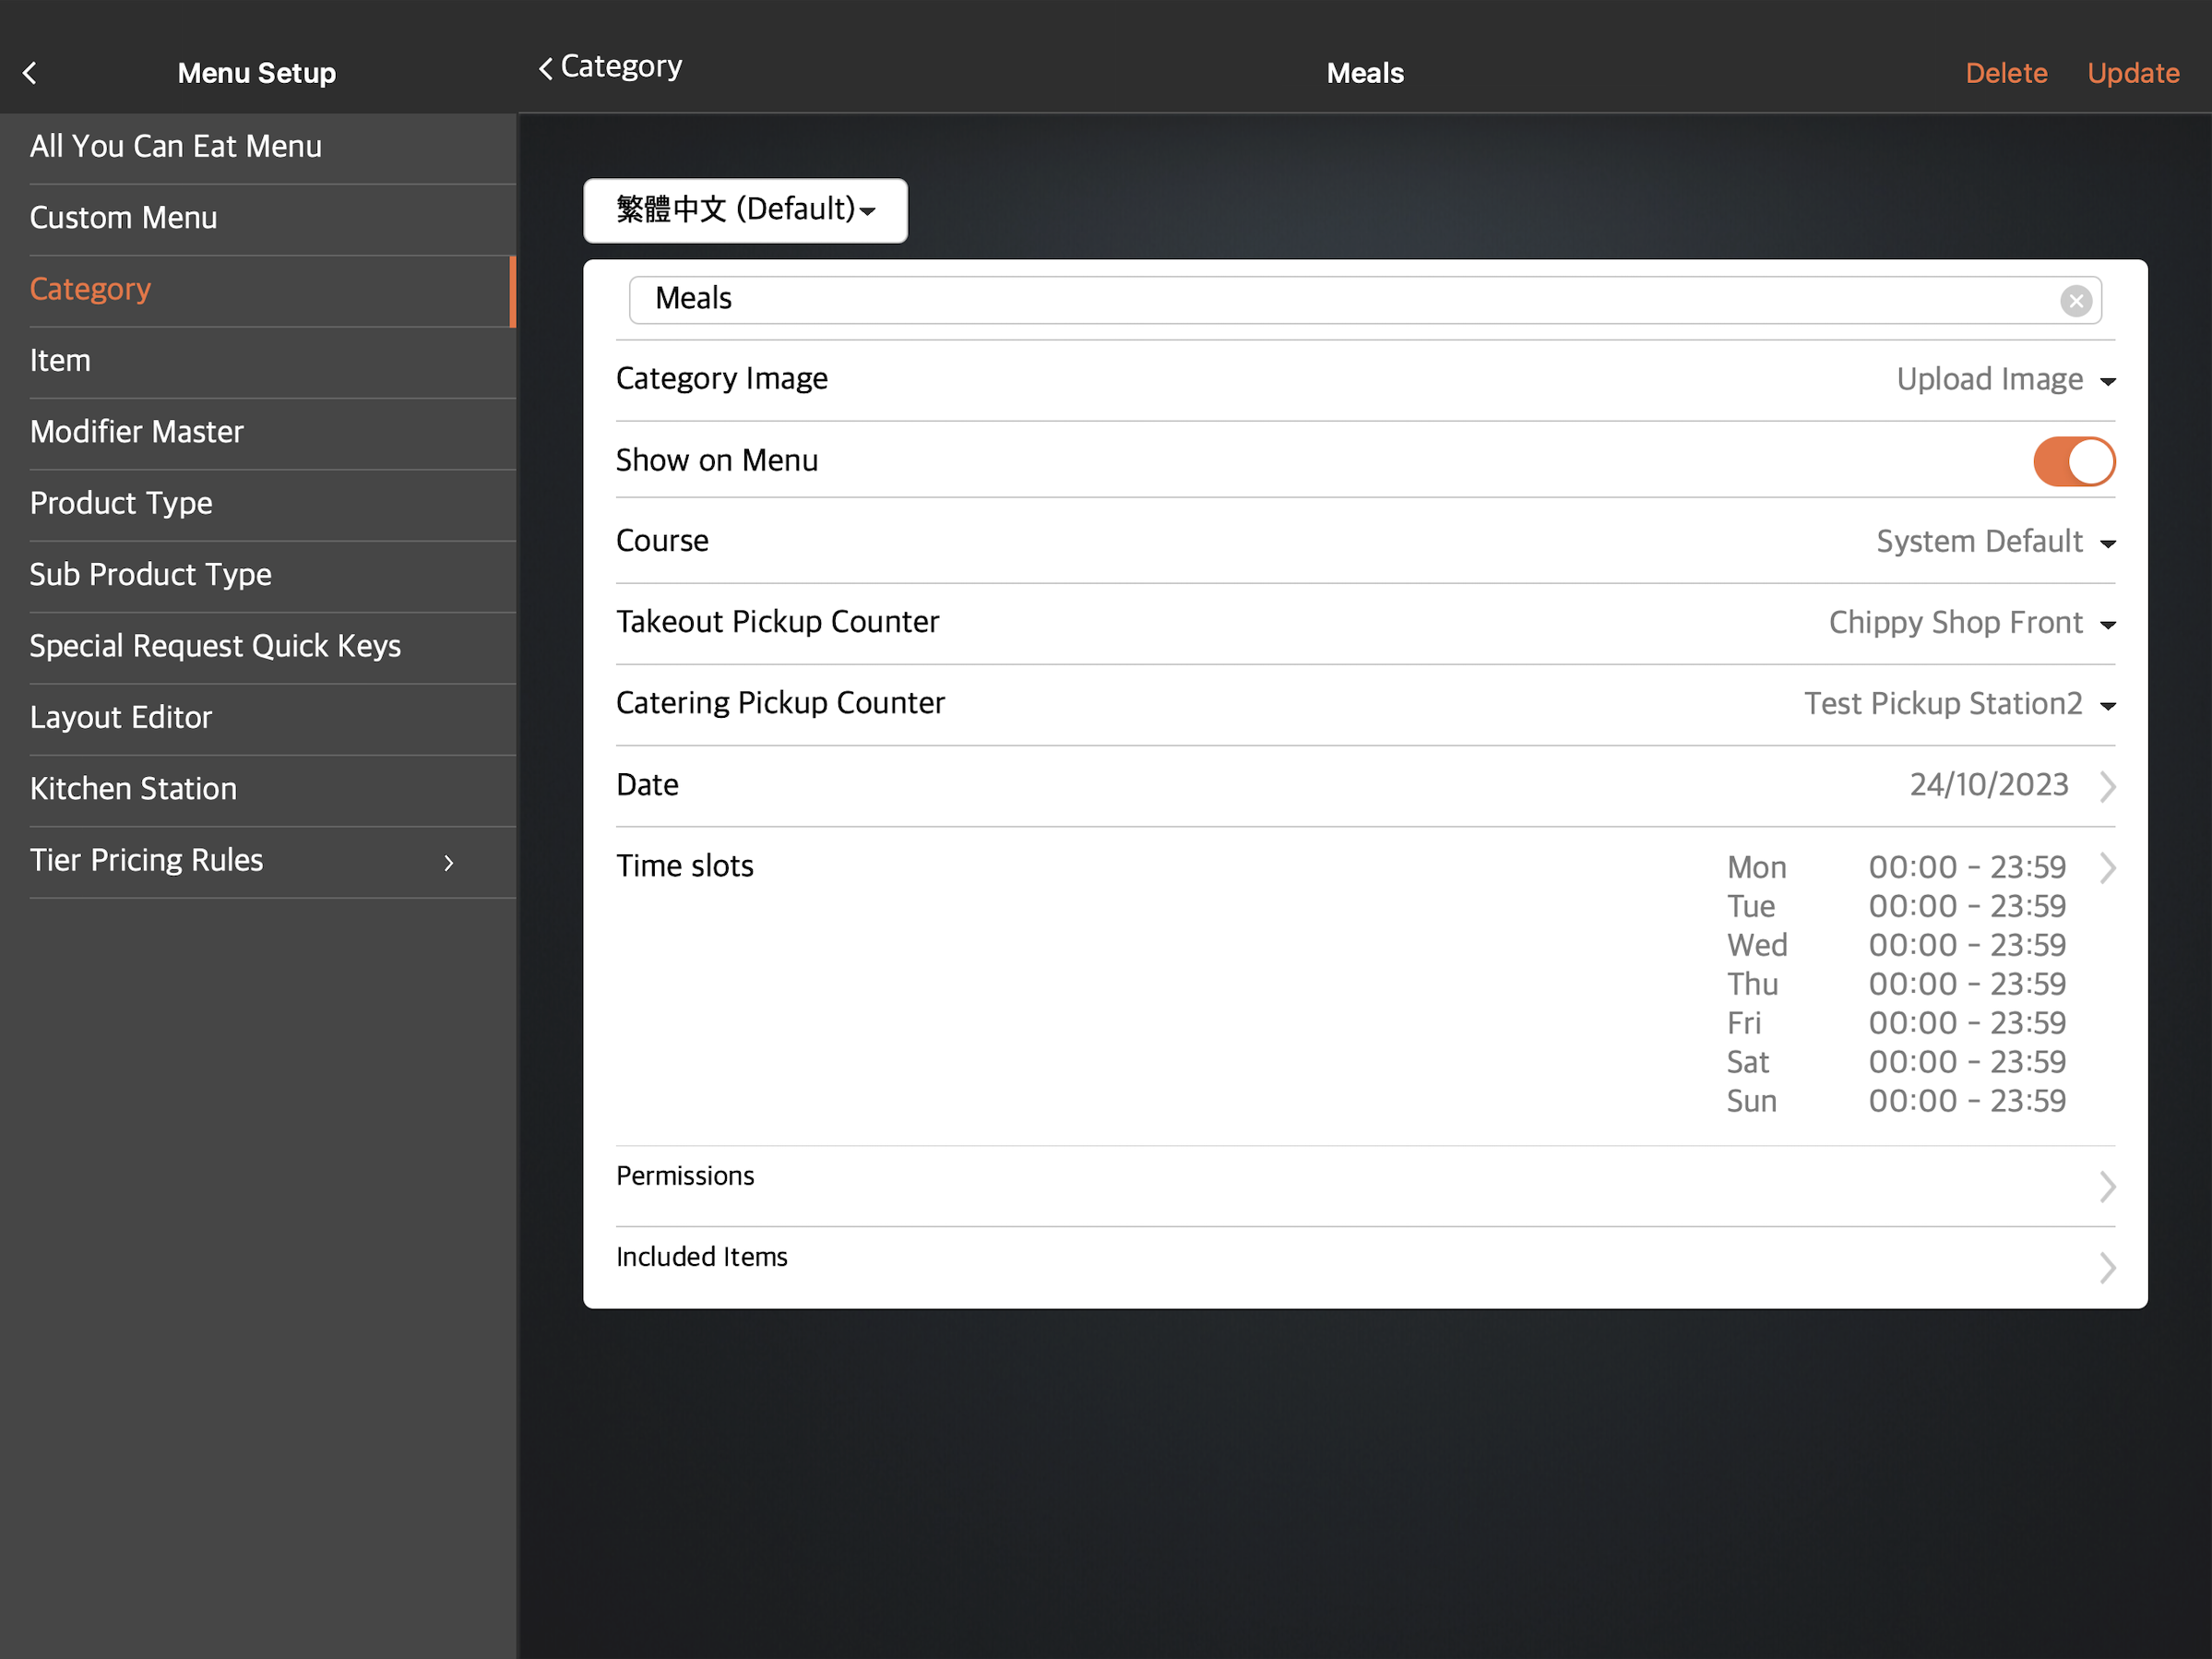
Eats365 POS
- Log in to the Eats365 POS.
- At the top left, tap Settings
 .
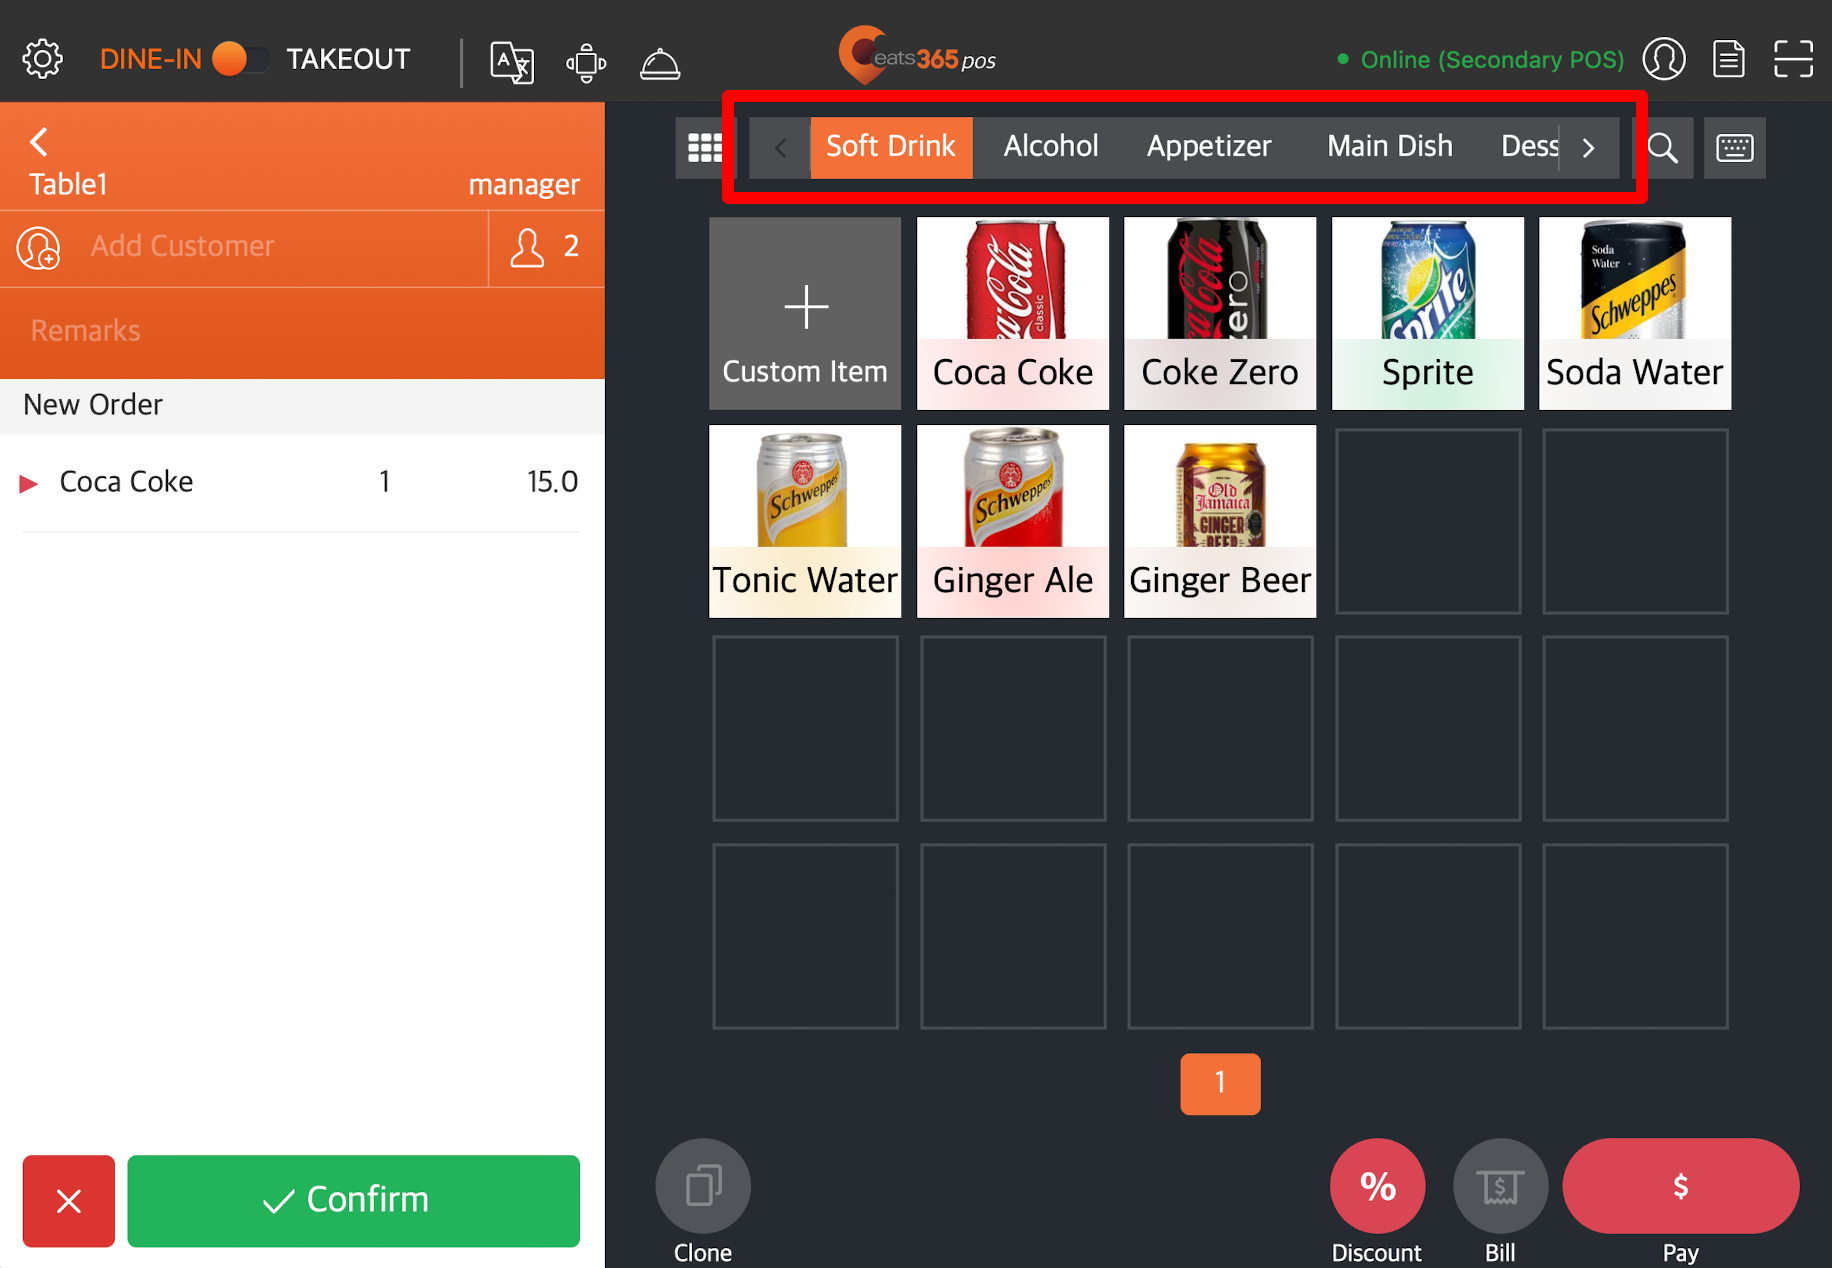
. - Under "General," tap Menu Setup, then select Category.
- At the top right, tap Add Category.
- Select the category language.
 Note: You must enter a default name for the category. The name becomes available in whatever language the POS app is using. For multi-language menus, after selecting a default language, tap the language drop-down list and select your preferred language. Then, enter the alternate name in that language.
 - On the blank field, enter the category’s name.
- (Optional) Add an image for the category.
- To allow the category to show up on the POS, turn on Show on Menu
 .
.
Tip: When "Show on Menu" is disabled, the category won't be available on the order-taking screen. However, the category can still be used for combo items setup. For example, if you have a "Set Drinks" category and you want items under this category to only be available to customers as part of a combo item, you can turn off Show on Menu , so customers won't be able to order set drink items individually.
 - Set which course the category should fall under. By default, the category shows up under the "Instant" course.
Tip: You can change the default course from "System Preferences." For more information, refer to Set up and manage Courses. - Add the date and time when the category becomes available on the POS.
Tip:- You can customize the category to appear on the POS in specific time slots, depending on the day. For example, you can set the category to show on the POS from 8 AM to 10 AM on Wednesdays and from 10 AM to 5 PM on other days of the week.
- If "Date Group" is available, you can also customize the category to appear during “Special Handling Dates,” or define “Excluded Dates.” For more information about Date Group, refer to Create and manage Date Groups.
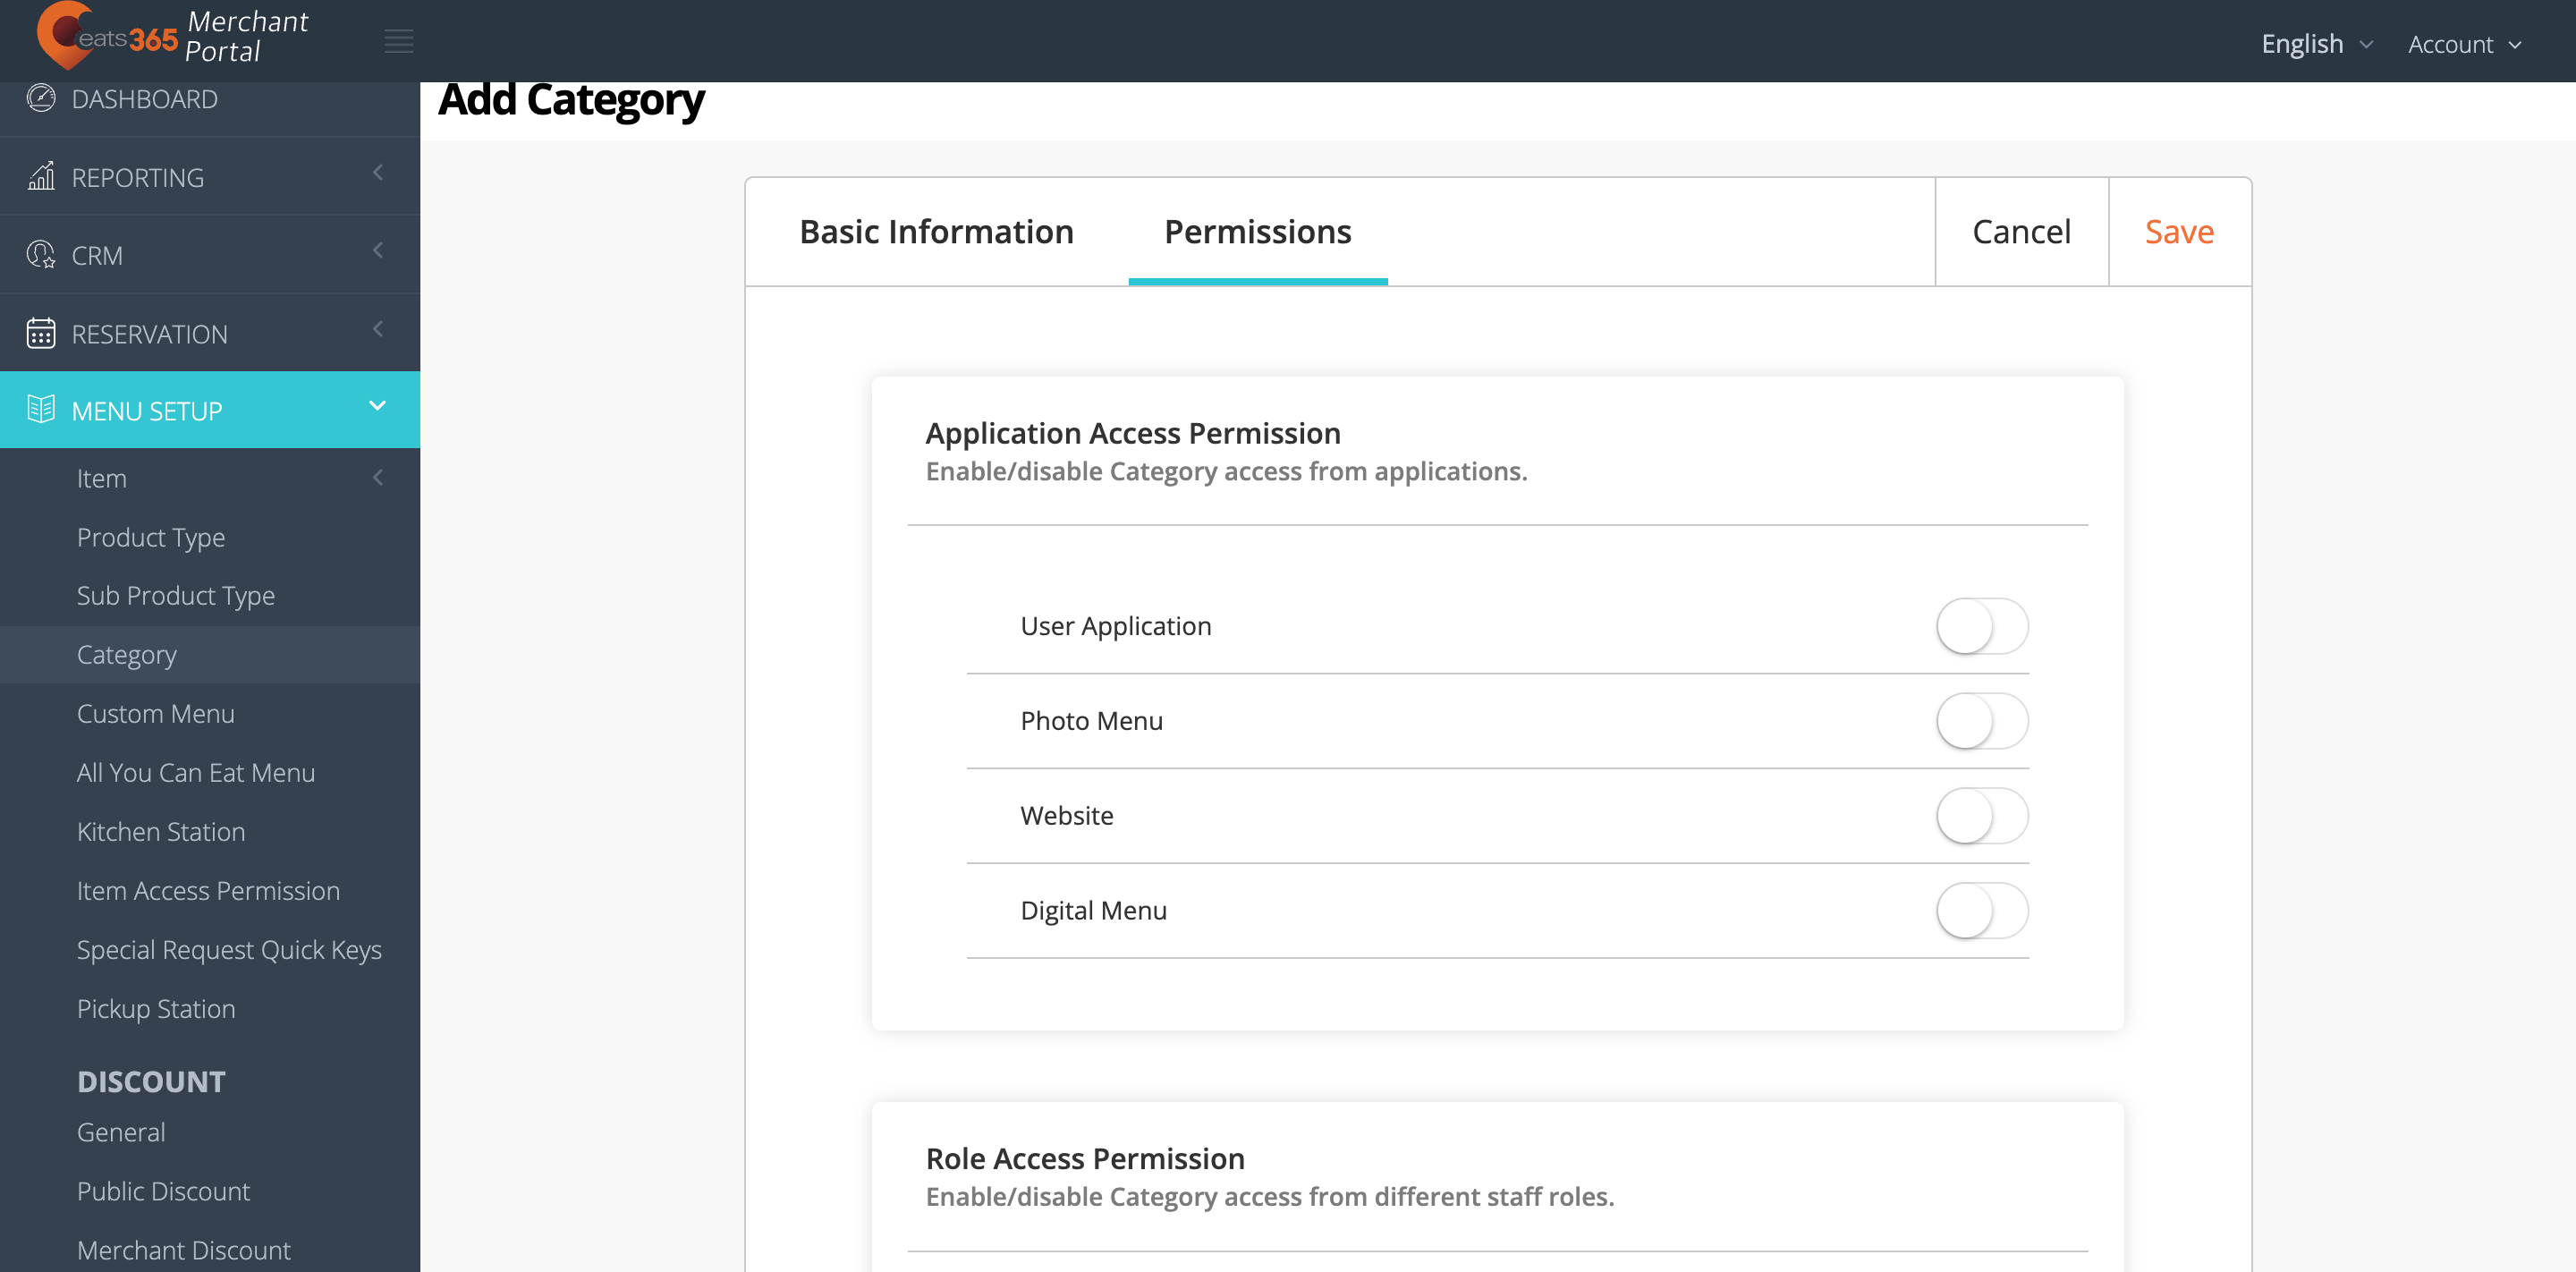
- Set up staff roles and application permissions.
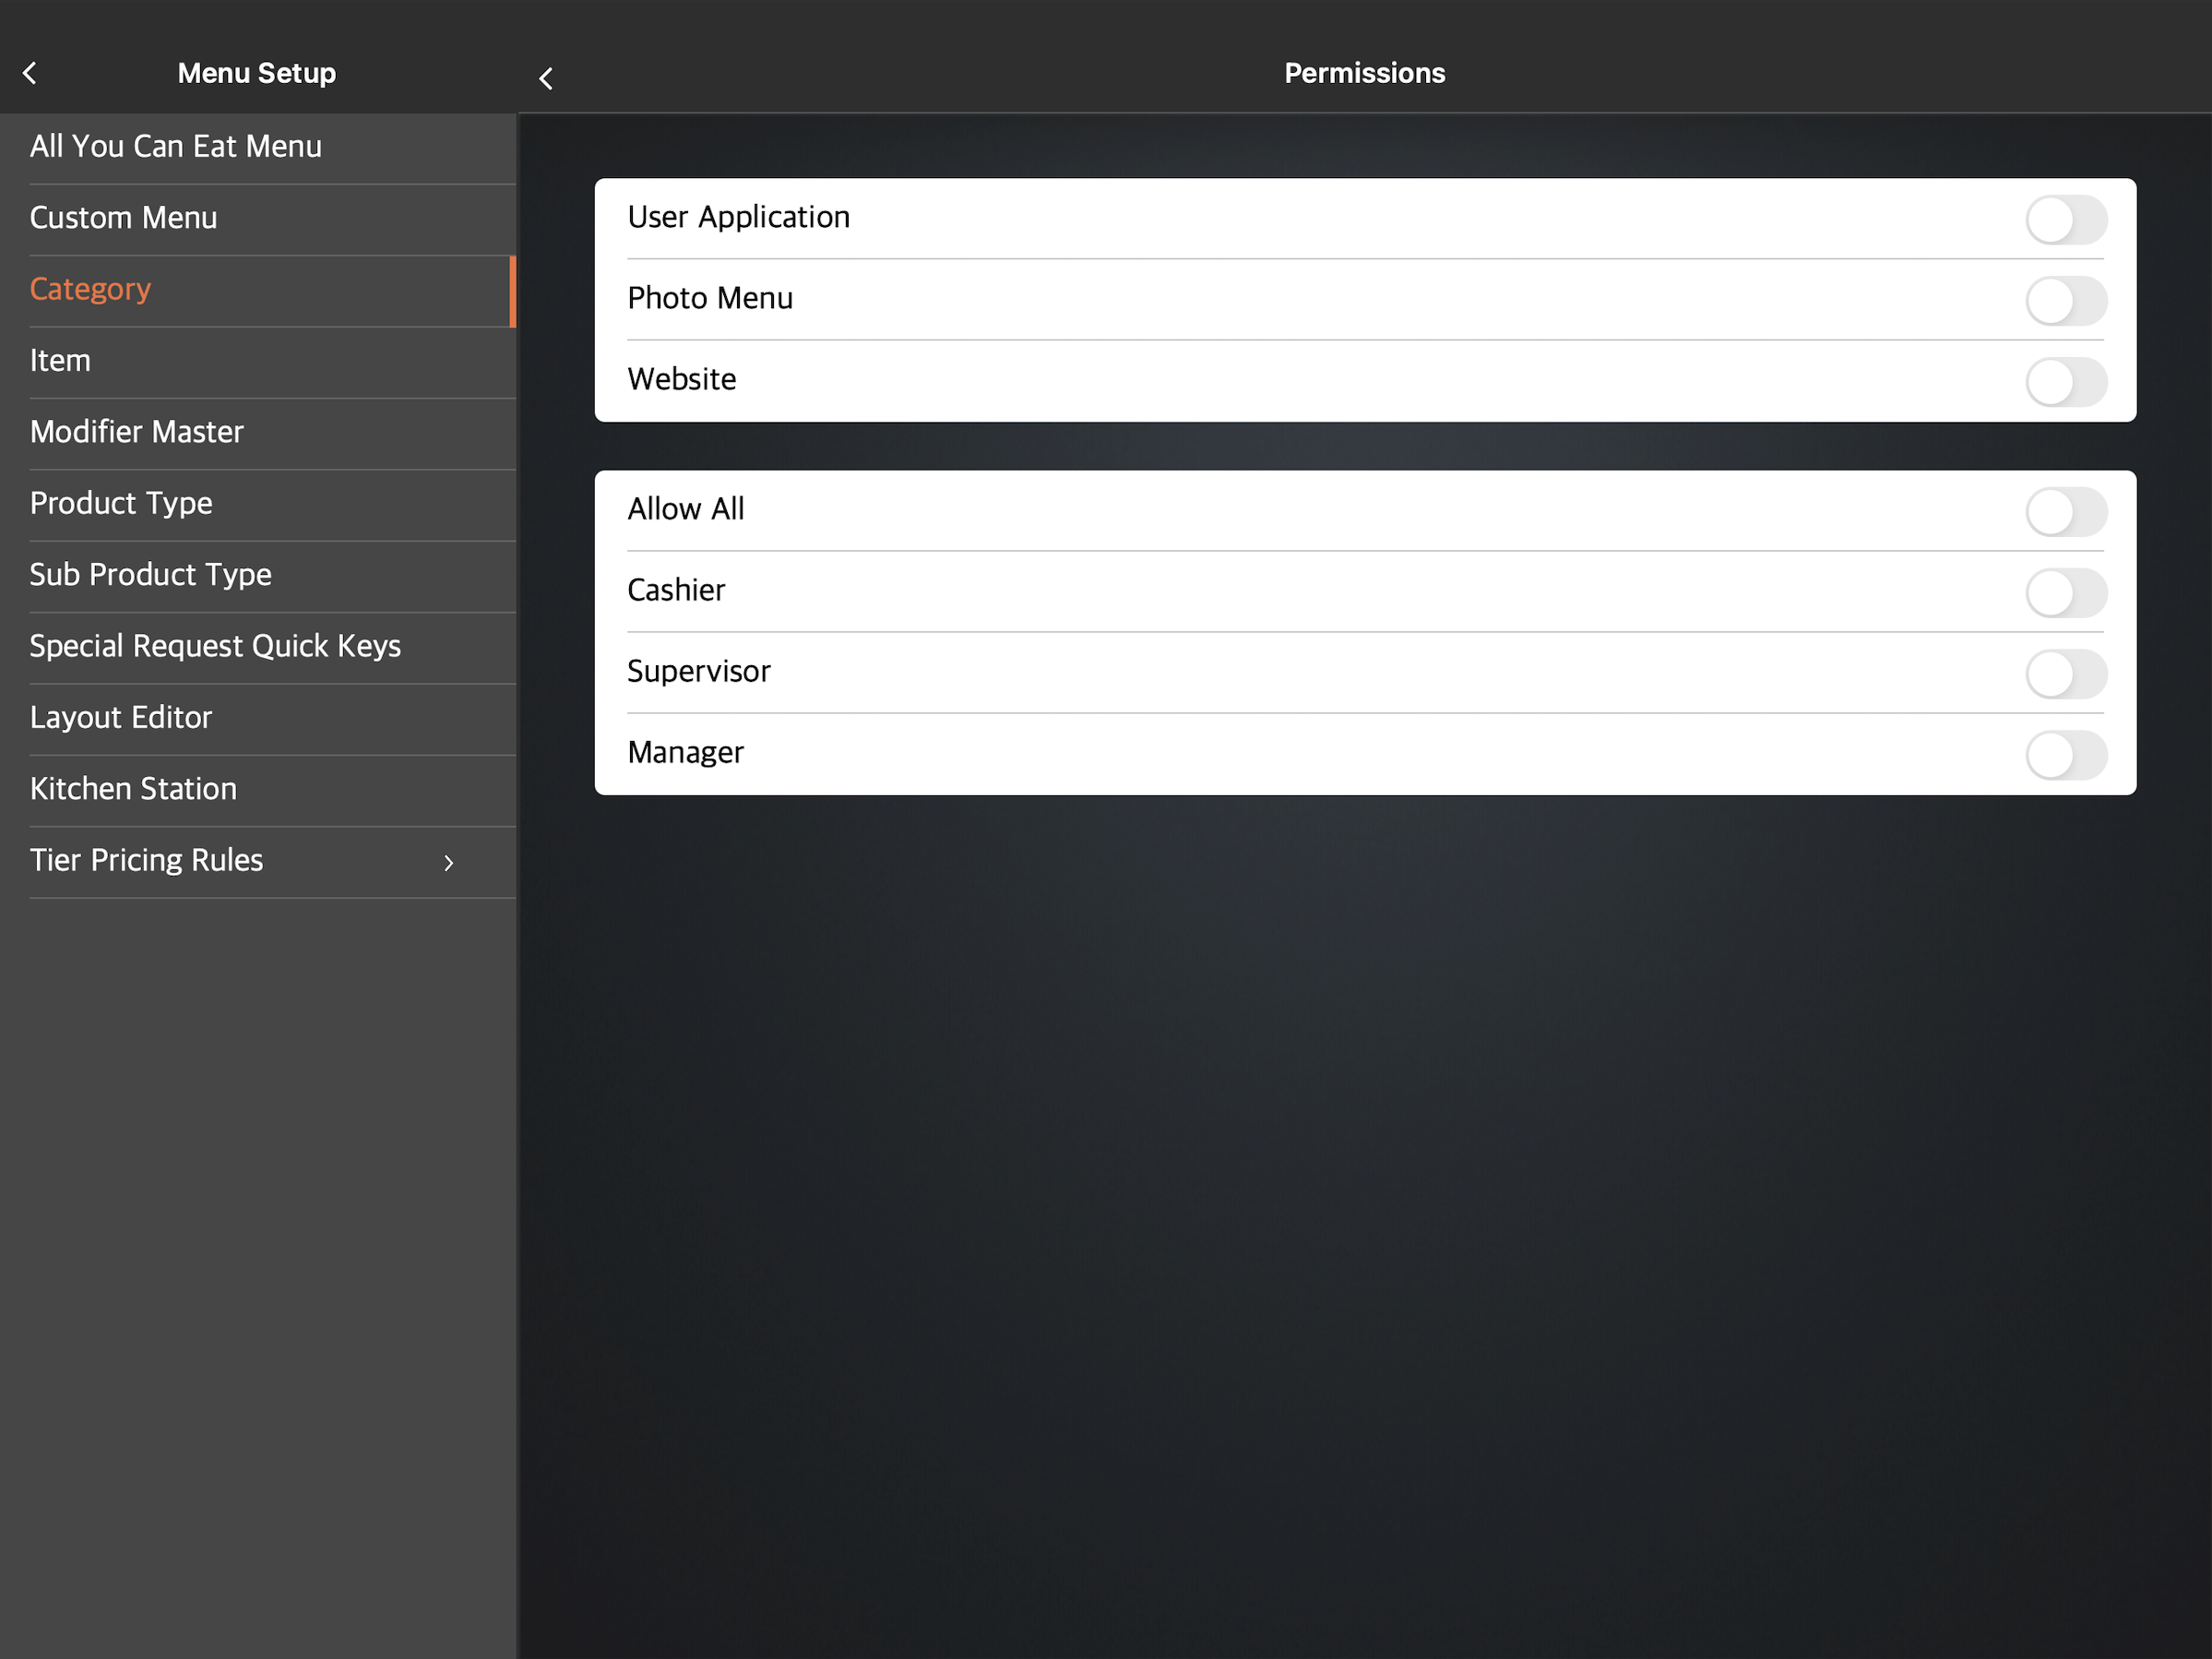 Note: You can toggle Allow All to grant access to all staff roles and applications simultaneously. However, it’s recommended that you enable or disable access to each role and application individually.
 - At the top right, tap Save to confirm.
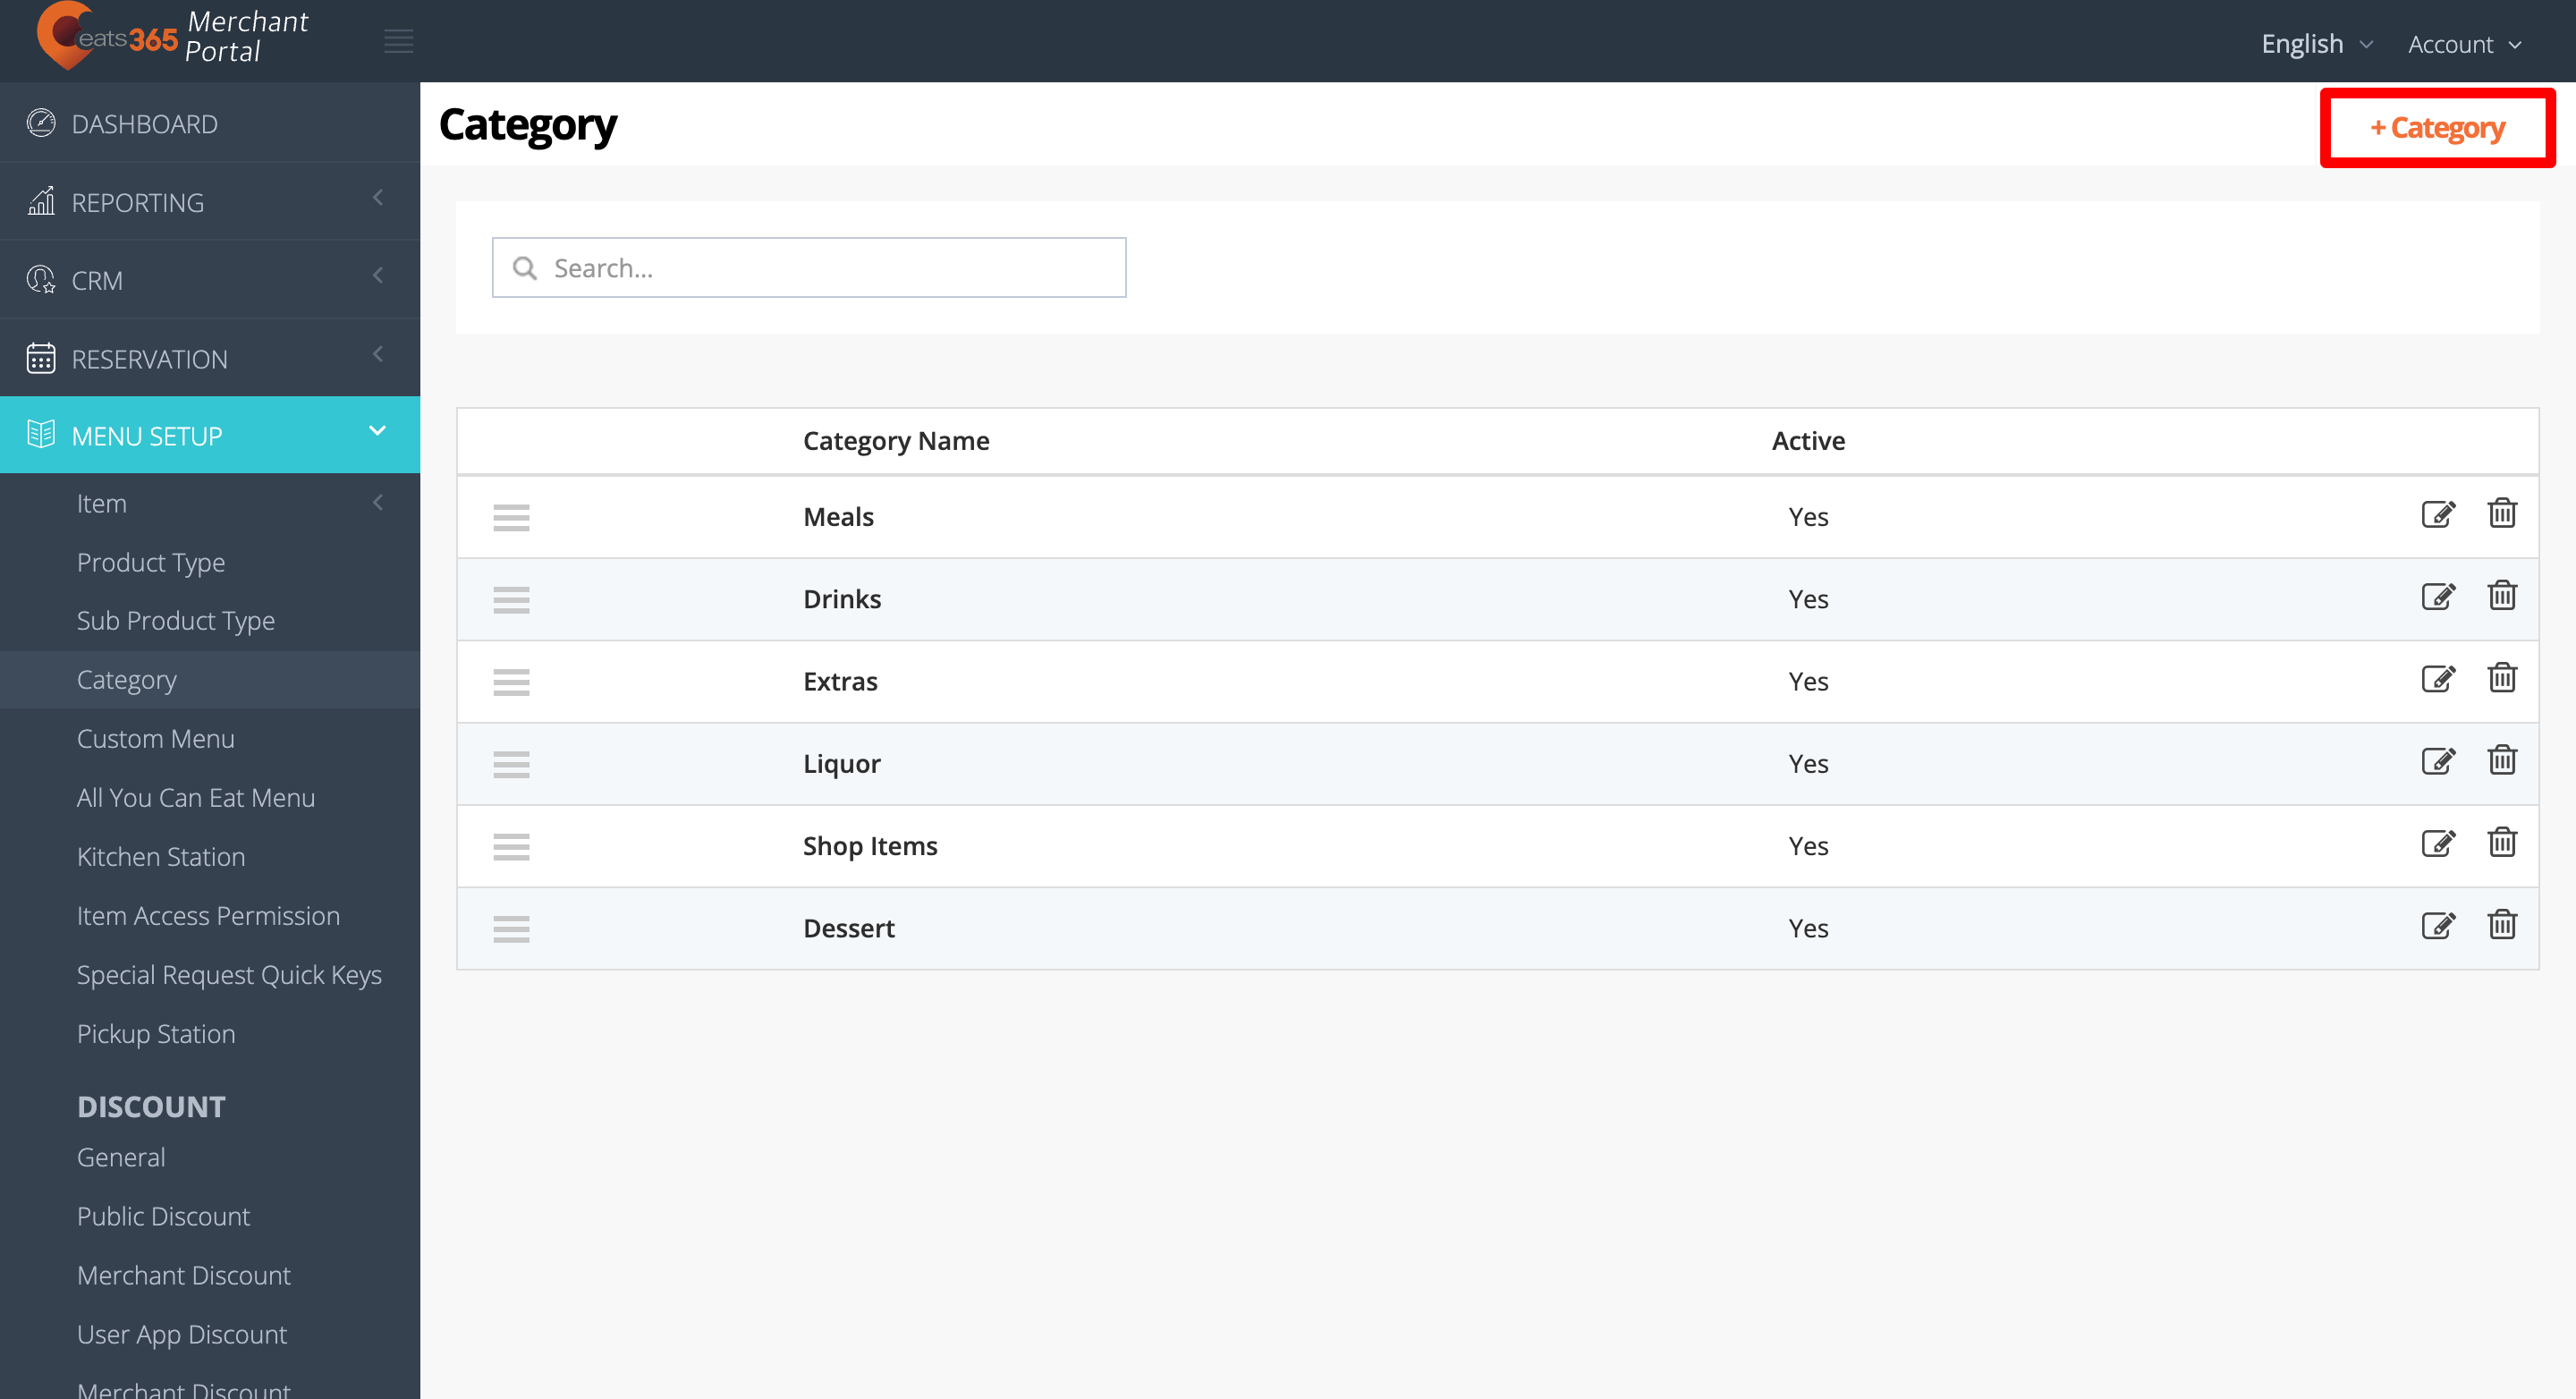
Merchant Portal (Classic Theme)
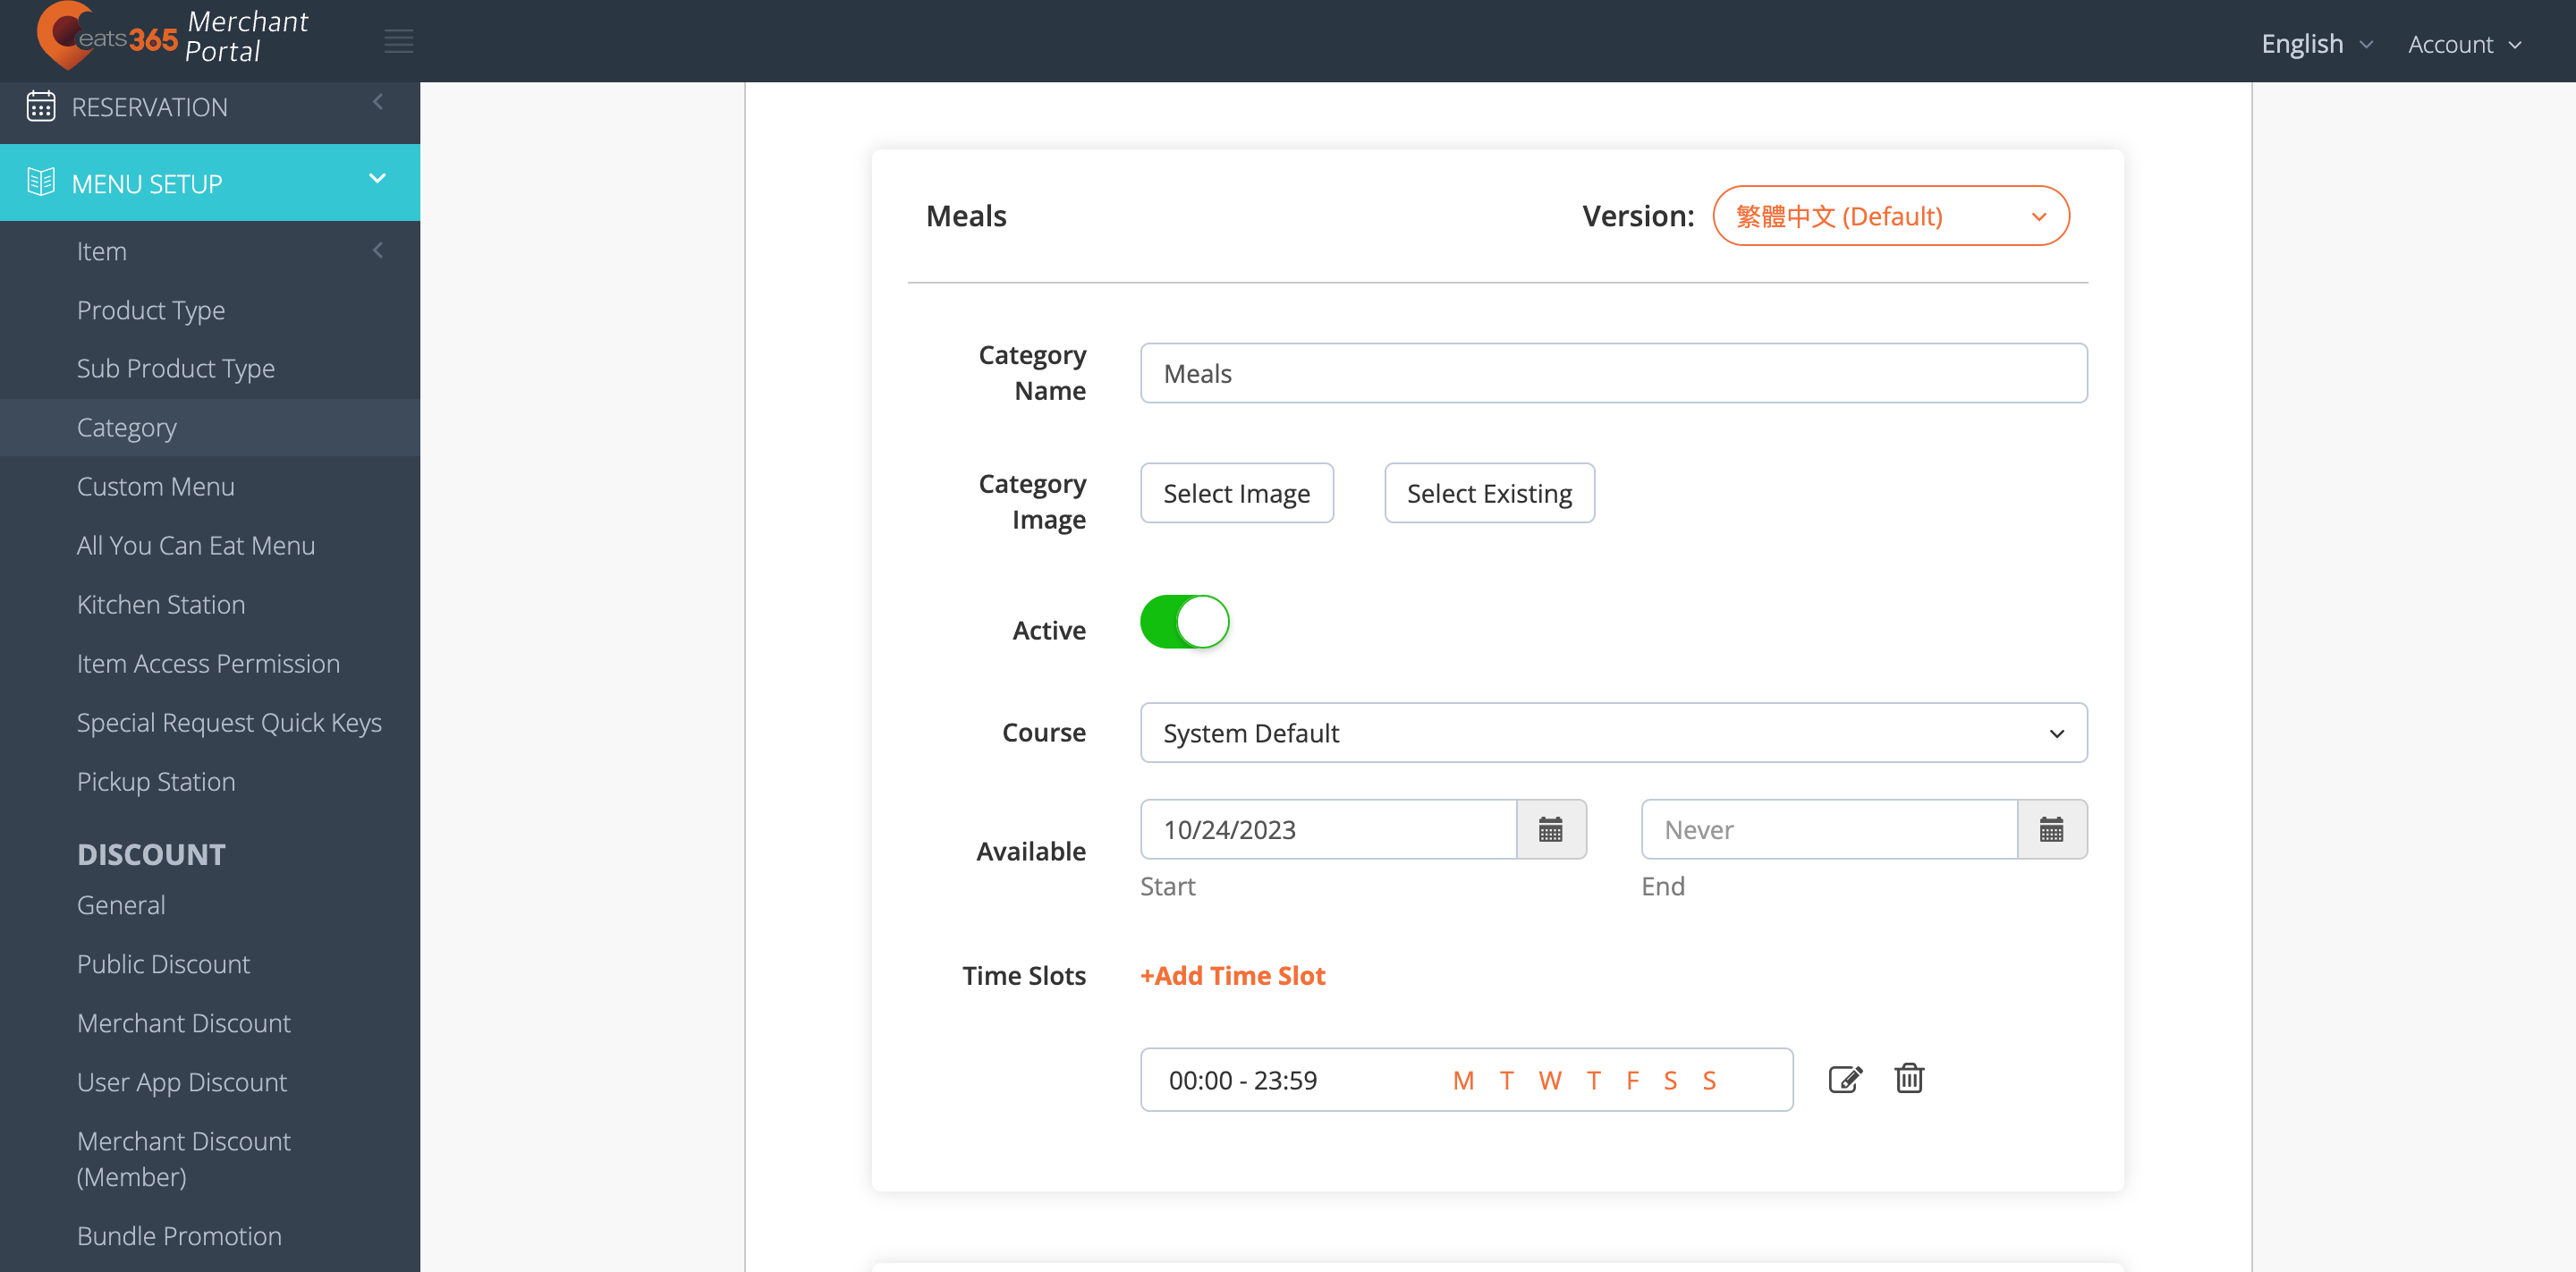
- Log in to the Merchant Portal.
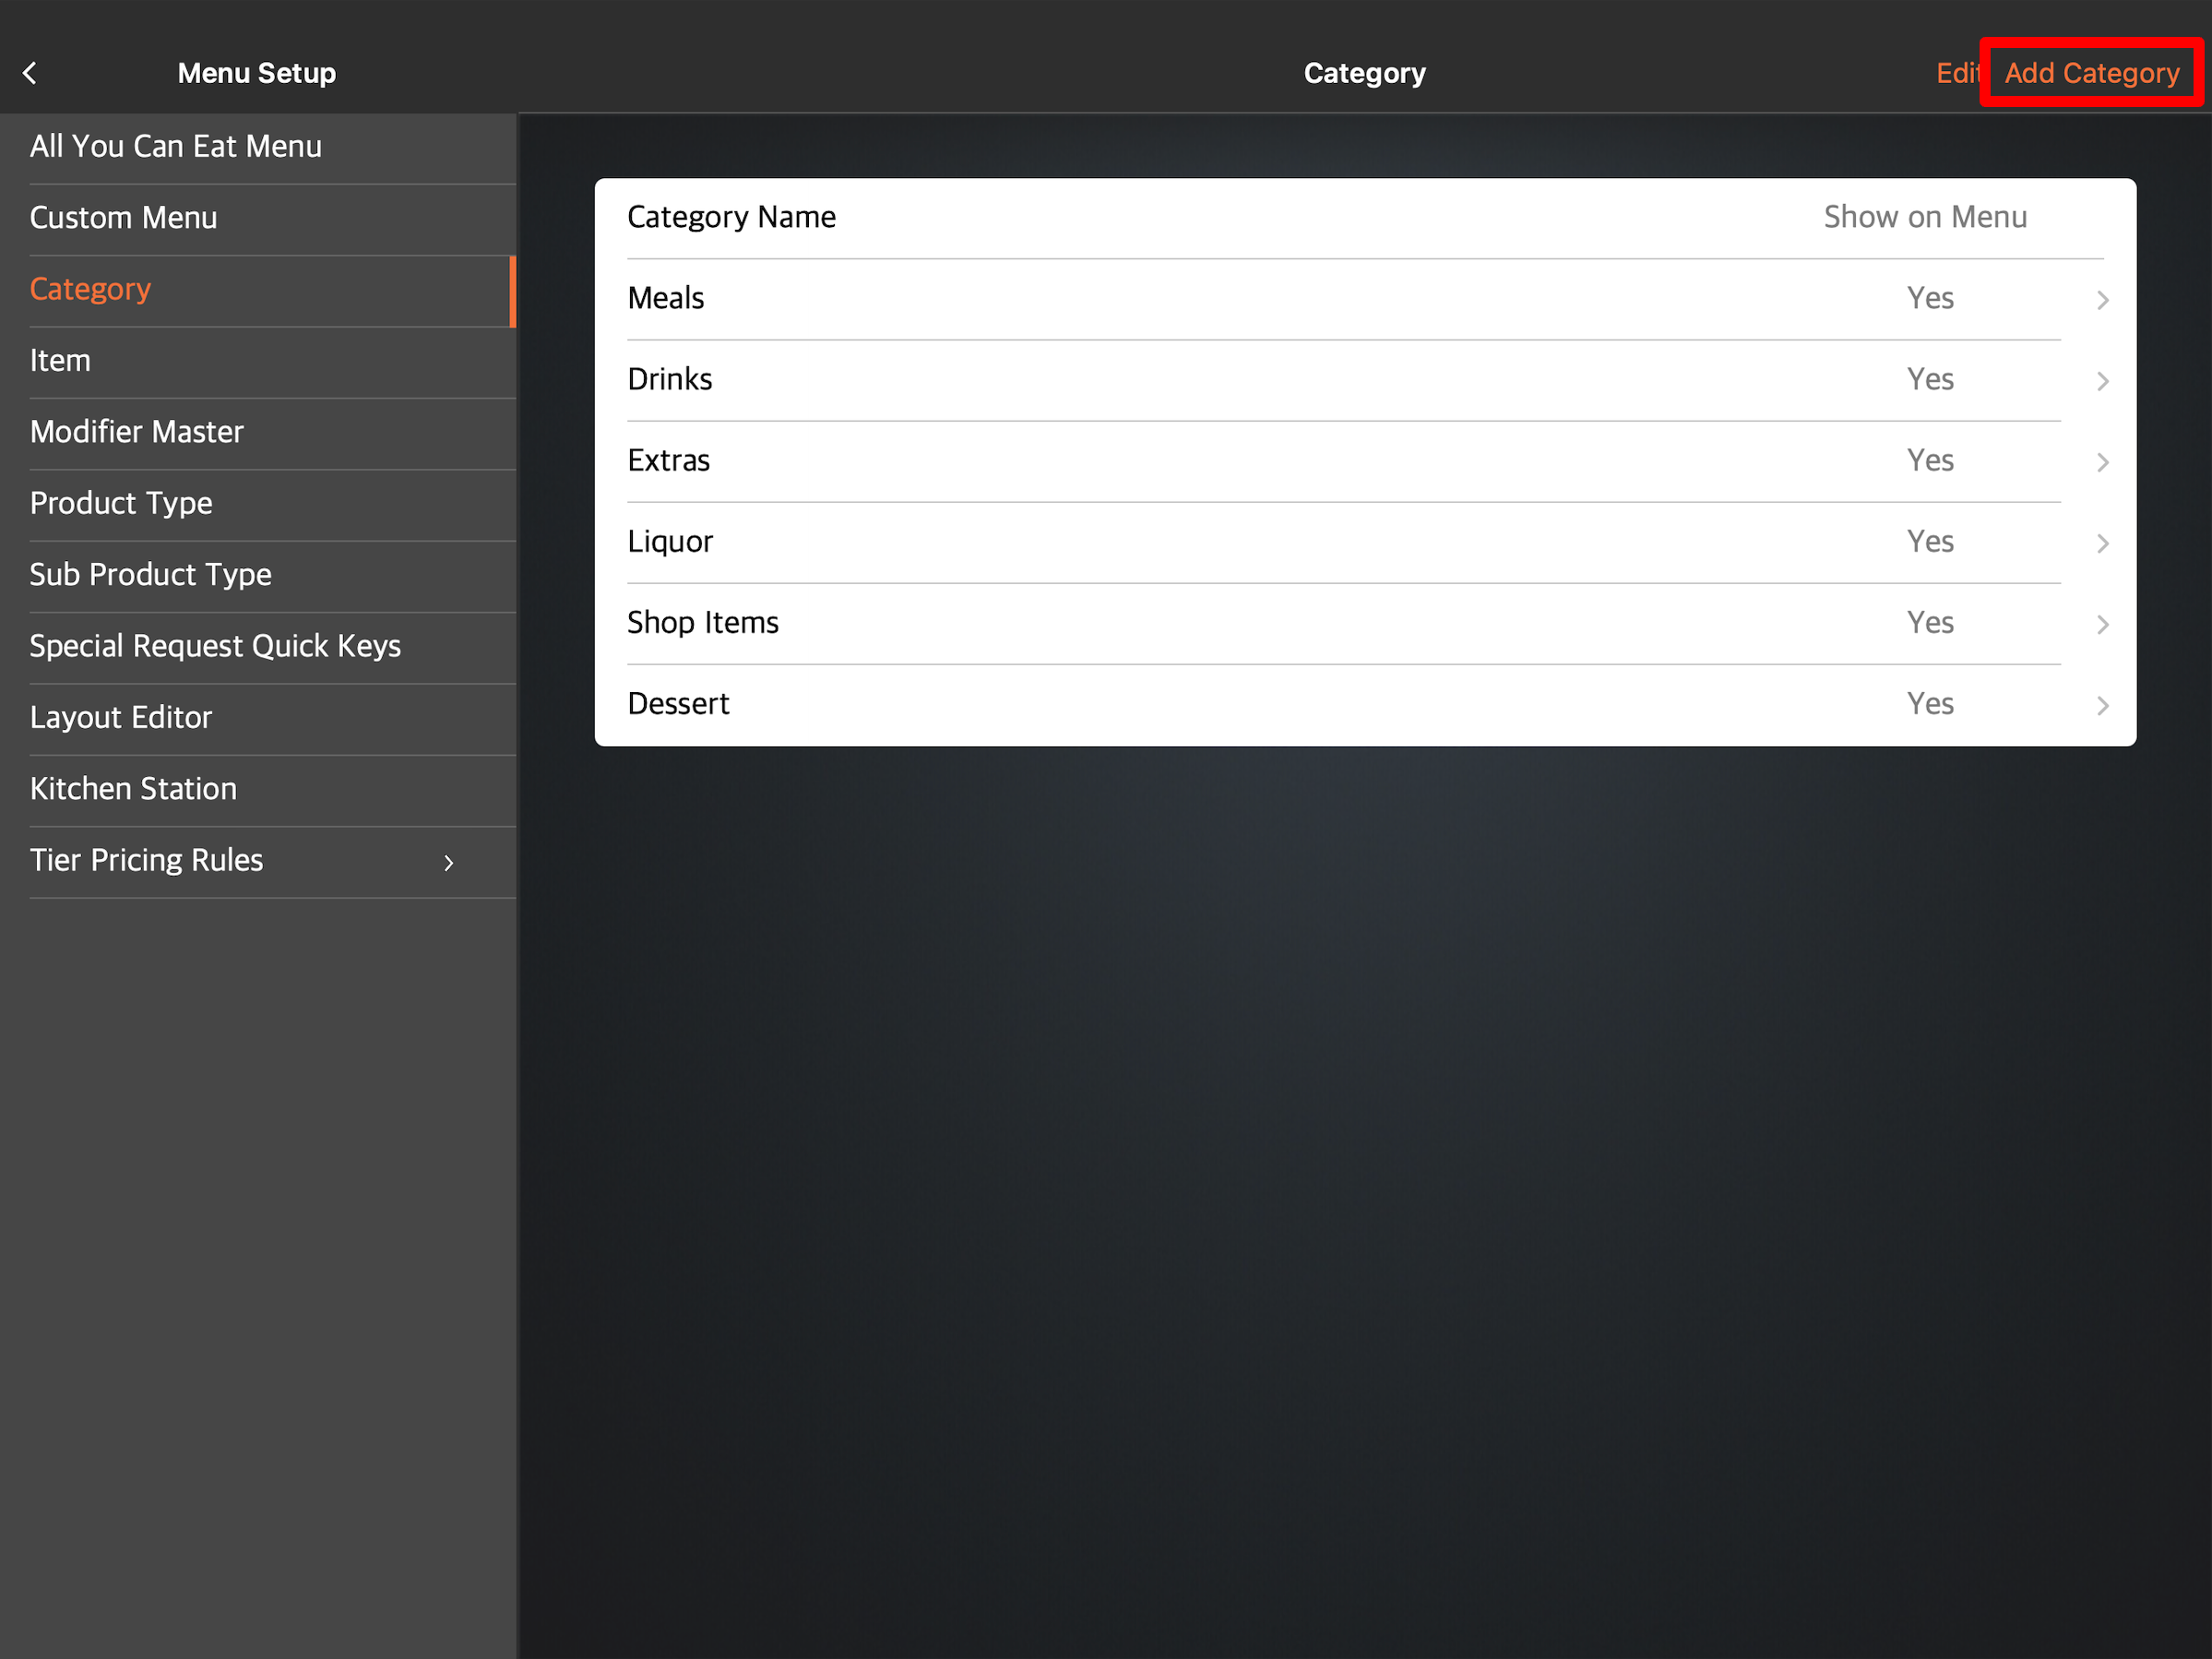
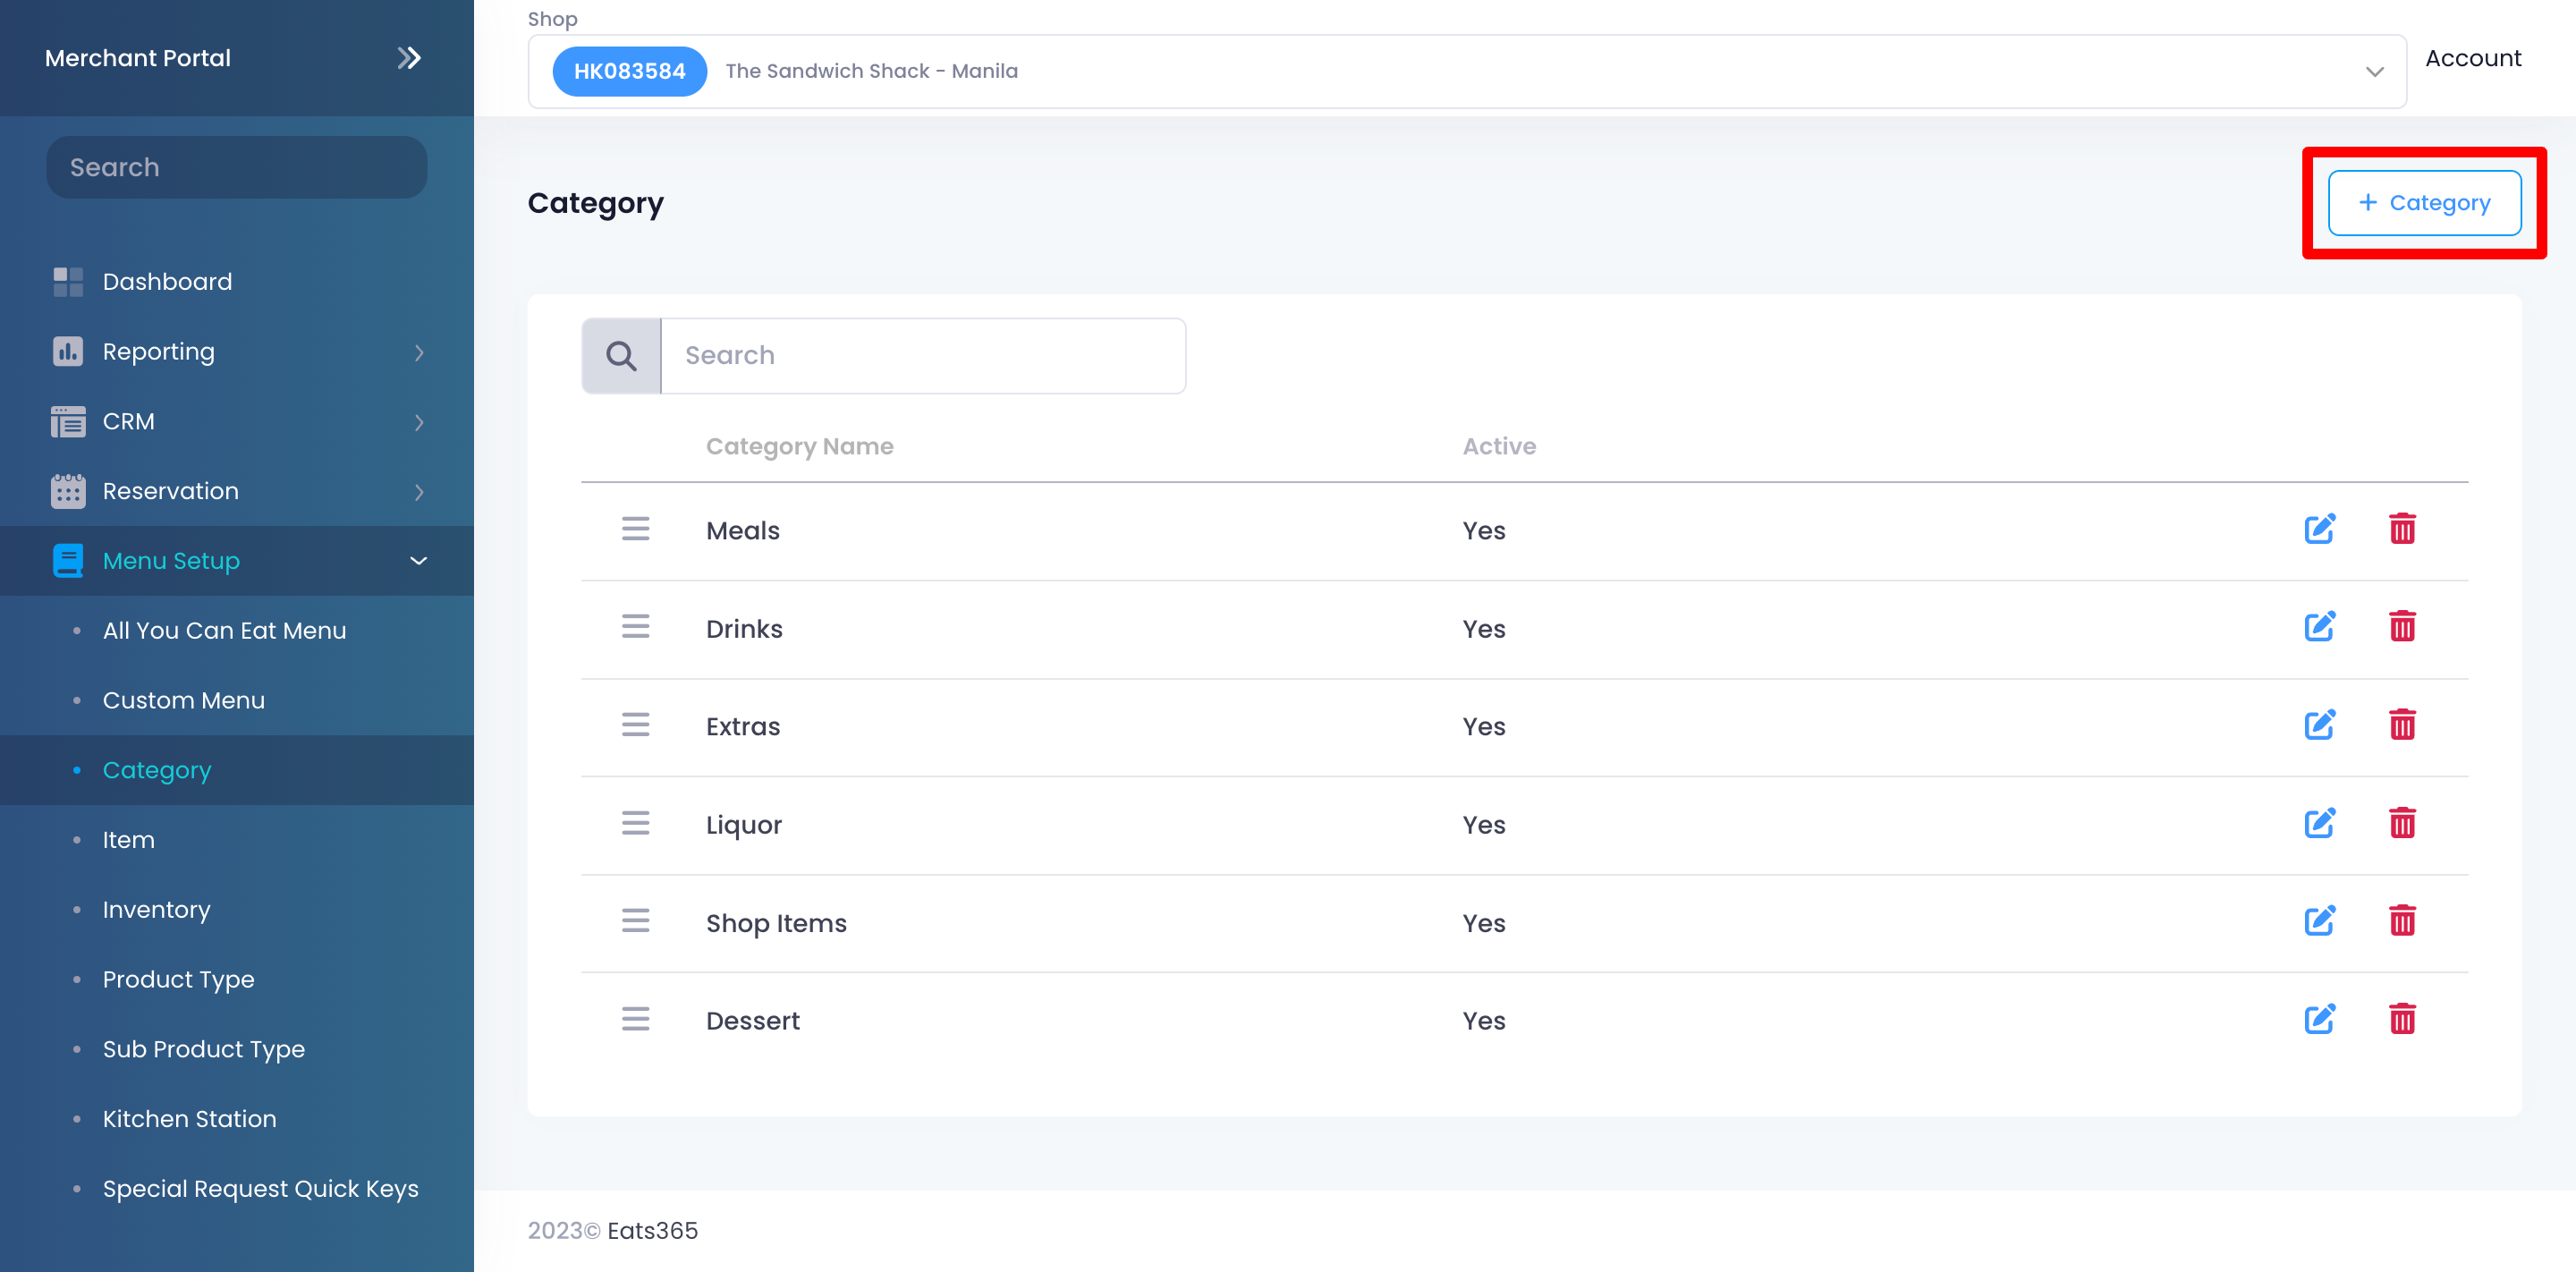
- On the left panel, click on Menu Setup, then select Category.
- At the top right, click on +Category.
- Select the category language.
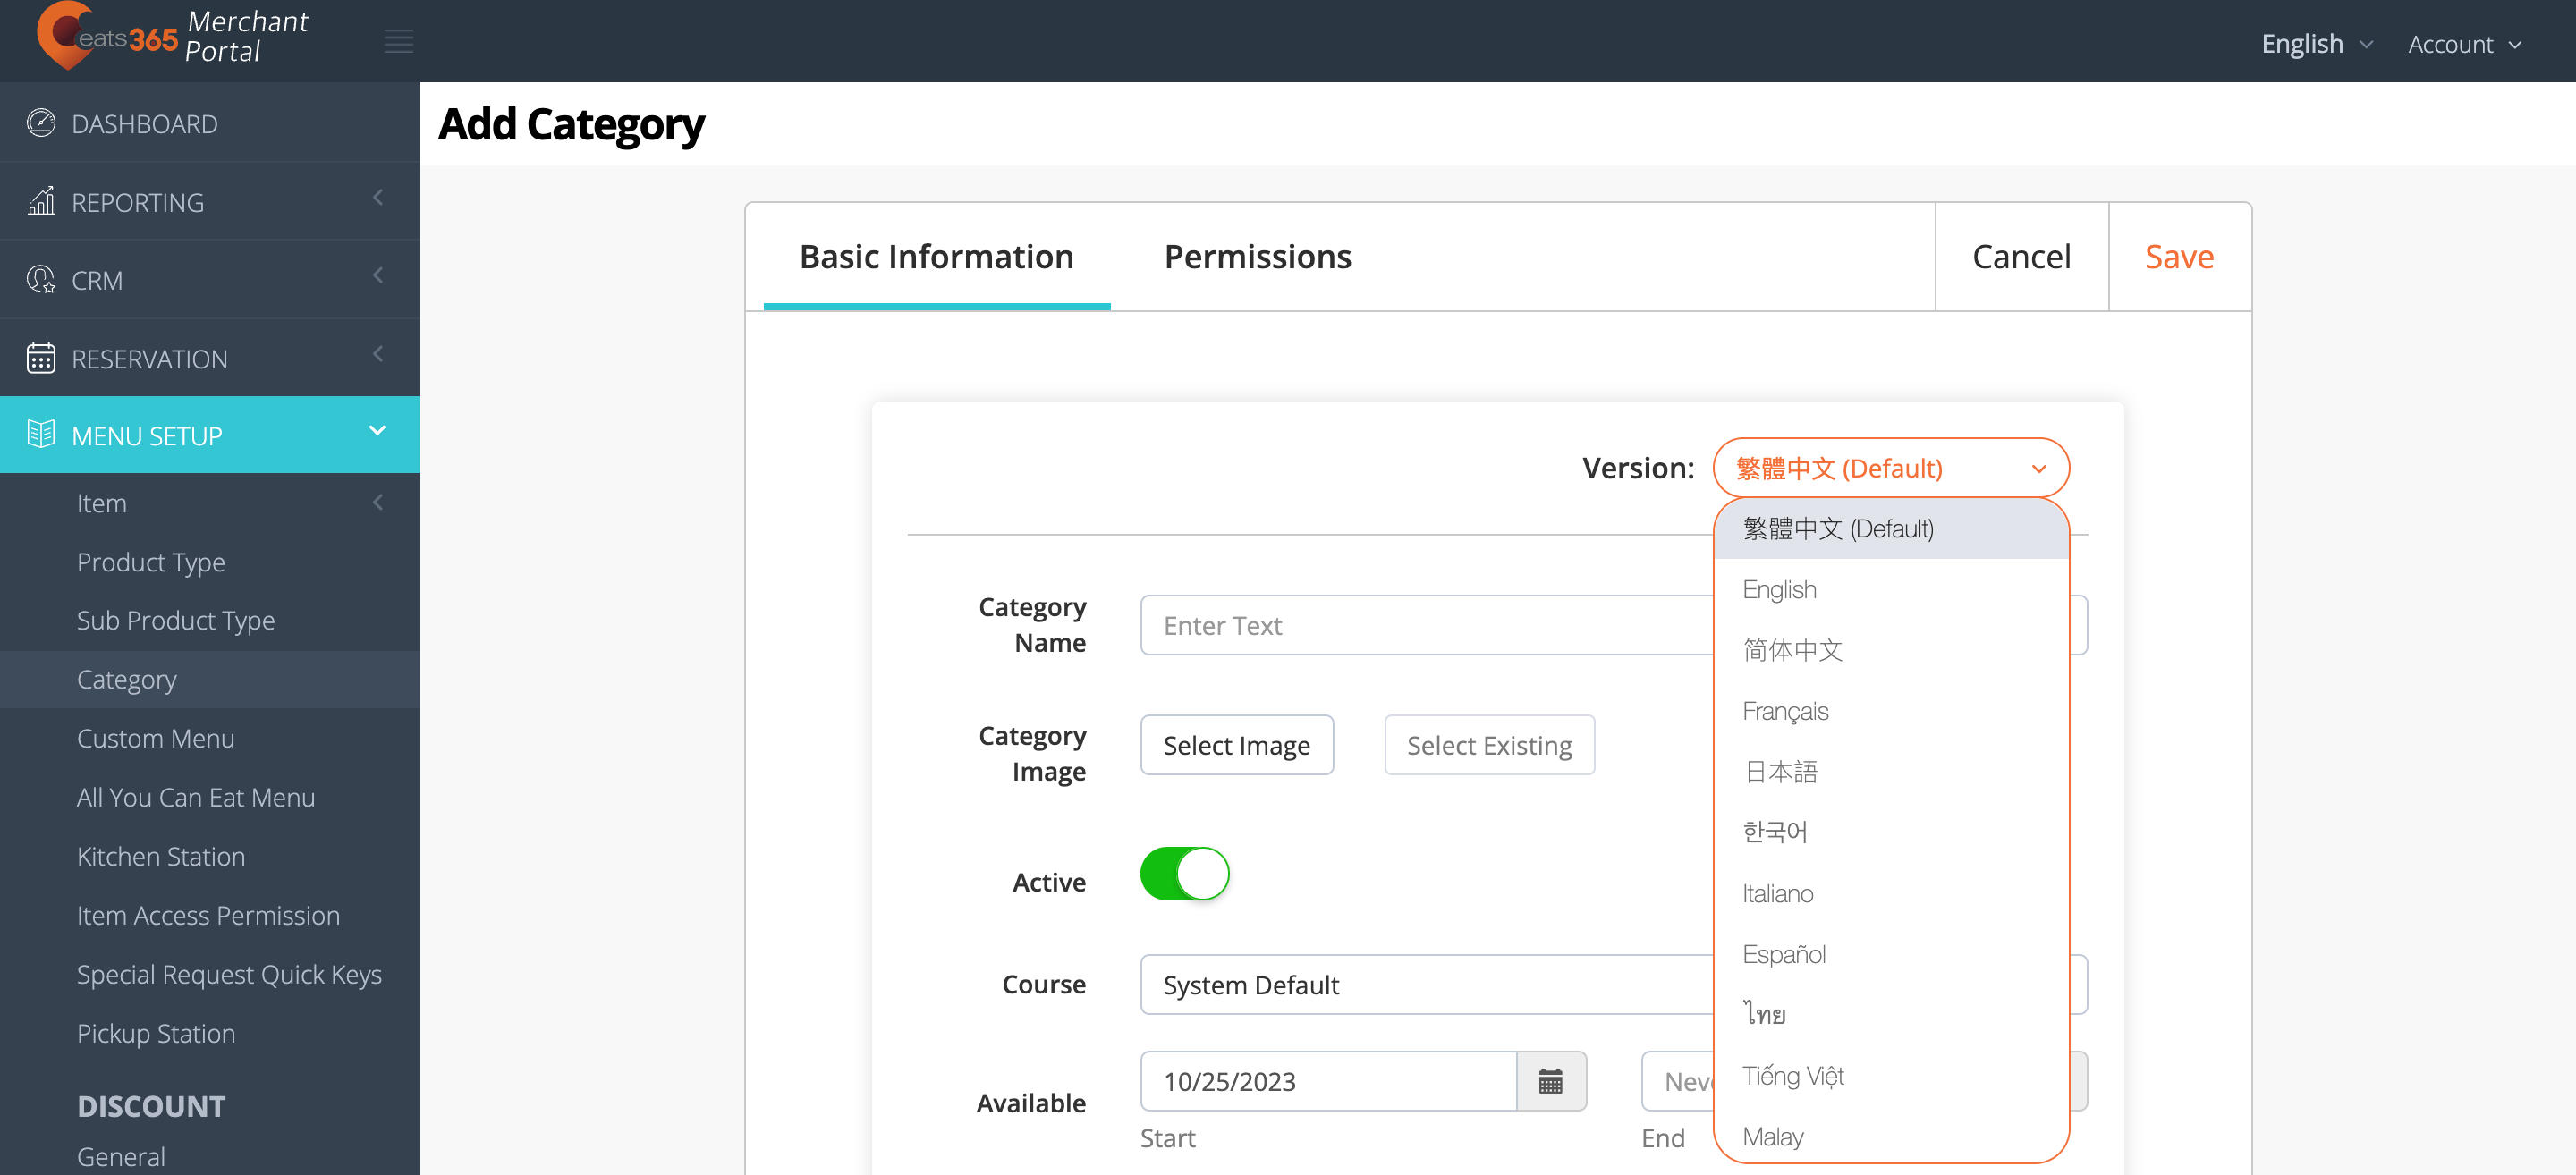 Note: You must enter a default name for the category. The name becomes available in whatever language the POS app is using. For multi-language menus, after selecting a default language, tap the language drop-down list and select your preferred language. Then, enter the alternate name in that language.
 - On the blank field, enter the category’s name.
- (Optional) Add an image for the category.
- To allow the category to show up on the POS, turn on Active
 .
.
Tip: When "Active" is disabled, the category won't be available on the order-taking screen. However, the category can still be used for combo items setup. For example, if you have a "Set Drinks" category and you want items under this category to only be available to customers as part of a combo item, you can turn off Active, so customers won't be able to order set drink items individually. - Set which course the category should fall under. By default, the category shows up under the "Instant" course.
Tip: You can change the default course from "System Preferences." For more information, refer to Set up and manage Courses. - Add the date and time when the category becomes available on the POS.
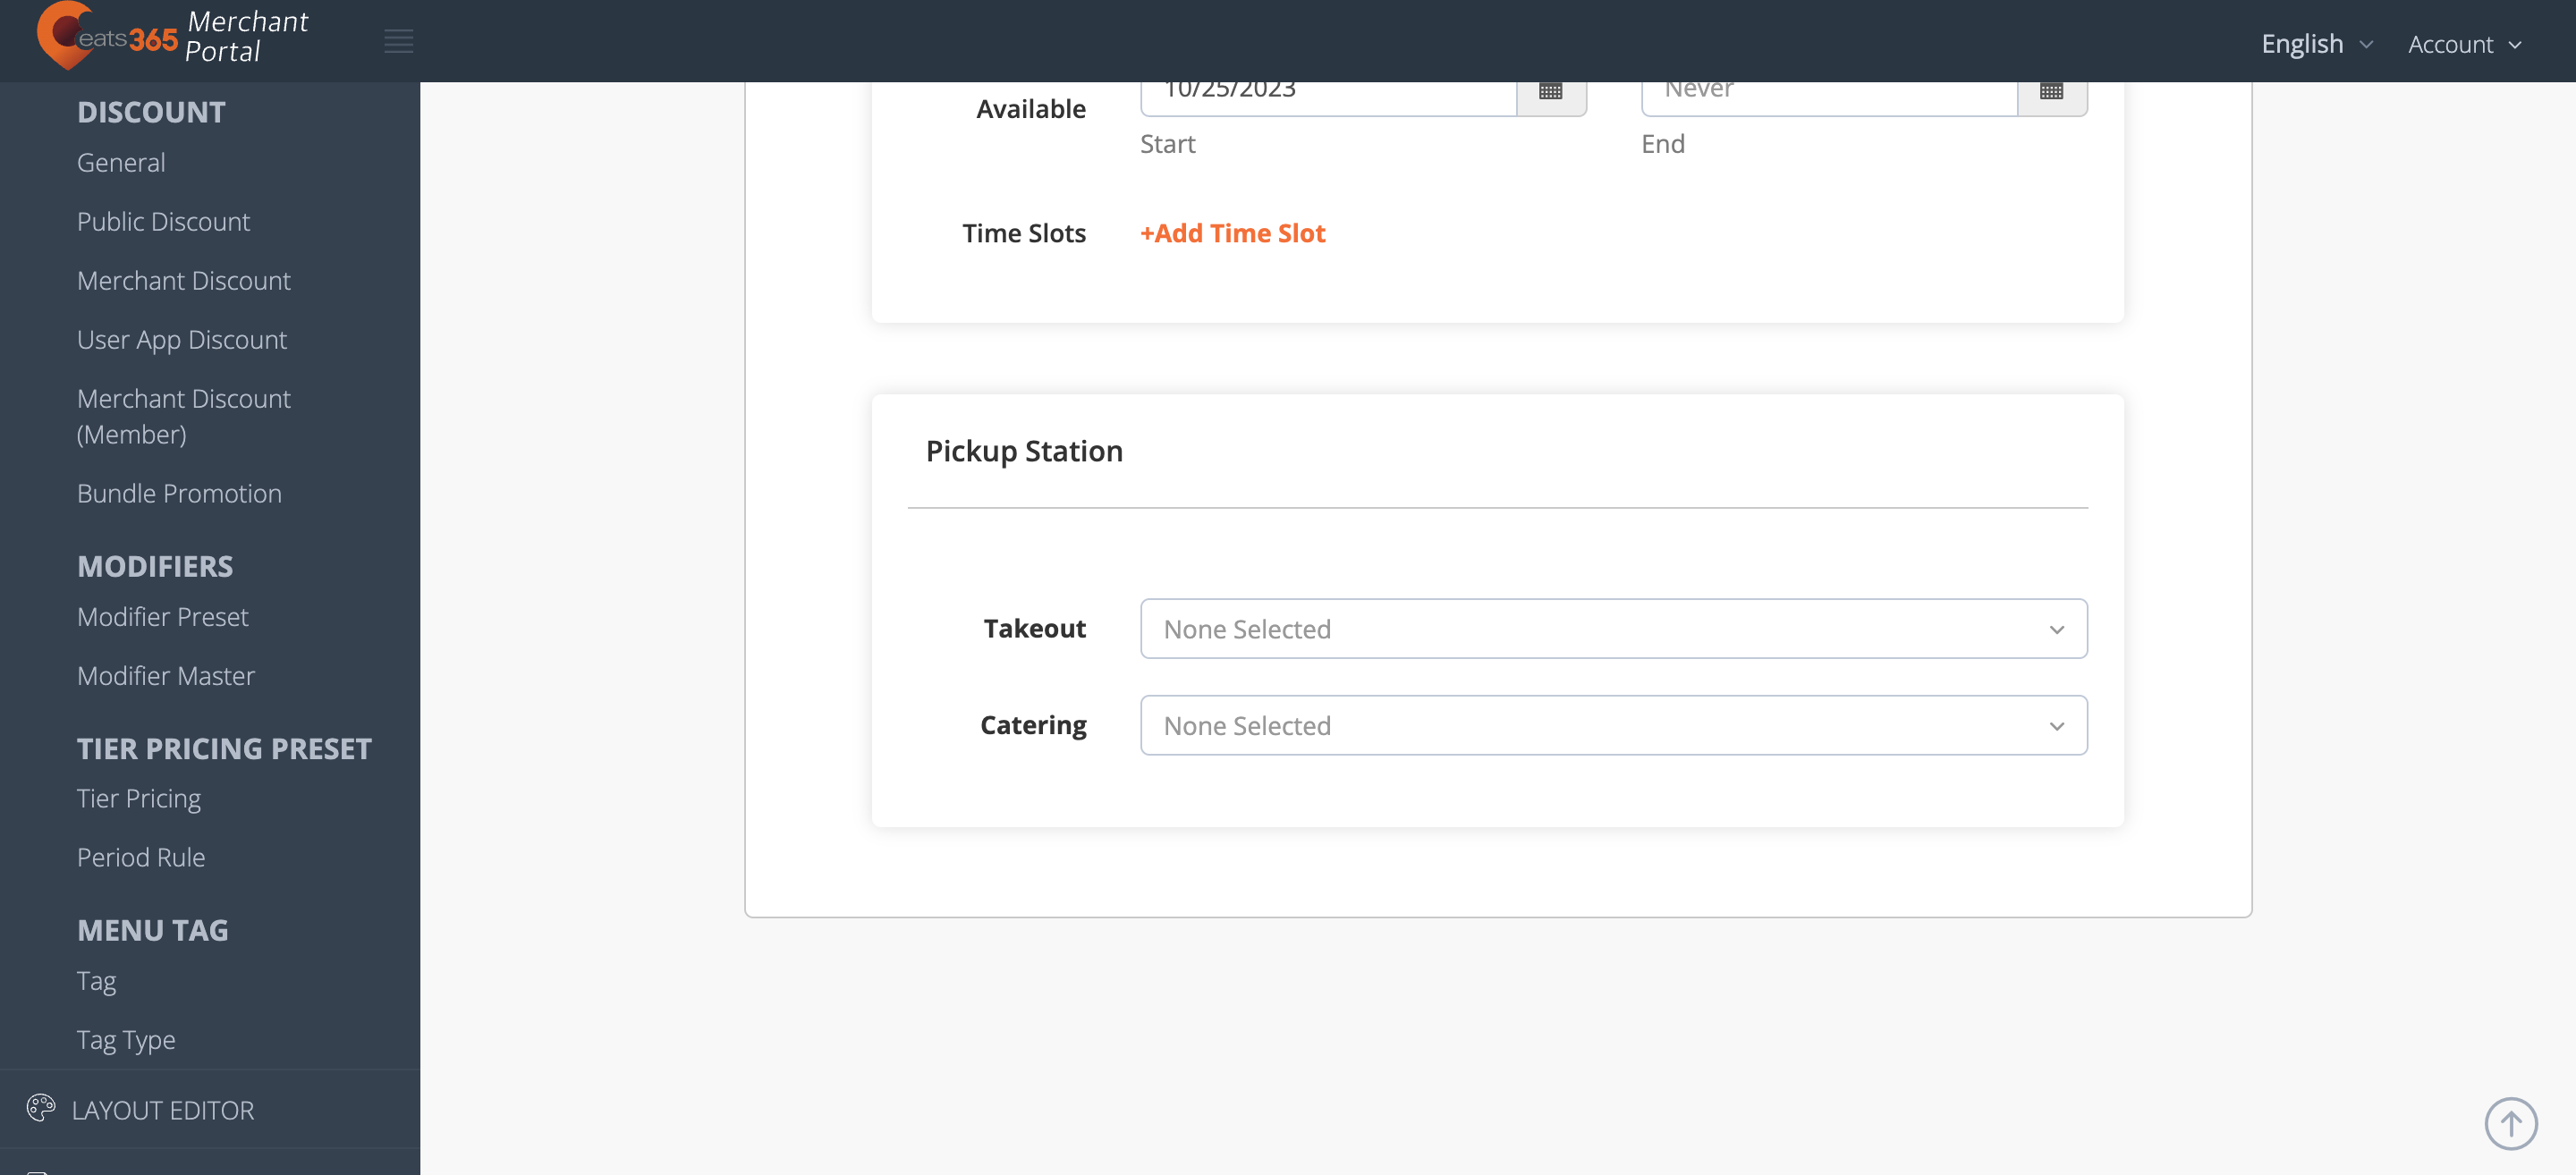
Tip: You can customize the category to appear on the POS in specific time slots, depending on the day. For example, you can set the category to show on the POS from 8 AM to 10 AM on Wednesdays and from 10 AM to 5 PM on other days of the week. - (Optional) If you have Pickup Station set up, choose under which Pickup Station should menu items go.
- At the top, click on the Permissions tab. Then, set up staff roles and application permissions.
- At the top right, click on Save to confirm.
Merchant Portal 2.0
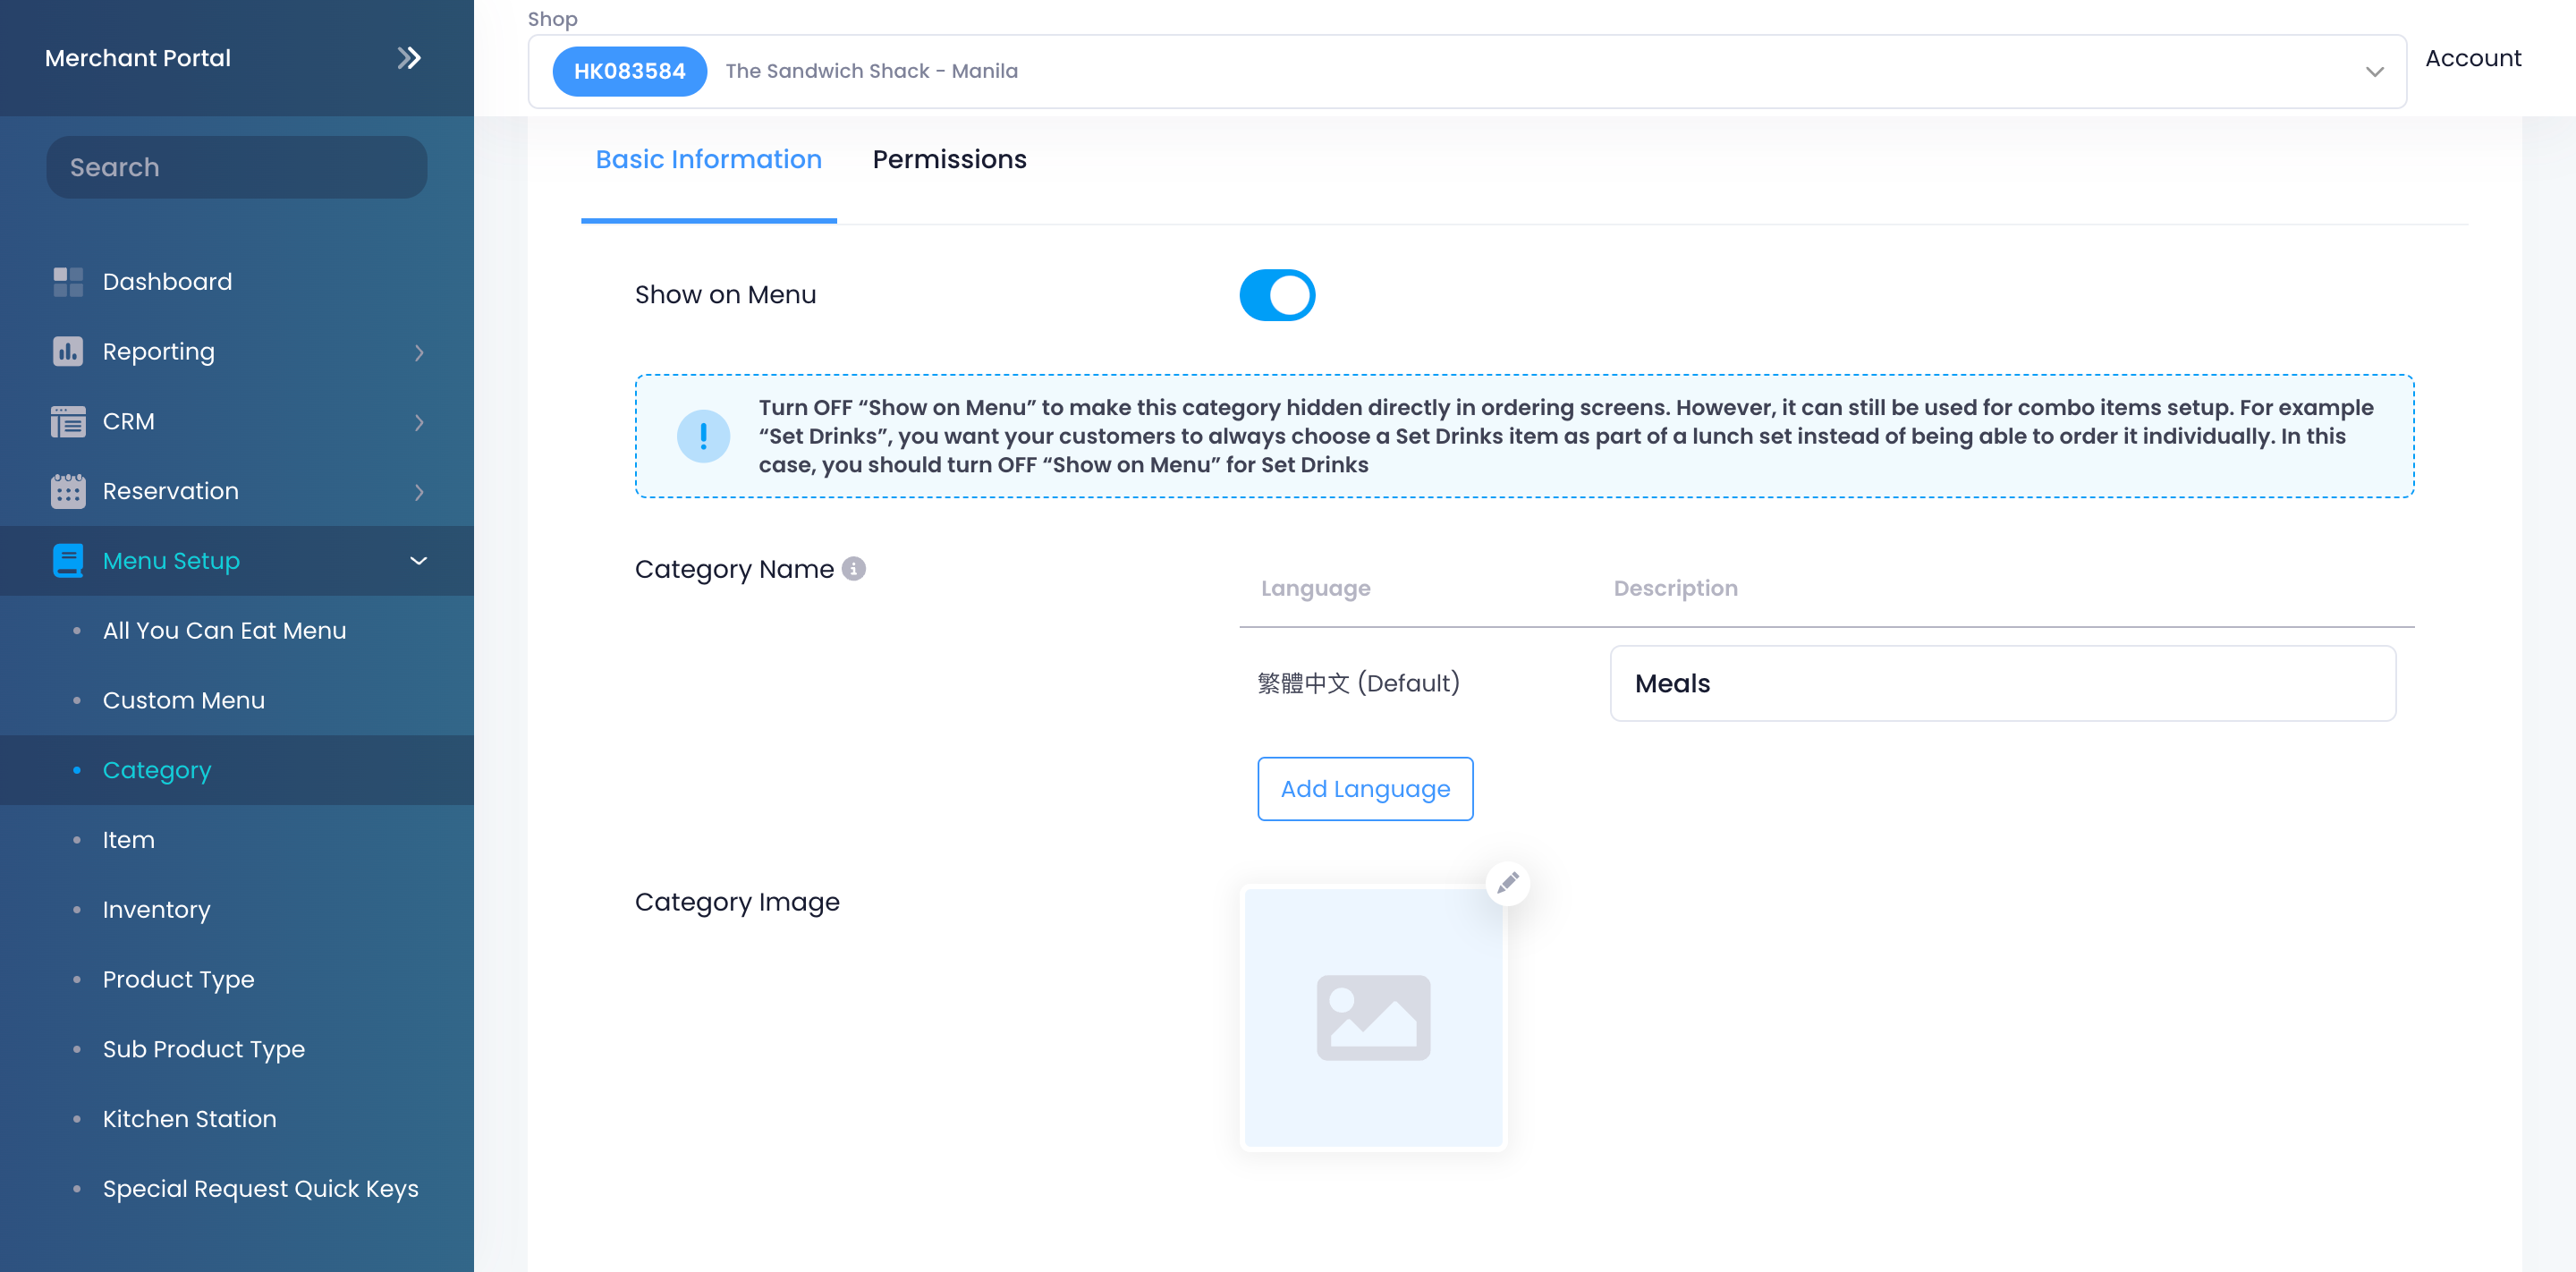
- Log in to the Merchant Portal.
- On the left panel, click on Menu Setup.
- Click on Category. Then, select +Category.
- To allow the category to show up on the POS, turn on Show on Menu
 .
.
Tip: When "Show on Menu" is disabled, the category won't be available on the order-taking screen. However, the category can still be used for combo items setup. For example, if you have a "Set Drinks" category and you want items under this category to only be available to customers as part of a combo item, you can turn off Show on Menu, so customers won't be able to order set drink items individually. - Enter the category name per language.
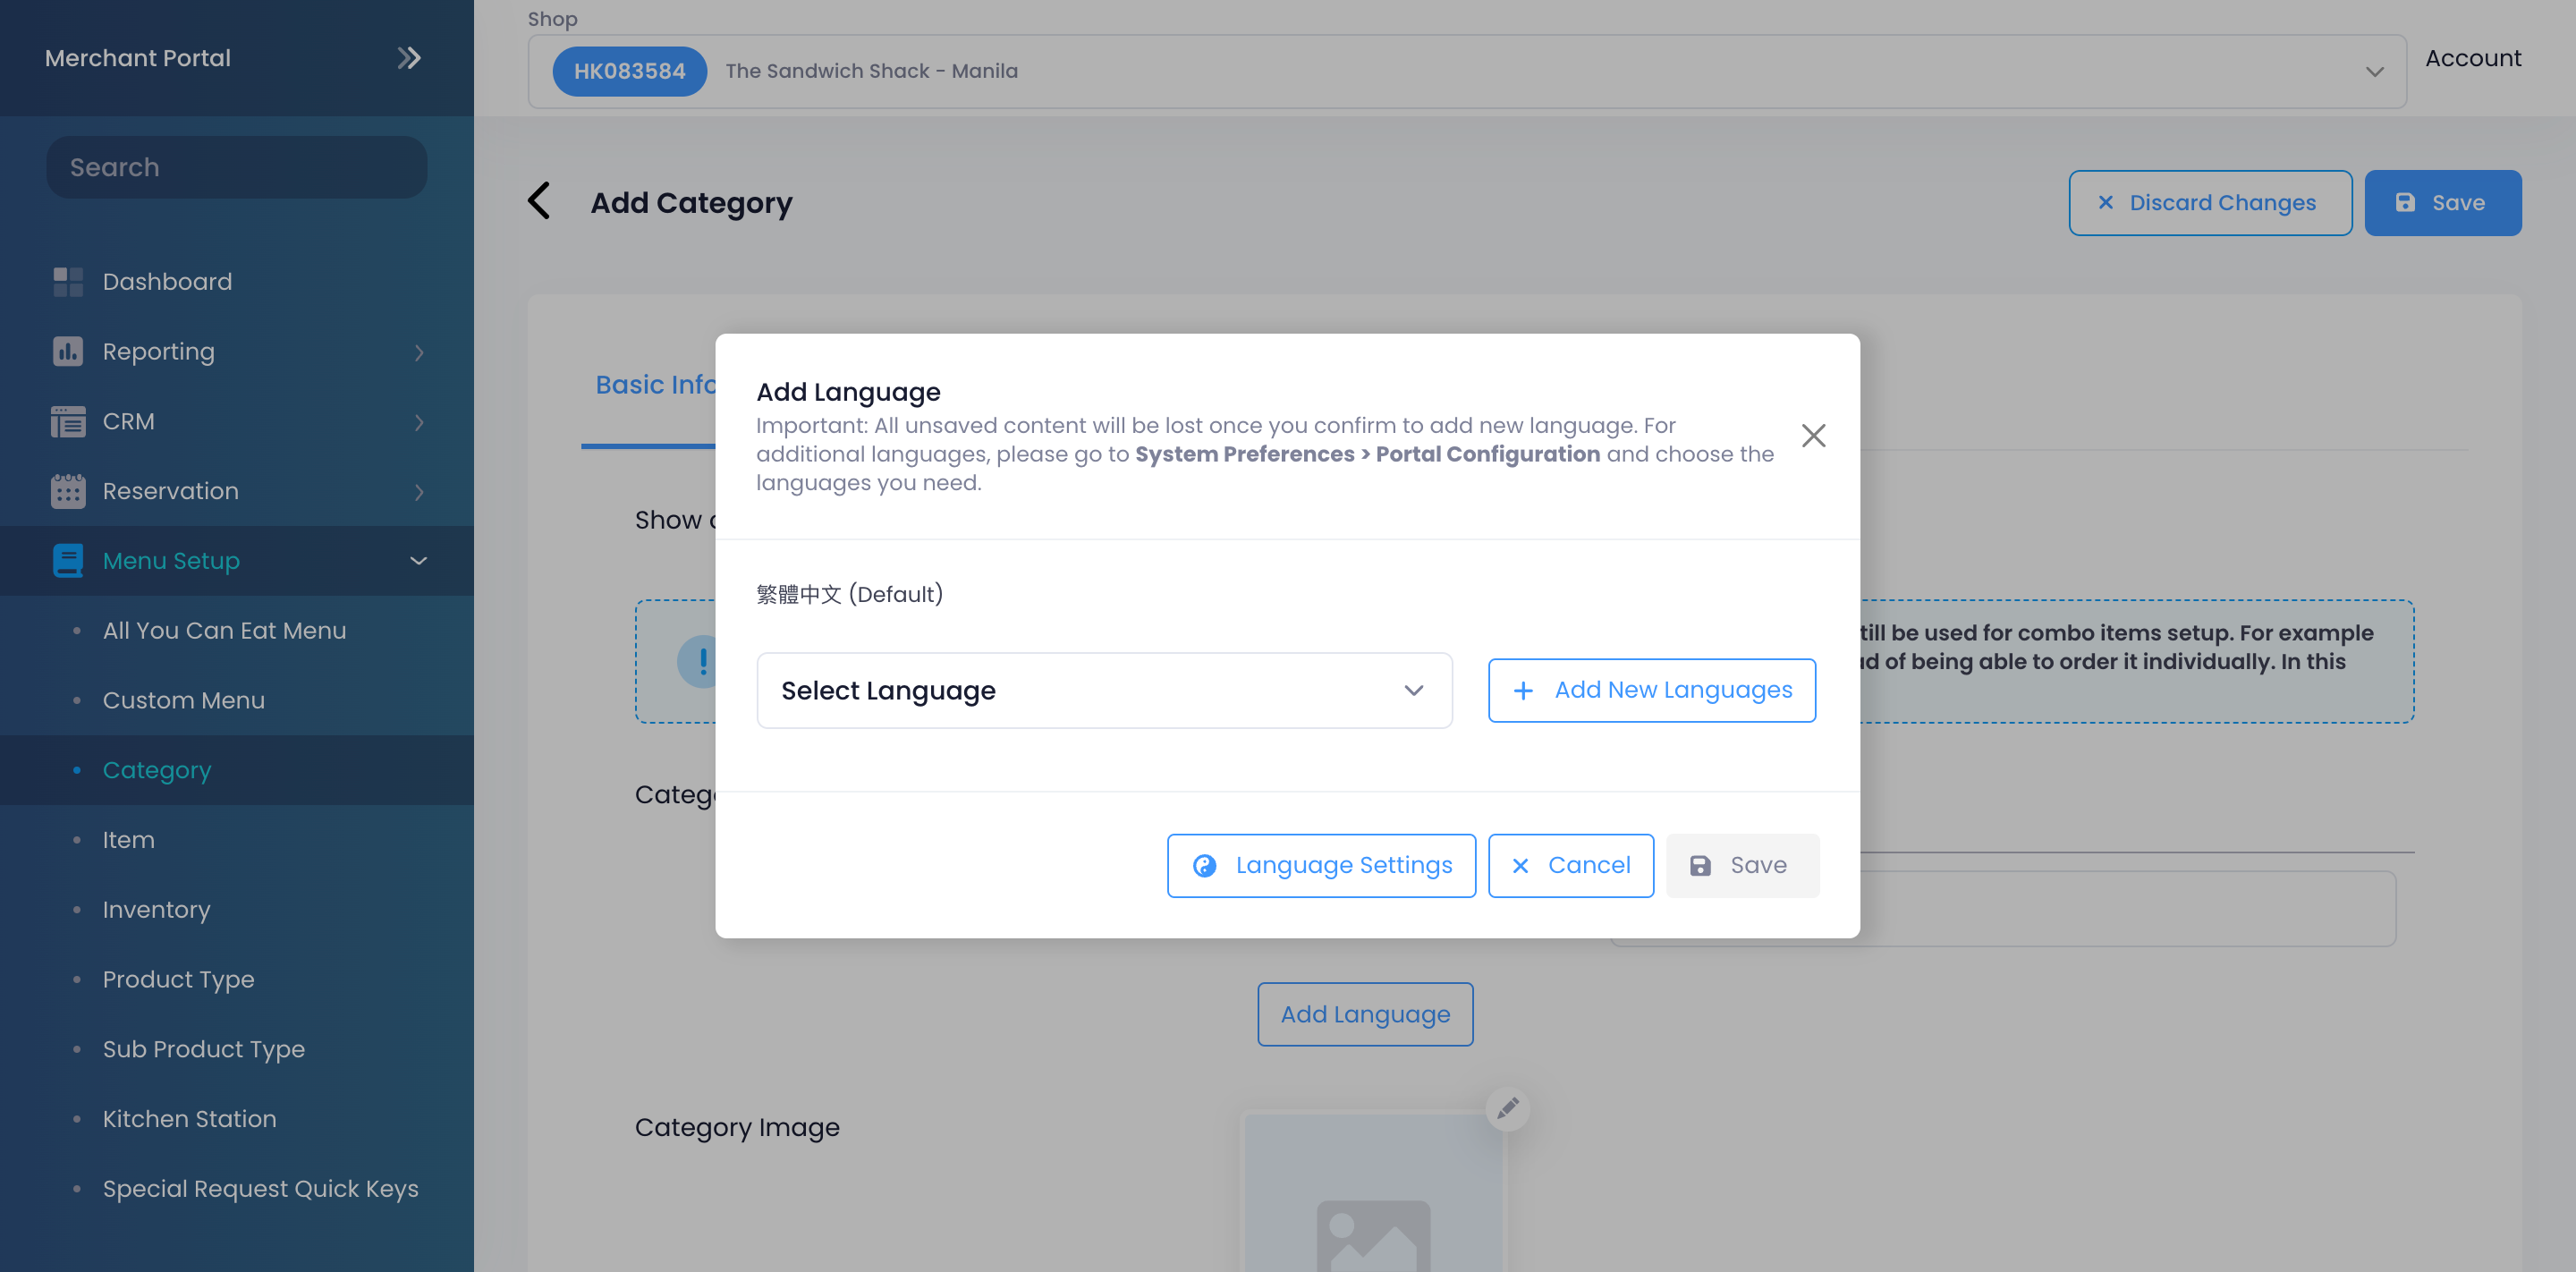 Note: You must enter a default name for the category. The name becomes available in whatever language the POS app is using. To add more languages, click on Add Language.
 - Add an image for the category.
- Set which course the category should fall under. By default, the category shows up under the "Instant" course.
Tip: You can change the default course from "System Preferences." For more information, refer to Set up and manage Courses. - Add the date and time when the category becomes available on the POS.
Tip:- You can customize the category to appear on the POS in specific time slots, depending on the day. For example, you can set the category to show on the POS from 8 AM to 10 AM on Wednesdays and from 10 AM to 5 PM on other days of the week.
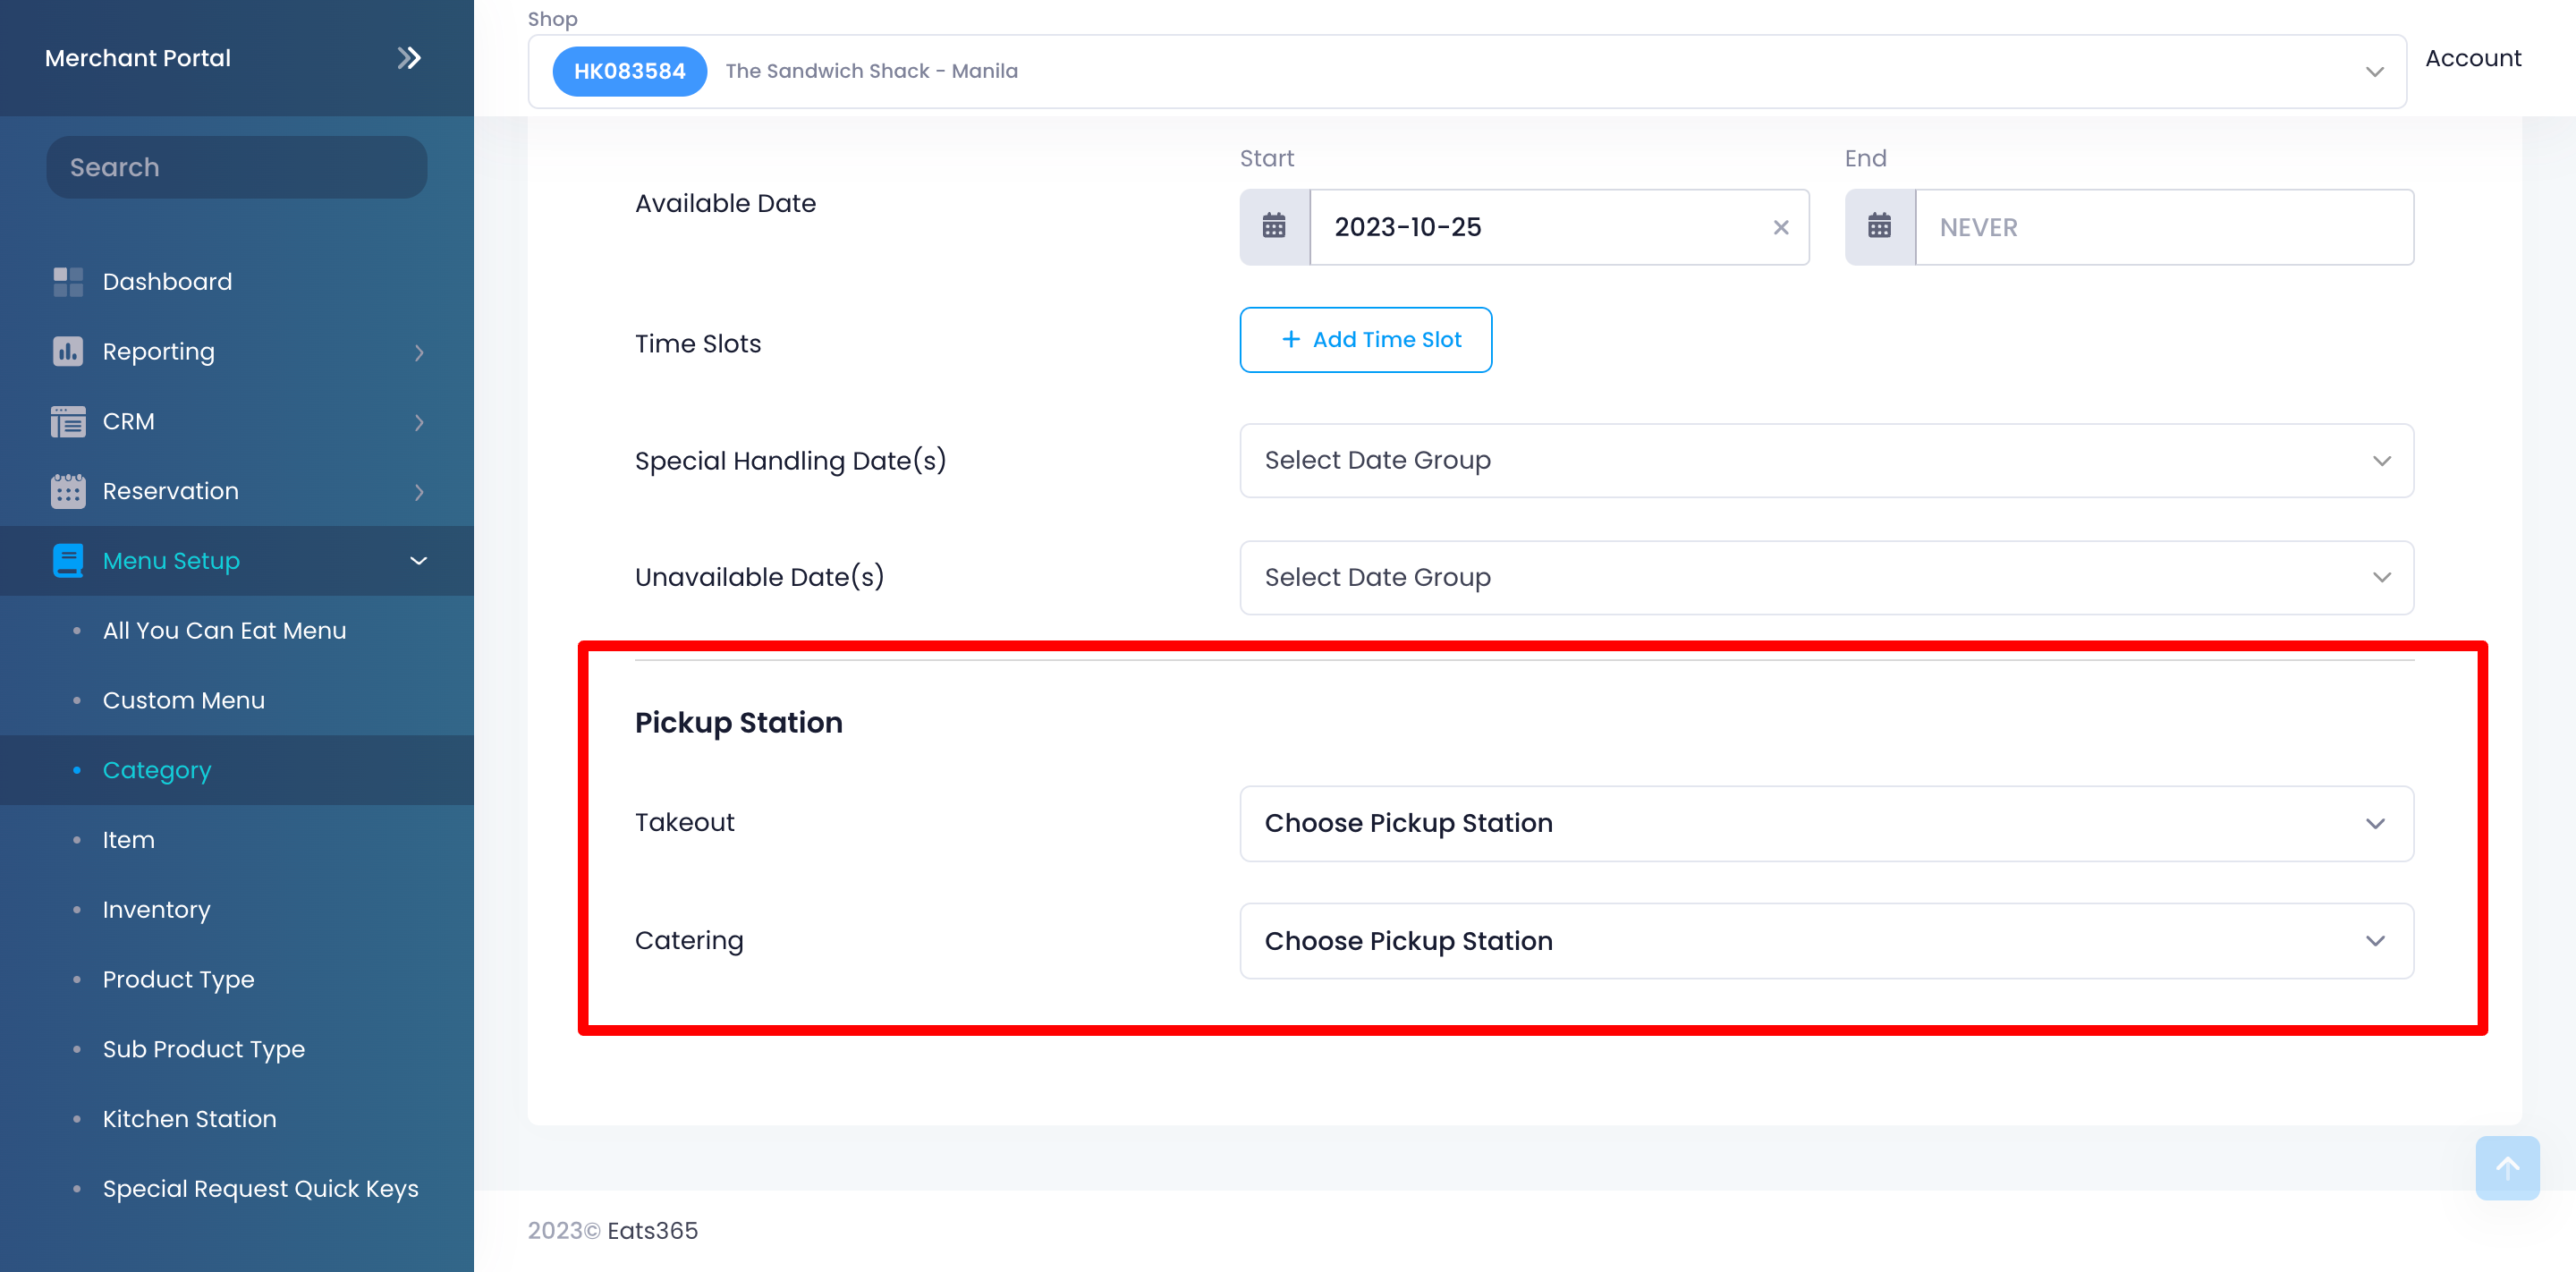
- If "Date Group" is available, you can also customize the category to appear during “Special Handling Dates” or define “Unavailable Dates.” For more information about Date Group, refer to Create and manage Date Groups.
- (Optional) If you have "Pickup Station" set up, choose under which pickup station should menu items go.
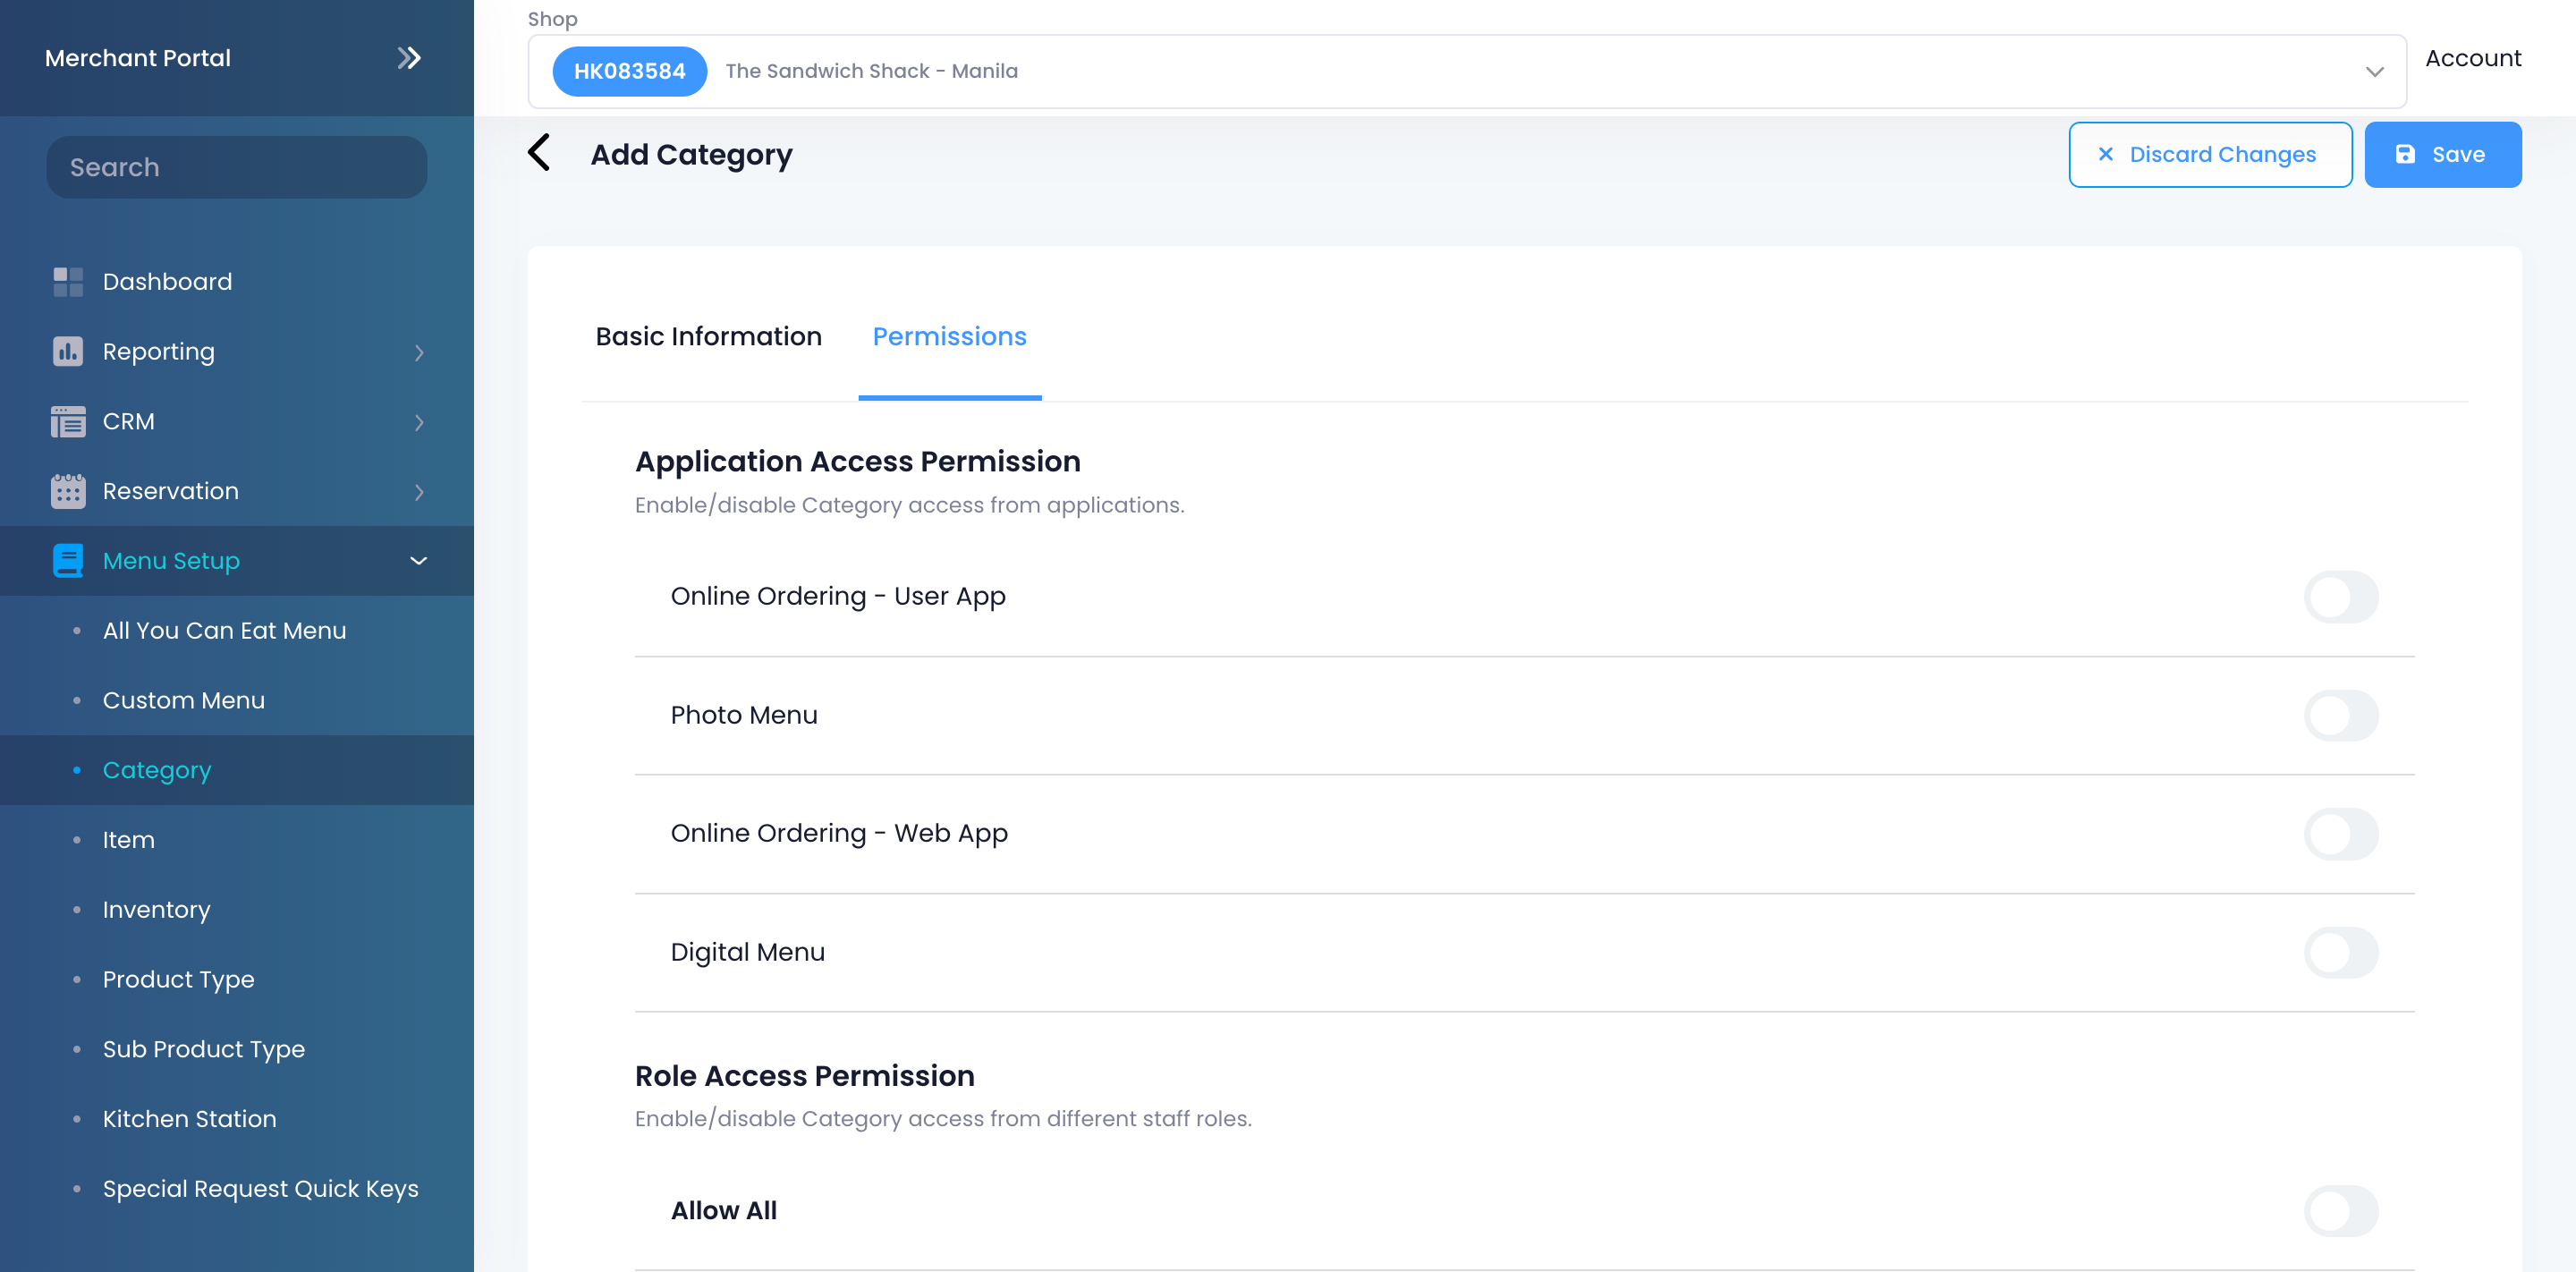
- At the top, click on the Permissions tab. Then, set up staff roles and application permissions.
- At the top right, click on Save to confirm.
Manage categories
Edit a category
To modify a category, follow the steps below:
Eats365 POS
- Log in to the Eats365 POS.
- At the top left, tap Settings .
- Under "General," tap Menu Setup, then select Category.
- Tap the category that you want to edit.
- Update the category.
- At the top right, tap Update to confirm.
Merchant Portal (Classic Theme)
- Log in to the Merchant Portal.
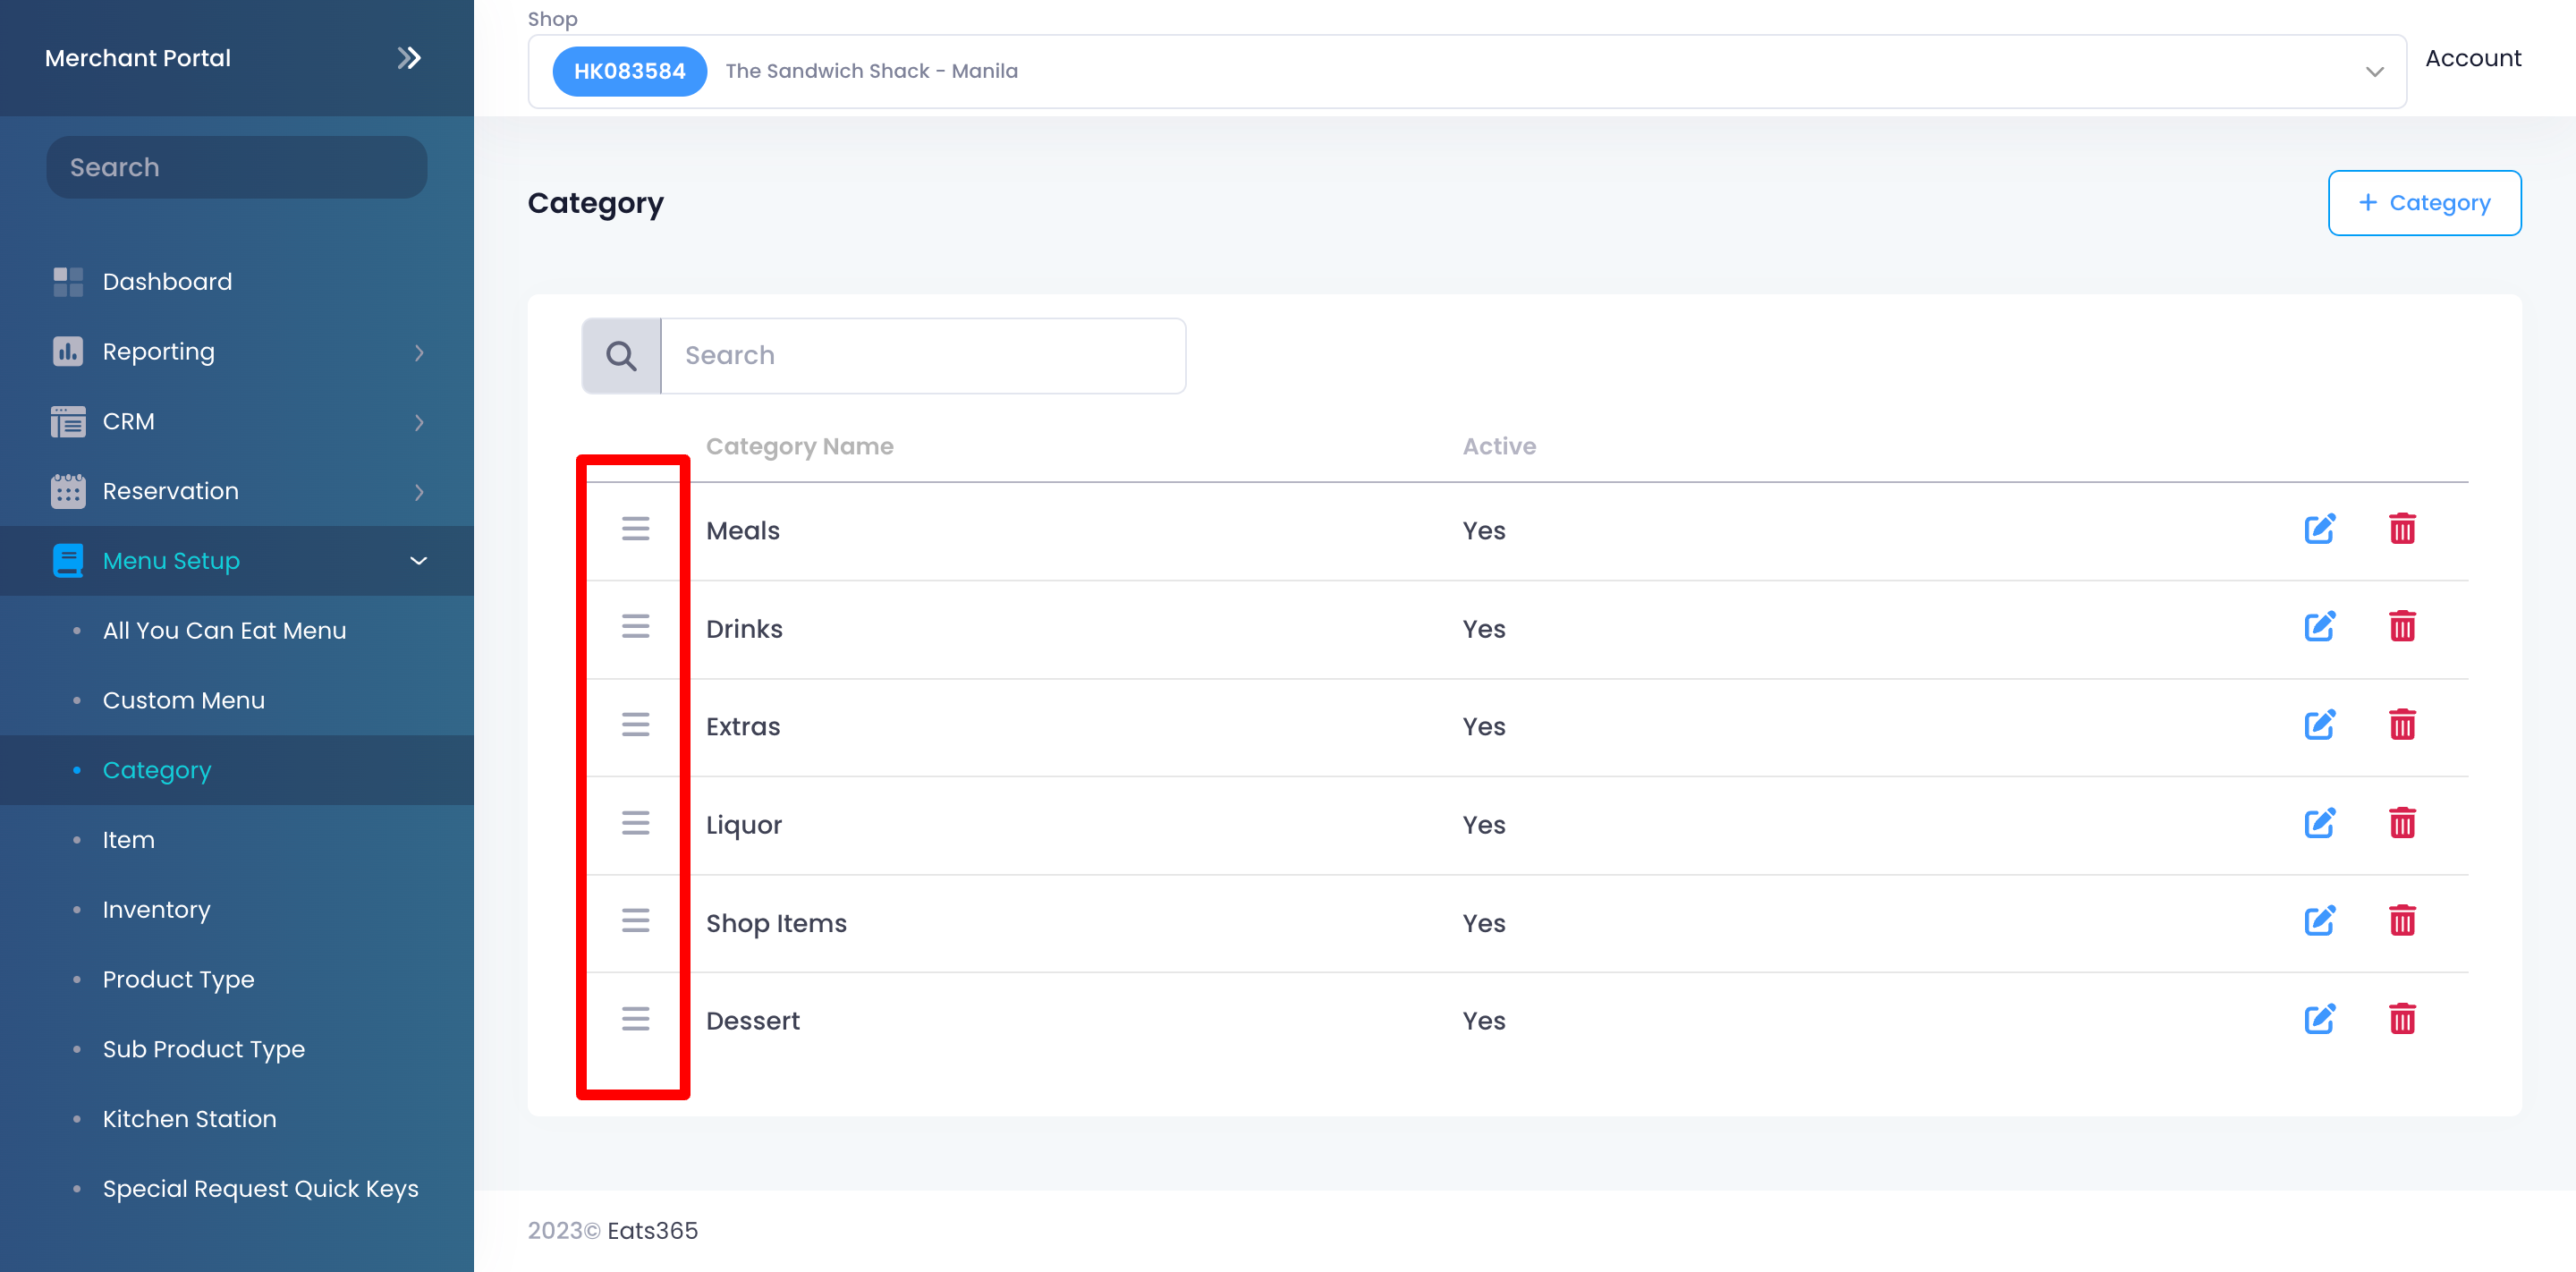
- On the left panel, click on Menu Setup, then select Category.
- Next to the category that you want to edit, click on Edit
 .
. - Update the category.
- At the top right, click on Save to confirm.
Merchant Portal 2.0
- Log in to the Merchant Portal.
- On the left panel, click on Menu Setup, then select Category.
- Next to the category that you want to edit, click on Edit
 .
. - Update the category.
- At the top right, click on Save to confirm.
Delete a category
To remove a category, follow the steps below:
Eats365 POS
- Log in to the Eats365 POS.
- At the top left, tap Settings .
- Under "General," tap Menu Setup, then select Category.
- Tap the category that you want to delete.
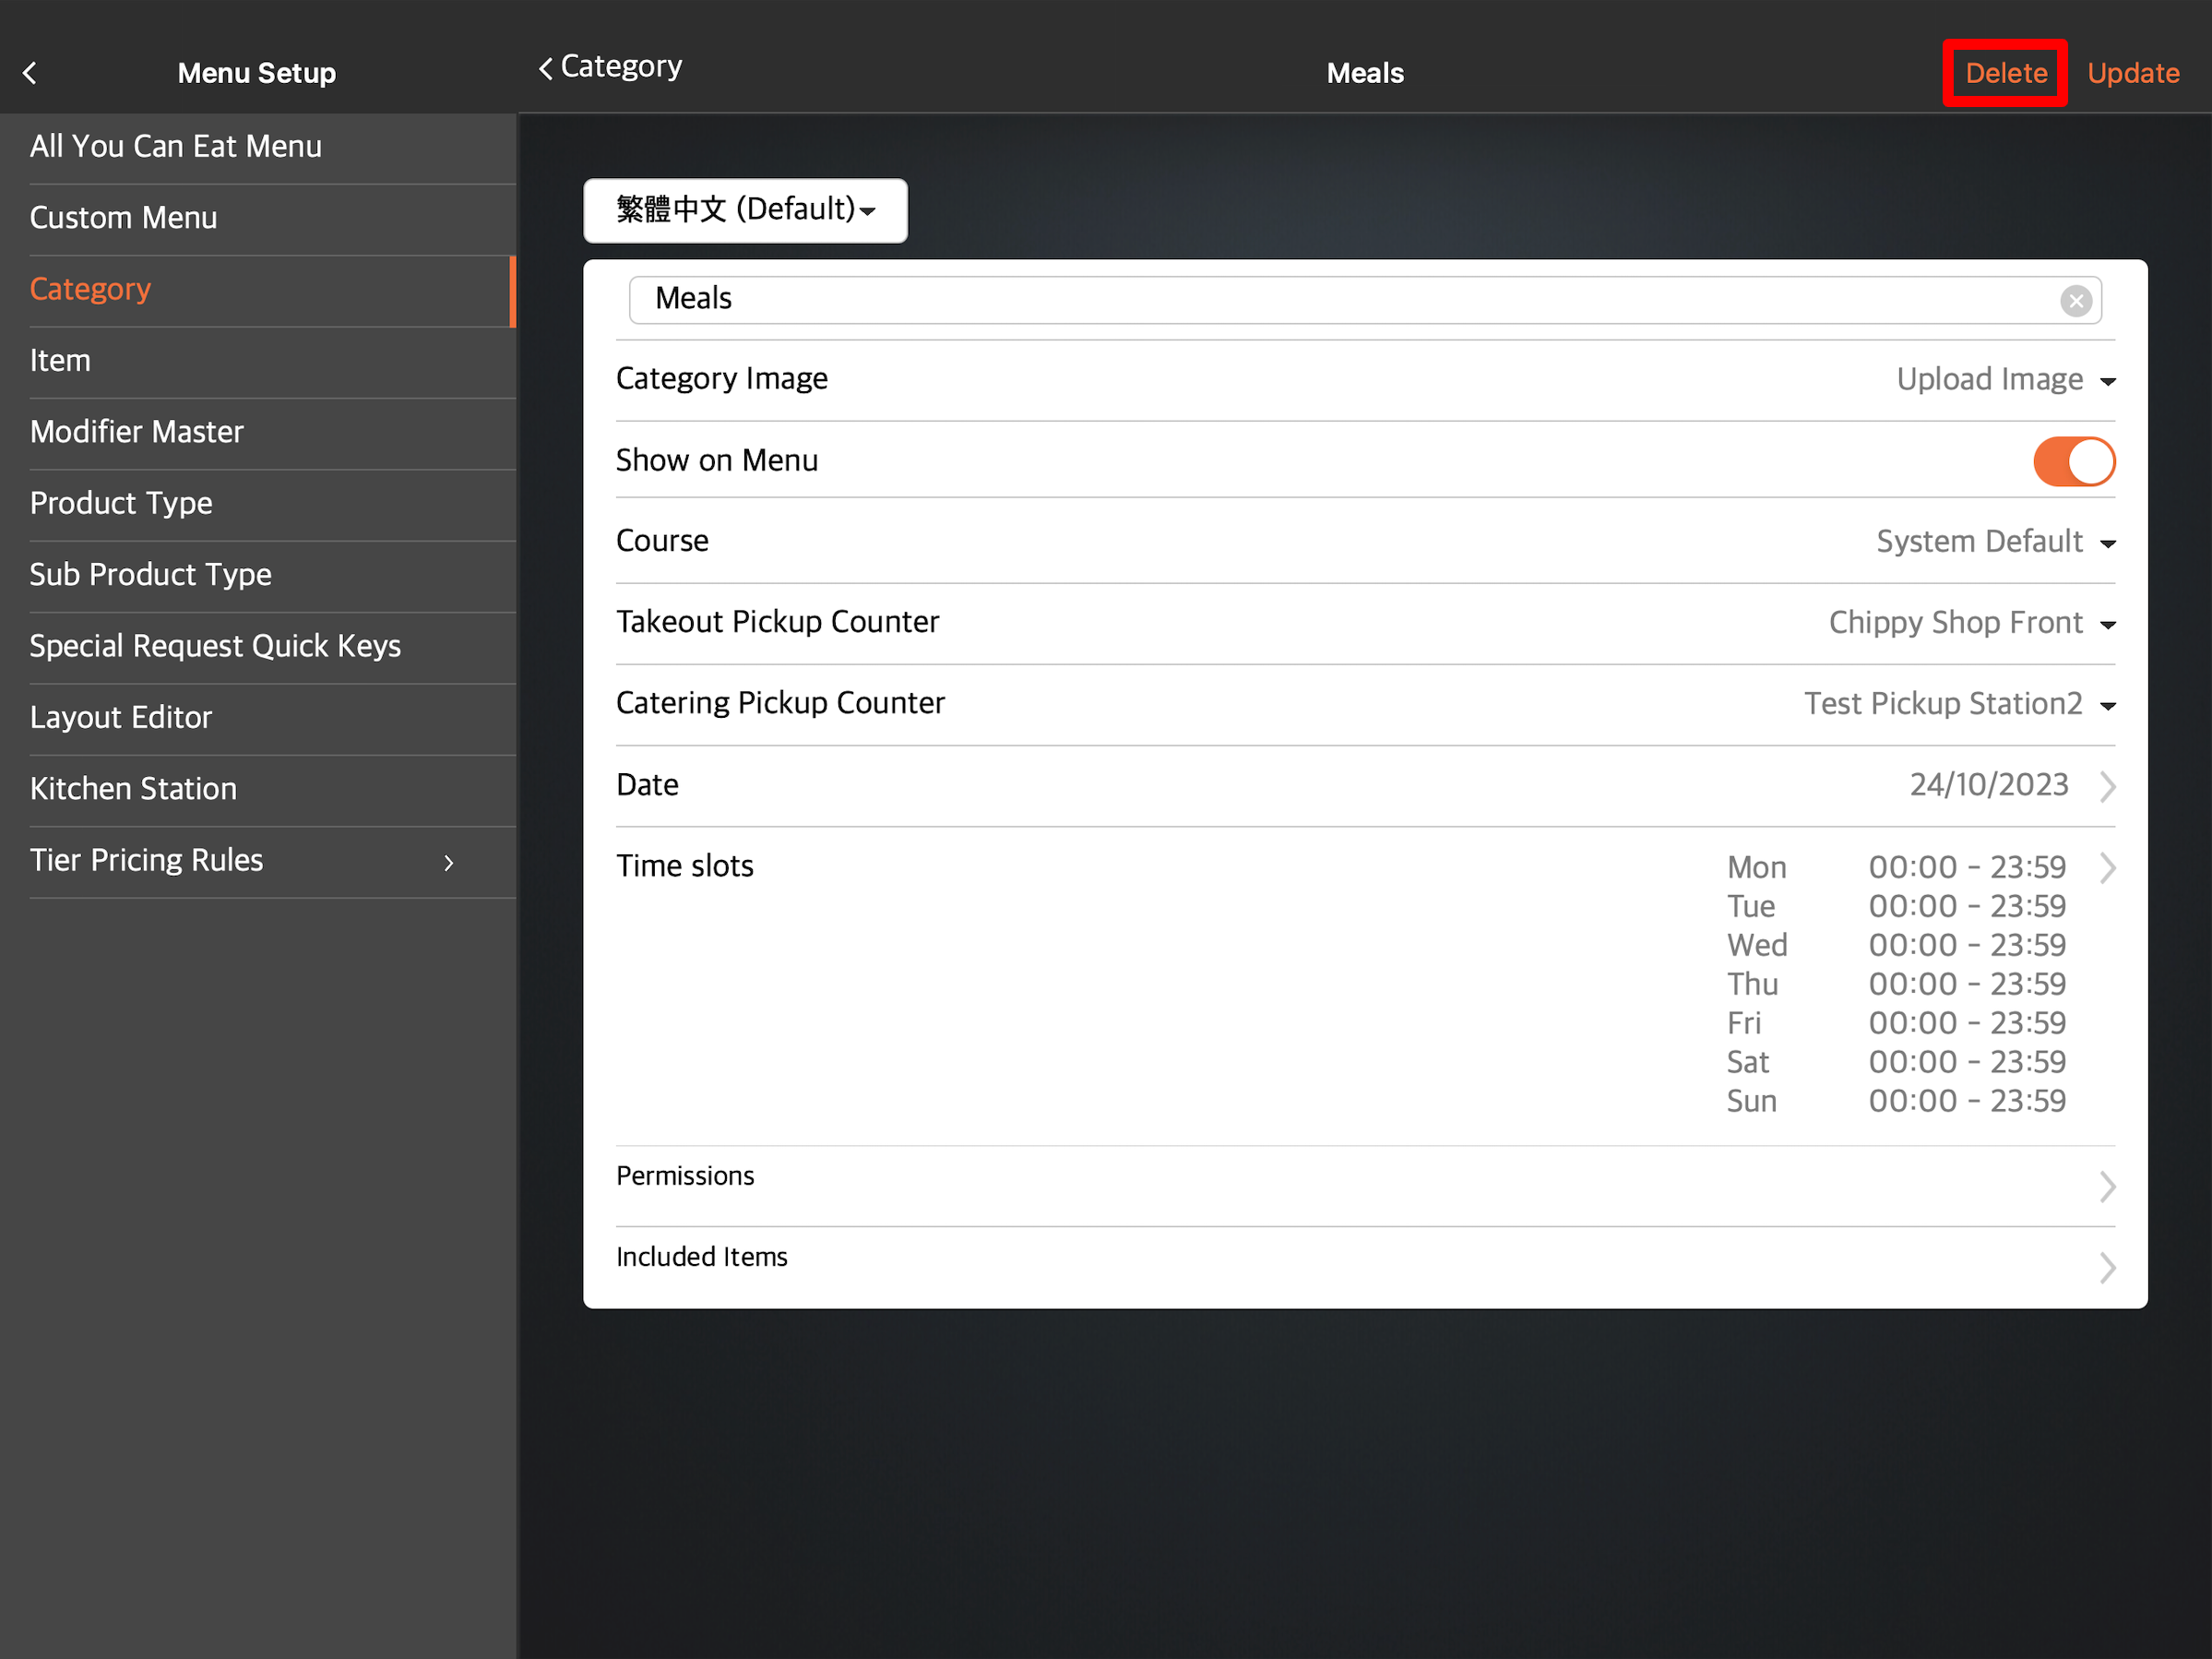
- At the top right, tap Delete. A prompt appears to confirm if you want to delete the category.
- Tap Delete to confirm.
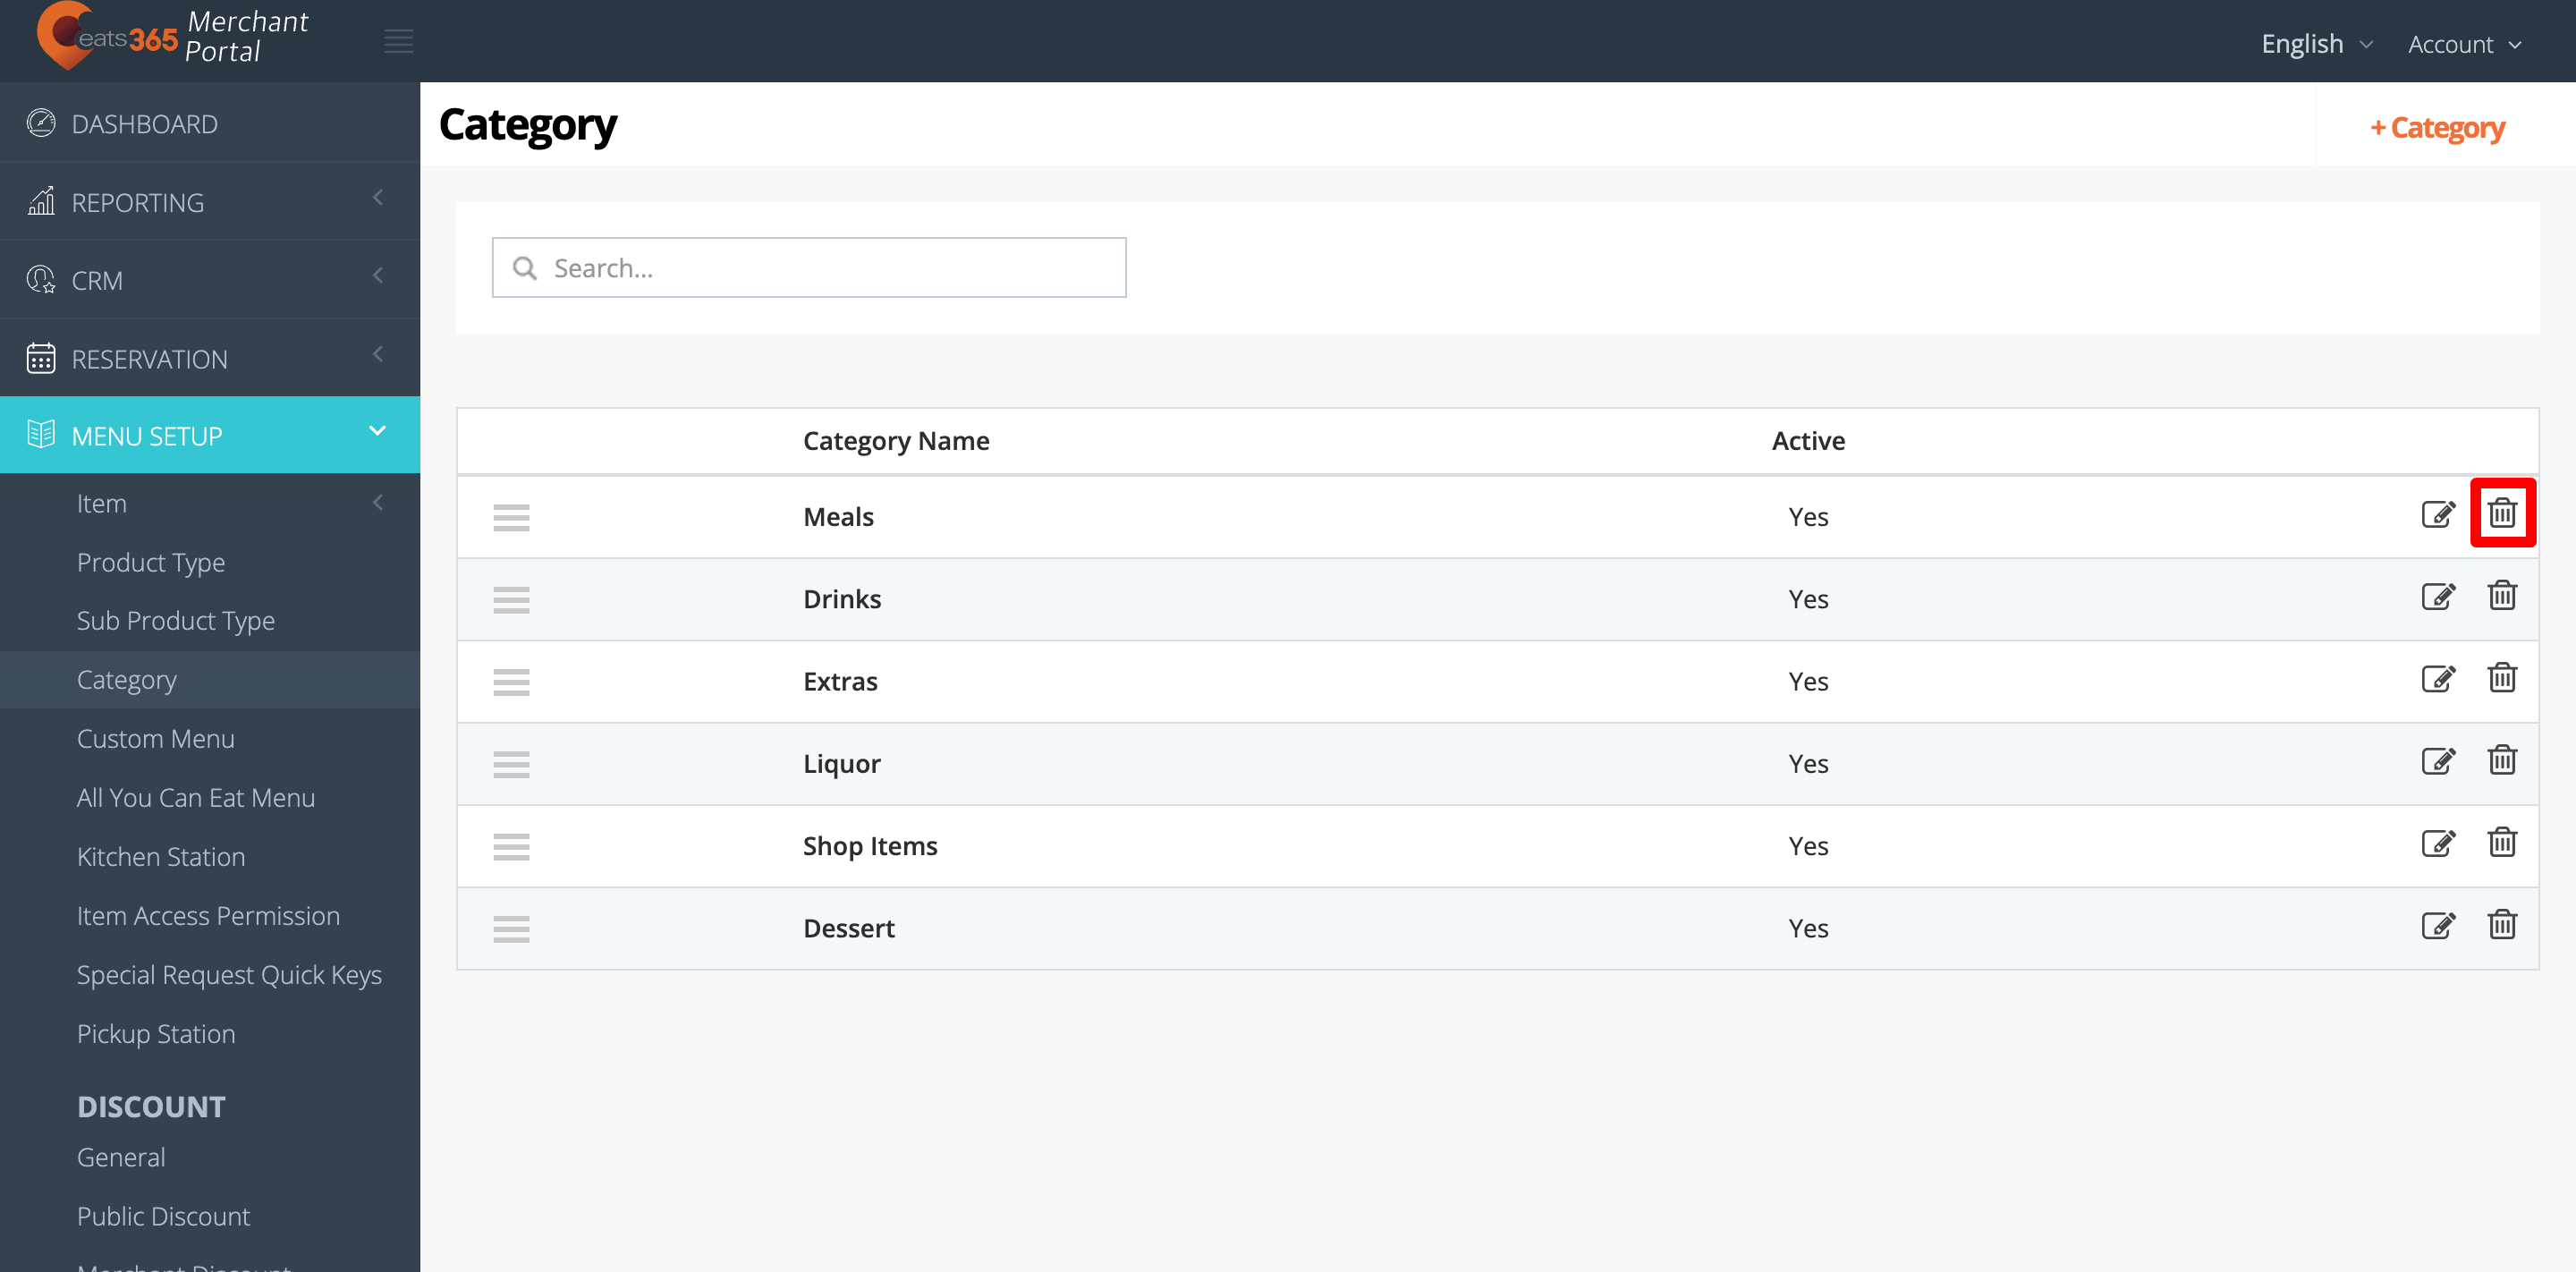
Merchant Portal (Classic Theme)
- Log in to the Merchant Portal.
- On the left panel, click on Menu Setup, then select Category.
- Next to the category that you want to delete, click on Delete
 . Then, select Confirm.
Merchant Portal 2.0
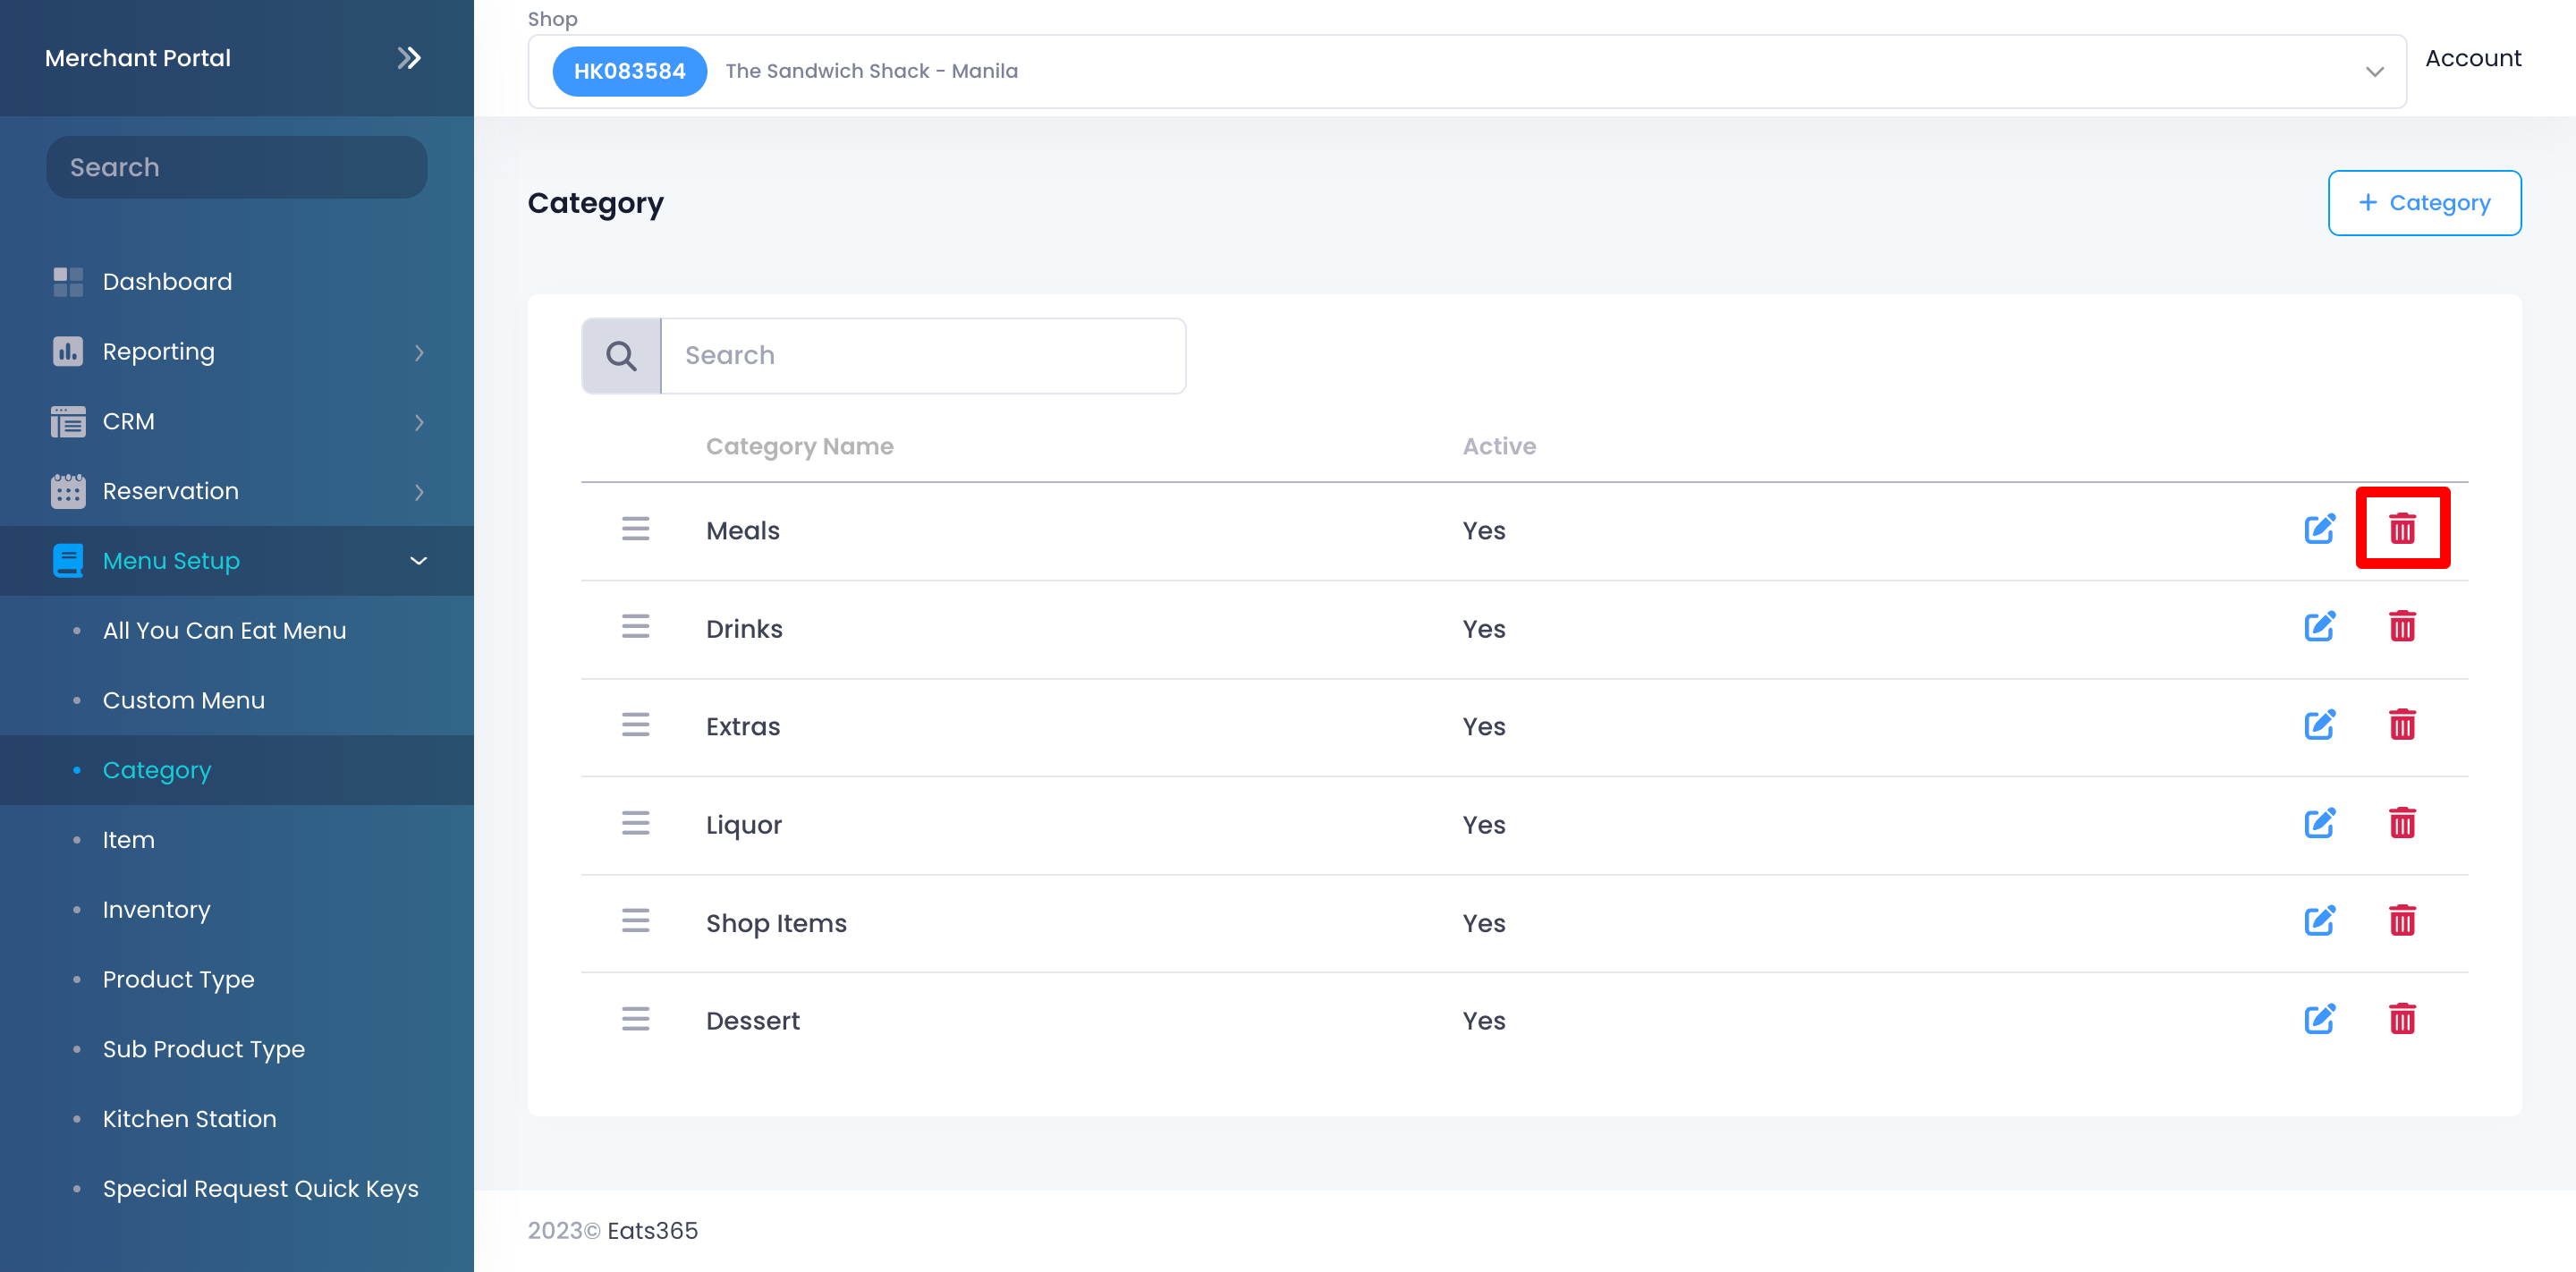
- Log in to the Merchant Portal.
- On the left panel, click on Menu Setup, then select Category.
- Next to the category that you want to delete, click on Delete
 . Then, select Confirm.
Reorder categories
If you want your categories to appear in a specific order on the POS, follow the steps below:
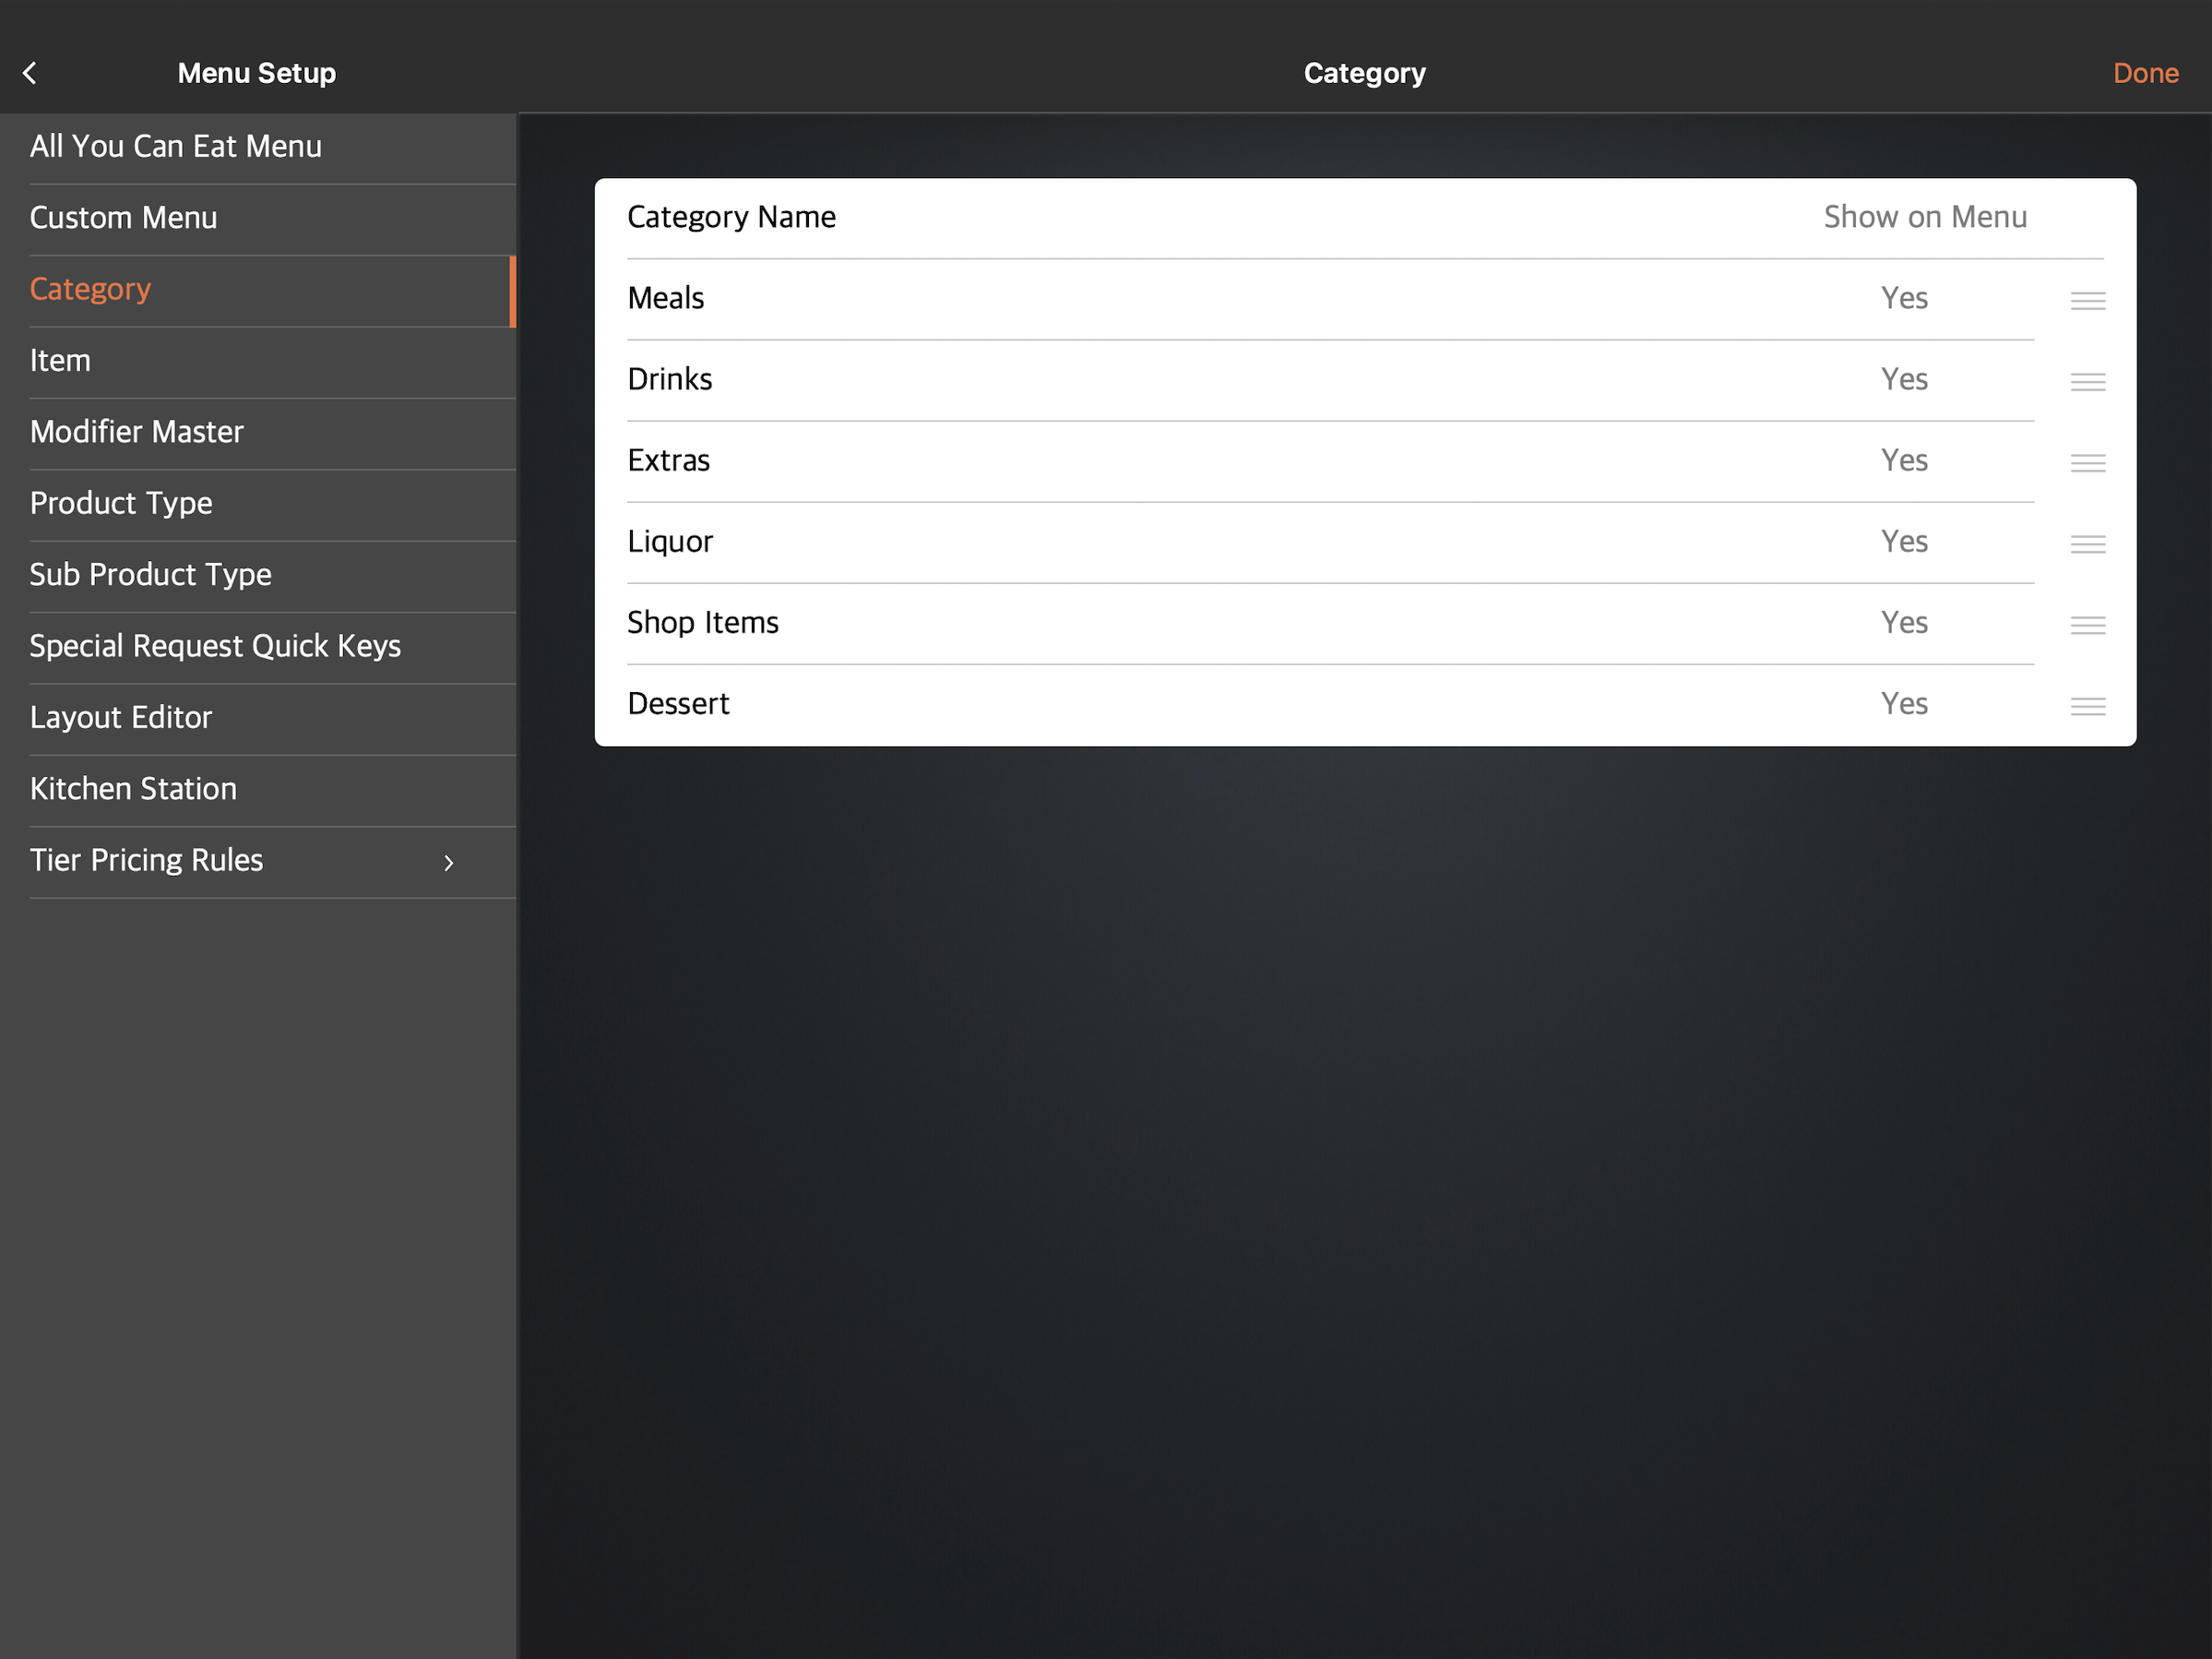
Eats365 POS
- Log in to the Eats365 POS.
- At the top left, tap Settings .
- Under "General," tap Menu Setup, then select Category.
- At the top right, tap Edit.
- Next to the category that you want to move, tap and hold Reorder
 . Then, drag the category in the order that you want it to appear on the POS.
 - At the top right, tap Done to confirm.
Merchant Portal (Classic Theme)
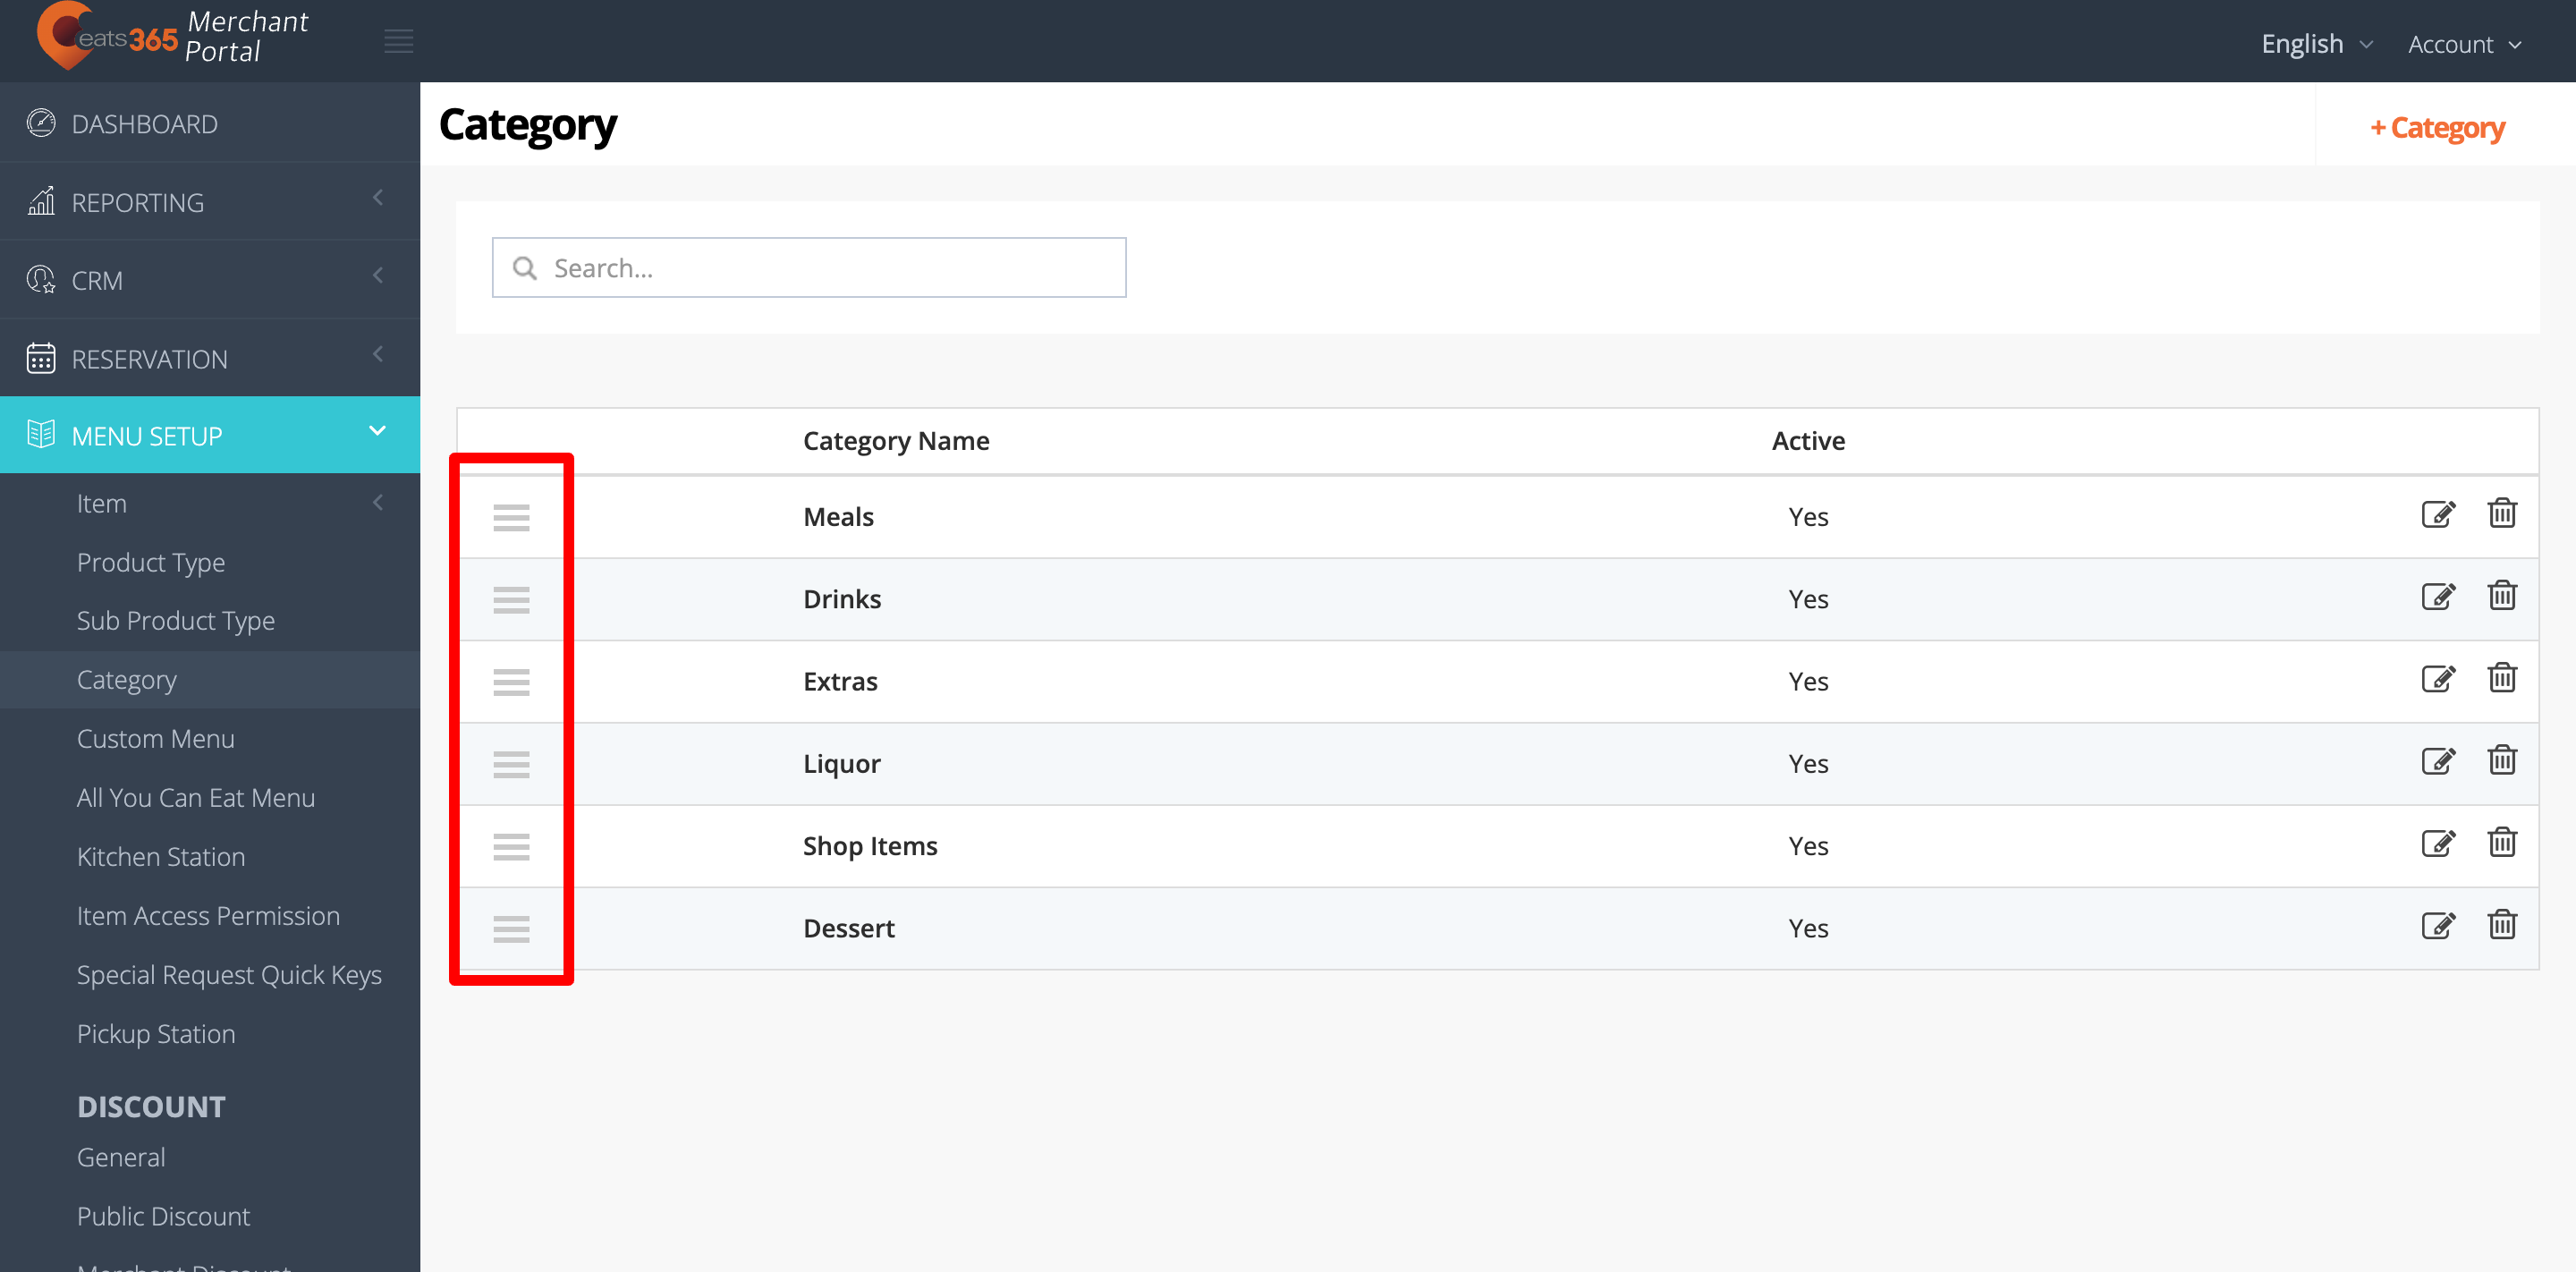
- Log in to the Merchant Portal.
- On the left panel, click on Menu Setup, then select Category.
- Next to the category that you want to move, click and hold on Reorder . Then, drag the category in the order that you want it to appear on the POS.
Merchant Portal 2.0
- Log in to the Merchant Portal.
- On the left panel, click on Menu Setup, then select Category.
- Next to the category that you want to move, click and hold on Reorder . Then, drag the category in the order that you want it to appear on the POS.