Menu Setup
Table of Contents
Set up and manage Special Request Quick Keys
Learn how to create and manage Special Request Quick Keys on the Eats365 POS or on the Merchant Portal.
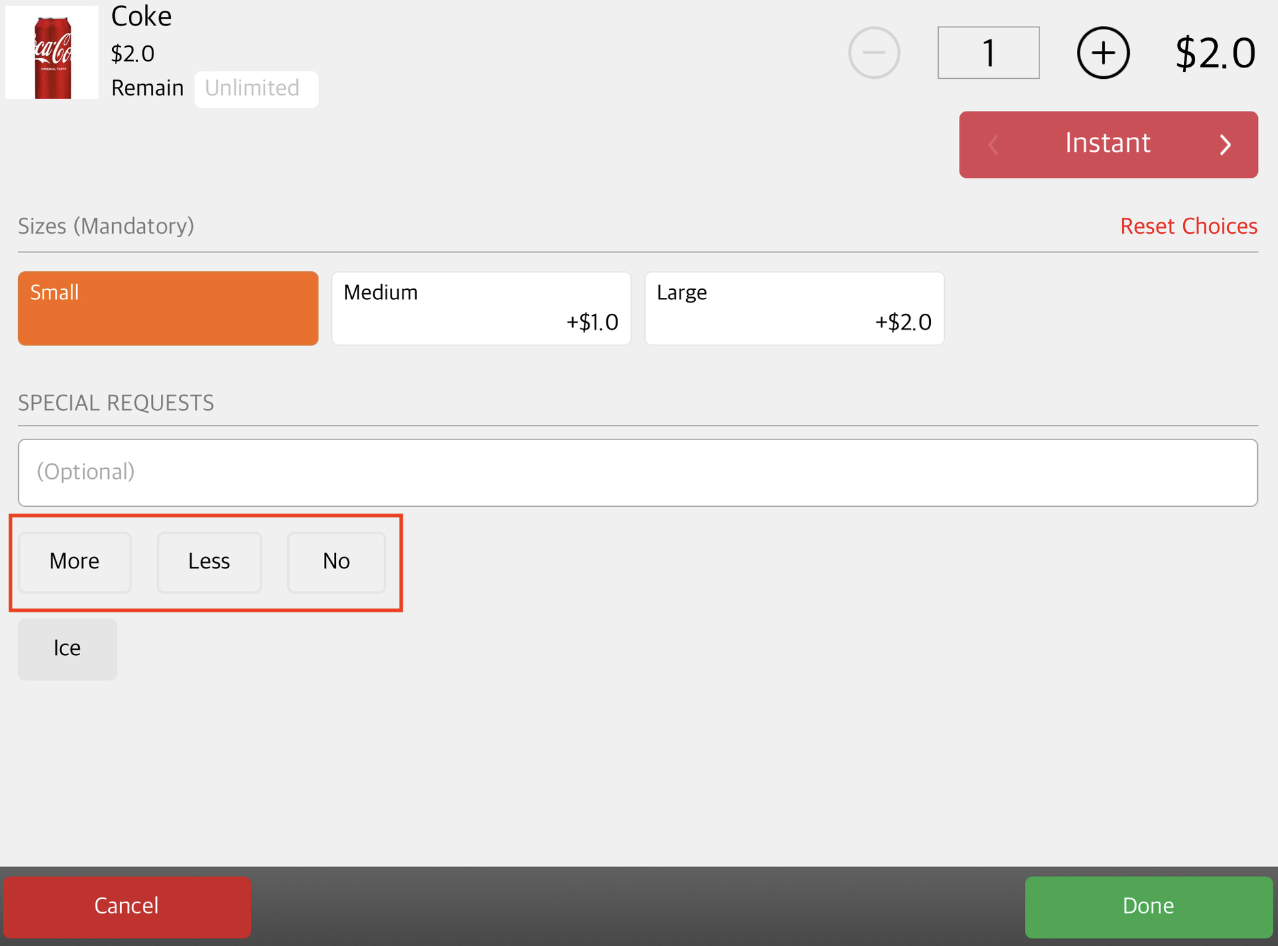
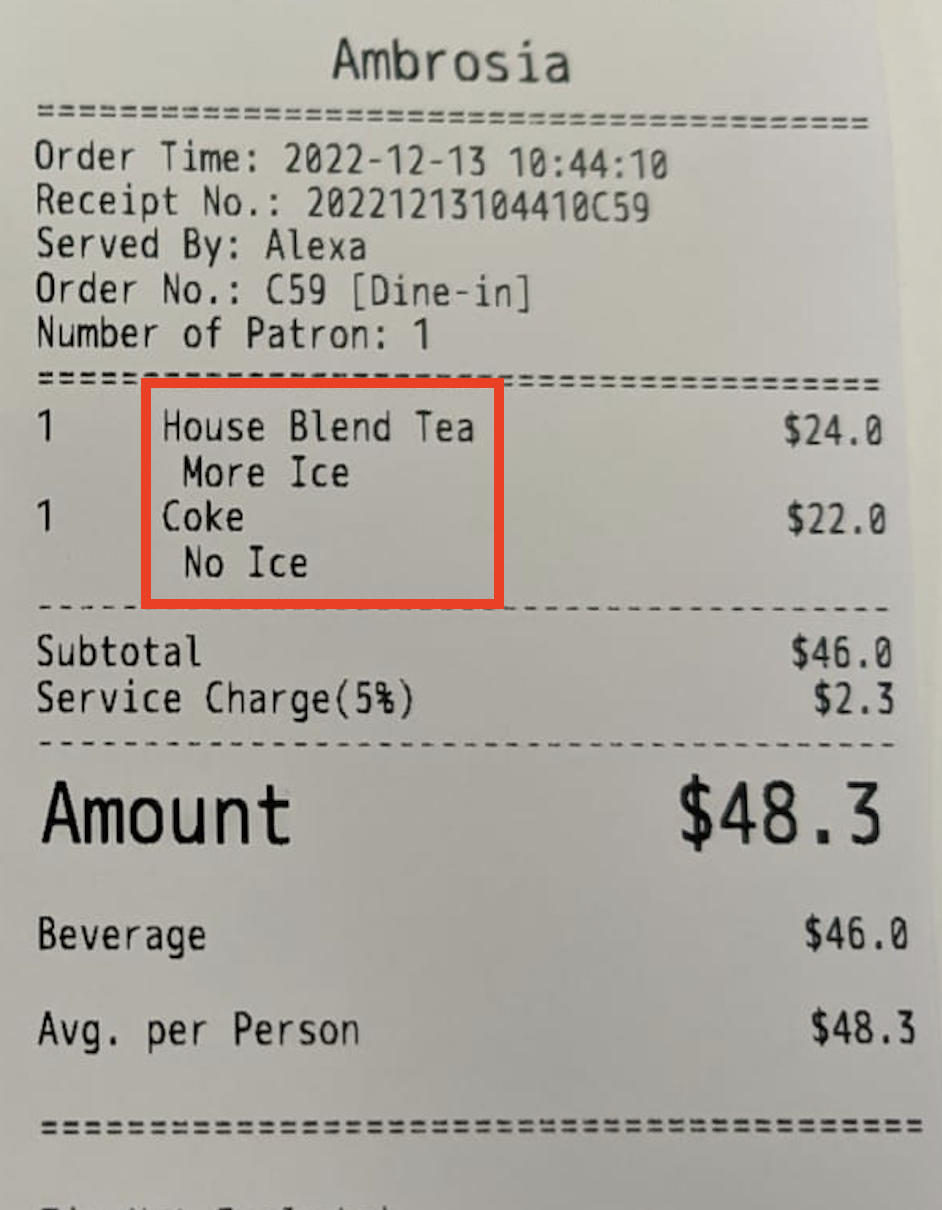
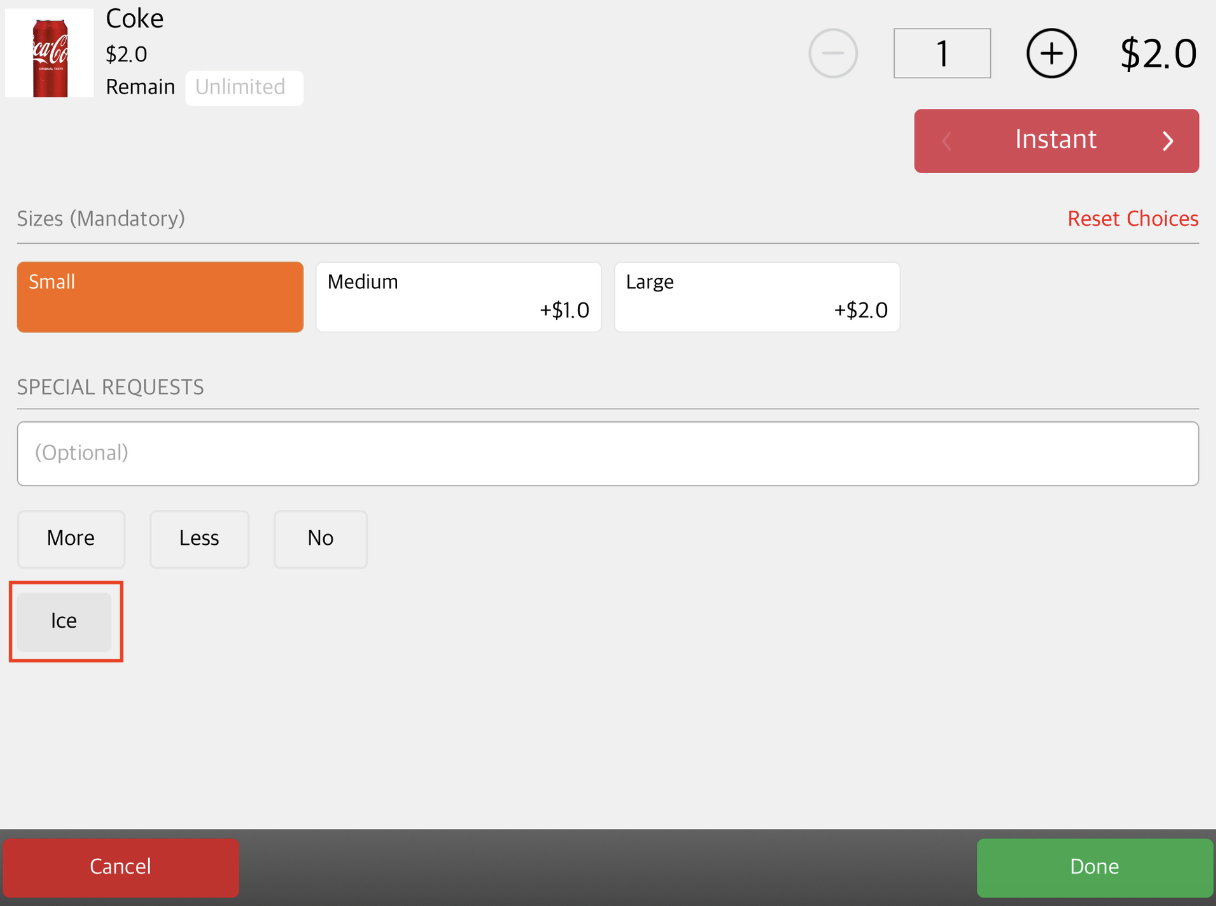
The Special Request Quick Keys setting allows you to create a preset of short tappable words or phrases to easily modify your customer’s orders if they have a special request. For example, the customer might ask for more ice in their drink. You can use the quick keys so you won’t have to type the request manually on the Eats365 POS.
In this article, you’ll learn how to create Special Request Quick Keys, as well as, manage existing Special Request Quick Keys.
Add Special Request Quick Keys
There are two types of quick keys that you can create:
- Prefix - Prefix is used to modify the Key.
- Key - Key refers to preset keywords of commonly requested items.
Add a Prefix
Examples of commonly used Prefixes:
- More
- Less
- No
- Add
To add a Prefix, follow the steps below:
Eats365 POS
- Log in to the Eats365 POS.
- At the top left, tap Settings
 .
. - Under General, tap Menu Setup, and then select Special Request Quick Keys.
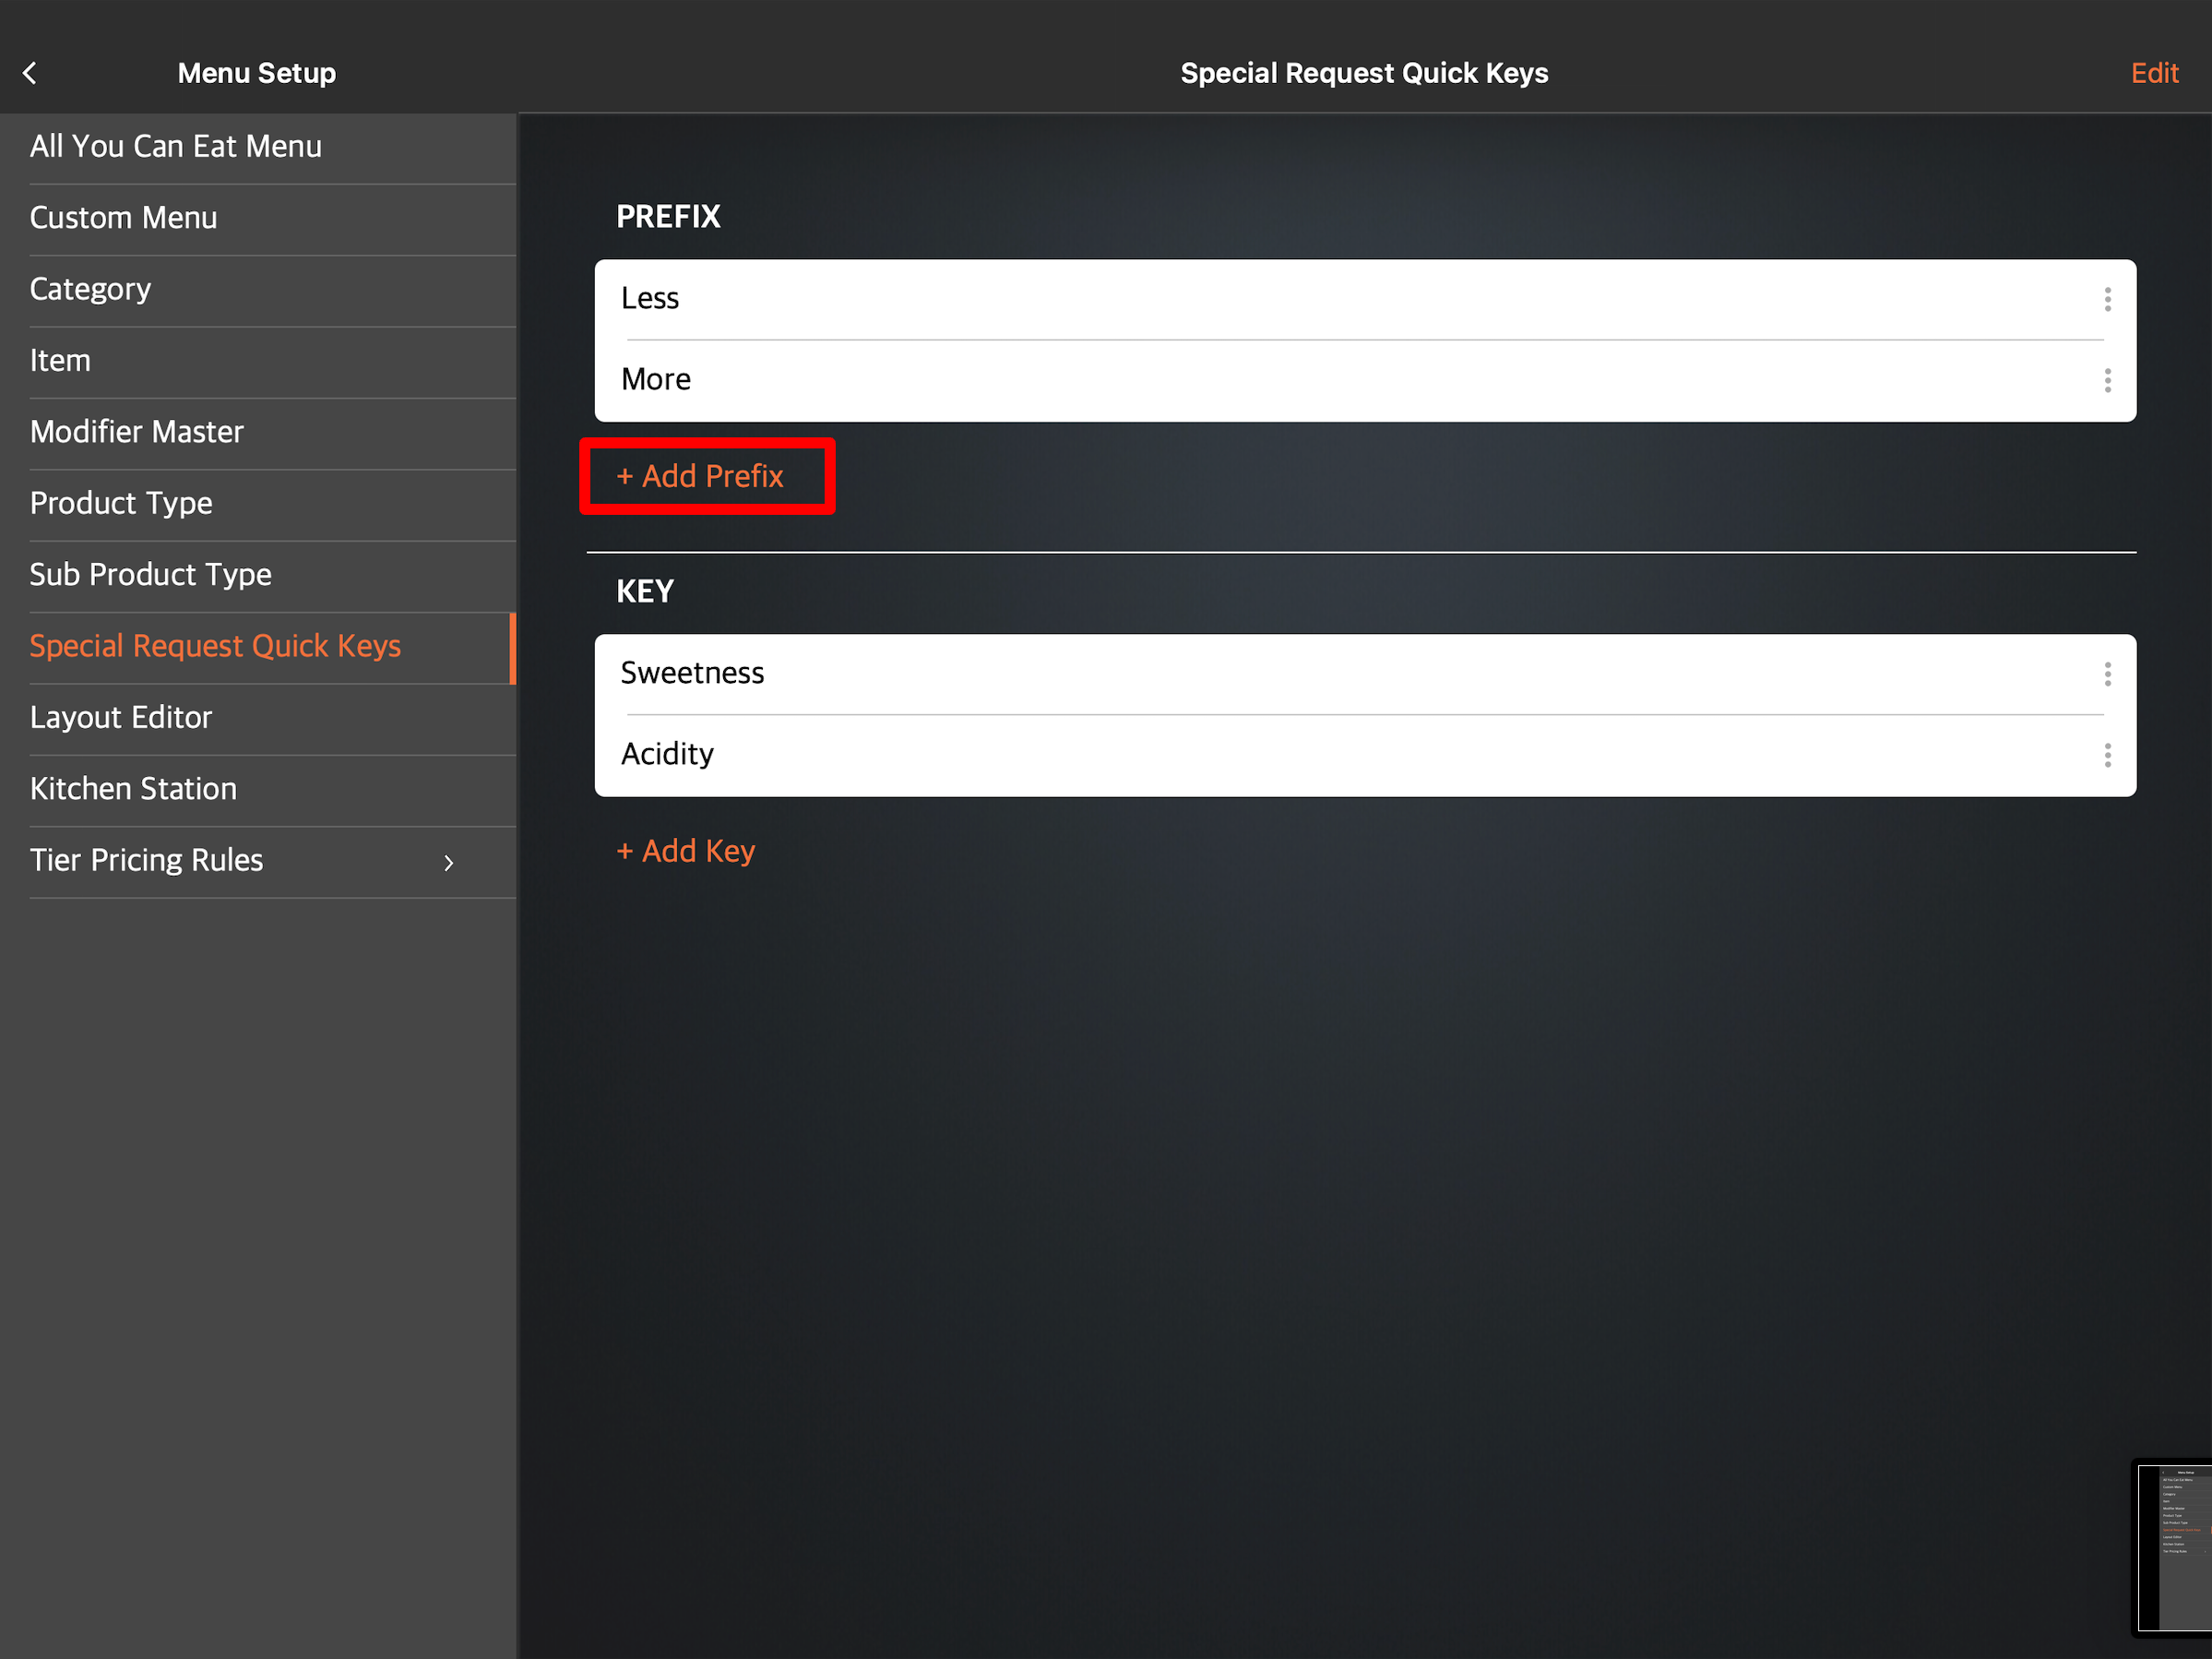
- Tap Add Prefix.
- Next to Prefix Name, enter the Prefix that you’d like to appear on the POS.
Tip: When a Prefix is combined with a Key, there won’t be any spaces in between the two keywords. If you want to have a space in between the two words, add a space after the Prefix.Sample receipt without spaces Sample receipt with spaces 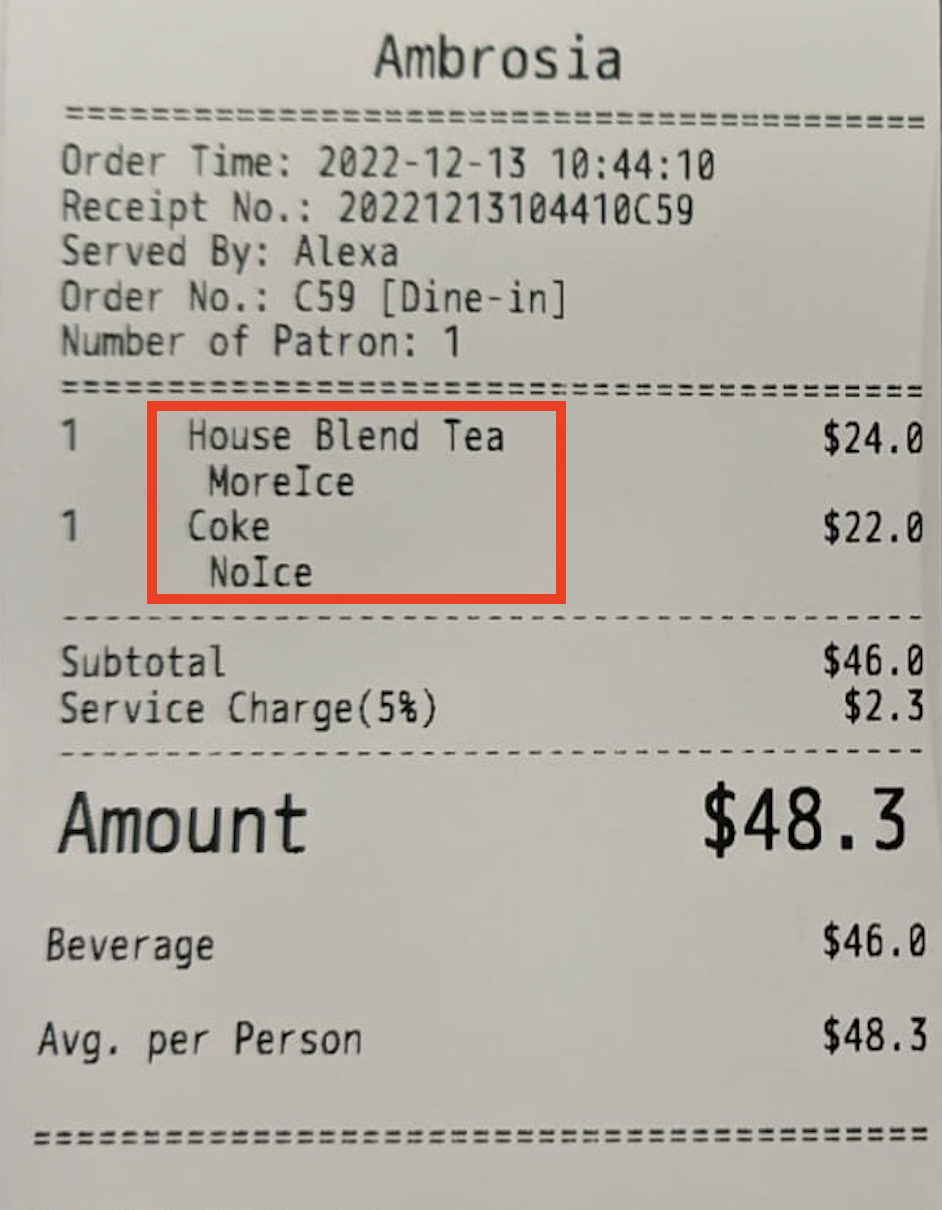
- Choose the category where you’d like the Prefix to appear. Tap each category or toggle All Categories
 . If you’d like the Prefix to also apply to custom items, you can also turn on Apply to custom items .
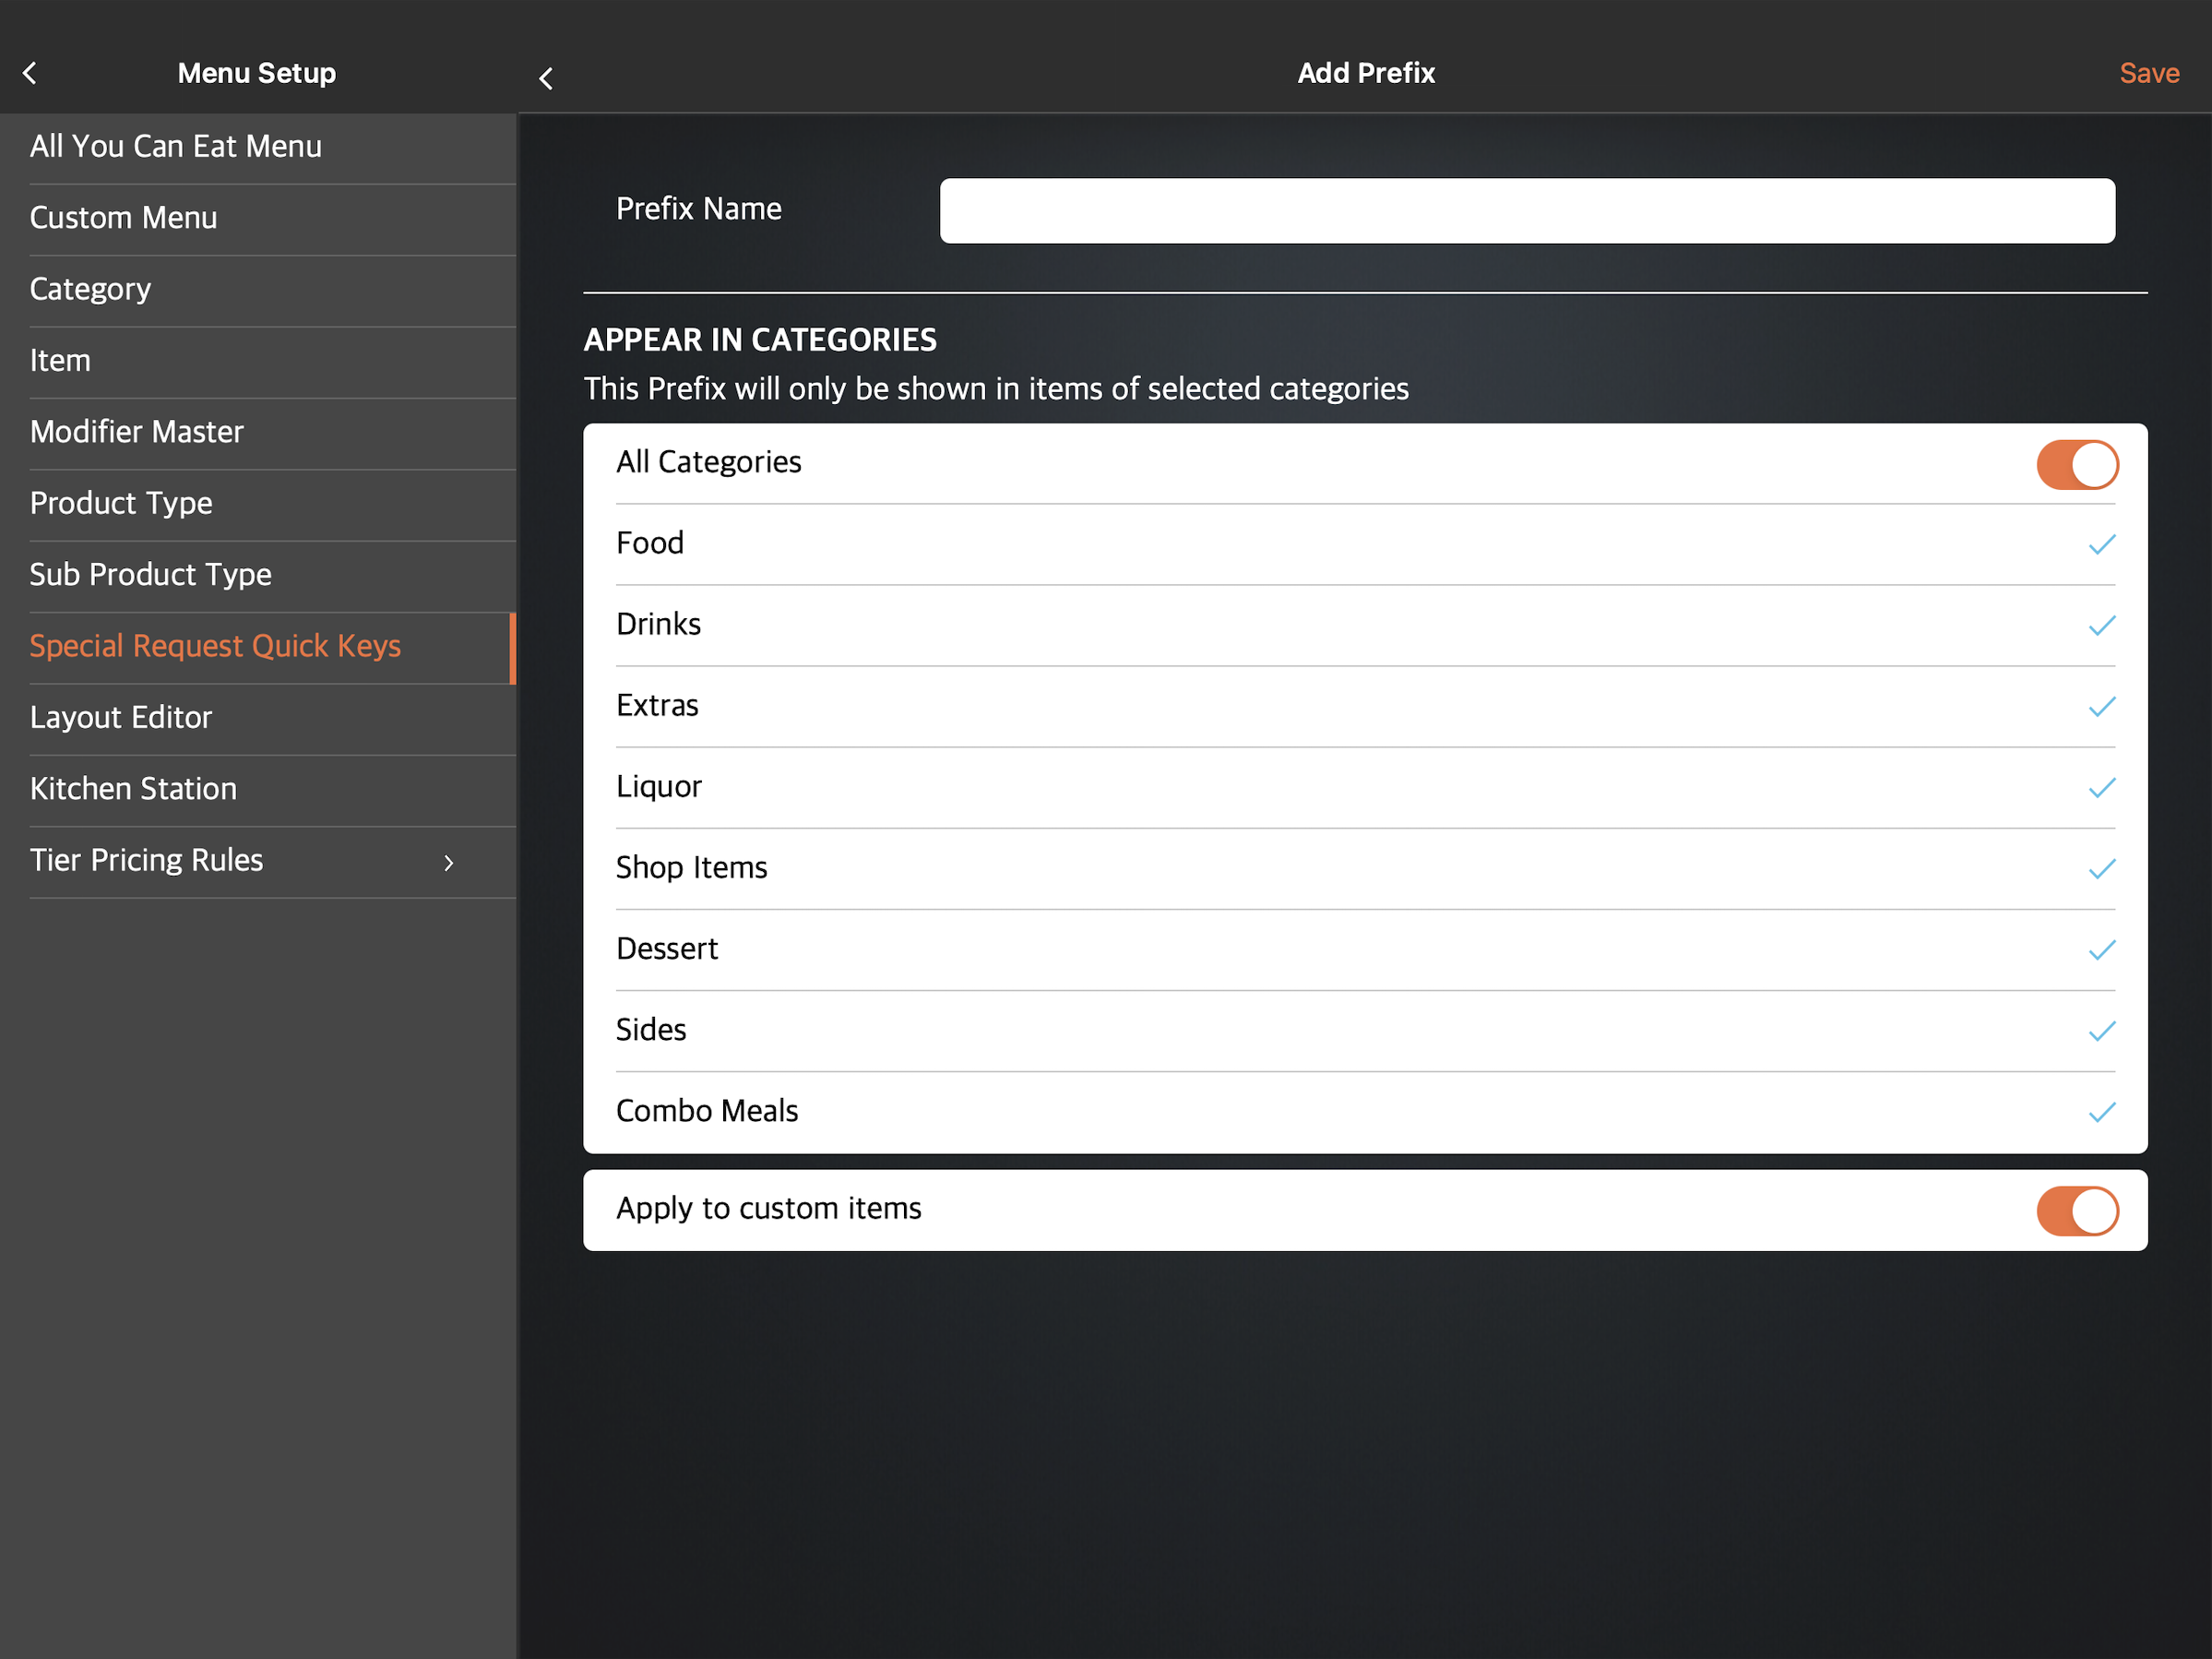
- At the top right, tap Save to confirm.
Merchant Portal (Classic Theme)
- Log in to the Merchant Portal.
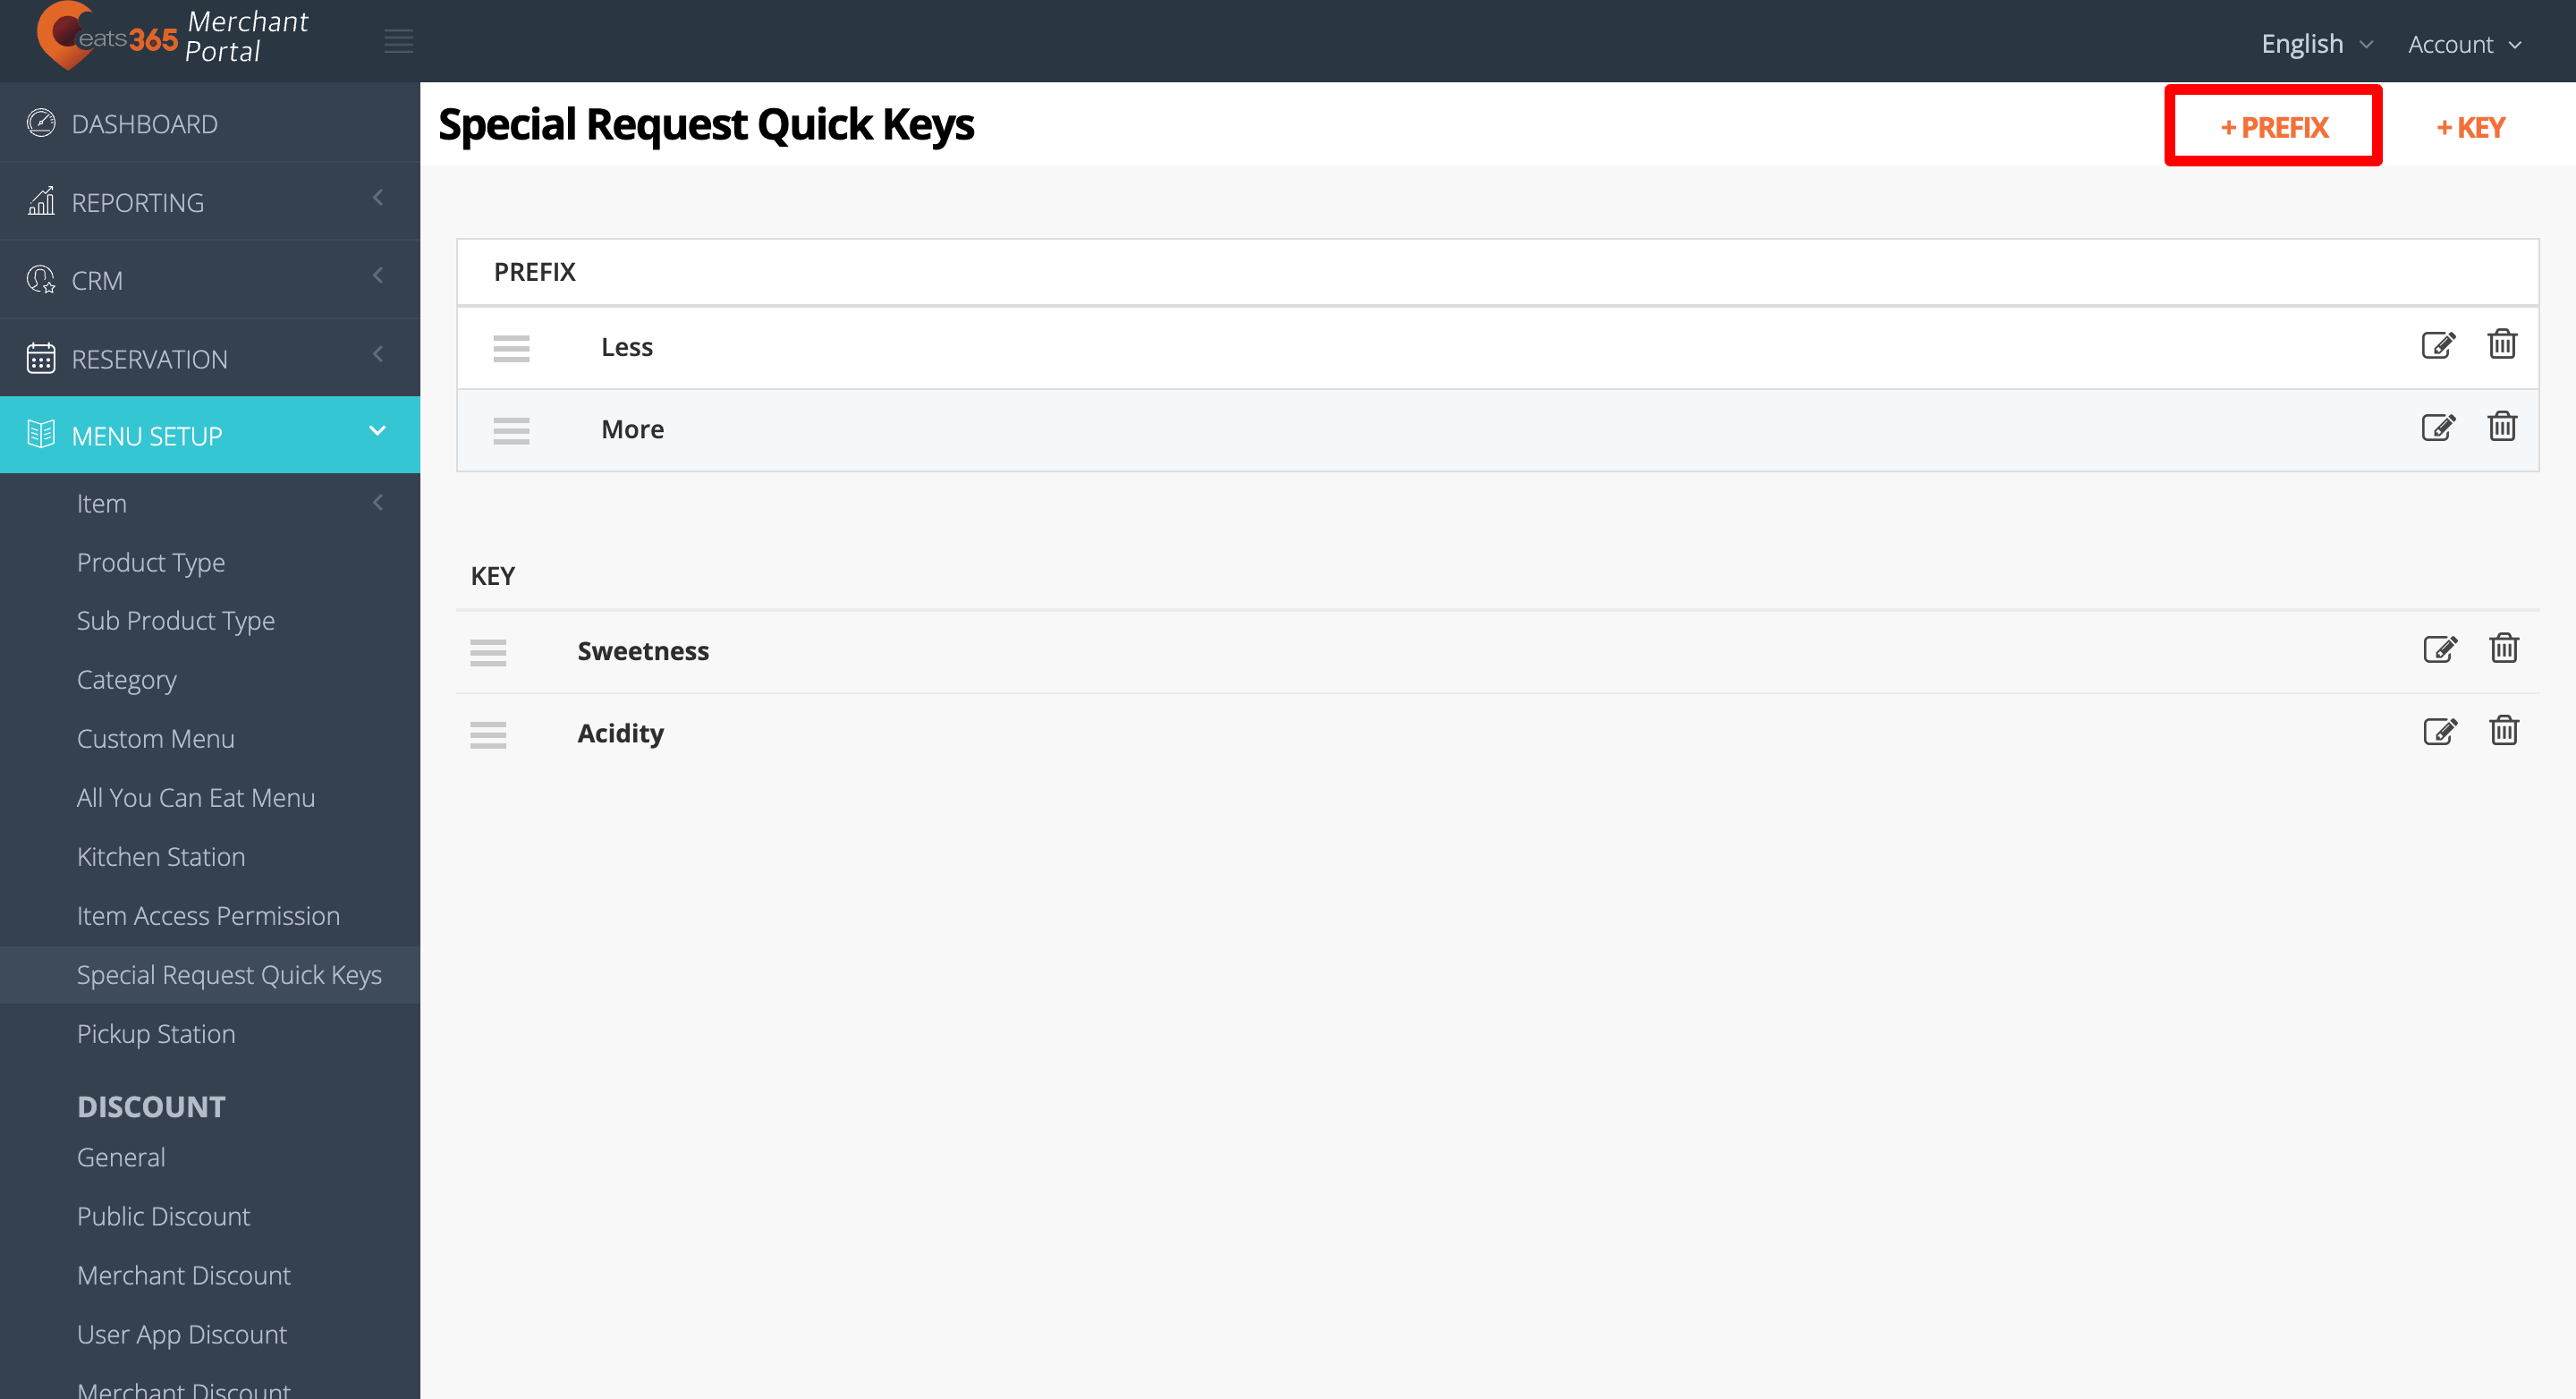
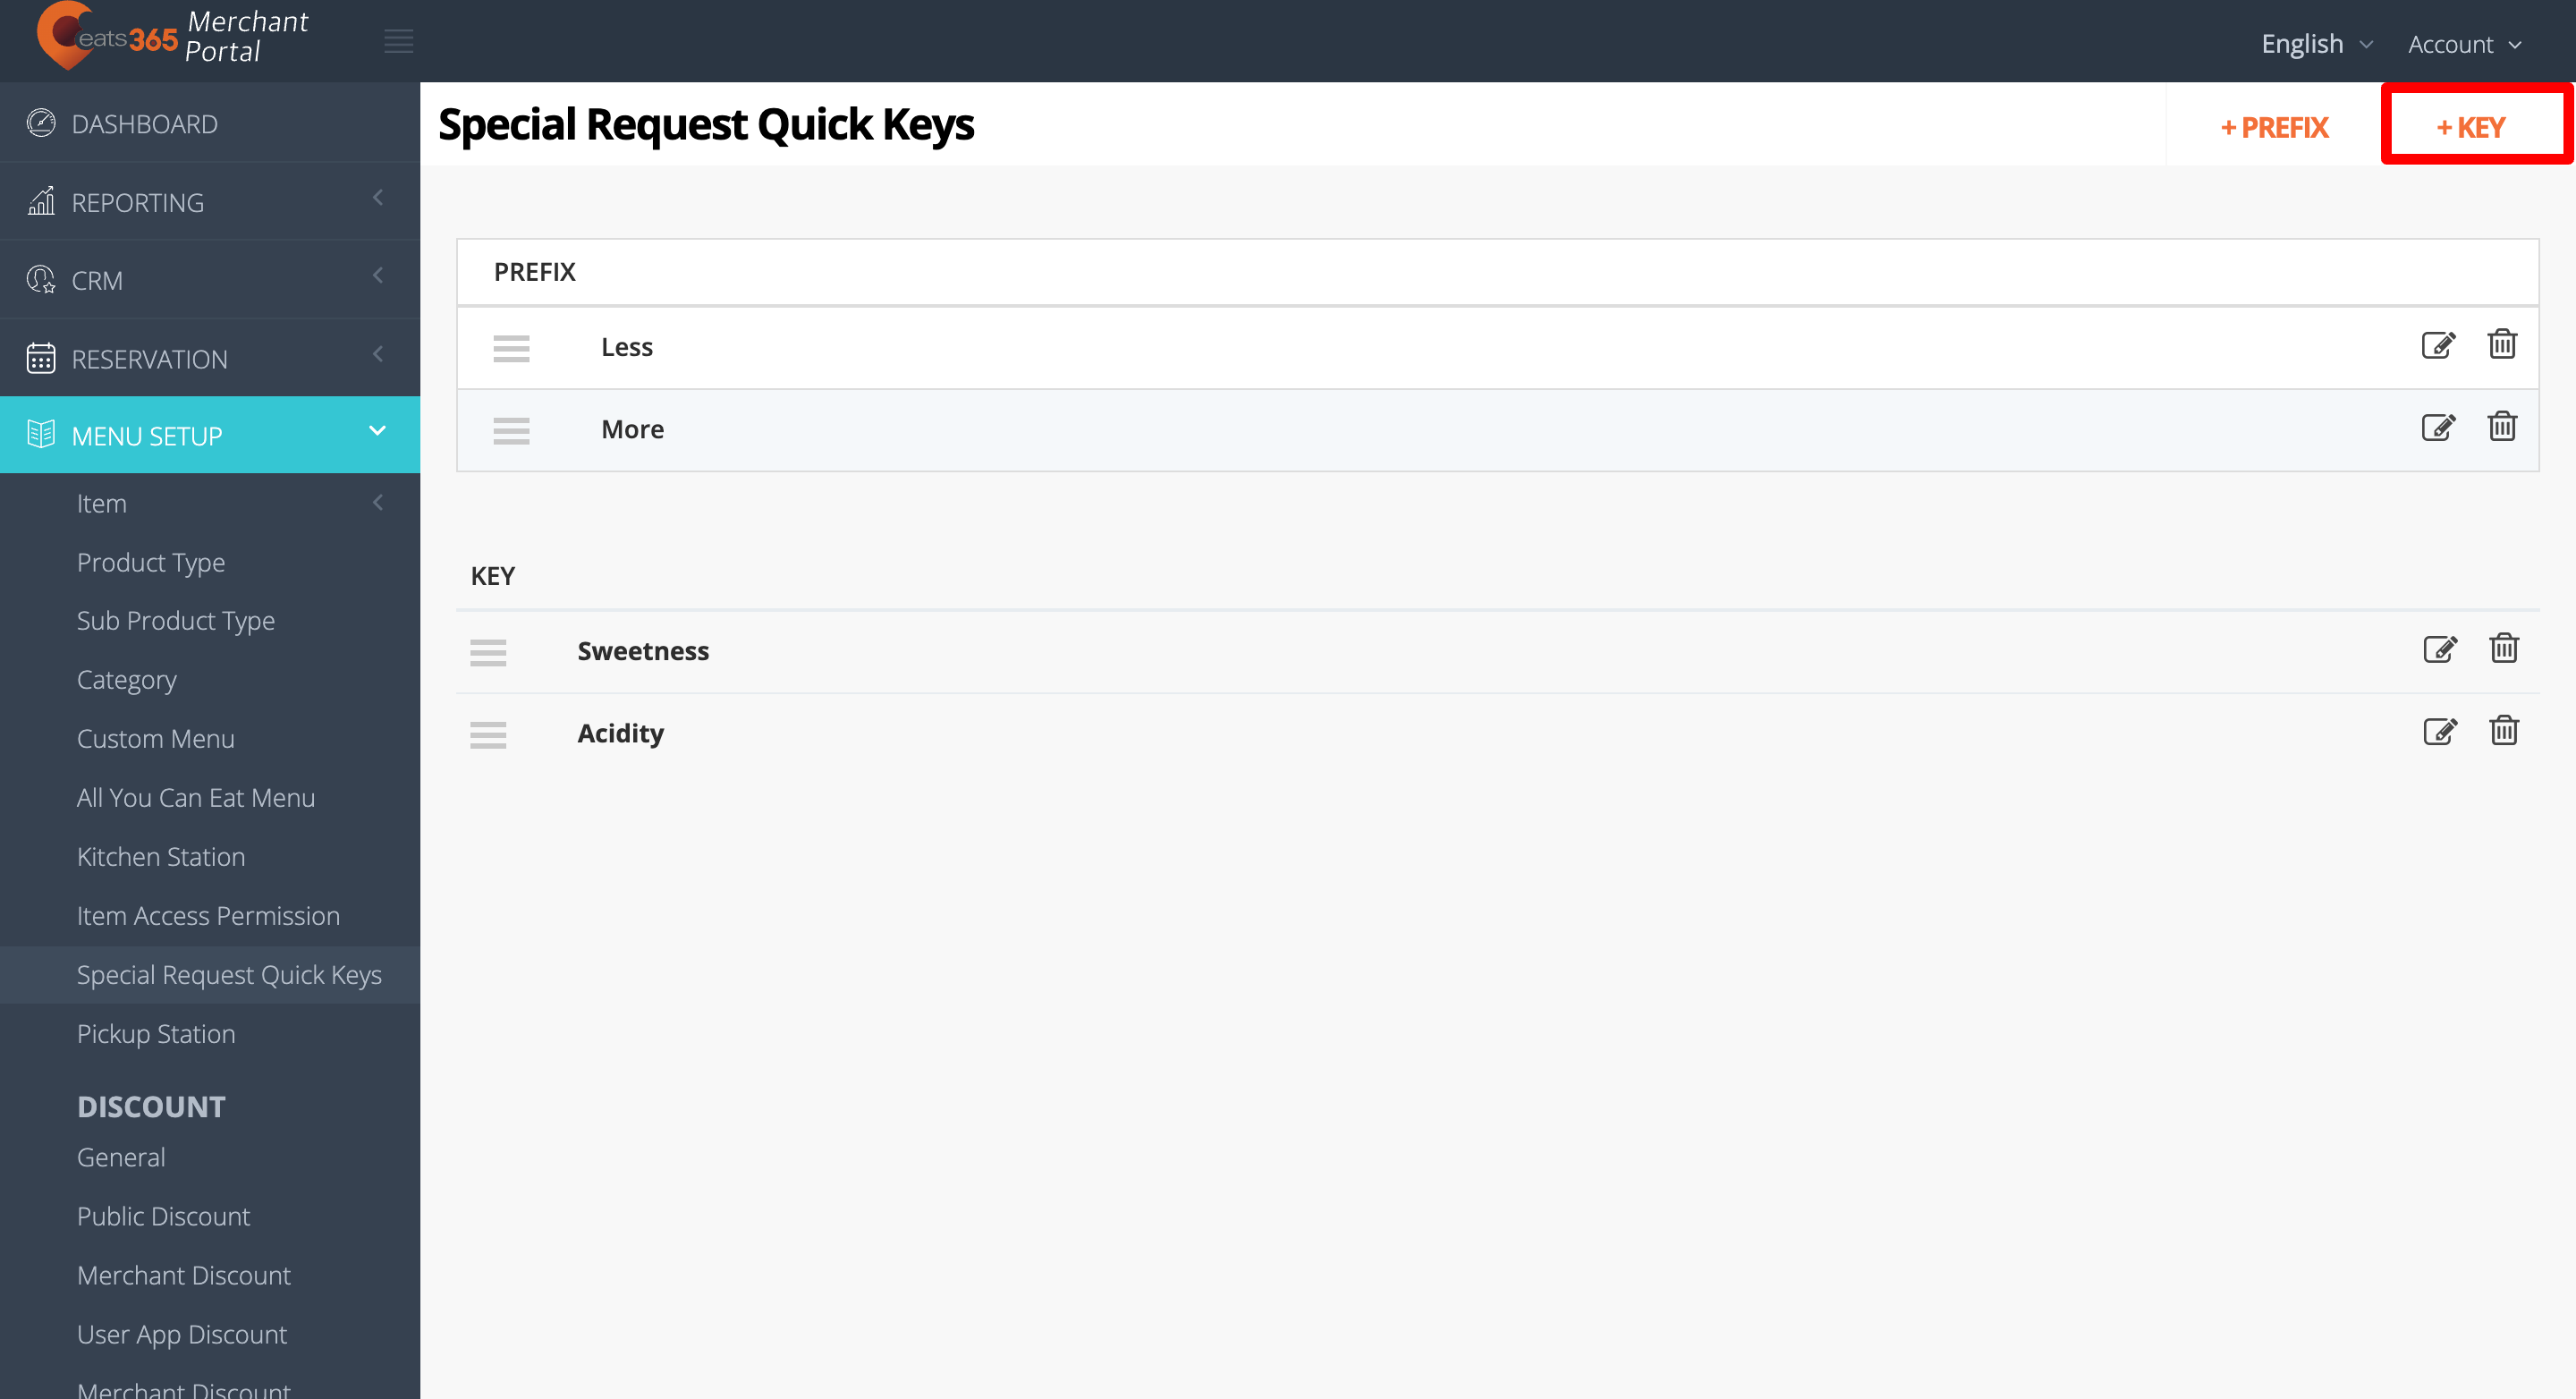
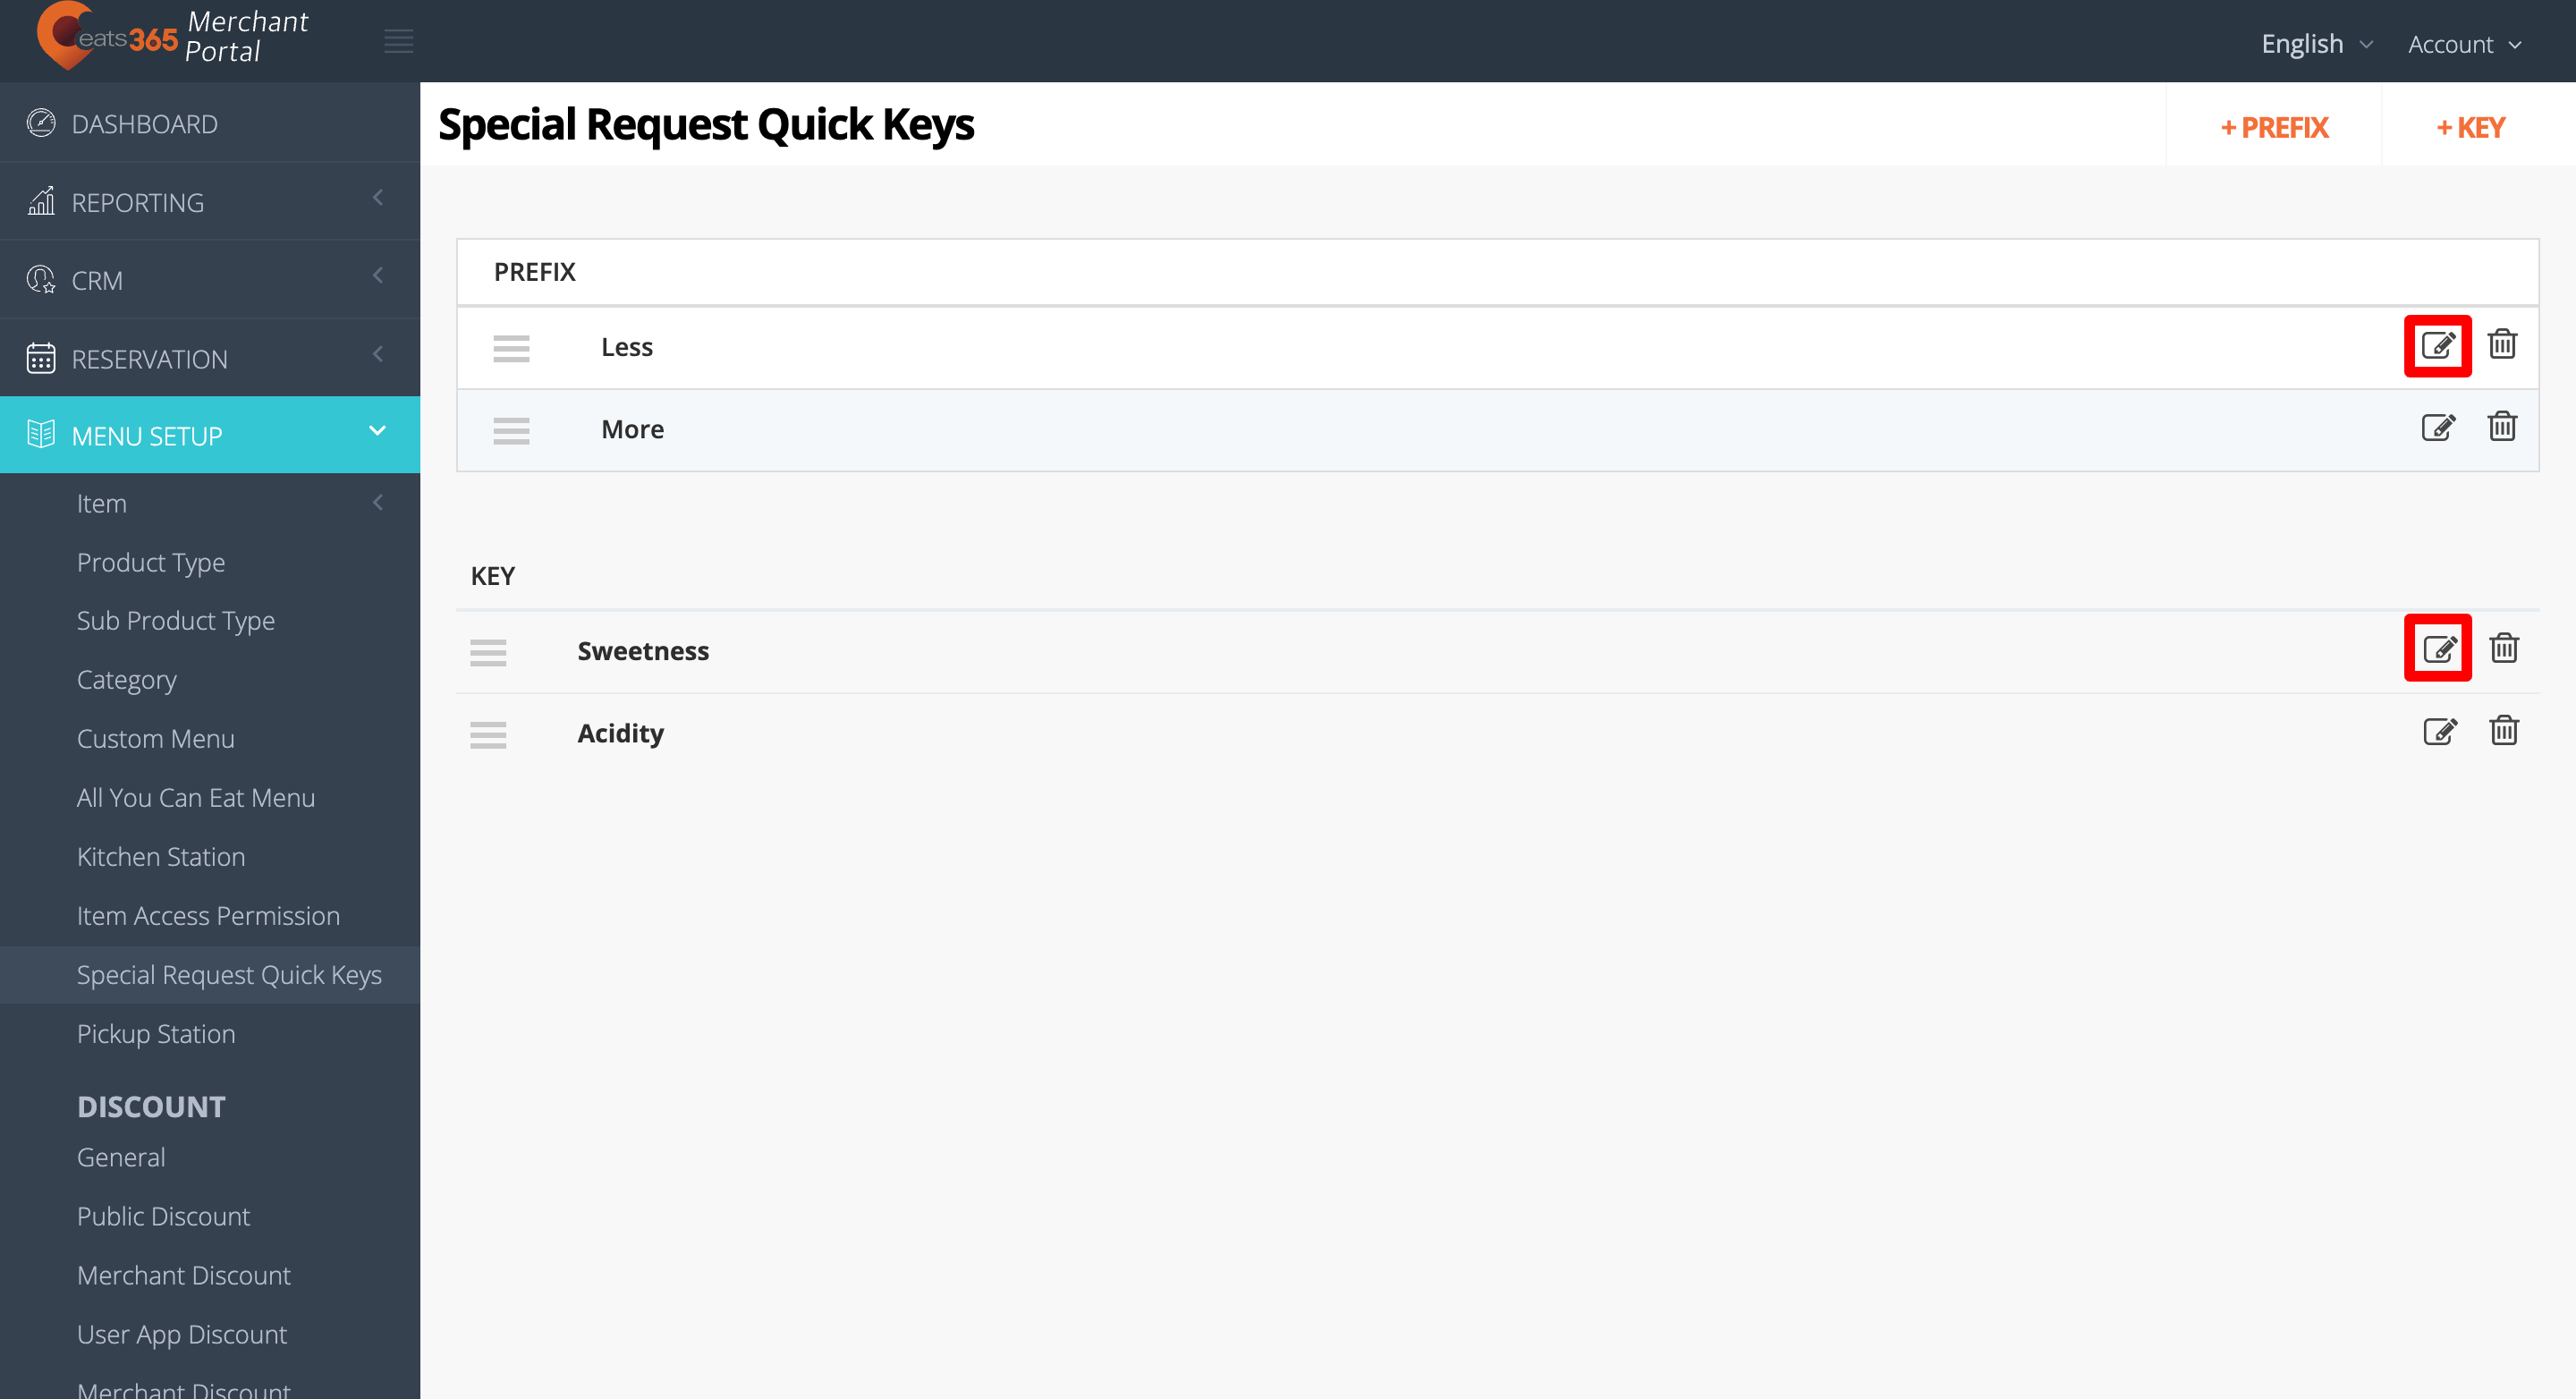
- On the left panel, click on Menu Setup, then select Special Request Quick Keys.
- At the top right, click +Prefix.
- Next to Prefix, enter the Prefix that you’d like to appear on the POS.
Tip: When a Prefix is combined with a Key, there won’t be any spaces in between the two keywords. If you want to have a space in between the two words, add a space after the Prefix.Sample receipt without spaces Sample receipt with spaces - Choose the category where you’d like the Prefix to appear. Click on each category or toggle Included All
 . If you’d like the Prefix to also apply to custom items, you can also turn on Apply to Custom Items .
- At the top right, click on Add to confirm.
Merchant Portal 2.0
- Log in to the Merchant Portal.
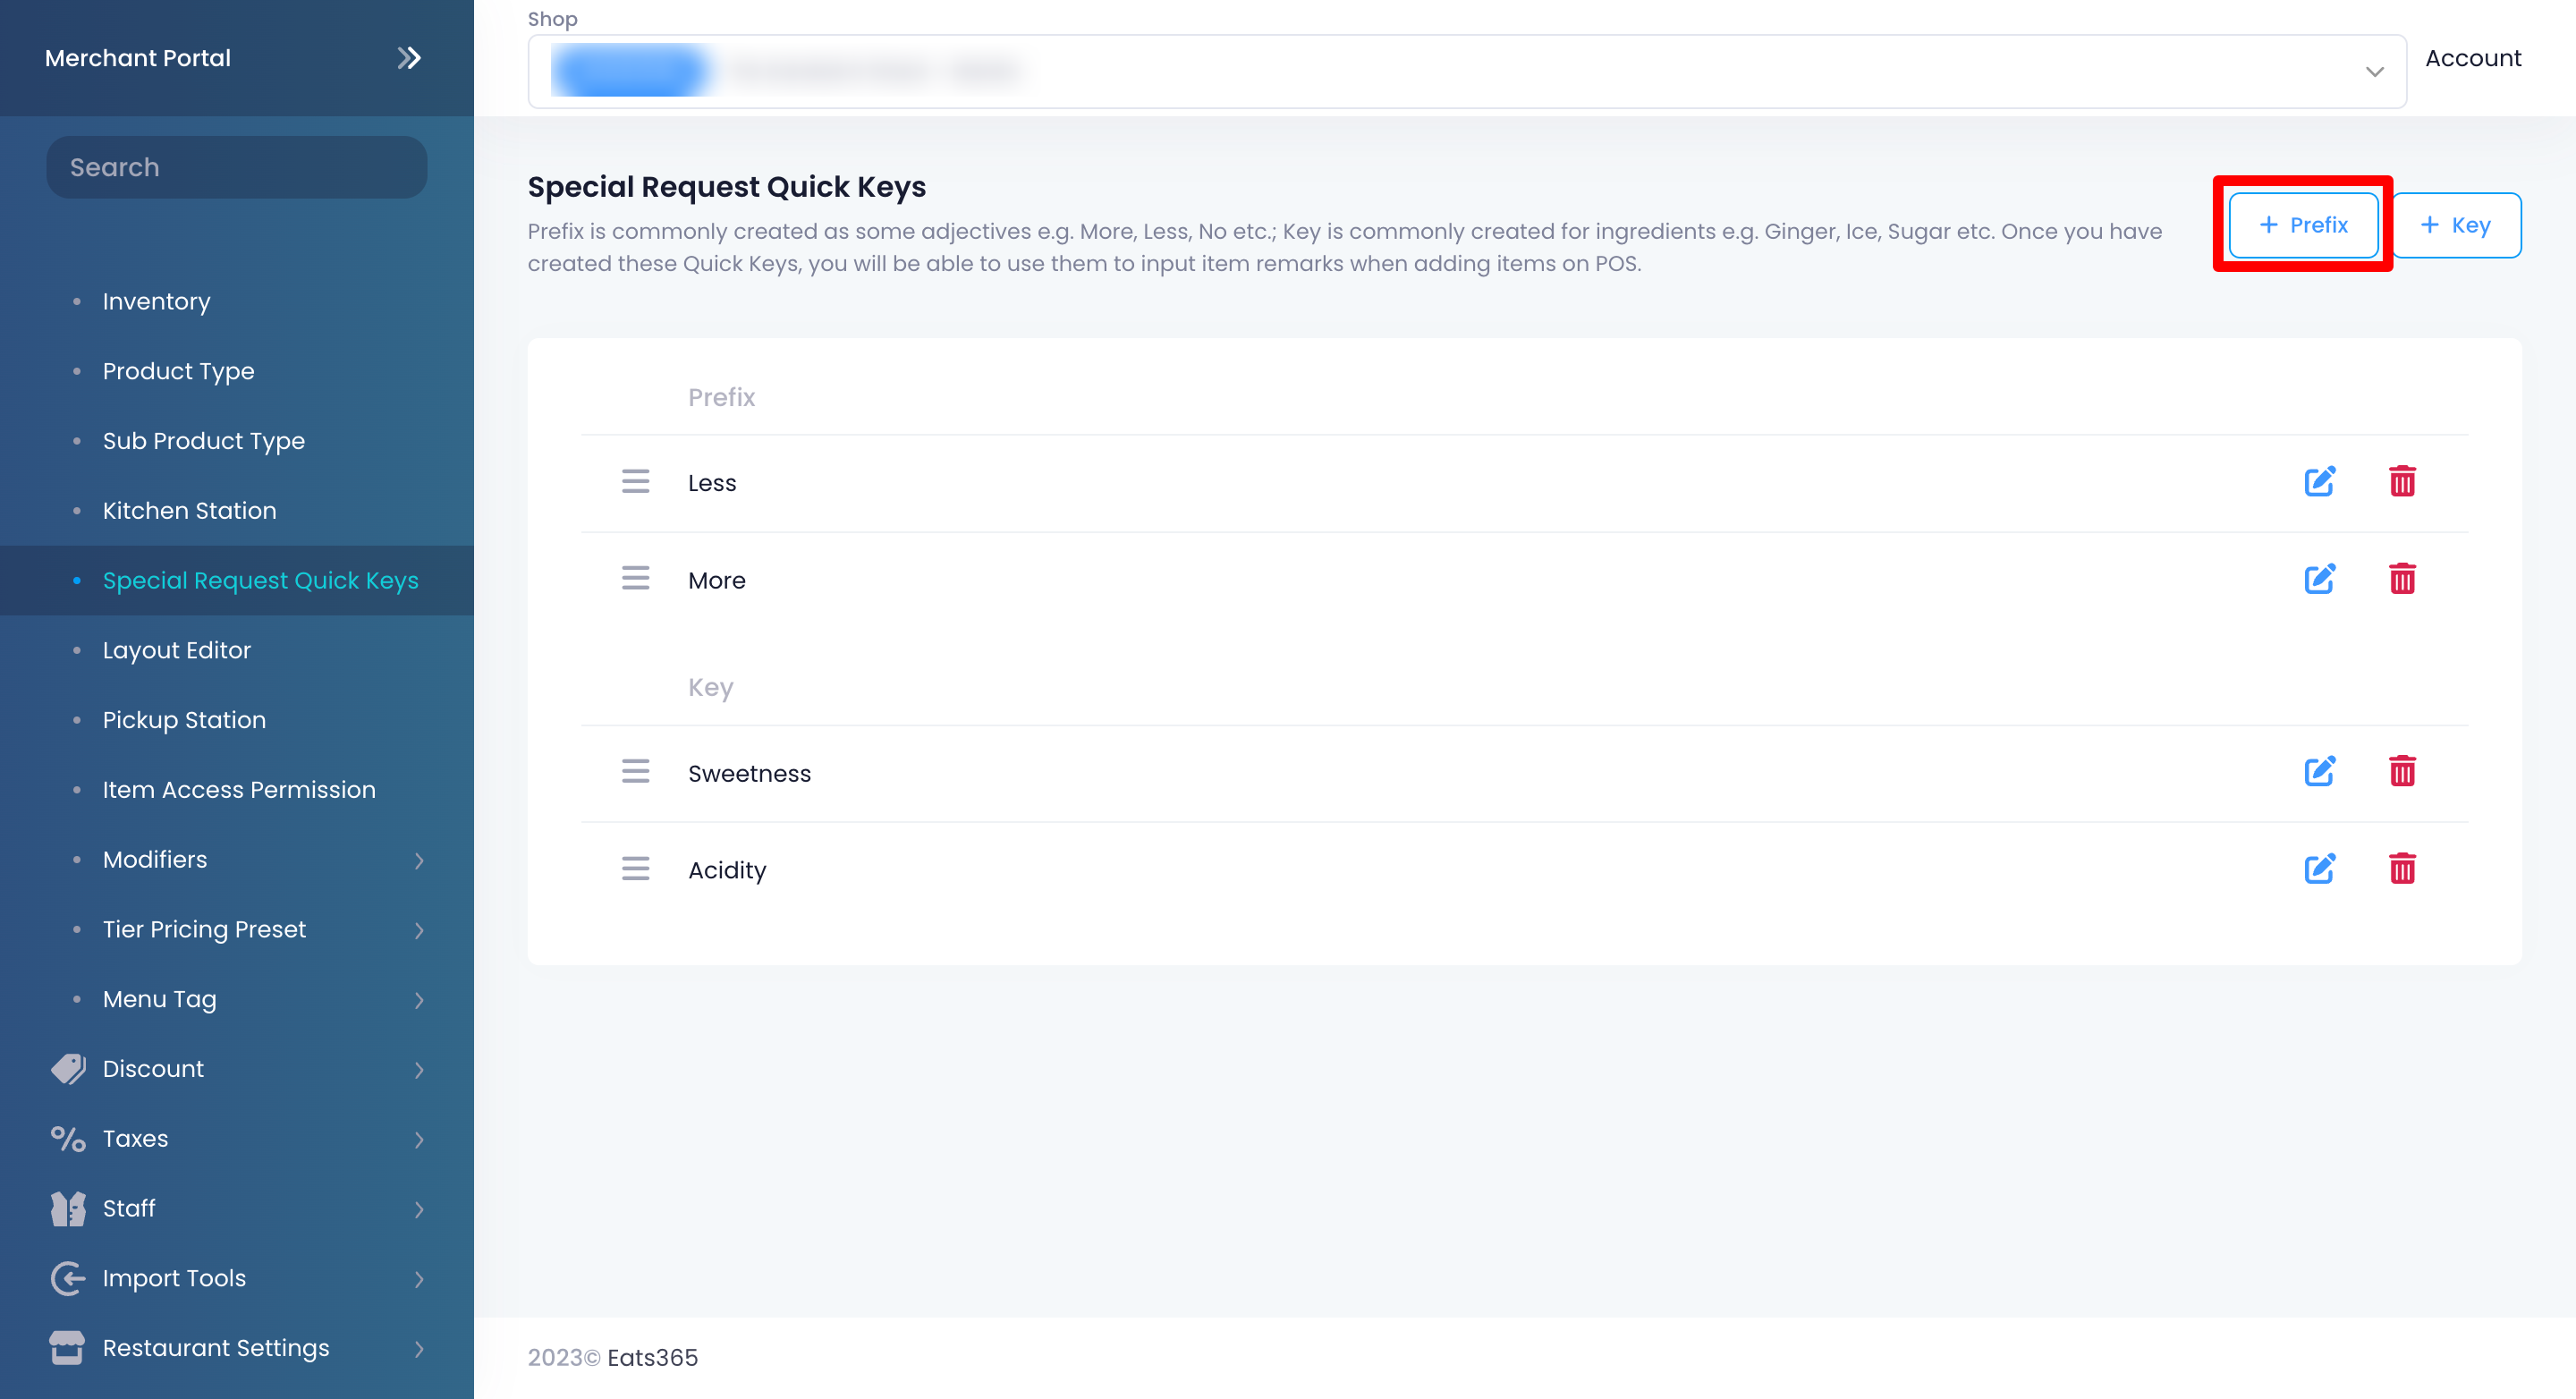
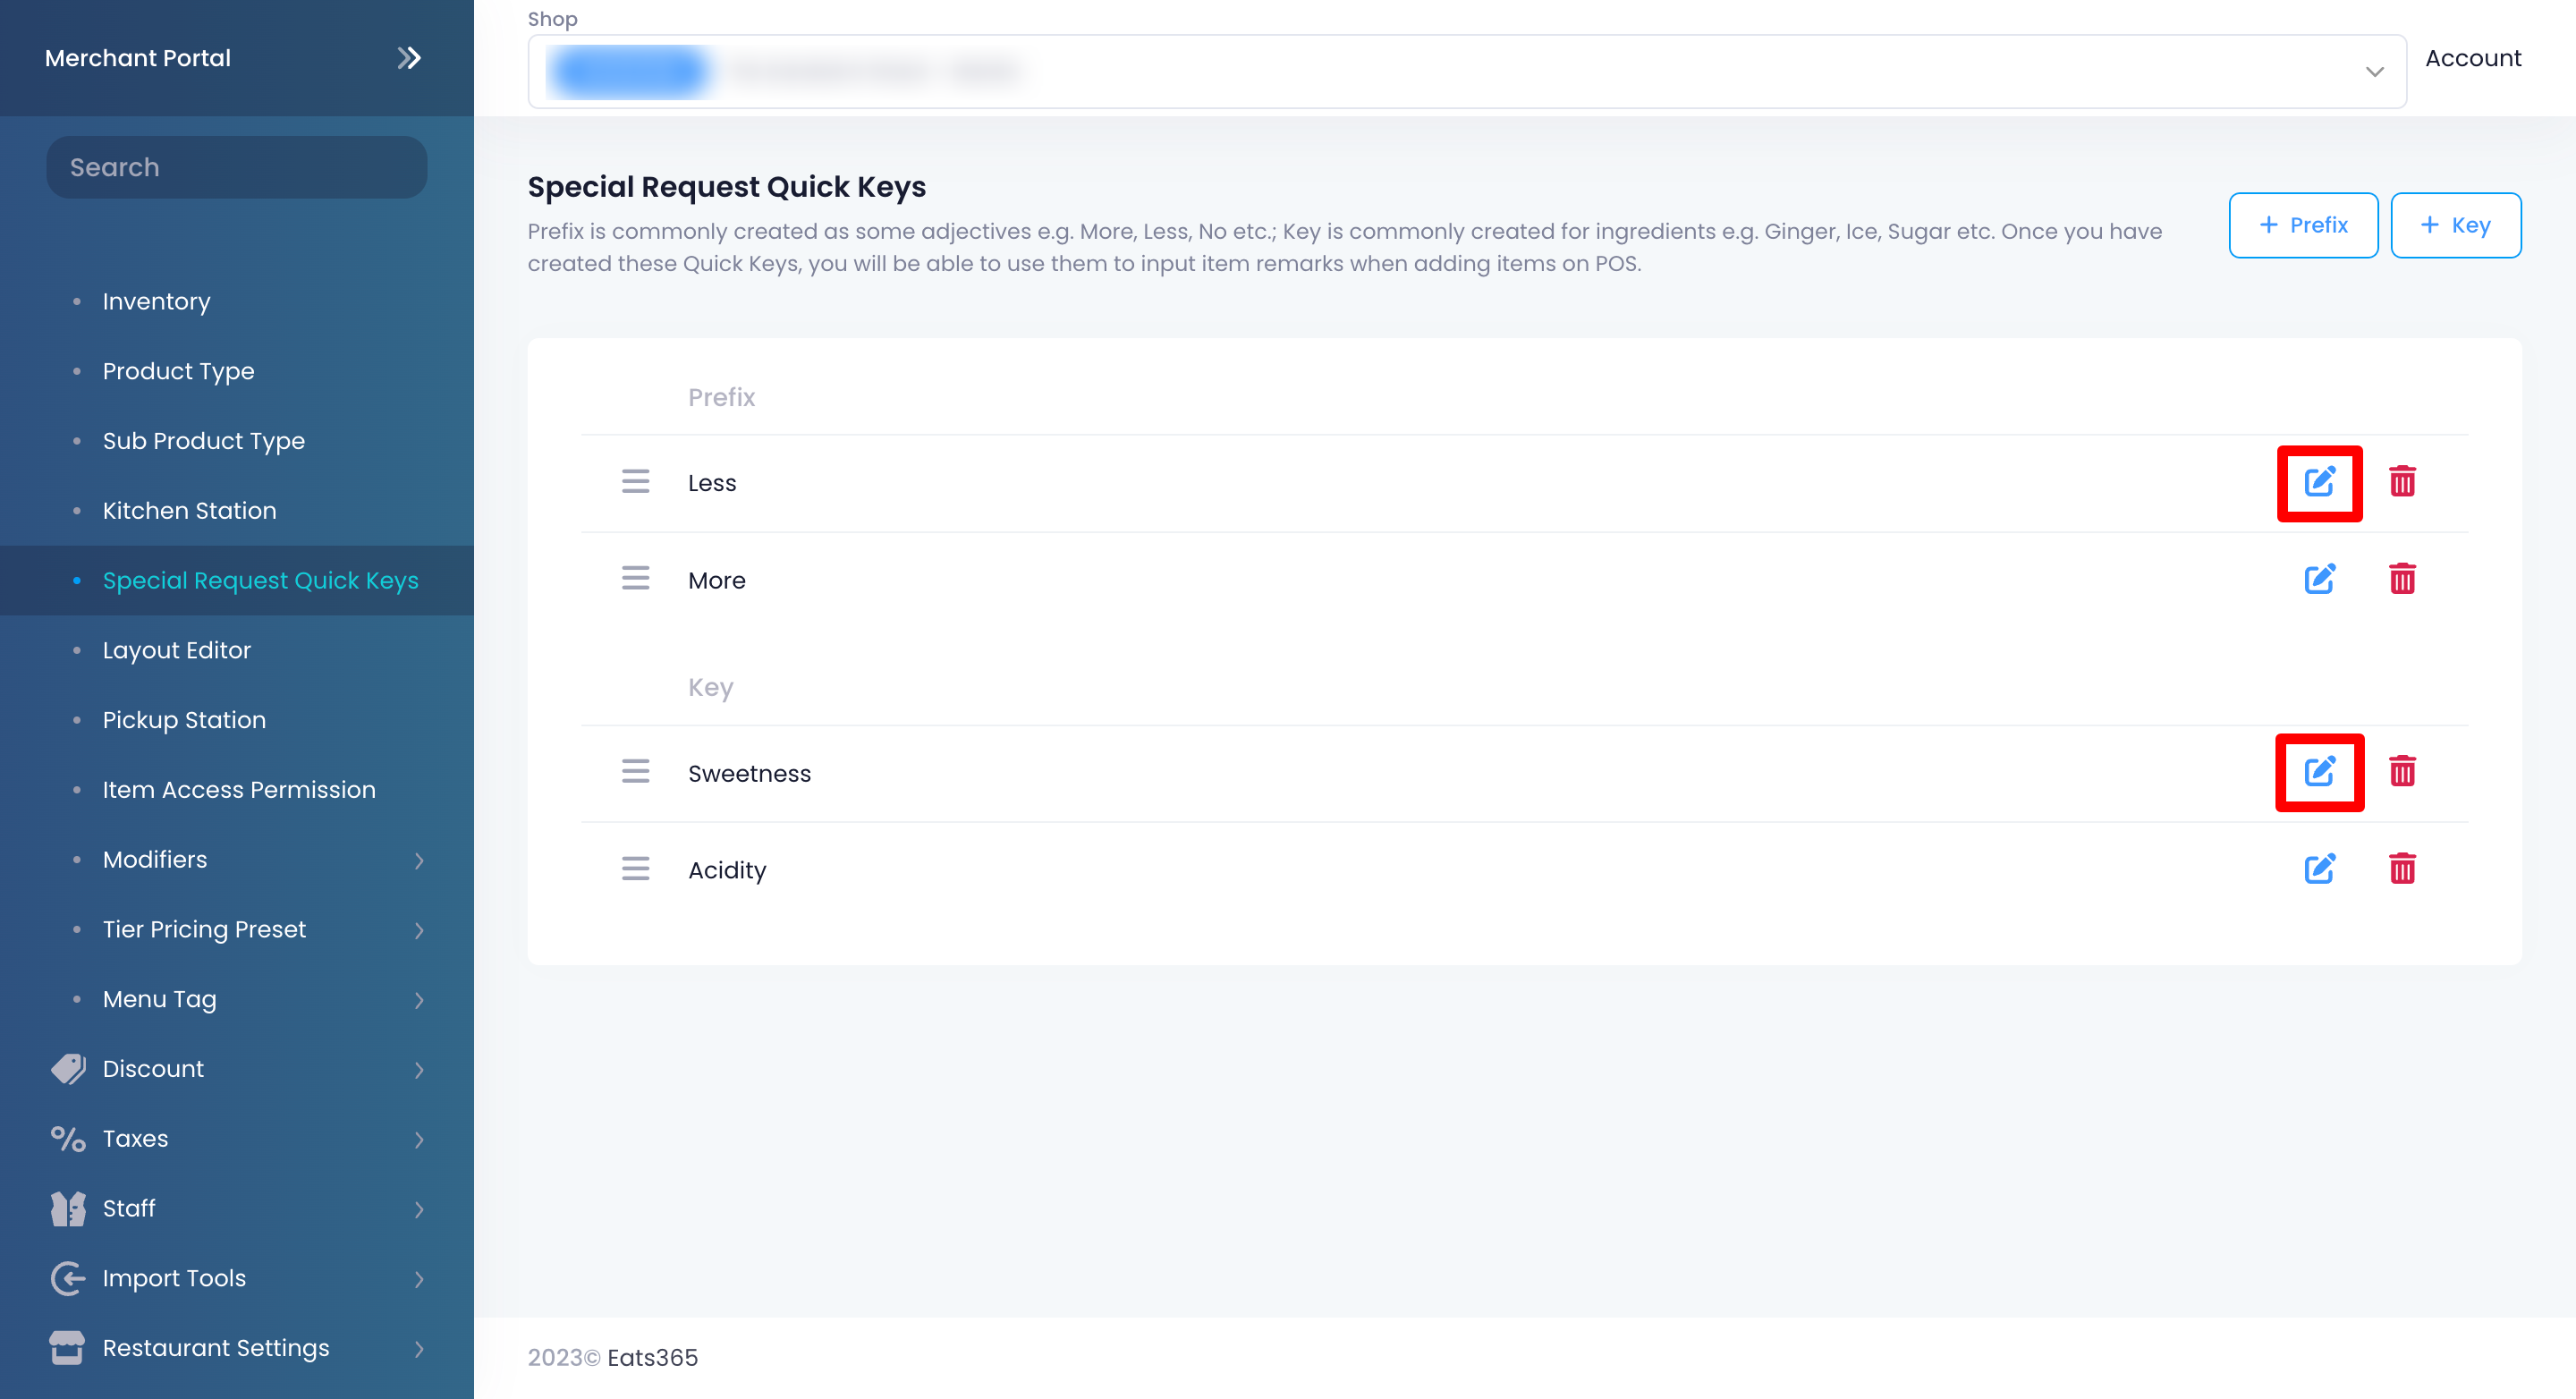
- On the left panel, click on Menu Setup, then select Special Request Quick Keys.
- At the top right, click +Prefix.
- Next to Prefix, enter the Prefix that you’d like to appear on the POS.
Tip: When a Prefix is combined with a Key, there won’t be any spaces in between the two keywords. If you want to have a space in between the two words, add a space after the Prefix.Sample receipt without spaces Sample receipt with spaces - Choose the category where you’d like the Prefix to appear. Allow each category or toggle Allow All
 . If you’d like the Prefix to also apply to custom items, turn on Apply to Custom Items .
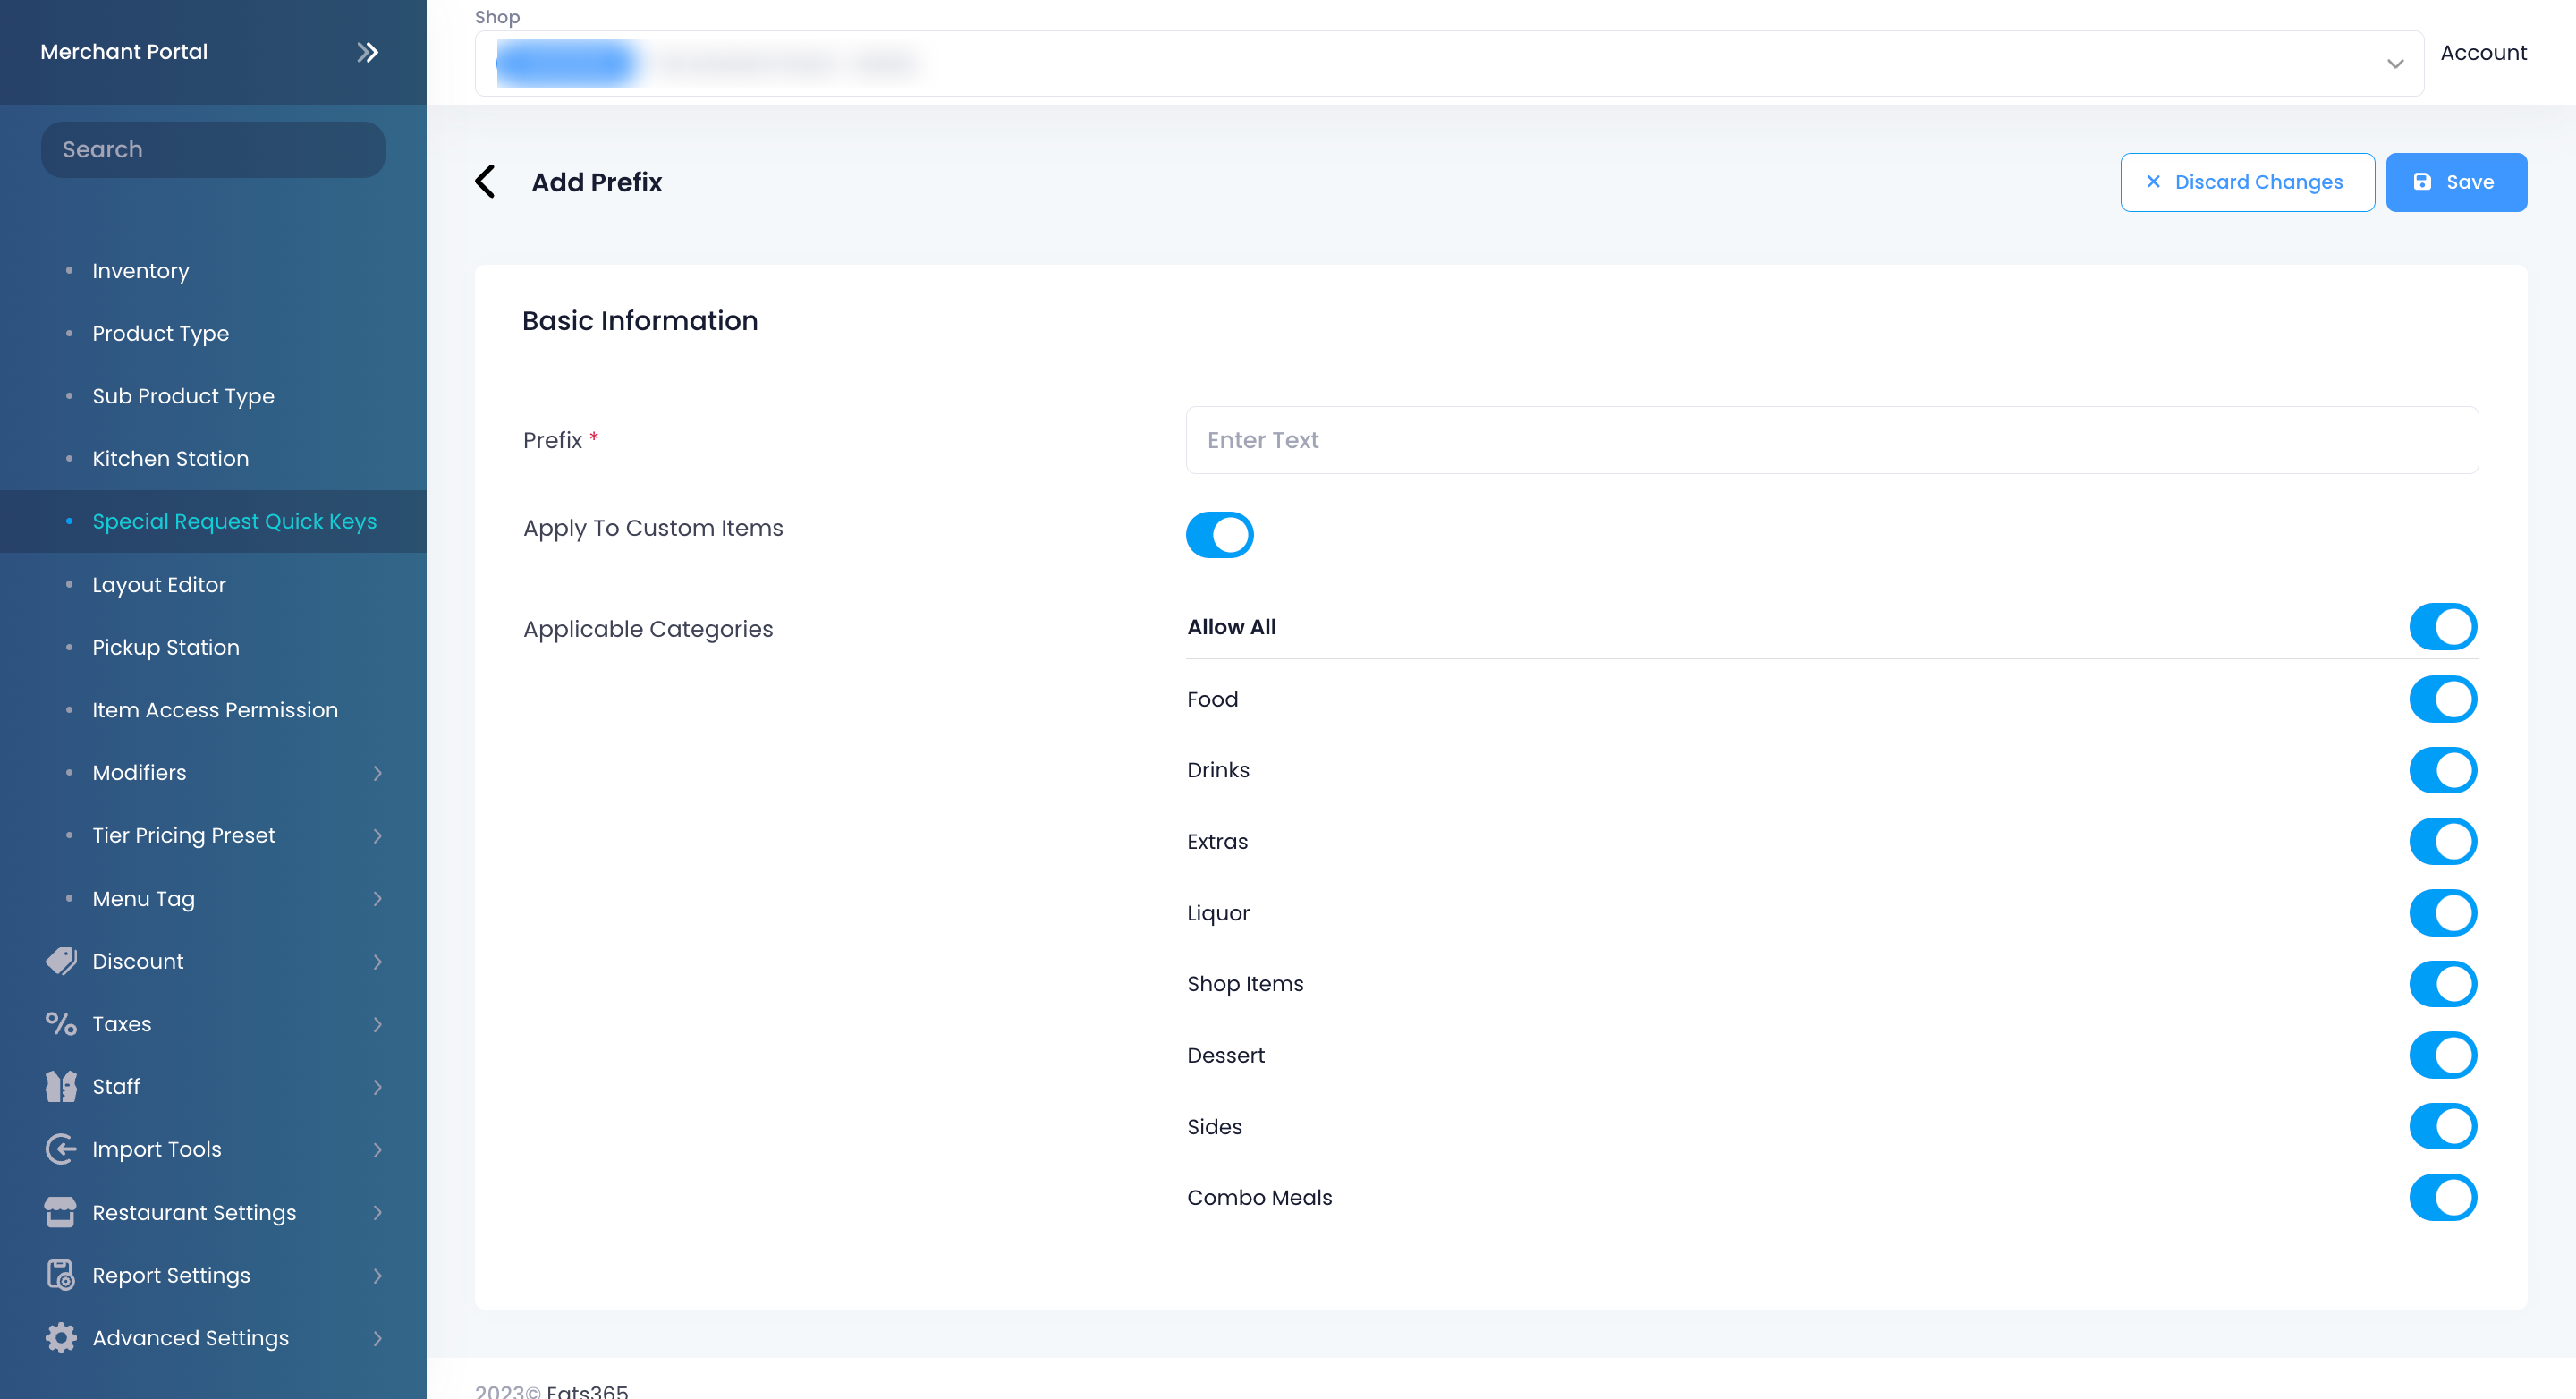
- At the top right, click on Add to confirm.
Add a Key
Examples of commonly used Keys:
- Ice
- Sweetness
To add a Key, follow the steps below:
Eats365 POS
- Log in to the Eats365 POS.
- At the top left, tap Settings .
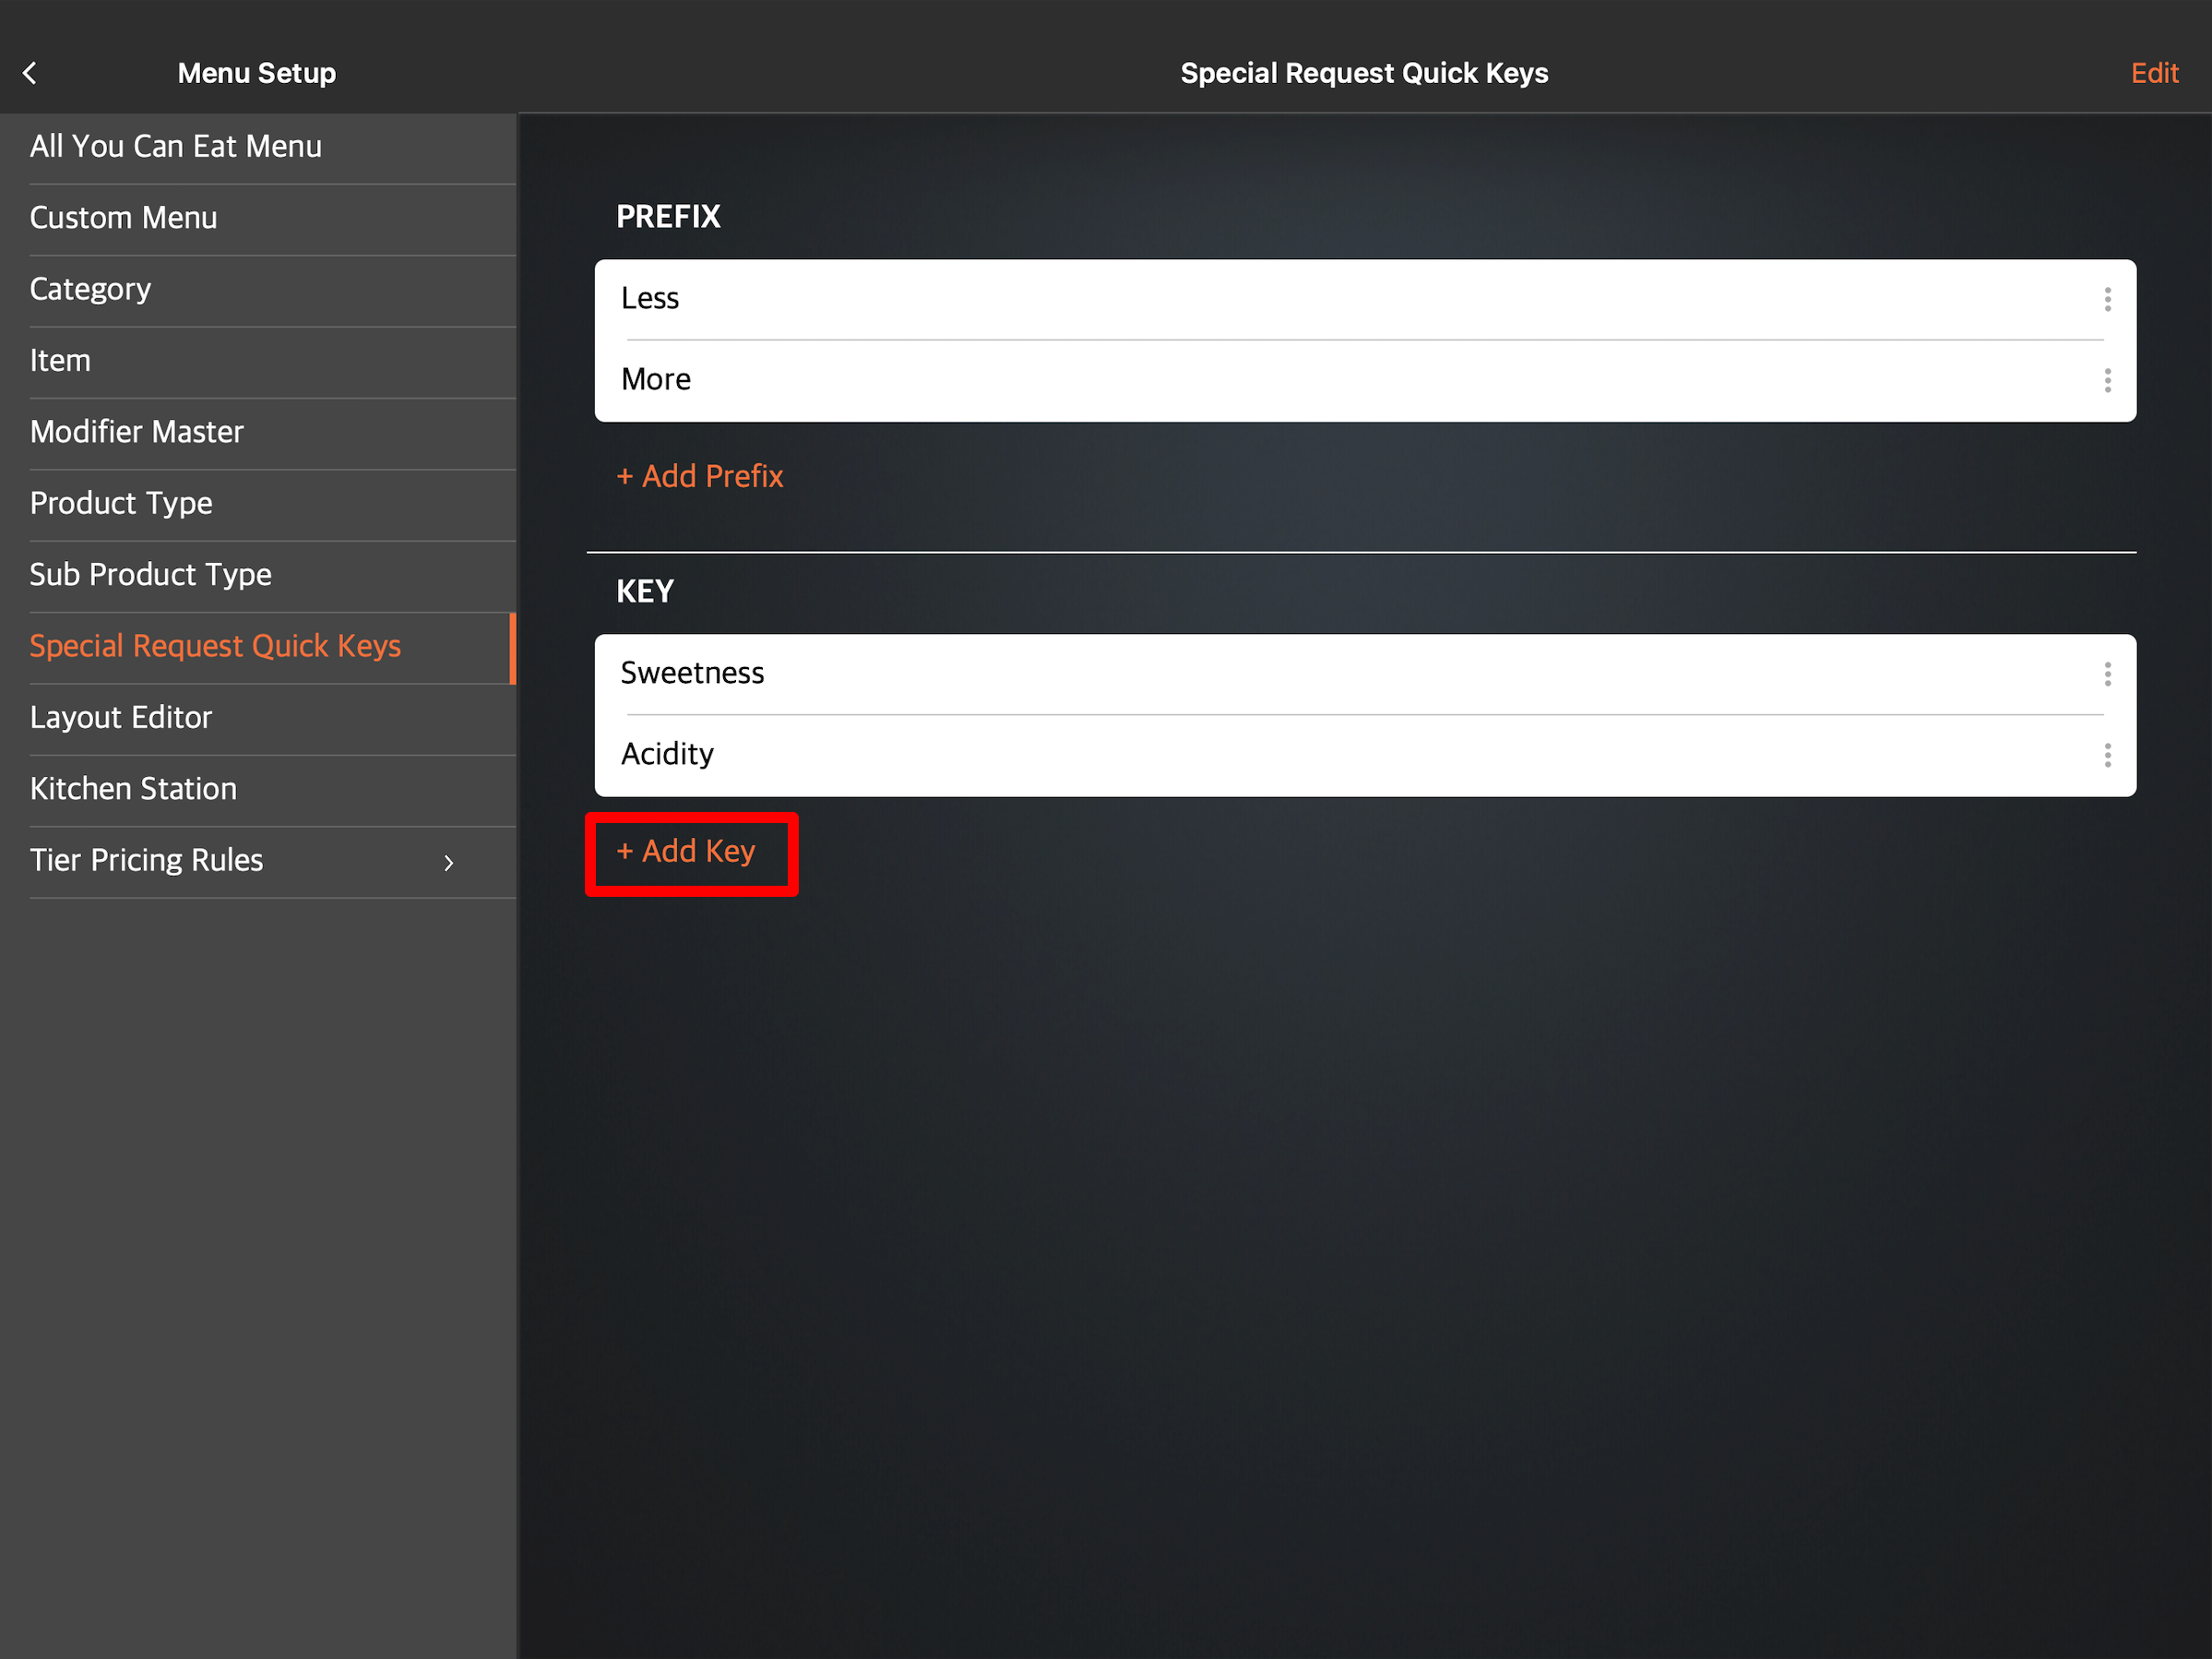
- Under General, tap Menu Setup, and then select Special Request Quick Keys.
- Tap Add Key.
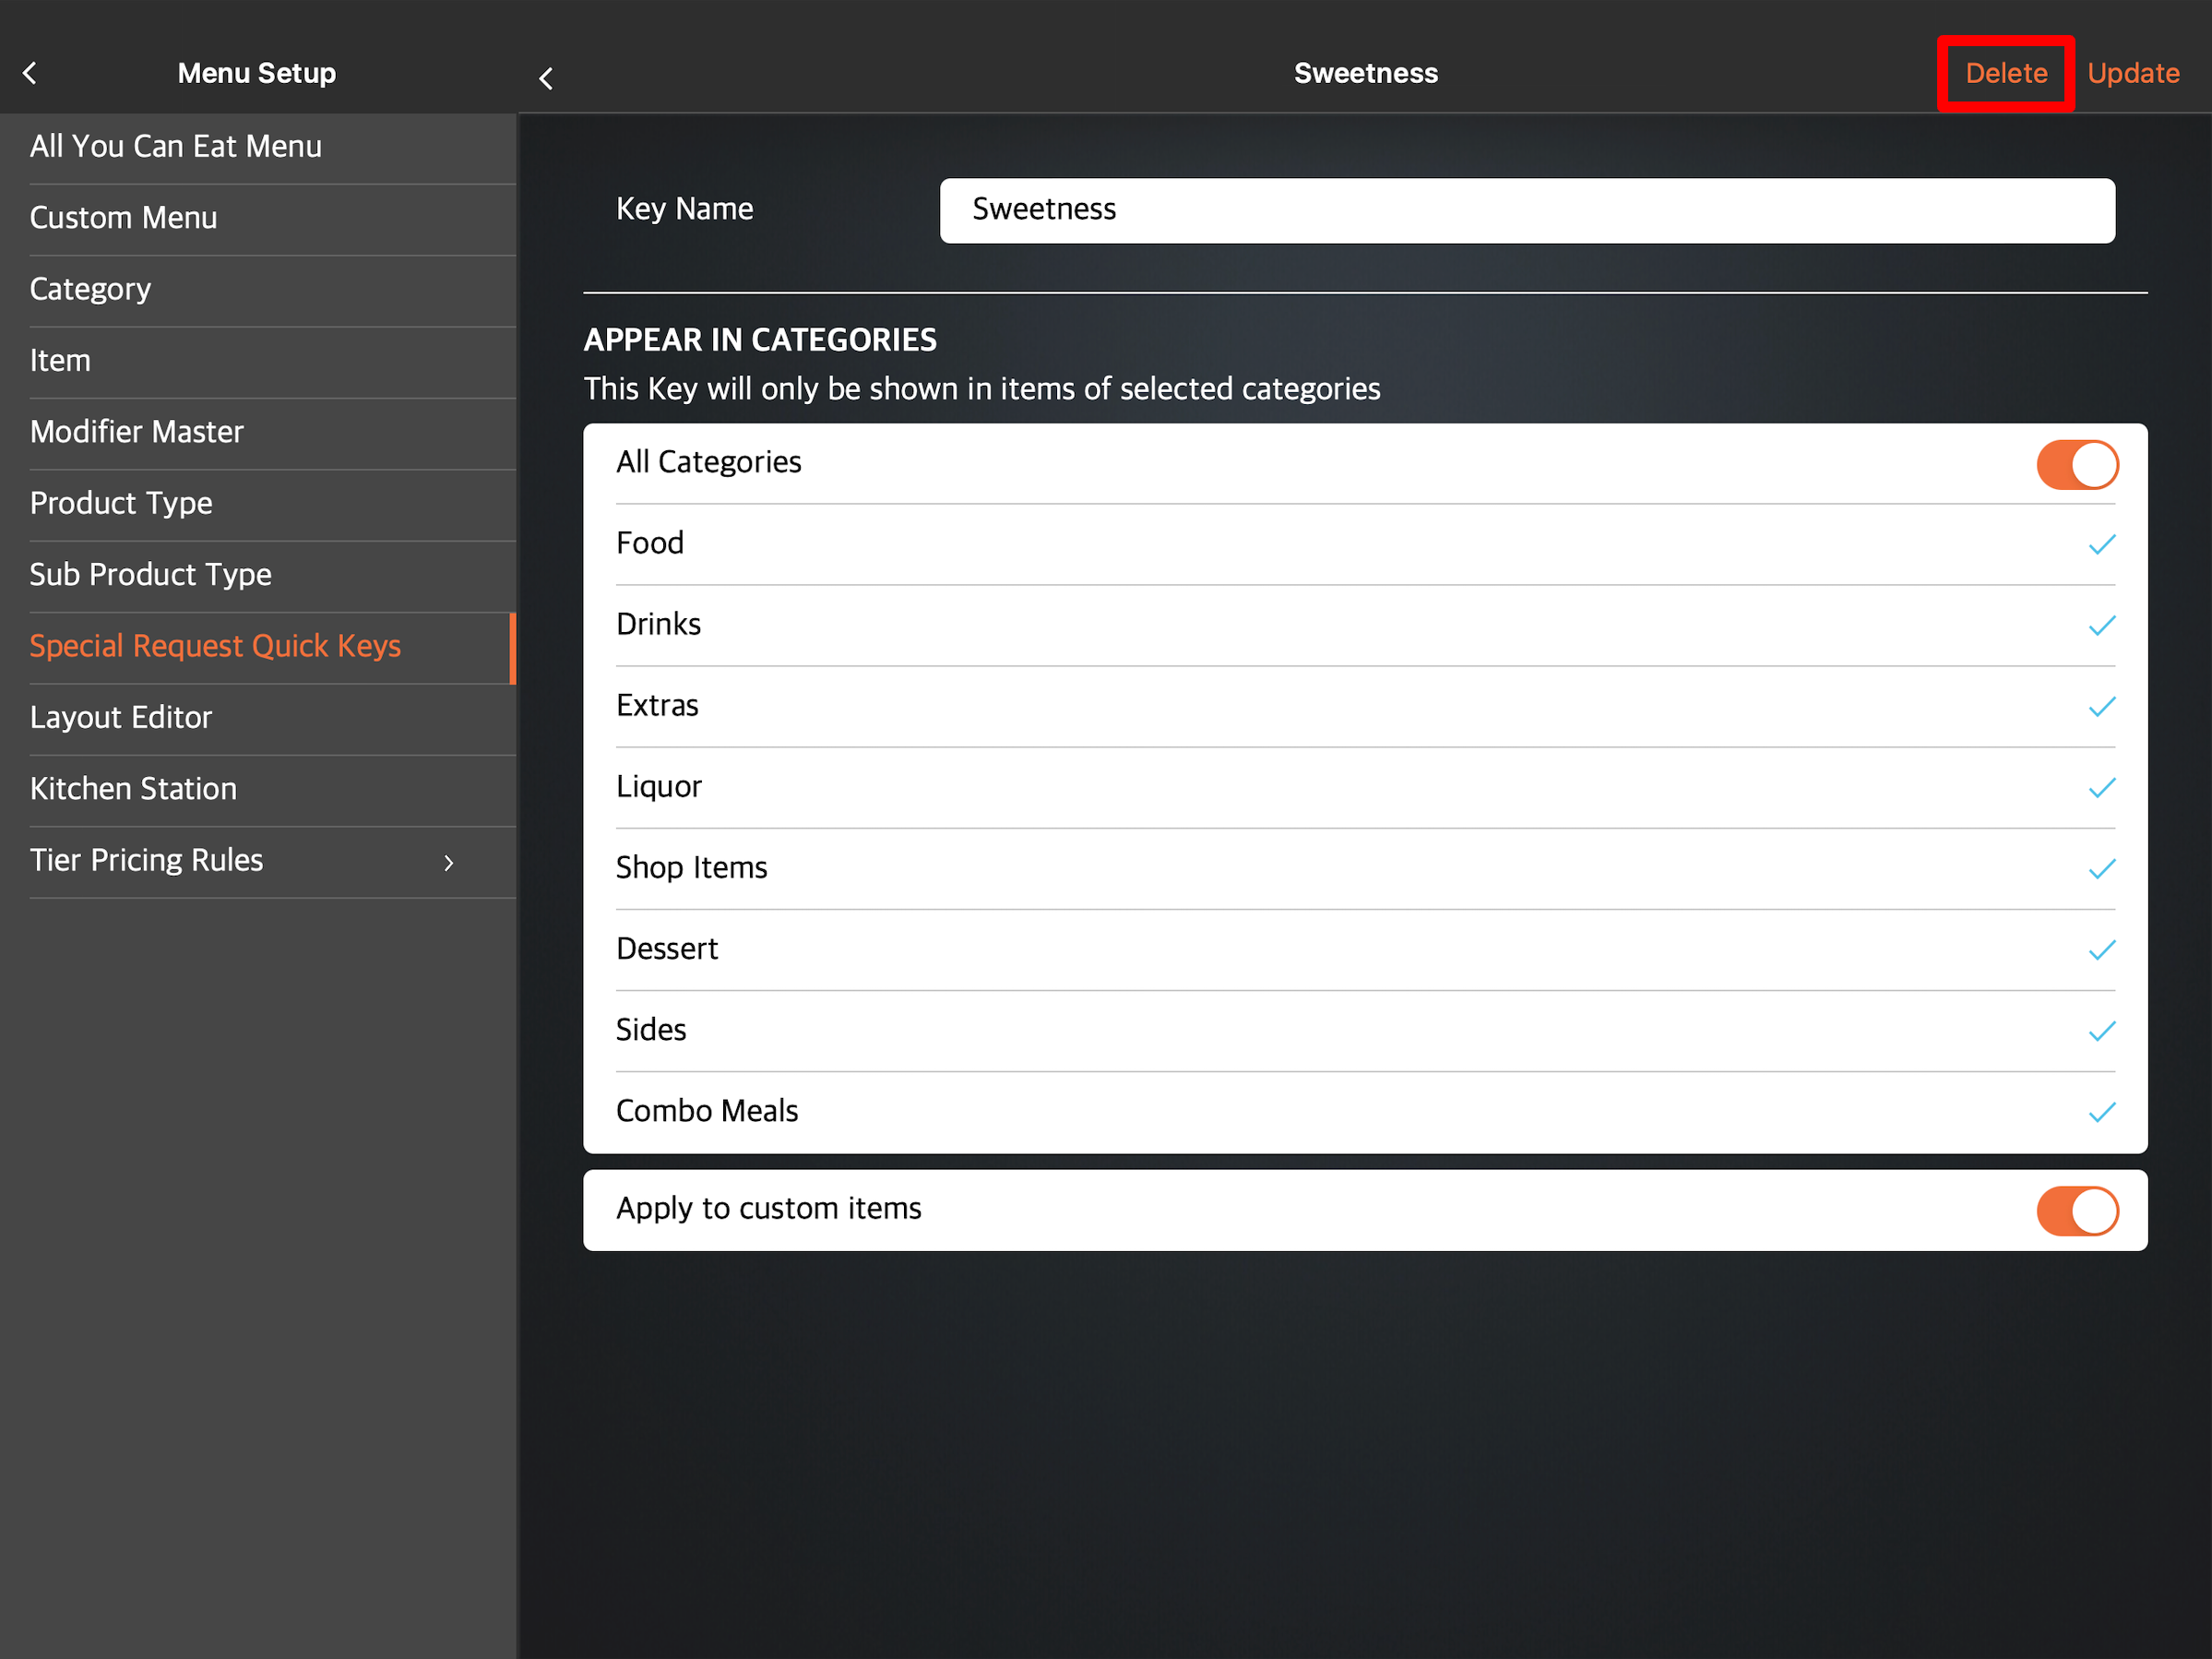
- Next to Key Name, enter the Key that you’d like to appear on the POS.
- Choose the category where you’d like the Key to appear. Tap each category or select All Categories . If you’d like the Key to also apply to custom items, turn on Apply to custom items .
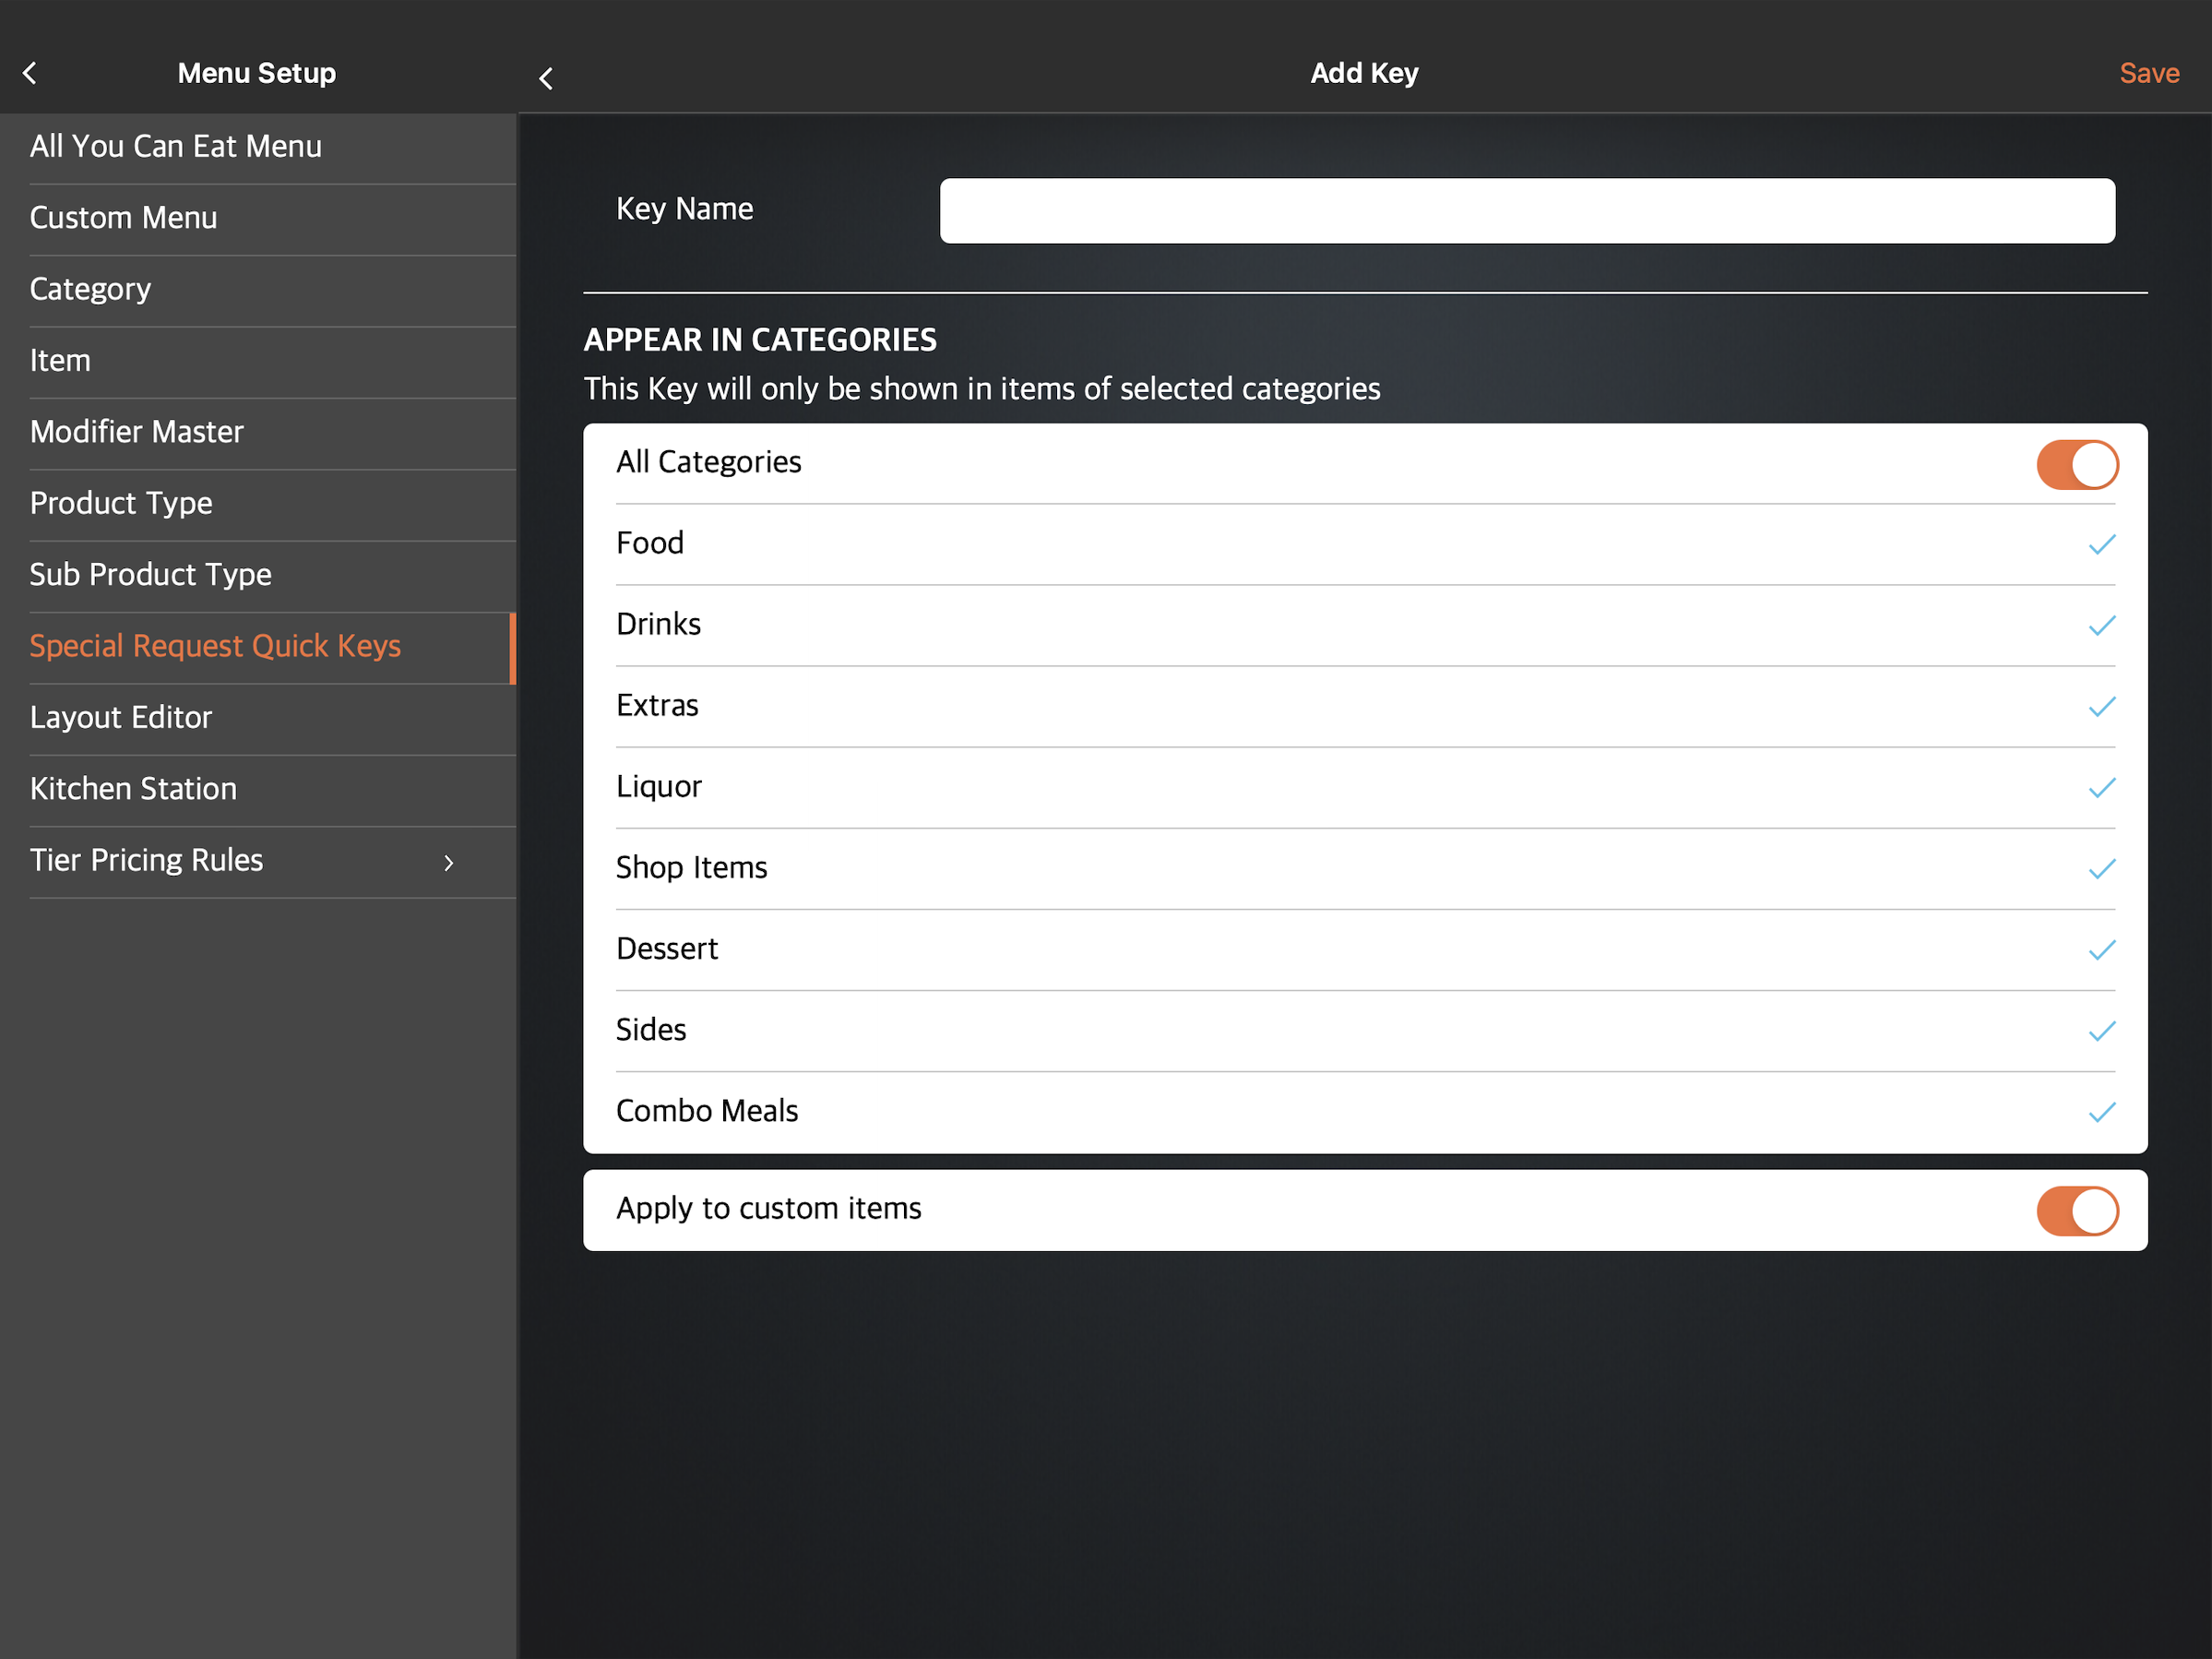
- At the top right, tap Save to confirm.
Merchant Portal (Classic Theme)
- Log in to the Merchant Portal.
- On the left panel, click on Menu Setup, then select Special Request Quick Keys.
- At the top right, click on +Key.
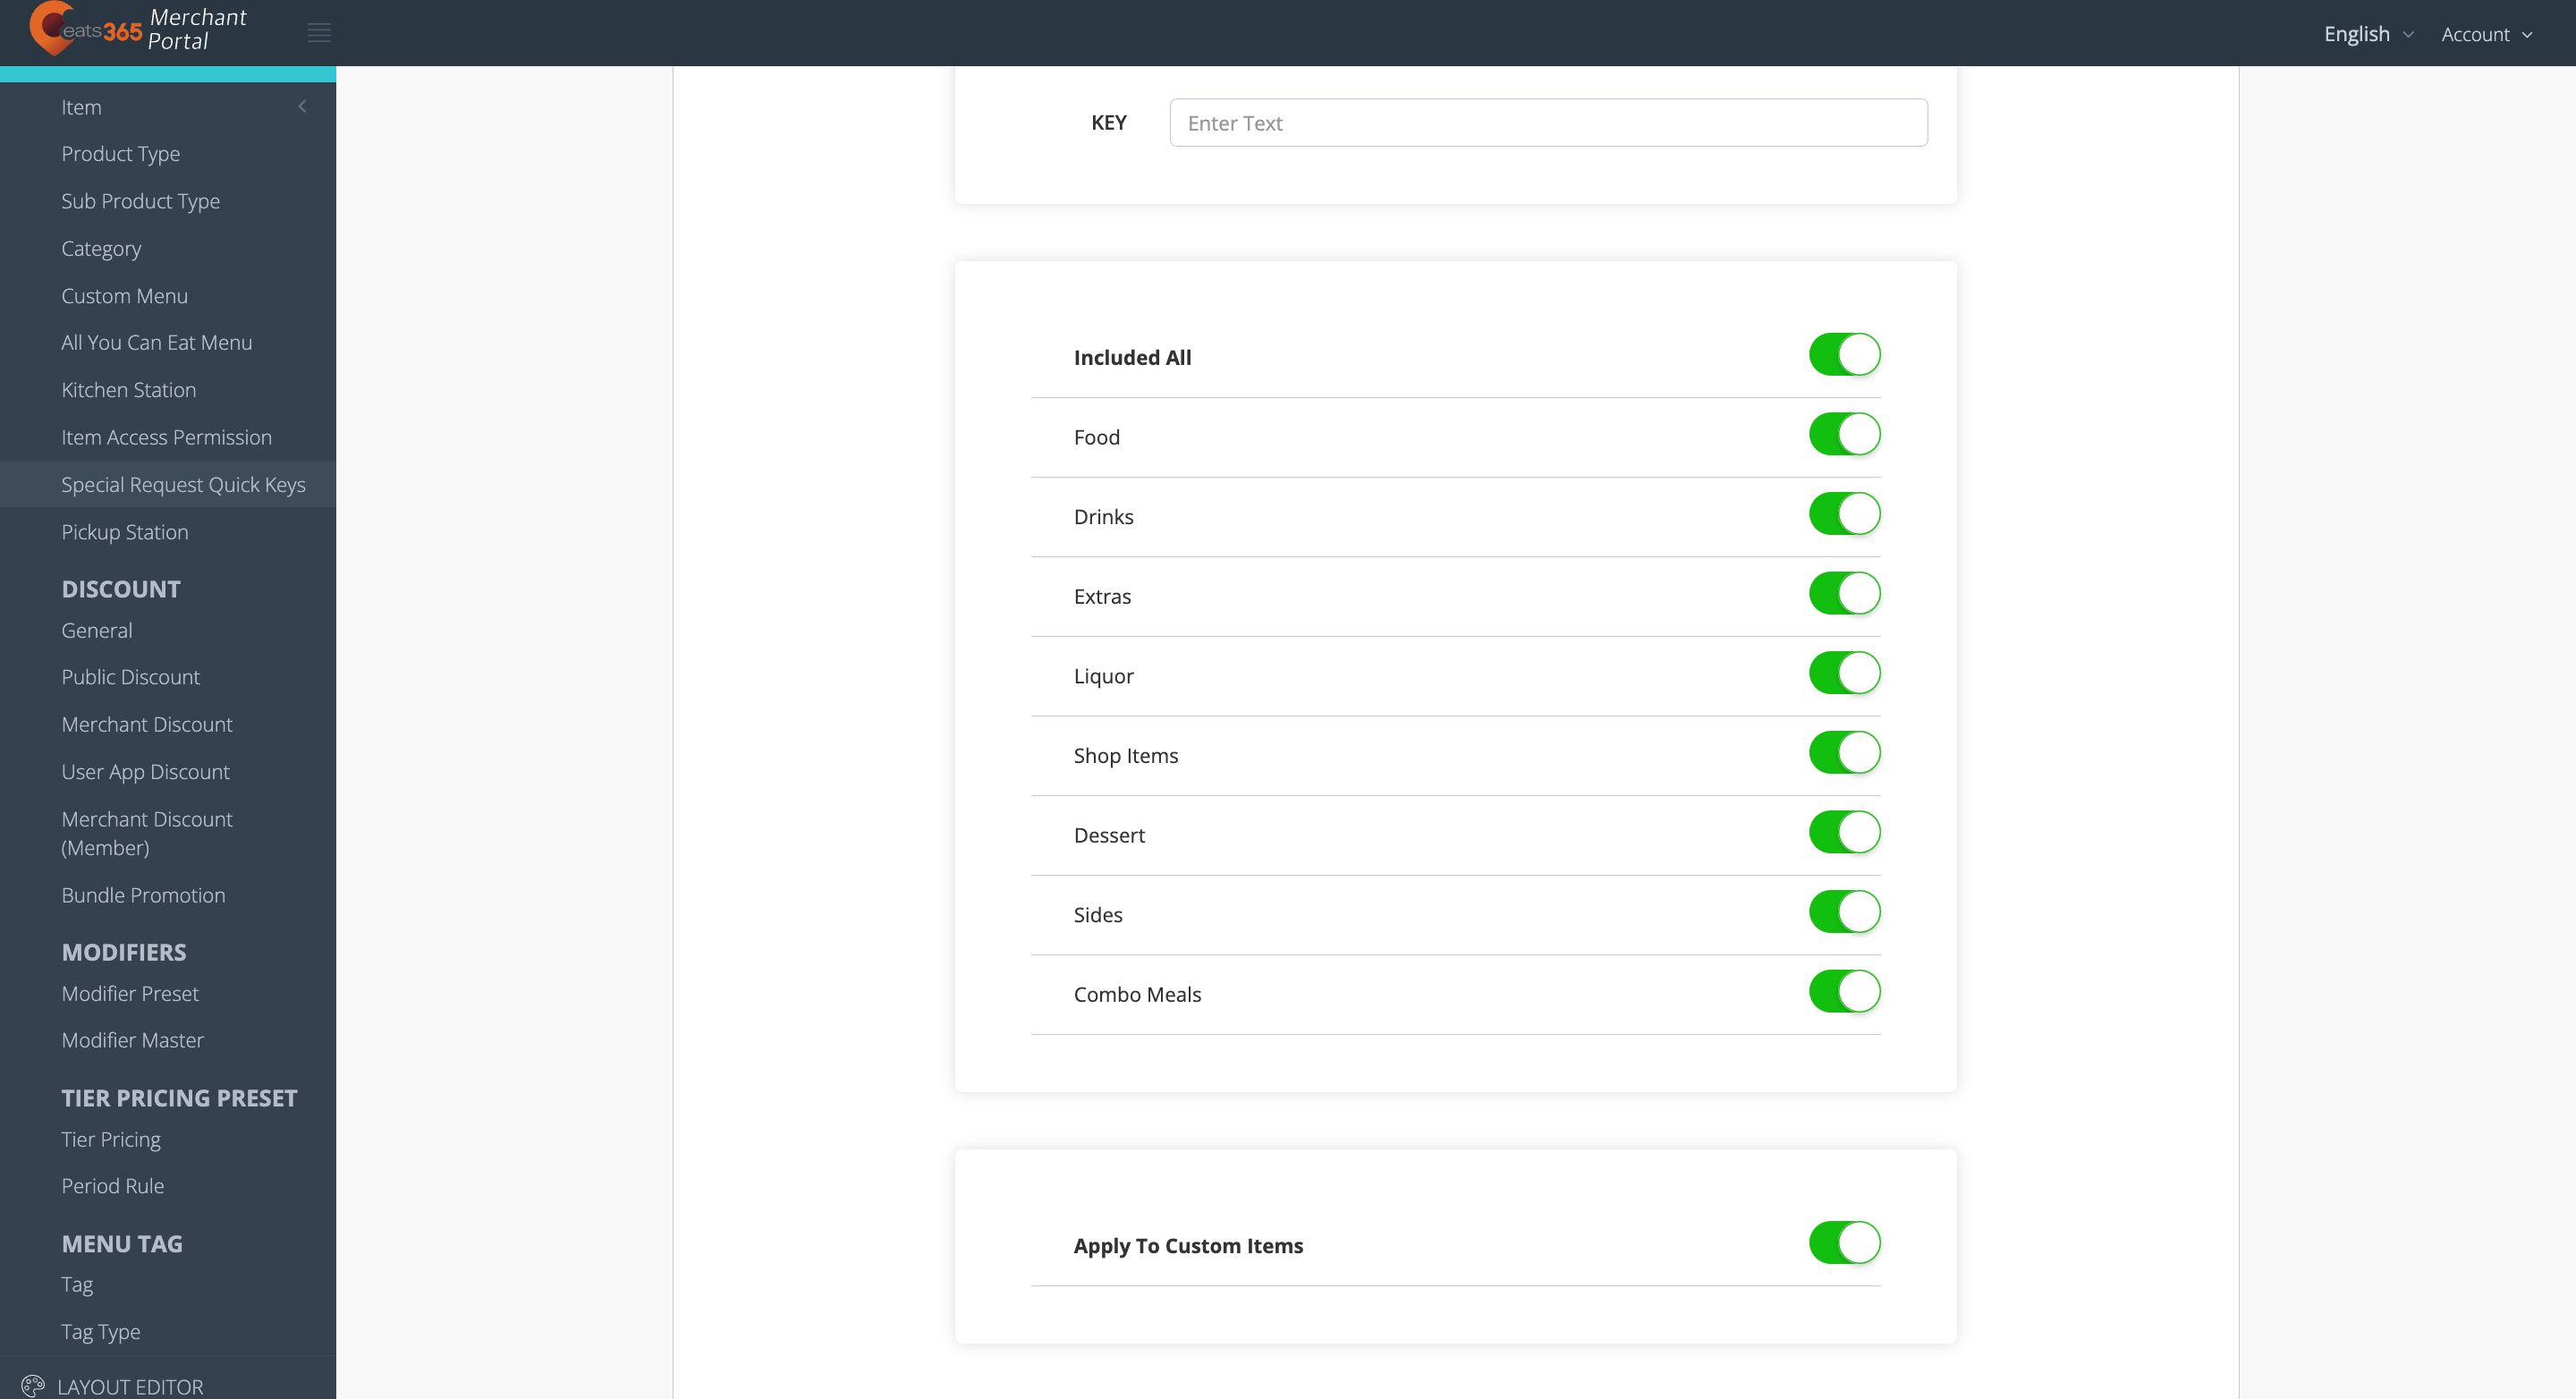
- Next to Key, enter the Key that you’d like to appear on the POS.
- Choose the category where you’d like the Key to appear. Click on each category or toggle Included All . If you’d like the Key to also apply to custom items, you can also turn on Apply to Custom Items .
- At the top right, click on Add to confirm.
Merchant Portal 2.0
- Log in to the Merchant Portal.
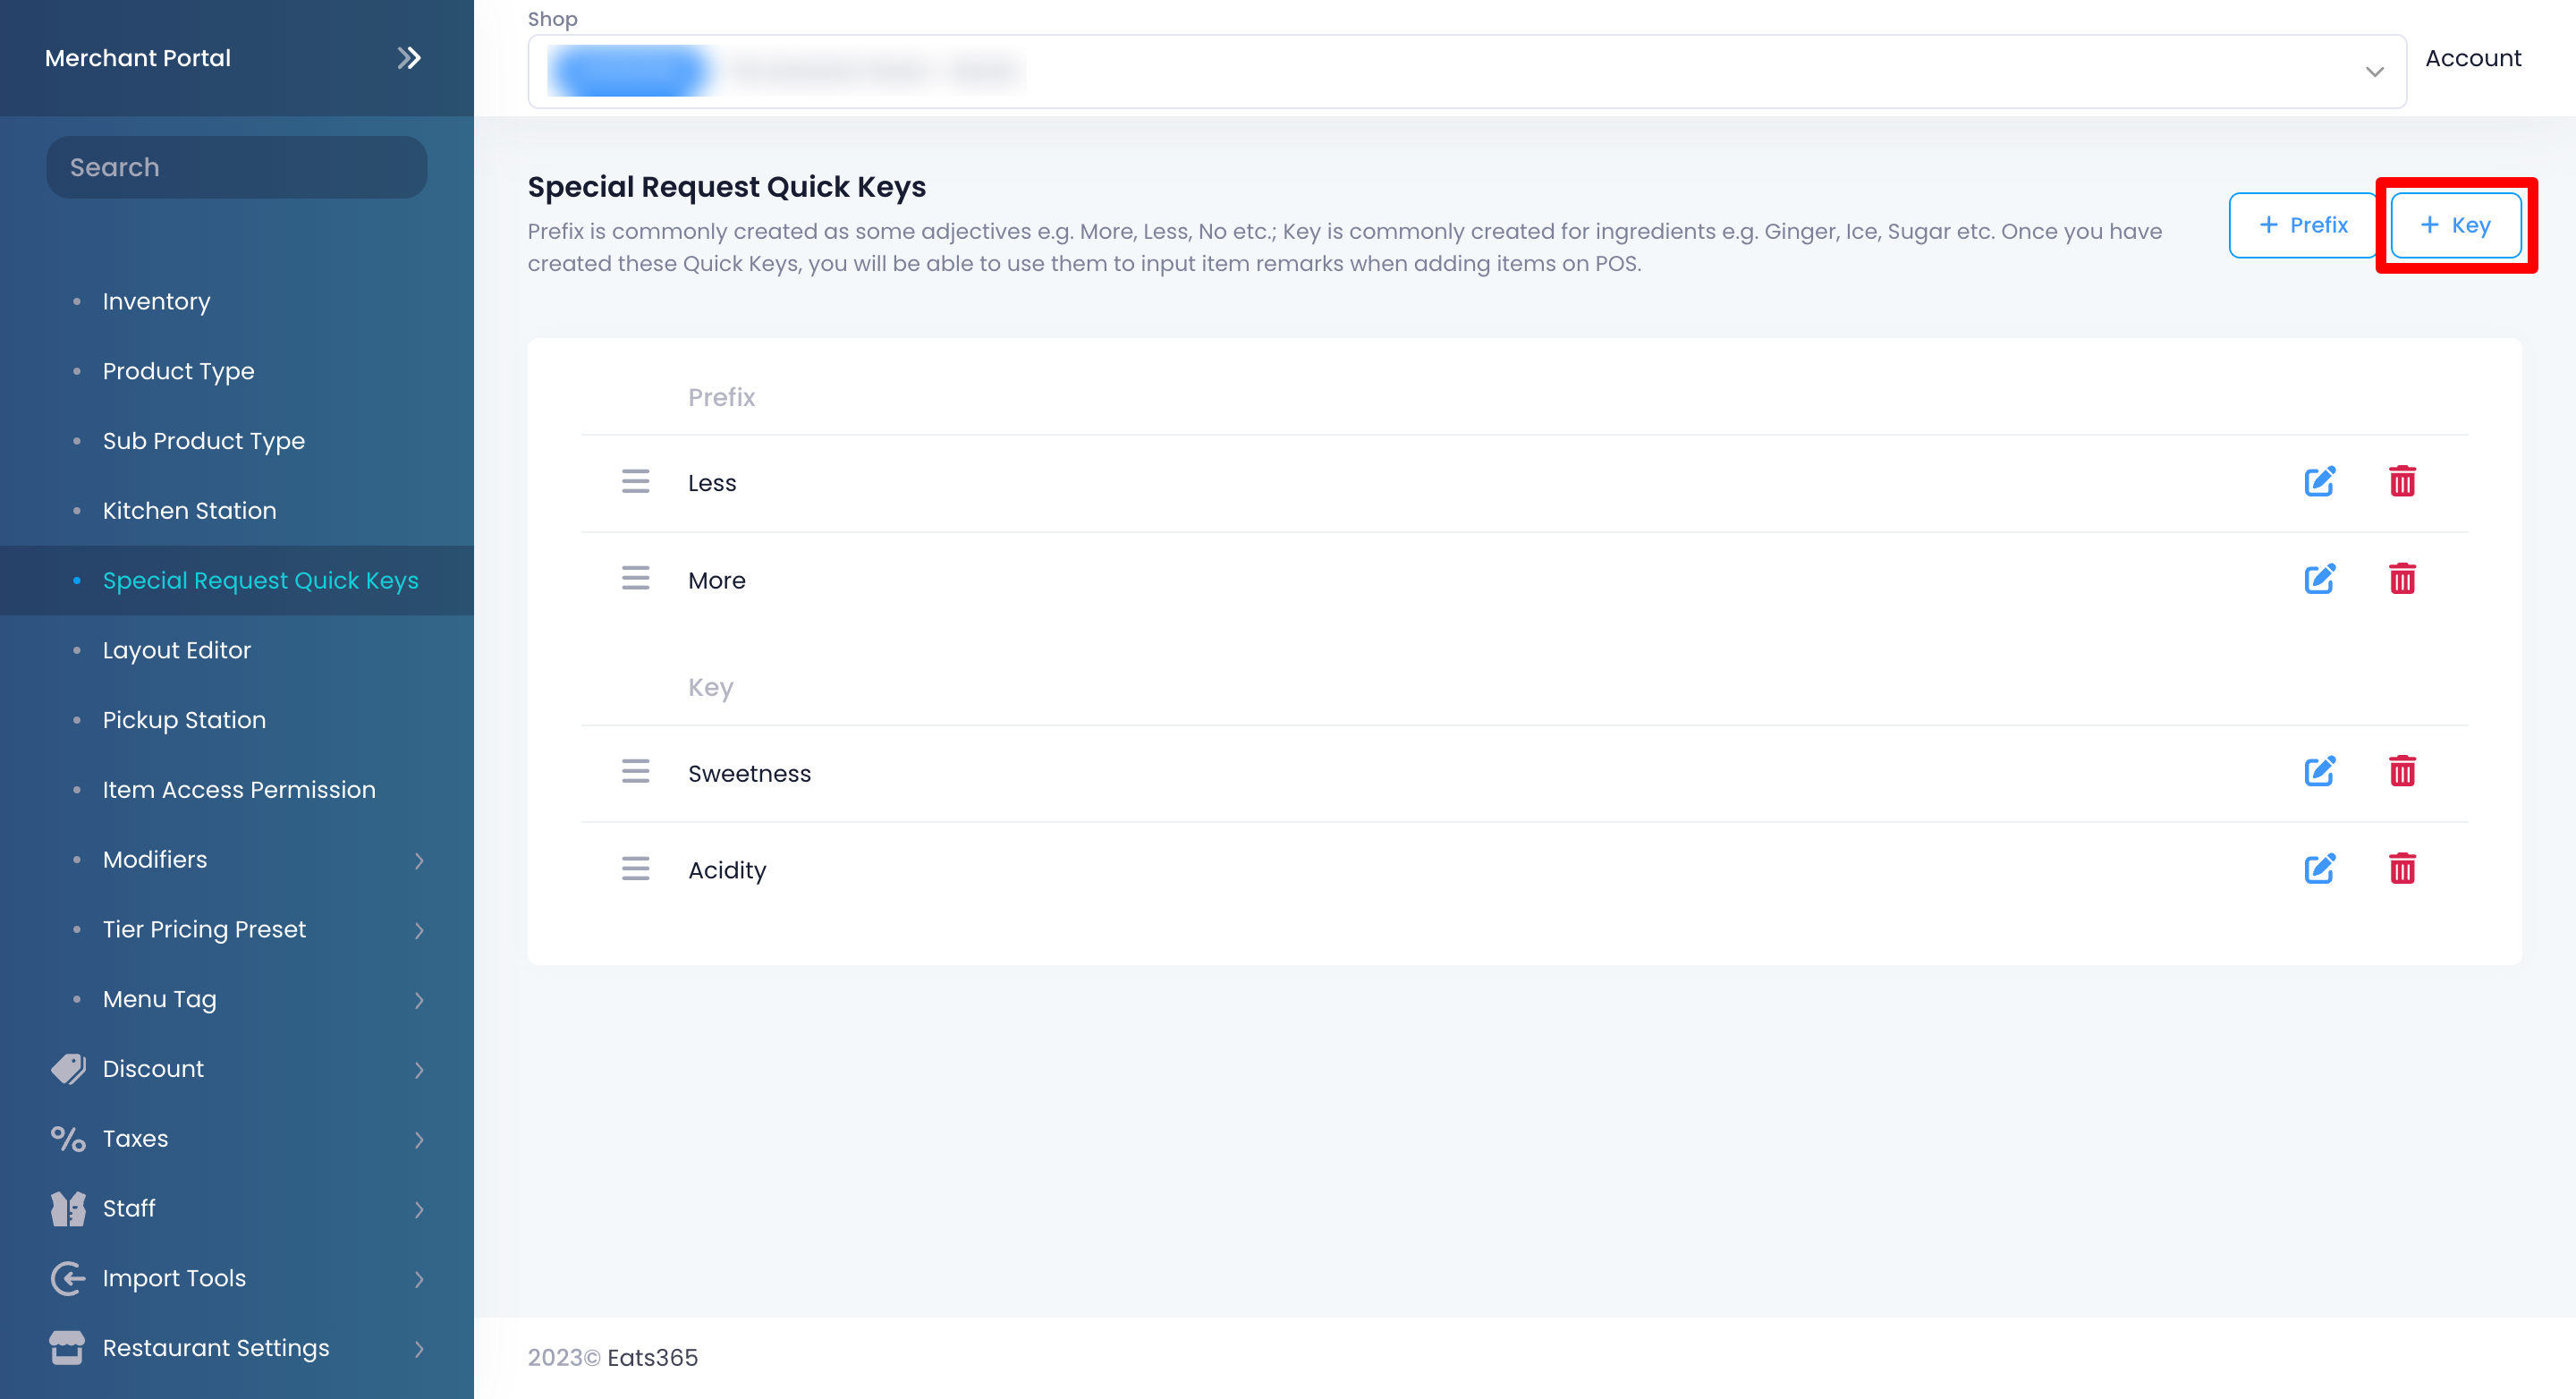
- On the left panel, click on Menu Setup, then select Special Request Quick Keys.
- At the top right, click on +Key.
- Next to Key, enter the Key that you’d like to appear on the POS.
- Choose the category where you’d like the Key to appear. Allow each category or toggle Allow All . If you’d like the Key to also apply to custom items, turn on Apply to Custom Items .

- At the top right, click on Add to confirm.
Manage Special Request Quick Keys
Edit Special Request Quick Keys
To modify a Special Request Quick Key, follow the steps below:
Eats365 POS
- Log in to the Eats365 POS.
- At the top left, tap Settings .
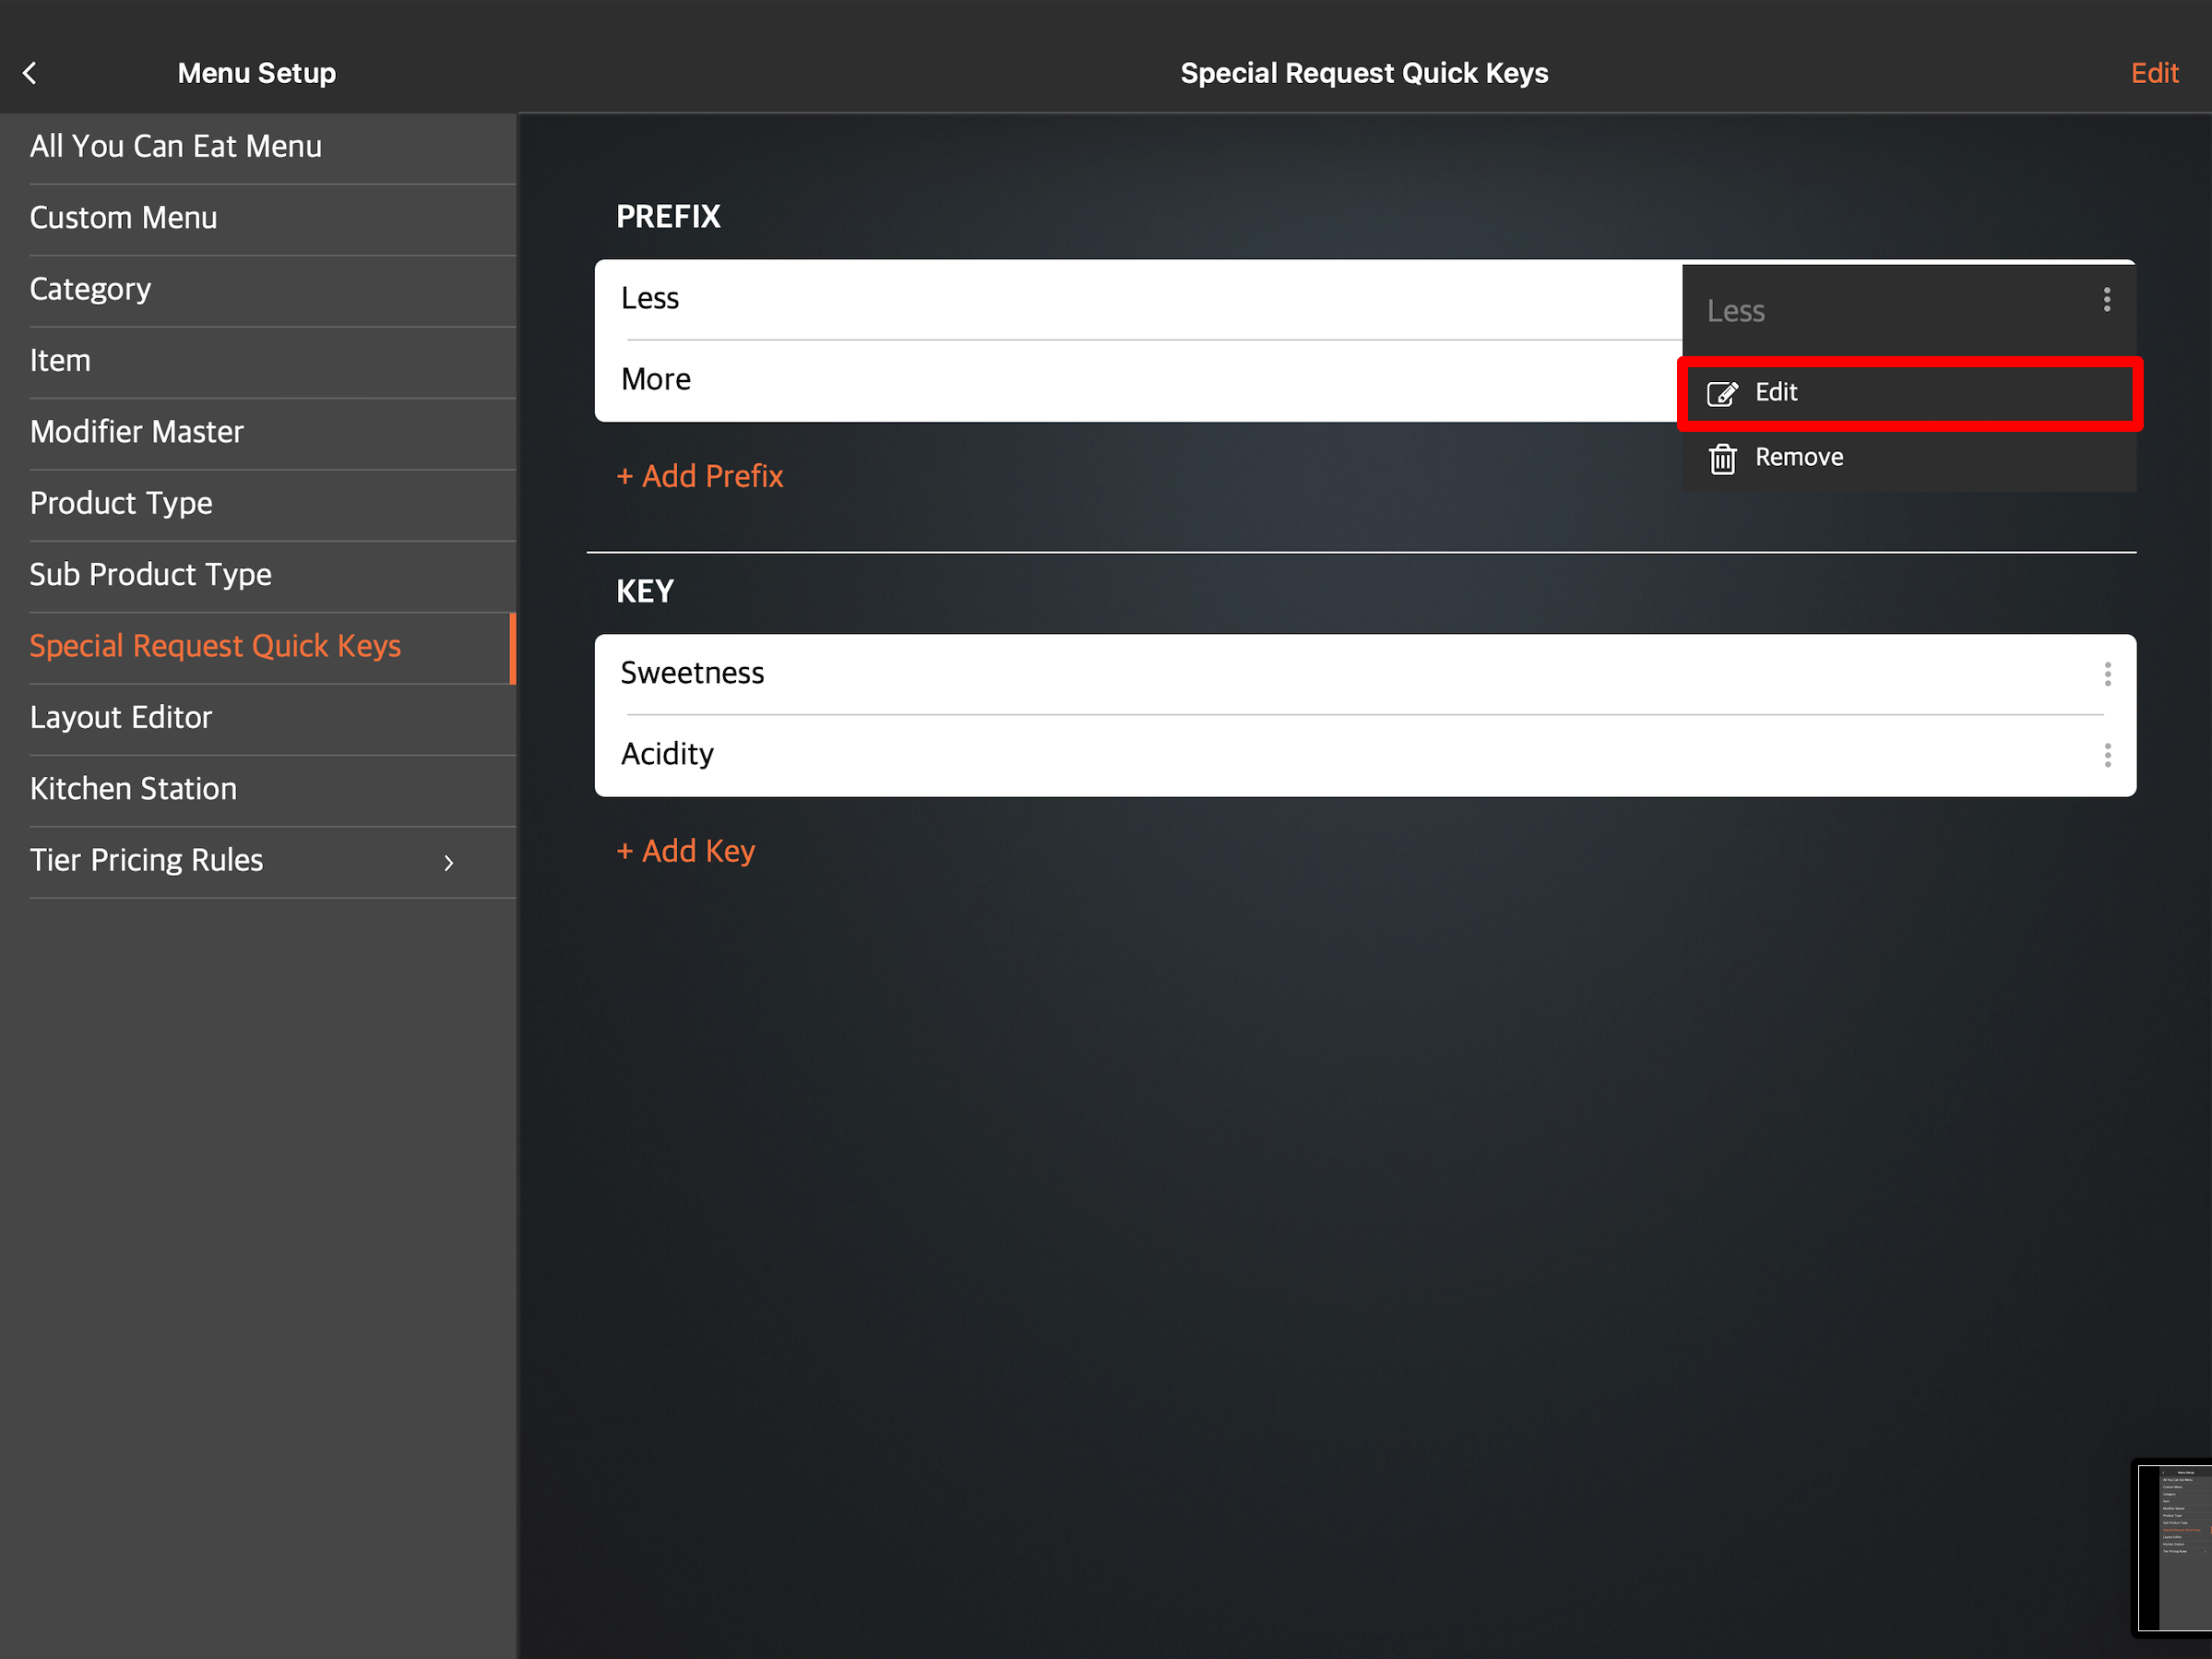
- Under General, tap Menu Setup, and then select Special Request Quick Keys.
- Tap the Prefix or the Key that you want to edit. You can also tap the three-dot menu
 , and then tap Edit
  .
.
- Update the Prefix or the Key to your preferred settings.
- At the top right, tap Update to confirm.
Merchant Portal (Classic Theme)
- Log in to the Merchant Portal.
- On the left panel, click on Menu Setup, then select Special Request Quick Keys.
- Next to the Prefix or the Key that you want to edit, click on Edit .
- Update the Prefix or the Key to your preferred settings.
- At the top right, click on Save to confirm.
Merchant Portal 2.0
- Log in to the Merchant Portal.
- On the left panel, click on Menu Setup, then select Special Request Quick Keys.
- Next to the Prefix or the Key that you want to edit, click on Edit
 .
.
- Update the Prefix or the Key to your preferred settings.
- At the top right, click on Save to confirm.
Delete Special Request Quick Keys
To delete a Special Request Quick Key, follow the steps below:
Eats365 POS
- Log in to the Eats365 POS.
- At the top left, tap Settings .
- Under General, tap Menu Setup, and then select Special Request Quick Keys.
- There are two ways to delete your quick keys:
- Tap the Prefix or the Key that you want to delete. Then, at the top right, tap Delete. A prompt appears to confirm if you want to delete the Prefix or Key.
- Next to the Prefix or the Key that you want to delete, tap the three-dot menuthen tap Remove
 . A prompt appears to confirm if you want to delete the Prefix or Key.
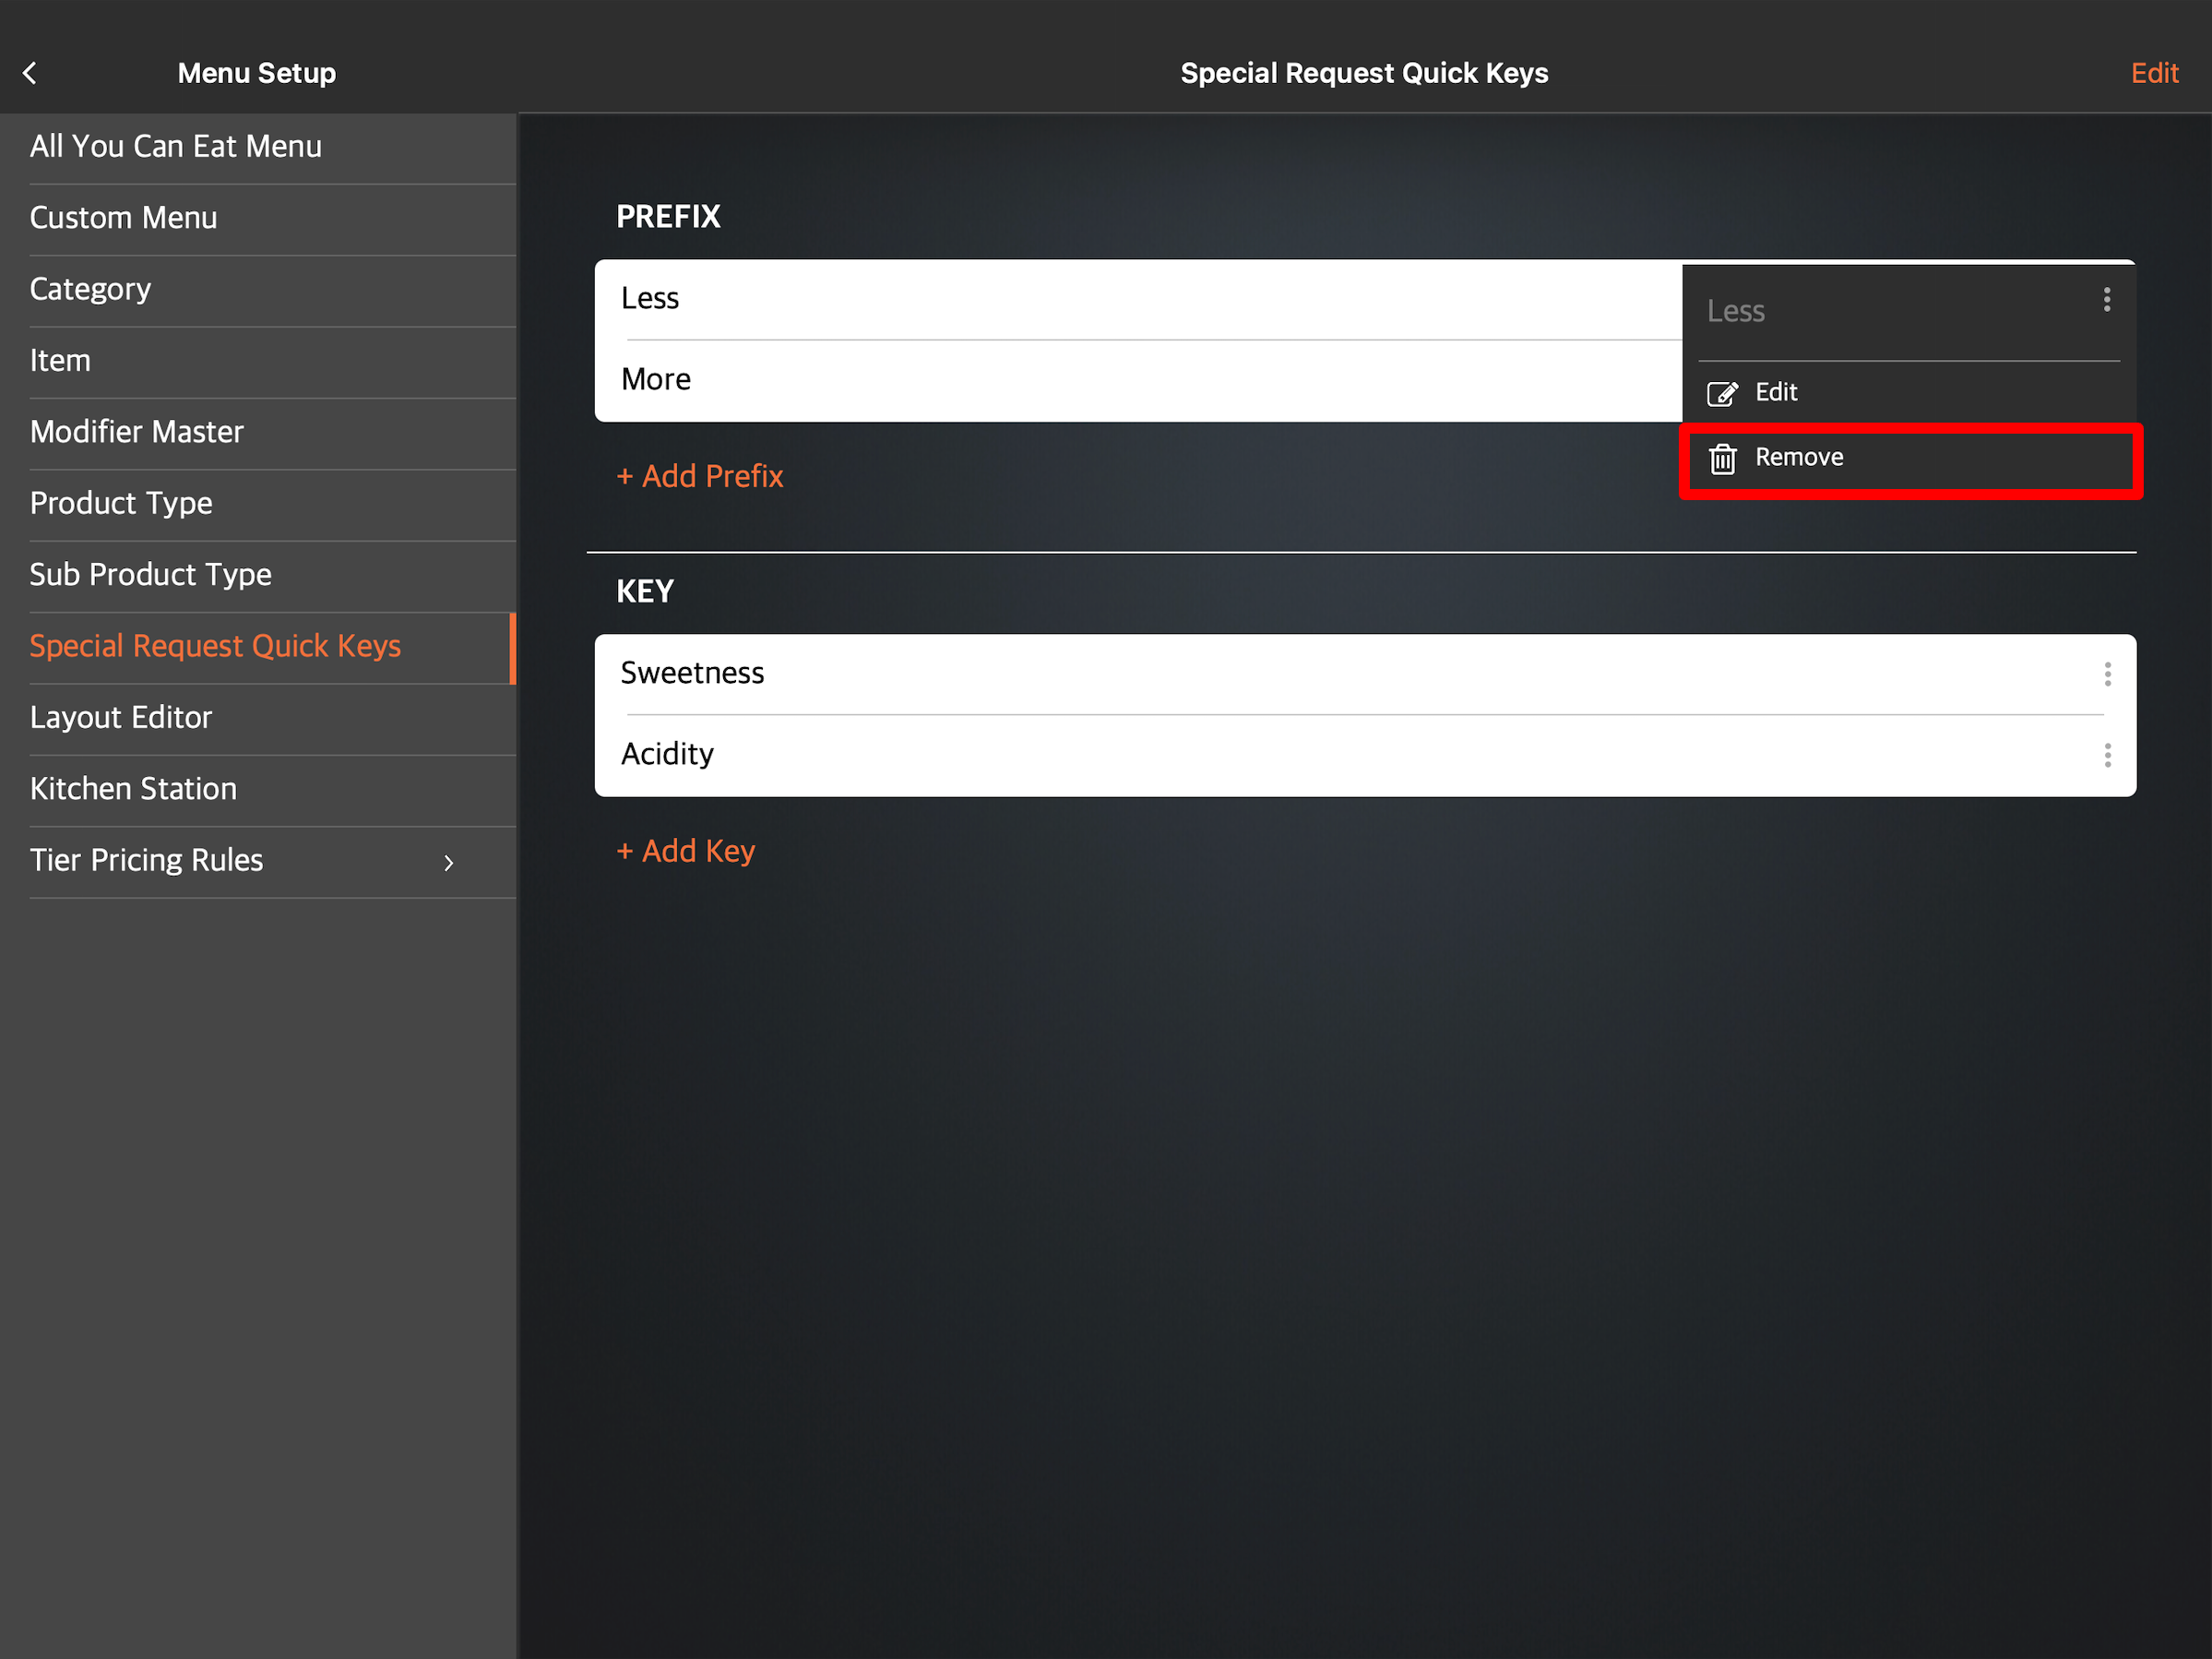
- Tap the Prefix or the Key that you want to delete. Then, at the top right, tap Delete. A prompt appears to confirm if you want to delete the Prefix or Key.
- Tap Delete to confirm.
Merchant Portal (Classic Theme)
- Log in to the Merchant Portal.
- On the left panel, click on Menu Setup, then select Special Request Quick Keys.
- Next to the Prefix or the Key that you want to delete, click on Delete .

- Click on Confirm.
Merchant Portal 2.0
- Log in to the Merchant Portal.
- On the left panel, click on Menu Setup, then select Special Request Quick Keys.
- Next to the Prefix or the Key that you want to delete, click on Delete
 .
.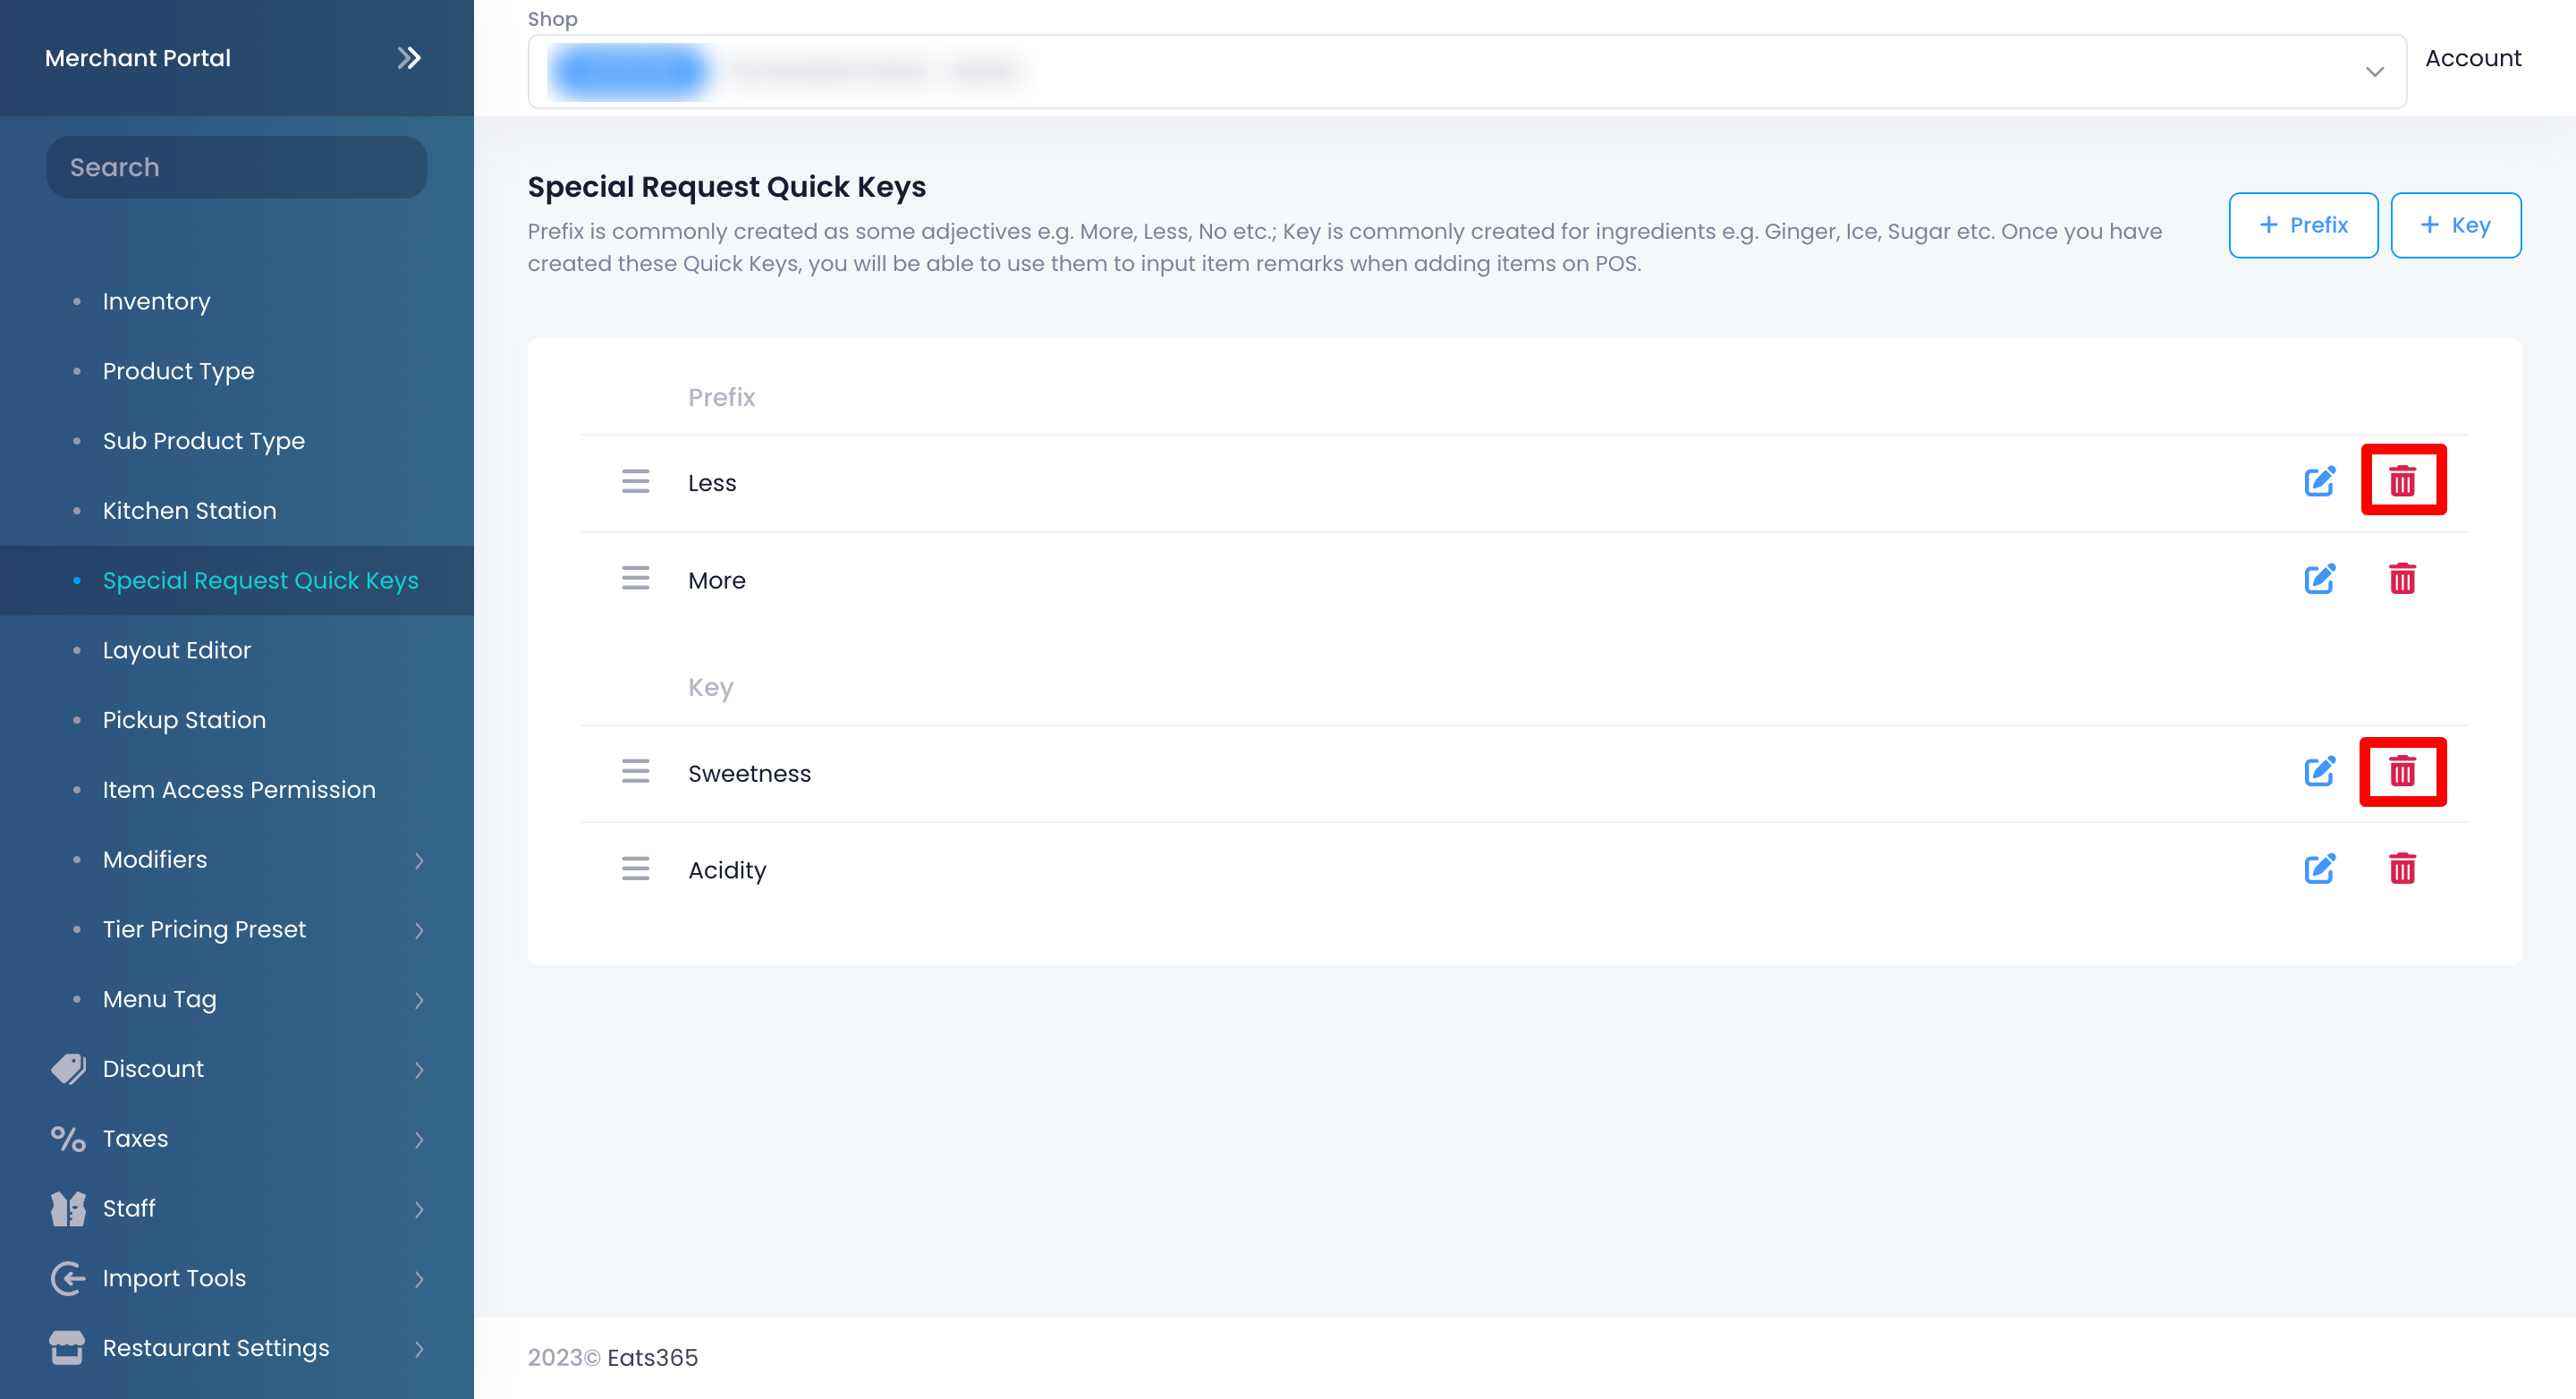
- Click on Confirm.
Reorder Special Request Quick Keys
To rearrange the Special Request Quick Keys in a specific order, follow the steps below:
Eats365 POS
- Log in to the Eats365 POS.
- At the top left, tap Settings .
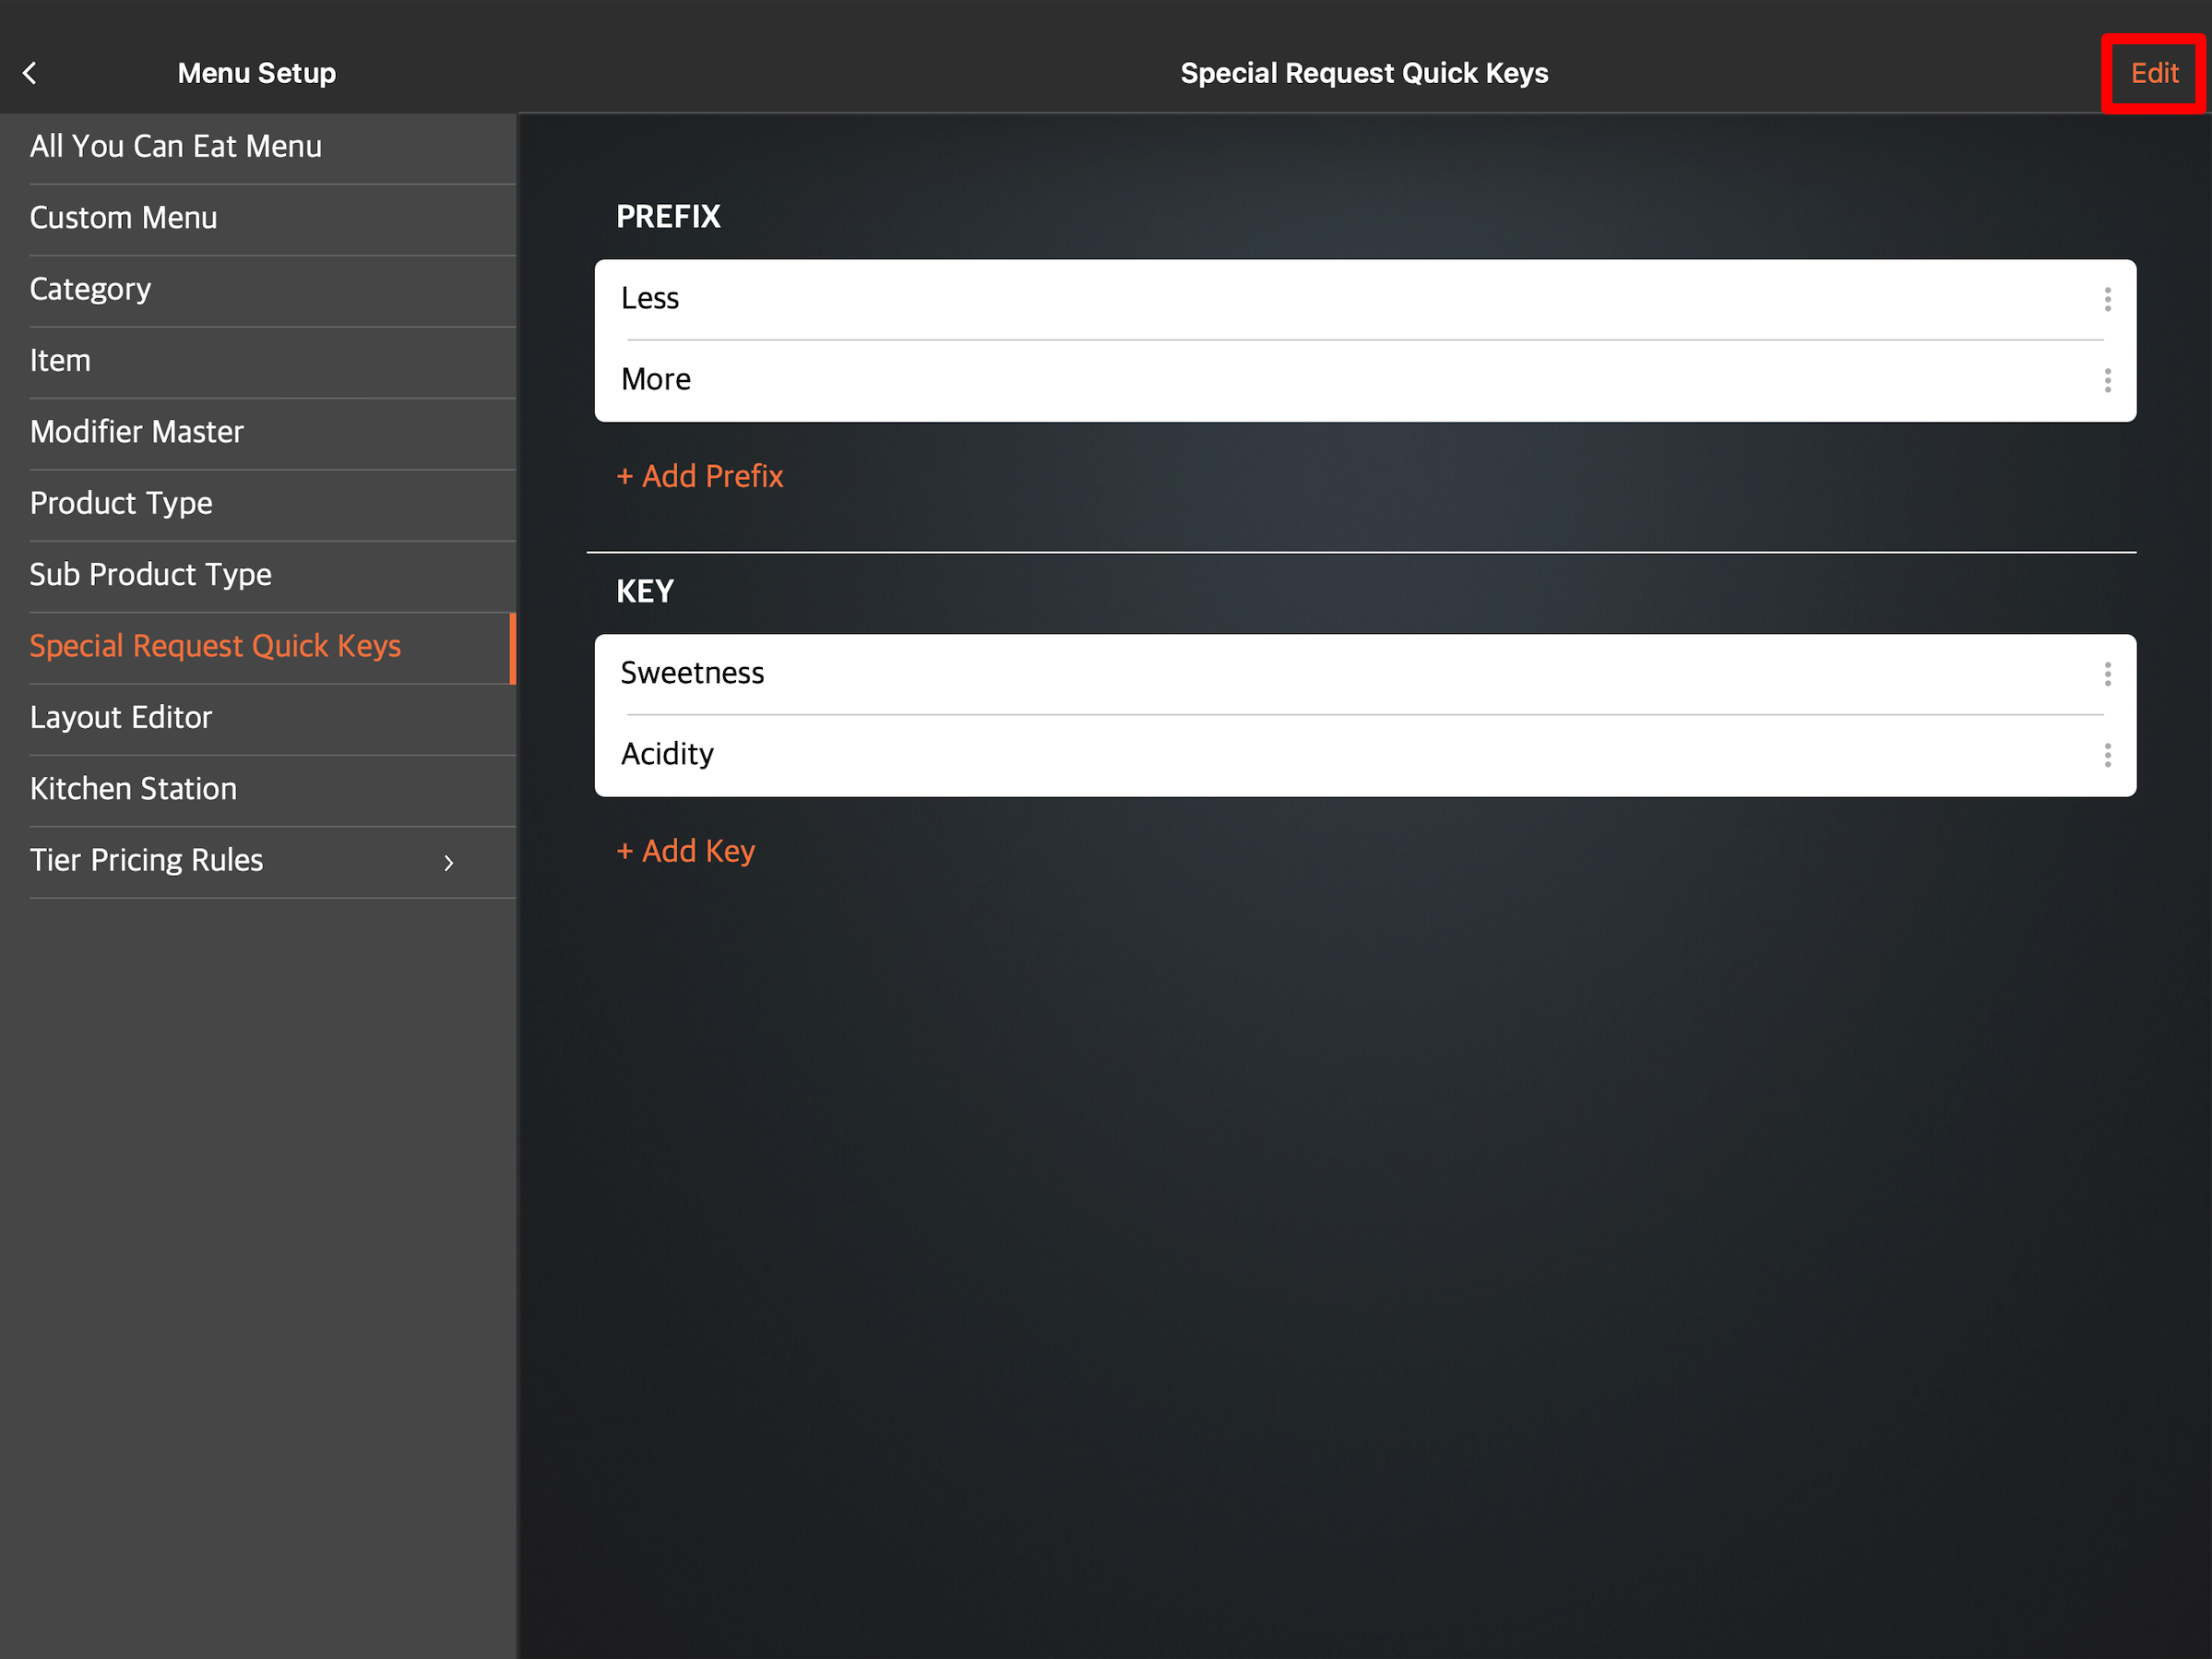
- Under General, tap Menu Setup, and then select Special Request Quick Keys.
- At the top right, tap Edit.
- Next to the Special Request Quick Key that you want to move, tap and hold Reorder
 . Then, drag the Special Request Quick Key in the order that you want it to appear in the POS.
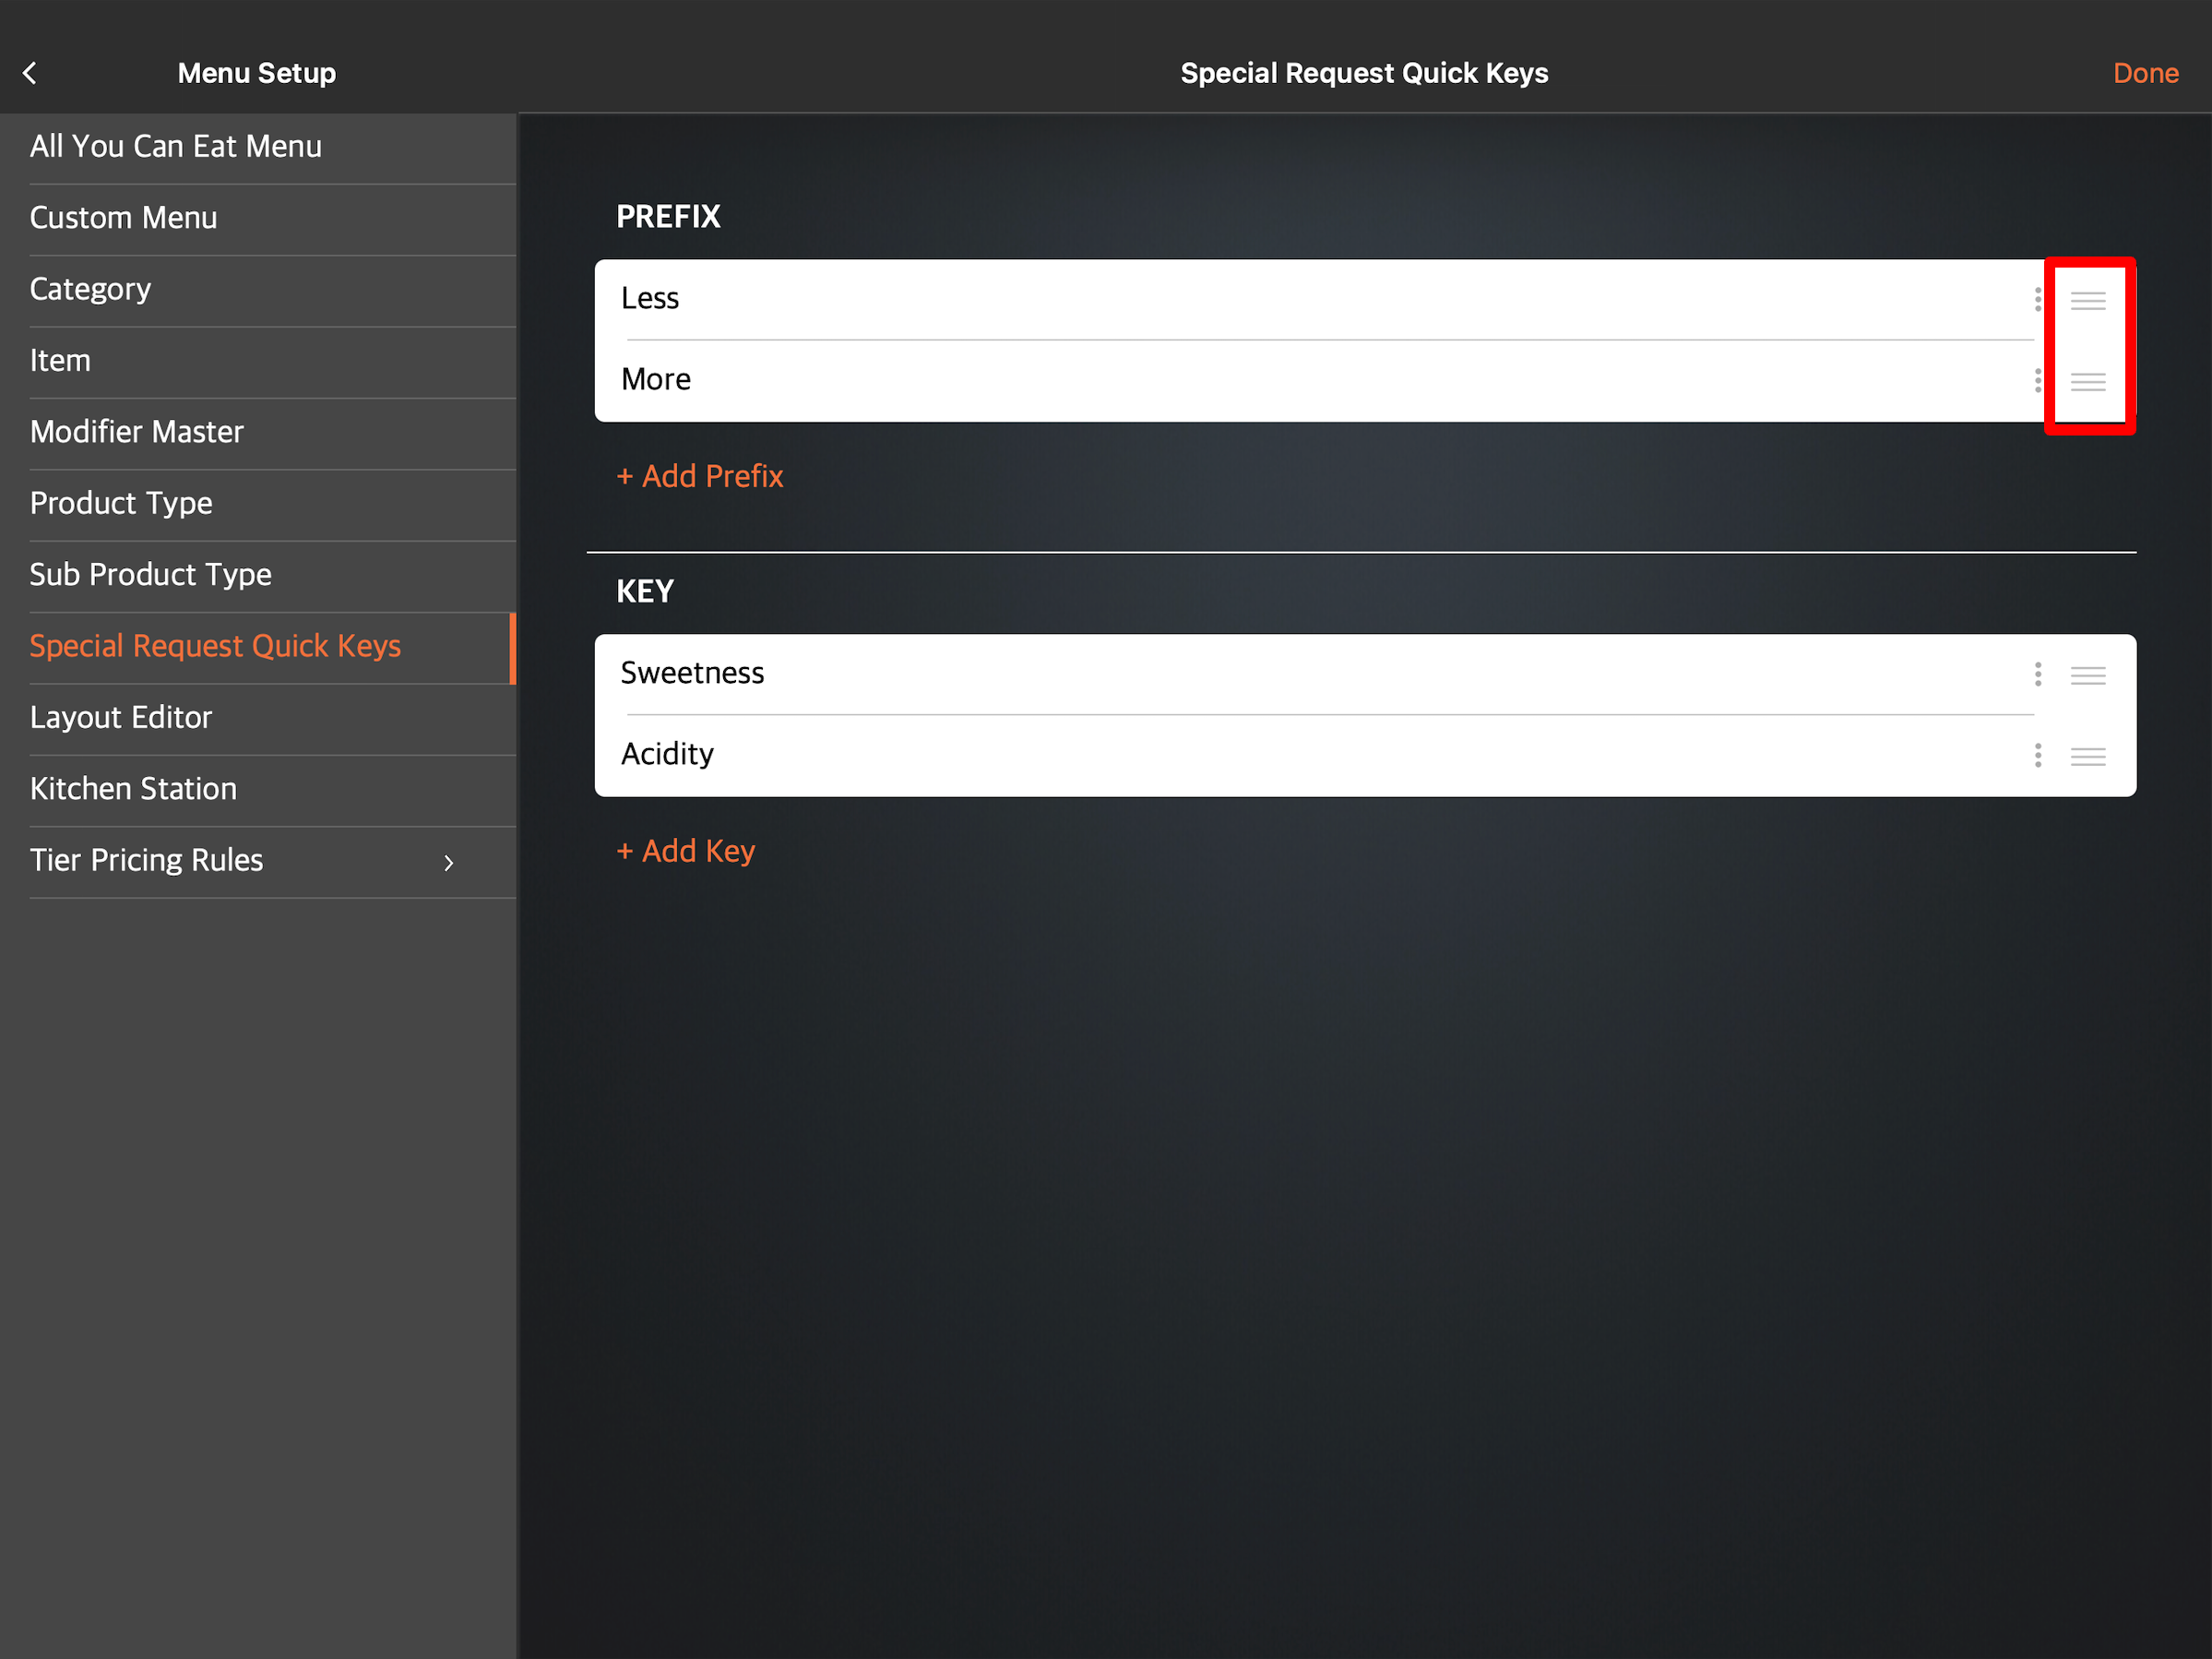
- At the top right, tap Done to confirm.
Merchant Portal (Classic Theme)
- Log in to the Merchant Portal.
- On the left panel, click on Menu Setup, then select Special Request Quick Keys.
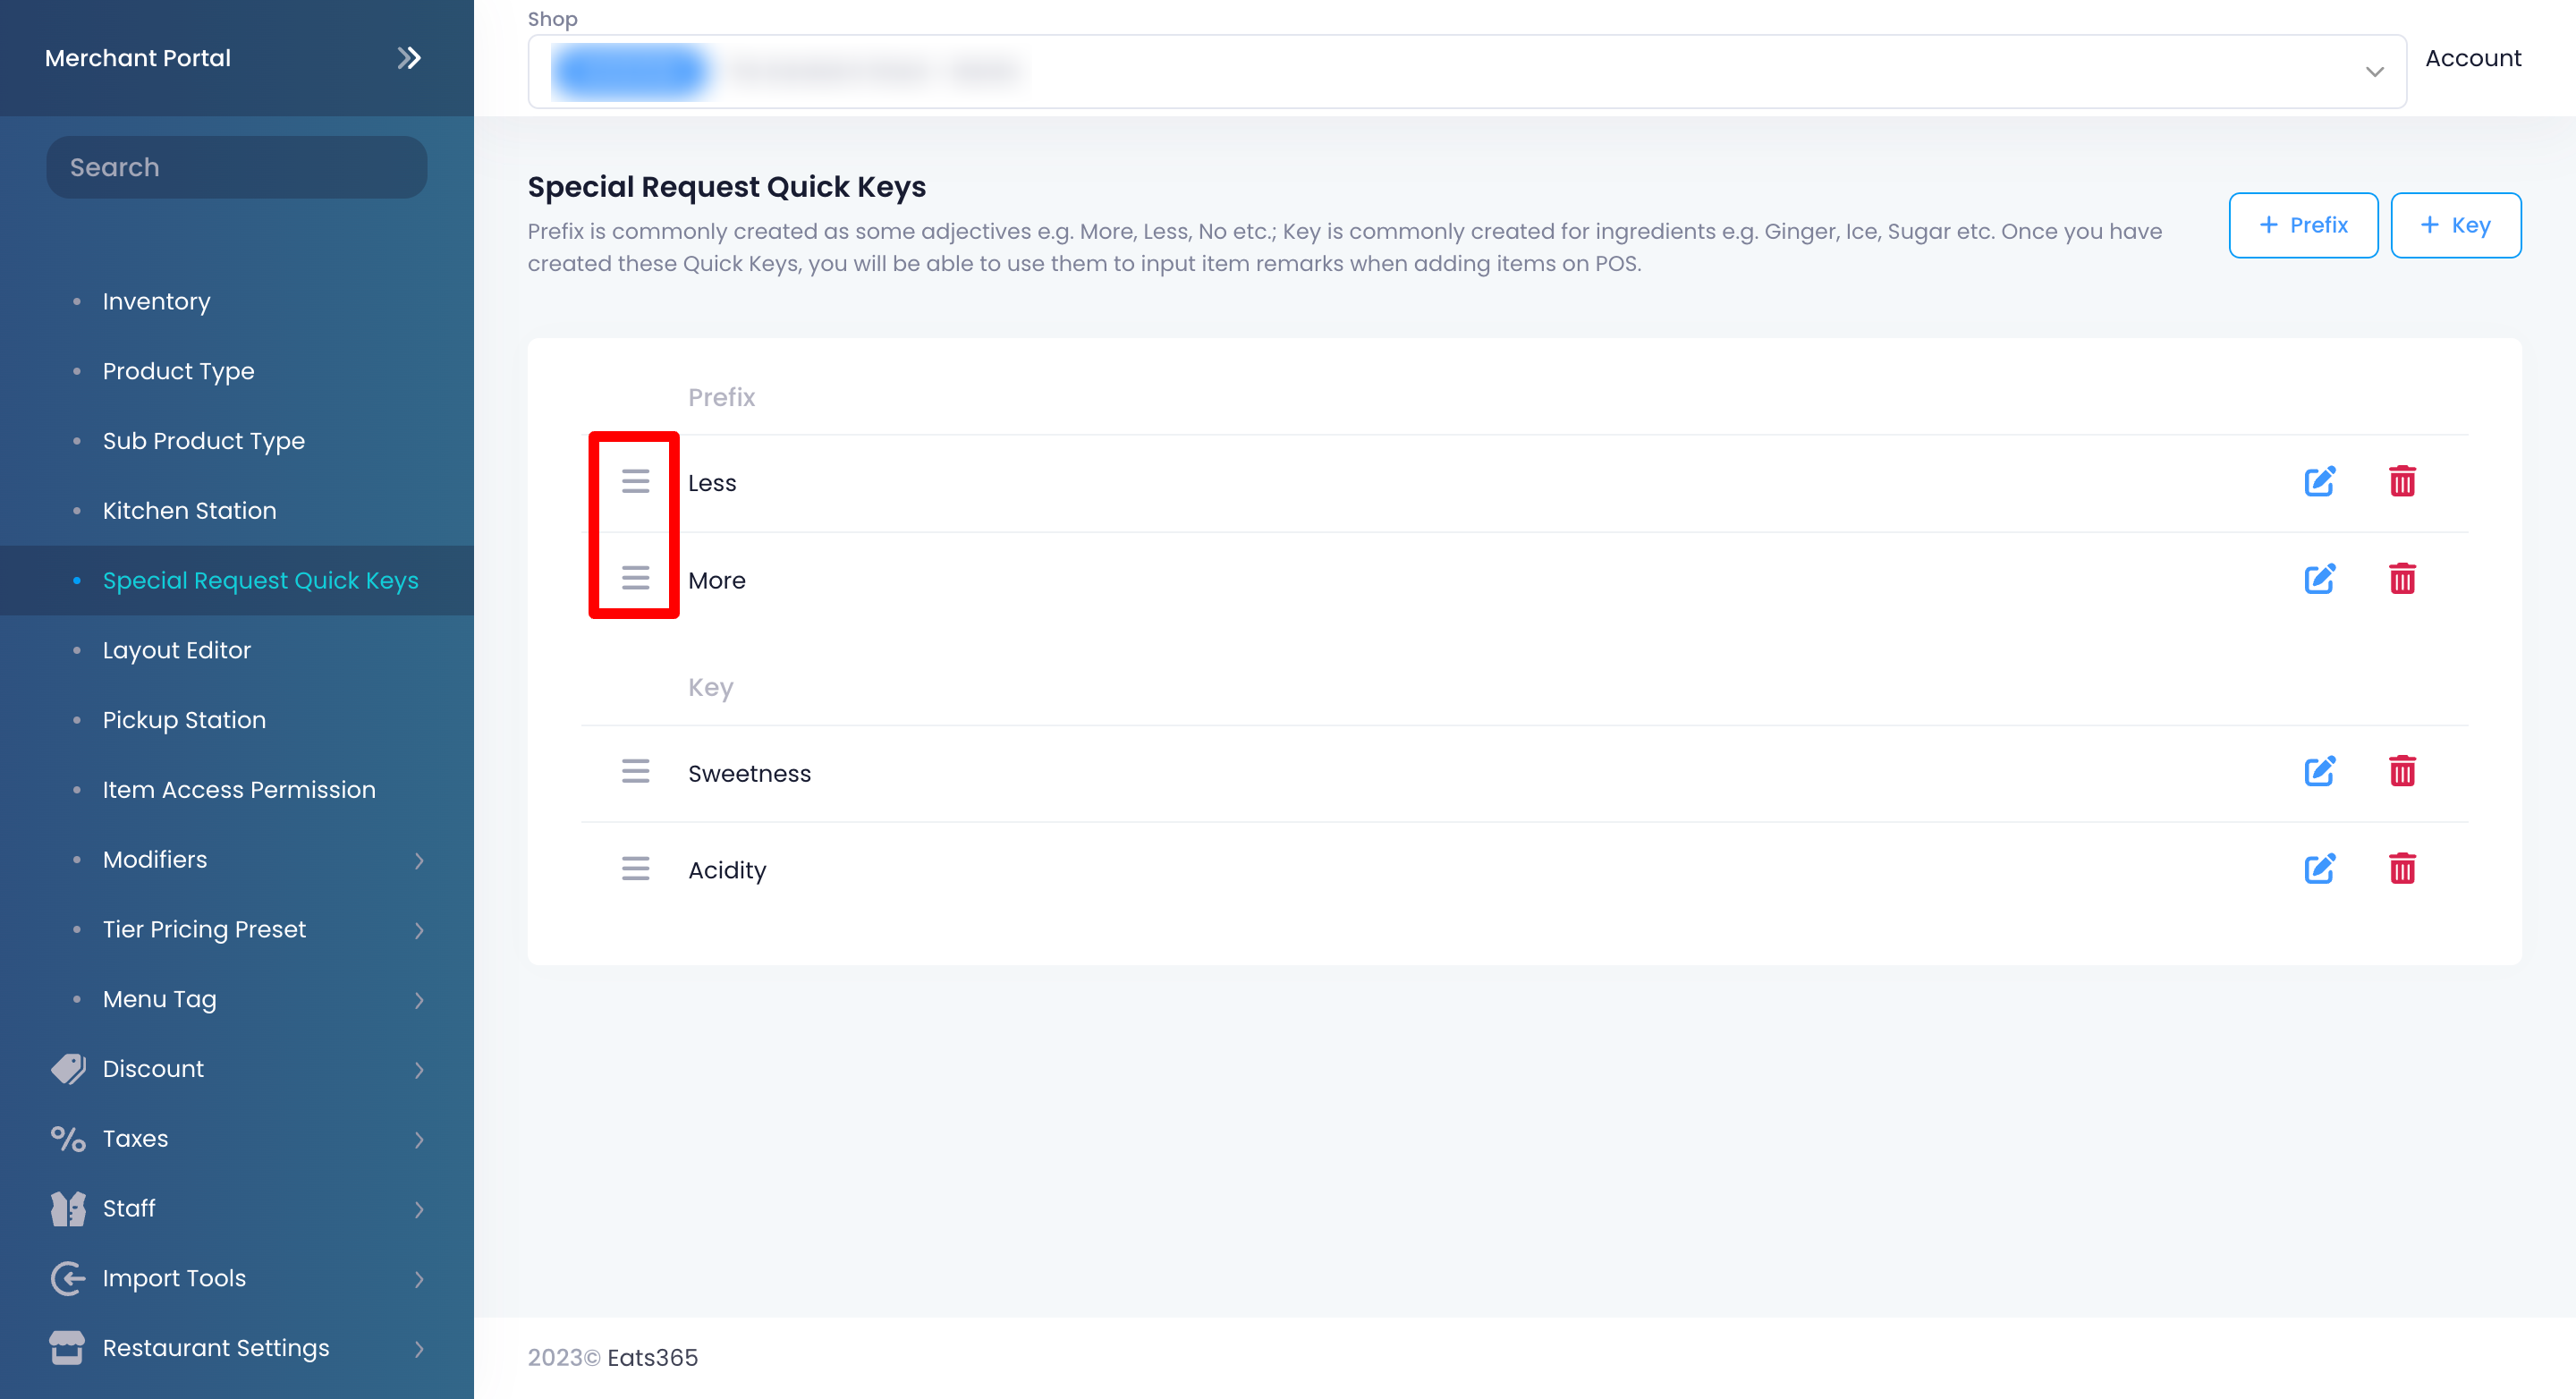
- Click and hold on the Prefix or Key that you want to move. Then, drag the Prefix or Key in the order that you want it to appear.
Merchant Portal 2.0
- Log in to the Merchant Portal.
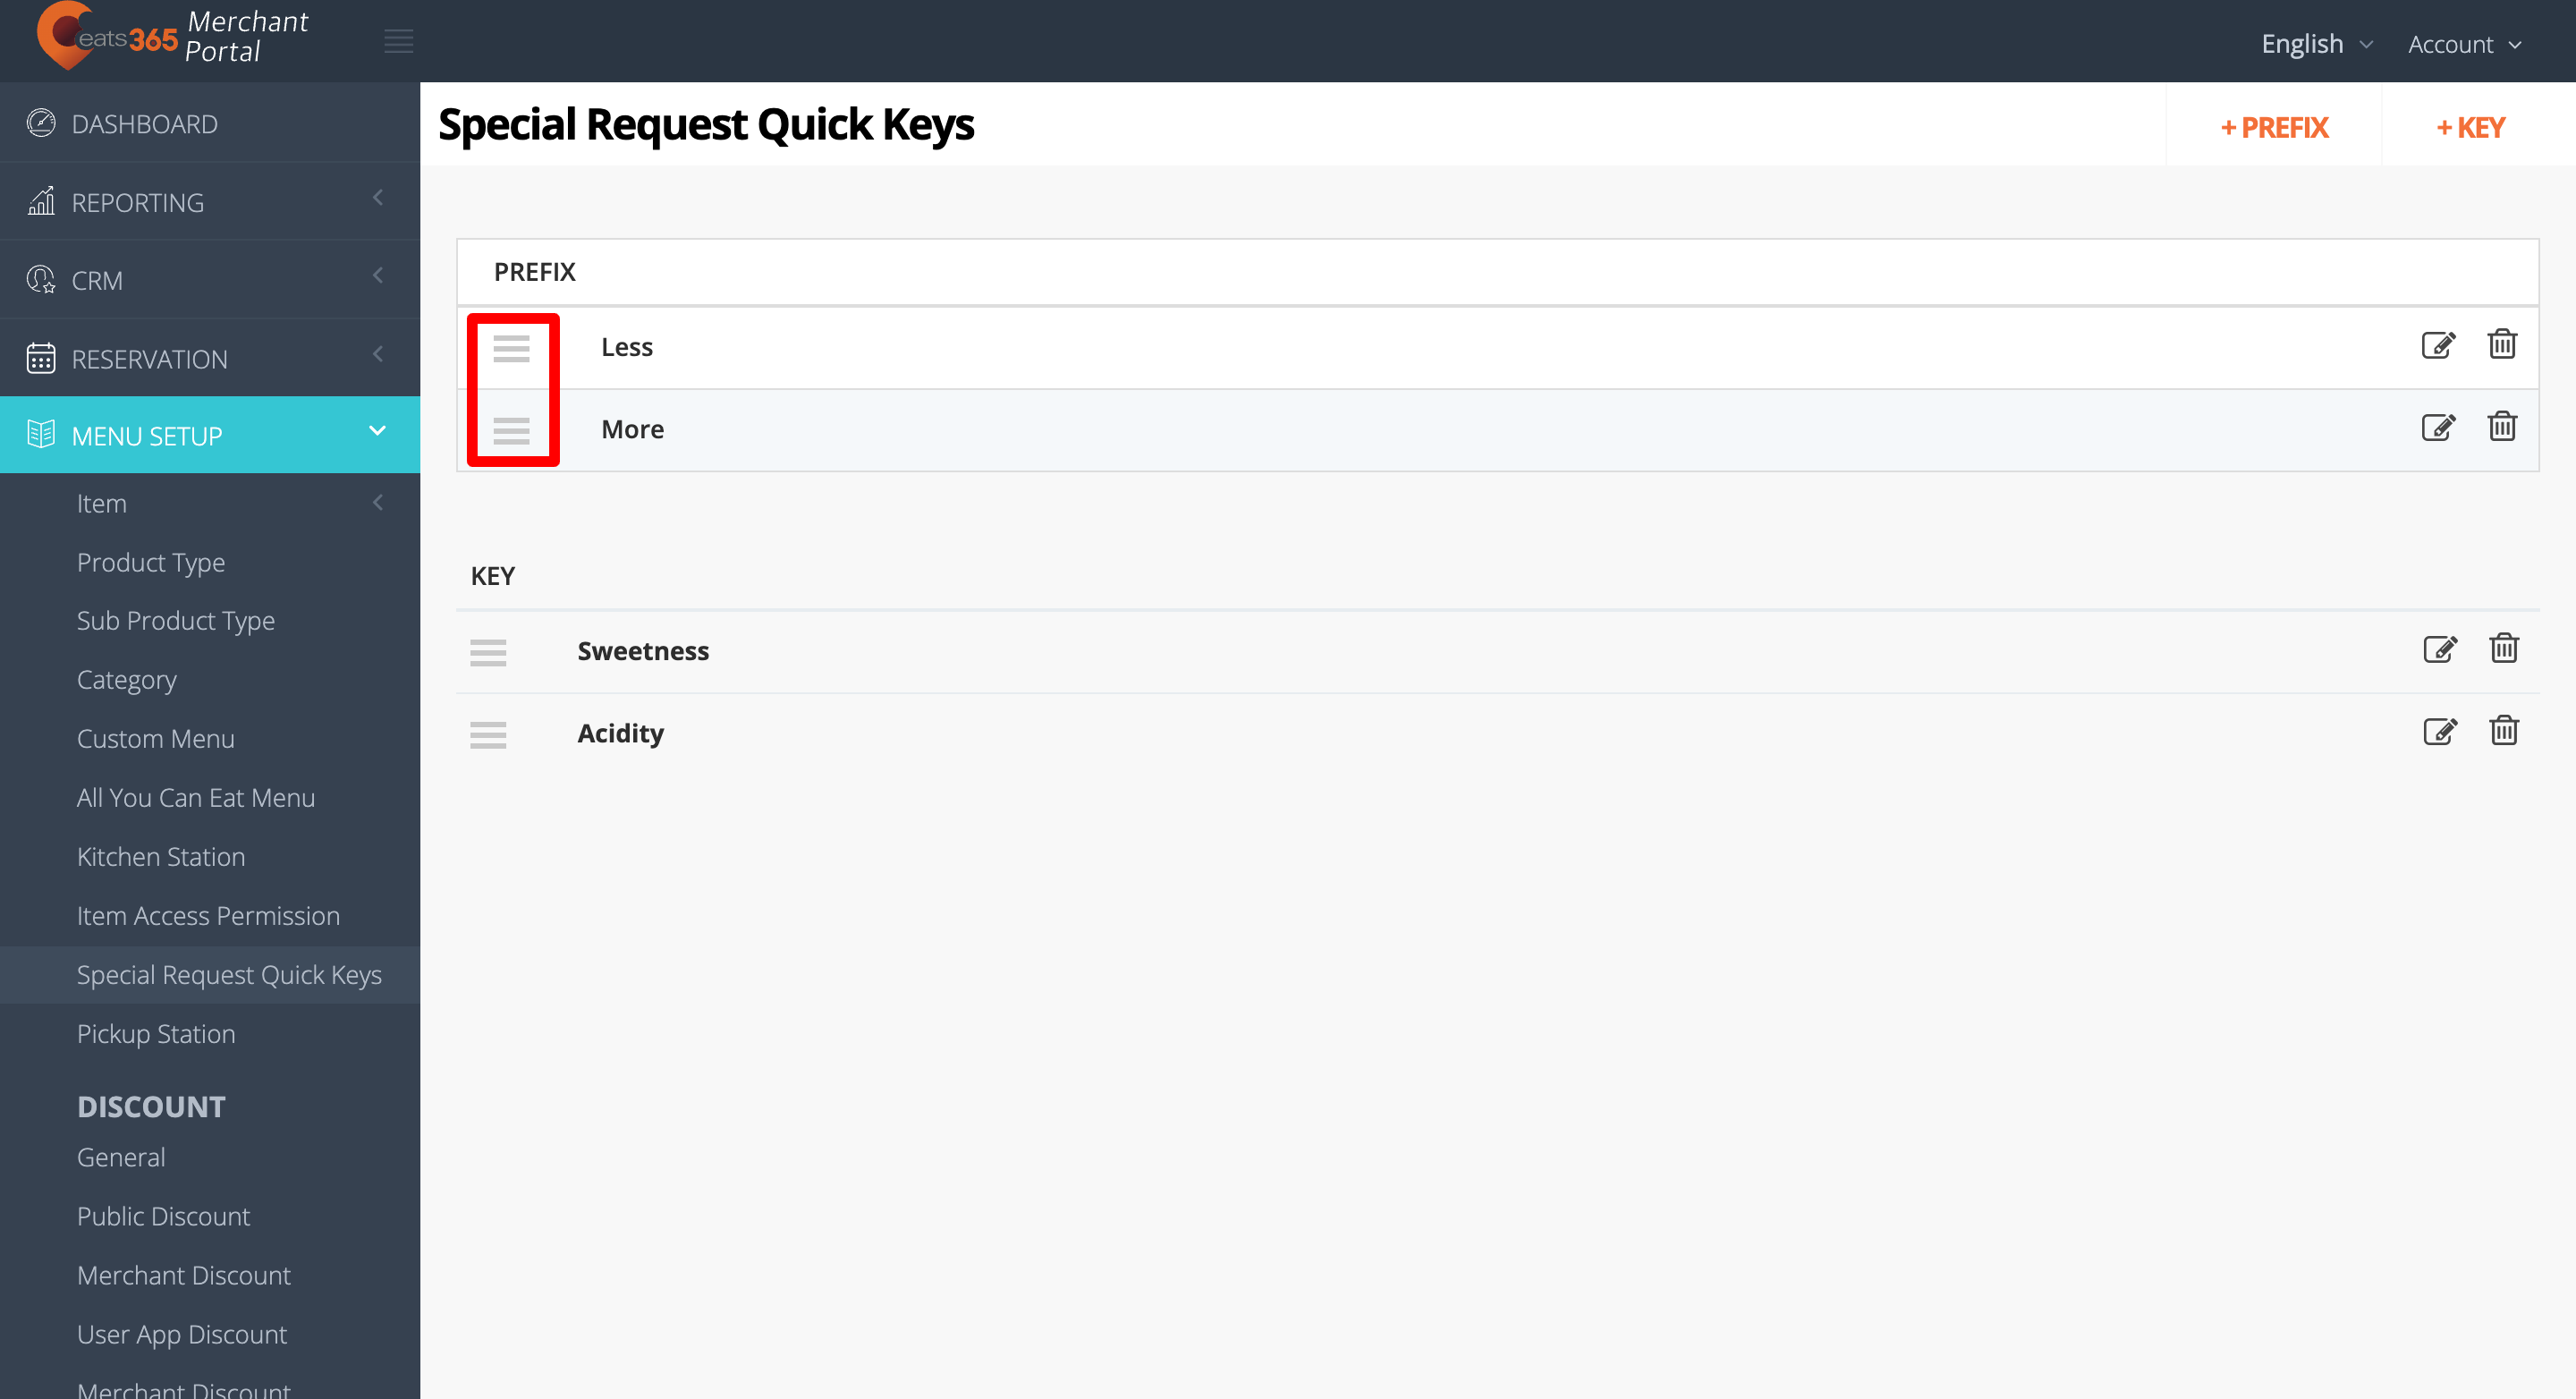
- On the left panel, click on Menu Setup, then select Special Request Quick Keys.
- Click and hold on Reorder before the Prefix or Key that you want to move. Then, drag the Prefix or Key in the order that you want it to appear.