 Eats365 Products
 Merchant Guide
 Modules
 Membership
 Integrations
 Hardware
 Staff Operations
 Roles & Permissions
 Payments
 Reports
 What’s New
 Release Notes
 Troubleshooting
 Simulators
 Glossary
 Troubleshooter
 System Status
System Preferences
Table of Contents
Set up and manage Ordering Quantity Limit
Learn how to set up and apply quantity limit to orders.
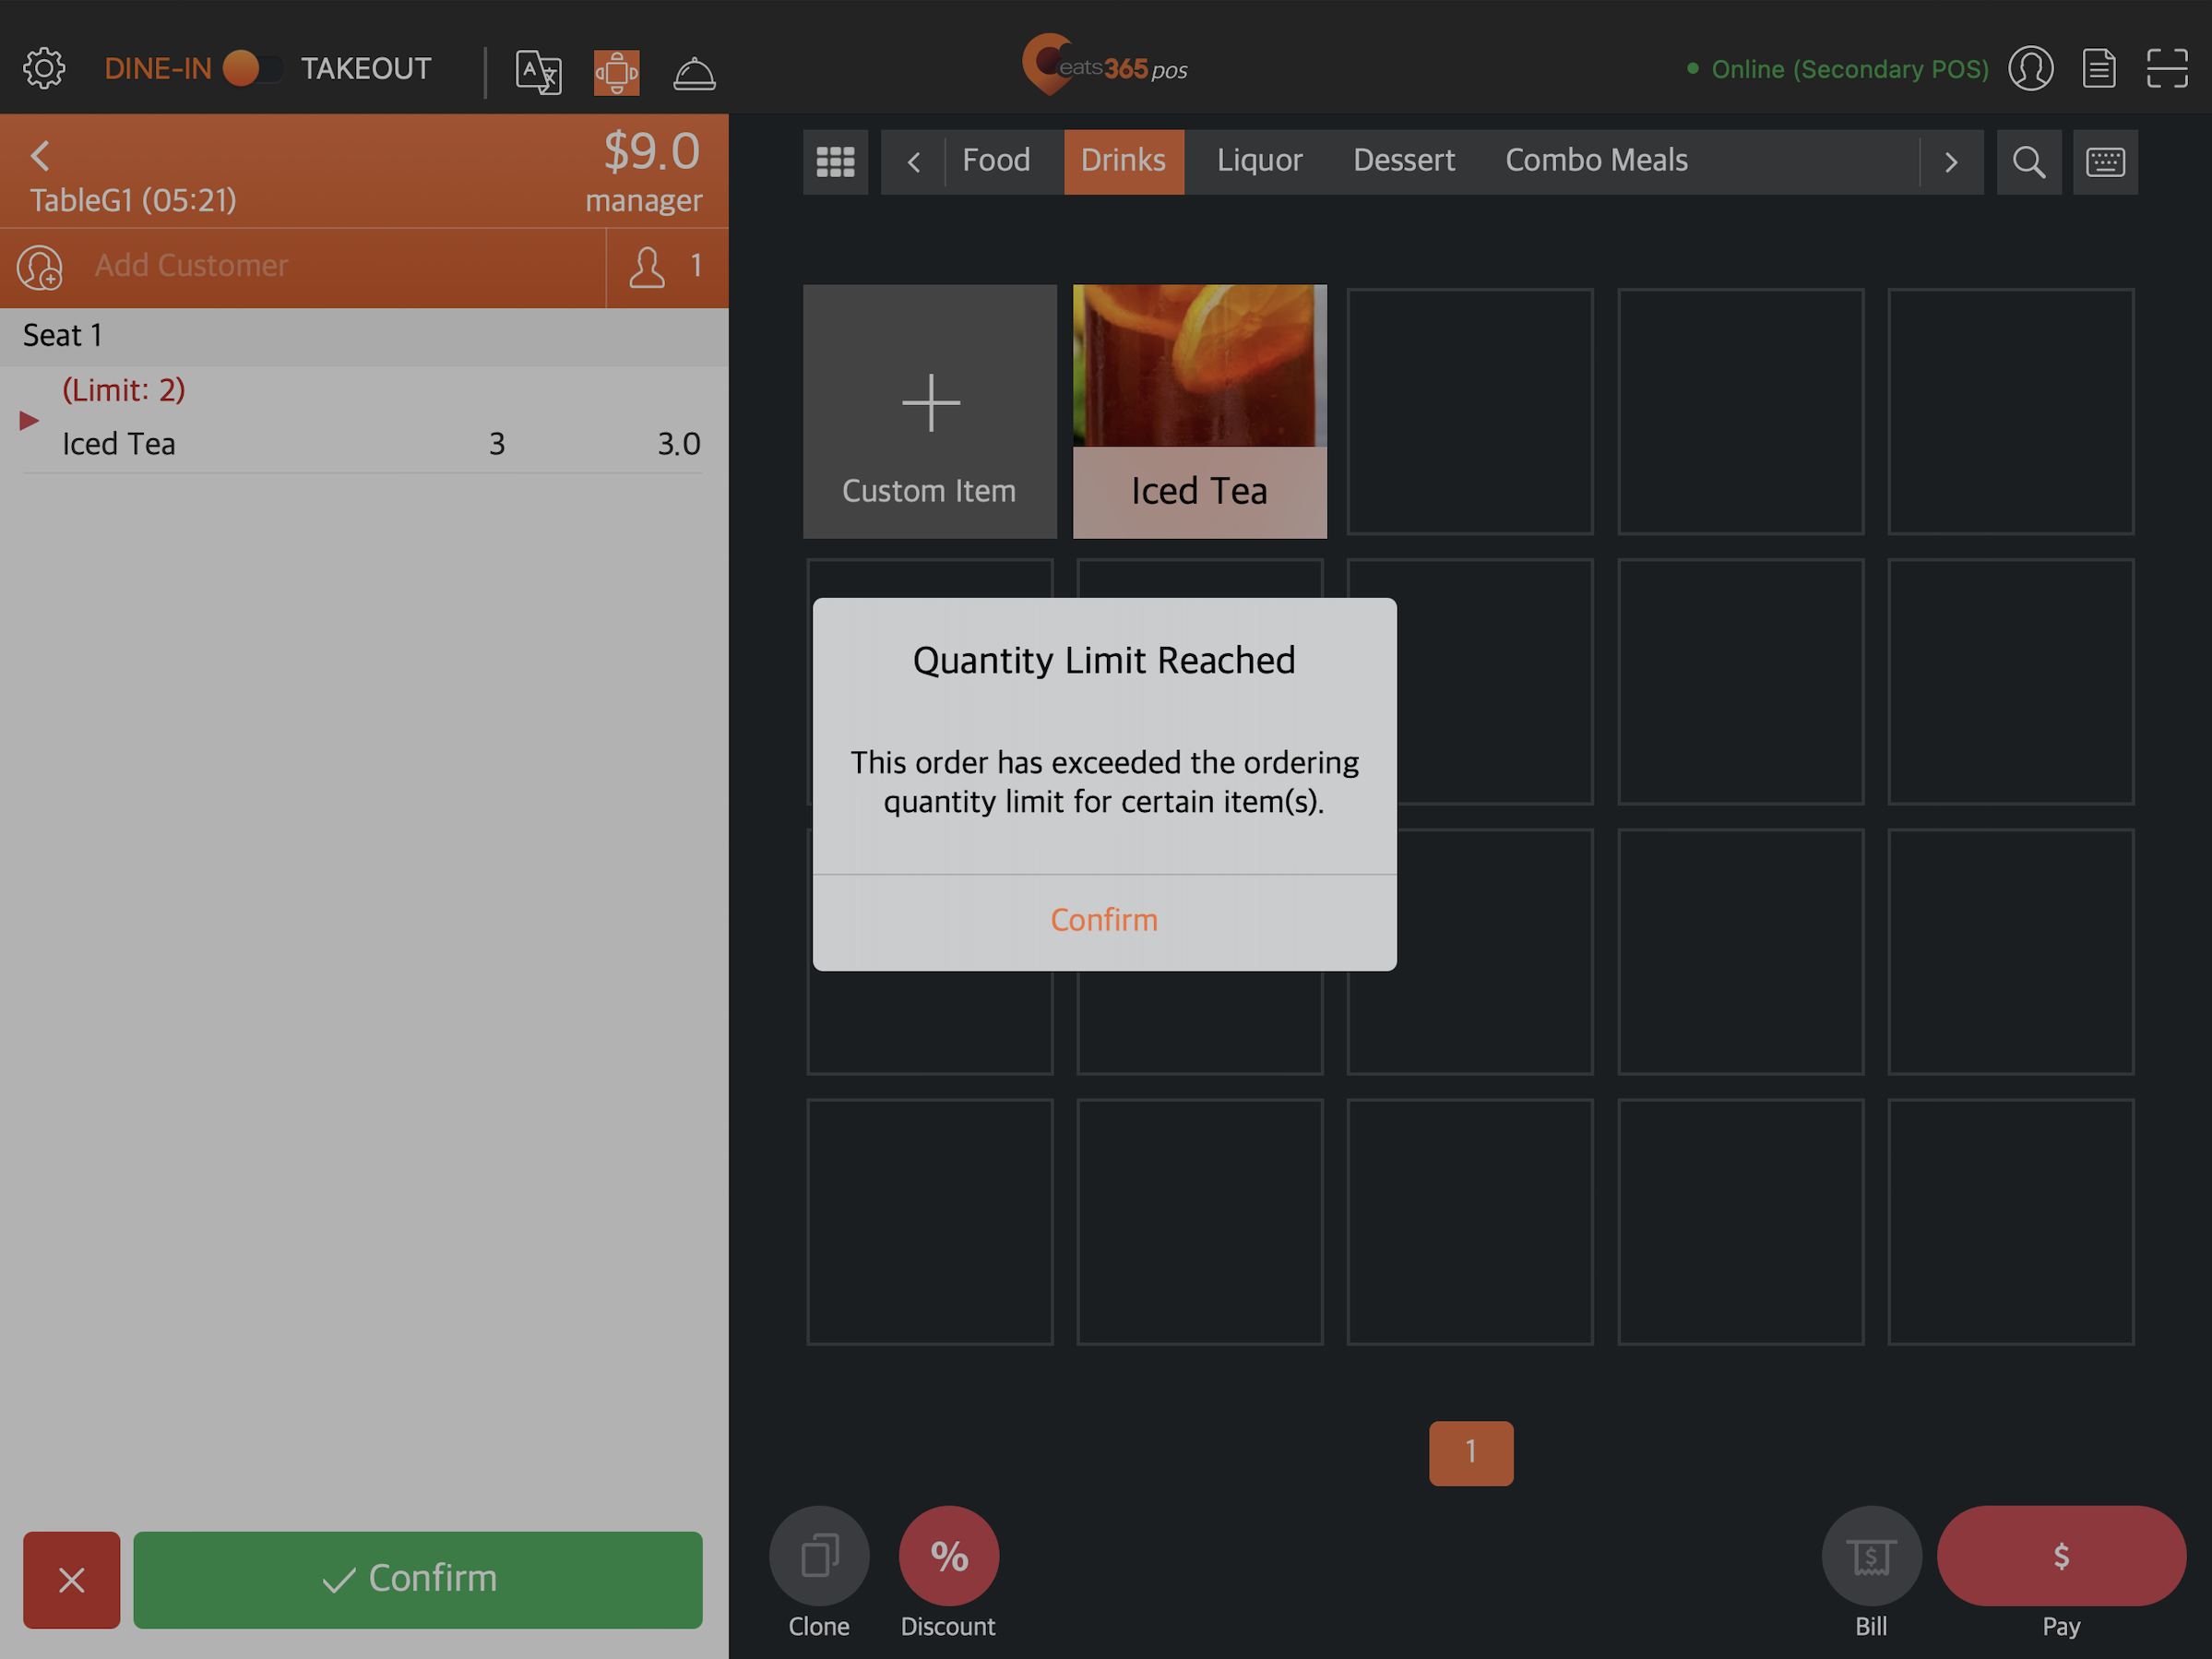
Ordering Quantity Limit allows the Eats365 POS system to limit the number of items that customers can order. You can set the restriction to apply based on Party Size, per Table Order, per Order Attempt, or per Age.
In this article, you’ll learn how to set up ordering quantity limits.
Set up an Ordering Quantity Limit
Before you can apply an ordering quantity limit to an item, you must first set the conditions for the ordering quantity limit.
To set up an ordering quantity limit, follow the steps below:
- Log in to the Merchant Portal.
- On the left panel, click on Advanced Settings.
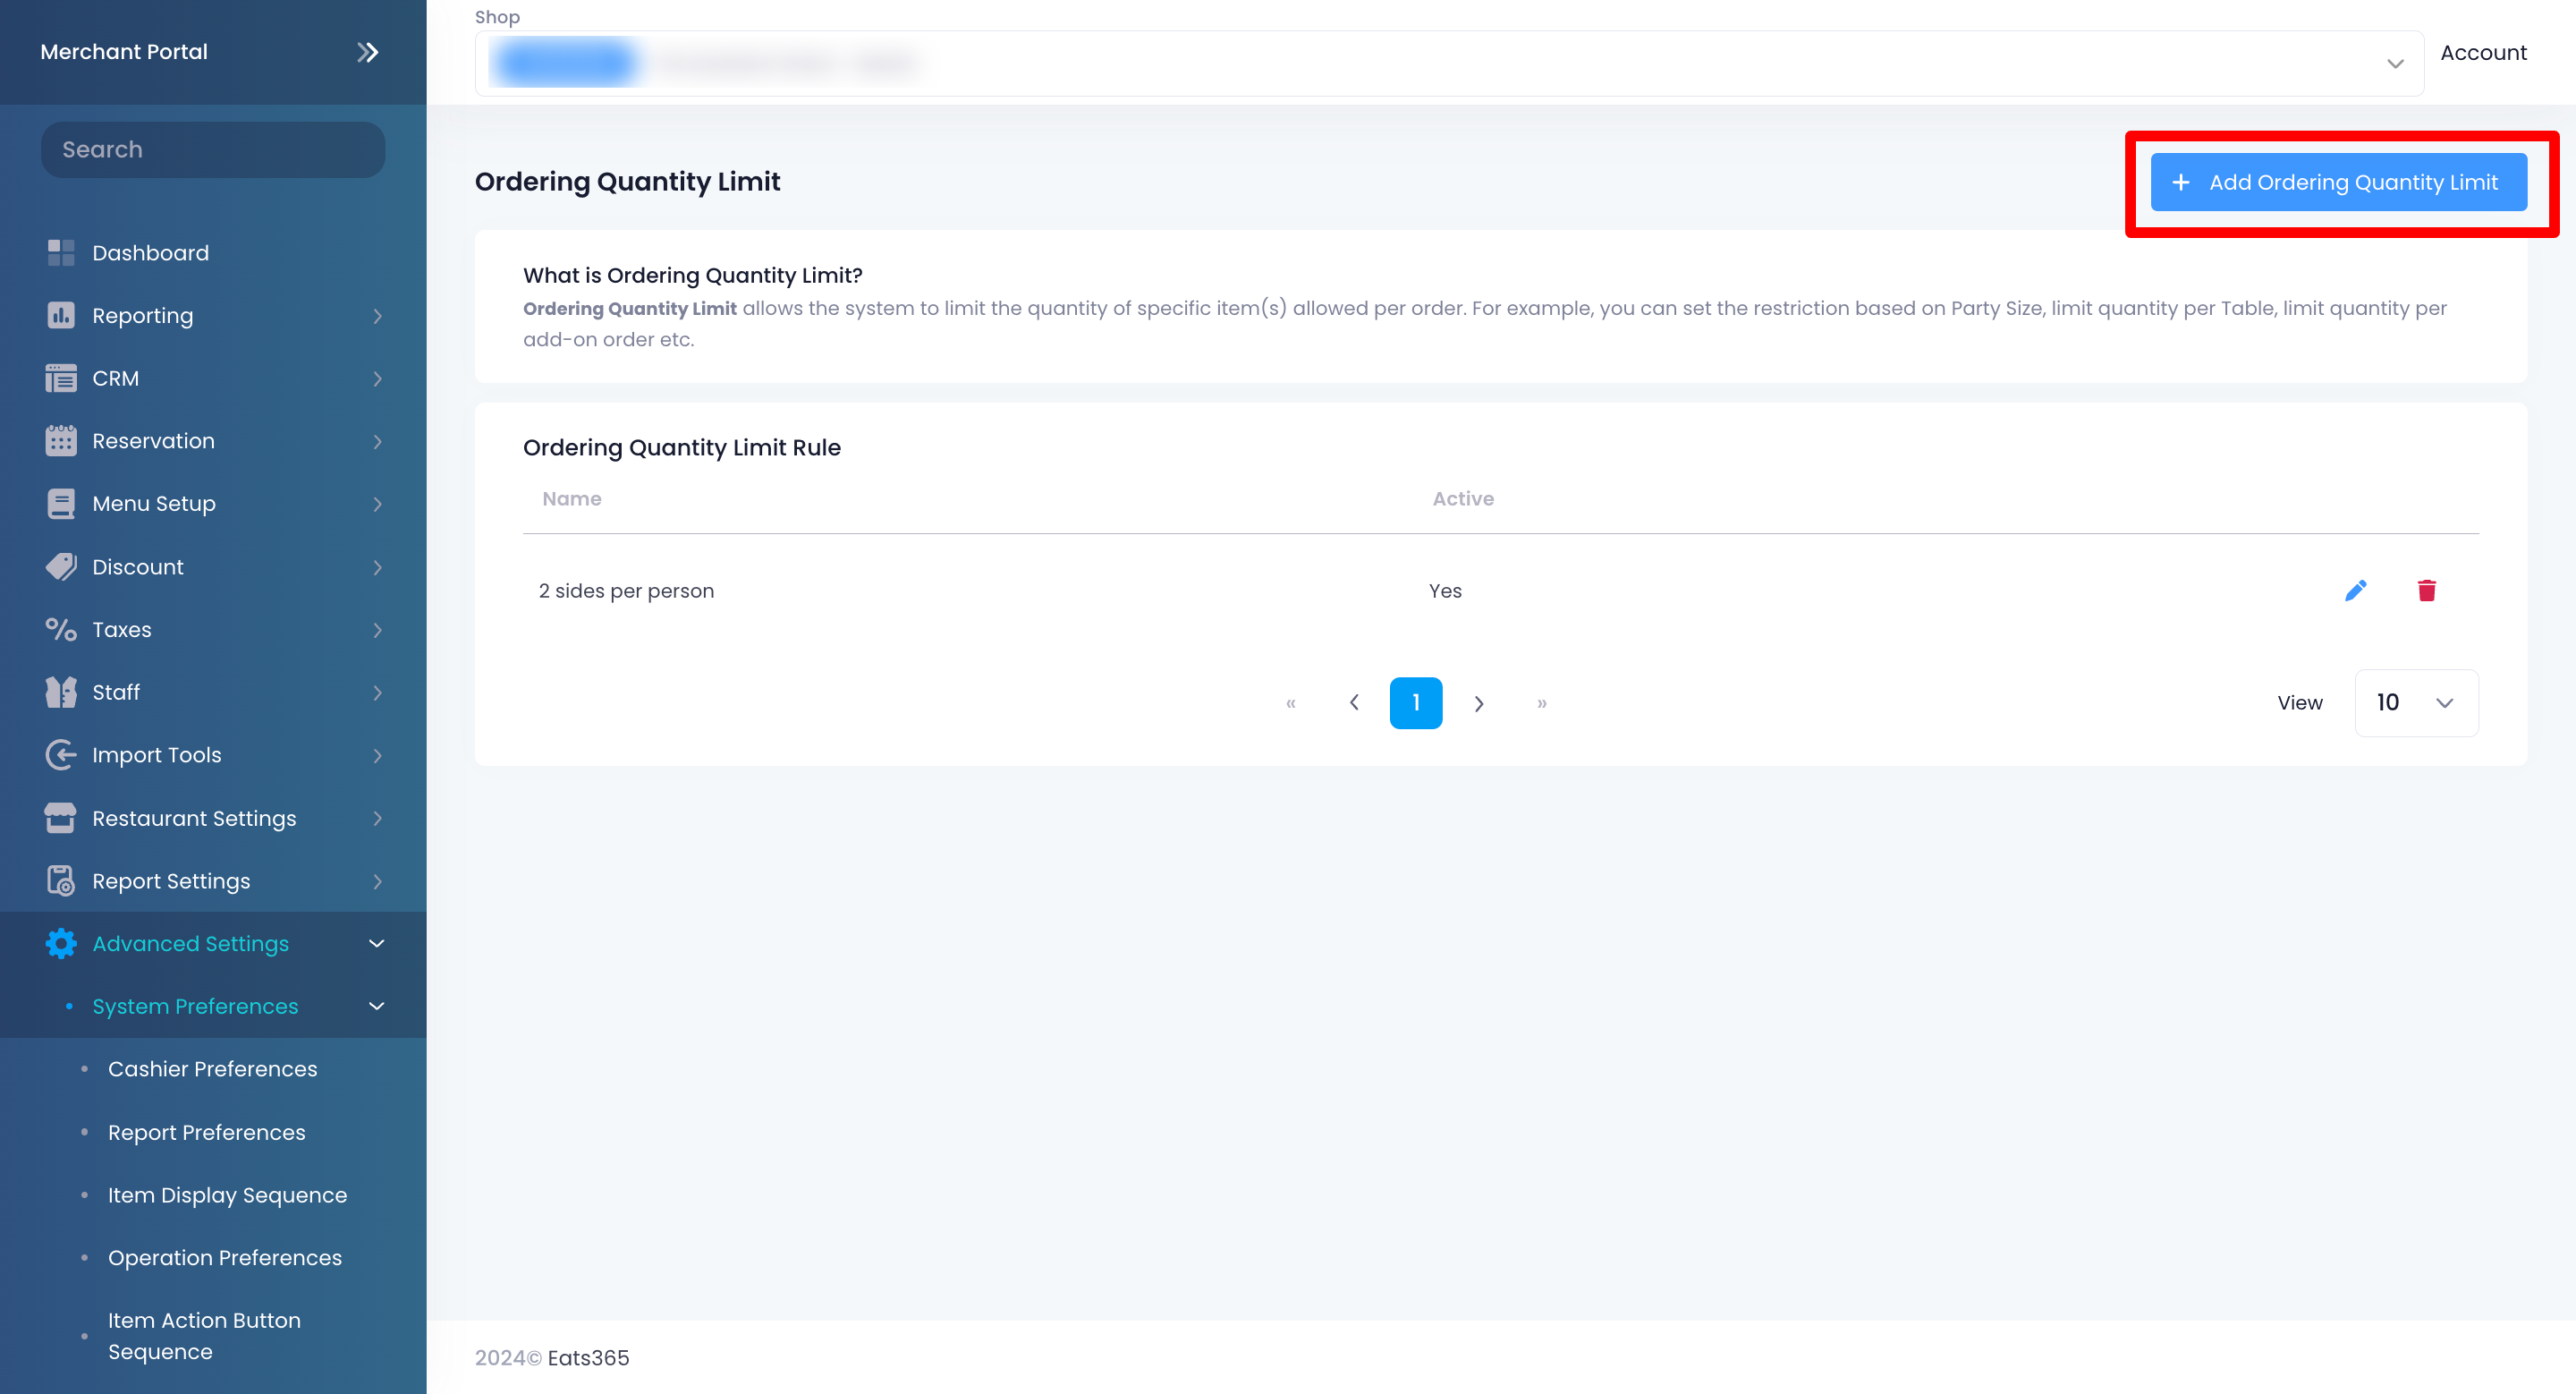
- Click on System Preferences. Then, select Ordering Quantity Limit.
- Click on +Add Ordering Quantity Limit.
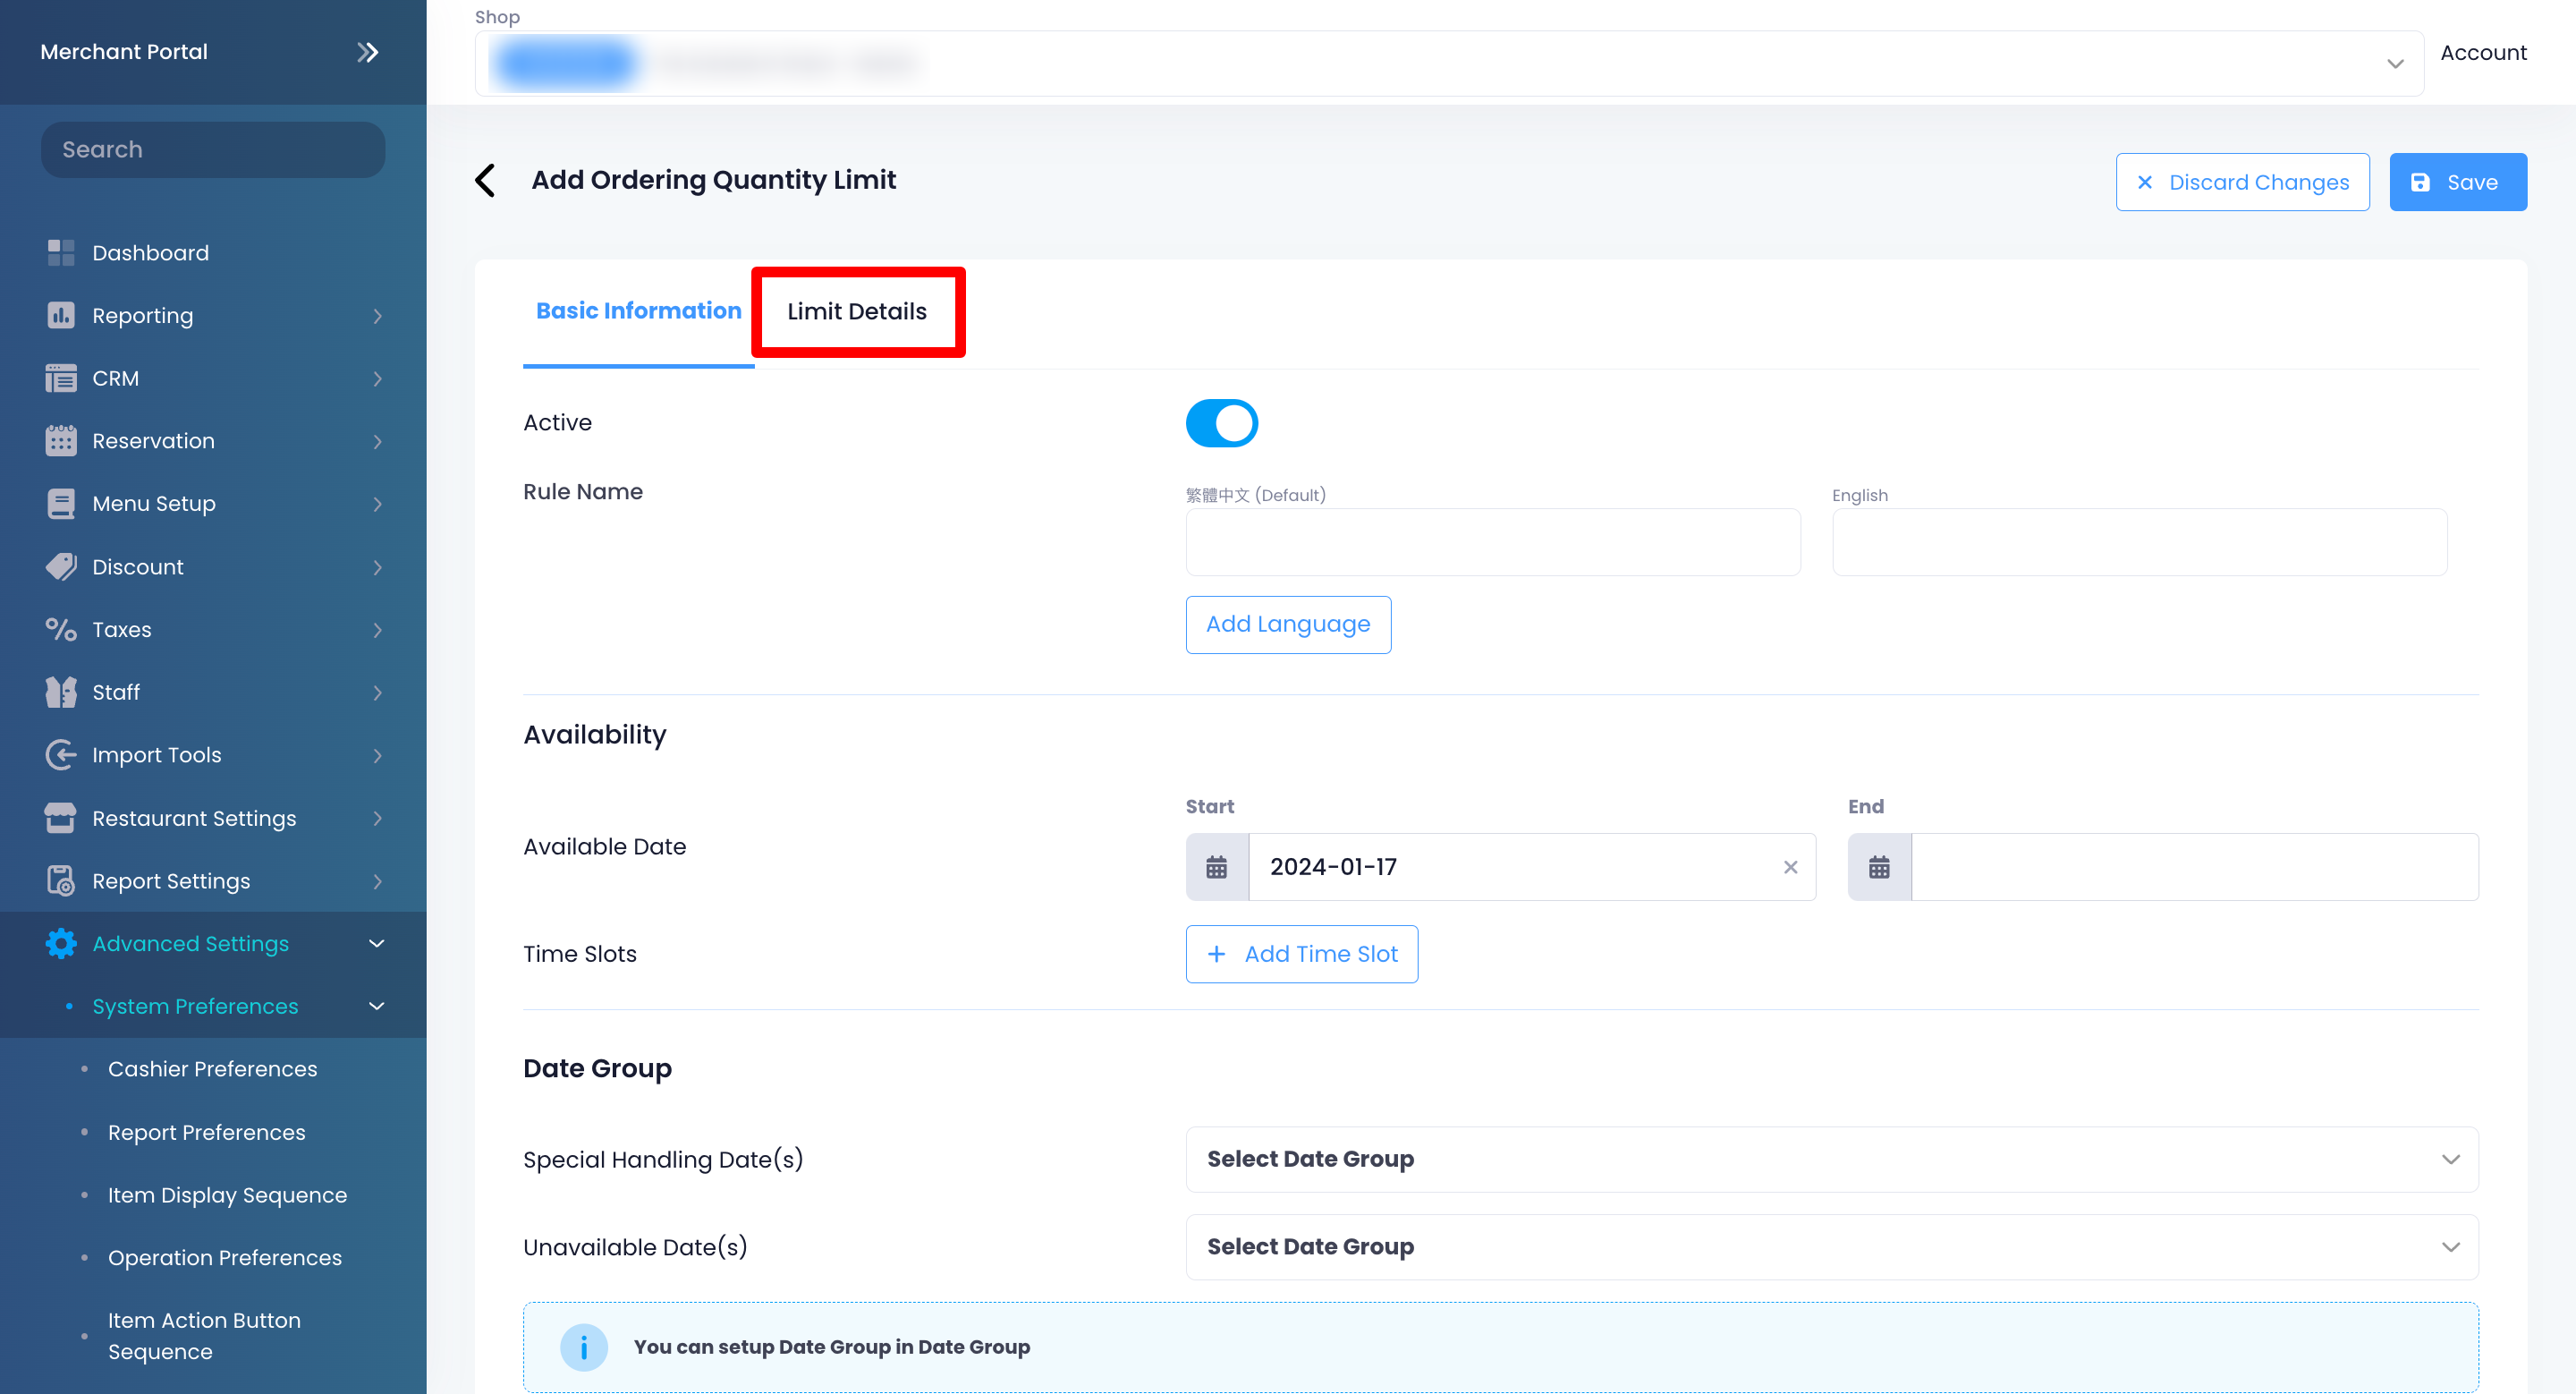
- Toggle Active
 to enable Ordering Quantity Limit.
 - Enter a Rule Name per language.
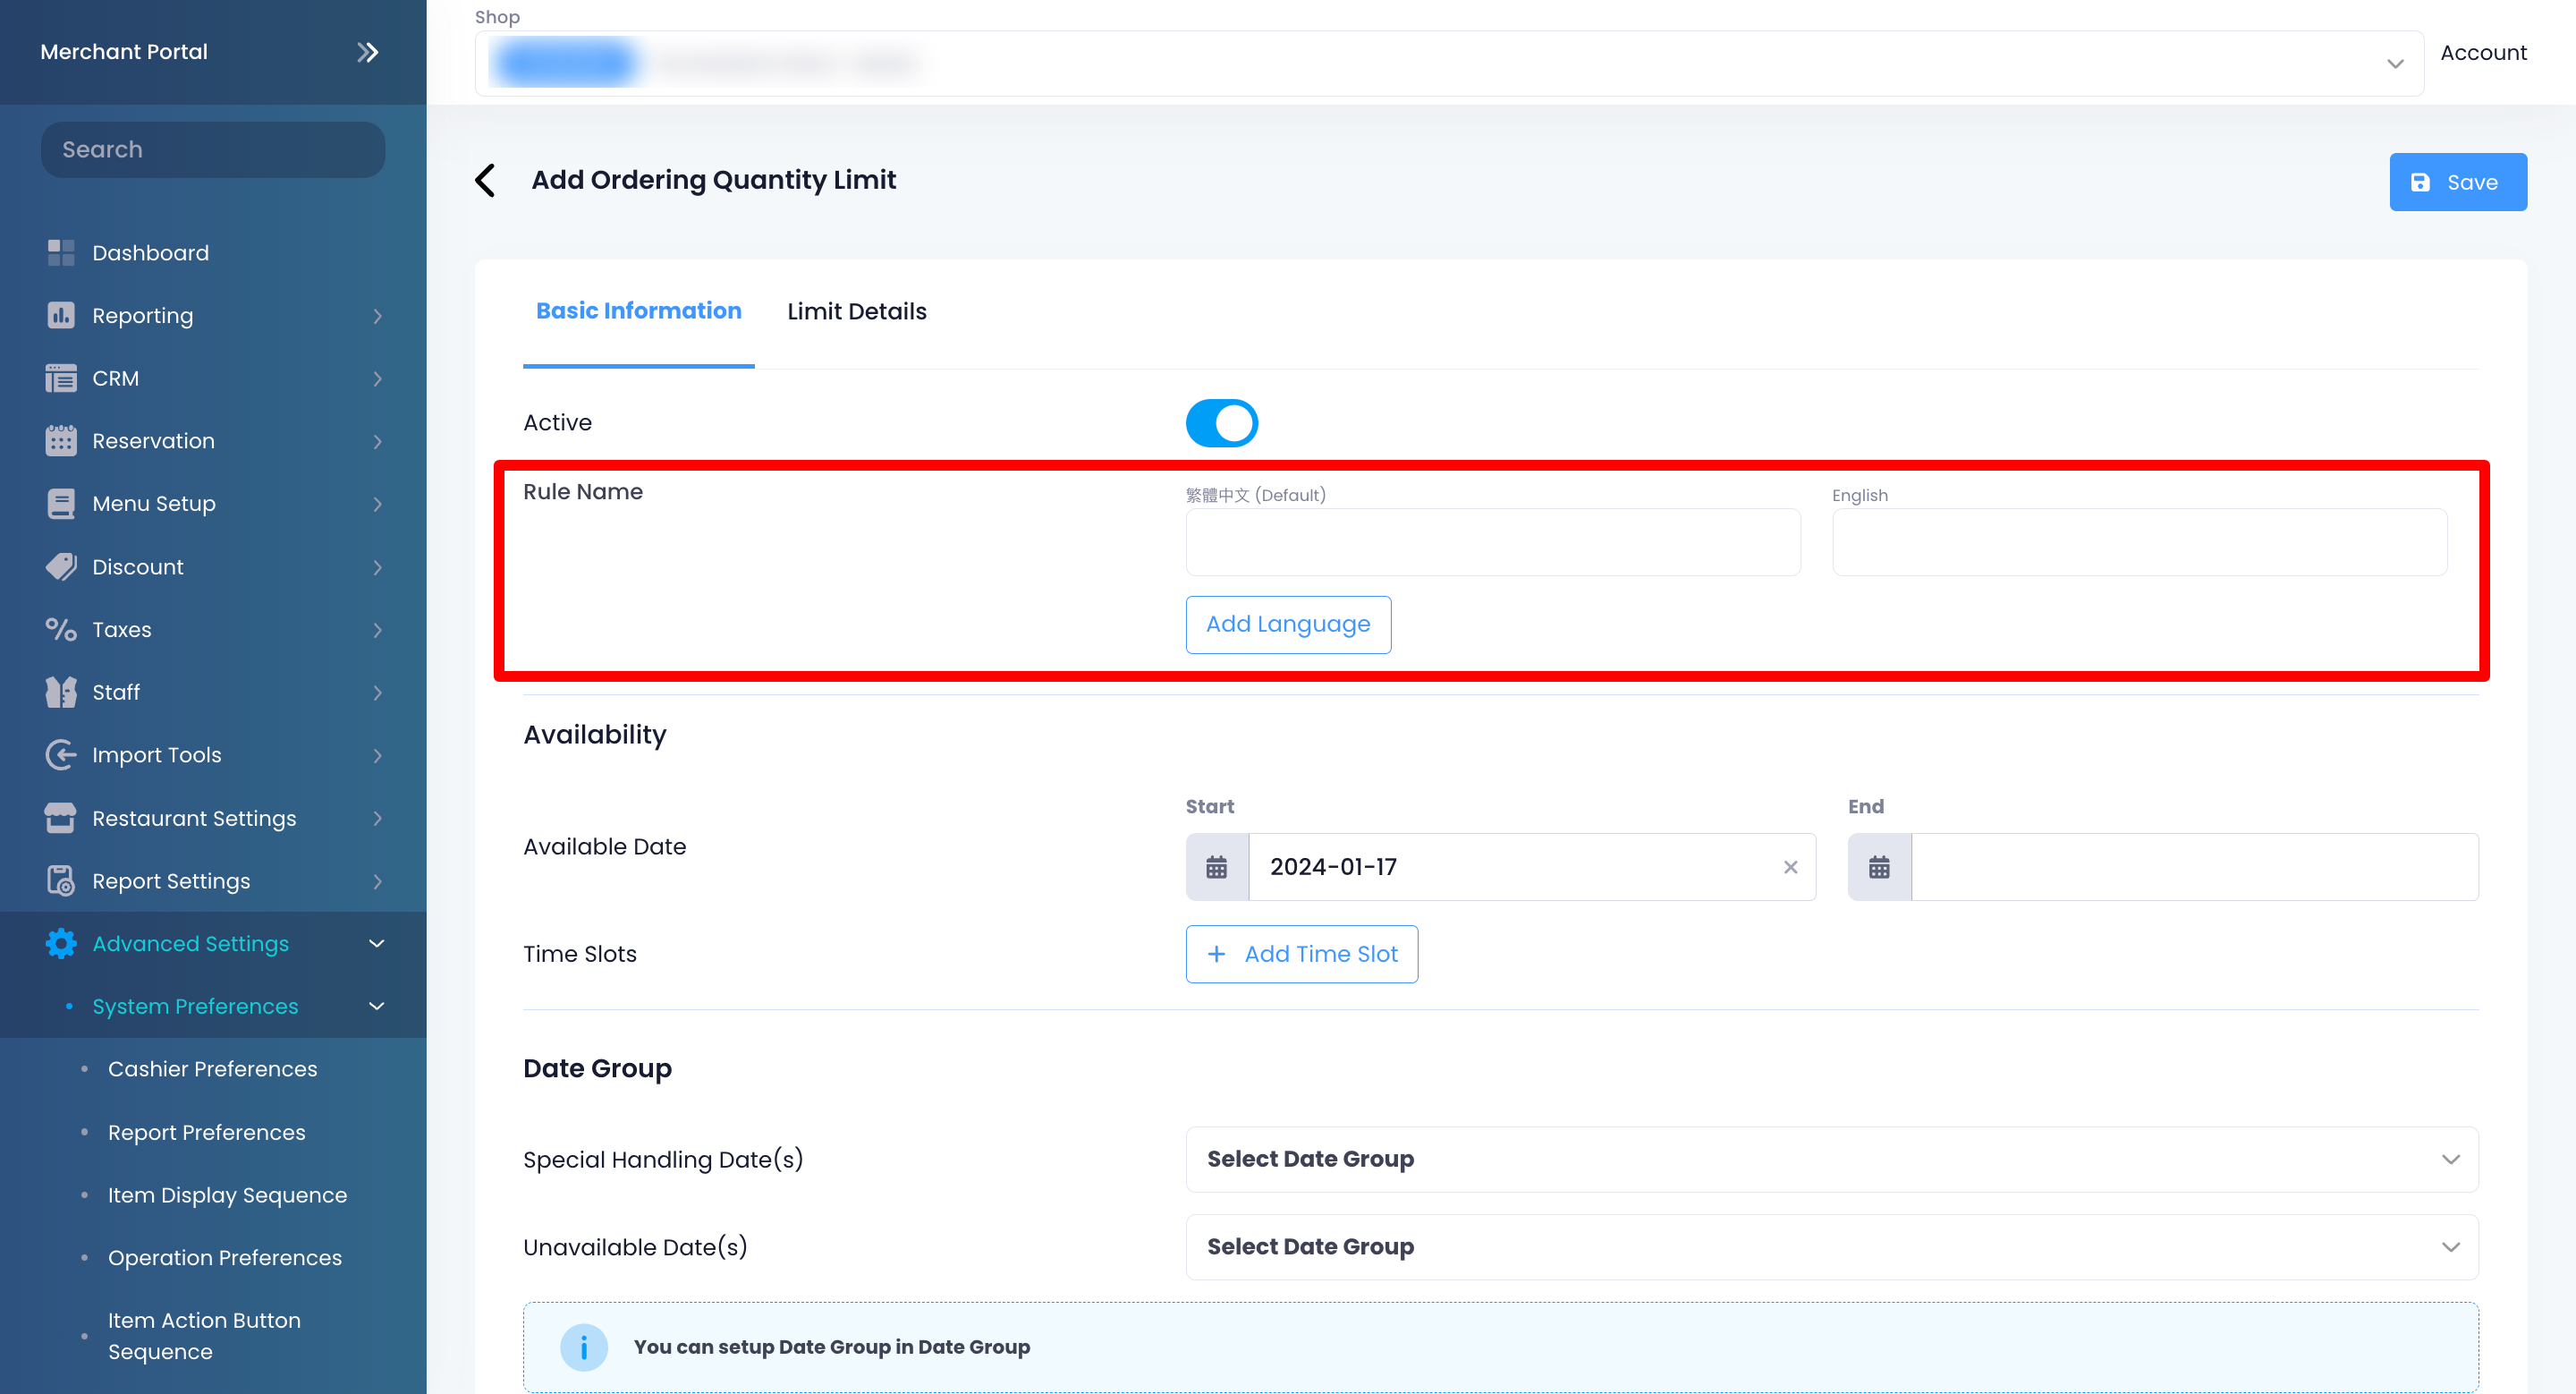 Note: To add a Rule Name in another language, click on Add Language. Then, select the language.
 - Set the date and time when the Ordering Quantity Limit would apply to orders.
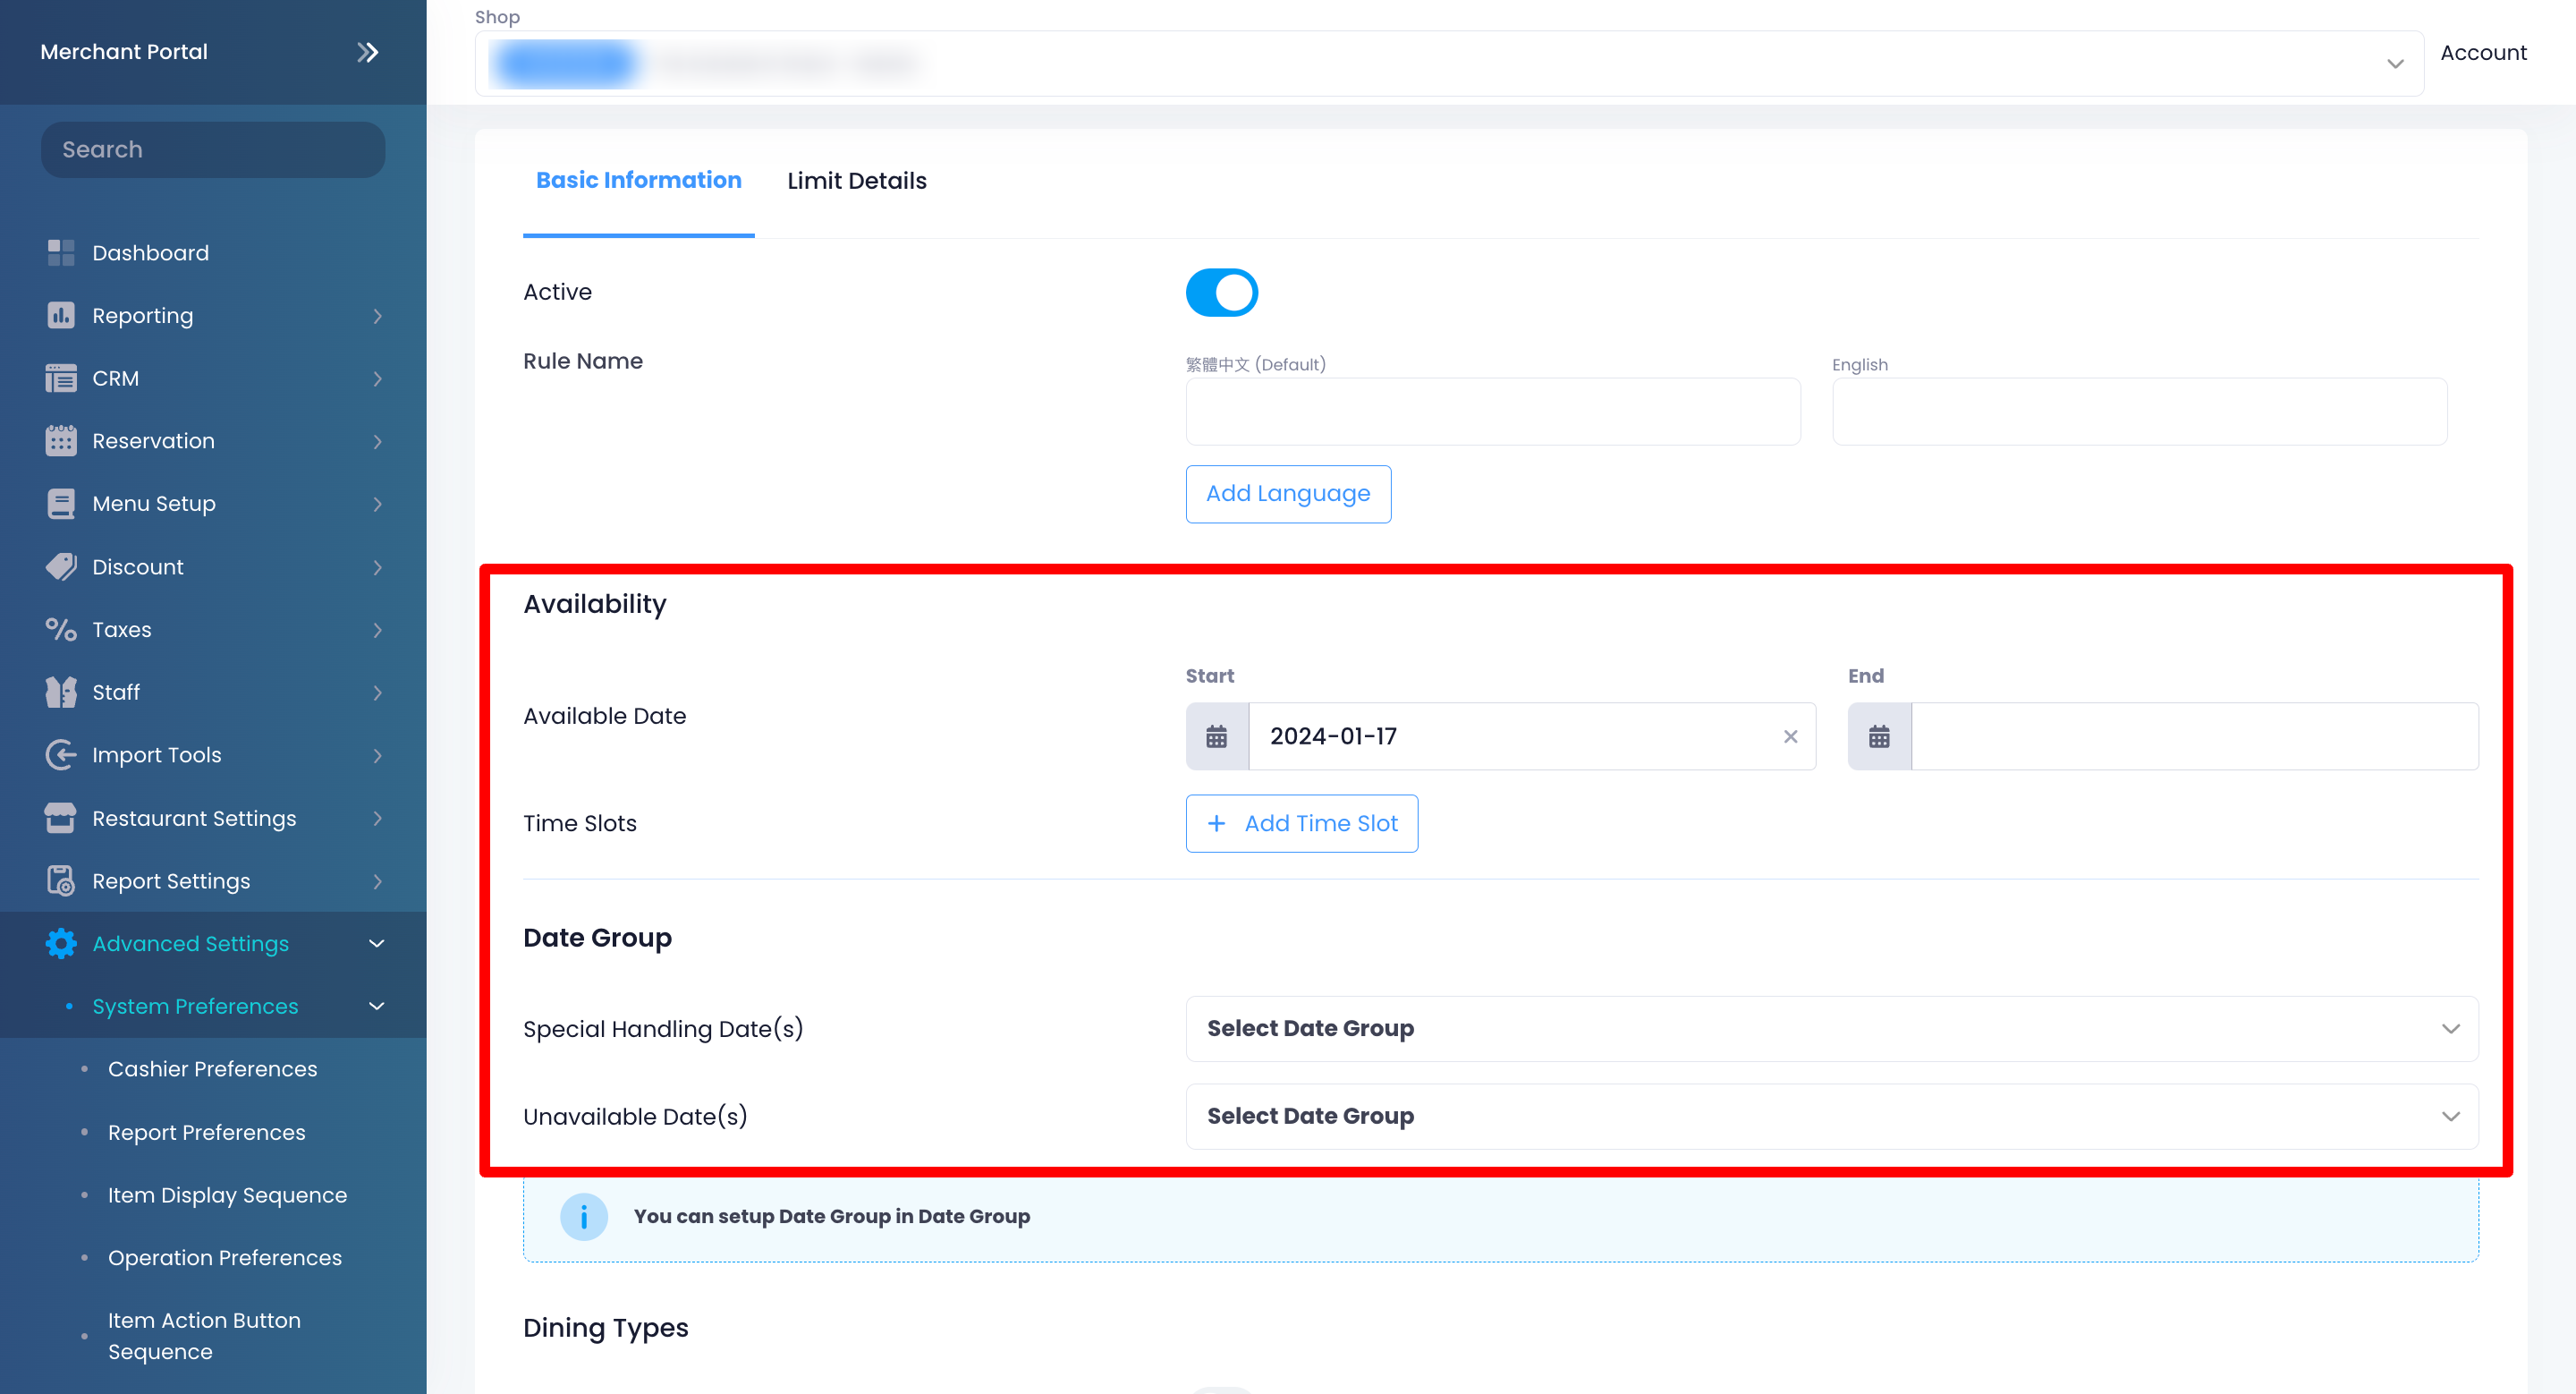
- Select the Dining Types where the Ordering Quantity Limit would apply.
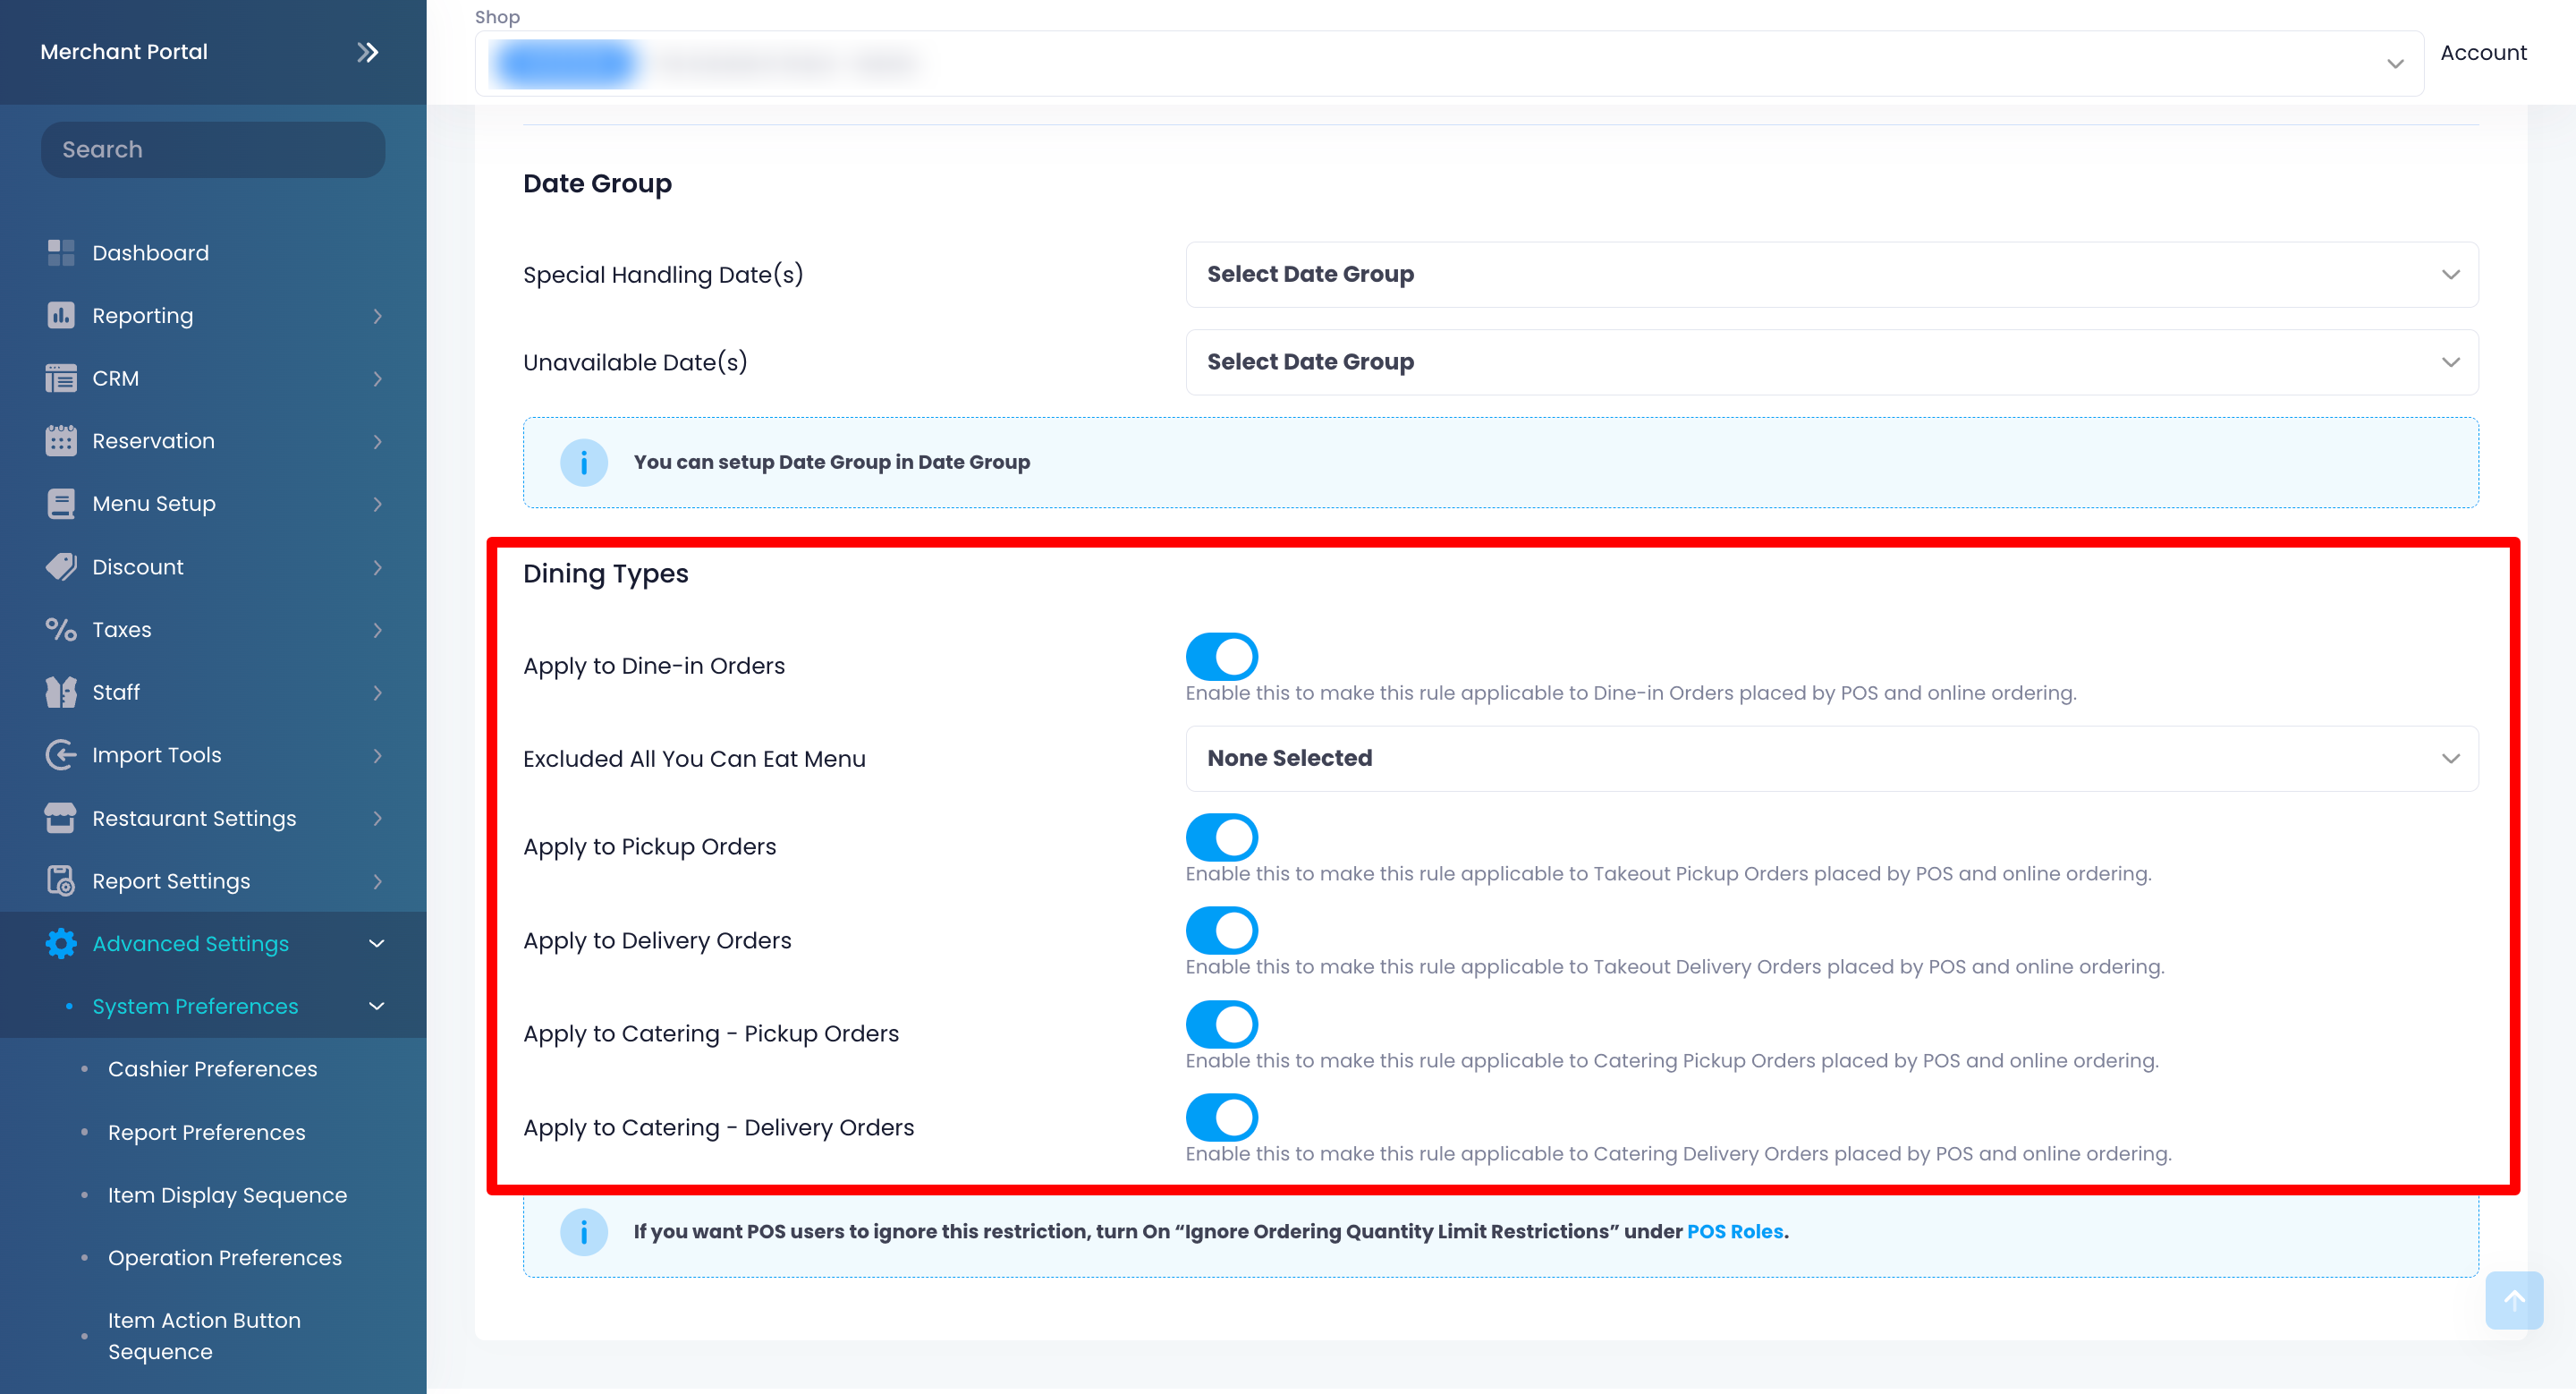 Note: If you want a specific POS user to bypass this restriction, you can enable permissions to Ignore Ordering Quantity Limit Restrictions.
 - To set the conditions on how to limit items’ ordering quantity, click on the Limit Details tab.
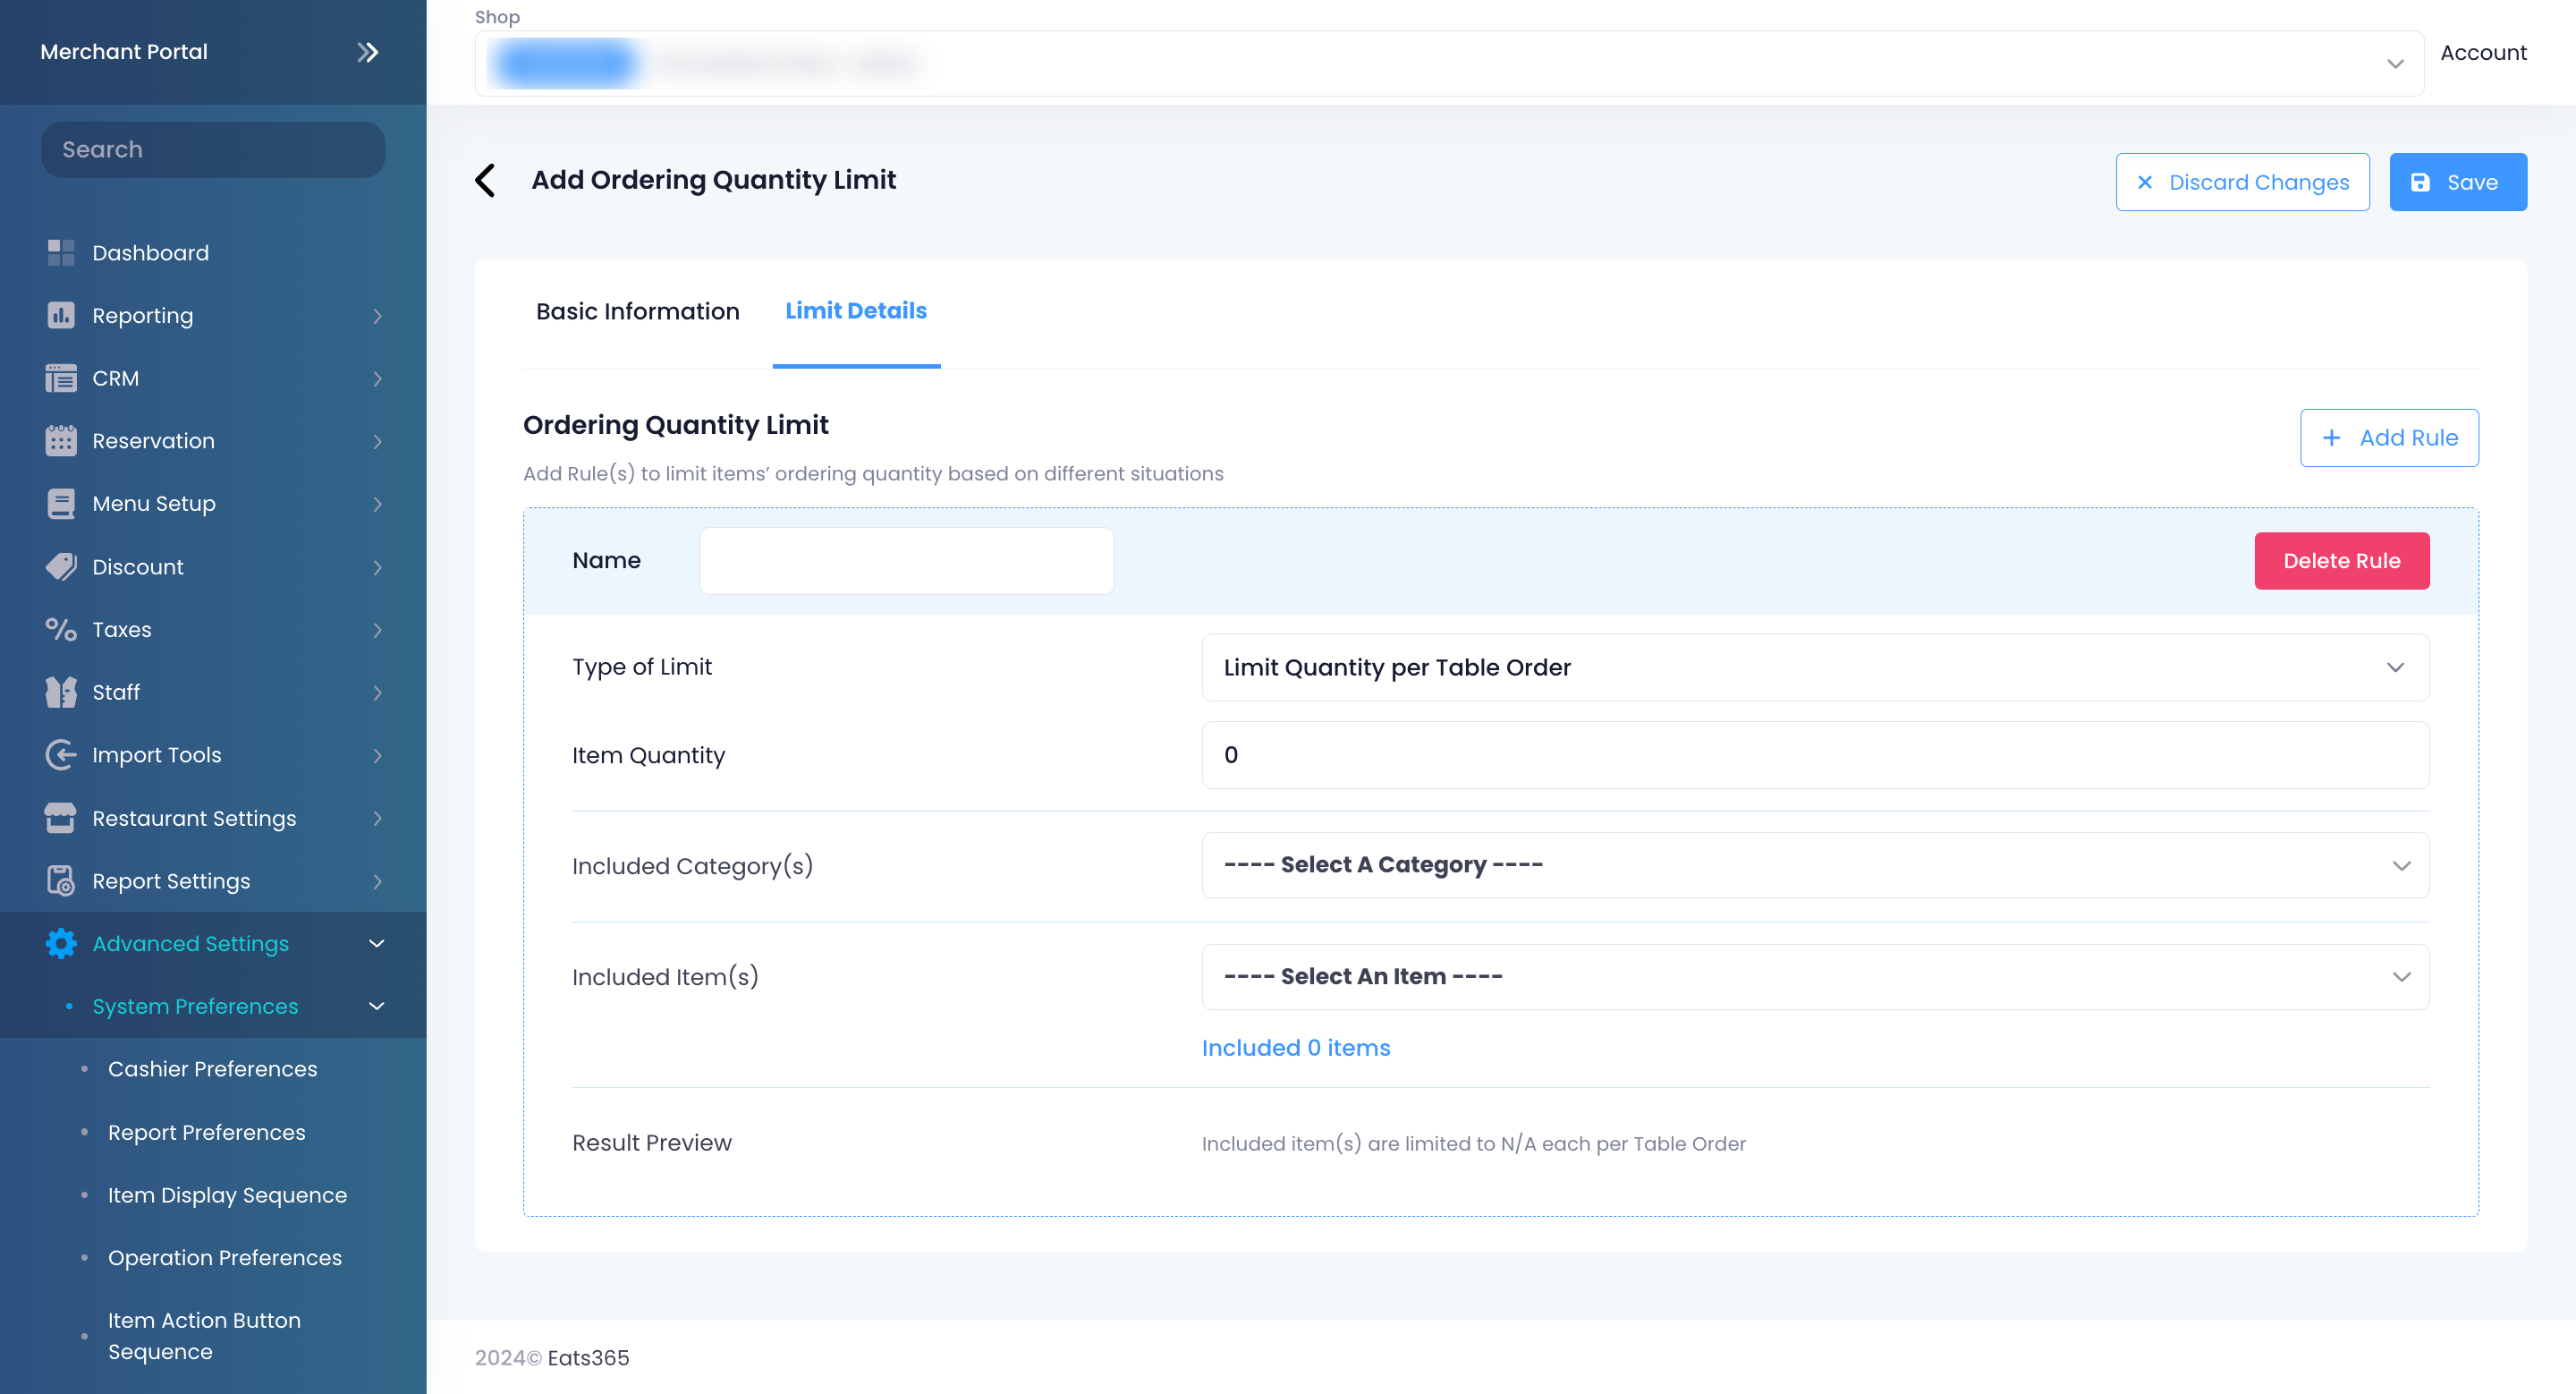
- Click on +Add Rule.
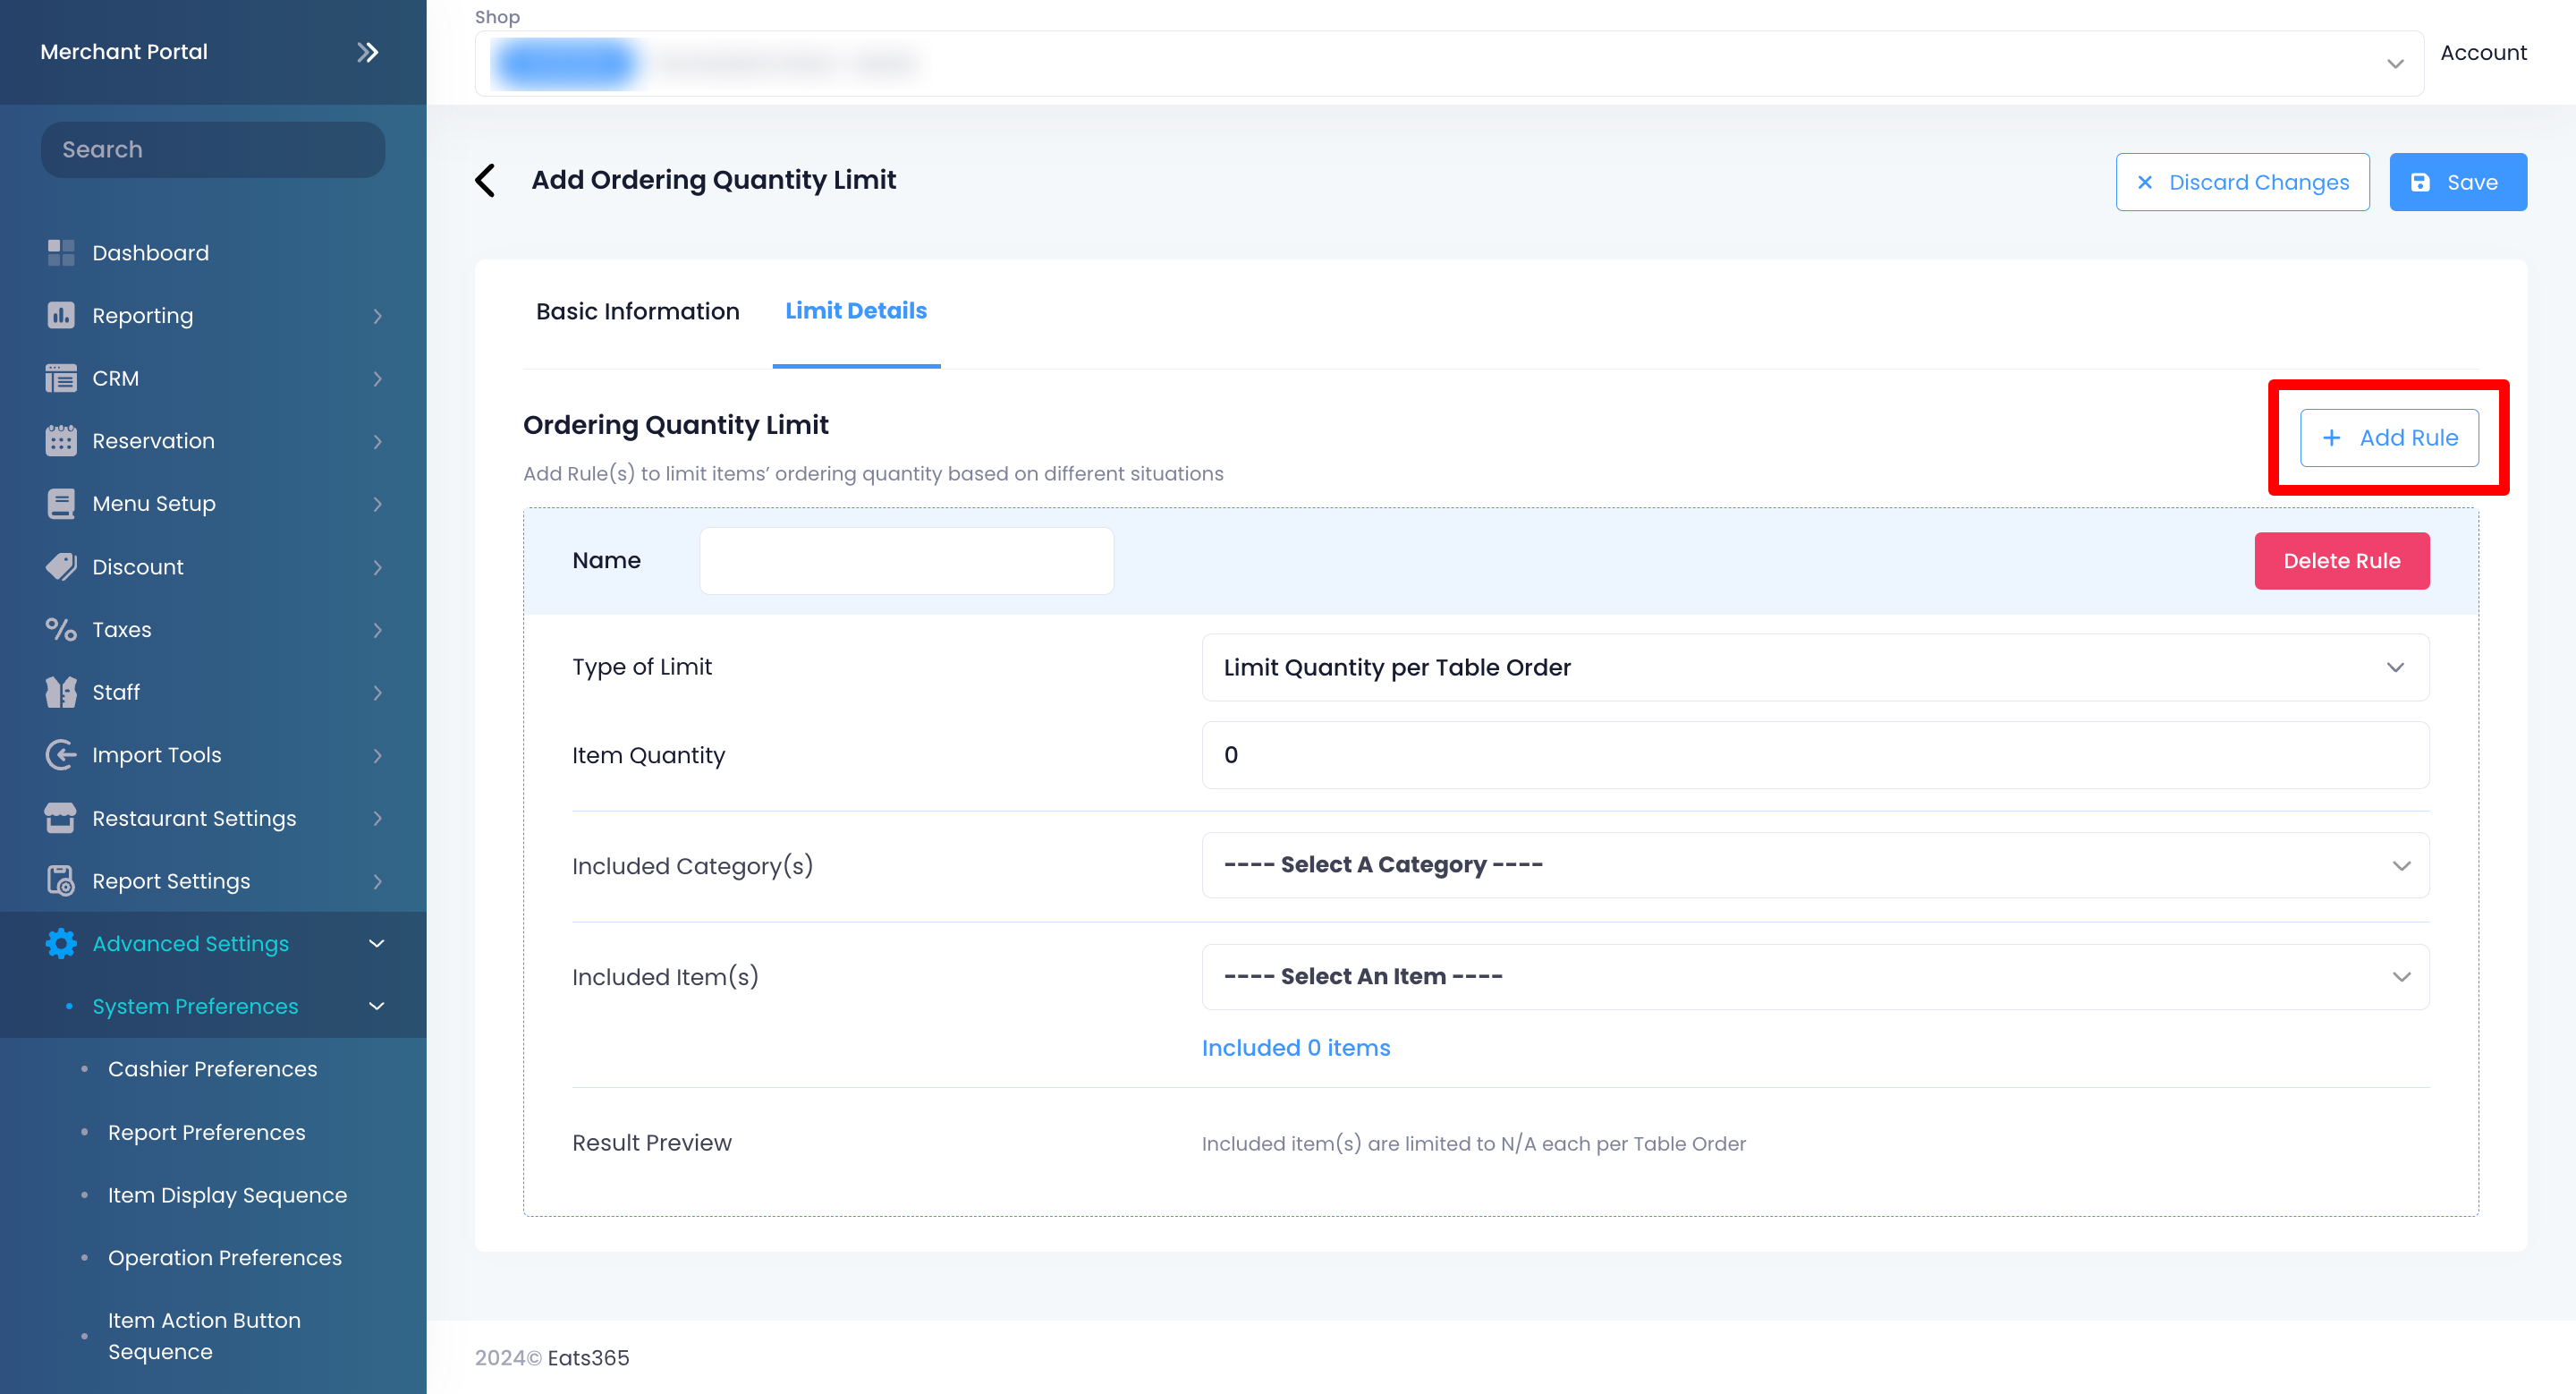
- Enter a rule name.
- Select the type of limit that you want to apply to the rule. For each limit type, you can set different conditions.
- To add another rule, click on +Add Rule.
- Click on Save to confirm.
Once the Ordering Quantity Limit is created and activated, the quantity limit will automatically apply to items included in the limit.
Use the guide below to set the conditions depending on the limit type:
Limit Quantity per Table Order
Allows you to limit the item quantity a table can order. For example, if you set the quantity limit to “1,” the table can only order one of the set items for the entire table. You can set the following conditions for Limit Quantity per Table Order:
- Item Quantity - Set the value of item quantity that customers can order.
-
Limit Per Item - Enable this setting to apply the Ordering Quantity Limit rule to the individual quantity of each included item, rather than the total number of items, rather than the total number of items a table can order.
For example, if Limit Per Item is enabled with an Item Quantity set to “2” and three included items in the rule (Burger, Fries, and Cola), the table will be able to order 2 servings of each item, allowing the table to order 2 Burgers, 2 Fries, and 2 Colas. If disabled, the table can only order 2 included items or 2 servings of the included items. - Included Category(s) - Select a category where the limit would apply.
- Included Item(s) - Select the item where the limit would apply.
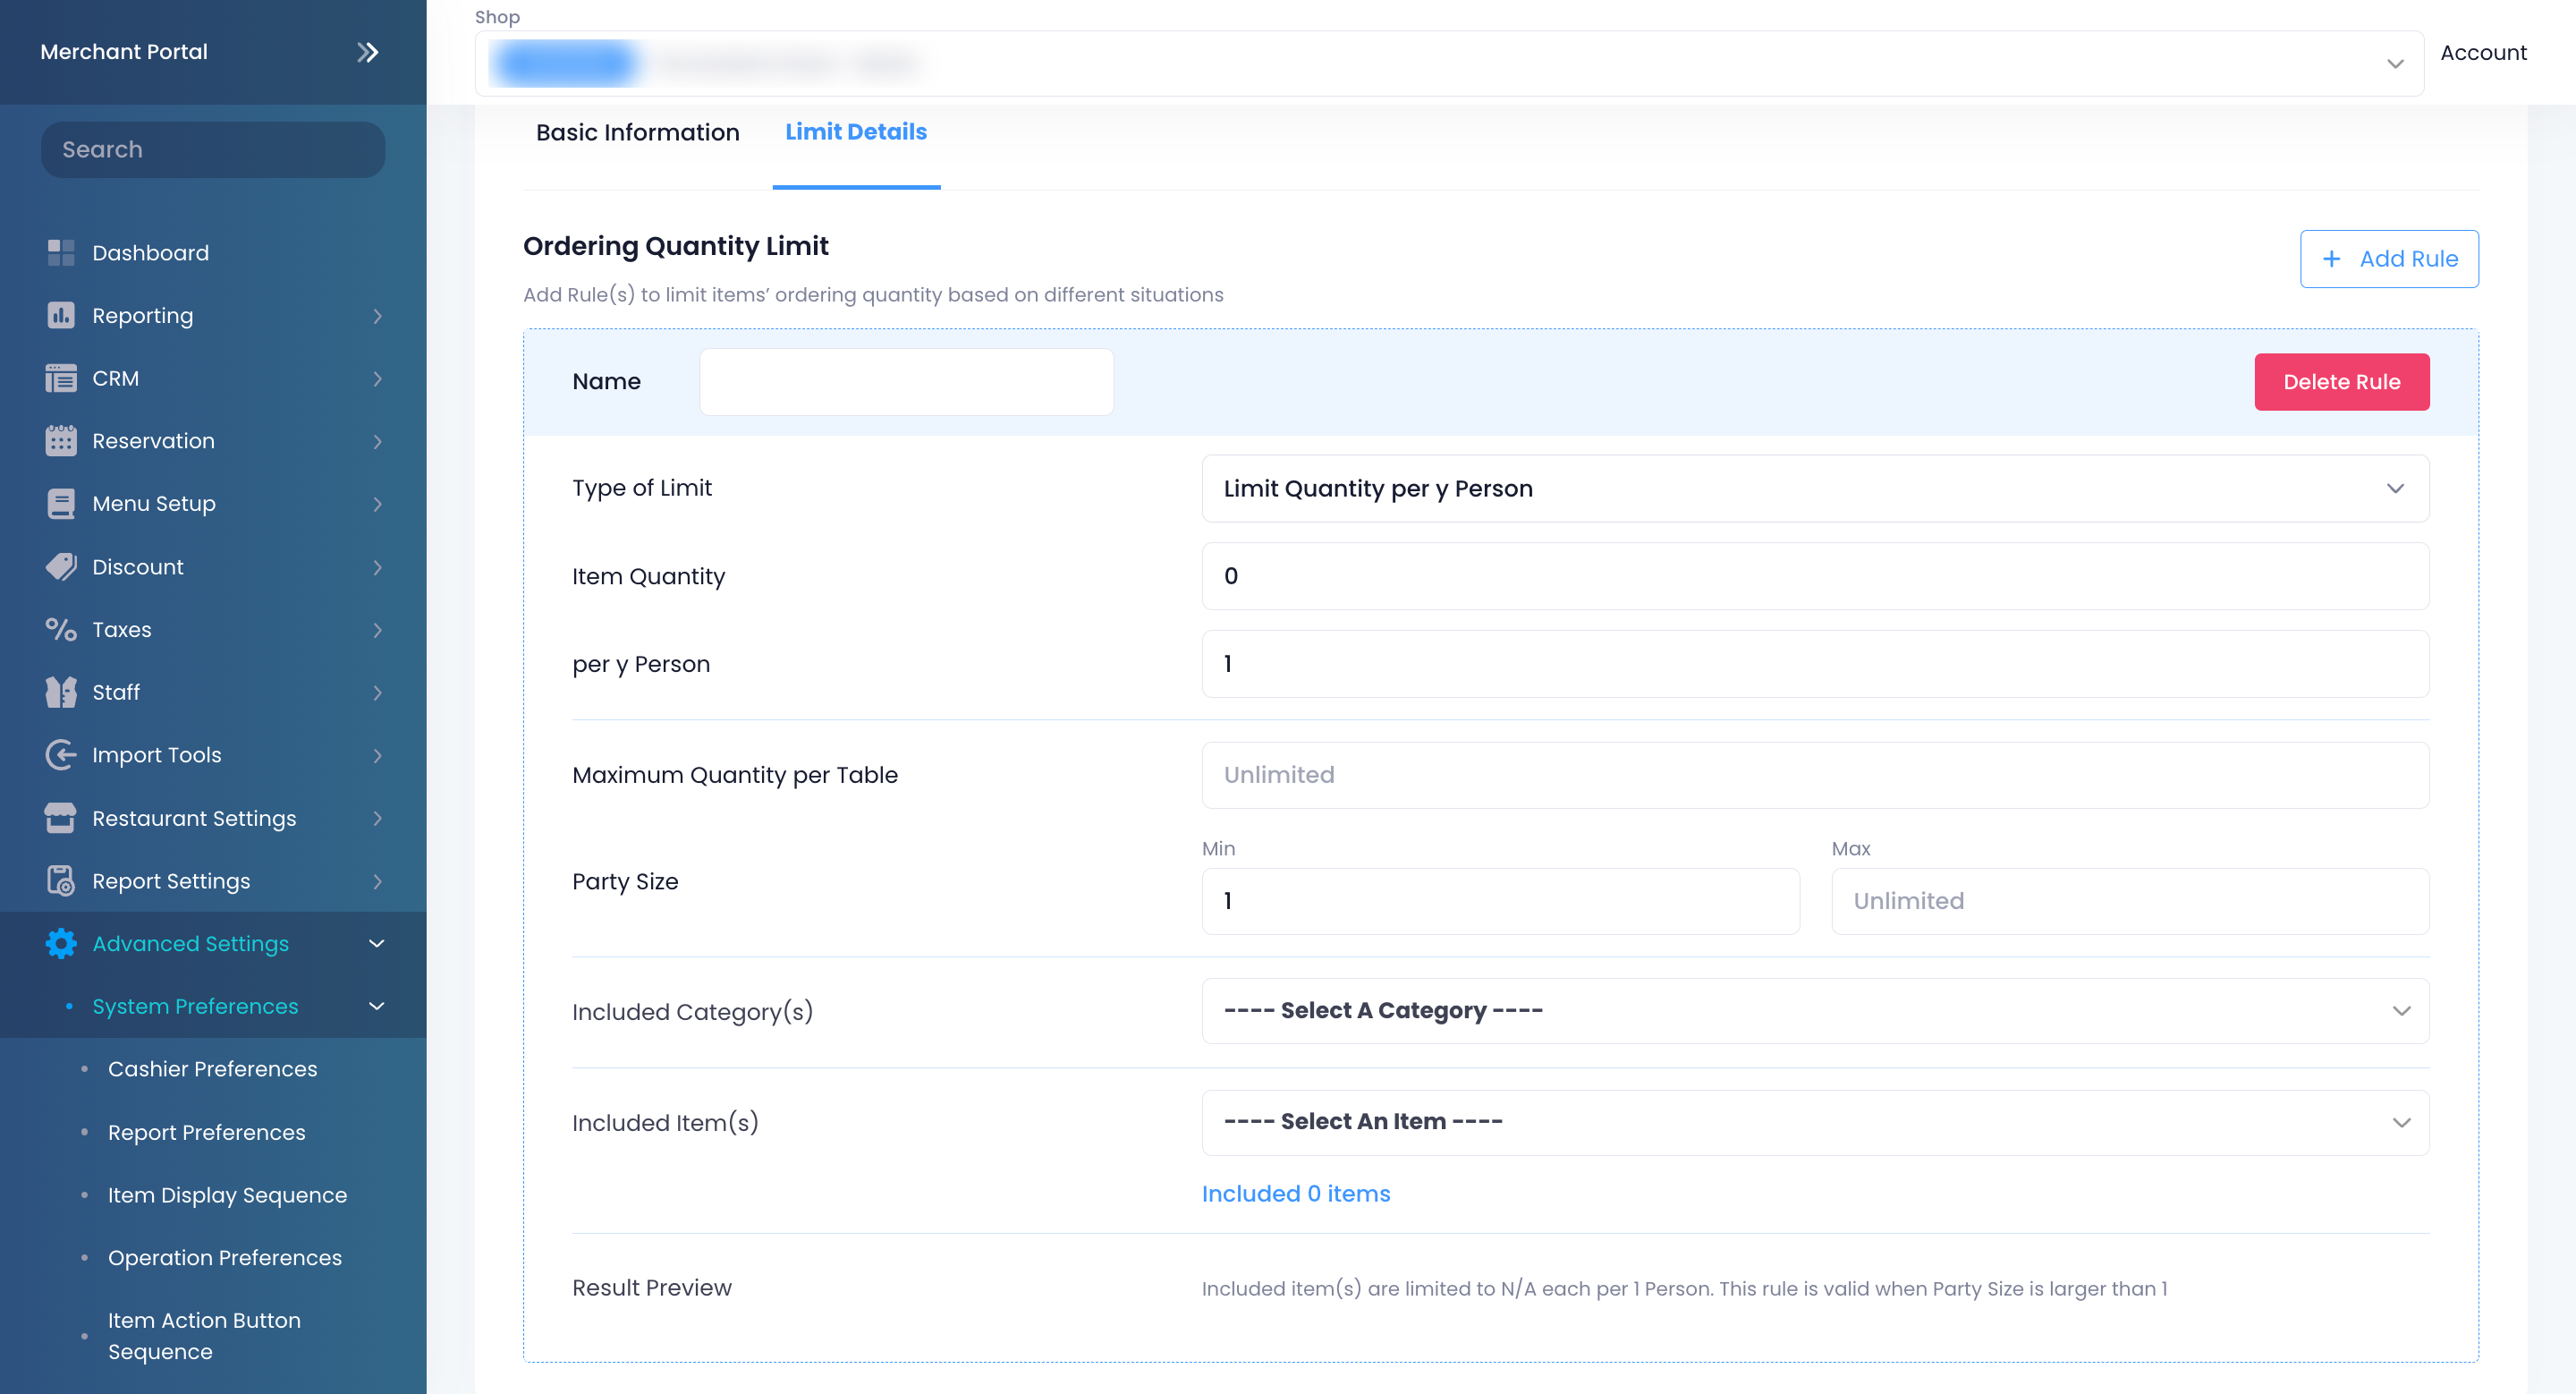
Limit Quantity per y Person
Allows you to limit the item quantity a table can order for every “y” person in the party. For example, if you set the quantity limit for Cola to “1,” and set the number of y person to “2,” a party of 10 can order 5 colas for the entire table, or 1 cola for every 2 persons in the party. You can set the following conditions for Limit Quantity per y Person:
- Item Quantity - Set the value of item quantity that customers can order.
-
Limit Per Item - Enable this setting to apply the Ordering Quantity Limit rule to the individual quantity of each included item, rather than the total number of items a party can order.
For example, if Limit Per Item is enabled with an Item Quantity set to “2” and three included items in the rule (Burger, Fries, and Cola), the party will be able to order 2 servings of each item, allowing them to order 2 Burgers, 2 Fries, and 2 Colas. If disabled, they can only order 2 included items or 2 servings of the included items. per y Person - Set the value of “y”.
Maximum Quantity per Table - Set the maximum number of items a table can order. For example, if you set the number to “3,” even if there are six or more persons in a party, the maximum quantity that the table can order is three.
Party Size - Set the minimum and maximum range for the party size.
Included Category(s) - Select a category where the limit would apply.
Included Item(s) - Select the item where the limit would apply.
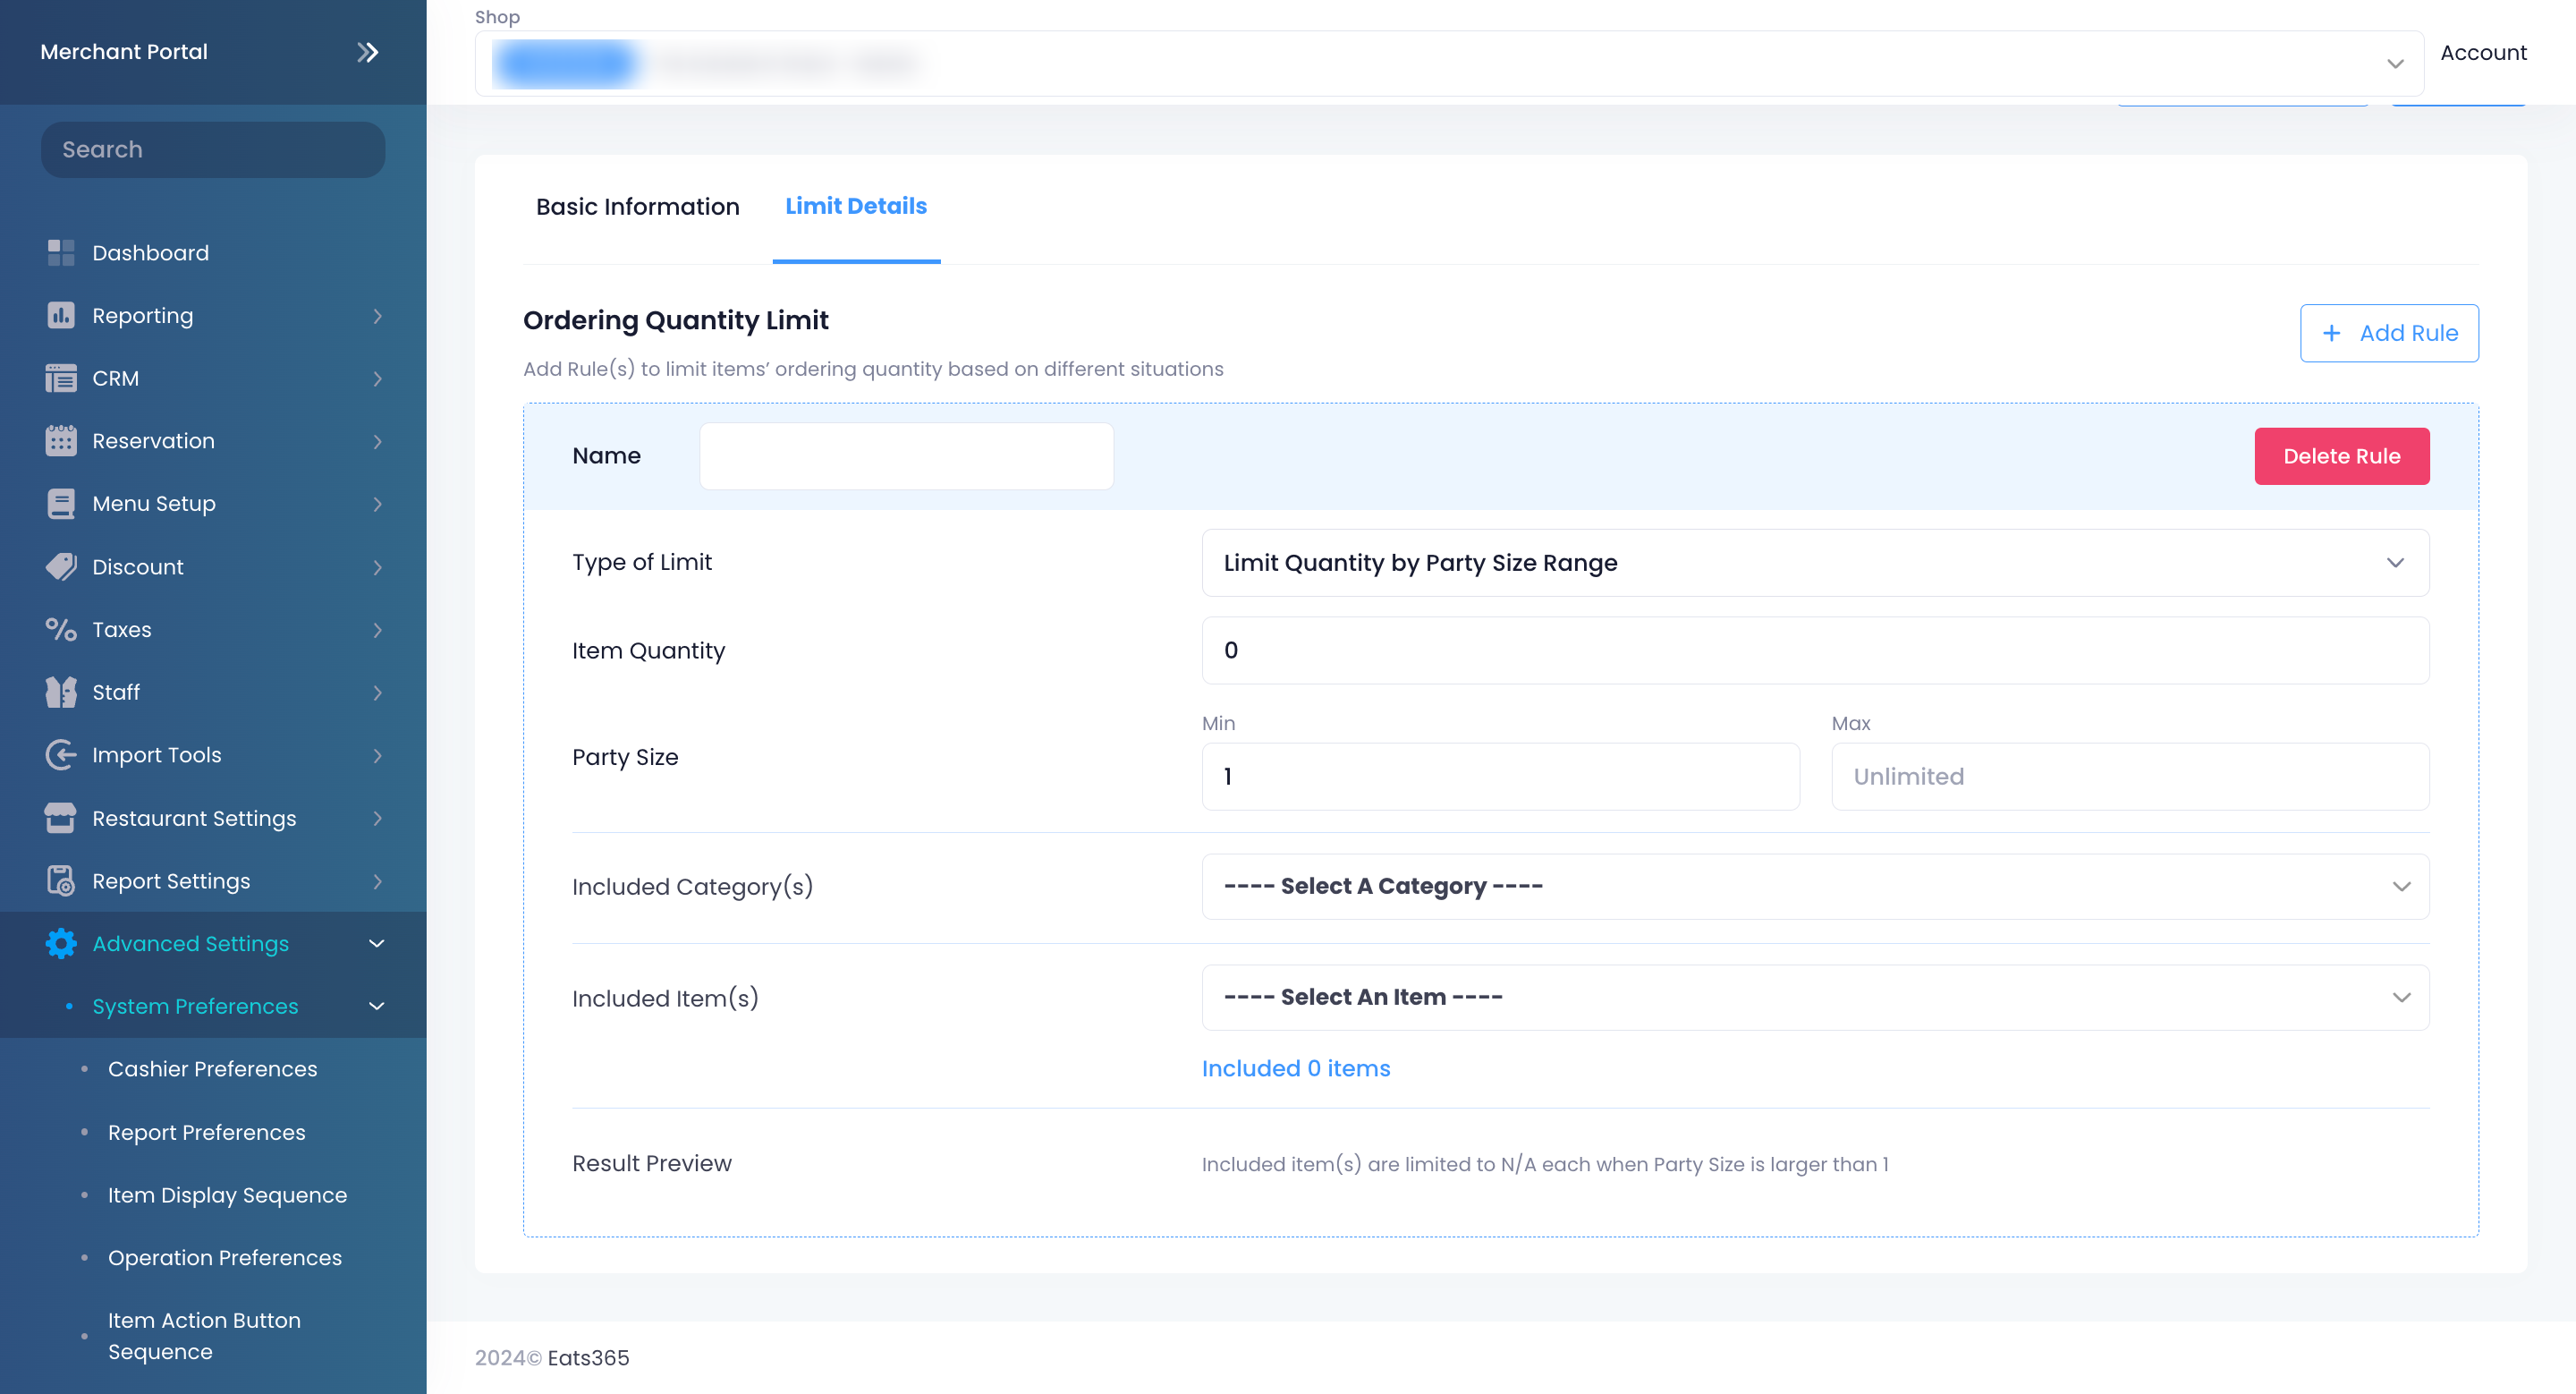
Limit Quantity by Party Size Range
Allows you to limit the item quantity a table can order depending on the party size. For example, you can set a rule that for a party size of 2 to 5, the table can only order one of the set item, or for a party size of 6 to 10, the table can order two sets of the item. You can set the following conditions for Limit Quantity by Party Size Range:
- Item Quantity - Set the value of item quantity that customers can order.
-
Limit Per Item - Enable this setting to apply the Ordering Quantity Limit rule to the individual quantity of each included item, rather than the total number of items a party can order.
For example, if Limit Per Item is enabled with an Item Quantity set to “2” and three included items in the rule (Burger, Fries, and Cola), the party will be able to order 2 servings of each item, allowing the customers to order 2 Burgers, 2 Fries, and 2 Colas. If disabled, they can only order 2 included items or 2 servings of the included items. - Party Size - Set the minimum and maximum range for the party size.
- Included Category(s) - Select a category where the limit would apply.
- Included Item(s) - Select the item where the limit would apply.
Limit Quantity per Order Attempt per Person
Allows you to limit the item quantity a person can order per order attempt. For example, if you set the quantity limit to “1,” each person in the table can only order one set of the item per order. If they want to order the same item again, the same rule would apply for each succeeding order. You can set the following conditions for Limit Quantity per Order Attempt per Person:
- Item Quantity - Set the value of item quantity that customers can order.
-
Limit Per Item - Enable this setting to apply the Ordering Quantity Limit rule to the individual quantity of each included item, rather than the total number of items a customer can order per order attempt.
For example, if Limit Per Item is enabled with an Item Quantity set to “2” and three included items in the rule (Burger, Fries, and Cola), the customer will be able to order 2 servings of each item, allowing them to order 2 Burgers, 2 Fries, and 2 Colas. If disabled, they can only order 2 included items or 2 servings of the included items. - Included Category(s) - Select a category where the limit would apply.
- Included Item(s) - Select the item where the limit would apply.

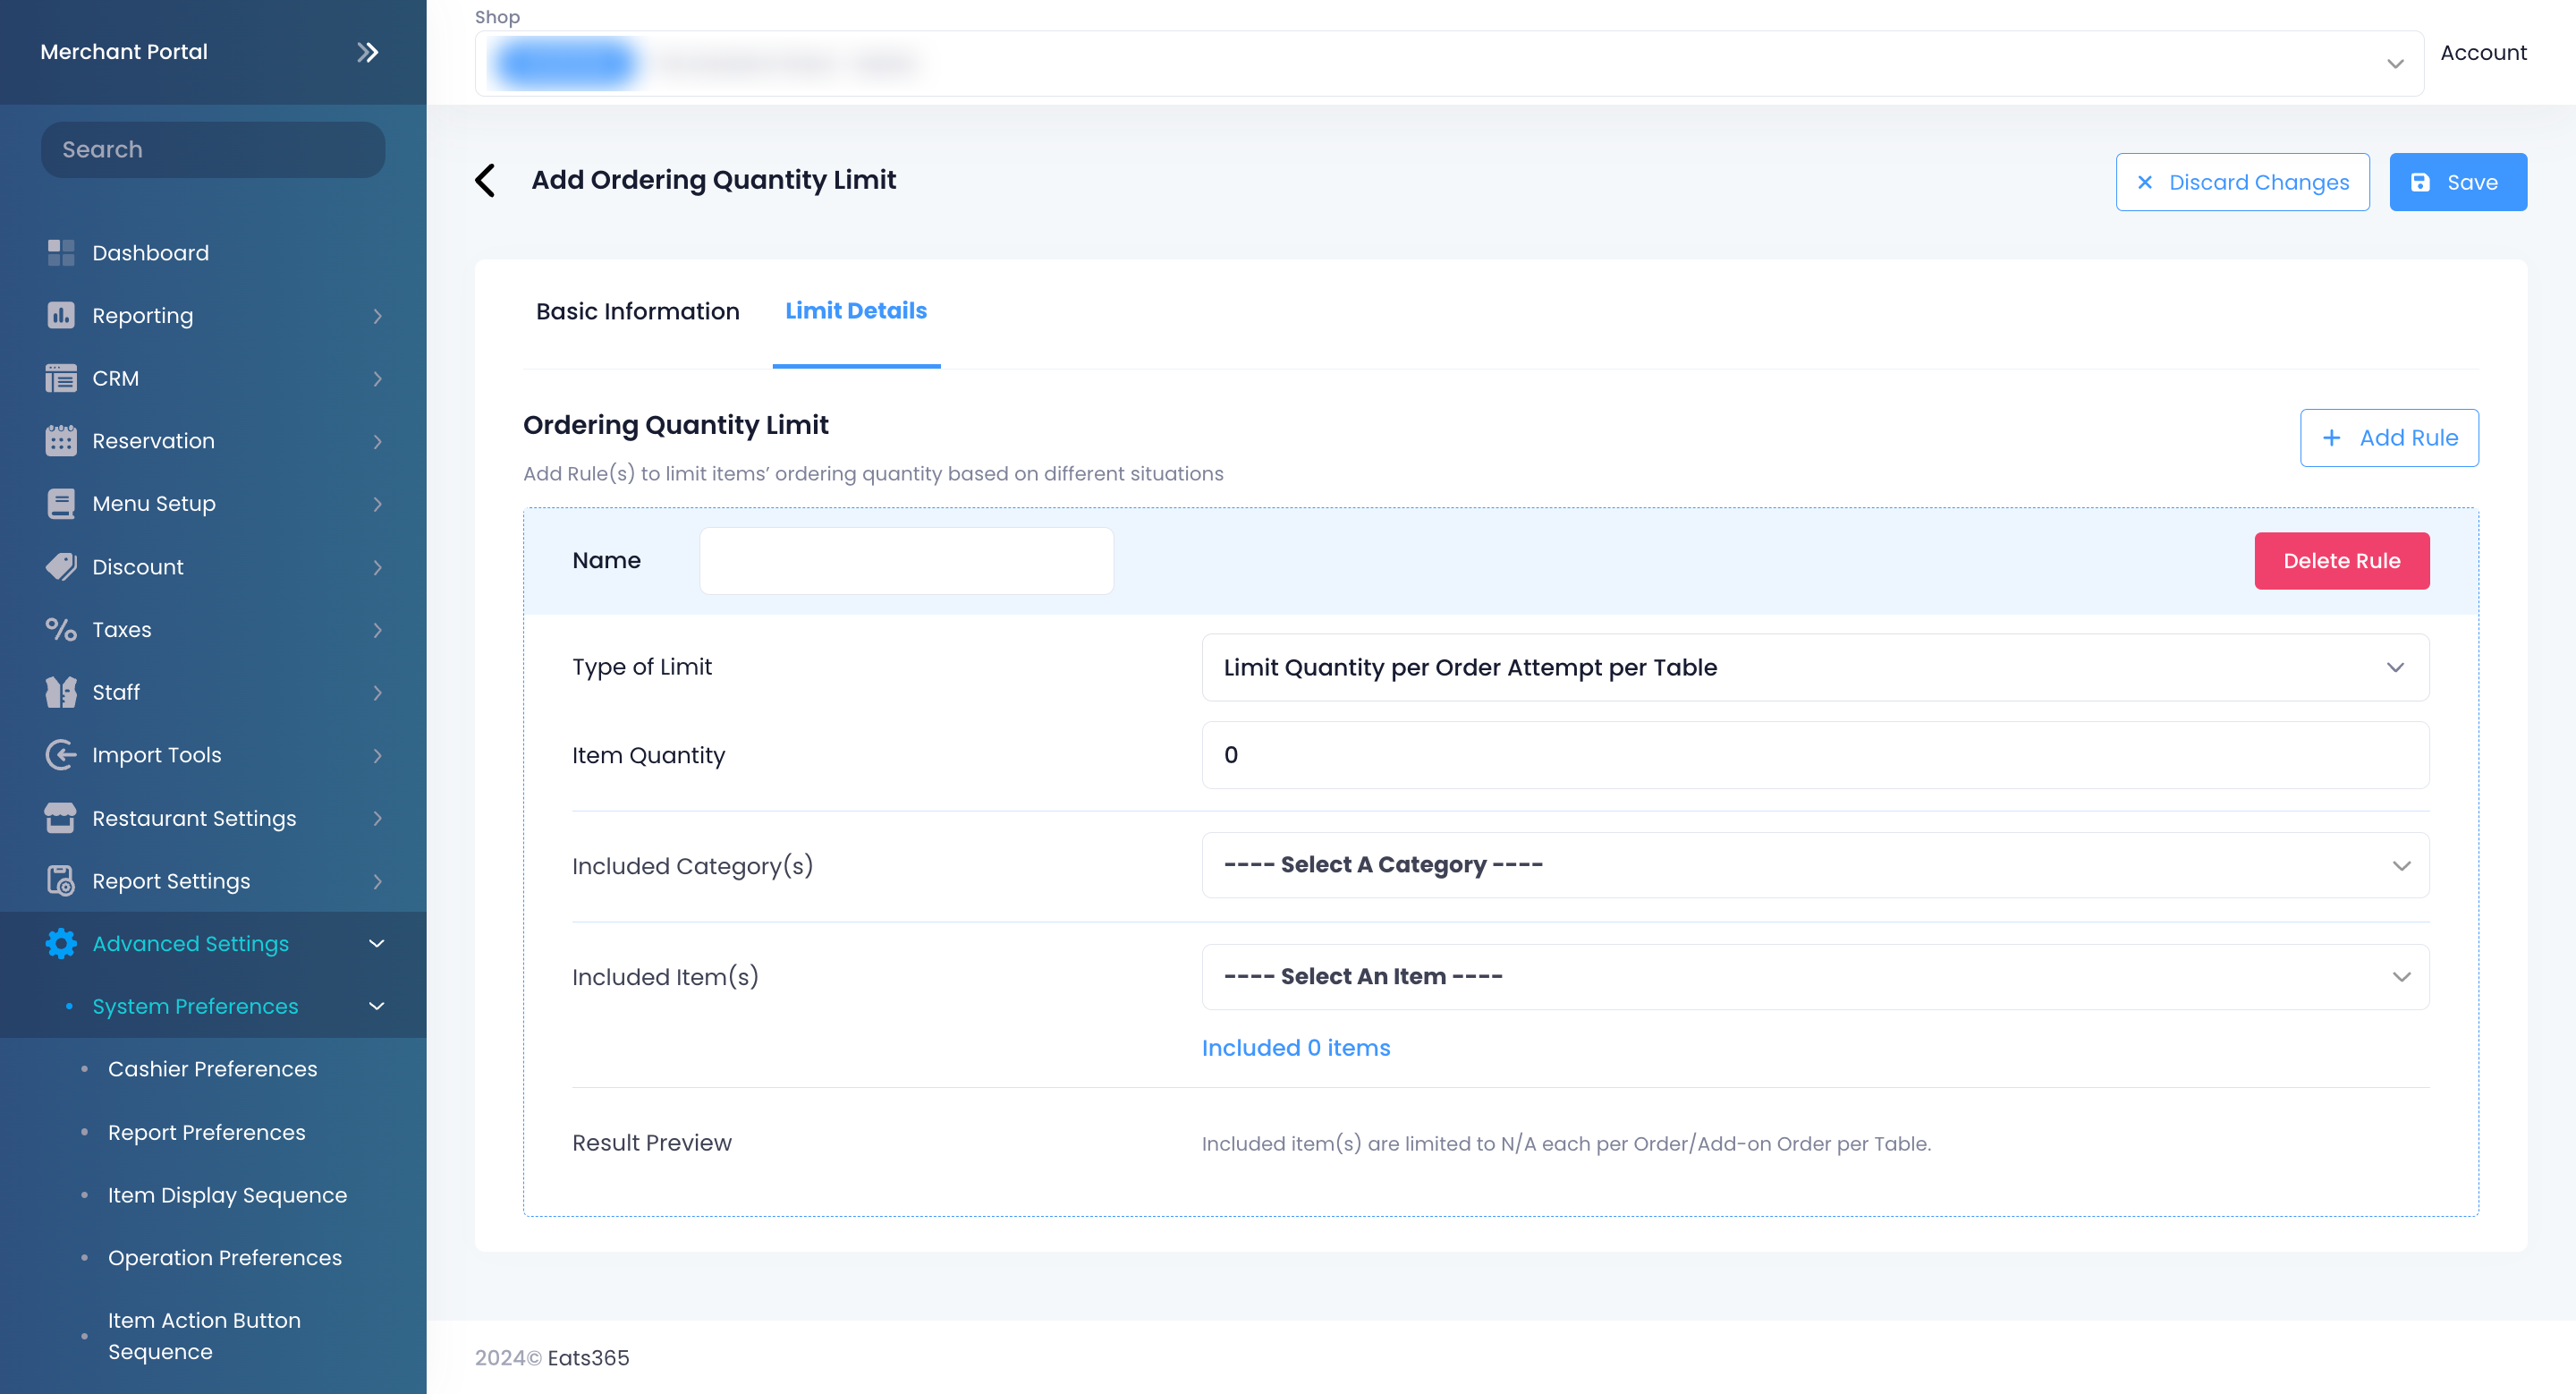
Limit Quantity per Order Attempt per Table
Allows you to limit the item quantity a table can order per order attempt. For example, if you set the quantity limit to “1,” the table can only order one set of the item per order. If they want to order the same item again, the same rule would apply for each succeeding order. You can set the following conditions for Limit Quantity per Order Attempt per Table:
- Item Quantity - Set the value of item quantity that customers can order.
-
Limit Per Item - Enable this setting to apply the Ordering Quantity Limit rule to the individual quantity of each included item, rather than the total number of items a table can order per order attempt.
For example, if Limit Per Item is enabled with an Item Quantity set to “2” and three included items in the rule (Burger, Fries, and Cola), the table will be able to order 2 servings of each item, allowing the table to order 2 Burgers, 2 Fries, and 2 Colas. If disabled, the table can only order 2 included items or 2 servings of the included items. - Included Category(s) - Select a category where the limit would apply.
- Included Item(s) - Select the item where the limit would apply.
Limit Quantity per Person
Allows you to limit the quantity each person in the party can order. For example, if you set the quantity limit to “1” for a Cola and there are three persons in the party, each member of the party can order one Cola or a total of three Colas for the entire table. You can set the following conditions for Limit Quantity per Person:
- Item Quantity - Set the value of item quantity that customers can order.
-
Limit Per Item - Enable this setting to apply the Ordering Quantity Limit rule to the individual quantity of each included item, rather than the total number of items a customer can order.
For example, if Limit Per Item is enabled with an Item Quantity set to “2” and three included items in the rule (Burger, Fries, and Cola), the customer will be able to order 2 servings of each item, allowing the customer to order 2 Burgers, 2 Fries, and 2 Colas. If disabled, the customer can only order 2 included items or 2 servings of the included items. - Included Category(s) - Select a category where the limit would apply.
- Included Item(s) - Select the item where the limit would apply.

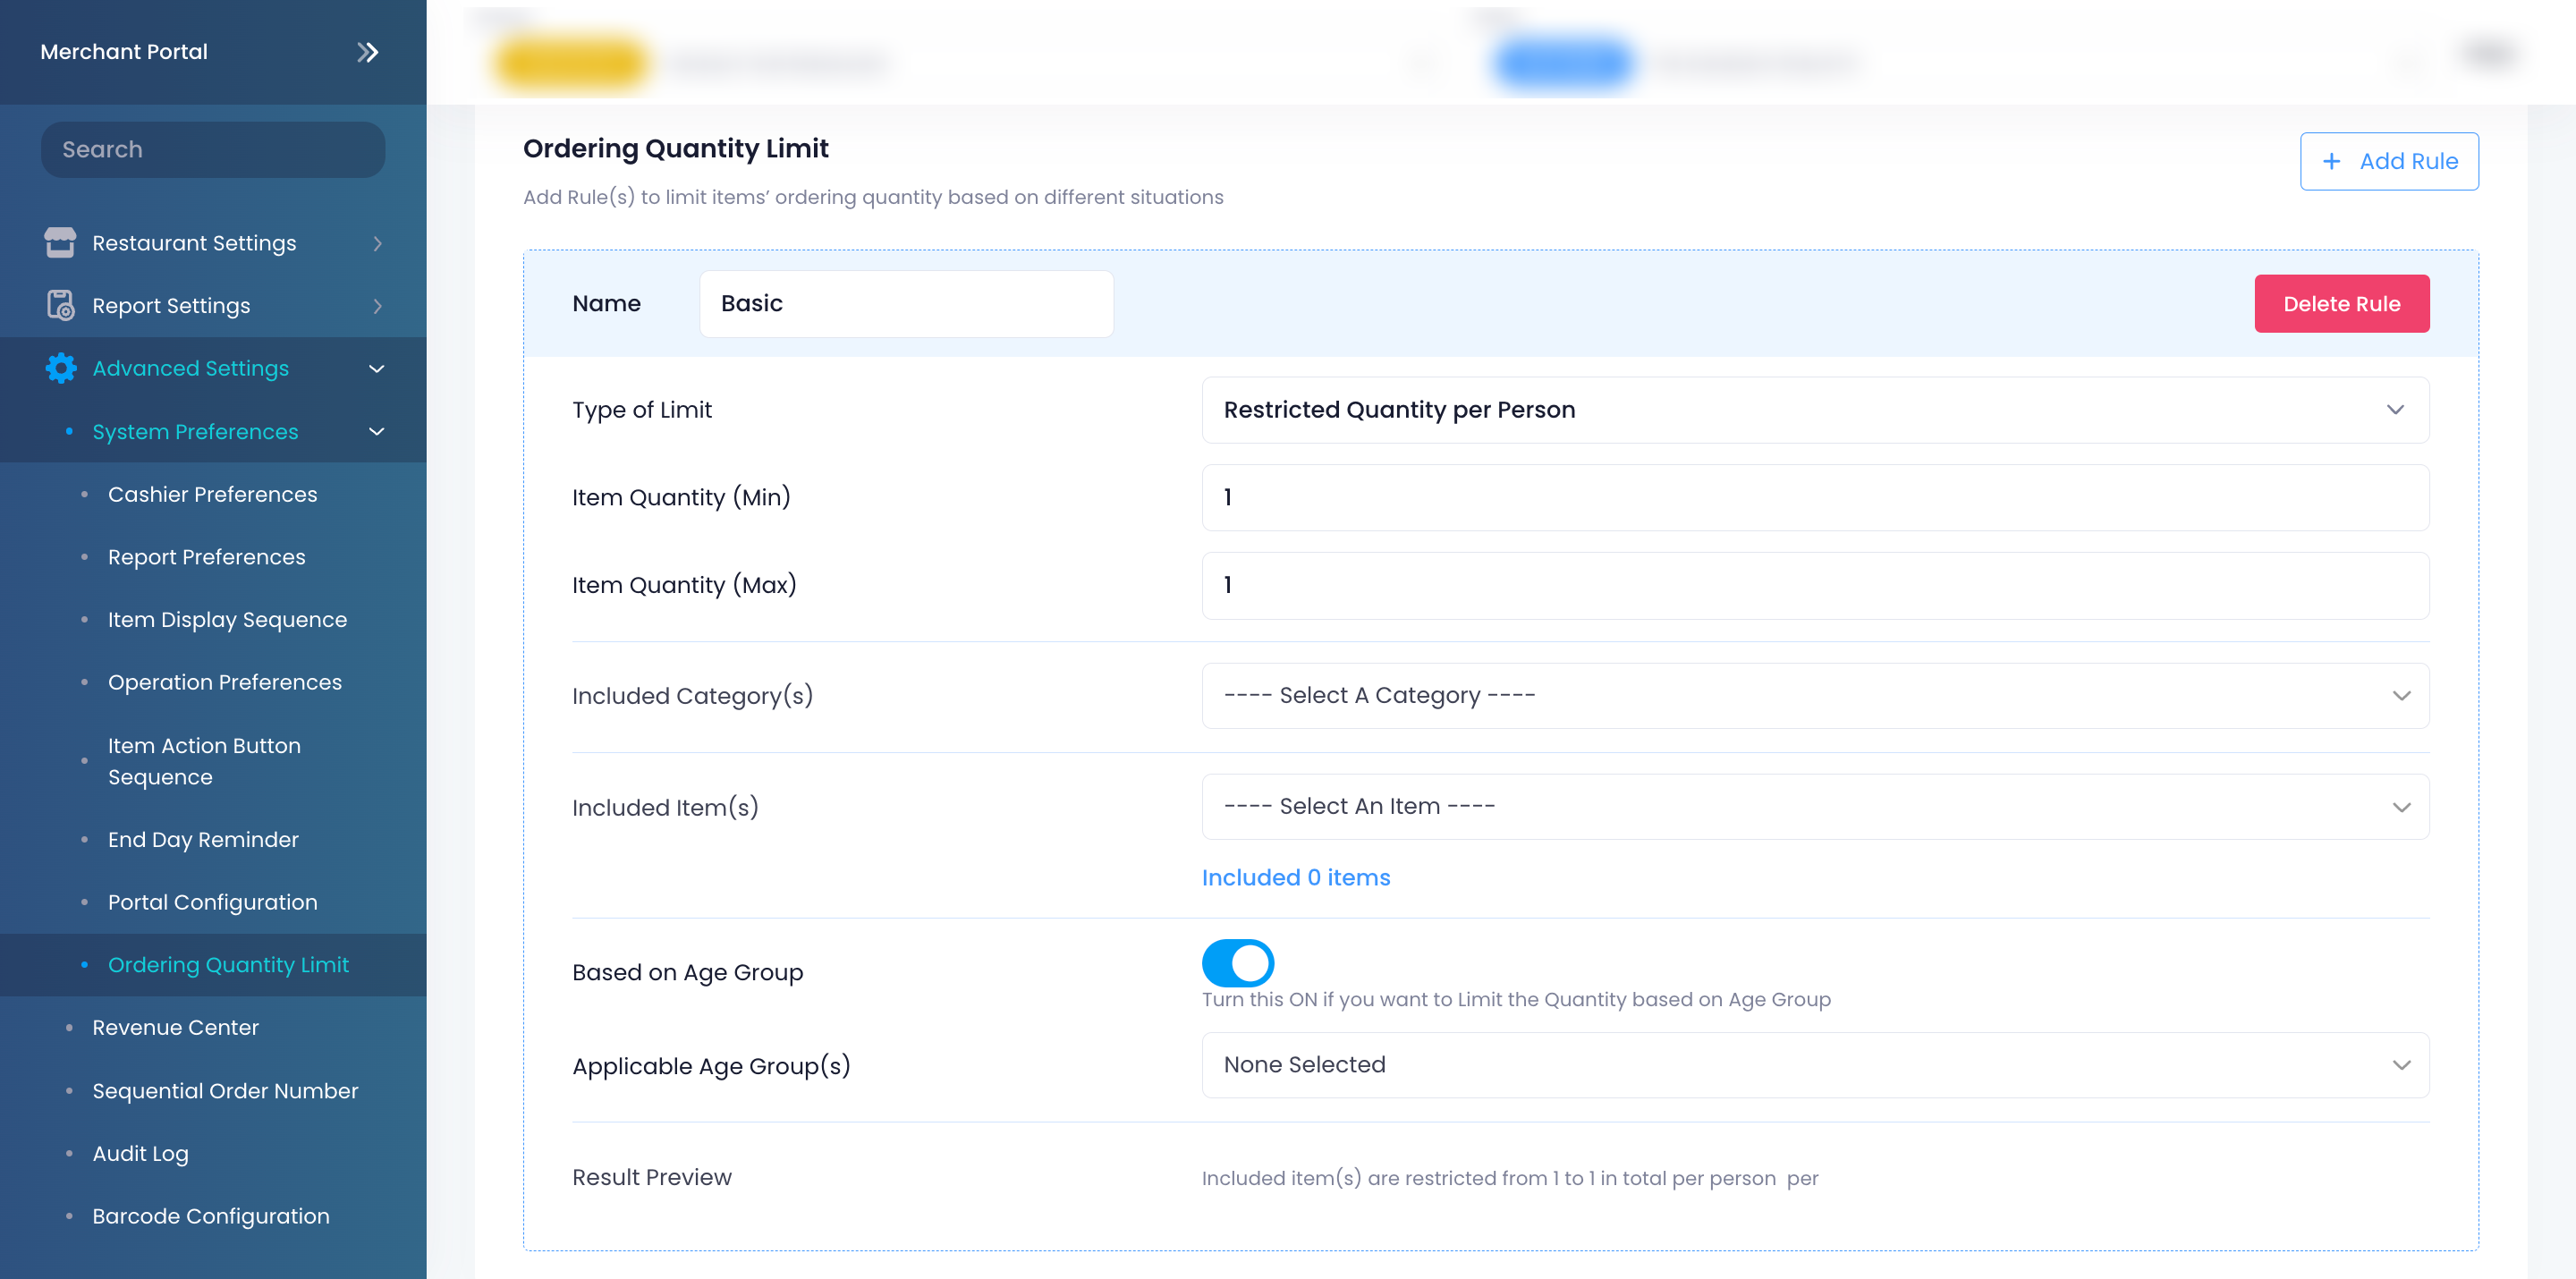
Restricted Quantity per Person
Allows you to set the required quantity each person in the party must order. For example, you can set the quantity limit to a minimum of “1” and a maximum of “1” for All You Can Eat Menu sets. If there are three persons in the party, each member of the party must order one All You Can Eat Menu set. This is especially useful for All You Can Eat Menu, to make sure that all members of the party order the correct number of meal sets. 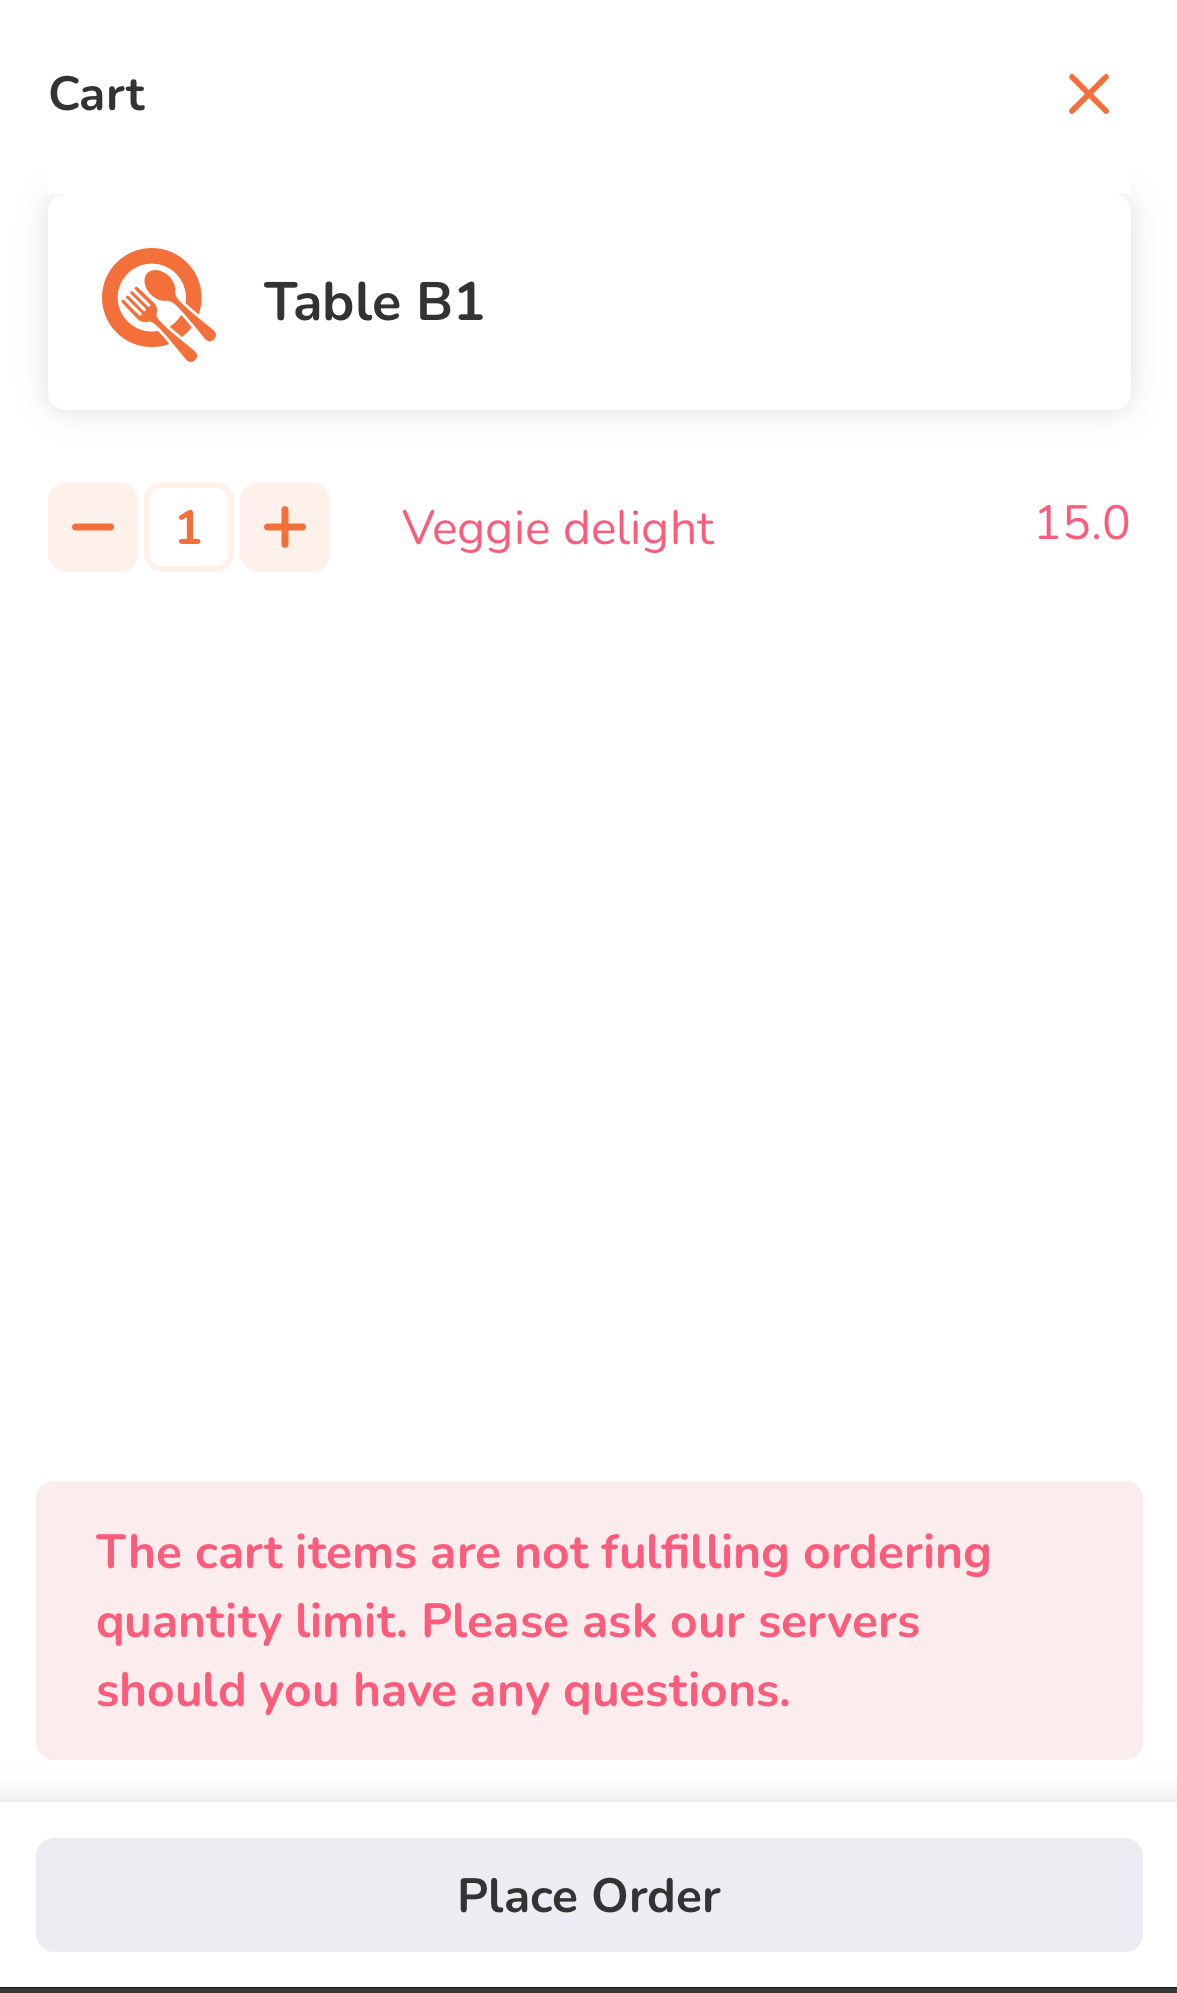
- Item Quantity (min) - Set the value of the minimum item quantity that customers can order.
- Item Quantity (max) - Set the value of the maximum item quantity that customers can order.
- Included Category(s) - Select a category where the limit would apply.
- Included Item(s) - Select the item where the limit would apply.
- Based on Age Group - Turn on if you want the restriction to apply to customers based on their age group.
Manage Ordering Quantity Limit
Edit Ordering Quantity Limit
To modify an ordering quantity limit, follow the steps below:
- Log in to the Merchant Portal.
- On the left panel, click on Advanced Settings.
- Click on System Preferences. Then, select Ordering Quantity Limit.
- Next to the ordering quantity limit that you want to update, click on Edit
 .
.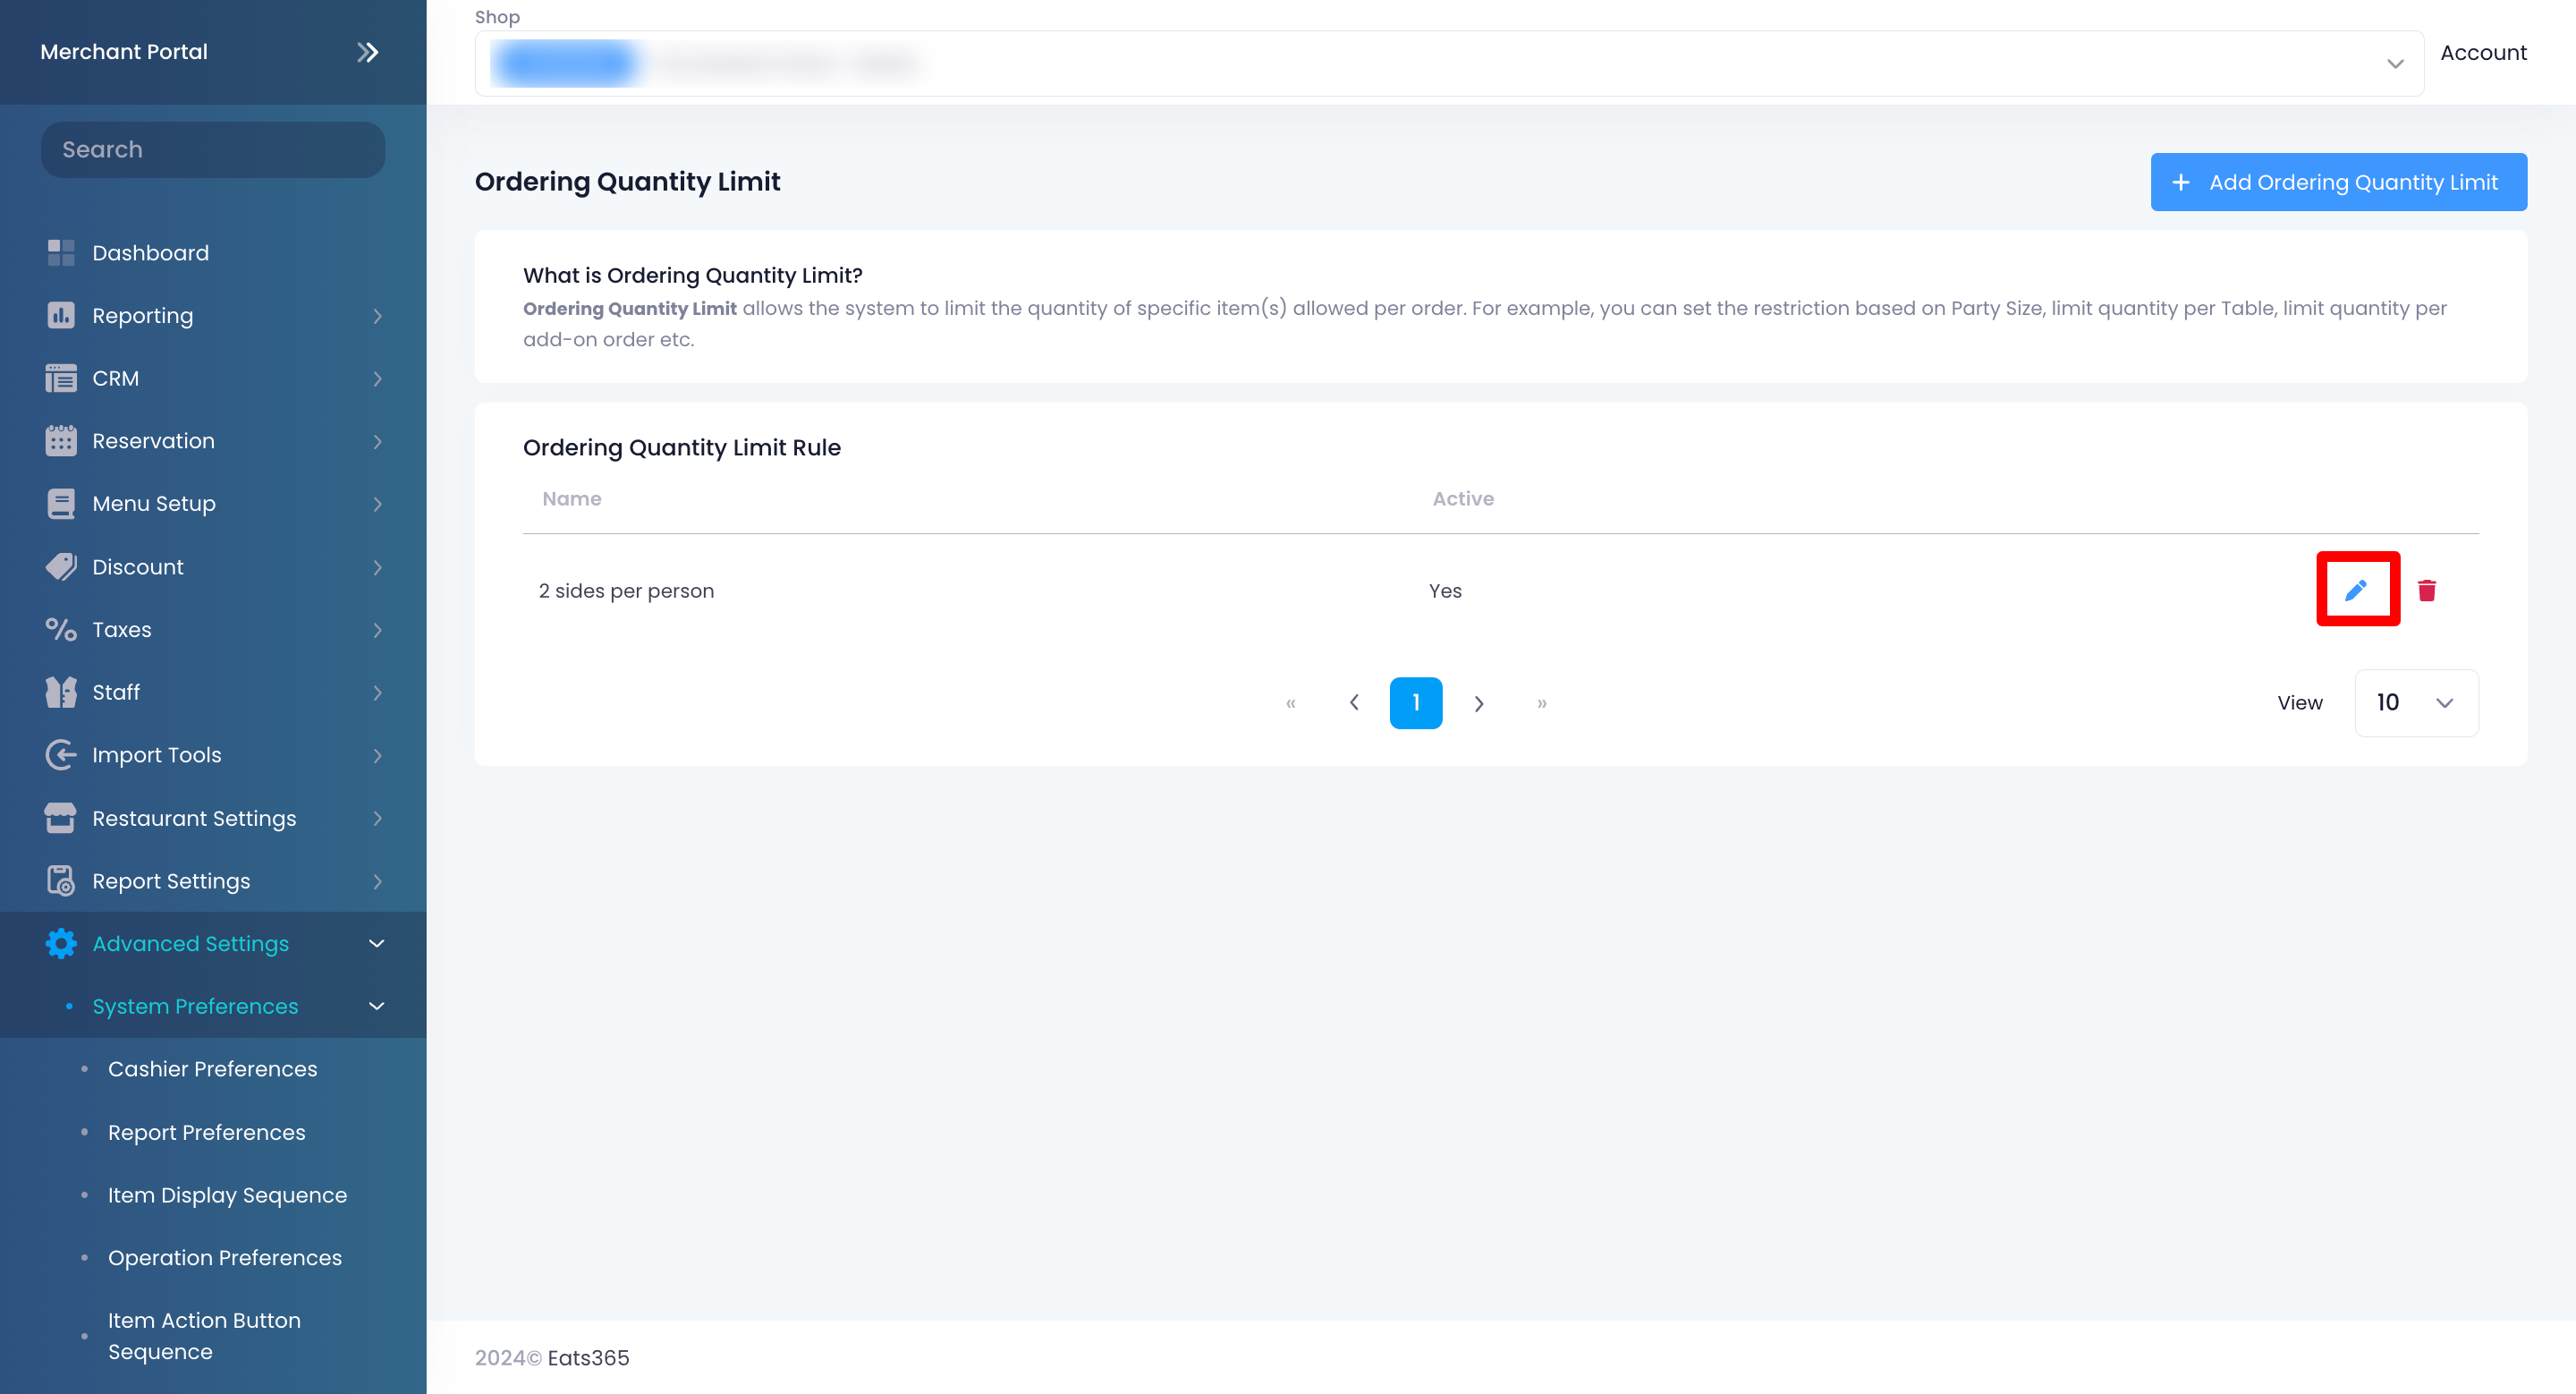
- Update the Ordering Quantity Limit.
- Click on Save to confirm changes.
Delete Ordering Quantity Limit
To remove an ordering quantity limit, follow the steps below:
- Log in to the Merchant Portal.
- On the left panel, click on Advanced Settings.
- Click on System Preferences. Then, select Ordering Quantity Limit.
- Next to the ordering quantity limit that you want to update, click on Delete
 . A prompt appears to confirm that you want to delete the rule.
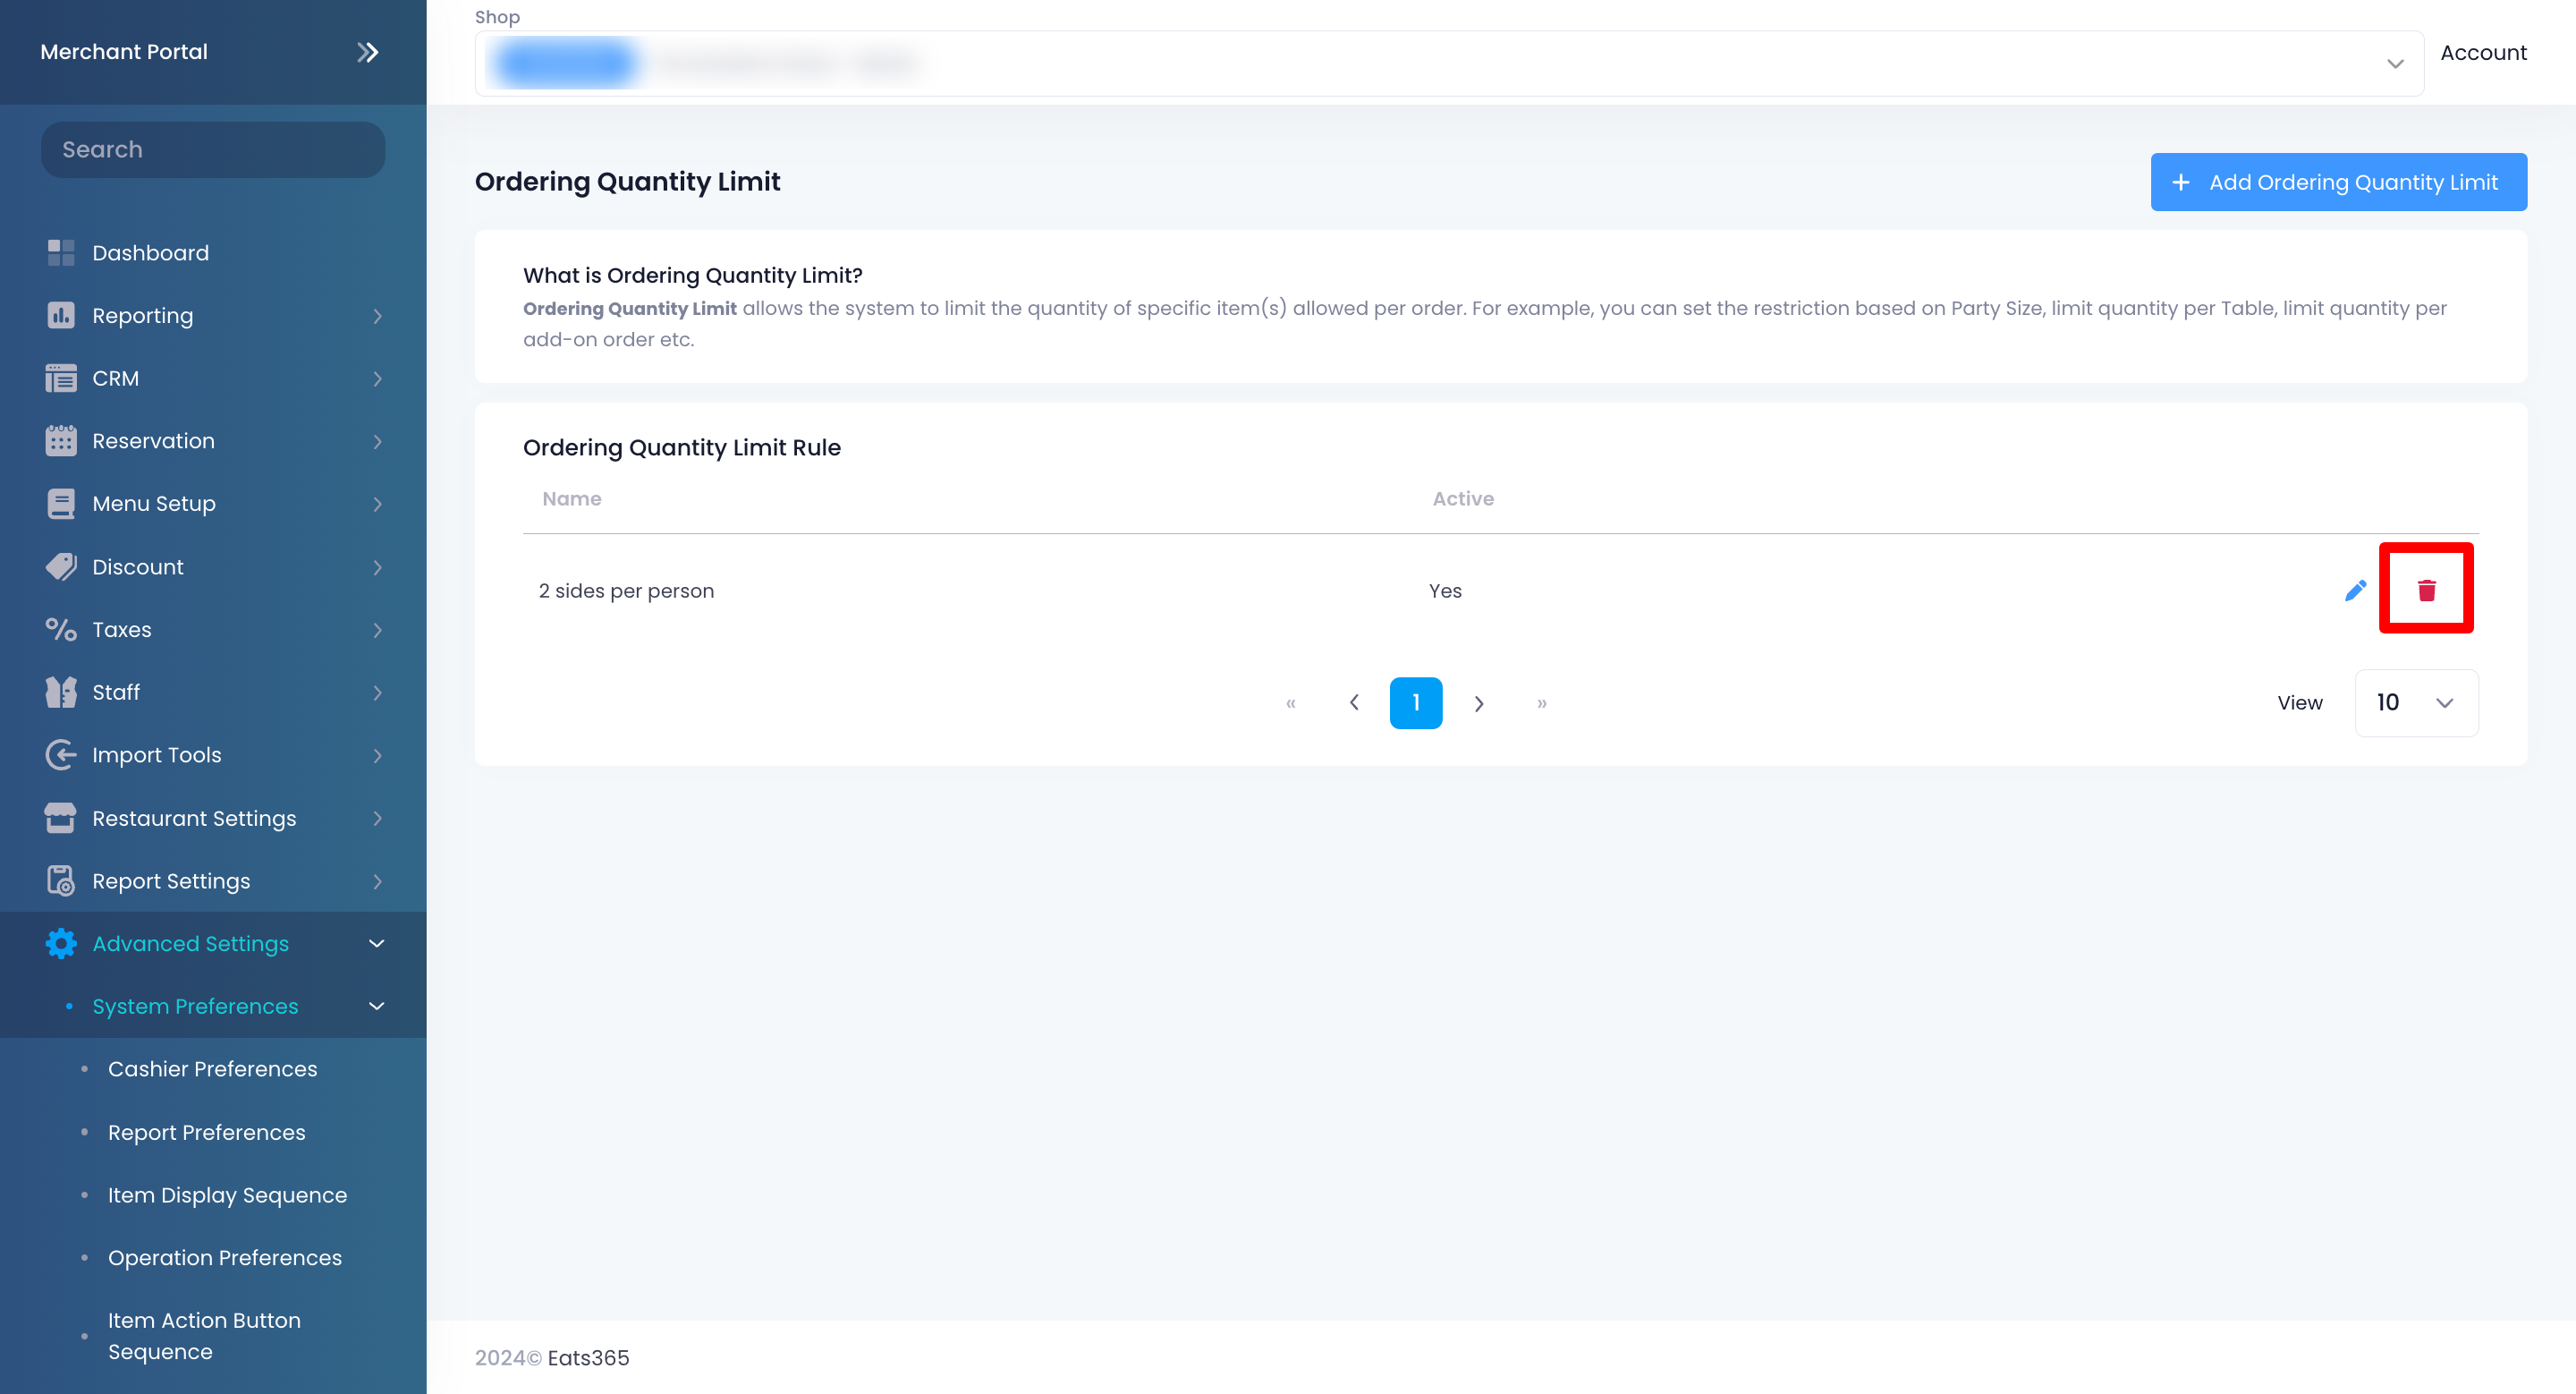
- Click on Confirm.