Menu Setup
Table of Contents
Set up and manage Tier Pricing Rules
Learn how to create and manage Tier Pricing Rules that you can use to set different pricing on menu items during specific periods.
“Tier Pricing” allows you to define different pricing rules for menu items based on specific periods or conditions. A popular use for this feature is setting different item pricing for specific periods like “Lunch Hour,” delivery platforms like foodpanda or Deliveroo, or for different membership plans.
In this article, you’ll learn how to create, modify, and delete a tier pricing rule.
For information on how to apply tier pricing to menu items, refer to Apply tier pricing to menu items.
Tier pricing rule presets
To apply tier prices to menu items and orders, you must first create tier pricing rules to define when a price tier should apply. Once tier pricing rule presets have been created, they must be associated with tiers and added to items to take effect. You can create the following tier pricing rule presets:
Period Rule
This tier pricing rule is used to apply different pricing for menu items based on specific restaurant operation days and times. For example, you can create a period rule for “Breakfast Period” which applies to restaurant operations from Monday to Friday from 8 AM to 10 AM. If a customer orders during this period, the menu item’s price is adjusted automatically.
Custom Rule
This tier pricing rule can be created to apply different pricing for menu items based on specific conditions. For example, you can create a custom rule for VIP customers. If an order is placed by a VIP customer, you can then apply the custom tier pricing rule to the order.
Membership Plan Rule
This tier pricing rule is used to apply different pricing for menu items depending on the customer’s membership plan.
Pricing Rule Group
“Pricing Rule Group” allows you to combine multiple tier pricing rules into a single rule. For example, you can group a “Period Rule” and a “Membership Plan Rule.” When tier pricing with a rule group is applied to an item, the menu item’s price will be adjusted upon meeting all conditions included in the rule group.
Enable advanced settings for tier pricing
Before you start, you must first enable “Advanced Price by Tier” to configure “Custom Rule,” “Membership Plan Rule,” and “Pricing Rule Group” on the Merchant Portal.
To enable the “Advanced Price by Tier” setting, follow the steps below:
- Log in to the Merchant Portal.
- On the left panel, click on Group Settings.
- Turn on Advanced Price by Tier
 .
.
- At the top right, click on Save to confirm.
Create tier pricing rules
Add a period rule
To add a period rule, follow the steps below:
Eats365 POS
- Log in to the Eats365 POS.
- At the top left, tap Settings
 .
. - Under "General," tap Menu Setup. Then, select Tier Pricing Rules.
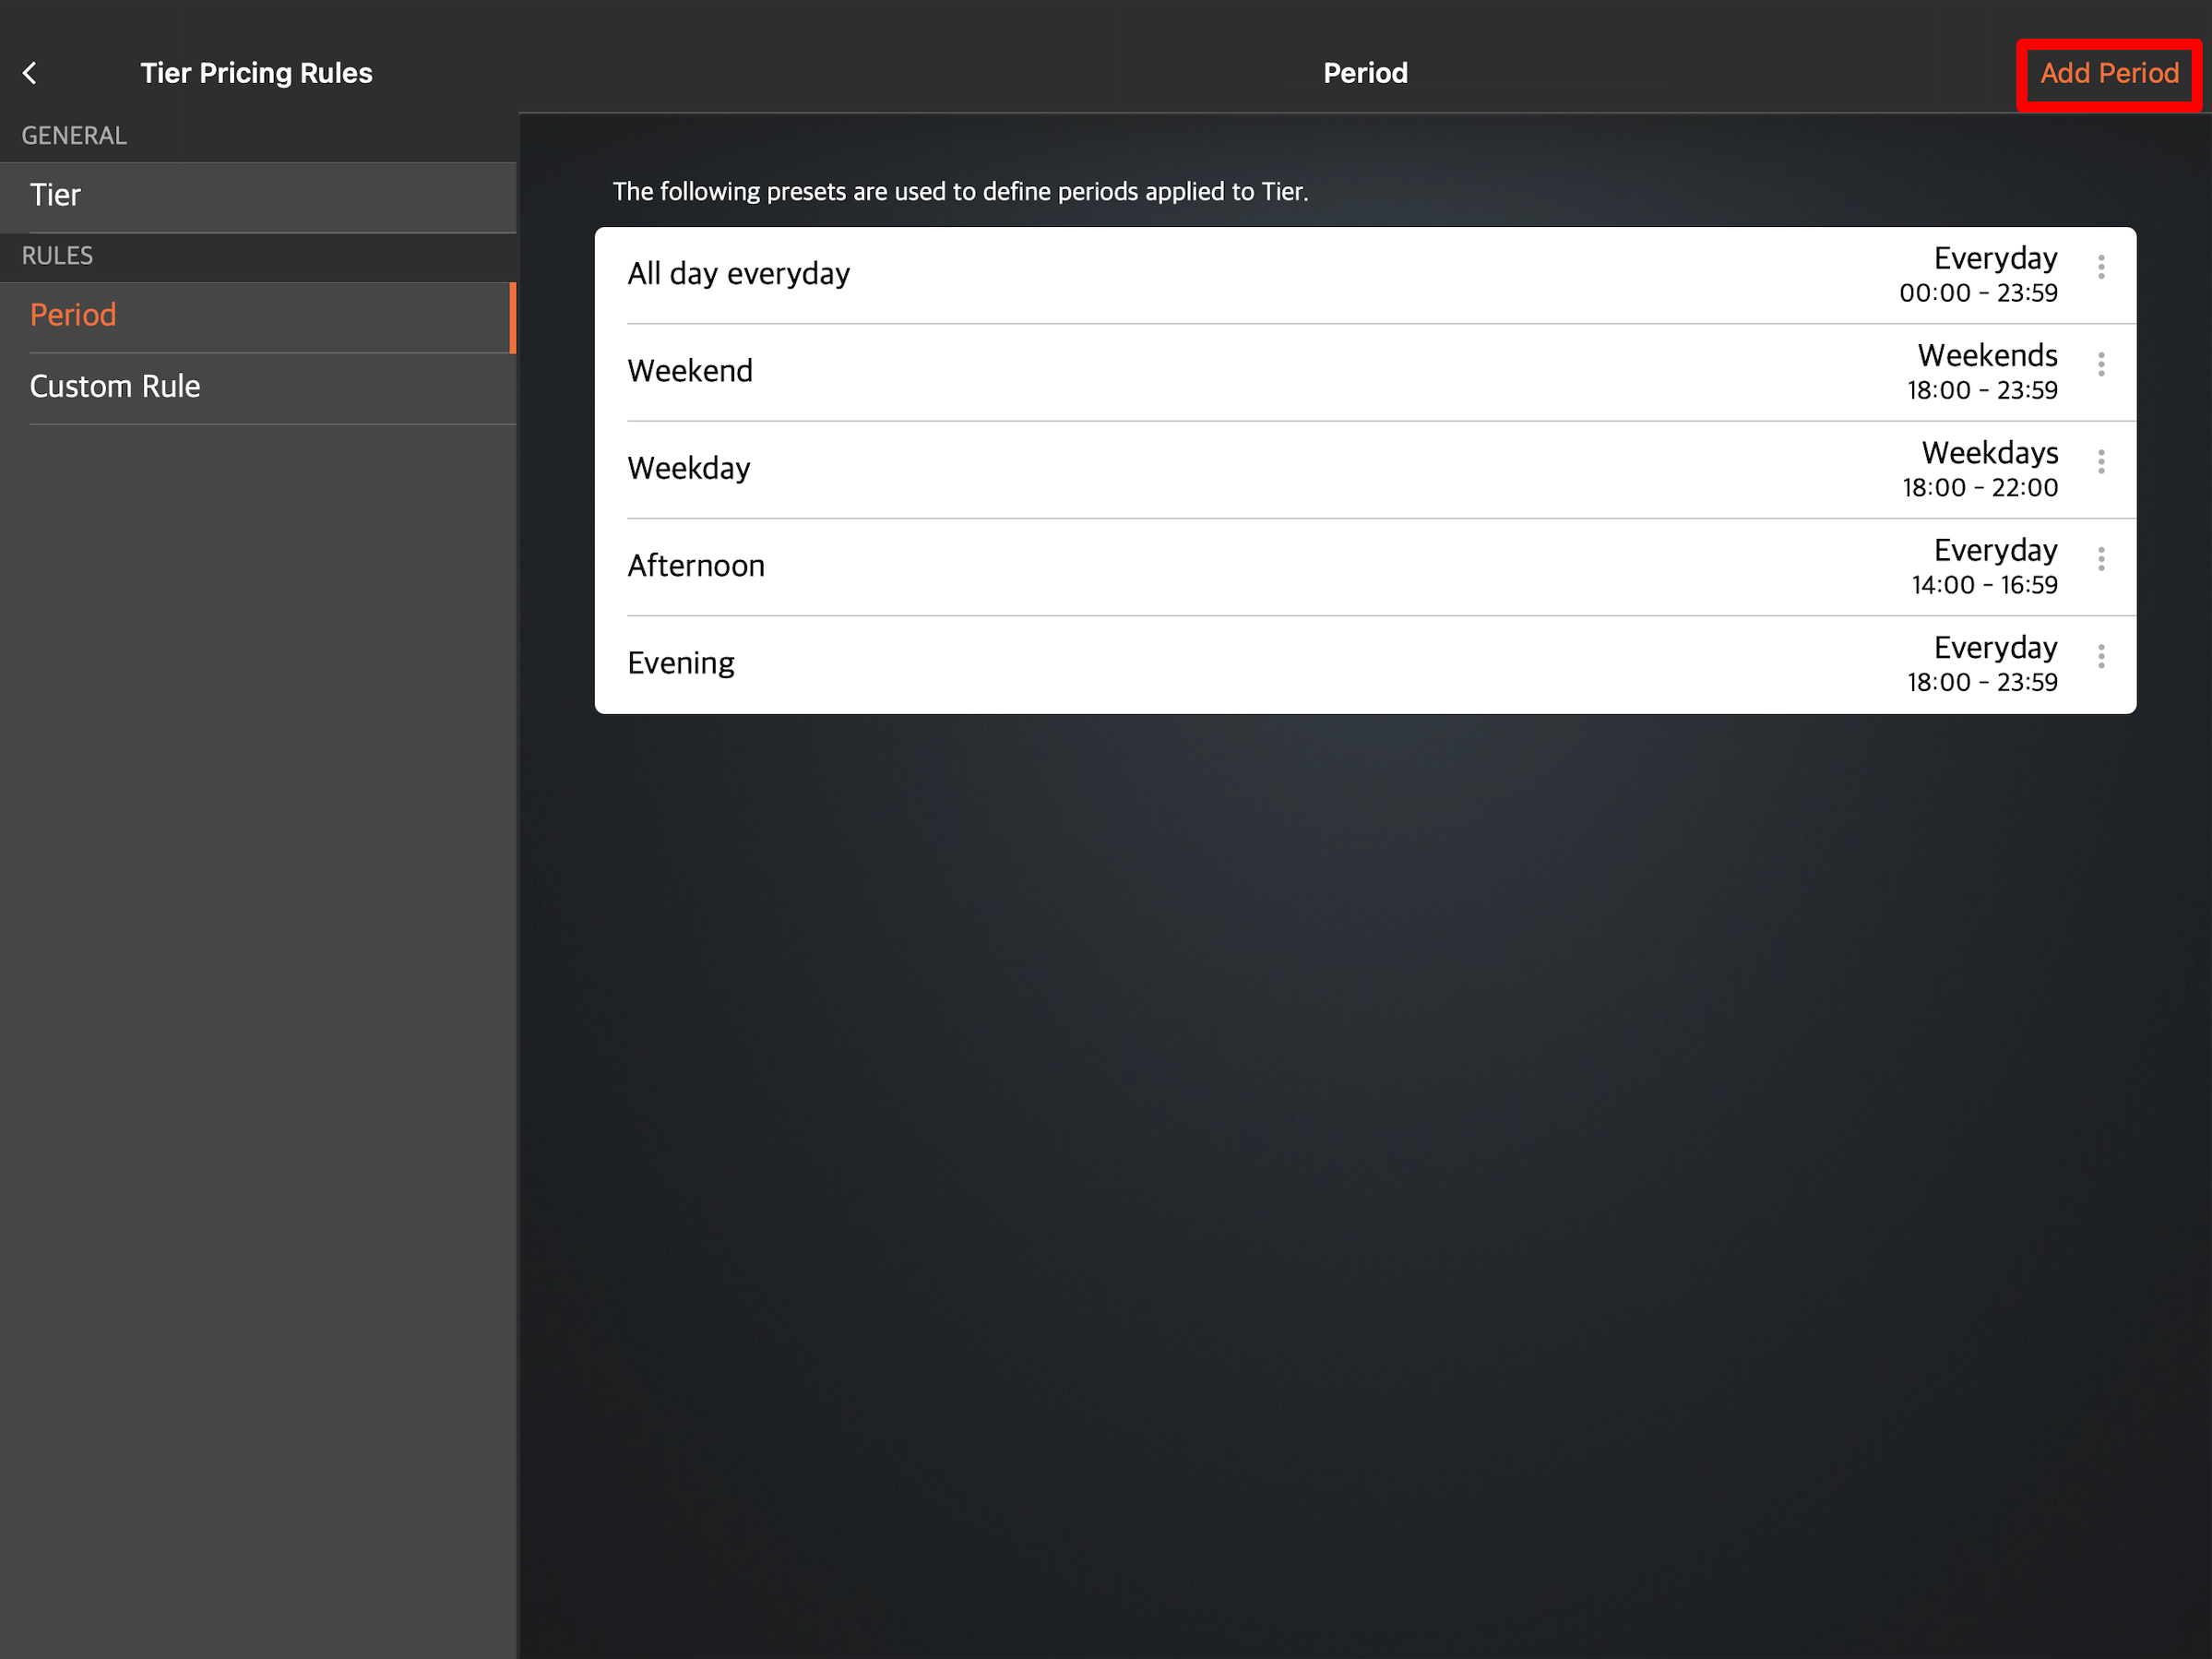
- Under "Rules," tap Period. Then, at the top right, tap Add Period.
- Enter your preferred "Period Name" and "Period Code."
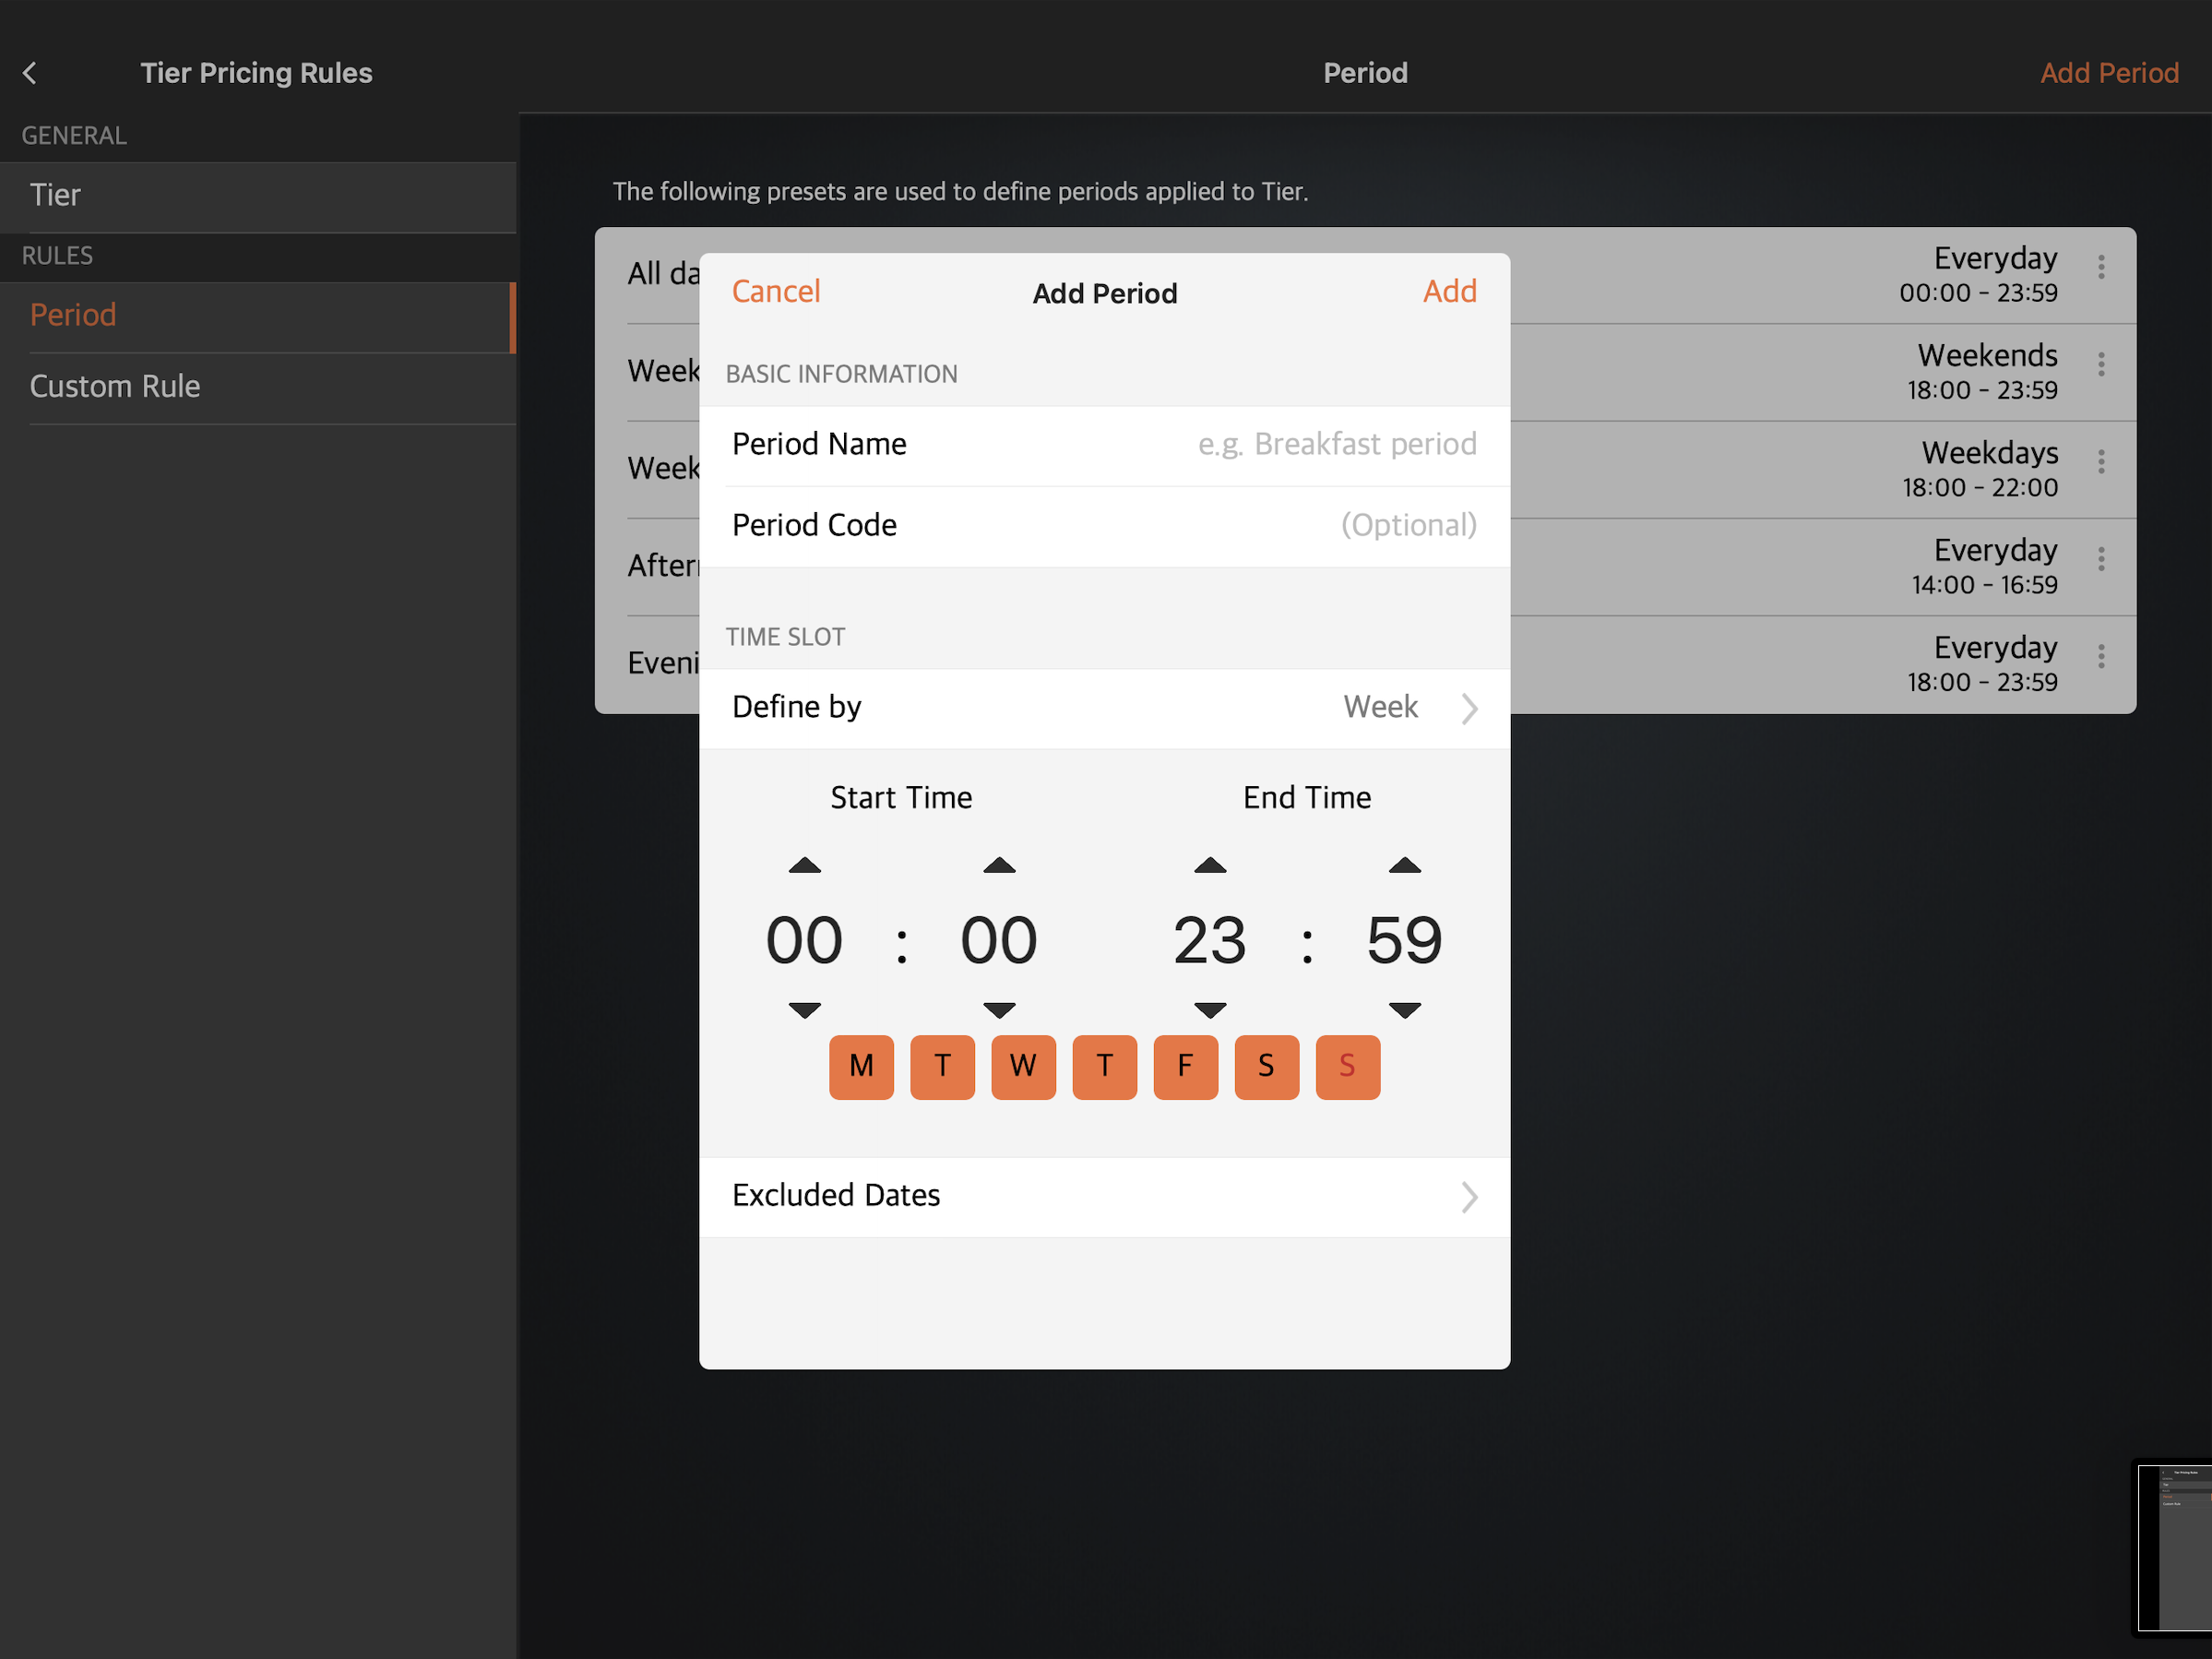
- Next to “Define By,” choose how you want to set the date the periodcovers:
- Define by Week: Select the days of the week applicable to the period.
- Define by Date Group: Select the date group applicable to the period. For more information about setting up a date group, refer to Create and manage Date Groups.
- Set the date and time that the period covers.
- Tap Add, then go back to the previous screen.
- Tap Save to confirm.
Merchant Portal
- Log in to the Merchant Portal.
- On the left panel, click on Menu Setup.
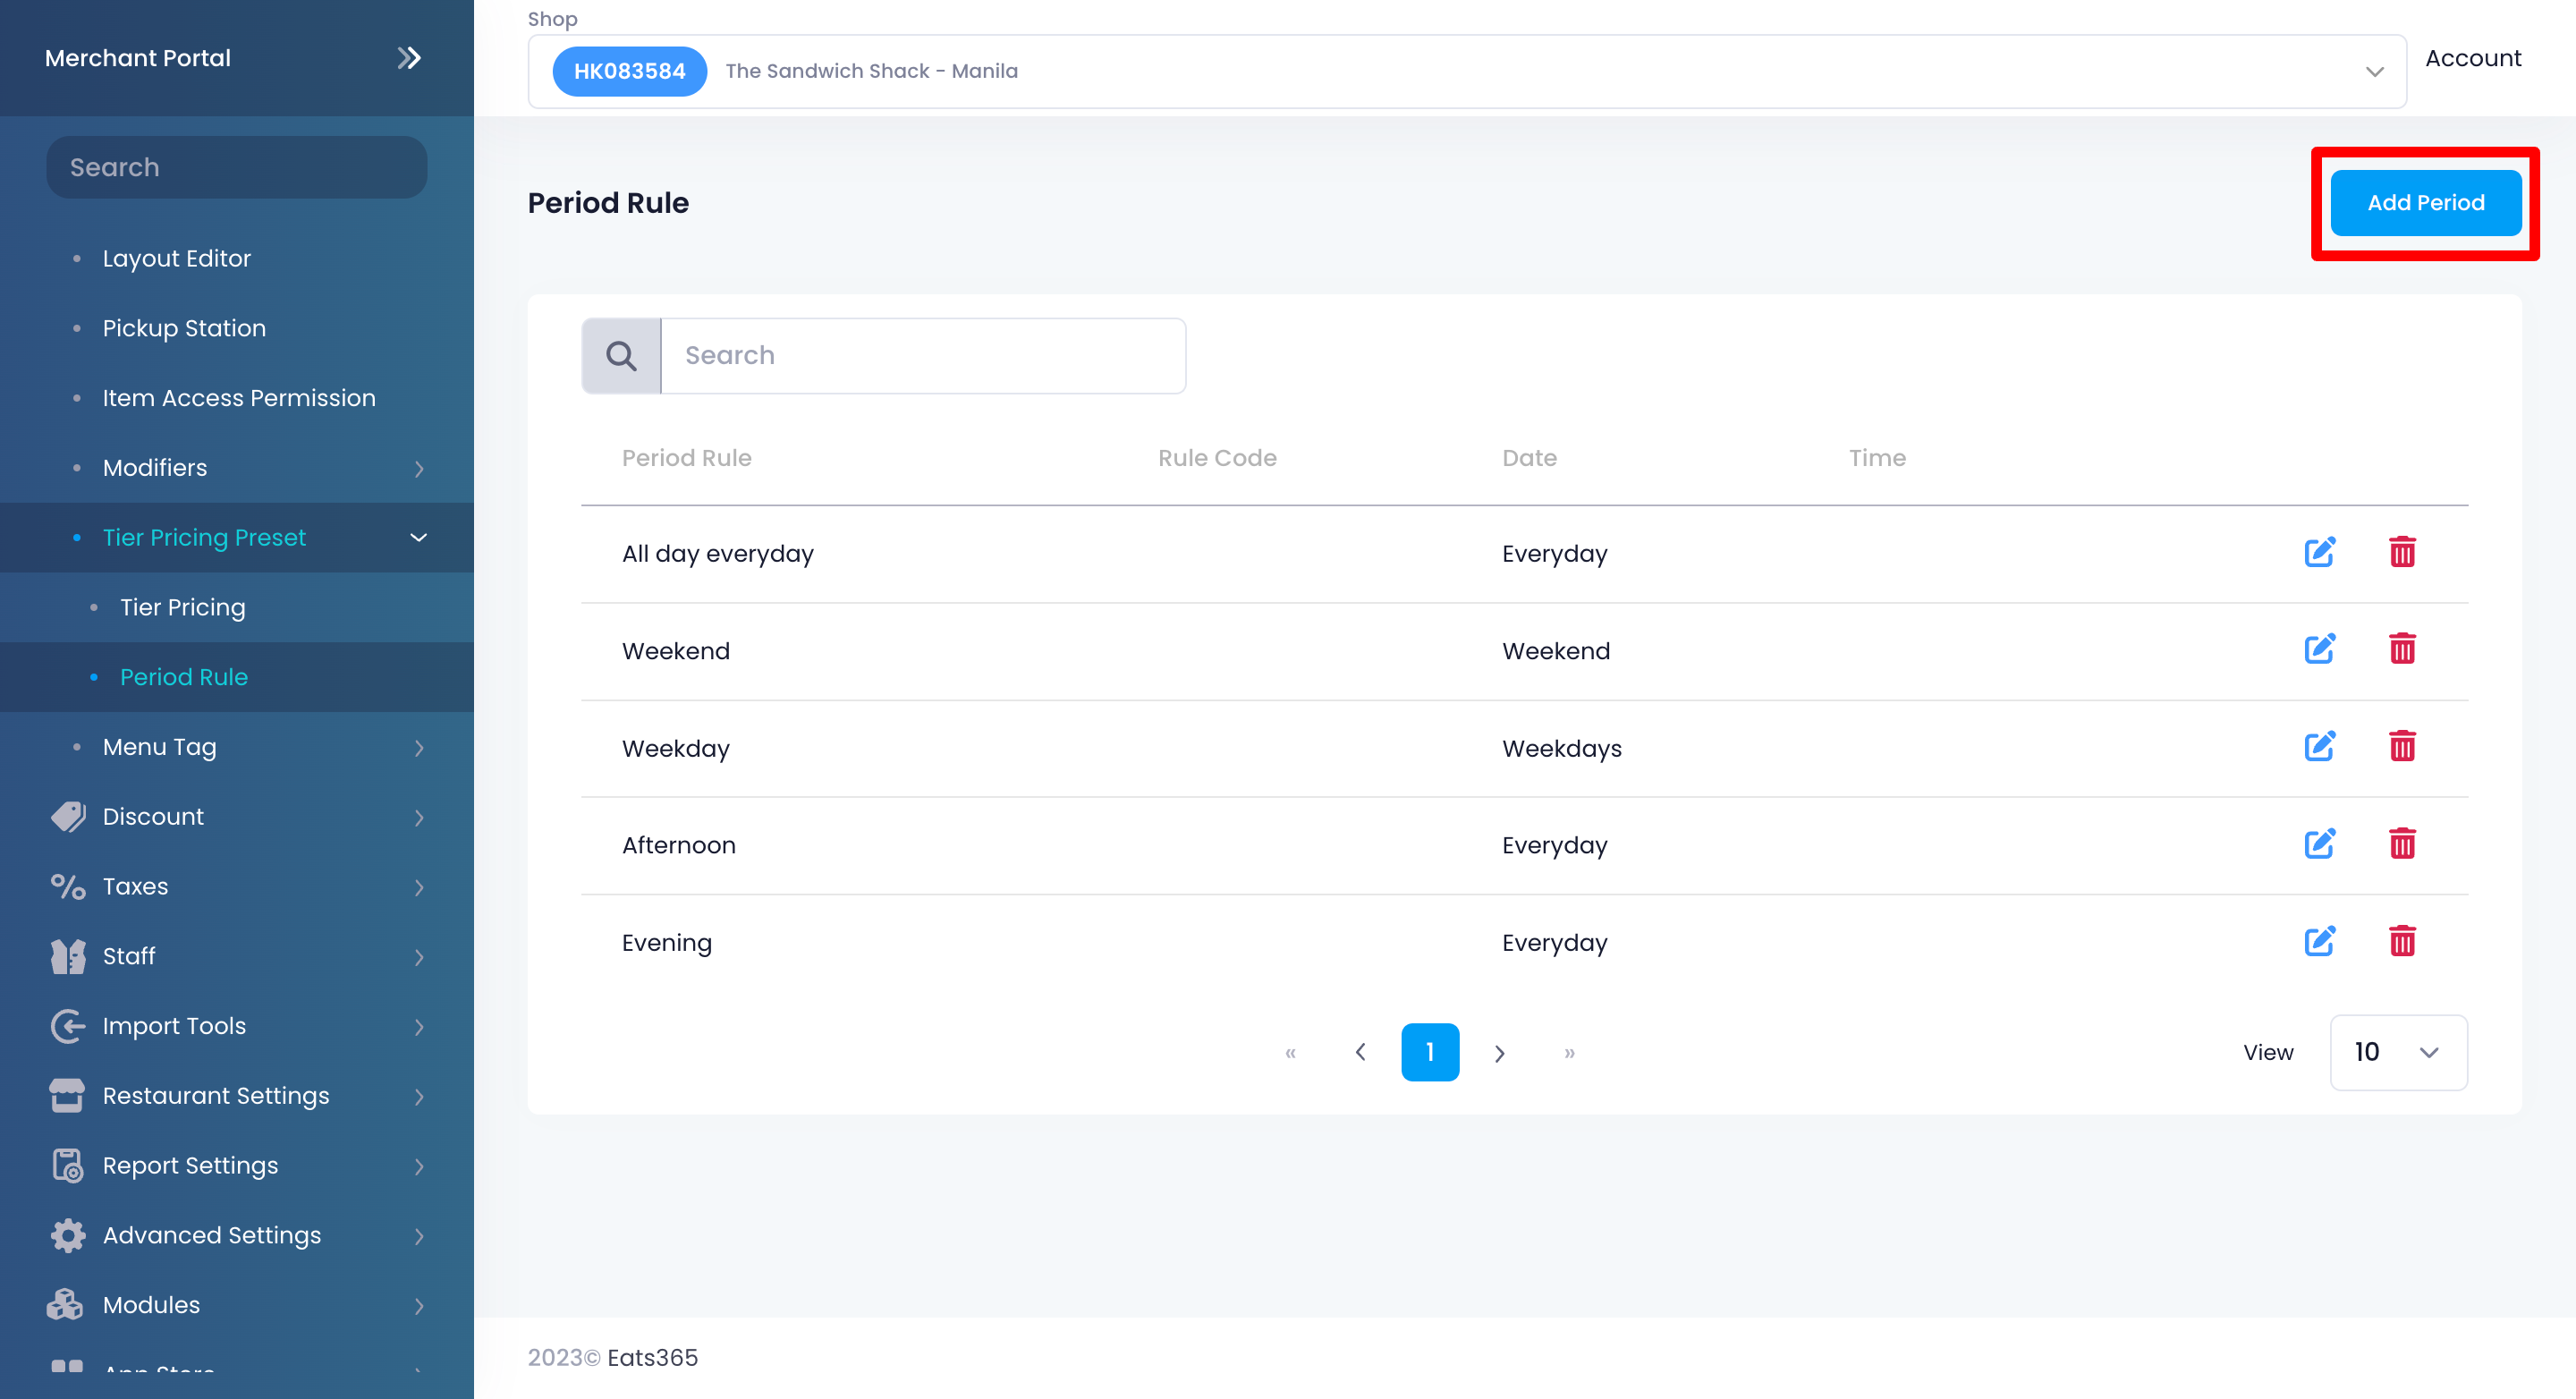
- Click on Tier Pricing Preset and select Period Rule.
- At the top right, click on Add Period.
- Enter your preferred "Period Name" and "Period Code."
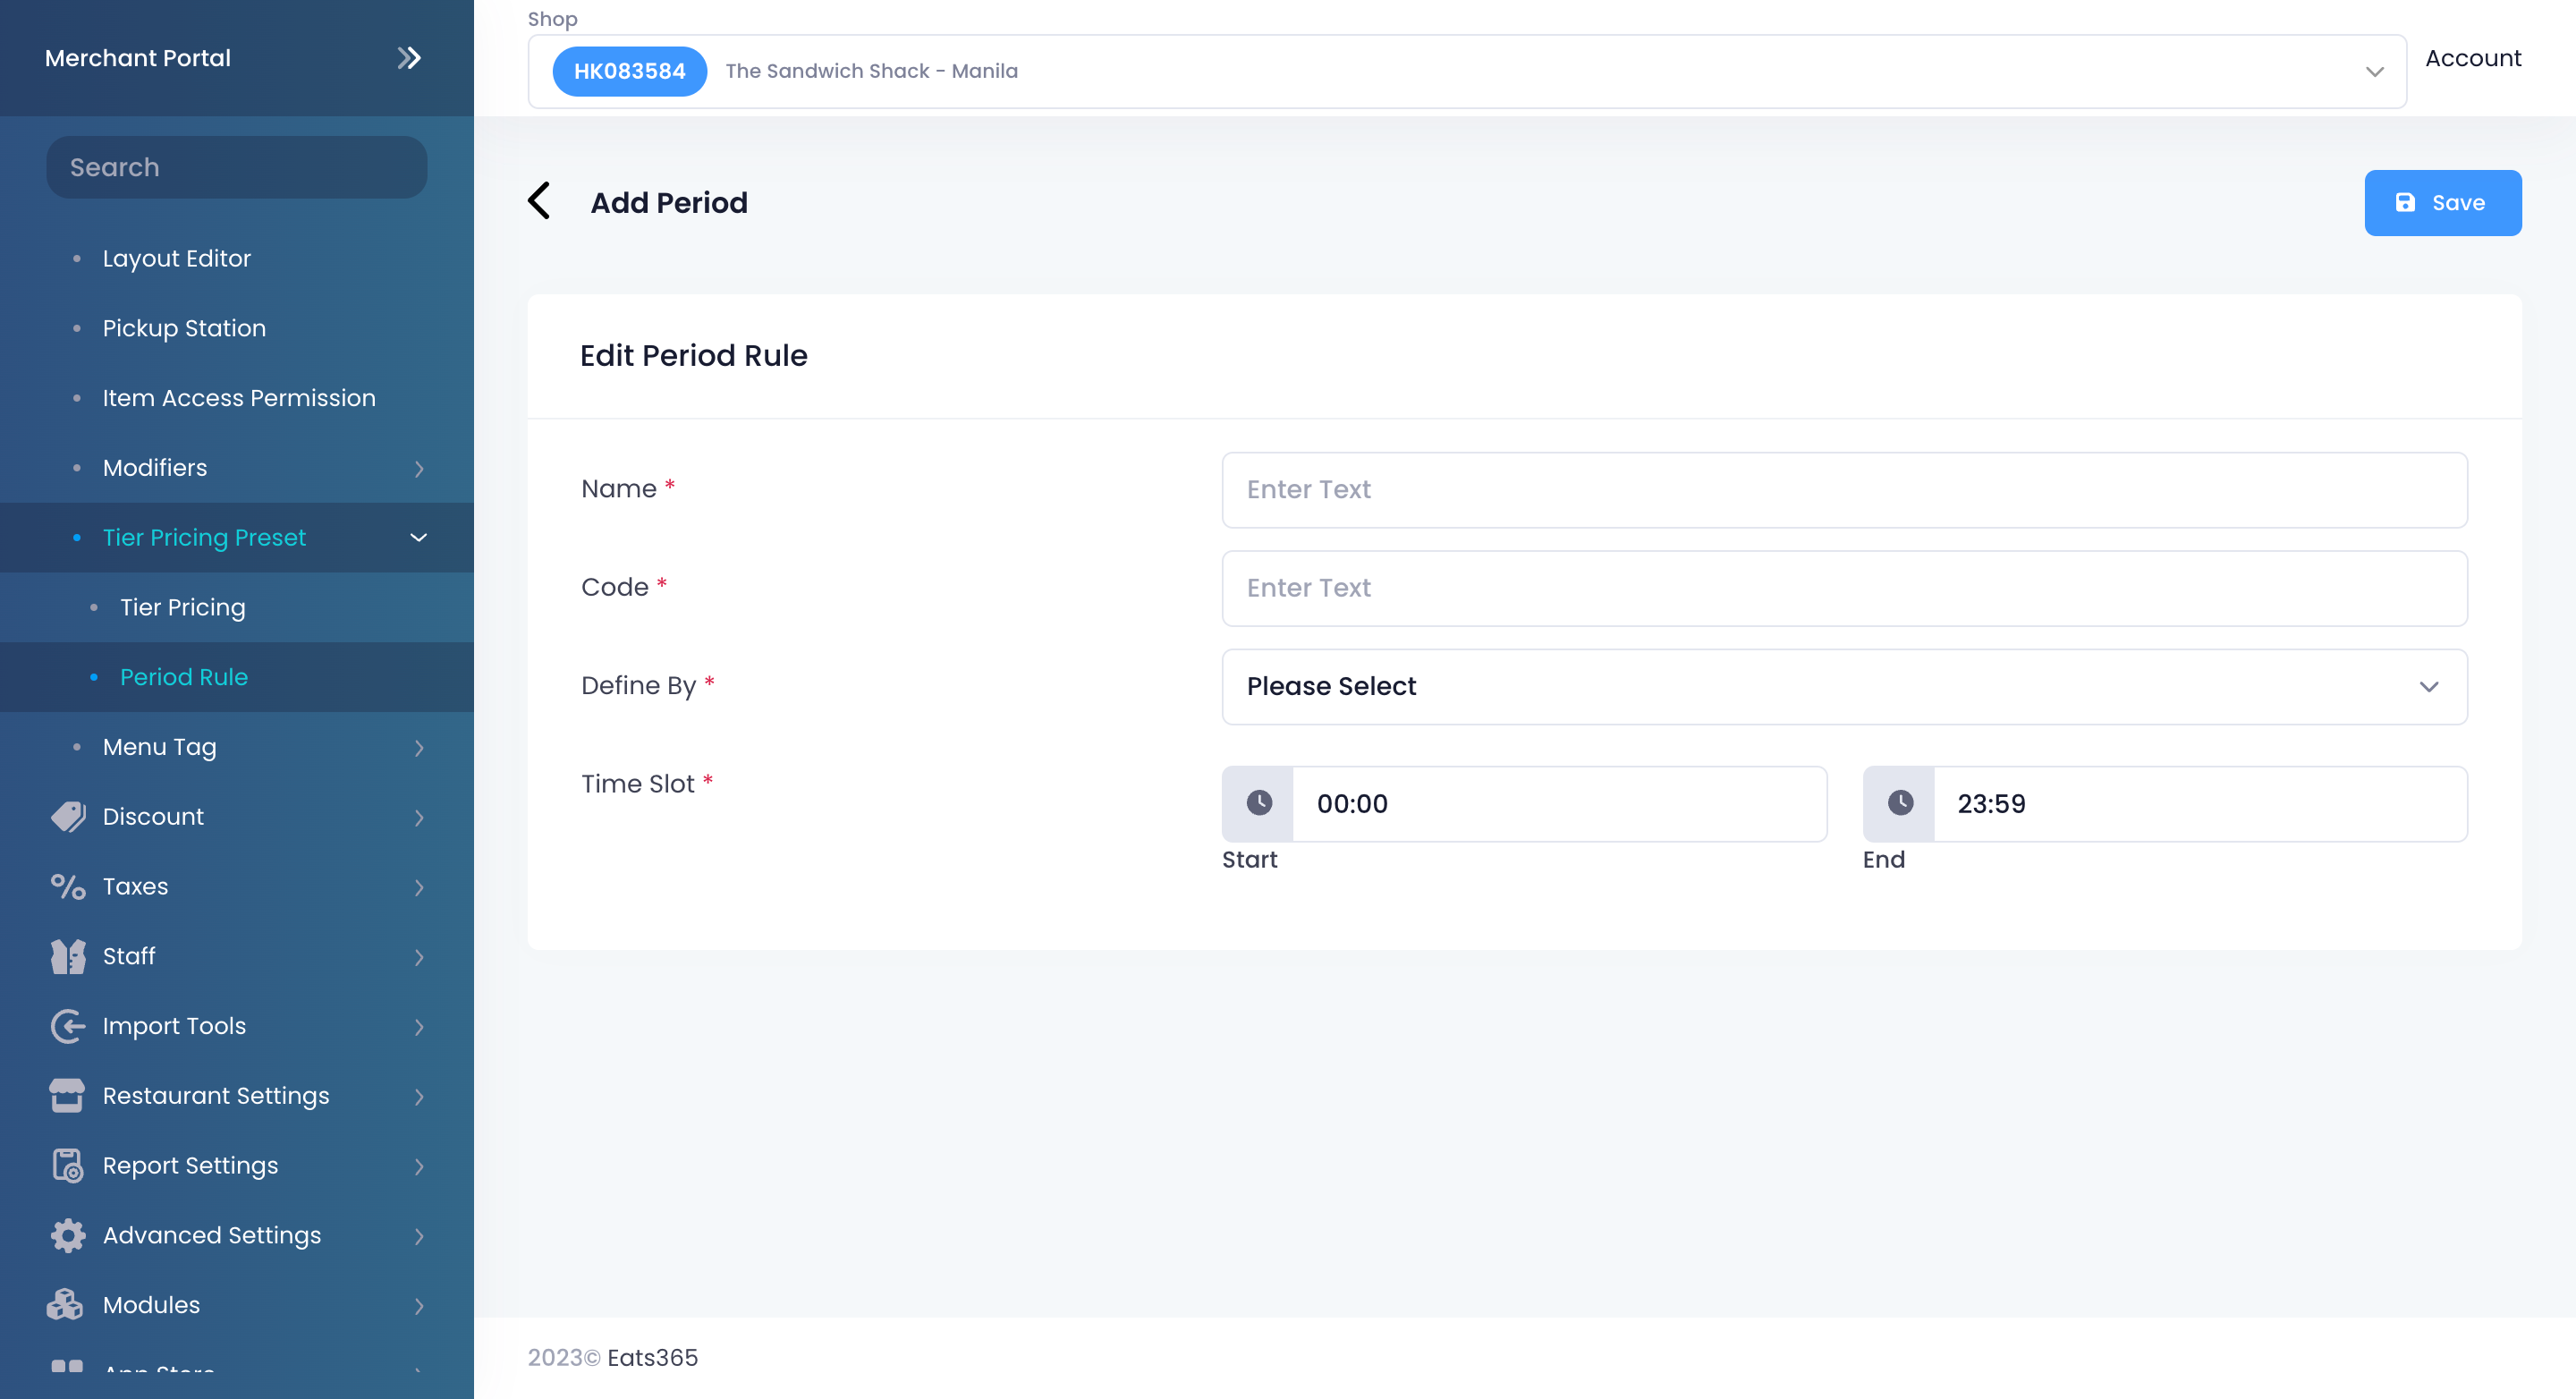
- Next to “Define By,” choose how you want to set the date the periodcovers:
- Define by Week: Select the days of the week applicable to the period.
- Define by Date Group: Select the date group applicable to the period. For more information about setting up a date group, refer to Create and manage Date Groups.
- Next to “Time Slot,” set the time the period covers.
- Click on Save to confirm.
Add a custom rule
To add a custom rule, follow the steps below:
Eats365 POS
- Log in to the Eats365 POS.
- At the top left, tap Settings .
- Under "General," tap Menu Setup. Then, select Tier Pricing Rules.
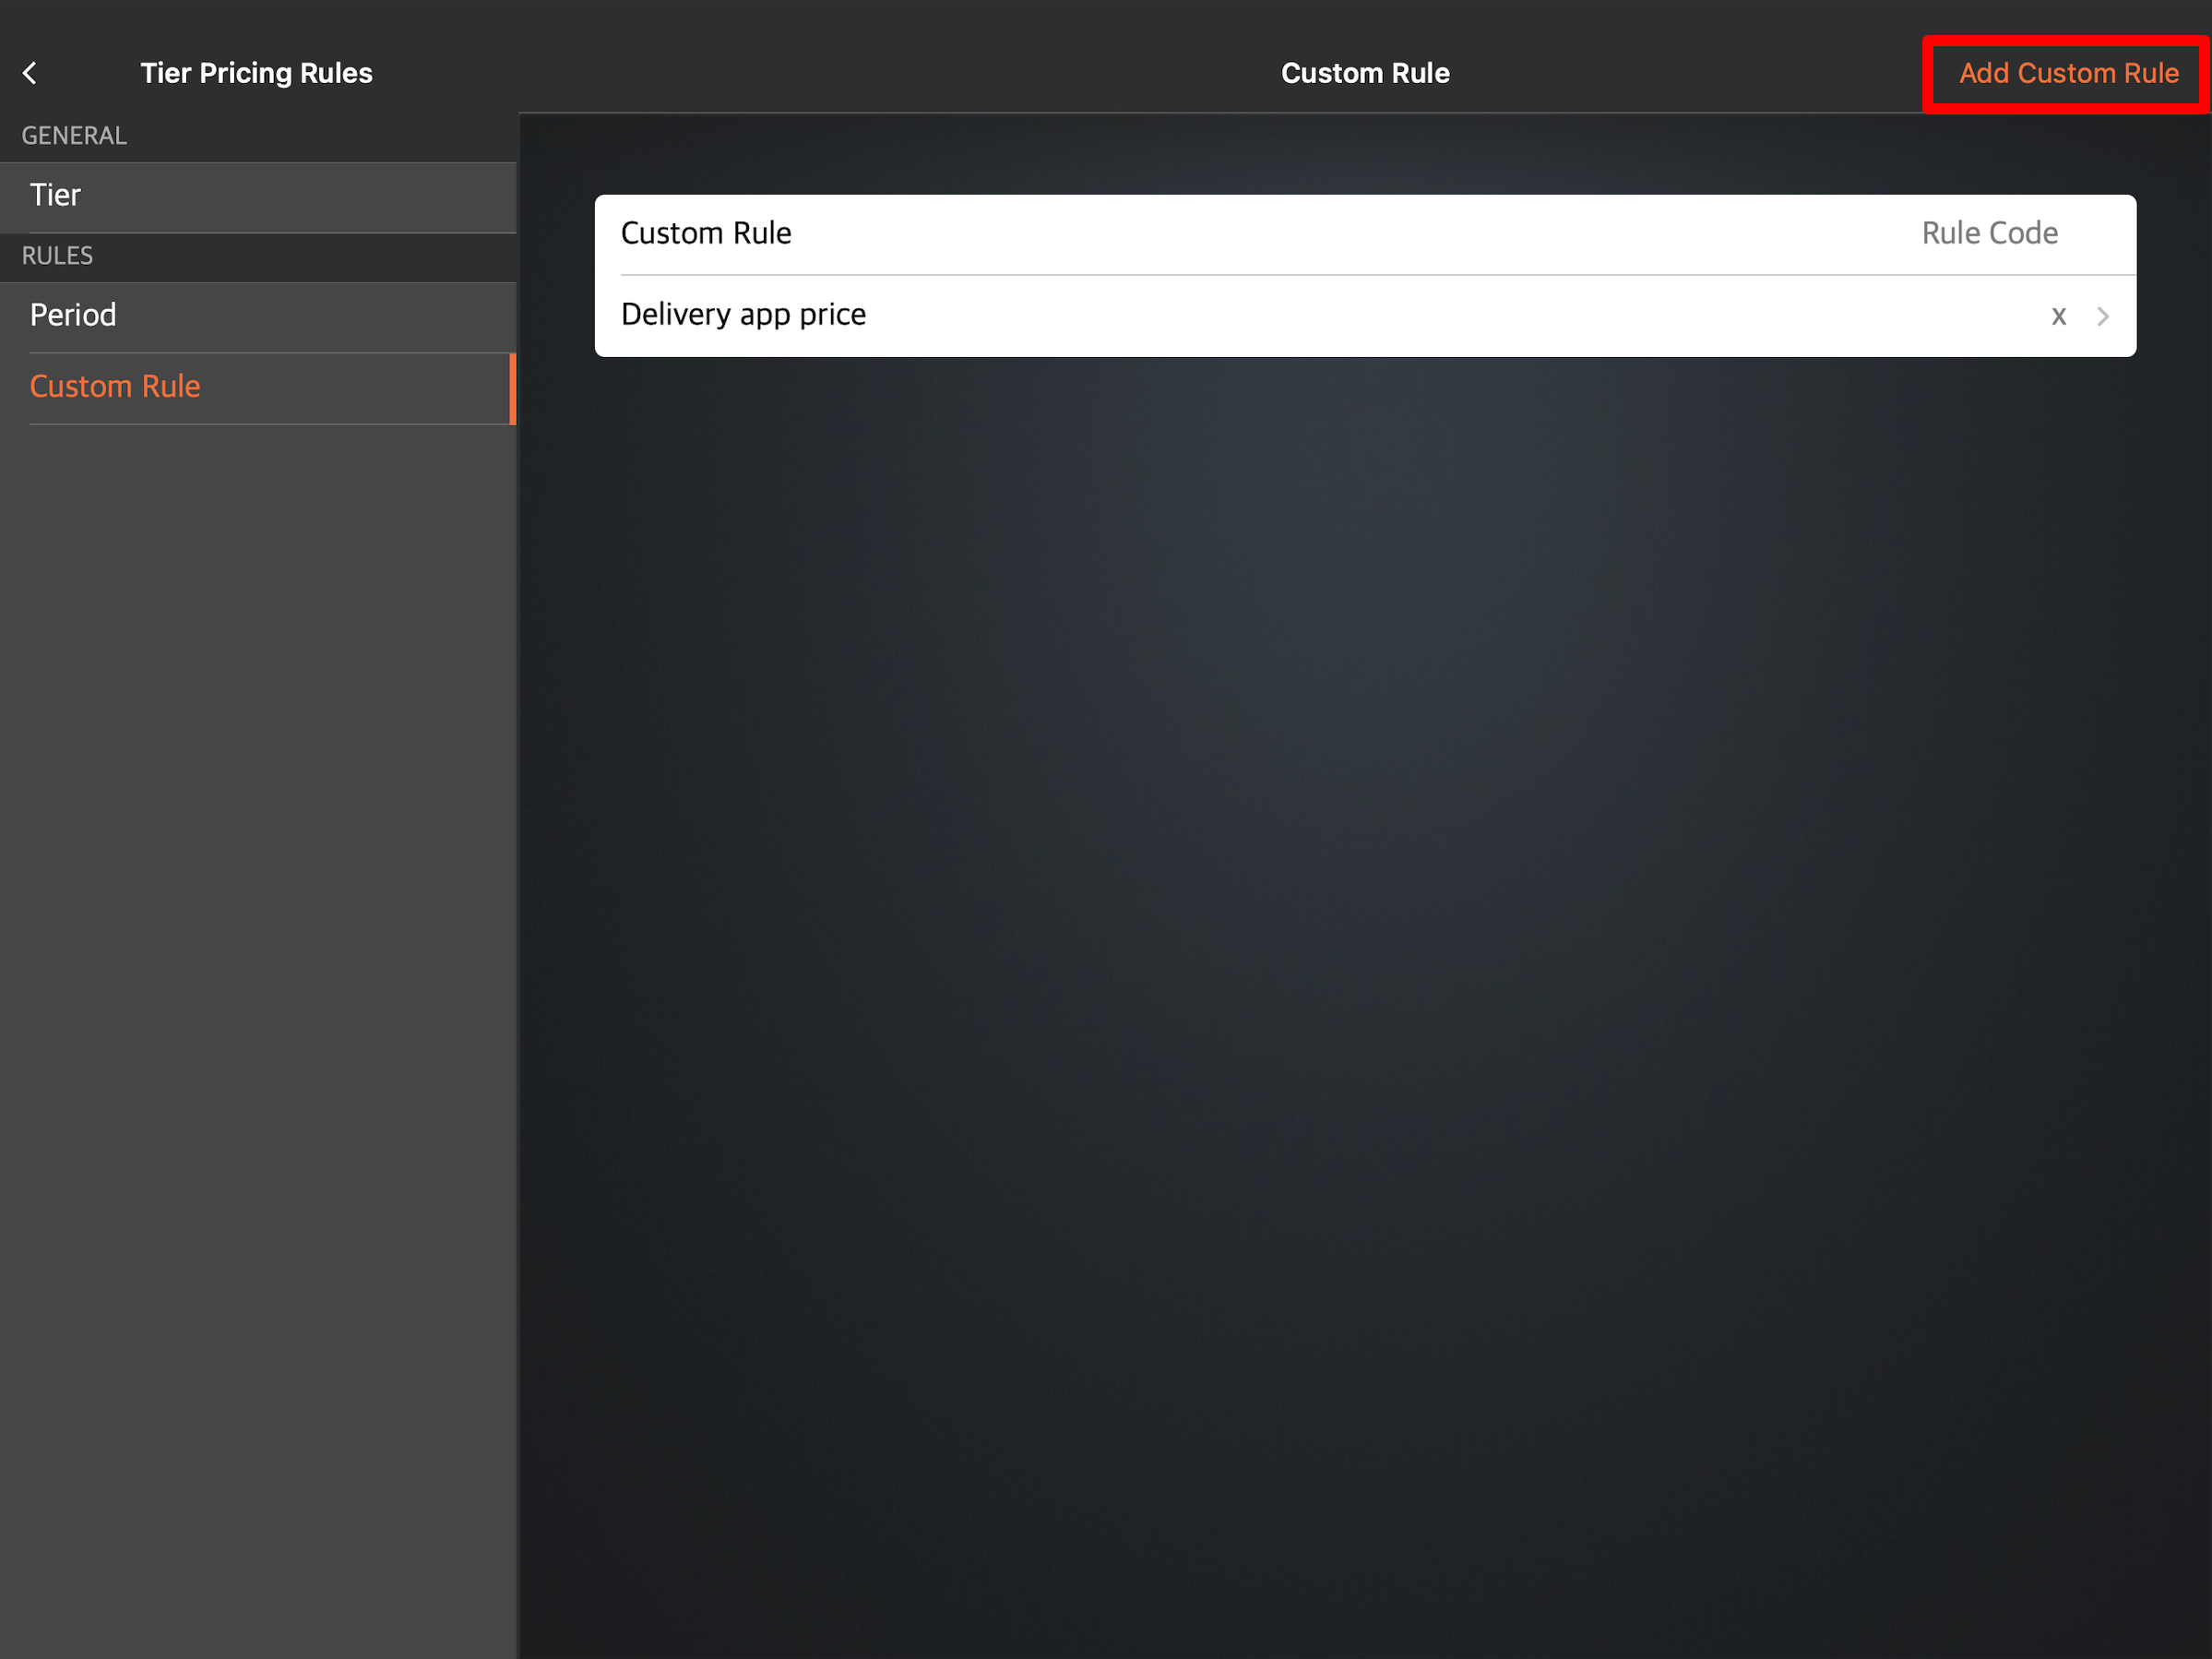
- Under "Rules," tap Custom Rule. Then, at the top right, tap Add Custom Rule.
- Enter your preferred "Rule Name" and "Rule Code."
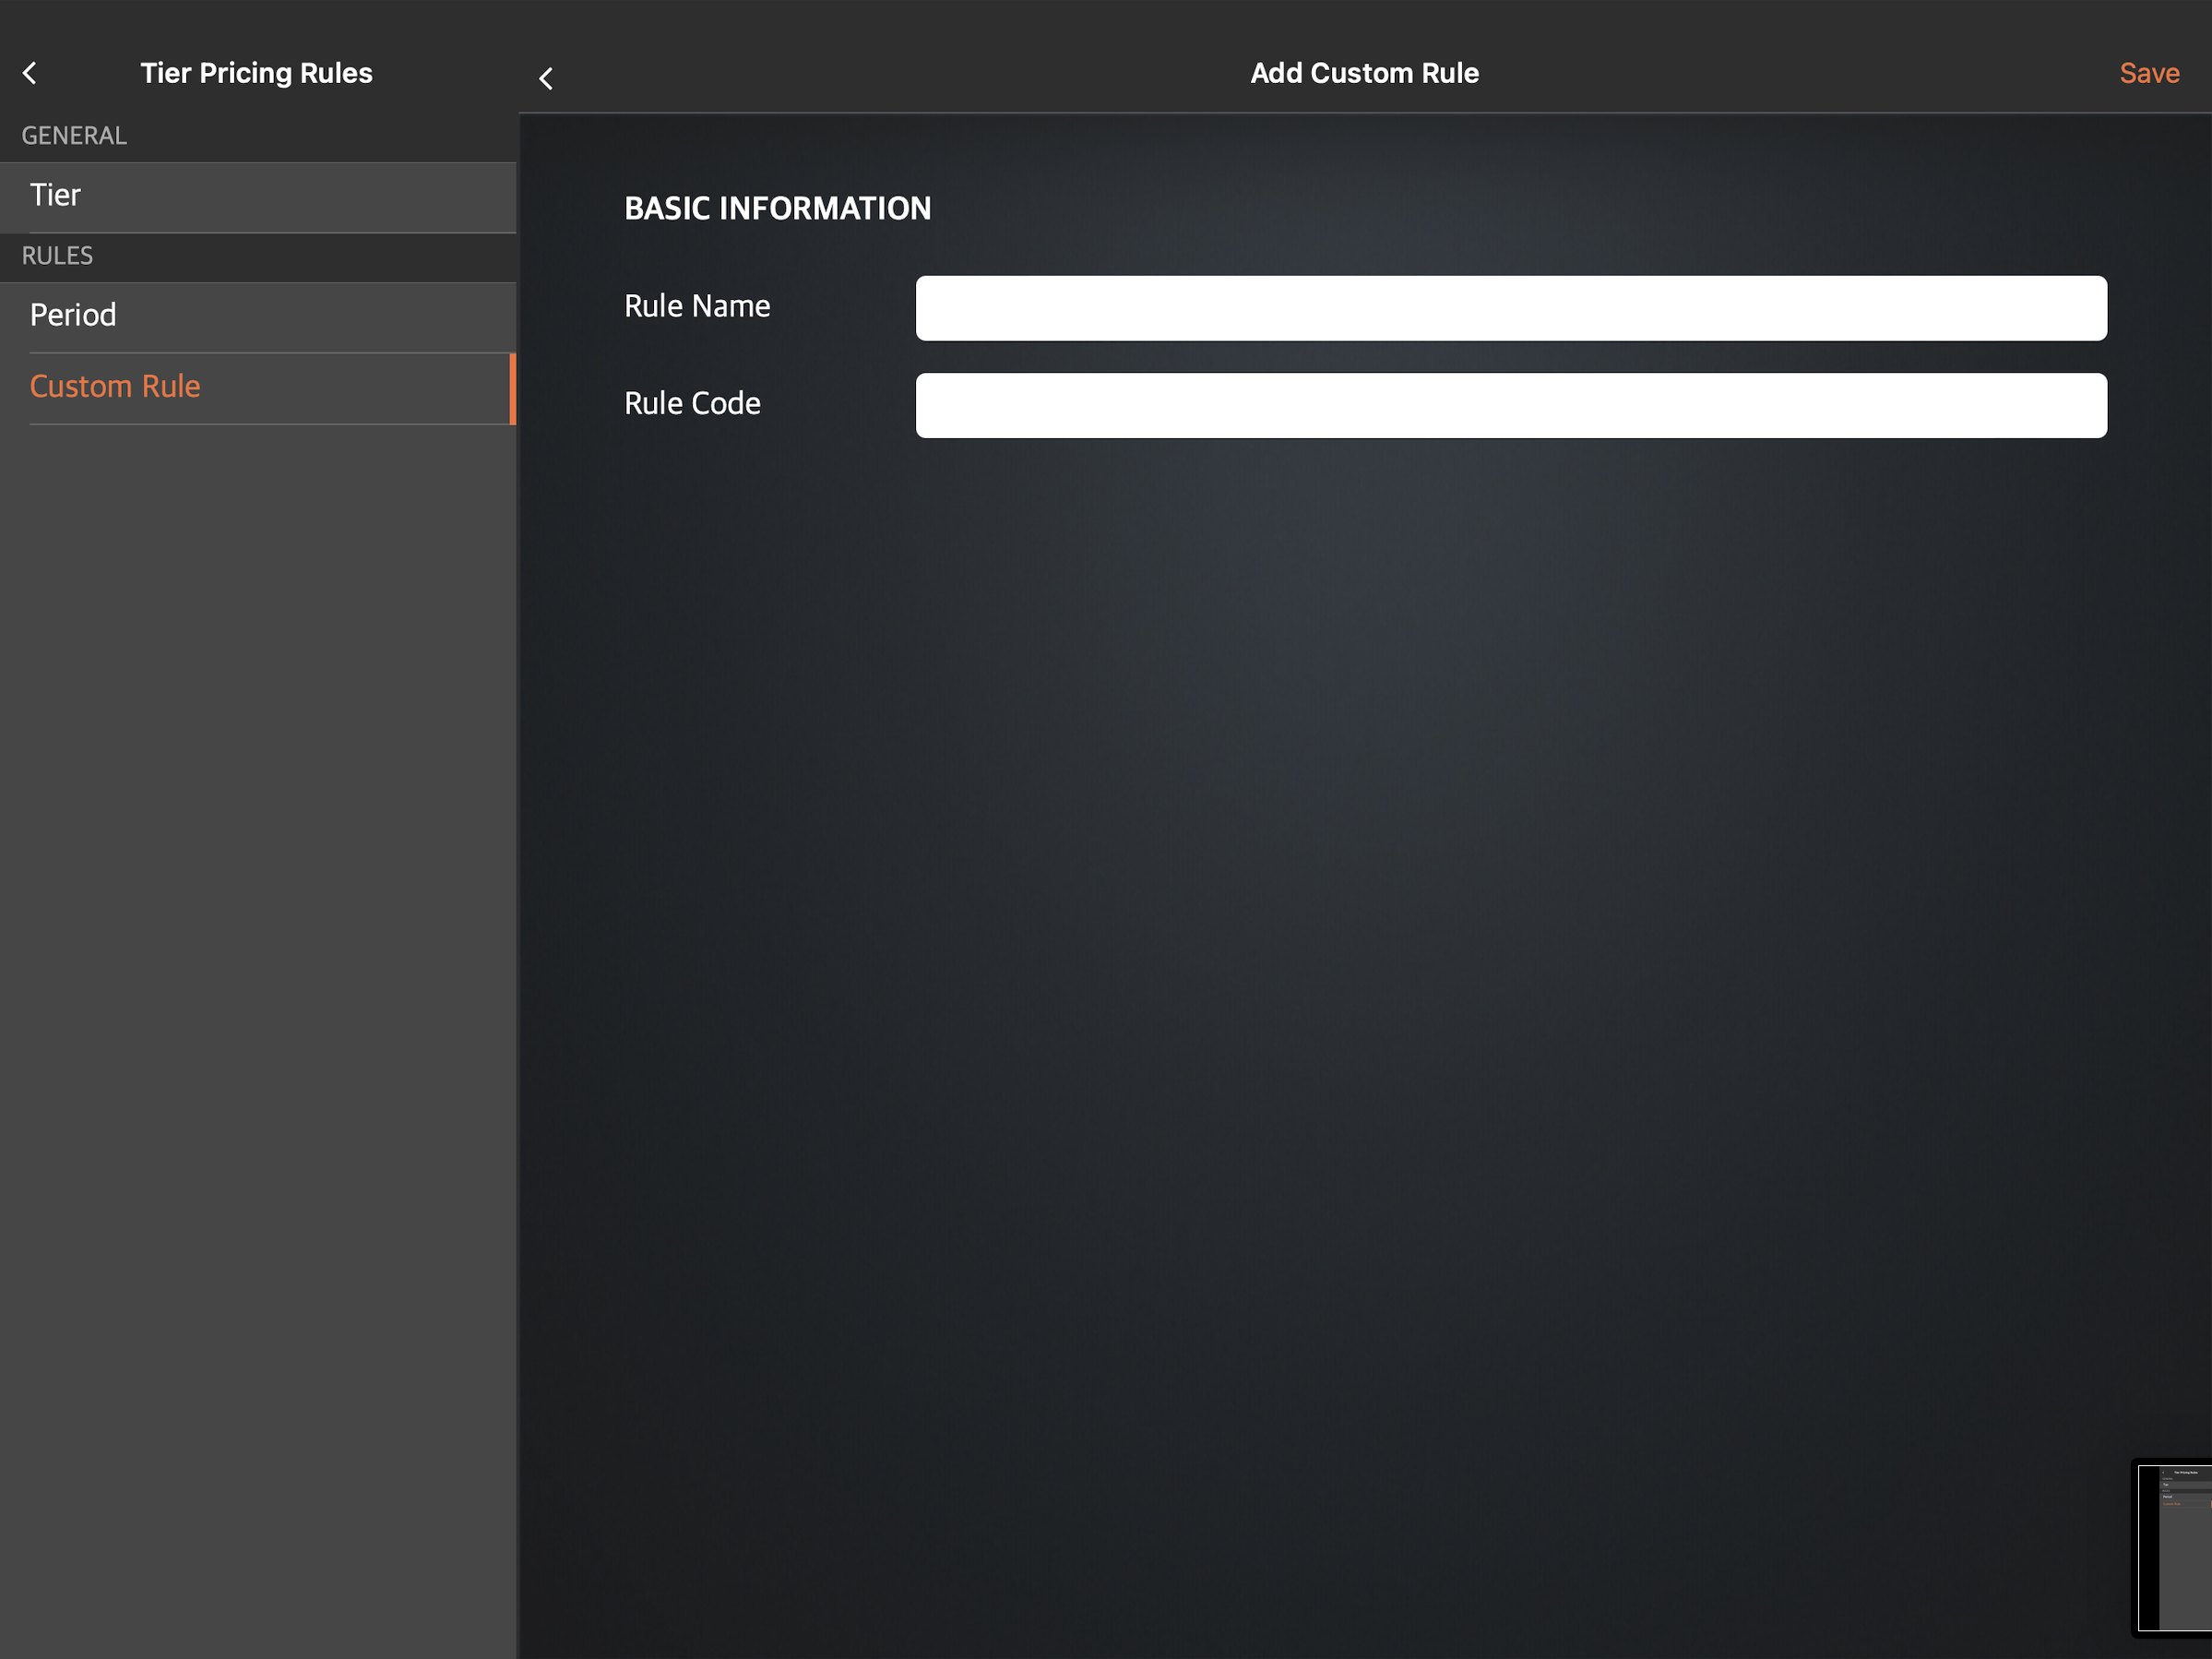
- Tap Save to confirm.
Merchant Portal
- Log in to the Merchant Portal.
- On the left panel, click on Menu Setup. Then, select Tier Pricing Preset.
- Click on Custom Rule.
- At the top right, click on Add Custom Rule.

- Enter your preferred “Custom Rule Name” and “Custom Rule Code.”

- At the top right, click on Save to confirm.
Add a membership plan rule
To add a membership plan rule, follow the steps below:
- Log in to the Merchant Portal.
- On the left panel, click on Menu Setup. Then, select Tier Pricing Preset.
- Click on Membership Plan Rule.
- At the top right, click on Add Membership Plan Rule.

- Enter your preferred “Membership Plan Rule Name” and “Membership Plan Rule Code.”

- Under “Included Membership Plan,” select the membership plan that you want to associate with the rule.
- If you’re using a third-party CRM for your restaurant’s membership program, leave this as None Selected. Then, next to “3rd Party CRMMember Plan Code,” click on + Add New and enter the code of the member plan you want to associate to the rule.
Important: Ensure that the member plan code matches the plan code indicated on the third-party CRM’s system.
- If you’re using a third-party CRM for your restaurant’s membership program, leave this as None Selected. Then, next to “3rd Party CRMMember Plan Code,” click on + Add New and enter the code of the member plan you want to associate to the rule.
- At the top right, click on Save to confirm.
Create a pricing rule group
To add a pricing rule group, follow the steps below:
- Log in to the Merchant Portal.
- On the left panel, click on Menu Setup. Then, select Tier Pricing Preset.
- Click on Pricing Rule Group.
- At the top right, click on Add Pricing Rule Group.

- Enter your preferred “Pricing Rule Group Name” and “Pricing Rule Group Code.”

- Under “Included Rules” next to “Rule Type,” select the rule type that you want to include in the rule group. Then, click on Add.

- Select the rule that you want to include.

- Repeat the steps to add more rules to the group.
- At the top right, click on Save to confirm.
Set up tier pricing
Once tier pricing rules have been created, you can then set up tiers and associate them with menu items. You can set up tier pricing from the “Item” settings or create a tier pricing preset from the ”Tier Pricing Preset” settings.”
Create tier pricing within Item settings
You can add tier pricing whenever you create a single or combo Item.
Eats365 POS
- Log in to the Eats365 POS.
- At the top left, tap Settings .
- Under "General," tap Menu Setup. Then, select Item.
- At the top right, tap Add Item.

- Choose either Single Item or Combo Item.
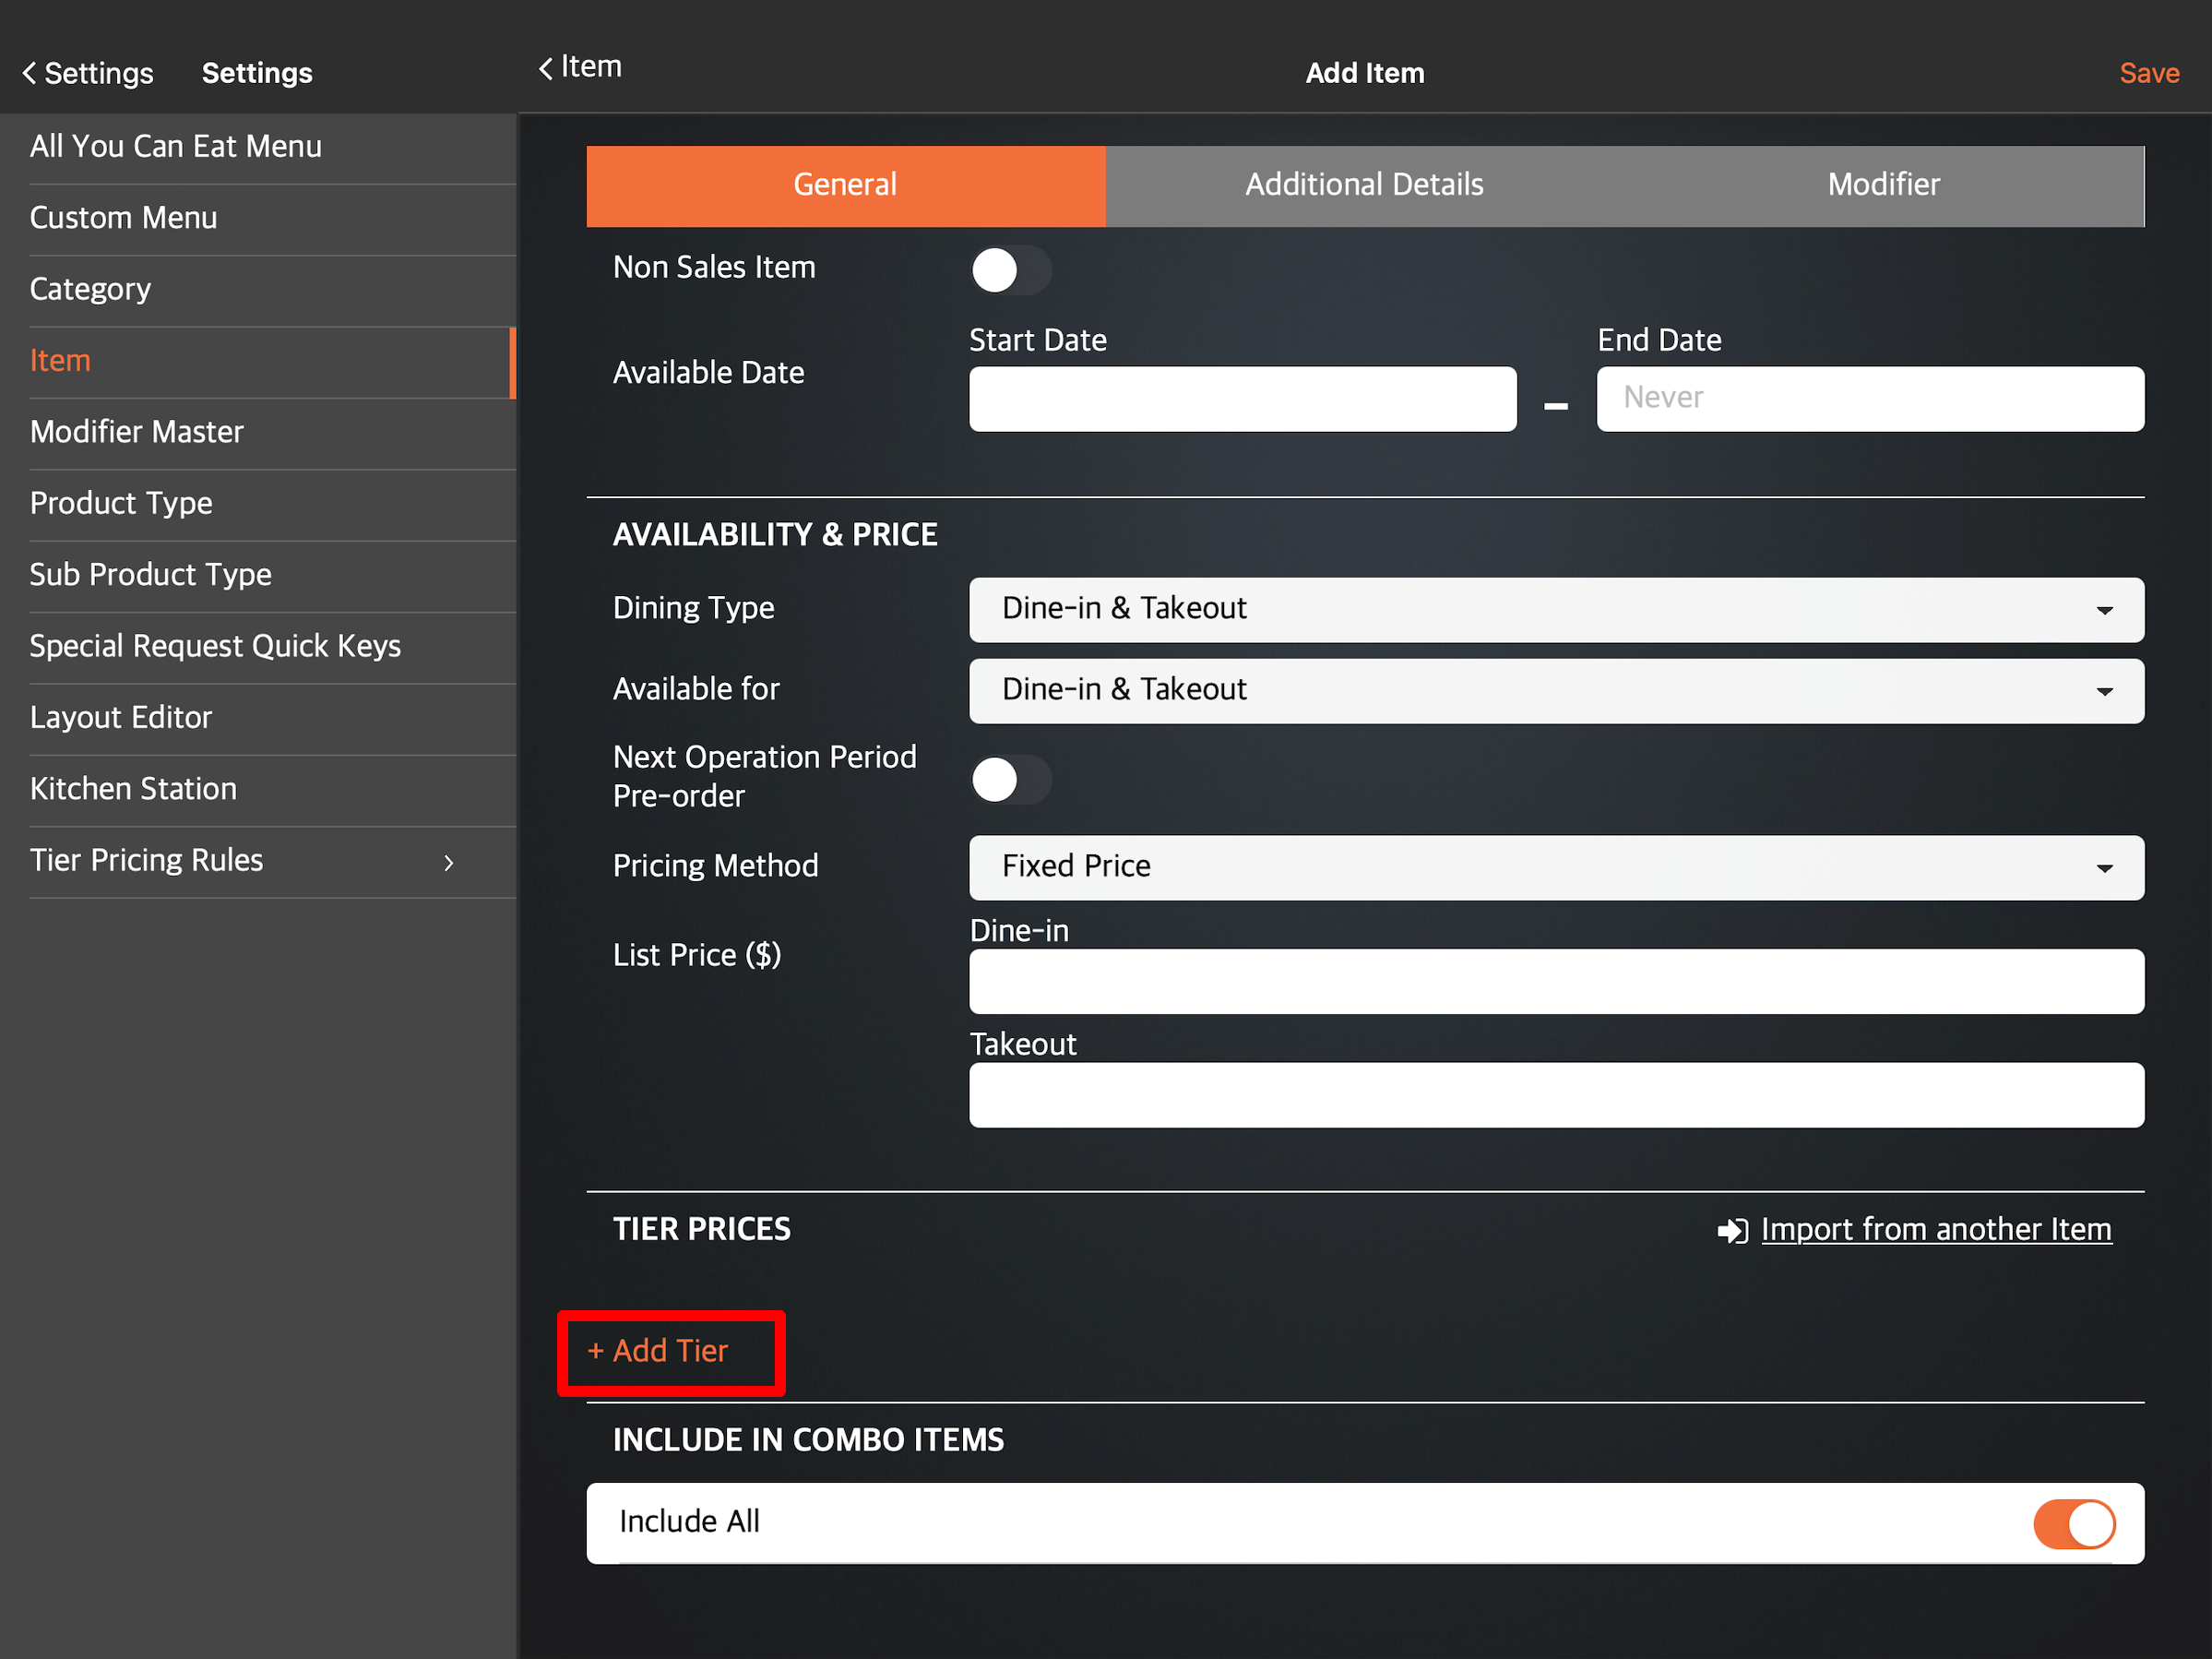
- At the bottom of the page, under "Tier Prices," choose + Add Tier.
 Tip: If you have an existing menu item with the same tier pricing rules that you’d like to add, you can copy the tier pricing instead by selecting Import from another Item.
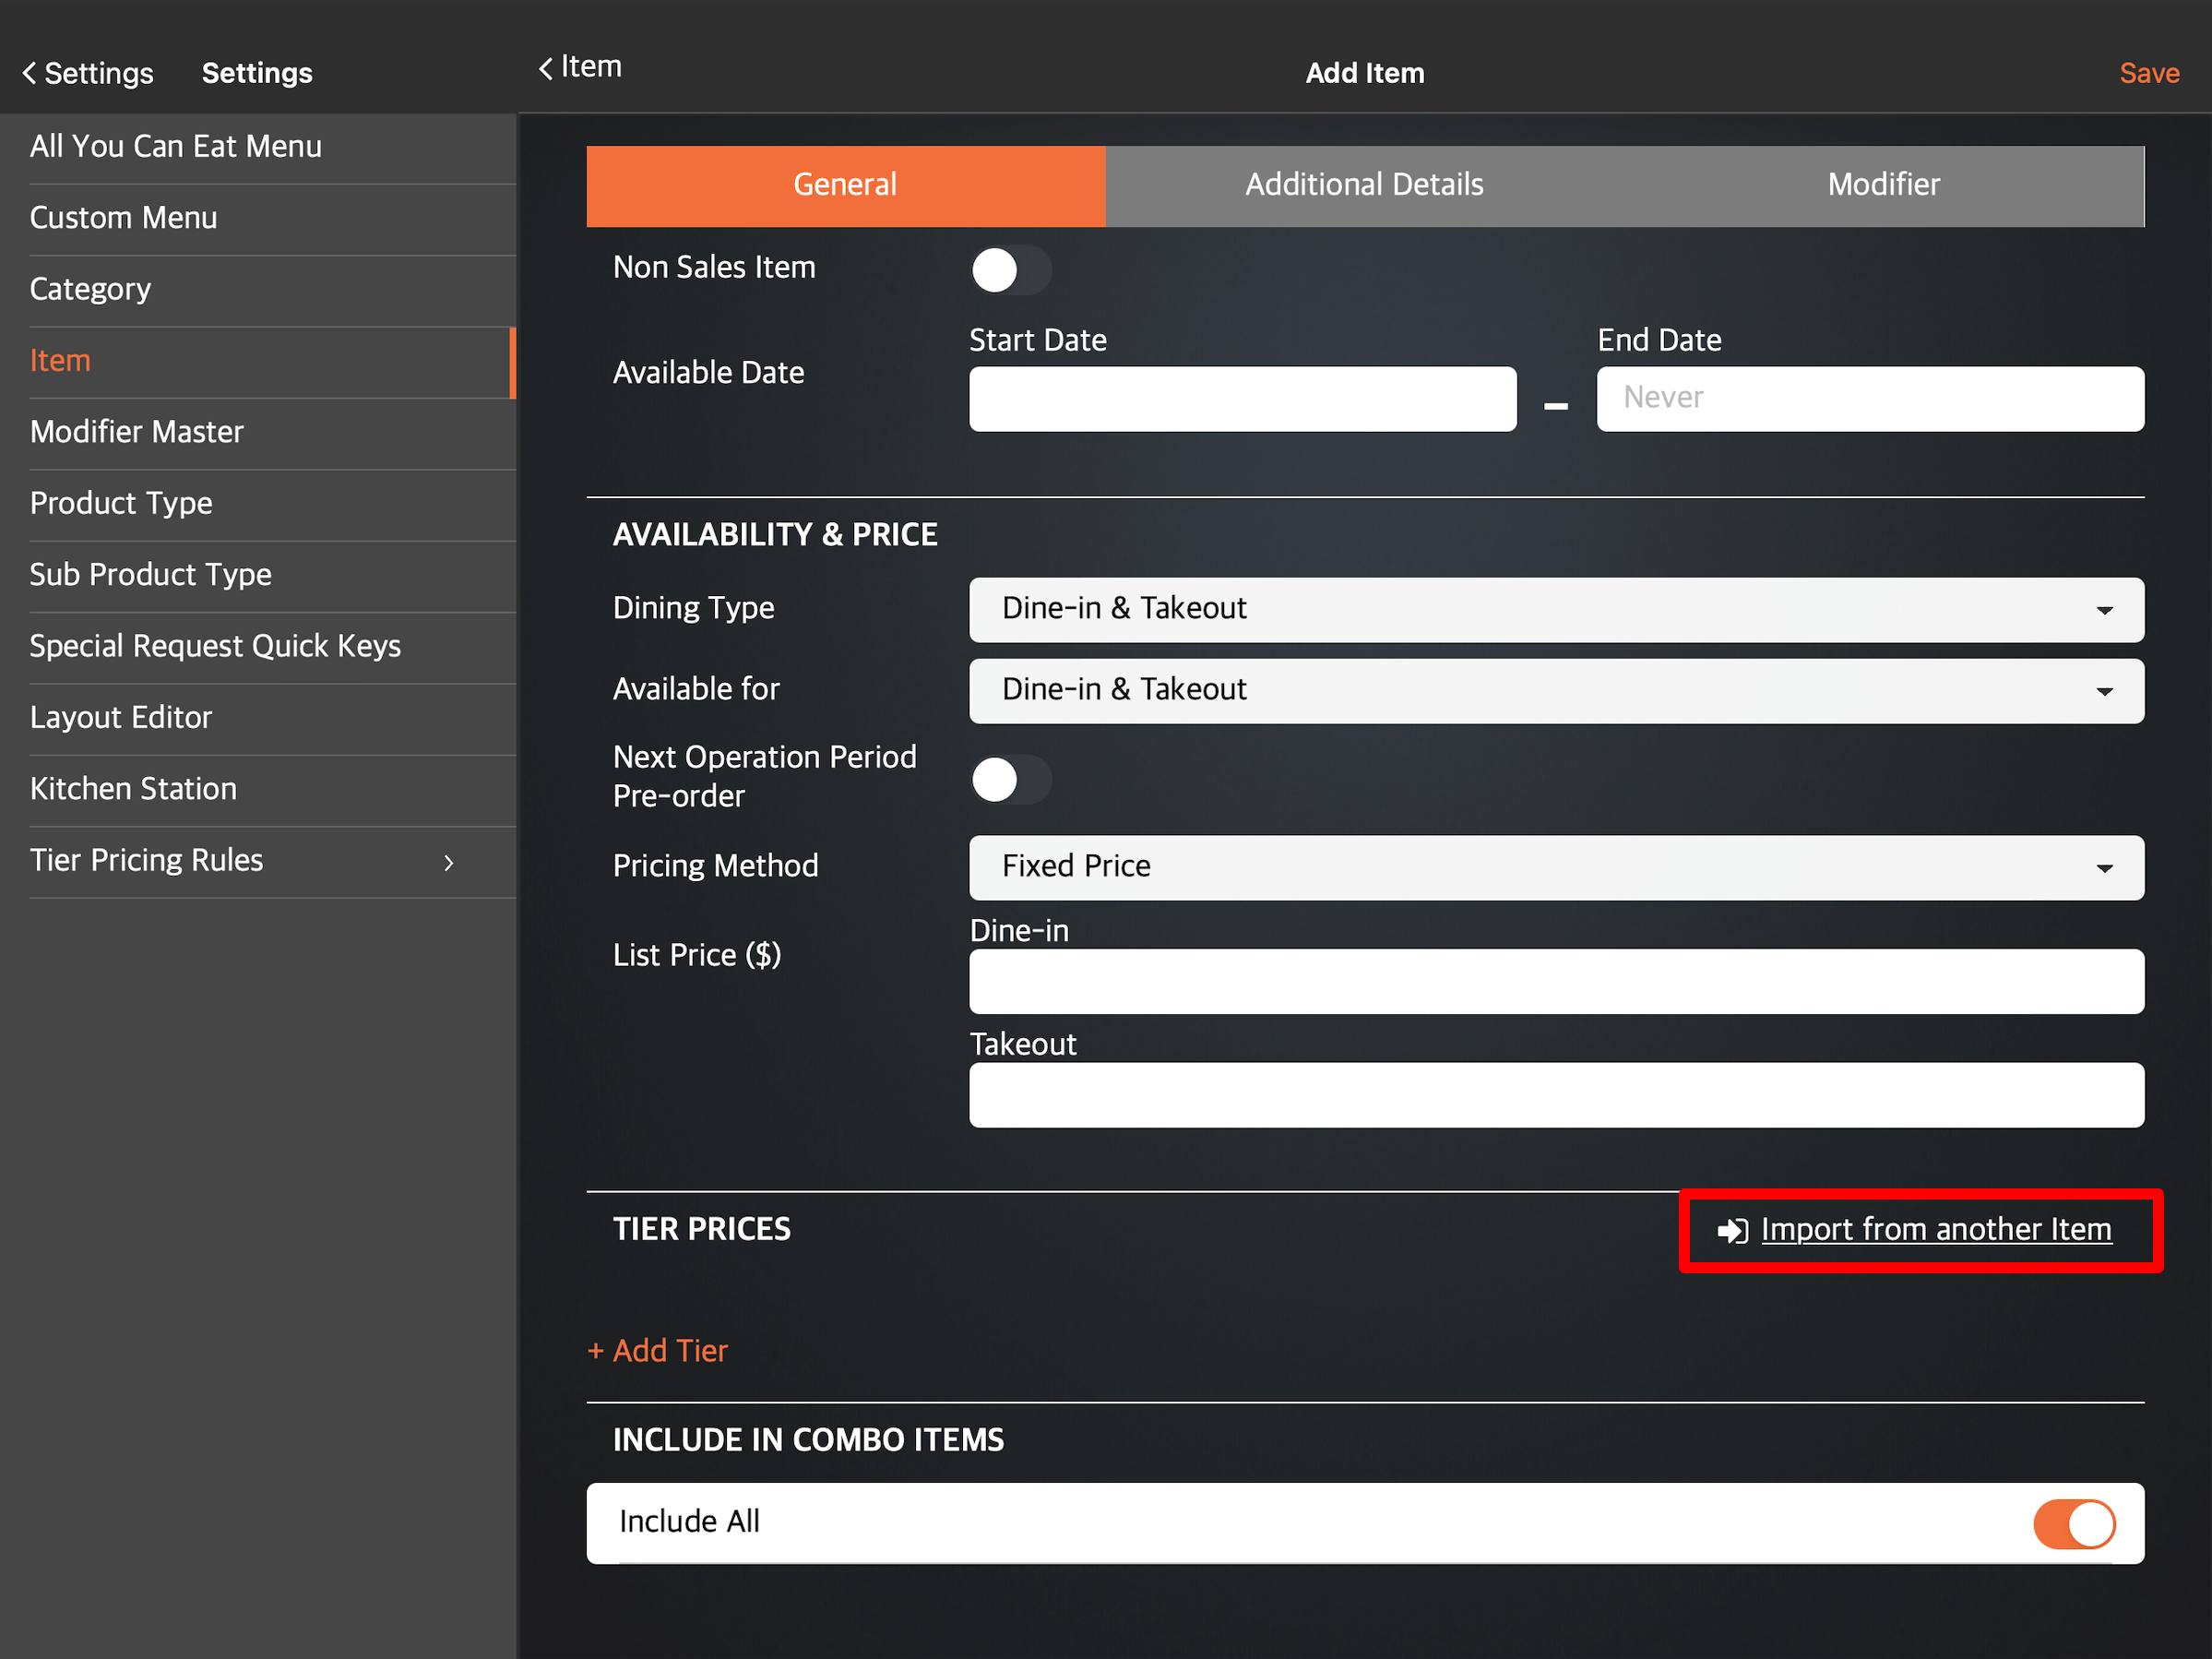
- To create a new tier pricing, select New Tier.
- Enter your preferred "Tier Name" and "Tier Code."
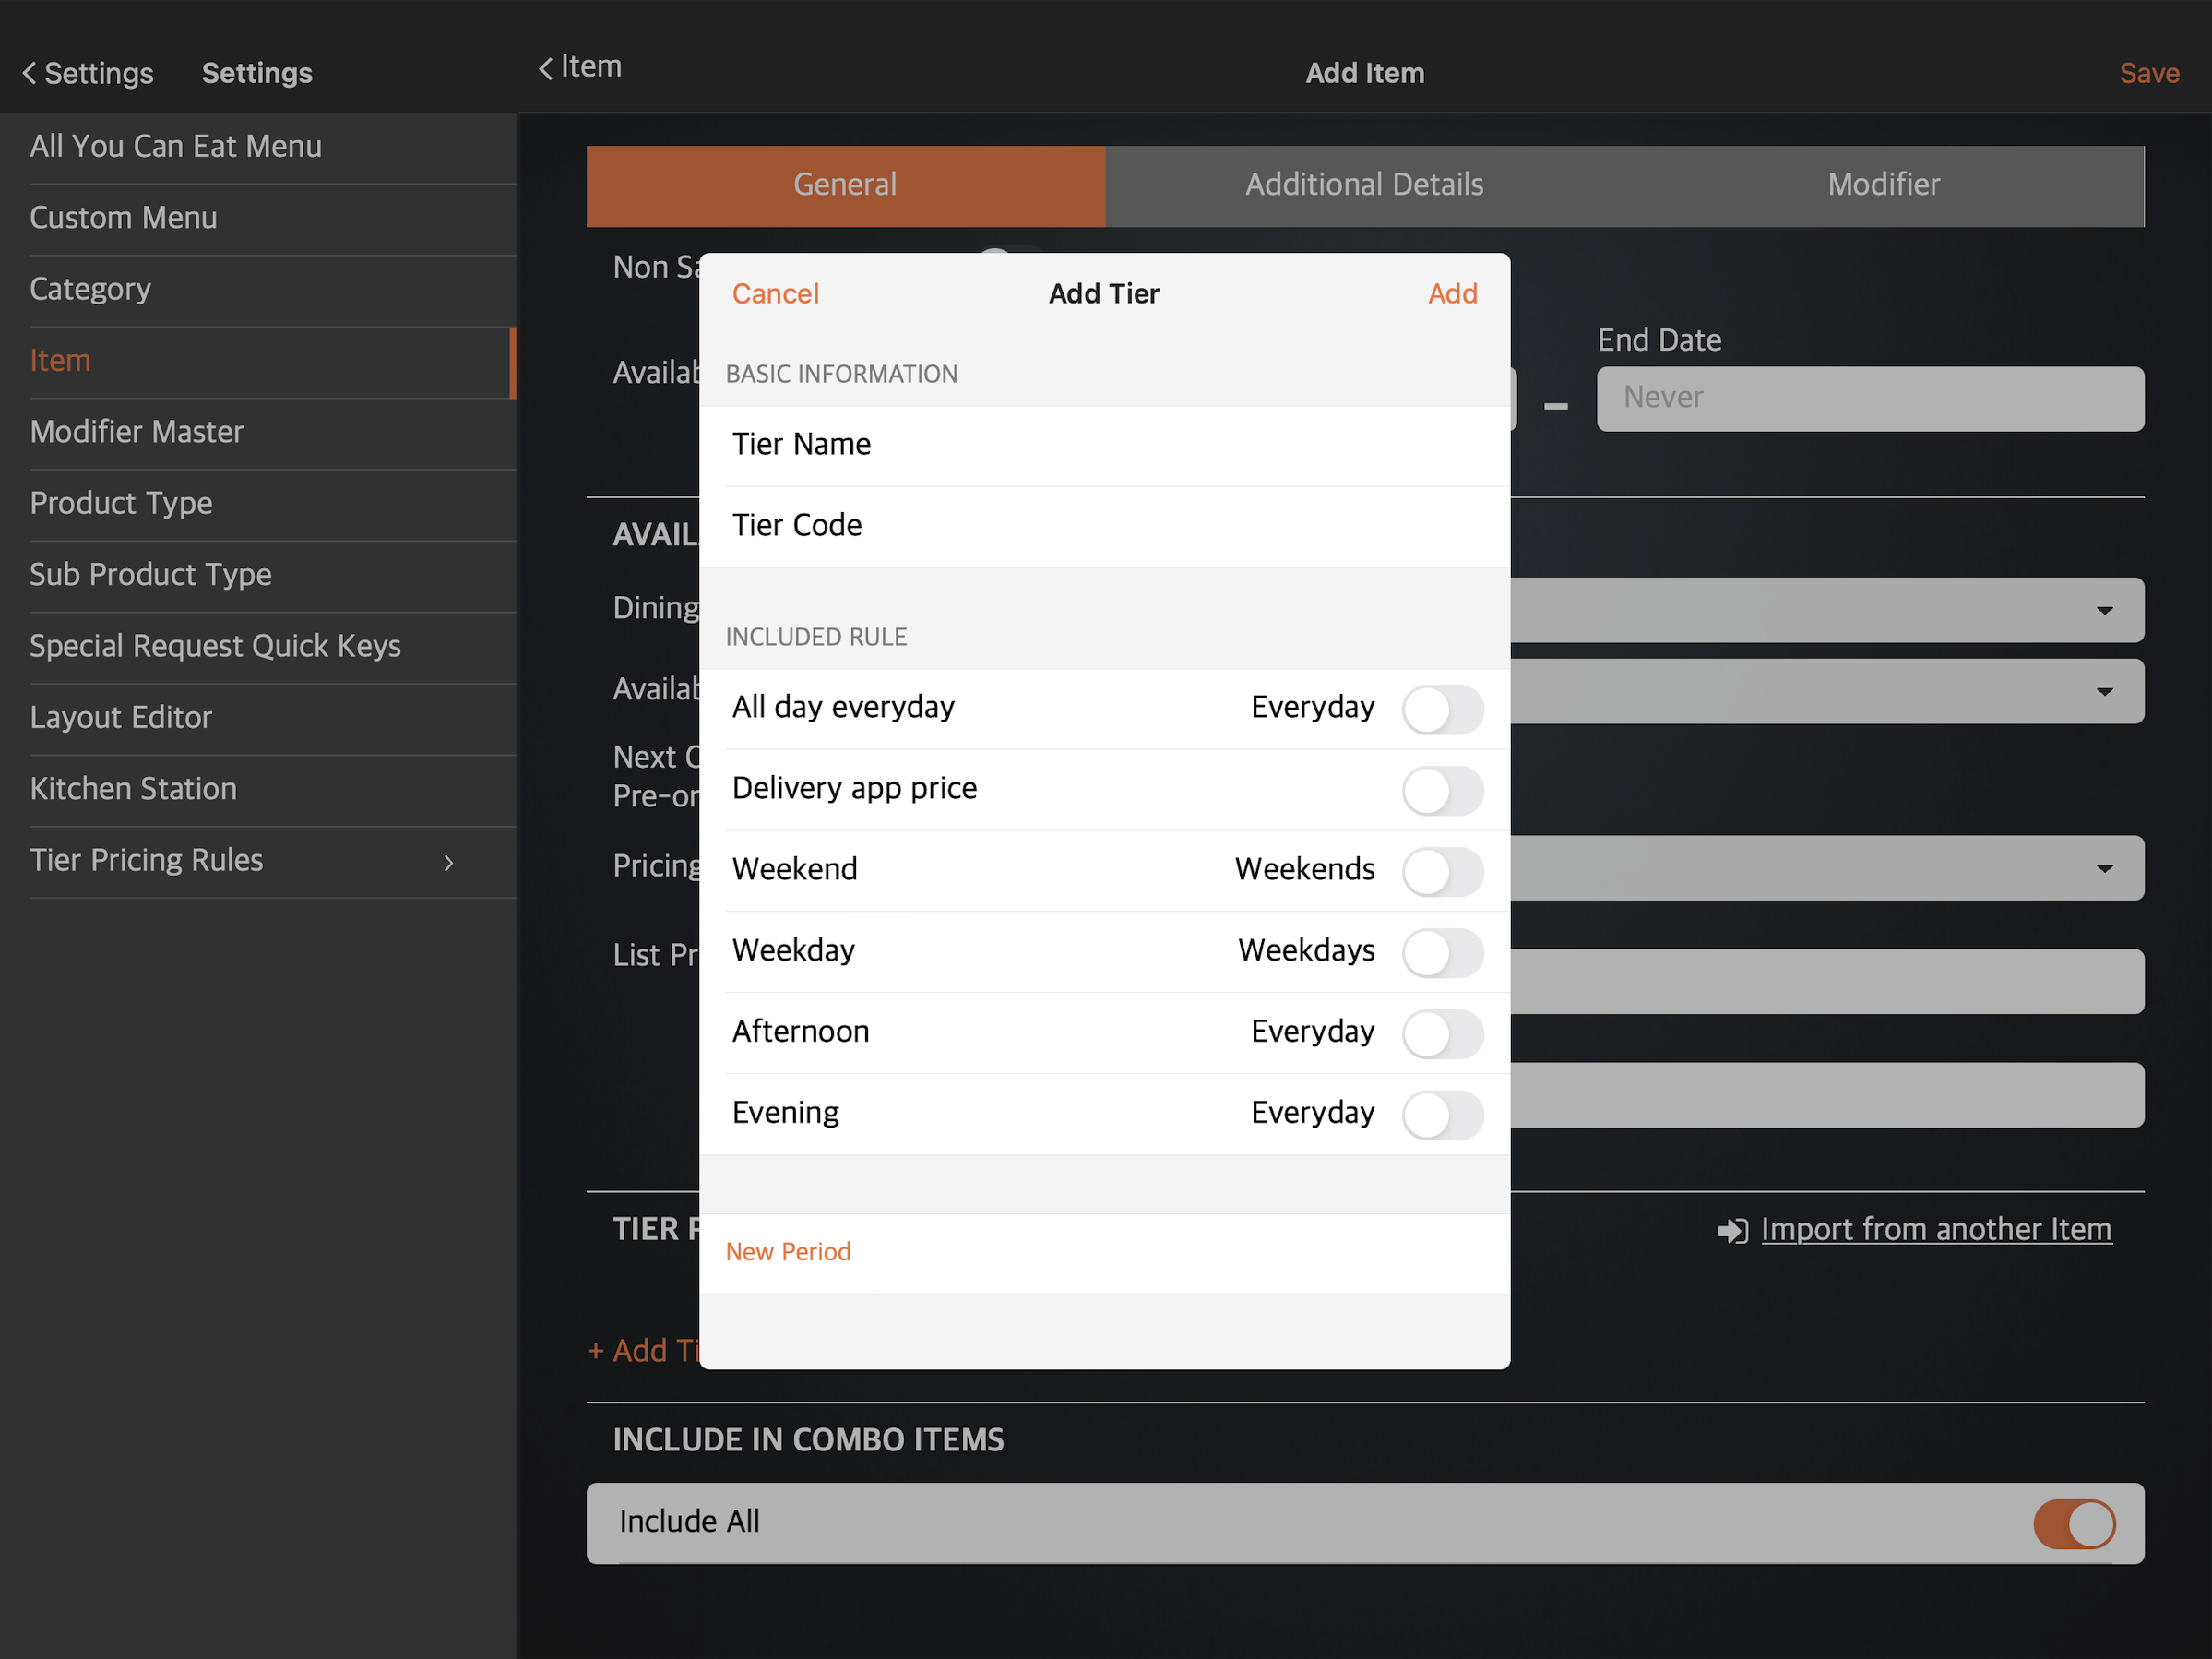
- Under “Included Rule,” select the rules that you want to apply to the tier pricing.
- To add a new rule, tap New Period. Then, set up the new period rule. Tap Continue to confirm.
Note: For other rule types, you must create the rule from the “Tier Pricing Rules” settings.
- To add a new rule, tap New Period. Then, set up the new period rule. Tap Continue to confirm.
- Tap Add to save your changes.
Merchant Portal
- Log in to the Merchant Portal.
- On the left panel, click on Menu Setup, then select Item.
- At the top right, click on +Single Item or +Combo Item.
- Scroll down to “Availability & Price.” Then, next to “Price Tier,” click on +Add Price Tier.

Tip: If you have an existing menu item with the same tier pricing rules that you’d like to add, next to “Import Tier Pricing from Another Item,” click on the drop-down button and select the item with the tier pricing rule that you want to copy.
- Enter your preferred “Tier Price Name” and “Tier Code.”

- Next to “Select Rule(s),” click on the drop-down button and select your preferred rules.
- To add a new rule, click on +Add New Period. Then, set up the new period rule.
Note: For other rule types, you must create the rule from the “Tier Pricing Preset” setting.
- To add a new rule, click on +Add New Period. Then, set up the new period rule.
- Click on Save to confirm.
Create a tier pricing preset
To add a tier pricing preset, follow the steps below:
Eats365 POS
- Log in to the Eats365 POS.
- At the top left, tap Settings .
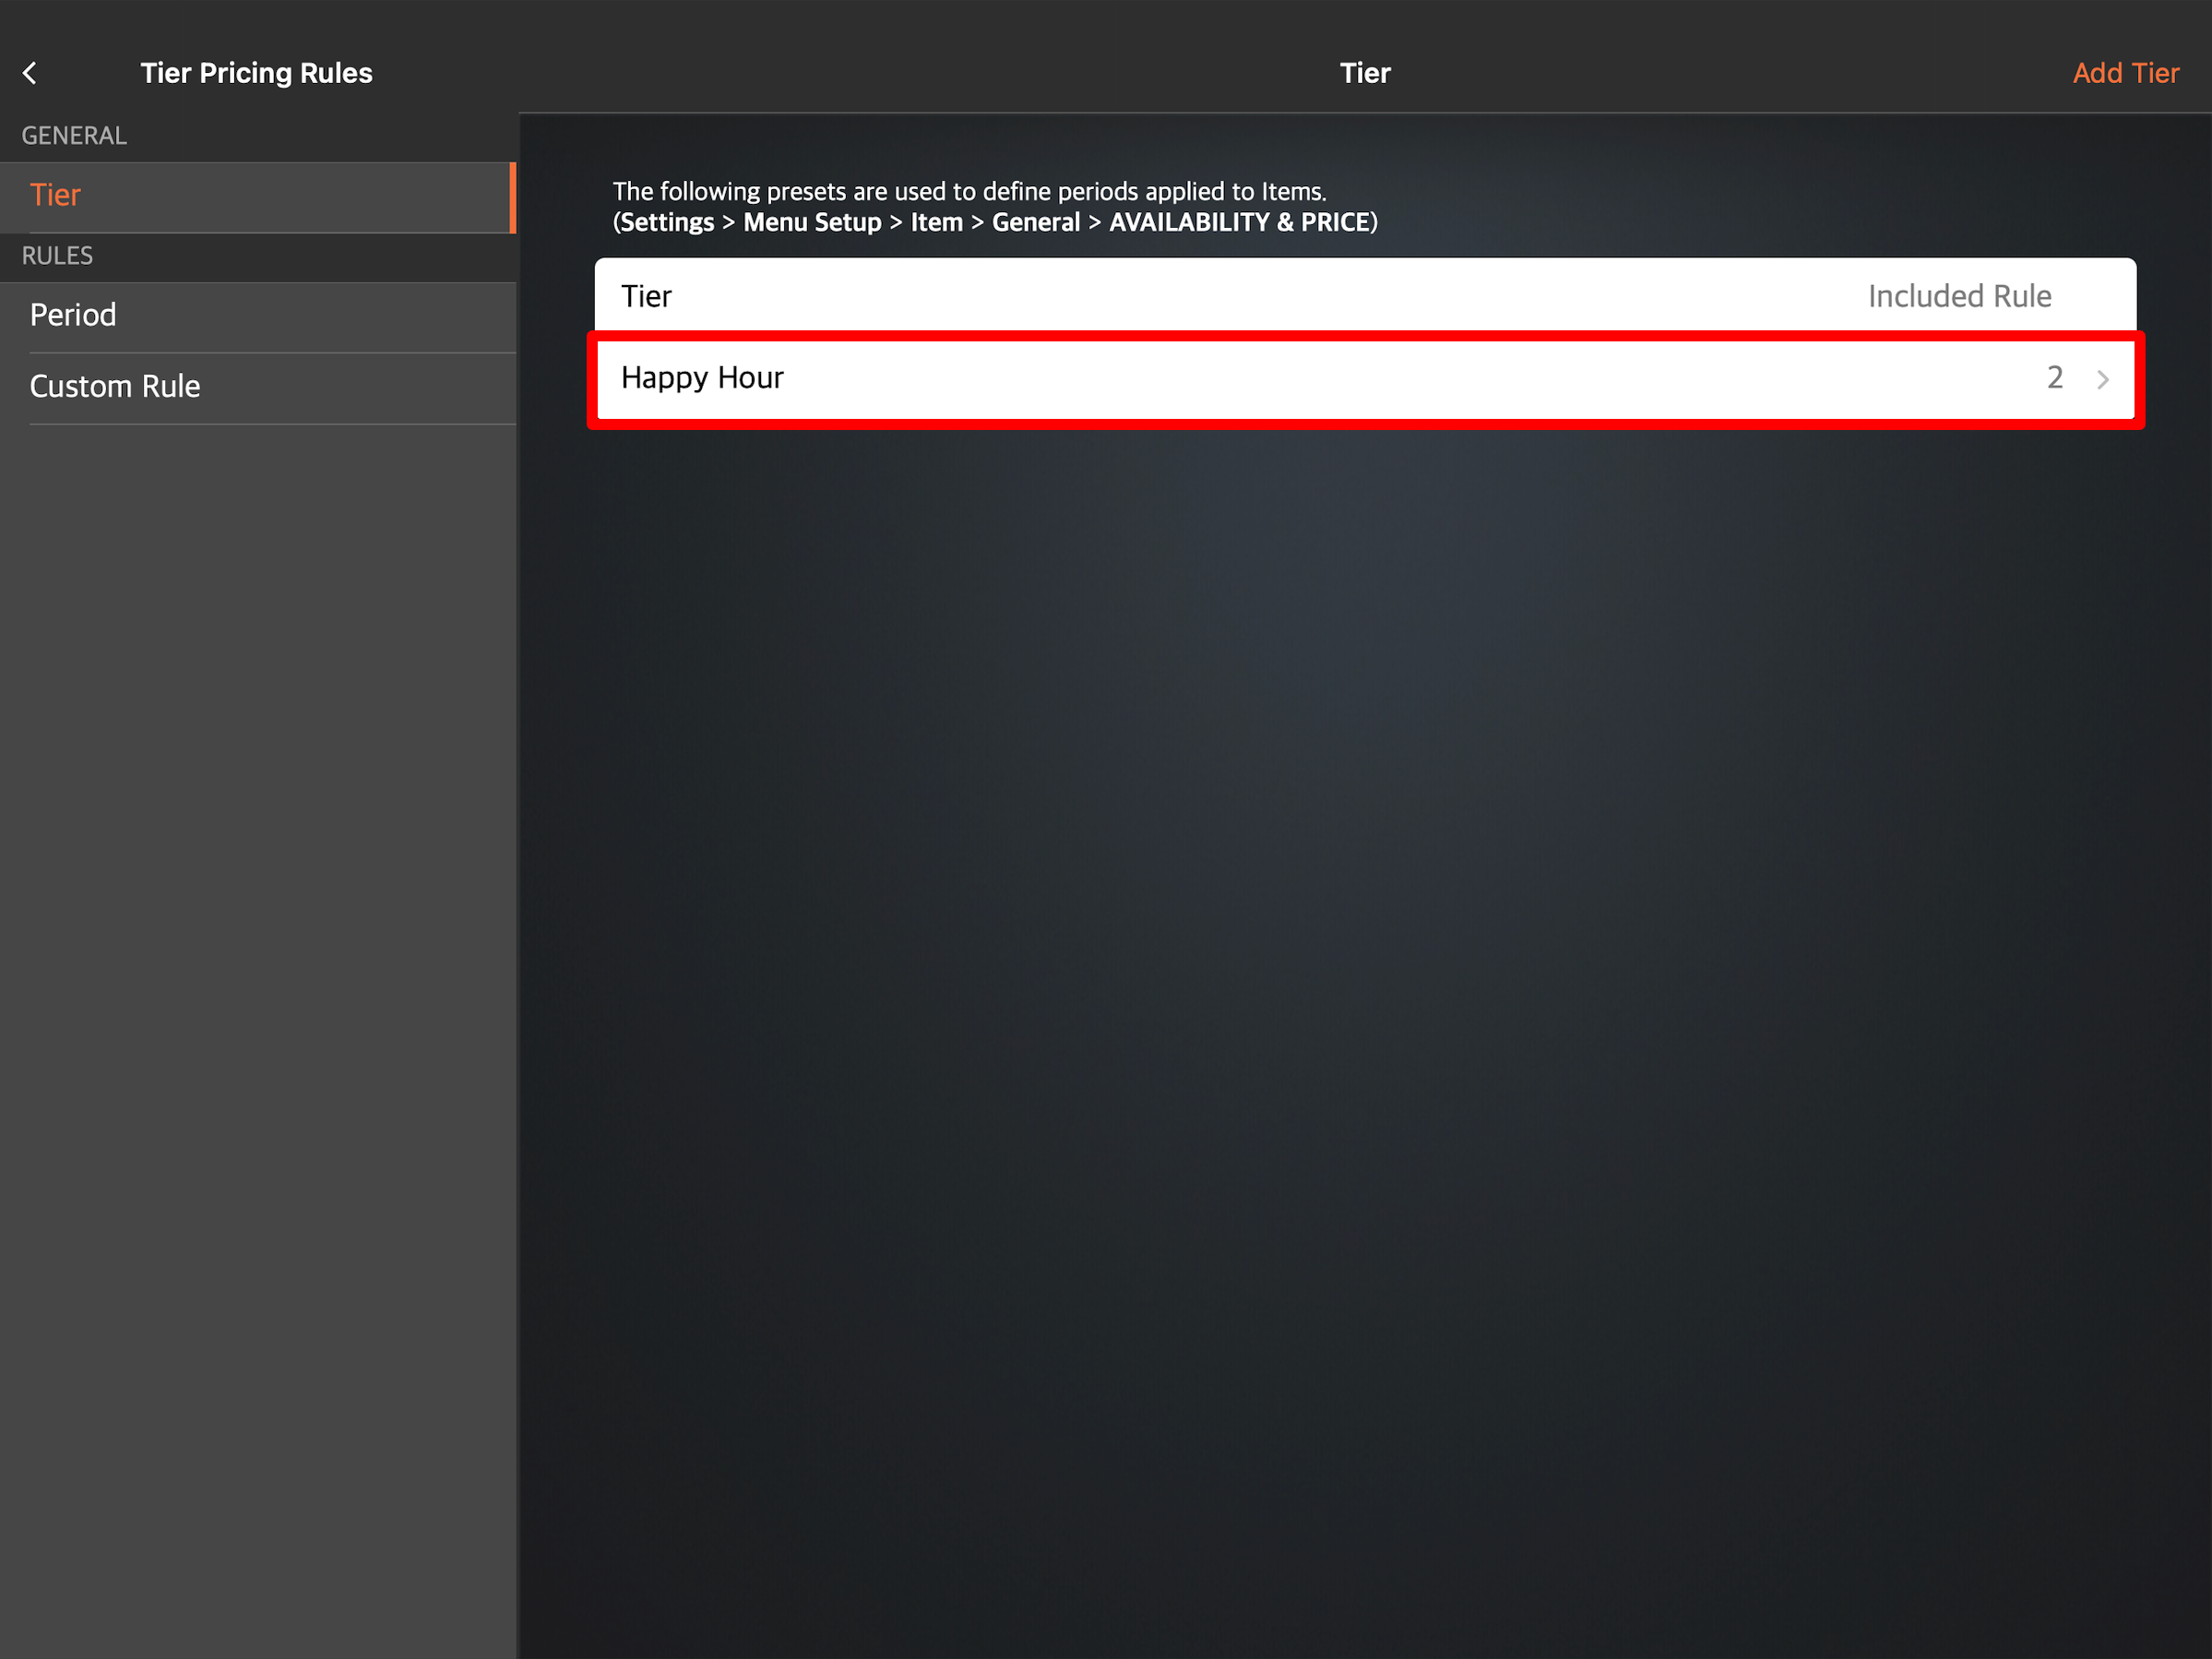
- Under "General," tap Menu Setup. Then, select Tier Pricing Rules.
- At the top right, tap Add Tier.
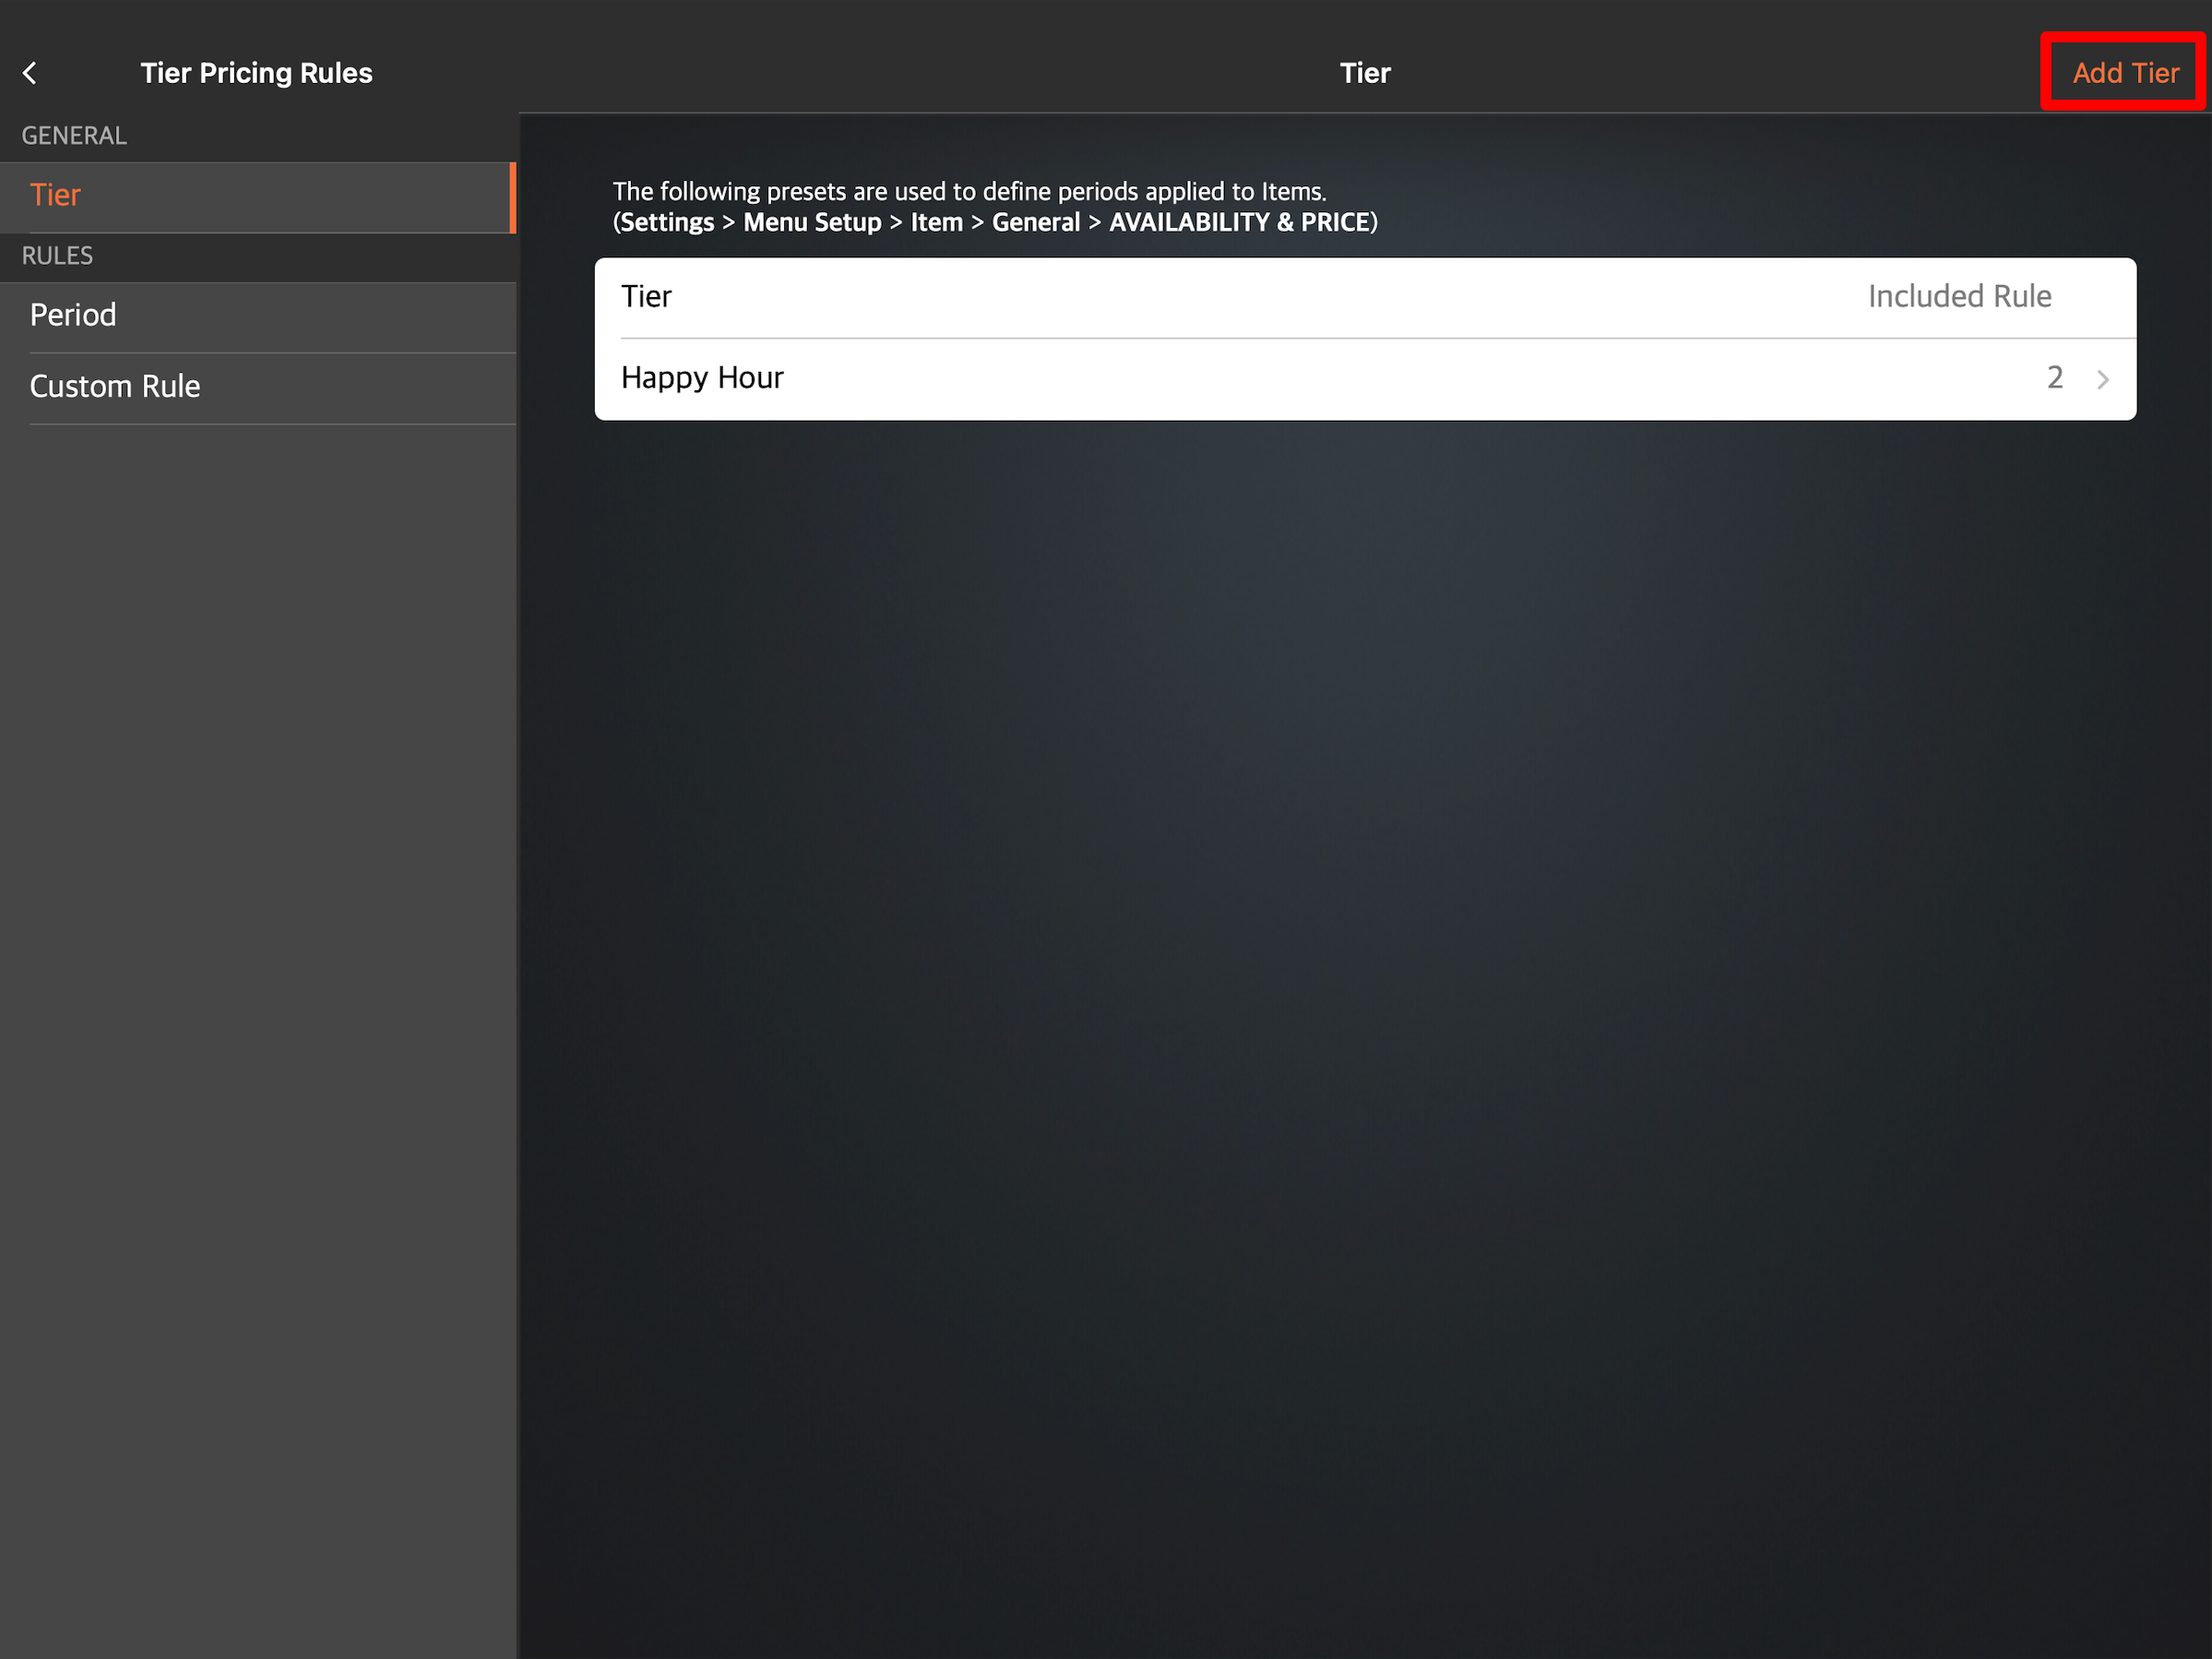
- Enter your preferred "Tier Name" and "Tier Code."
- Tap Included Rule, then tap Add Rule.
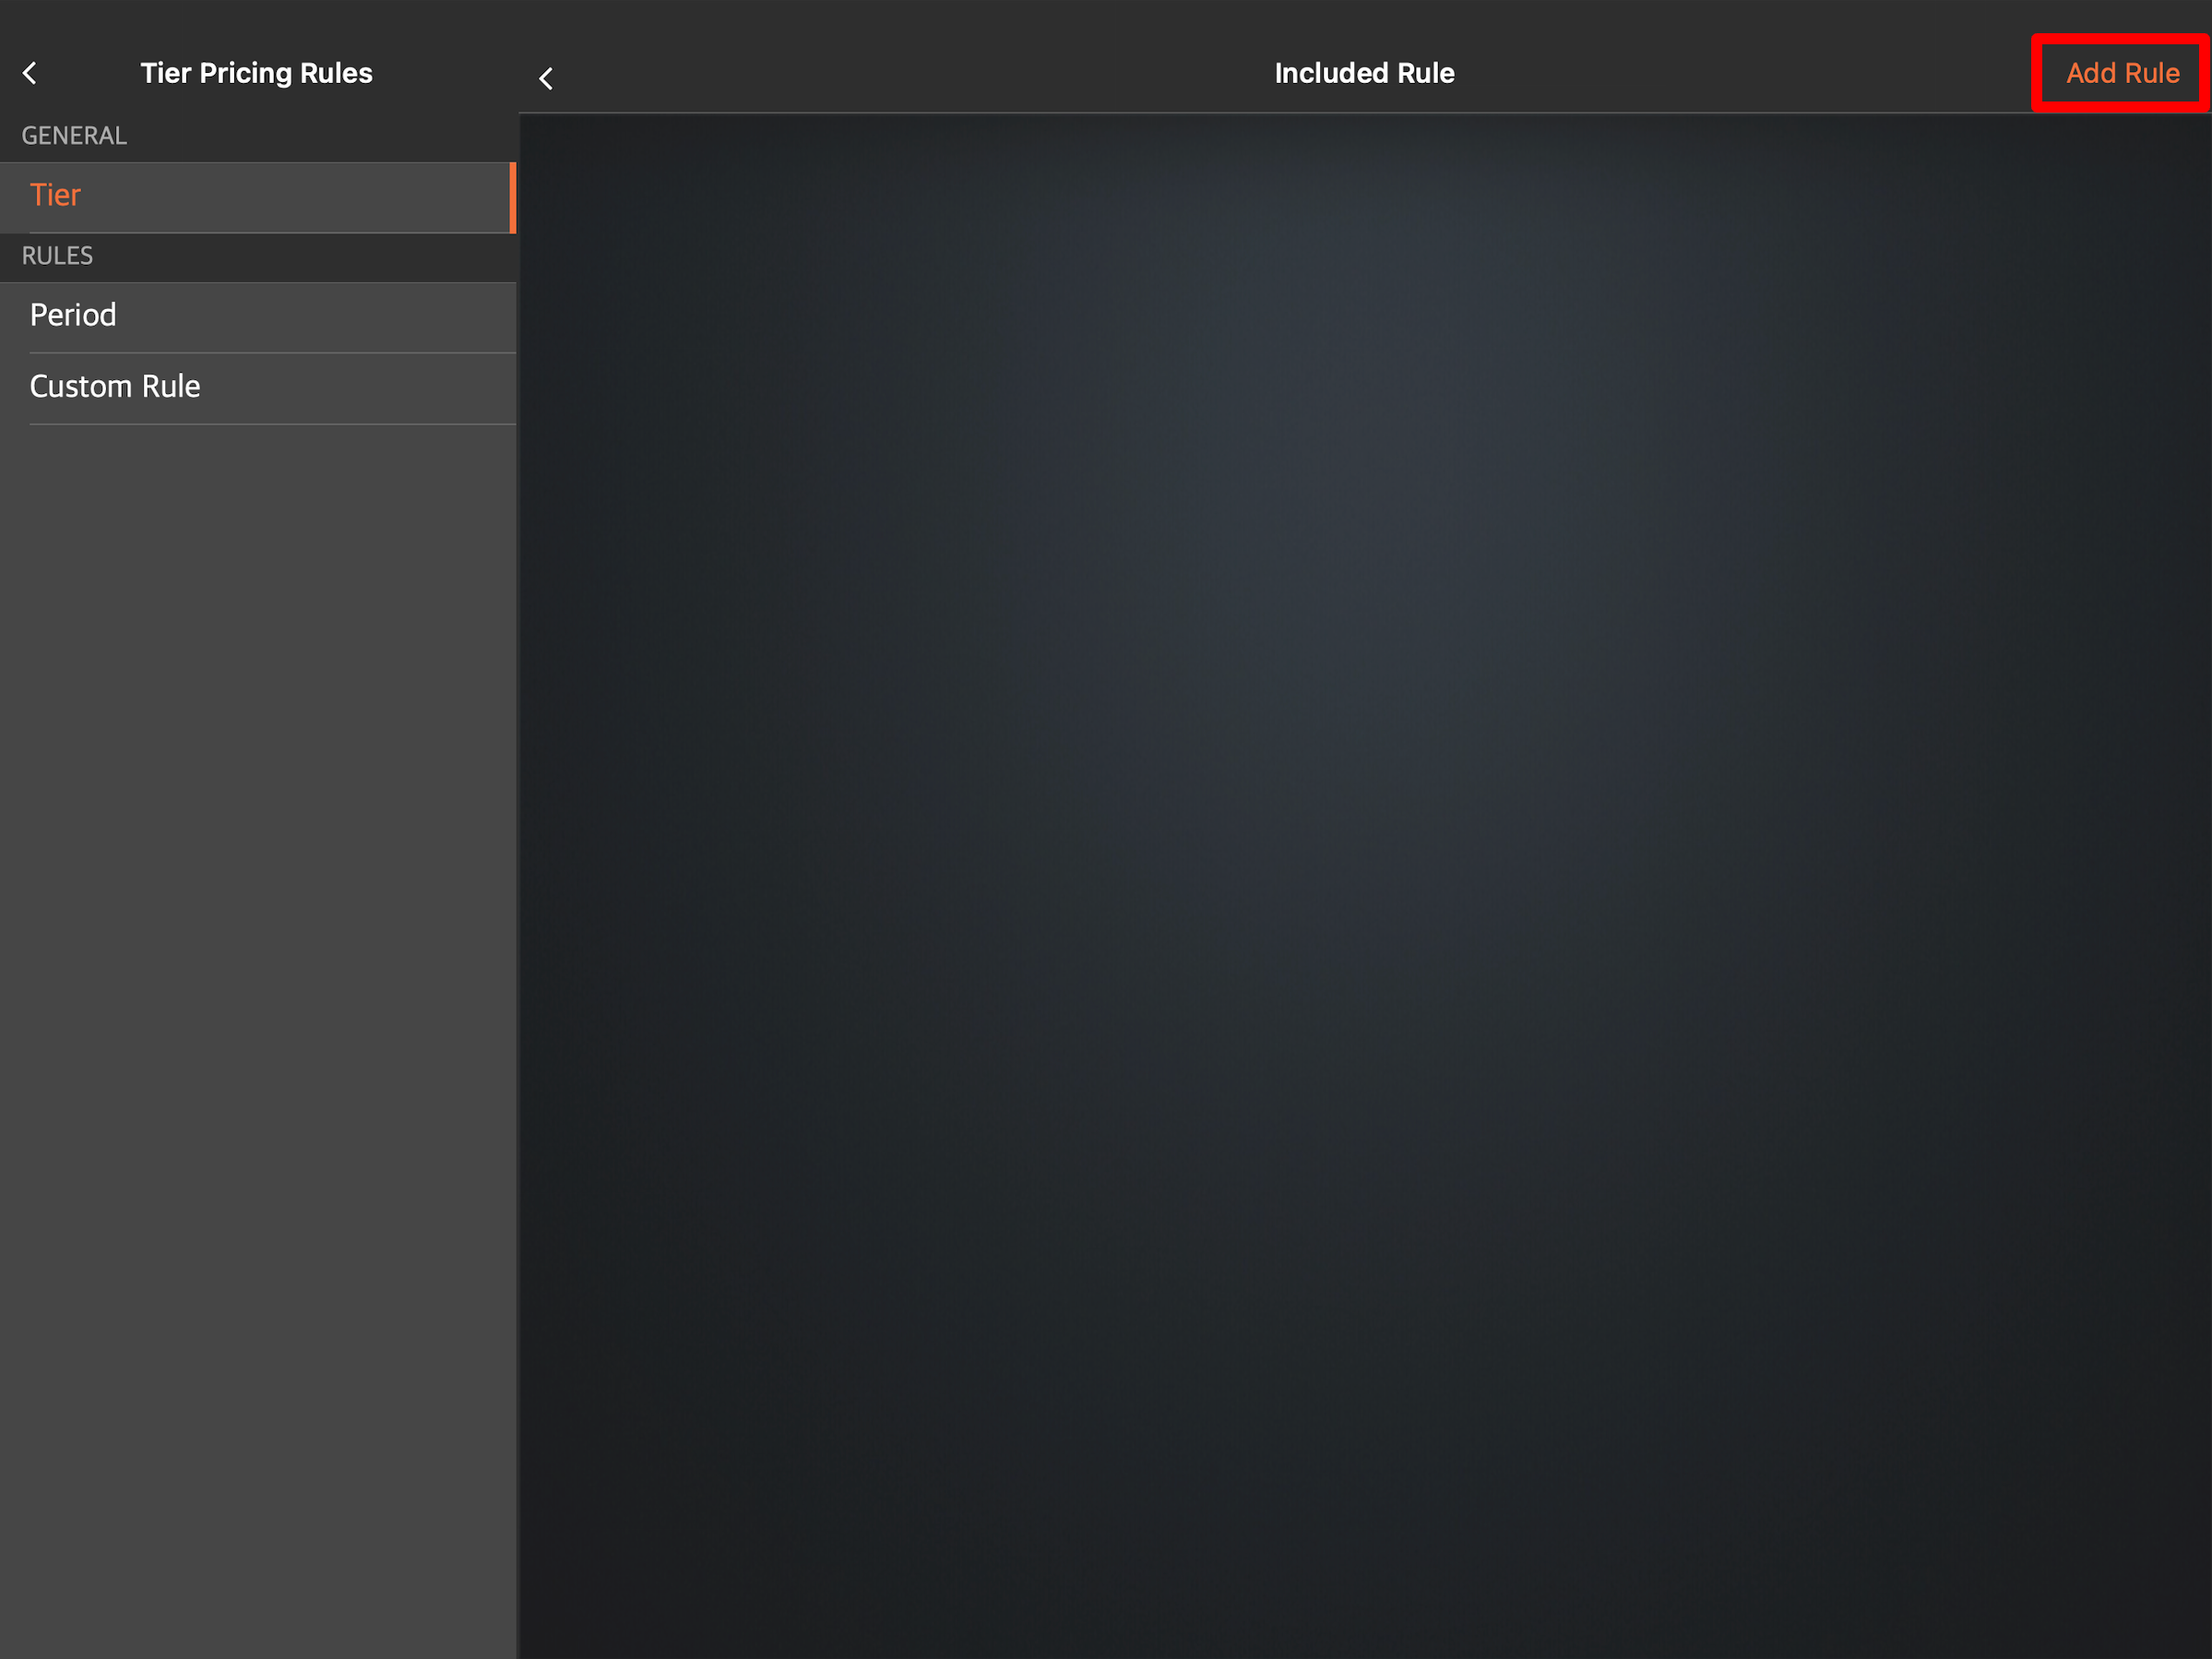
- Select an existing rule preset. To create a new rule, click on New Period or New Custom Rule.
Tip: You can include multiple rules in any tier price. For example, if you're offering a "Happy Hour" in which you intend to charge alcoholic drinks at lower prices, and you plan to have two periods of “Happy Hour” a day, you can create a tier price for “Happy Hour” and then add two period rules for the times you intend the adjusted pricing to apply.
- Go back to the previous screen.
- At the top right, tap Save to confirm.
Merchant Portal
- Log in to the Merchant Portal.
- On the left panel, click on Menu Setup.
- Click on Tier Pricing Preset and select Tier Pricing.
- At the top right, click on +Tier.
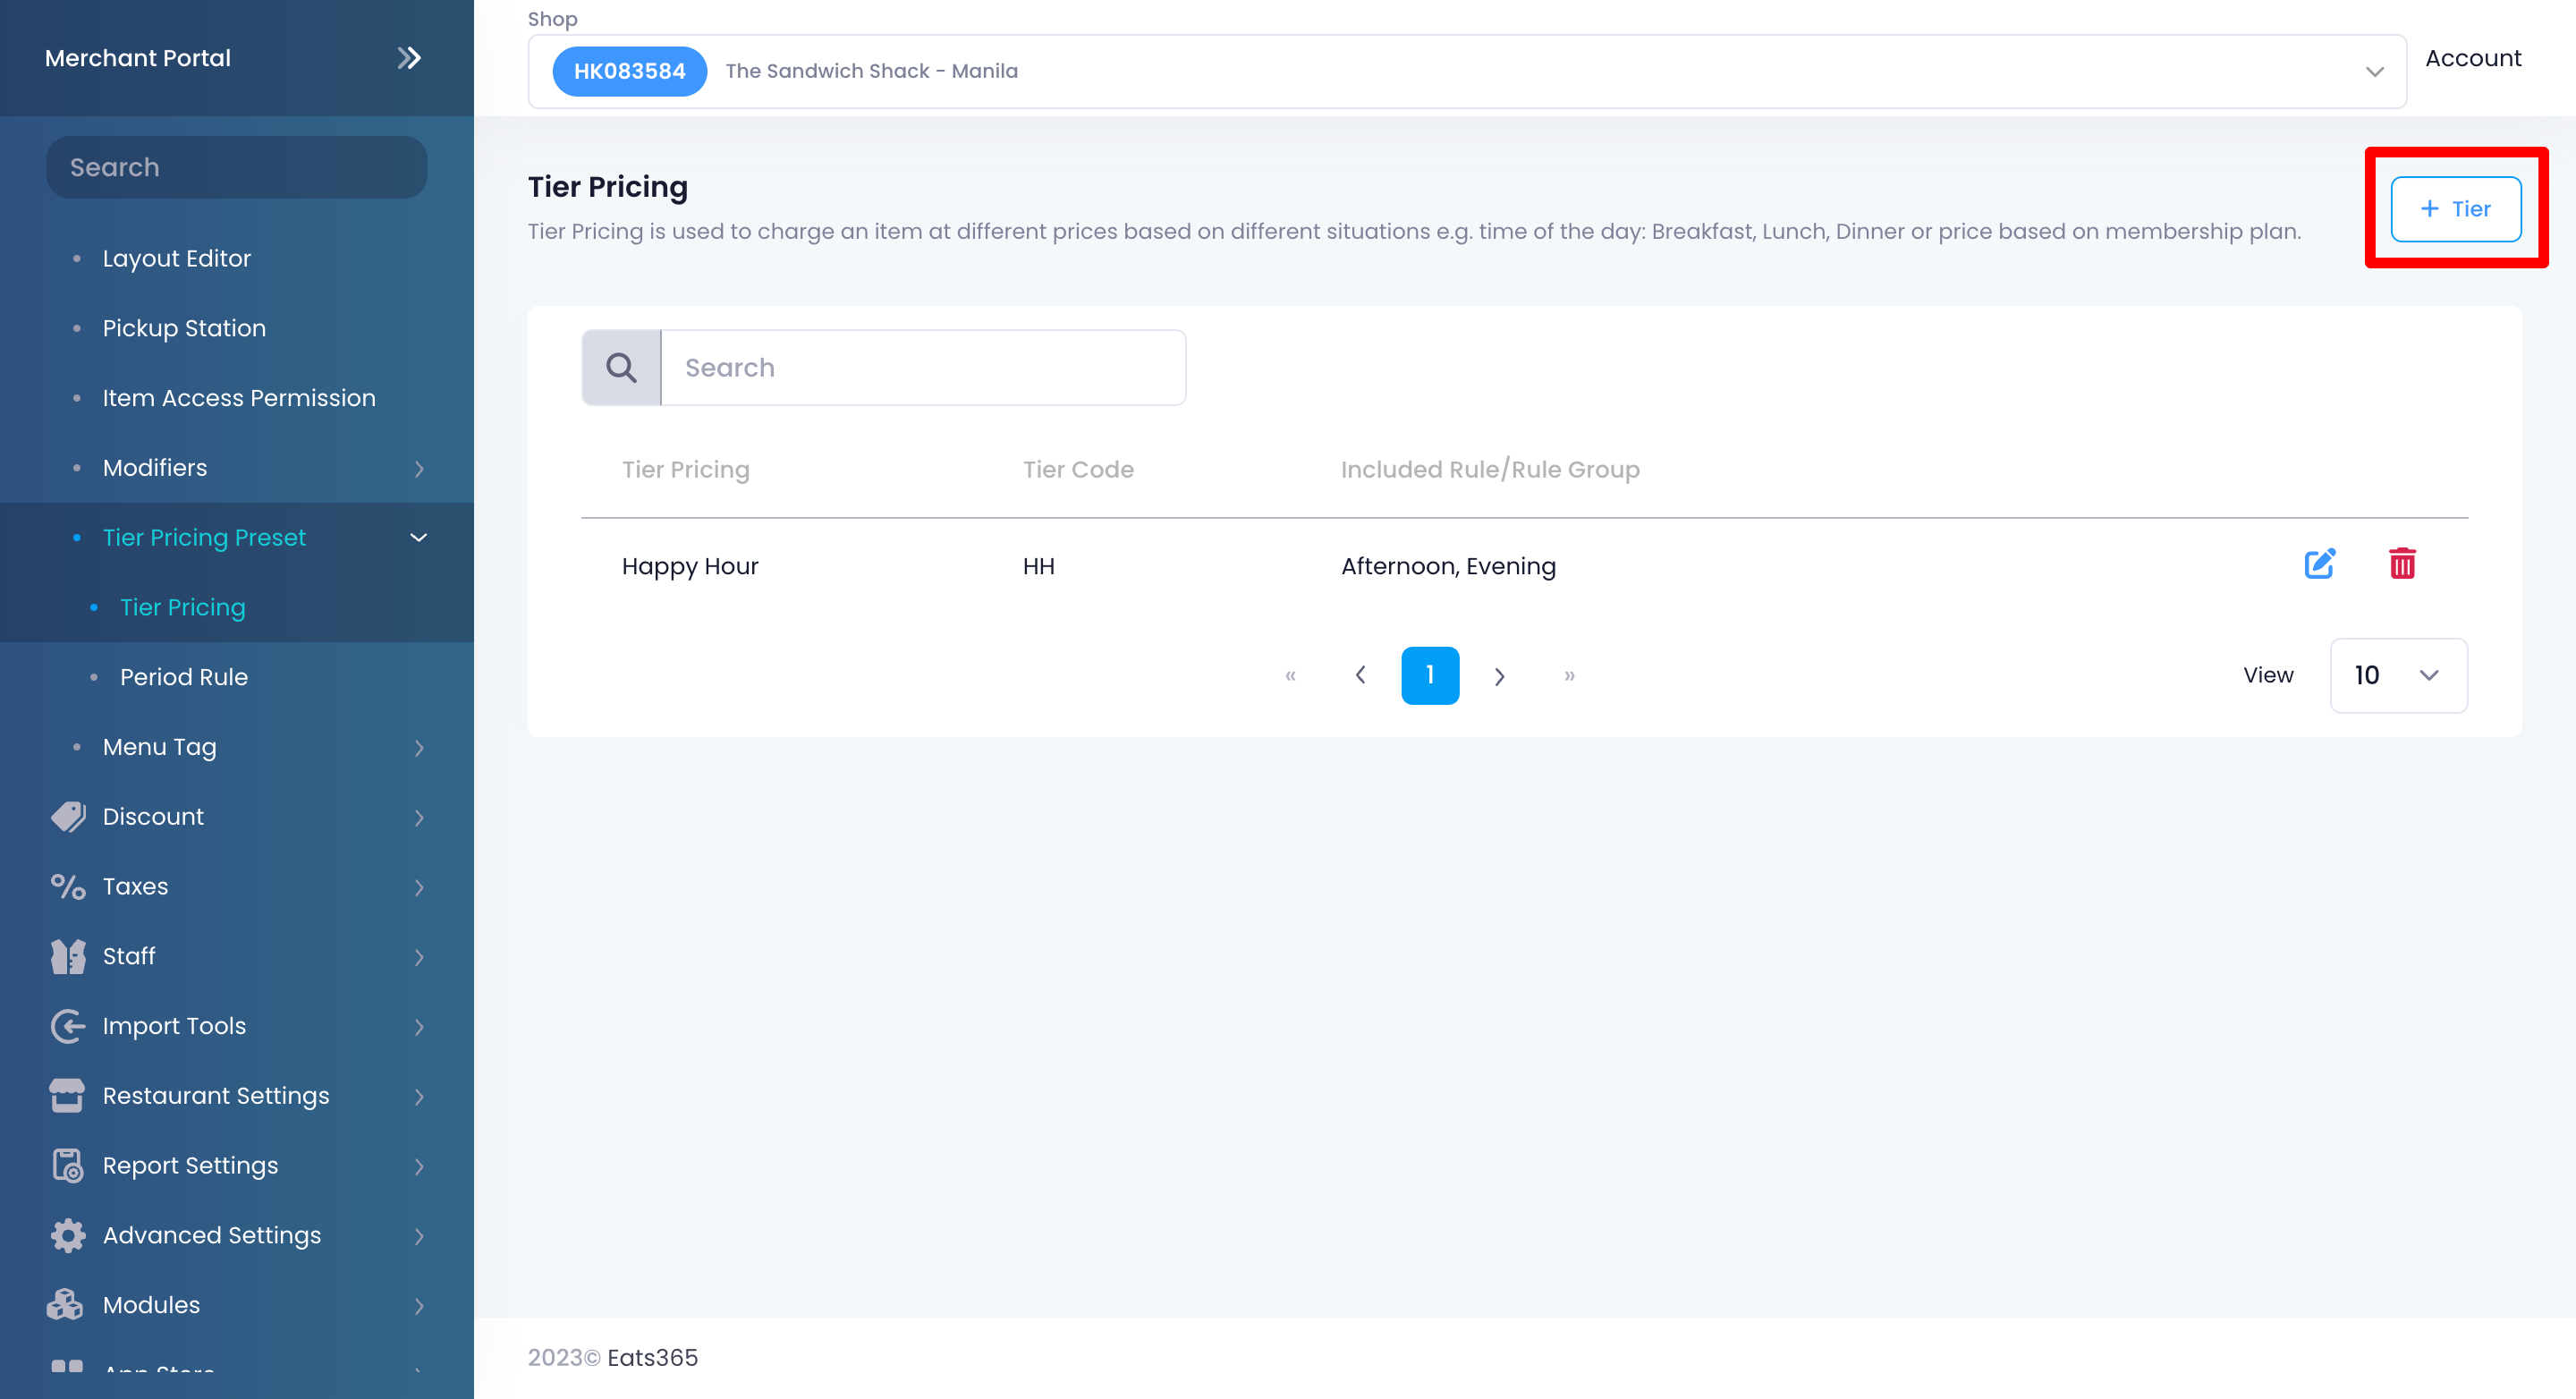
- Enter your preferred "Tier Price Name" and "Tier Code."
- Under “Period,” select an existing rule preset. To create a new rule, click on +Add New Period Rule.
Tip: You can include multiple rules in any tier price. For example, if you're offering a "Happy Hour" in which you intend to charge alcoholic drinks at lower prices, and you plan to have two periods of “Happy Hour” a day, you can create a tier price for “Happy Hour” and then add two period rules for the times you intend the adjusted pricing to apply.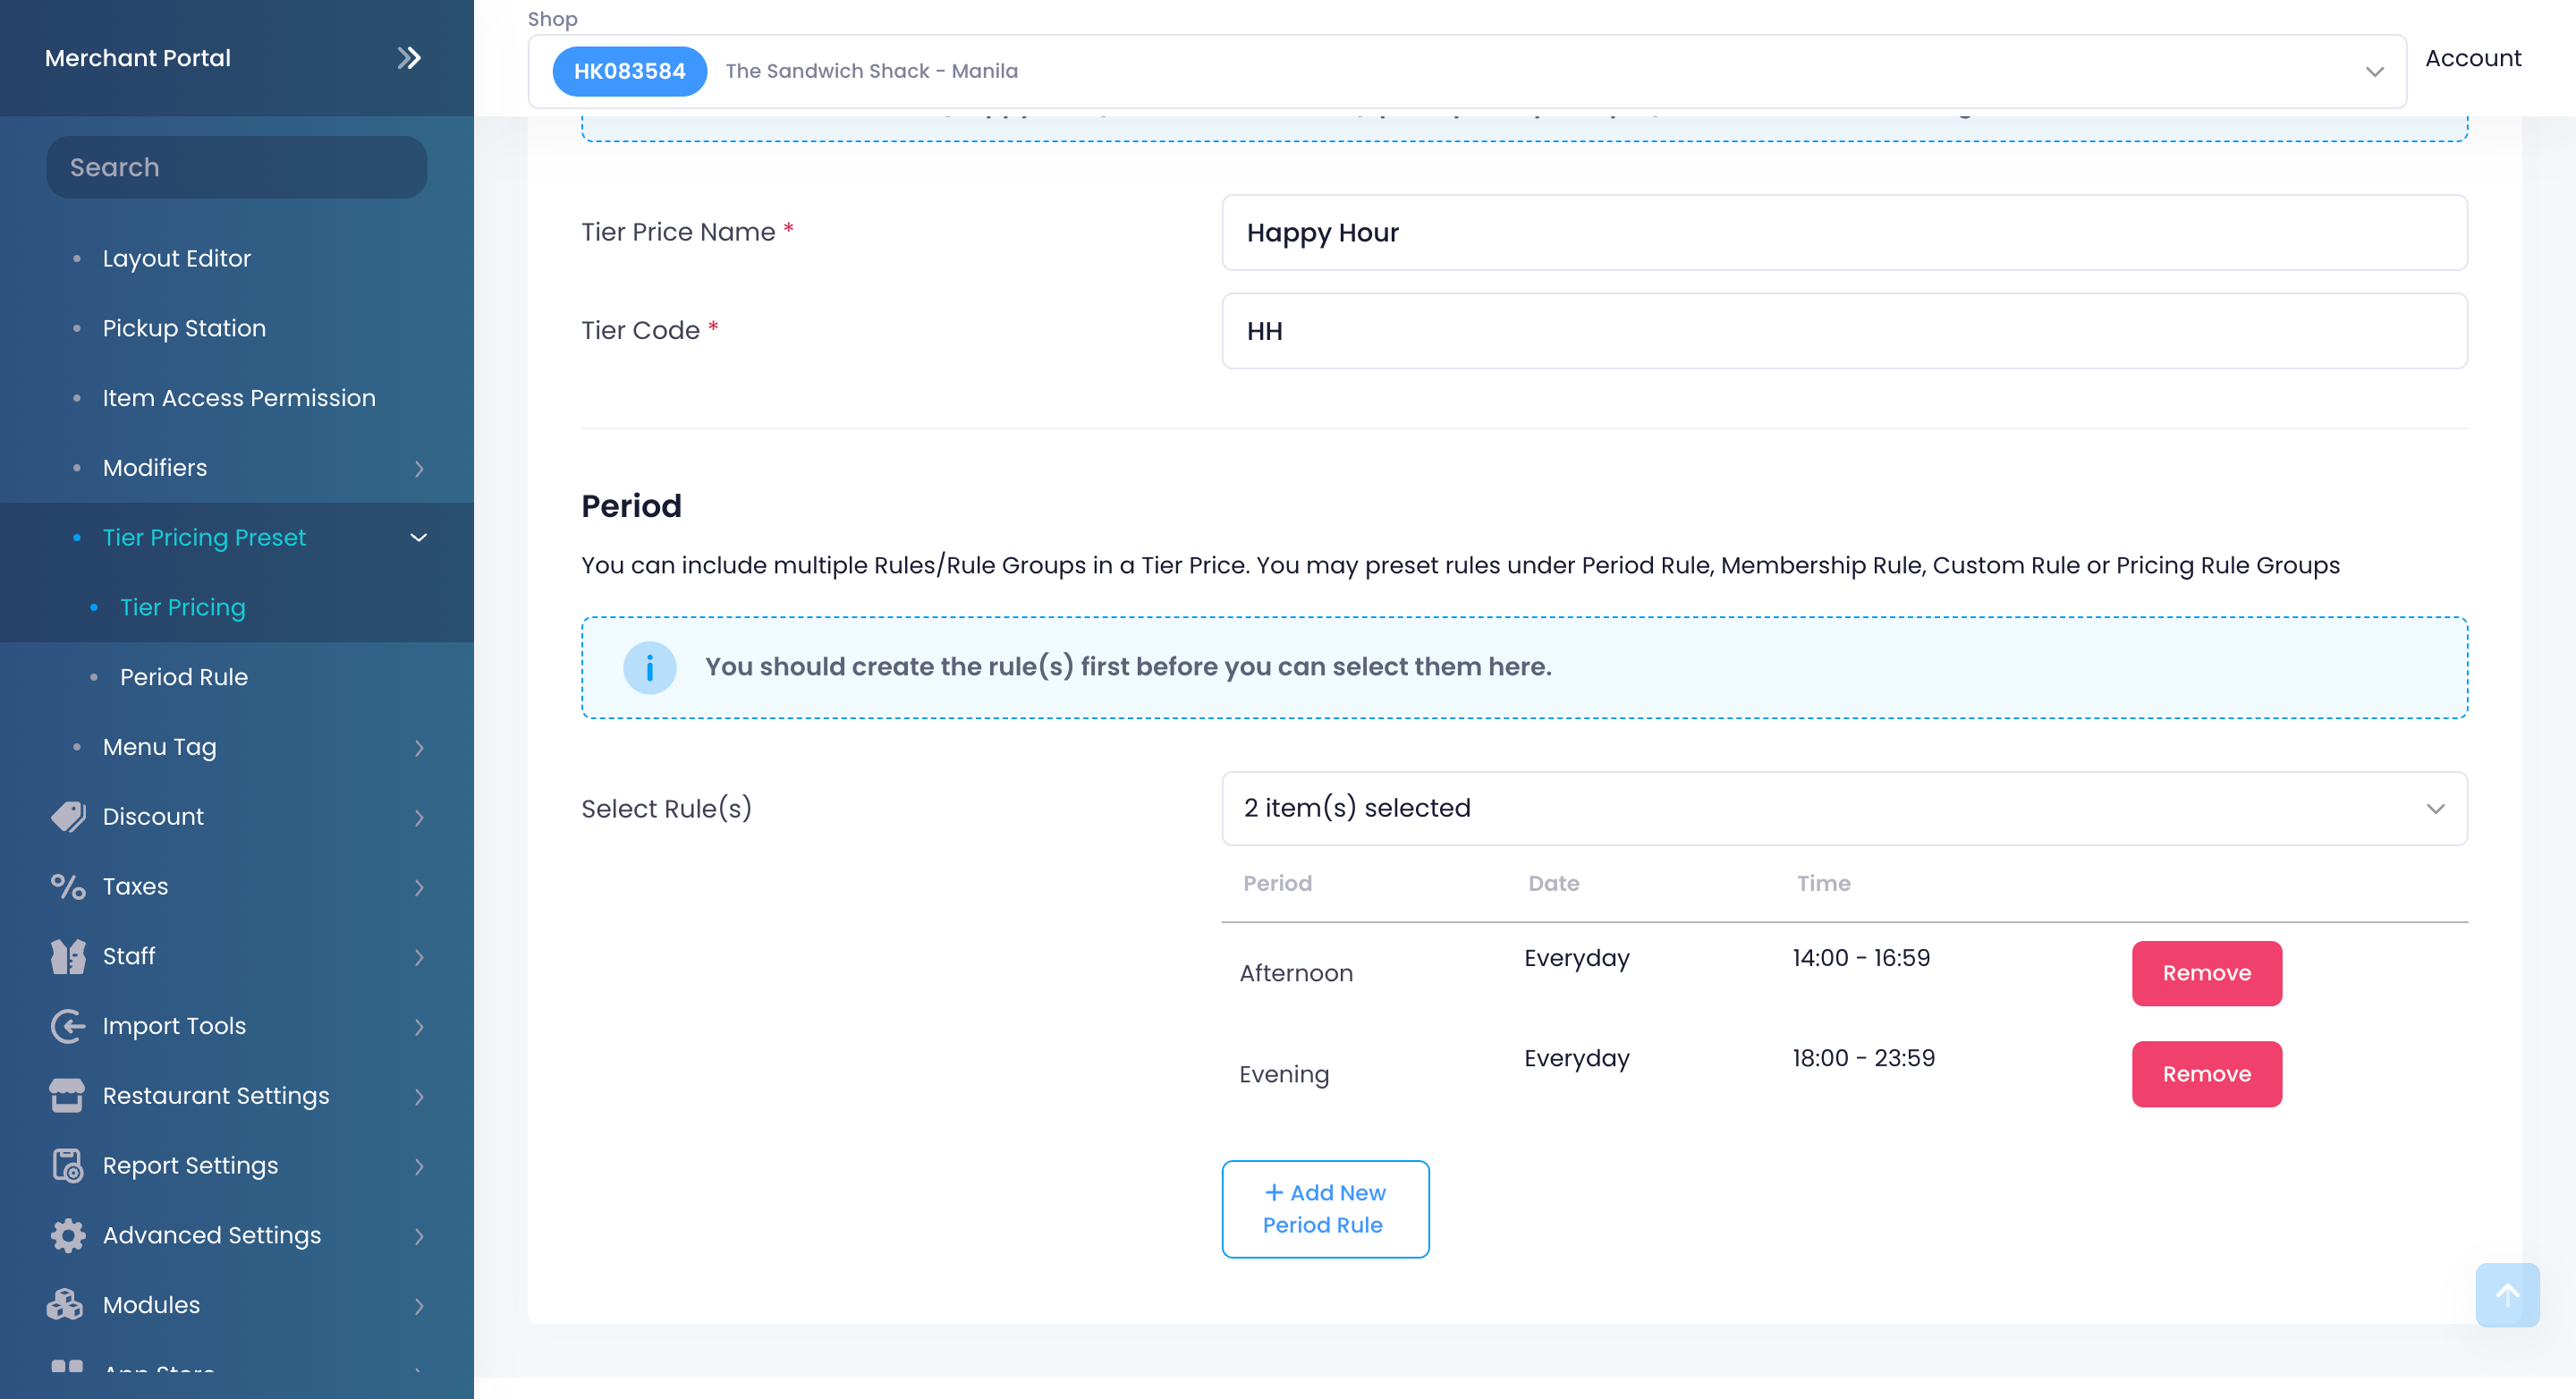
- At the top right, click on Save to confirm.
Manage tier pricing rules
Edit a tier pricing rule
To modify a tier pricing rule, follow the steps below:
Eats365 POS
- Log in to the Eats365 POS.
- At the top left, tap Settings .
- Under "General," tap Menu Setup. Then, select Tier Pricing Rules.
- On the left panel, tap the tier pricing rule type that you want to update.
- Tap the rule that you want to modify. Alternatively, you can tap the three-dot menu and select Edit.
- Update the tier pricing rule to your preference.
- Tap Save or Update to confirm.
Note: “Membership Plan Rule” and “Pricing Rule Group” and can only be set up and modified on the Merchant Portal.
Merchant Portal
- Log in to the Merchant Portal.
- On the left panel, click on Menu Setup.
- Click on Tier Pricing Preset and select the tier pricing rule type that you want to update.
- Next to the tier pricing rule that you want to modify, click on Edit
 .
.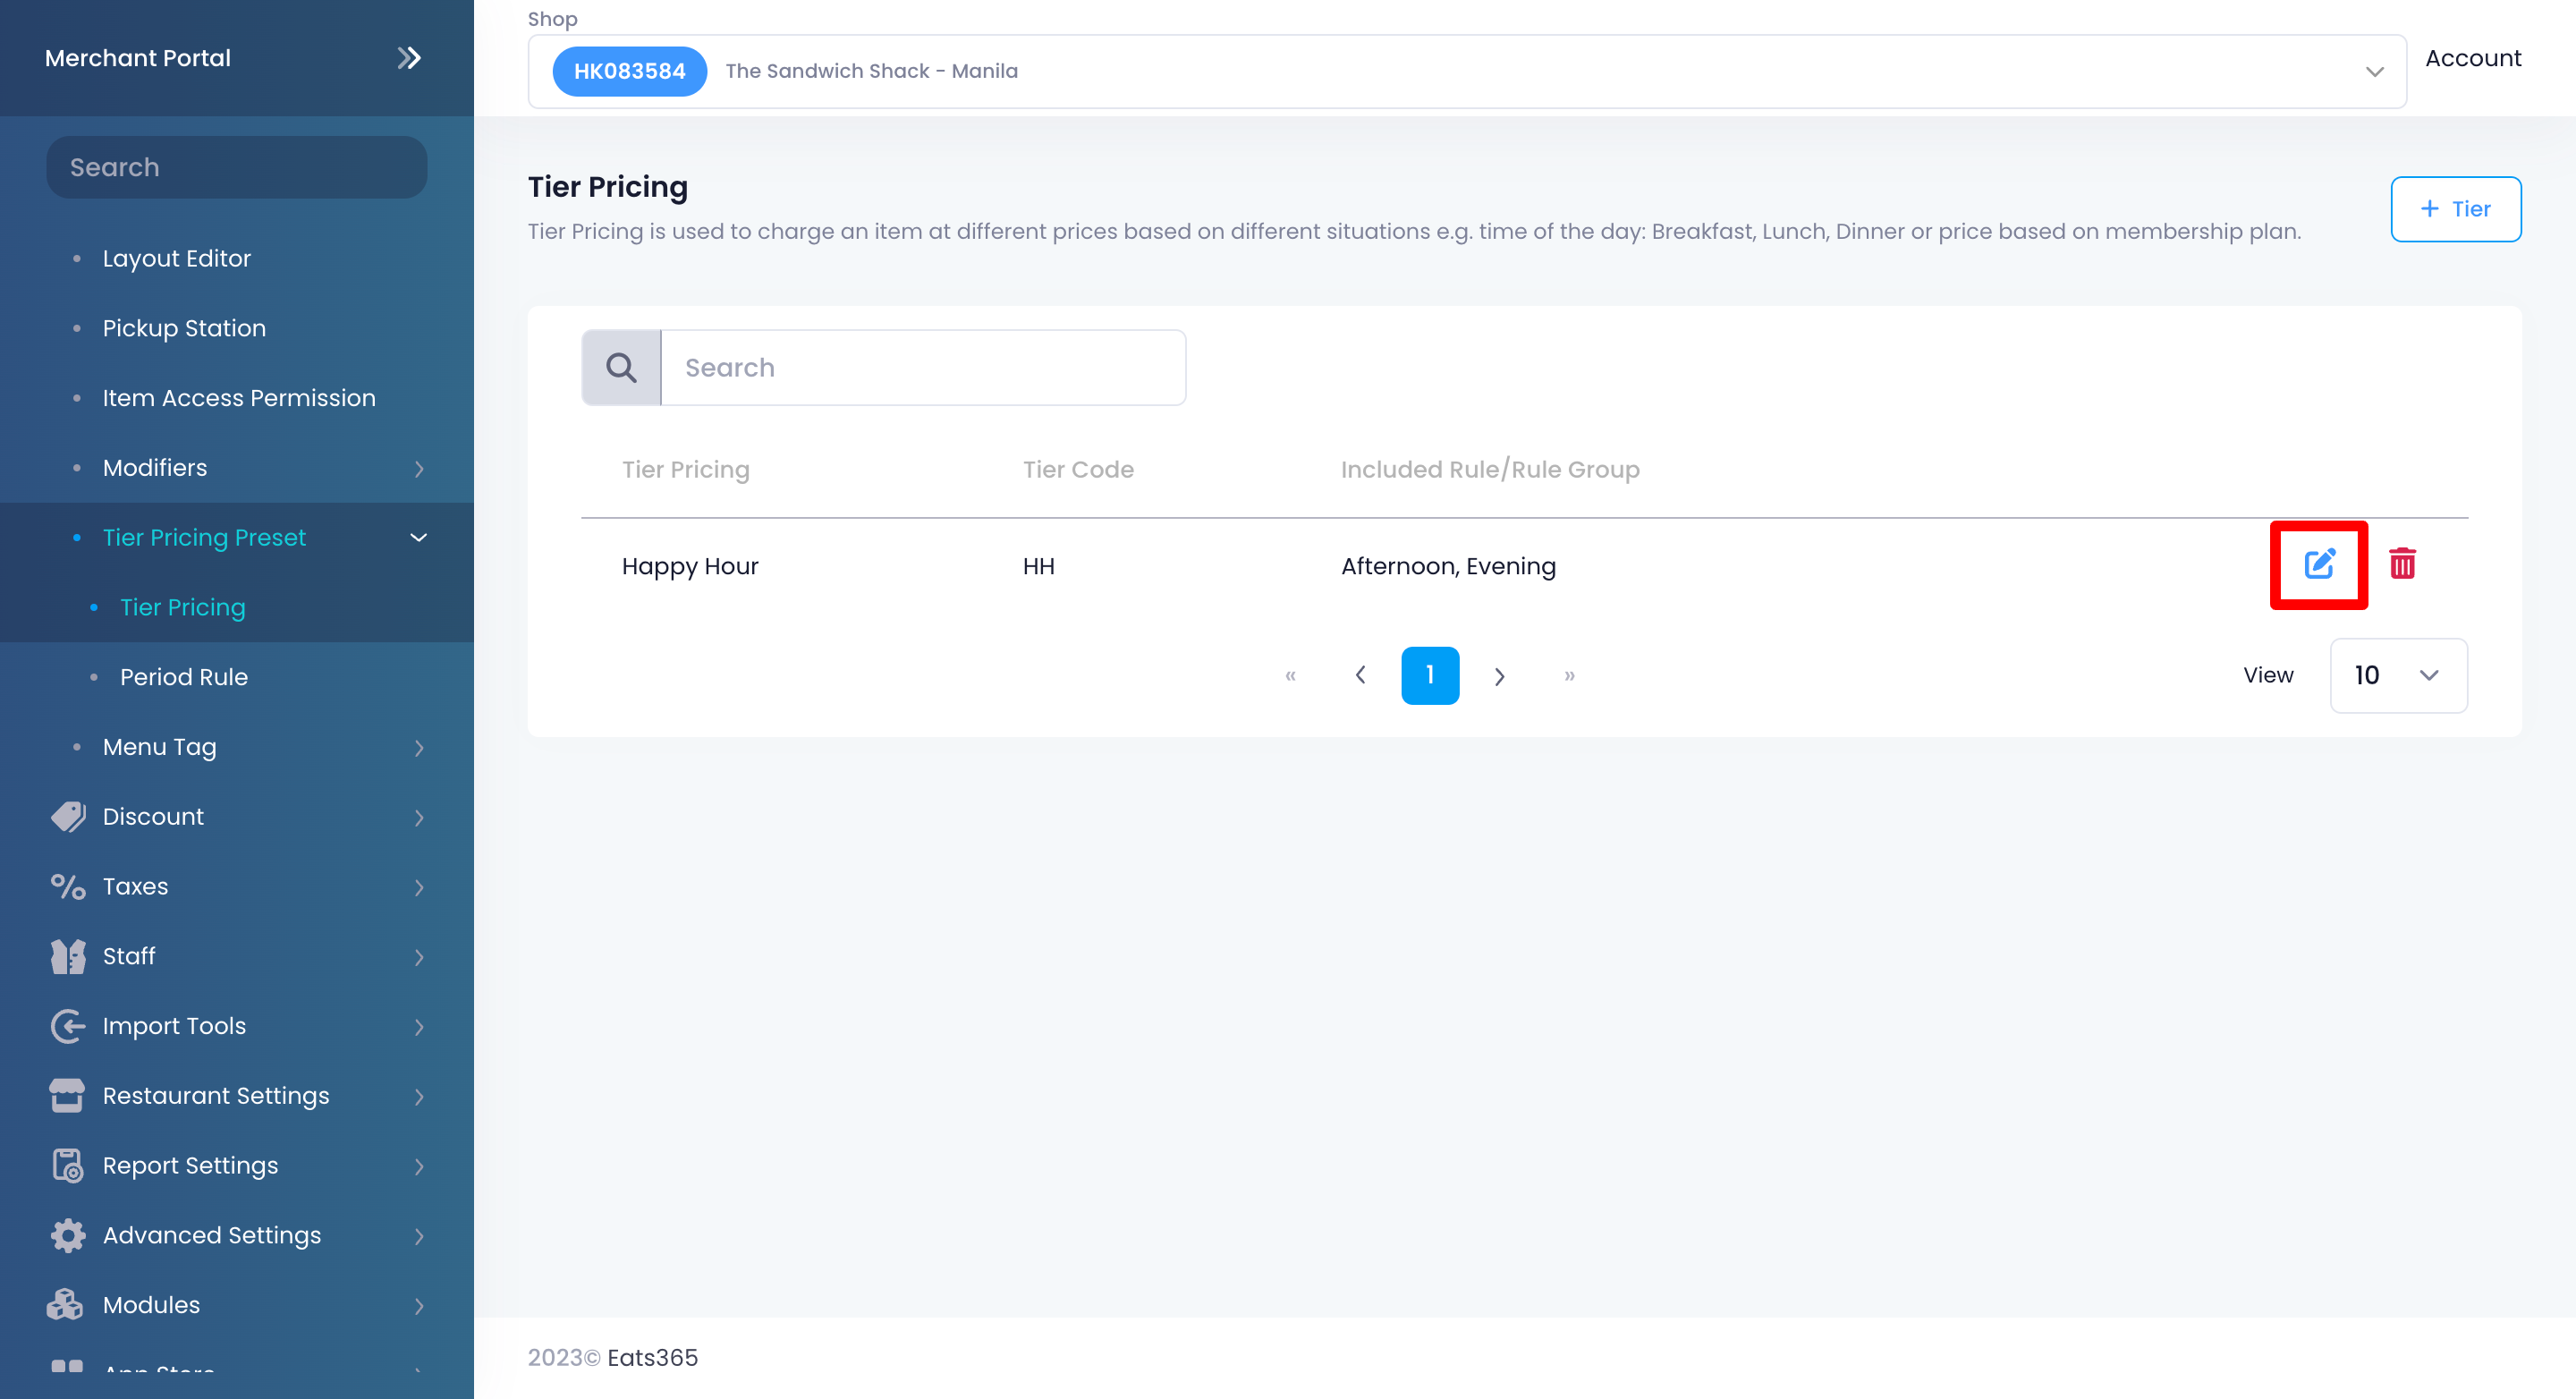
- Update the tier pricing rule to your preference.
- Click on Save to confirm.
Delete a tier pricing rule
To remove a tier pricing rule, follow the steps below:
Eats365 POS
- Log in to the Eats365 POS.
- At the top left, tap Settings .
- Under "General," tap Menu Setup. Then, select Tier Pricing Rules.
- On the left panel, select the tier pricing rule type that you want to delete.
- Tap the rule that you want to delete. Alternatively, you can tap the three-dot menu and select Remove.
- At the top right, tap Delete.

- Tap Delete to confirm.
Merchant Portal
- Log in to the Merchant Portal.
- On the left panel, click on Menu Setup.
- Click on Tier Pricing Preset and select the tier pricing rule type that you want to delete.
- Next to the tier pricing rule that you want to remove, click on Delete
 .
.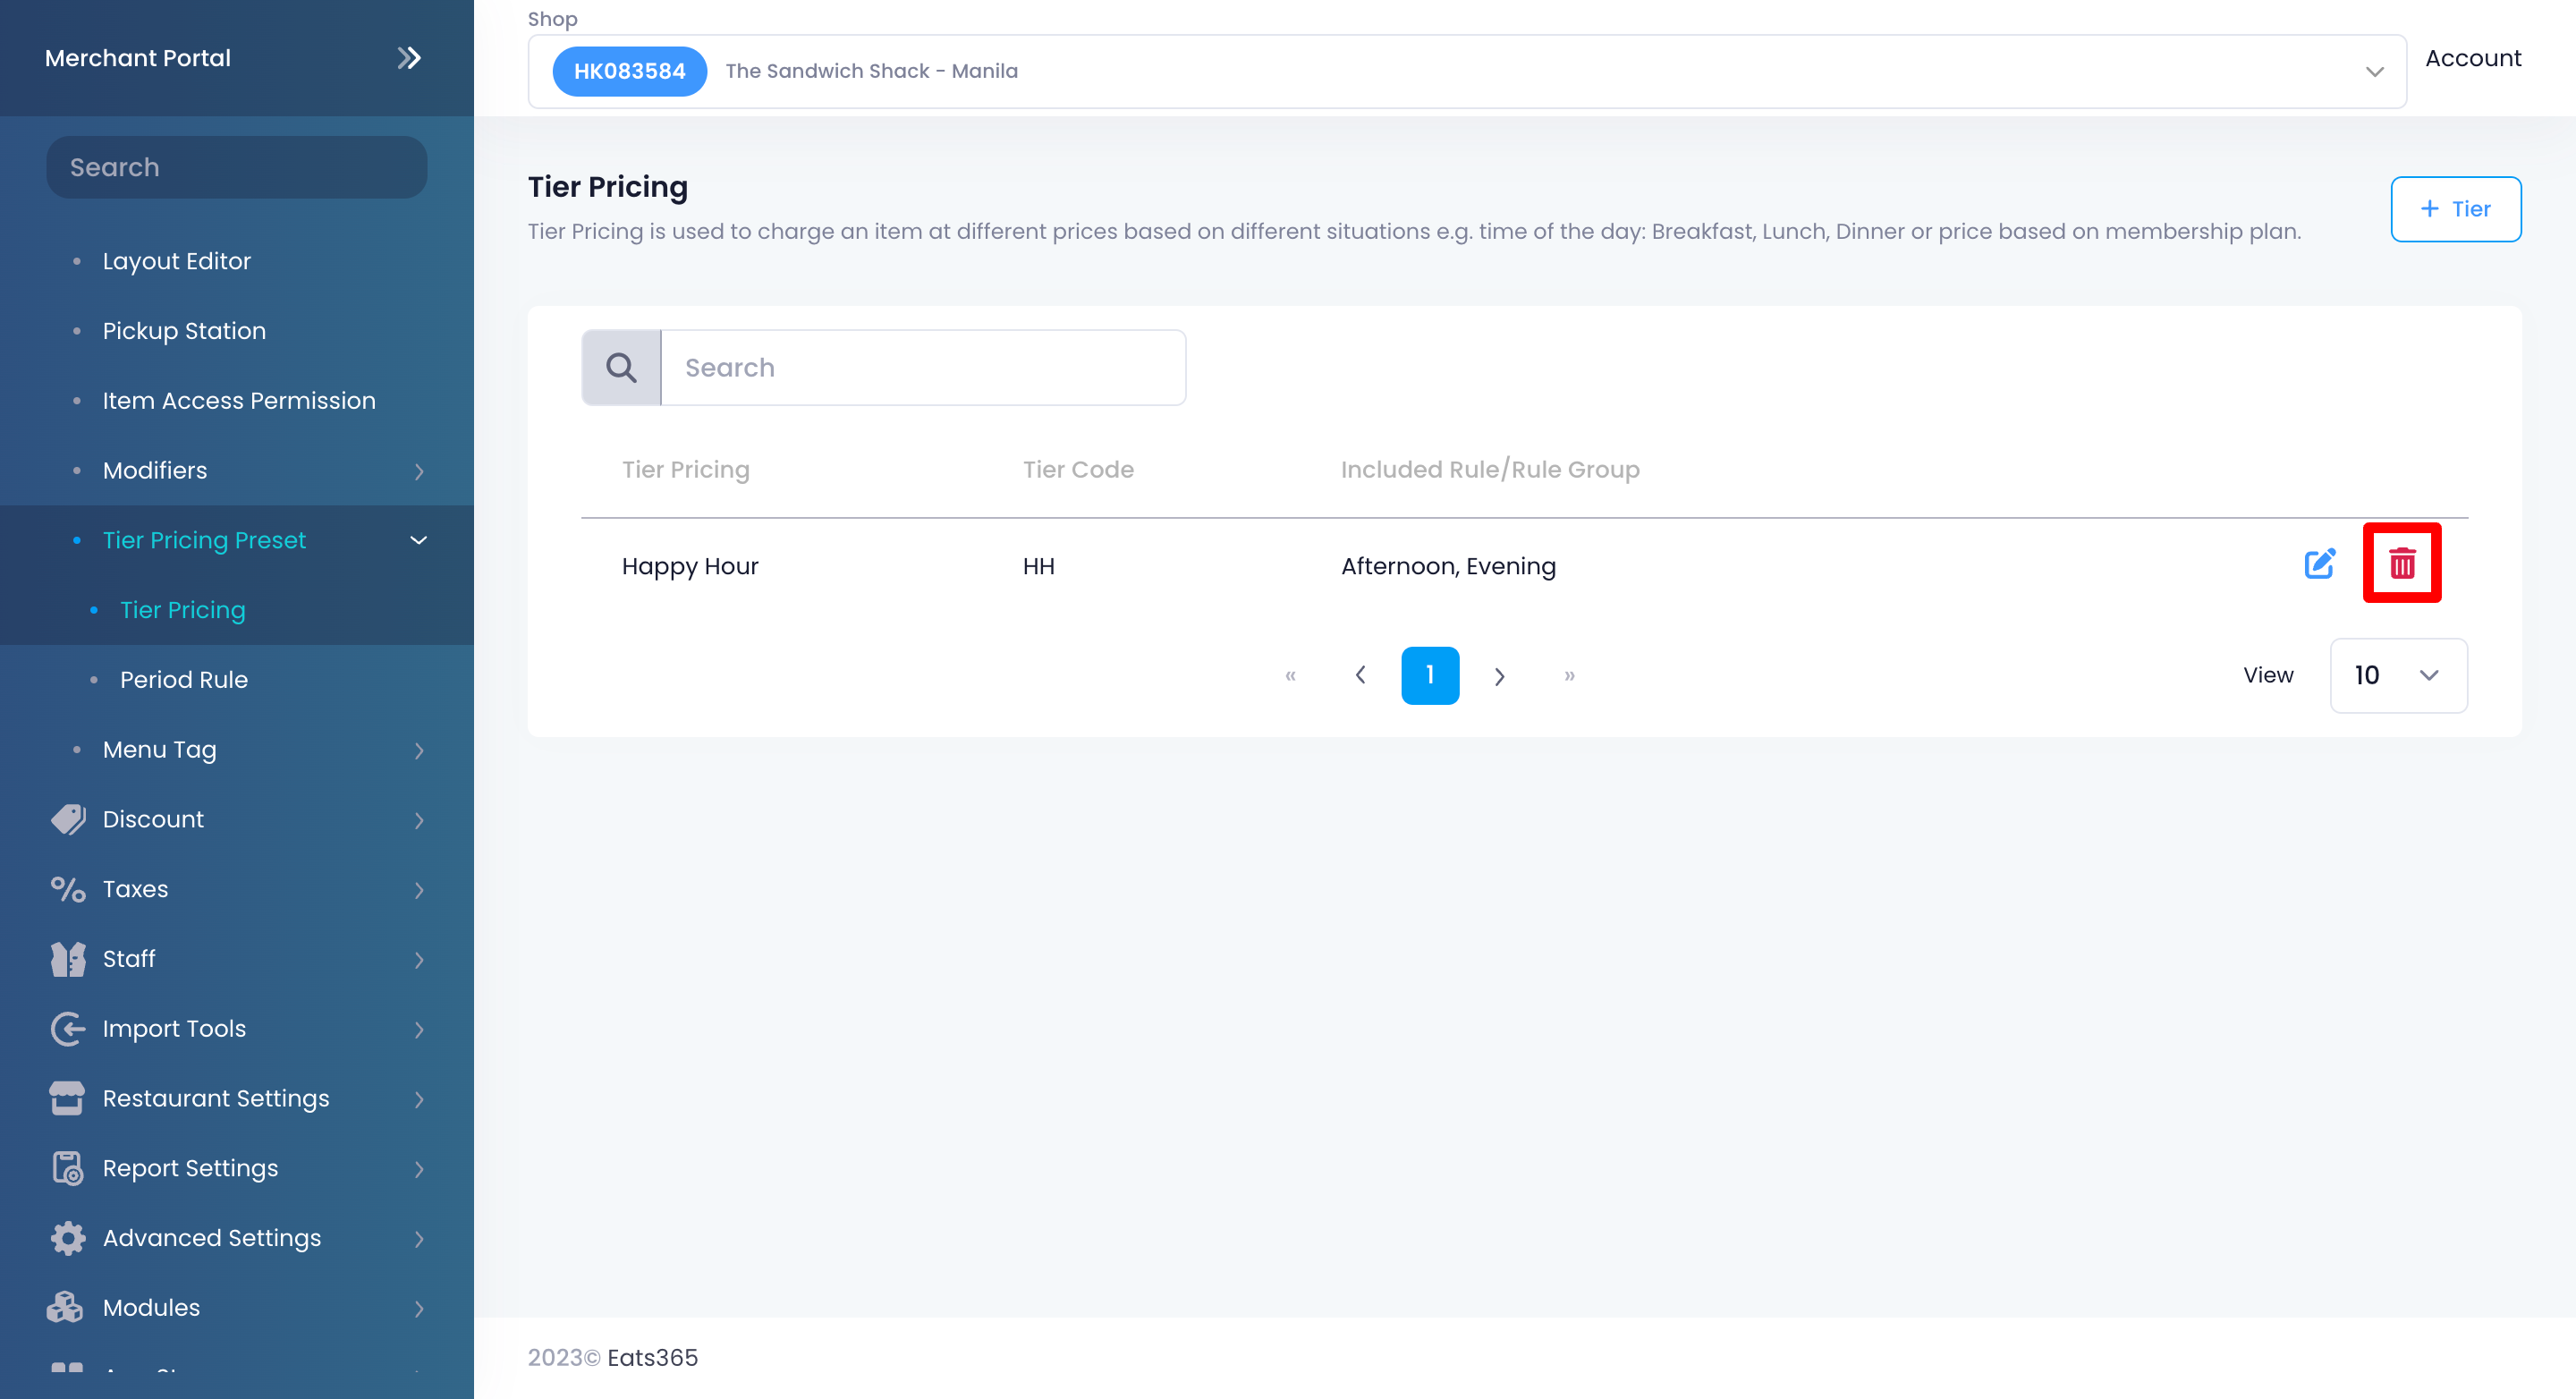
- Click on Confirm to delete.