 Eats365 Products
 Merchant Guide
 Modules
 Membership
 Integrations
 Hardware
 Staff Operations
 Roles & Permissions
 Payments
 Reports
 What’s New
 Release Notes
 Troubleshooting
 Simulators
 Glossary
 Troubleshooter
 System Status
Reservation
Table of Contents
Set up Reservation
Learn how to turn on Reservation on the Merchant Portal to allow customers to book reservations in your restaurant.
The Reservation feature allows customers to book a table in your restaurant in advance, ensuring they have guaranteed seats upon arrival.
In this article, you’ll learn how to enable Reservations on the Merchant Portal and configure it according to your preferred settings.

Enable Reservation on the Merchant Portal
To allow reservations in your restaurant, follow the steps below:
Merchant Portal (Classic Theme)
- Log in to the Merchant Portal.
- On the left panel, click on Reservation, then click on General.
- Turn on Enable Reservation
 .
.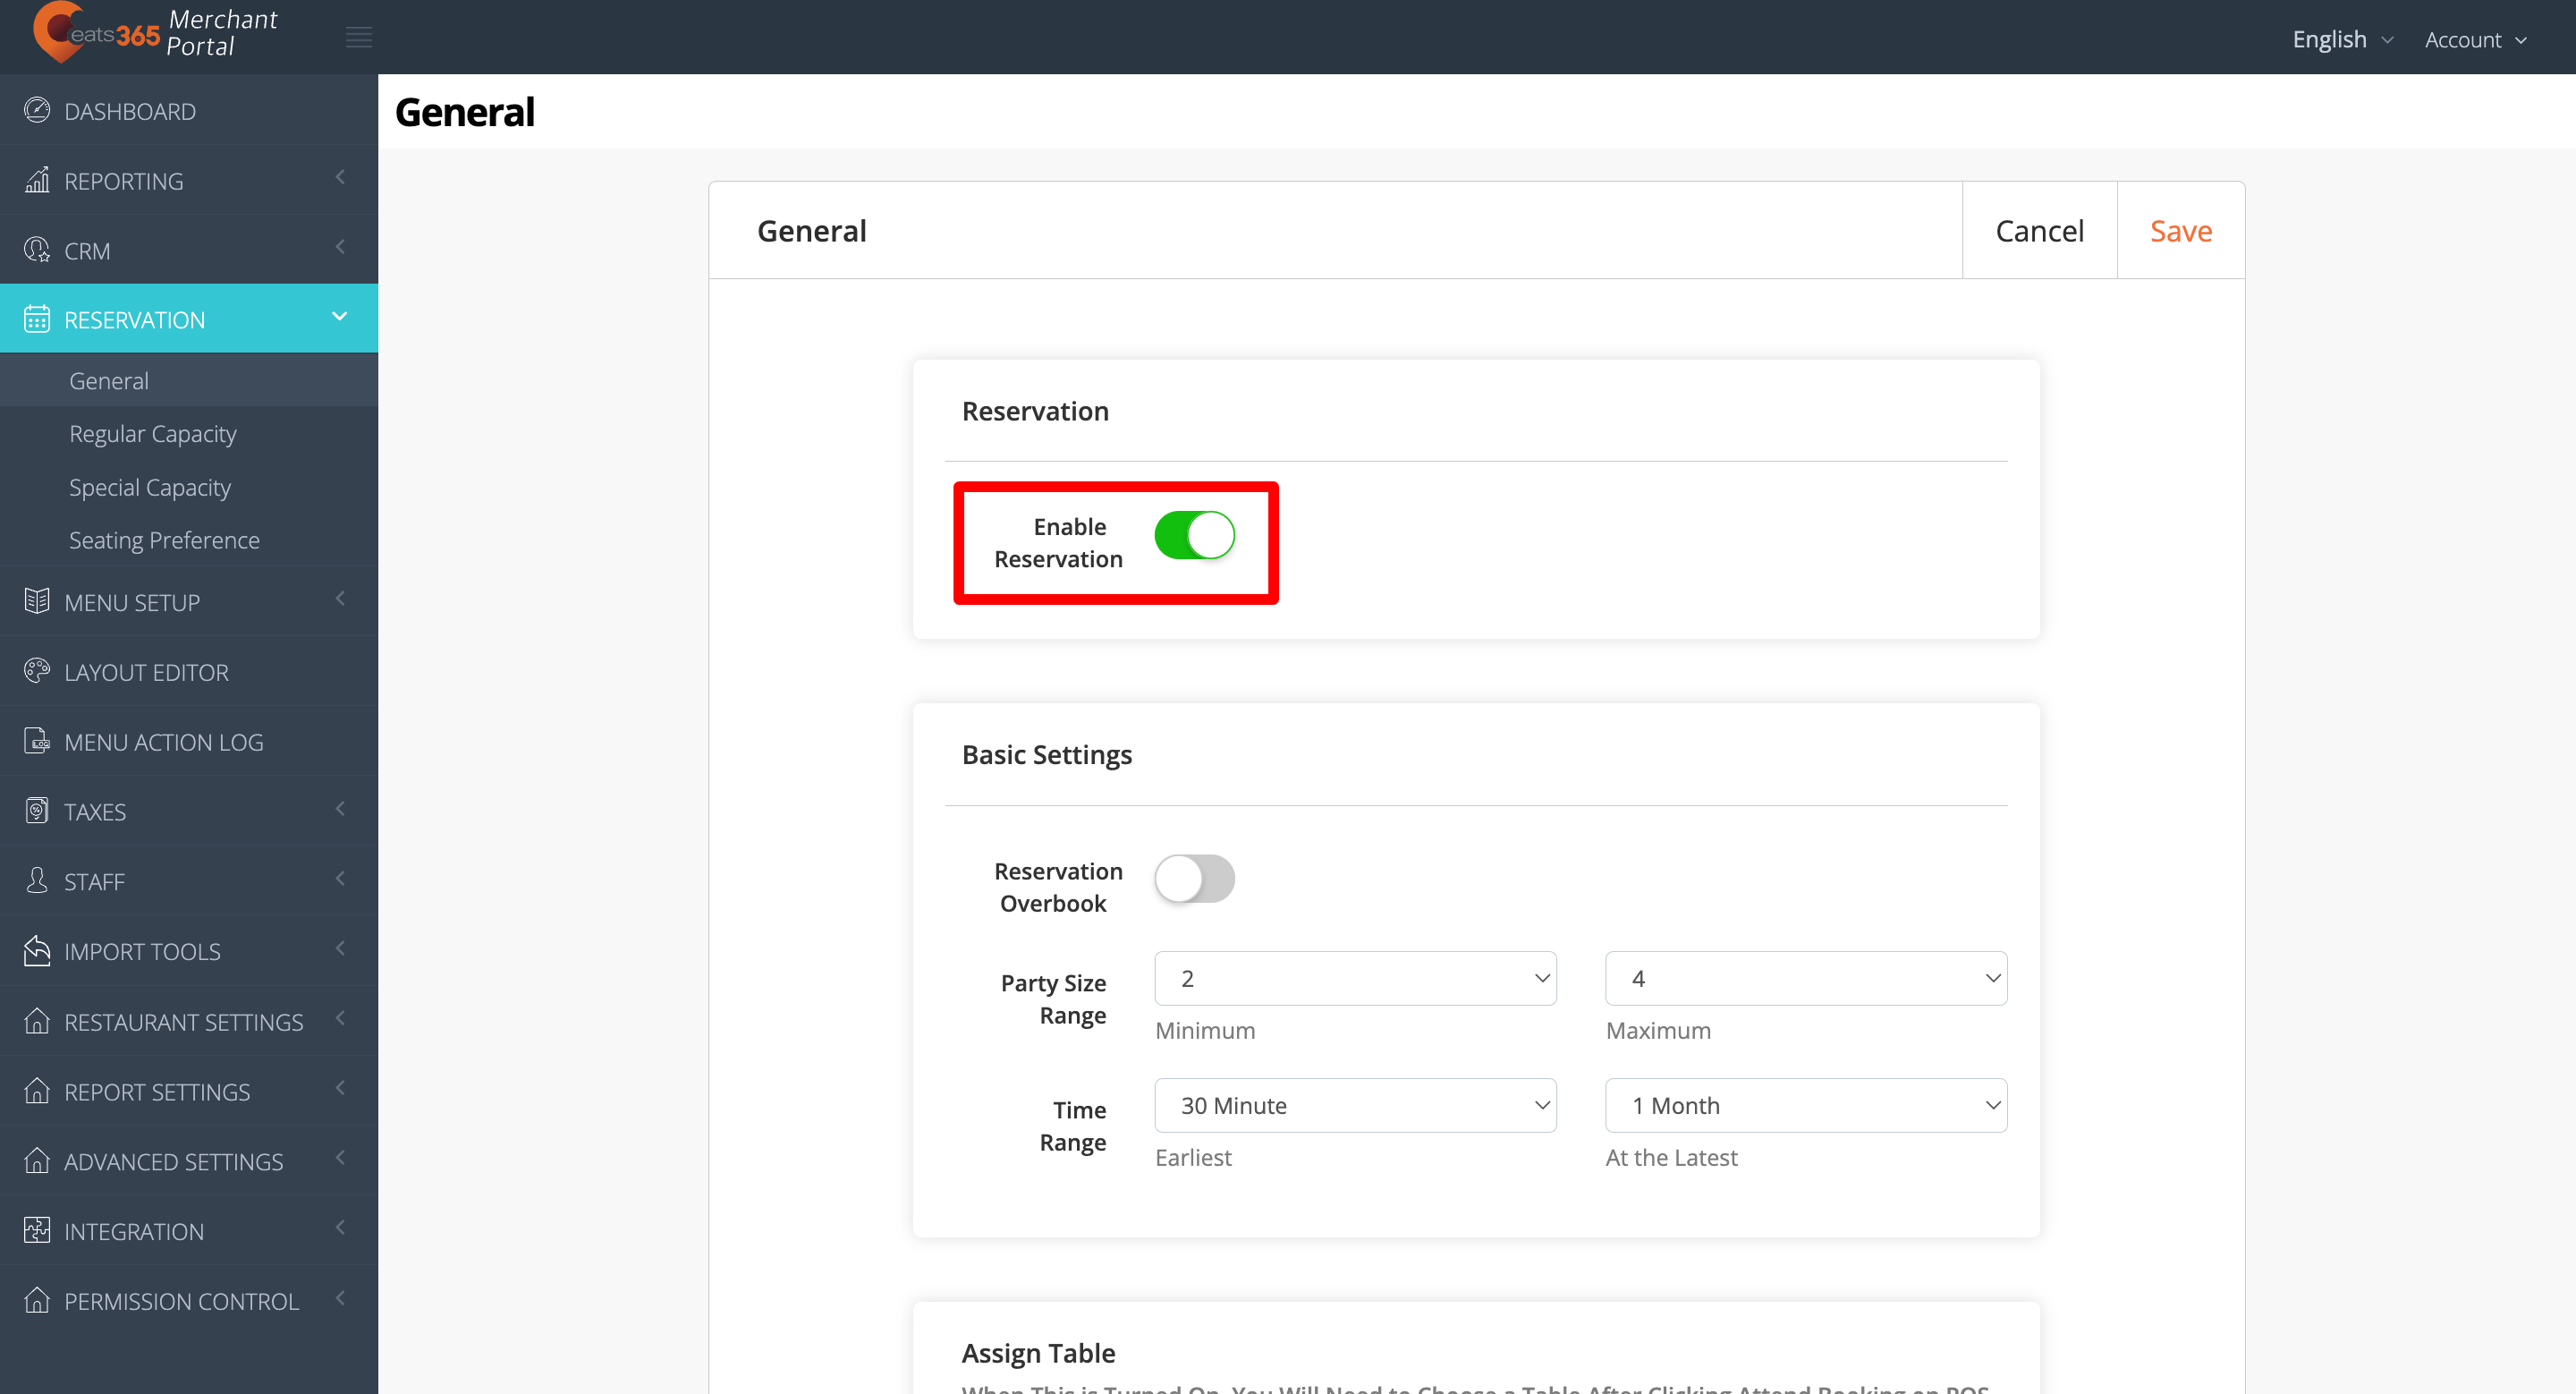
- Under "Basic Settings," complete the necessary information to configure your Reservation settings.
- To accept reservations even when tables are fully booked, turn on Reservation Overbook.
- Select the minimum and maximum Party Size Range that you want to accept.
- Select the earliest and latest Time Range that customers can place their reservations.
- To accept reservations even when tables are fully booked, turn on Reservation Overbook
- If you want to manually assign tables to customers, turn on Assign Table.
Note: When this setting is turned on, you must assign a table to the customer after selecting Attend on the POS. - At the top right, click on Save to confirm.
Merchant Portal 2.0
- Log in to the Merchant Portal.
- On the left panel, click on Reservation, then click on General.

- Turn on Enable Reservation
 .
.
- To have an unread indicator of new reservation bookings on the POS, enable Manage Unread Bookings . When enabled, the Reservation
 button on the Table Map screen will display the number of currently unread reservation bookings. A booking will only be removed from the unread count once a staff member opens the booking.
- Under "Basic Settings," complete the necessary information to configure your Reservation settings.

- To accept reservations even when tables are fully booked, turn on Reservation Overbook .
Note: If you’re using a third-party reservation management system, under “API Settings,” enable Reservation Overbook via API. Then, turn on the API user(s) that you’d like to enable the overbooking function for.
- Select the minimum and maximum Party Size Range that you want to accept.
- Select the earliest and latest Time Range that customers can place their reservations.
- To accept reservations even when tables are fully booked, turn on Reservation Overbook
- If you want to manually assign tables to customers, turn on Assign Table.
 Note: When this setting is turned on, you must assign a table to the customer after selecting Attend on the POS.
 - At the top right, click on Save to confirm.
Once Reservation is enabled, you can further configure its settings, including when to accept reservations and establishing seating preferences.
Set up Regular Capacity settings
Regular Capacity allows you to set when and how customers can book reservations when the restaurant is at regular capacity or on a typical operating day.
To configure the Regular Capacity settings, follow the steps below:
Merchant Portal (Classic Theme)
- Log in to the Merchant Portal.
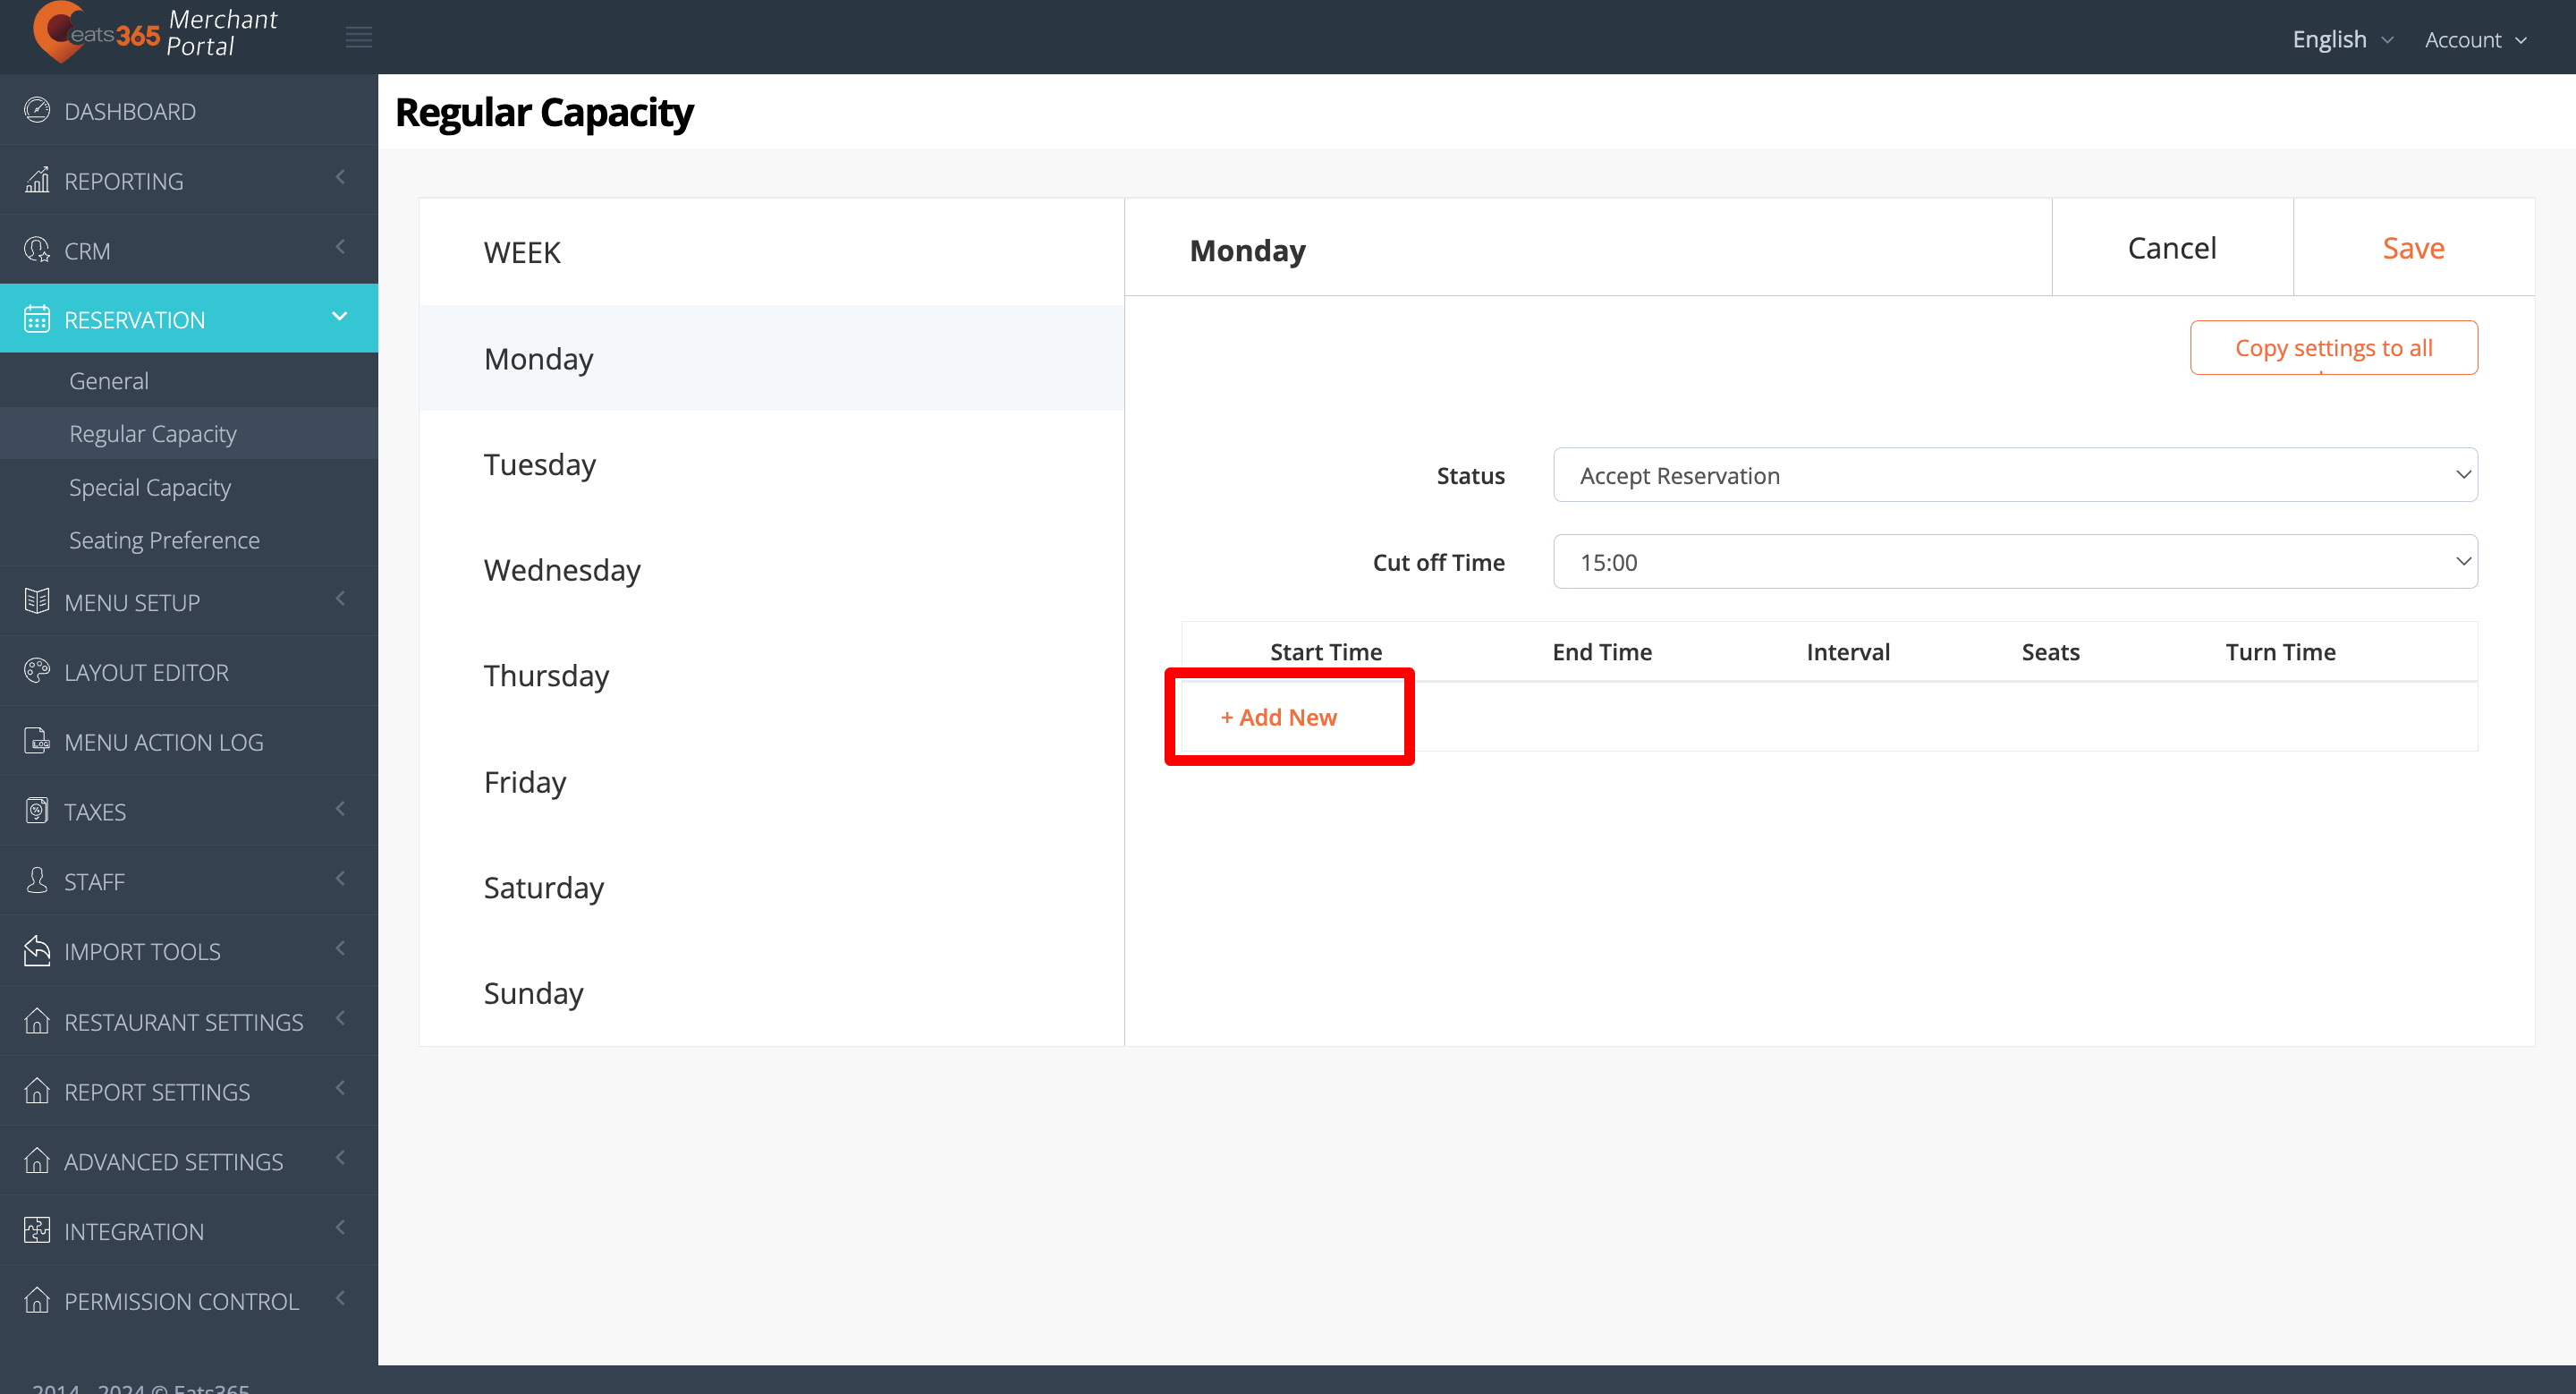
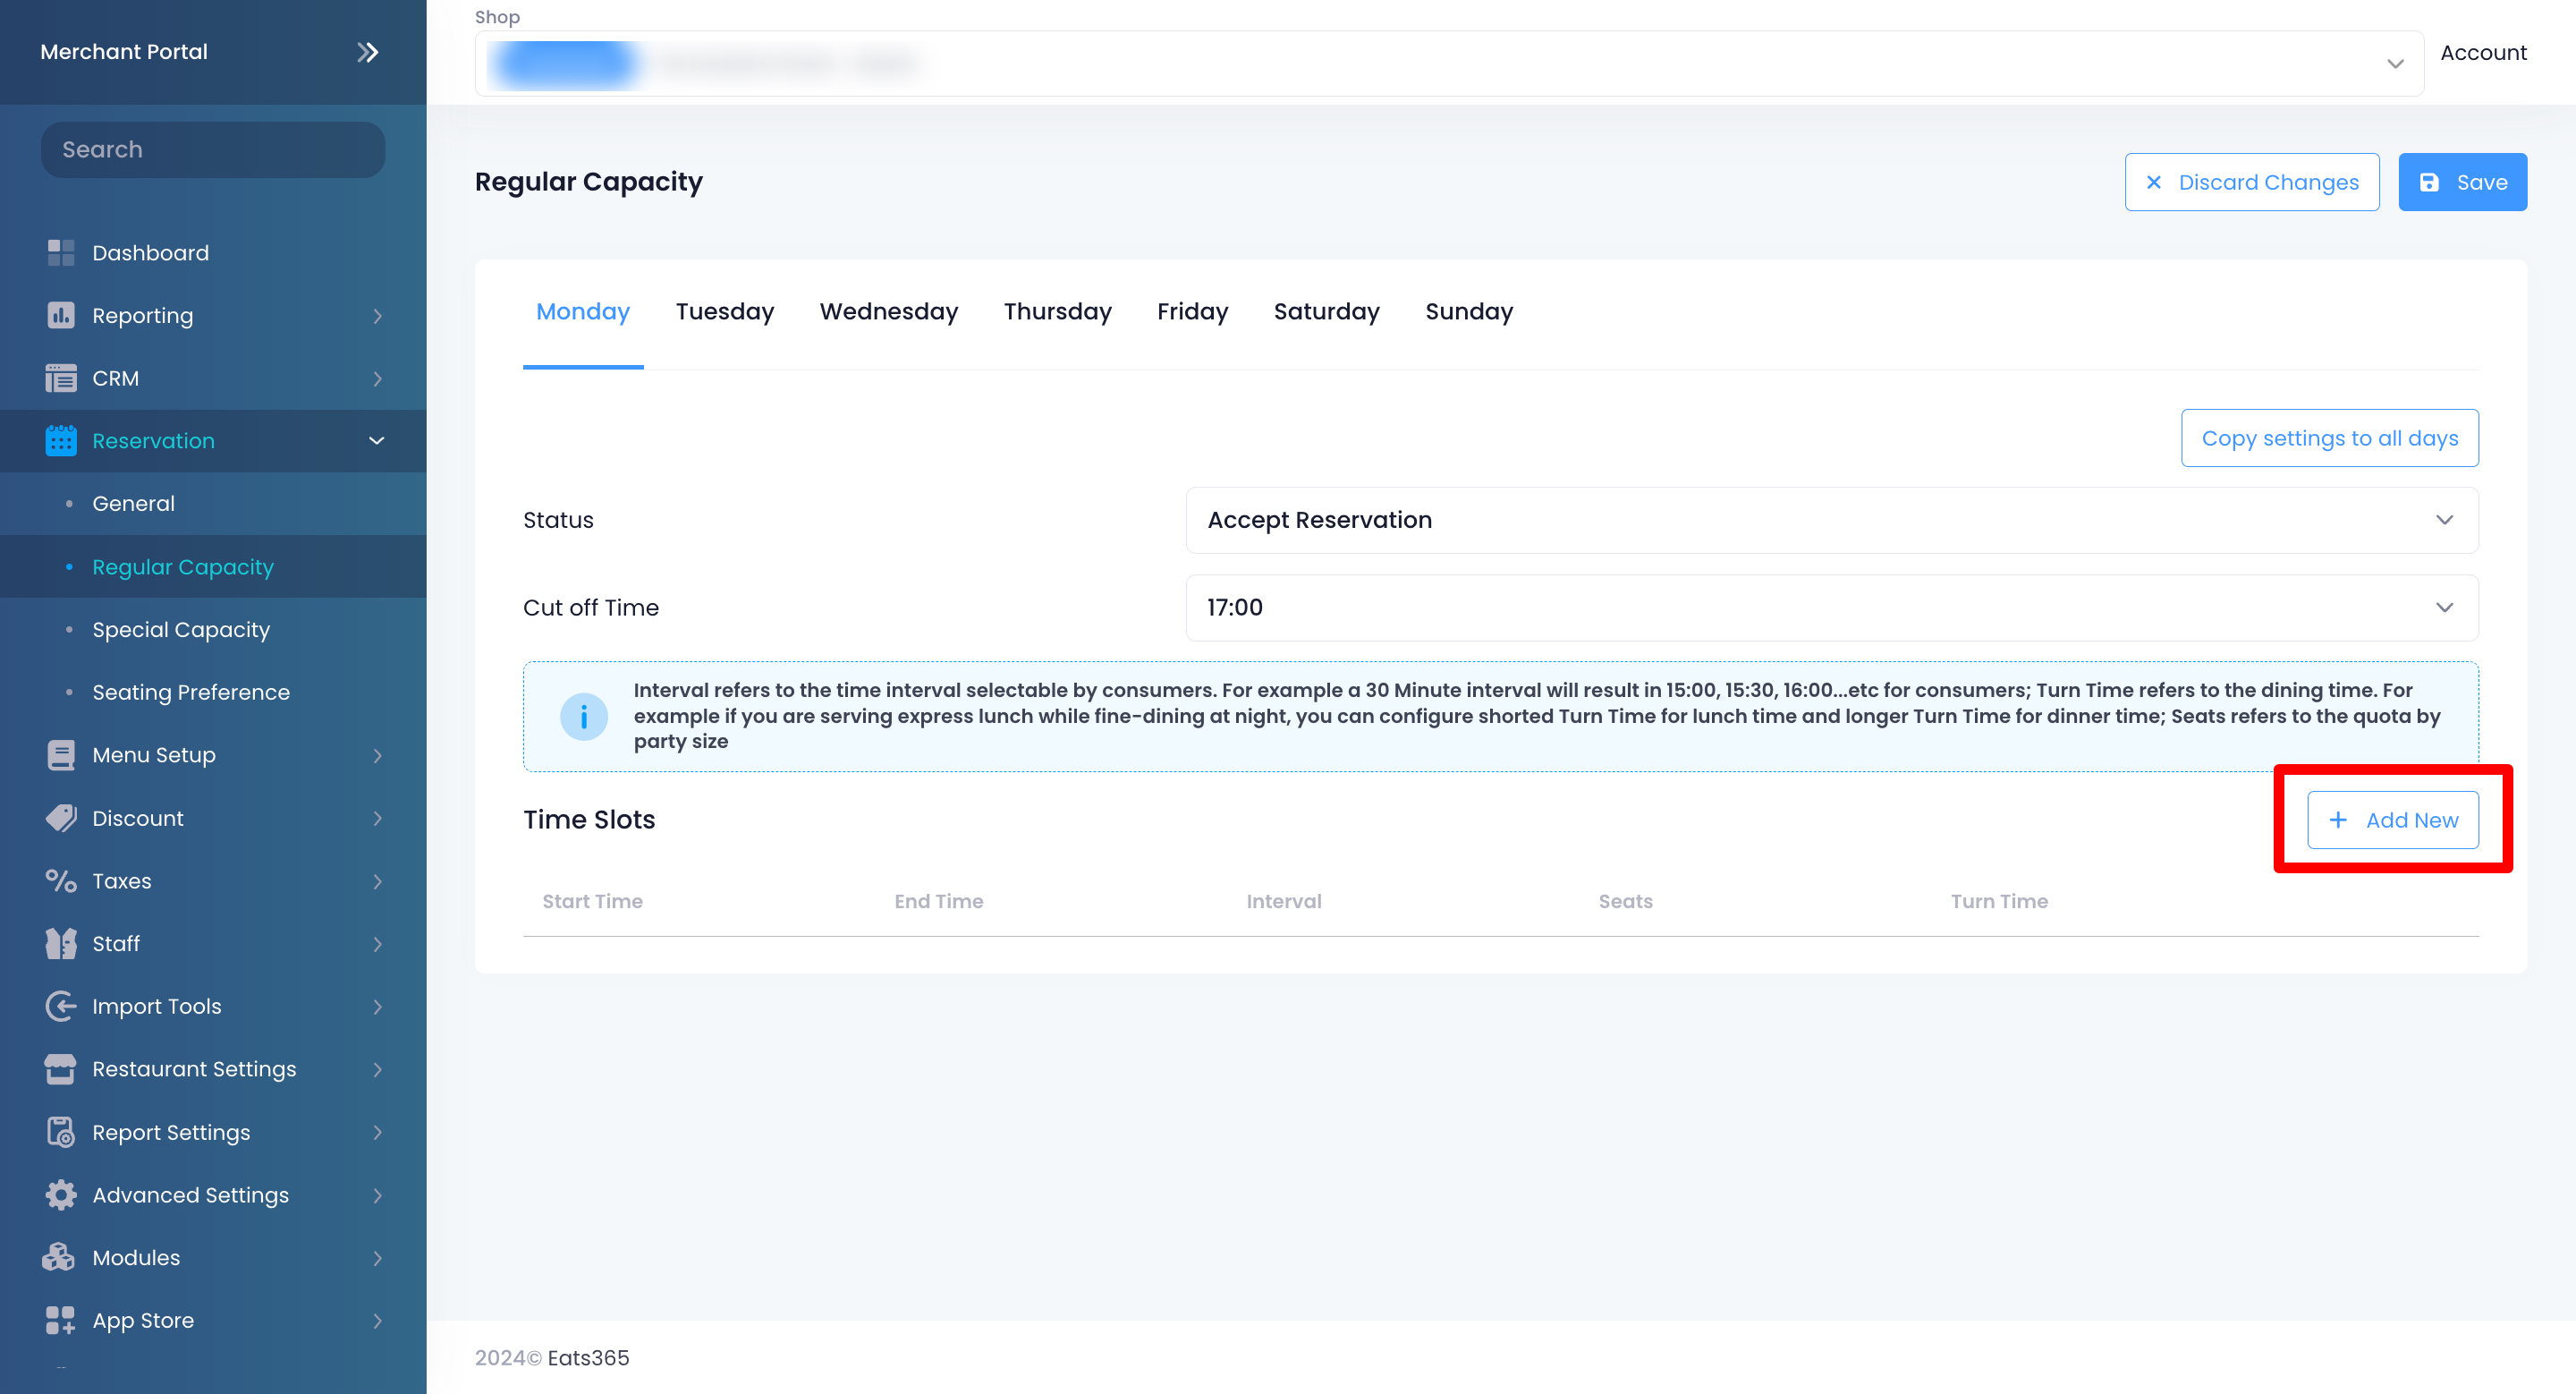
- On the left panel, click on Reservation, then click on Regular Capacity.

- Select a day when you want to accept reservations.
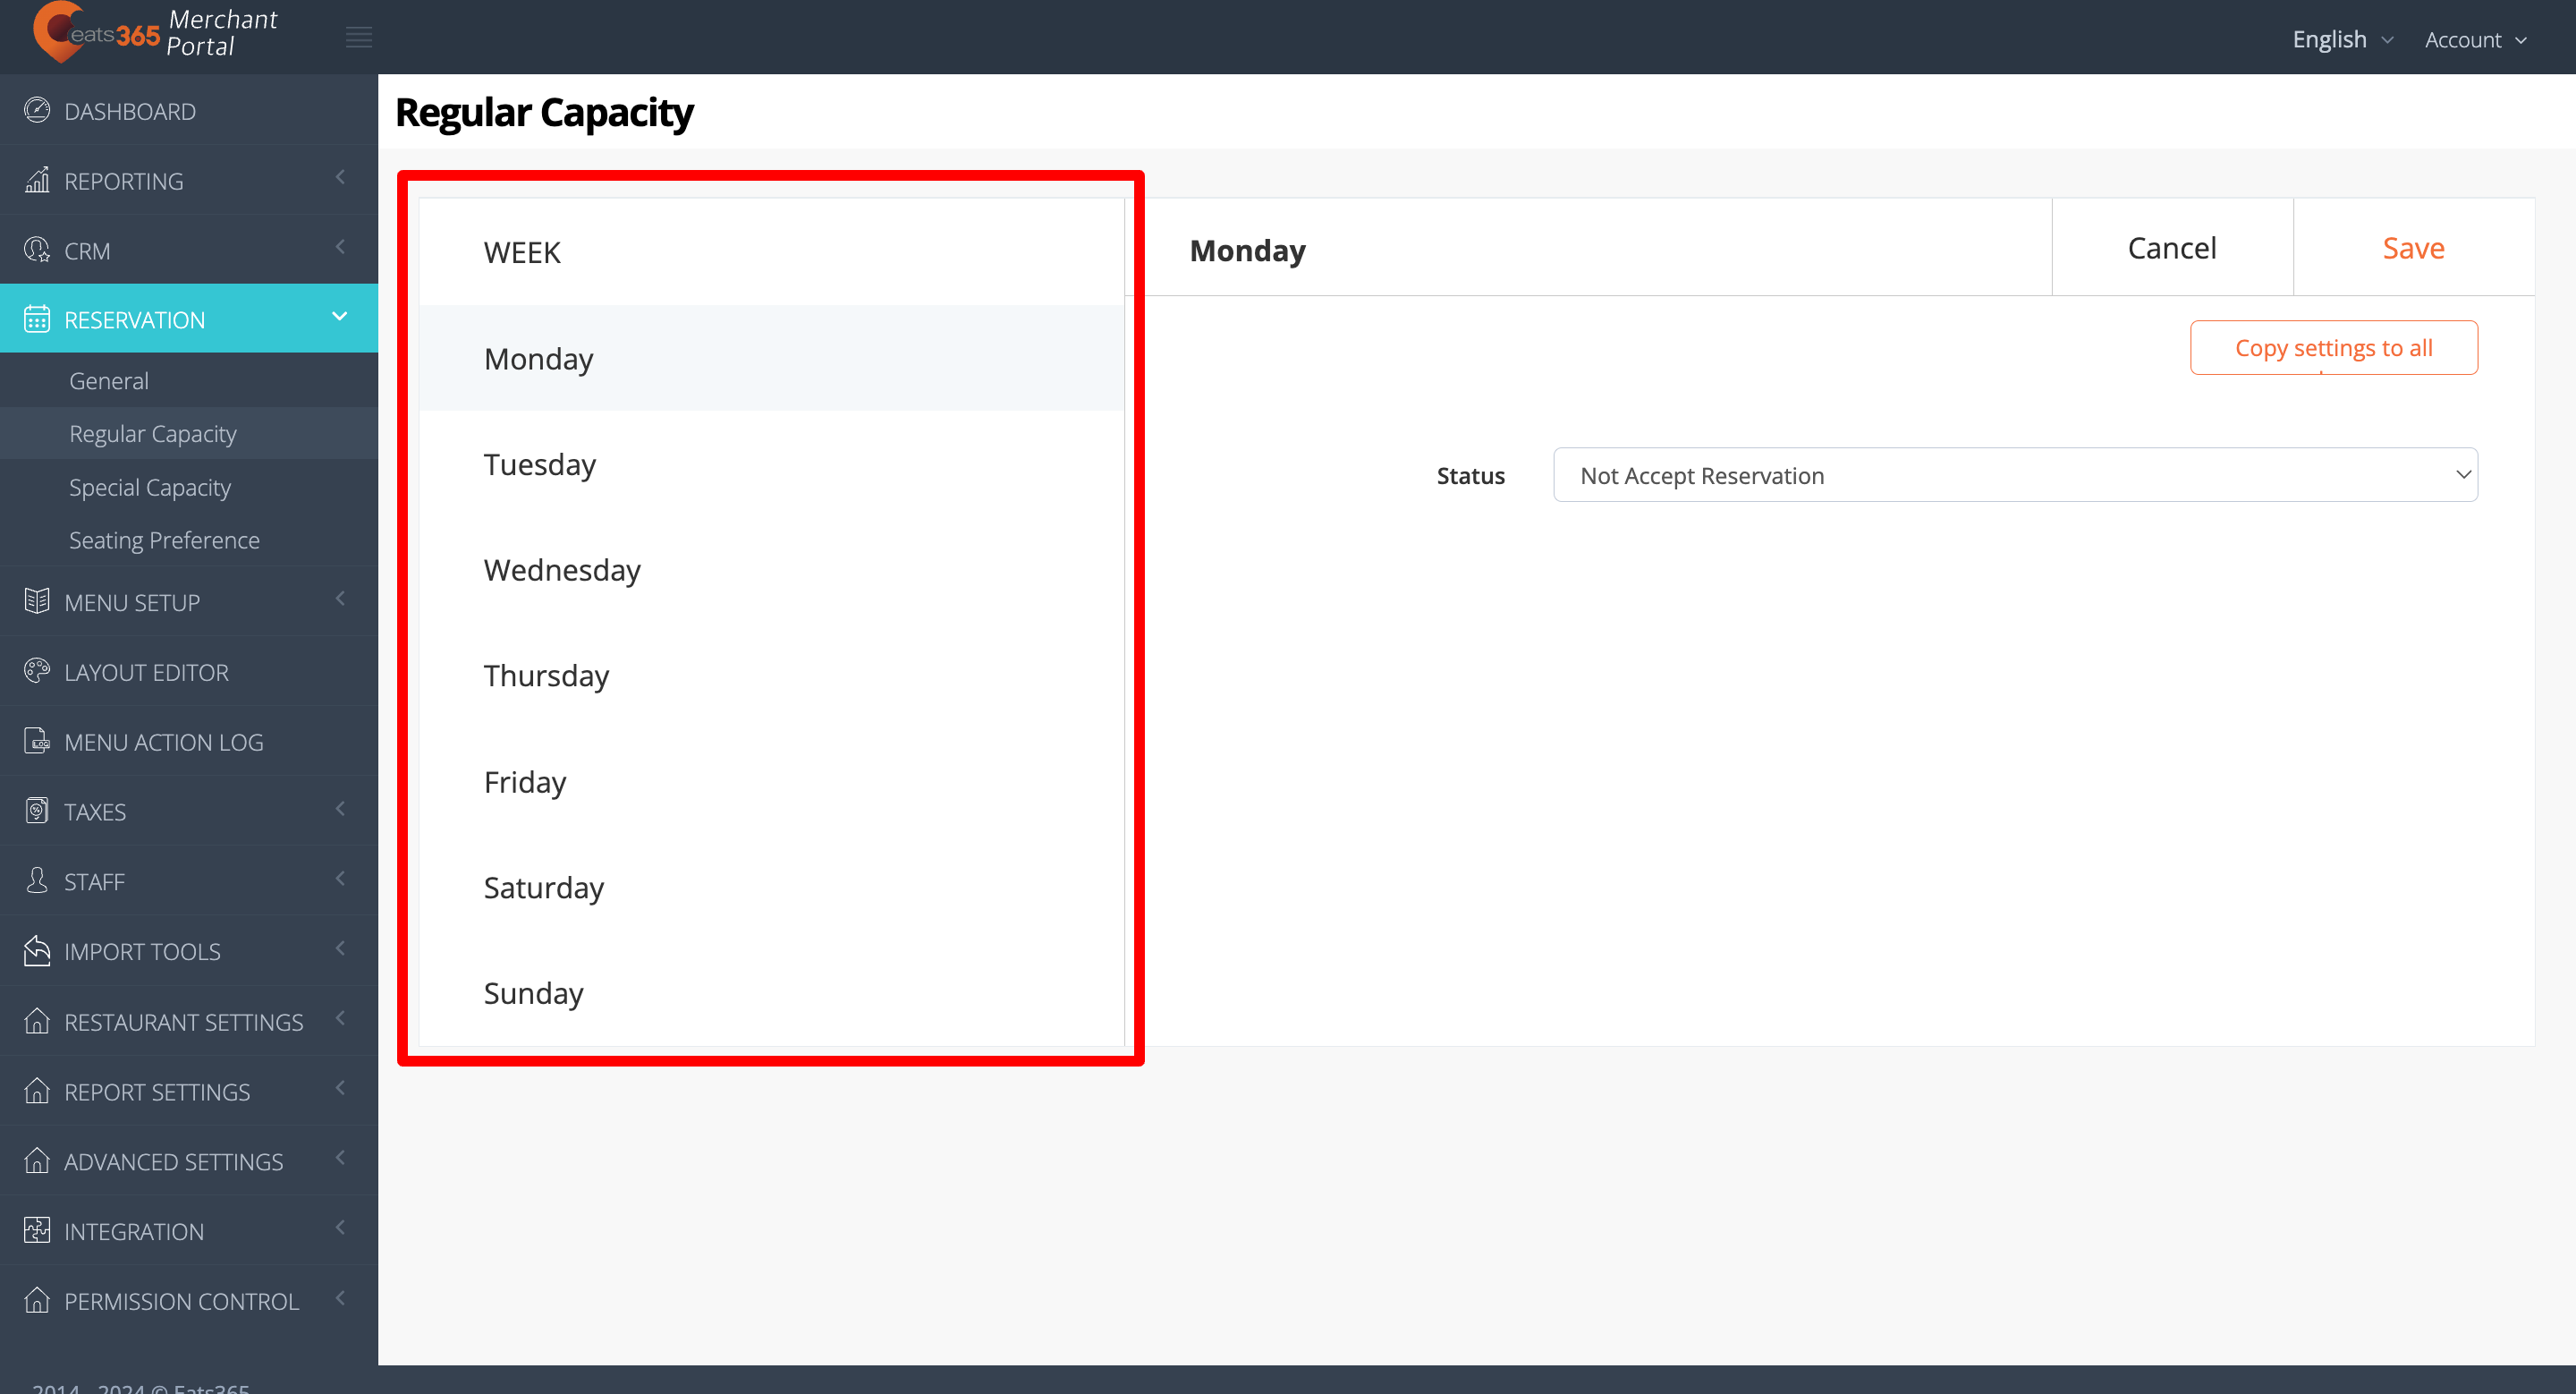
- To accept reservations, select Accept Reservation from the drop-down list.
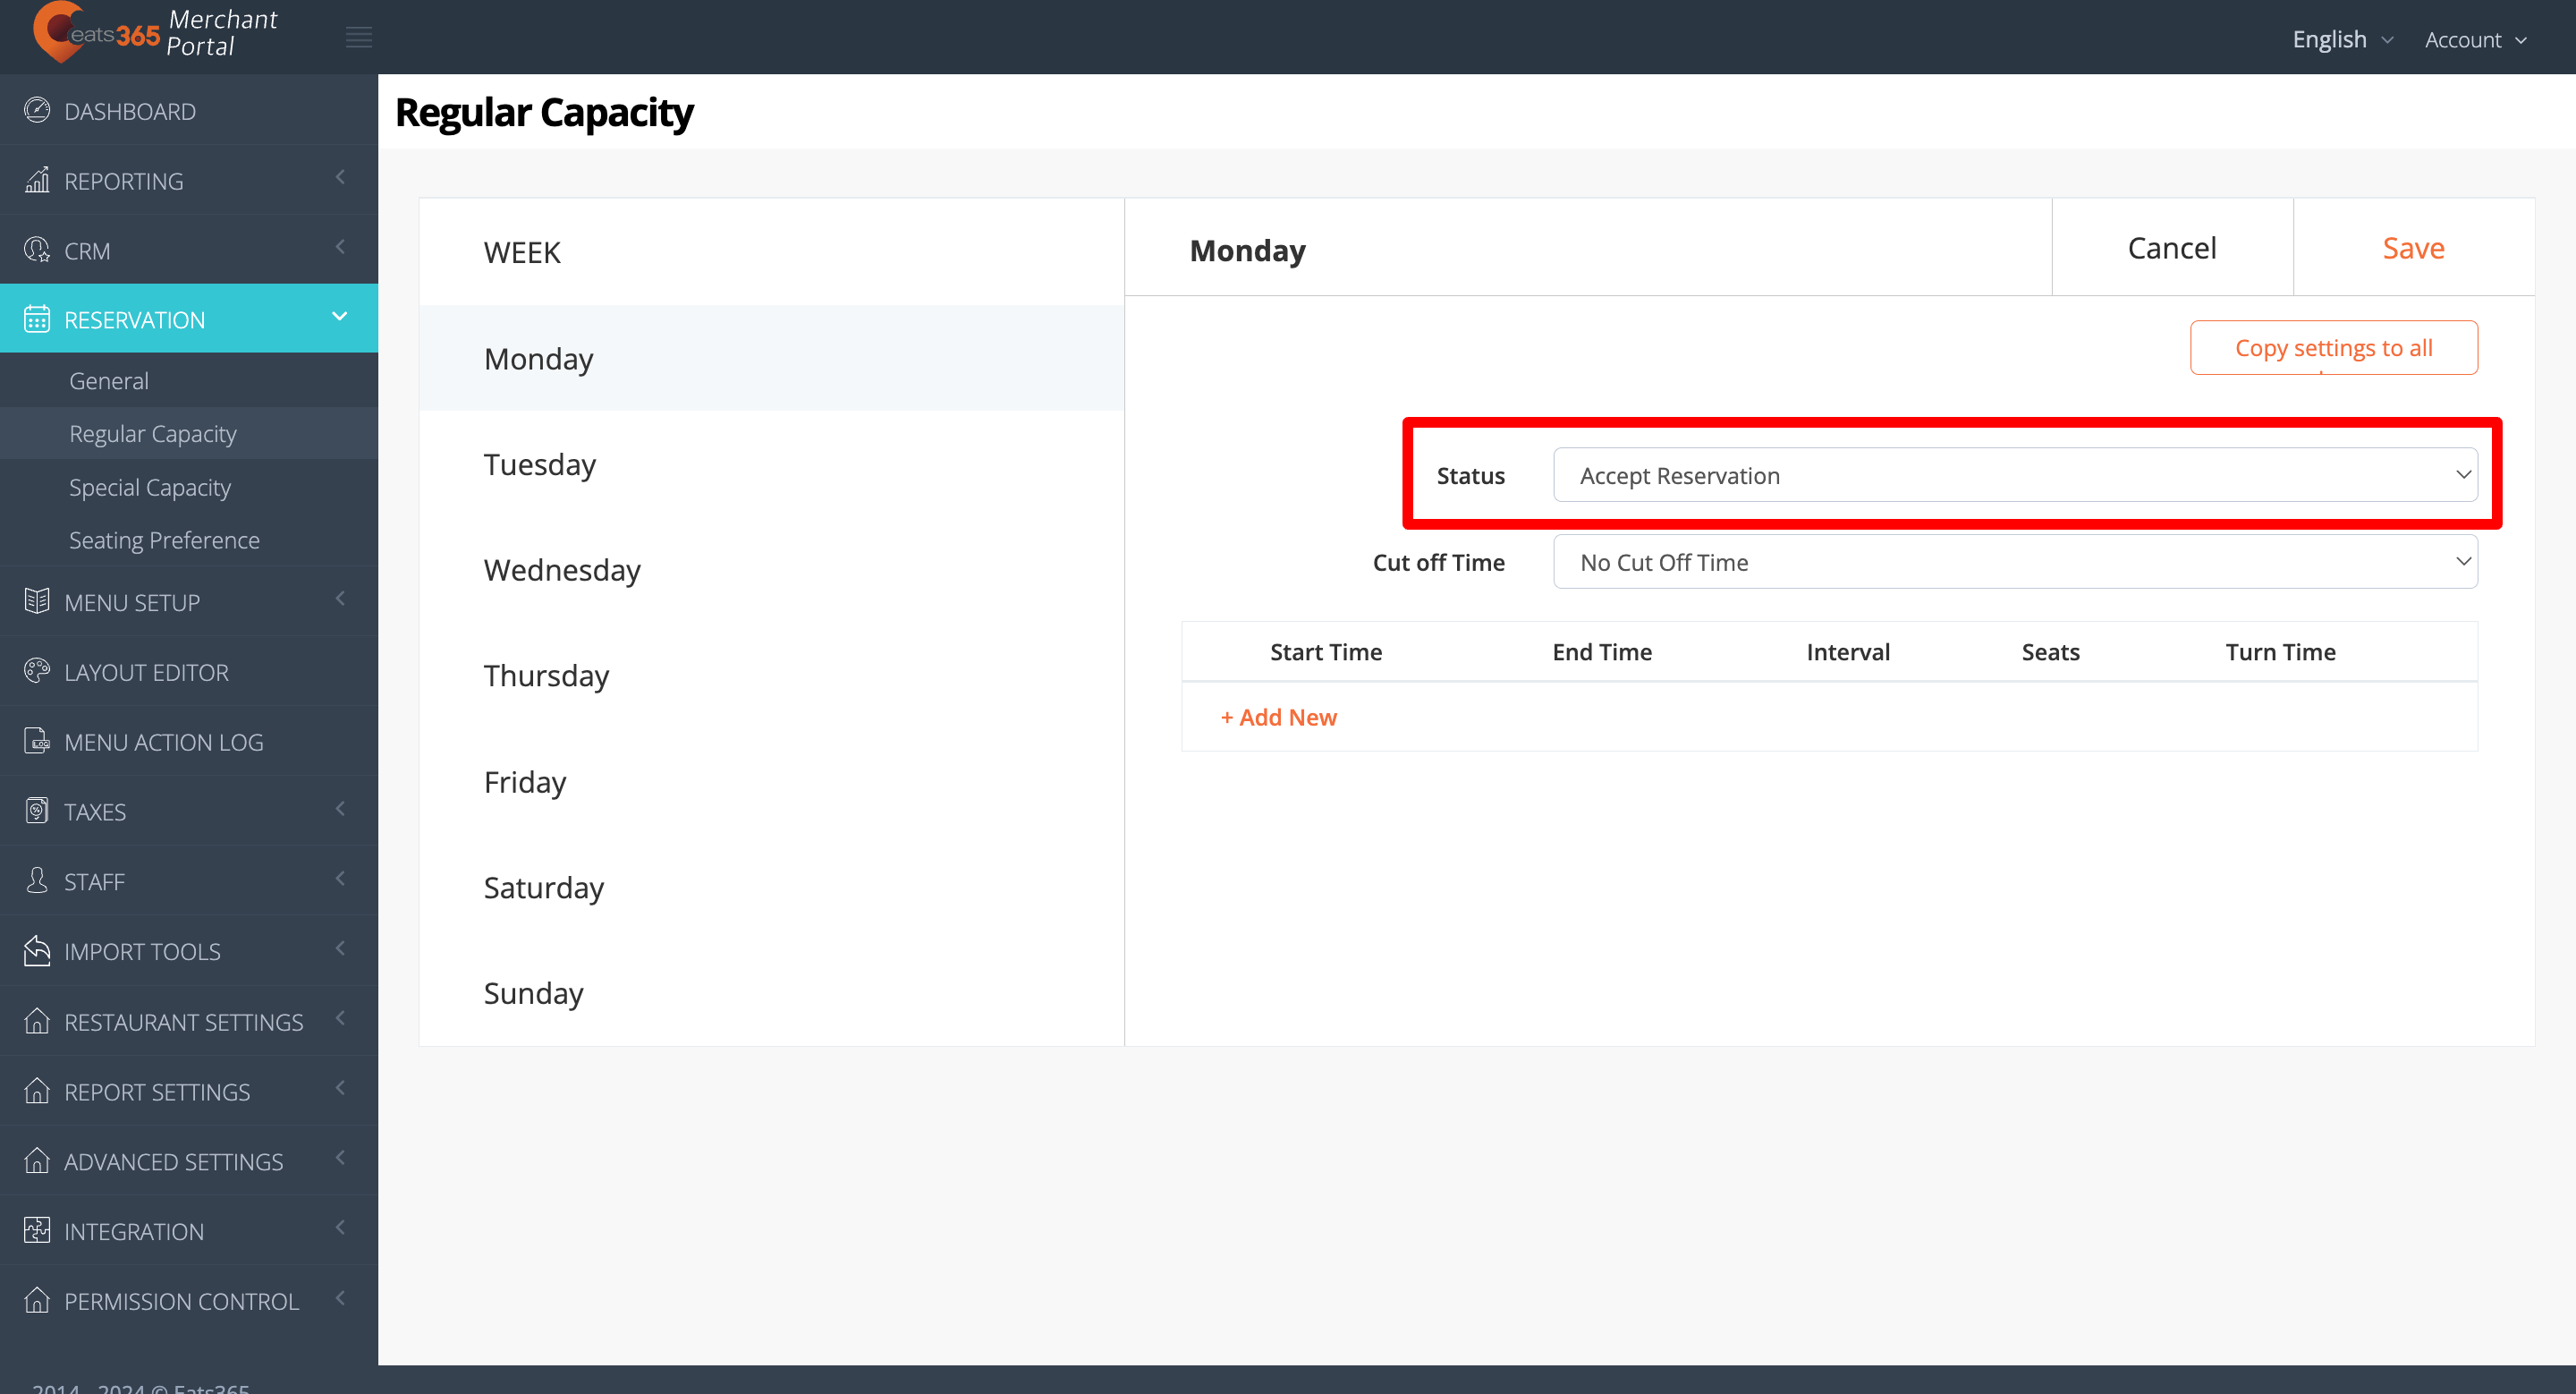
- Set a cut-off time for reservations. The cut-off time determines until when can customers book a reservation. For example, if you set the cut-off time to 14:00, customers must place their reservations between the opening hour and 14:00. Customers can no longer book a reservation after 14:00.
- Enter the Reservation Start Time and End Time. The Reservation Start and End times determine the available window when customers can book a reservation. For example, if you want to accept dinner reservations from 18:00 to 23:00, you can enter 18:00 as the Start Time and 23:00 as the End Time.
- Select the Reservation Interval. The Reservation Interval determines how far apart the reservation time slots should be. For example, if you choose an interval of 30 minutes for dinner reservations available from 18:00 to 23:00, the reservation time interval in the POS shows up as 18:00, 18:30, 19:00, and so on.
- Enter how many seats are available for reservations.
- Set the Turn Time. The Turn Time determines how long the party can stay in the restaurant.
- (Optional) To configure different settings for another reservation period, click on +Add New. Then, repeat the steps above. For example, you can set up different settings for lunch and dinner reservations.
- To apply the same settings to all days of the week, click on Copy settings to all days. You can also manually configure the settings for other days of the week by selecting the day and repeating the steps above.
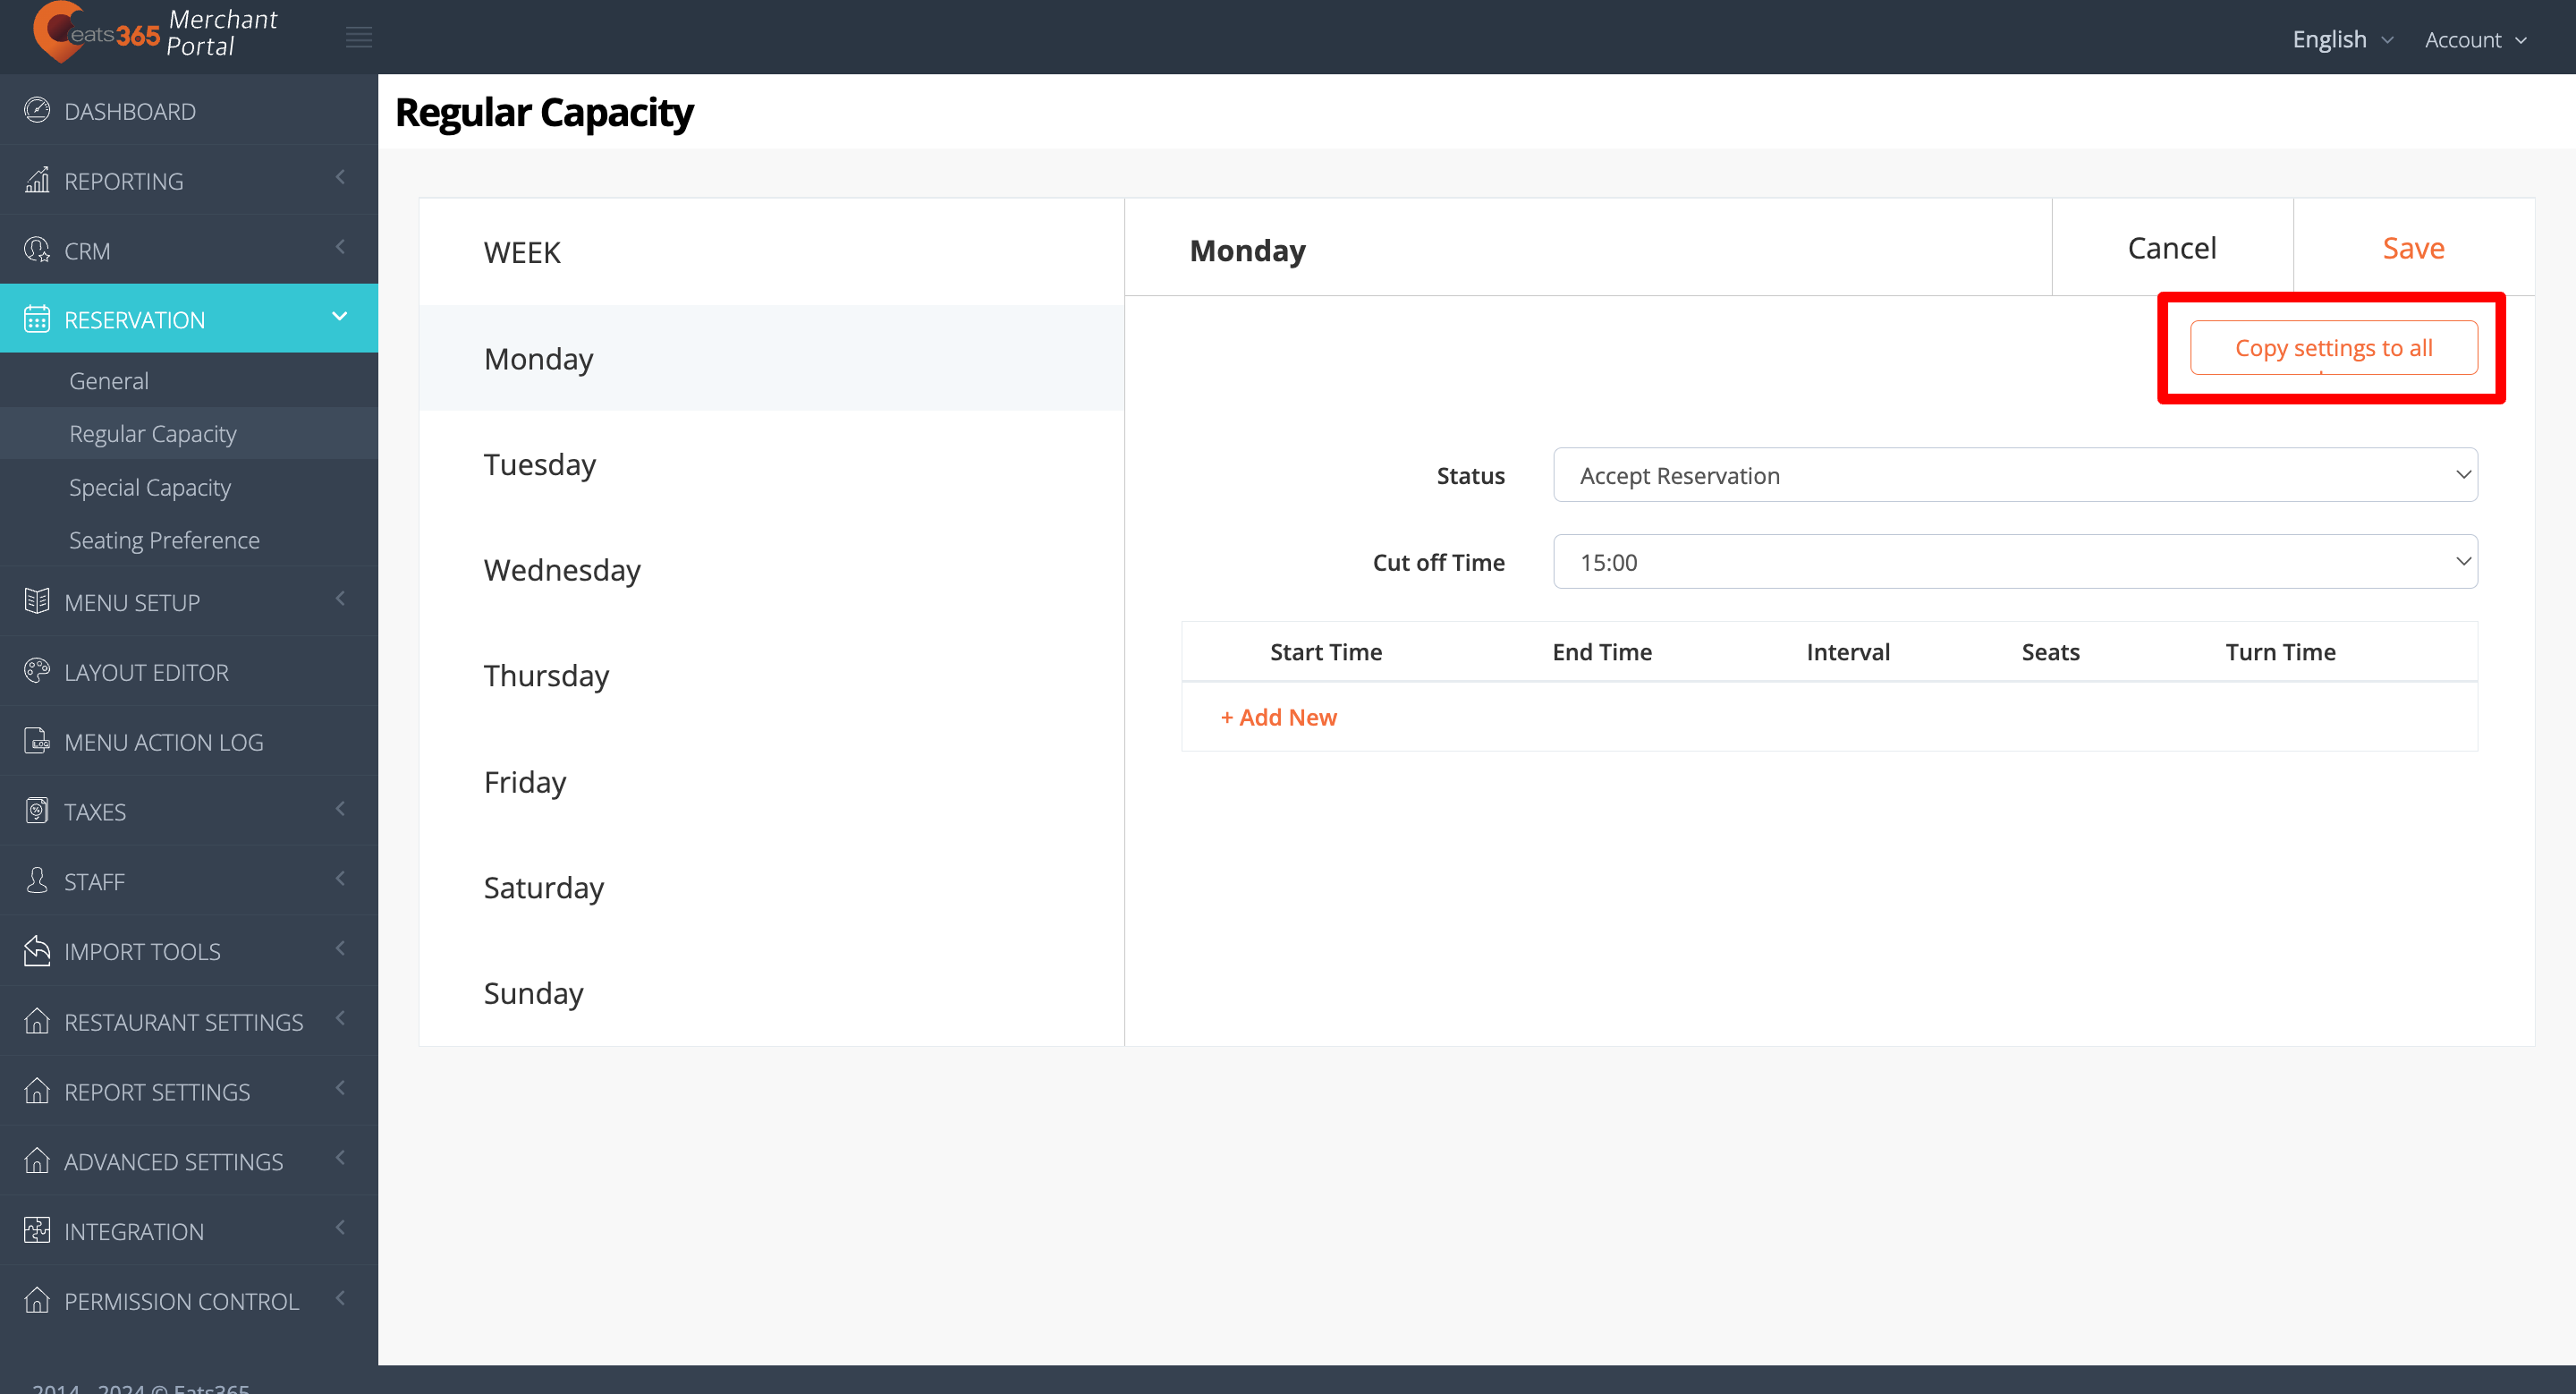
- At the top right, click on Save to confirm.
Merchant Portal 2.0
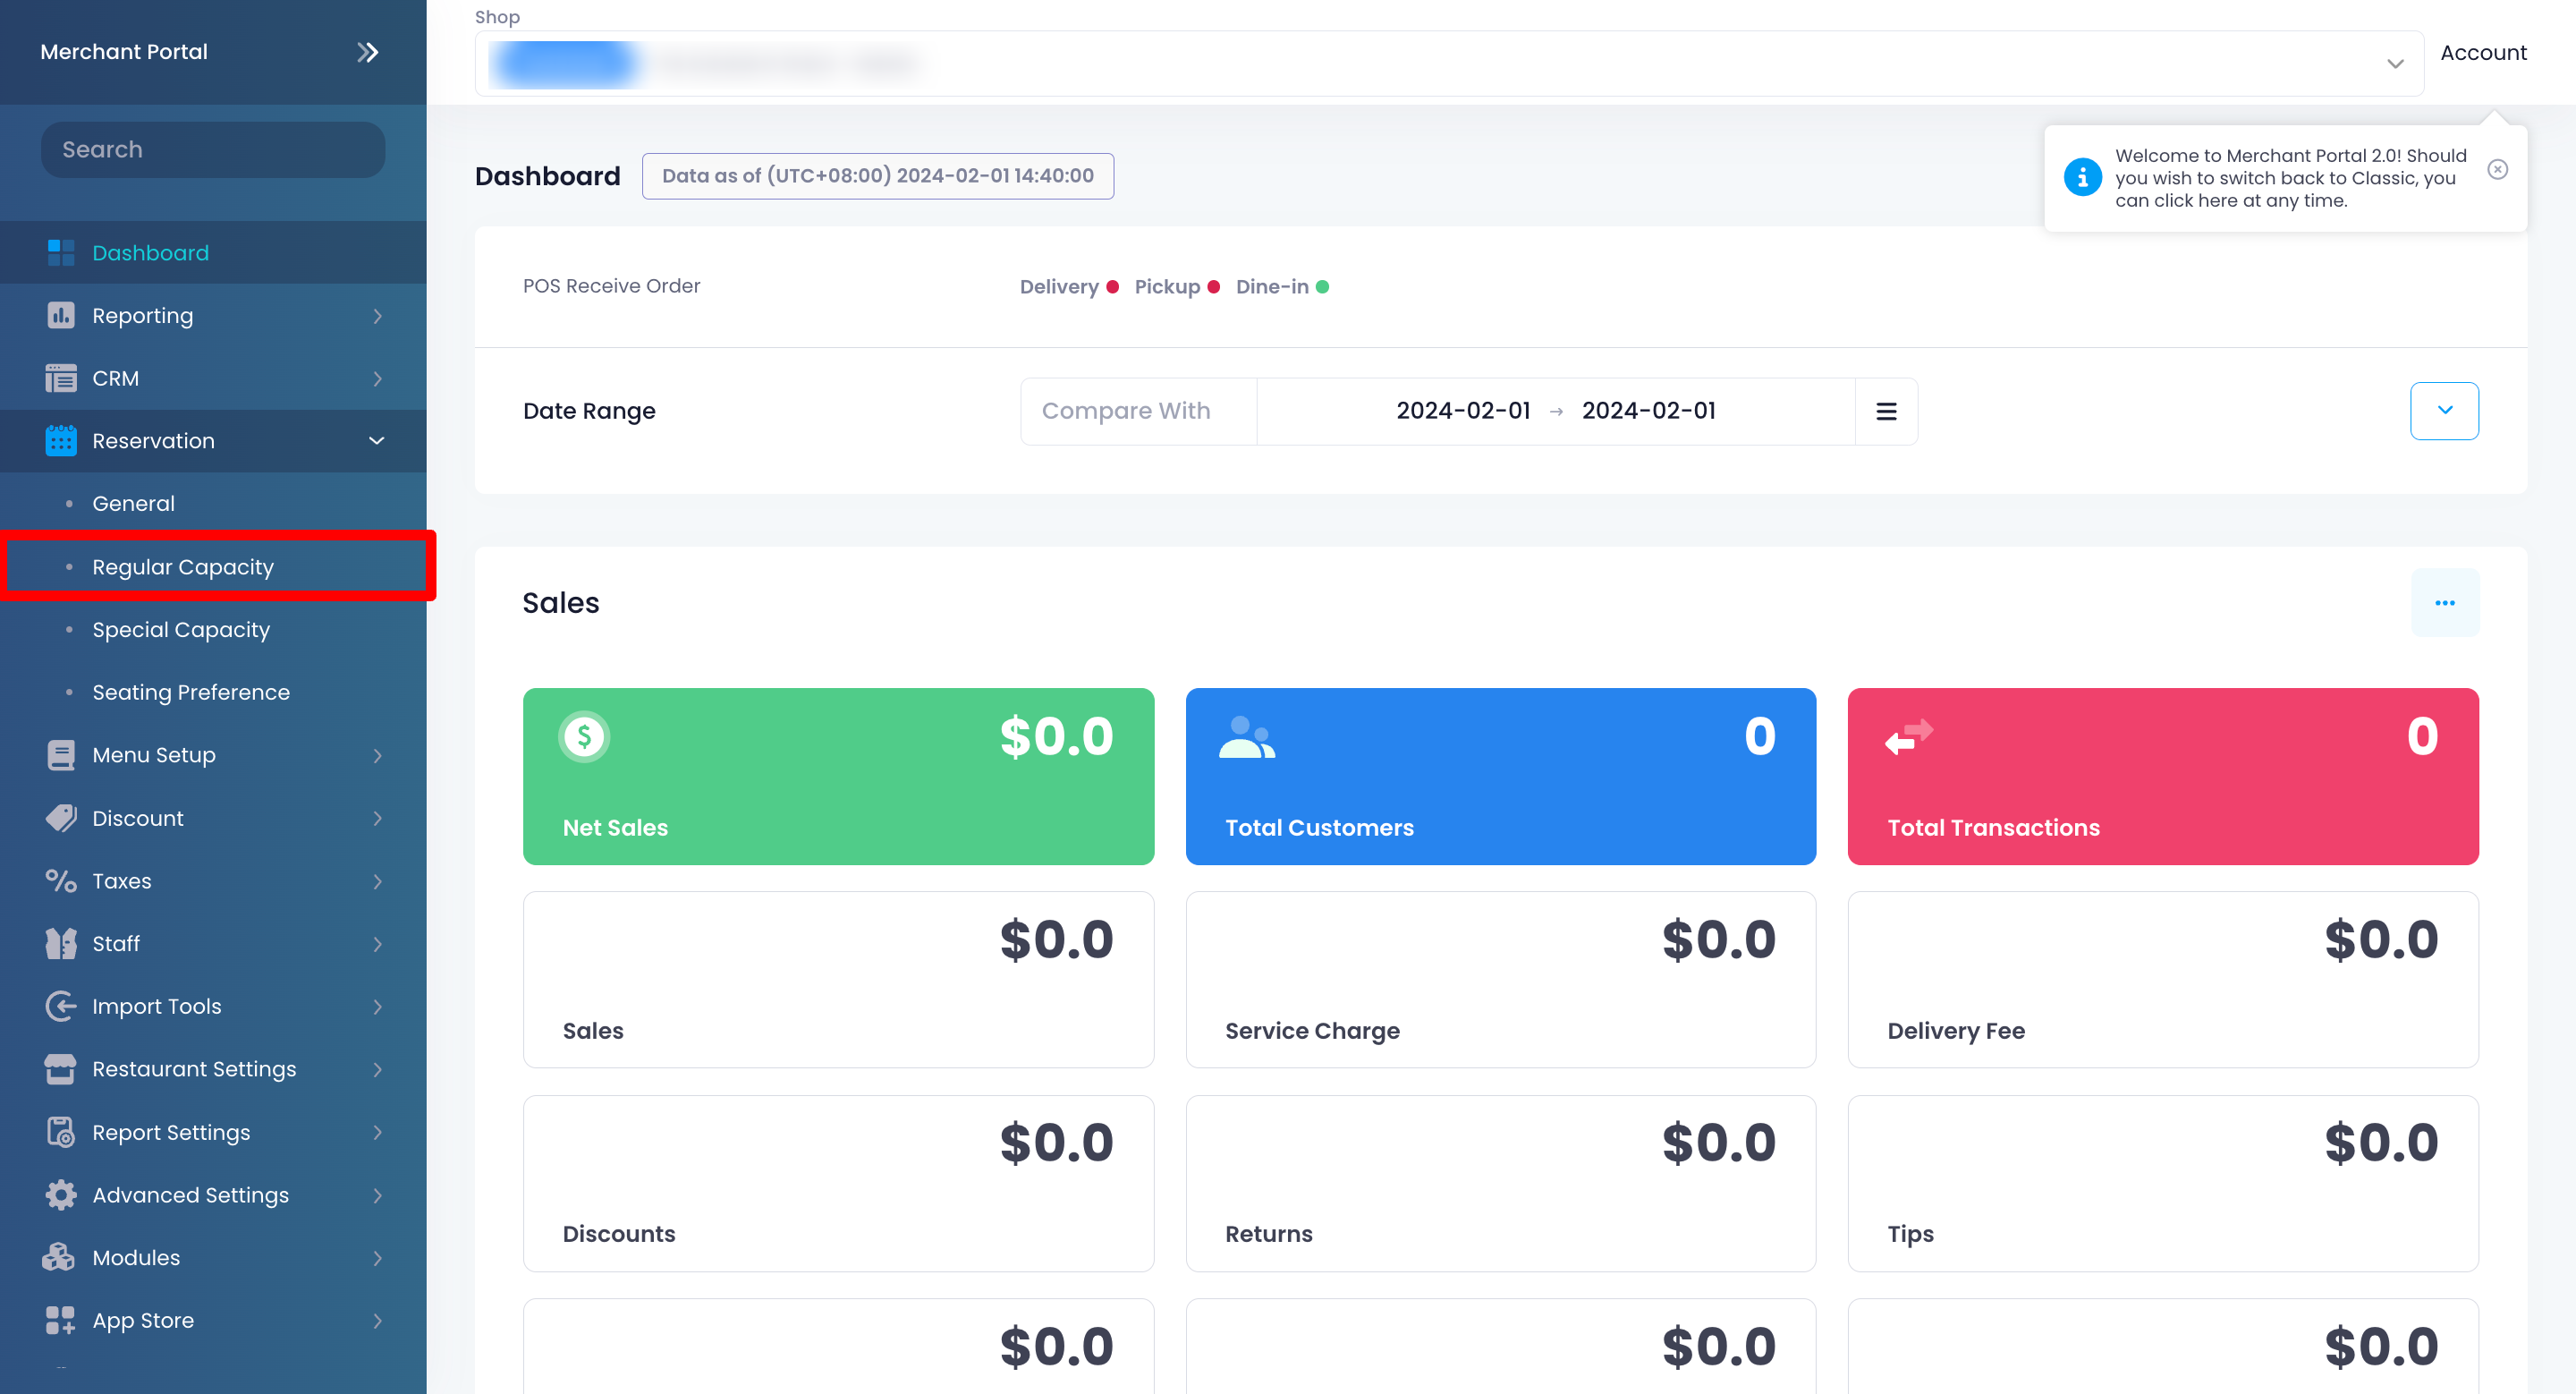
- Log in to the Merchant Portal.
- On the left panel, click on Reservation, then click on Regular Capacity.
- Select a day when you want to accept reservations.
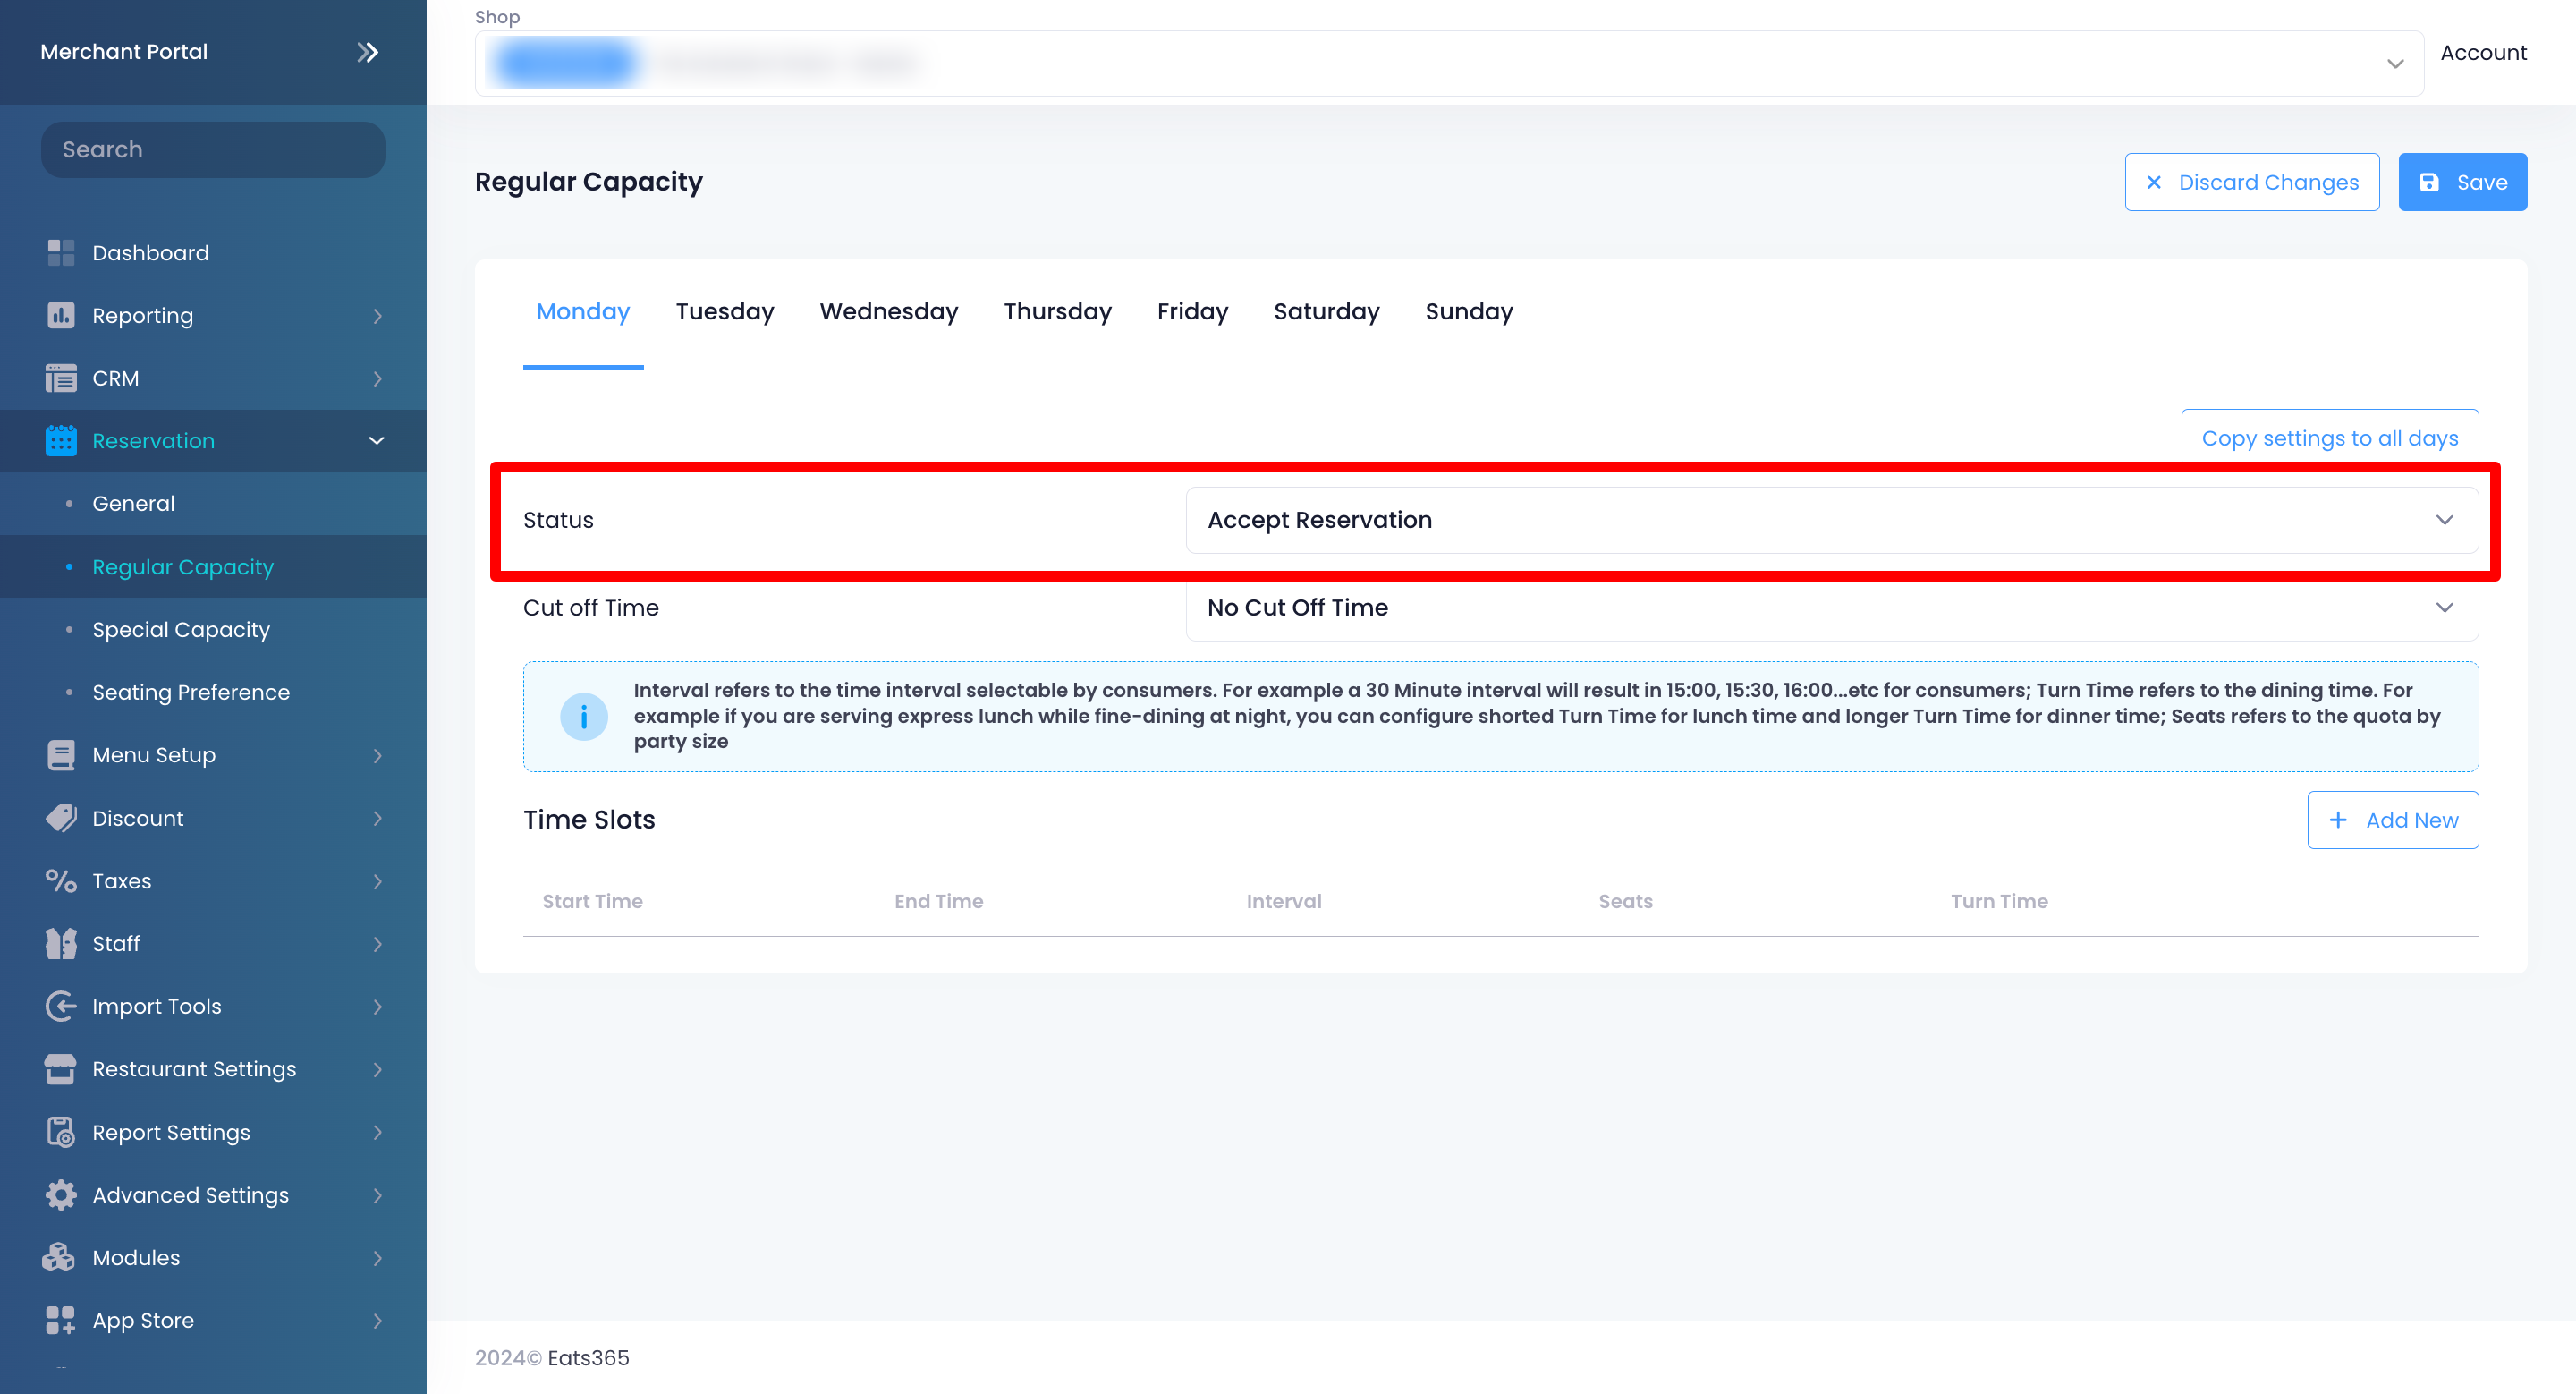
- To accept reservations, select Accept Reservation from the drop-down list.
- Set a cut-off time for reservations. The cut-off time determines until when can customers book a reservation. For example, if you set the cut-off time to 14:00, customers must place their reservations between the opening hour and 14:00. Customers can no longer book a reservation after 14:00.
- Enter the Reservation Start Time and End Time. The Reservation Start and End times determine the available window when customers can book a reservation. For example, if you want to accept dinner reservations from 18:00 to 23:00, you can enter 18:00 as the Start Time and 23:00 as the End Time.
- Select the Reservation Interval. The Reservation Interval determines how far apart the reservation time slots should be. For example, if you choose an interval of 30 minutes for dinner reservations available from 18:00 to 23:00, the reservation time interval in the POS shows up as 18:00, 18:30, 19:00, and so on.
- Enter how many seats are available for reservations.
- Set the Turn Time. The Turn Time determines how long the party can stay in the restaurant.
- (Optional) To configure different settings for another reservation period, click on +Add New. Then, repeat the steps above. For example, you can set up different settings for lunch and dinner reservations.
- To apply the same settings to all days of the week, click on Copy settings to all days. You can also manually configure the settings for other days of the week by selecting the day and repeating the steps above.
- At the top right, click on Save to confirm.
Set up Special Capacity settings
If you want to customize your Reservation settings to have a different setup for holidays and special occasions, you can configure this in the Special Capacity settings.
To configure the Special Capacity settings, follow the steps below:
Merchant Portal (Classic Theme)
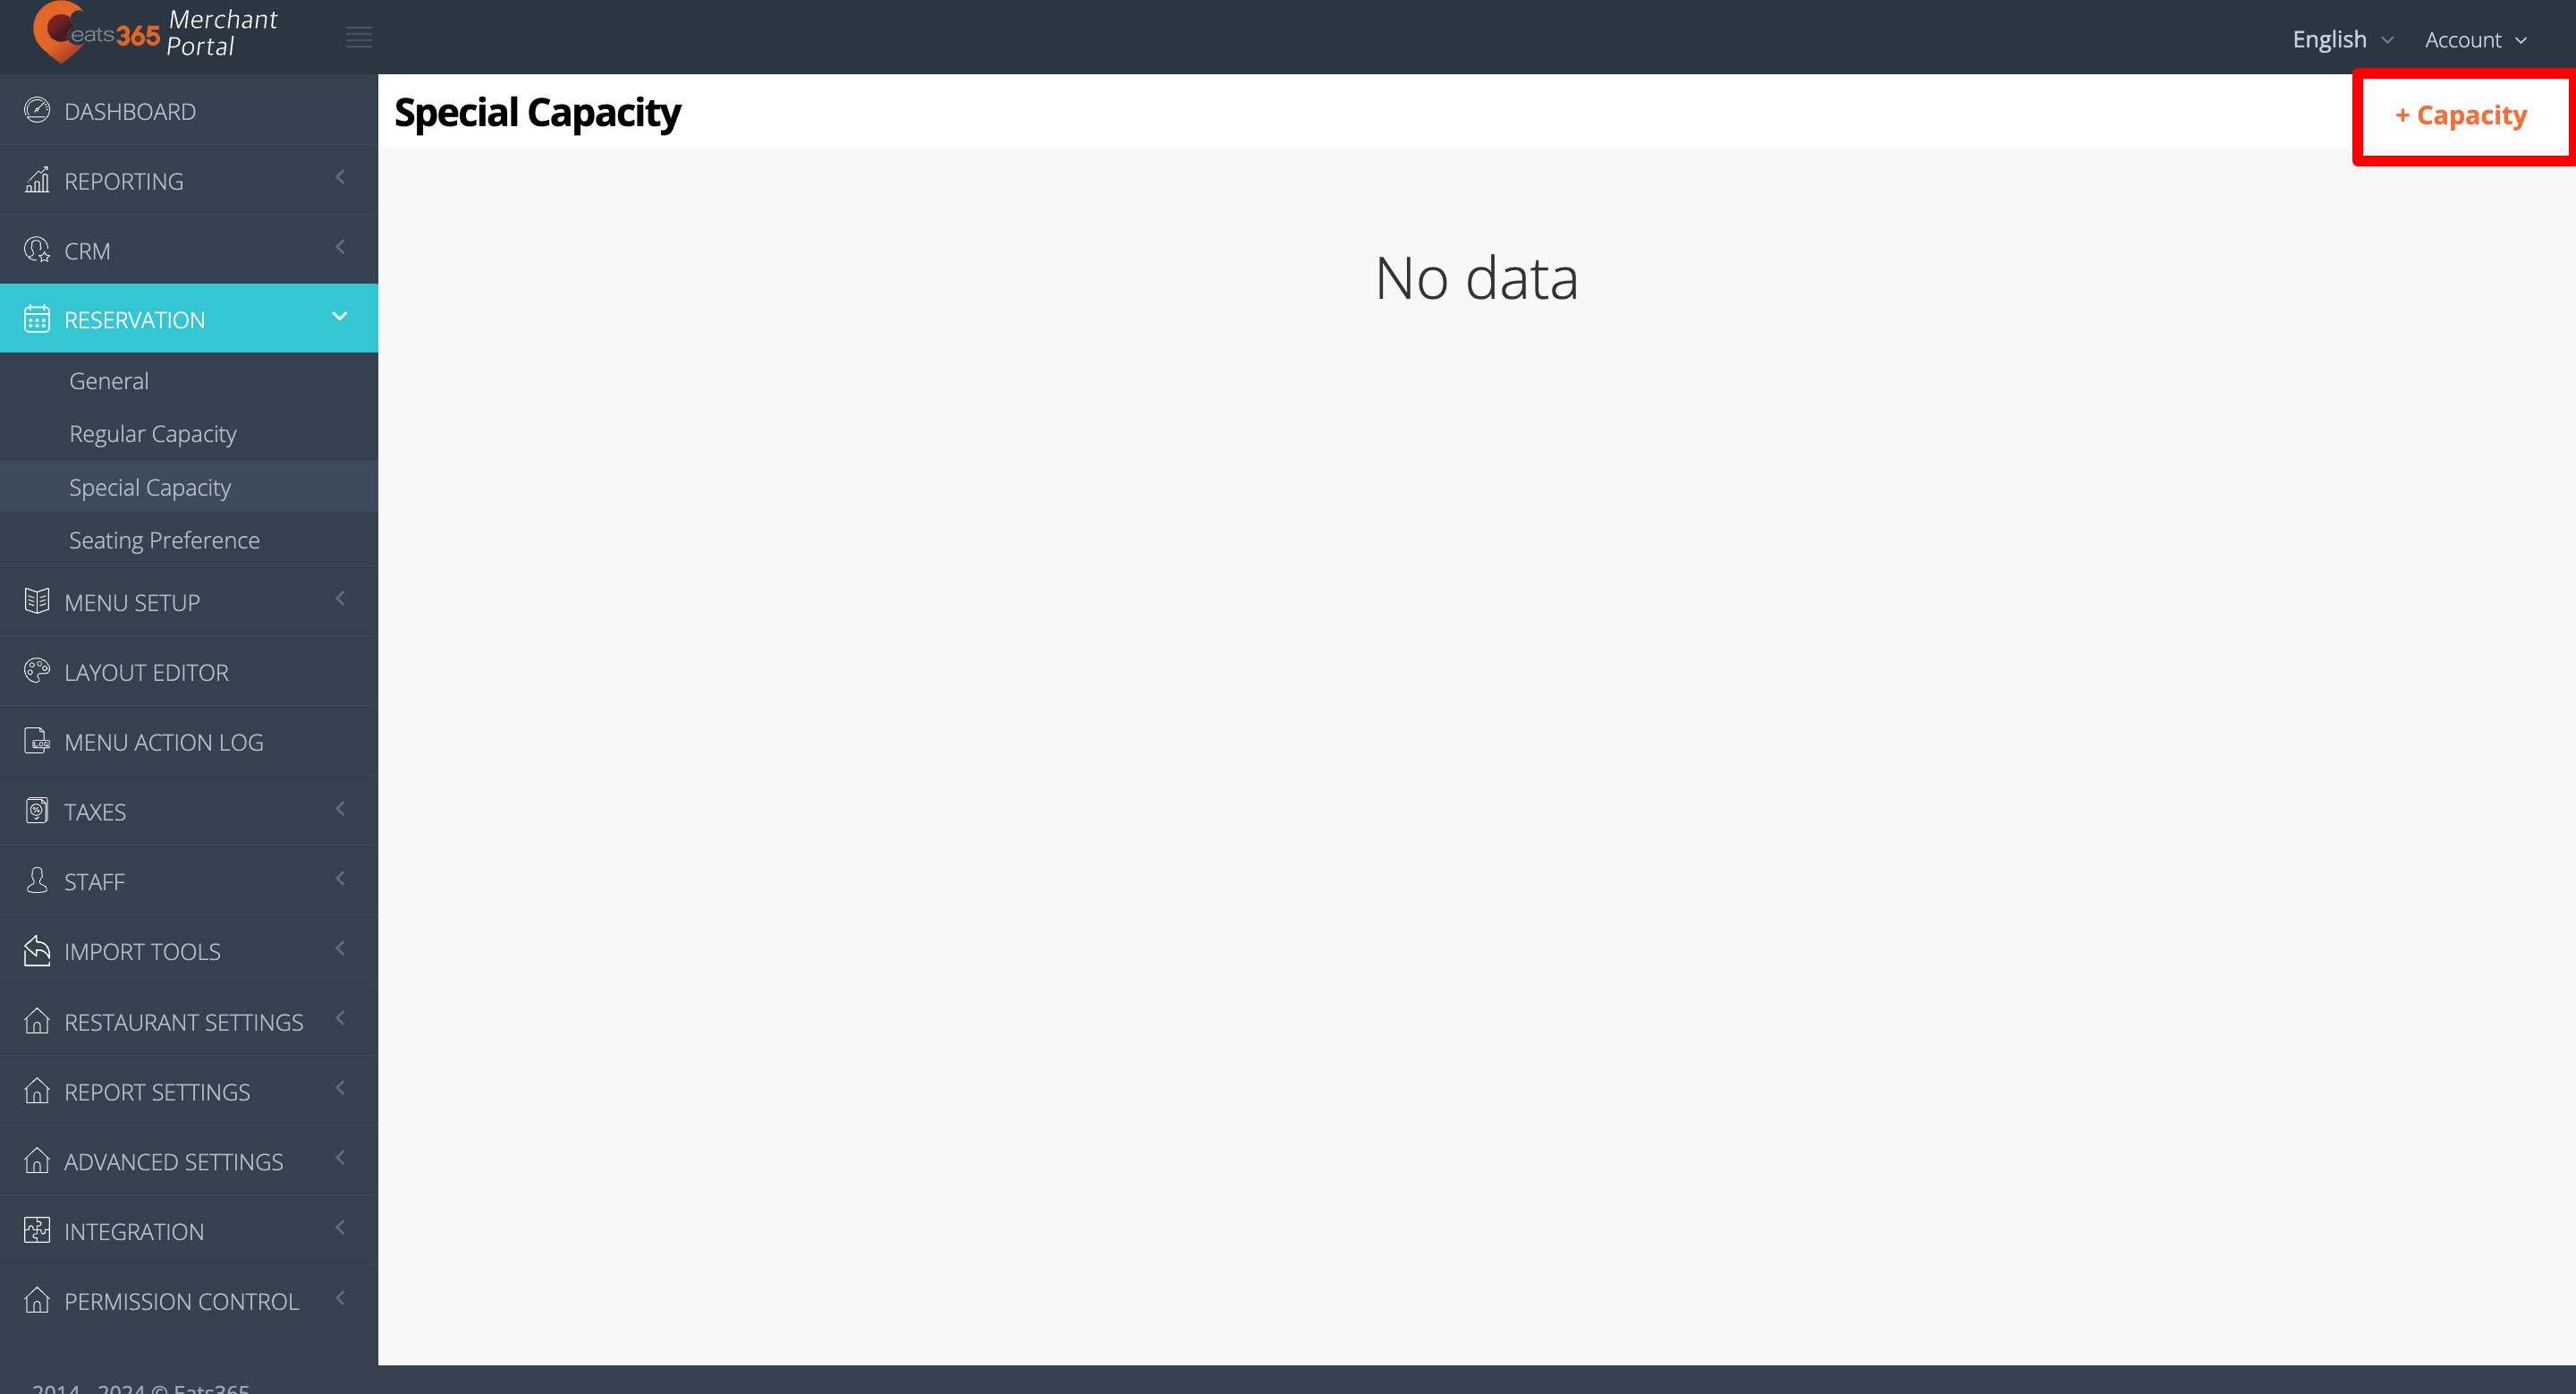
- Log in to the Merchant Portal.
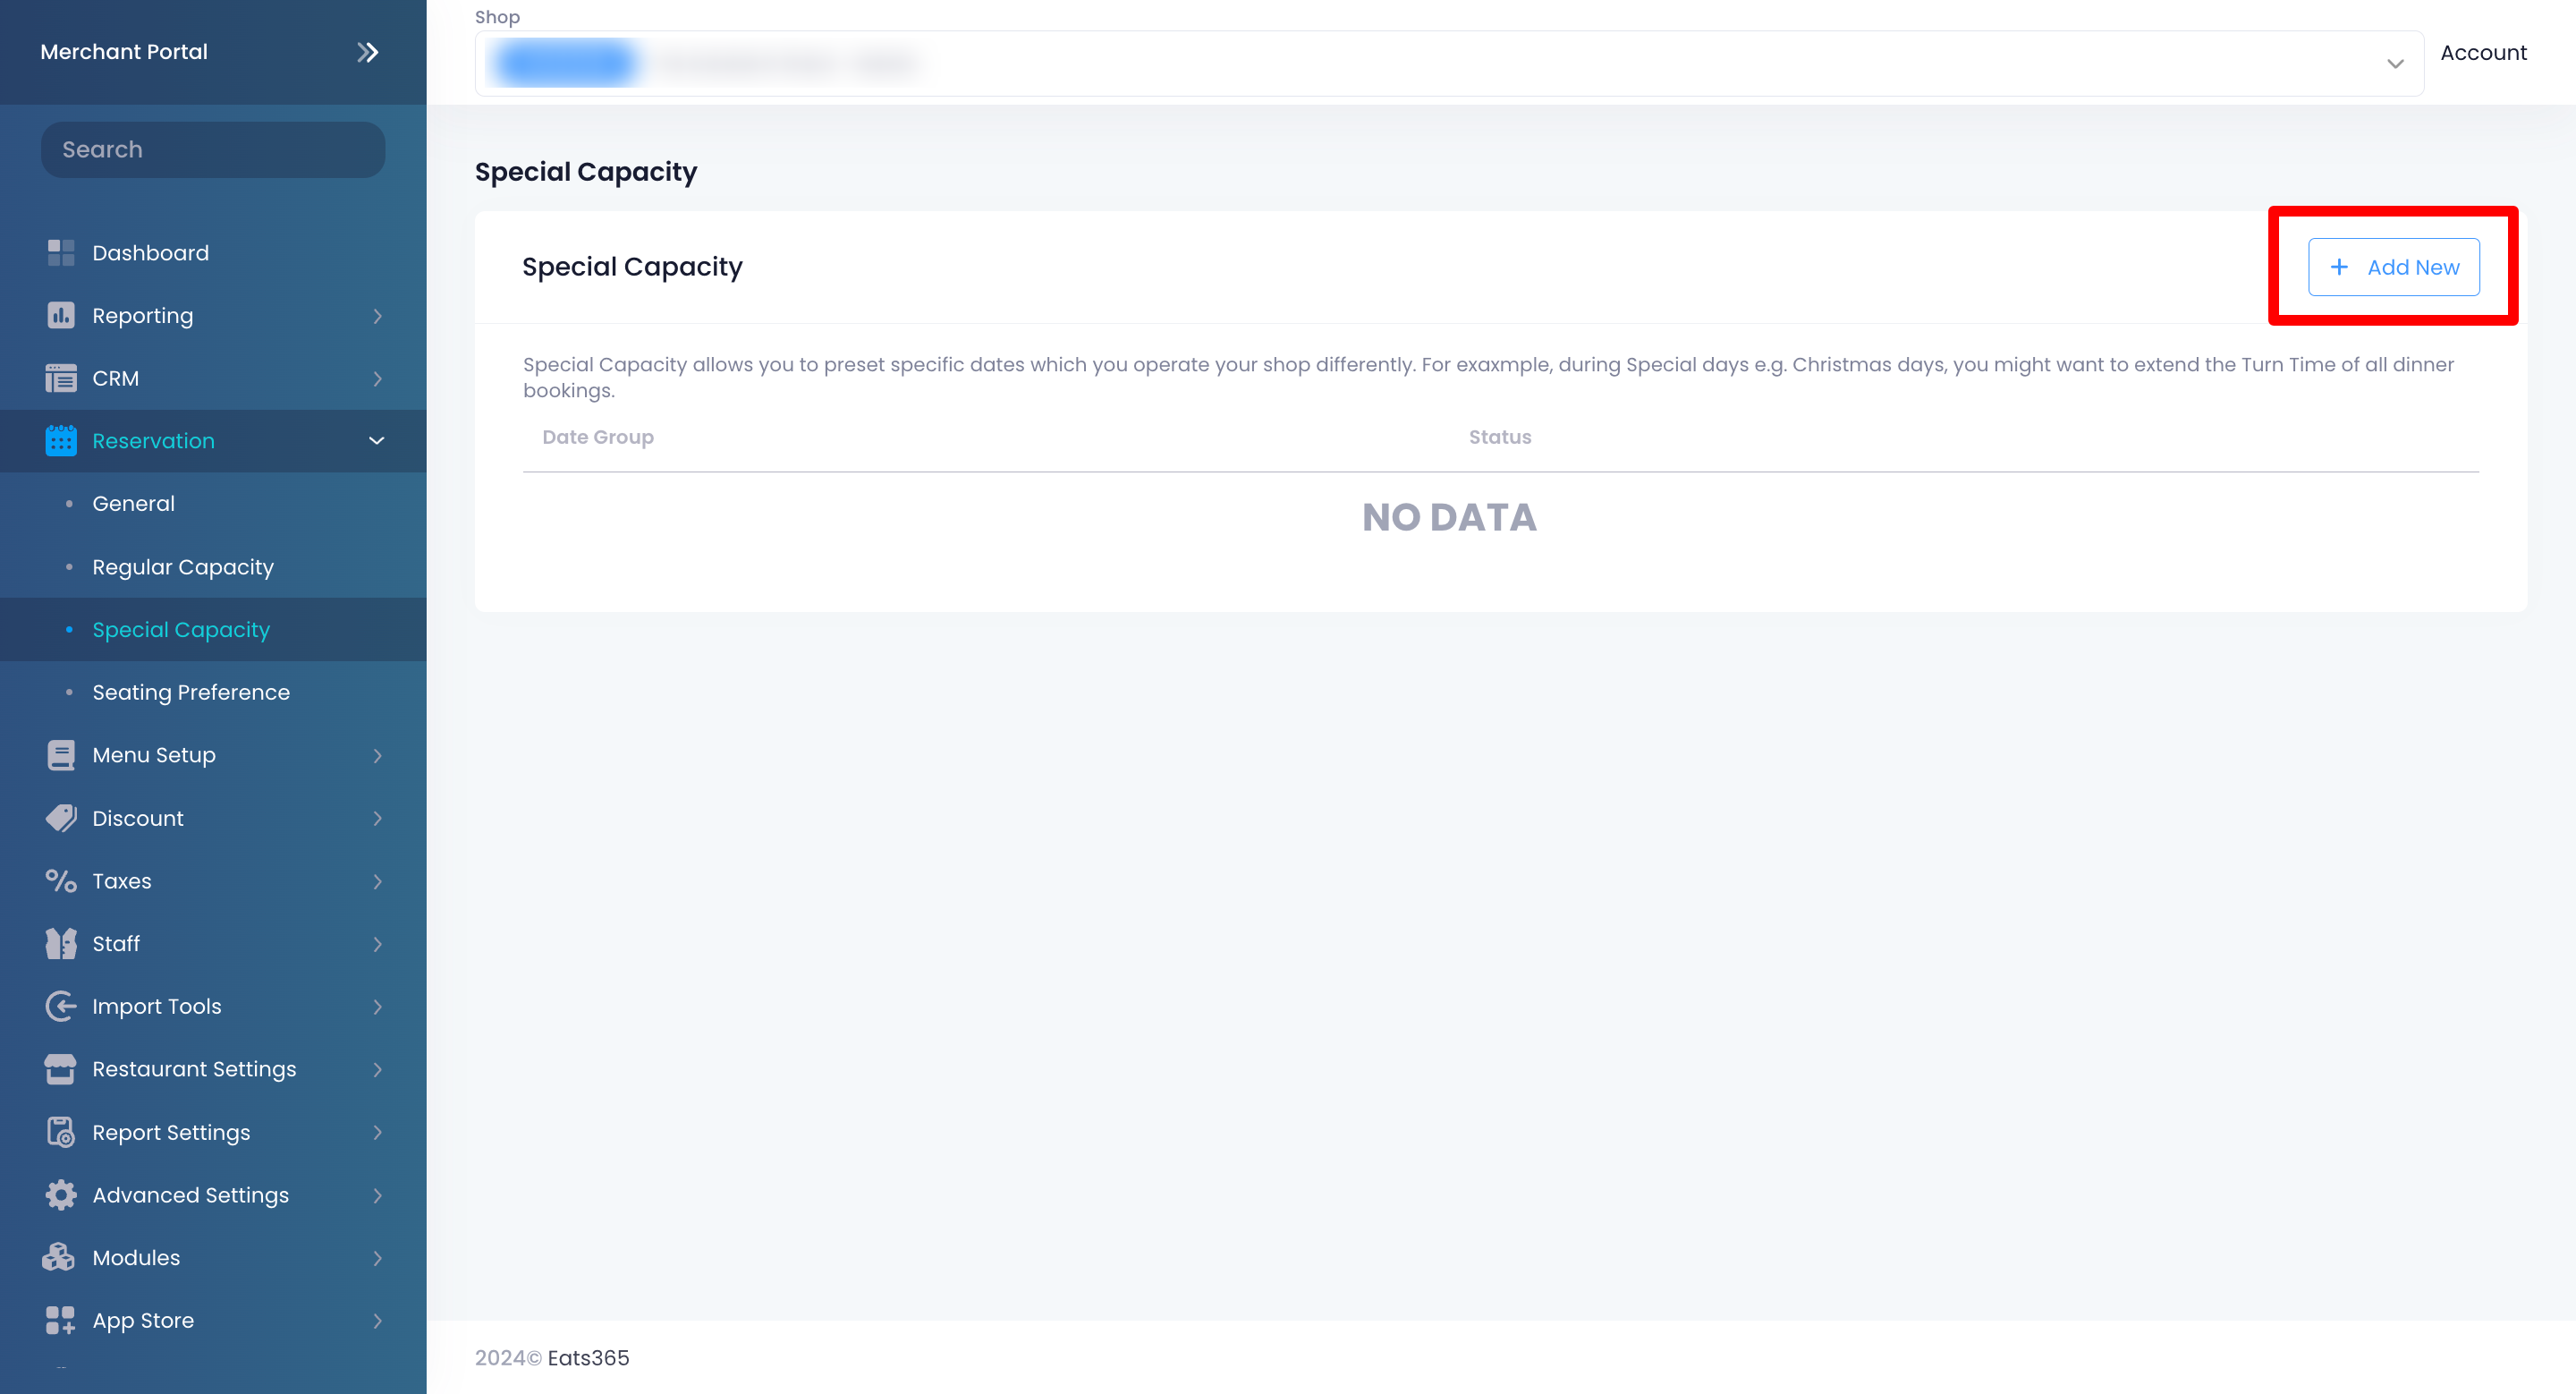
- On the left panel, click on Reservation, then click on Special Capacity.

- At the top right, click on +Capacity.
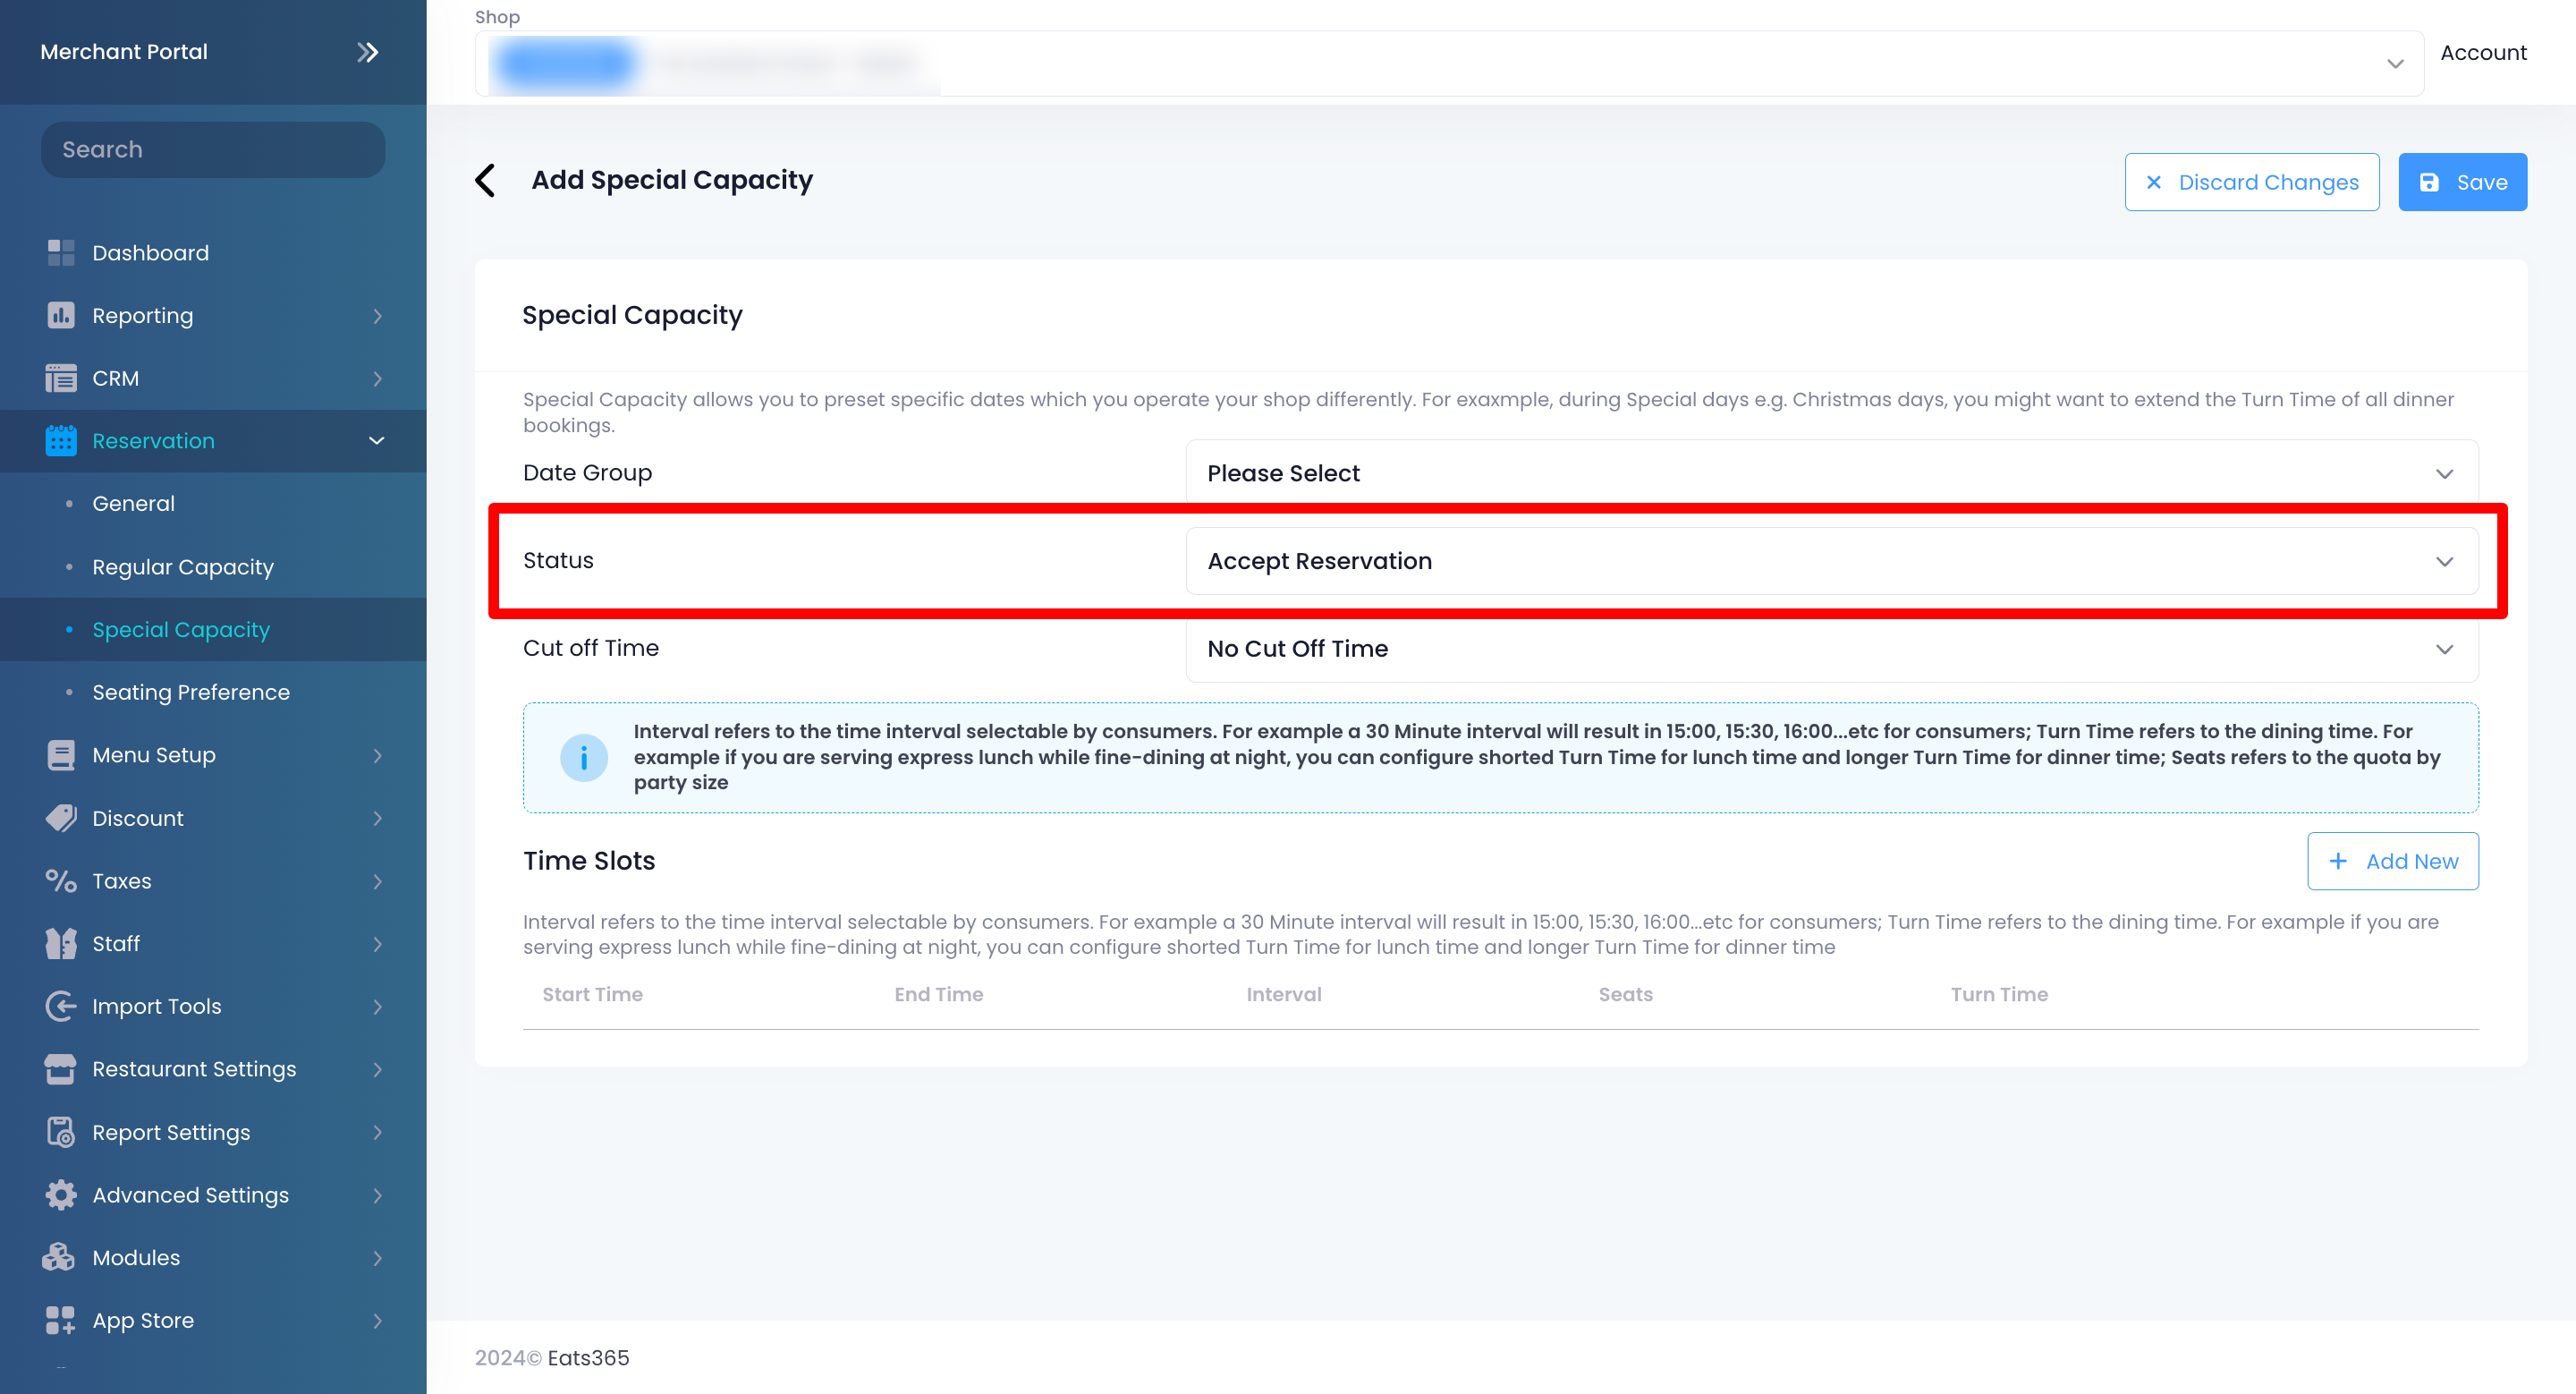
- Select the Date Group when you want to accept reservations.
- To accept reservations, select Accept Reservation from the drop-down list.
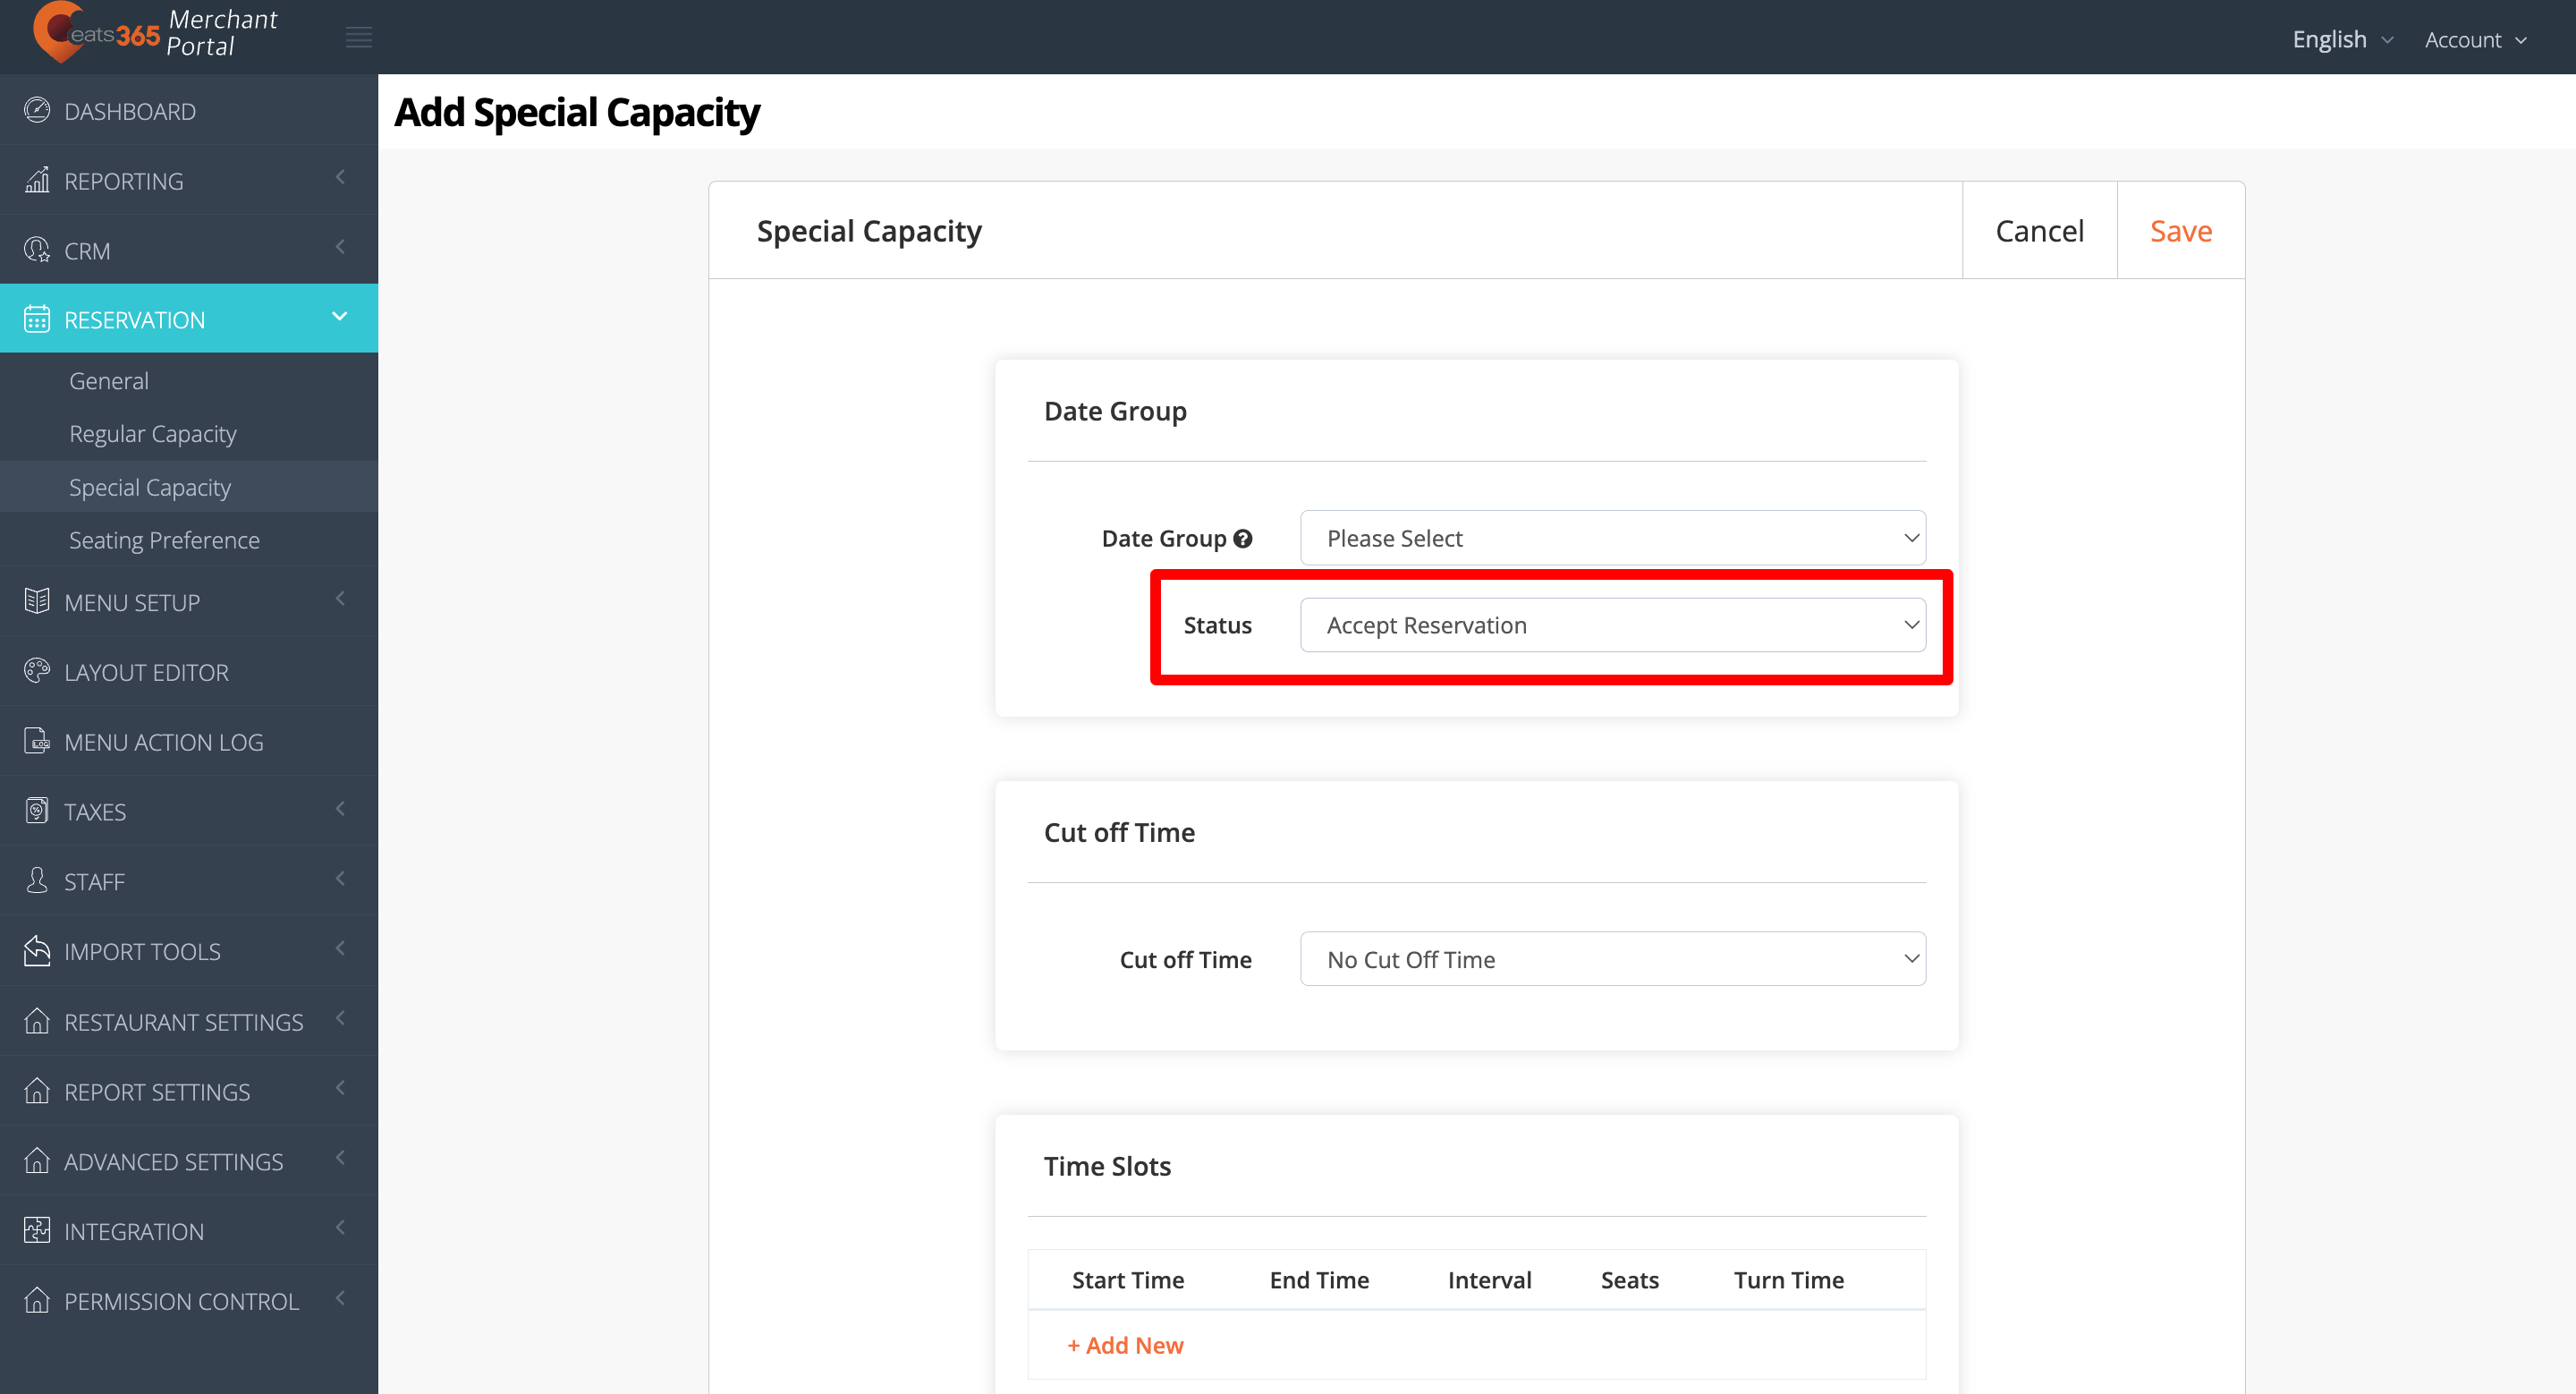
- Set a cut-off time for reservations. The cut-off time determines the time until when can customers book a reservation. For example, if you set the cut-off time to 14:00, customers must place their reservations between the opening hour and 14:00. Customers can no longer book a reservation after 14:00.
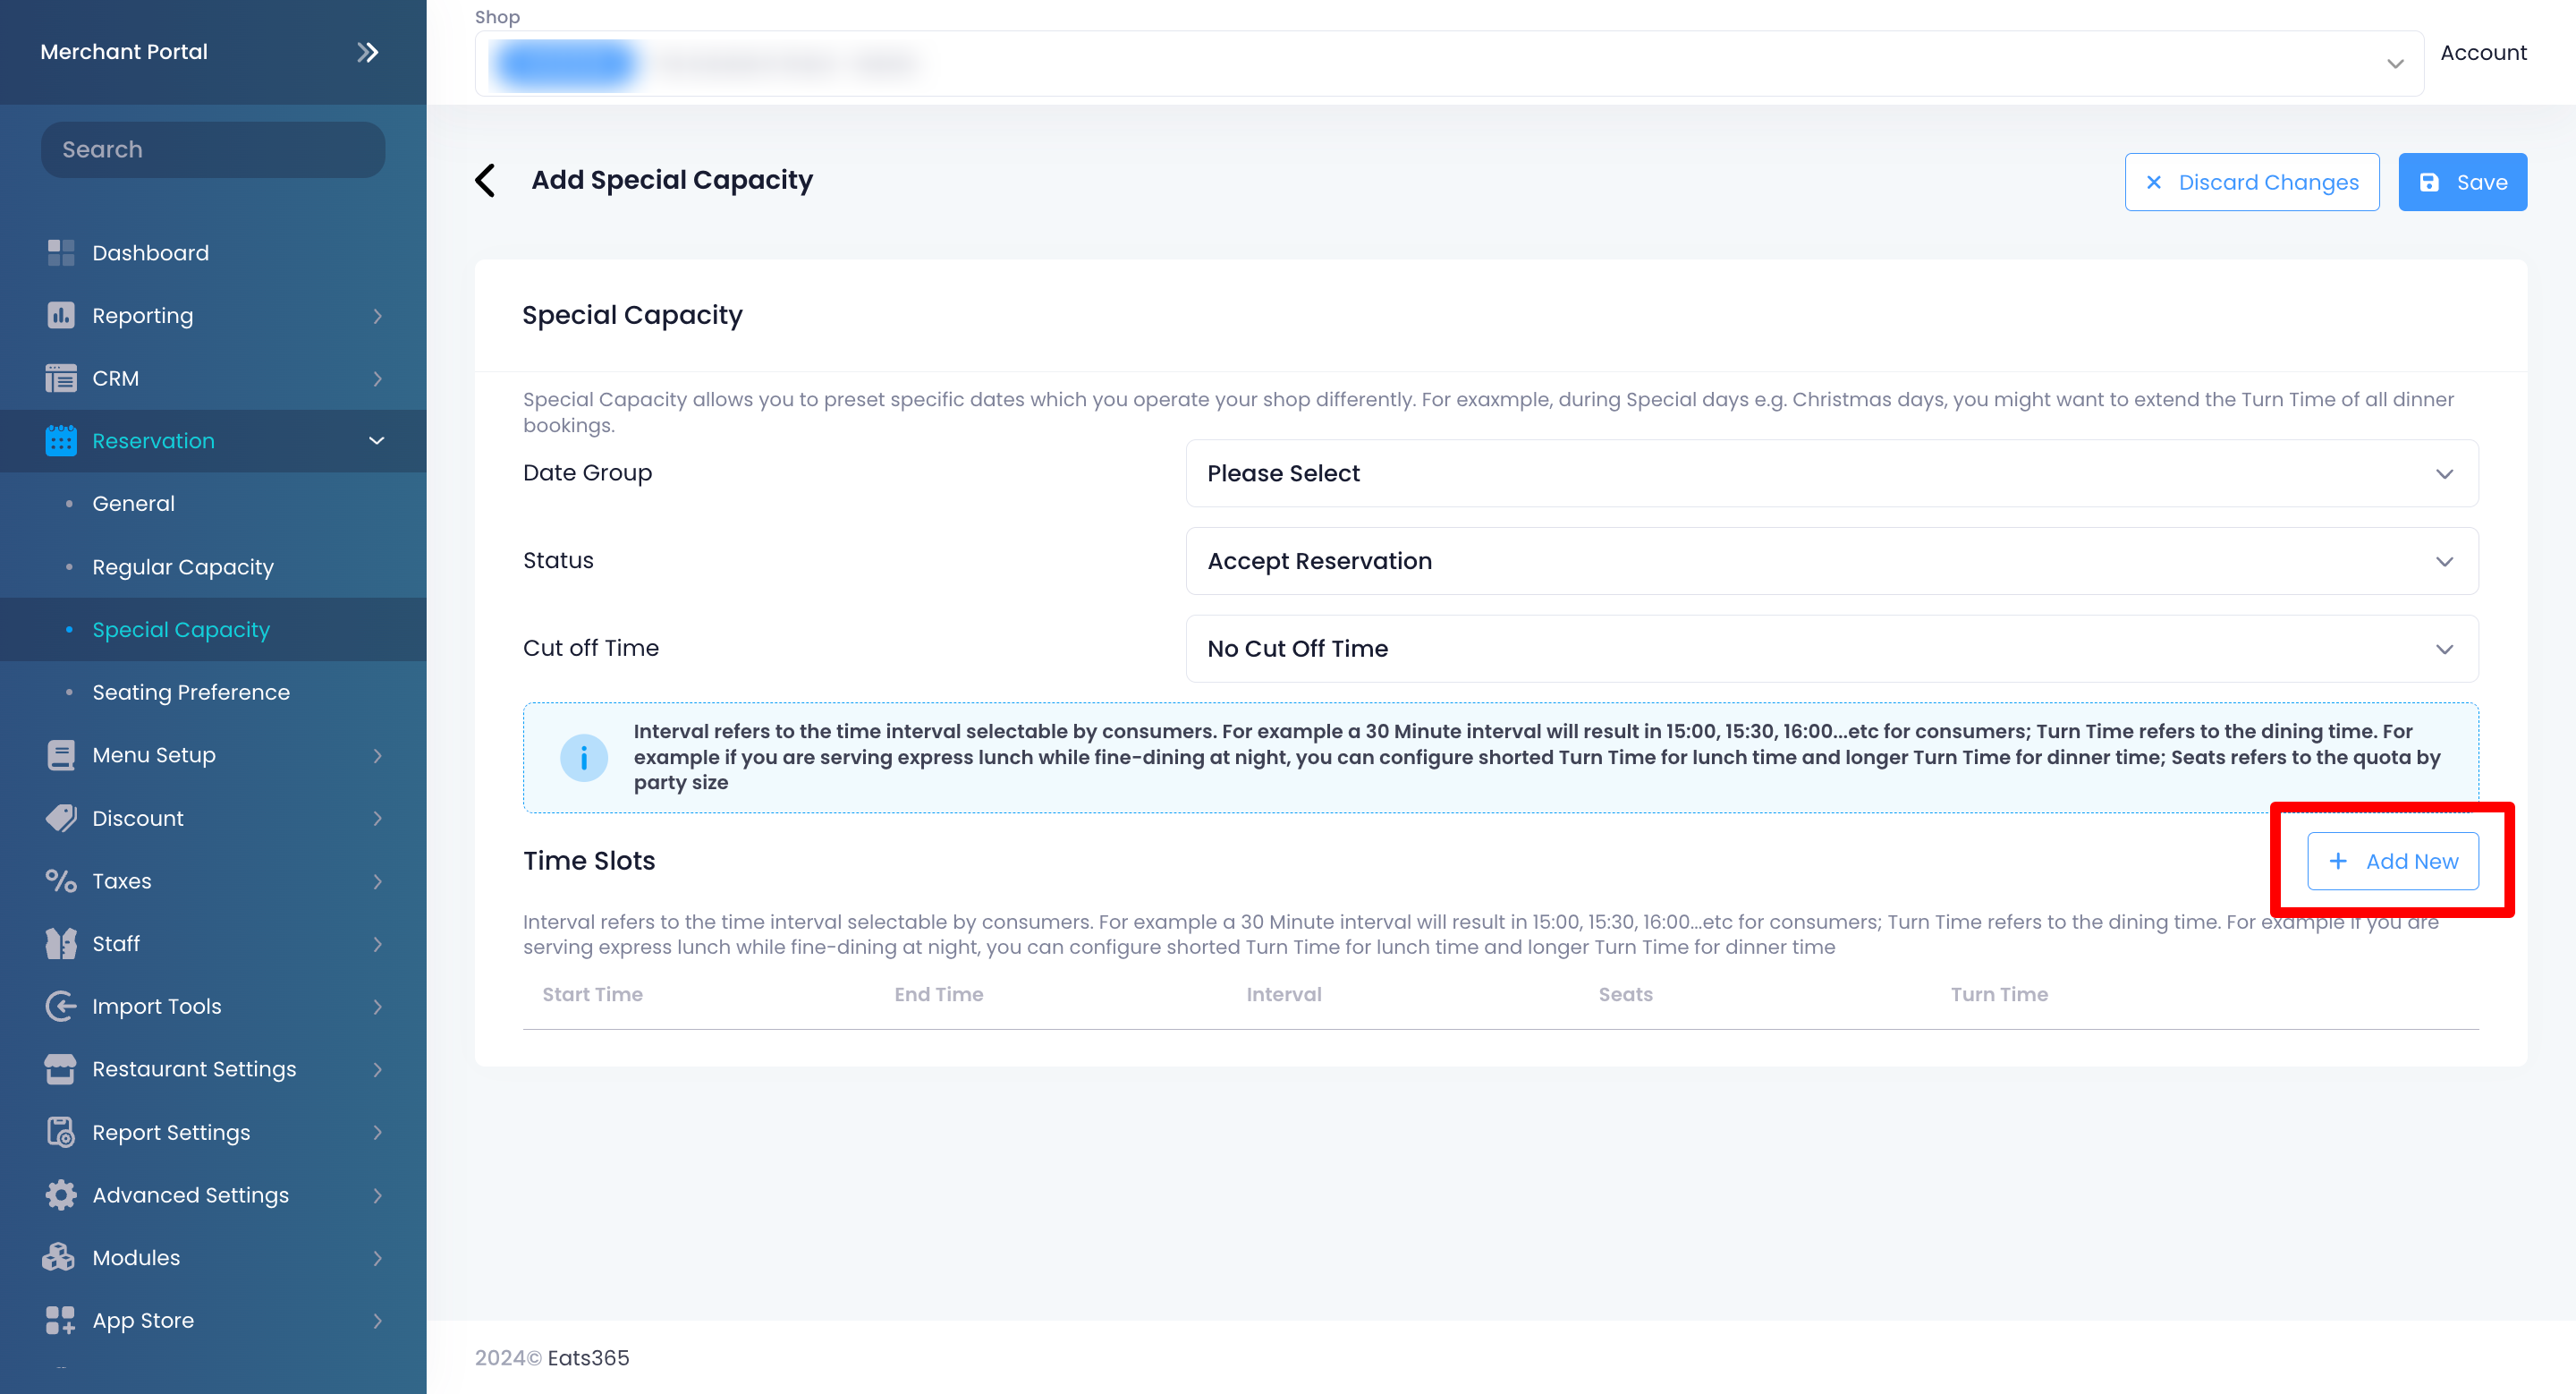
- Enter the Reservation Start Time and End Time. The Reservation Start and End times determines the available window when customers can book a reservation. For example, if you want to accept dinner reservations from 18:00 to 23:00, you can enter 18:00 as the Start Time and 23:00 as the End Time.
- Select the Reservation Interval. The Reservation Interval determines how far apart the Reservation time slots should be. For example, if you choose an interval of 30 minutes for dinner reservations available from 18:00 to 23:00, the reservation time interval in the POS shows up as 18:00, 18:30, 19:00, and so on.
- Enter how many seats are available for reservations.
- Set the Turn Time. The Turn Time determines how long the party can stay in the restaurant.
- (Optional) To configure different settings for another reservation period, click on +Add New. Then, repeat the steps above. For example, you can set up different settings for lunch and dinner reservations.
- At the top right, click on Save to confirm.
Merchant Portal 2.0
- Log in to the Merchant Portal.
- On the left panel, click on Reservation, then click on Special Capacity.

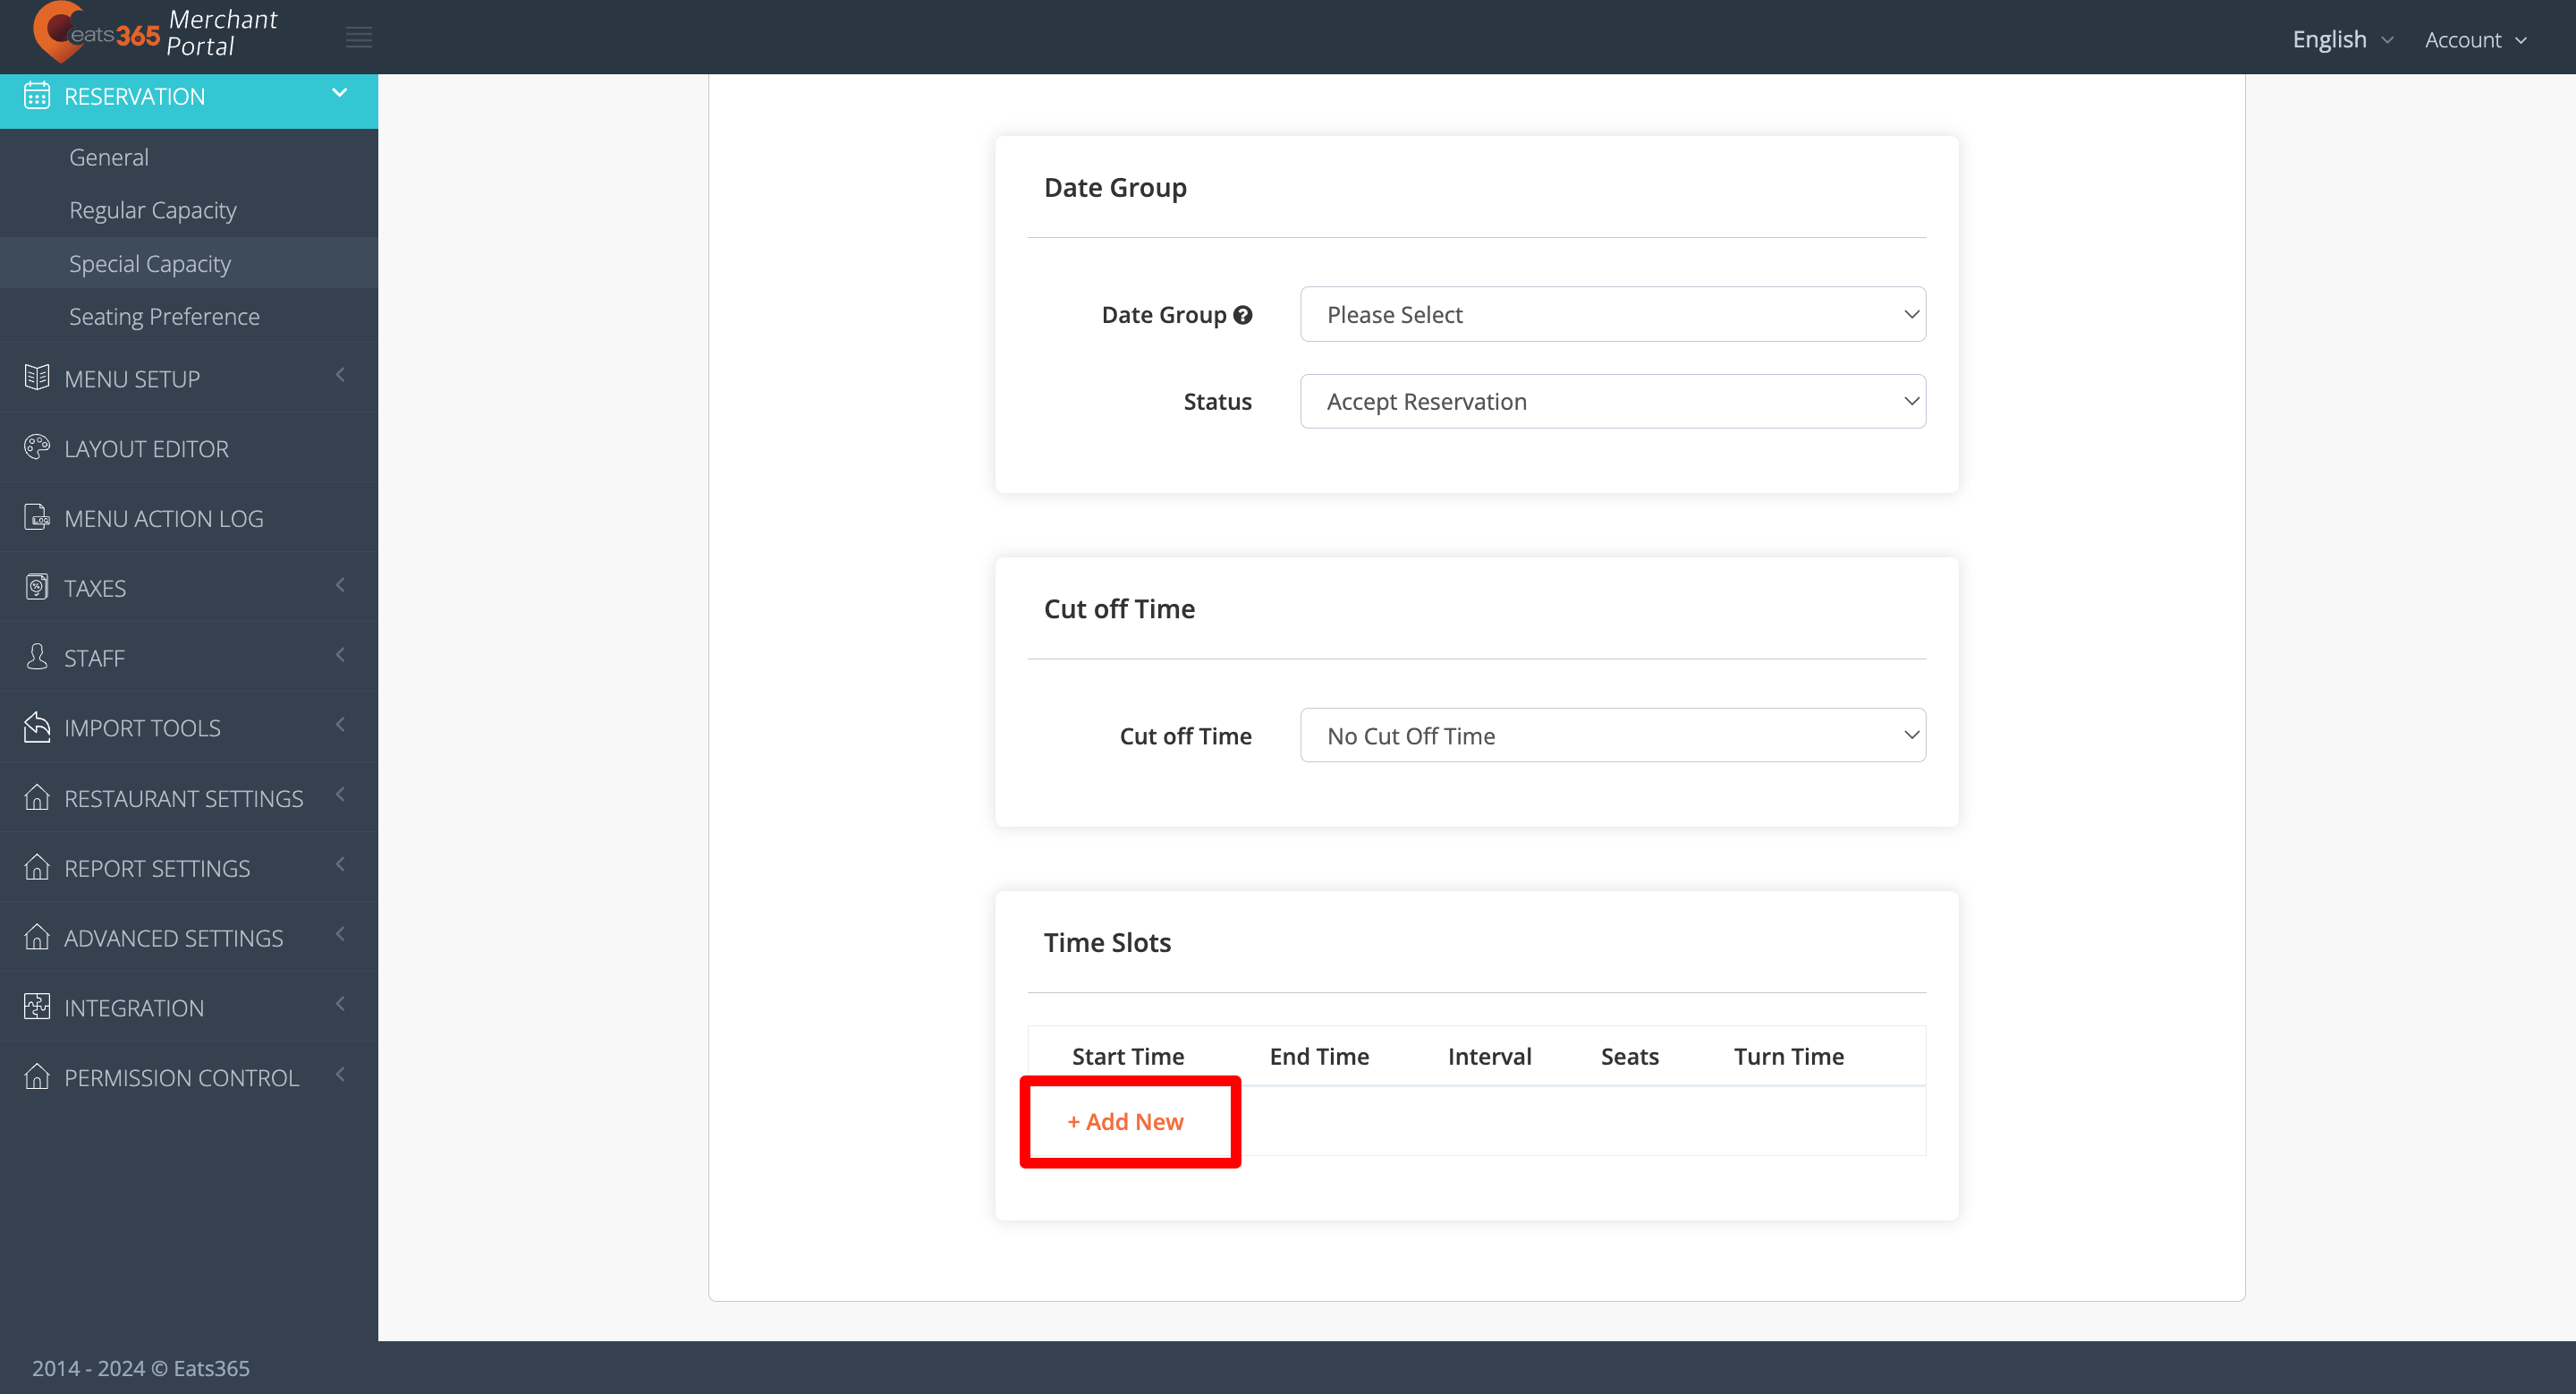
- At the top right, click on +Add New.
- Select the Date Group when you want to accept reservations.
- To accept reservations, select Accept Reservation from the drop-down list.
- Set a cut-off time for reservations. The cut-off time determines the time until when can customers book a reservation. For example, if you set the cut-off time to 14:00, customers must place their reservations between the opening hour and 14:00. Customers can no longer book a reservation after 14:00.
- Enter the Reservation Start Time and End Time. The Reservation Start and End times determines the available window when customers can book a reservation. For example, if you want to accept dinner reservations from 18:00 to 23:00, you can enter 18:00 as the Start Time and 23:00 as the End Time.
- Select the Reservation Interval. The Reservation Interval determines how far apart the Reservation time slots should be. For example, if you choose an interval of 30 minutes for dinner reservations available from 18:00 to 23:00, the reservation time interval in the POS shows up as 18:00, 18:30, 19:00, and so on.
- Enter how many seats are available for reservations.
- Set the Turn Time. The Turn Time determines how long the party can stay in the restaurant.
- (Optional) To configure different settings for another reservation period, click on +Add New. Then, repeat the steps above. For example, you can set up different settings for lunch and dinner reservations.
- At the top right, click on Save to confirm.
Add Seating Preference
The Seating Preference setting allows you to add seating options for customers. When you add a seating option, customers can choose where they want to sit based on the options available.
To add a seating option, follow the steps below:
Merchant Portal (Classic Theme)
- Log in to the Merchant Portal.
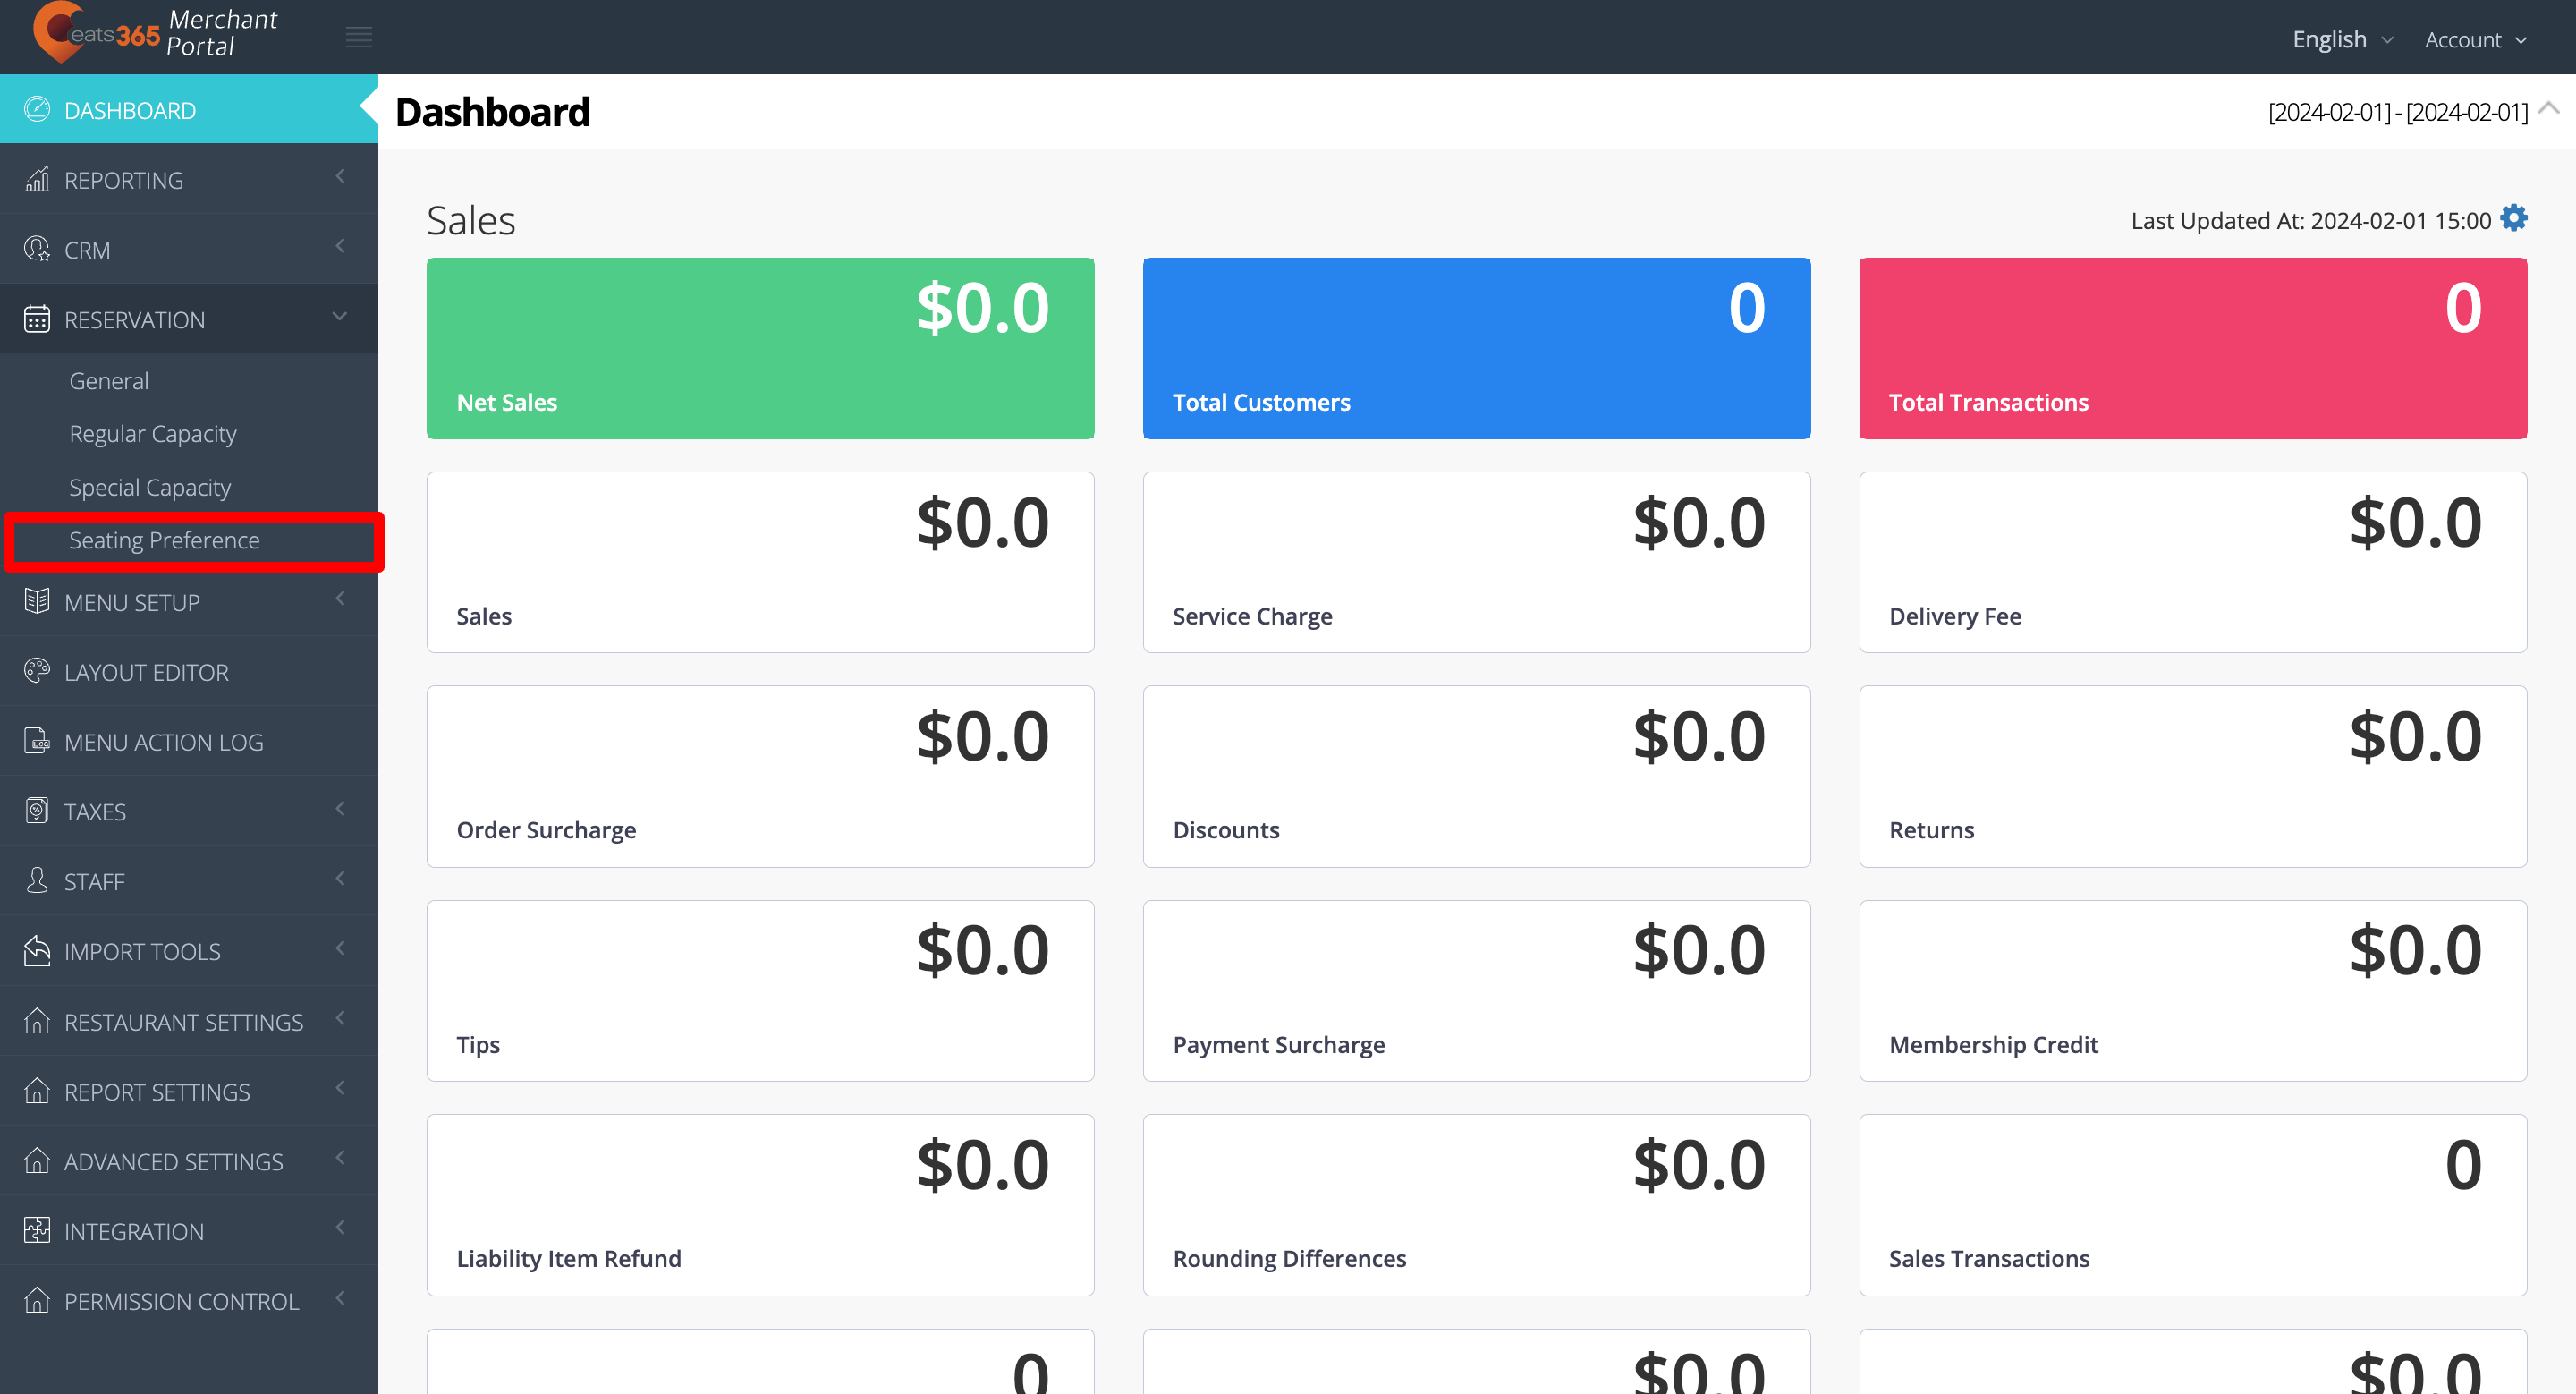
- On the left panel, click on Reservation, then click on Seating Preference.
- Click on +Add New. Then, add the Seating Preference Name.
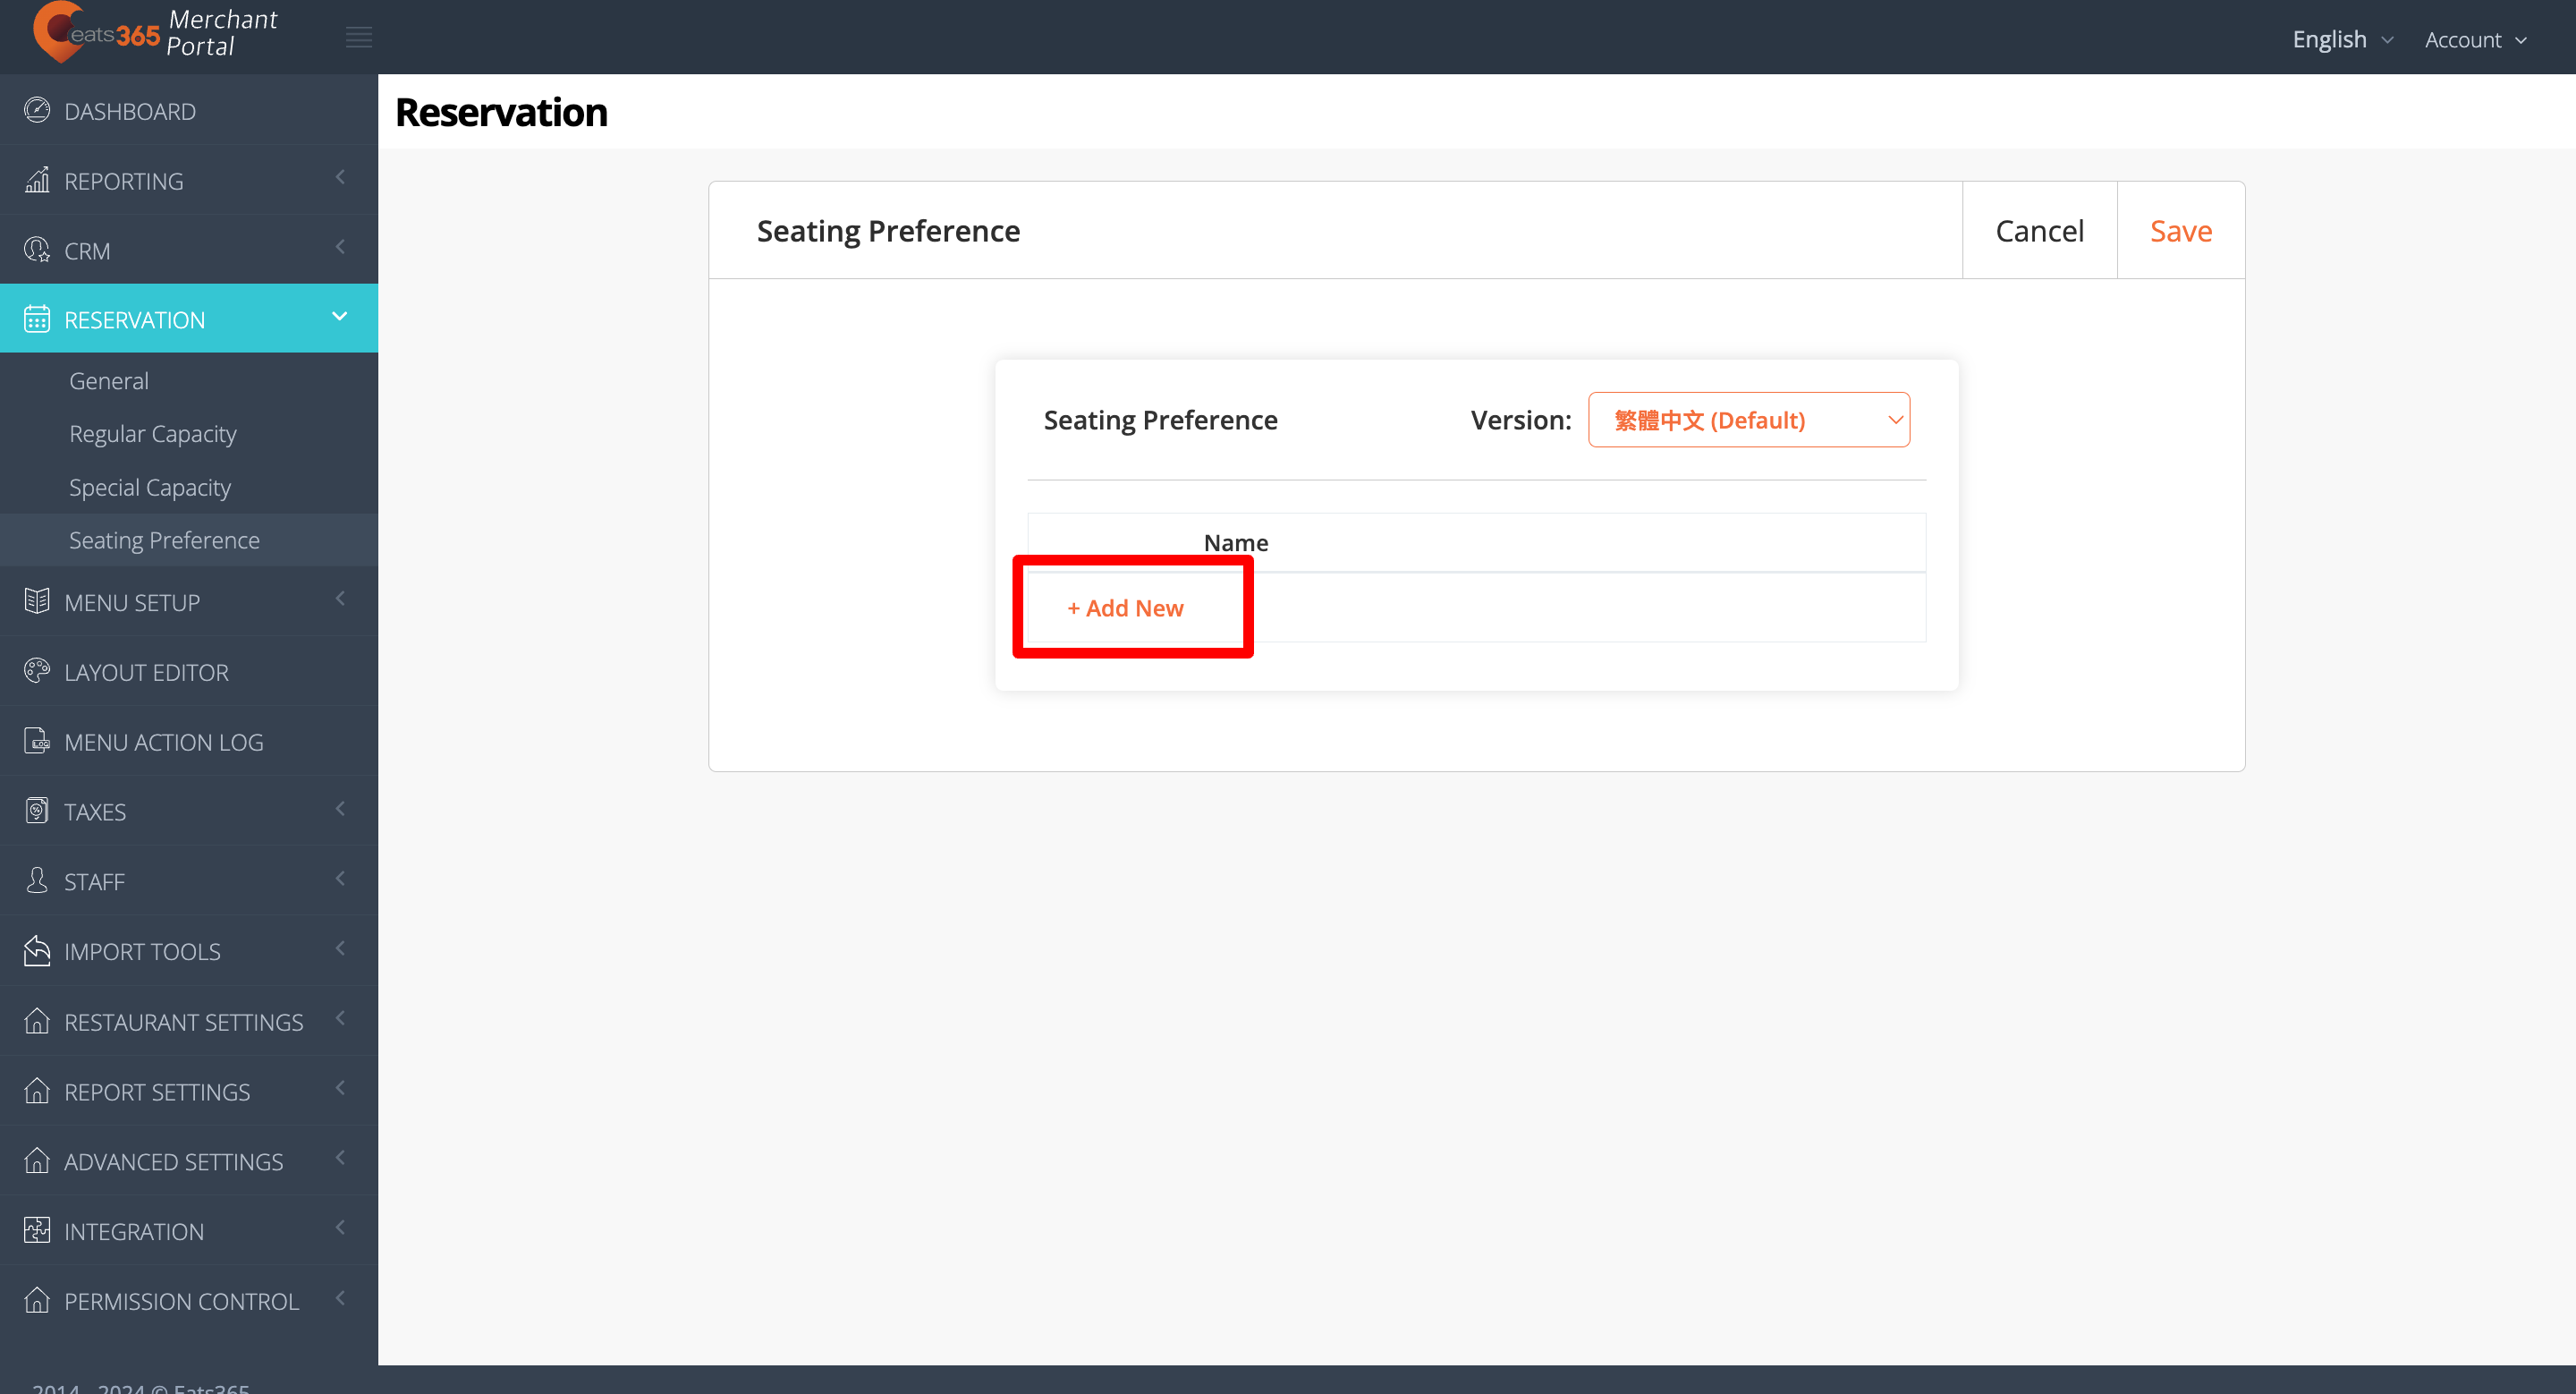
- At the top right, click on Save to confirm.
Merchant Portal 2.0
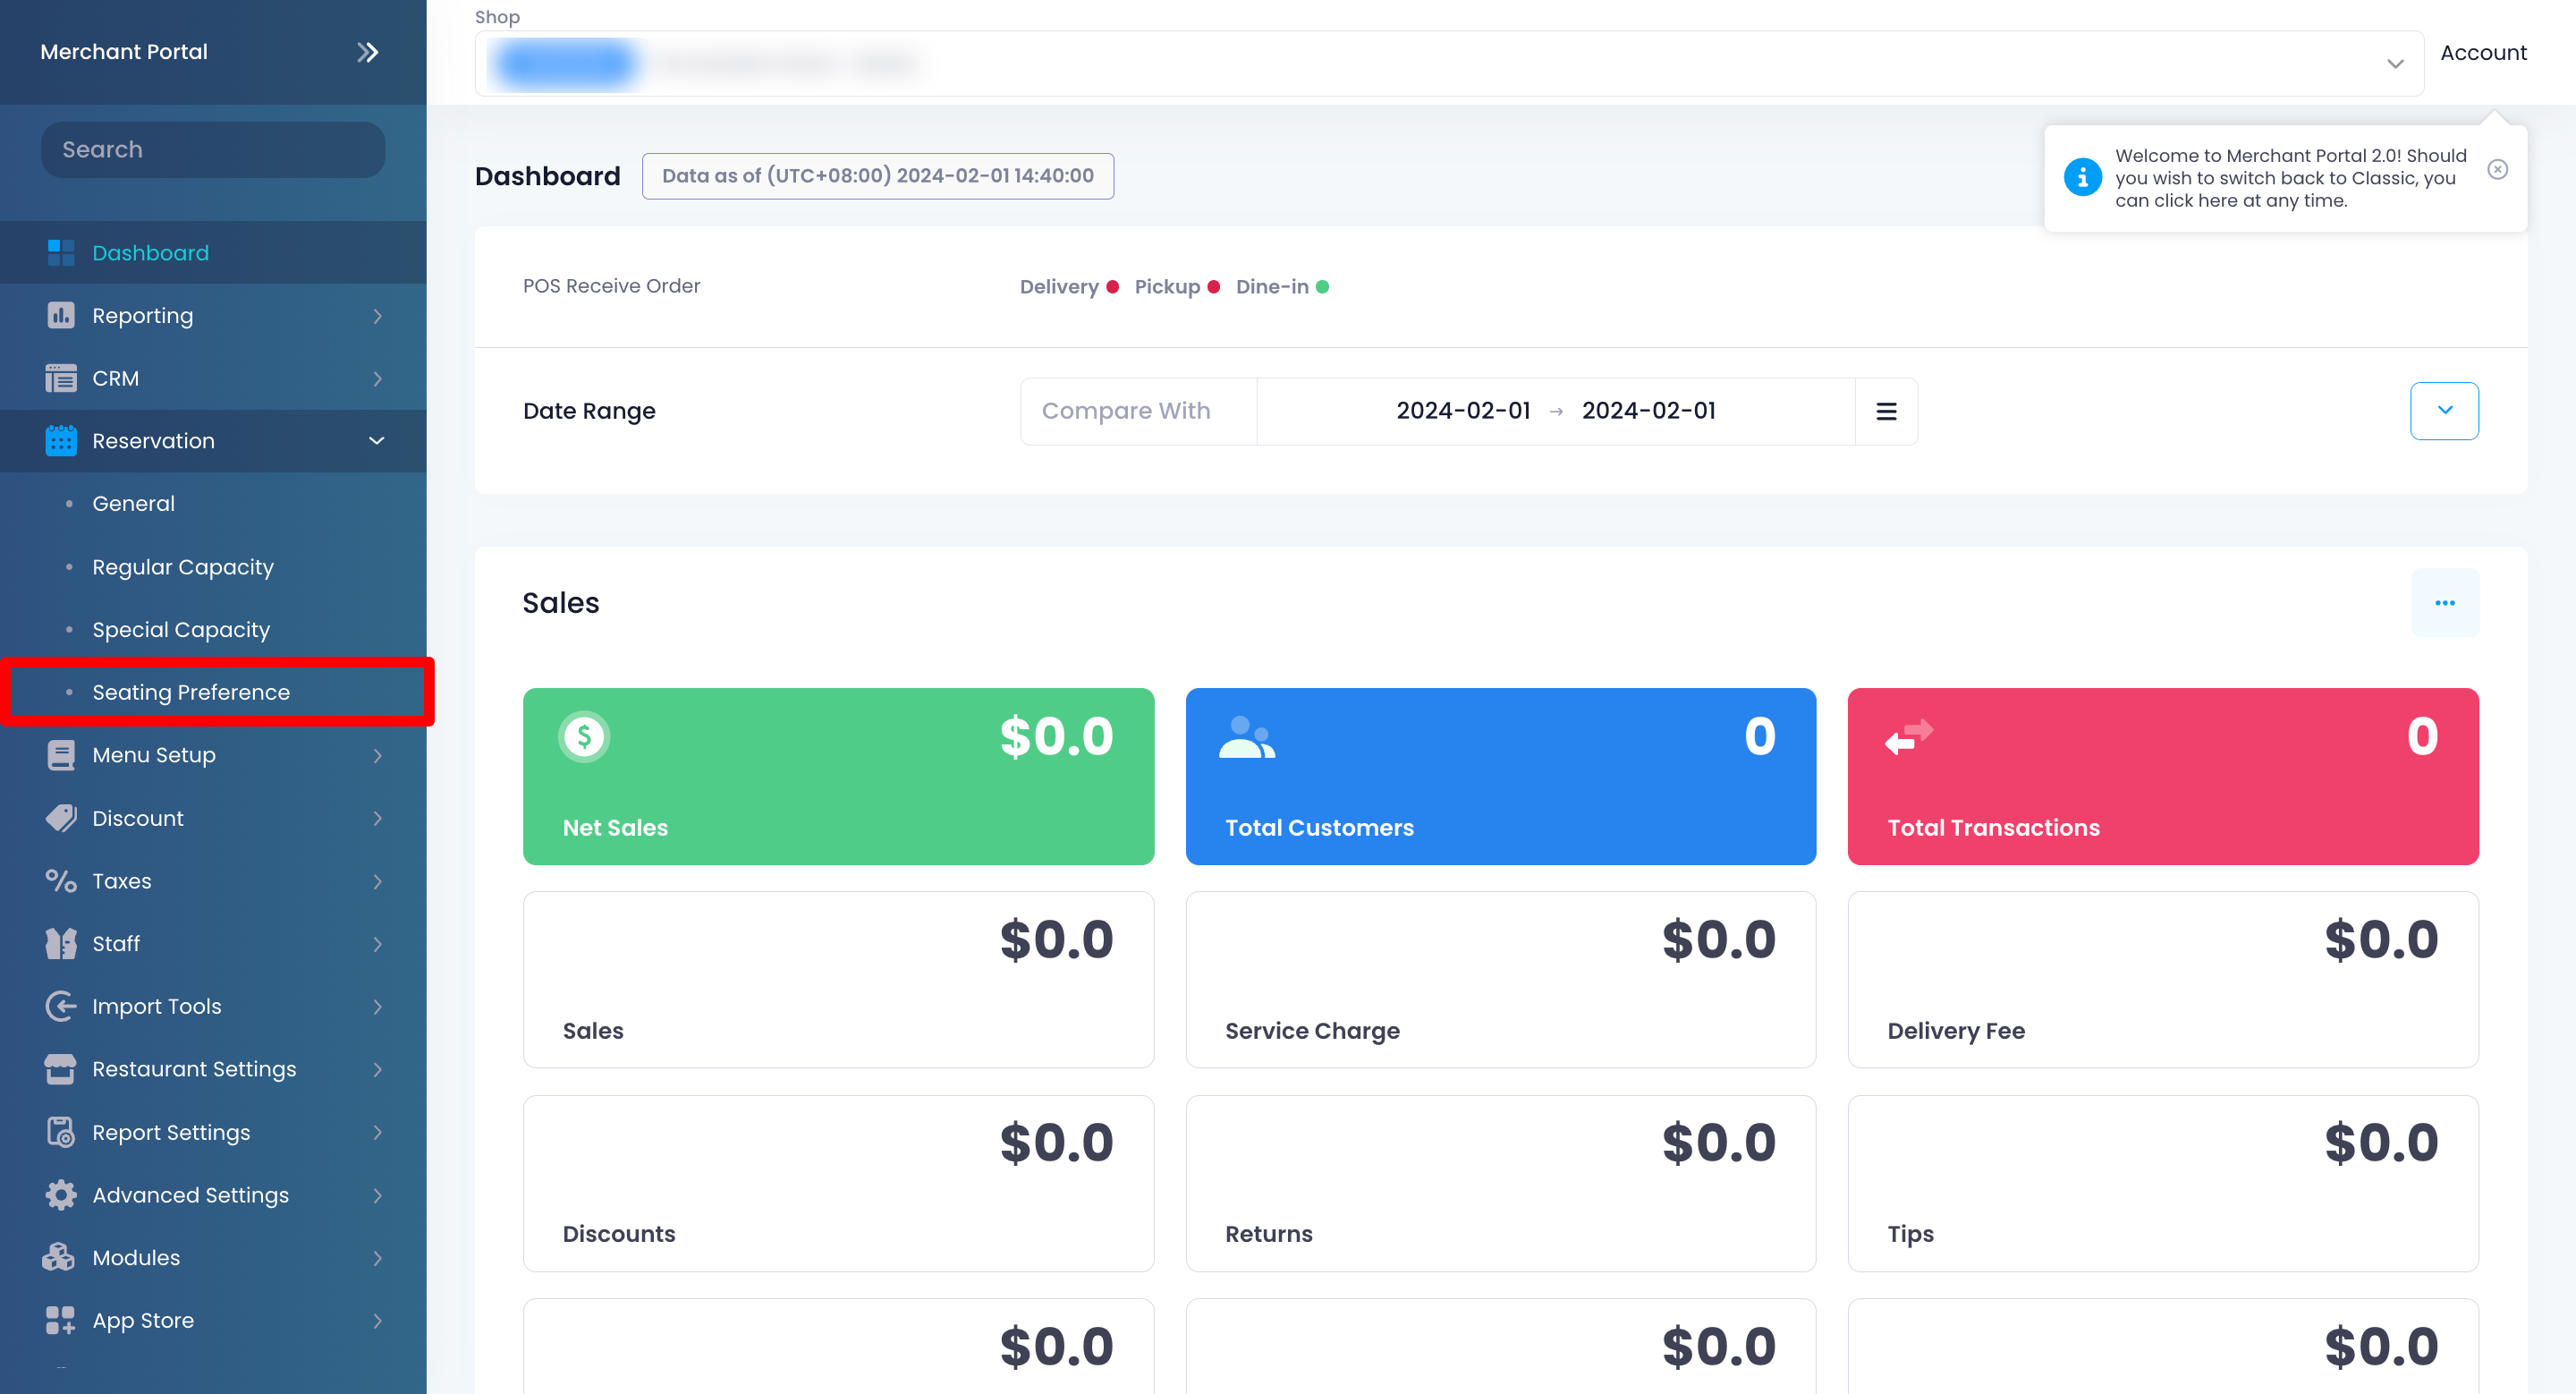
- Log in to the Merchant Portal.
- On the left panel, click on Reservation, then click on Seating Preference.
- Click on +Add New. Then, add the Seating Preference Name.
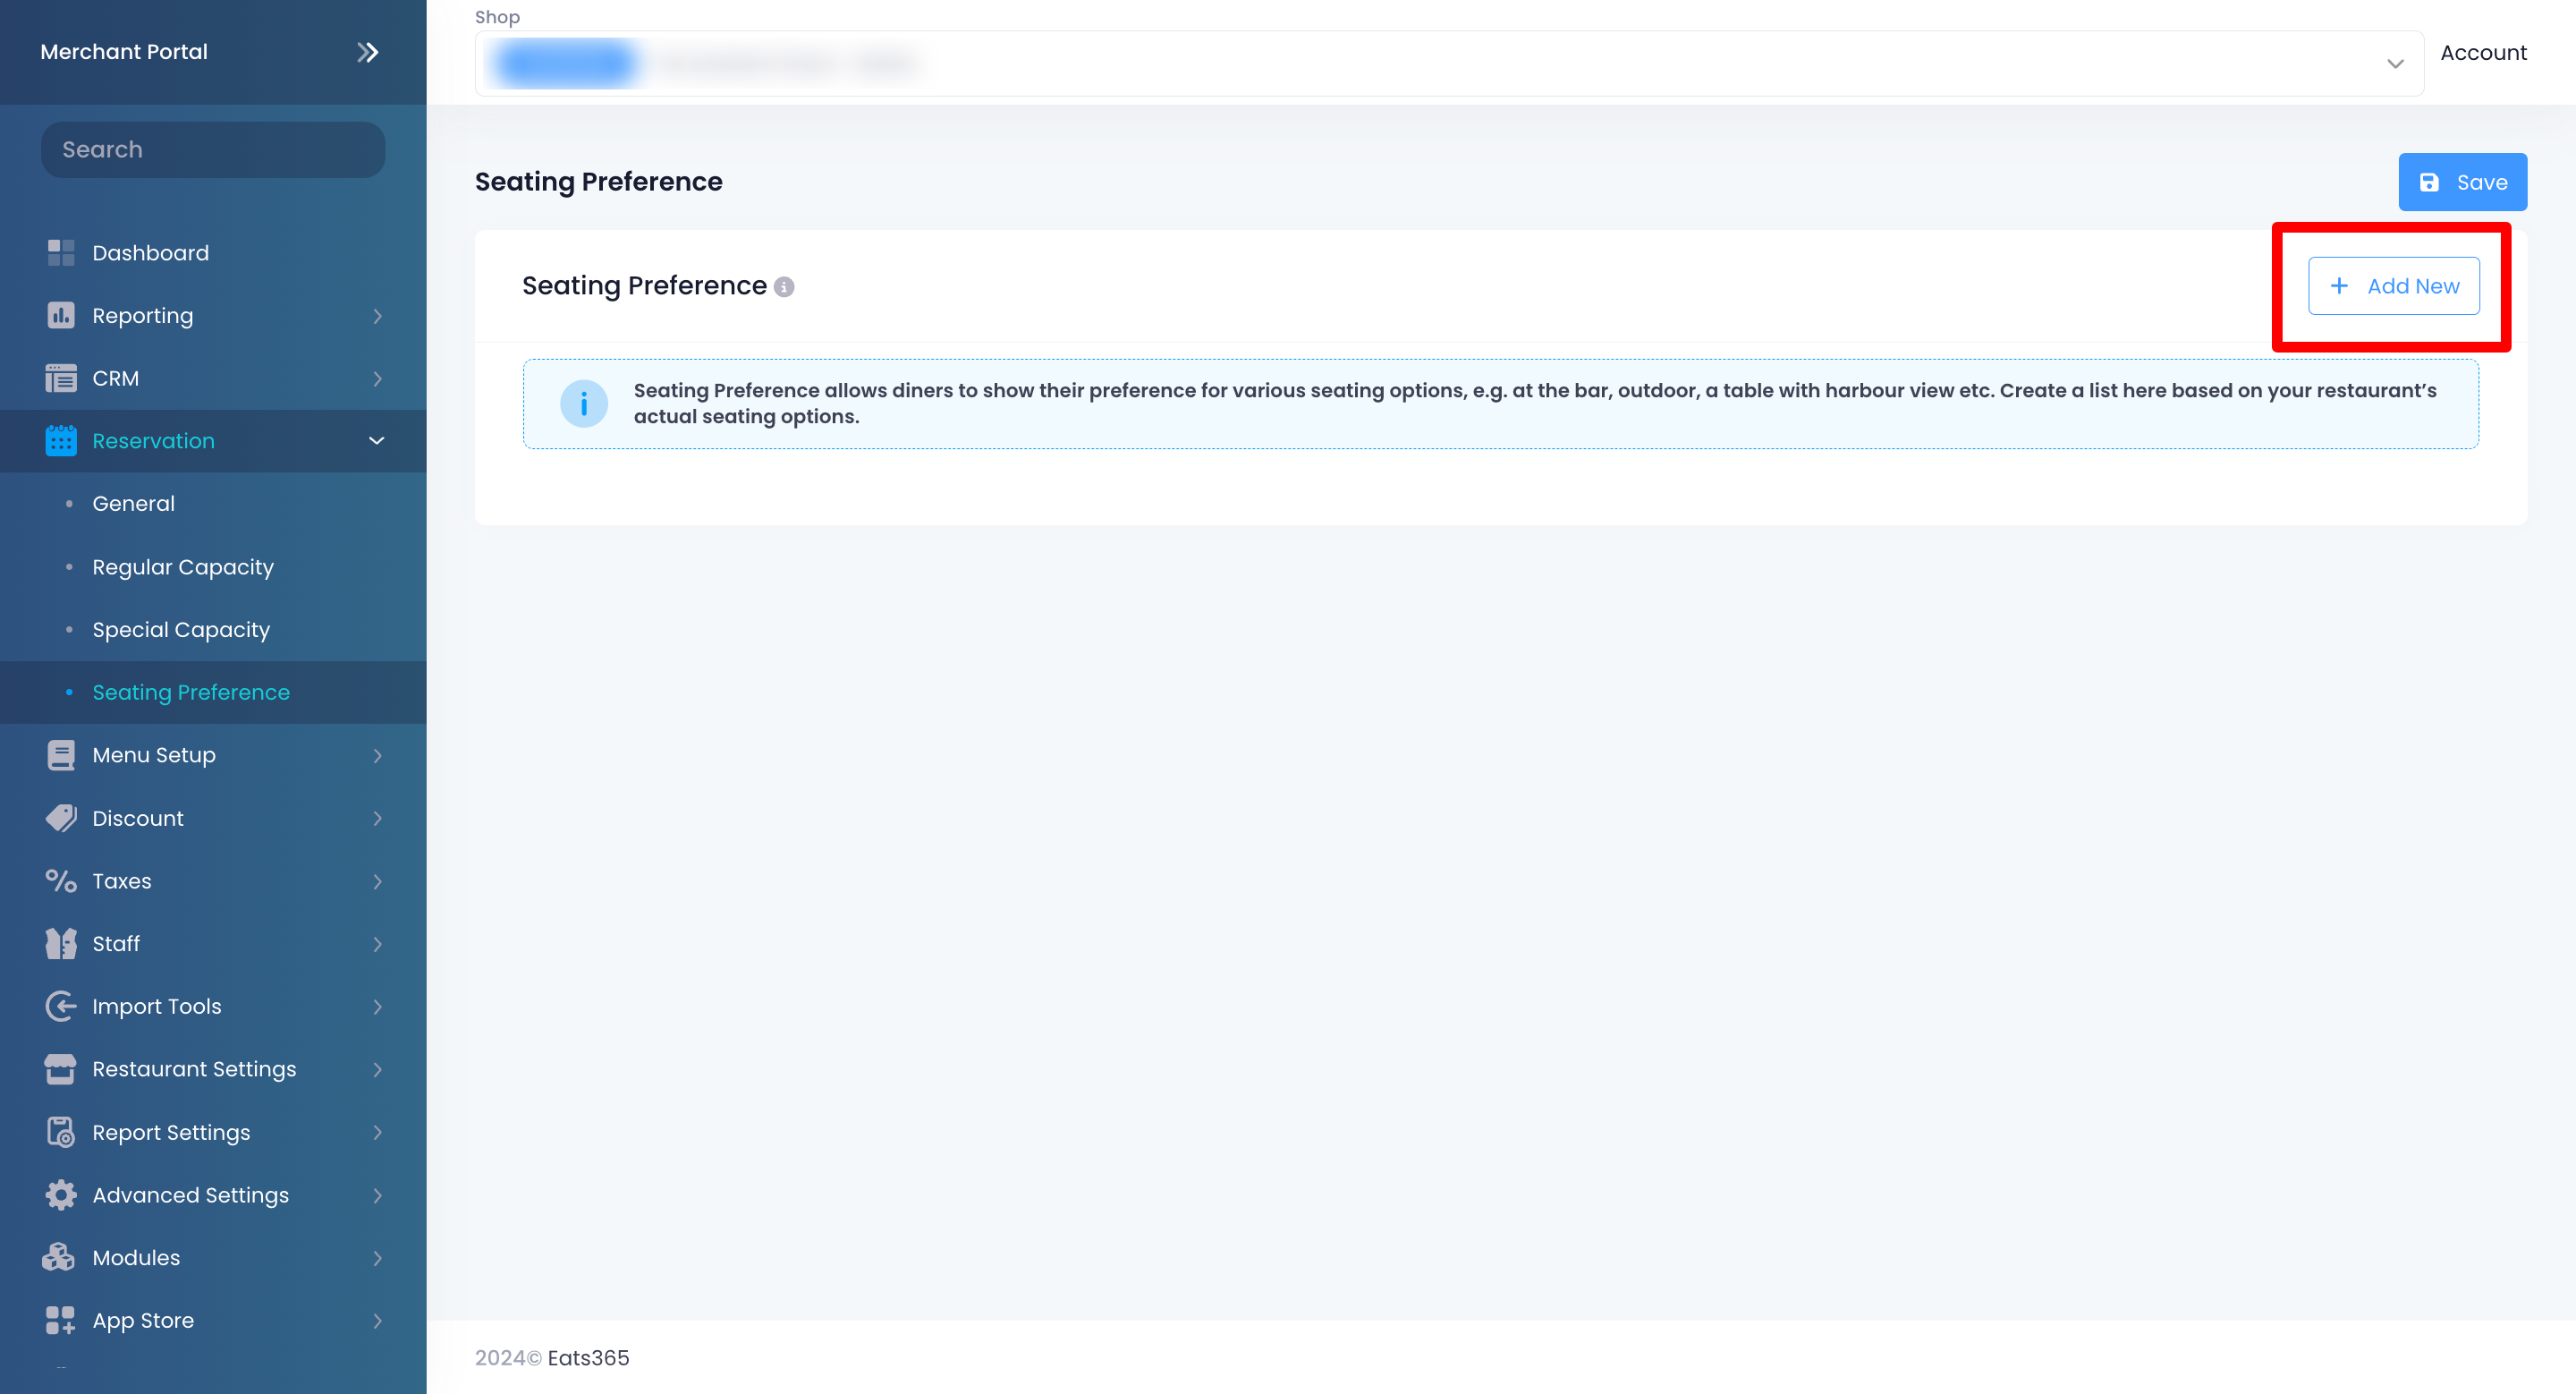
- At the top right, click on Save to confirm.
Set up Online Reservation
The Online Reservation function allows customers to make a reservation at your restaurant using your restaurant’s Branded Online Store. The settings you configured for the POS reservation function are automatically applied to Online Reservation.
When making an online reservation, customers are required to log in to your restaurant’s website. After making a successful online reservation, they’ll be directed to a confirmation page and an email confirmation will be sent to their registered email address containing the reservation information.
To enable Online Reservation for your restaurant, follow the steps below:
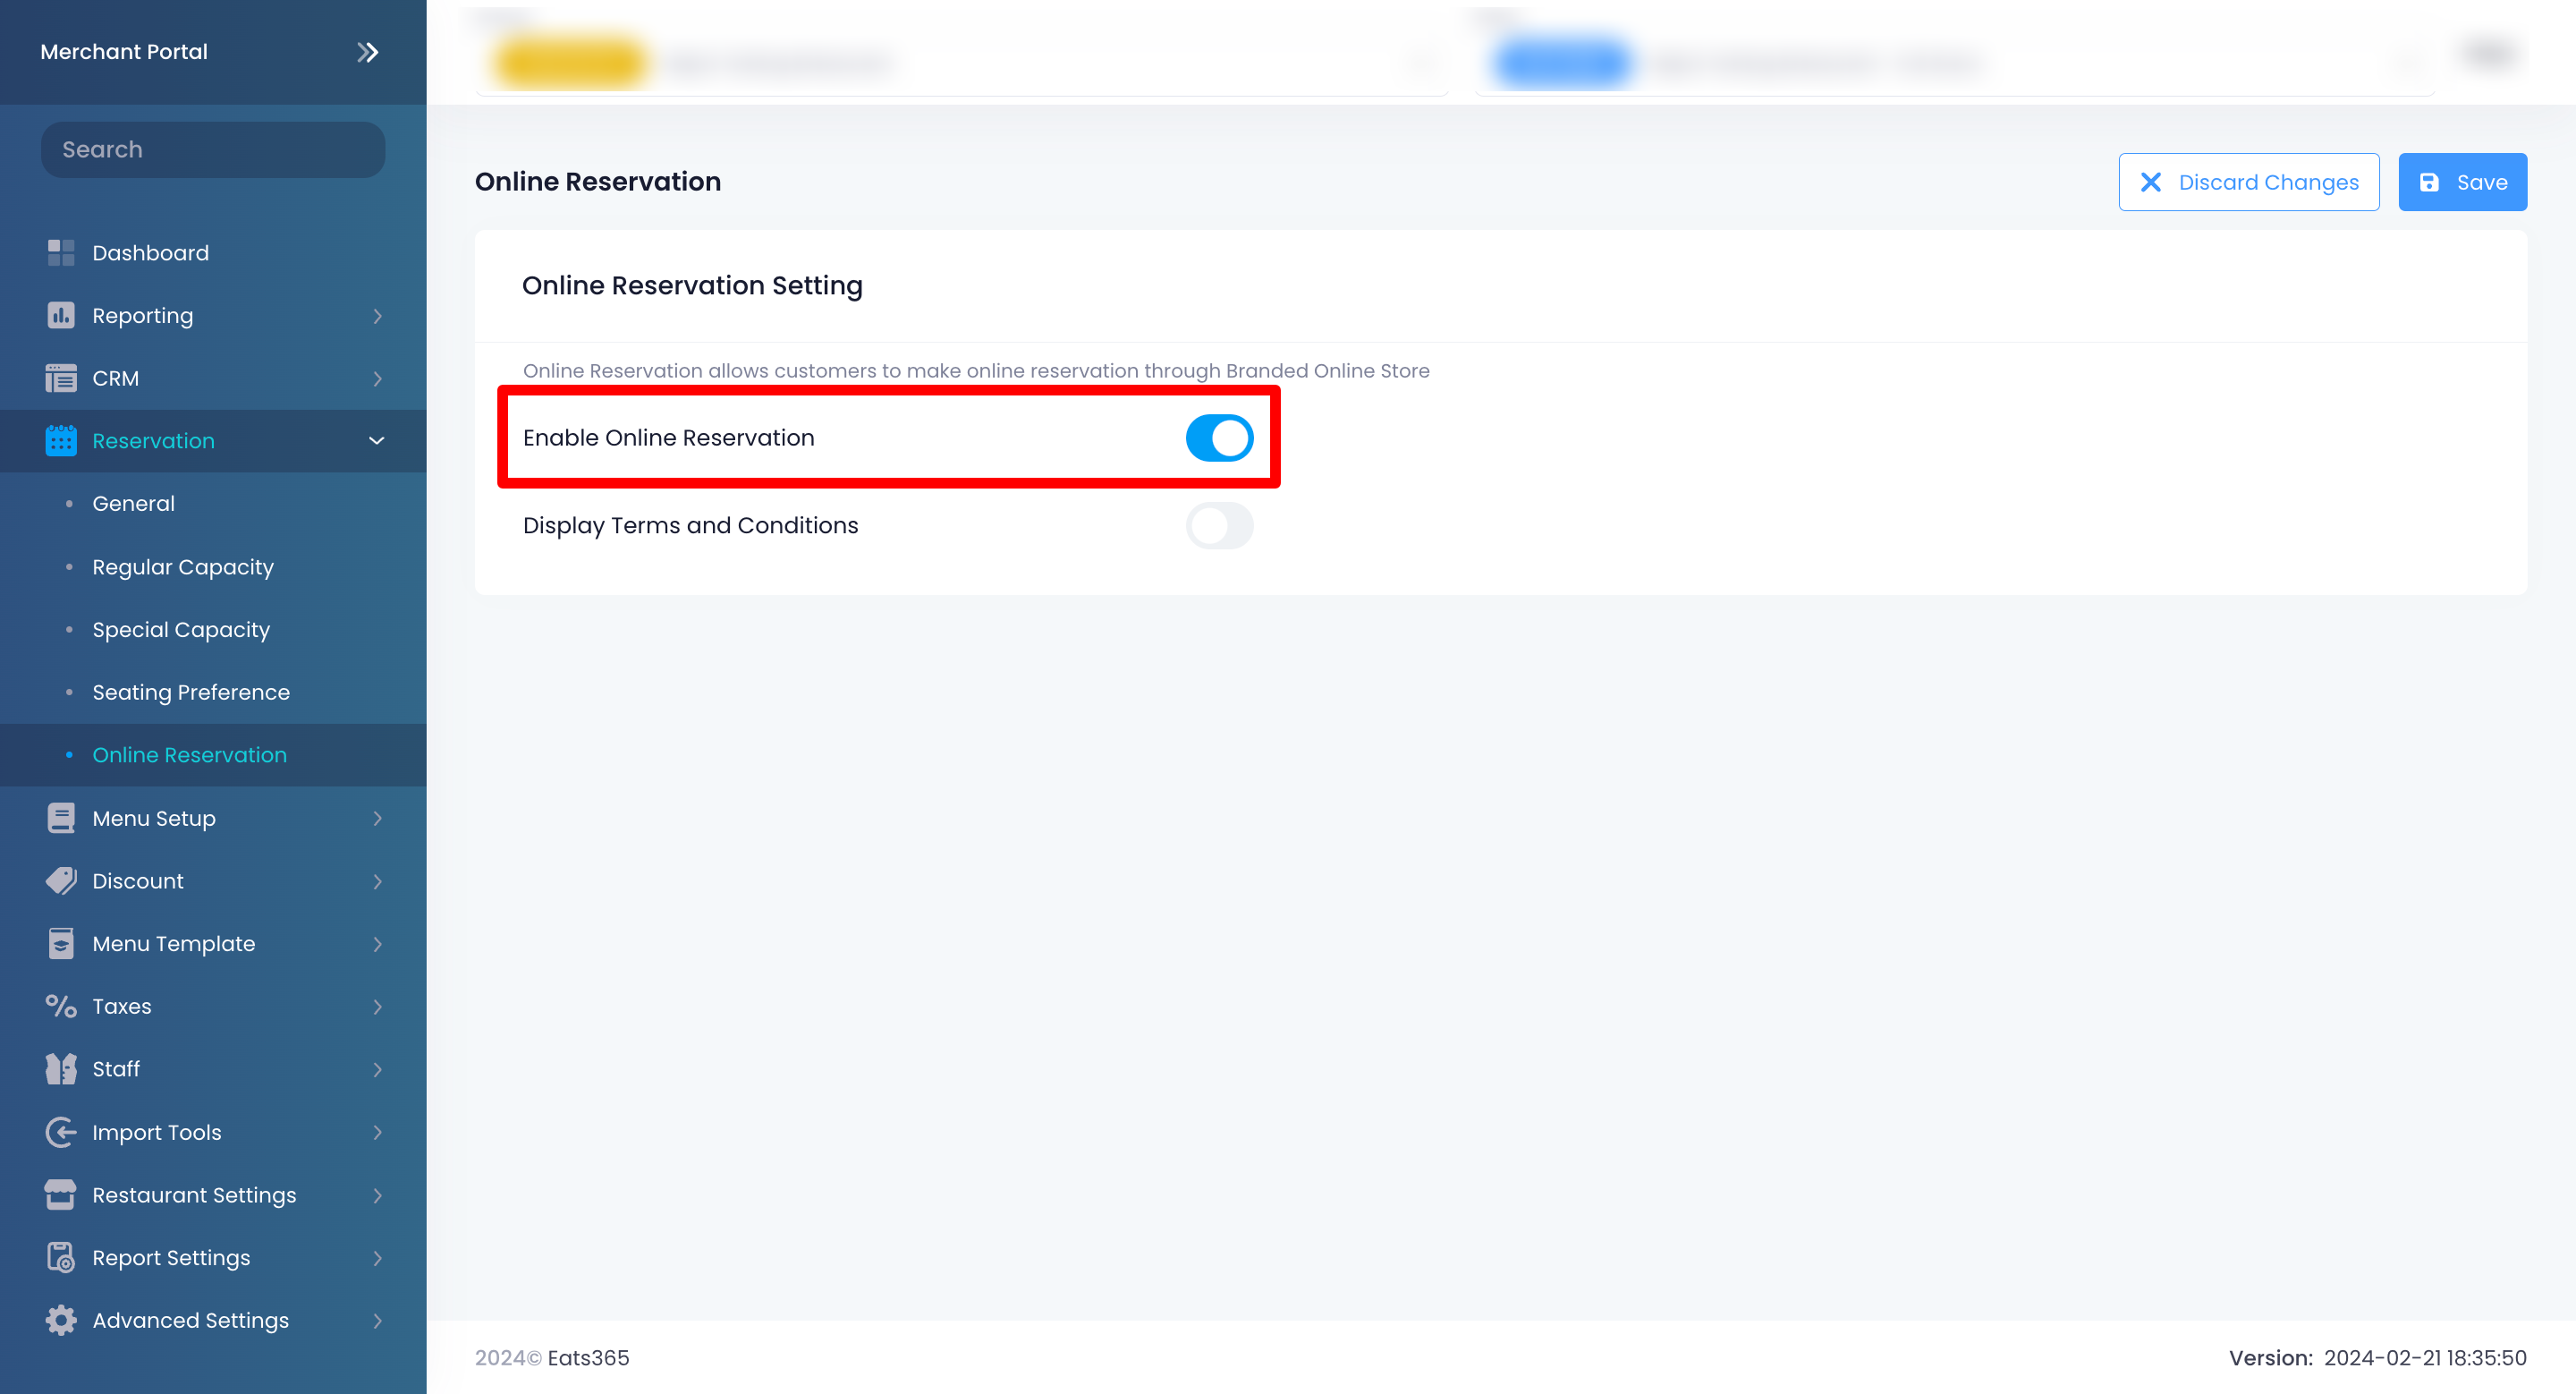
- Log in to the Merchant Portal.
- On the left panel, click on Reservation, then click on Online Reservation.
- Toggle Enable Online Reservation on.
- To display the reservation terms and conditions on your Branded Web’s reservation page, turn on Display Terms and Conditions .
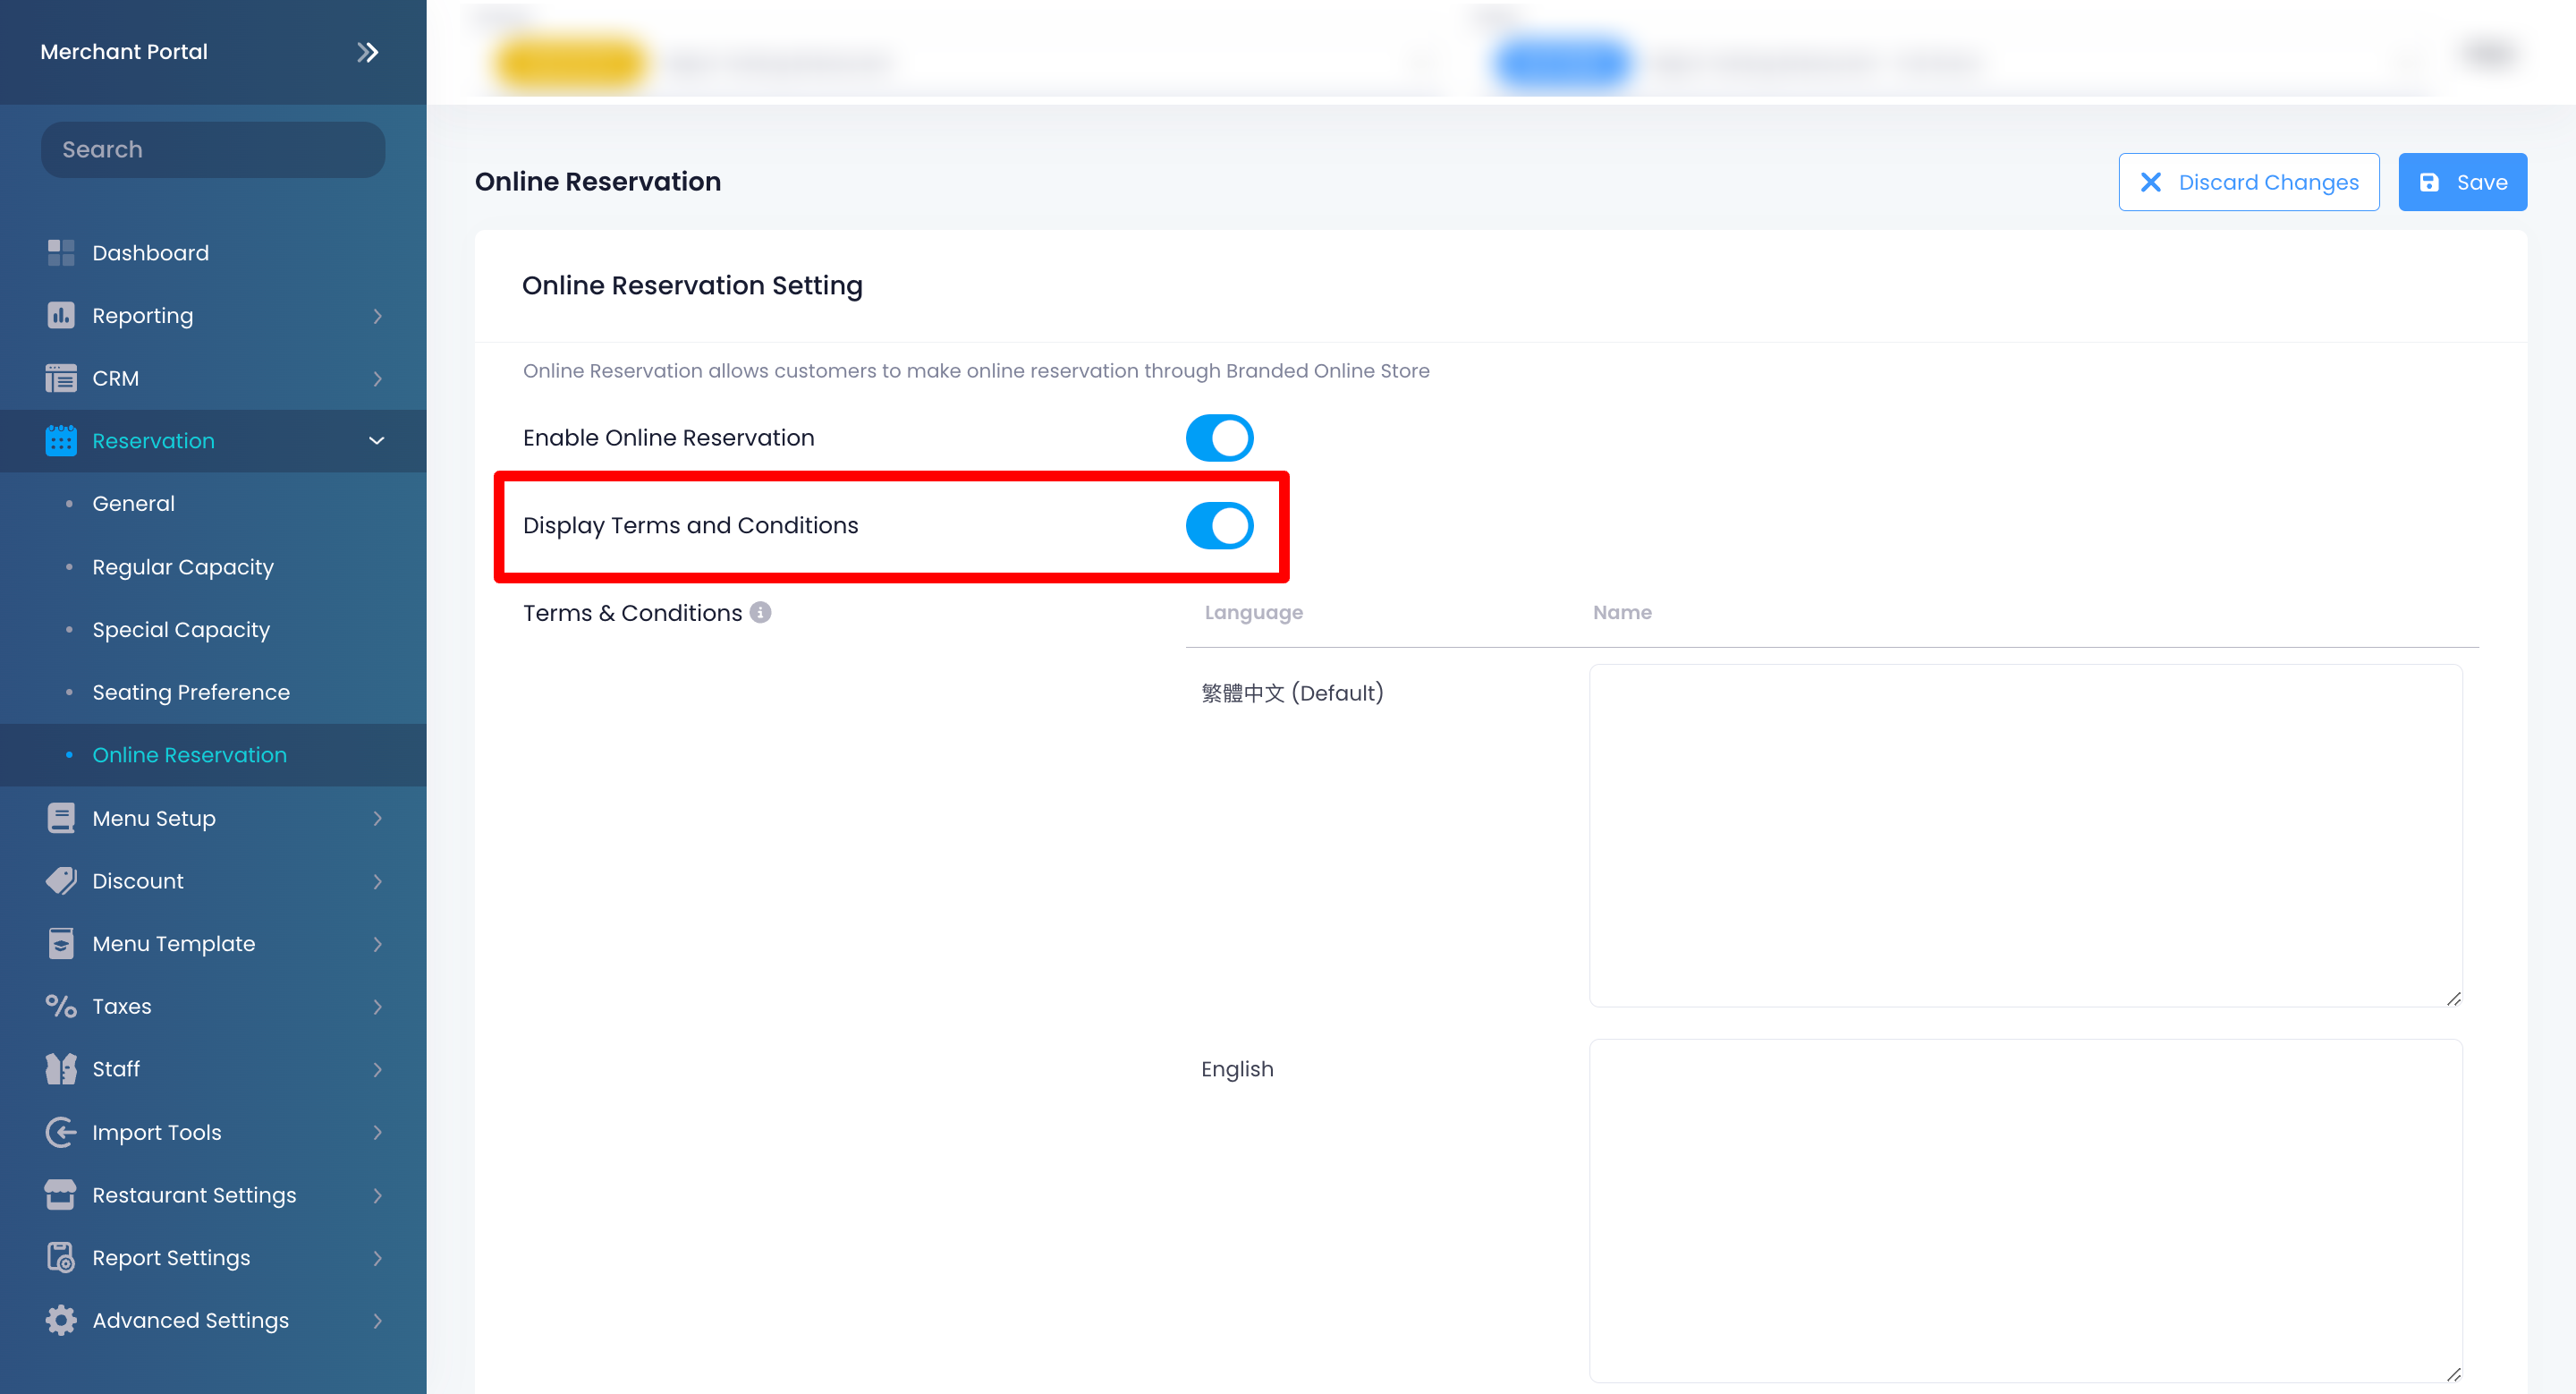
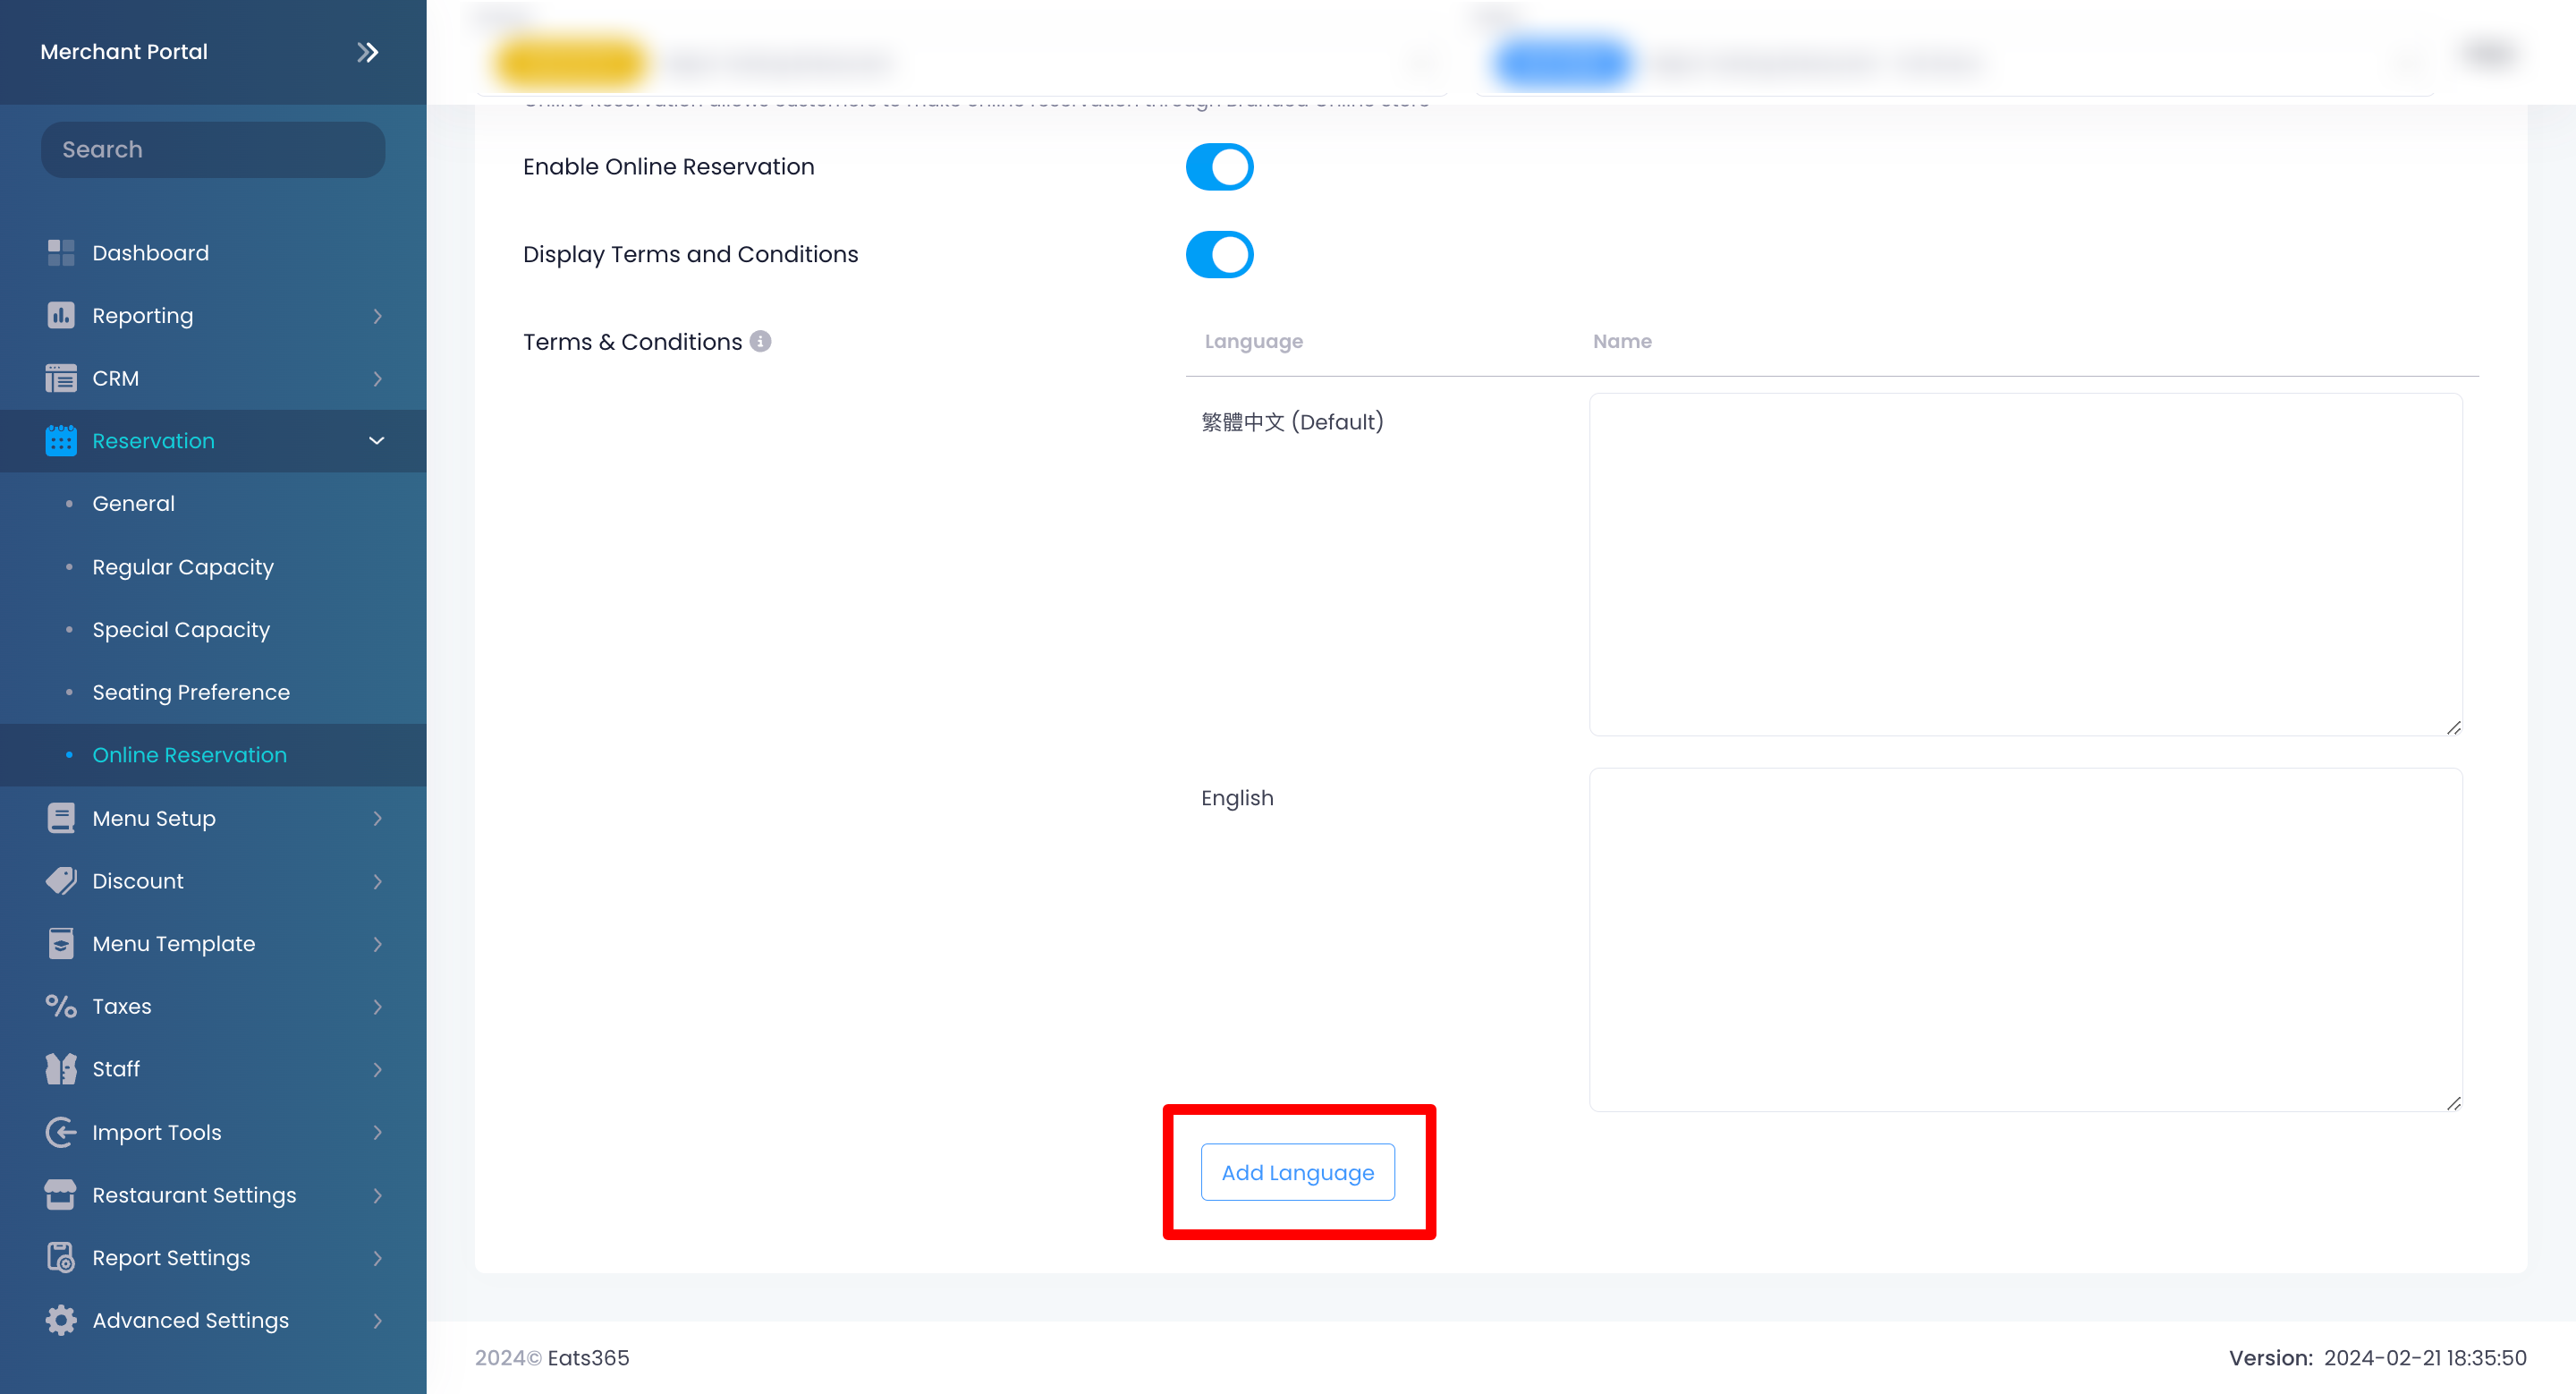
- Under "Terms & Conditions," enter the terms and conditions per language. To add more languages, click on Add Language.
- At the top right, click on Save to confirm.