Set up and Installation
Table of Contents
Hardware Setup
Learn how to prepare the hardware you’ll need for your restaurant to use Eats365 POS.
To prepare your restaurant for using Eats365 Core and Expansion Modules, it is important to have the correct hardware setup to ensure efficient communication across all connected devices. There are a number of configuration options that you can use depending on your restaurant’s scale and needs. This article will guide you through the basic hardware, covering networking and cross-device connectivity.
What you need to get started
- A stable internet connection with at least 10 Mbps download and 5 Mbps upload speeds
- A modem
- A router
- Network cables to connect your devices to the same network
- A compatible iPad unit secured to an iPad stand
- iPad Ethernet adapter (for wired connection)
Note: You can choose to use Wi-Fi and connect the iPad to the router wirelessly, however, it’s recommended to use an iPad Ethernet adapter to ensure that the POS terminal gets consistent connection to the router. - Compatible printers that can print Receipts and Kitchen Tickets
- A cash drawer and its included cables
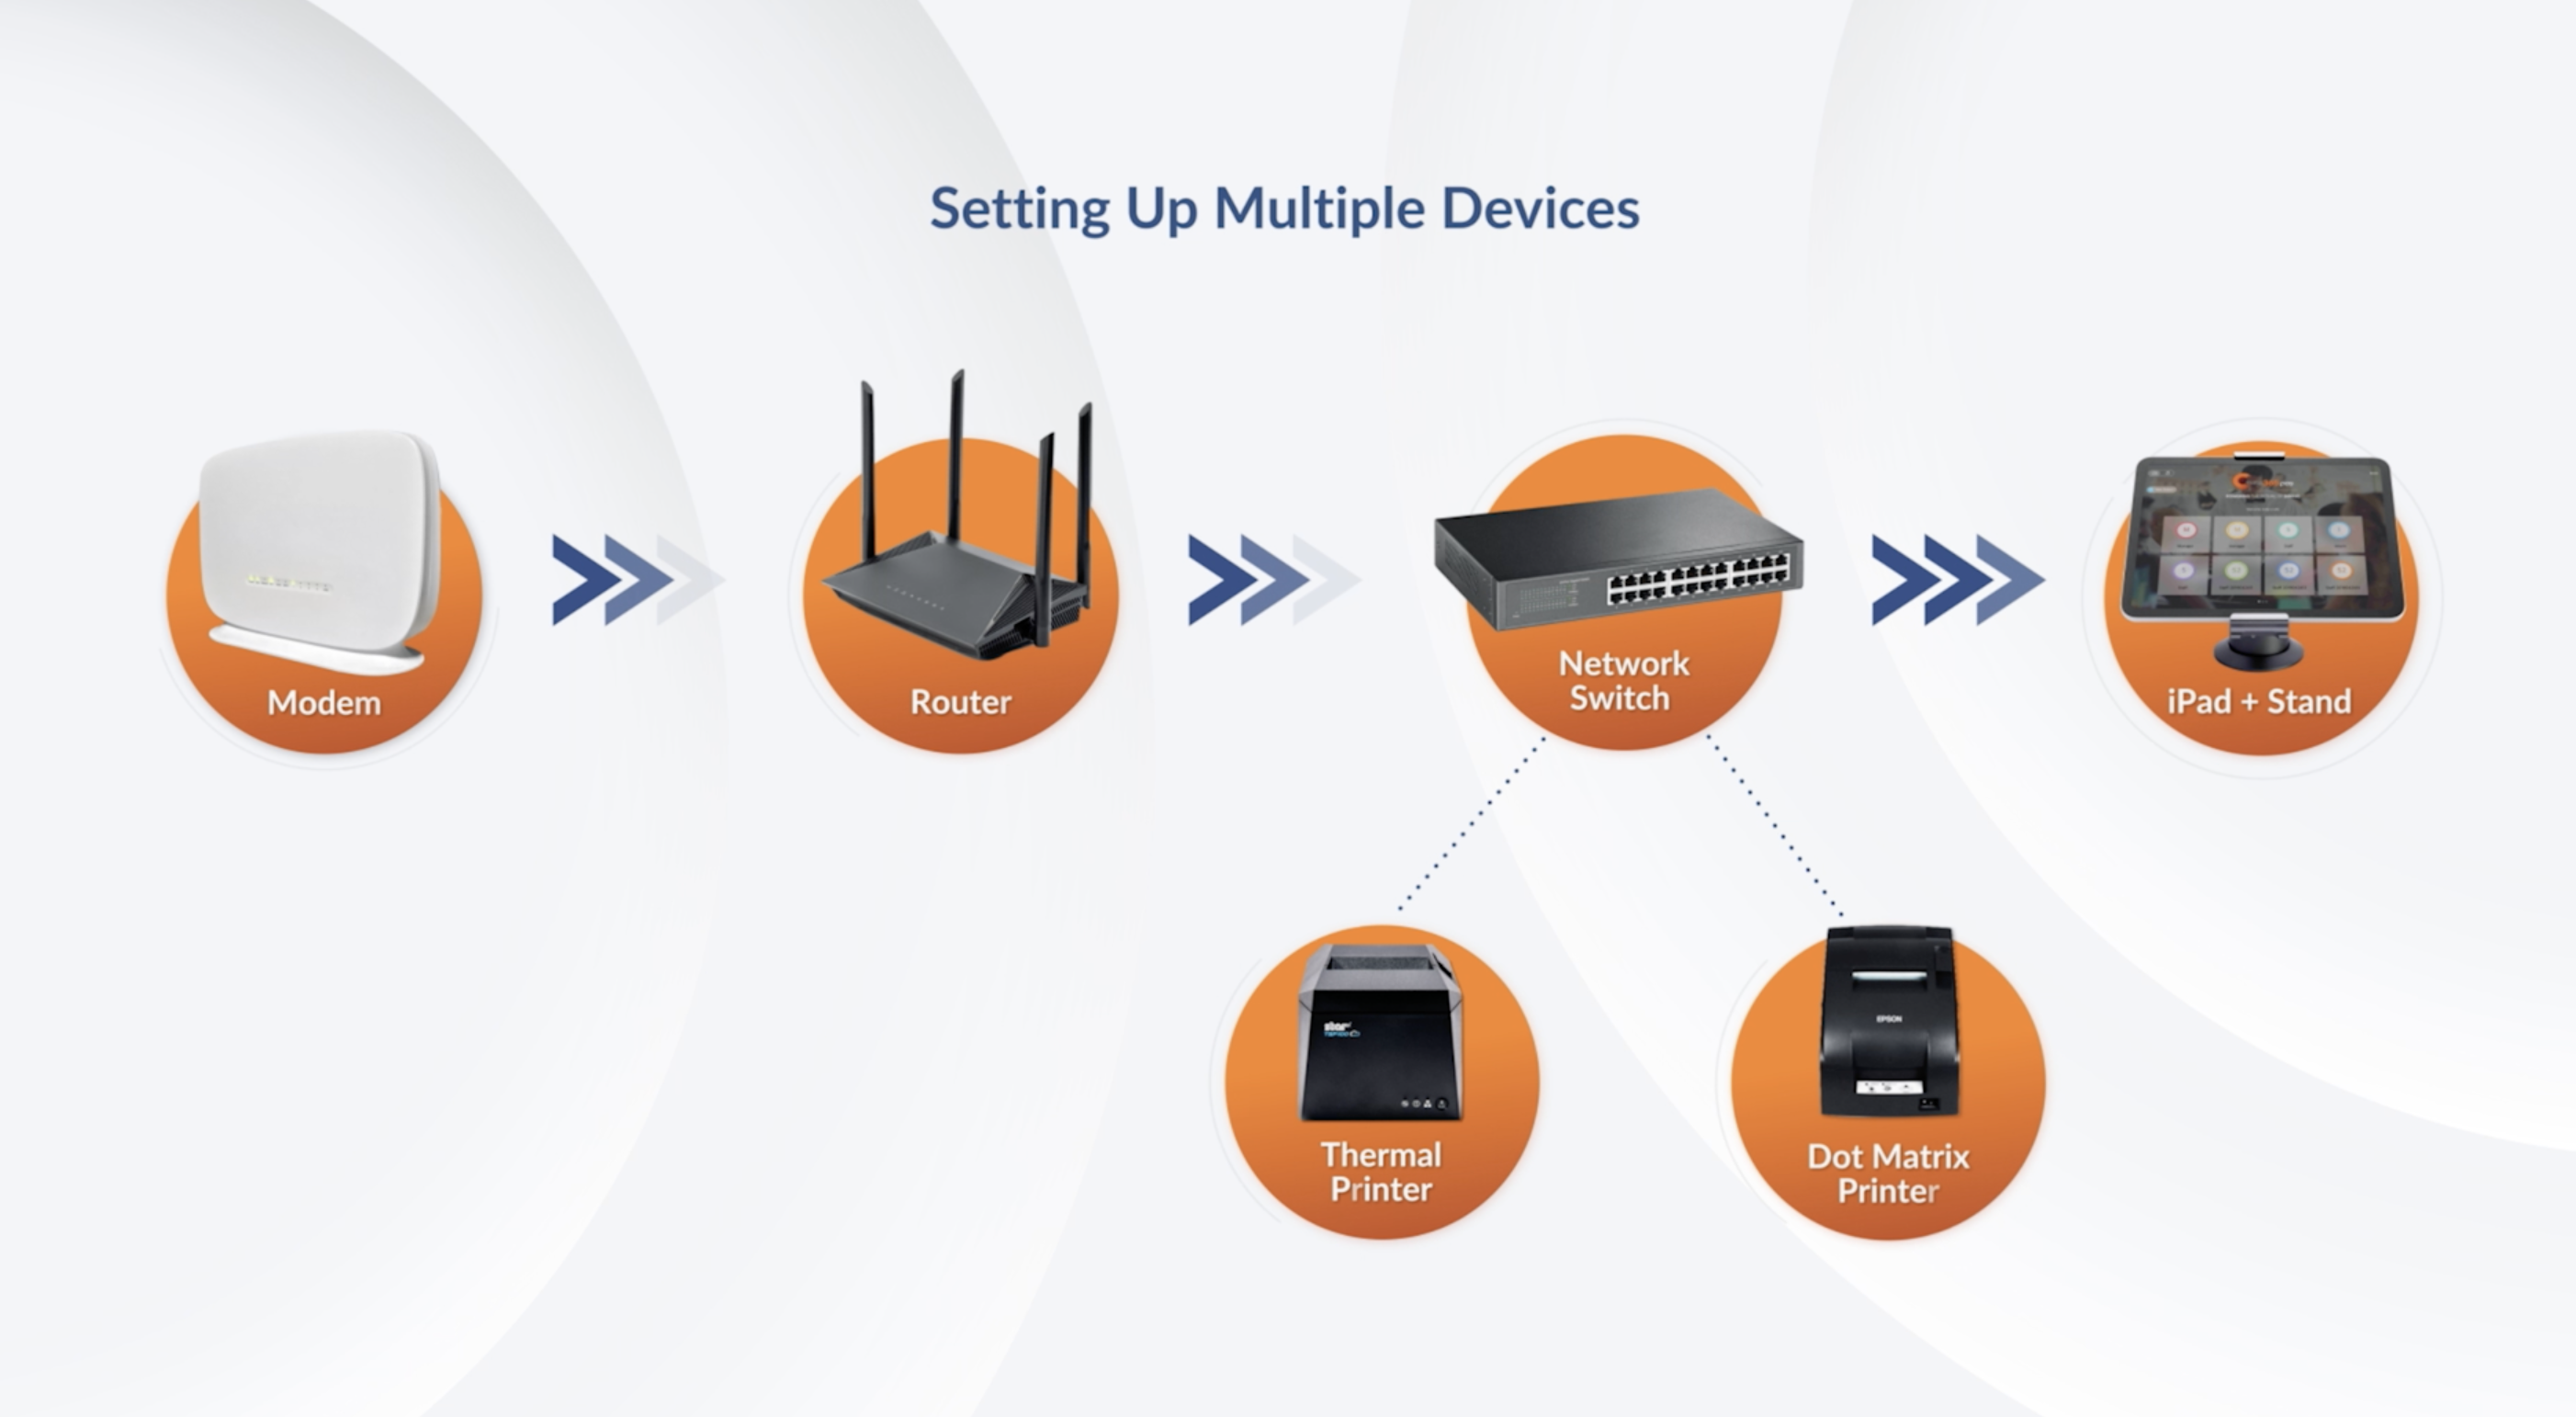
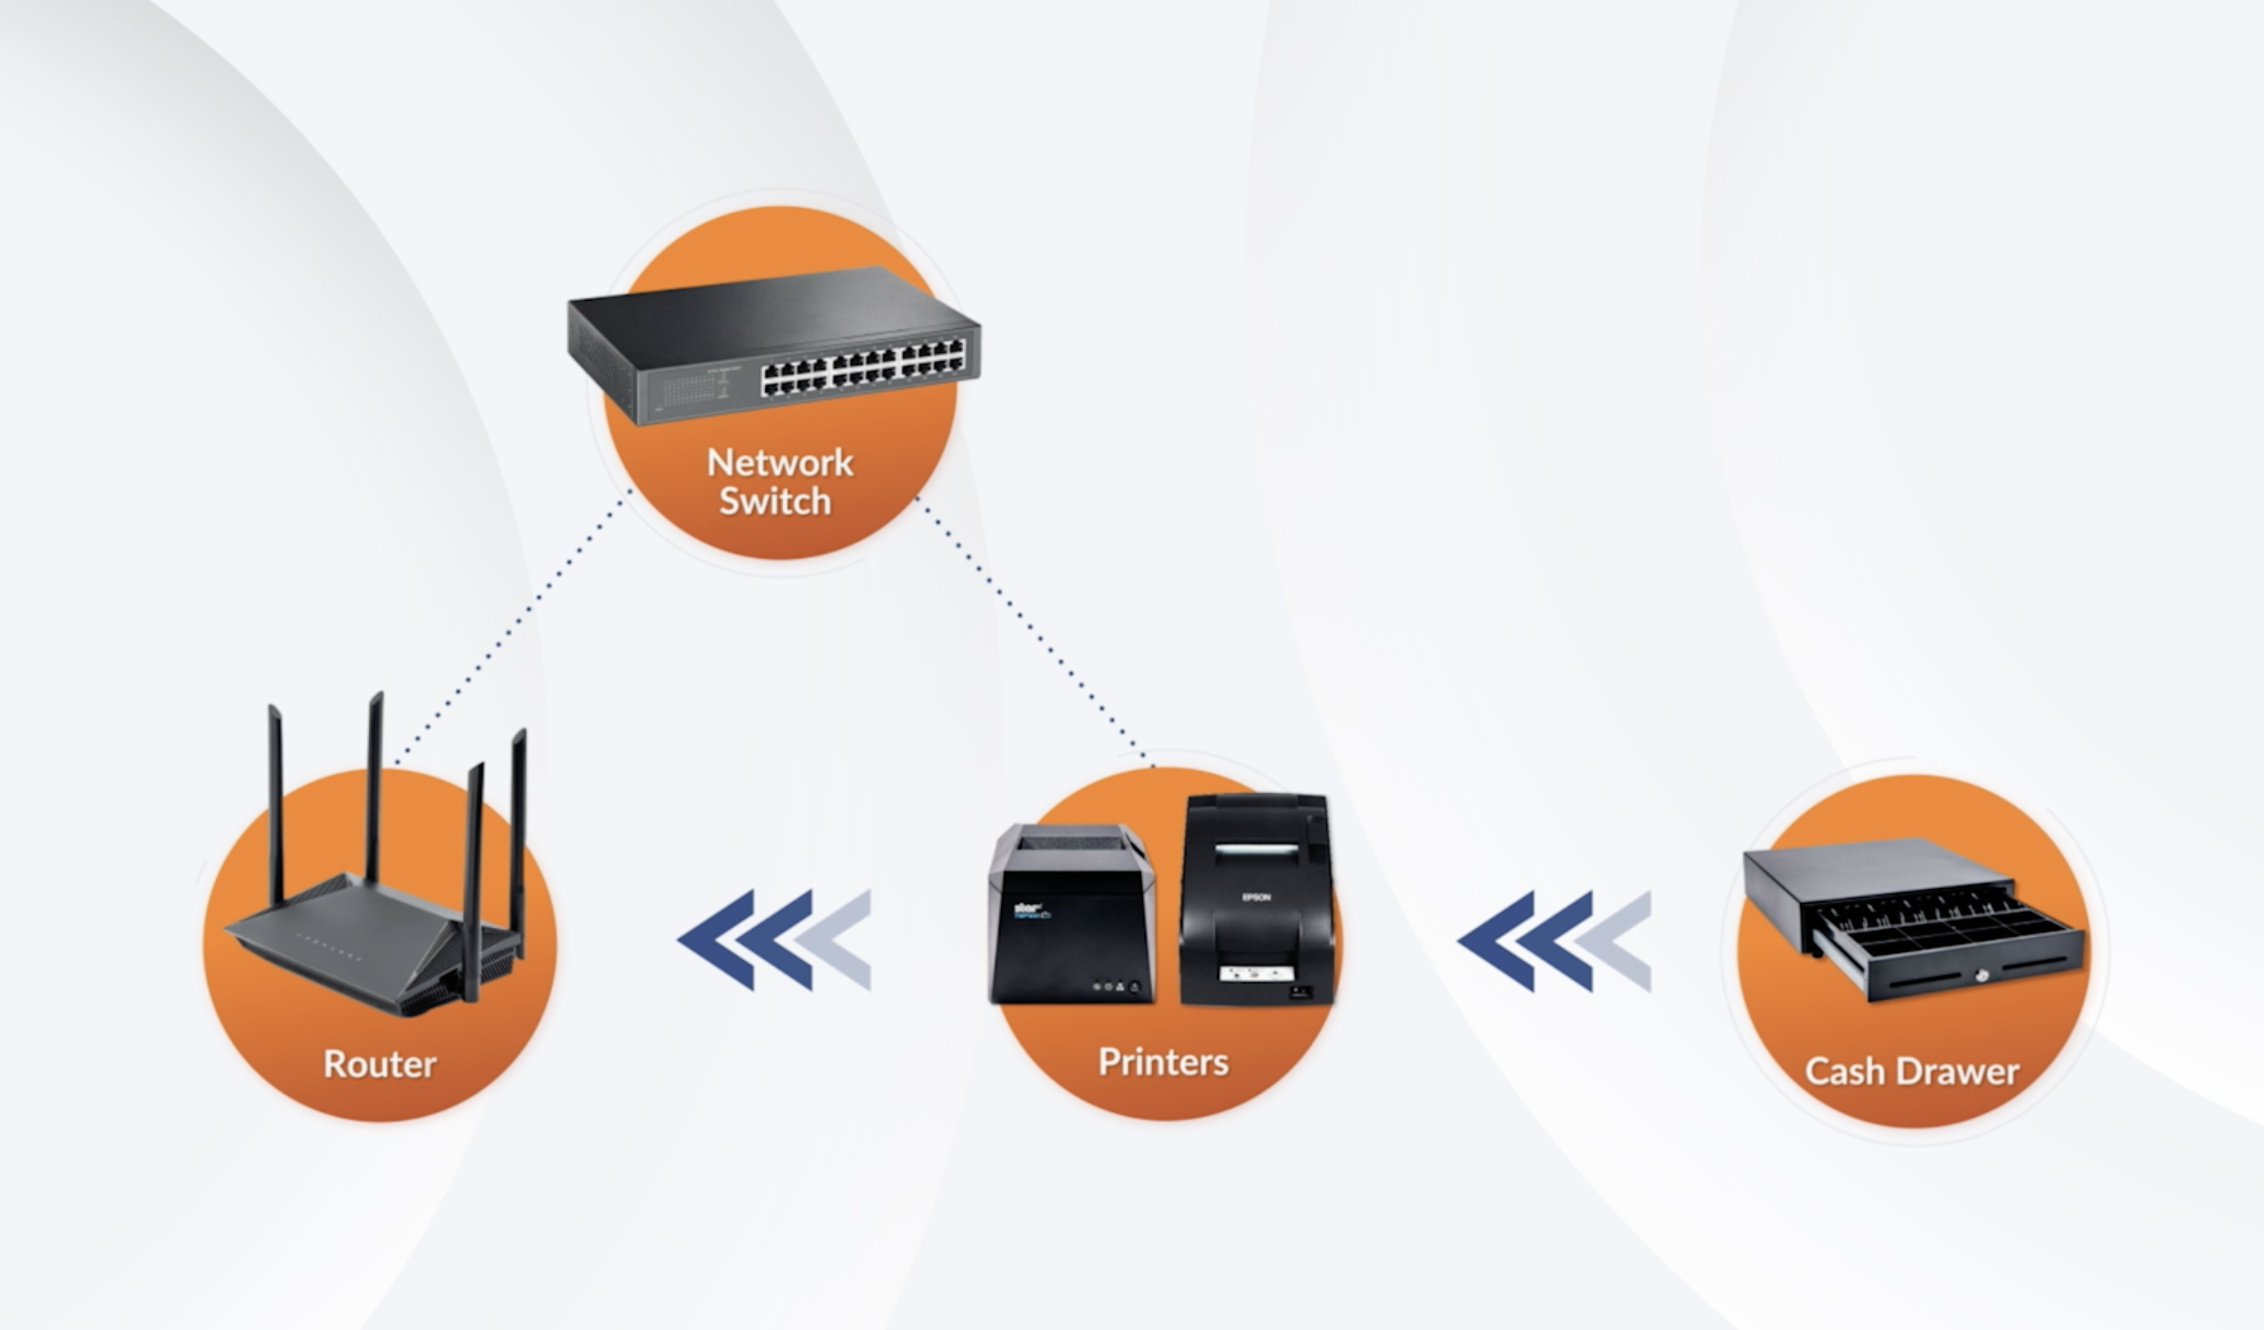
The diagram below shows the basic setup for the network and hardware.
Connect your devices
To connect your devices to the same router, follow the steps below:
1. Set up router
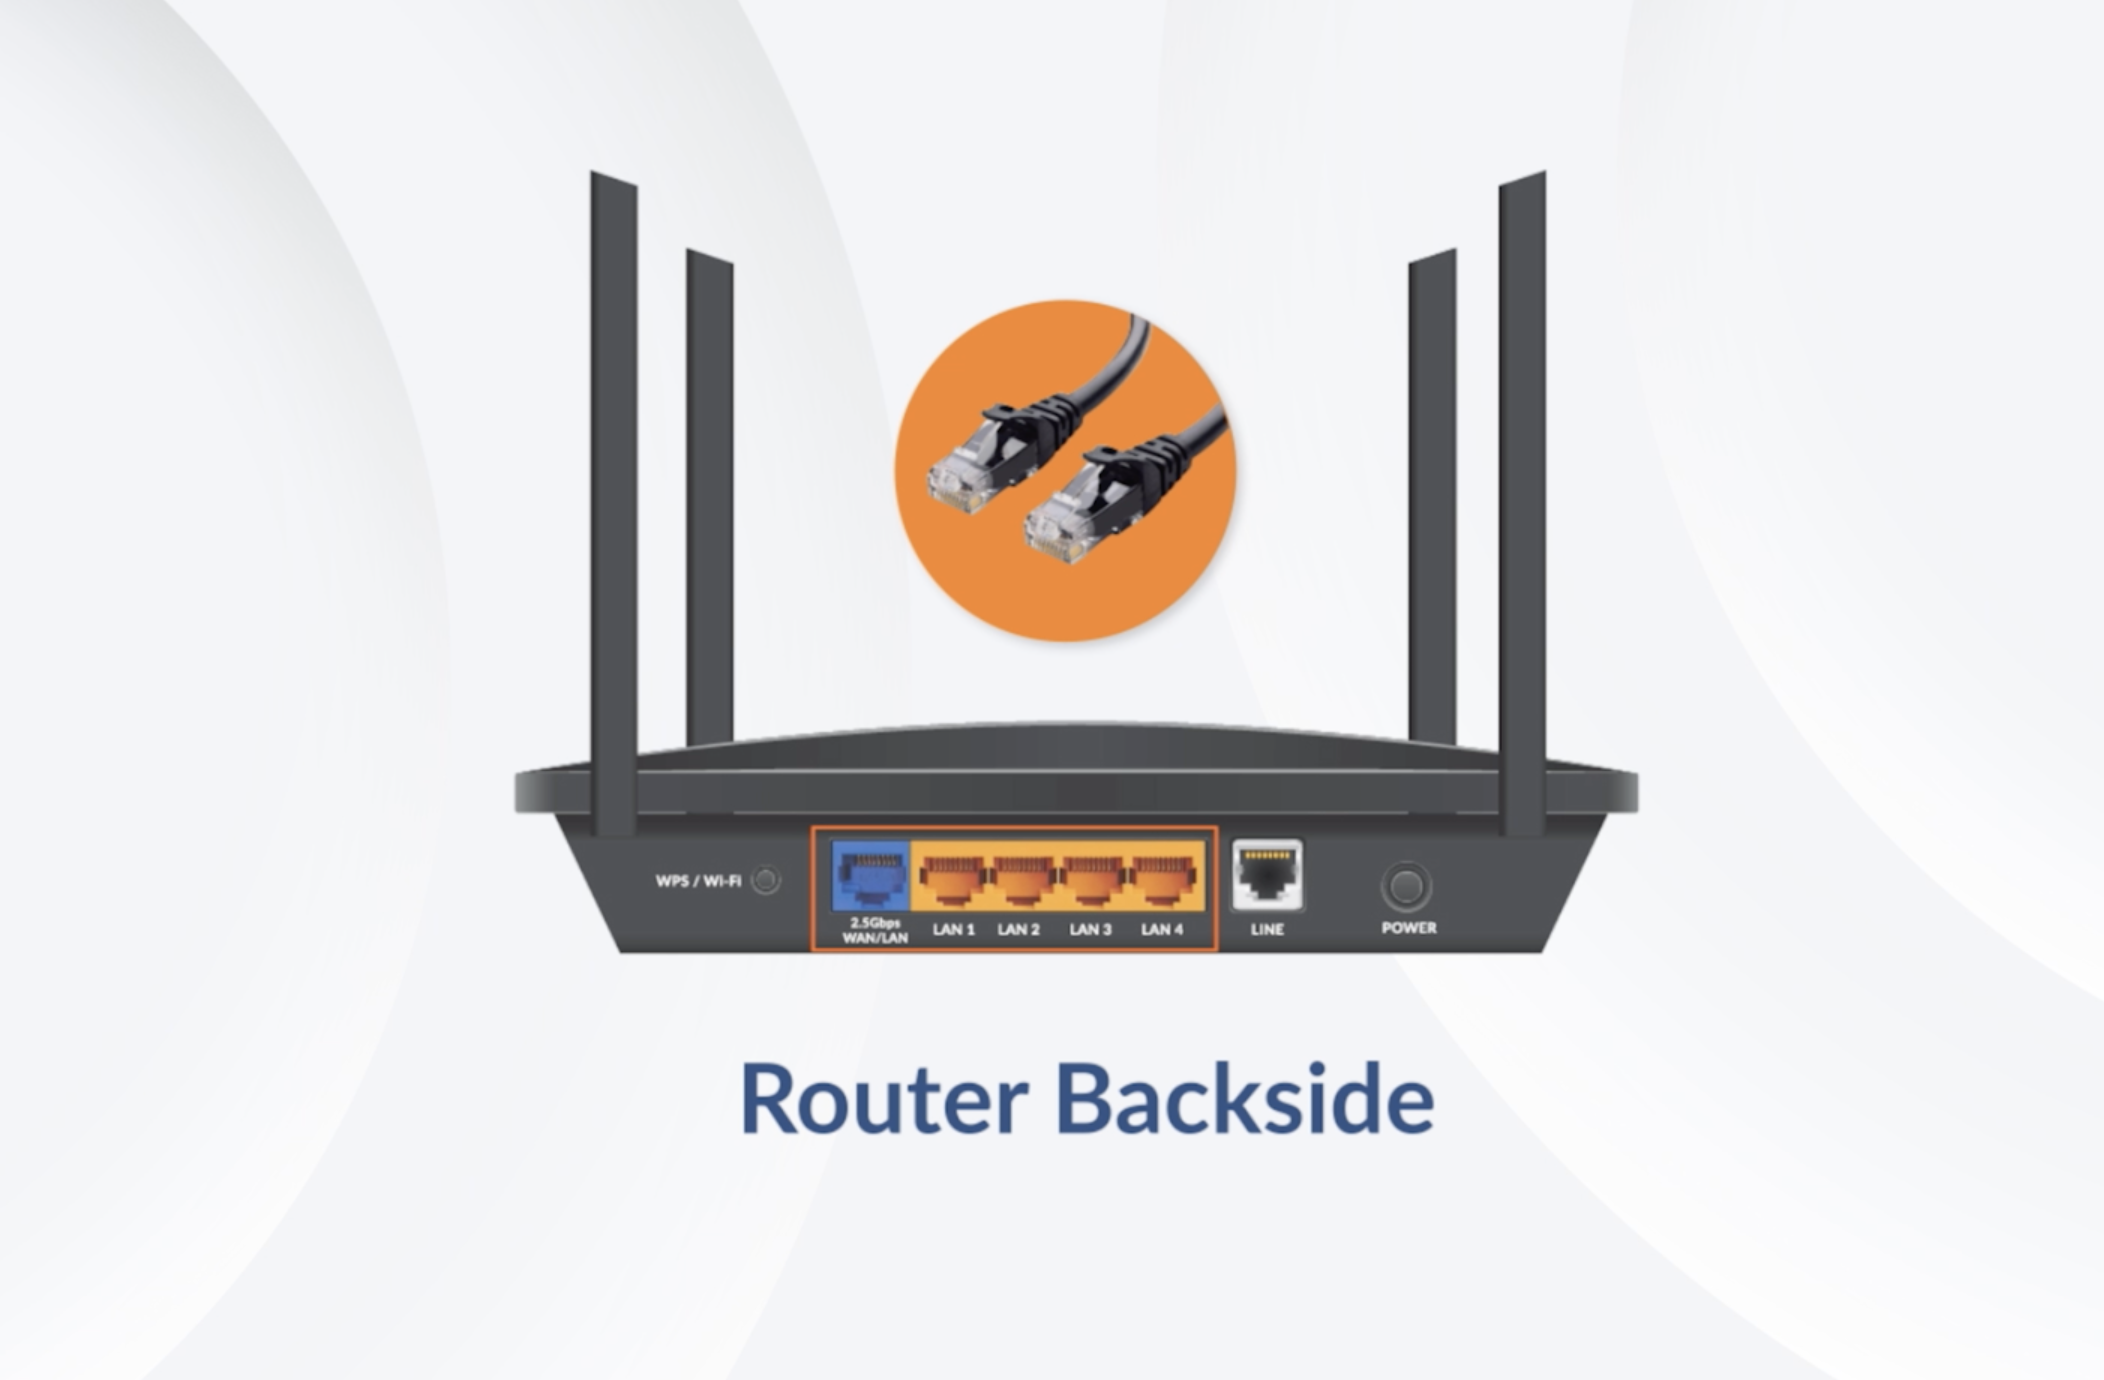
Connect an Ethernet cable to the WAN or Internet port of your router. Then, connect the other end to the WAN or Internet port of the modem that was provided by your Internet Service Provider (ISP).
2. Create a Local Network
Wired connection
Ensure that there are sufficient Ethernet ports on your router to connect iPads, printers, and other supported connected devices.
Additional Ports
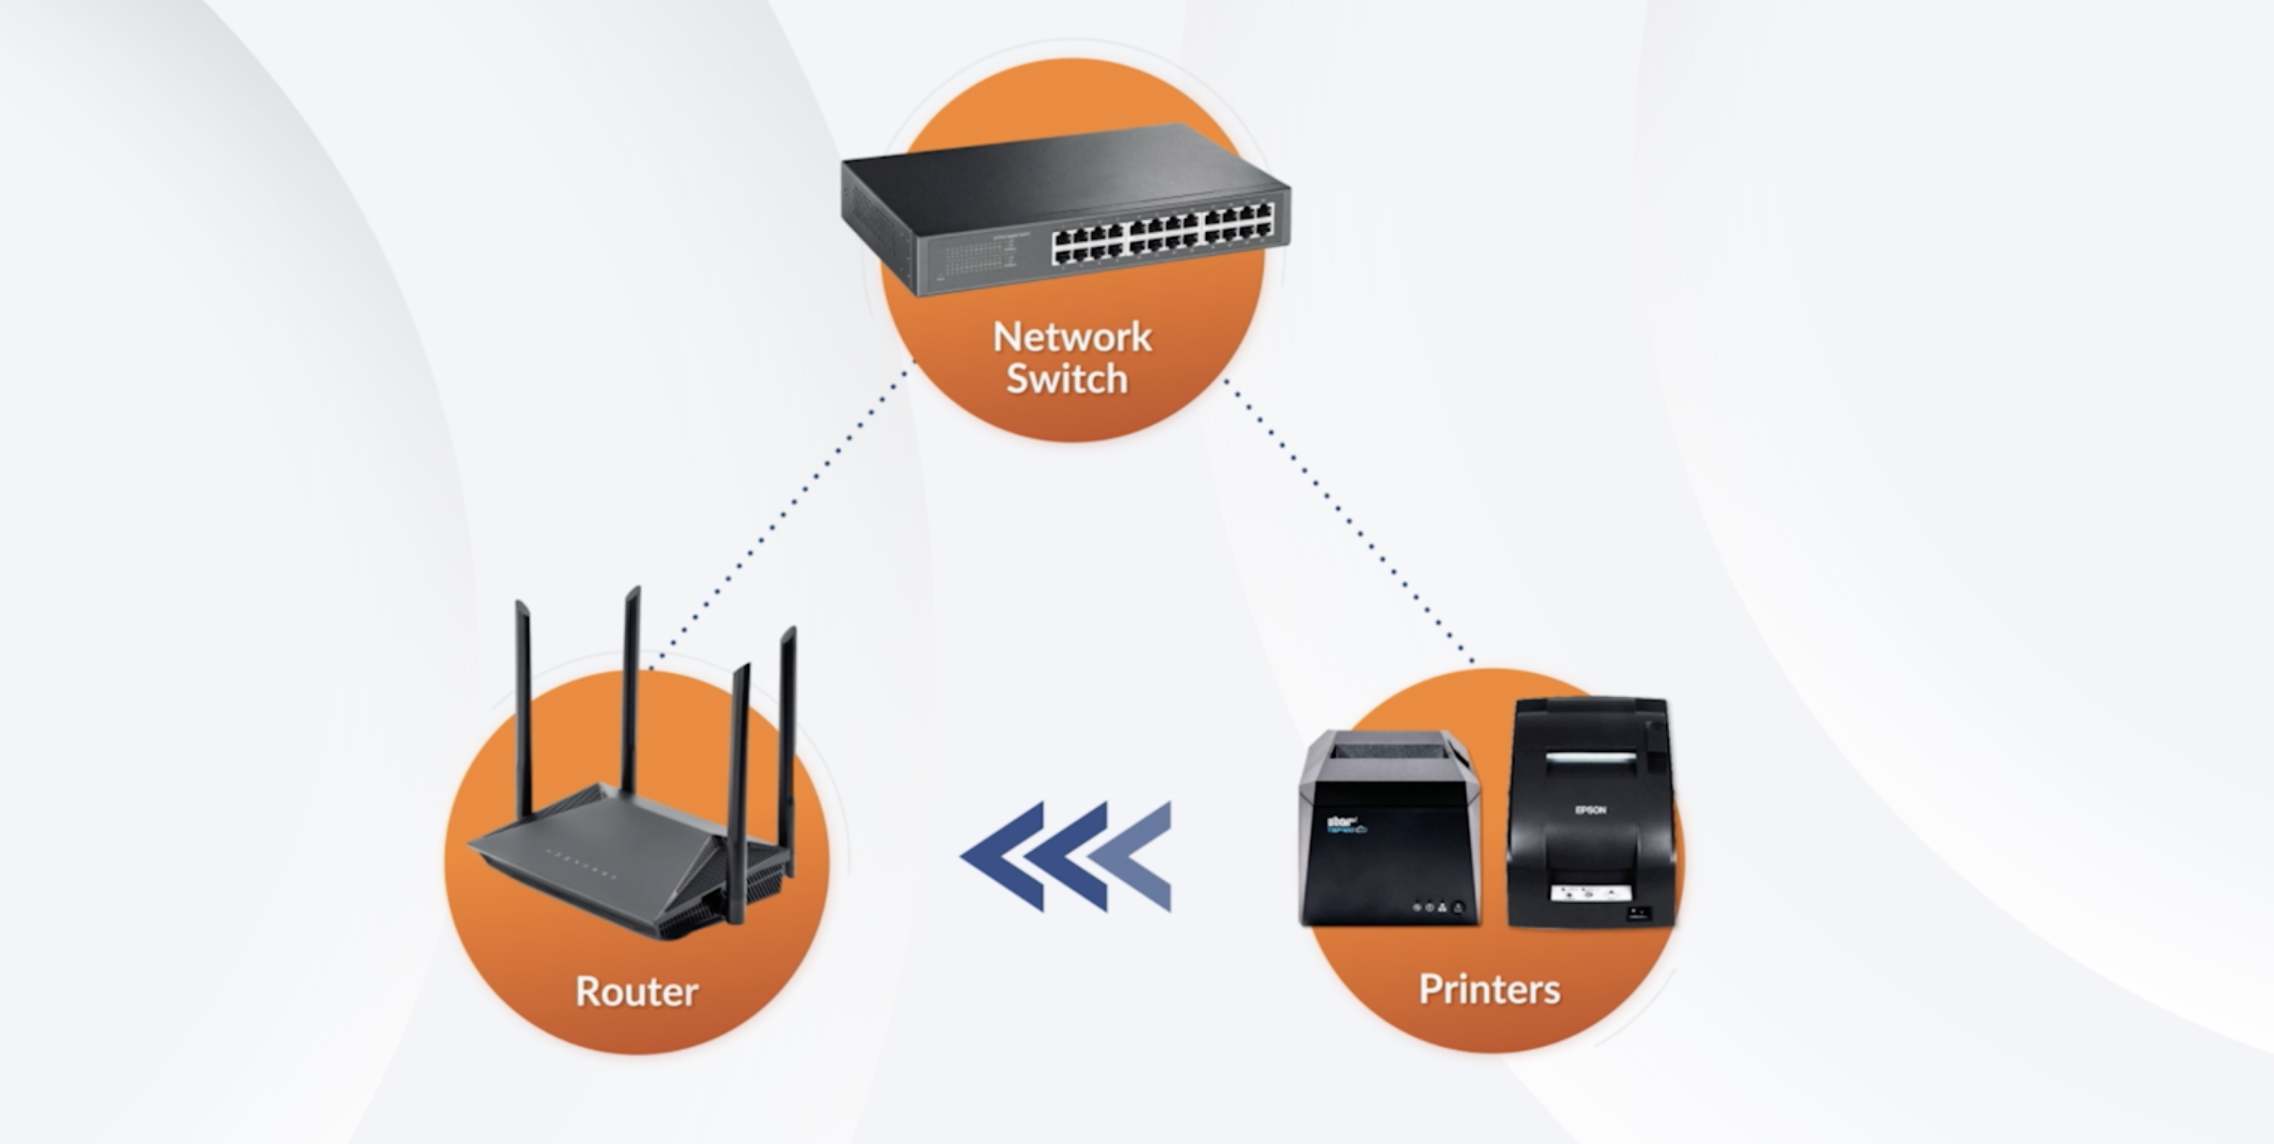
Connect a Network Switch to the router using an Ethernet cable.

Wireless connection
To connect devices wirelessly, you must have a supported Wi-Fi router. Some ISPs may provide all-in-one devices that would allow you to connect your devices to the Wi-Fi using the device provided by your ISP.
Delete3. Connect an iPad to the router
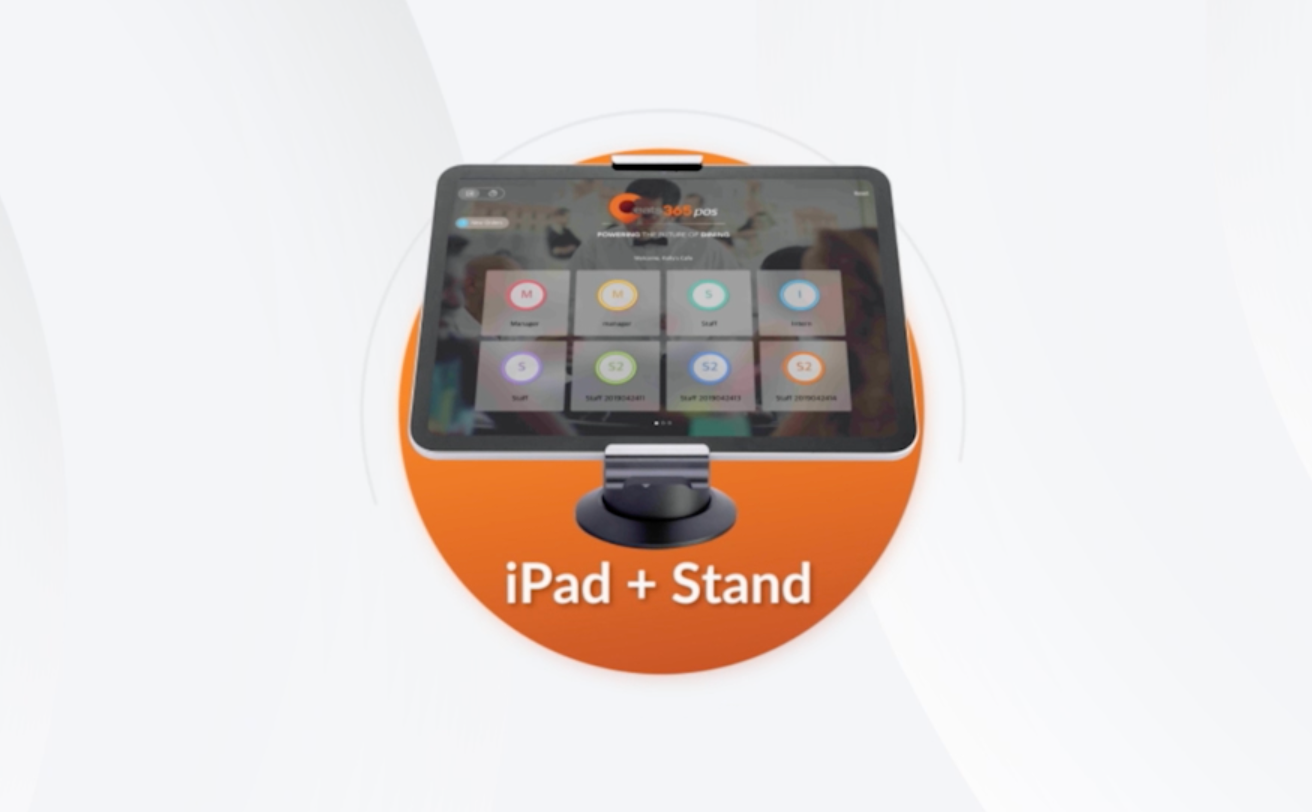
The Eats365 POS on your iPad can work on both wireless and wired Ethernet connections. For further instructions, refer to Connect an iPad to the network.
iPad stand
If the POS is a stationary device, it’s recommended to use an iPad stand with your iPad for both convenience and functionality. For recommended iPad stands, refer to iPad Point of Sale & Secure Stands.
4. Set up a printer
Connect your printer to the router or network switch using an Ethernet cable.
Once your printer is set up and connected to the network, pair the printer to the POS. For further instructions, refer to Scan and pair a printer.
Configure printer preferences
You can set your printer to handle multiple jobs. For a list of different printer configurations, refer to the list below:
- Configure a receipt printer with cash drawer
- Configure a receipt printer for tables
- Configure a receipt printer to print Shift Report
- Configure Kitchen Printers for each Kitchen Station
- Configure Kitchen Printer to print expeditor list
5. Connect a cash drawer to a receipt printer
Connect the cash drawer to the receipt printer using the cable that came with the cash drawer.
Once the POS is set up and the cash drawer is connected to the printer, you can set the cash drawer to automatically open whenever a cash payment is made. For further instructions, refer to Scan and pair a printer.
Delete