Eats365 Products
 Merchant Guide
 Modules
 Membership
 Integrations
 Hardware
 Staff Operations
 Roles & Permissions
 Payments
 Reports
 What’s New
 Release Notes
 Troubleshooting
 Simulators
 Glossary
 Troubleshooter
 System Status
Menu Setup
All Product
Table of Contents
Set up and manage a Custom Menu
Learn how to create and manage a Custom Menu on the Eats365 POS or on the Merchant Portal.
Custom Menu allows you to group a set of categories into one custom menu. For example, if you want to have a different menu for lunch hour, you can create a Custom Menu that only includes the categories that you want to sell for that period. With Custom Menu, you can easily switch from one type of menu to another.
In this article, you’ll learn how to create a Custom Menu, as well as, manage existing Custom Menus.
Add a Custom Menu

To create a Custom Menu, follow the steps below:
Eats365 POS
- Log in to the Eats365 POS.
- At the top left, tap Settings
 .
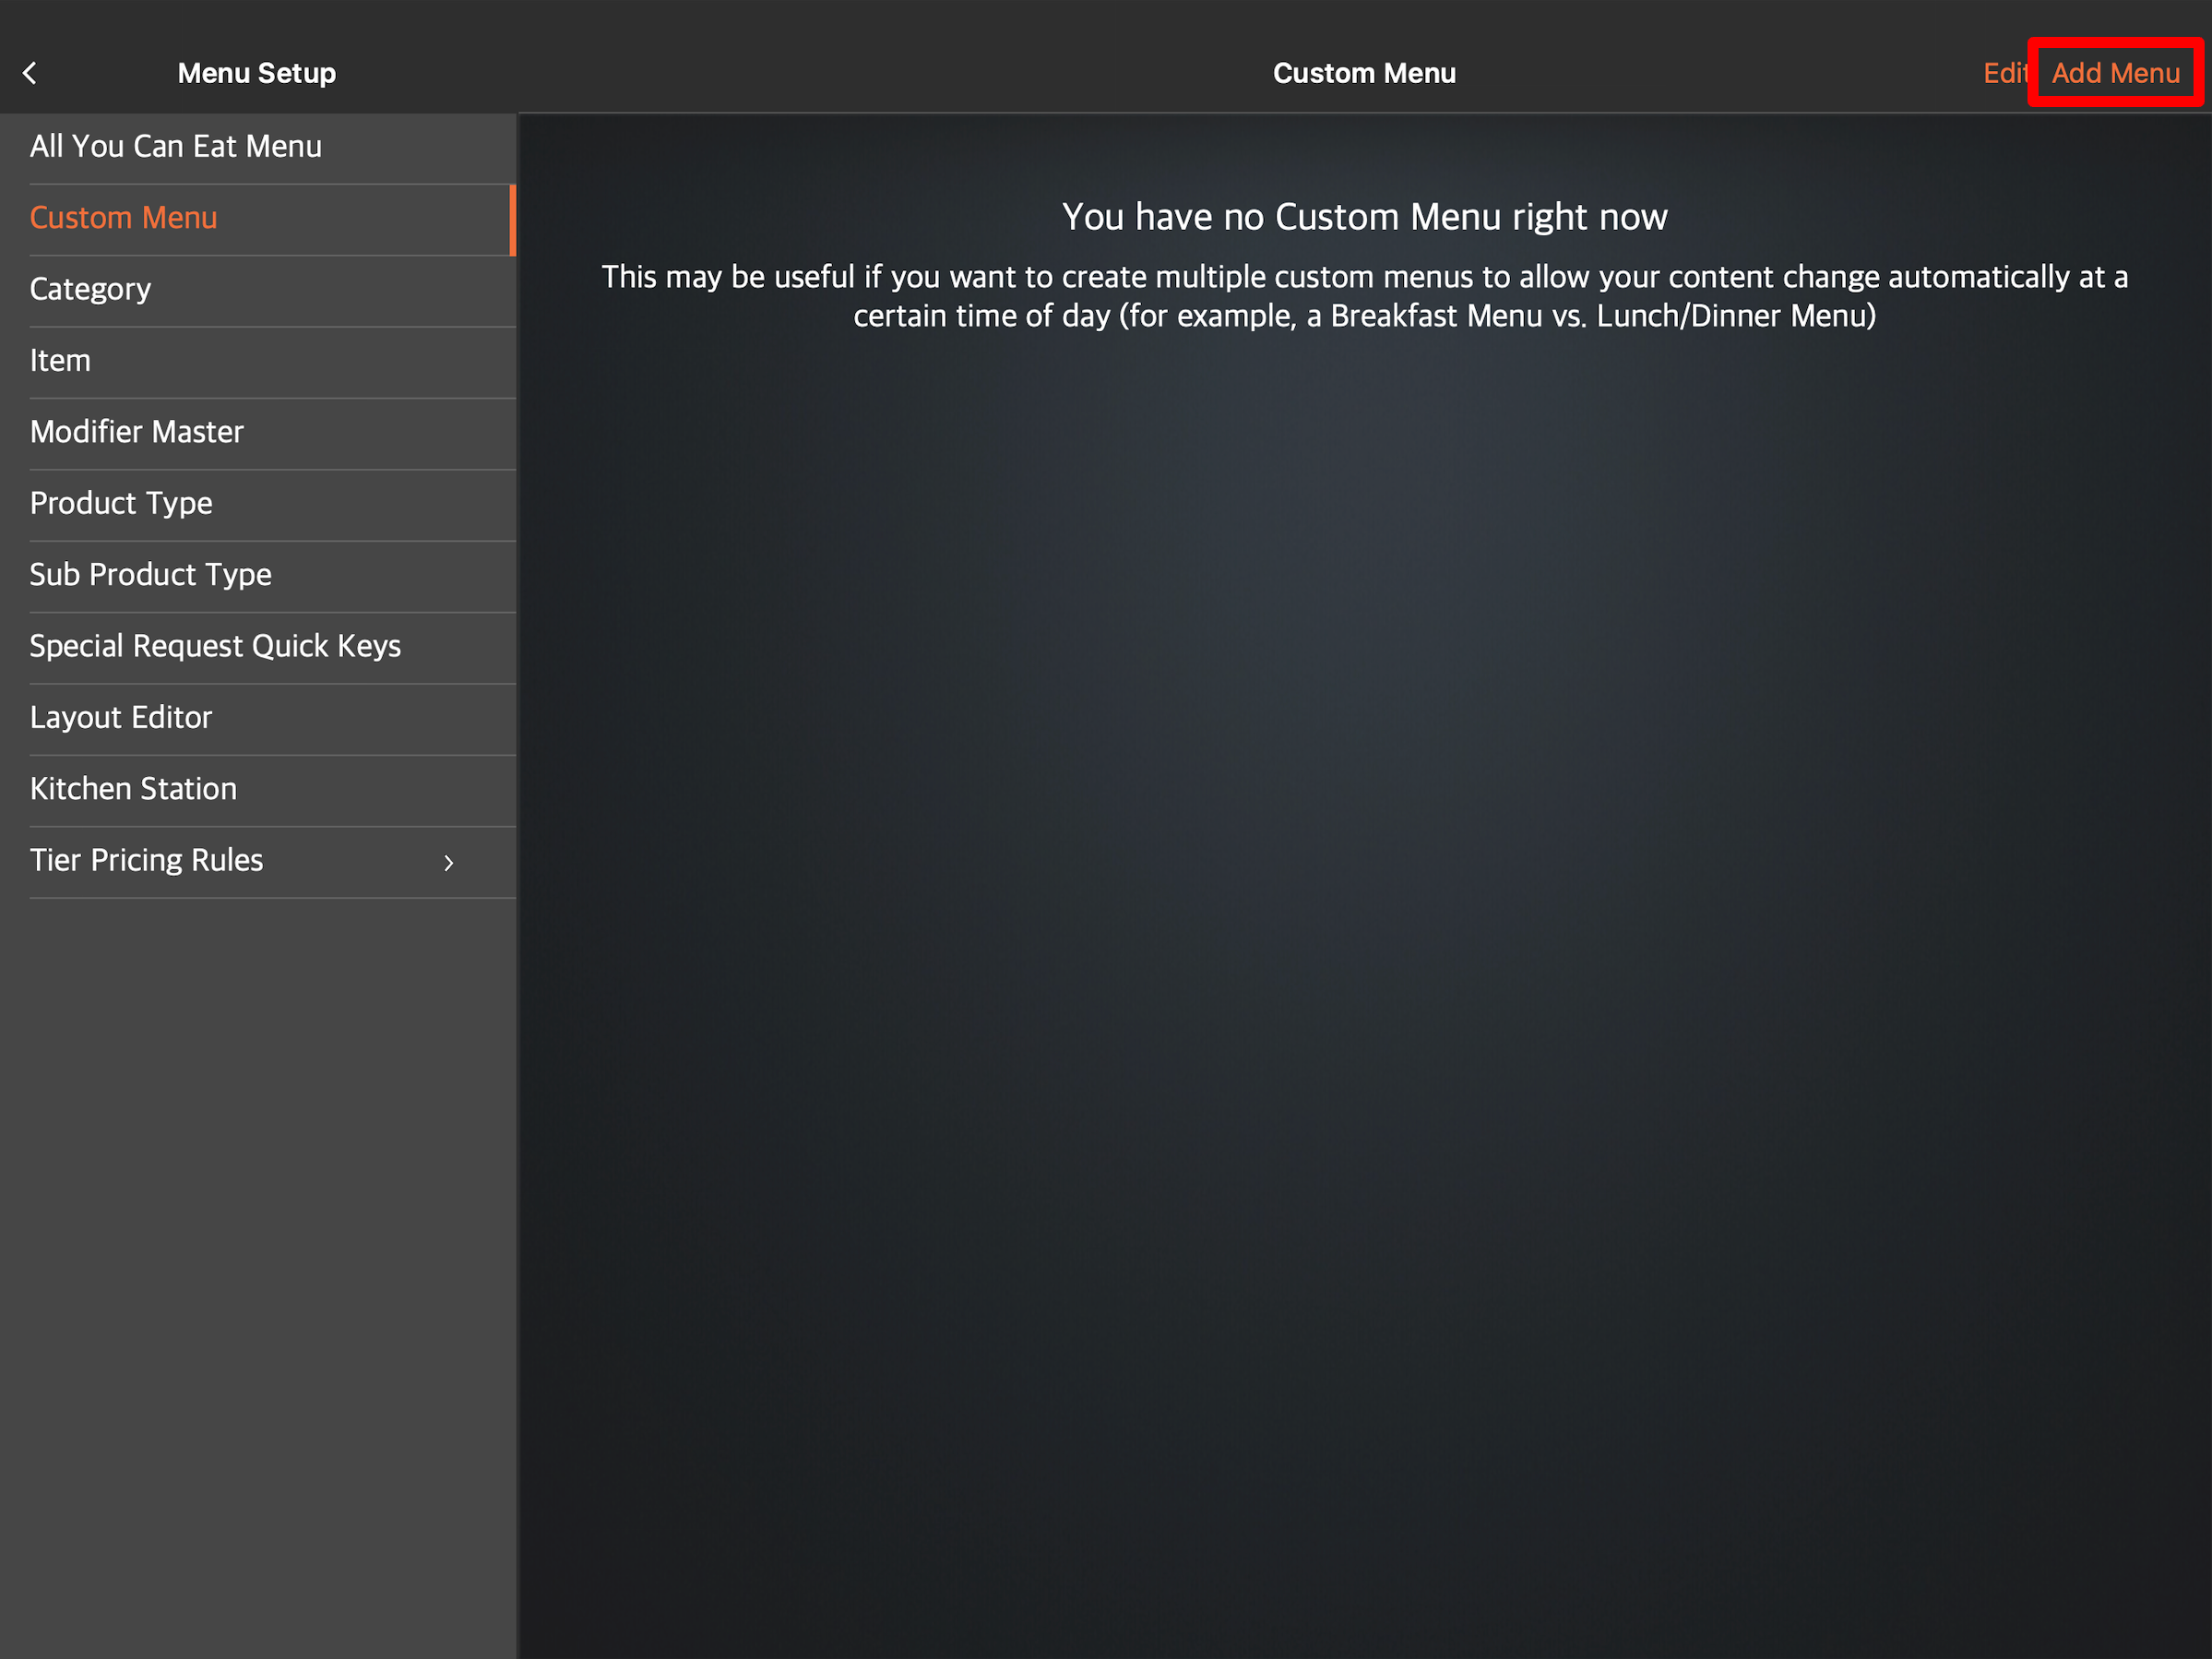
. - Under General, tap Menu Setup, then select Custom Menu.
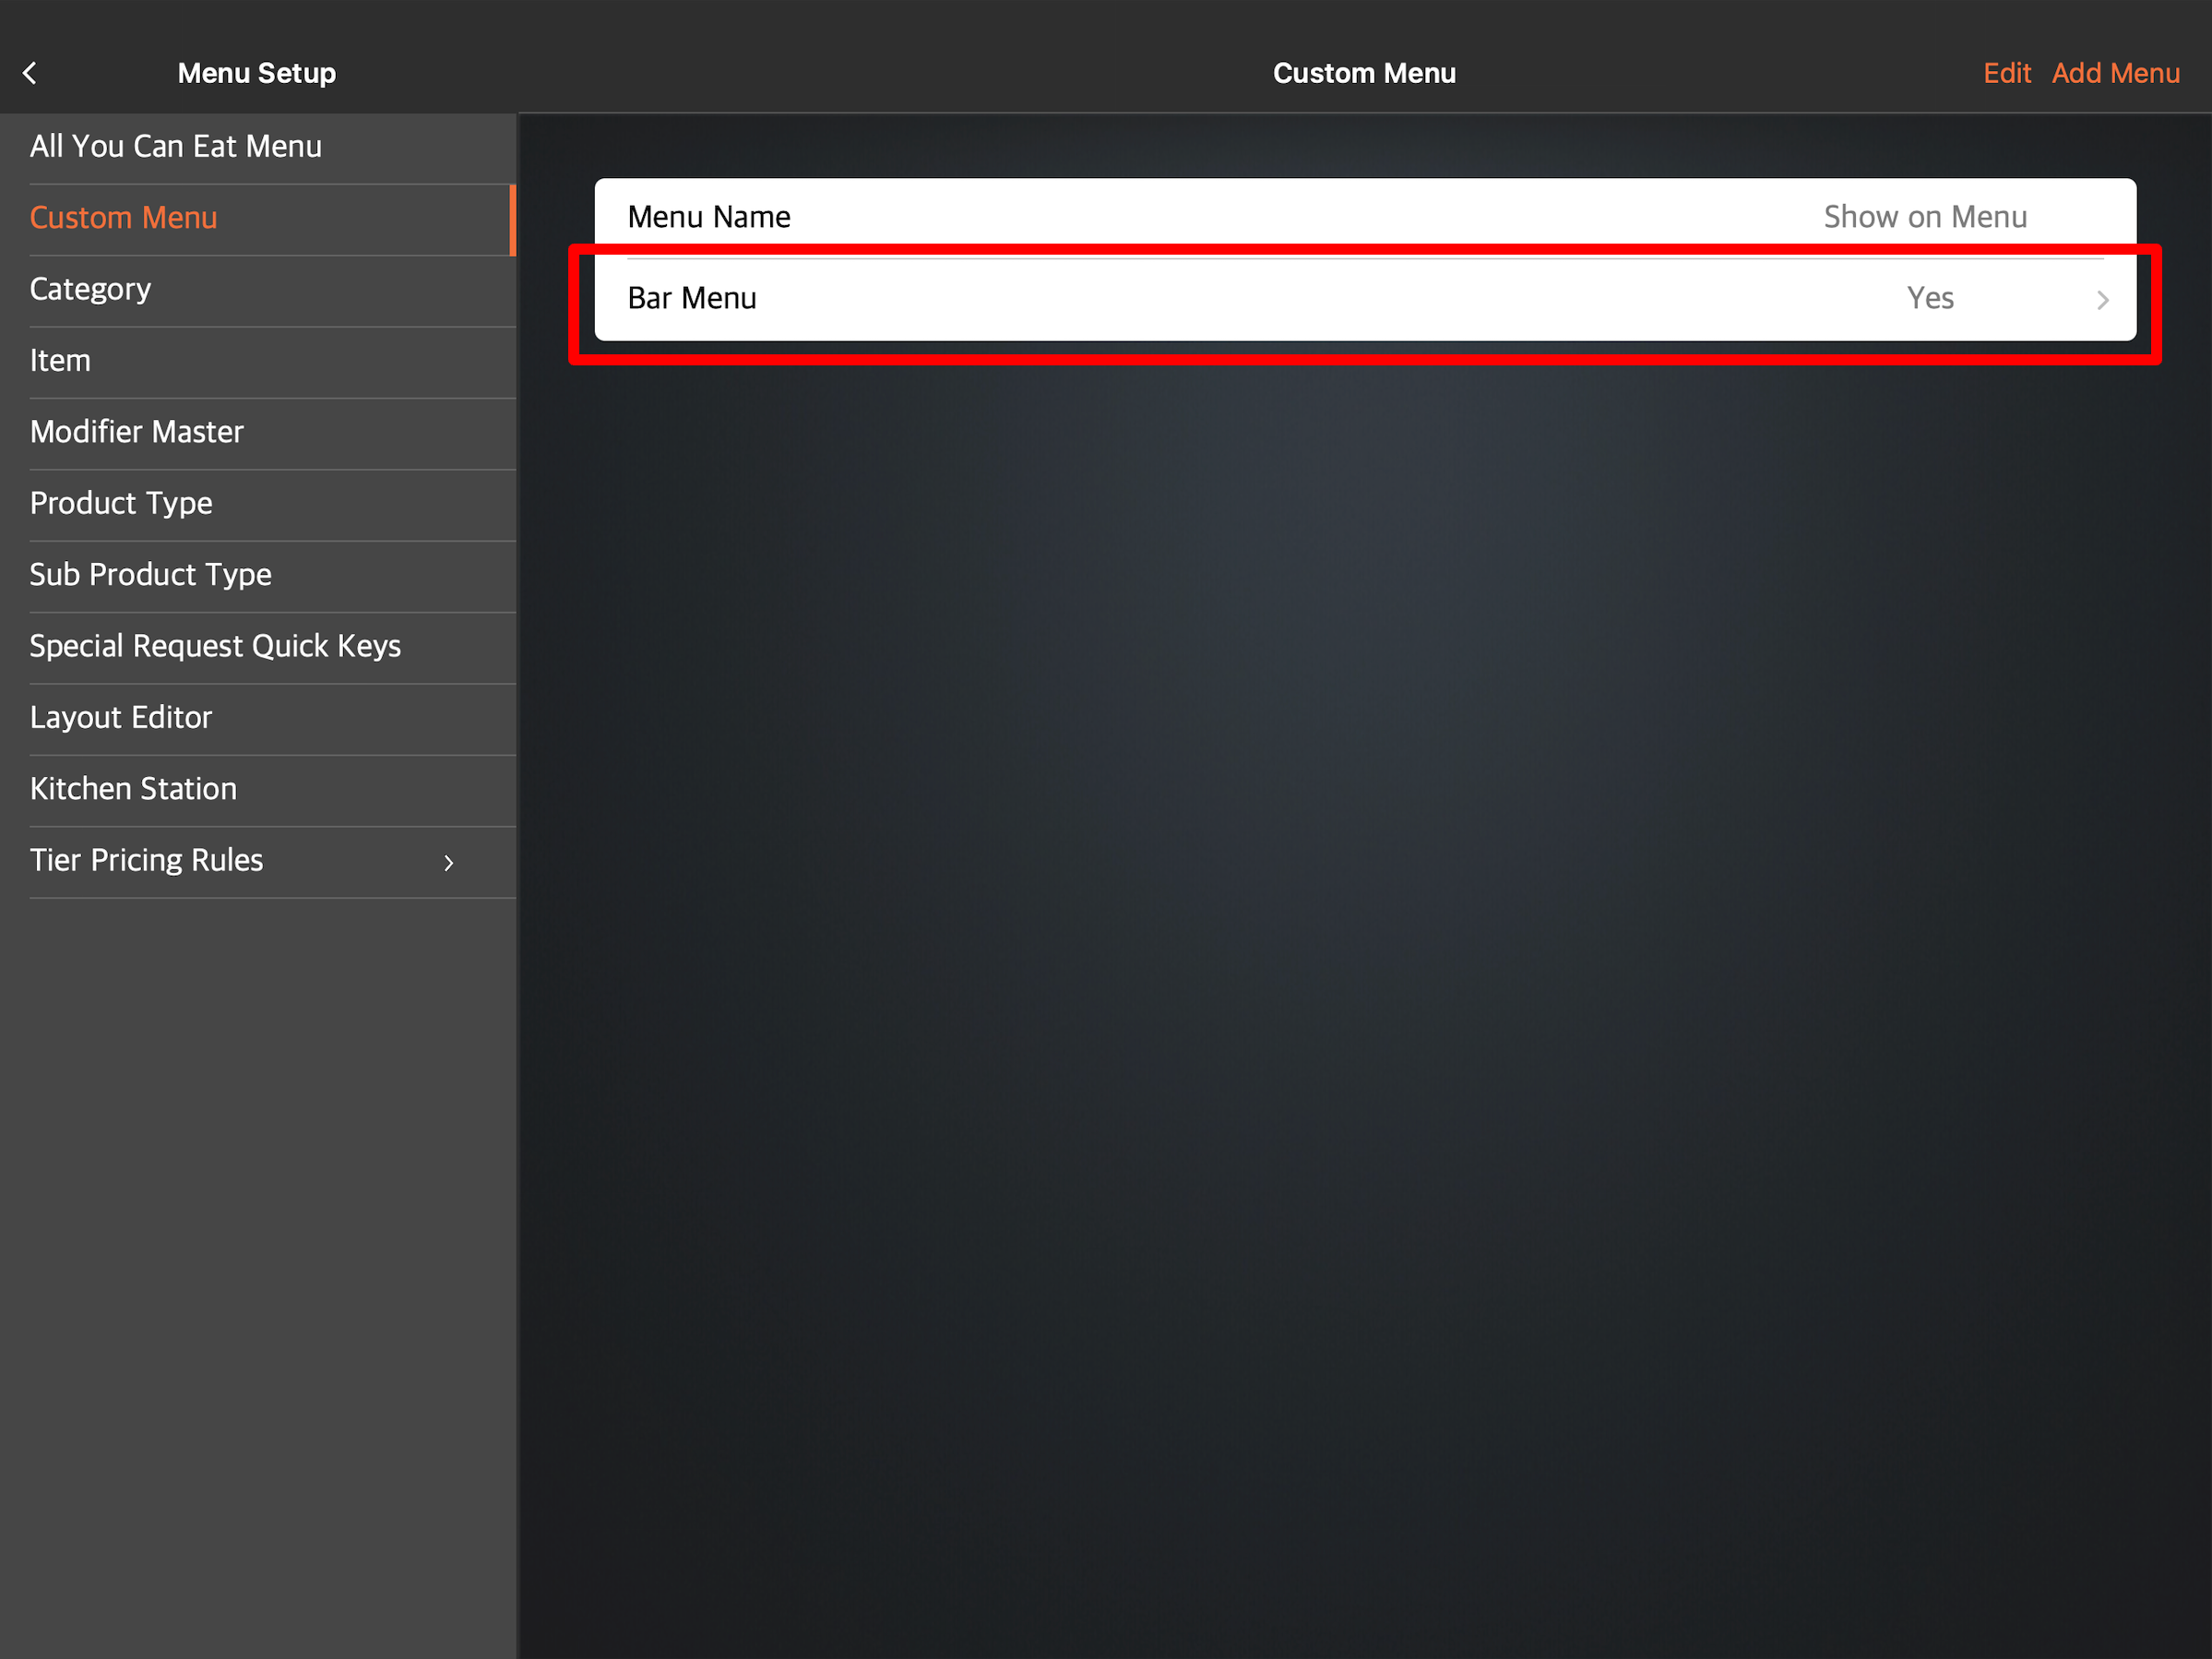
- At the top right, tap Add Menu.
- Select the Custom Menu language.
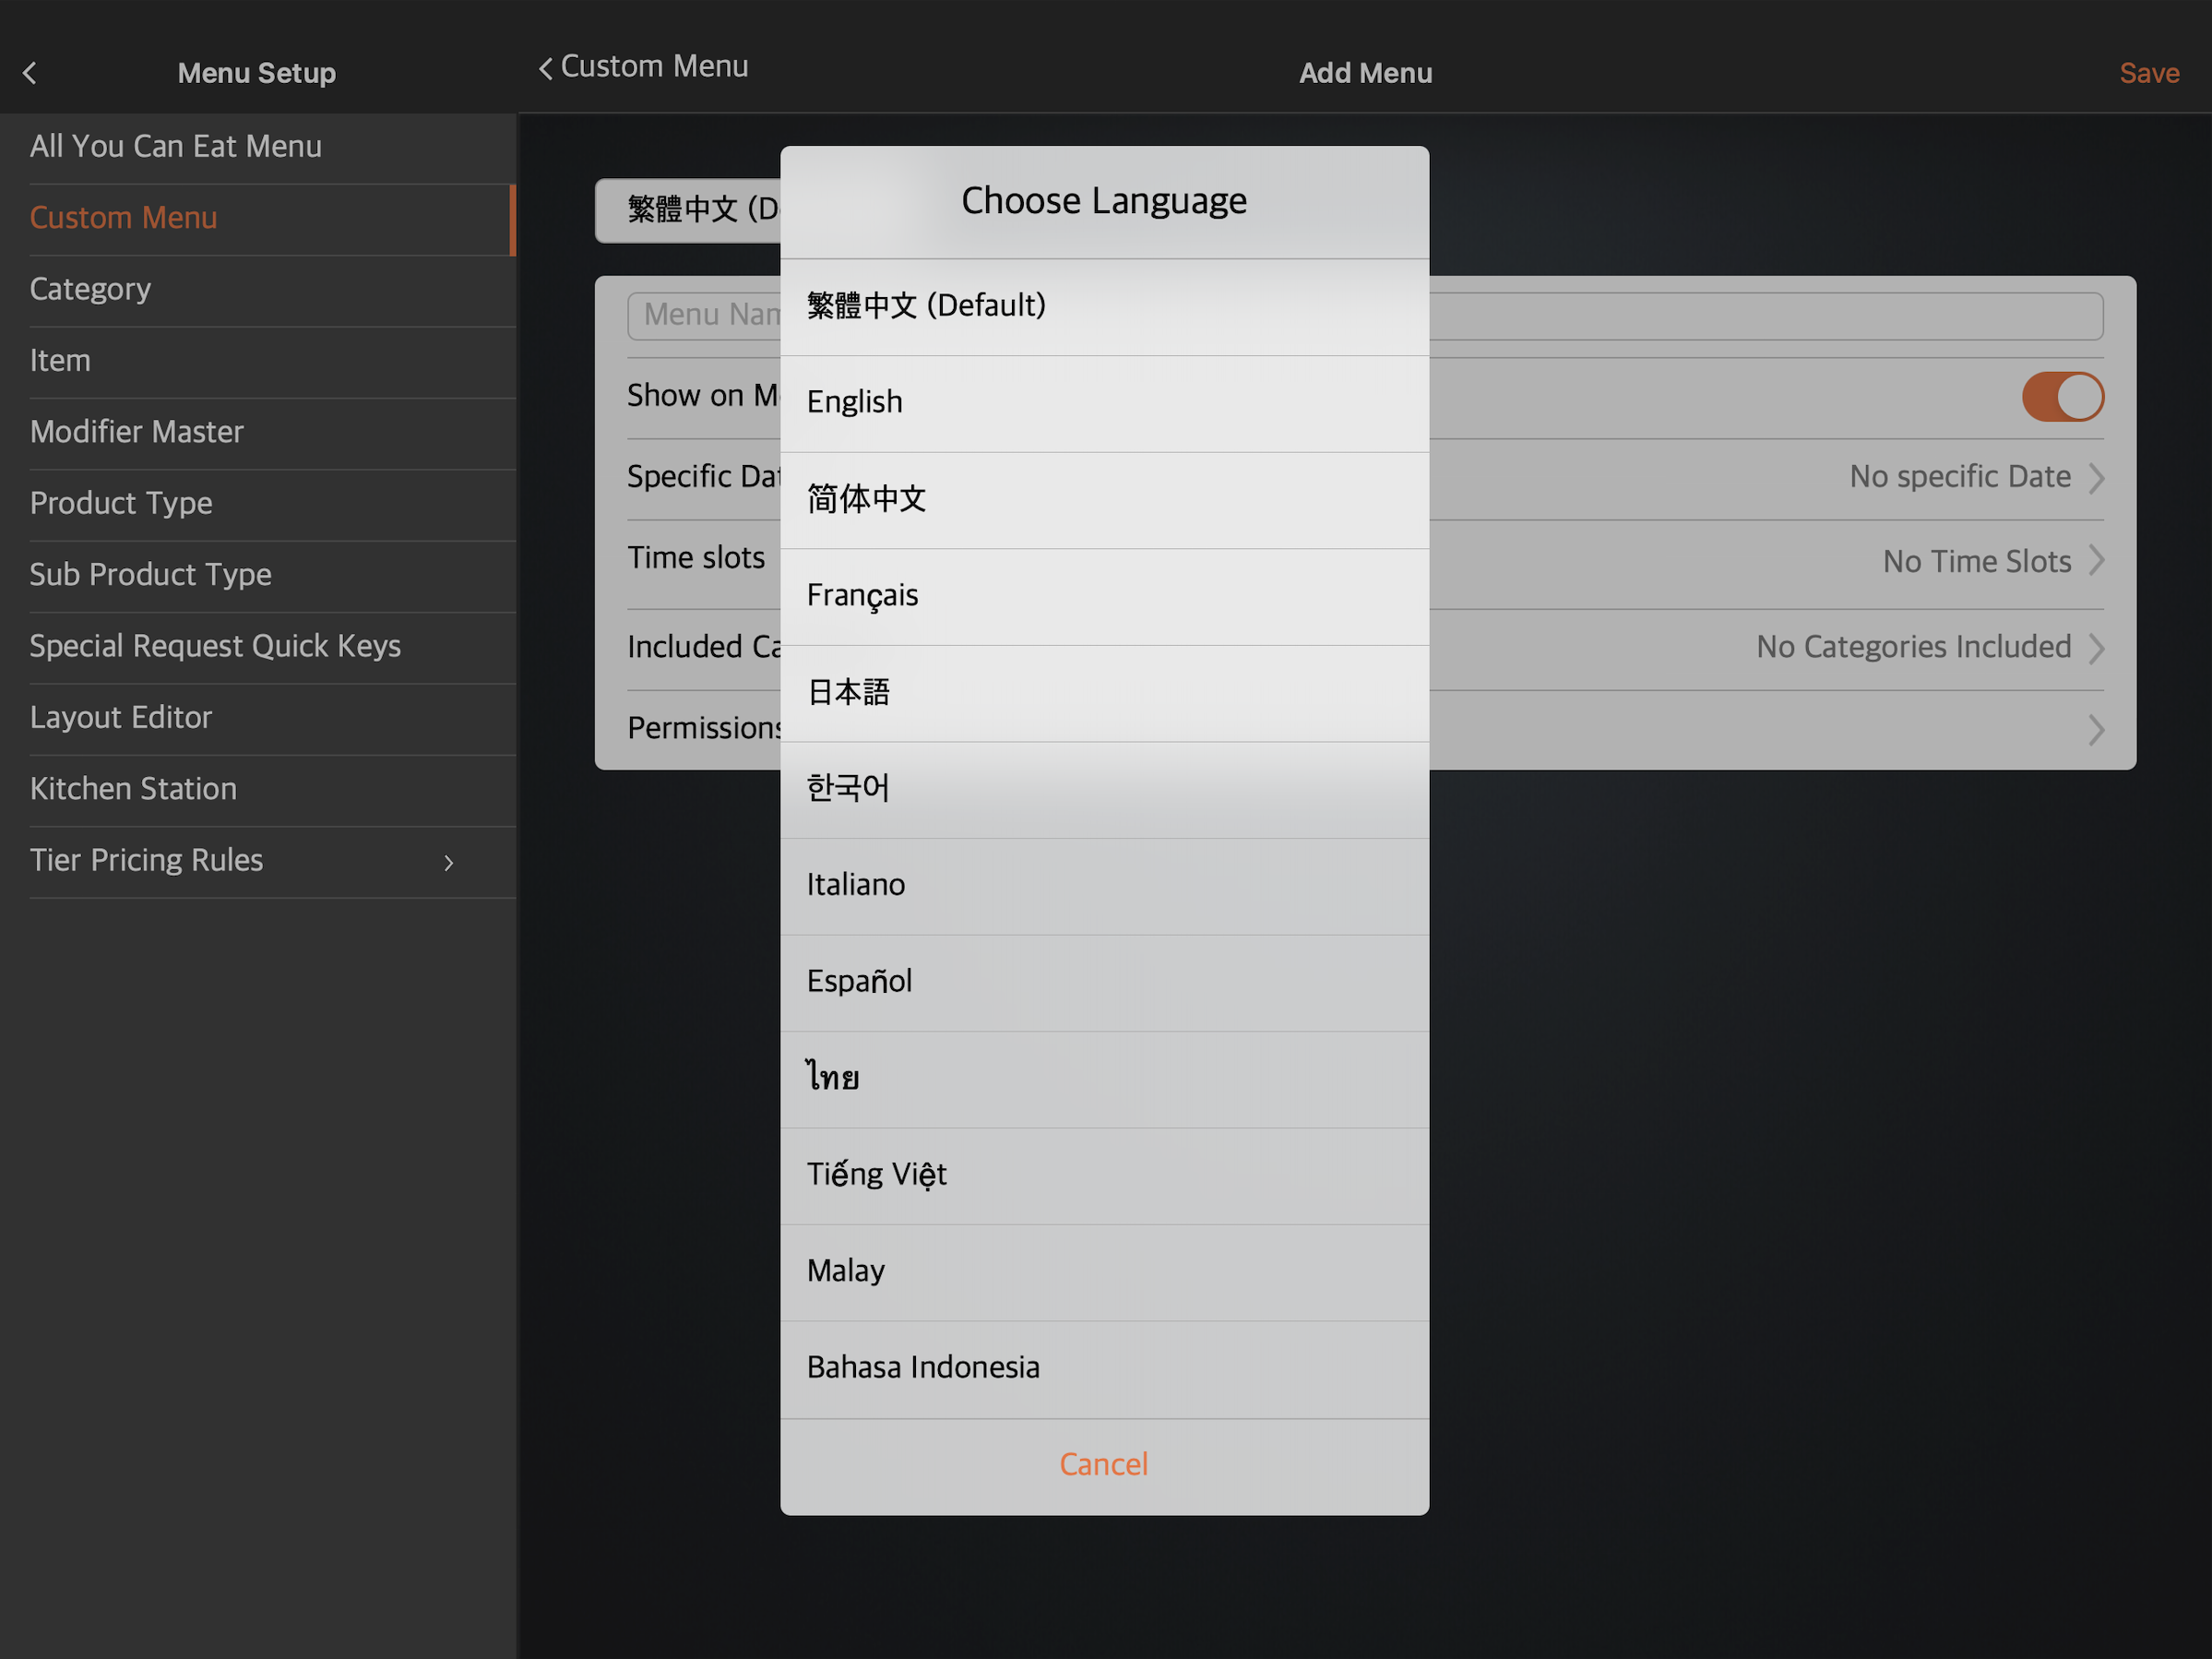 Note: You must enter a default name for the Custom Menu. The name becomes available in whatever language the POS app is using. For multi-language menus, after selecting a default language, tap the language drop-down list and select your preferred language. Then, enter the alternate name in that language.
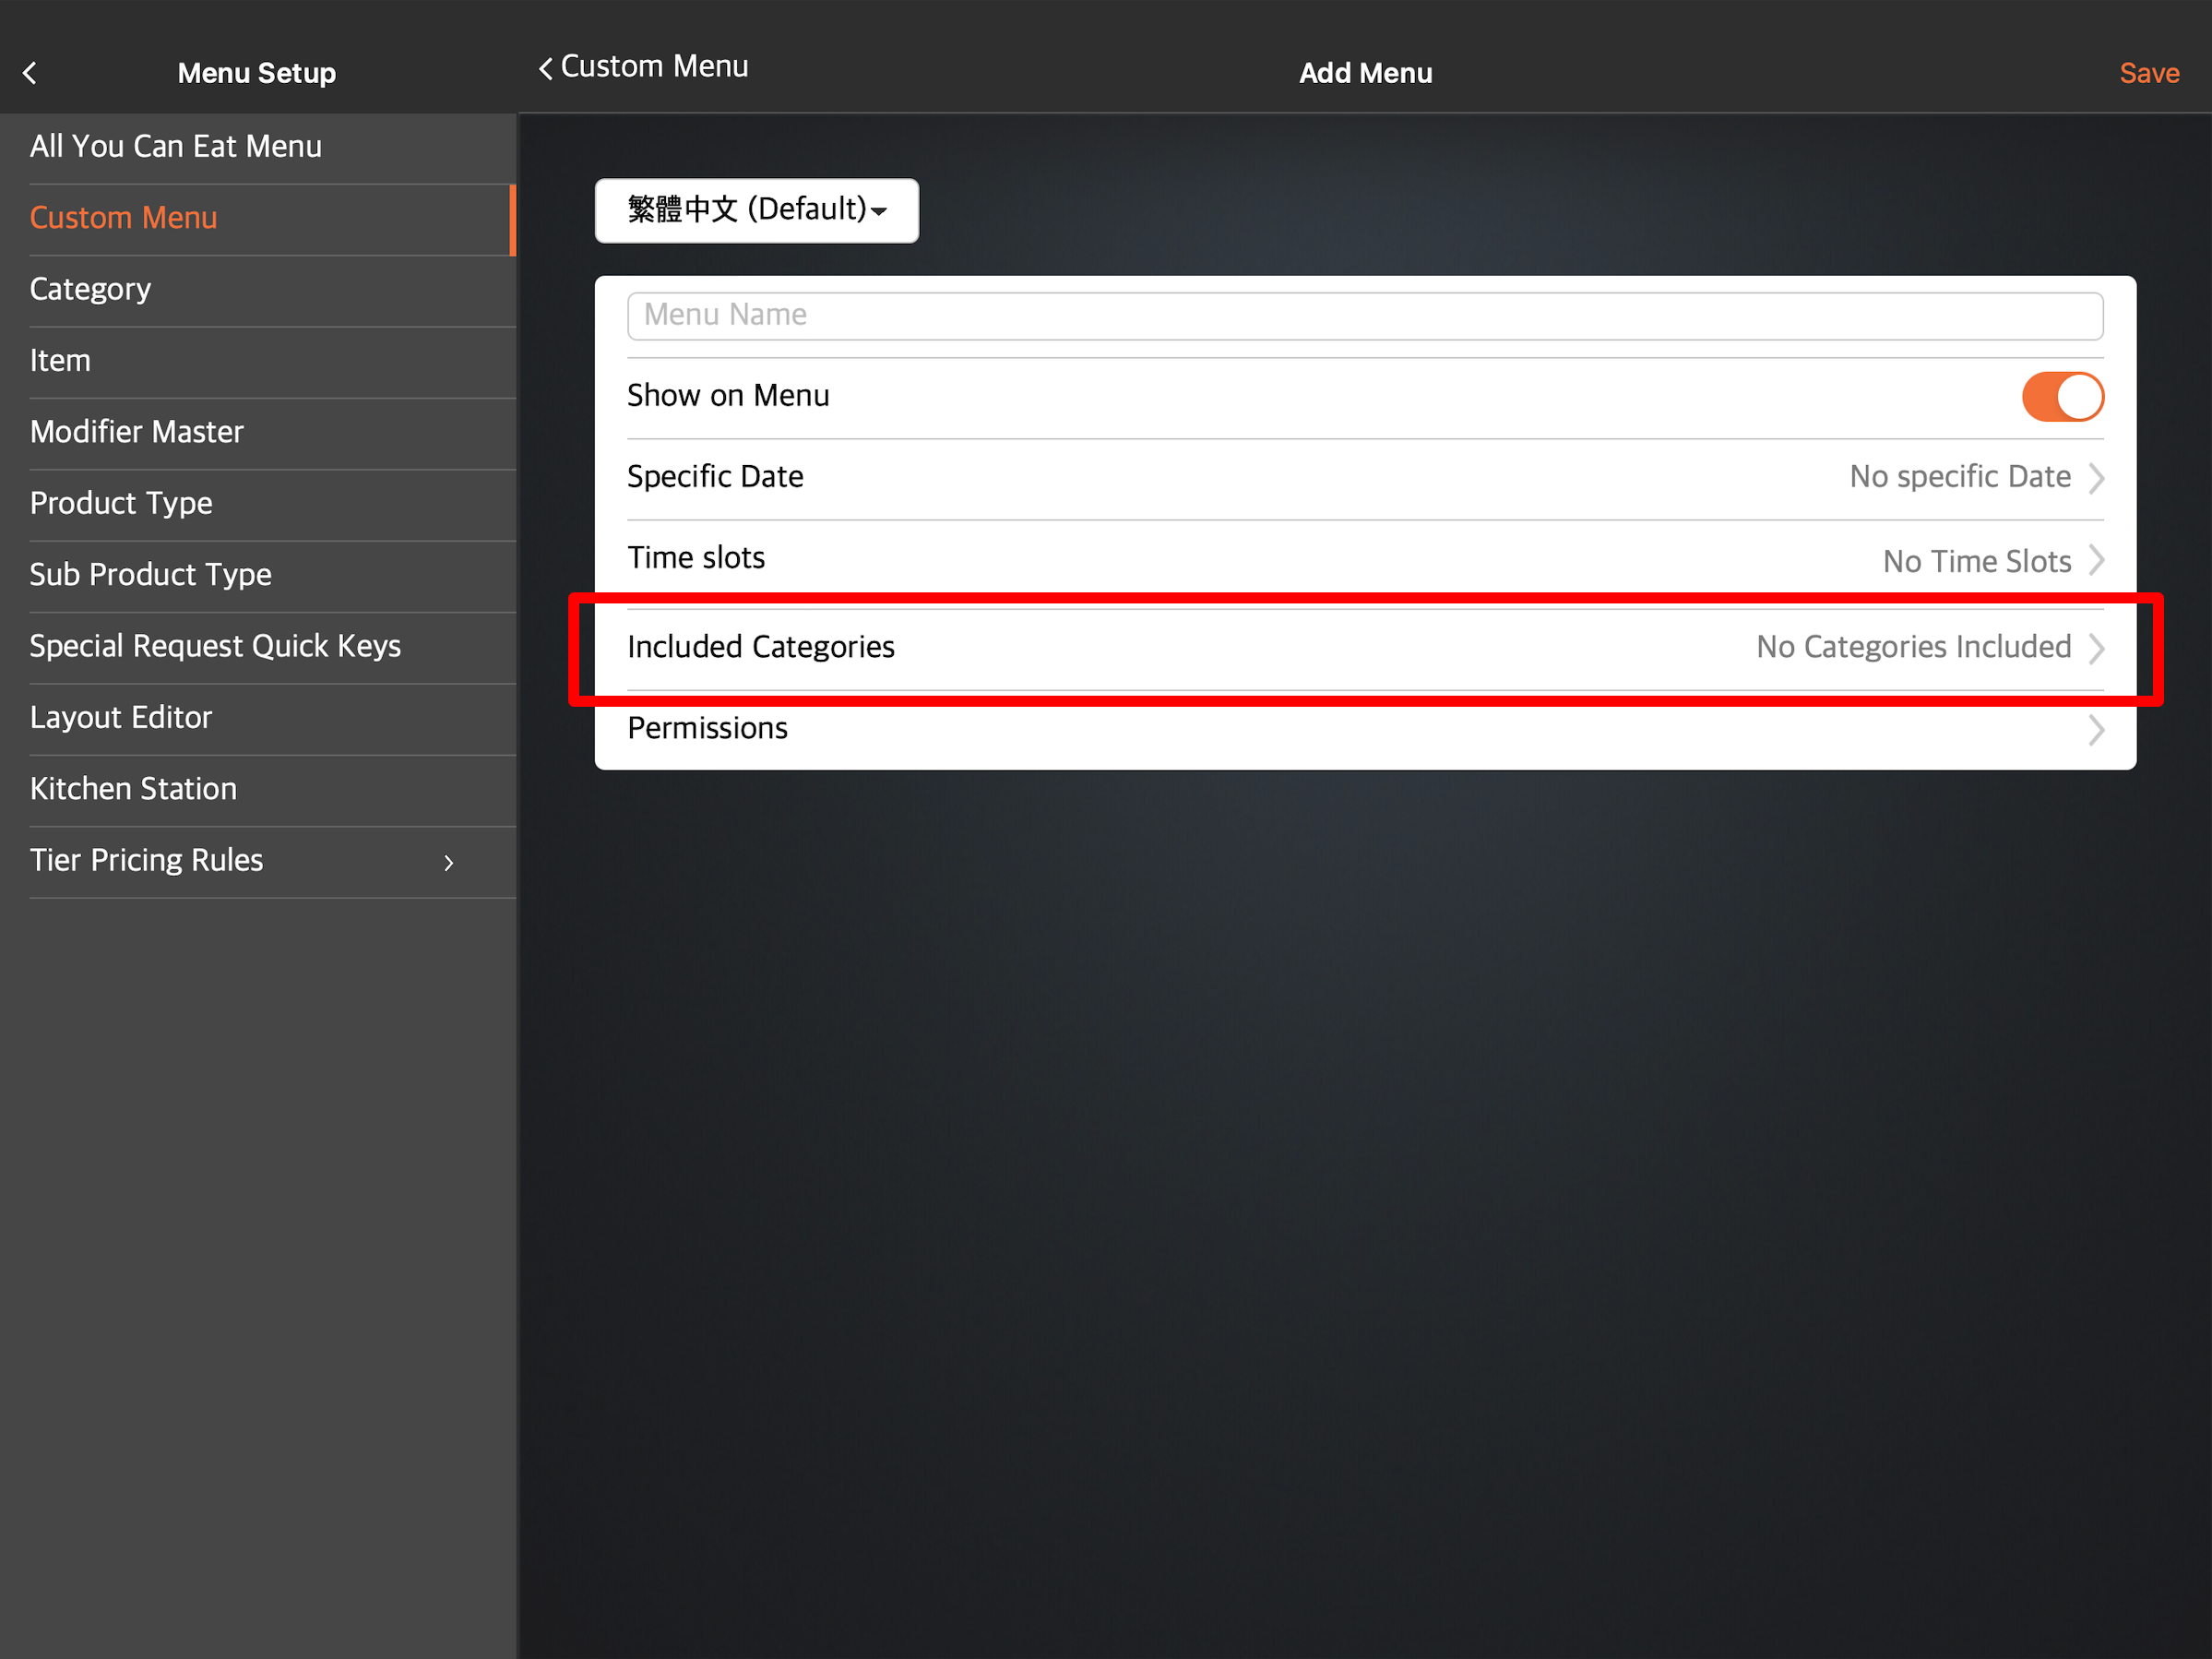
 - Enter the Custom Menu name.
- To make the Custom Menu appear on the POS, turn on Show on Menu
 .
. - Add the date and time when the Custom Menu would appear on the POS.
Tip: You can configure the Custom Menu to appear on specific time slots, depending on the day. For example, you can set your Custom Menu to show on the POS from 8 AM to 10 AM on Wednesdays, and from 10 AM to 5 PM on other days of the week. - Select the categories that you would like to include in the Custom Menu.
- Set up staff roles and application permissions.
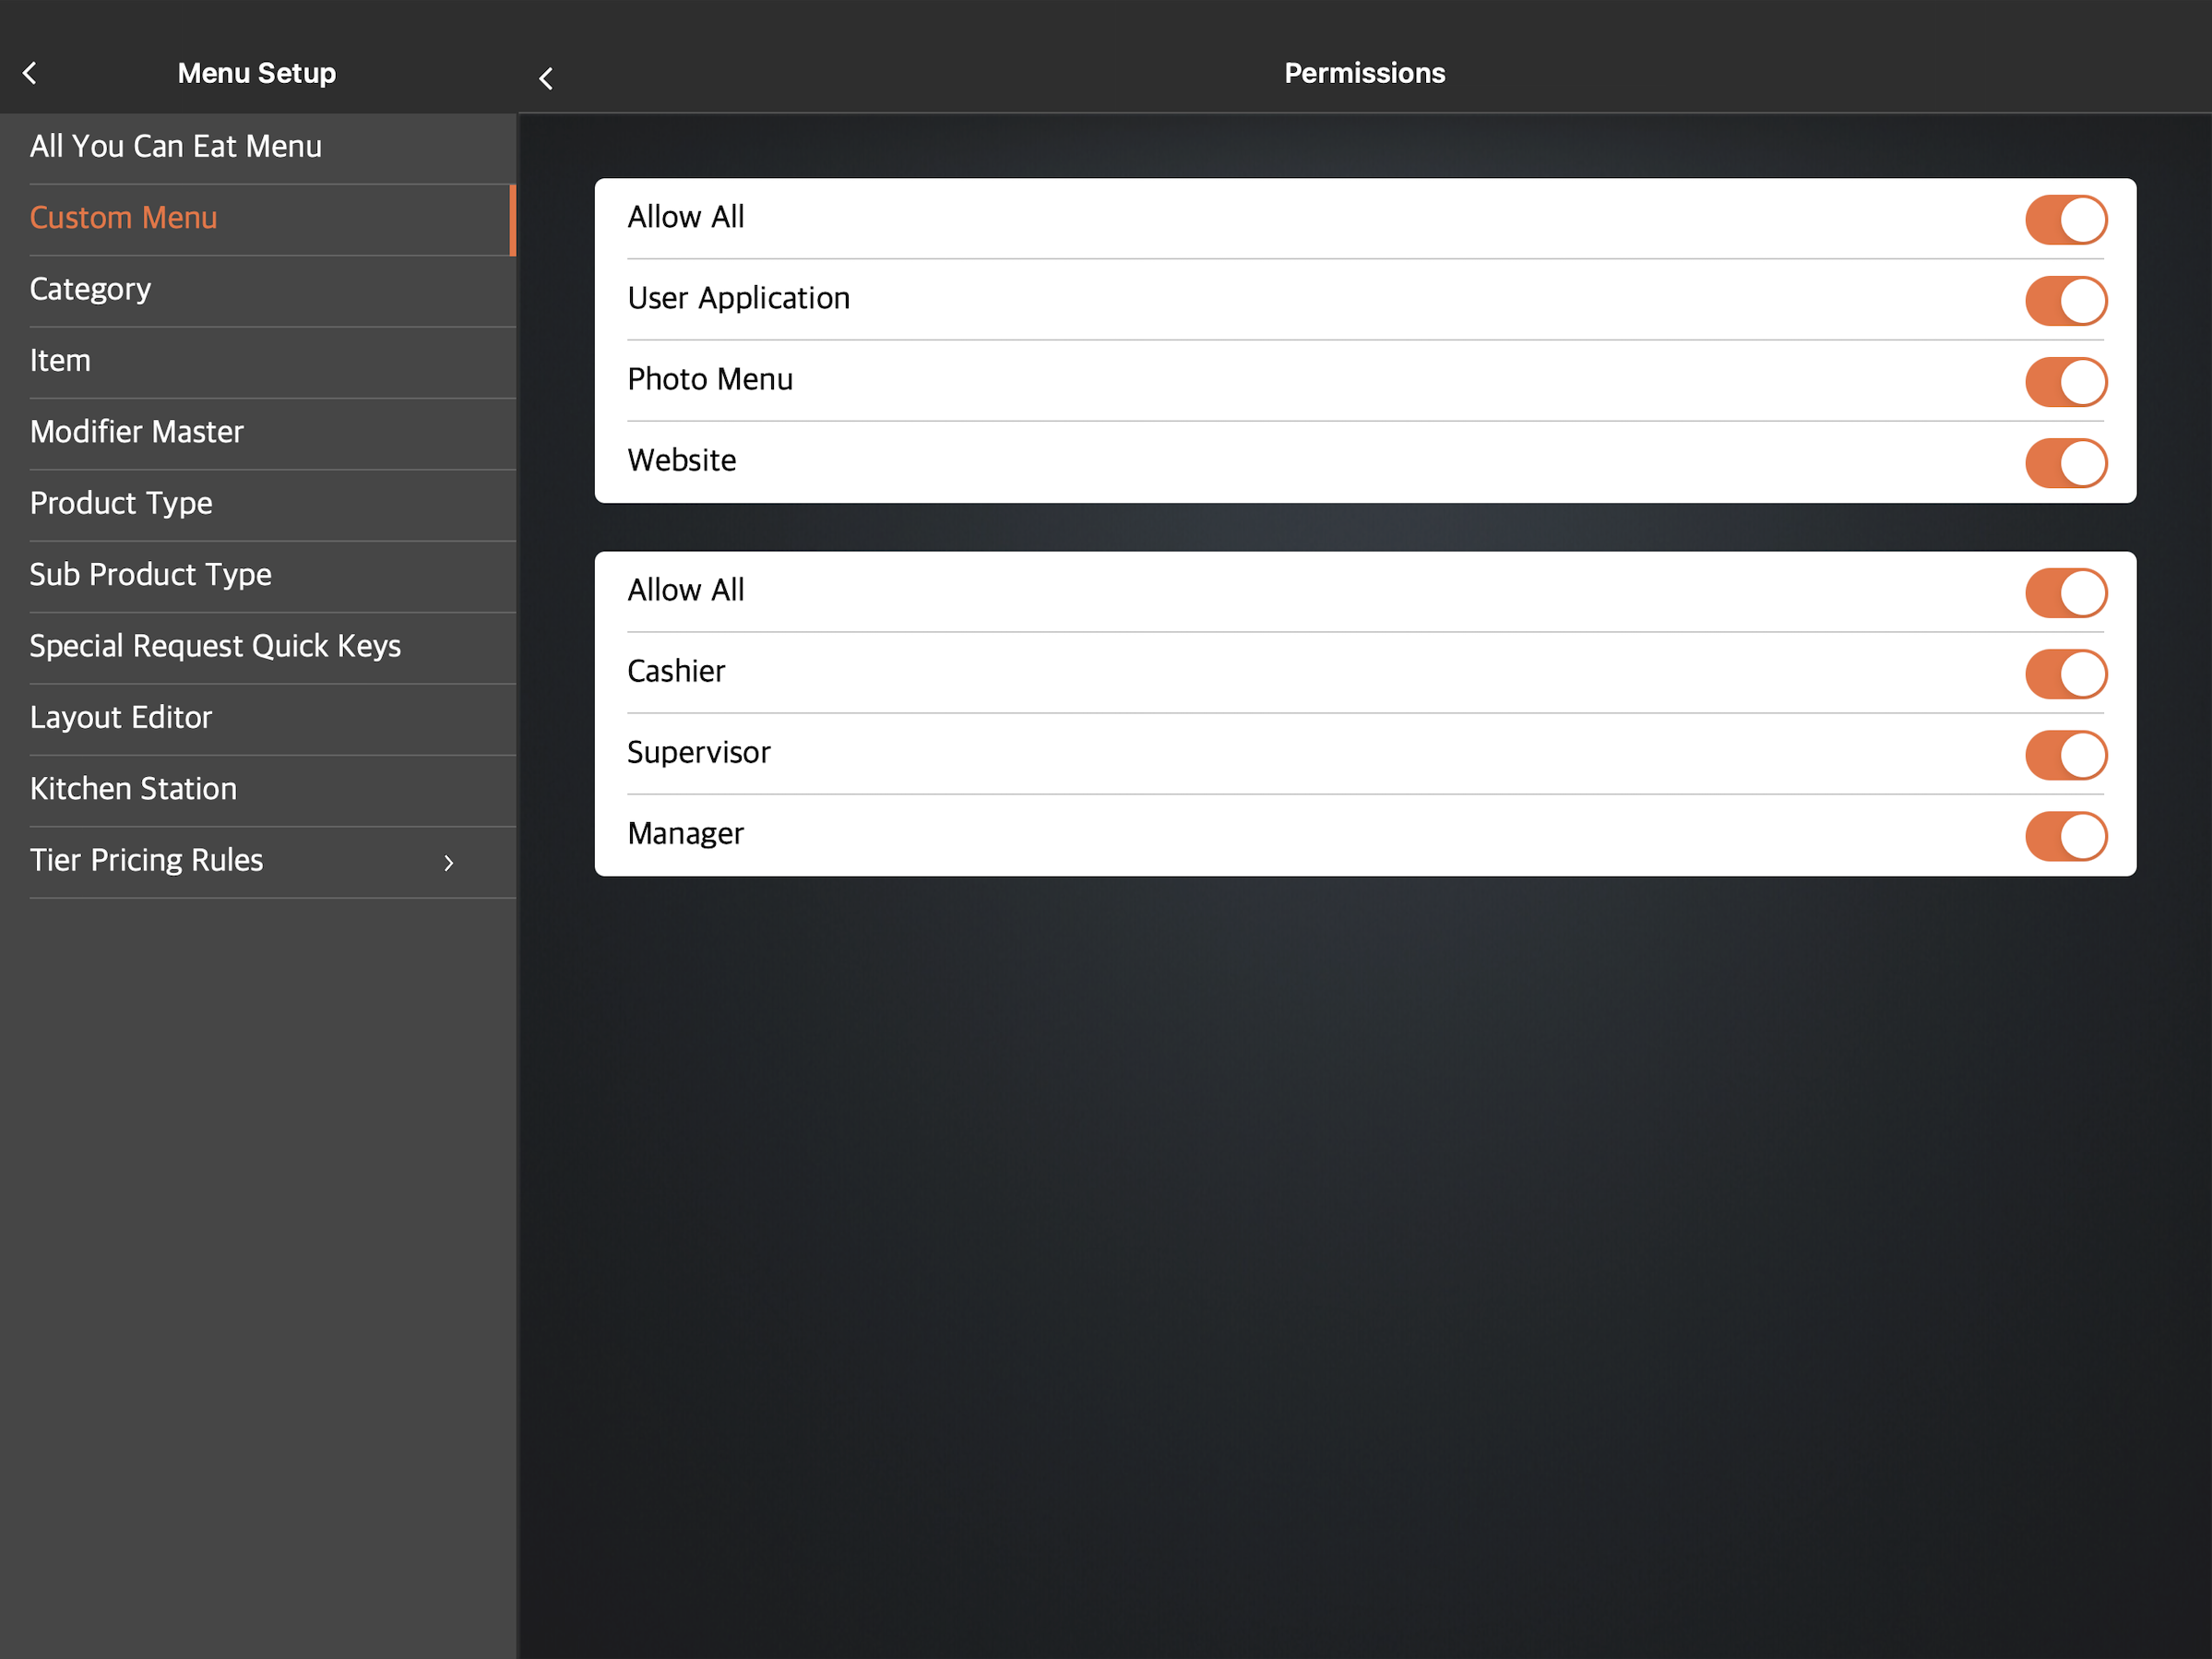 Note: You can choose to Allow All access to all staff roles and applications simultaneously. However, it’s recommended that you enable or disable access to each role and application individually.
 - At the top right, tap Save to confirm.
- To view the Custom Menu, go to the order-taking screen. Next to your menu categories, tap All
 .
.
Merchant Portal (Classic Theme)
- Log in to the Merchant Portal.
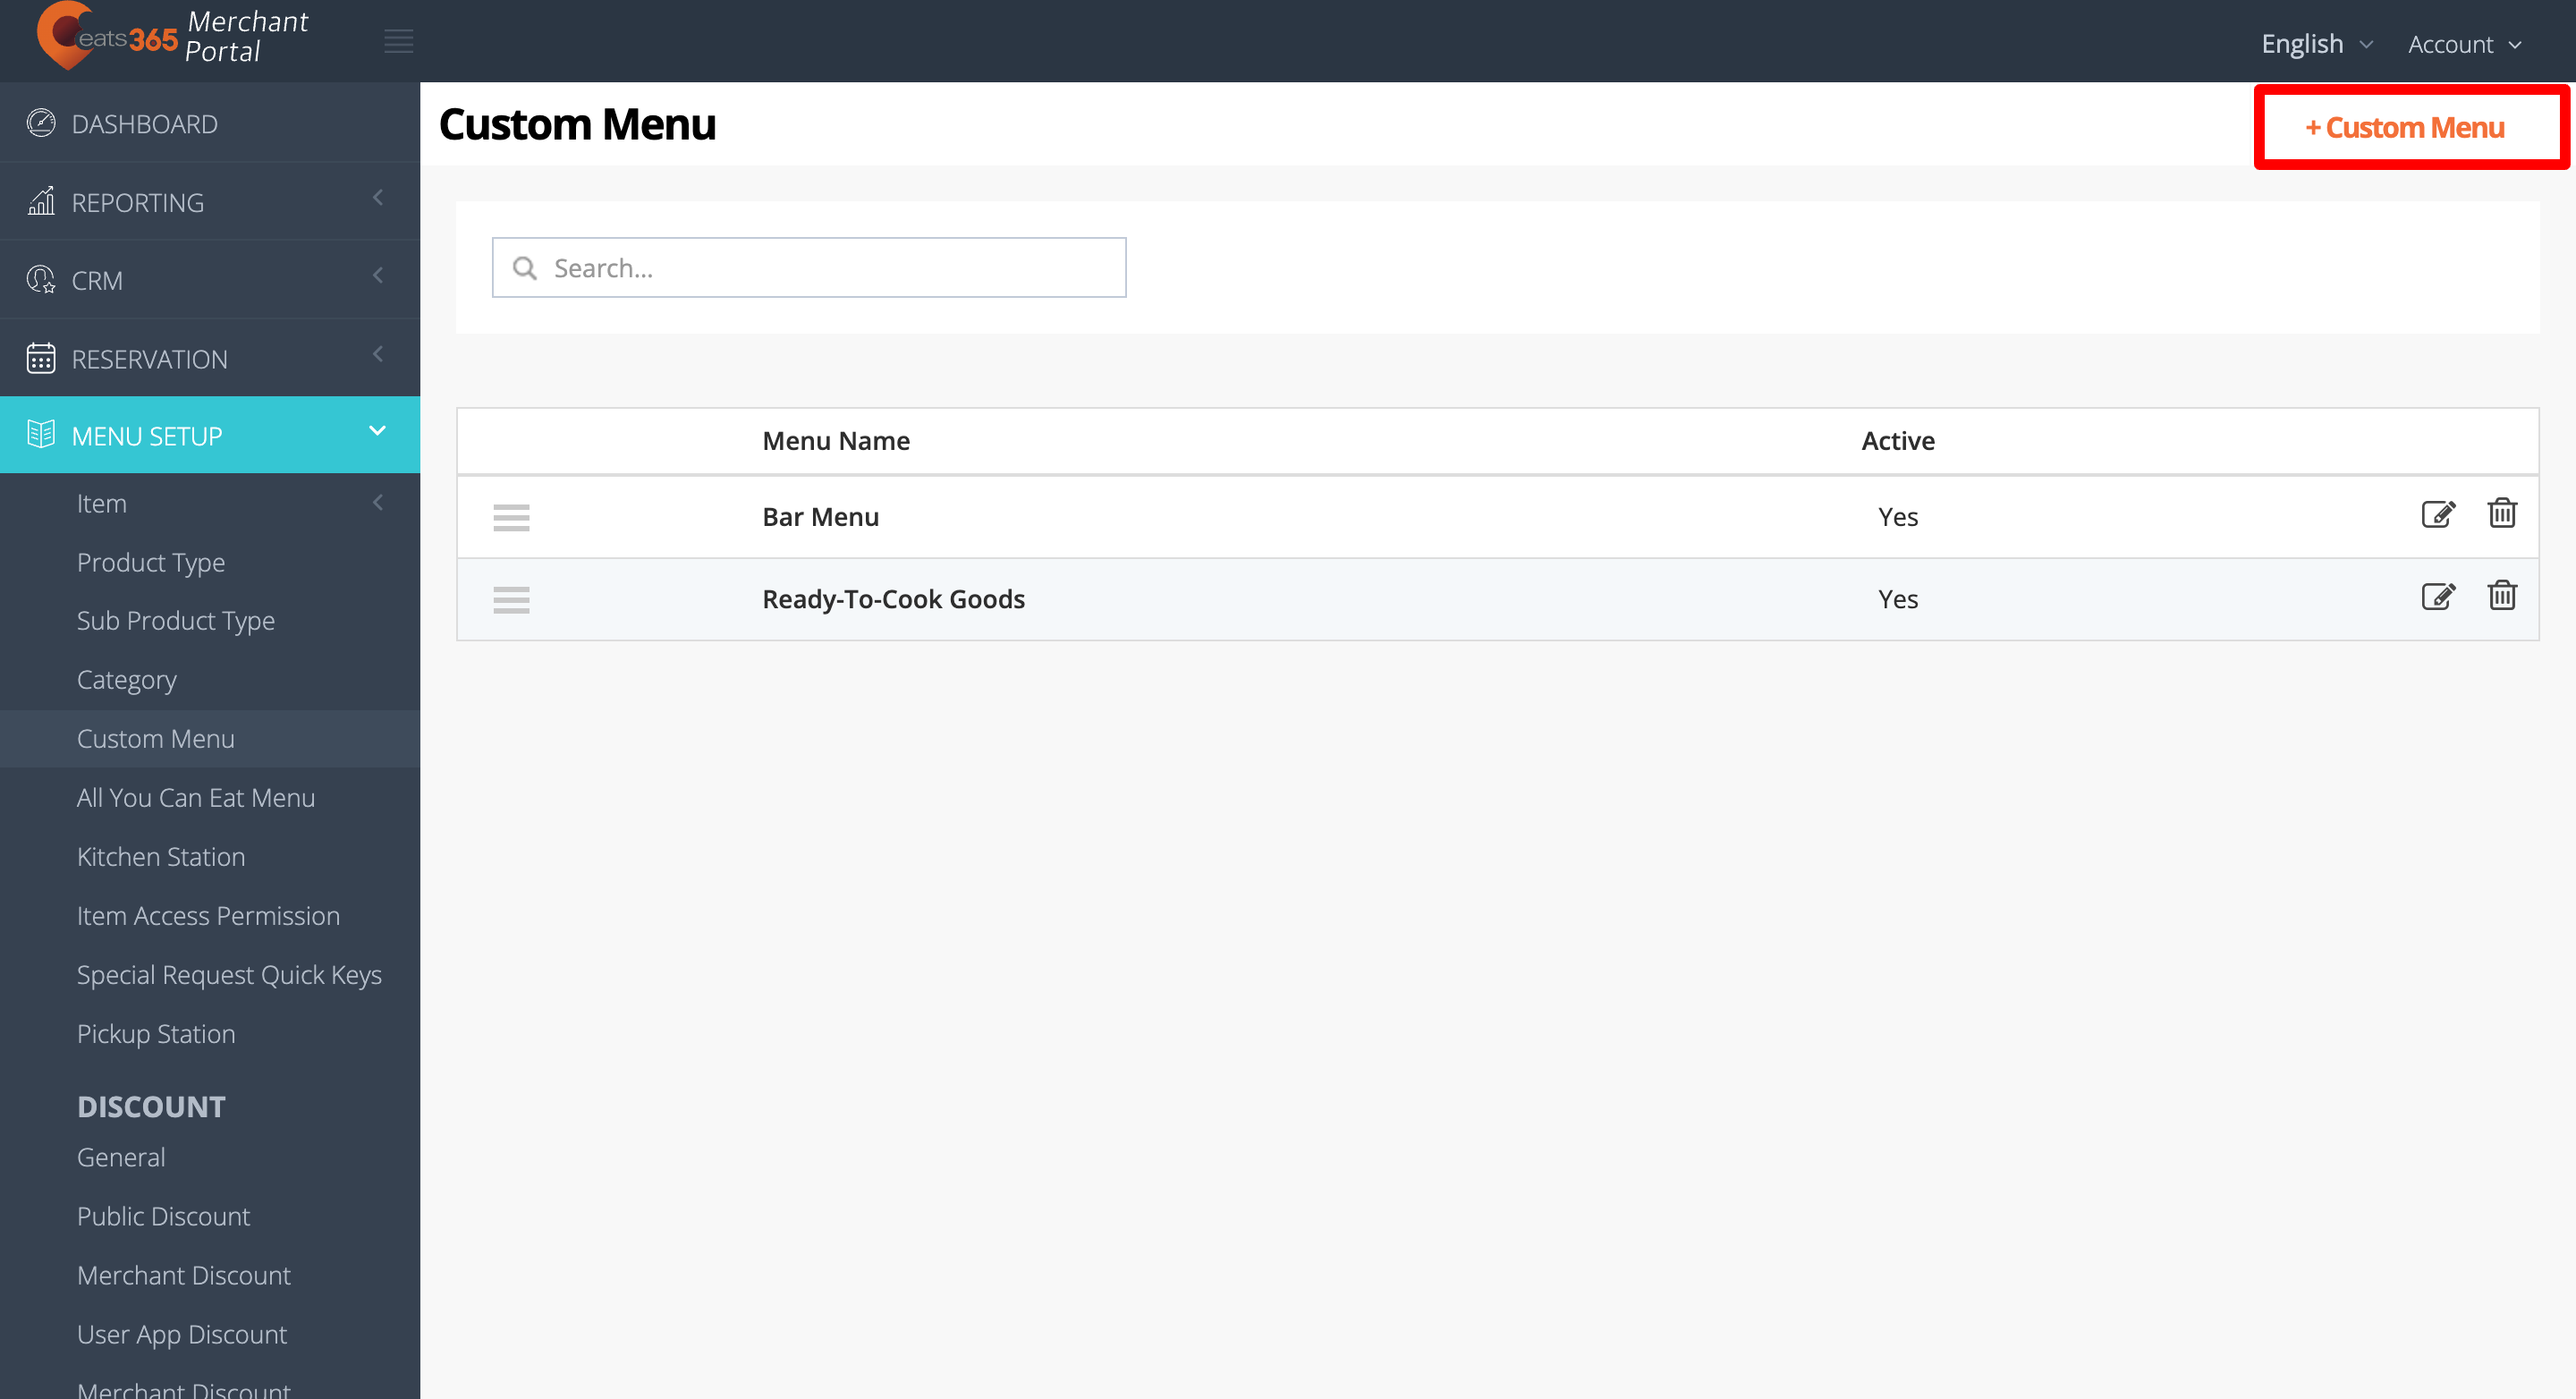
- On the left panel, click on Menu Setup, then select Custom Menu.
- At the top right, click on +Custom Menu.
- Add an image for the Custom Menu.
- Select the Custom Menu language.
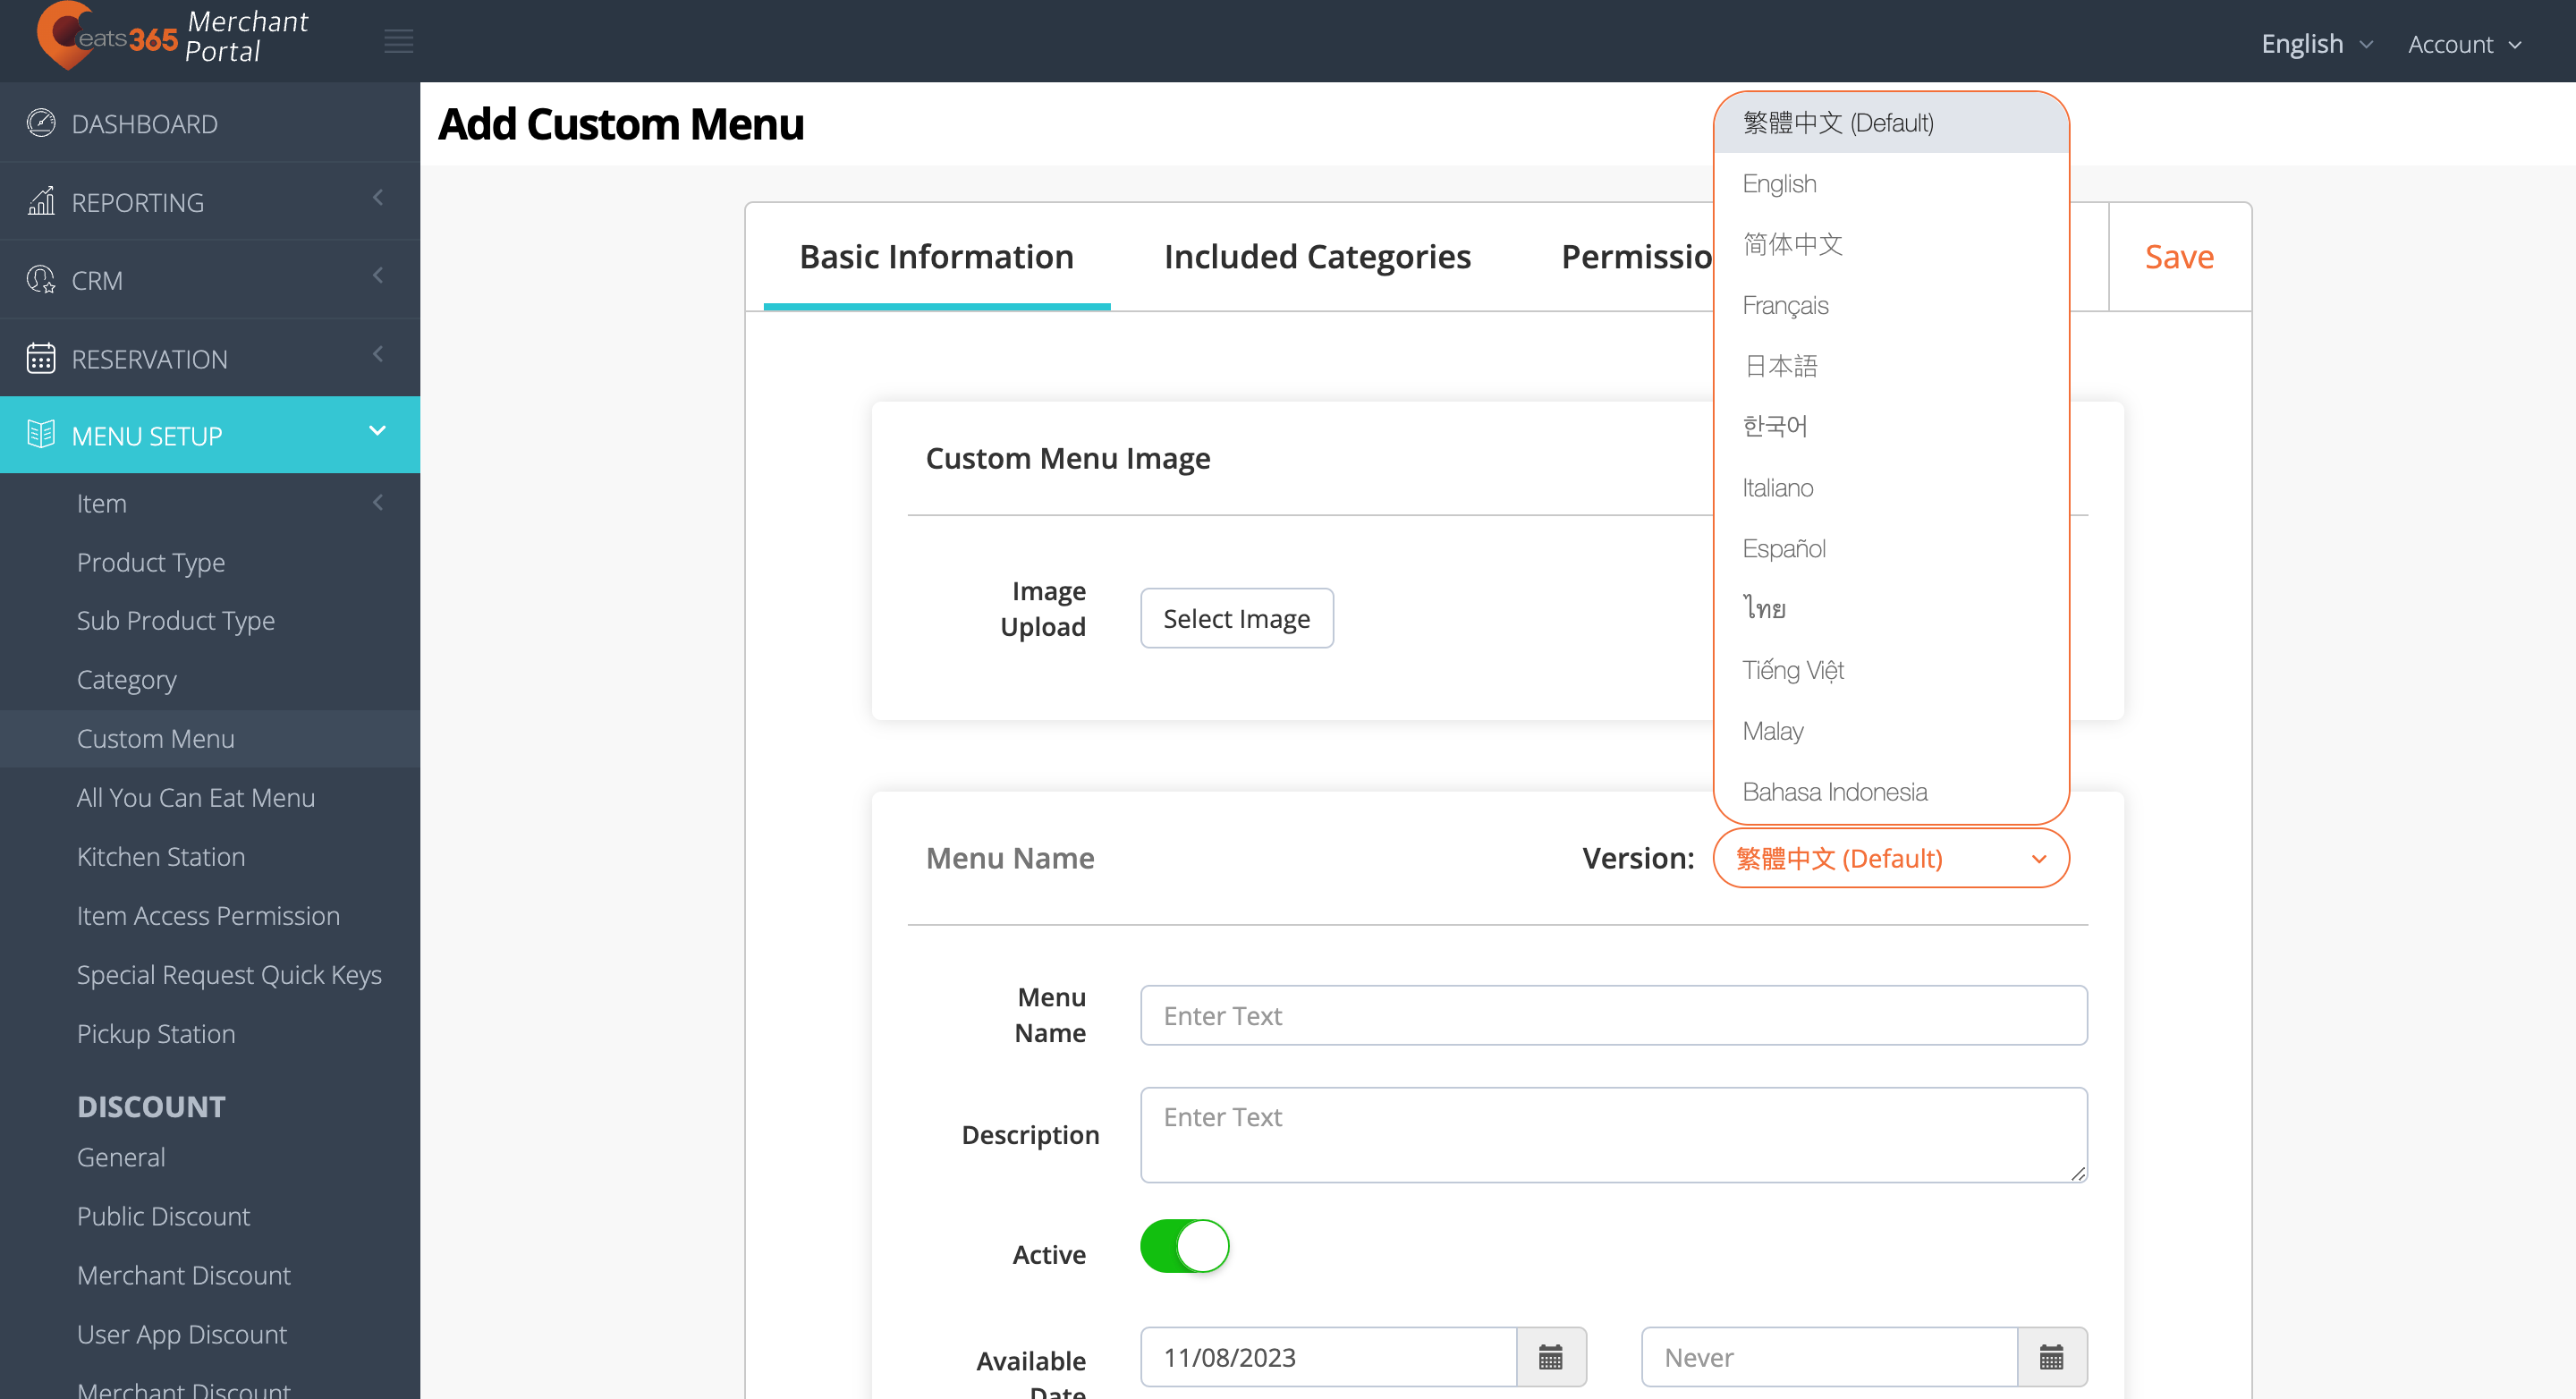 Note: You must enter a default name for the Custom Menu. The name becomes available in whatever language the POS app is using. For multi-language menus, after selecting a default language, tap the language drop-down list and select your preferred language. Then, enter the alternate name in that language.
 - Enter the Custom Menu name.
- Add a description of the Custom Menu.
- To make the Custom Menu appear on the POS, turn on Active
 .
. - Add the date and time when the Custom Menu would appear on the POS.
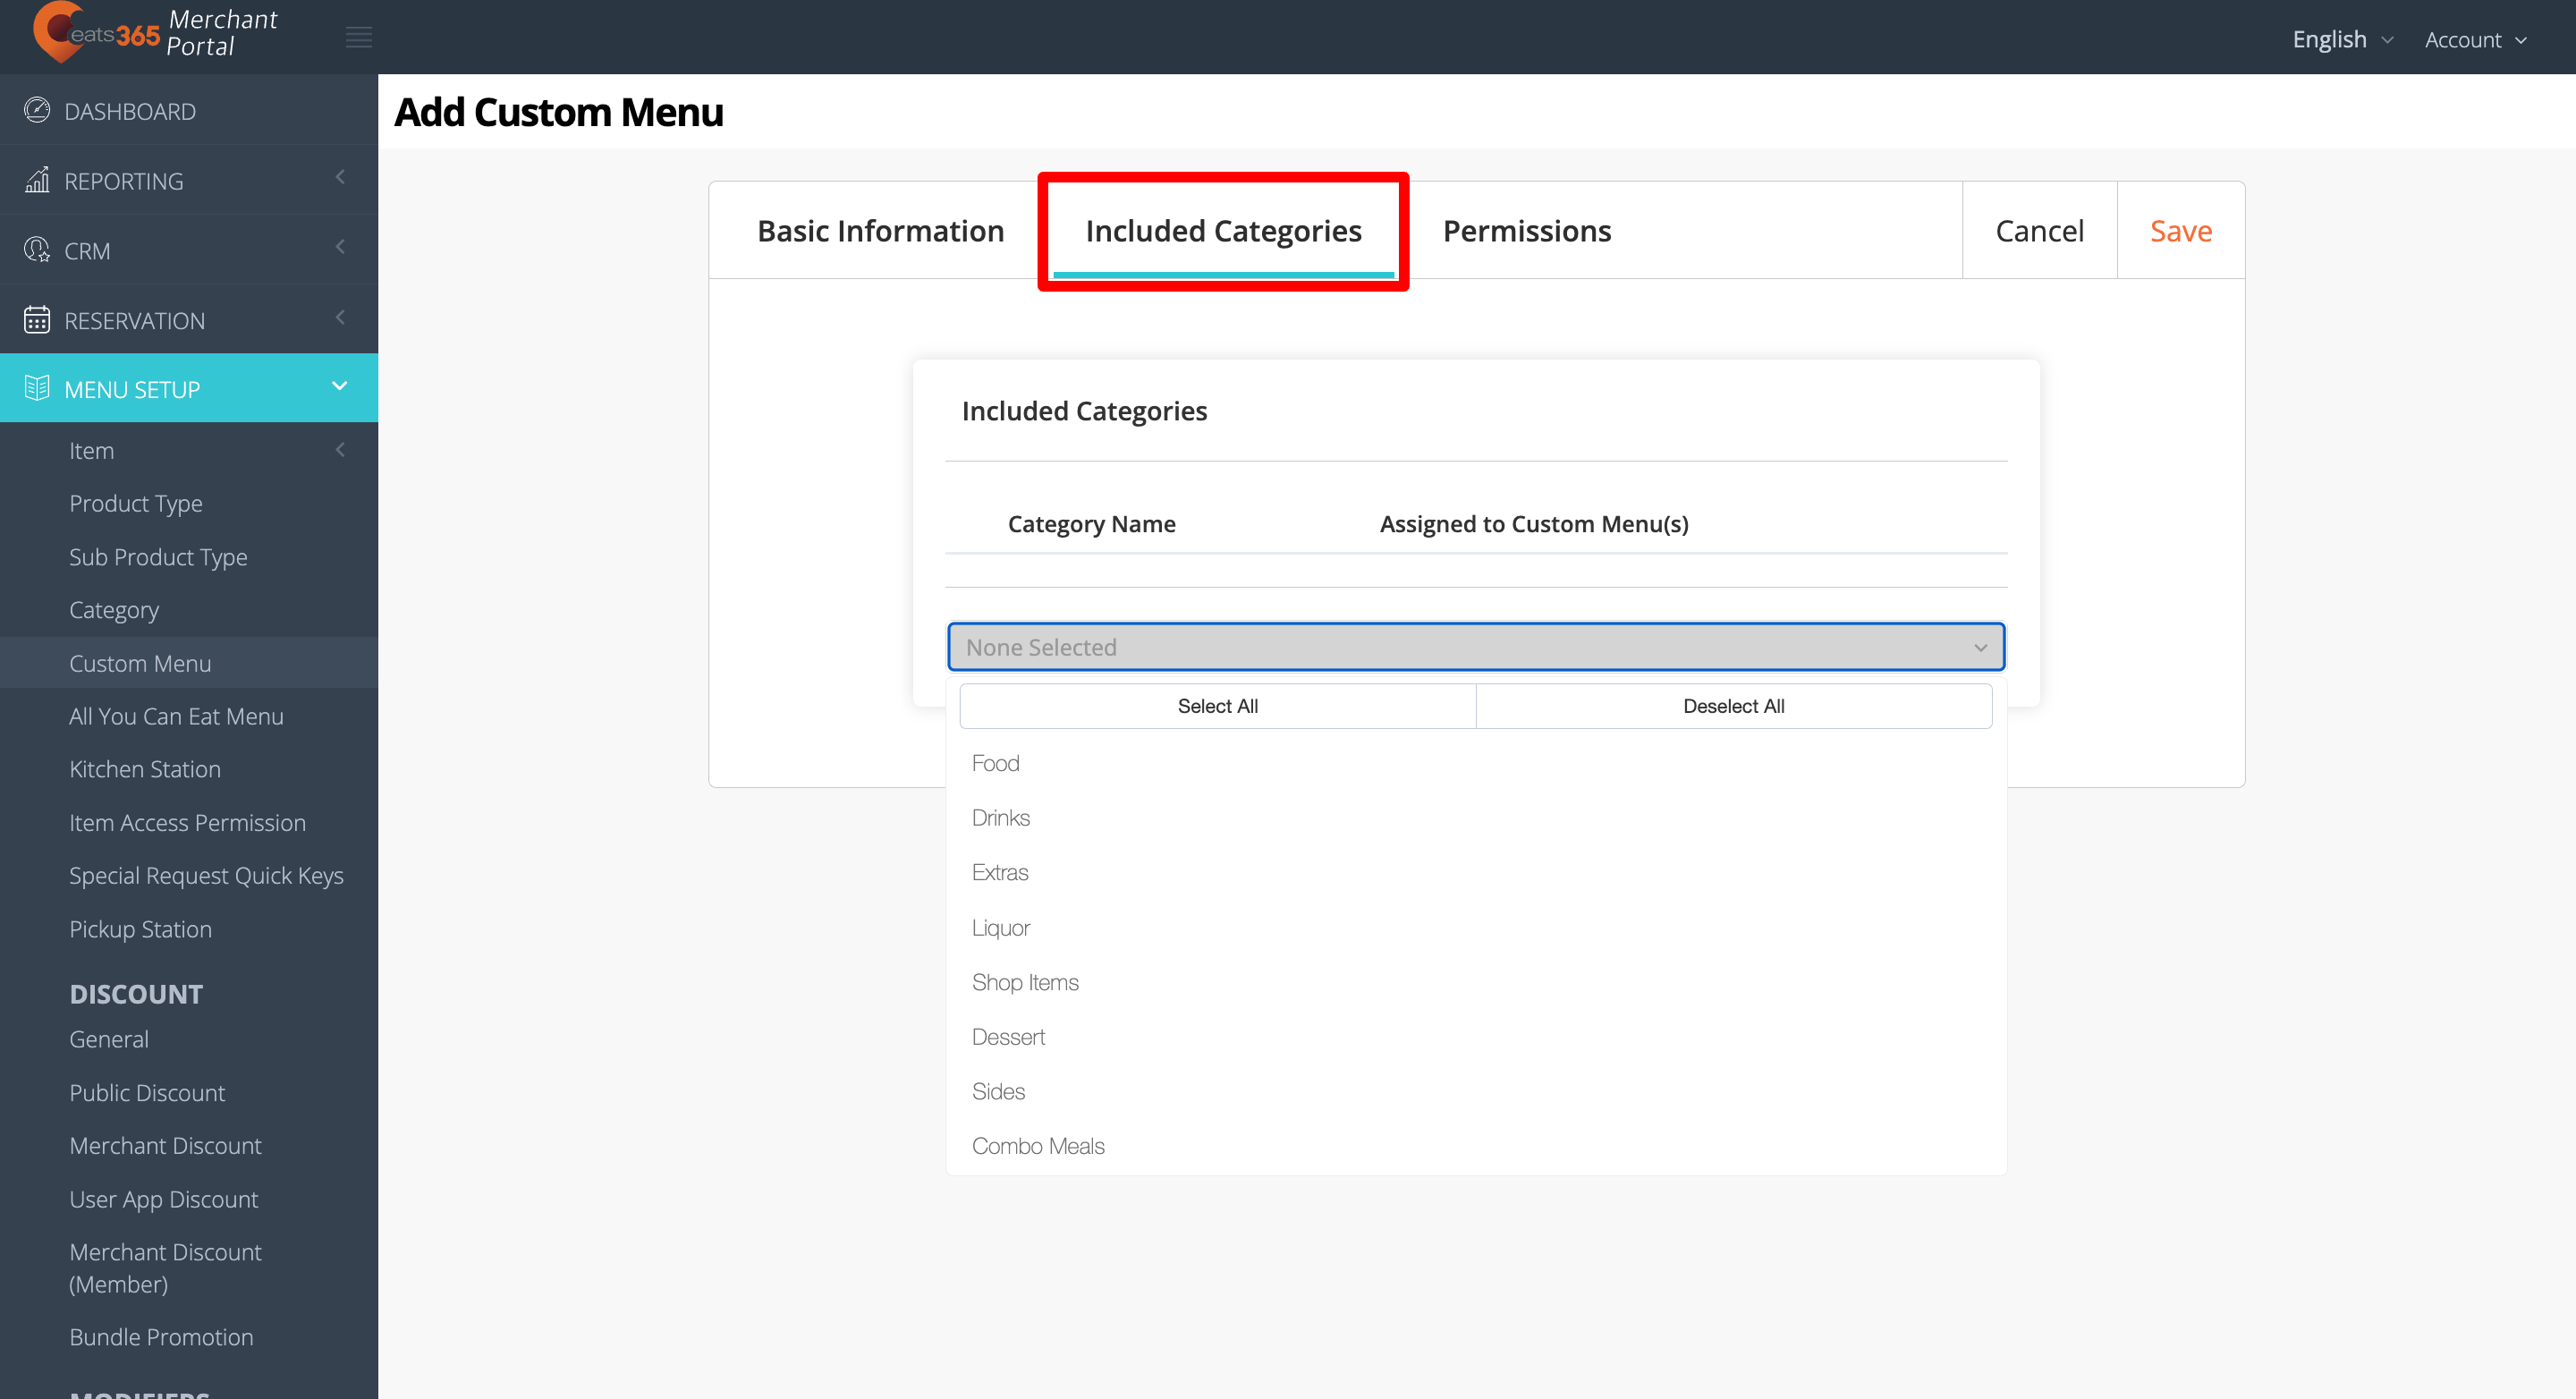
Tip: You can configure the Custom Menu to appear at specific time slots, depending on the day. For example, you can set your Custom Menu to appear on the POS from 8 AM to 10 AM on Wednesdays, and from 10 AM to 5 PM on other days of the week. - In the Included Categories tab, select the categories that you want to include in the Custom Menu.
- In the Permissions tab, set up staff roles and applications permissions.
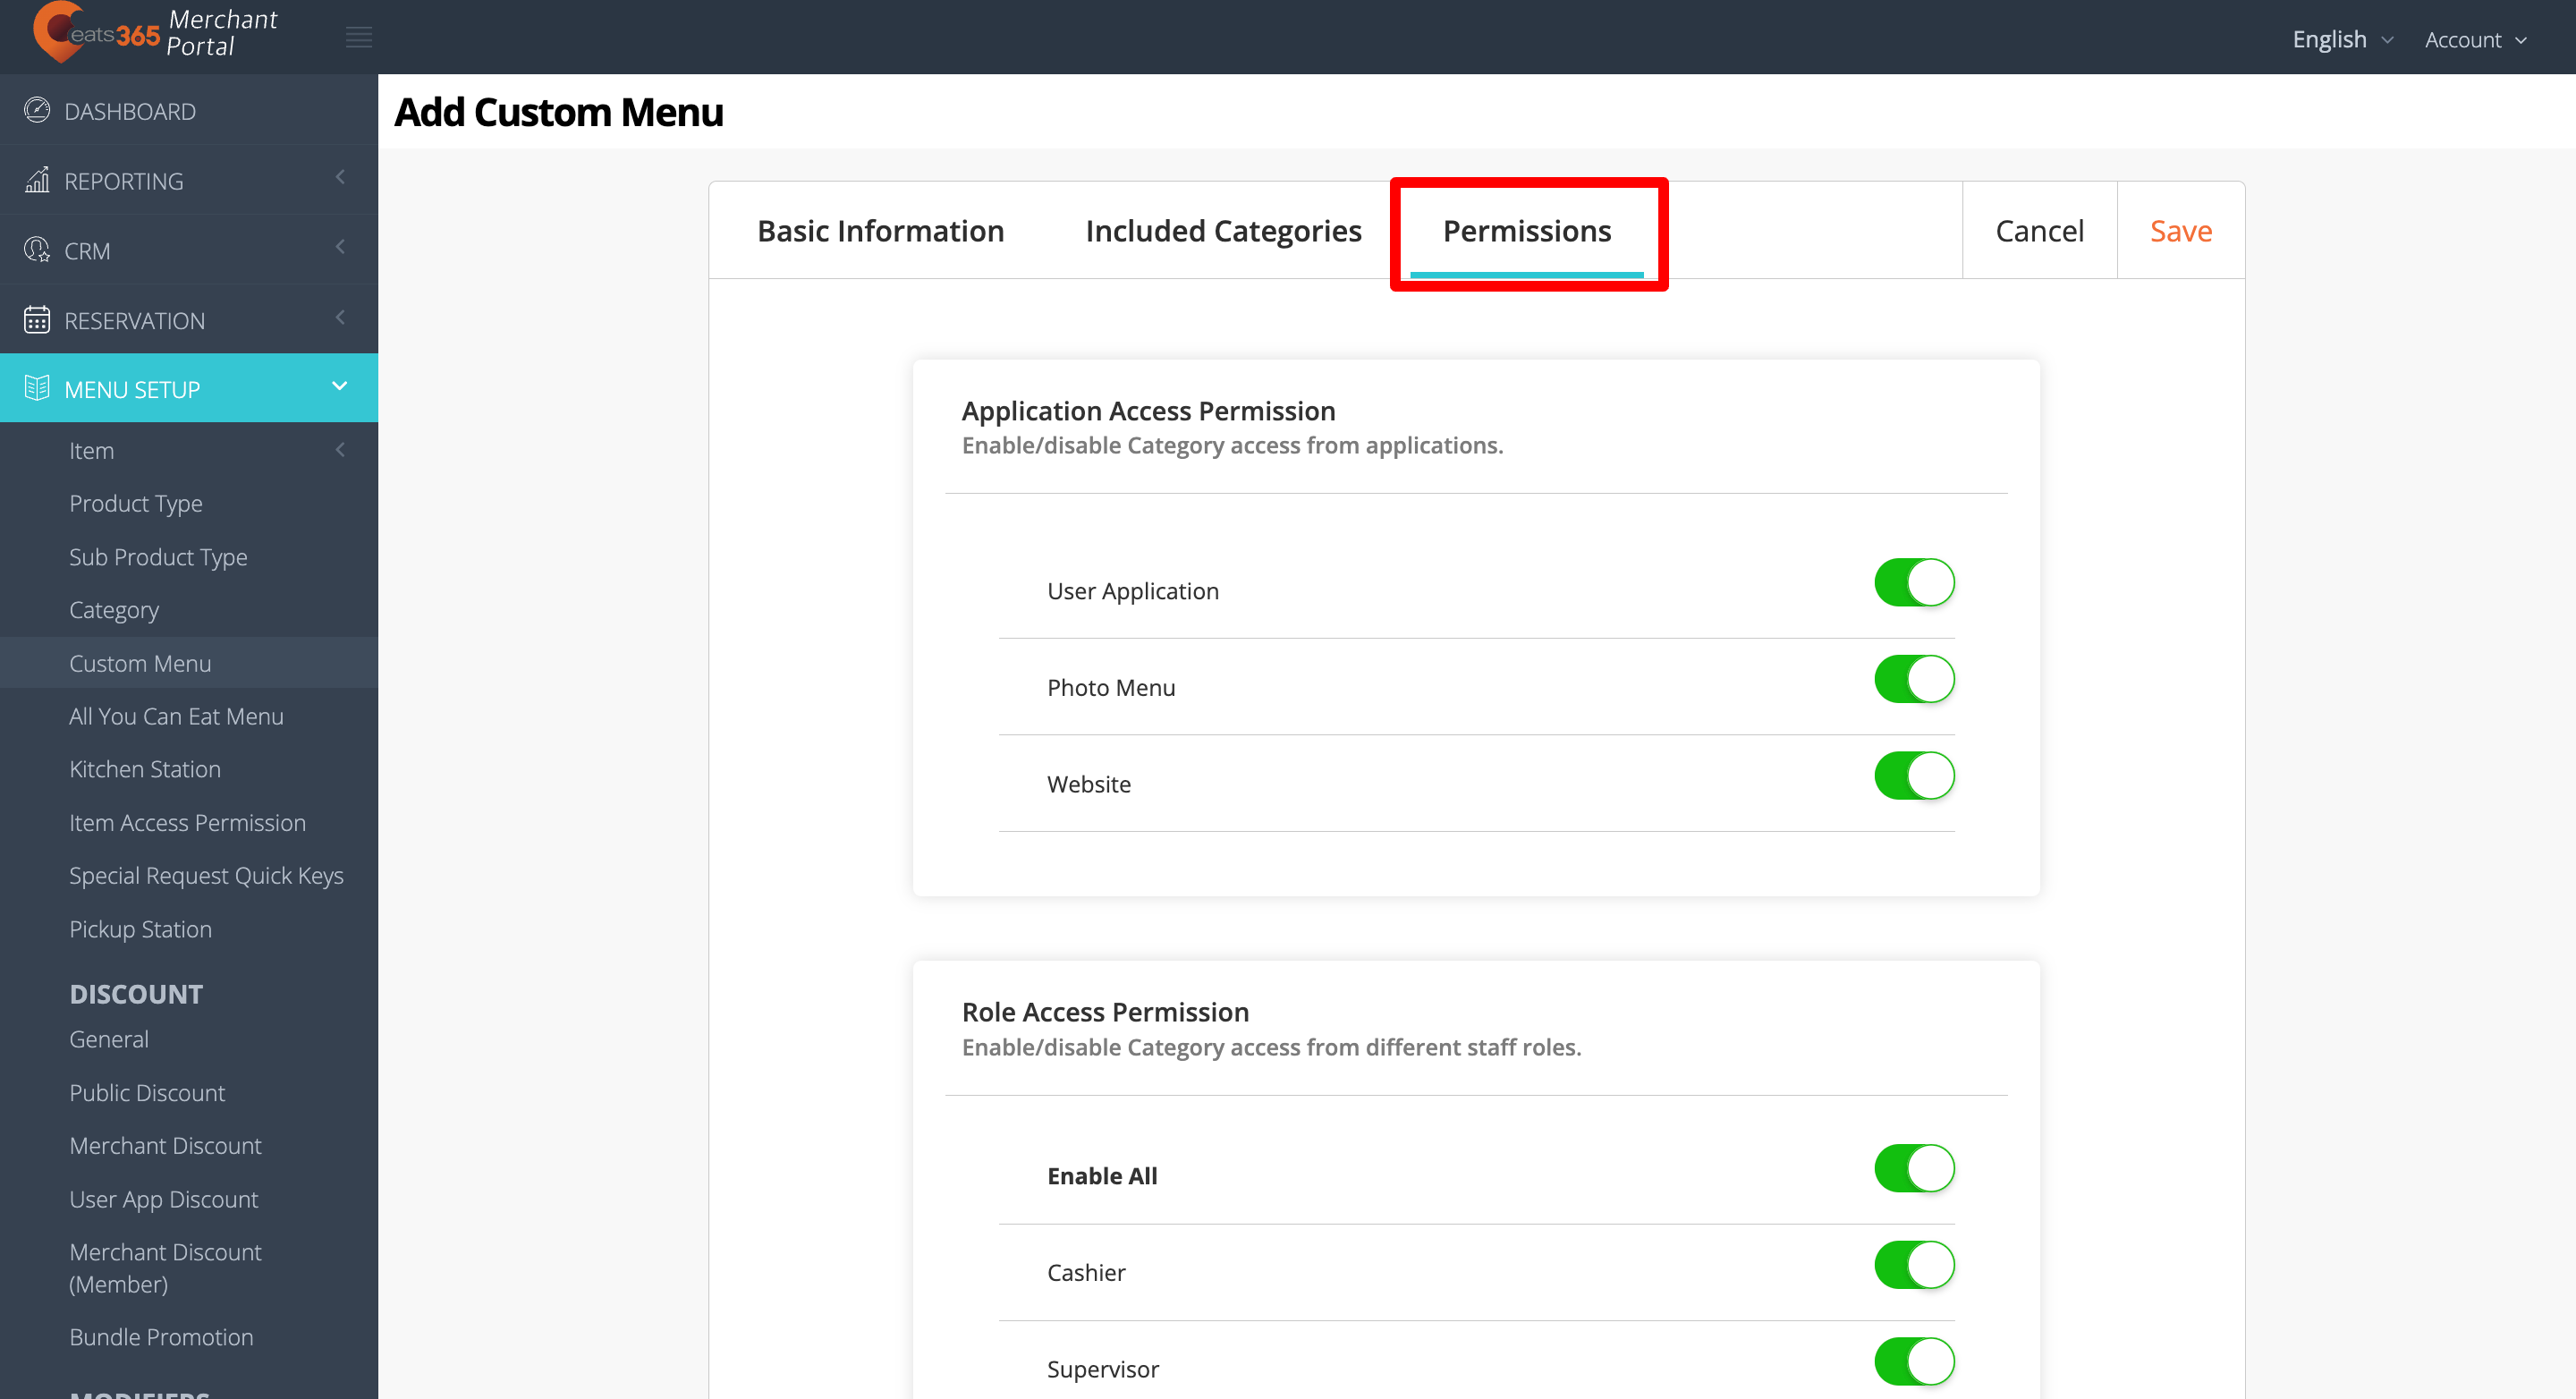
- At the top right, click on Save to confirm.
Merchant Portal 2.0
- Log in to the Merchant Portal.
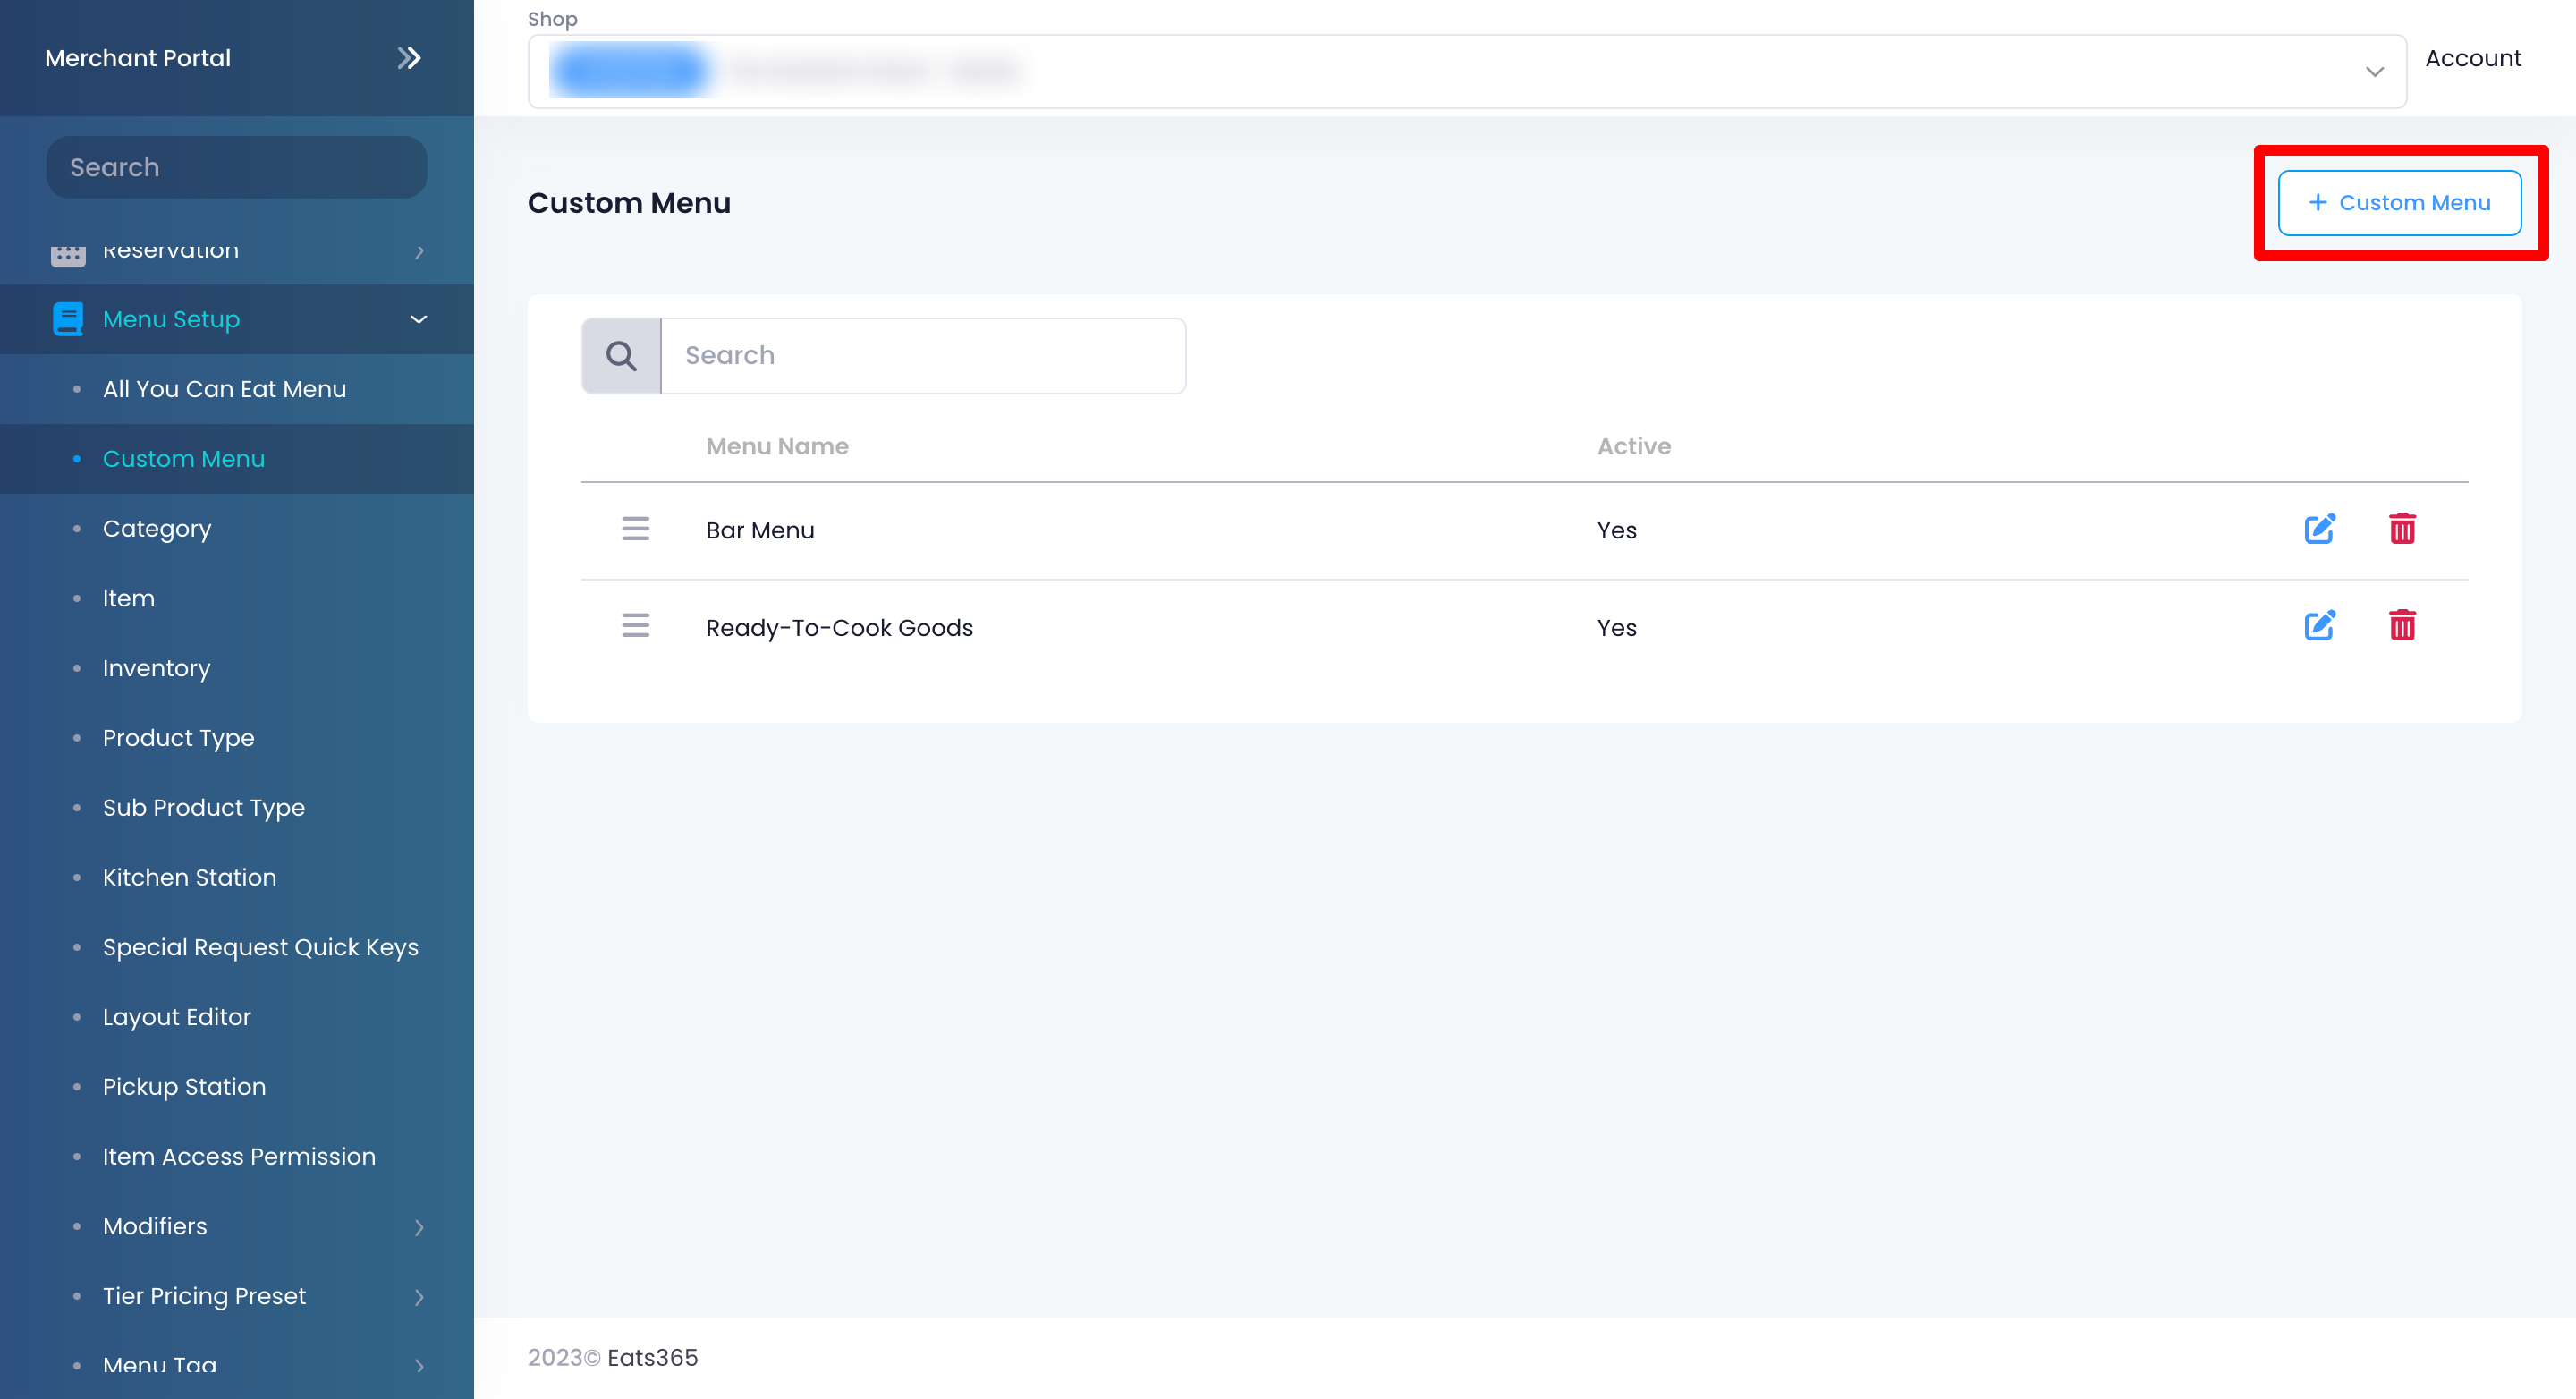
- On the left panel, click on Menu Setup, then select Custom Menu.
- At the top right, click on +Custom Menu.
- To make the Custom Menu appear on the POS, turn on Active
 .
. - Add an image for the Custom Menu.
- Enter the Custom Menu Name per language.
Note: You must enter a default name for the Custom Menu. The name becomes available in whatever language the POS app is using. To add more languages, click on Add Language.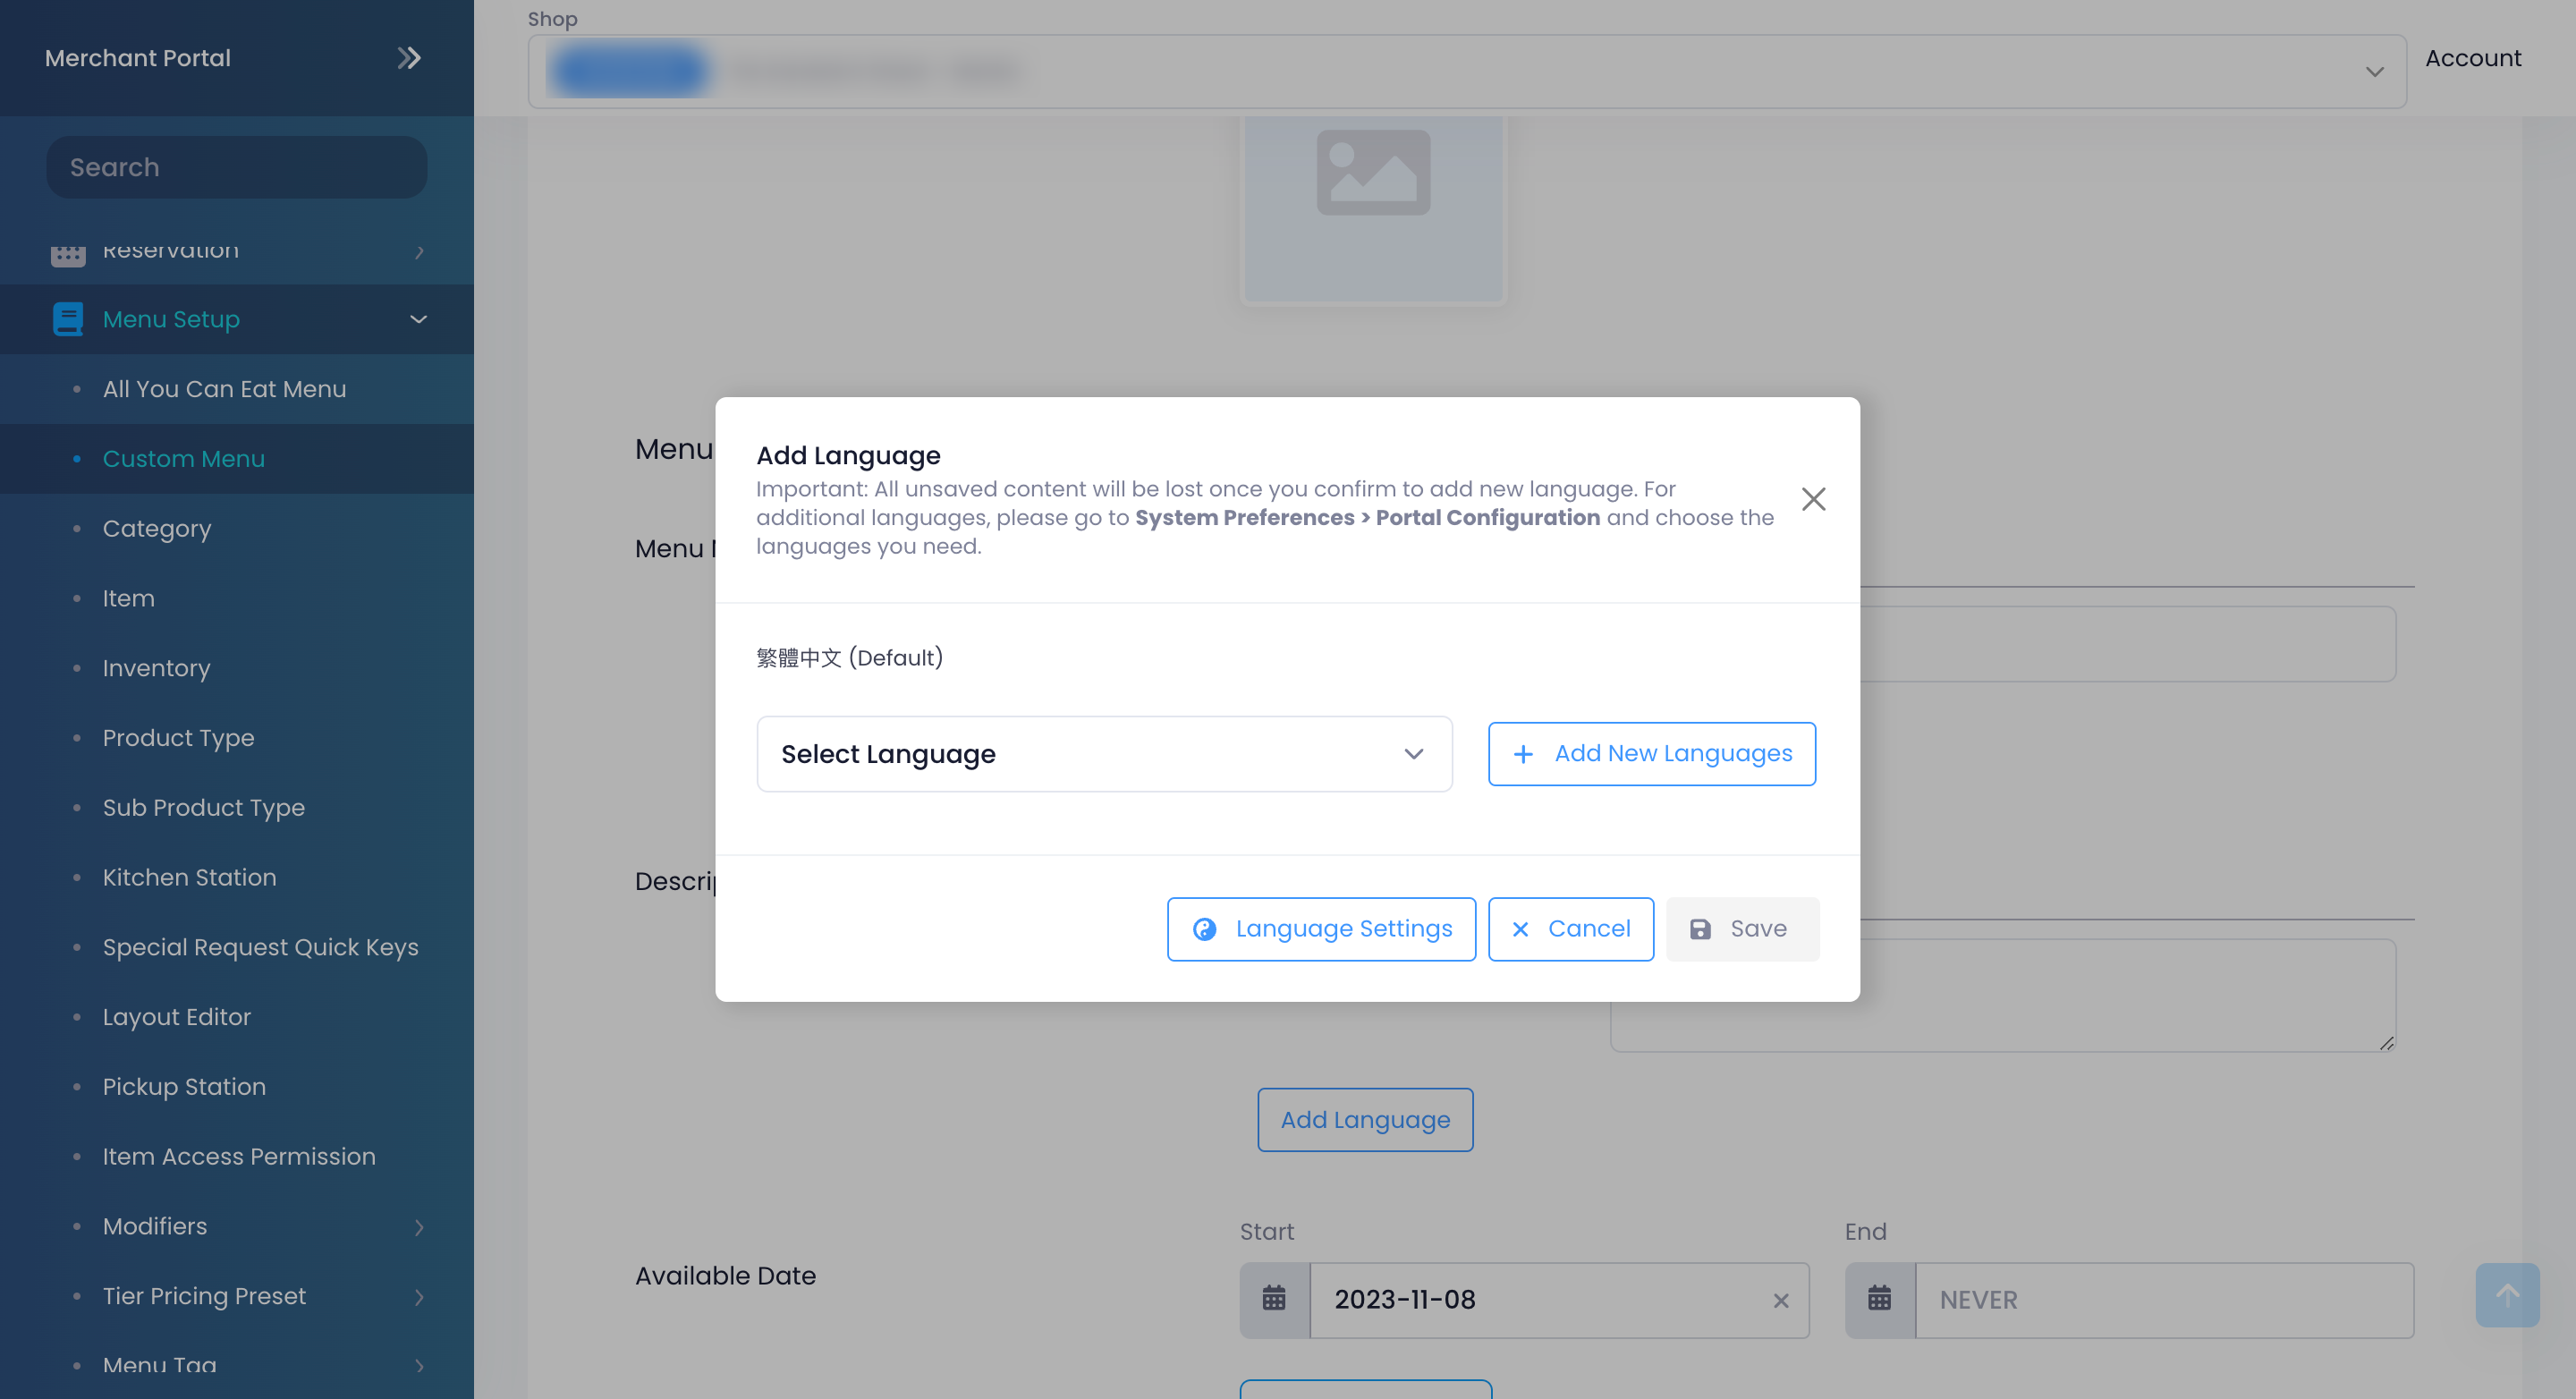
- Add the date and time when the Custom Menu would appear on the POS.
Tip: You can configure the Custom Menu to appear at specific time slots, depending on the day. For example, you can set the Custom Menu to appear on the POS from 8 AM to 10 AM on Wednesdays, and from 10 AM to 5 PM on other days of the week. - In the Included Categories tab, select the categories that you want to include in the Custom Menu.

- In the Permissions tab, set up staff roles and applications permissions.
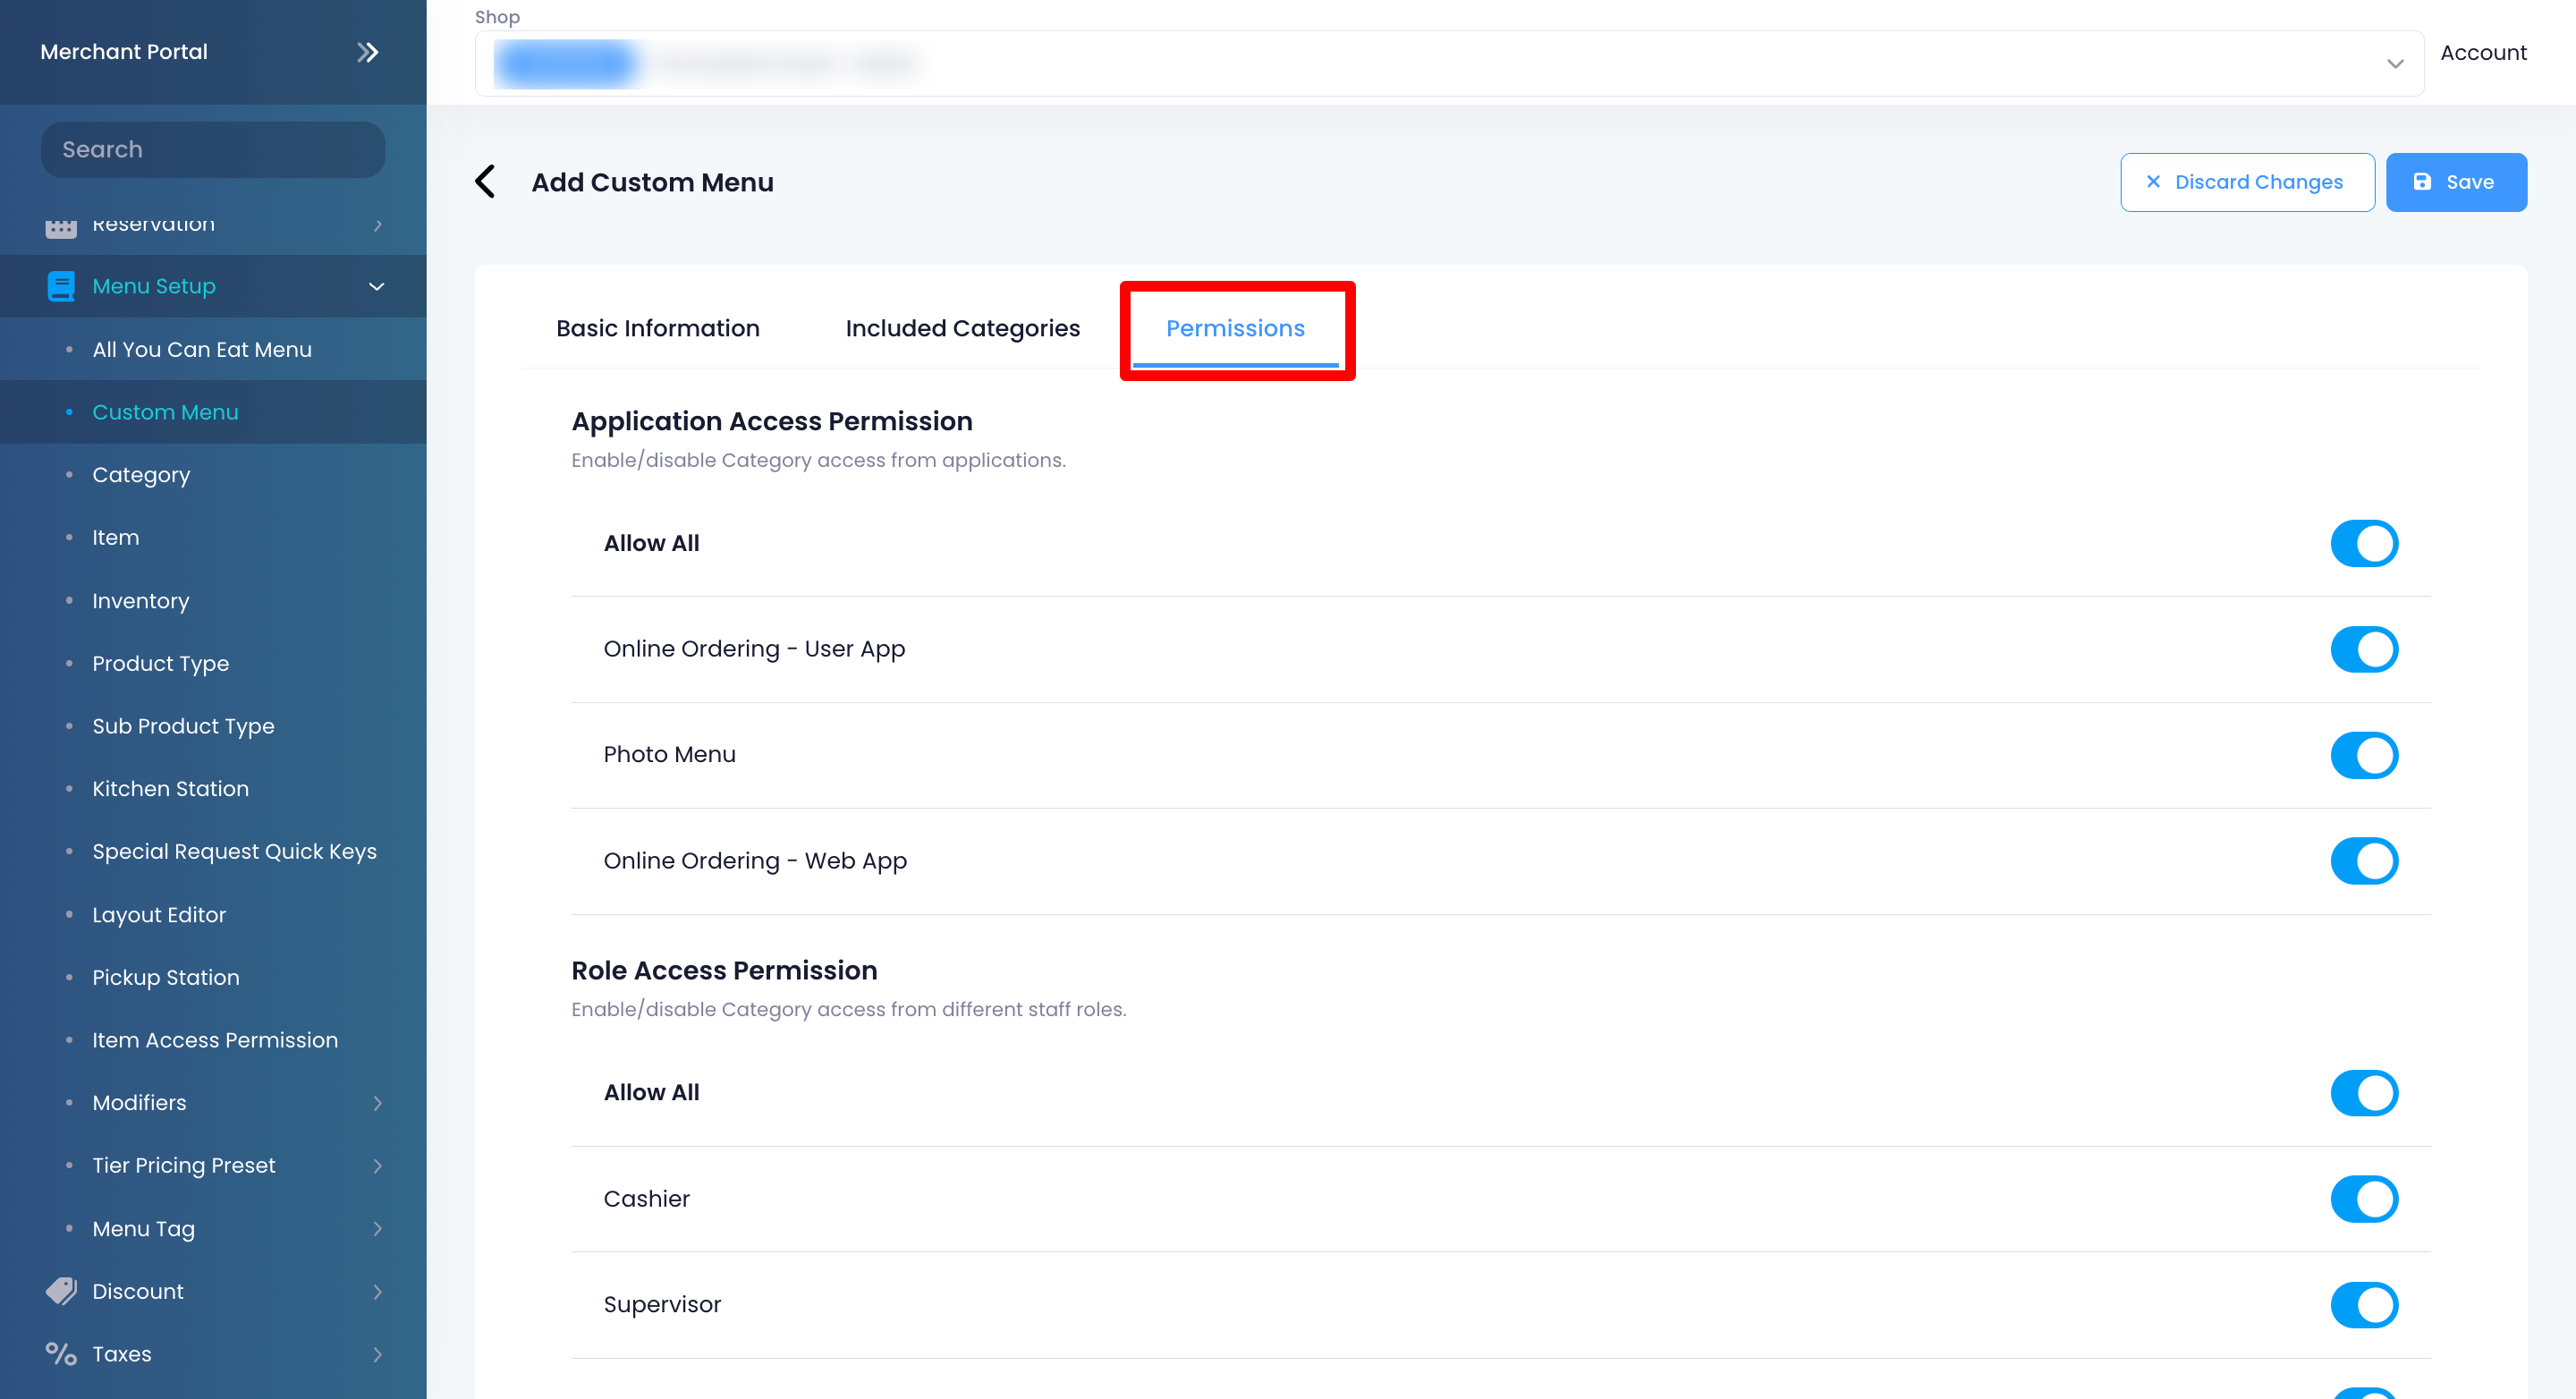 Note: You can choose to Allow All access to all staff roles simultaneously. However, it’s recommended that you enable or disable access to each role and application individually.
 - At the top right, click on Save to confirm.
Manage a Custom Menu
Edit a Custom Menu
To modify a Custom Menu, follow the steps below:
Eats365 POS
- Log in to the Eats365 POS.
- At the top left, tap Settings .
- Under General, tap Menu Setup, then select Custom Menu.
- Tap the Custom Menu that you want to edit.
- Update the Custom Menu.
- At the top right, tap Update to confirm.
Merchant Portal (Classic Theme)
- Log in to the Merchant Portal.
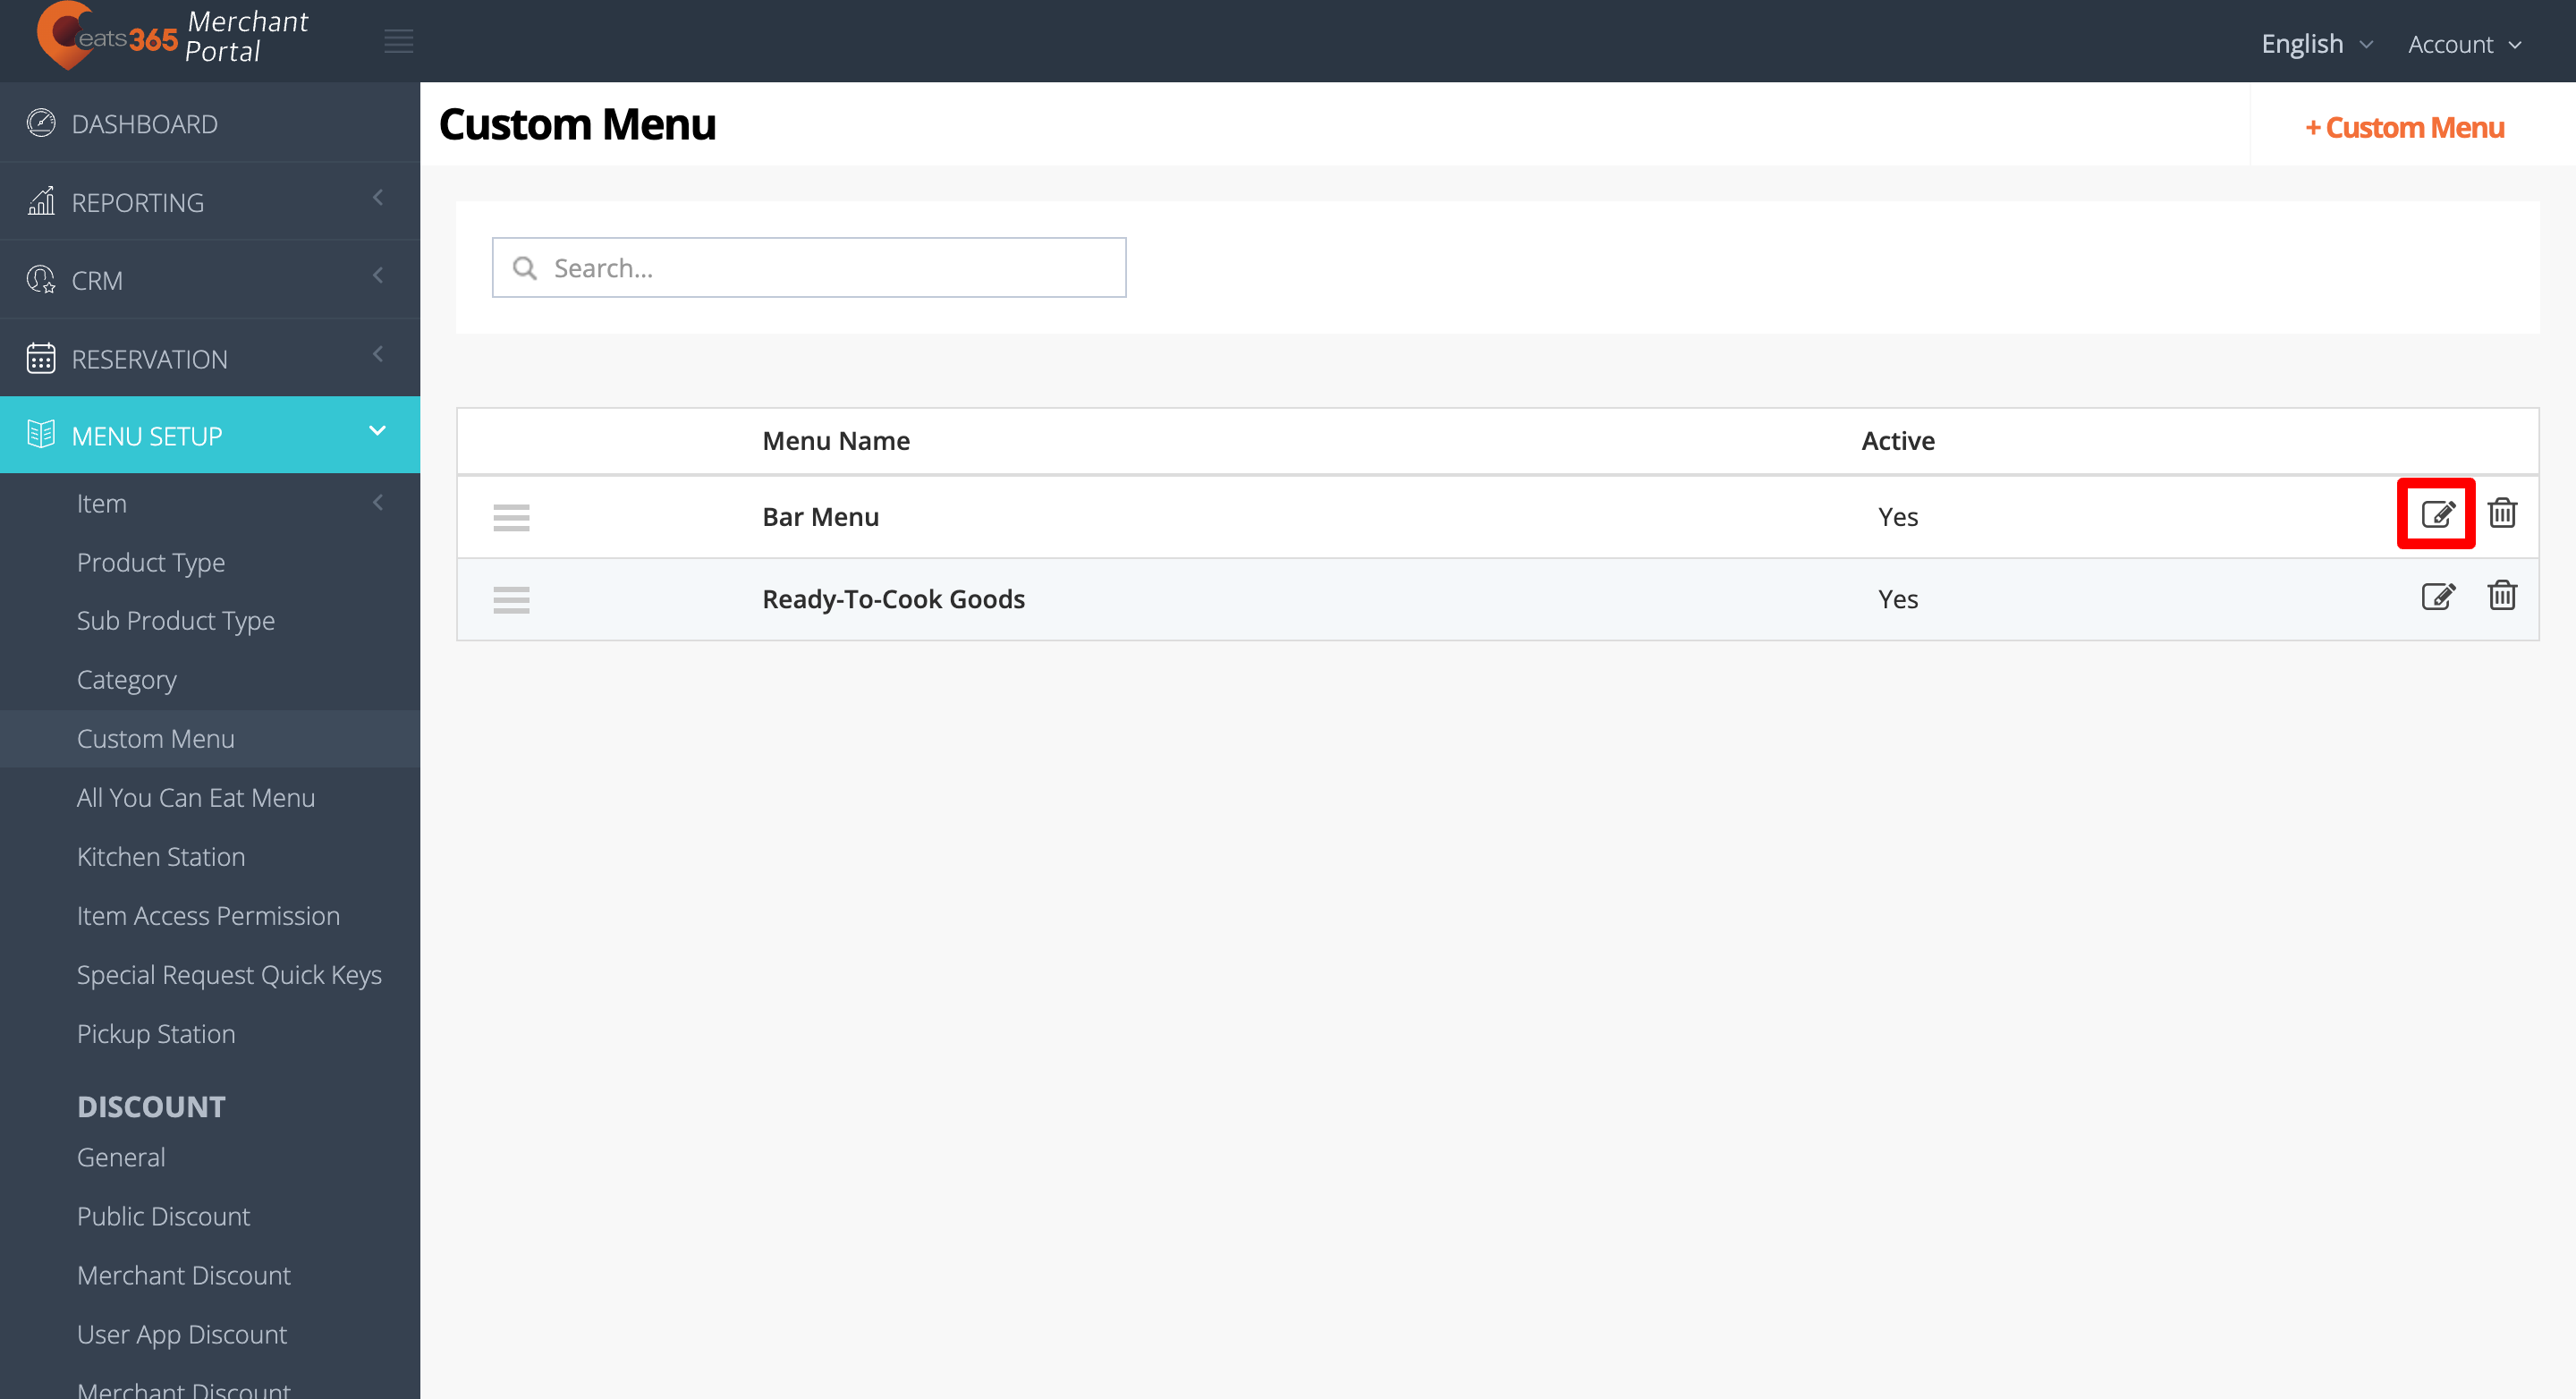
- On the left panel, click on Menu Setup, then select Custom Menu.
- Next to the Custom Menu that you want to edit, click on Edit
 .
.
- Update the Custom Menu.
- At the top right, click on Save to confirm.
Merchant Portal 2.0
- Log in to the Merchant Portal.
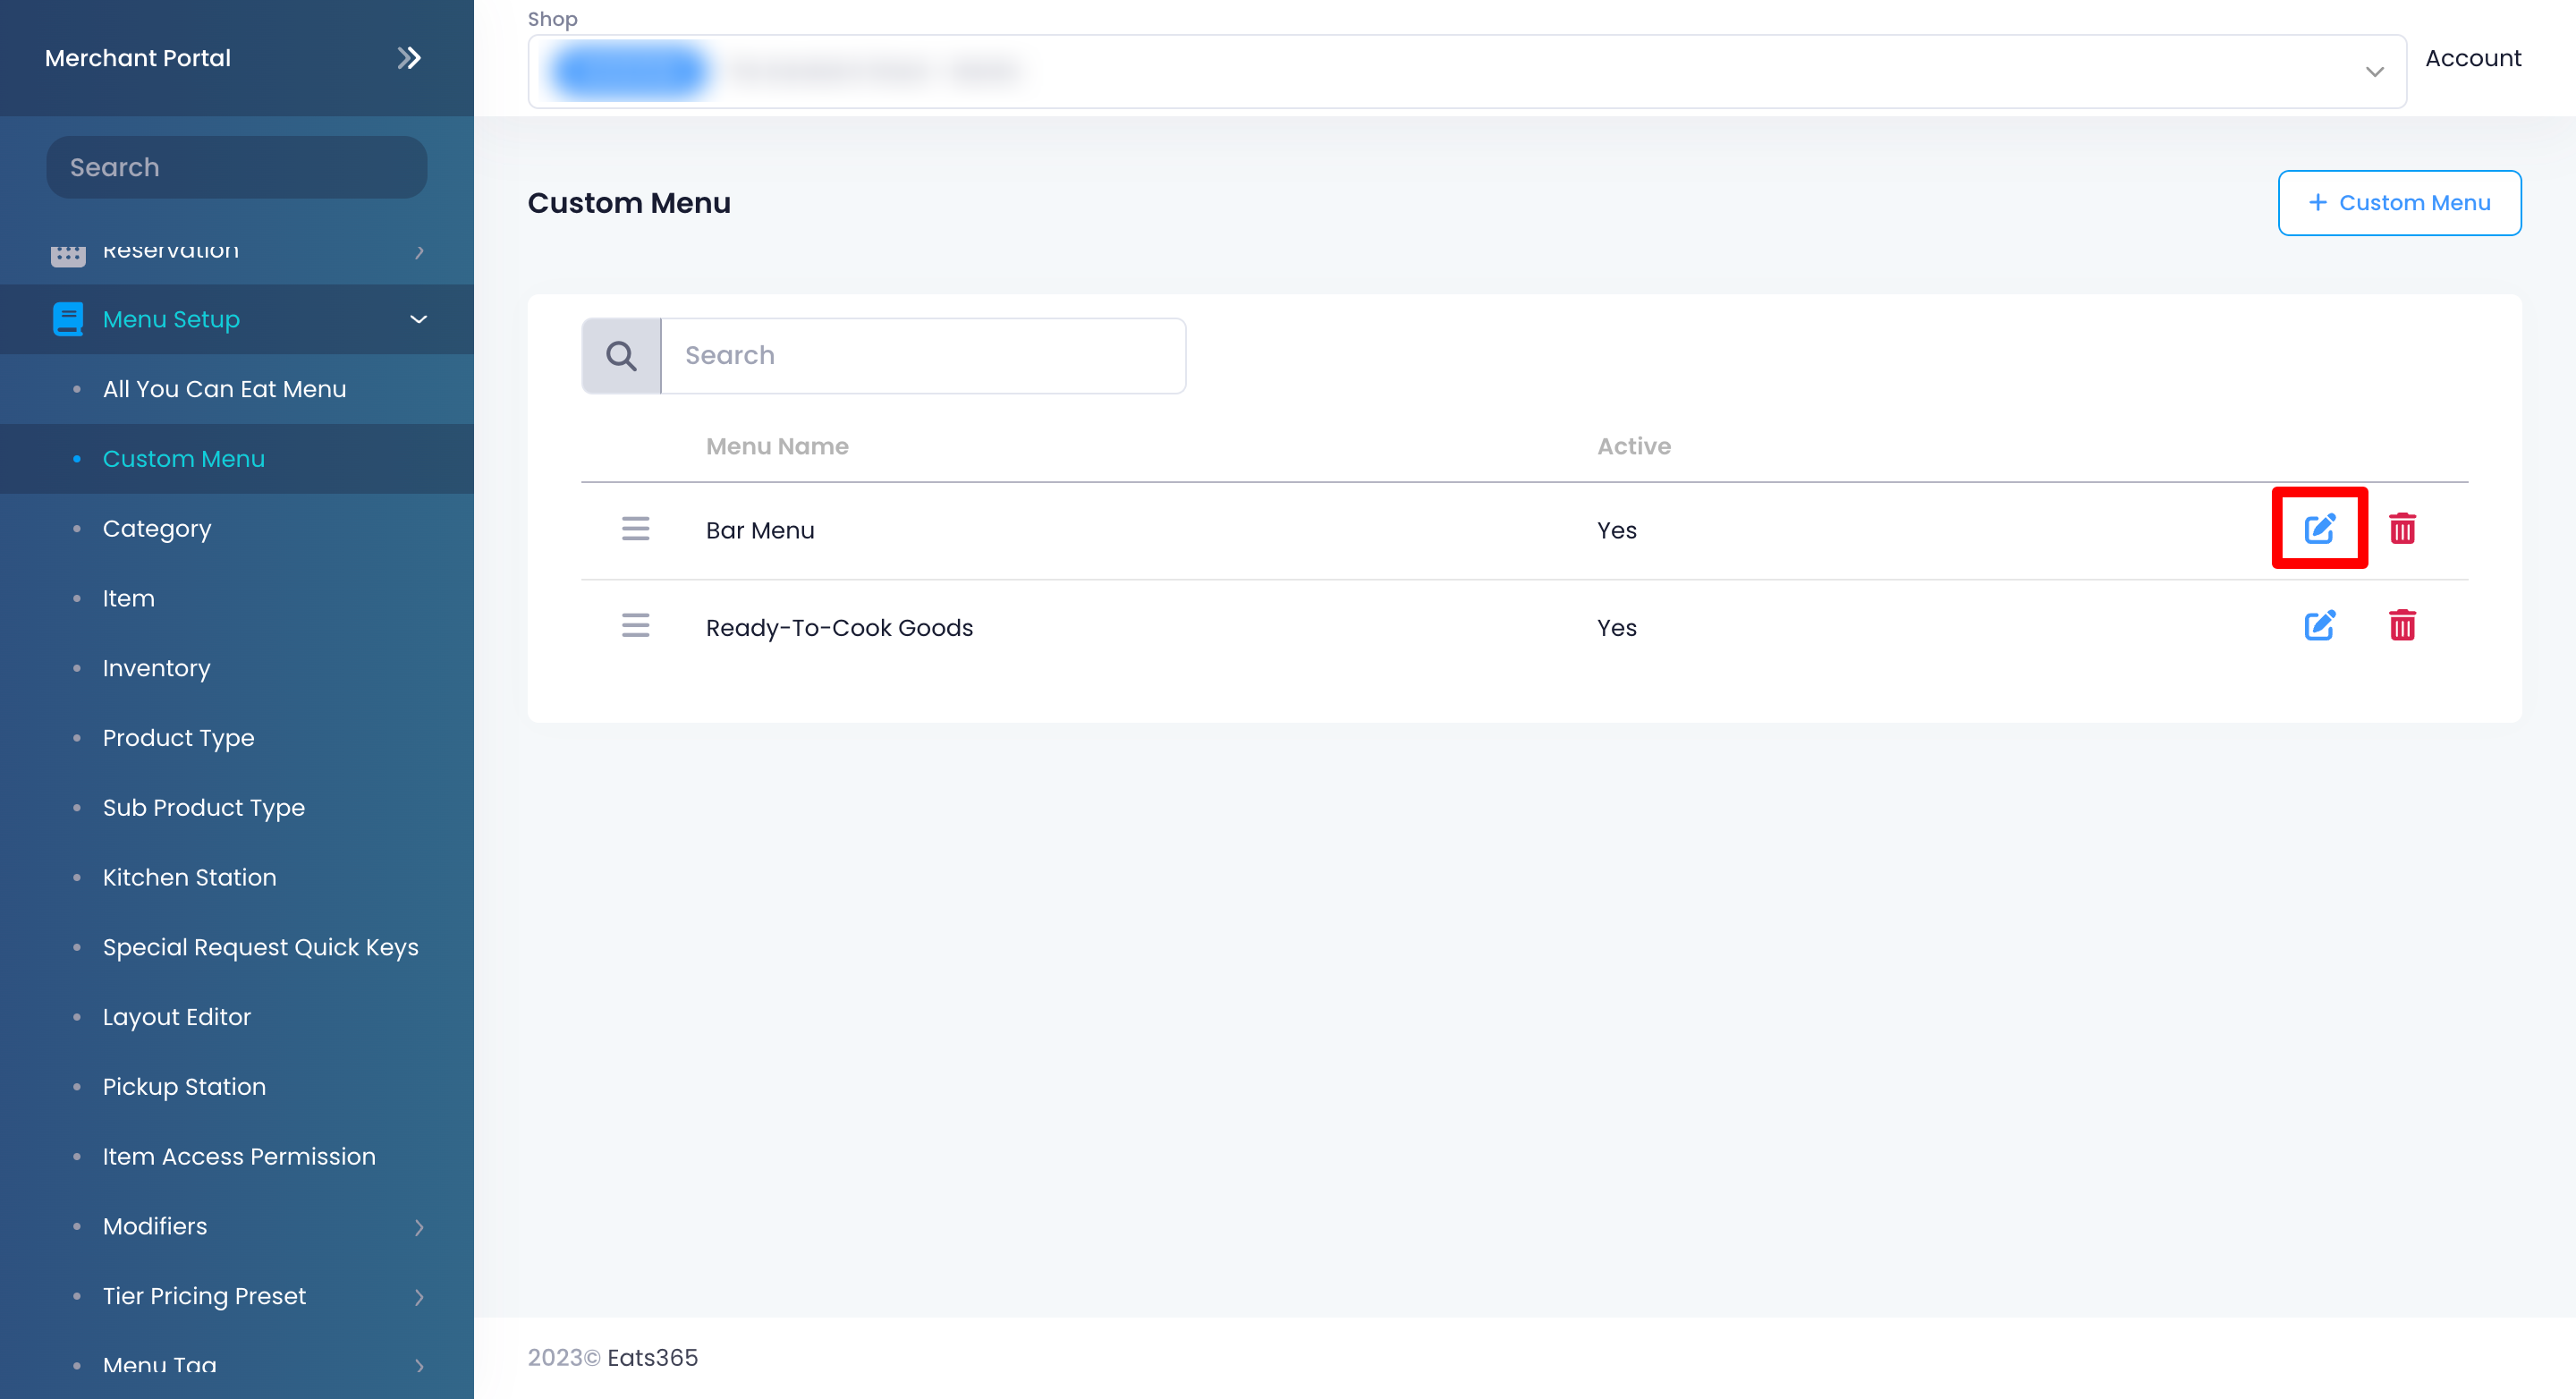
- On the left panel, click on Menu Setup, then select Custom Menu.
- Next to the Custom Menu that you want to edit, click on Edit
 .
.
- Update the Custom Menu.
- At the top right, click on Save to confirm.
Delete a Custom Menu
To delete a Custom Menu, follow the steps below:
Eats365 POS
- Log in to the Eats365 POS.
- At the top left, tap Settings .
- Under General, tap Menu Setup, then select Custom Menu.
- Tap the Custom Menu that you want to delete.
- At the top right, tap Delete. A prompt appears to confirm if you want to delete the Custom Menu.
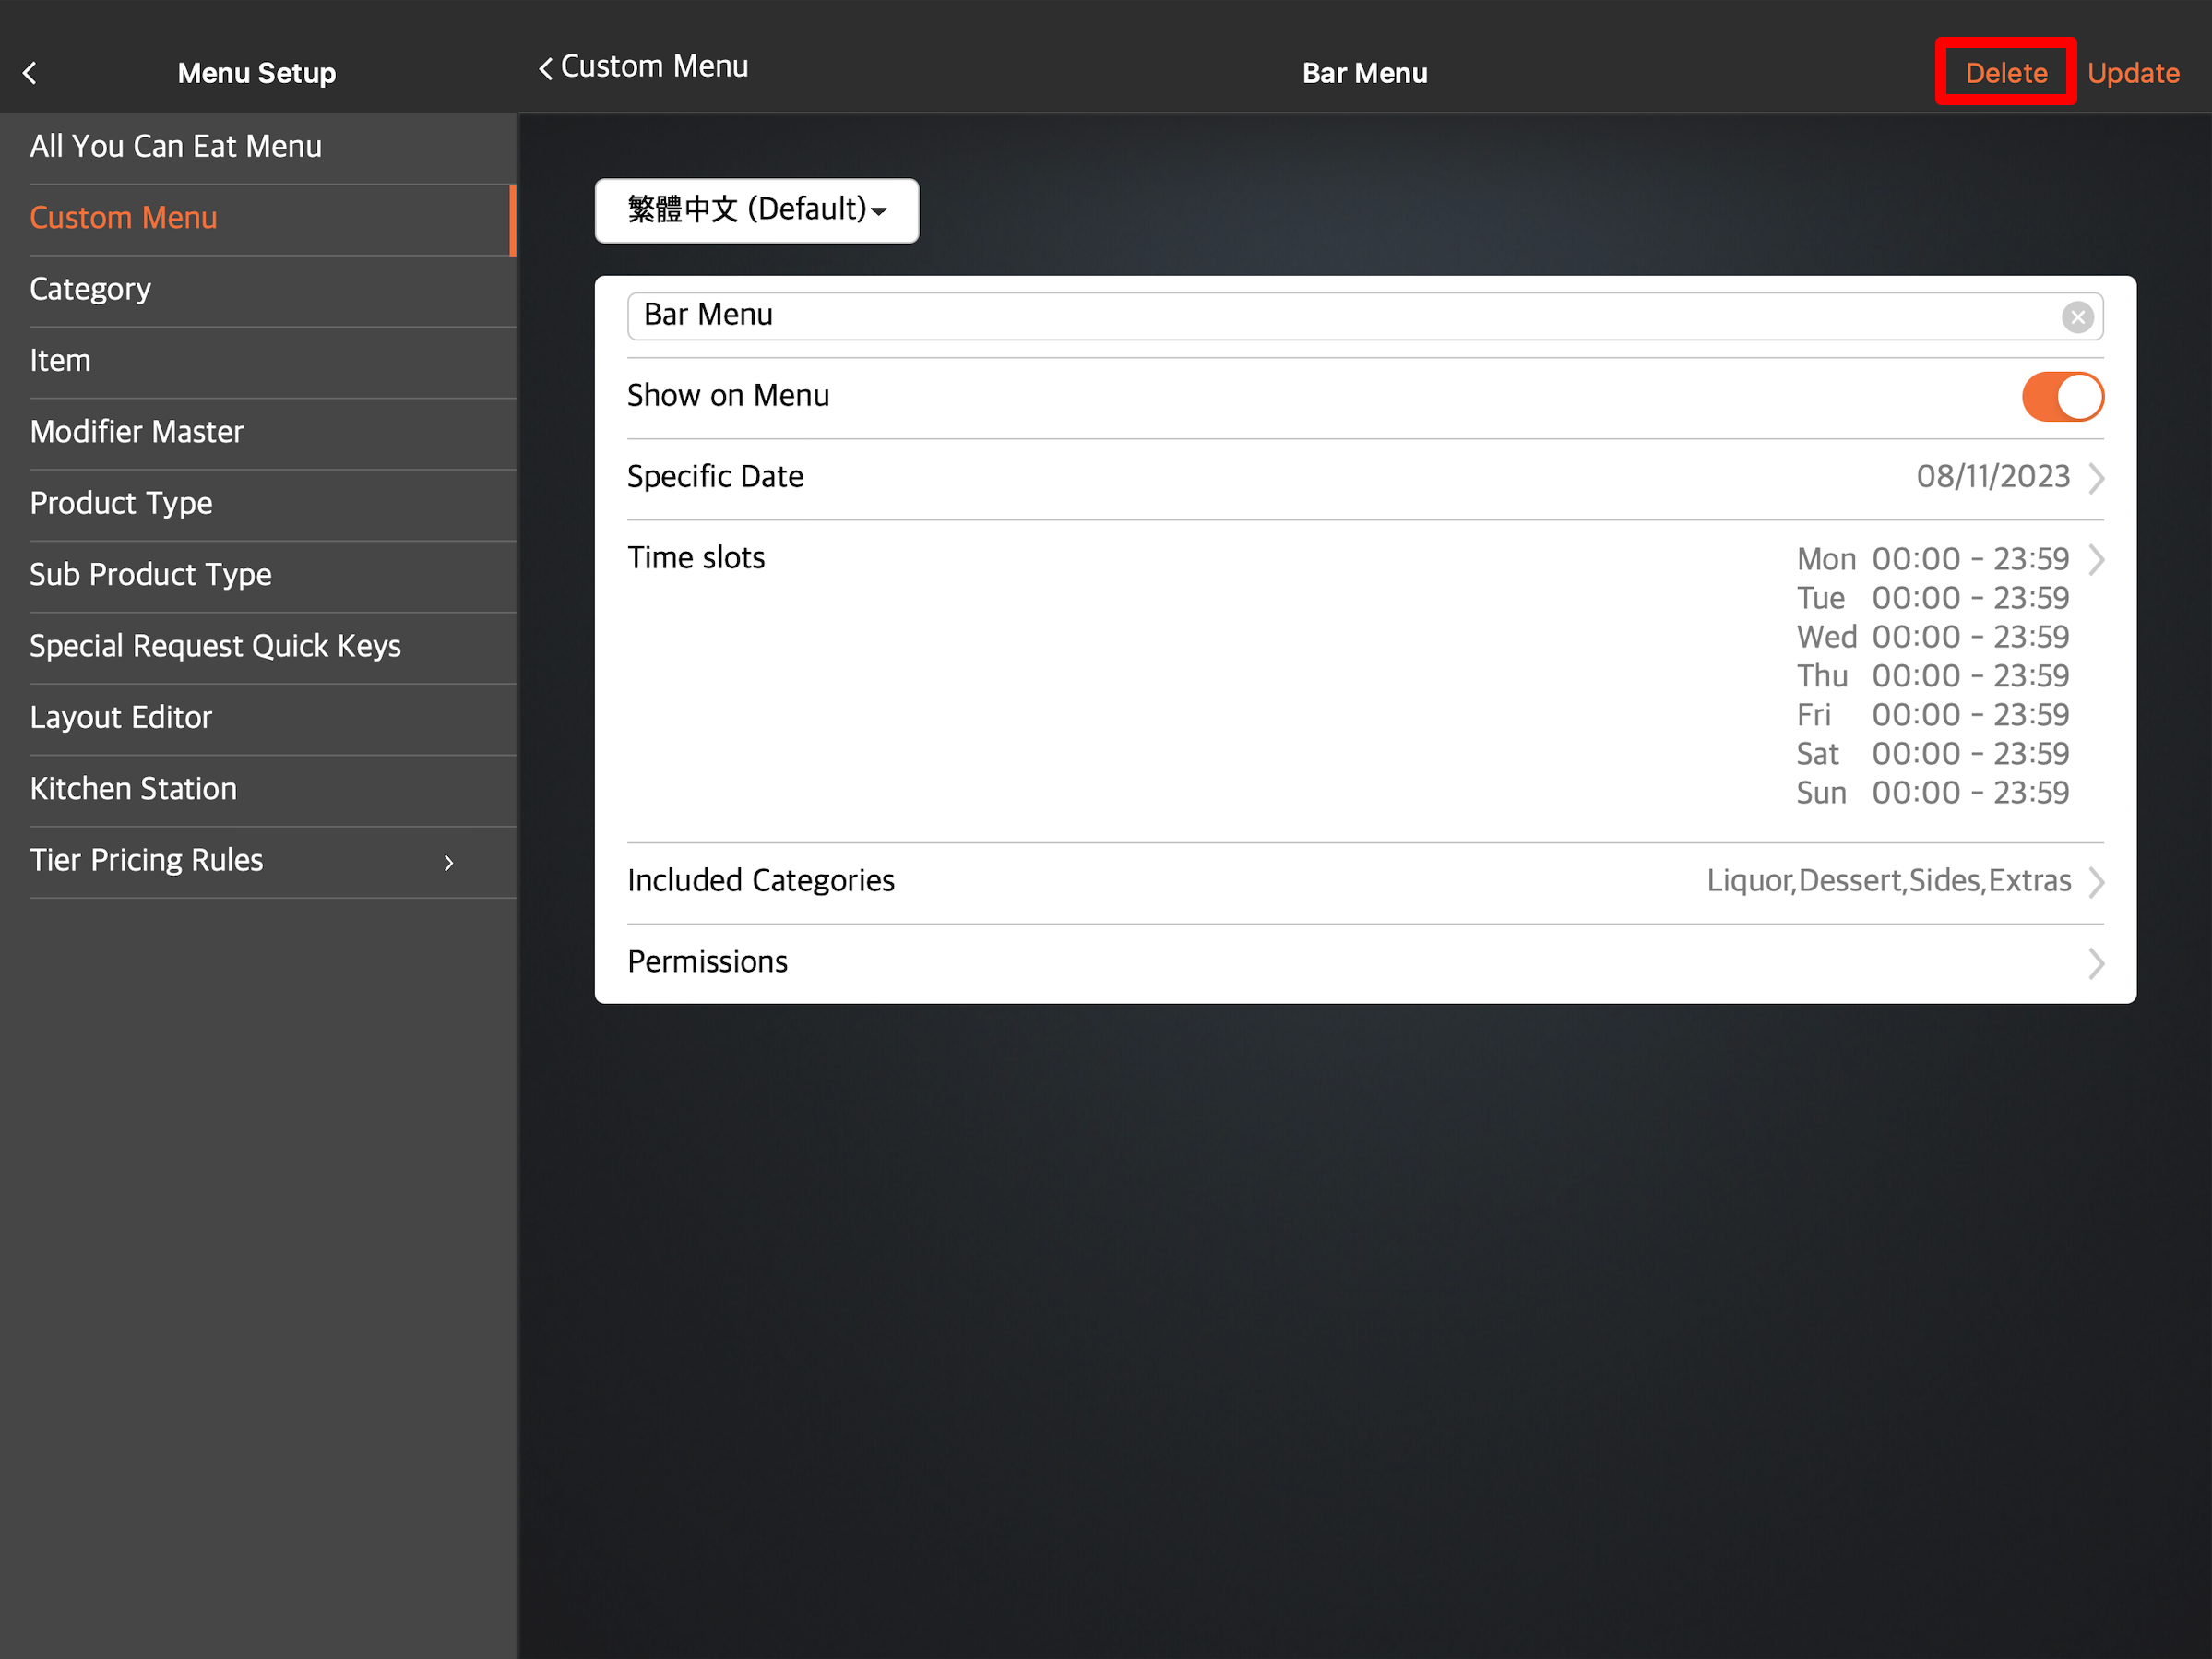
- Tap Delete to confirm.
Merchant Portal (Classic Theme)
- Log in to the Merchant Portal.
- On the left panel, click on Menu Setup, then select Custom Menu.
- Next to the Custom Menu that you want to edit, click on Delete
 . A prompt appears to confirm if you want to delete the Custom Menu.
- Click on Confirm to delete.
Merchant Portal 2.0
- Log in to the Merchant Portal.
- On the left panel, click on Menu Setup, then select Custom Menu.
- Next to the Custom Menu that you want to edit, click on Delete
 . A prompt appears to confirm if you want to delete the Custom Menu.
- Click on Confirm to delete.
Reorder Custom Menu
If you want your Custom Menu to appear in a specific order in the POS, follow the steps below:
Eats365 POS
- Log in to the Eats365 POS.
- At the top left, tap Settings .
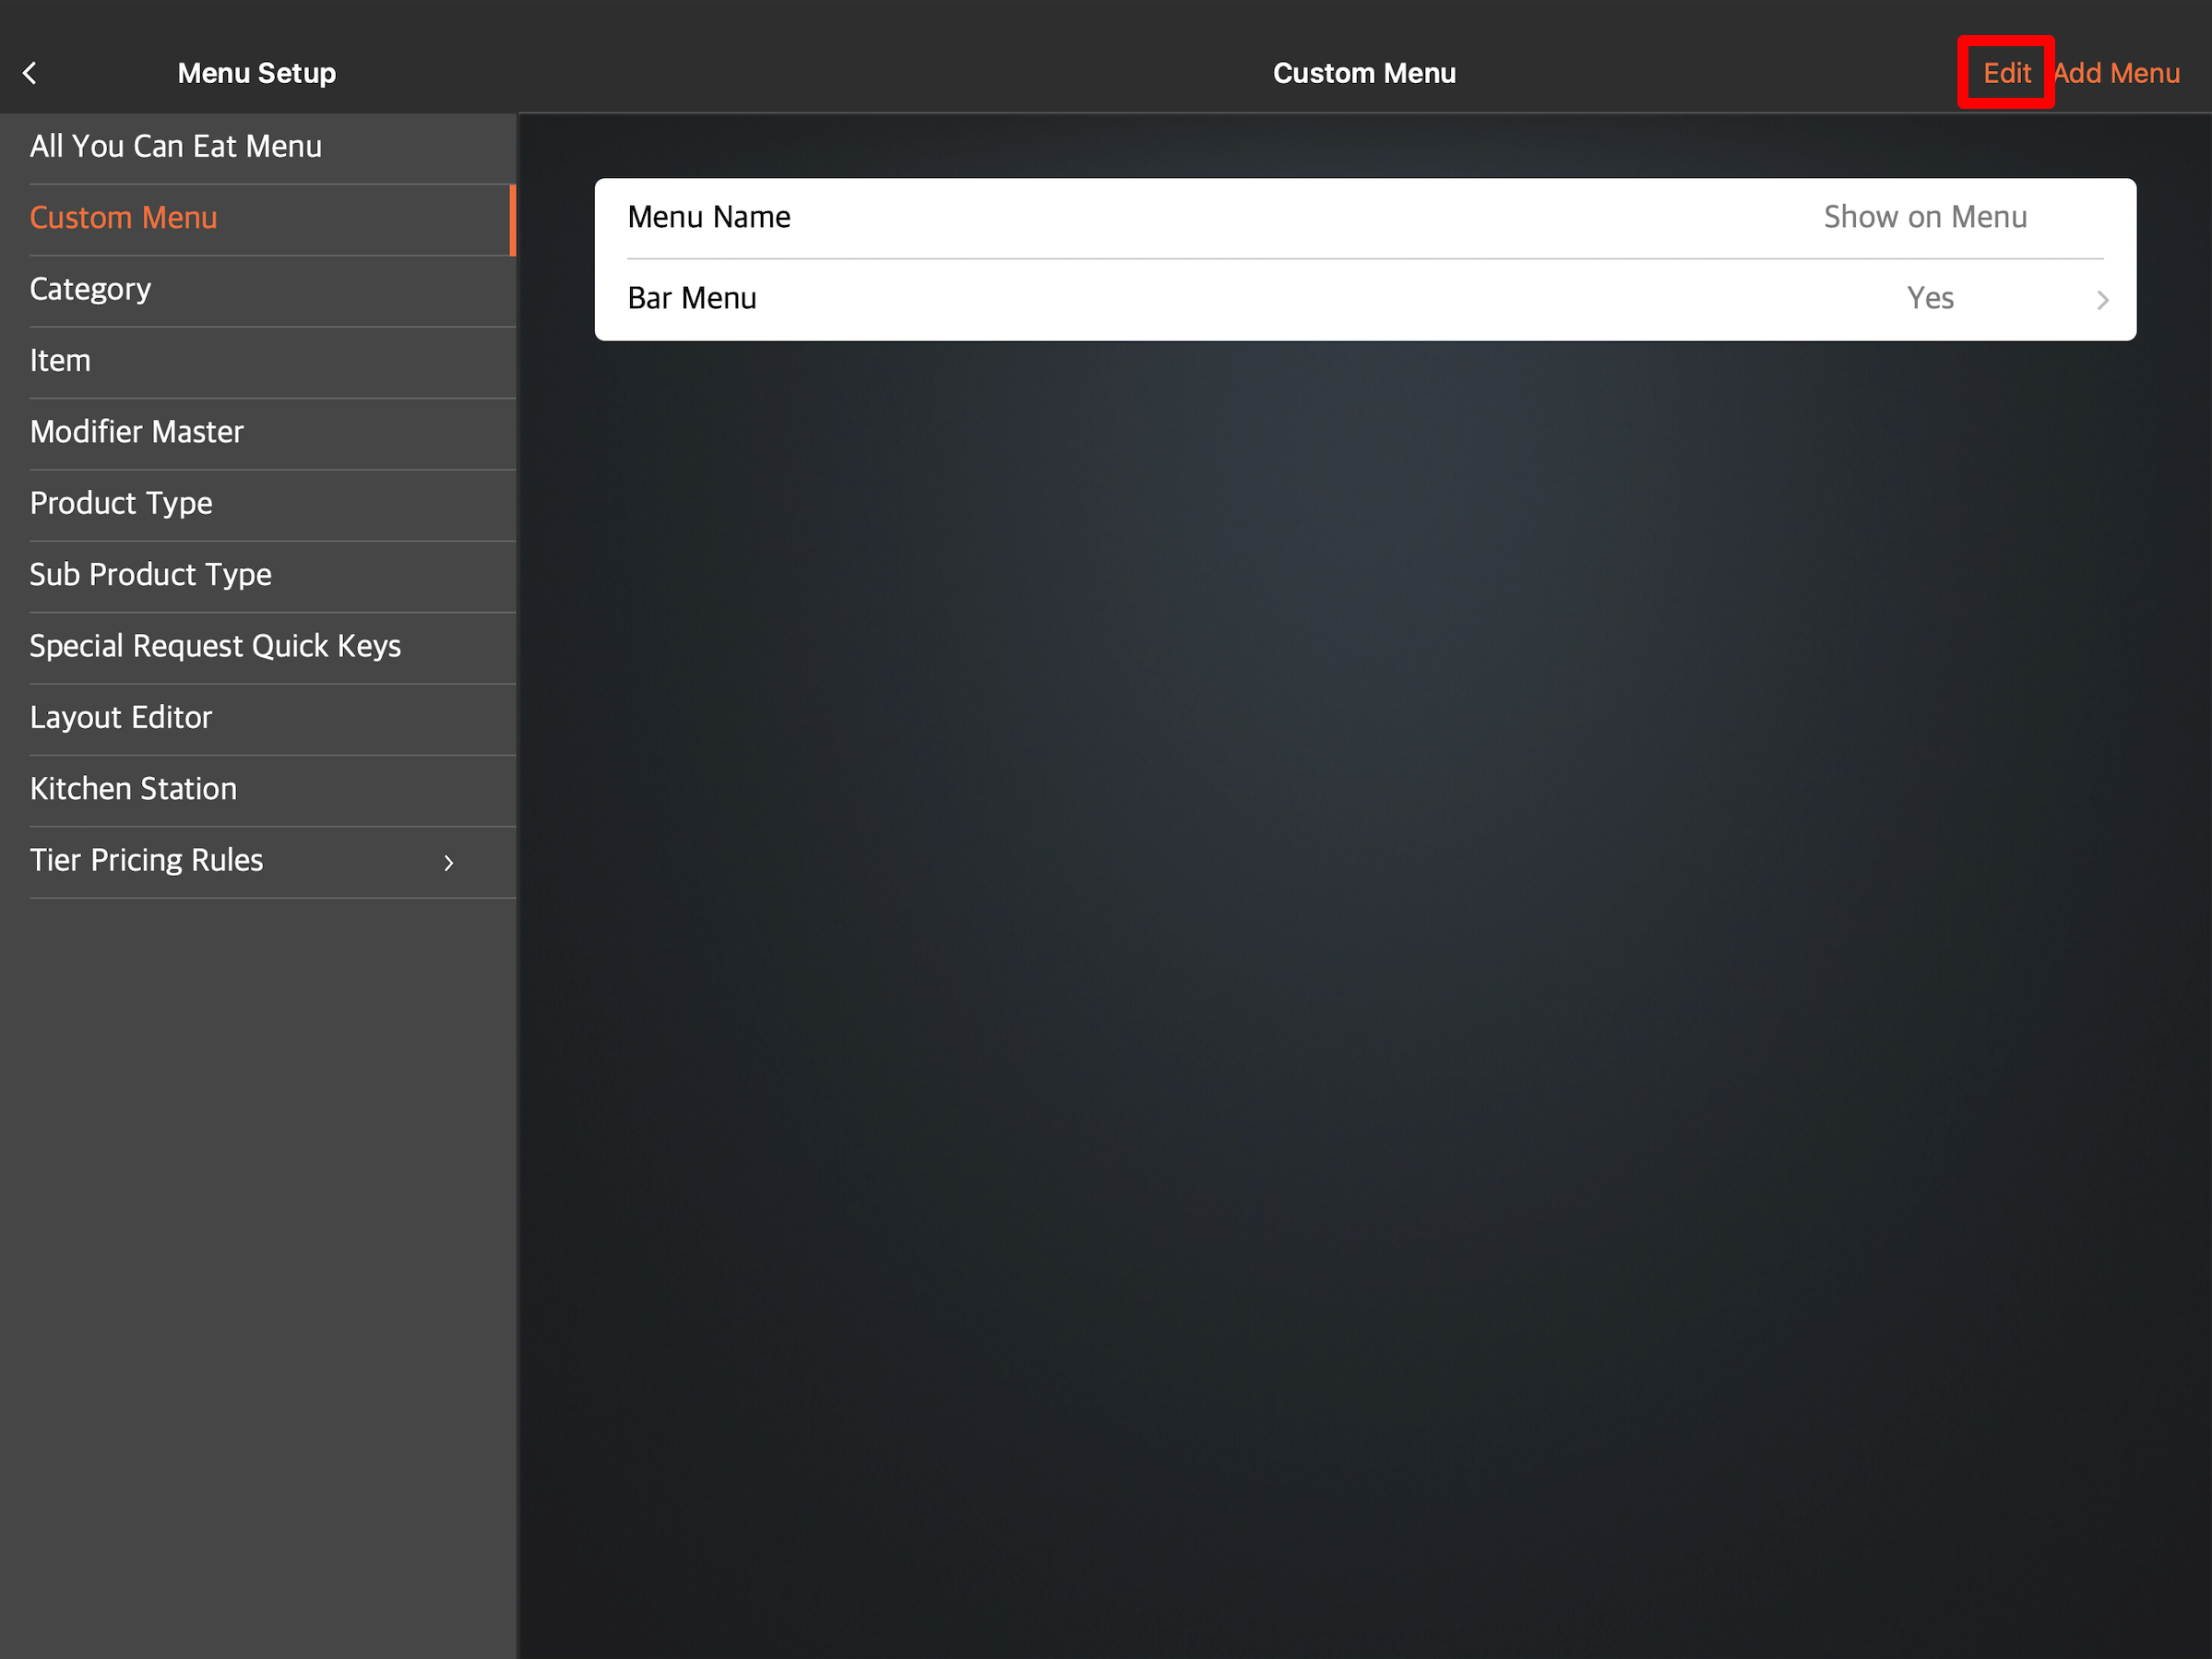
- Under General, tap Menu Setup, then select Custom Menu.
- At the top right, tap Edit.
- Next to the Custom Menu that you want to move, tap and hold Reorder
 . Then, drag the Custom Menu in the order that you want it to appear in the POS.
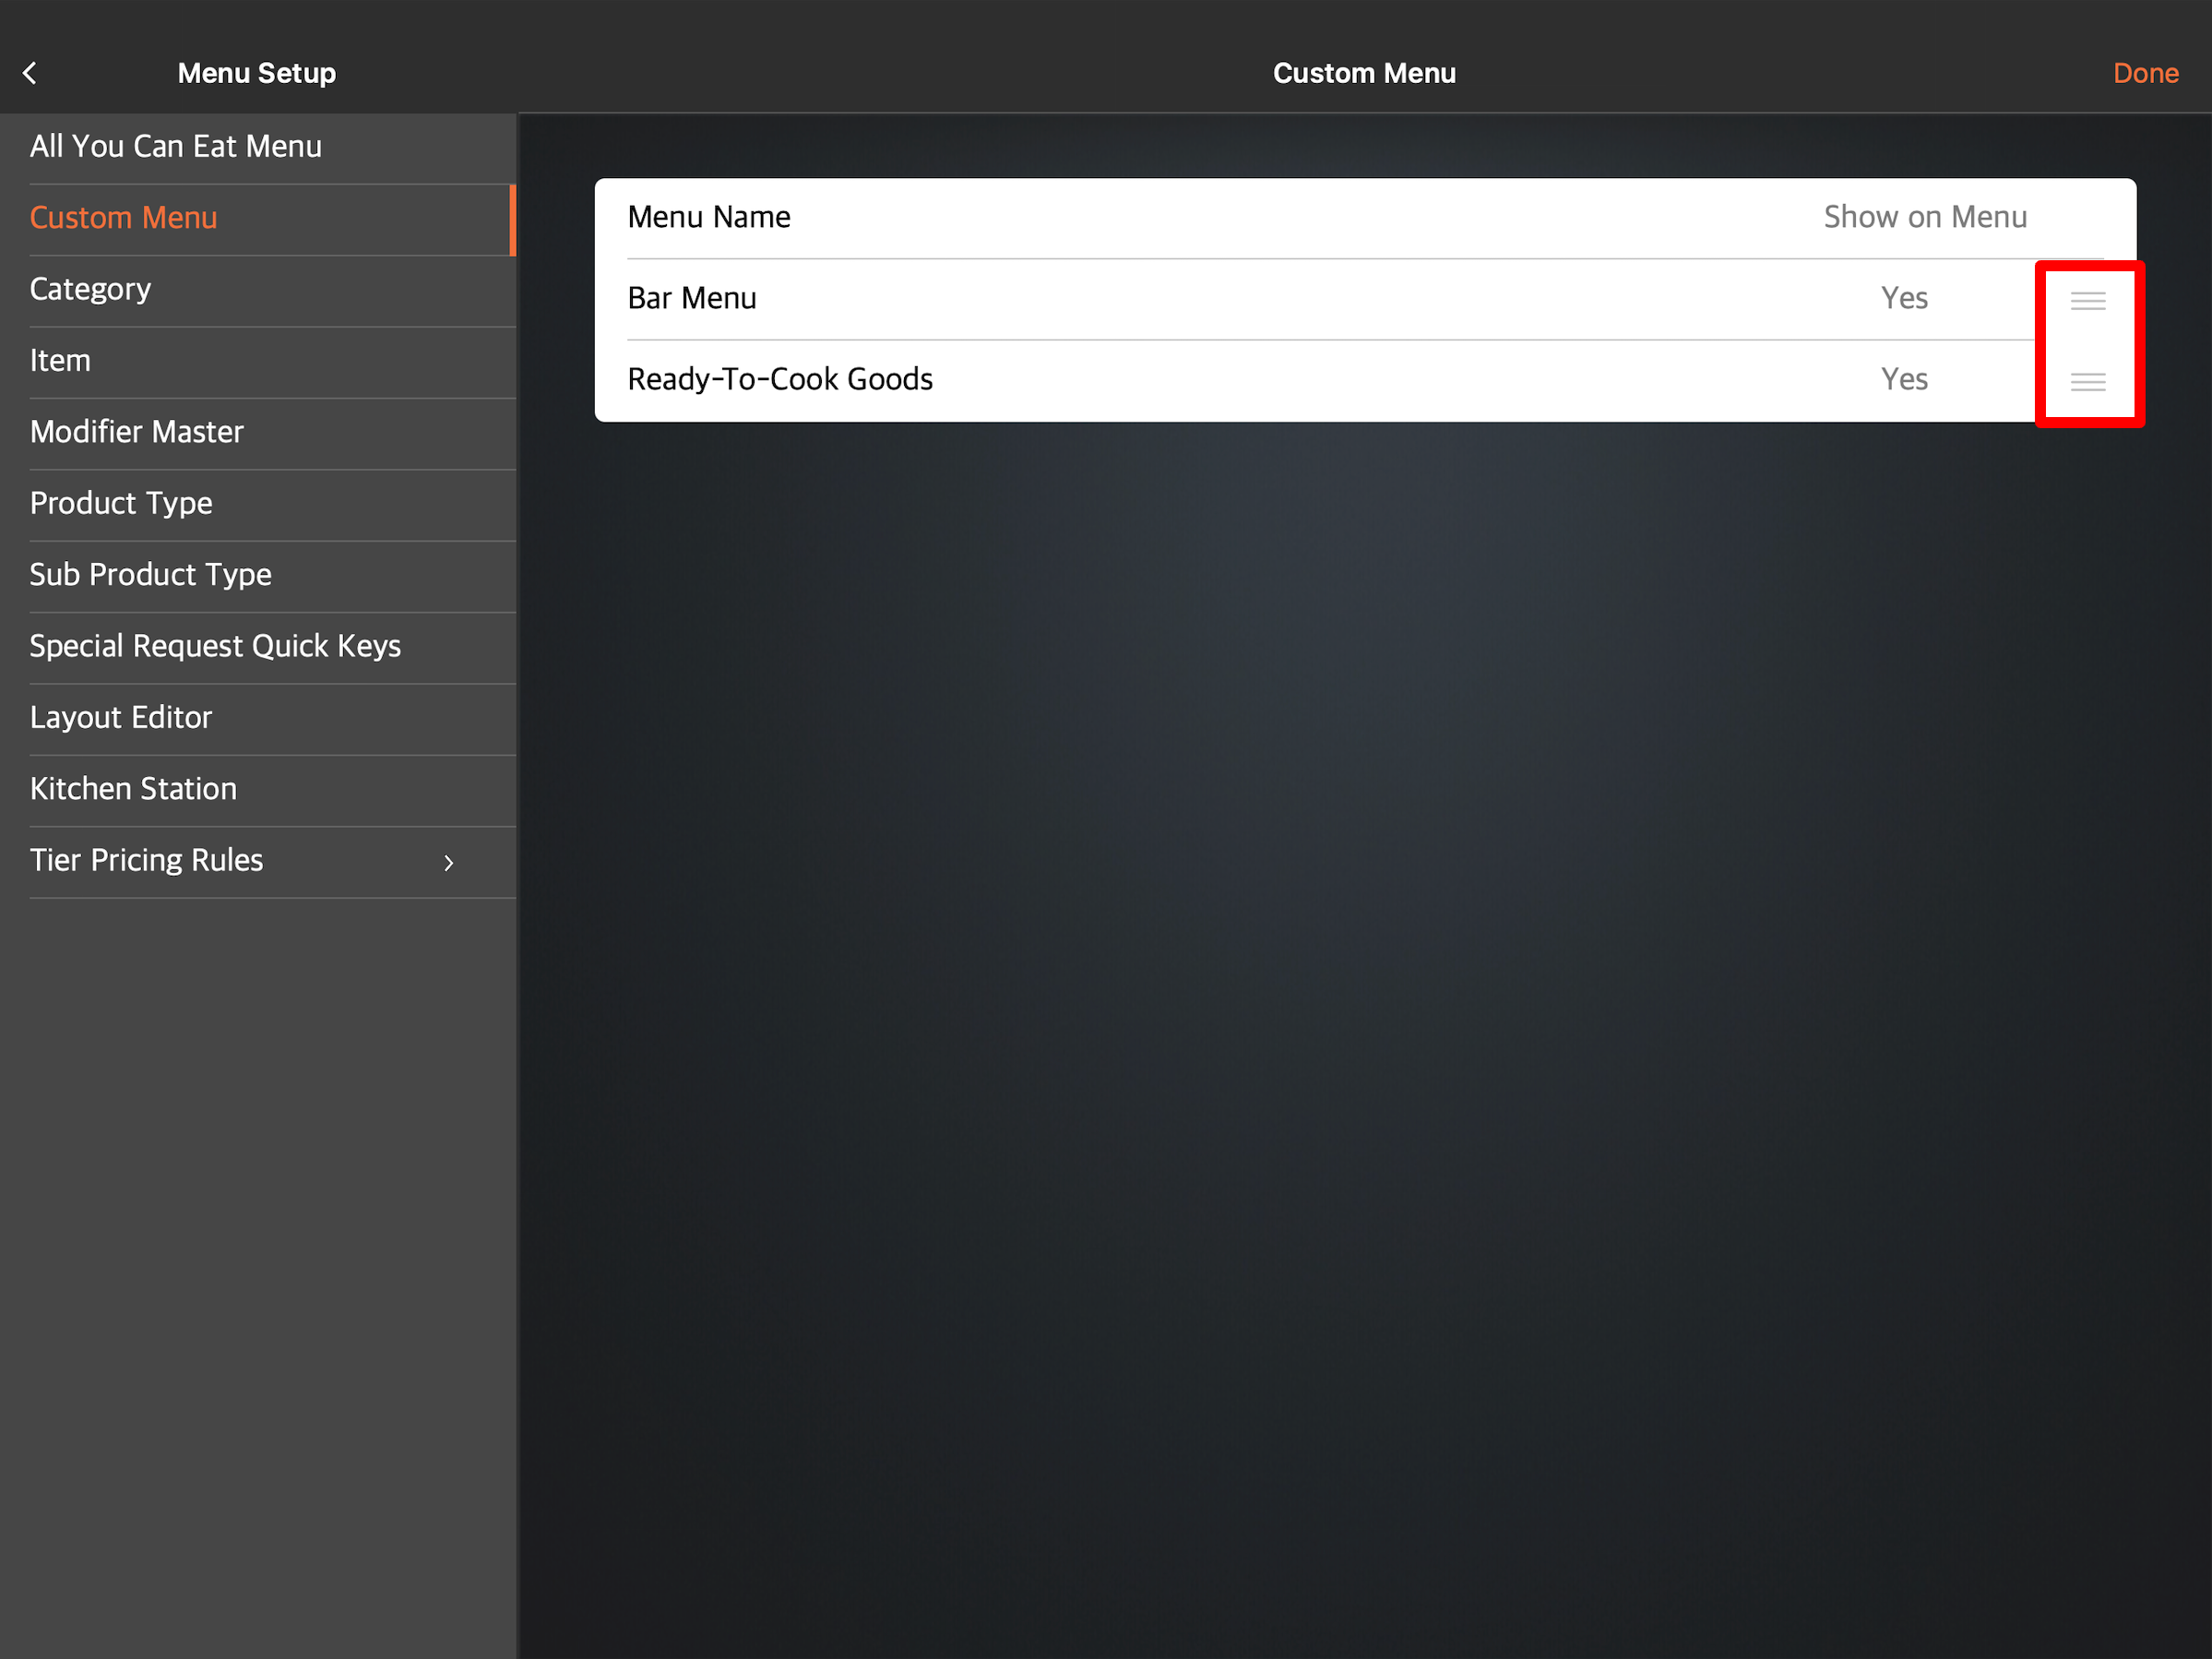
- At the top right, tap Done to confirm.
Merchant Portal (Classic Theme)
- Log in to the Merchant Portal.
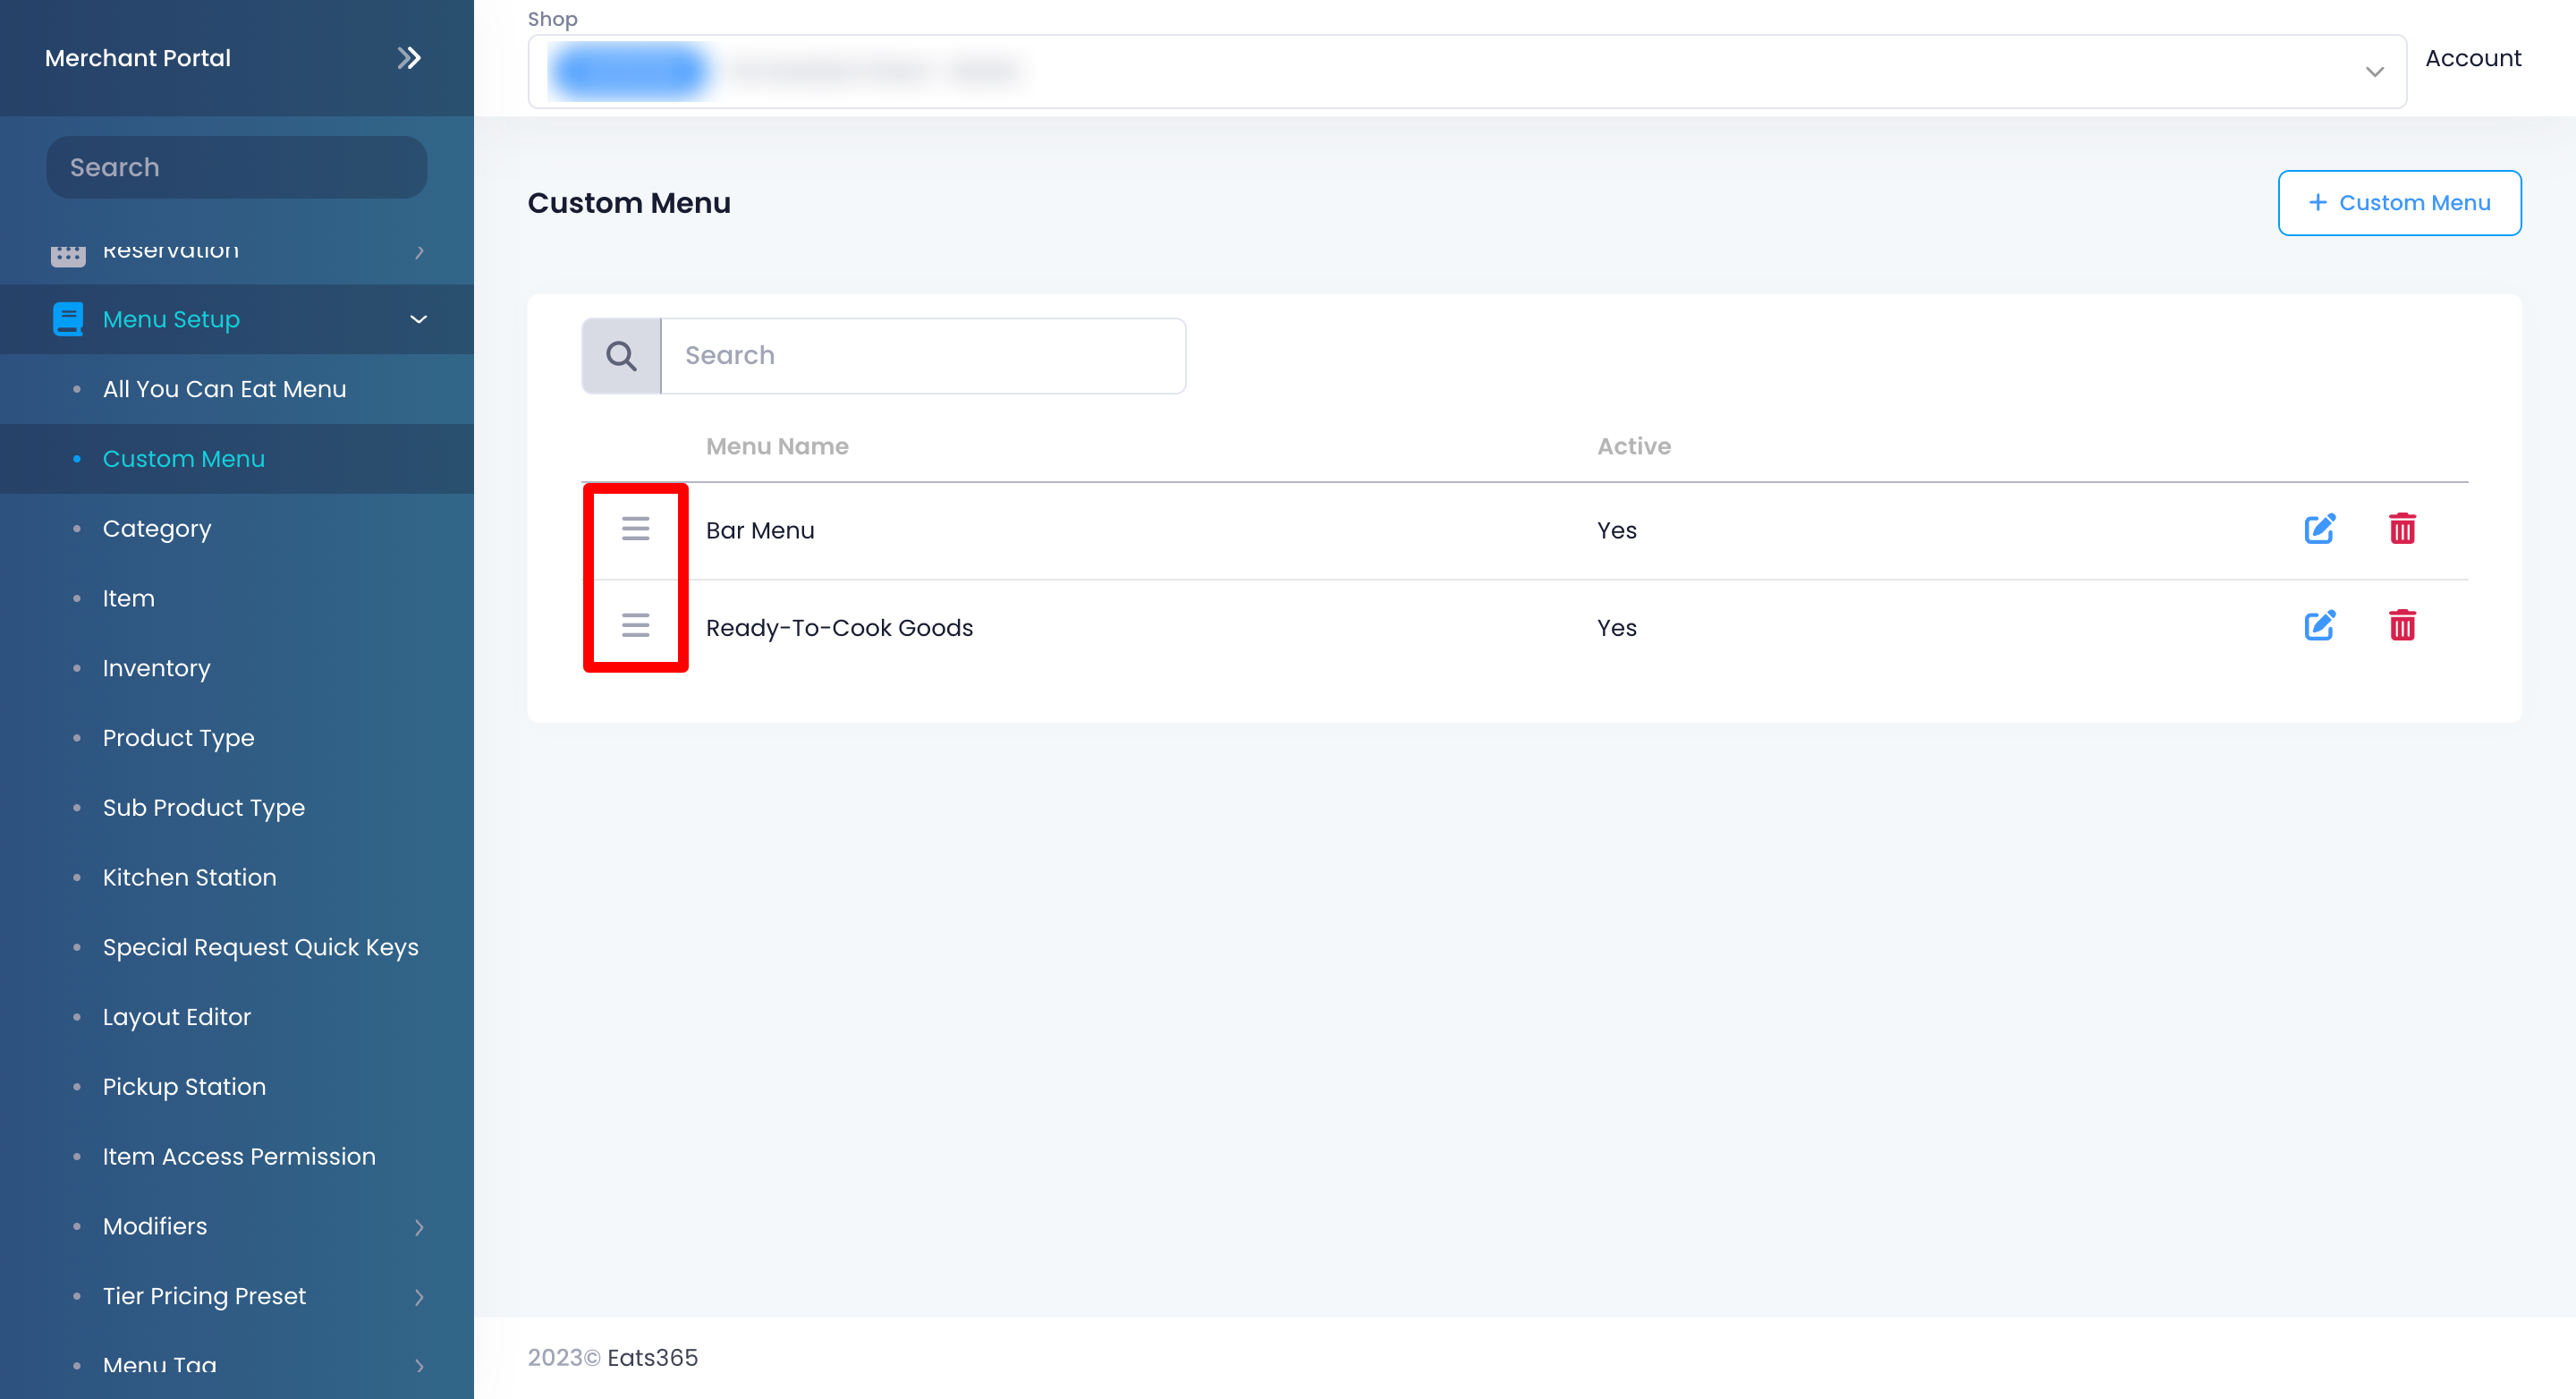
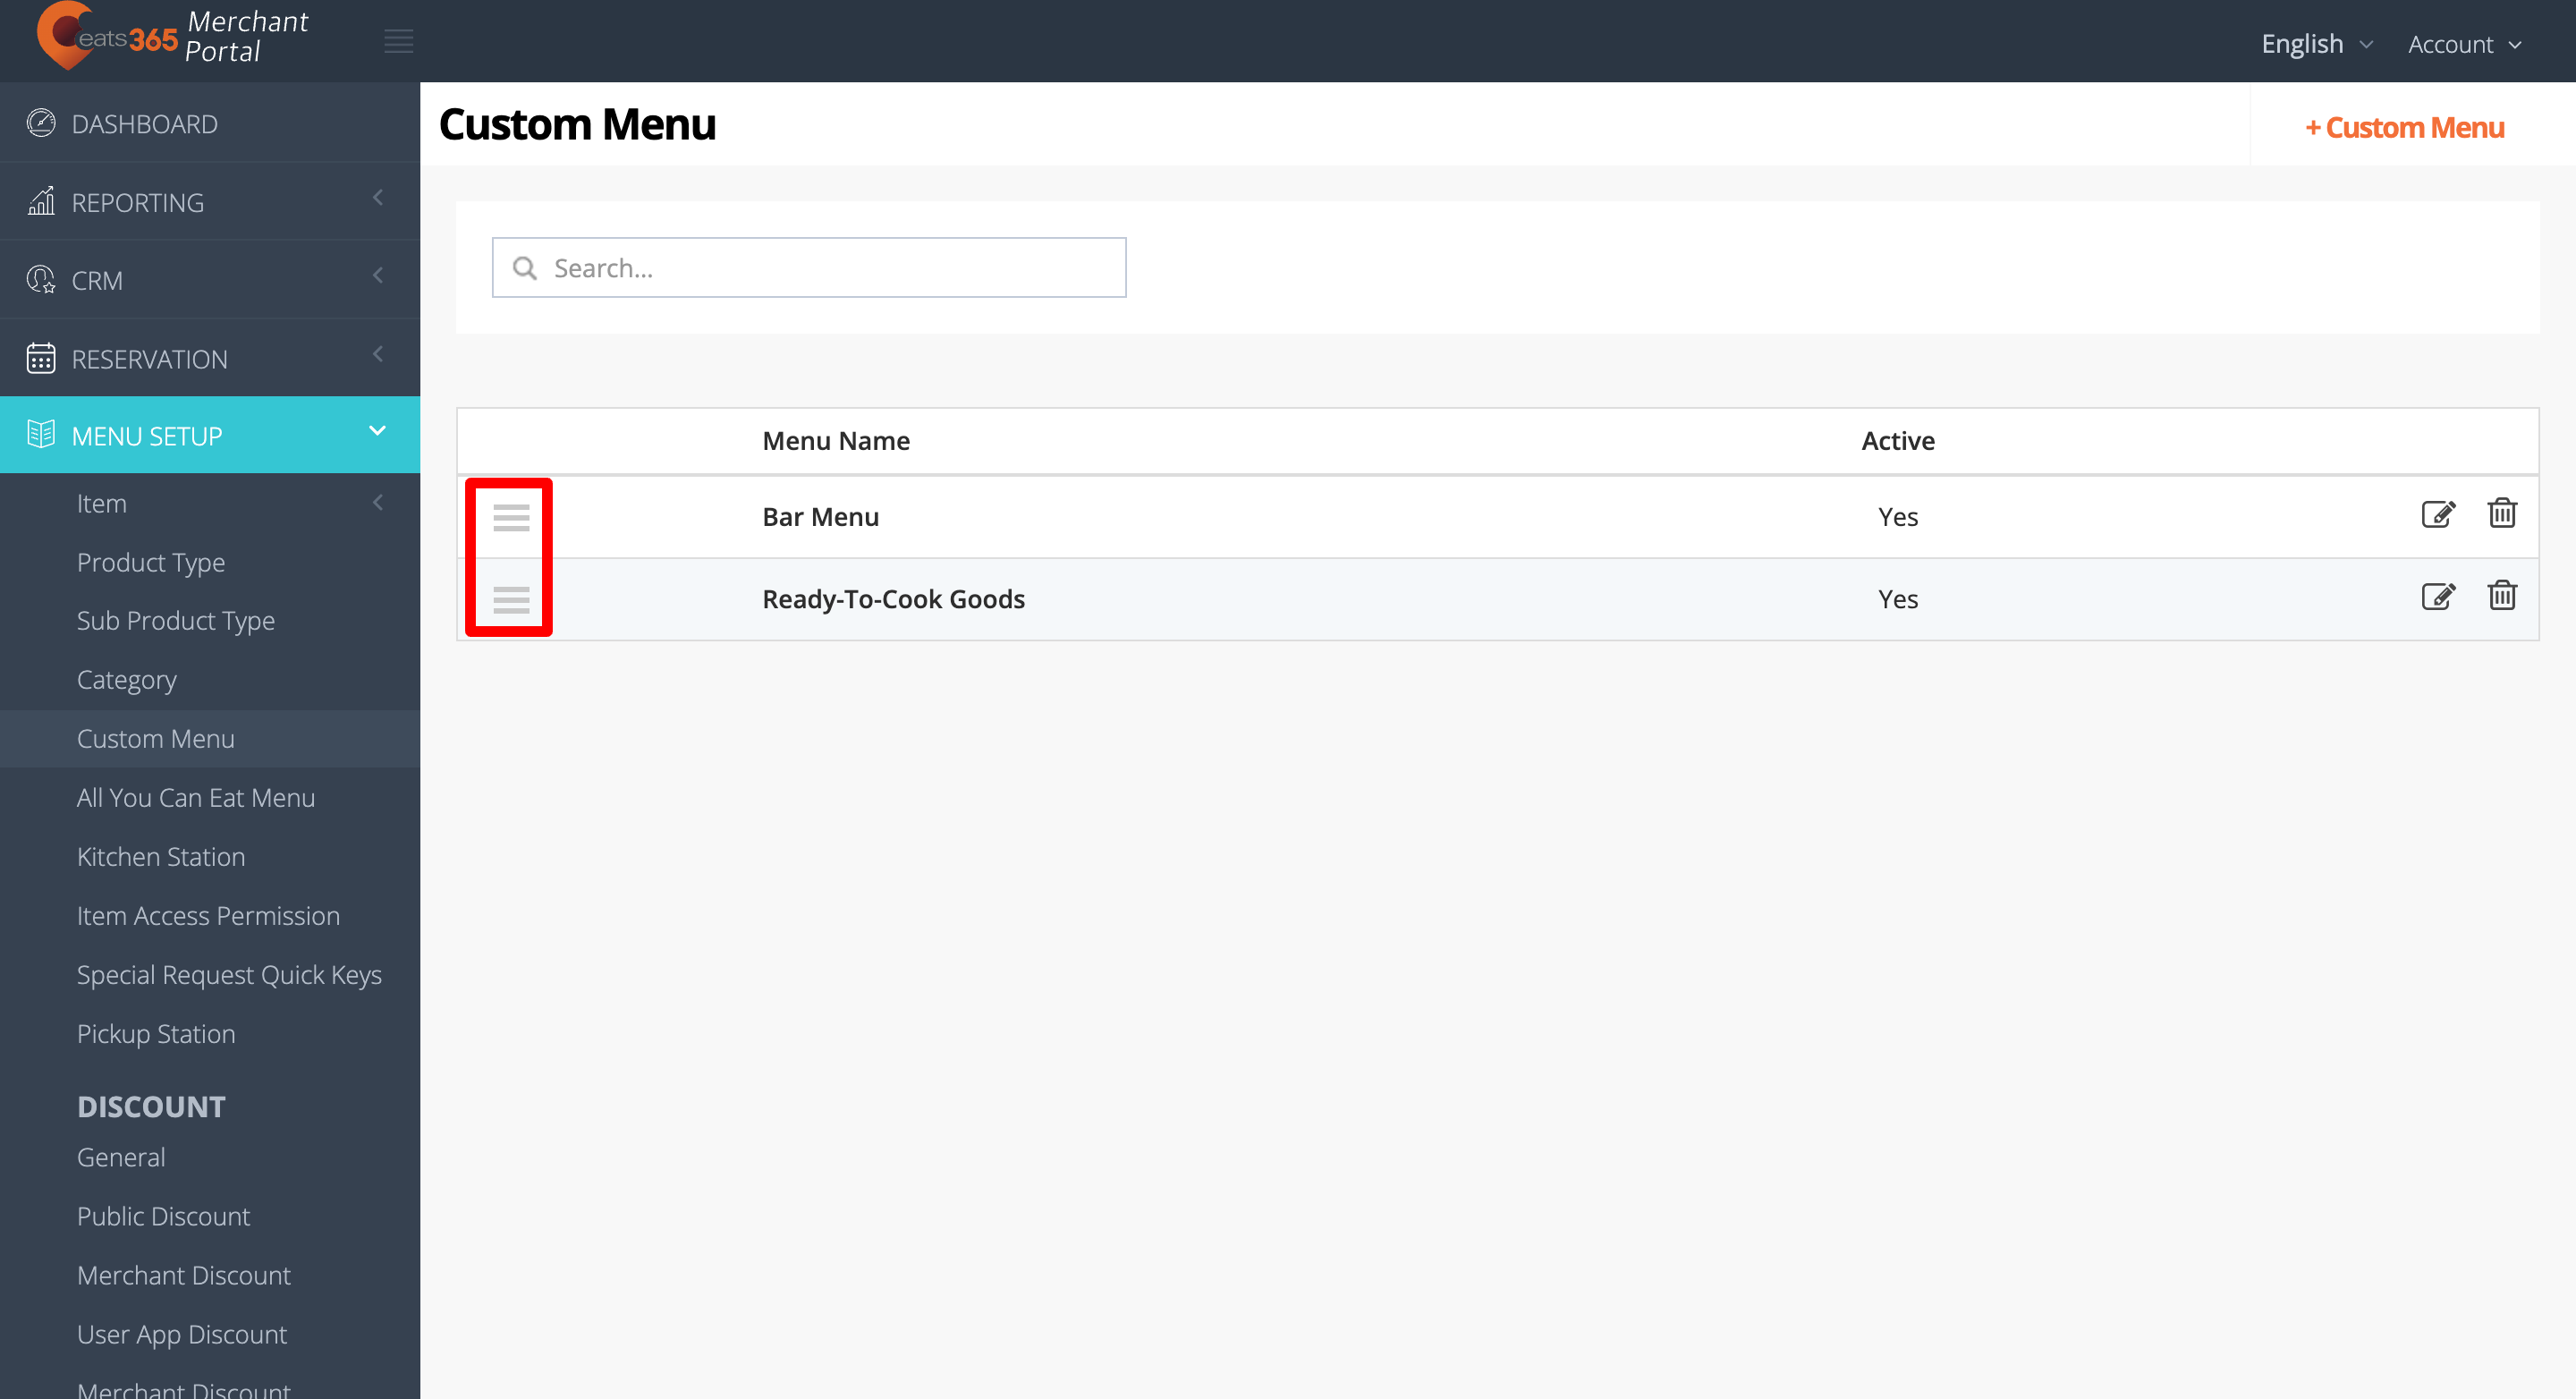
- On the left panel, click on Menu Setup, then select Custom Menu.
- Next to the Custom Menu that you want to move, click and hold on Reorder . Then, drag the Custom Menu in the order that you want it to appear in the POS.
Merchant Portal 2.0
- Log in to the Merchant Portal.
- On the left panel, click on Menu Setup, then select Custom Menu.
- Next to the Custom Menu that you want to move, click and hold on Reorder . Then, drag the Custom Menu in the order that you want it to appear in the POS.