 Eats365 Products
 Merchant Guide
 Modules
 Membership
 Integrations
 Hardware
 Staff Operations
 Roles & Permissions
 Payments
 Reports
 What’s New
 Release Notes
 Troubleshooting
 Simulators
 Glossary
 Troubleshooter
 System Status
System Preferences
Table of Contents
Modify Action Button options
Learn how to display or hide action buttons from the order-taking screen on the Eats365 POS.
Action Buttons allow you to perform actions on orders placed on the Eats365 POS. When you first log in to the POS, action buttons are automatically added and set up for your use. If you need to modify these buttons, you can do so in the System Preferences.
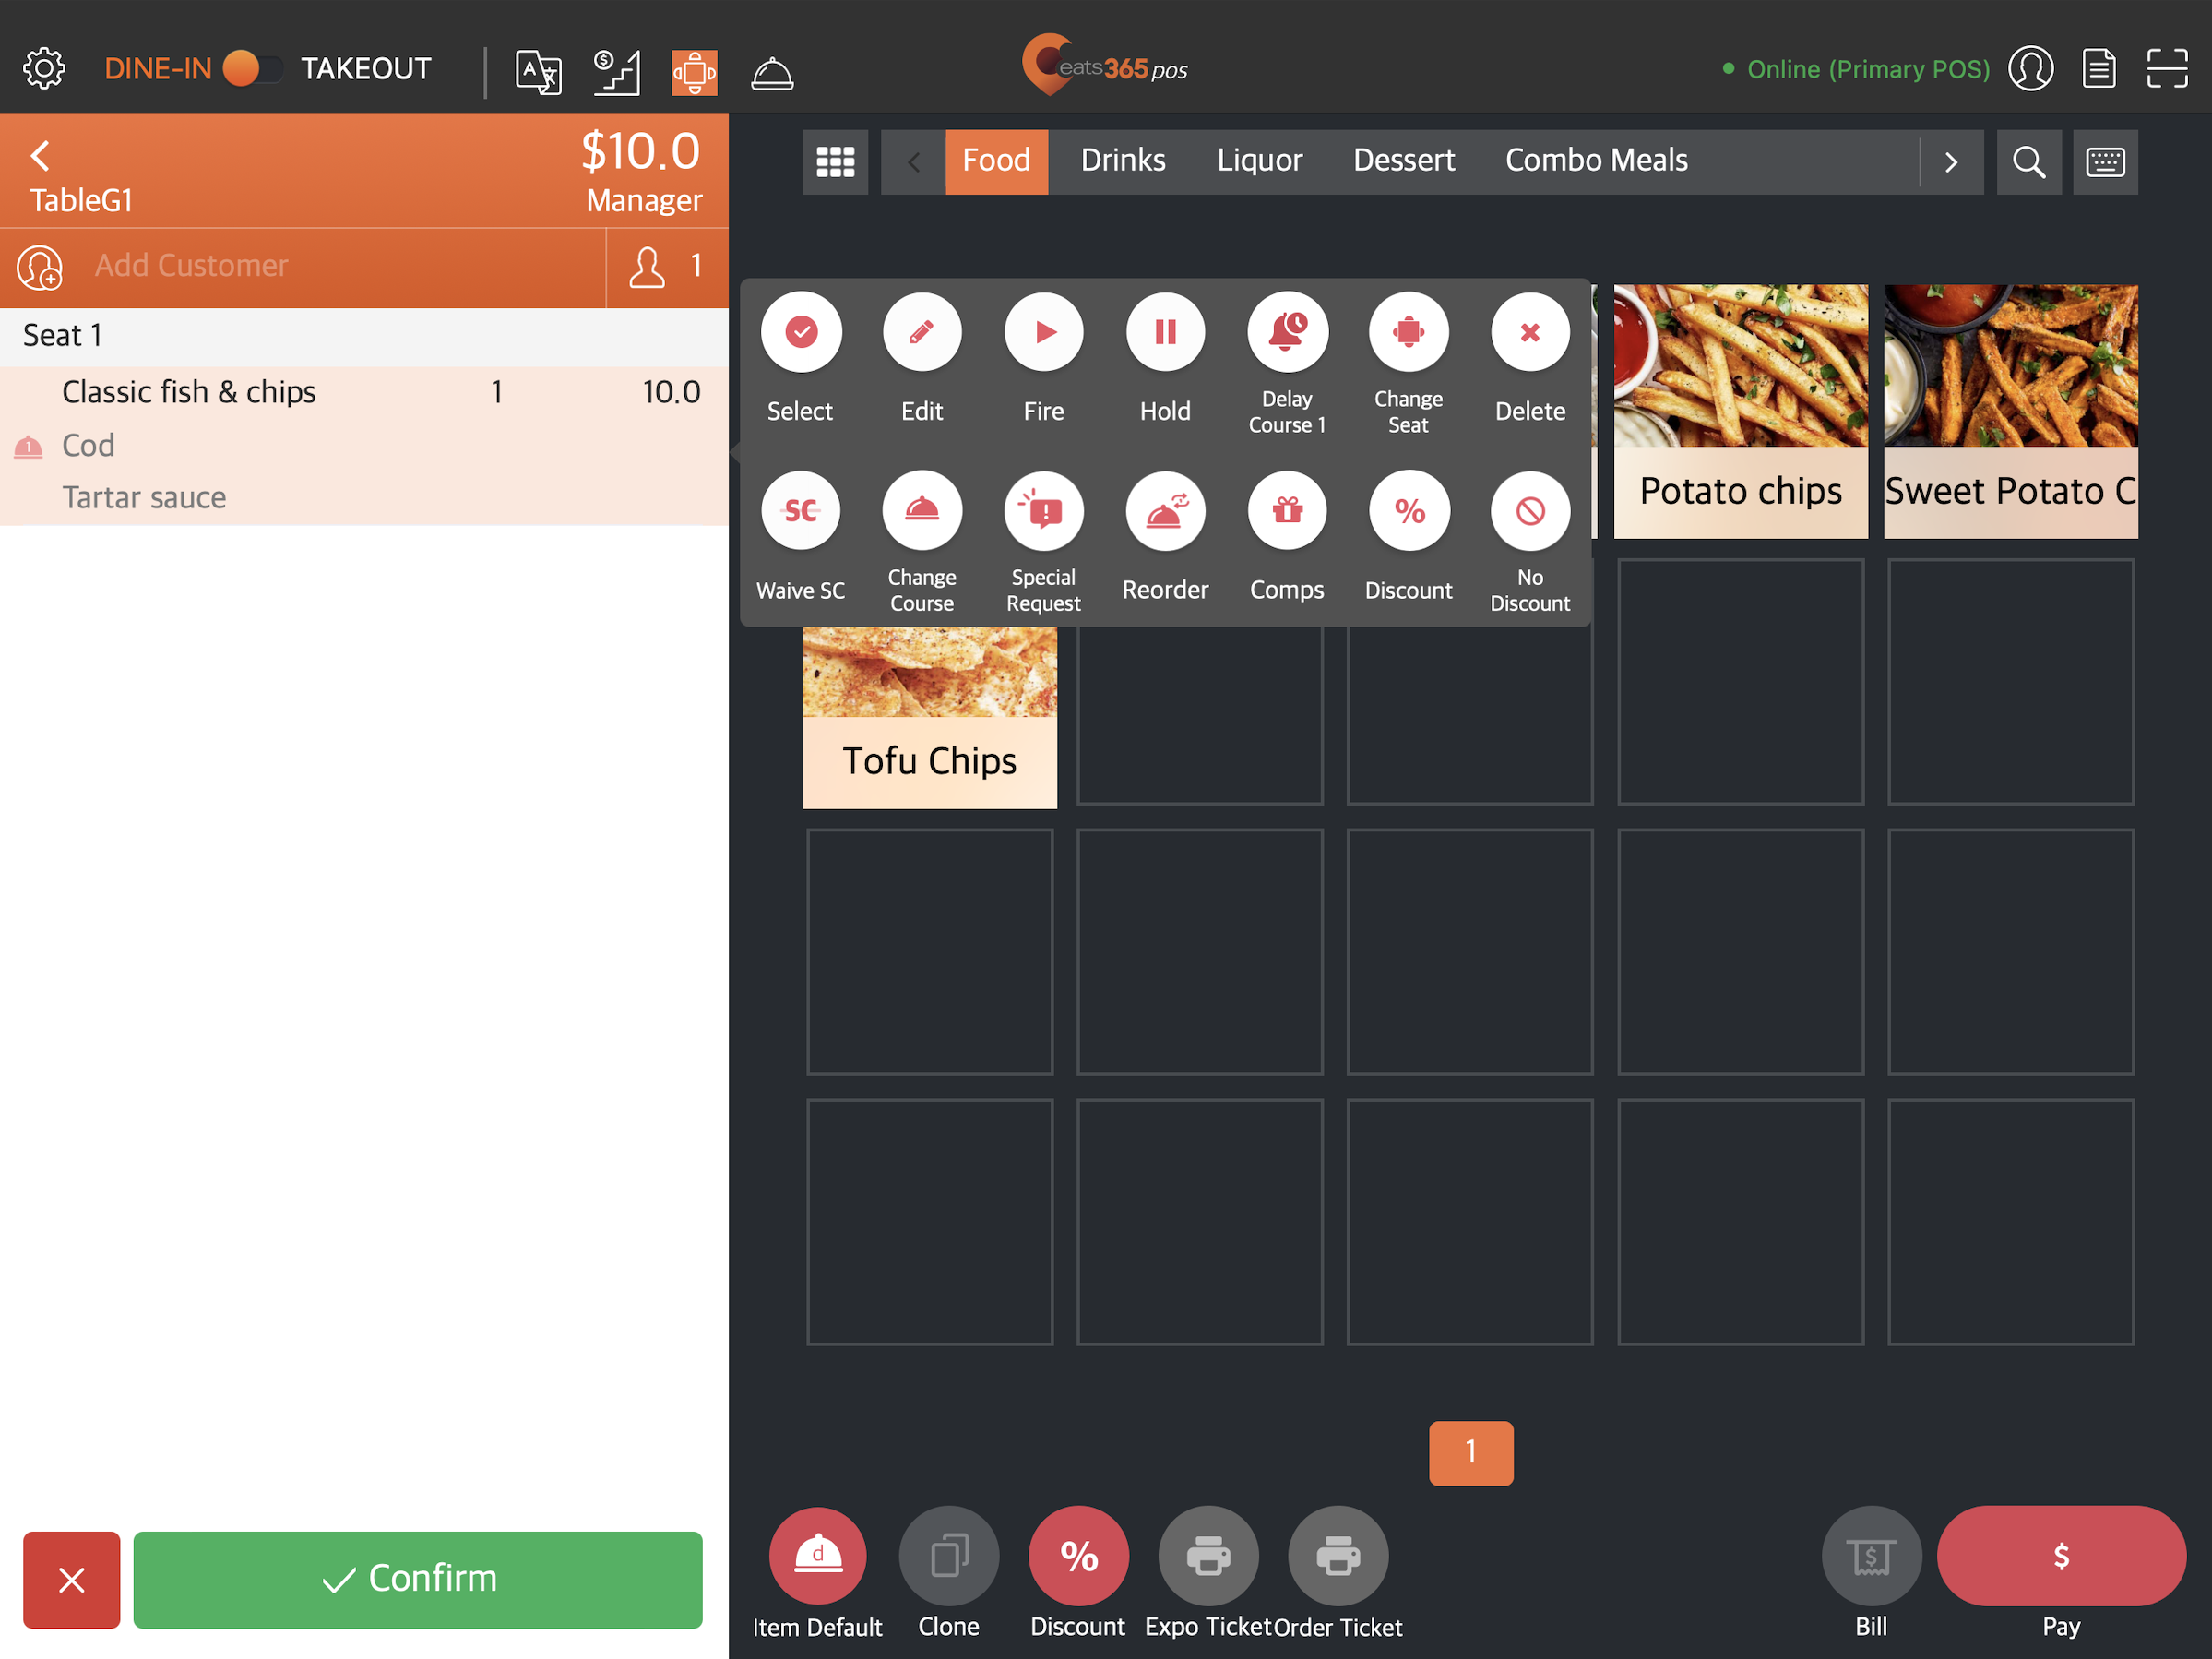
In this article, you’ll learn how to add or remove action buttons, as well as reorder their sequence on the Eats365 POS.
For information on how to use action buttons, refer to Use Action Buttons to modify an order.
Add an Action Button
To add an Action Button from the list of available options, follow the steps below:
Eats365 POS
- Log in to the Eats365 POS.
- At the top left, tap Settings
 .
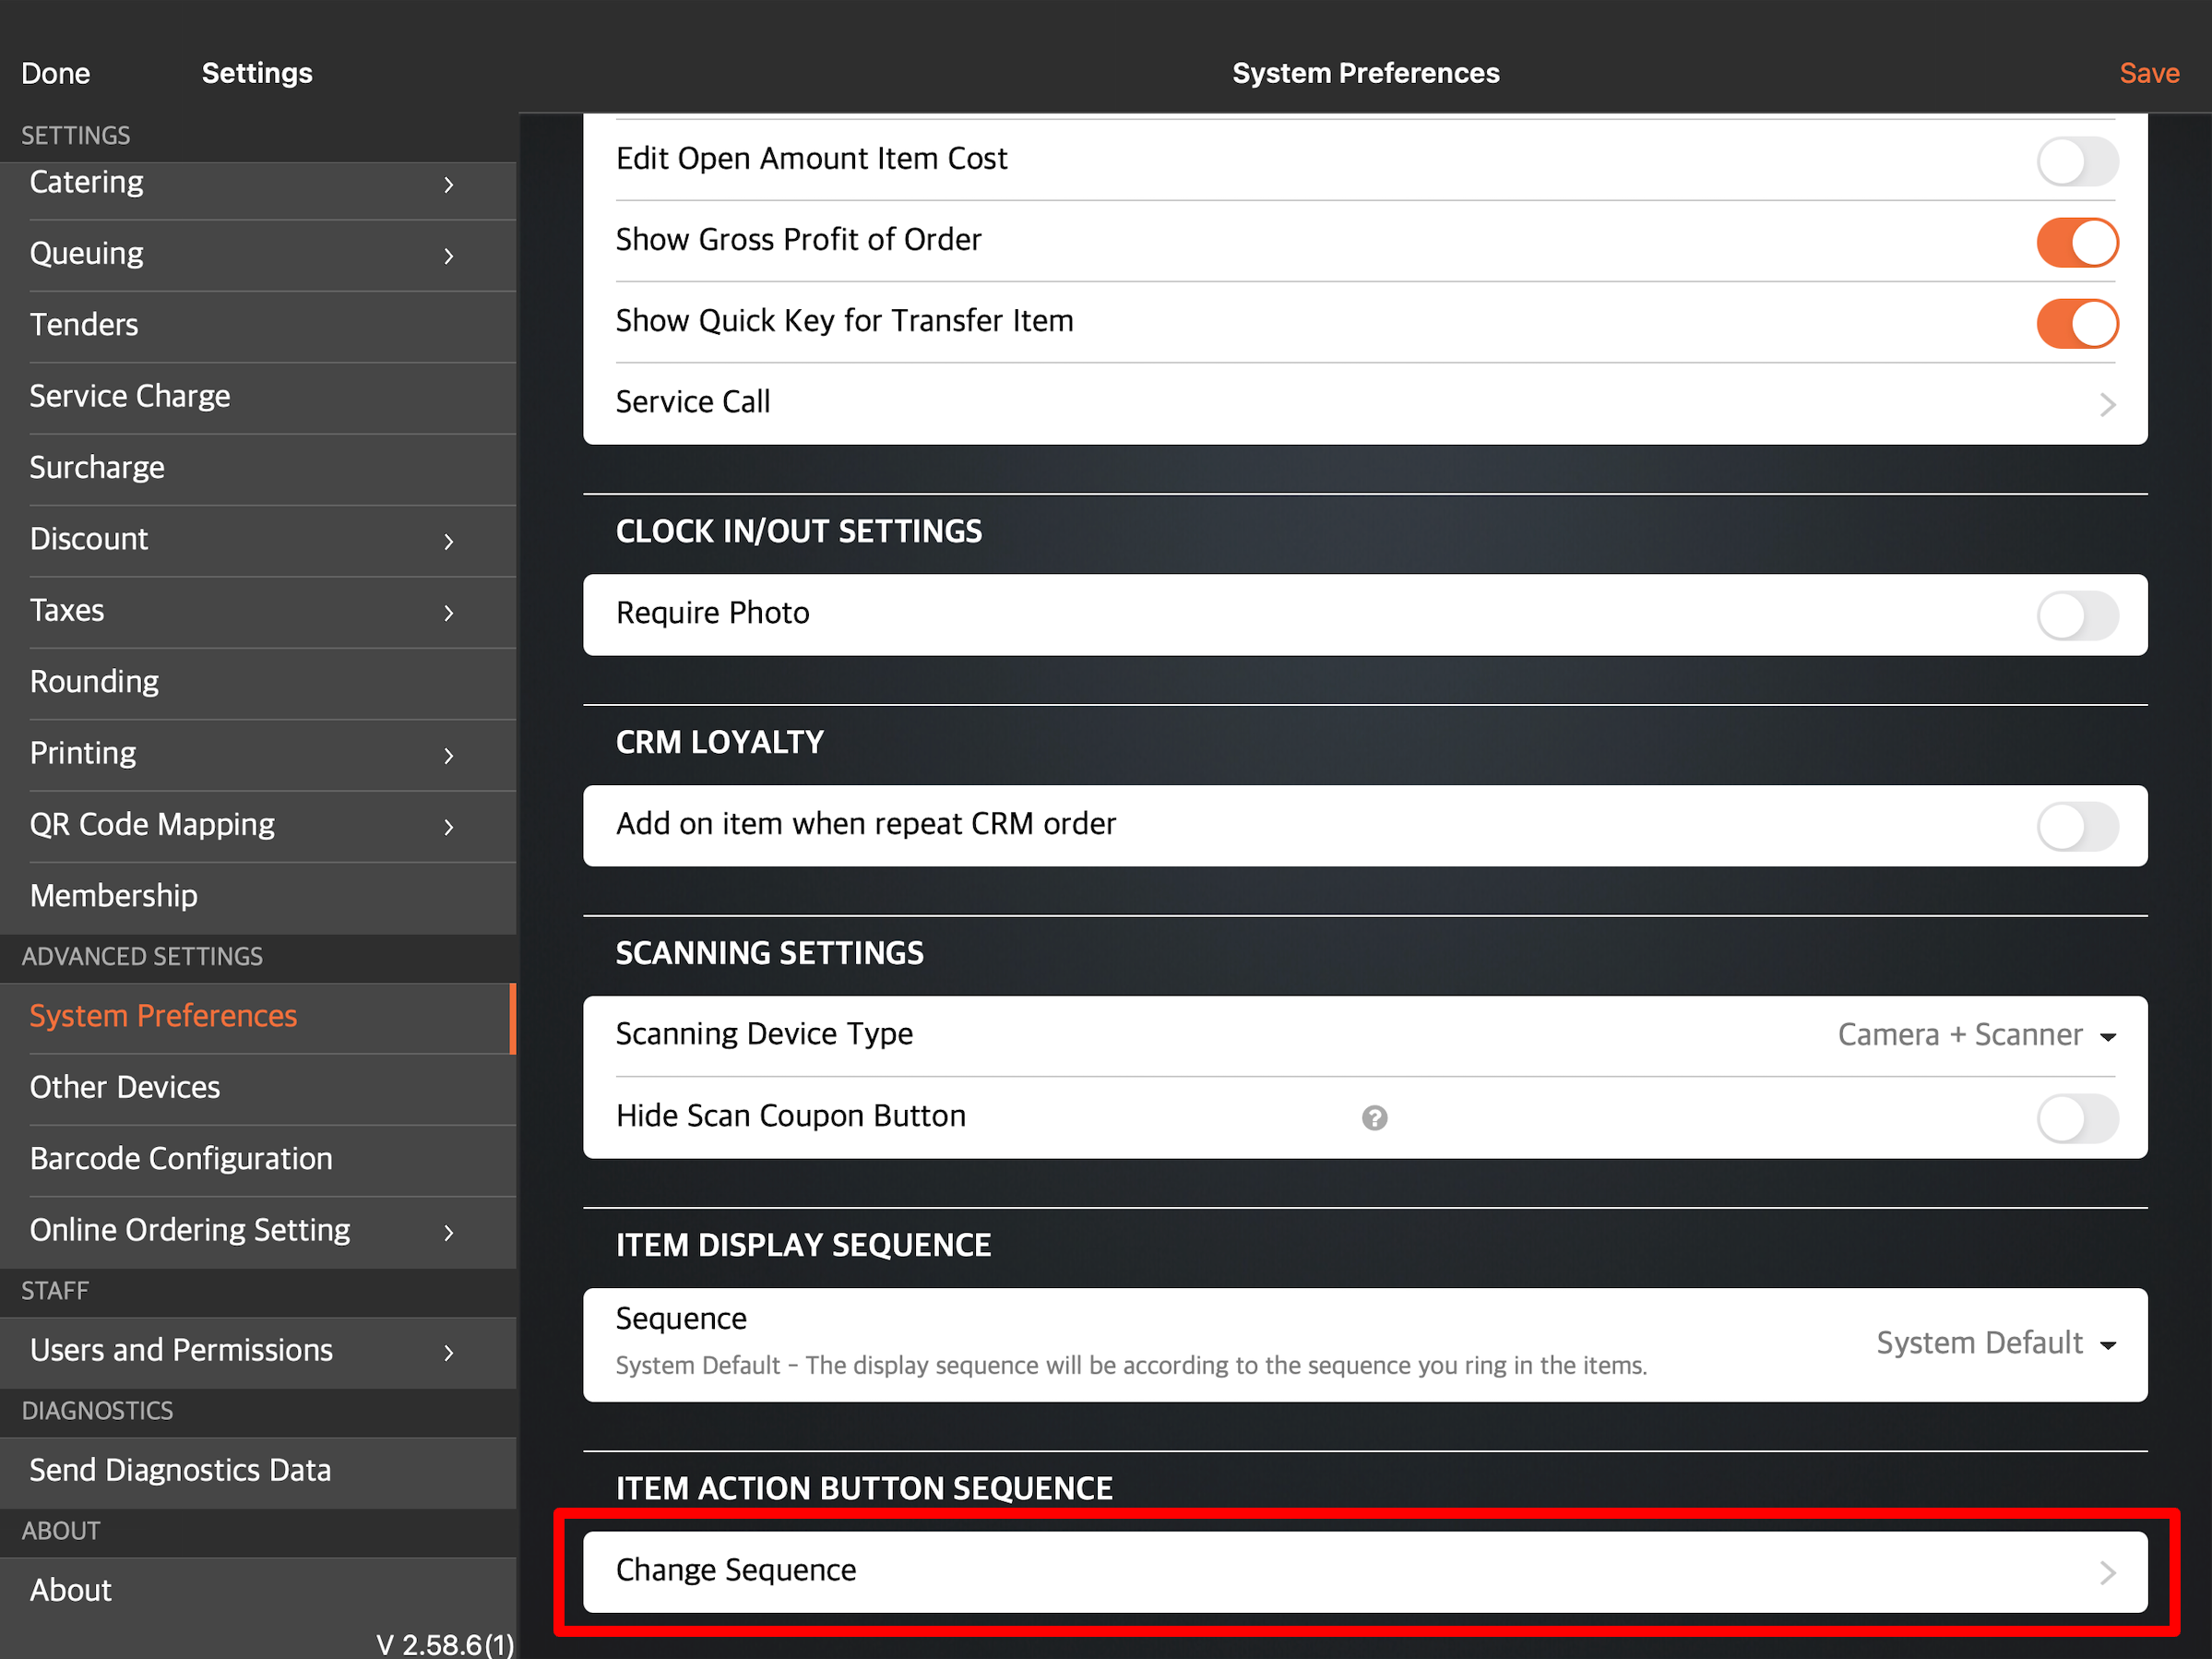
. - Under Advanced Settings, tap System Preferences.
- Scroll down to Item Action Button Sequence, then tap Change Sequence.
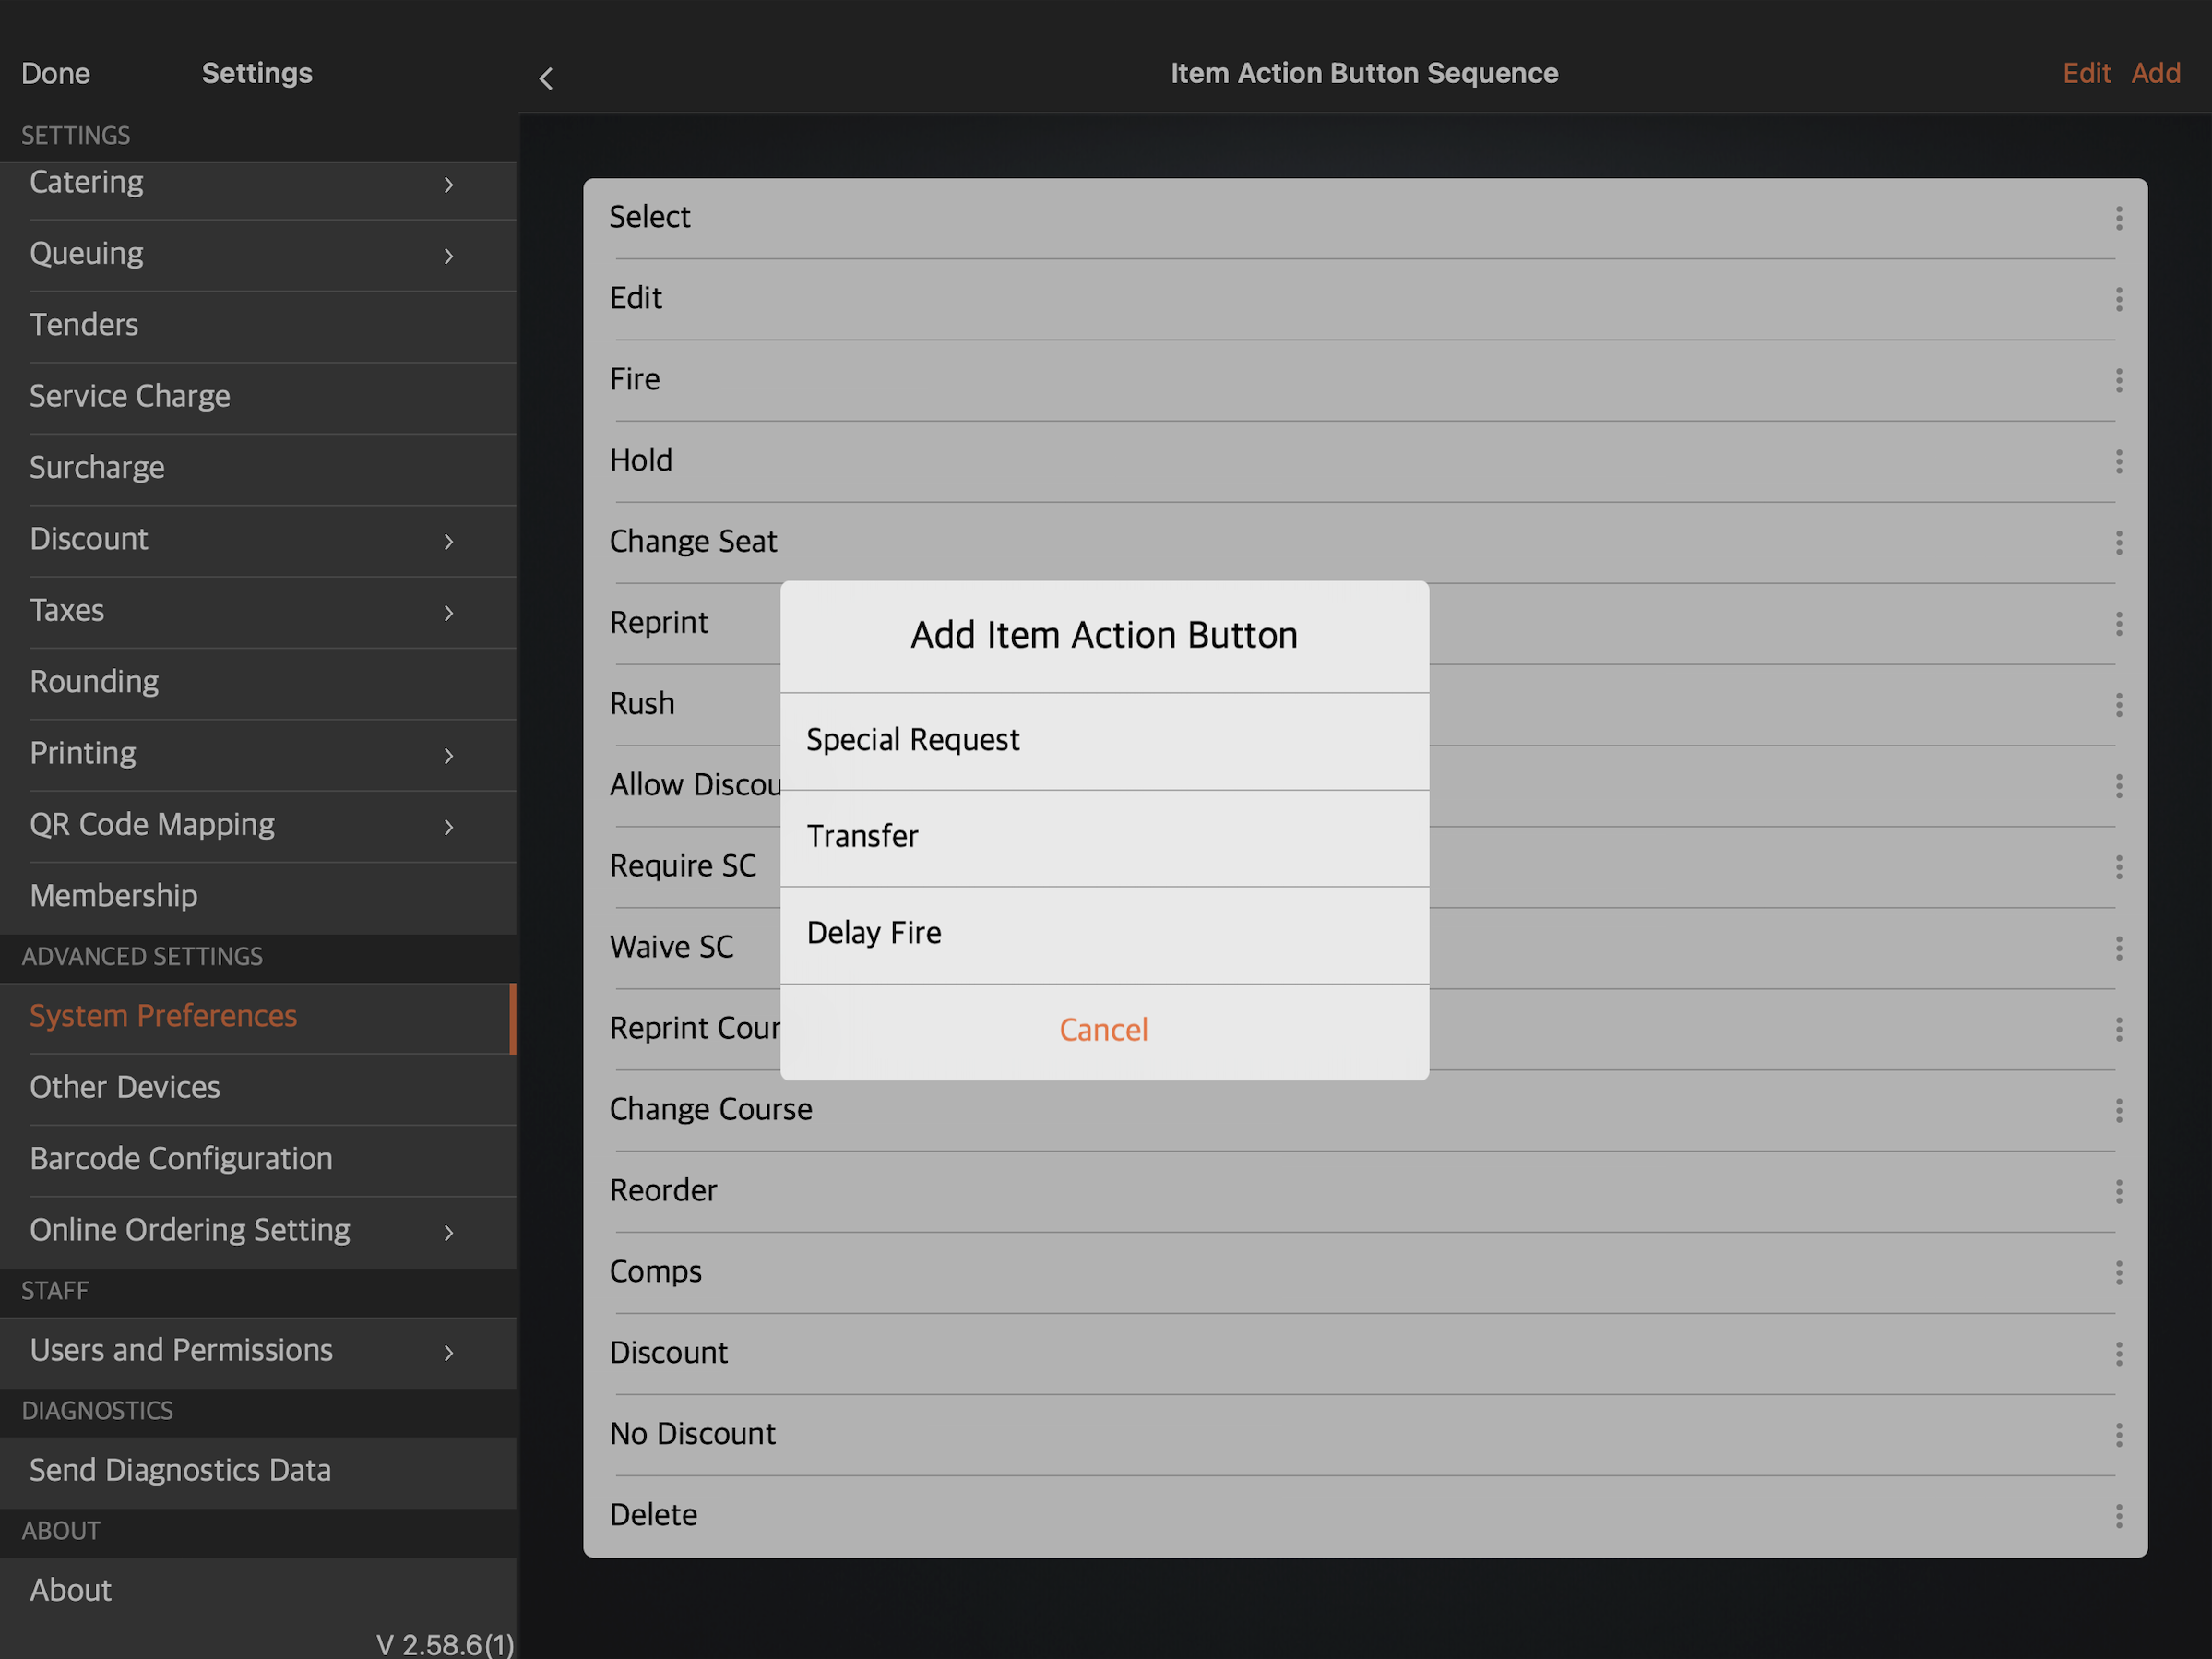
- At the top right, tap Add.

- Select the action buttons that you want to add the list of options.
- Tap Back
 to return to the main System Preferences settings.
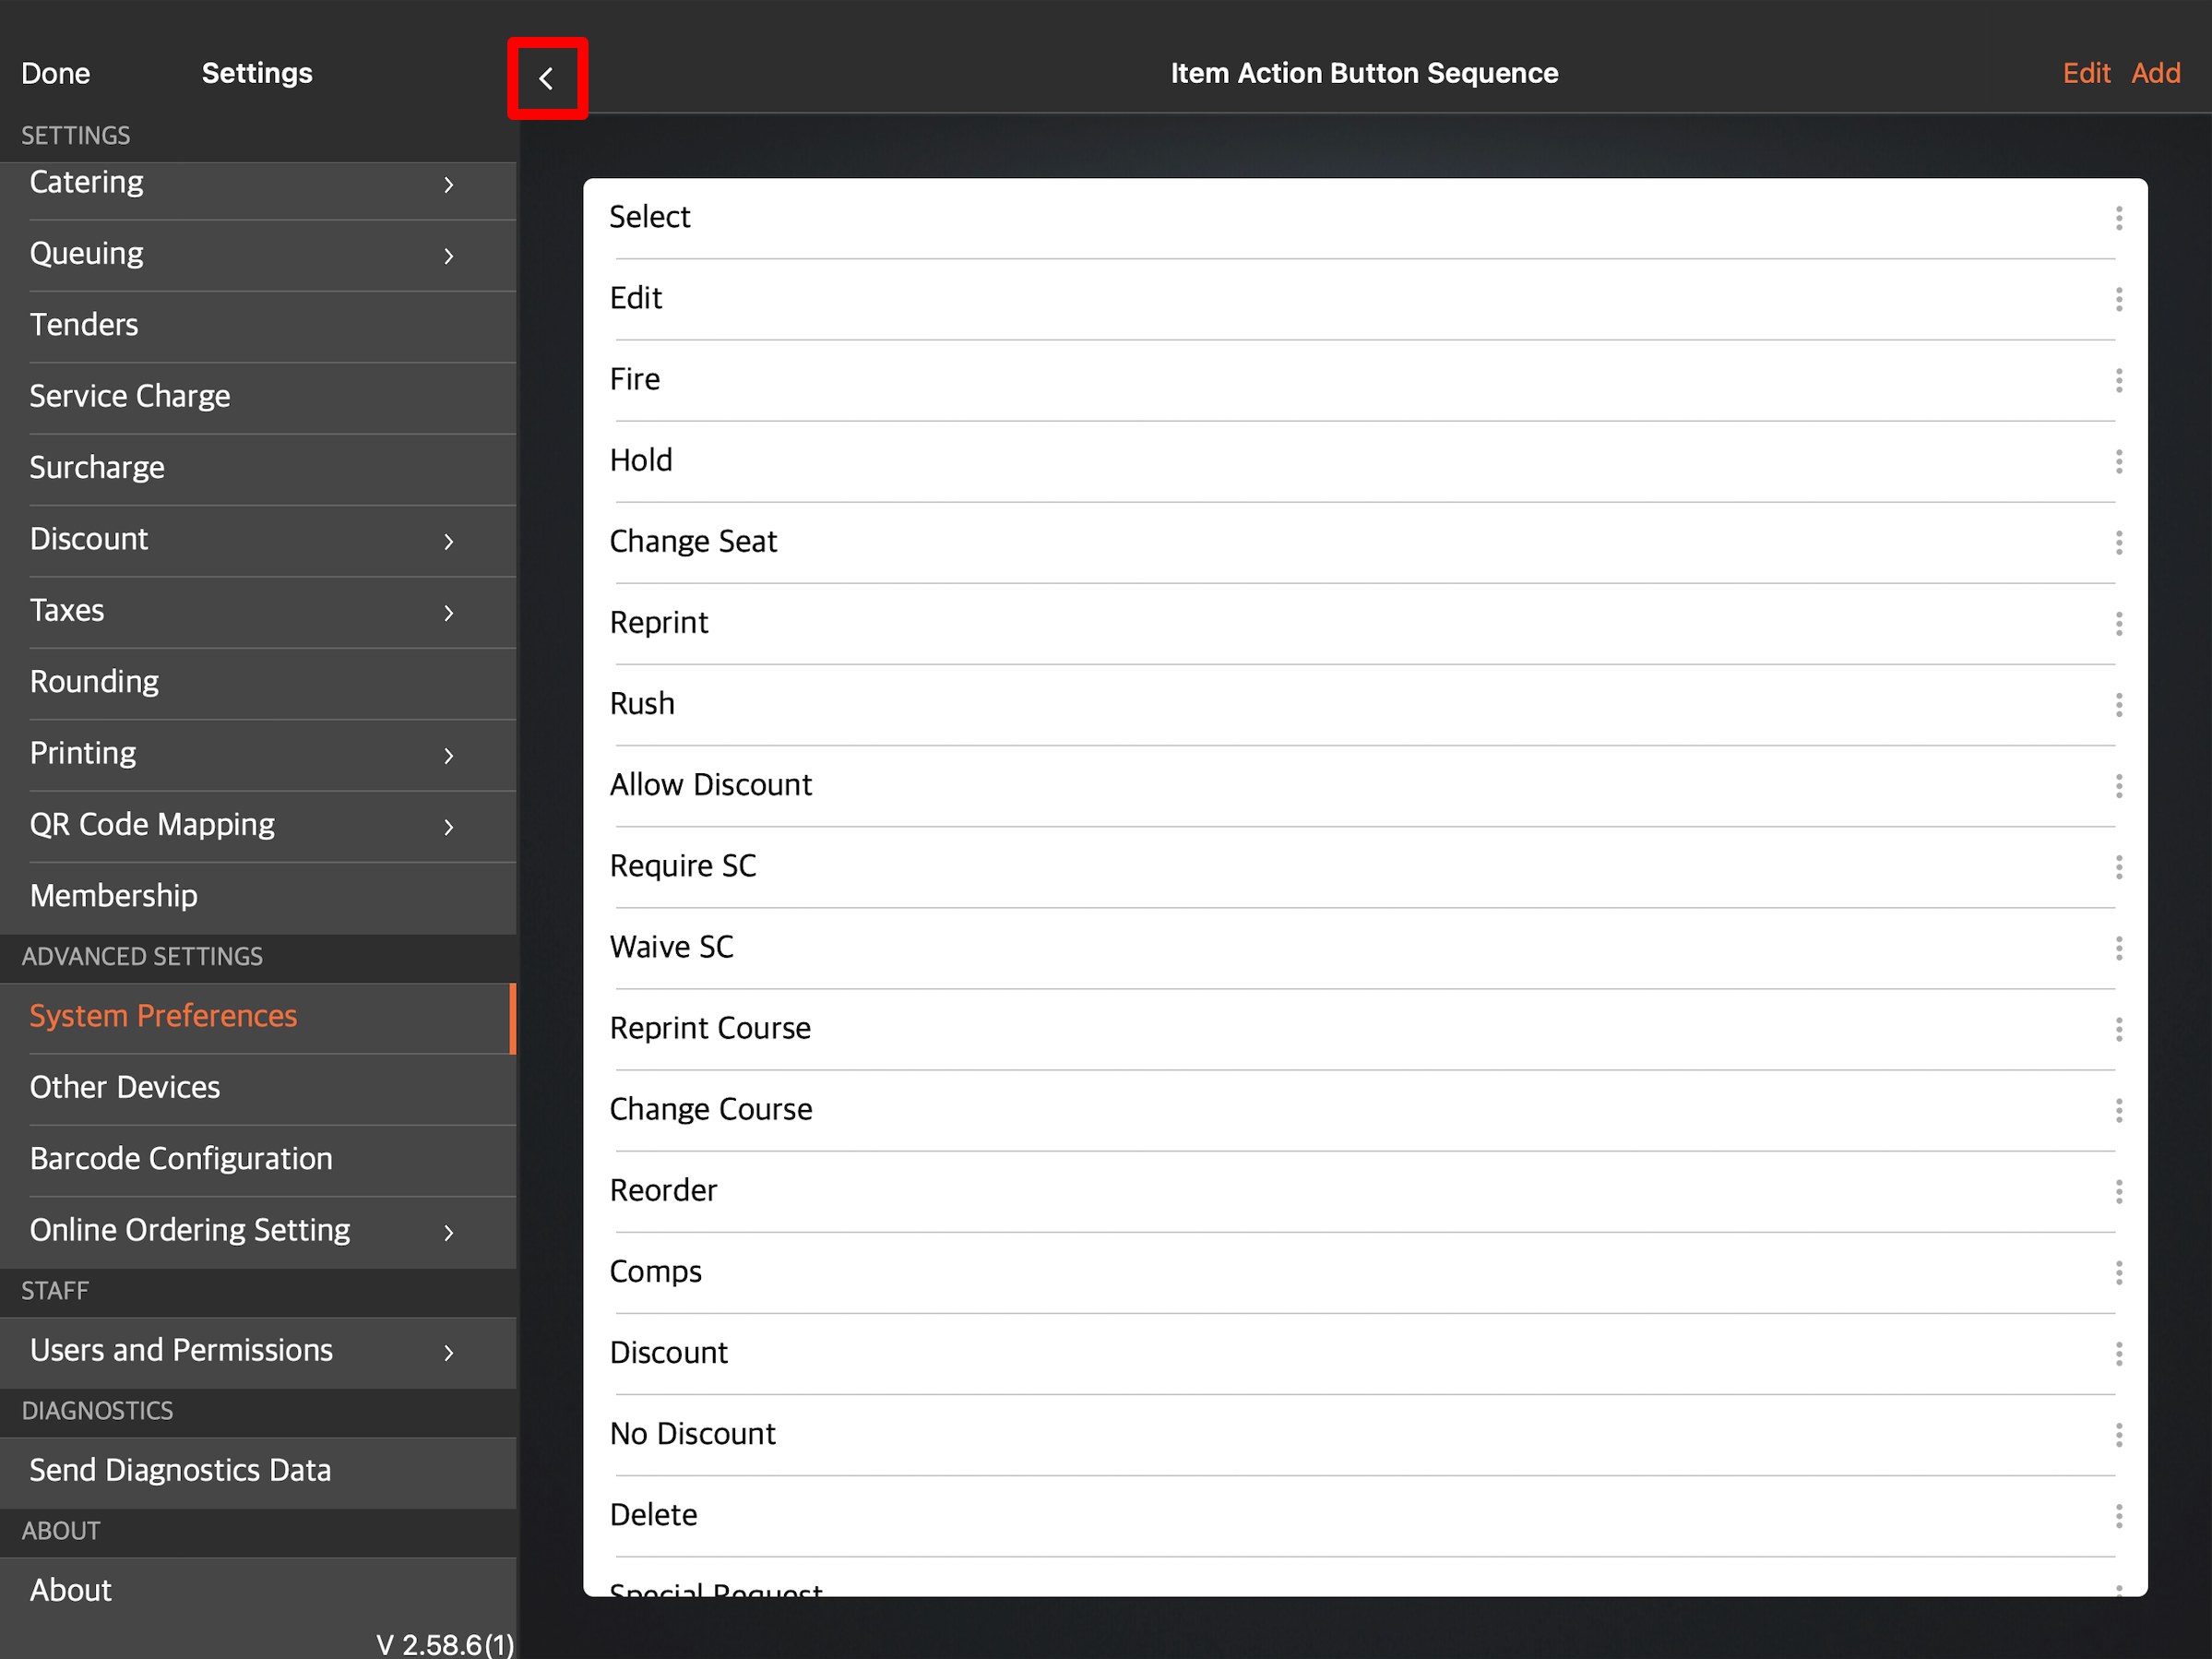
- Tap Save to confirm.
Merchant Portal (Classic Theme)
- Log in to the Merchant Portal.
- On the left panel, click on Advanced Settings. Then, click on System Preferences.
- Click on General.
- Click on the Item Action Button Sequence tab.
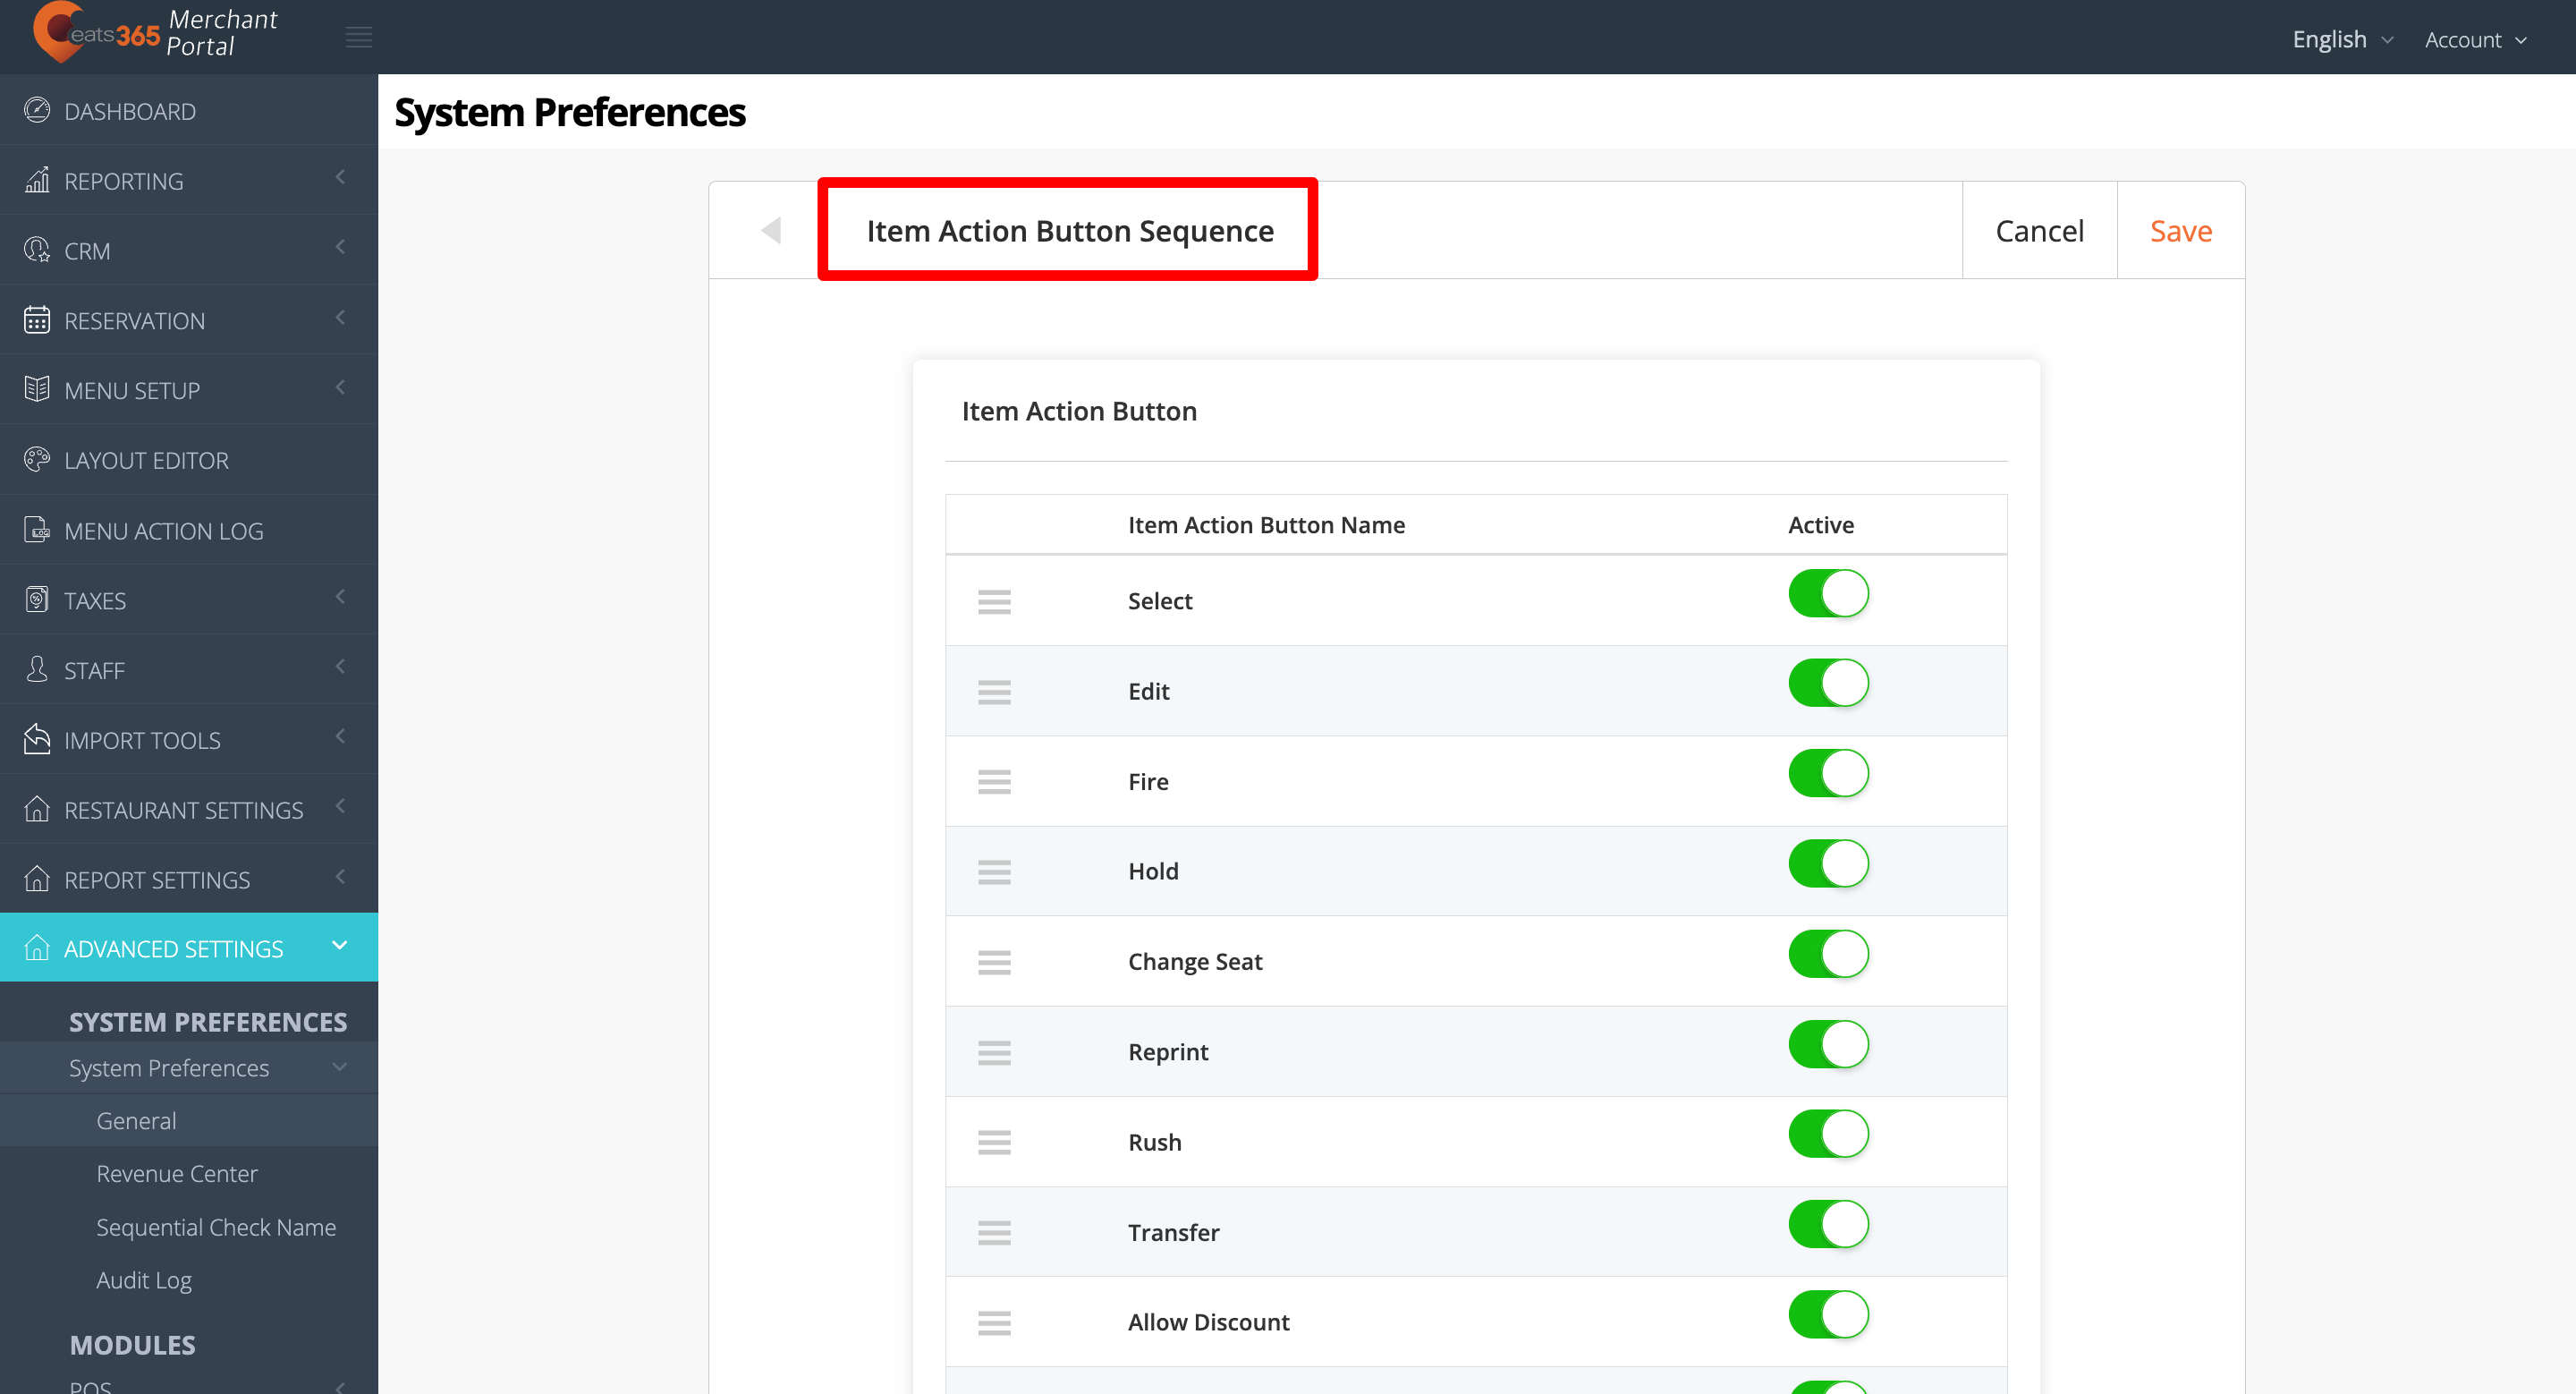
Tip: Click on the arrow buttons beside the tabs to navigate to the different settings.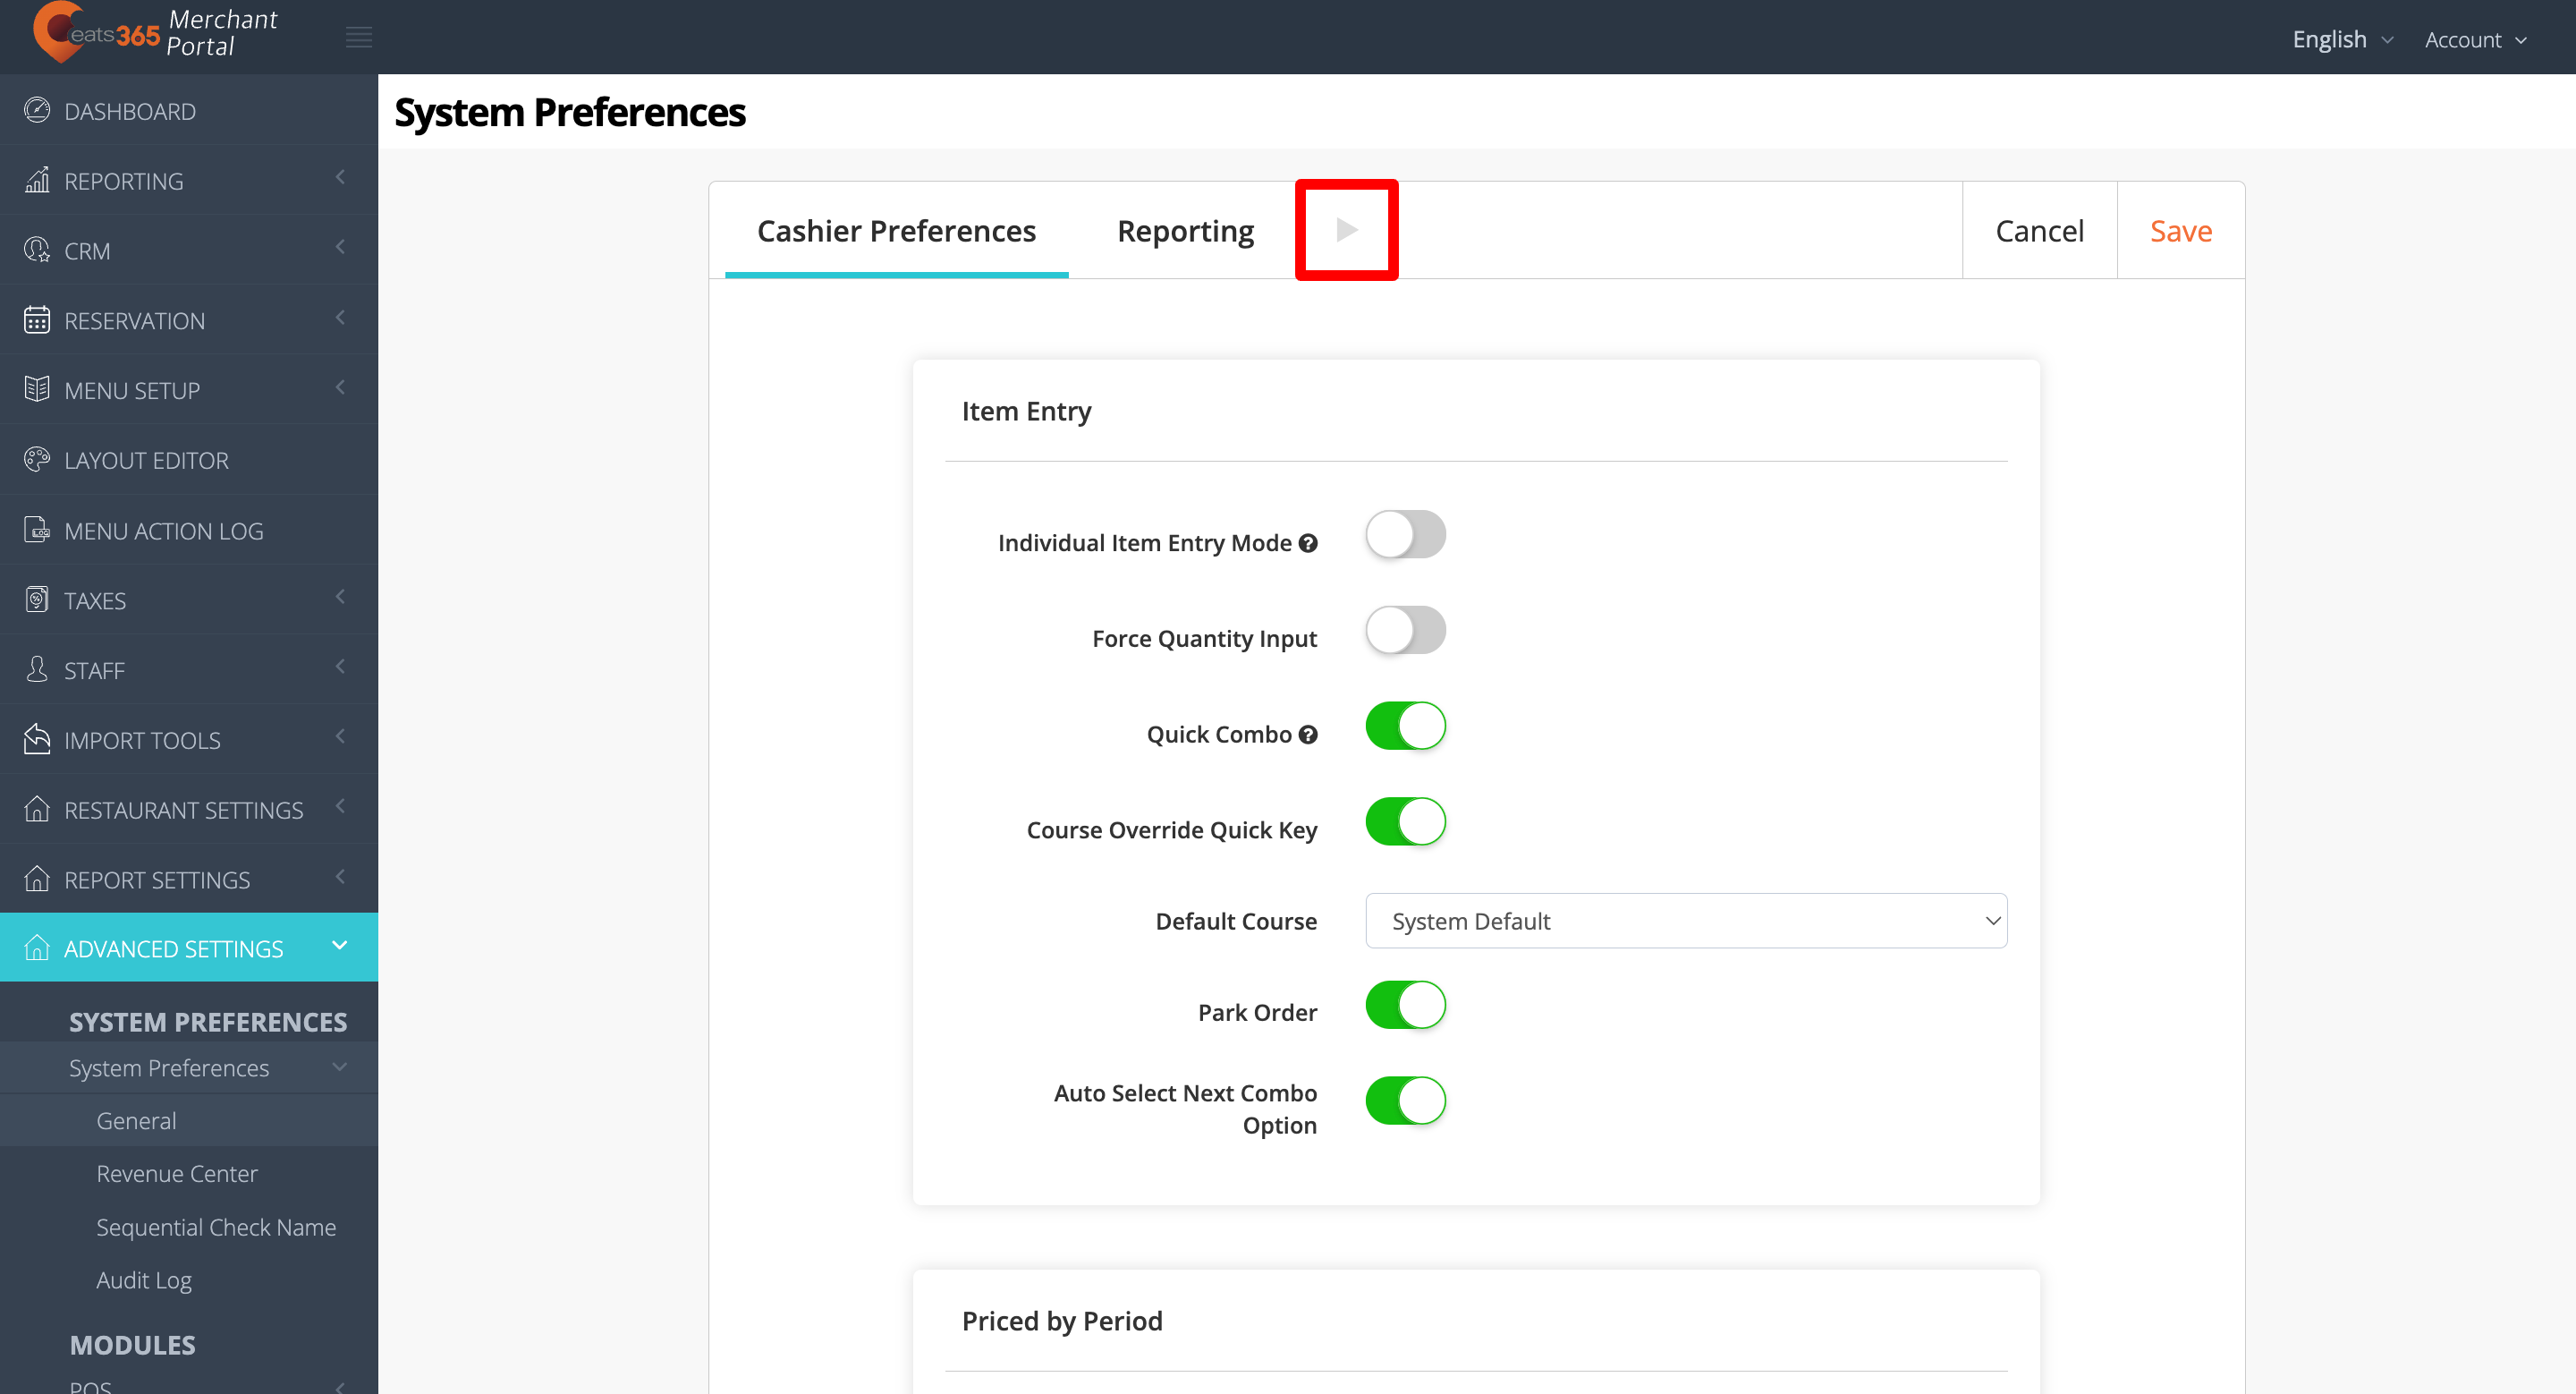
- Next to the action button that you want to include in the options, toggle on
 the switch.
- At the top right, click on Save to confirm.
Merchant Portal 2.0
- Log in to the Merchant Portal.
- On the left panel, click on Advanced Settings. Then, click on System Preferences.
- Click on Item Action Button Sequence.
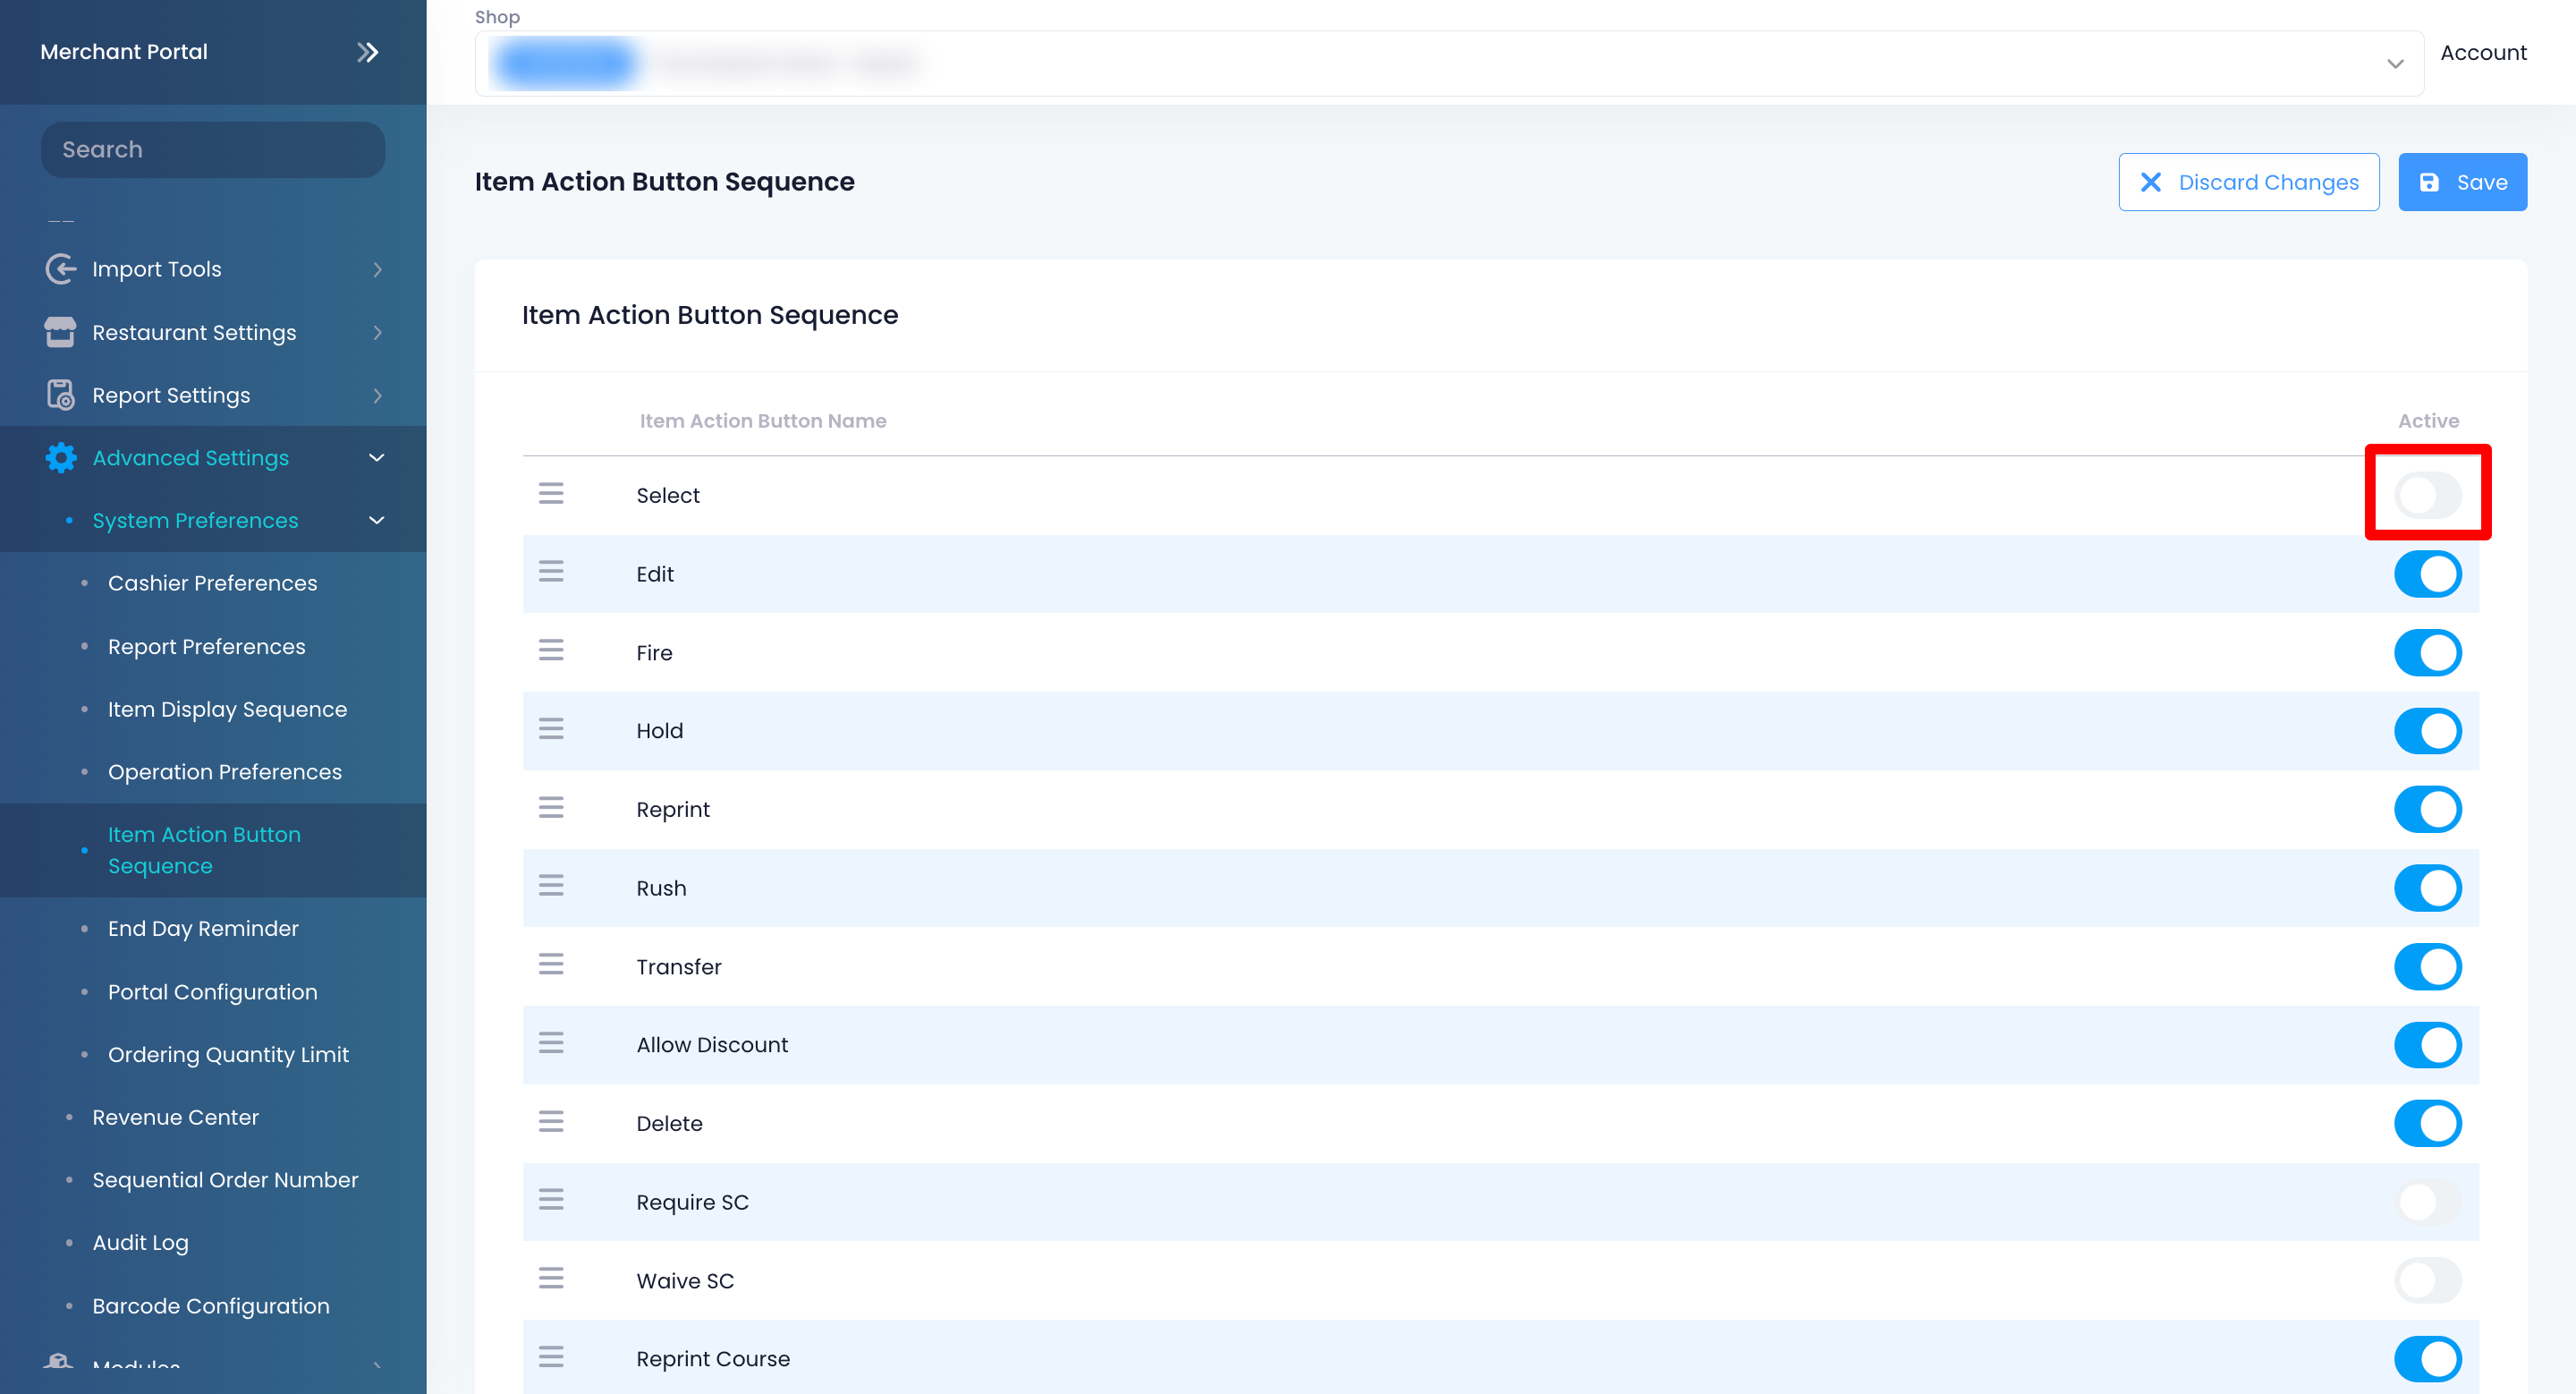
- Next to the action button that you want to include in the options, toggle on
 the switch.
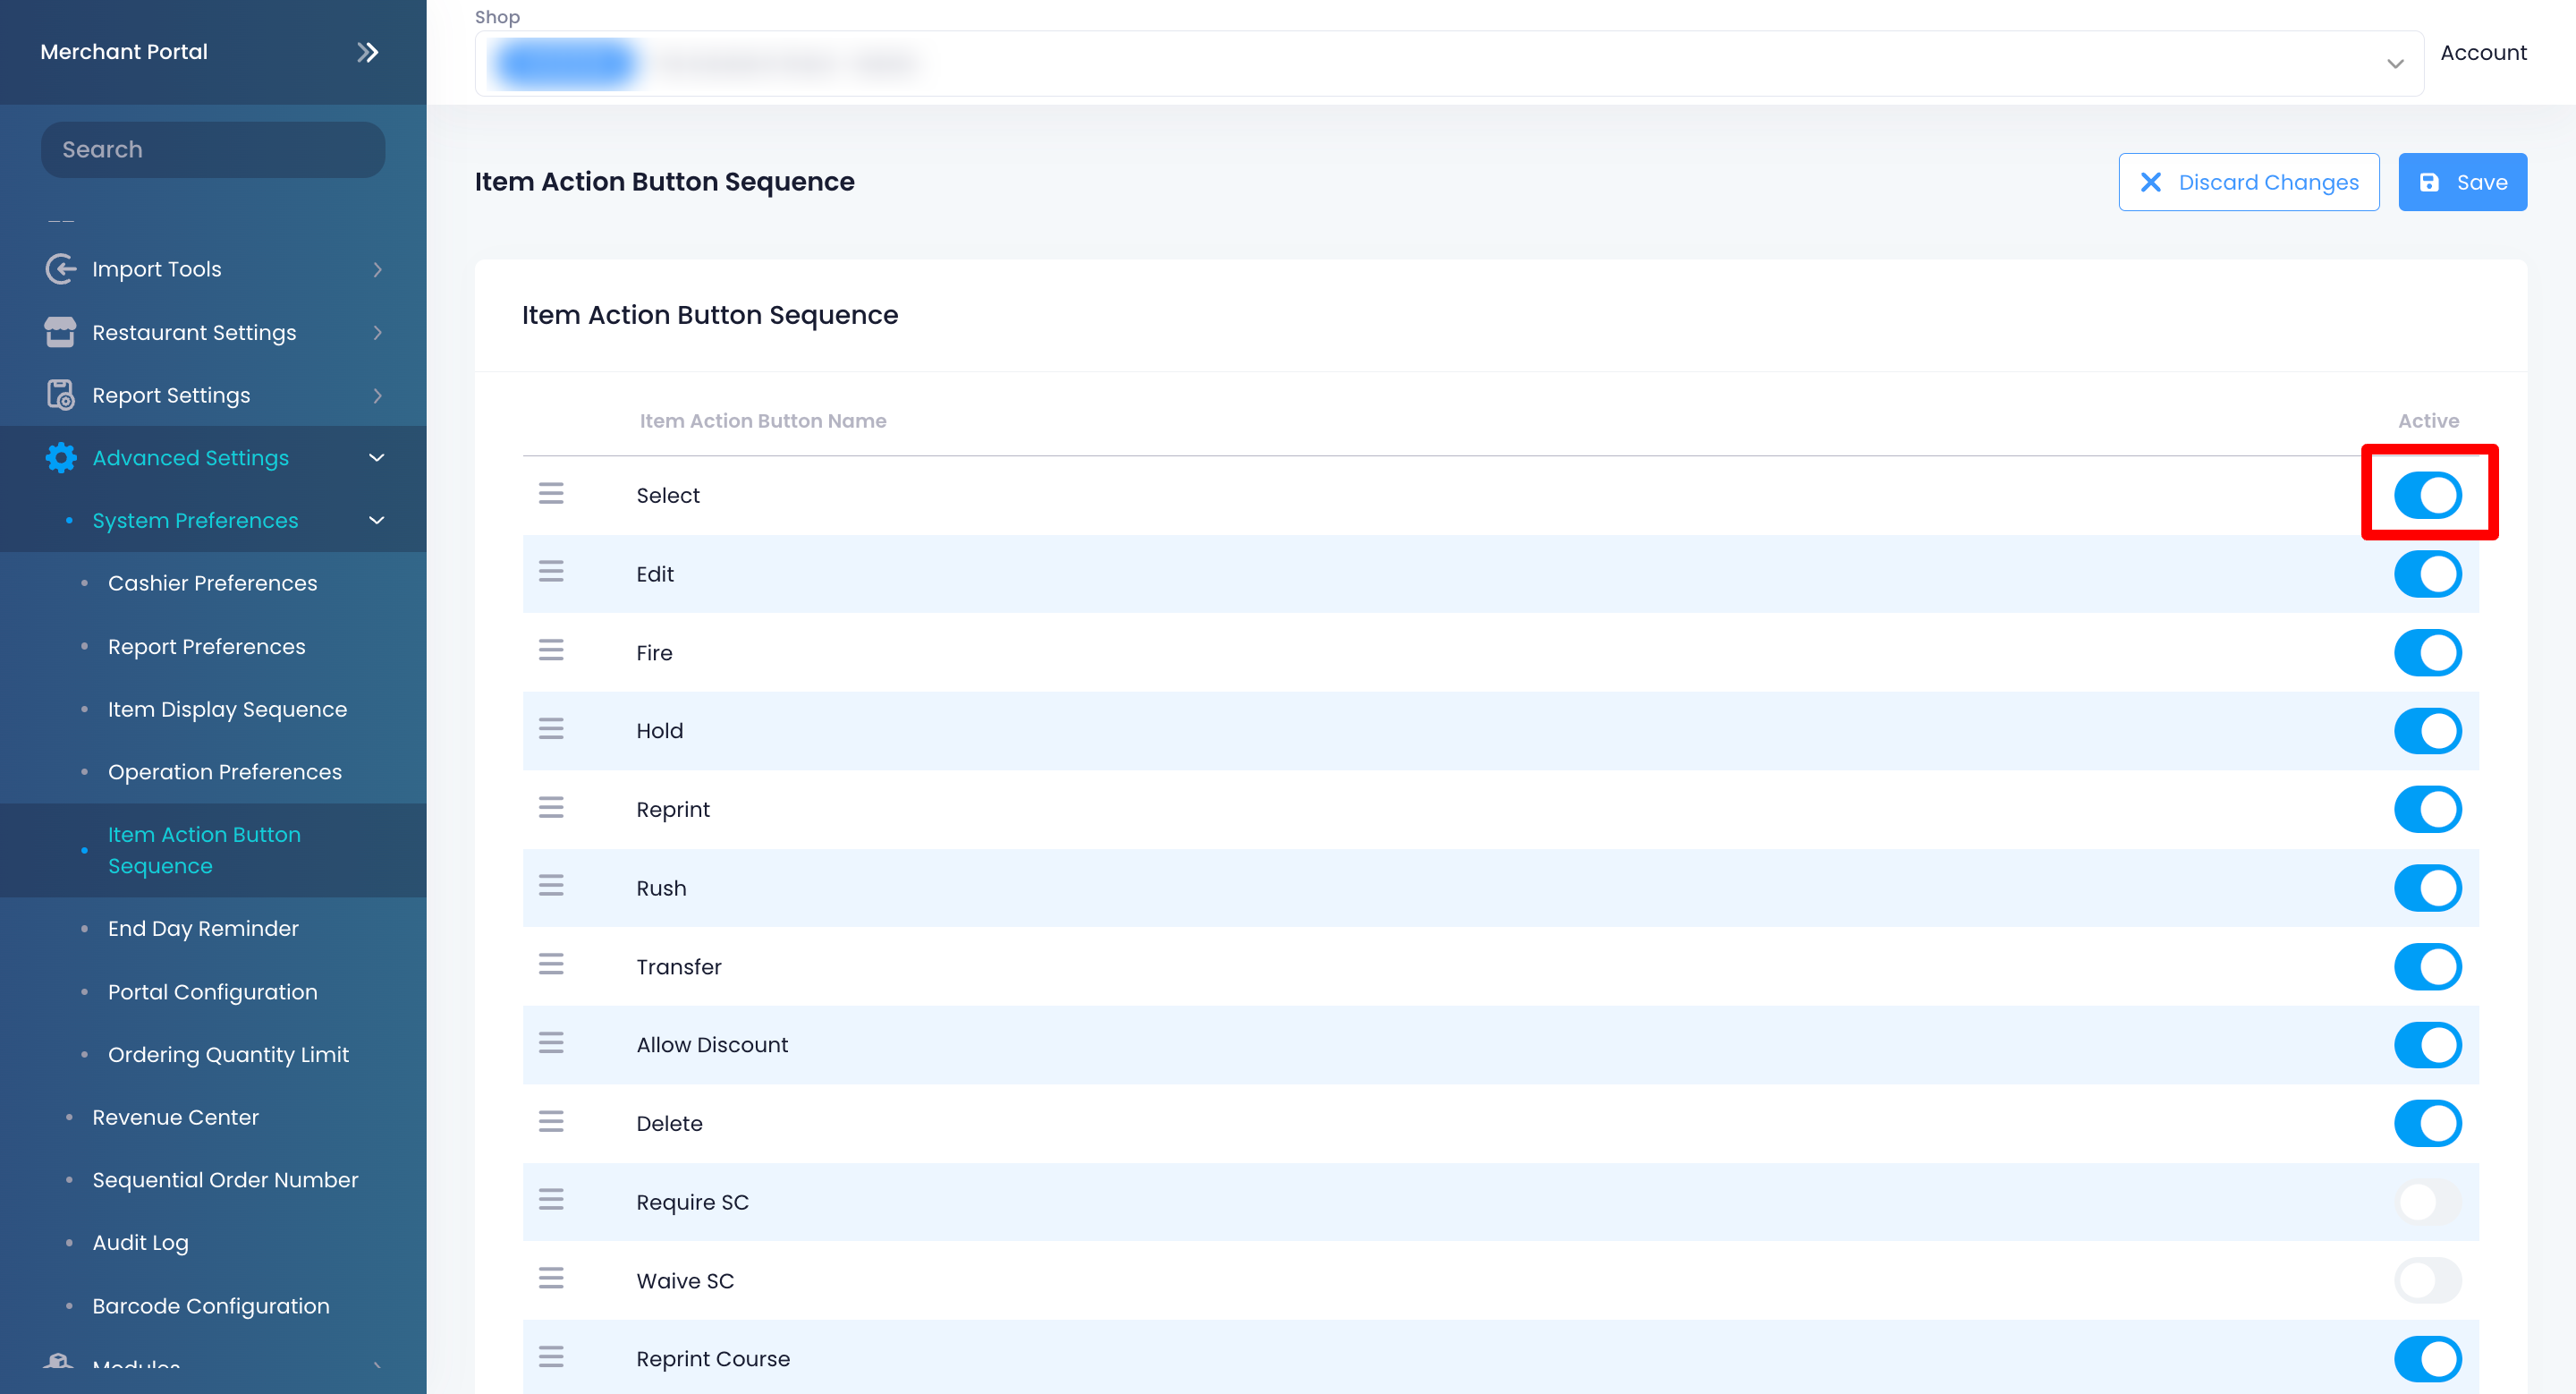
- At the top right, click on Save to confirm.
Delete an Action Button
To remove an Action Button from the list of available options, follow the steps below:
Eats365 POS
- Log in to the Eats365 POS.
- At the top left, tap Settings .
- Under Advanced Settings, tap System Preferences.
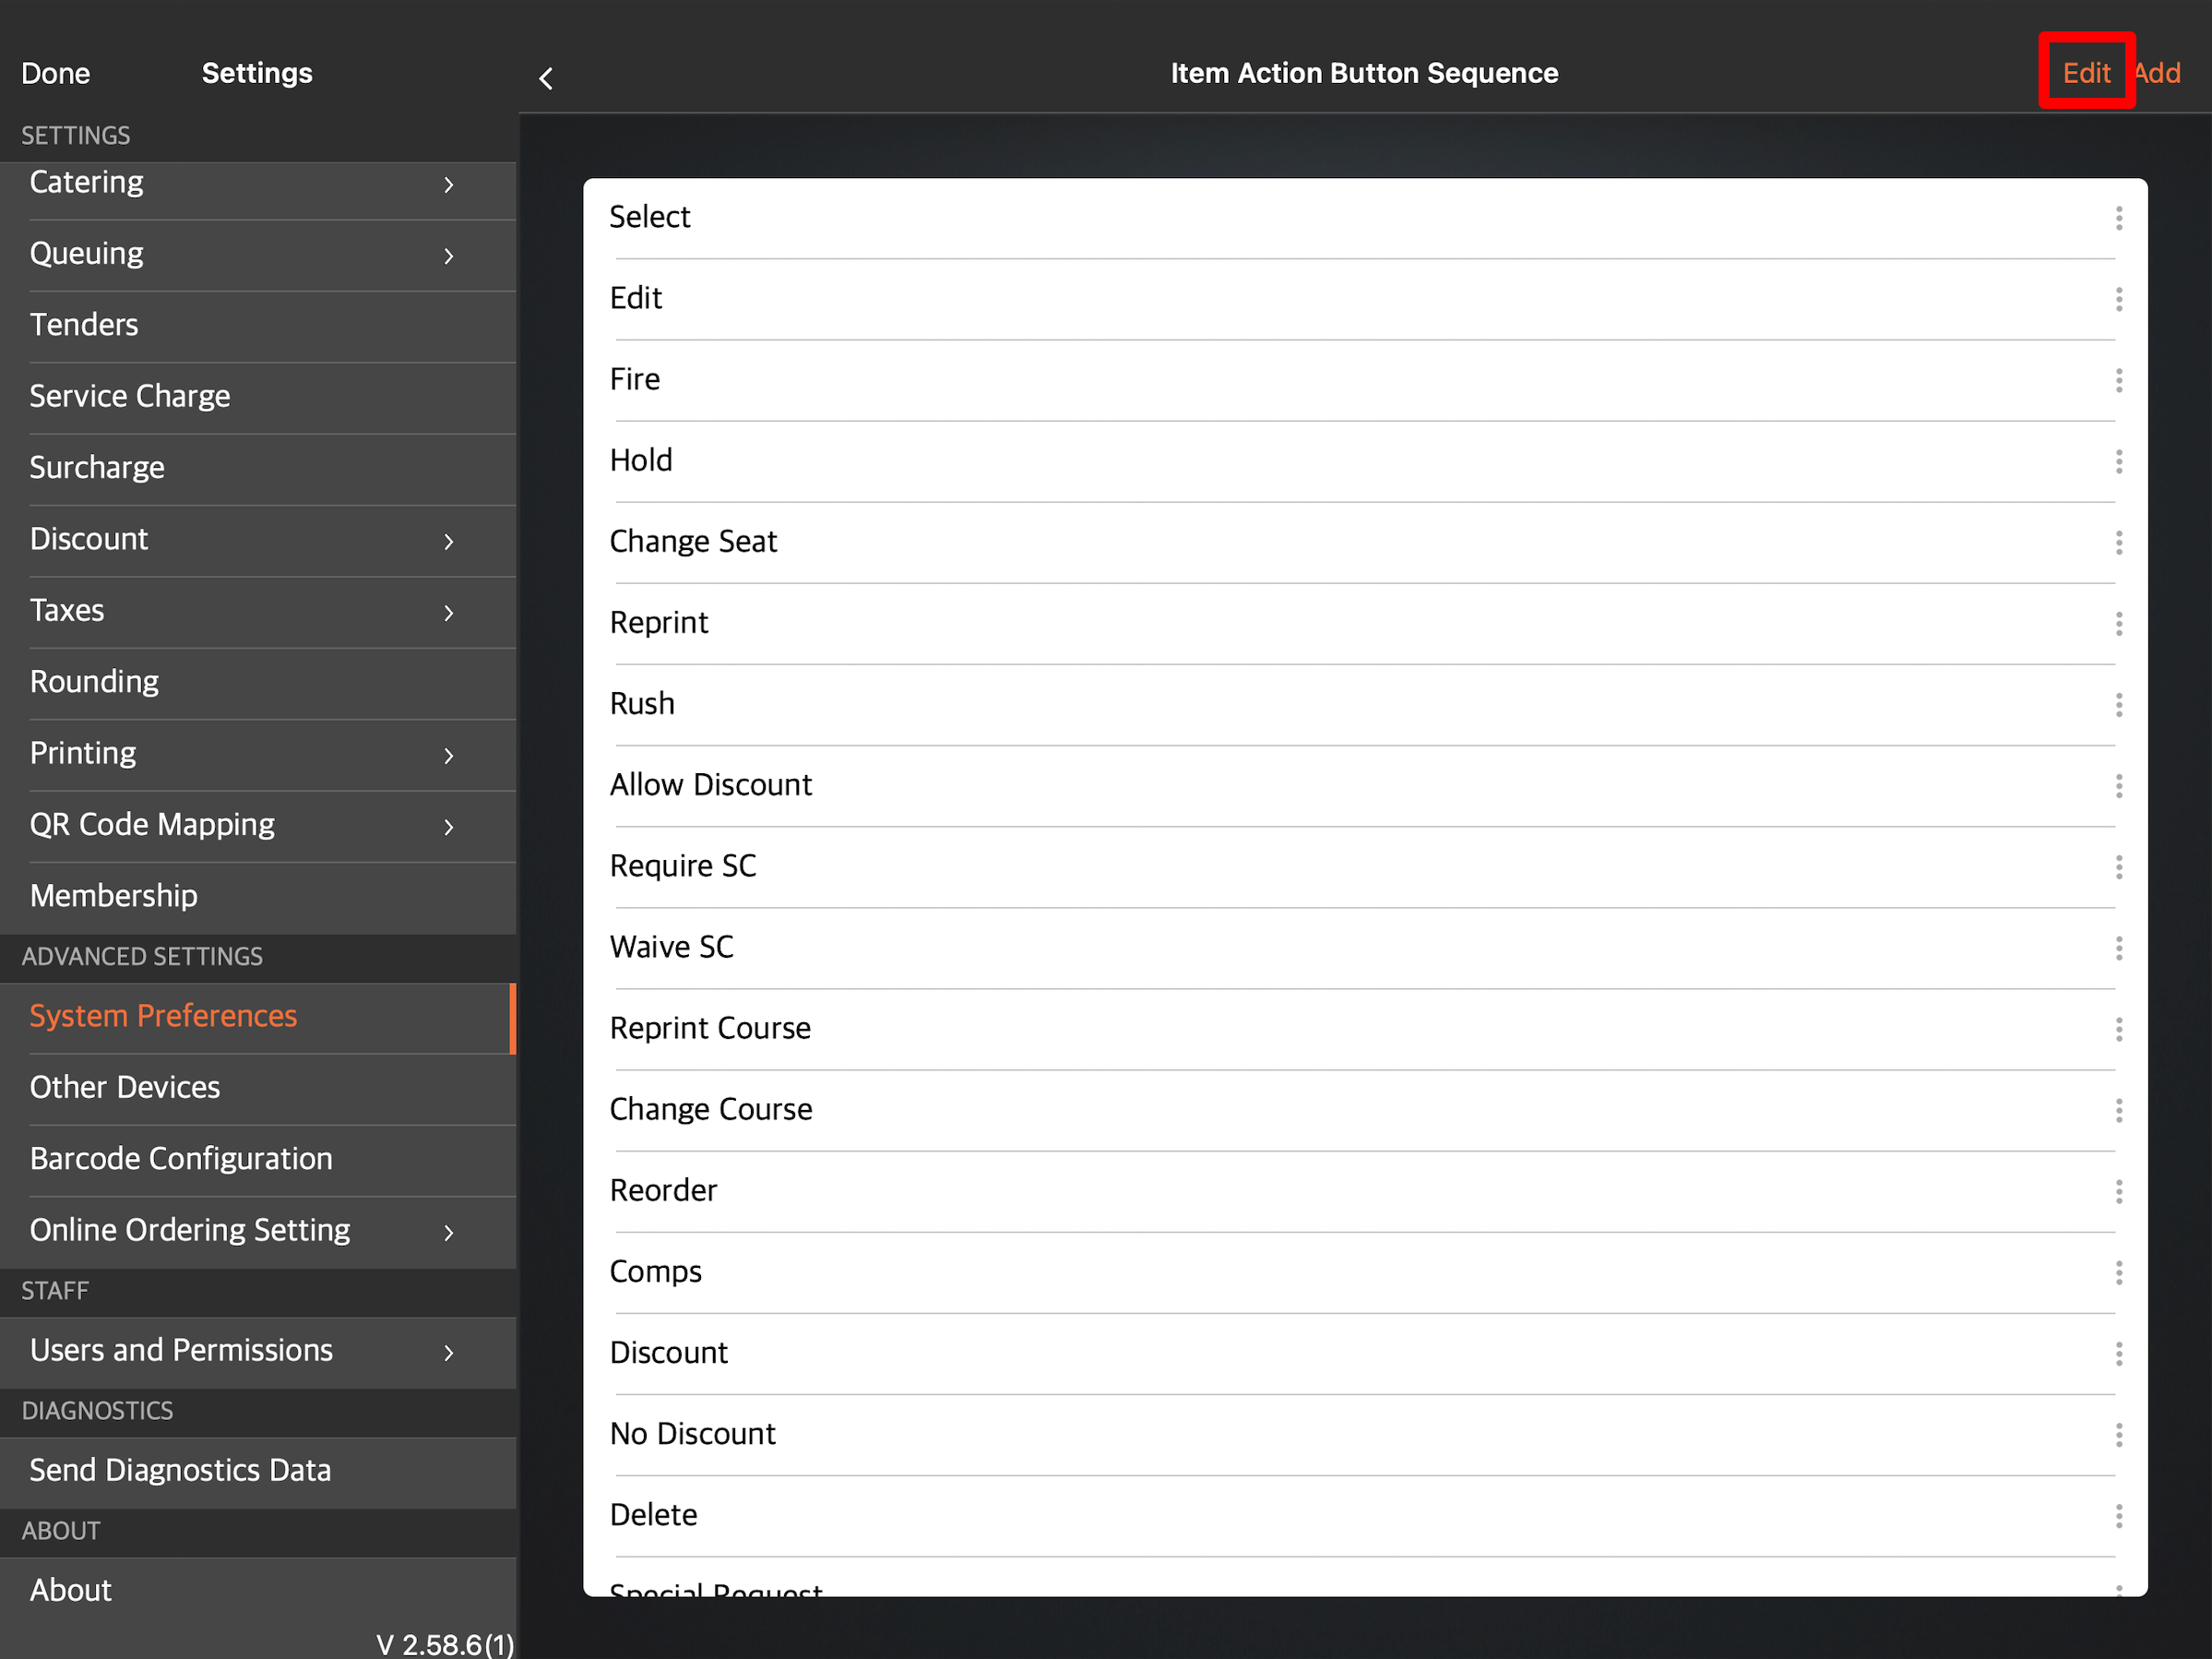
- Scroll down to Item Action Button Sequence, then tap Change Sequence.
- At the top right, tap Edit.
- Next to the action buttons that you want to remove, tap the three-dot menu
 .
.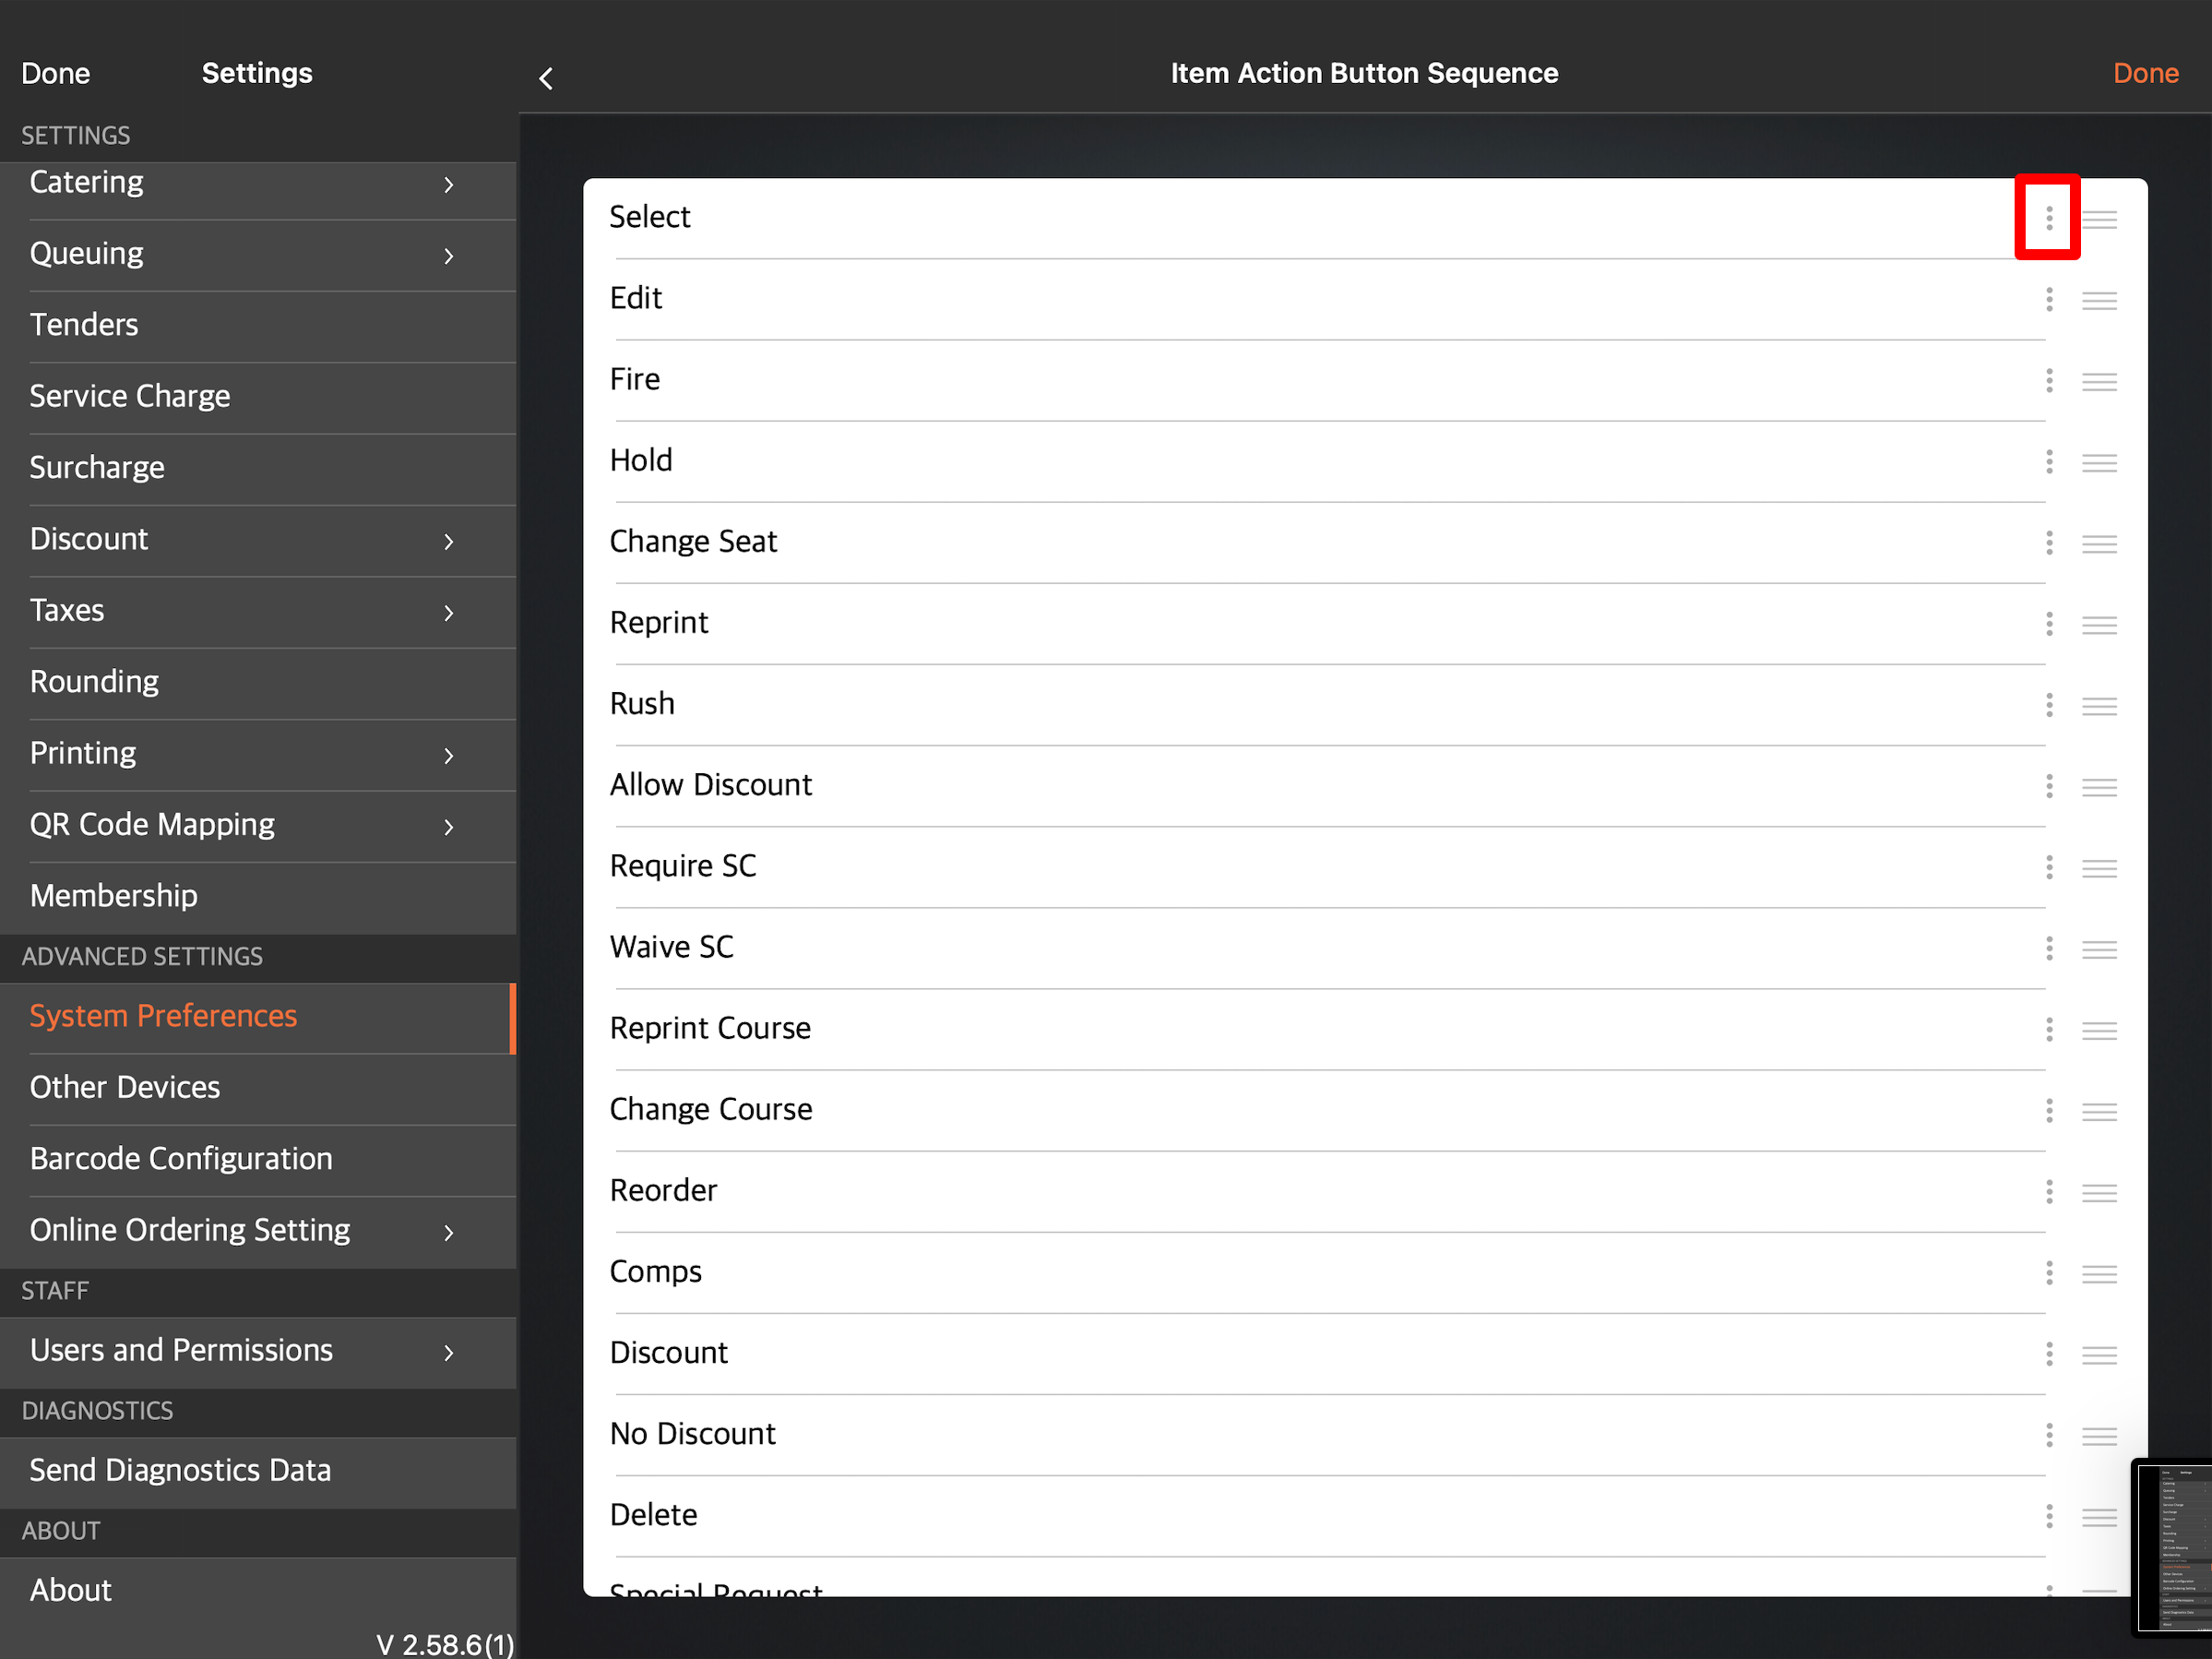
- Tap Remove
 .
. - Tap Back to return to the main System Preferences settings.
- Tap Save to confirm.
Merchant Portal (Classic Theme)
- Log in to the Merchant Portal.
- On the left panel, click on Advanced Settings. Then, click on System Preferences.
- Click on General.
- Click on the Item Action Button Sequence tab.
Tip: Click on the arrow buttons beside the tabs to navigate to the different settings.
- Next to the action button that you want to remove from the options, toggle off
 the switch.
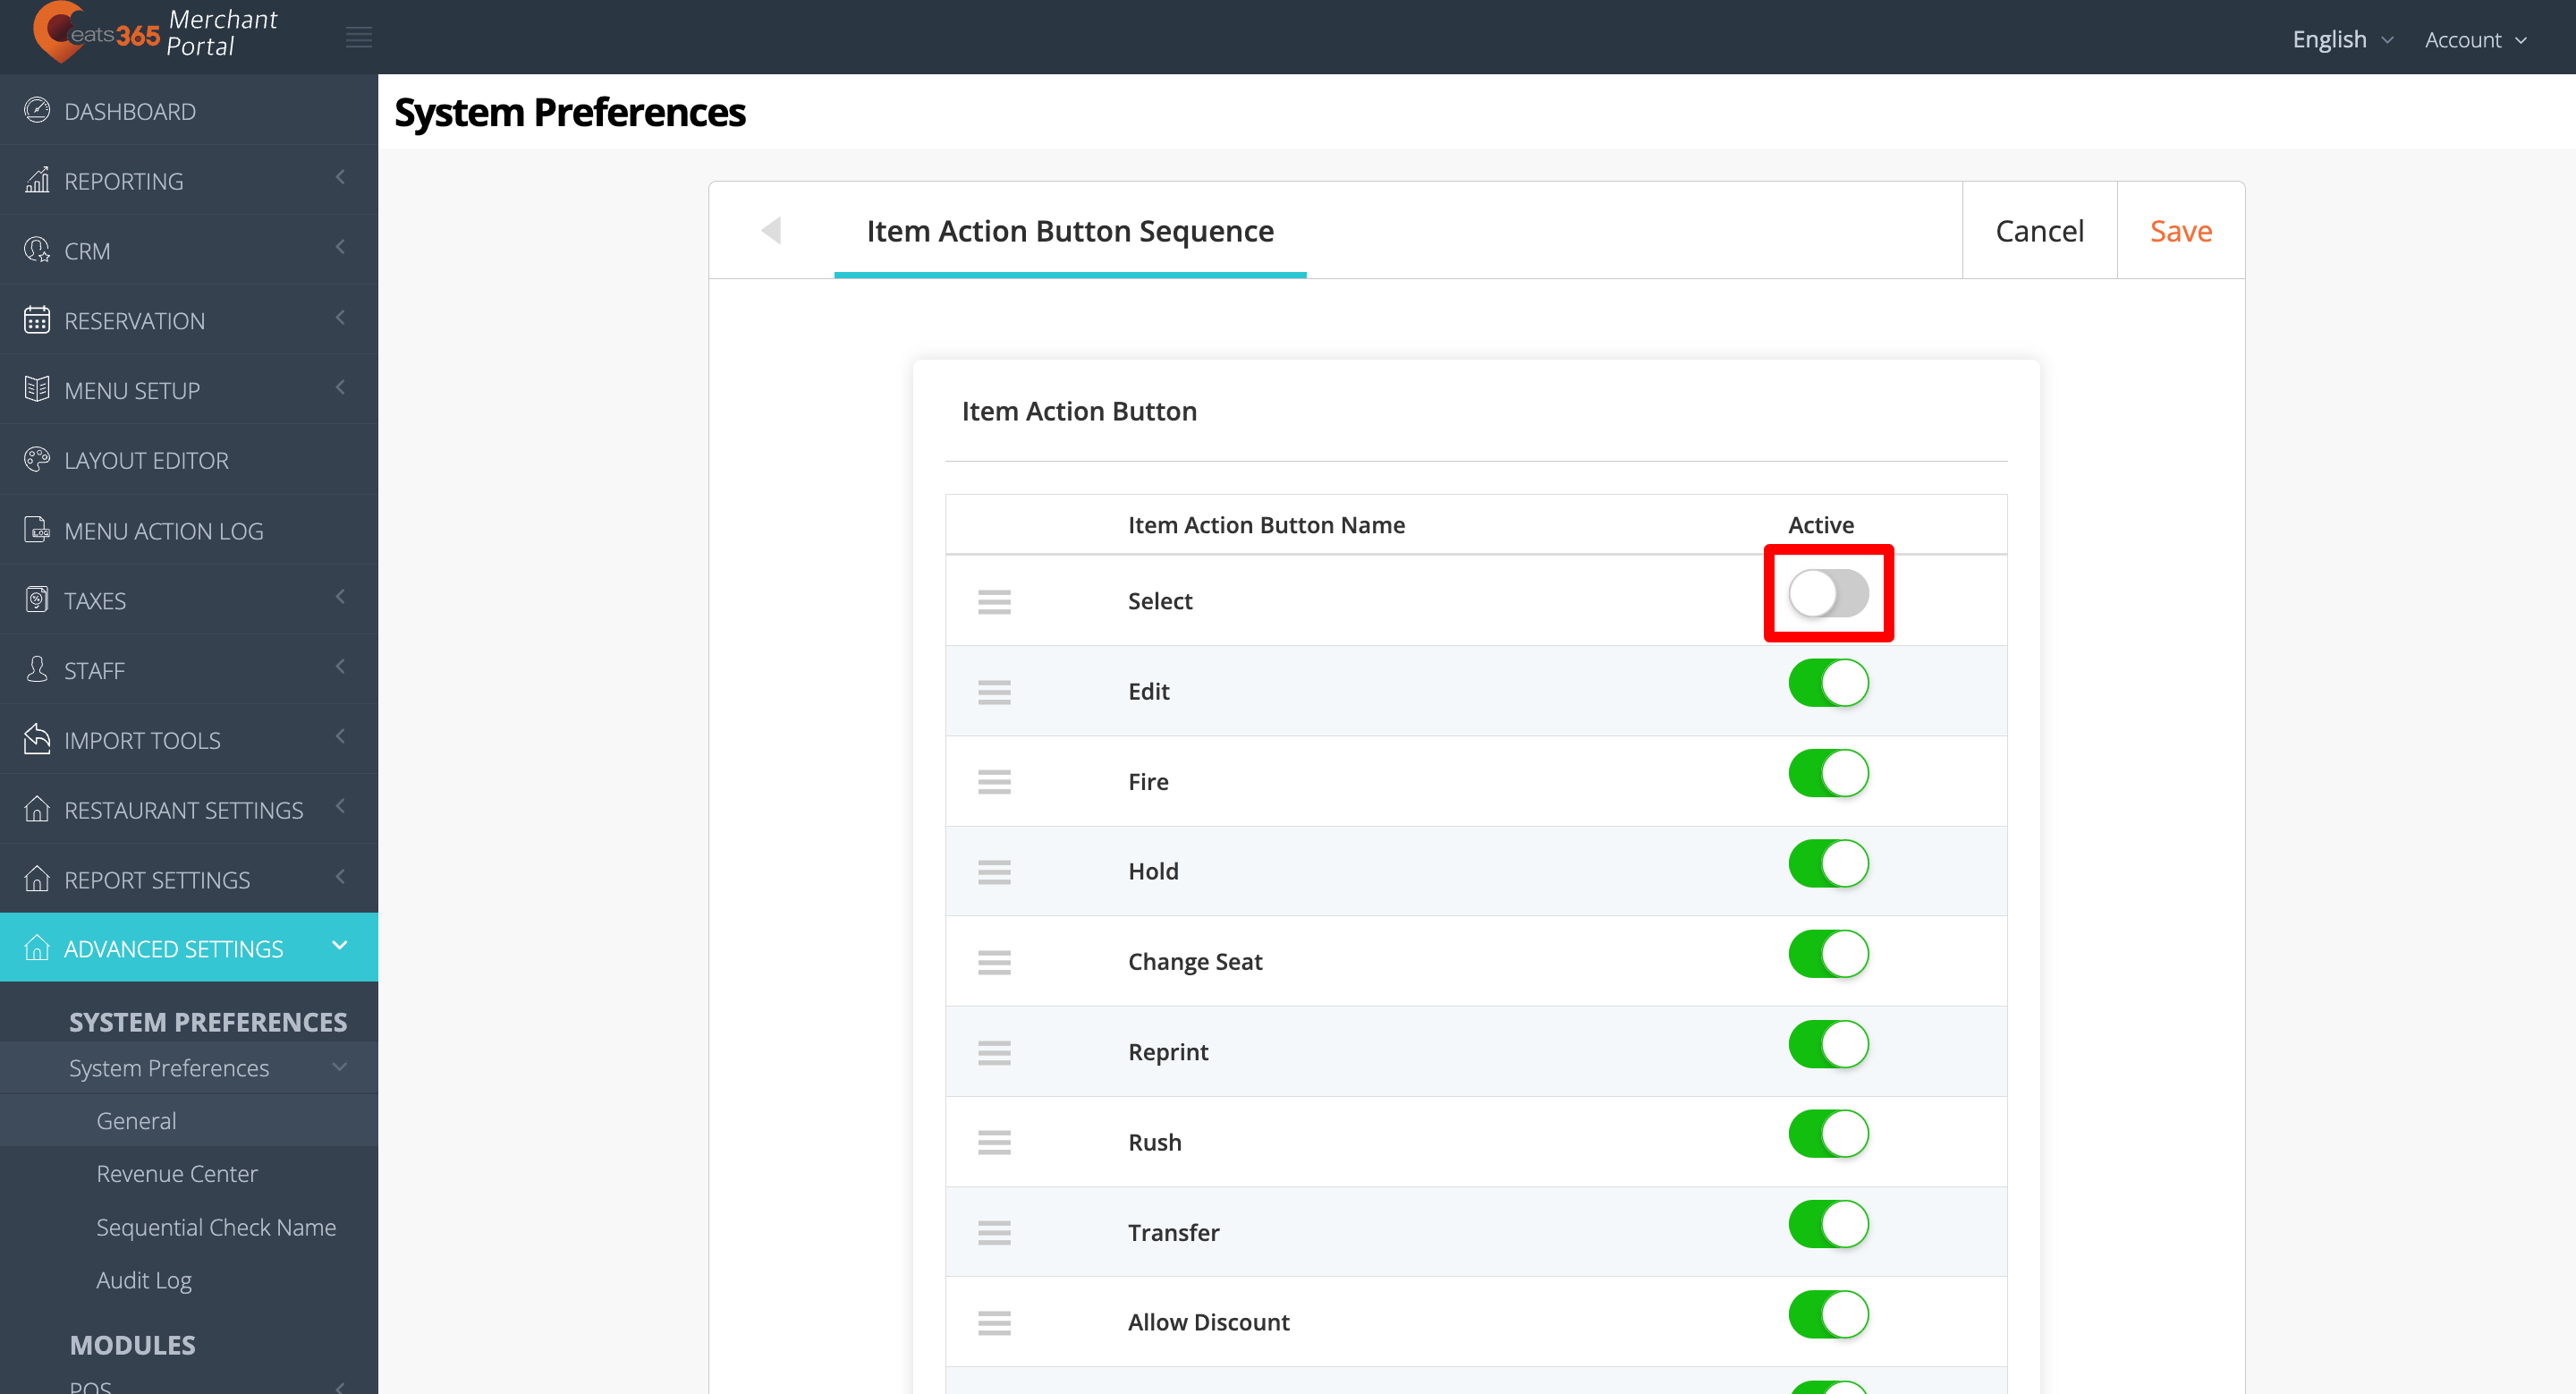
- At the top right, click on Save to confirm
Merchant Portal 2.0
- Log in to the Merchant Portal.
- On the left panel, click on Advanced Settings. Then, click on System Preferences.
- Click on Item Action Button Sequence.
- Next to the action button that you want to remove from the options, toggle off the switch .
- At the top right, click on Save to confirm.
Reorder Action Button sequence
To change the sequence of how action buttons appear on the POS, follow the steps below:
Eats365 POS
- Log in to the Eats365 POS.
- At the top left, tap Settings .
- Under Advanced Settings, tap System Preferences.
- Scroll down to Item Action Button Sequence, then tap Change Sequence.
- At the top right, tap Edit.
- Next to the action button that you want to move, press and hold Reorder
 . Then, move the action button in your preferred sequence.
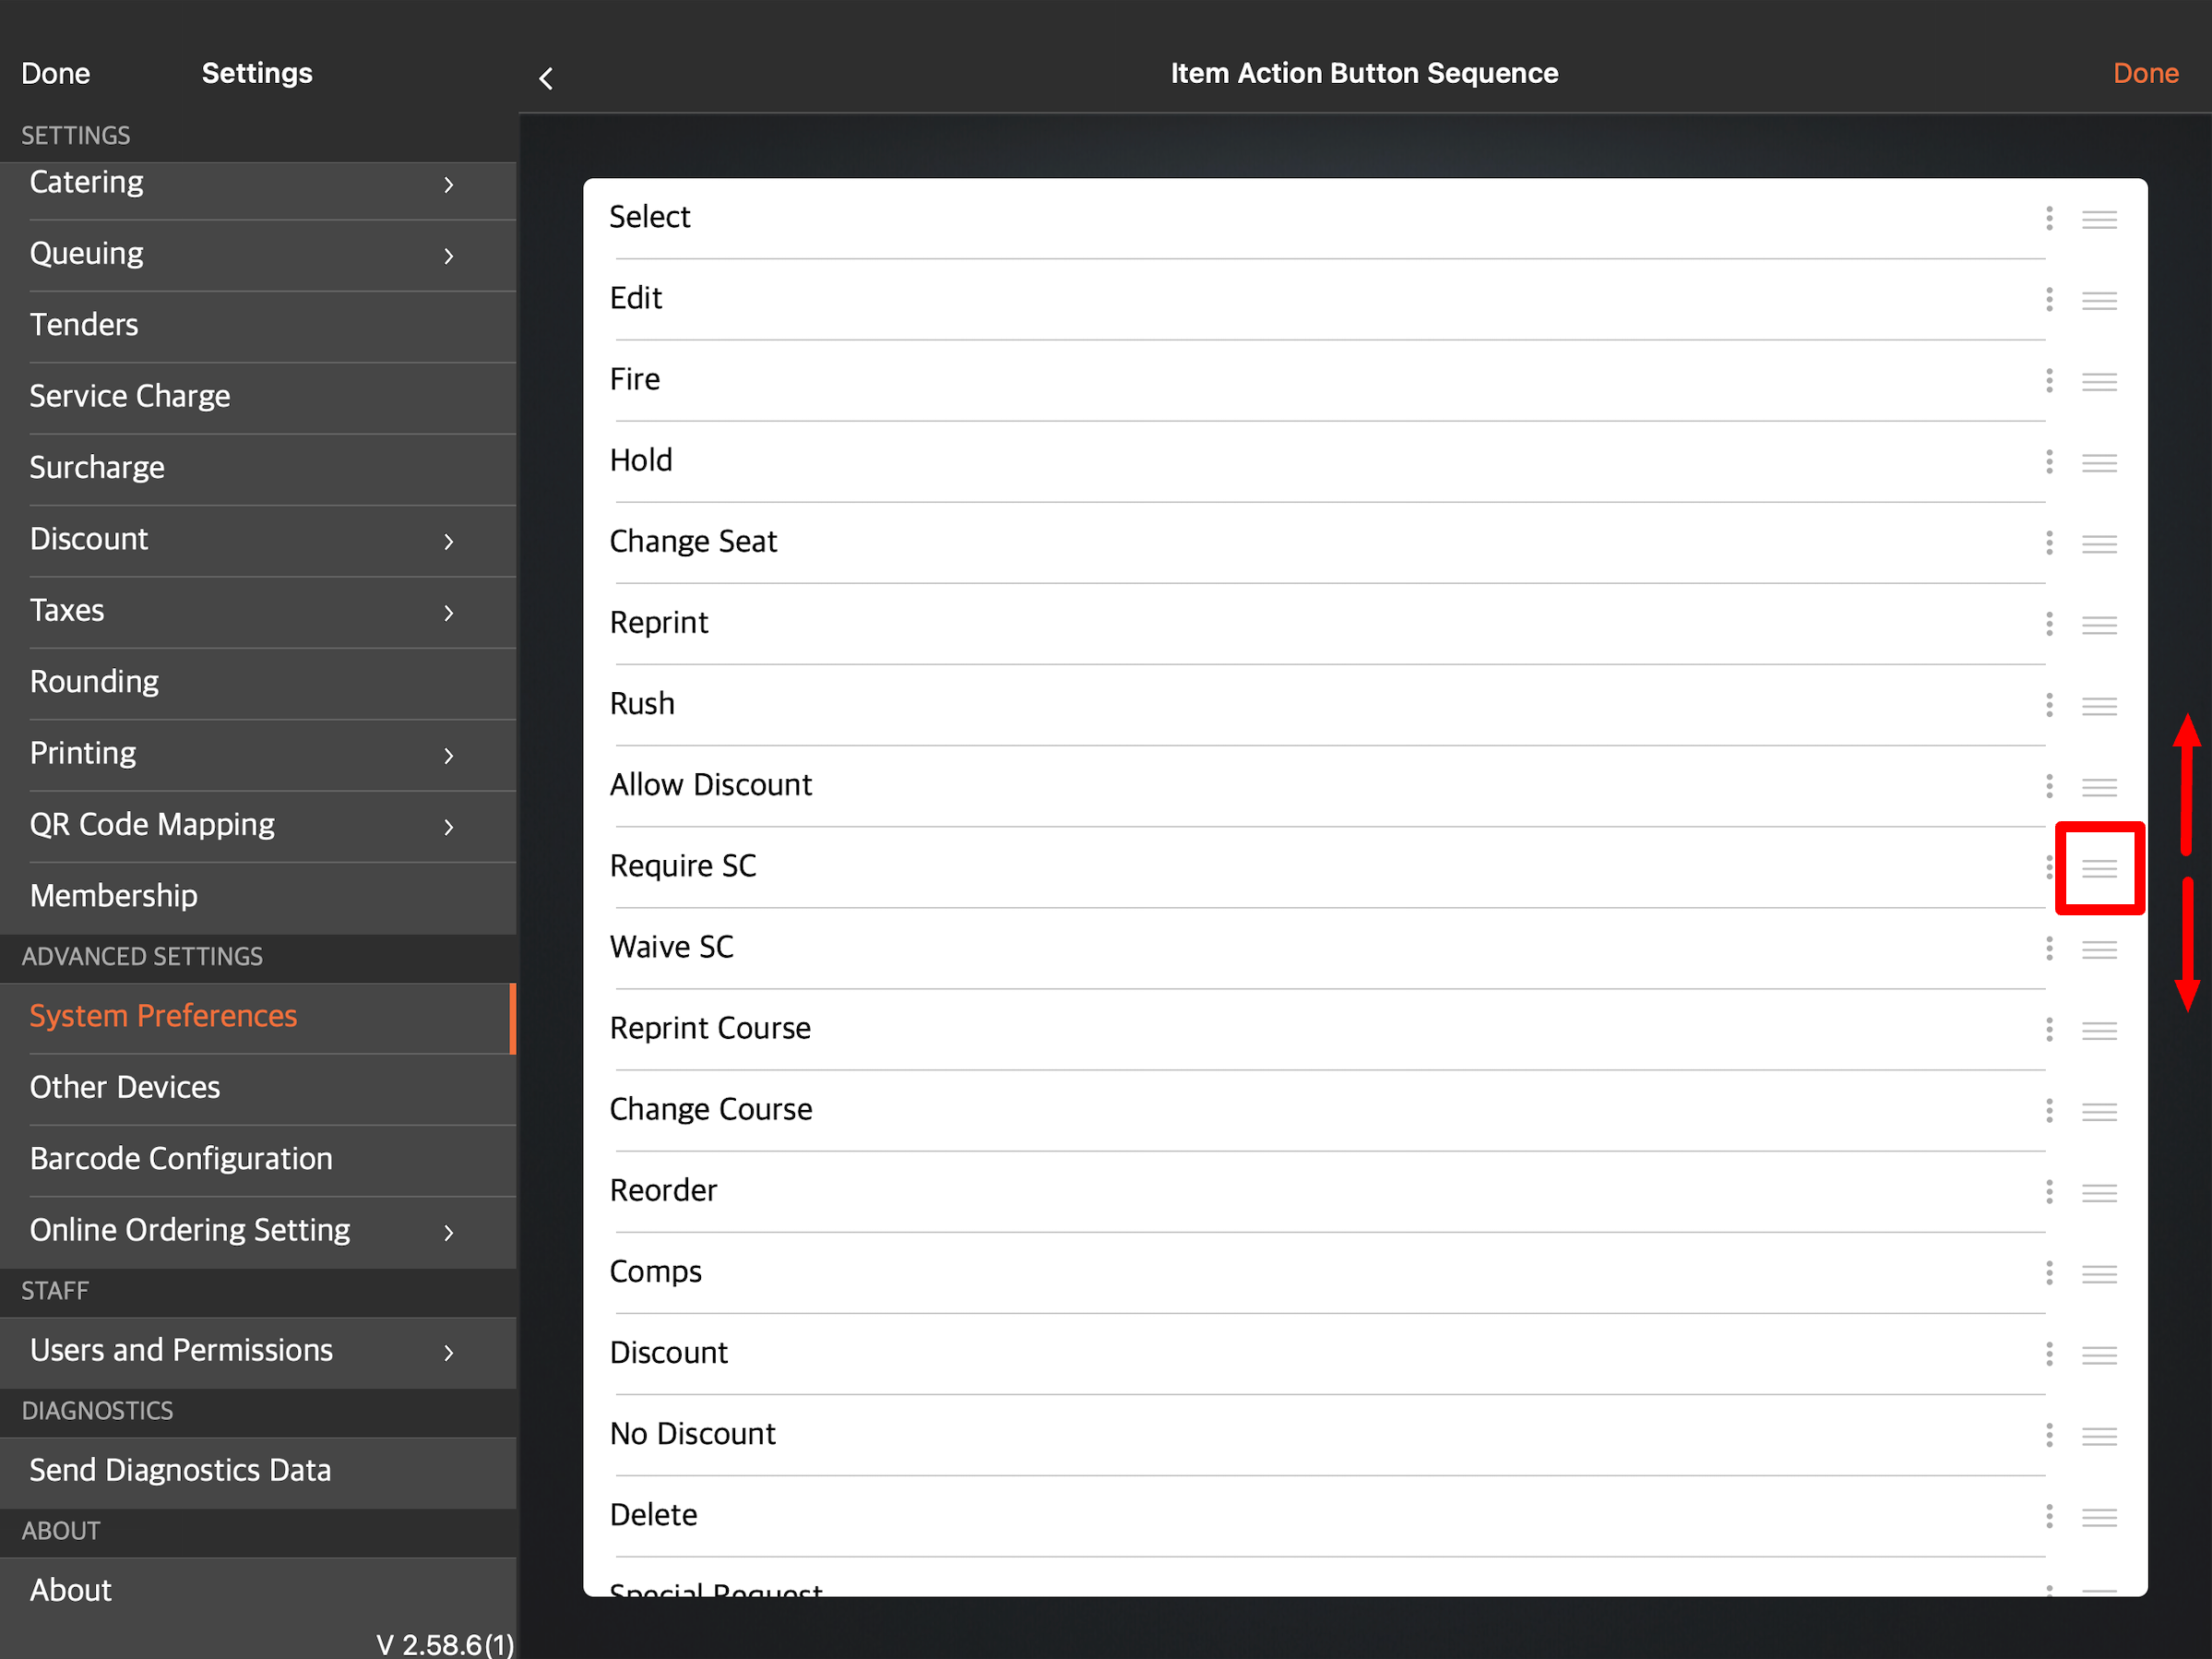
- Tap Back to return to the main System Preferences settings.
- Tap Save to confirm.
Merchant Portal (Classic Theme)
- Log in to the Merchant Portal.
- On the left panel, click on Advanced Settings. Then, click on System Preferences.
- Click on General.
- Click on the Item Action Button Sequence tab.
Tip: Click on the arrow buttons beside the tabs to navigate to the different settings.
- Next to the action button that you want to move, click and hold on Reorder then place the action button in the sequence where you want the button to appear in the POS.
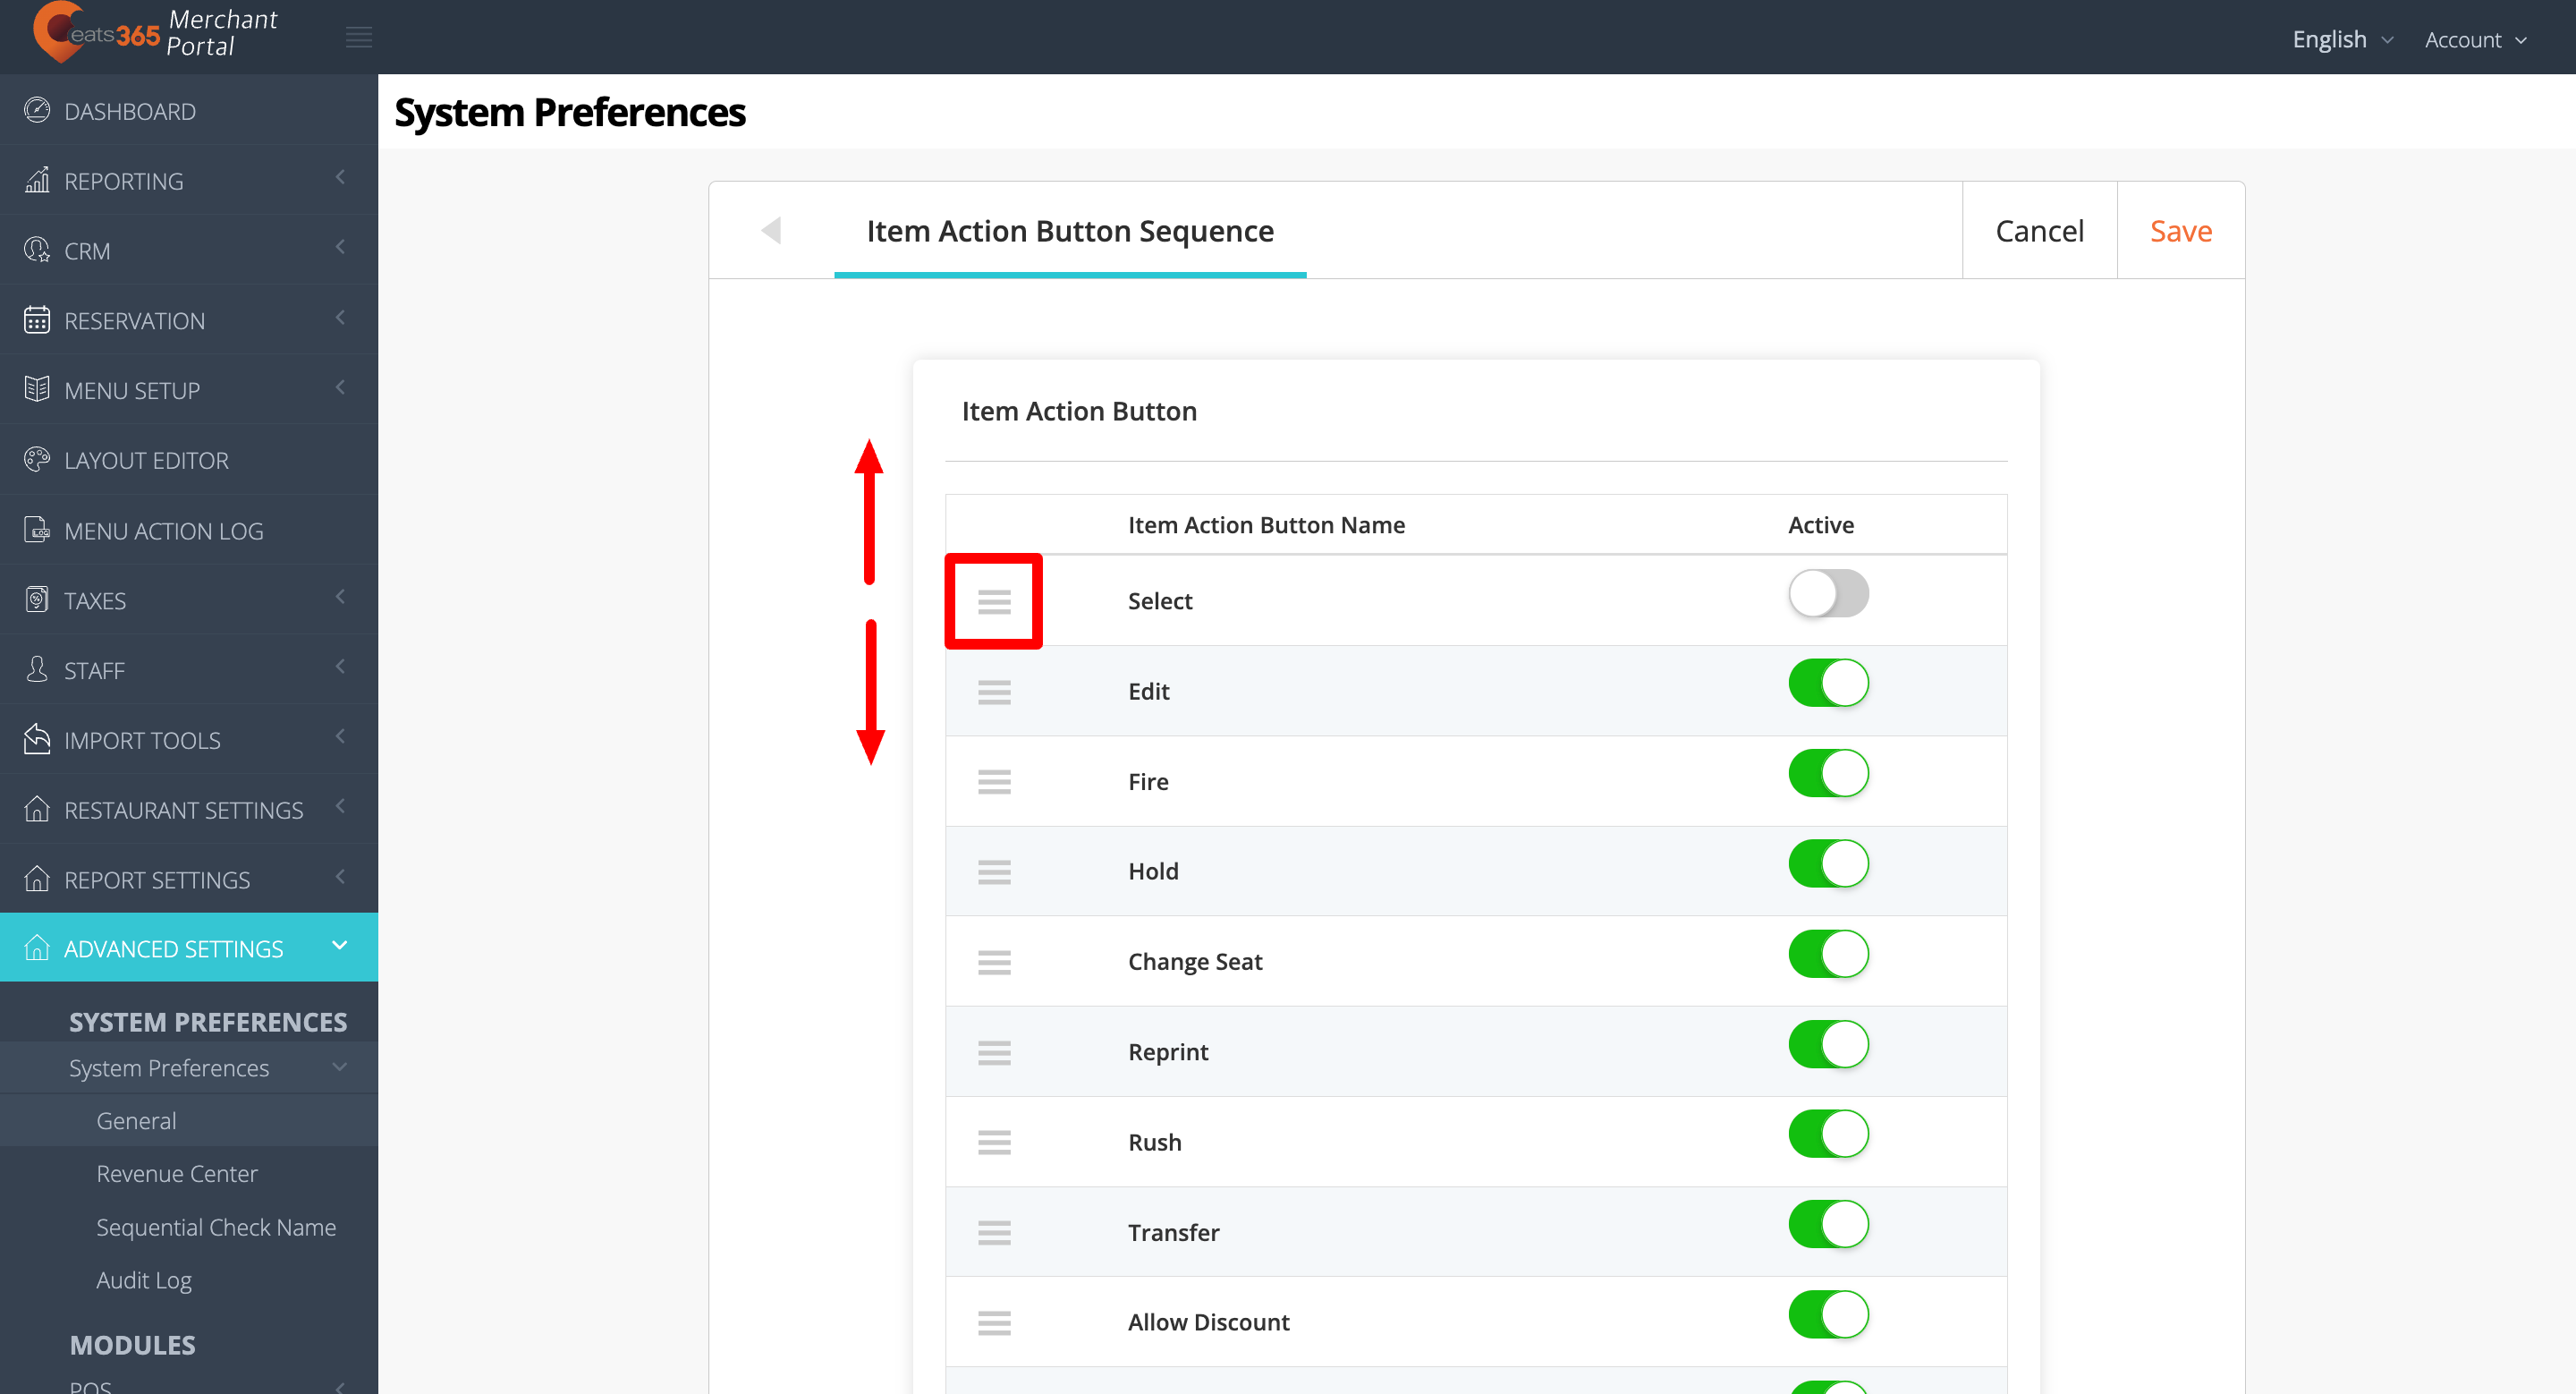
- At the top right, click on Save to confirm.
Merchant Portal 2.0
- Log in to the Merchant Portal.
- On the left panel, click on Advanced Settings. Then, click on System Preferences.
- Click on Item Action Button Sequence.
- Next to the action button that you want to move, click and hold on Reorder . then place the action button in the sequence where you want the button to appear in the POS.
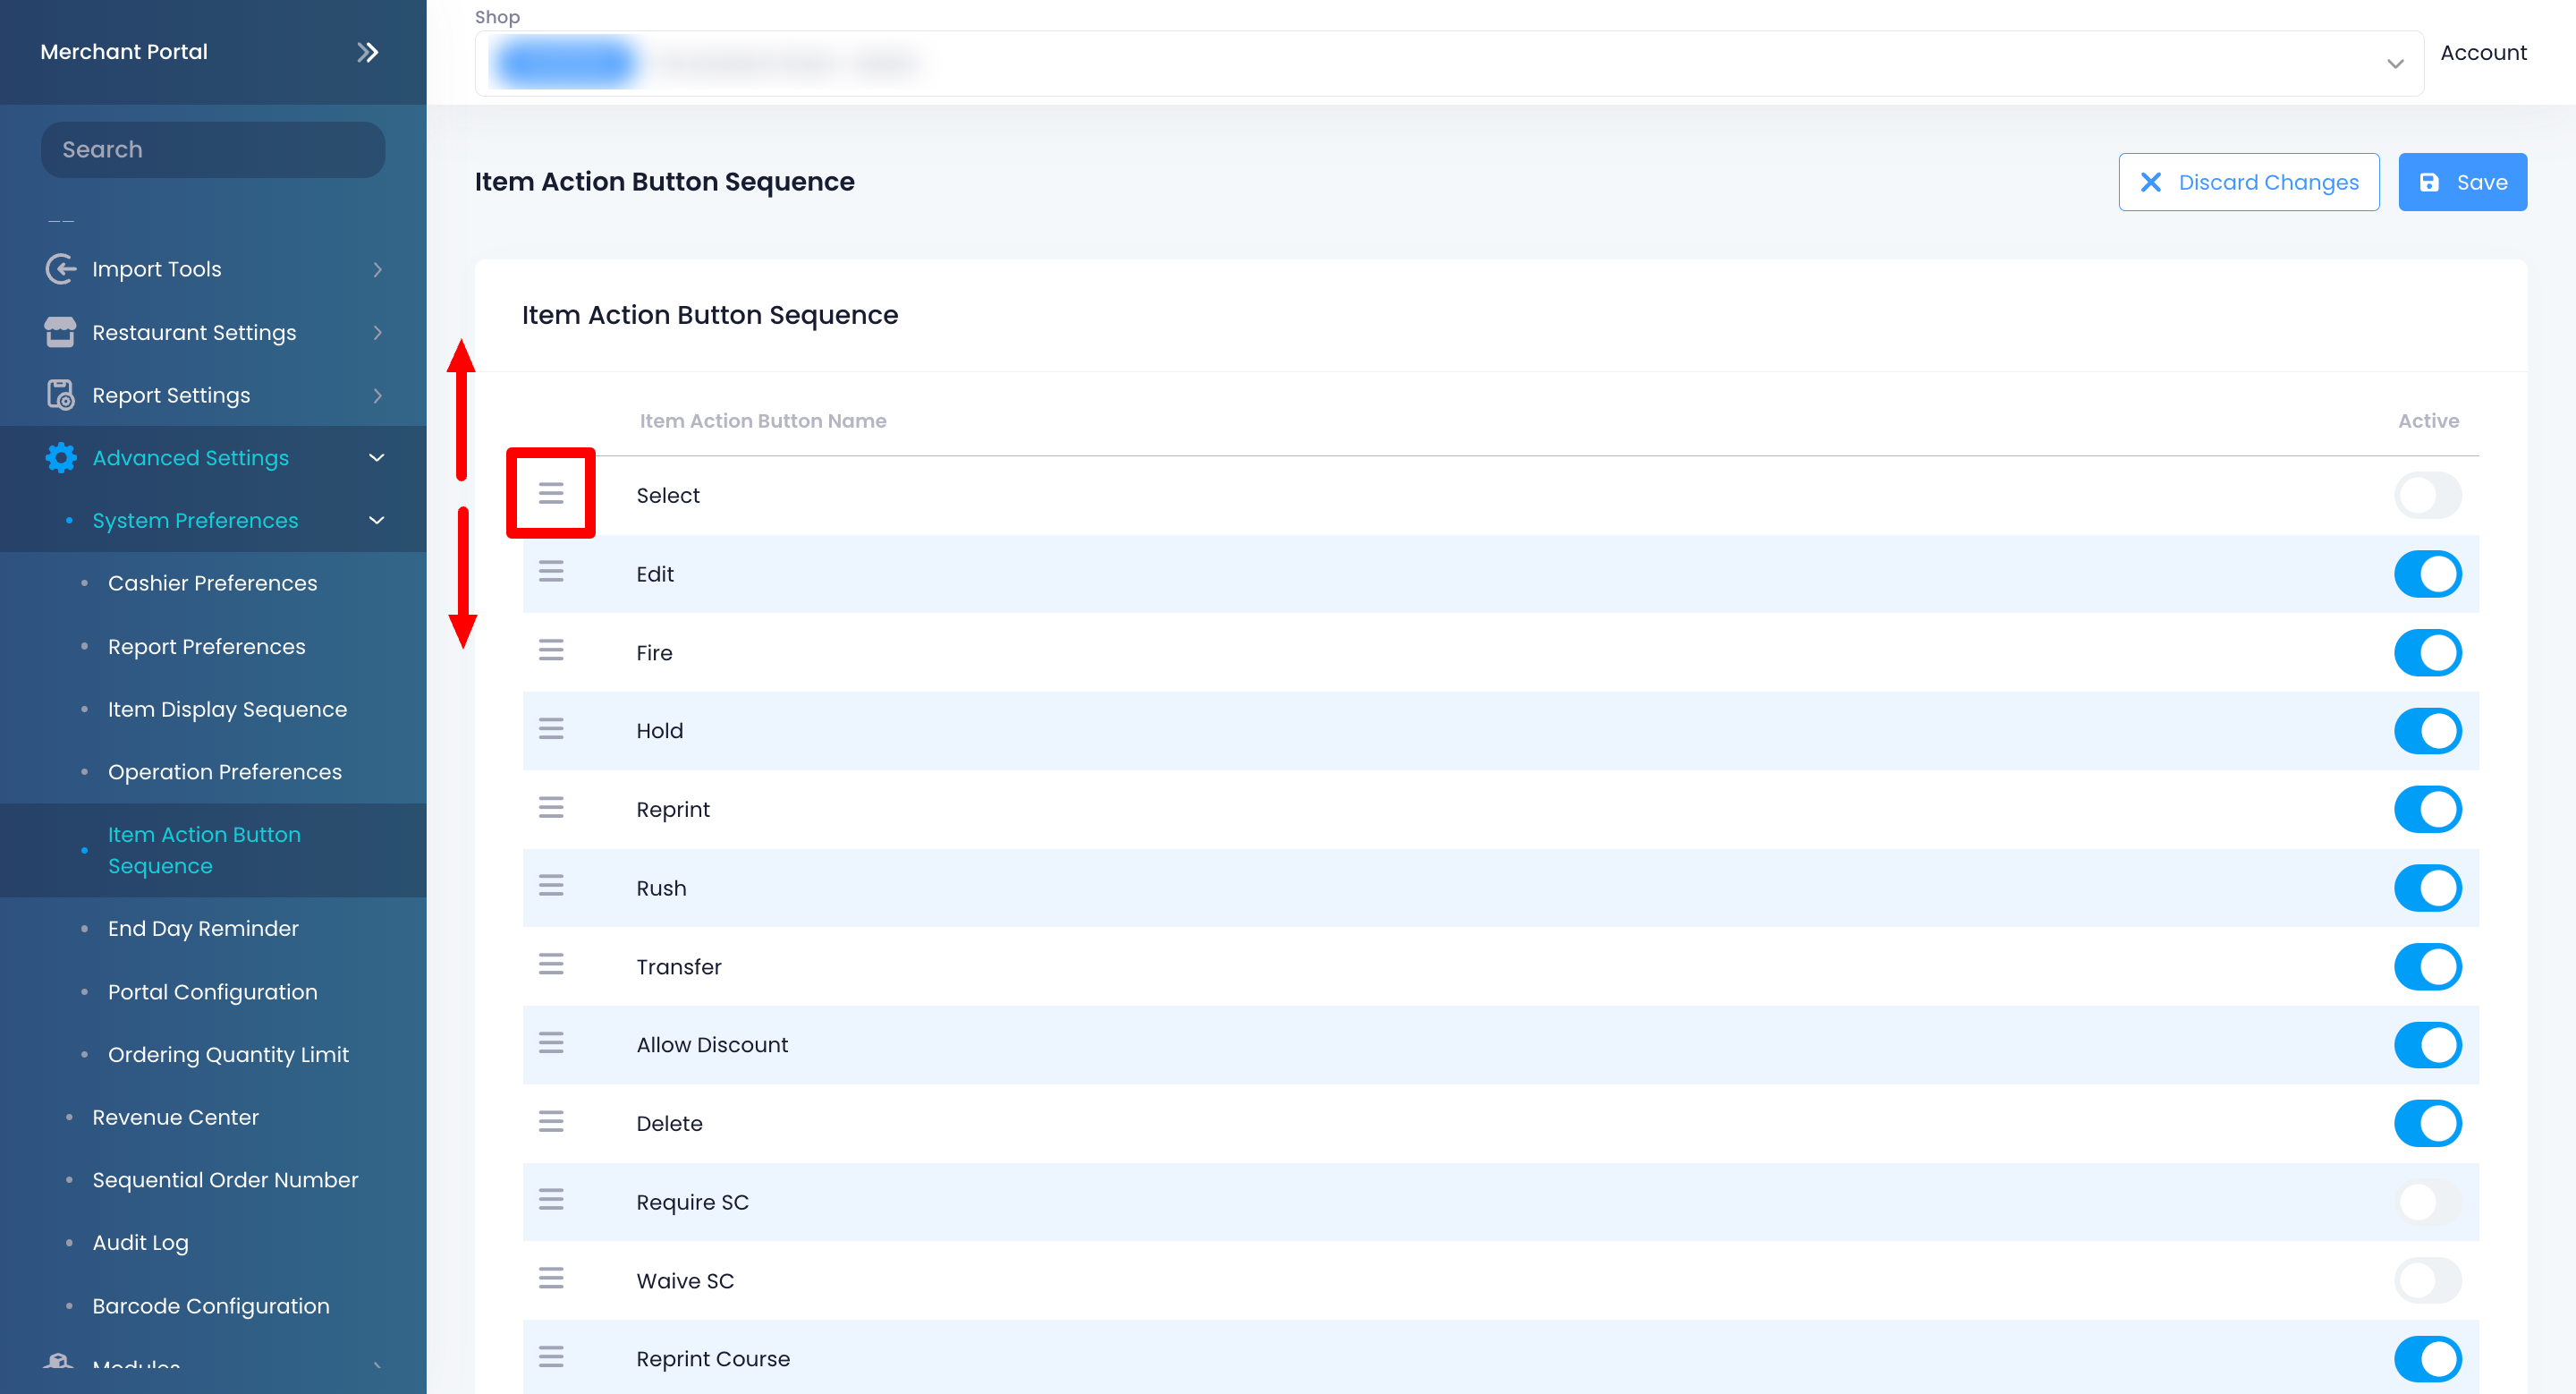
- At the top right, click on Save to confirm.