Order Handling
Table of Contents
Share a table between different party groups
Learn how to configure tables to accommodate different party groups on the Eats365 POS.
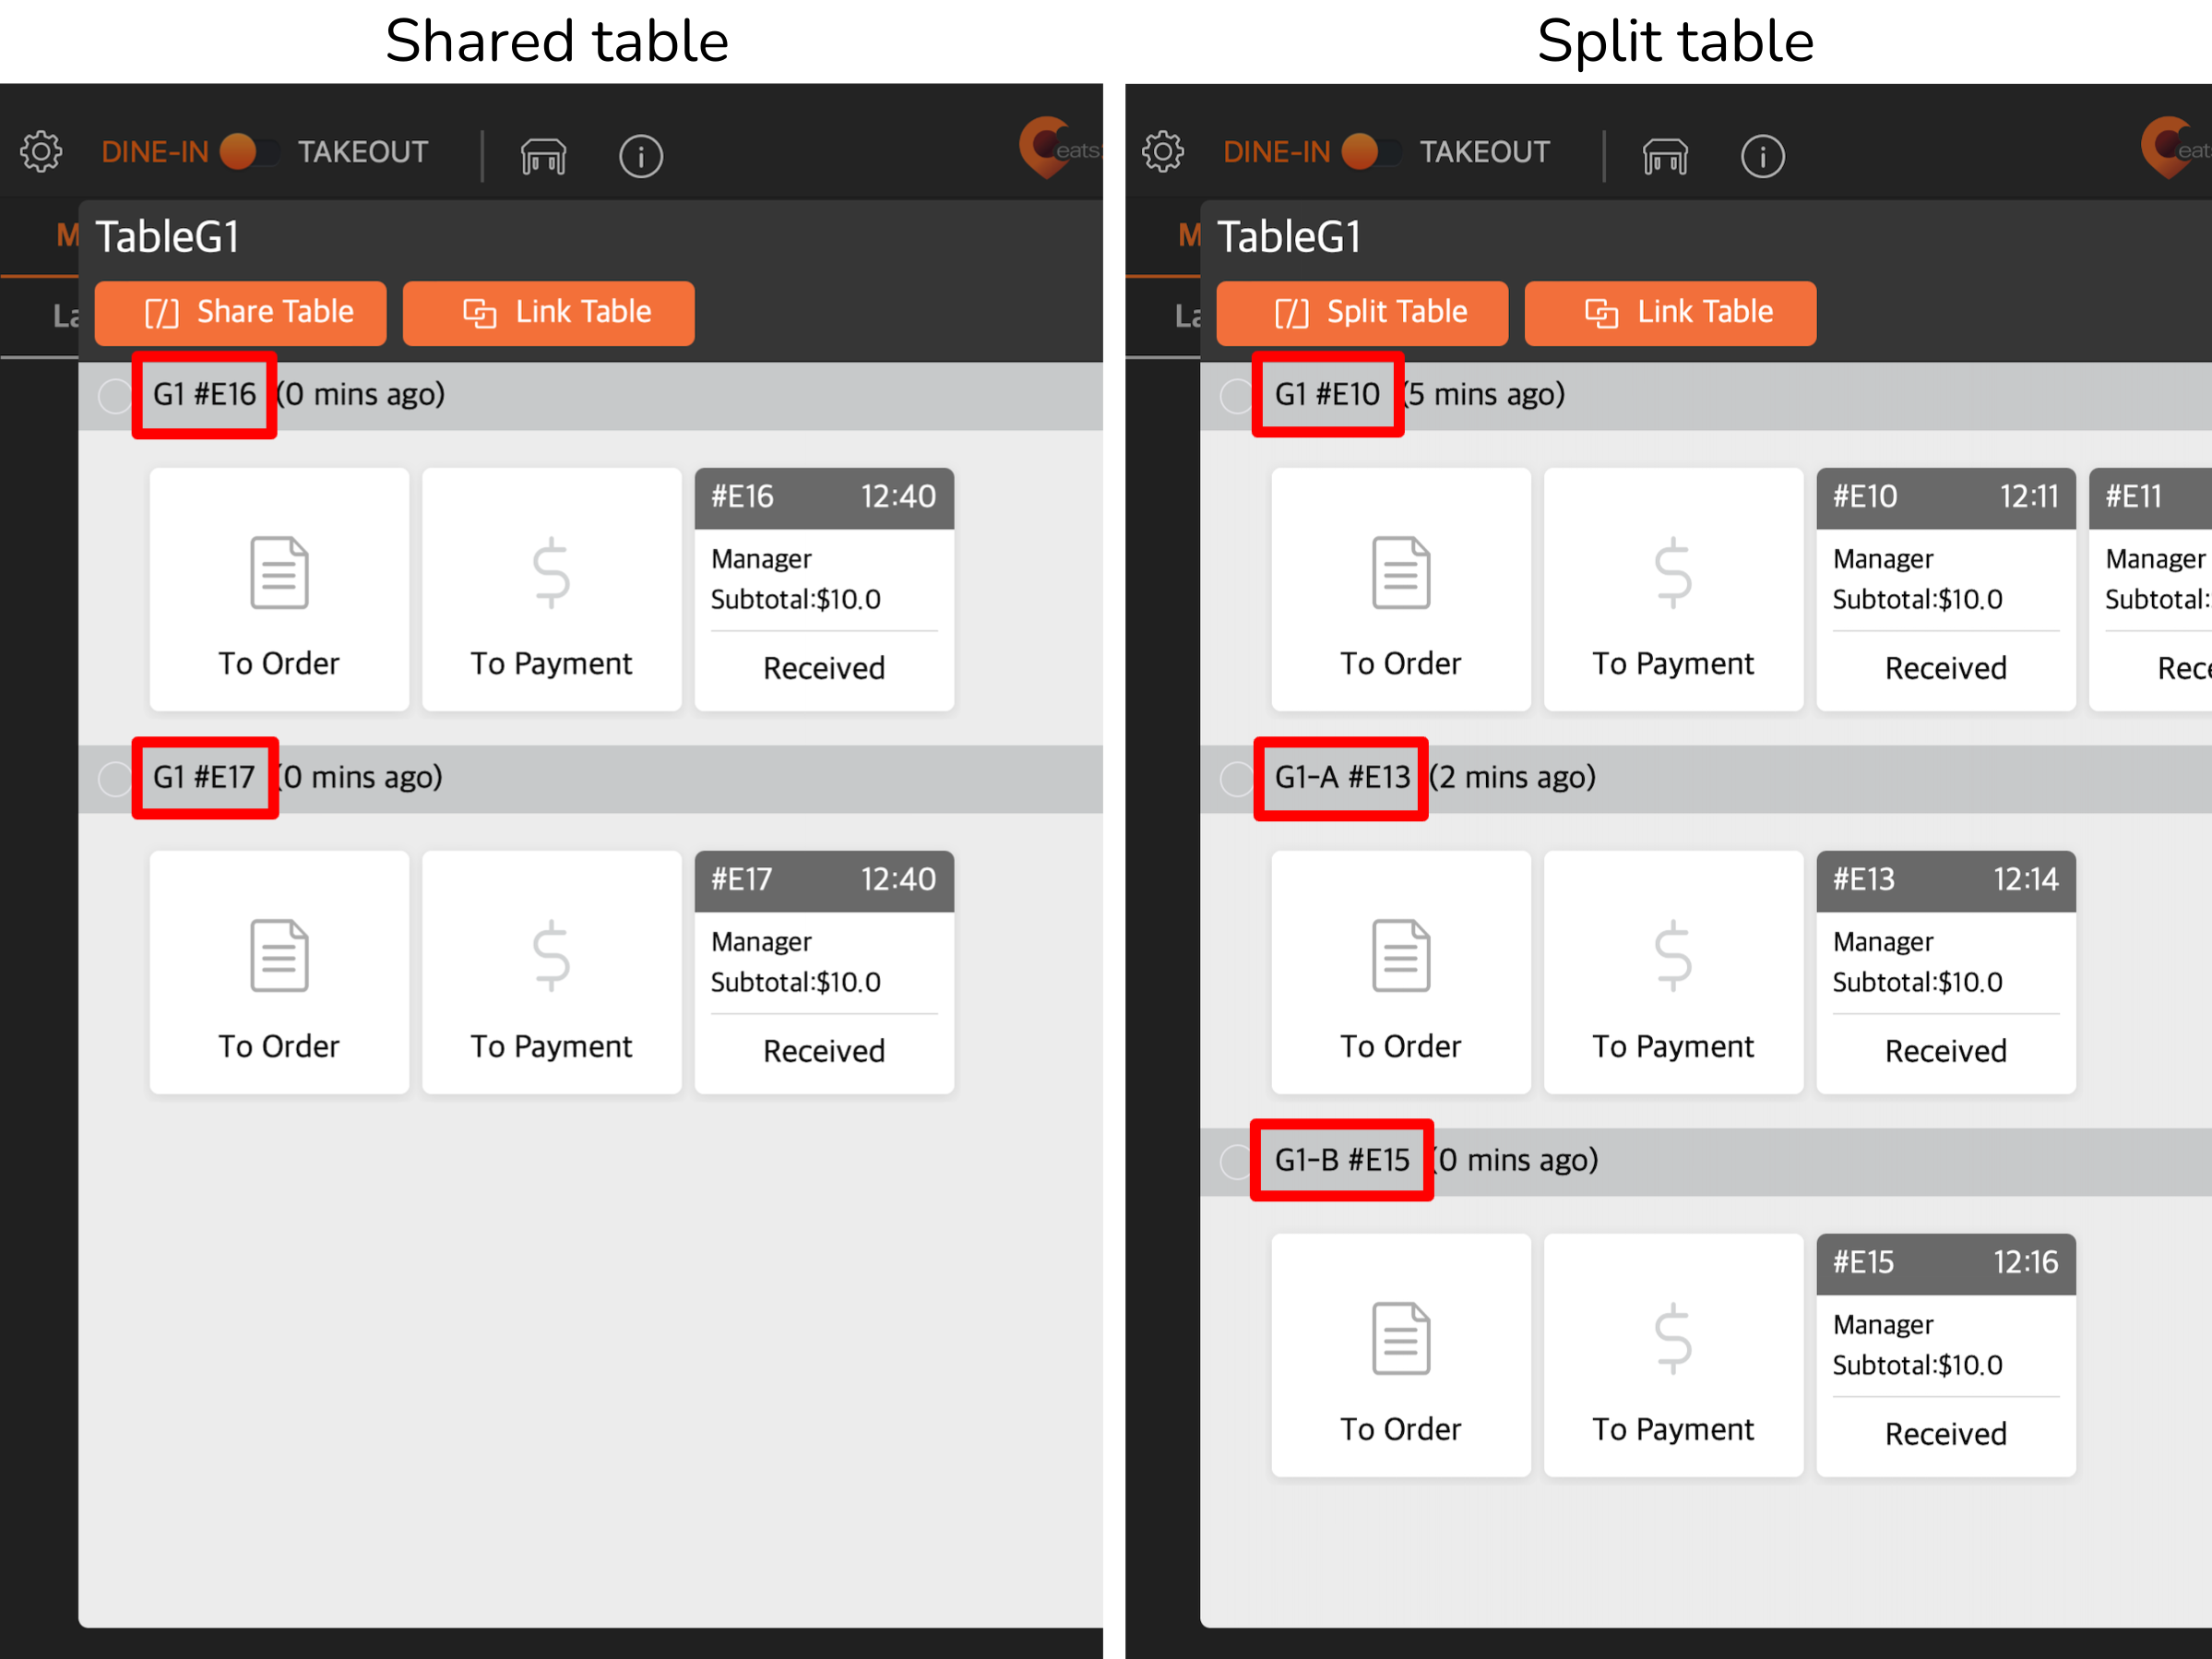
The Share Table function allows multiple independent groups of customers to share one table. It’s important to note that once a table is shared, customer orders and bills are separated.
The Share Table function operates similarly to Split Table. However, in a split table, each party is assigned a unique table number, while a shared table keeps the same table number it was originally assigned with. For example, a shared table with two party groups would maintain the same table number but have different order numbers, like “B1 - #C1” and “B1 - #C2.” In contrast, split table numbers would appear as “B1” and “B1-A.” For more information about split tables, refer to Split a table for different party groups.
 In this article, you’ll learn how to turn on table sharing and create shared tables.
Enable table sharing
Before you can share tables, you must turn on Table Sharing under Dine-In settings. To enable Table Sharing, follow the steps below:
- Log in to the Eats365 POS.
- At the top left, tap Settings
 .
. - Under Settings, tap Dine-In, then tap Workflow Settings.
- Under Table Sharing, turn on Allow Table Sharing
 .
.
- Beside Table Sharing Mode, tap the drop-down menu, then select Share Table.
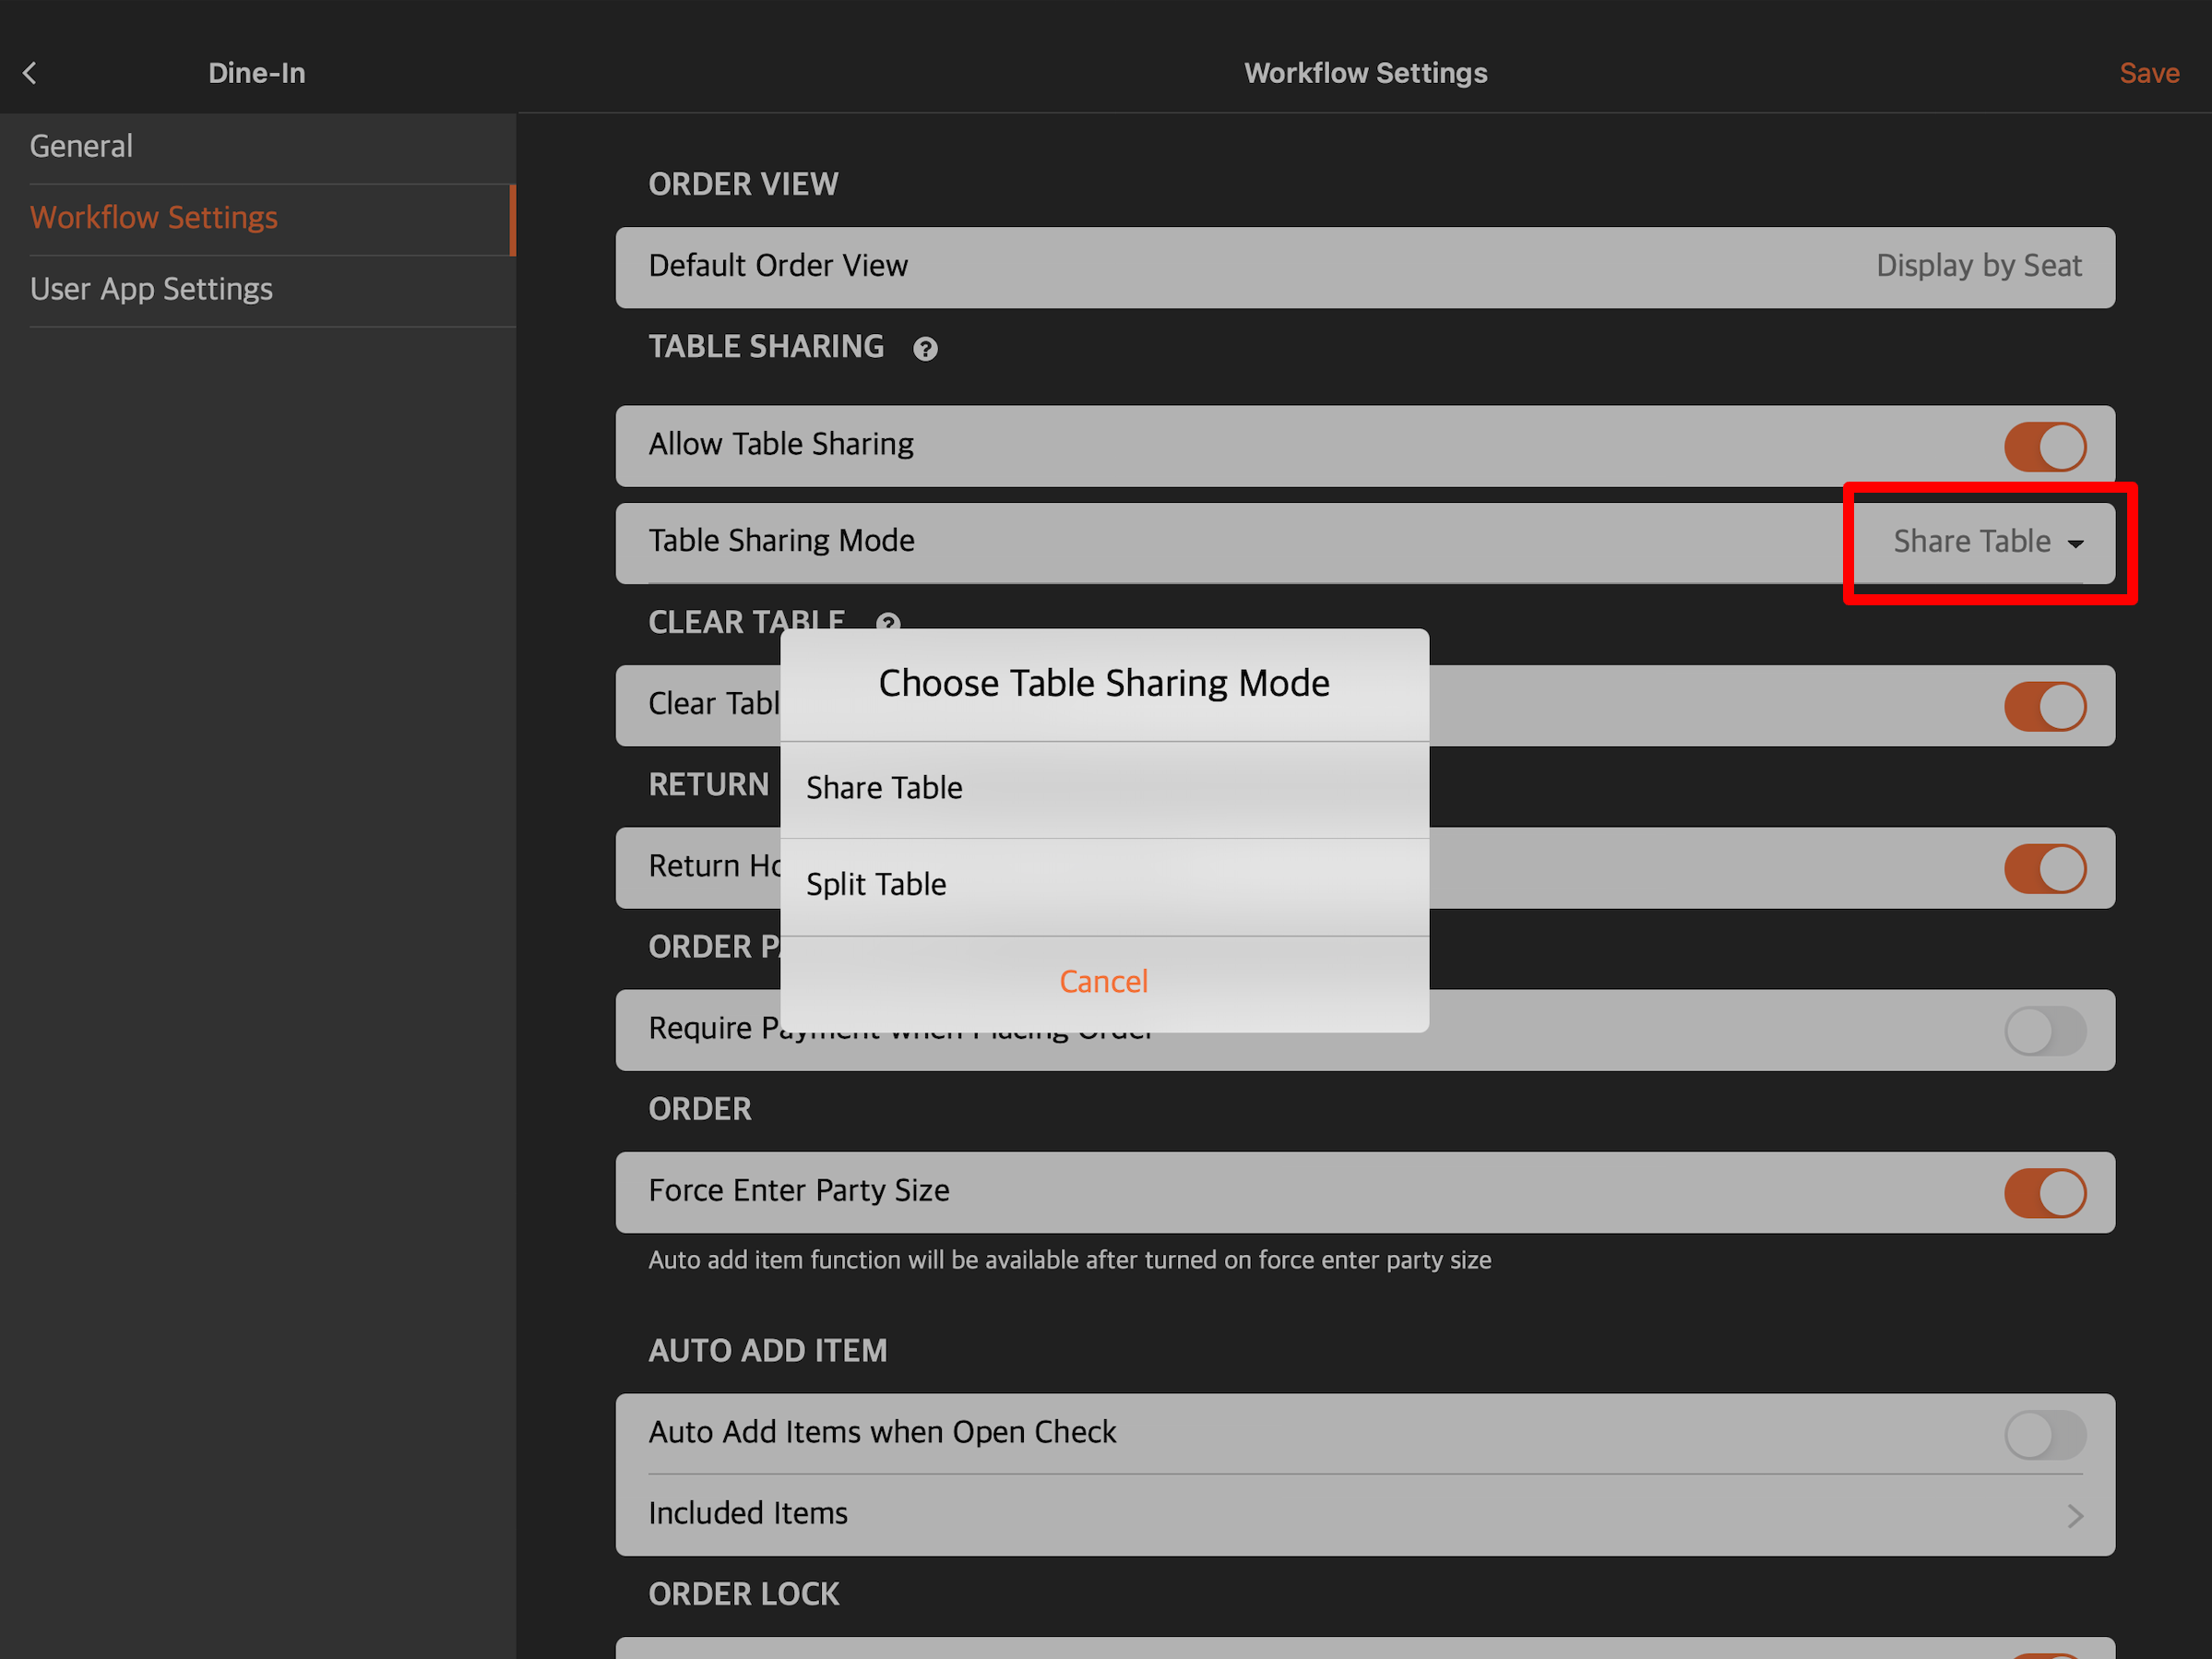
- At the top right, tap Save to confirm.
Create a shared table
To start sharing tables to accommodate different groups of customers, follow the steps below:
- Log in to the Eats365 POS.
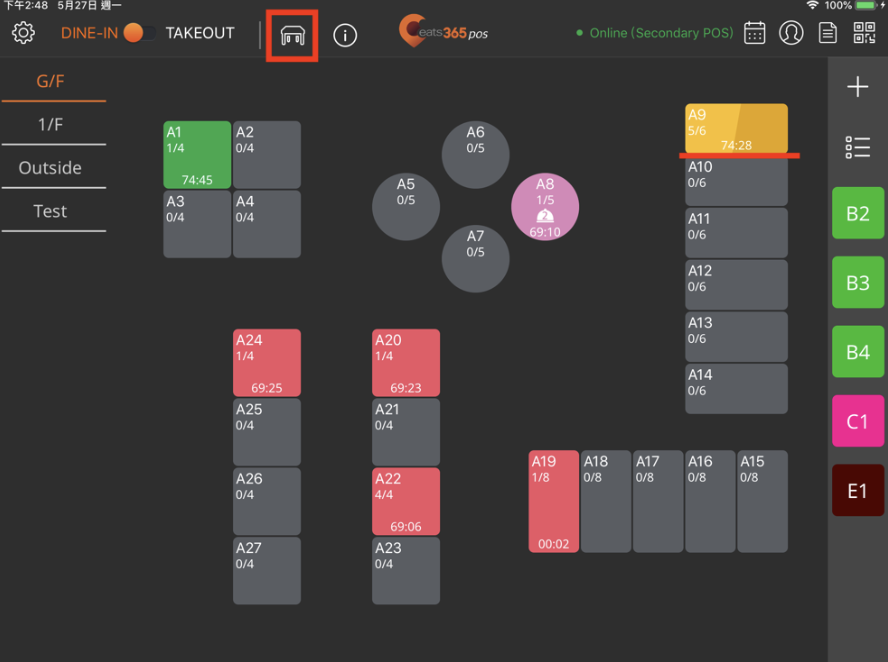
- At the top left, tap Dine-In to get to the Table Map screen.
Tip: You can set the Table Map screen as the default view from the General Preferences settings, so you won’t need to tap Dine-In every time you log in. - At the top of the Dine-In screen, tap Table
 .
.
- Choose a Party Size, then tap Confirm.
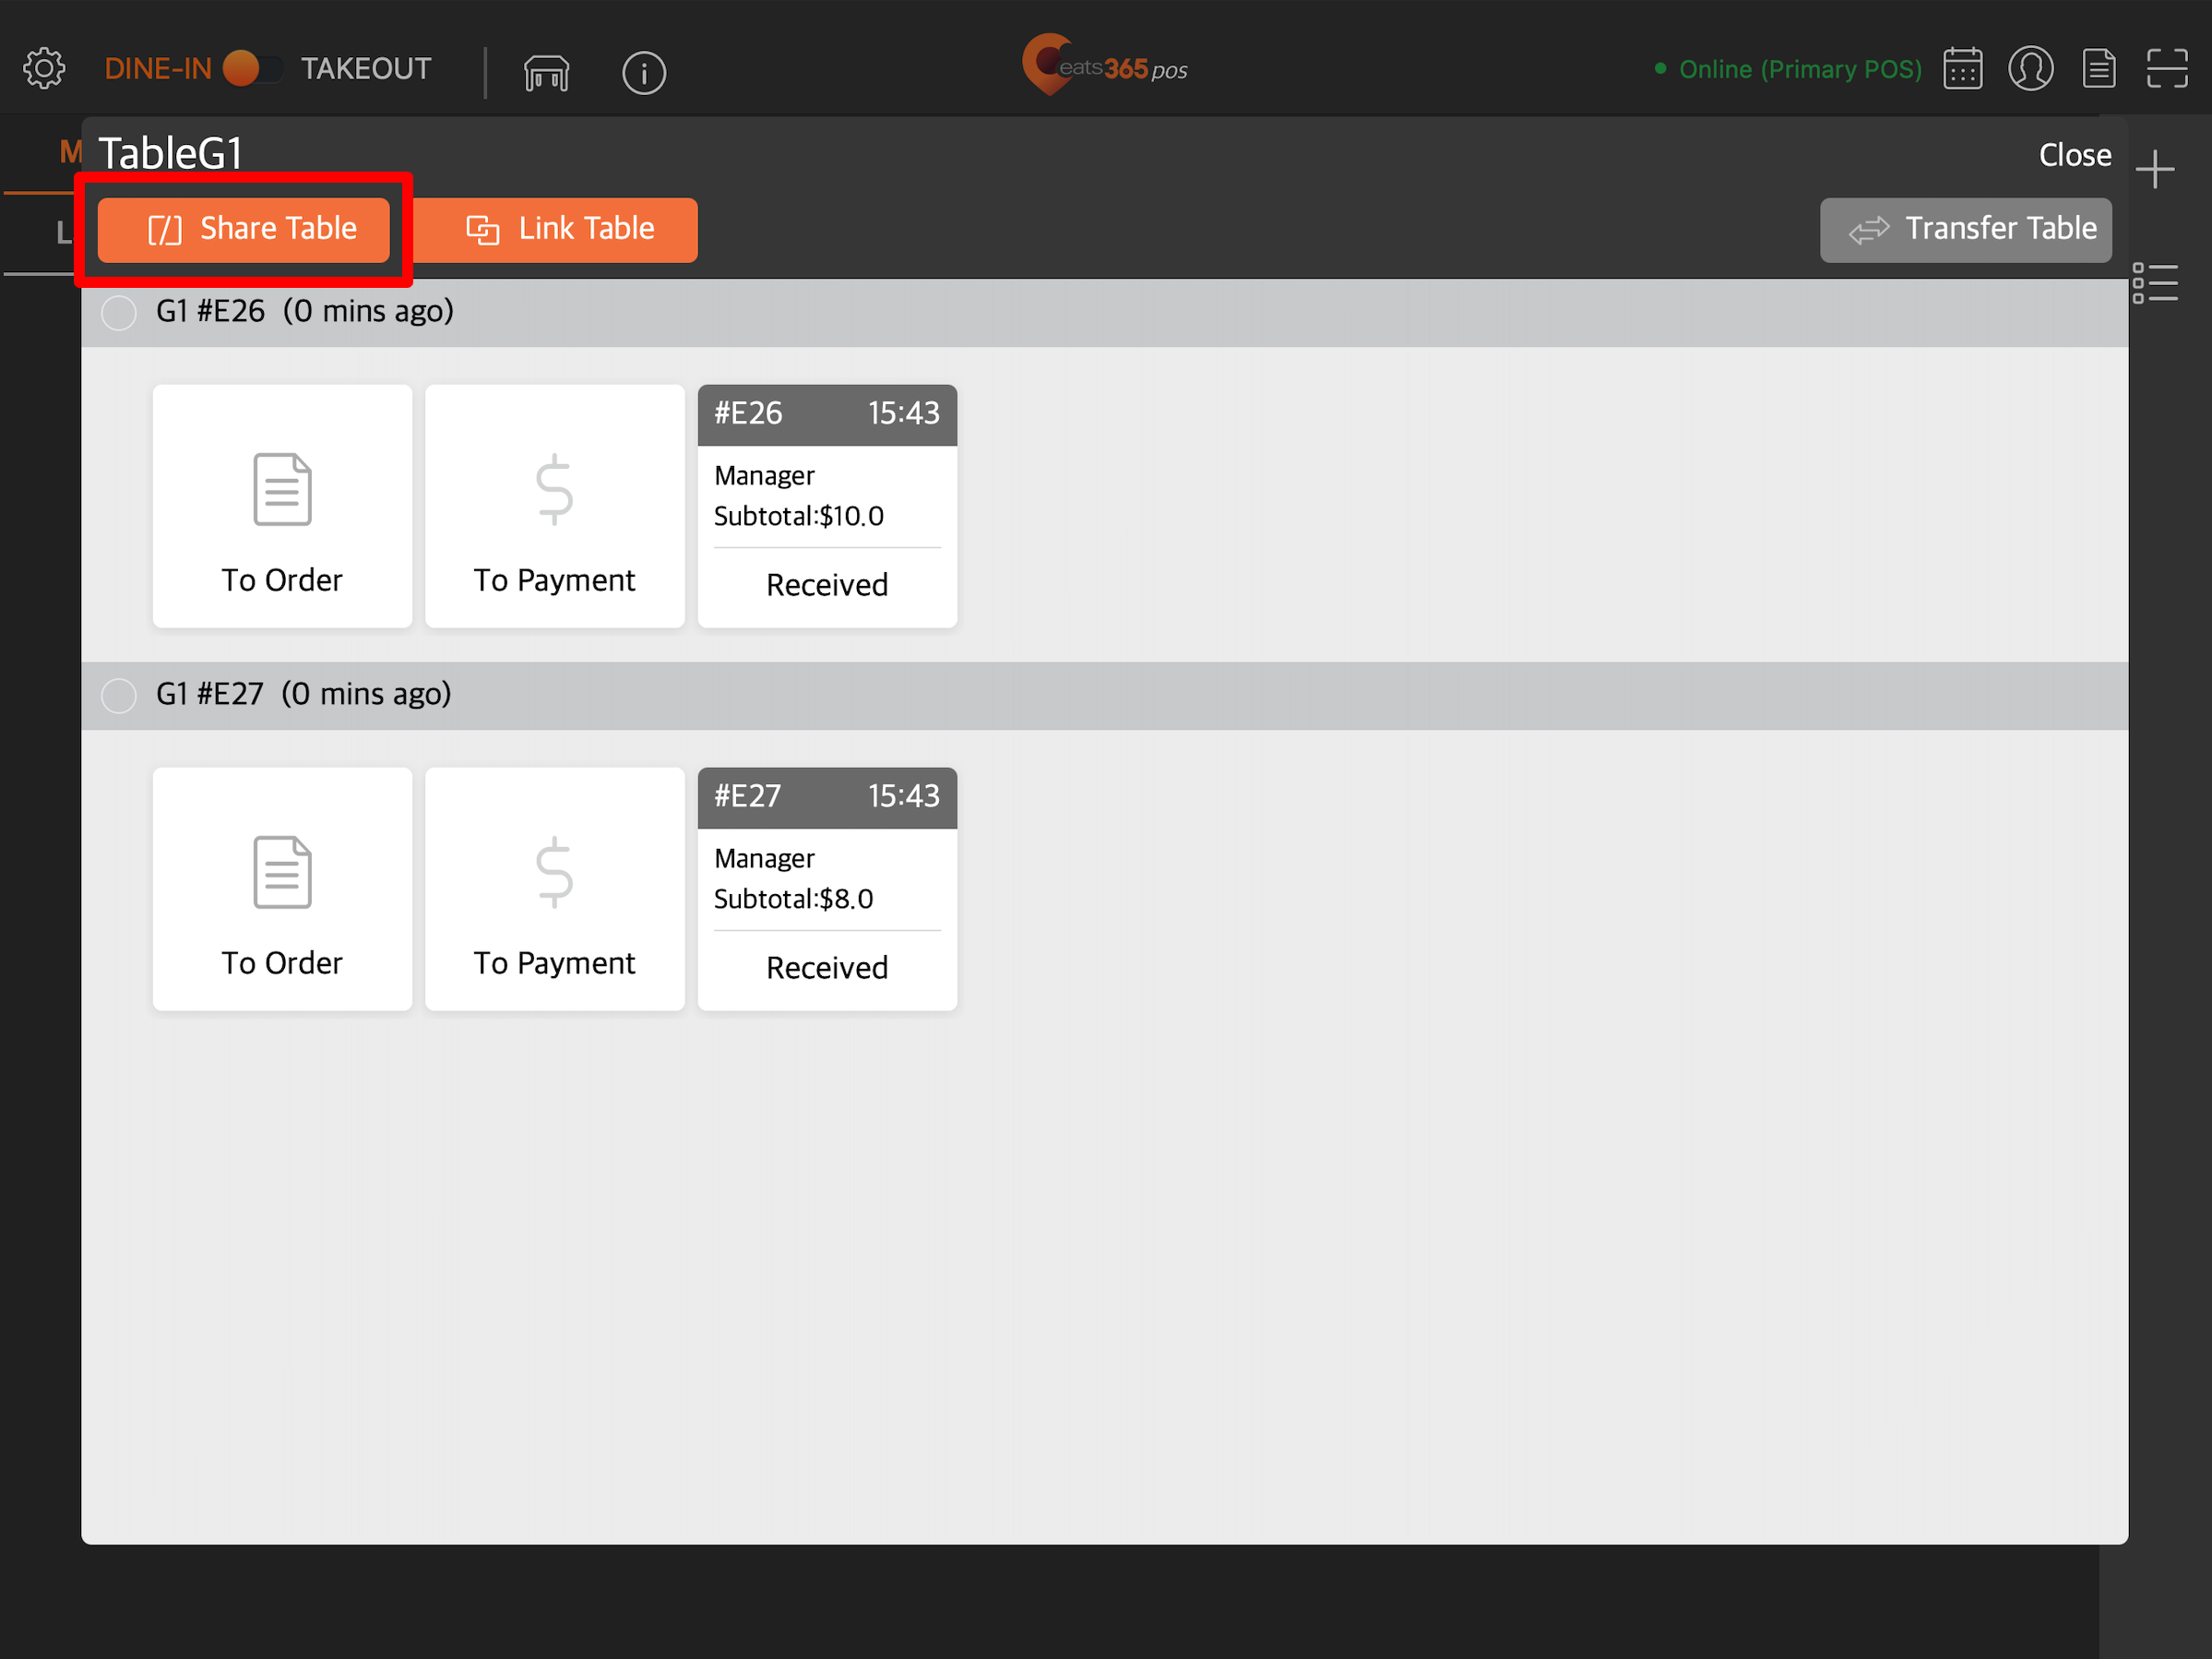
- Select any currently occupied table. The table’s status changes into a two-toned yellow color to indicate that it’s now being shared.
Manage shared tables
You can do several actions within shared tables. To perform an action, press and hold a shared table and choose from the following actions:
Share Table
Creates another seat designation to signify that the table can seat more customers or customer groups.
To Order
Redirects the POS to the order-taking screen.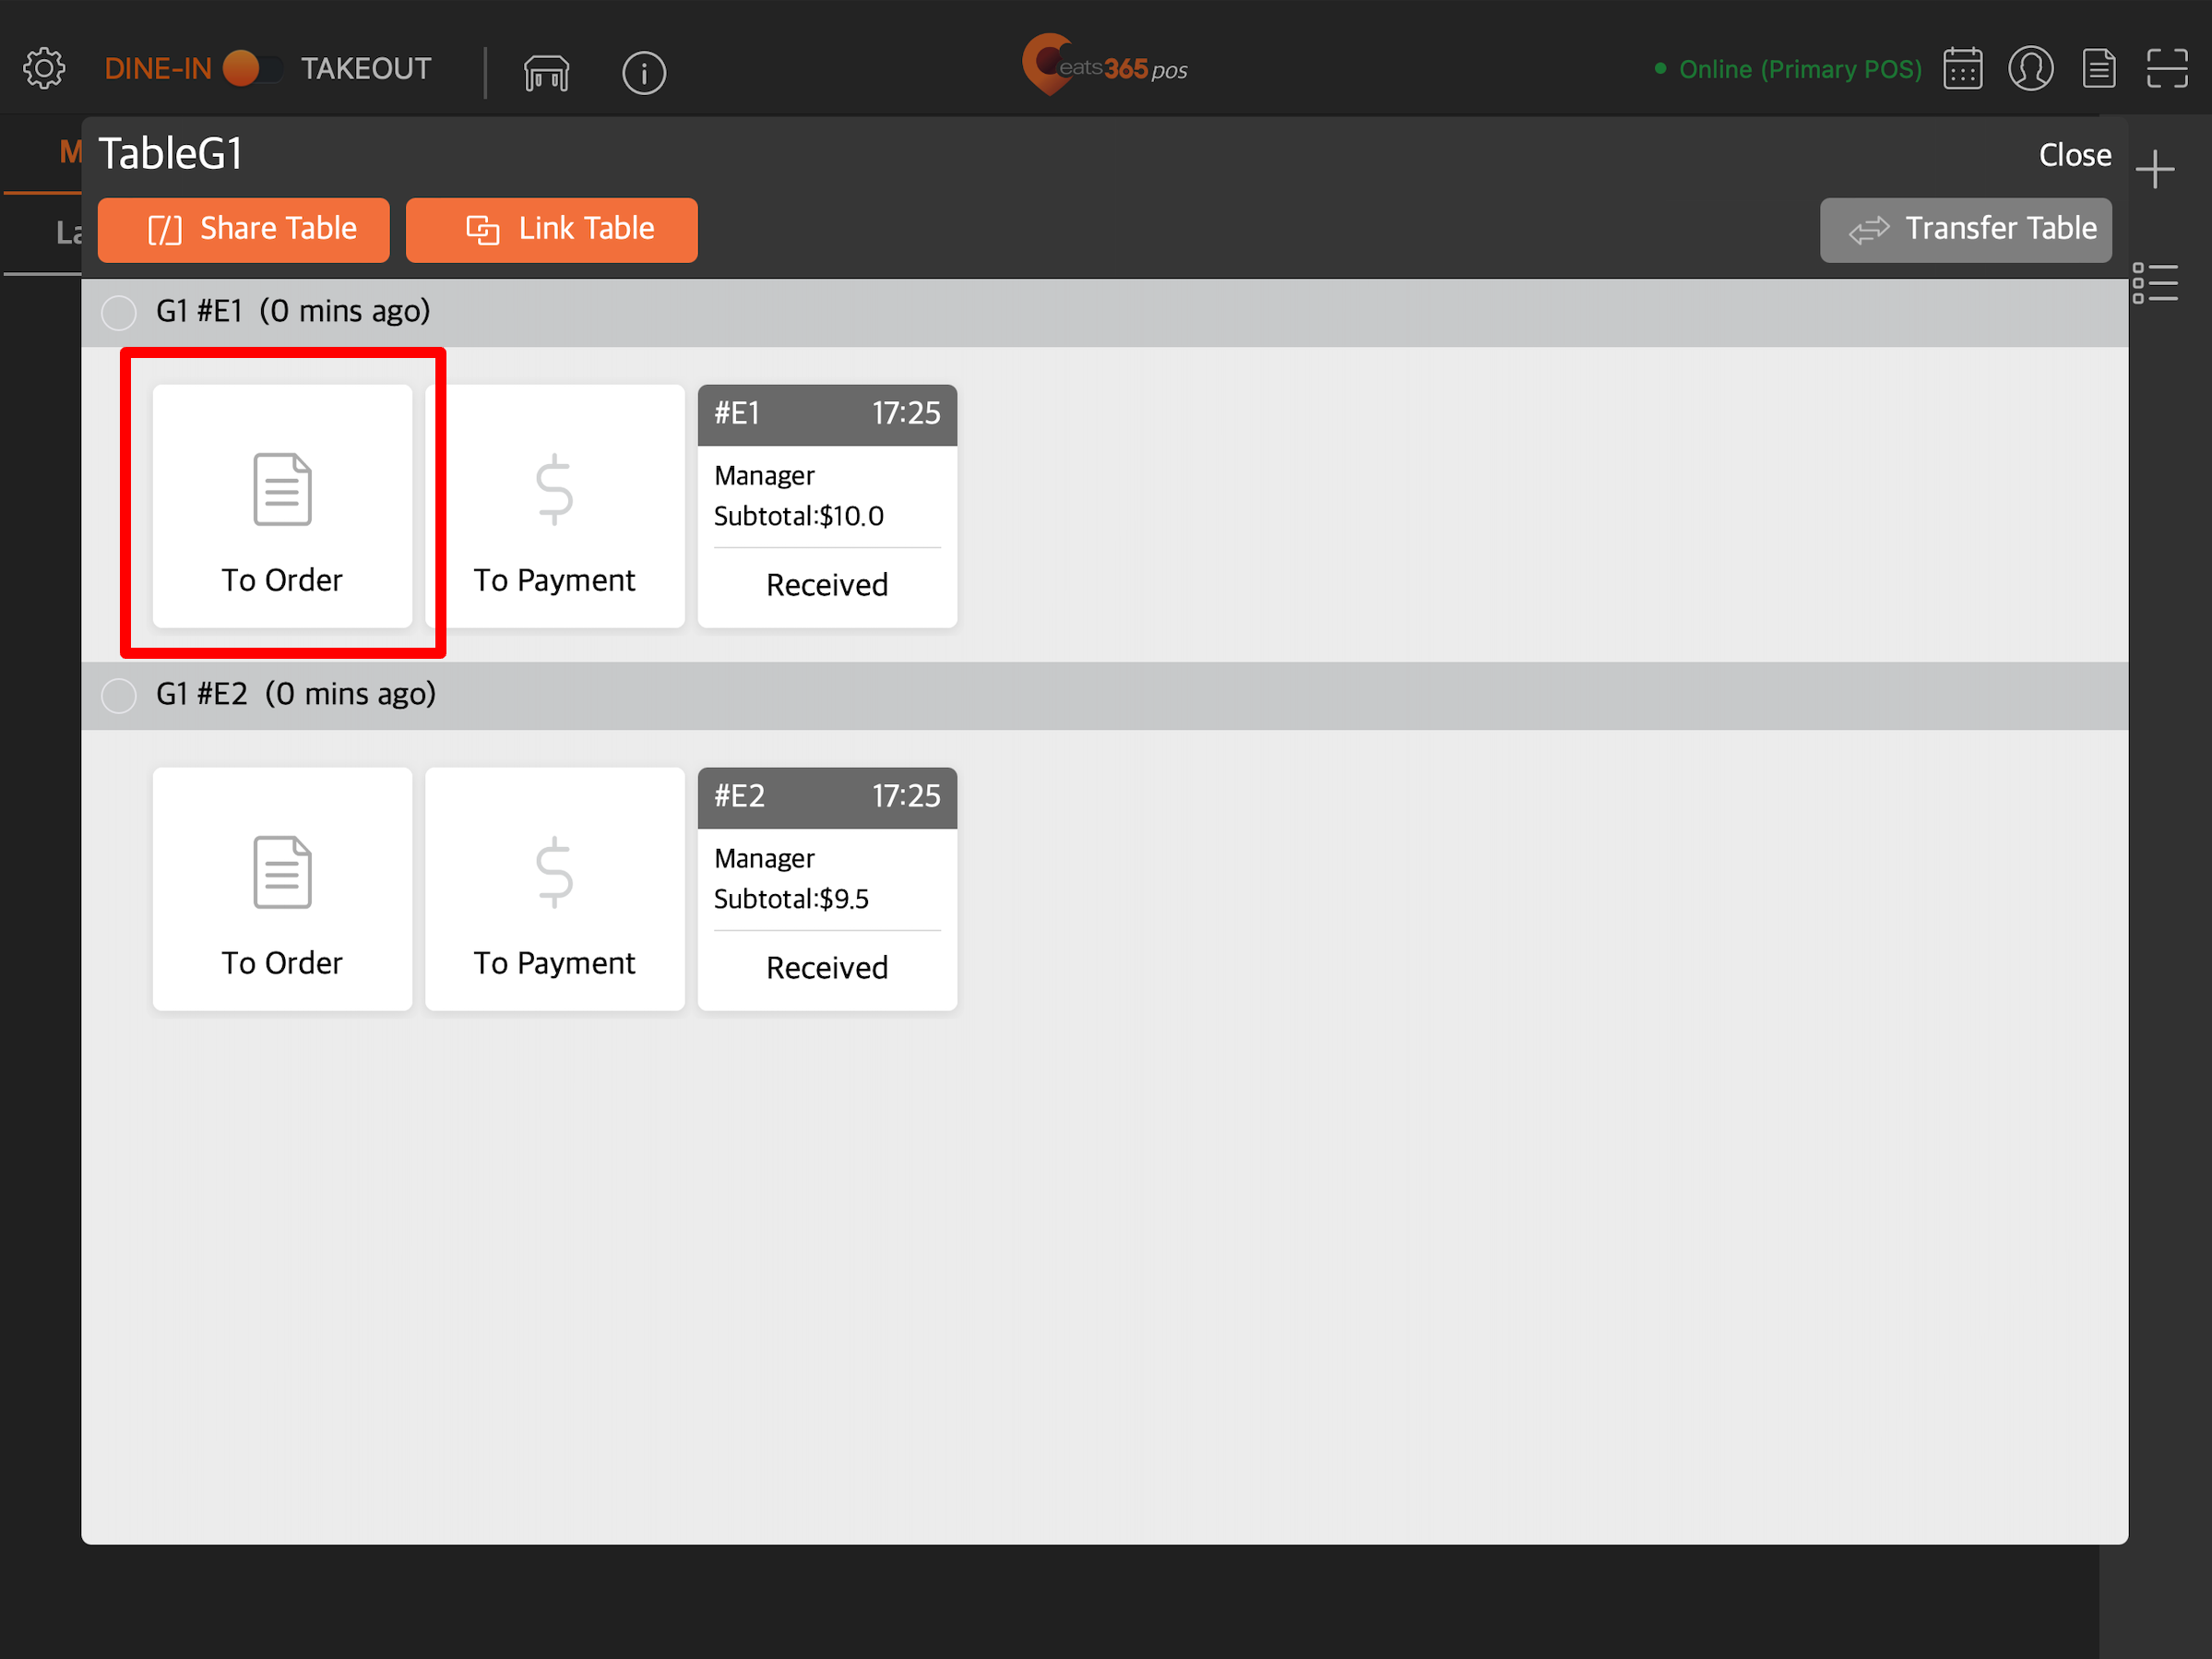
To Payment
Redirects the POS to the payment screen.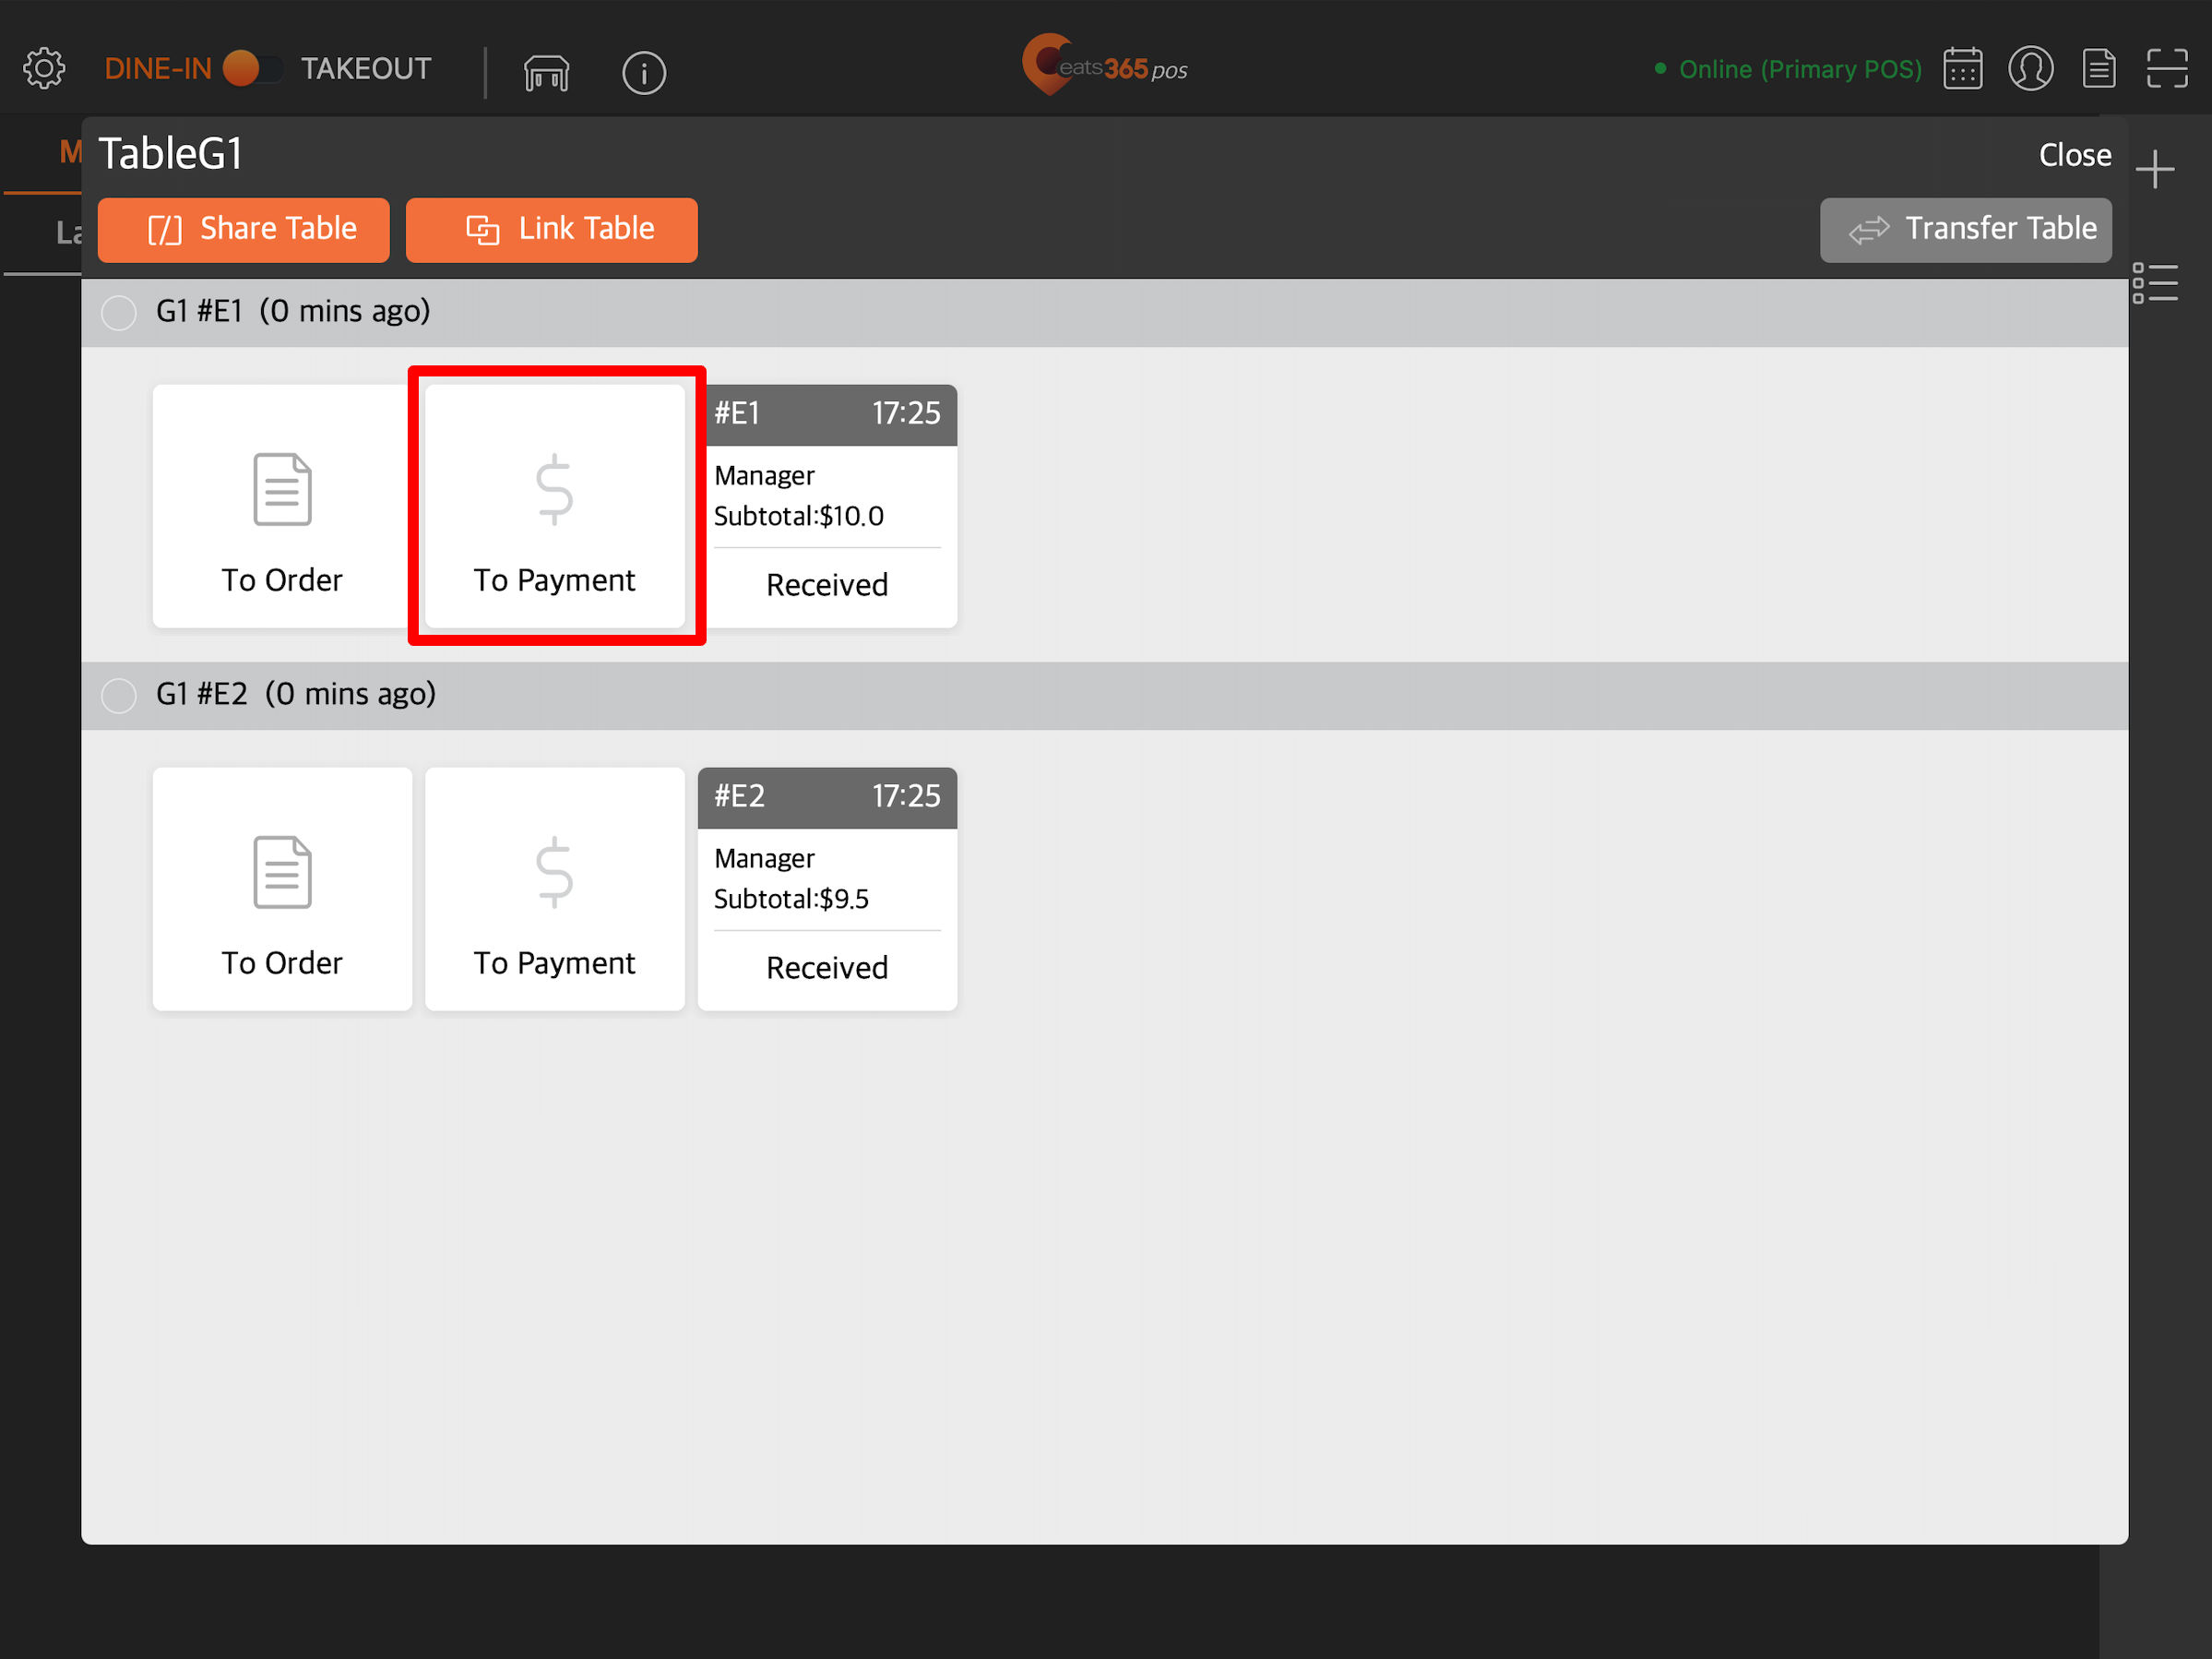
Done
Clears the table.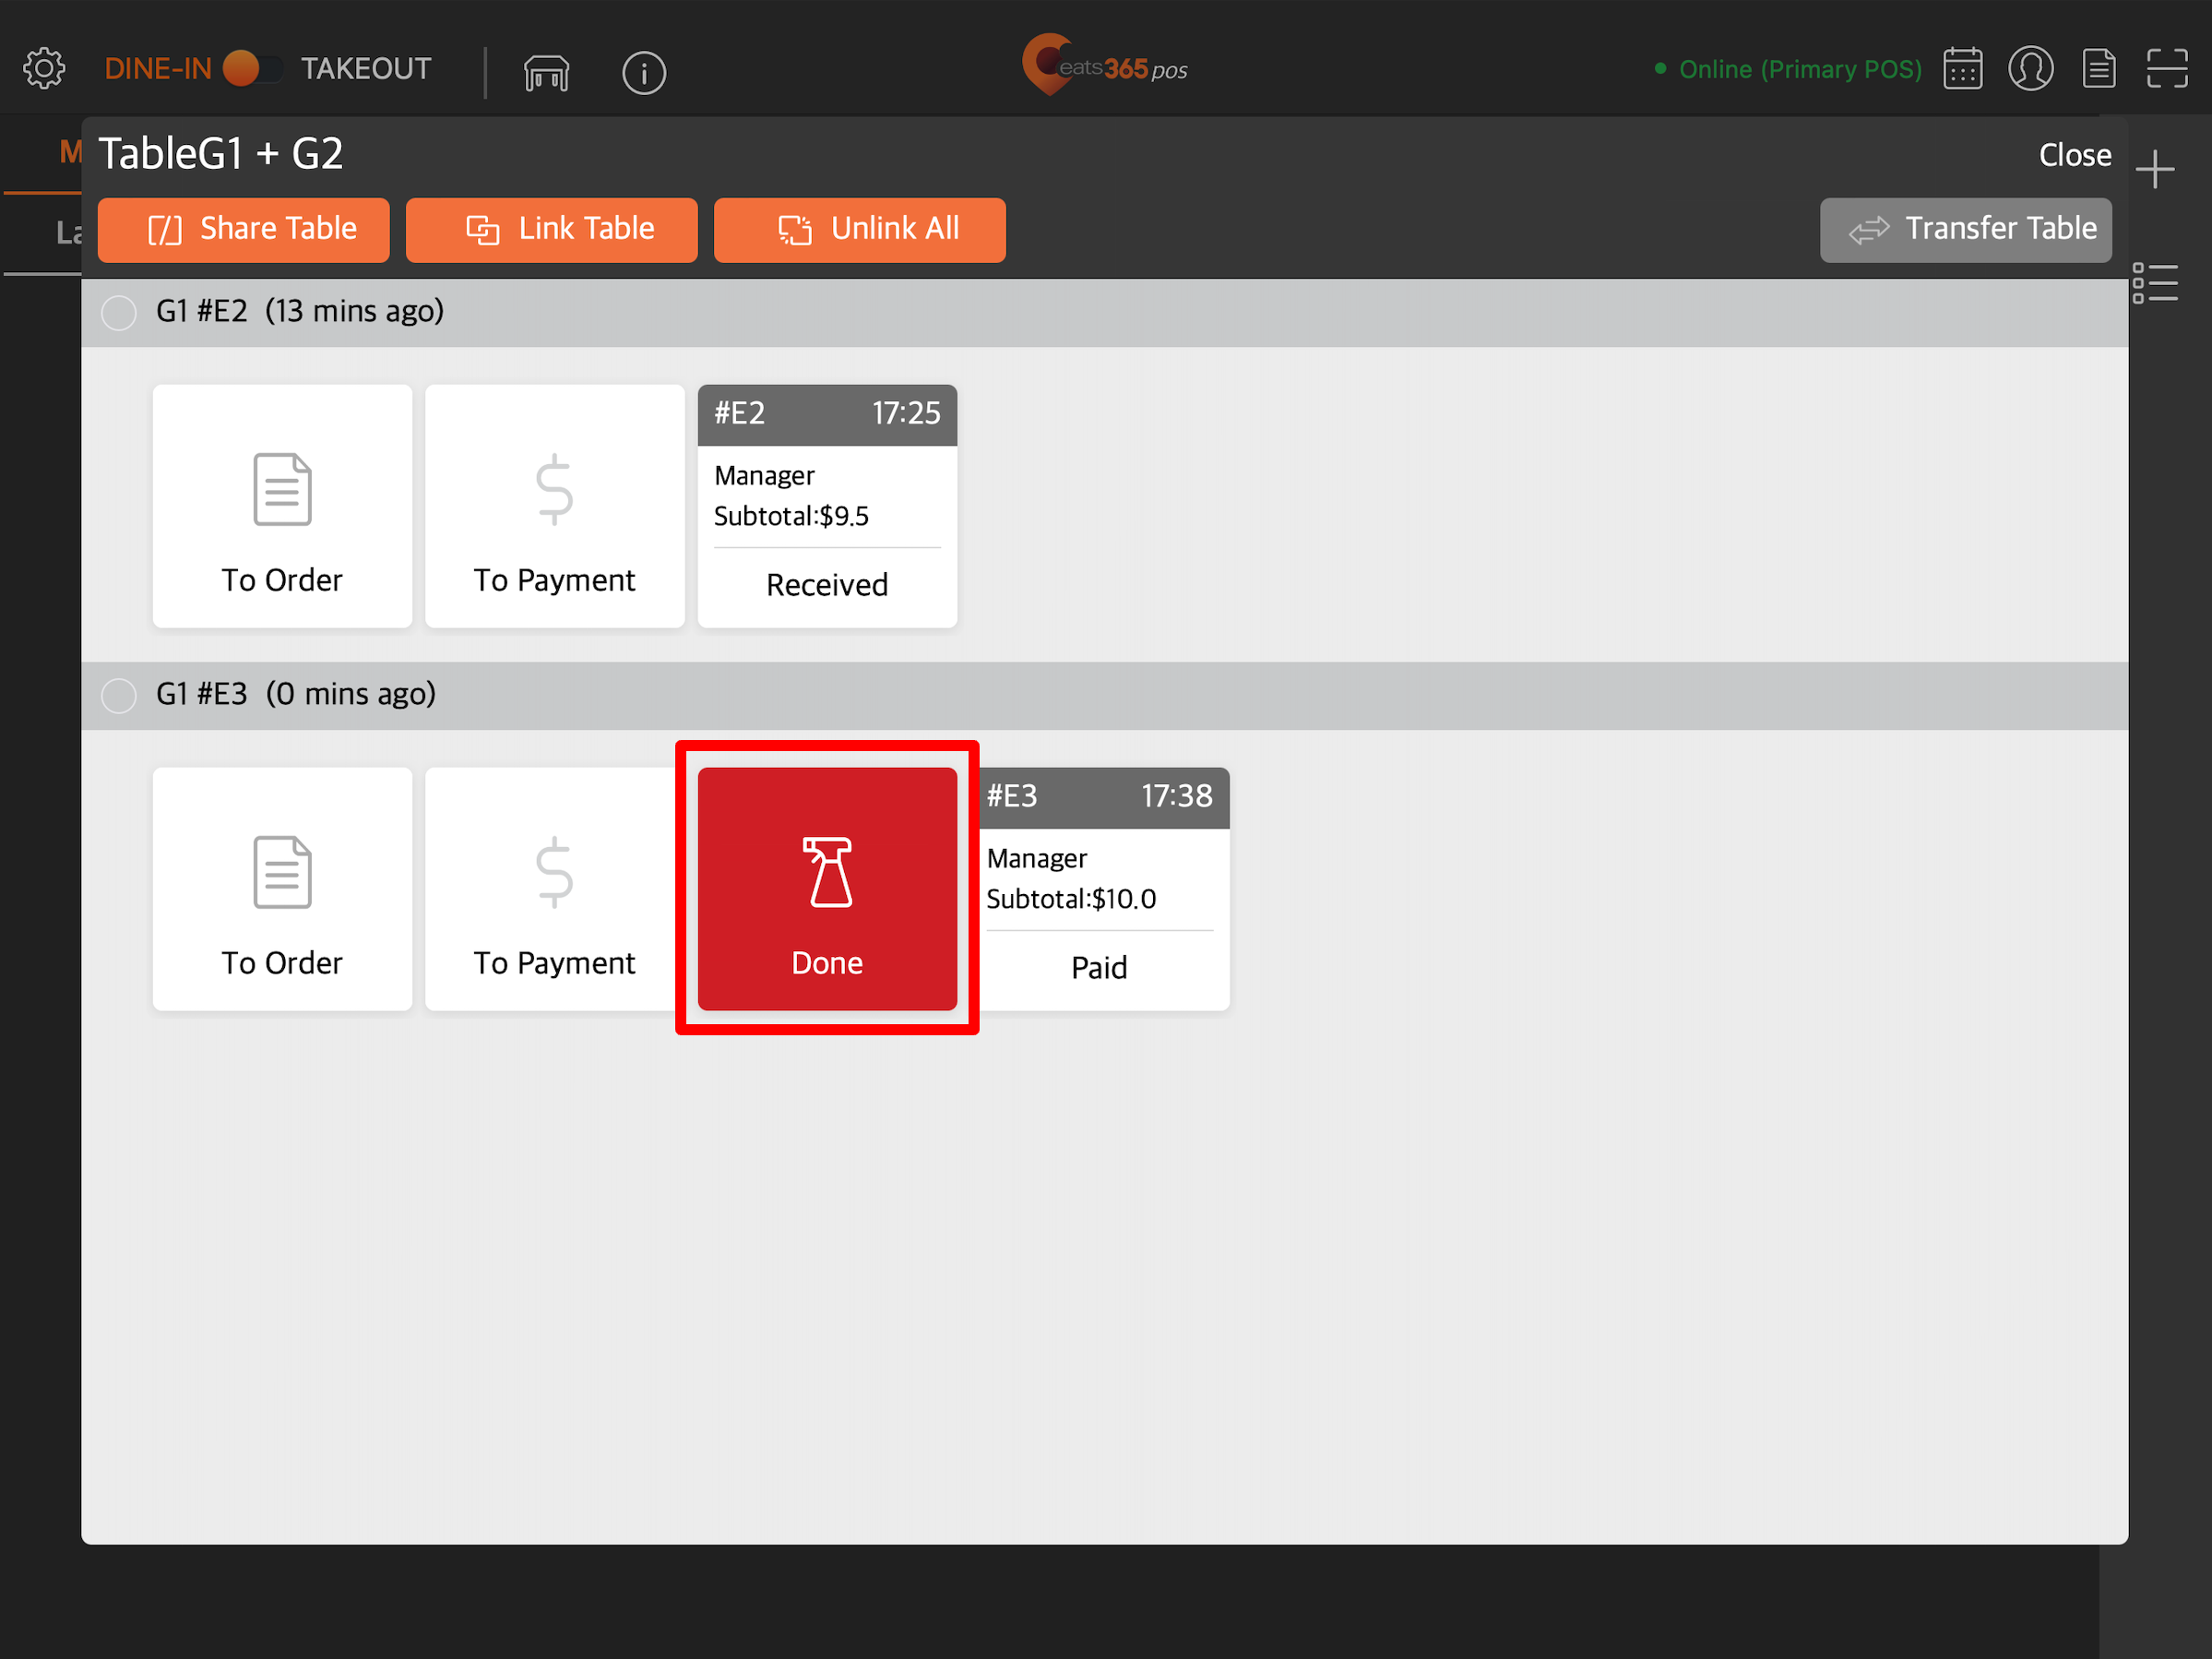
Link Table
Links the shared table to another table. To learn more about linking tables, refer to Join multiple tables together.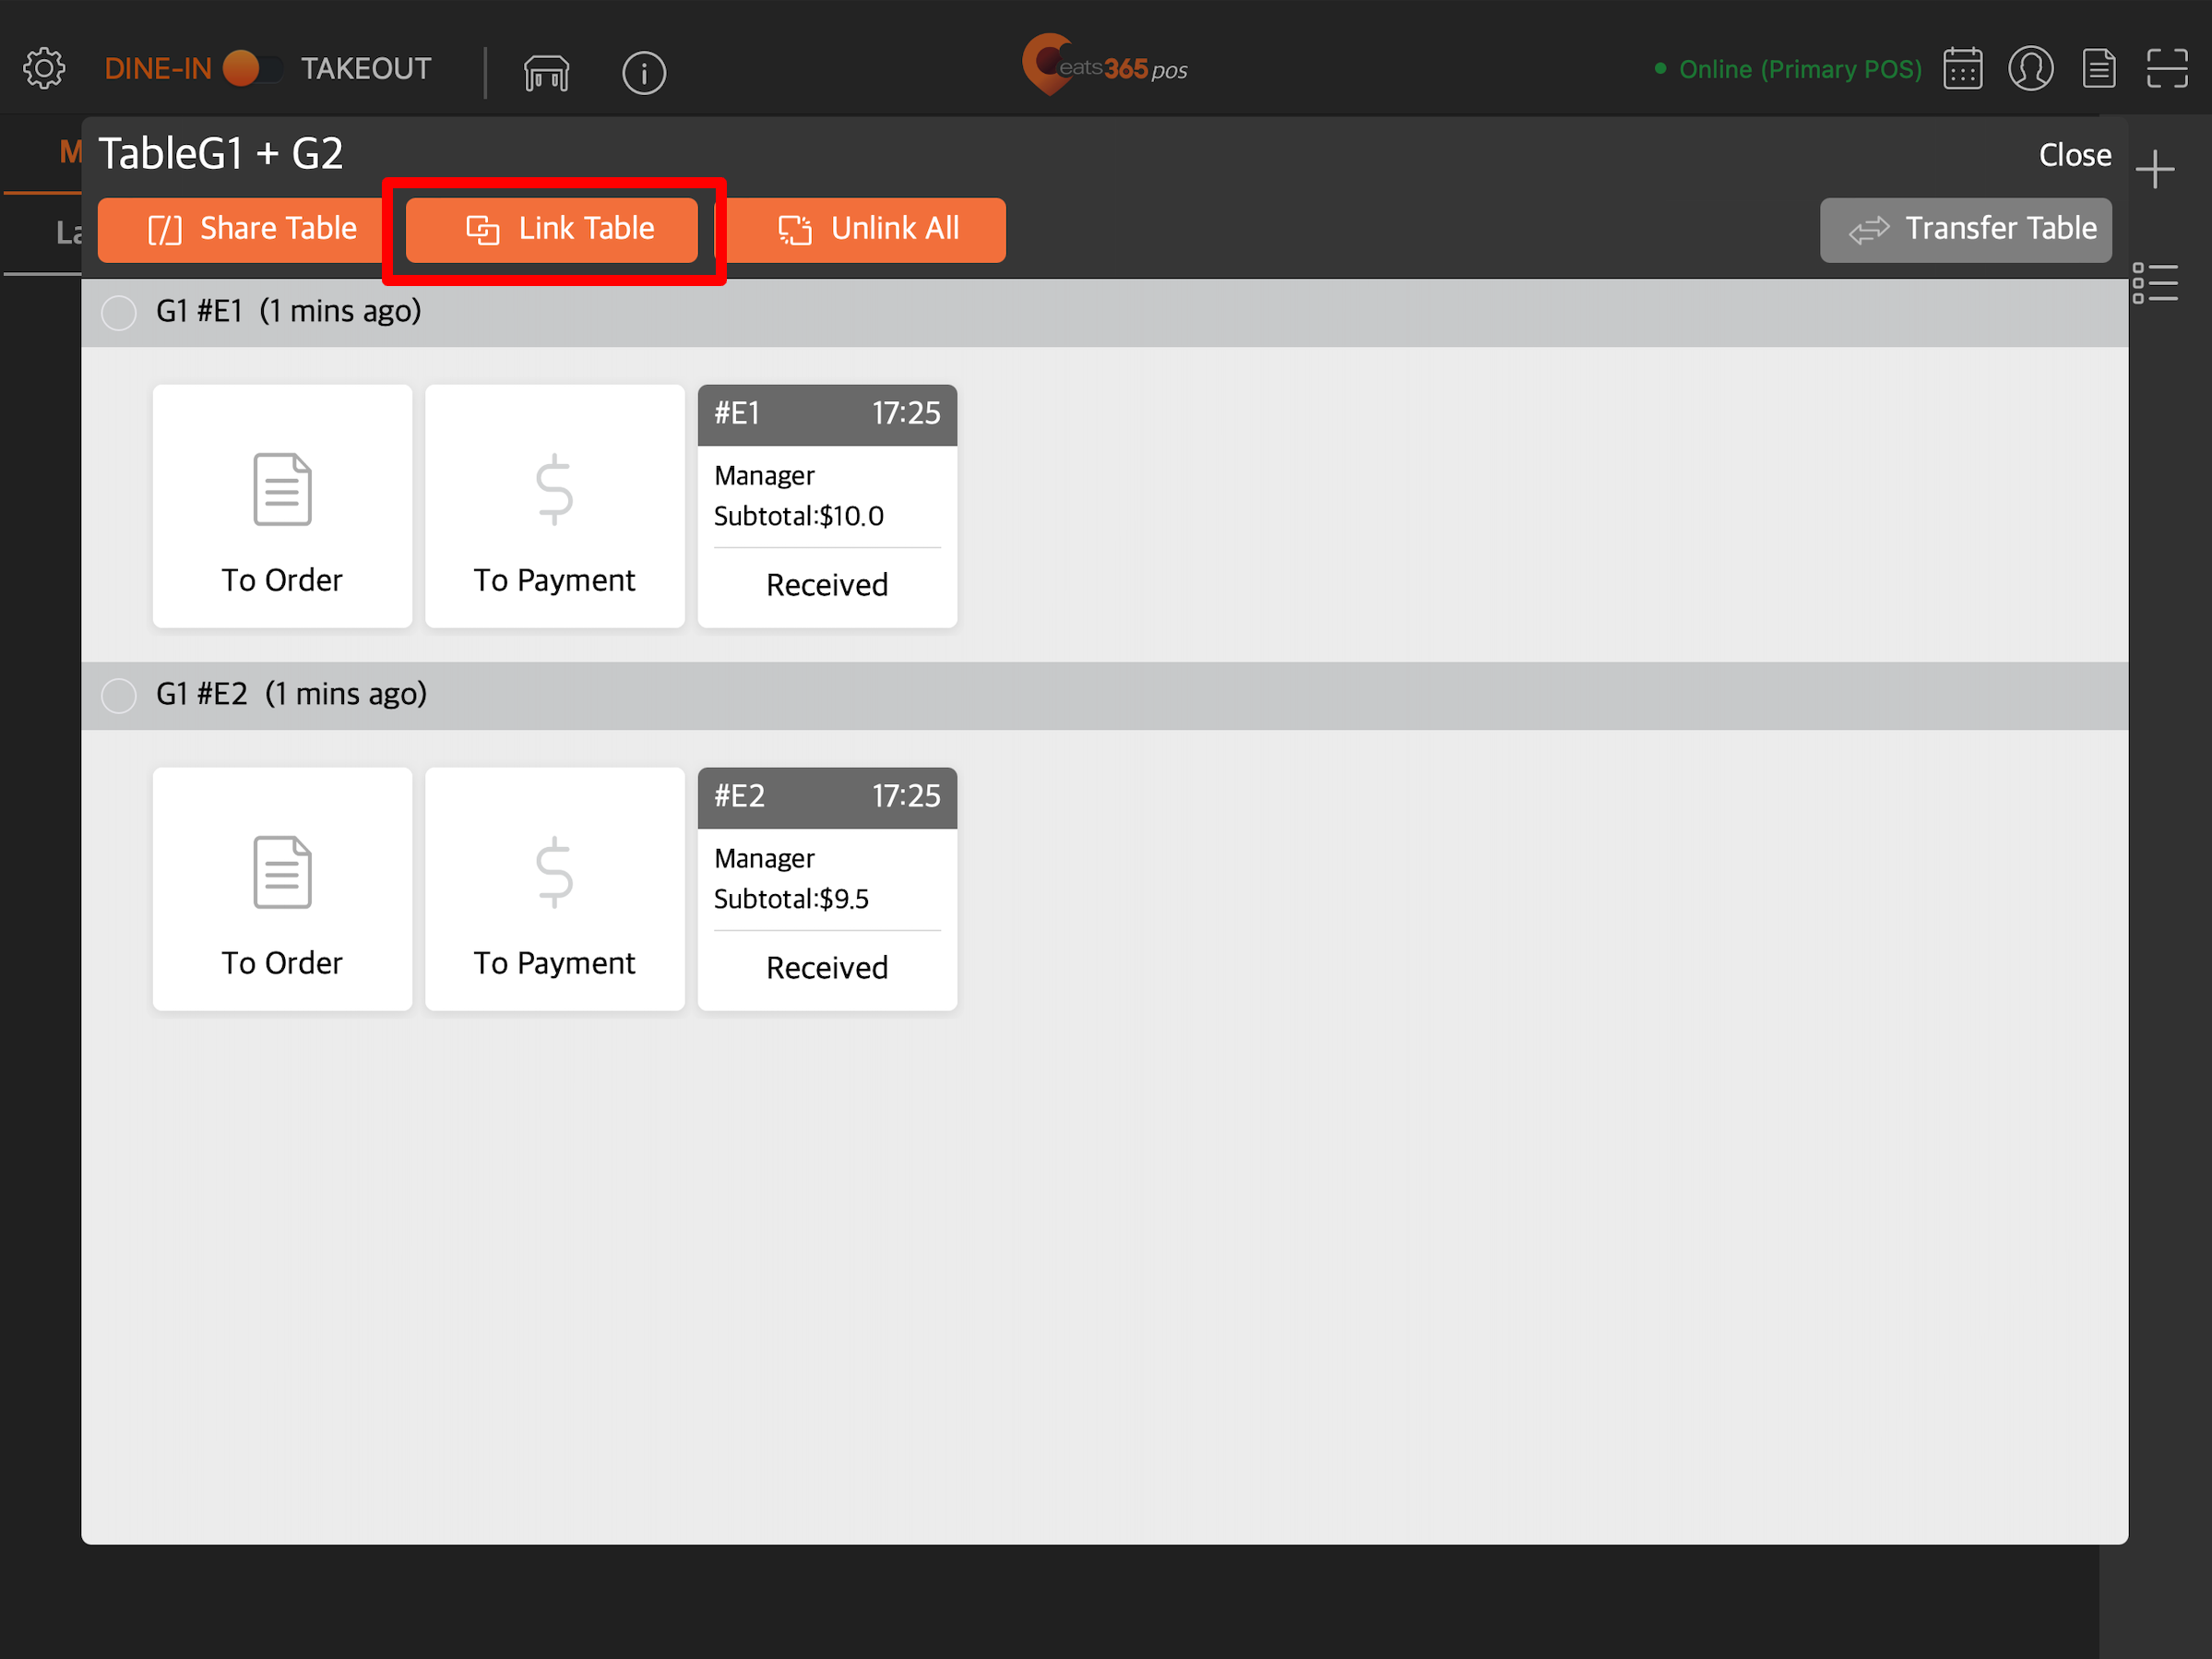
Unlink All
Unlinks the shared table from another table. 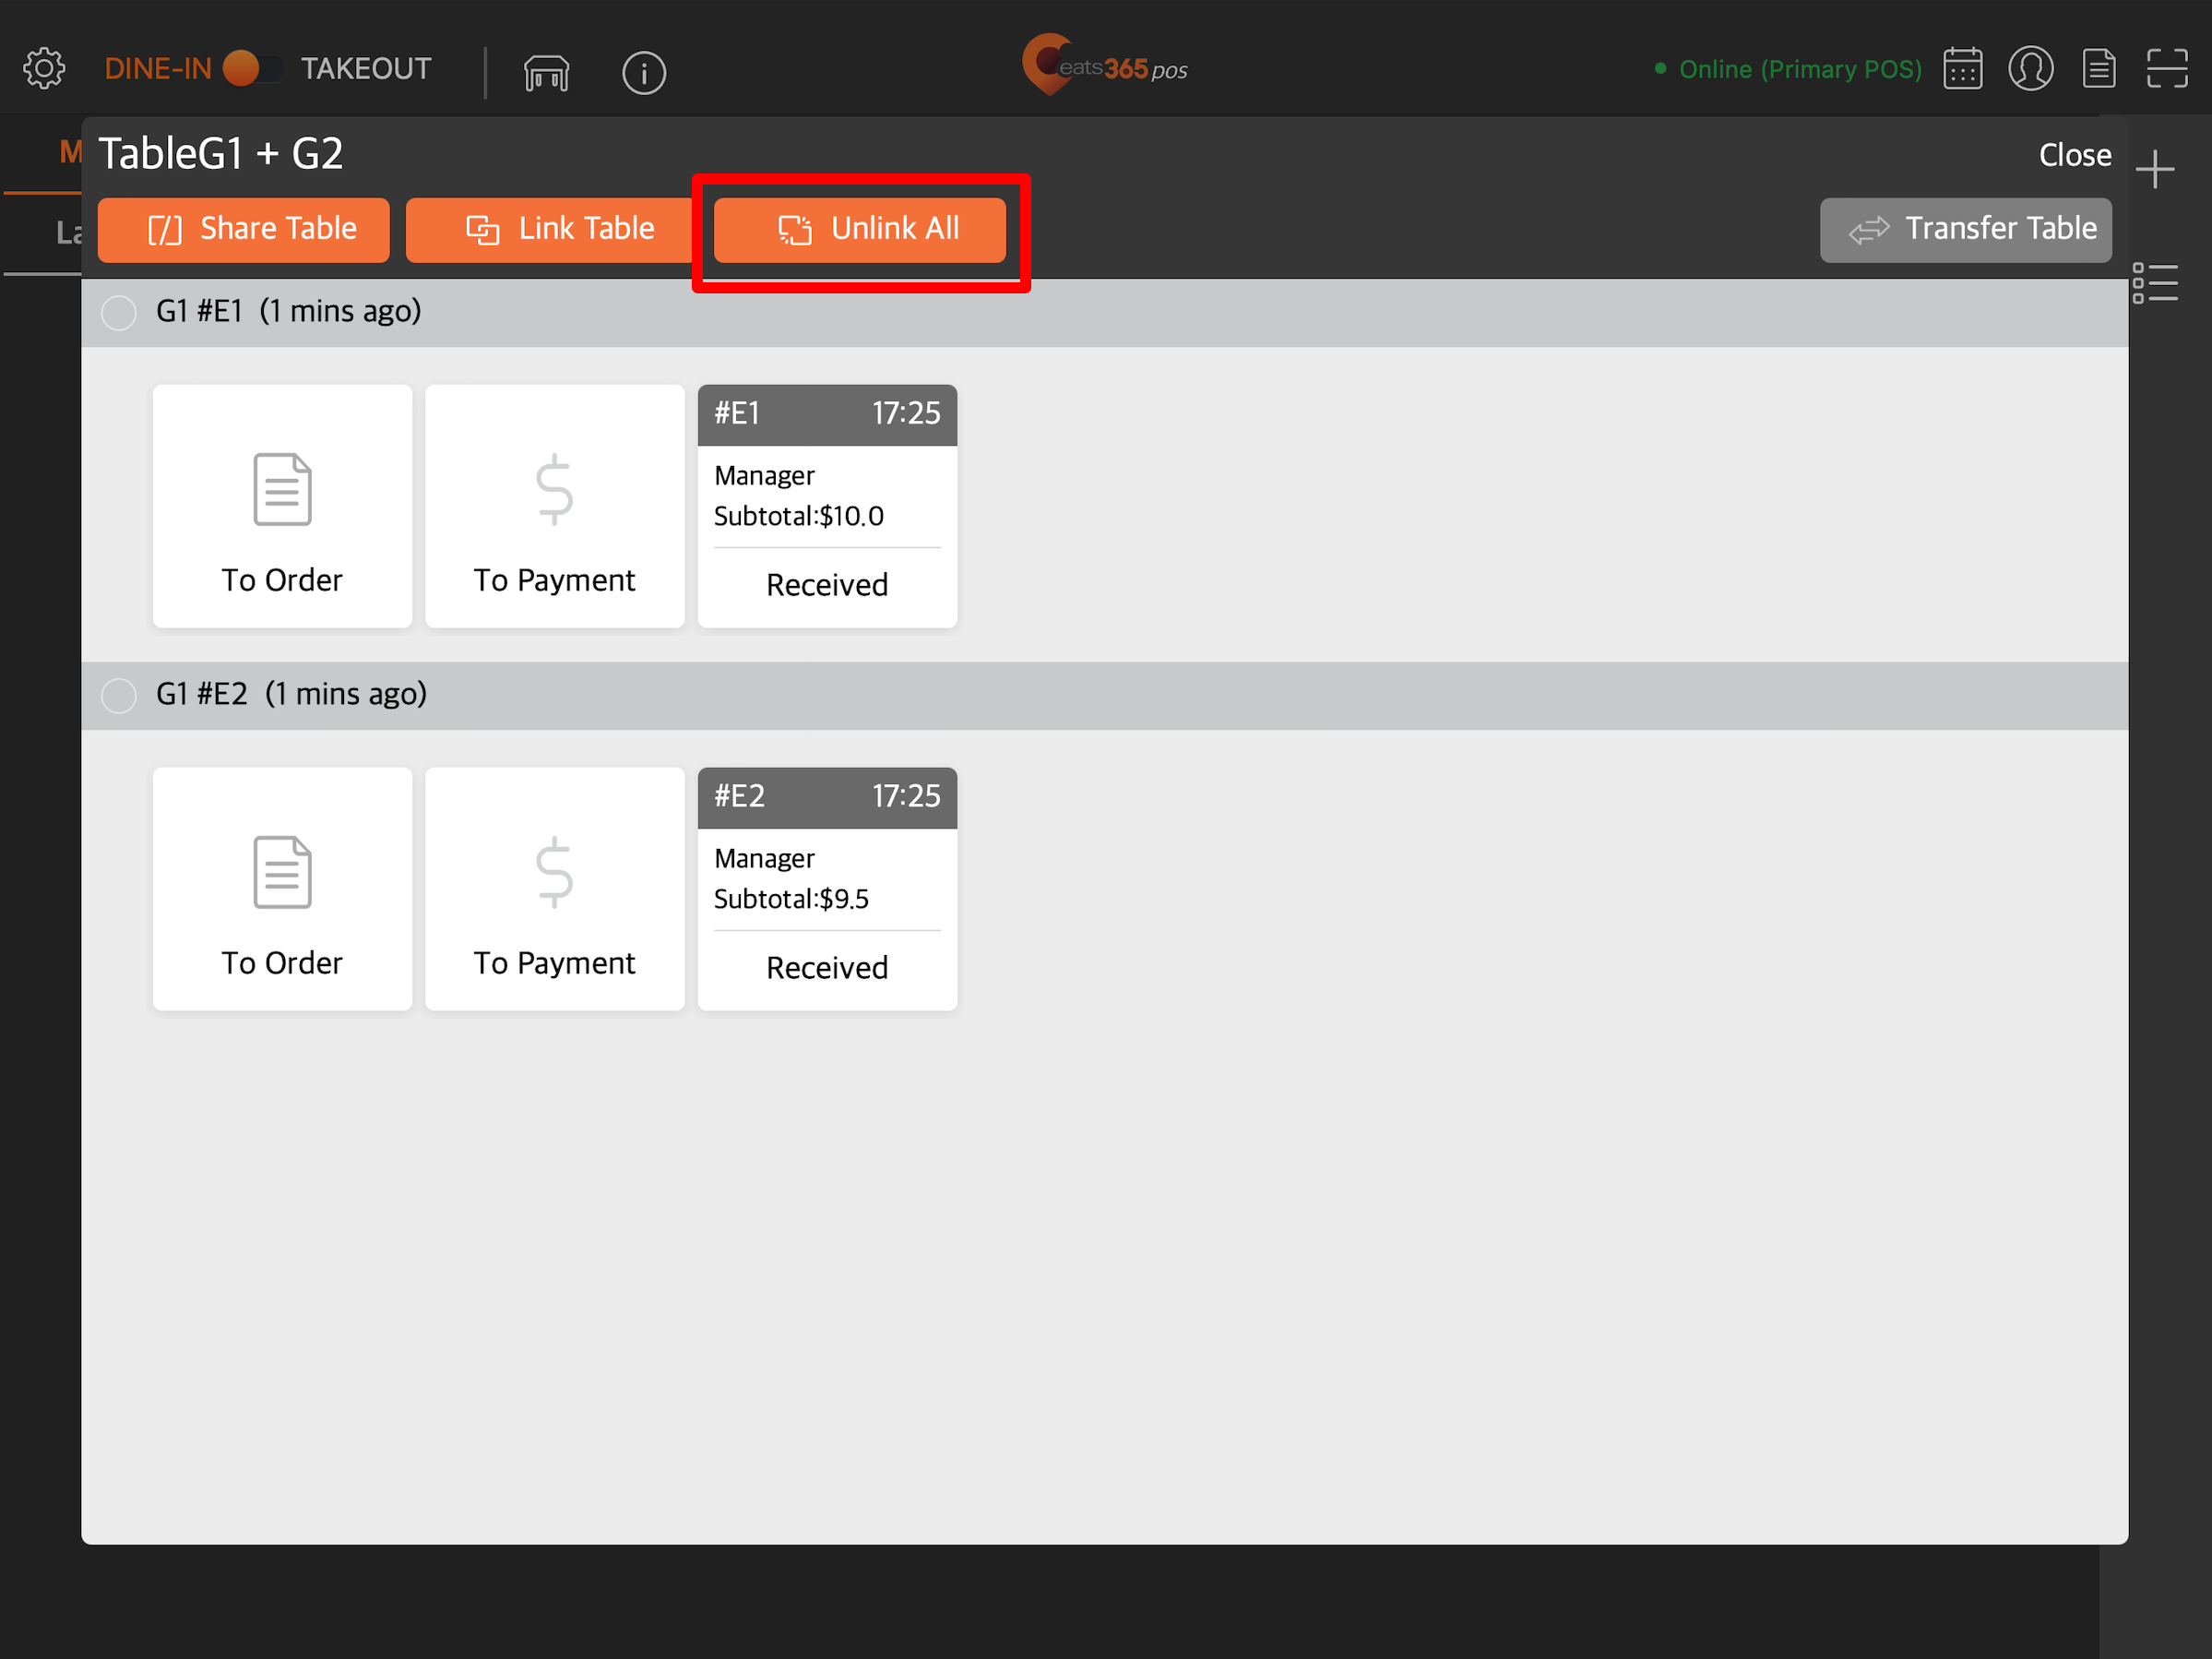
Transfer Table
Gives the option to transfer a customer group to another vacant table.
![]()