Eats365 Products
 Merchant Guide
 Modules
 Membership
 Integrations
 Hardware
 Staff Operations
 Roles & Permissions
 Payments
 Reports
 What’s New
 Release Notes
 Troubleshooting
 Simulators
 Glossary
 Troubleshooter
 System Status
Queuing Management
Table of Contents
Manage queuing tickets
Learn how to manage queuing tickets on the Eats365 POS.
The POS Queue Management screen enables you to efficiently manage queuing tickets issued from the Eats365 POS, the Queue Ticket Kiosk, and the Branded Online Store. This function enables staff to perform various actions such as calling the next ticket from the queue, assist with seating, hold ticket issuance, view issue history, and update customer information.
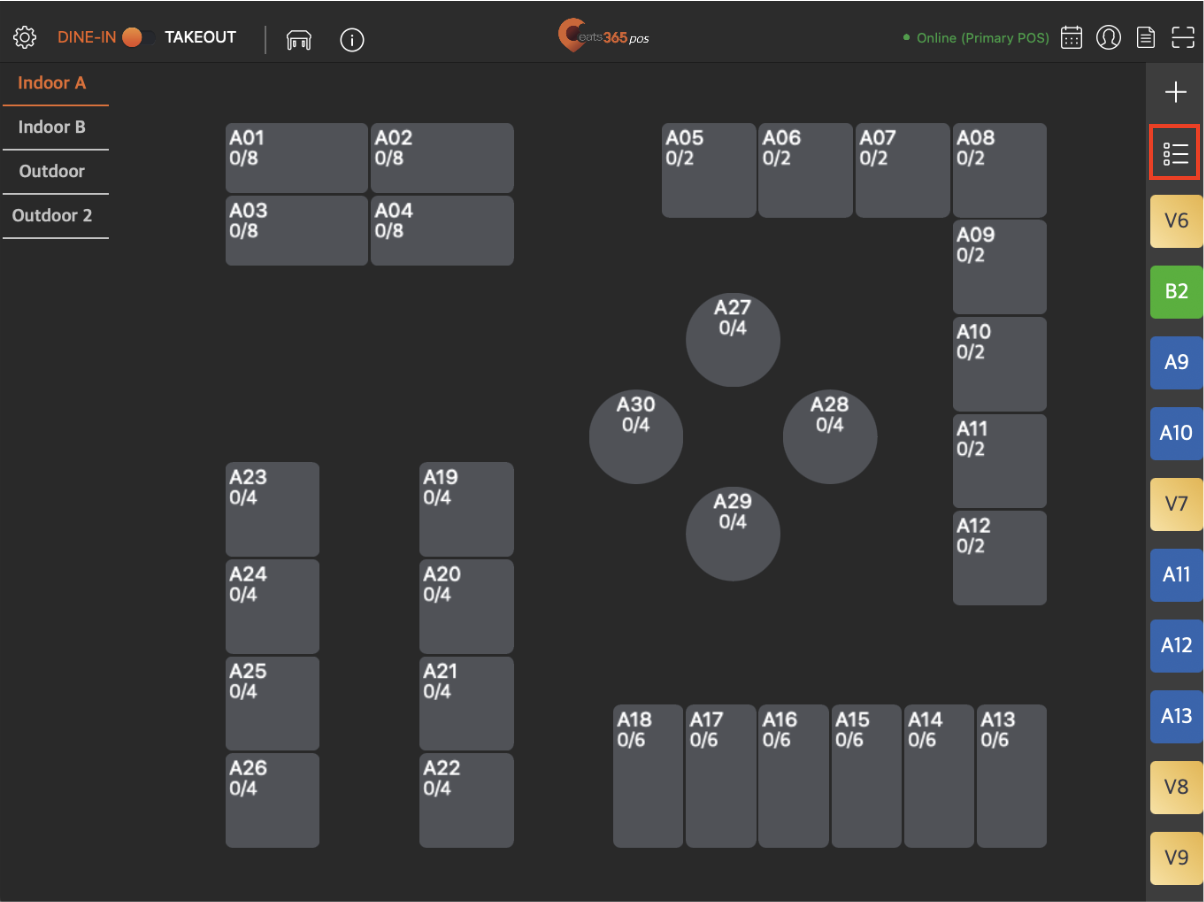
View queuing tickets
To check all issued queuing tickets, follow the steps below:
- Log in to the Eats365 POS.
- At the top left, tap Dine-In to get to the Table Map screen.
Tip: You can set the Table Map screen as the default view from the General Preferences settings, so you won’t need to tap Dine-In every time you log in. - On the Table Map screen, tap Queue Management
 . The Queue Management screen should appear.
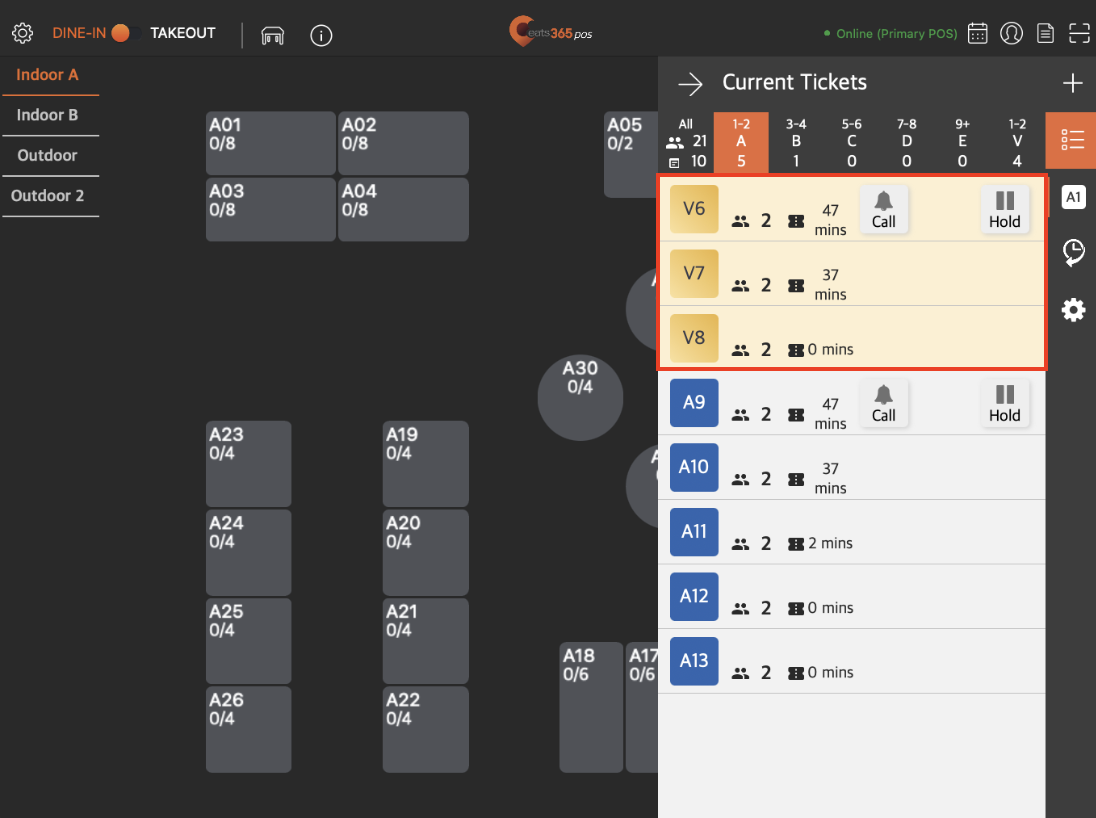
 - By default, all current queuing tickets are listed and sorted by waiting time. To view a particular ticket type, tap the ticket type.
Note:
- By default, ticket types are assigned their own ticket colors. To change the ticket type colors, refer to Set up Queuing.
Default ticket colors
Customized ticket colors


- If you have the VIP Ticket function set up, the ticket type would be highlighted based on the color you set. For more information about VIP tickets, refer to Set up VIP queuing.
- To prioritize displaying VIP tickets in the queue, you can pin them so they appear first in the “All” view of the “Current Tickets” tab. To pin VIP tickets, refer to Set up VIP queuing.
- Depending on how the queuing settings is configured, the queue management screen may show the waiting time in minutes, or show the exact time when the ticket was issued. For more information, refer to Set up Queuing.
Call a queuing ticket
When you’re ready to serve a customer, you can call their ticket from the Queue Management screen.
To call a queuing ticket, follow the steps below:
- Log in to the Eats365 POS.
- At the top left, tap Dine-In to get to the Table Map screen.
Tip: You can set the Table Map screen as the default view from the General Preferences settings, so you won’t need to tap Dine-In every time you log in. - On the Table Map screen, tap Queue Management . The Queue Management screen should appear.
- Next to the ticket that you want to call, tap Call to display the ticket number on a device running the Eats365 eSignage module.
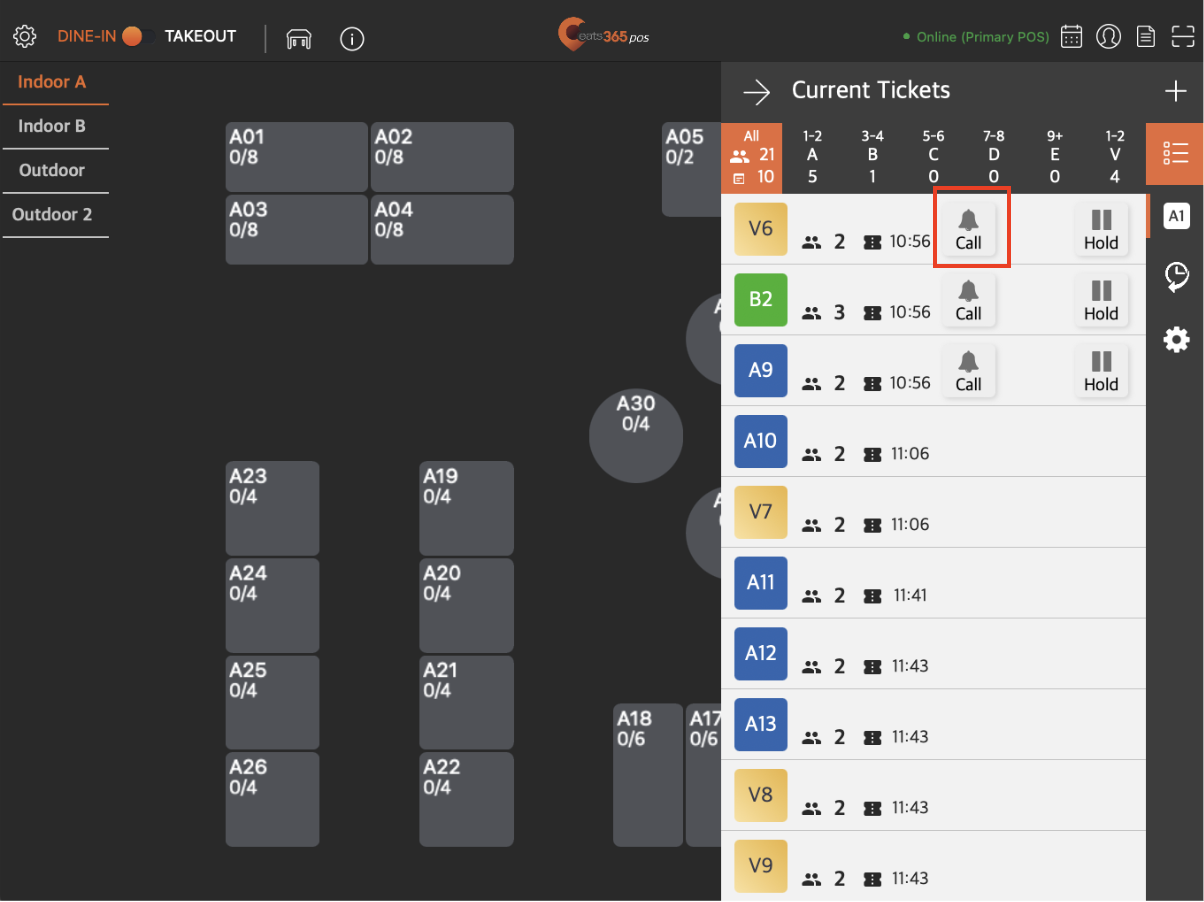
Note: The eSignage’s mode of operation must be set to Queue Kiosk in order to display queue tickets. For more information about setting up the eSignage module on a device, refer to Set up and install eSignage.
Once the customer’s ticket has been called, you can remove the ticket from the list by swiping left to dismiss the queuing ticket, or proceed to seat the customer to a table.
Seat a customer to a table
To seat a customer to a table, on the Queue Management screen, tap Seat. Then, choose a table to seat the customer.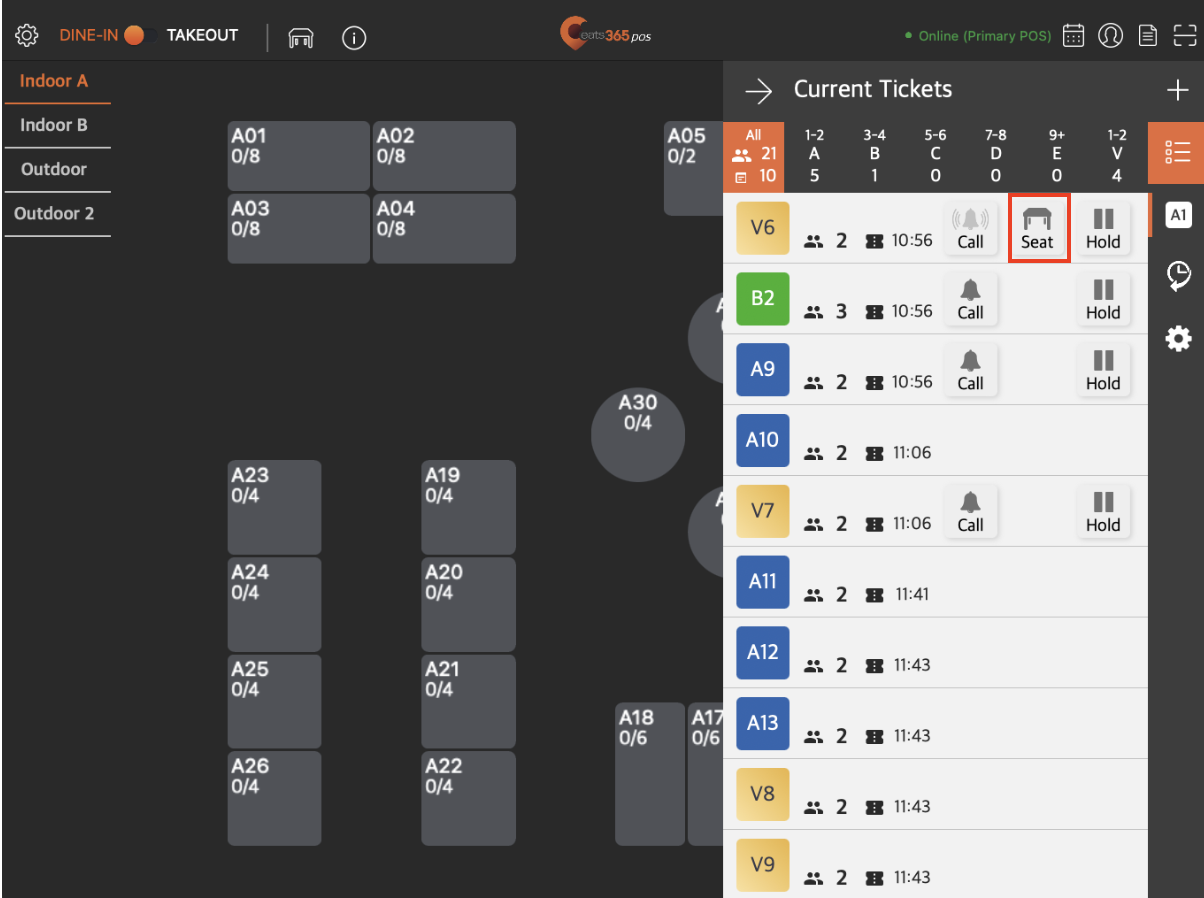
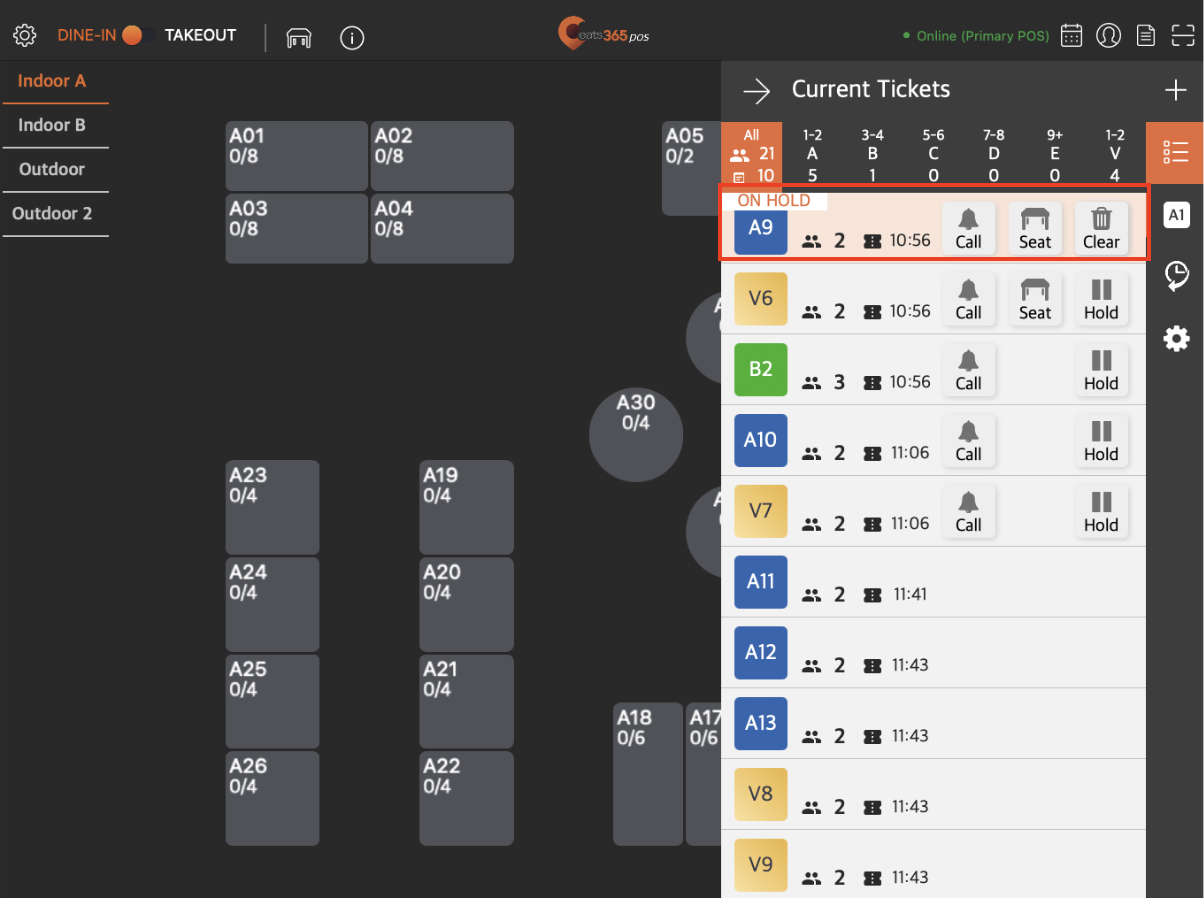
Hold a queuing ticket
- If you need to hold a queuing ticket for any reason, on the Queue Management screen, tap Hold next to the ticket that you want to put on hold. Tickets that are placed on hold are labeled as "ON HOLD."
- To return a ticket to the queue, tap Call and then Clear.
- You can also choose to skip a ticket by tapping the Call button on the next ticket.
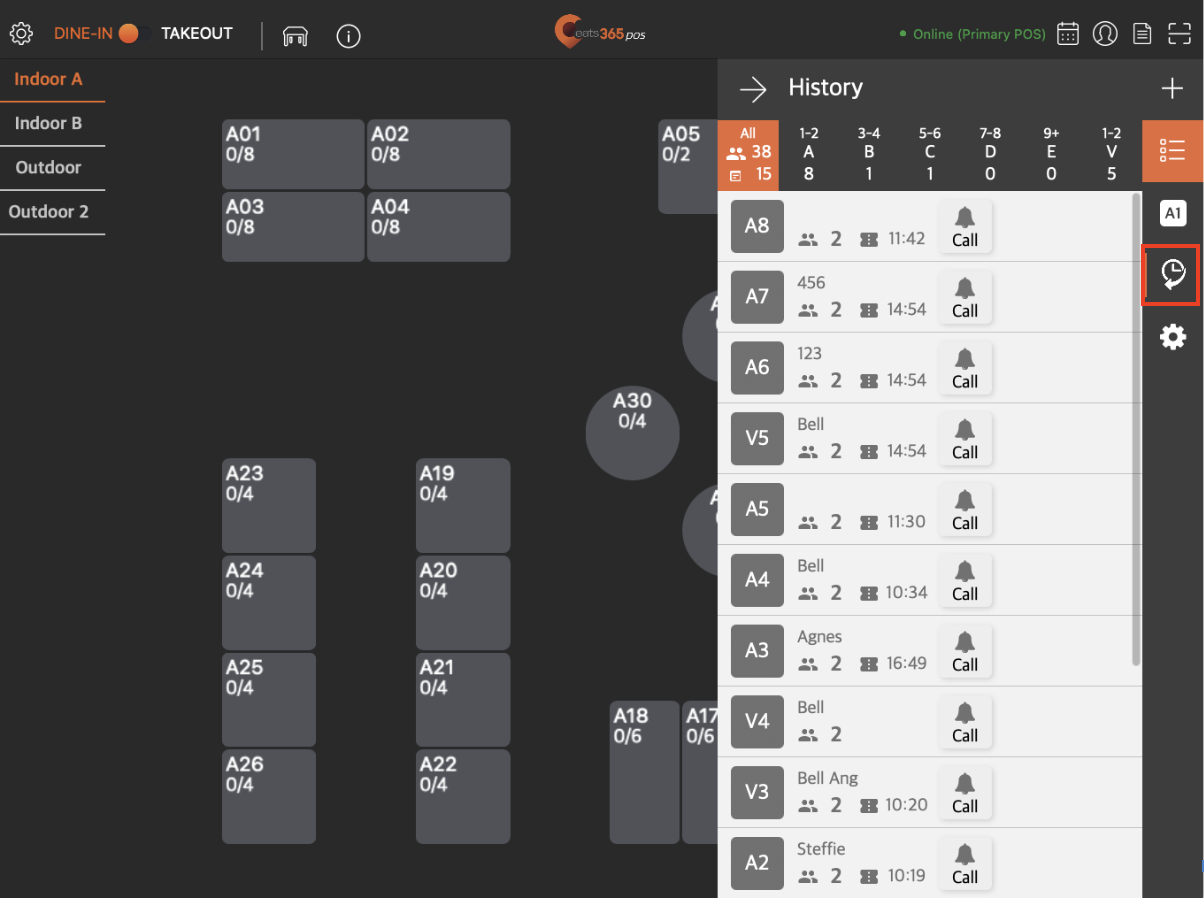
Check queuing ticket history
To check the history of queuing tickets issued for the day, on the Queue Management screen, tap History  . A list of all tickets attended to should appear on the screen.
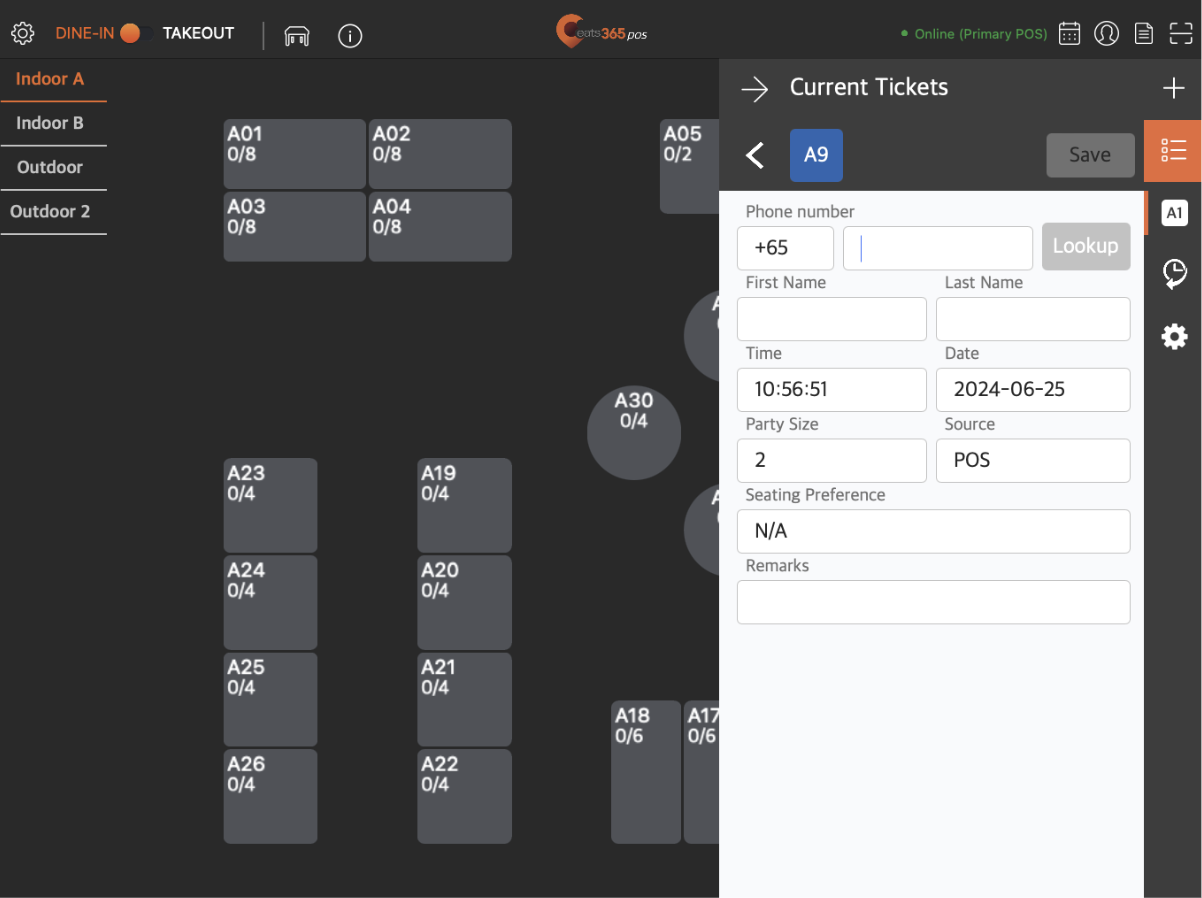
Update customer information
If you need to update a customer’s information, on the Queue Management screen, tap the queuing ticket with the customer information that you want to update.