Eats365 产品
 商家指南
商家指南 模块
模块 会员
会员 整合
整合 硬件
硬件 员工操作
员工操作 职级和权限
职级和权限 付款
付款 报表
报表 最新消息
最新消息 产品更新
产品更新 故障排除
故障排除 探索 Eats365 产品
 Eats365 POS 词汇表
 问题排解
问题排解订单处理
All Product
Table of Contents
管理自行结账订单
了解如何在 Eats365 POS 上接受或拒绝自行结帐的订单。
当「自行结帐」功能启用后,堂食顾客可以使用个人装置在线上支付订单。他们可以透过在线上落单网站上结帐 (扫码点餐),也可以扫描贴在餐桌或打印在帐单上的QR码来进行此操作。
有关如何启用自行结帐功能的更多信息,请参阅为堂食订单设置自行结帐。
在本文中,您将学会如何透过 Eats365 POS 系统接受,拒绝和取消自行结帐请求,以及打印带有自助结帐QR码的帐单。
接受自行结帐请求
要接受顾客的自行结帐请求,请按照以下步骤操作:
- 登入 Eats365 POS。
- 点击左上角的「堂食」即可进入 “餐桌地图” 屏幕。
提示:您可以从 “本机设置” 中将 “堂食” 屏幕设置为预设模式,这样您就不需要每次登入时都点击 “堂食”。 - 选择发出自行结帐请求的餐桌。
提示:当顾客要求自行结帐时,一个指示图标将会显示在该顾客就坐的餐桌上。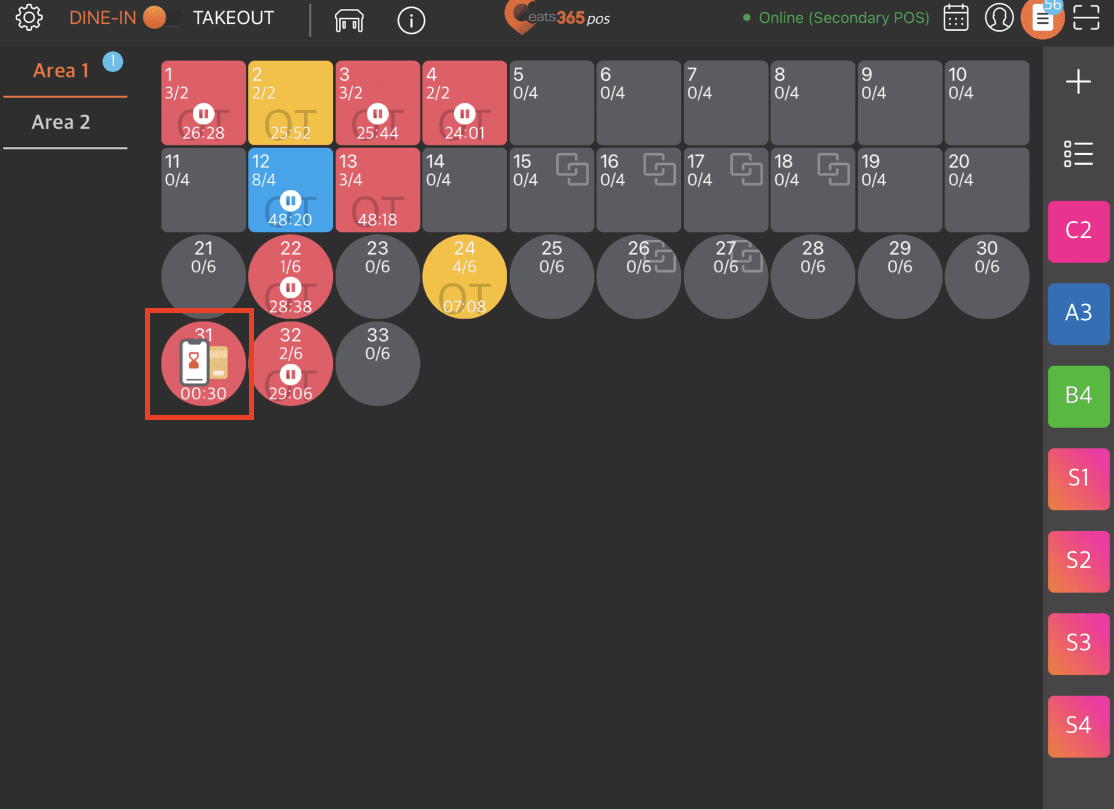
- 长按餐桌可显示操作按钮。
- 点击「自行结帐」。
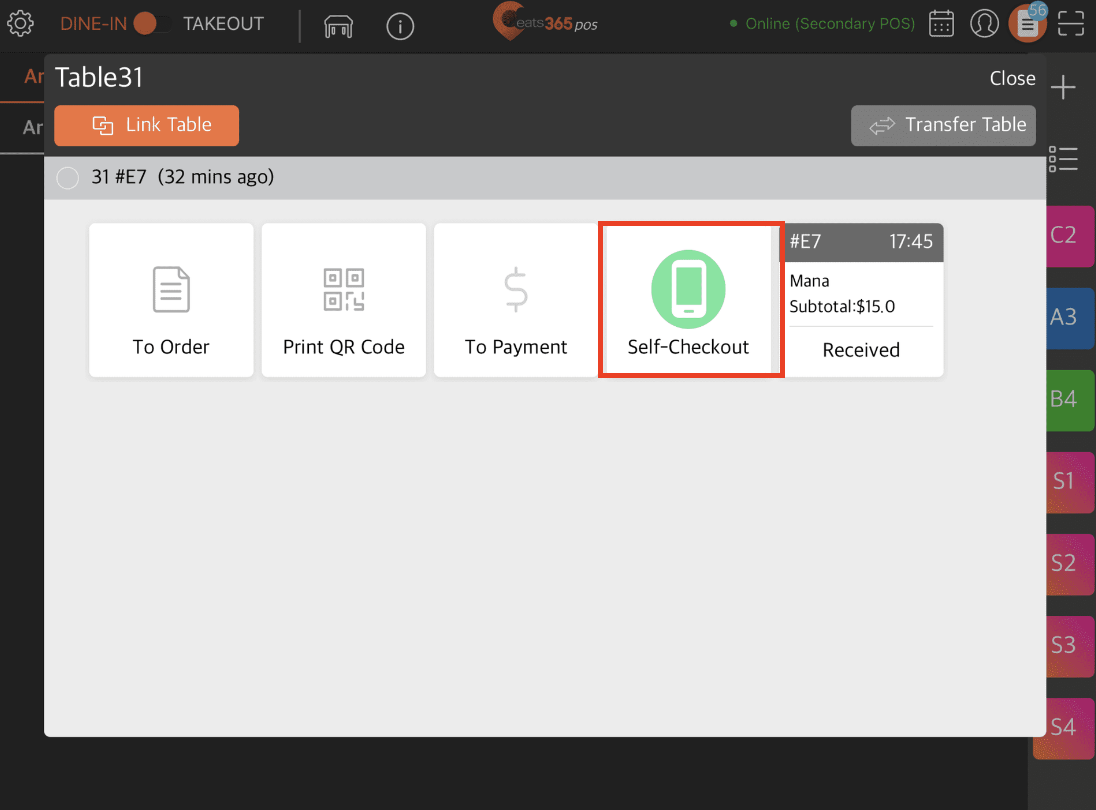
- 若要接受自行结帐请求,请点击「确定」。
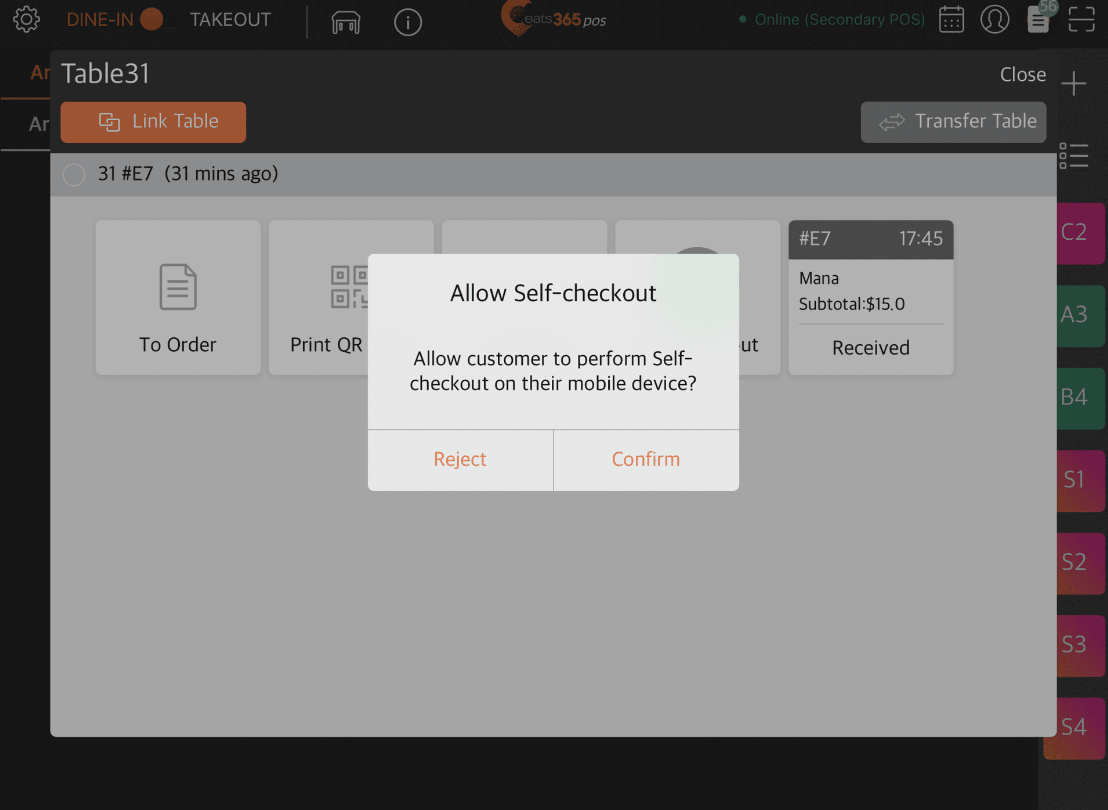
获得批准后,顾客即可继续付款流程。在顾客完成付款之前,自行结帐状态将在 POS 上显示为 “等待中”。付款完成后,自行结帐按钮便会移除。
拒绝自行结帐请求
要拒绝顾客的自行结帐请求,请按照以下步骤操作:
- 登入 Eats365 POS。
- 点击左上角的「堂食」即可进入 “餐桌地图” 屏幕。
提示:您可以从 “本机设置” 中将 “堂食” 屏幕设置为预设模式,这样您就不需要每次登入时都点击 “堂食”。 - 选择发出自行结帐请求的餐桌。
提示:当顾客要求自行结帐时,一个指示图标将会显示在该顾客就坐的餐桌上。
- 长按餐桌可显示操作按钮。
- 点击「自行结帐」。
- 若要拒绝自行结帐请求,请点击「拒绝」。
当自行结帐请求被拒绝后,顾客将会收到一则通知,提示自行结帐请求未得到确认,请顾客寻求协助。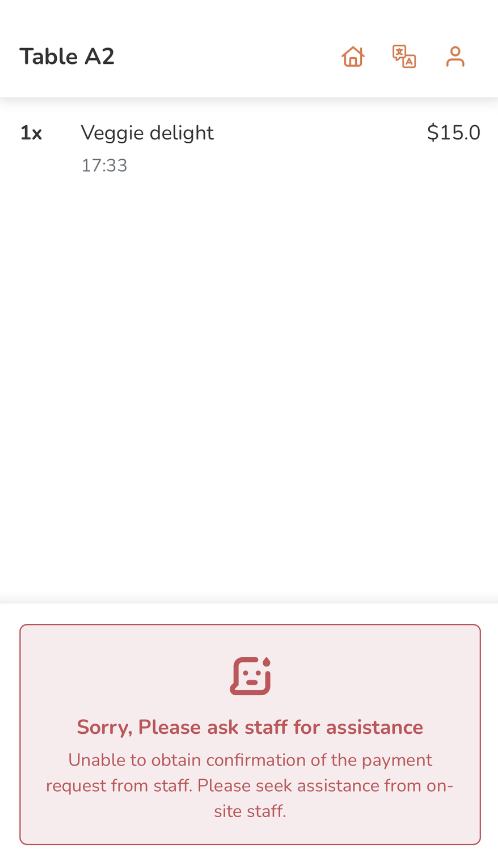
取消自行结帐请求
如果您在接受了顾客的自行结帐请求后需要取消它,您可以通过取消自行结帐来实现。
要暂停自行结帐请求,请按照以下步骤操作:
- 登入 Eats365 POS。
- 点击左上角的「堂食」即可进入 “餐桌地图” 屏幕。
提示:您可以从 “本机设置” 中将 “堂食” 屏幕设置为预设模式,这样您就不需要每次登入时都点击 “堂食”。 - 选择发出自行结帐请求的餐桌。
提示:当顾客要求自行结帐时,一个指示图标将会显示在该顾客就坐的餐桌上。
- 长按餐桌可显示操作按钮。
- 点击「自行结帐」。
- 若要接受自行结帐请求,请点击「确定」。获得批准后,顾客即可继续付款流程。在顾客完成付款之前,自行结帐状态将在 POS 上显示为 “等待中”。
- 若要暂停自行结帐请求,请再次点击「自行结帐」。系统将弹出提示,确认您是否要暂停自行结帐的程序。
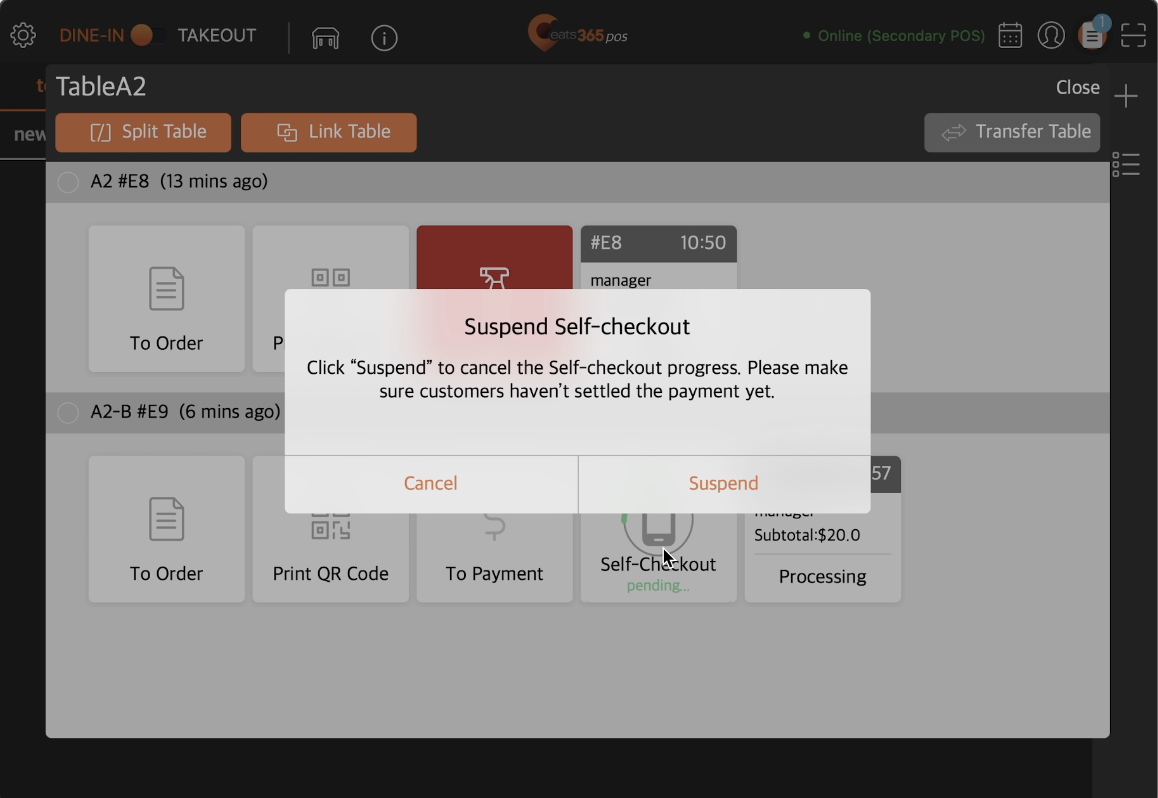
- 点击「暂停」即可继续。
当自行结帐请求被暂停后,顾客将会收到一则通知,提示自行结帐请求已被暂停,请顾客寻求协助。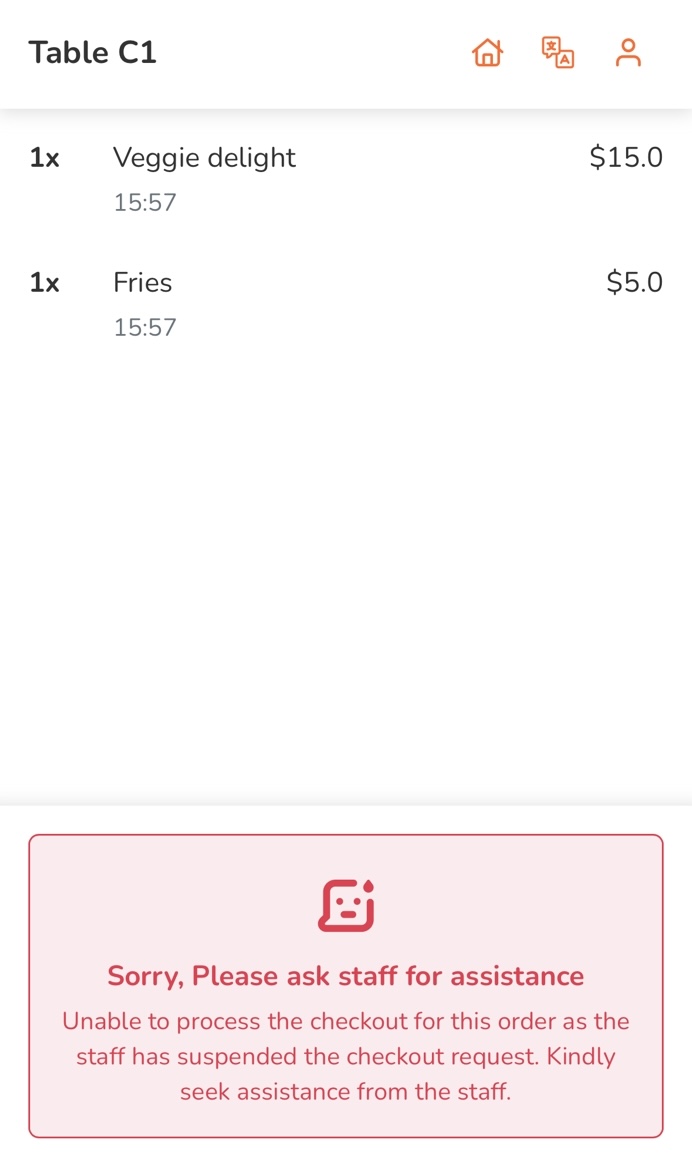
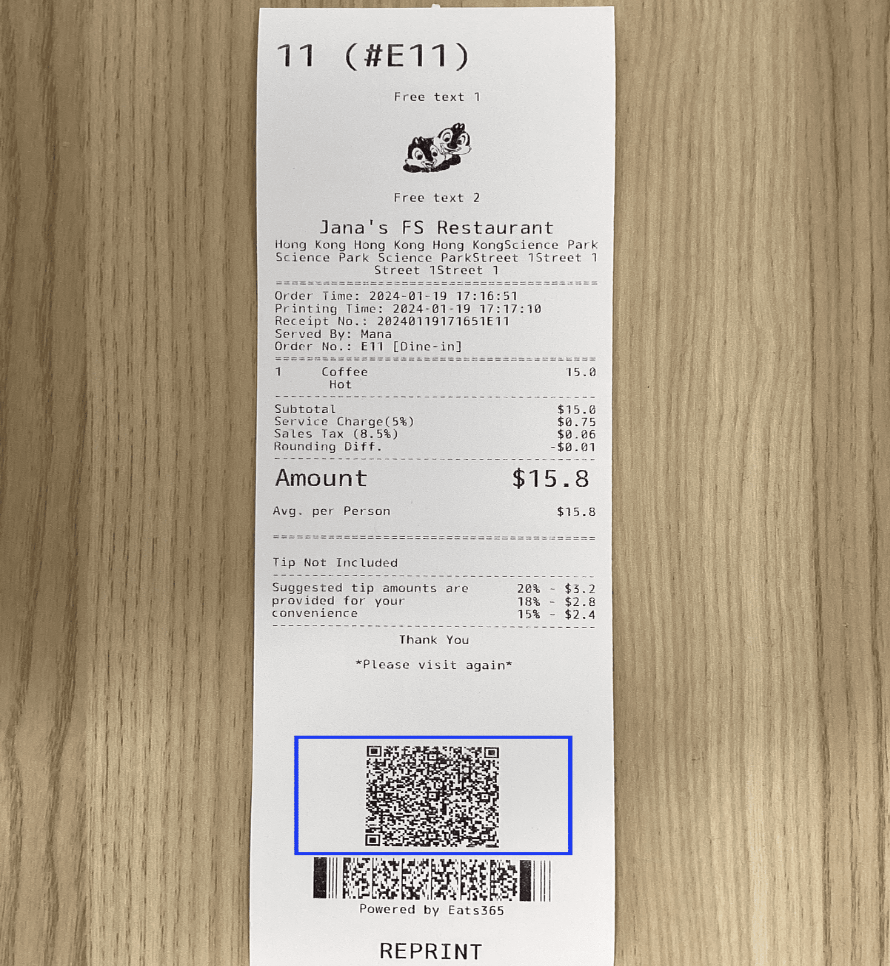
在帐单上打印付款QR码以供顾客自行结帐
一个将顾客导向付款渠道的QR码可打印在顾客的帐单上。顾客可使用其手机扫描该QR码,以便自行完成付款。
要在顾客的帐单上打印付款QR码,请按照以下步骤操作:
- 登入 Eats365 POS。
- 点击左上角的「堂食」即可进入 “餐桌地图” 屏幕。
提示:您可以从 “本机设置” 中将 “堂食” 屏幕设置为预设模式,这样您就不需要每次登入时都点击 “堂食”。 - 如果您有多个区域,请选择餐桌所在的区域。然后,点击顾客所在的餐桌。

提示:如果顾客已经入座但尚未点餐,该餐桌会显示为 “黄色”。有关餐桌状态的更多资讯,请参阅管理餐桌状态。 - 在下单屏幕上,像平常一样下单。
- 点击「付款」。
- 在付款页面,点击「帐单」
 以打印带有QR码的顾客帐单。
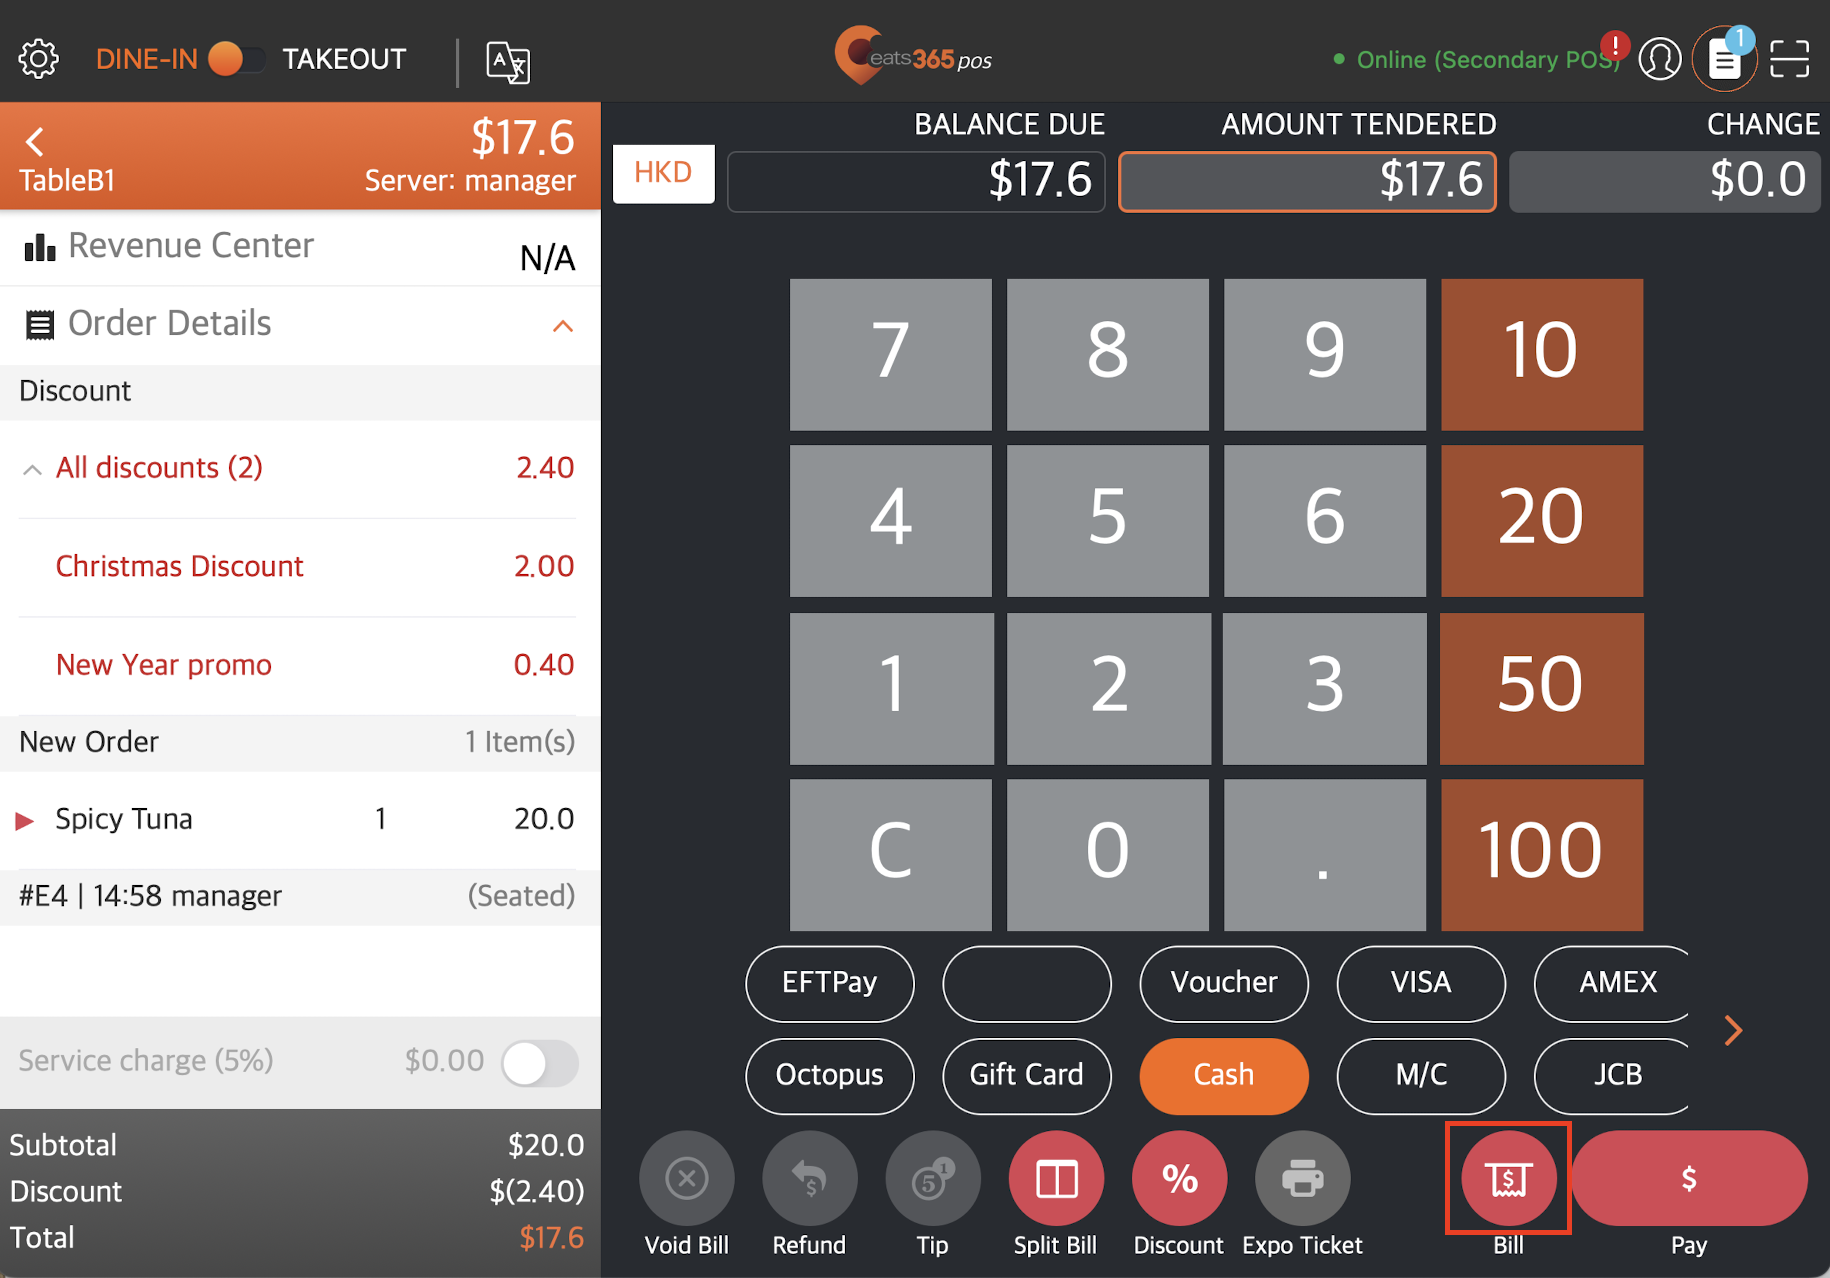
帐单打印完成后,顾客可以扫描帐单底部的QR码以完成付款。有关如何执行自行结帐的更多信息,请参阅为堂食订单自行结帐。