Order Handling
Table of Contents
Switch order view (Full Service)
Learn how to switch from one order view to another on the Eats365 POS.
The Eats365 POS allows you to choose how you want your order-taking screen to look in the POS. The POS also makes it easy to switch from one order view to another.
In this article, you’ll learn about the different order views available in the POS and how to change the order view.
Change Order List view
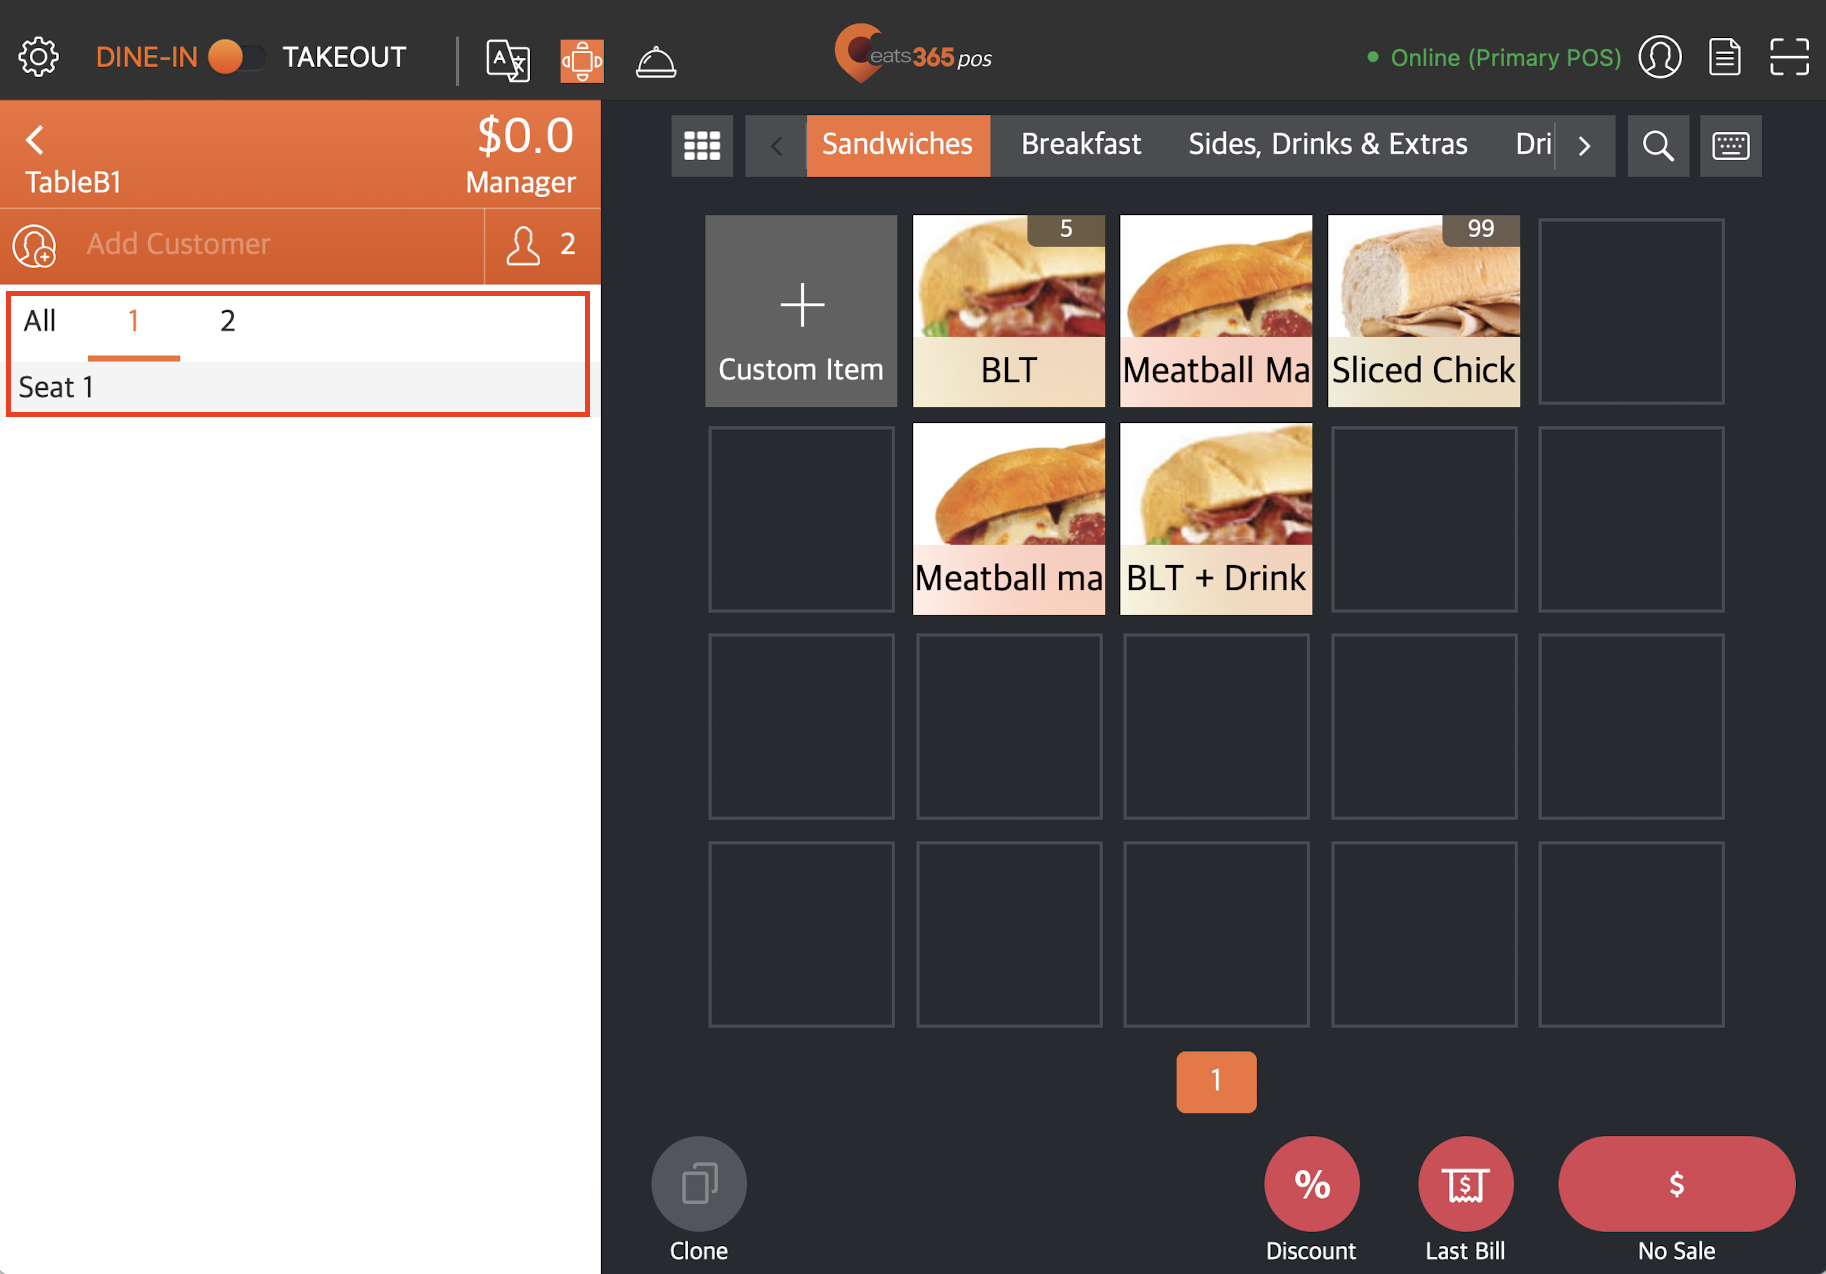
The “Order List” can be found on the left side of the order-taking screen. You can customize the Order List to either show orders by seat or show all orders in a single list.
Display by Seat
The “Display by Seat” view allows you to associate orders with a specific seat. When the order list is on a Display by Seat view, you can tap the seat number of each person in a party from the order list before adding Items to their order.
To display the order list by seat, on the order-taking screen, tap Seat View  . The Seat View icon is highlighted orange if the order is displayed by seat.
 and choose the party size number.
Display by Order
The “Display by Order” view shows all Items added to an order within a single list. For Takeout orders, the Display by Order view is the default view and cannot be changed.
To display orders in a single list, on the order-taking screen, tap Seat View  . The Seat View icon won’t be highlighted if the order is displayed as a single list.
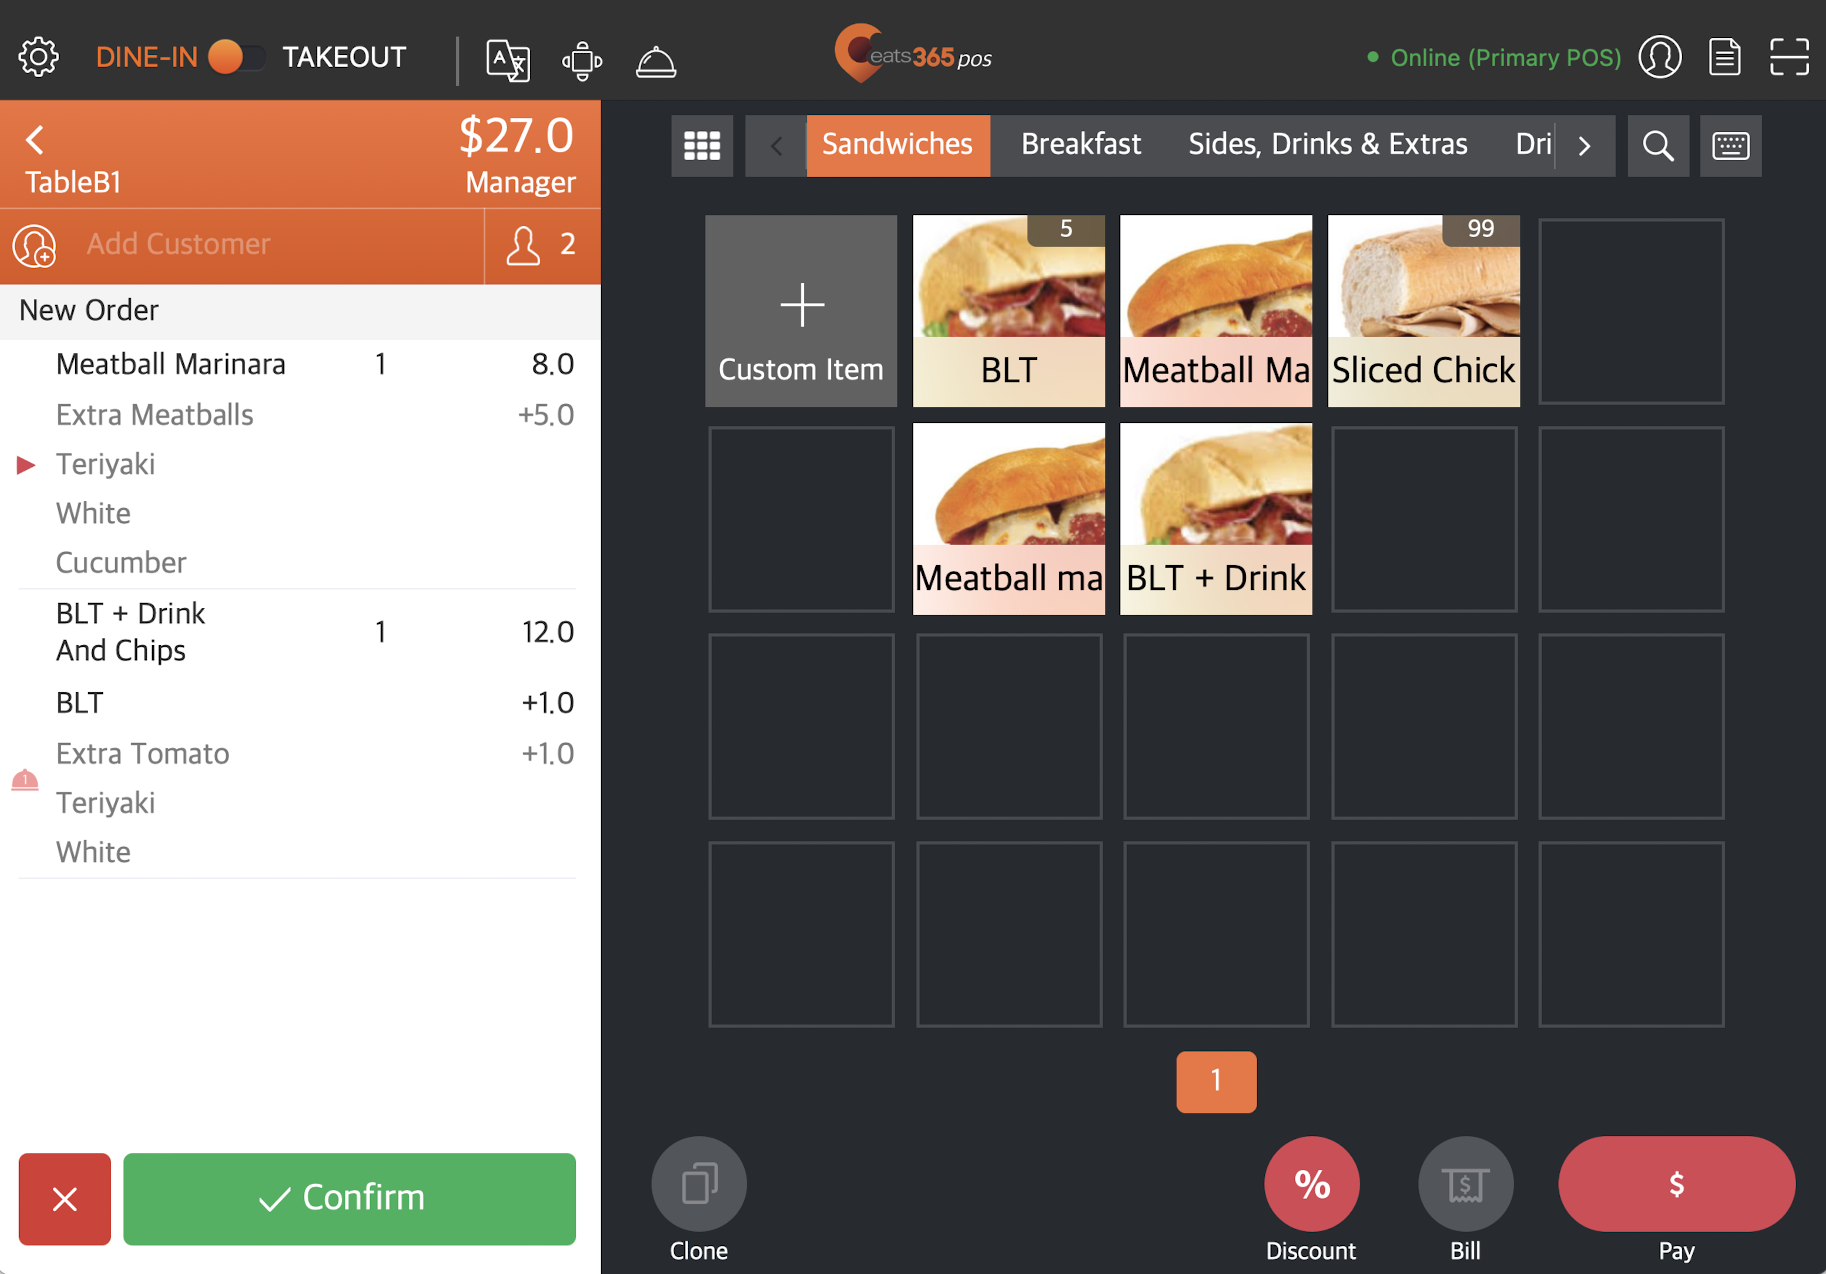
Change menu order view
You can customize your order-taking screen’s layout to either show your menu items or to enter the item’s Product Code.
Menu Layout
The “Menu Layout” is the default order view on the POS, which shows the restaurant’s menu Items.
To change the order view to show your restaurant’s menu items, on the order-taking screen, tap Menu Layout.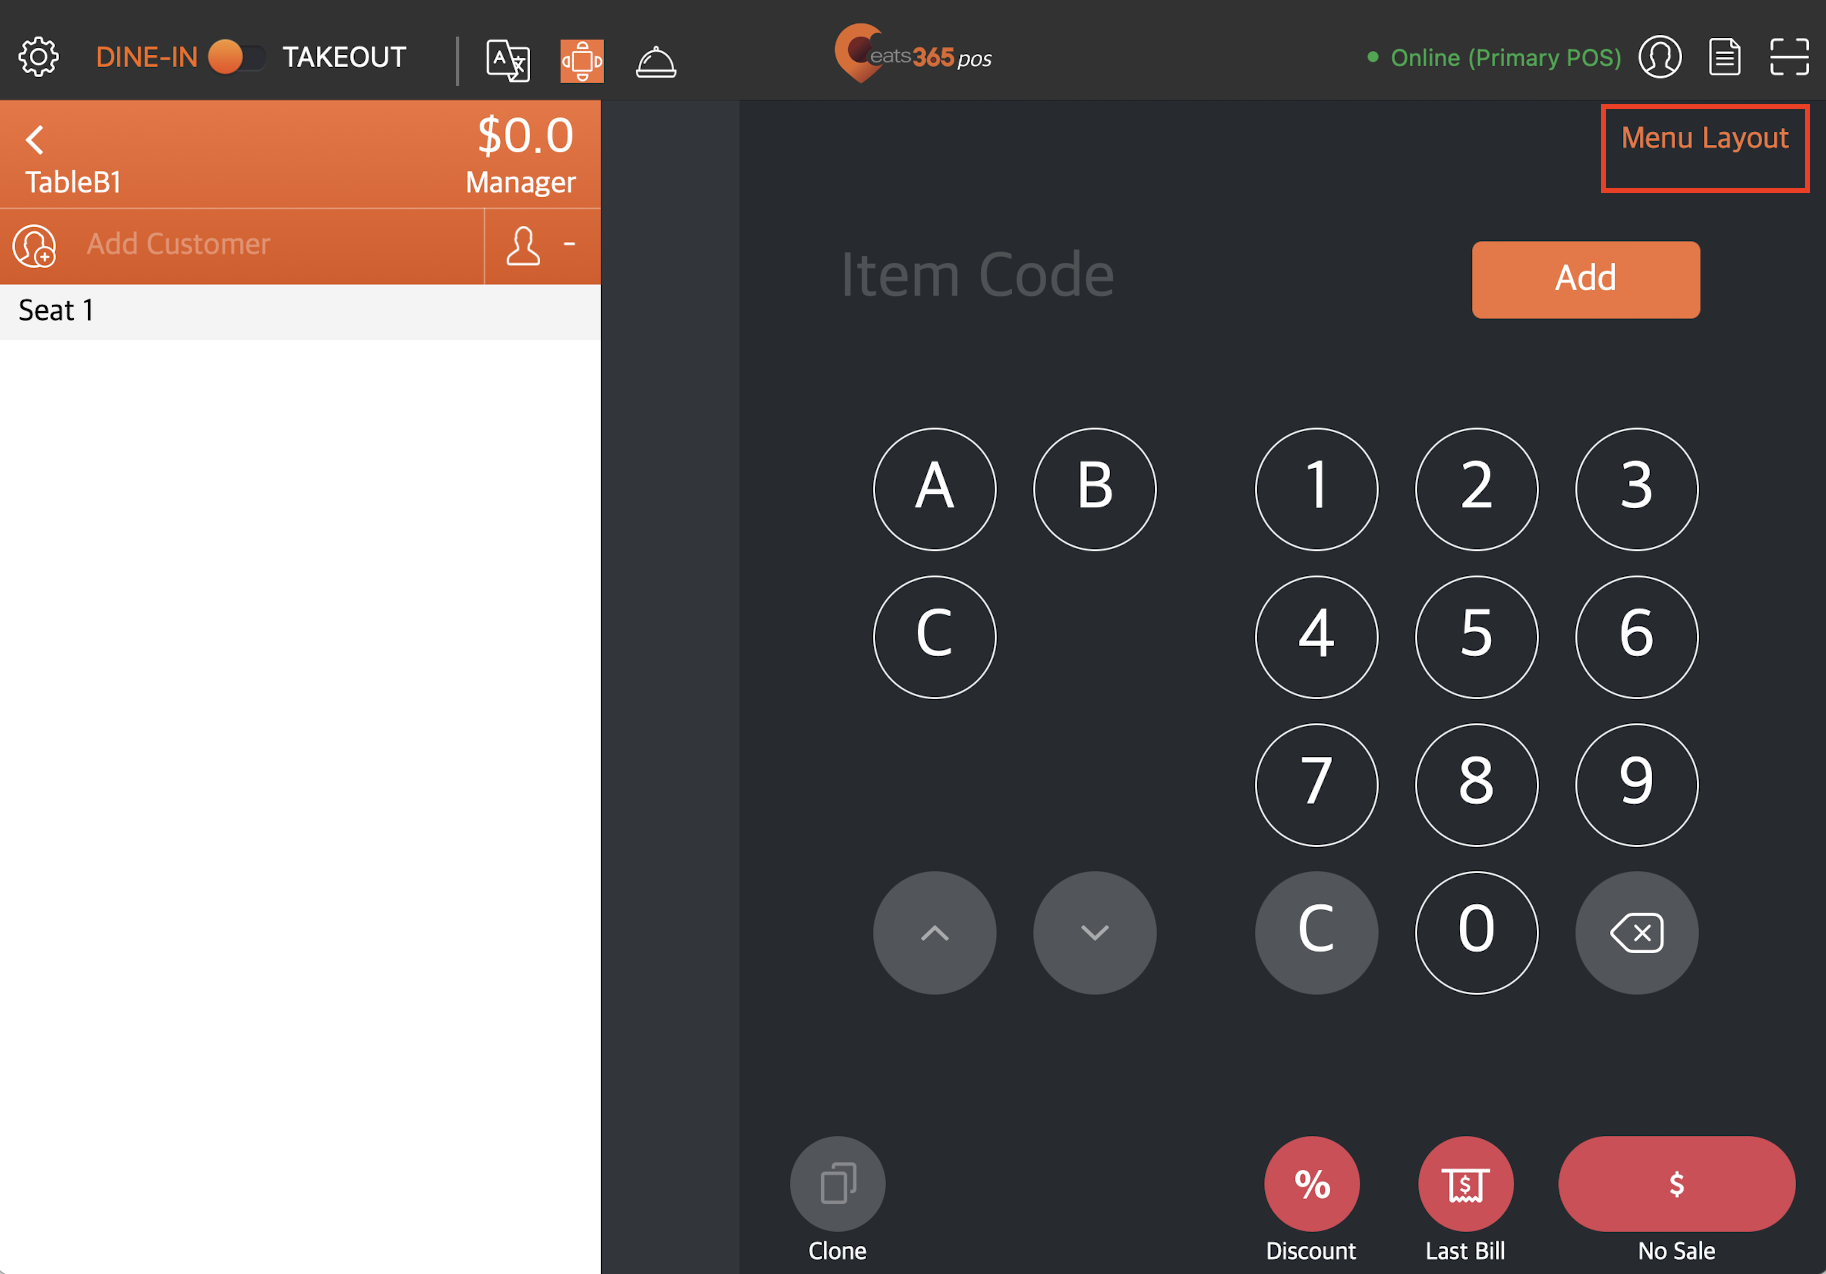
The order-taking screen should then show your menu items, including categories and custom menus that you’ve created.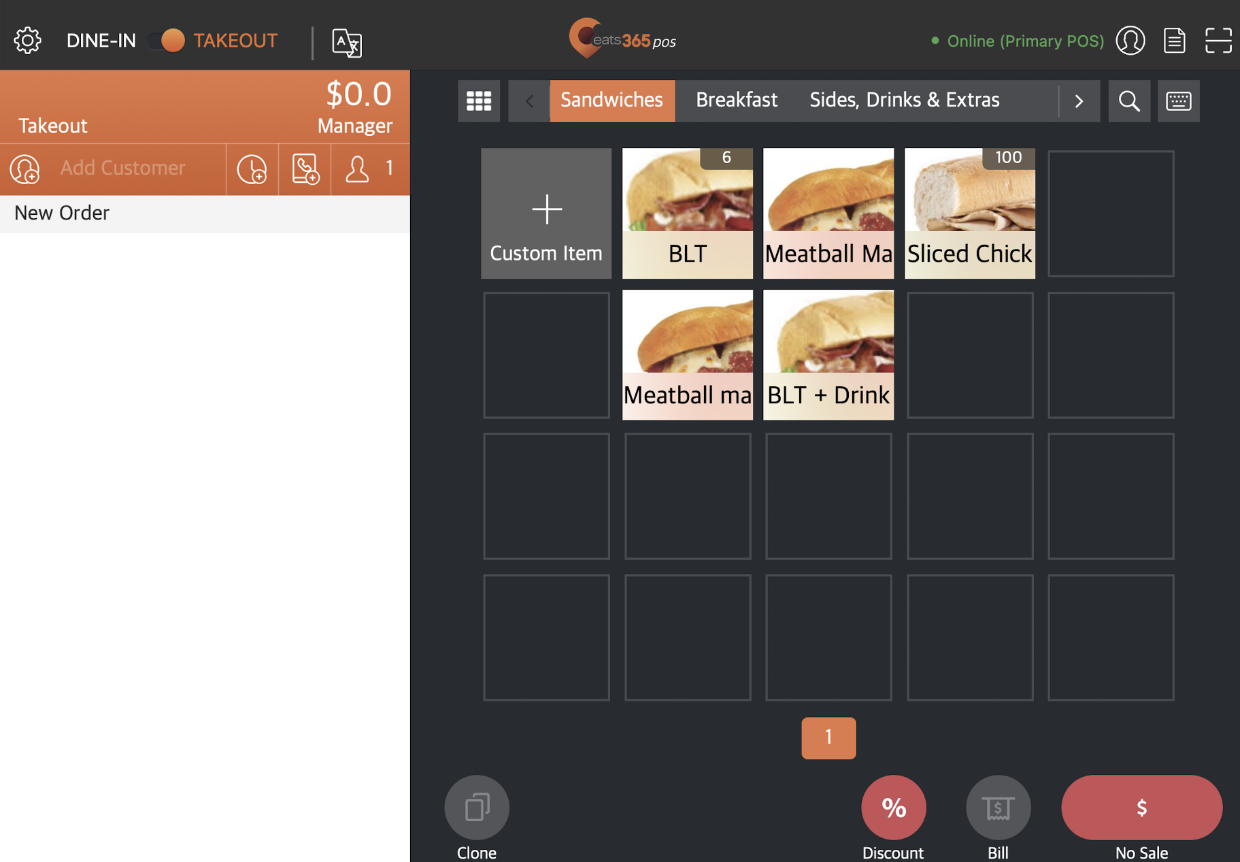
Product Code Layout
The “Product Code Layout” allows you to enter the Item’s product code from the order-taking screen instead of selecting the Item from the menu.
To change the order view to show the Product Code Layout, on the order-taking screen, tap the keyboard icon  .
.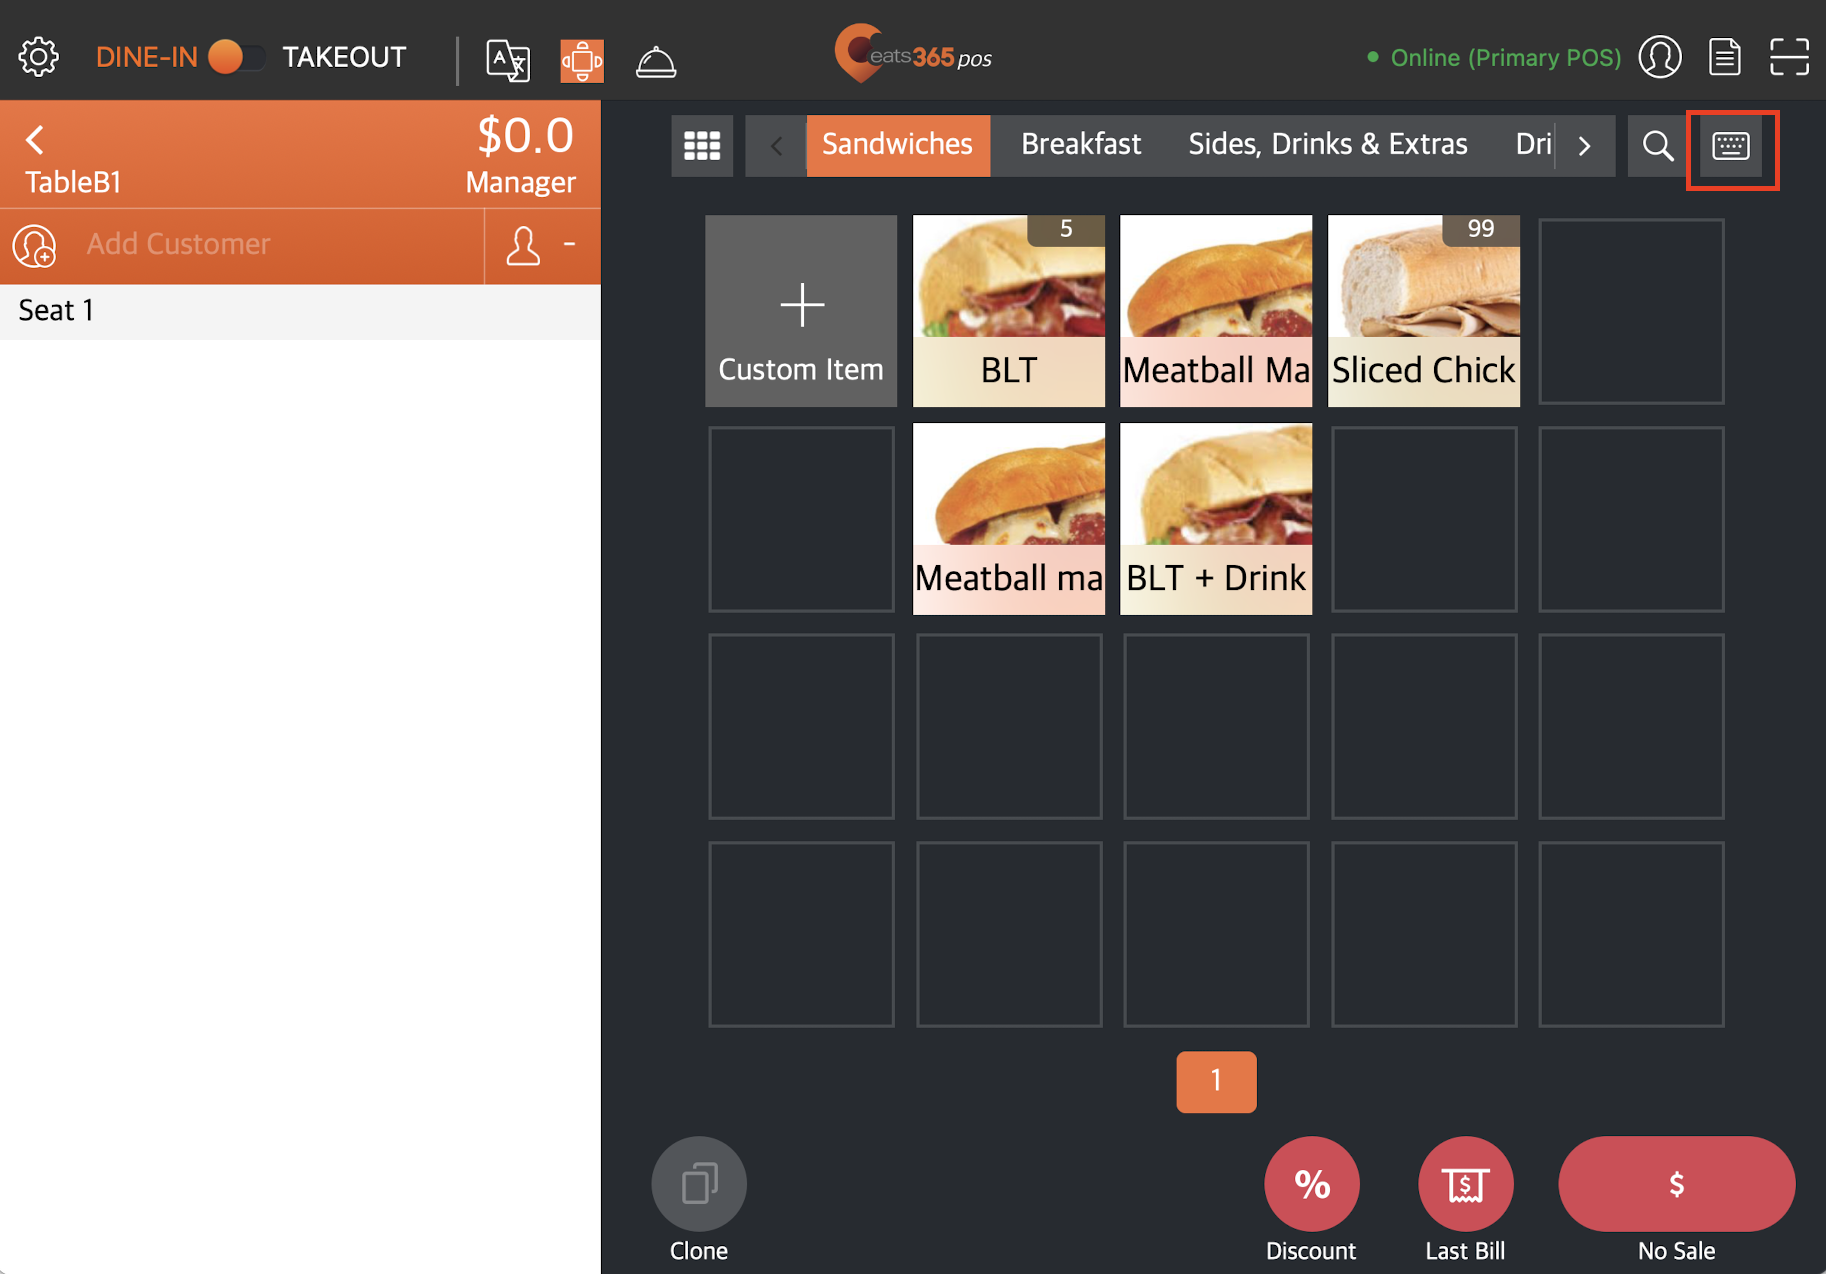
The order-taking screen should then show a keypad where you can directly enter the Product Code of the item.
 Delete
Configure Default Order List View
If you want to set up the order-taking screen to use a specific order list view as the default, follow the steps below:
Eats365 POS
- Log in to the Eats365 POS.
- At the top left, tap Settings
 .
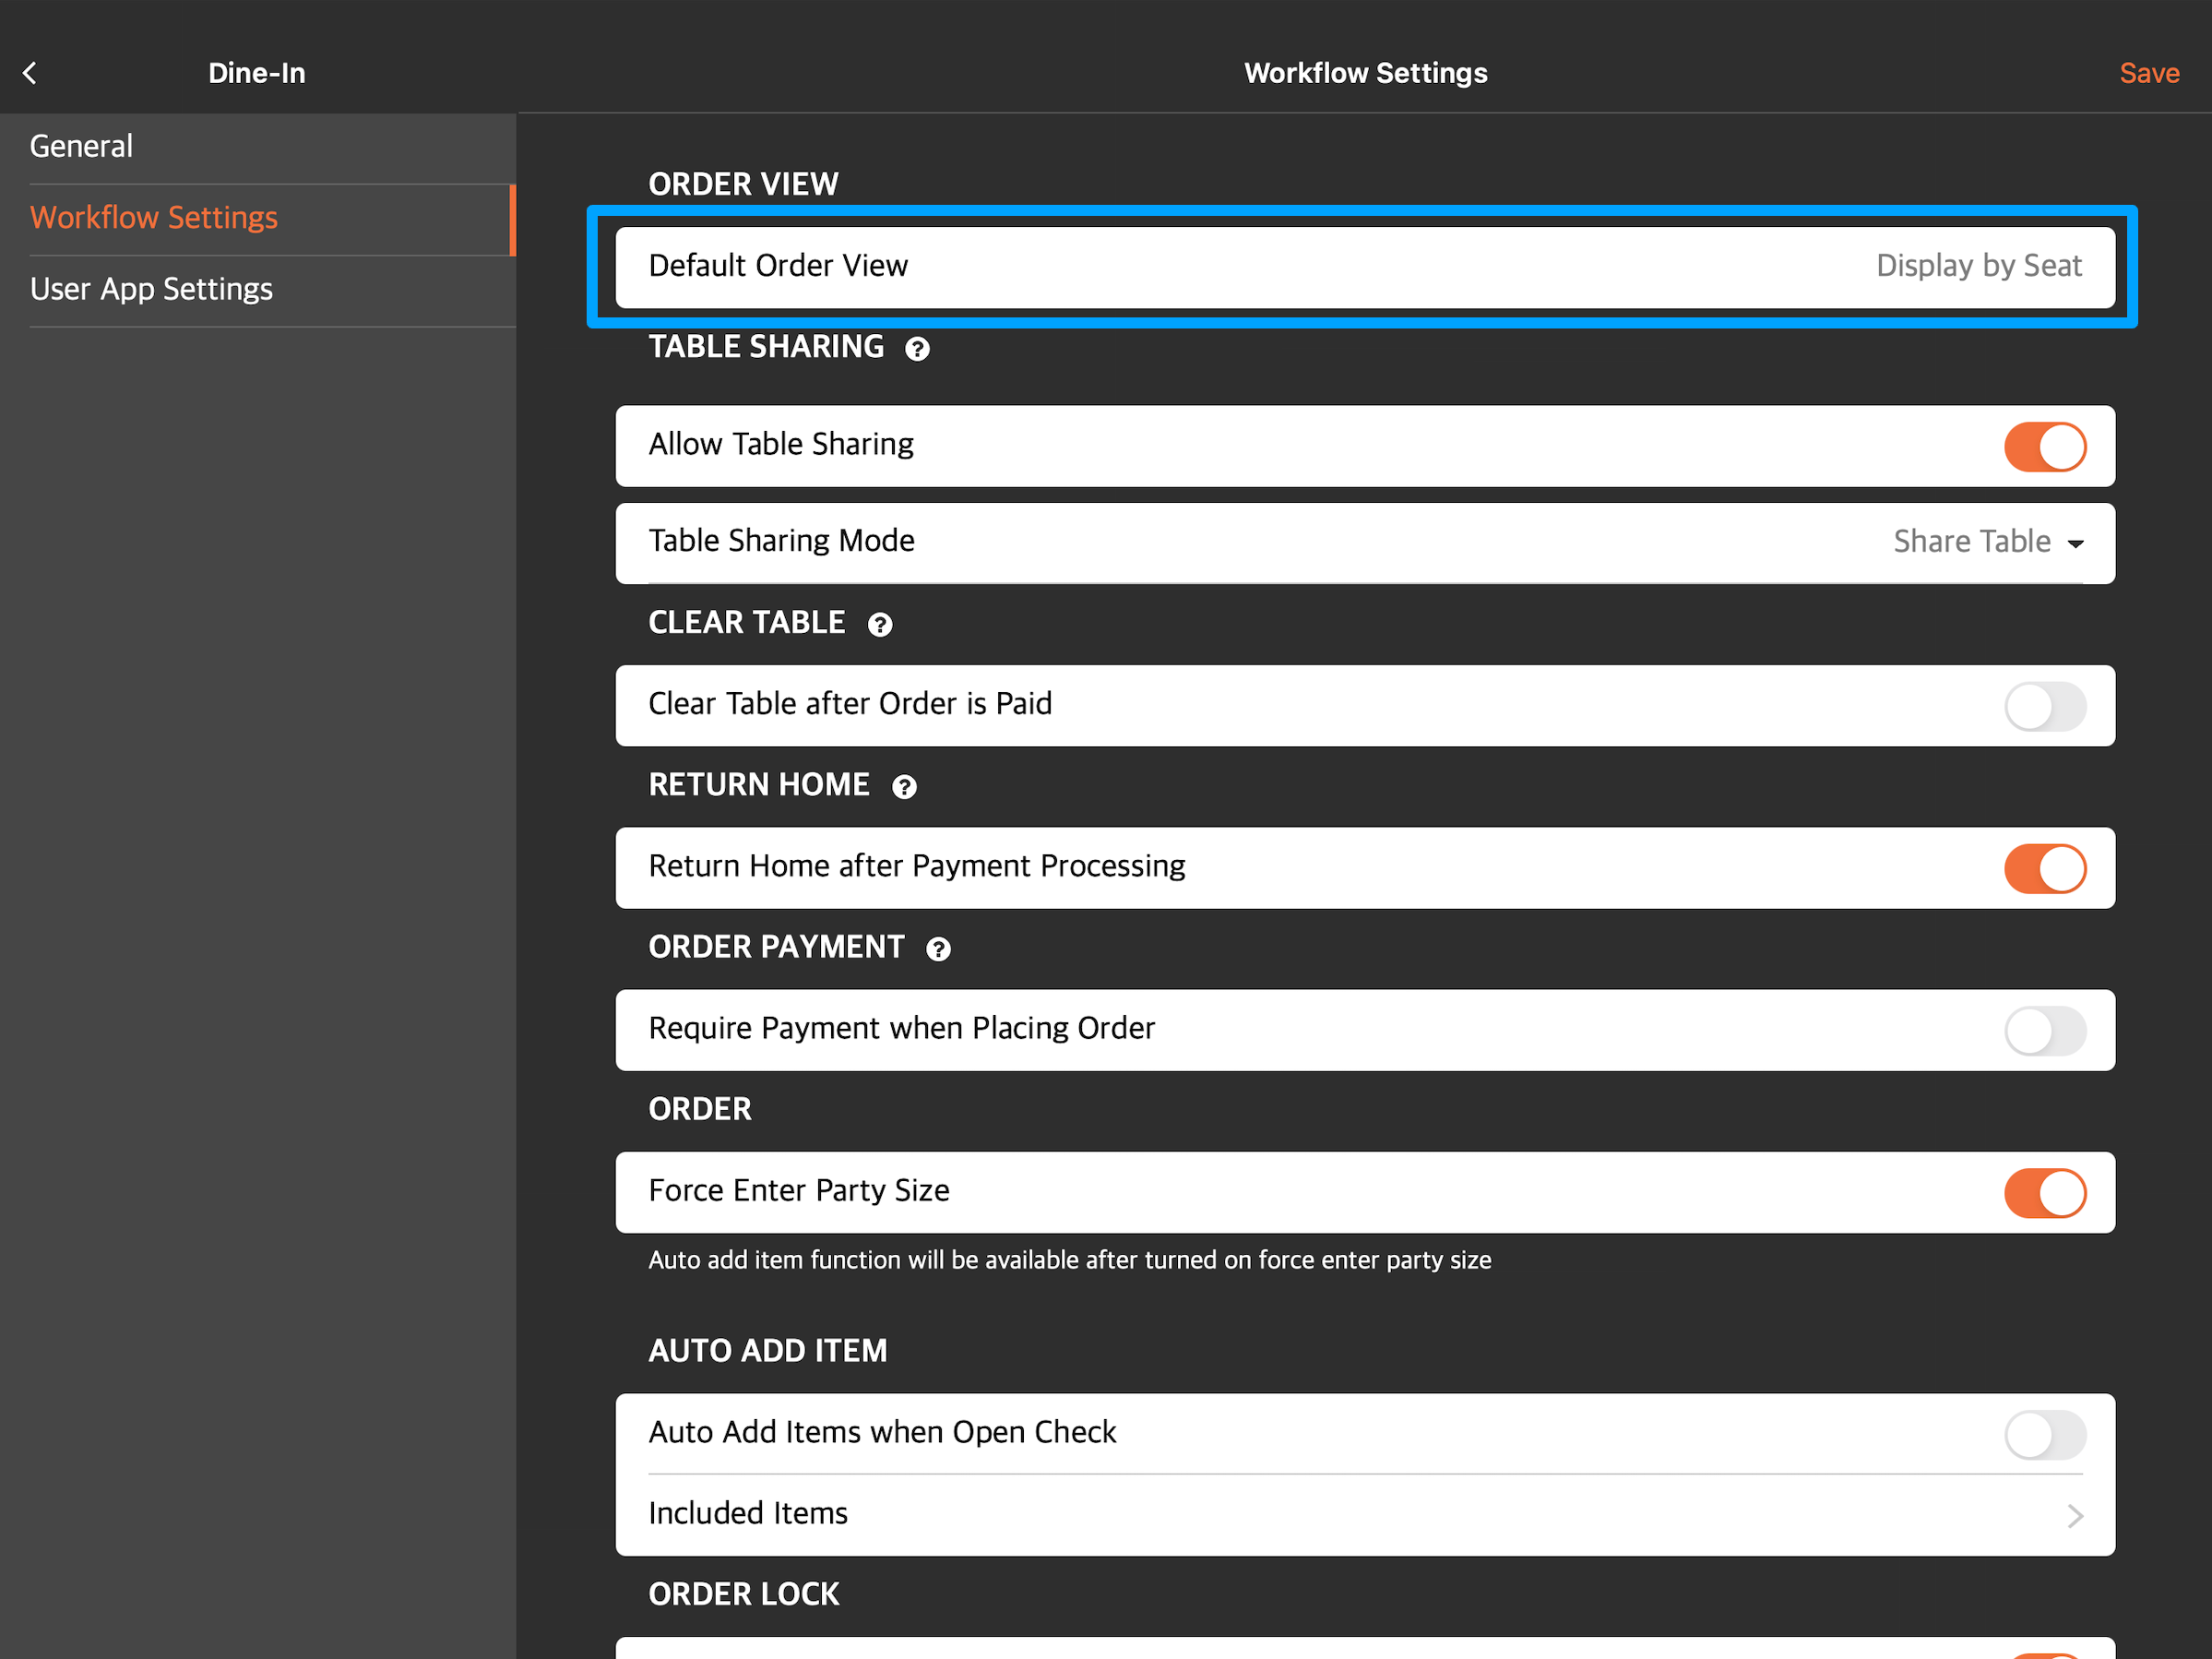
. - Under "Settings," tap Dine-In. Then, select Workflow Settings.
- Under “Order View,” select the order list view that you want to use as the default. You can select either “Display by Order” or “Display by Seat.”
- At the top, tap Back
 to return to the "Workflow Settings" screen.
Note: Make sure to tap the back button next to “Default Order View,” and not the back button beside “Dine-In.”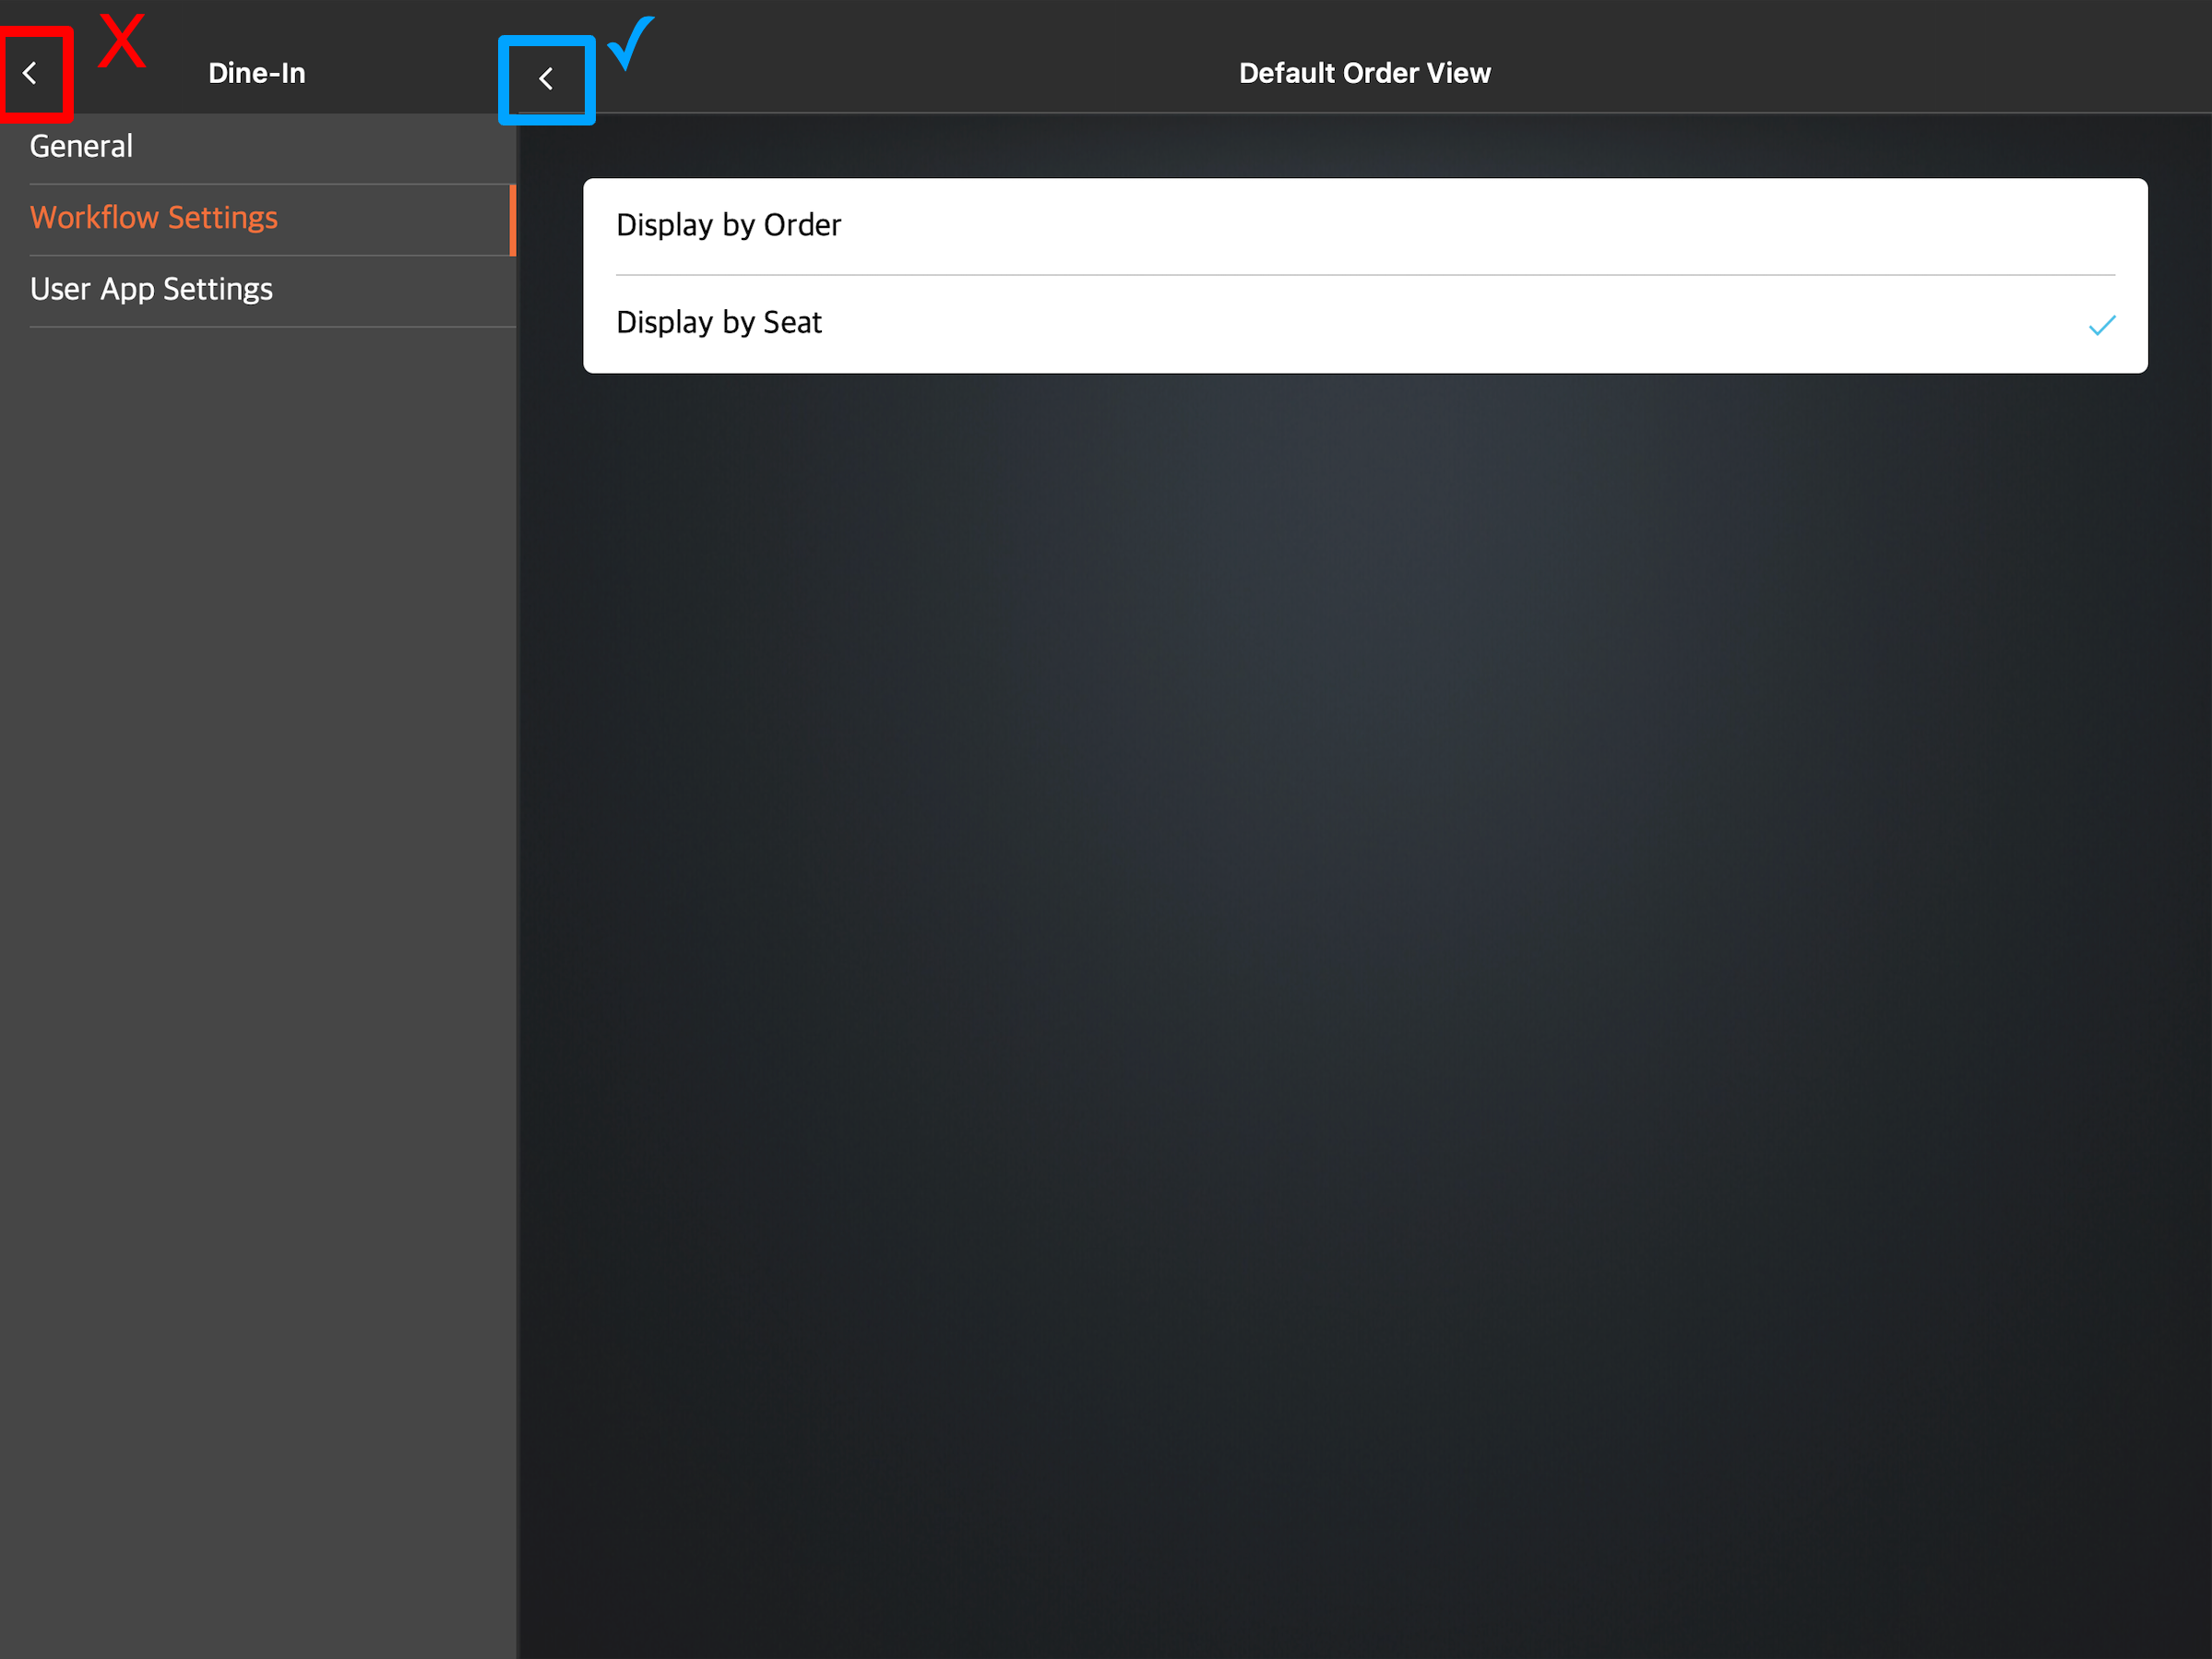
- At the top right, tap Save to confirm.
Merchant Portal (Classic Theme)
- Log in to the Merchant Portal.
- On the left panel, click on Restaurant Settings. Then, click on Dine-In.
- Click on the Workflow tab.
- Under "Order View," select the order list view that you want to use as the default. You can select either "Display by Order" or "Display by Seat."
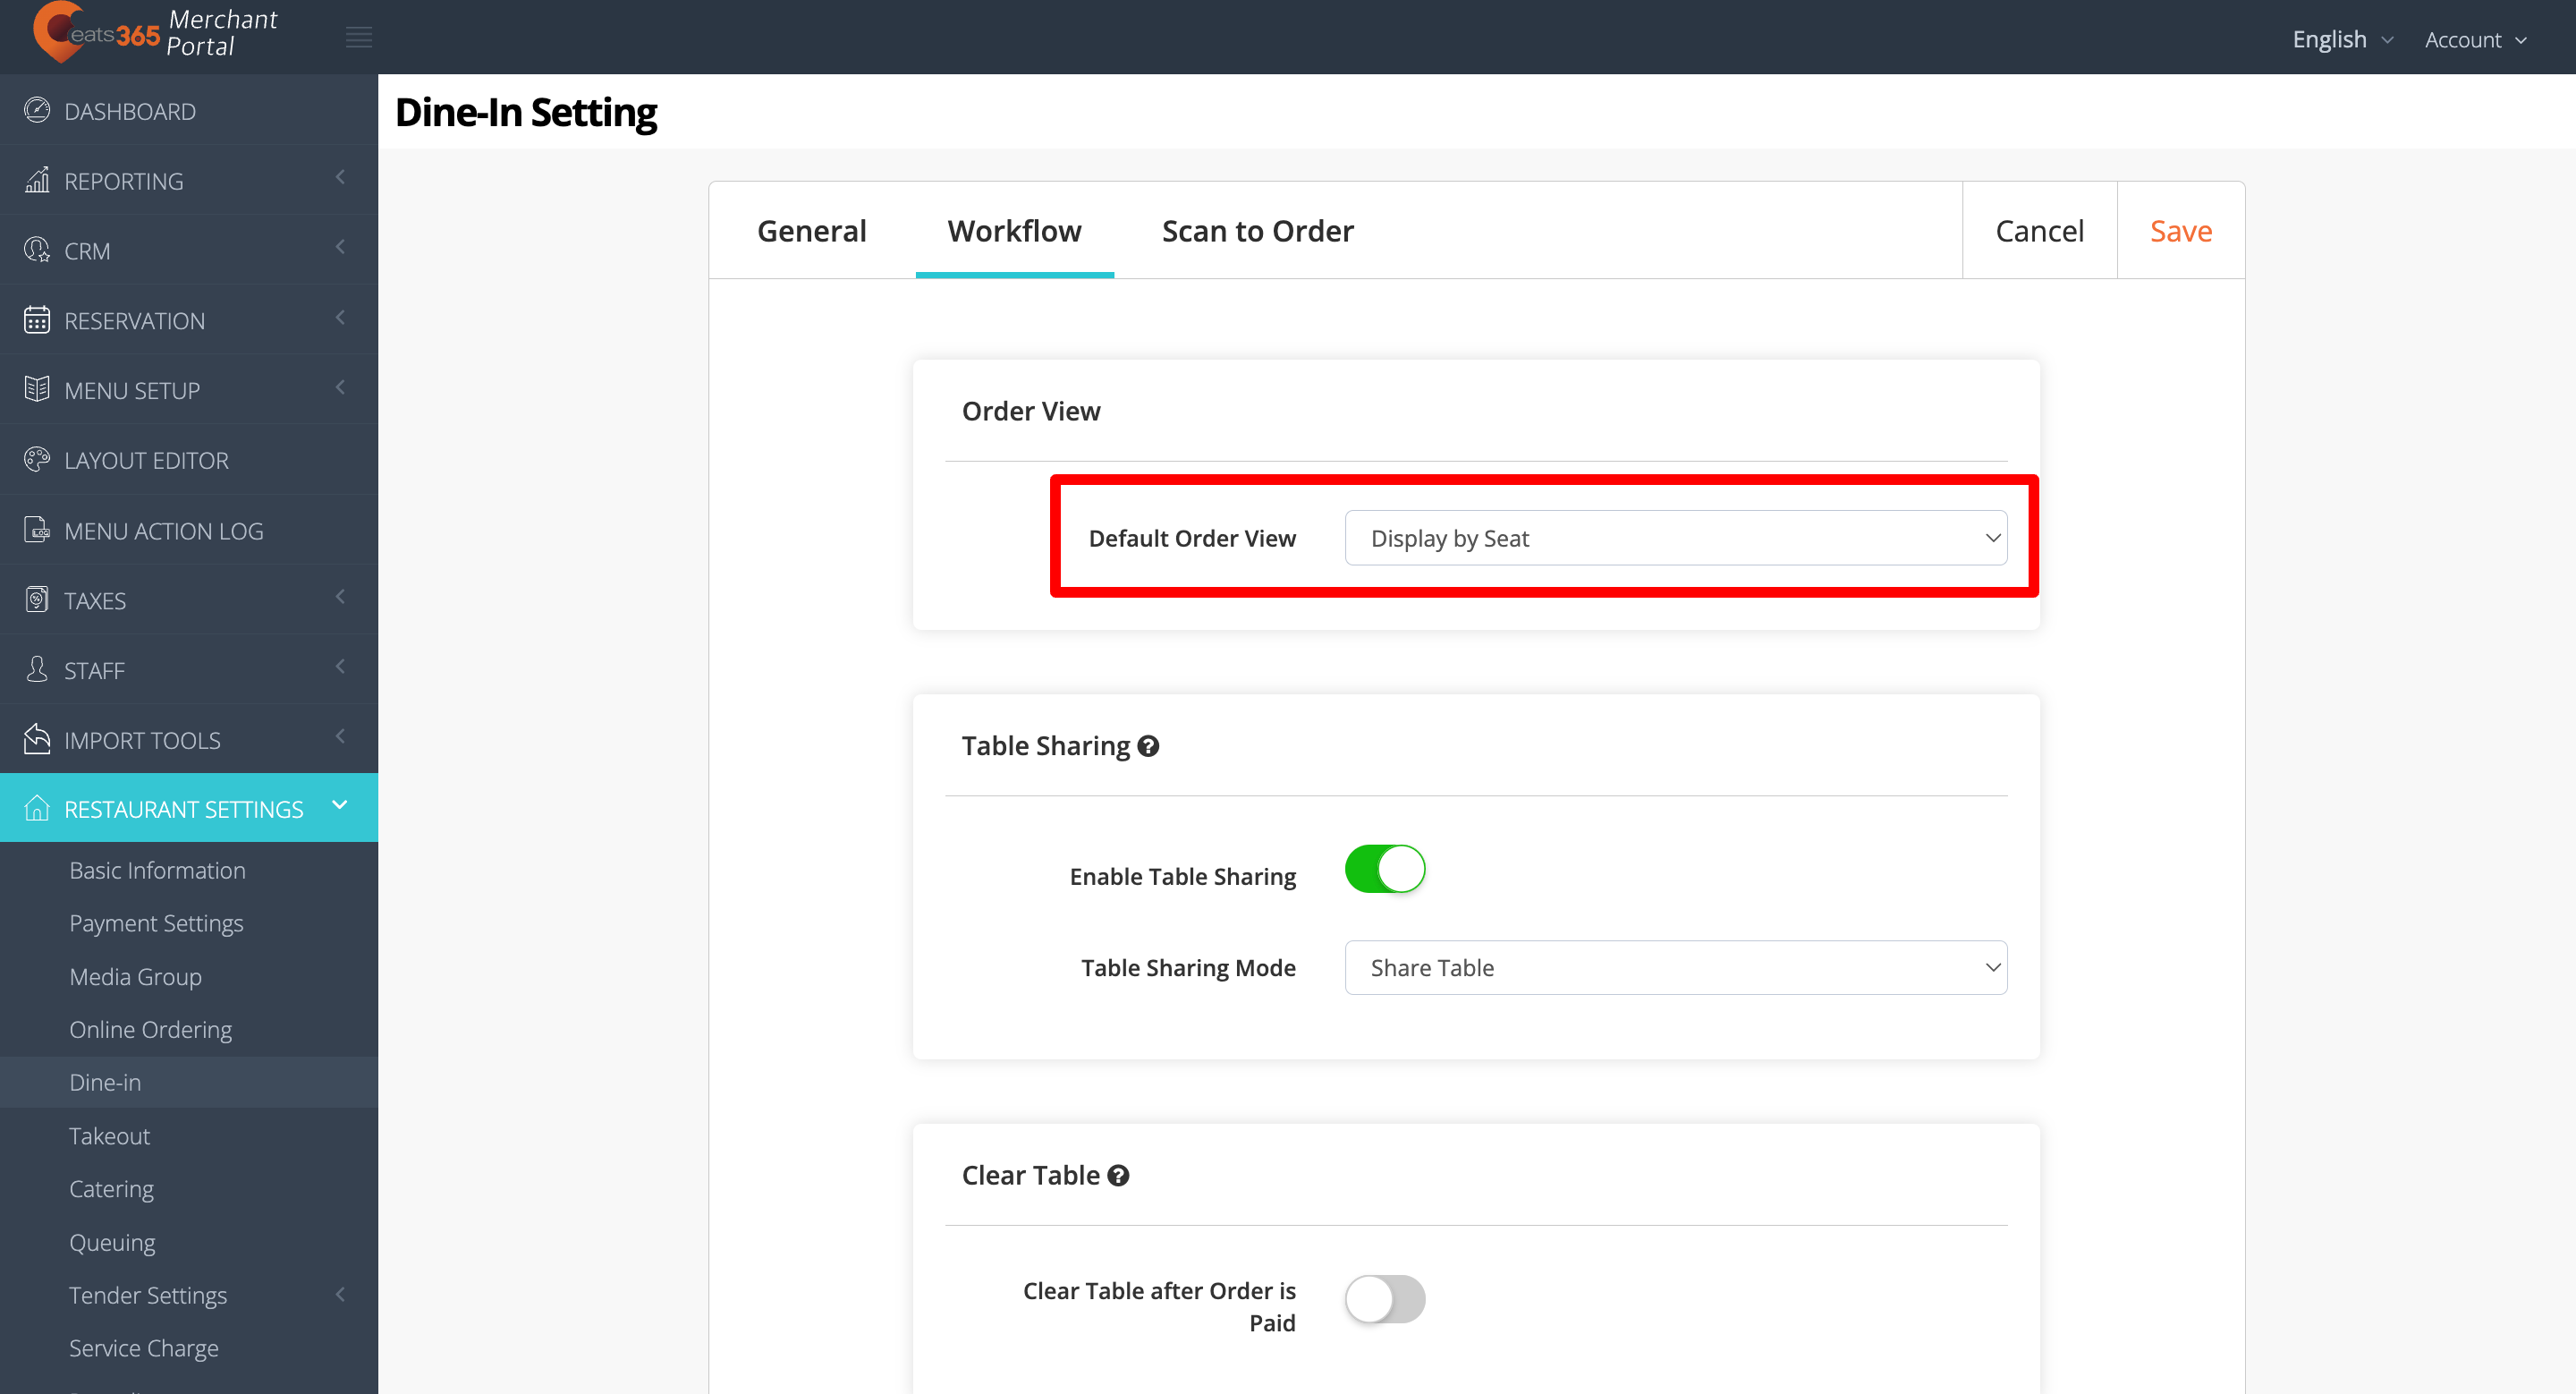
- At the top right, click on Save to confirm.
Merchant Portal 2.0
- Log in to the Merchant Portal.
- On the left panel, click on Restaurant Settings. Then, click on Dine-In.
- Click on Workflow.
- Under "Order View," select the order list view that you want to use as the default. You can select either "Display by Order" or "Display by Seat."
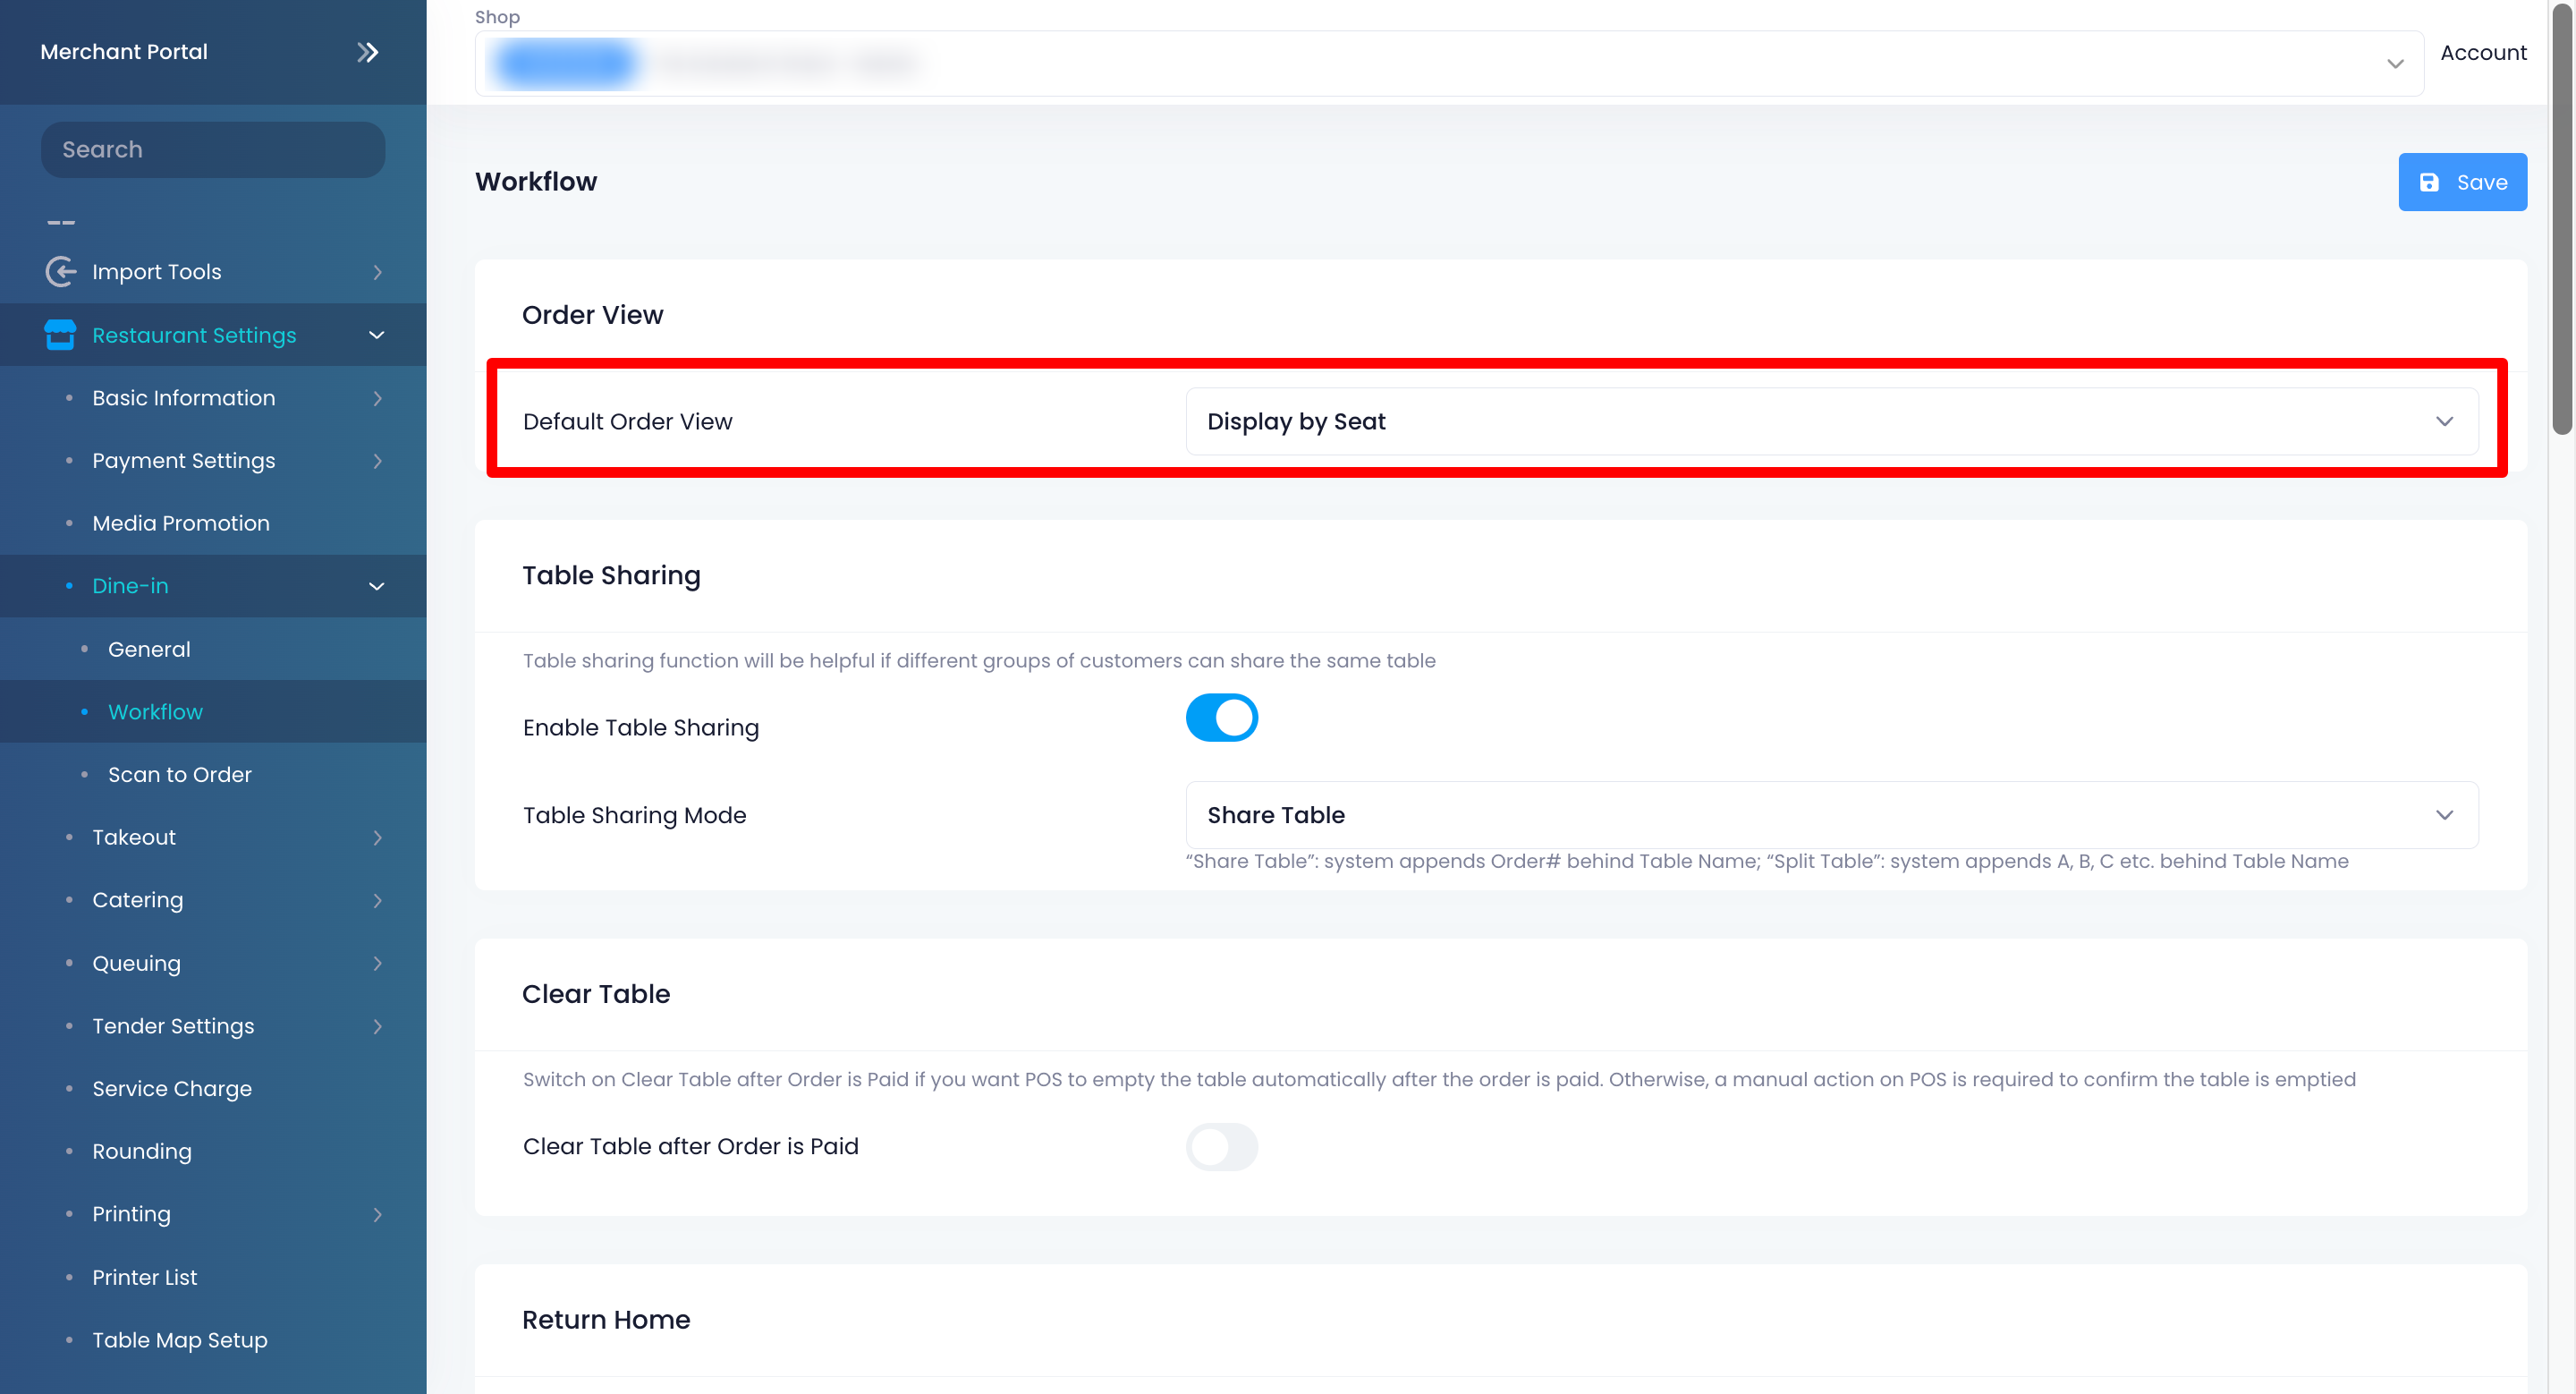
- At the top right, click on Save to confirm.
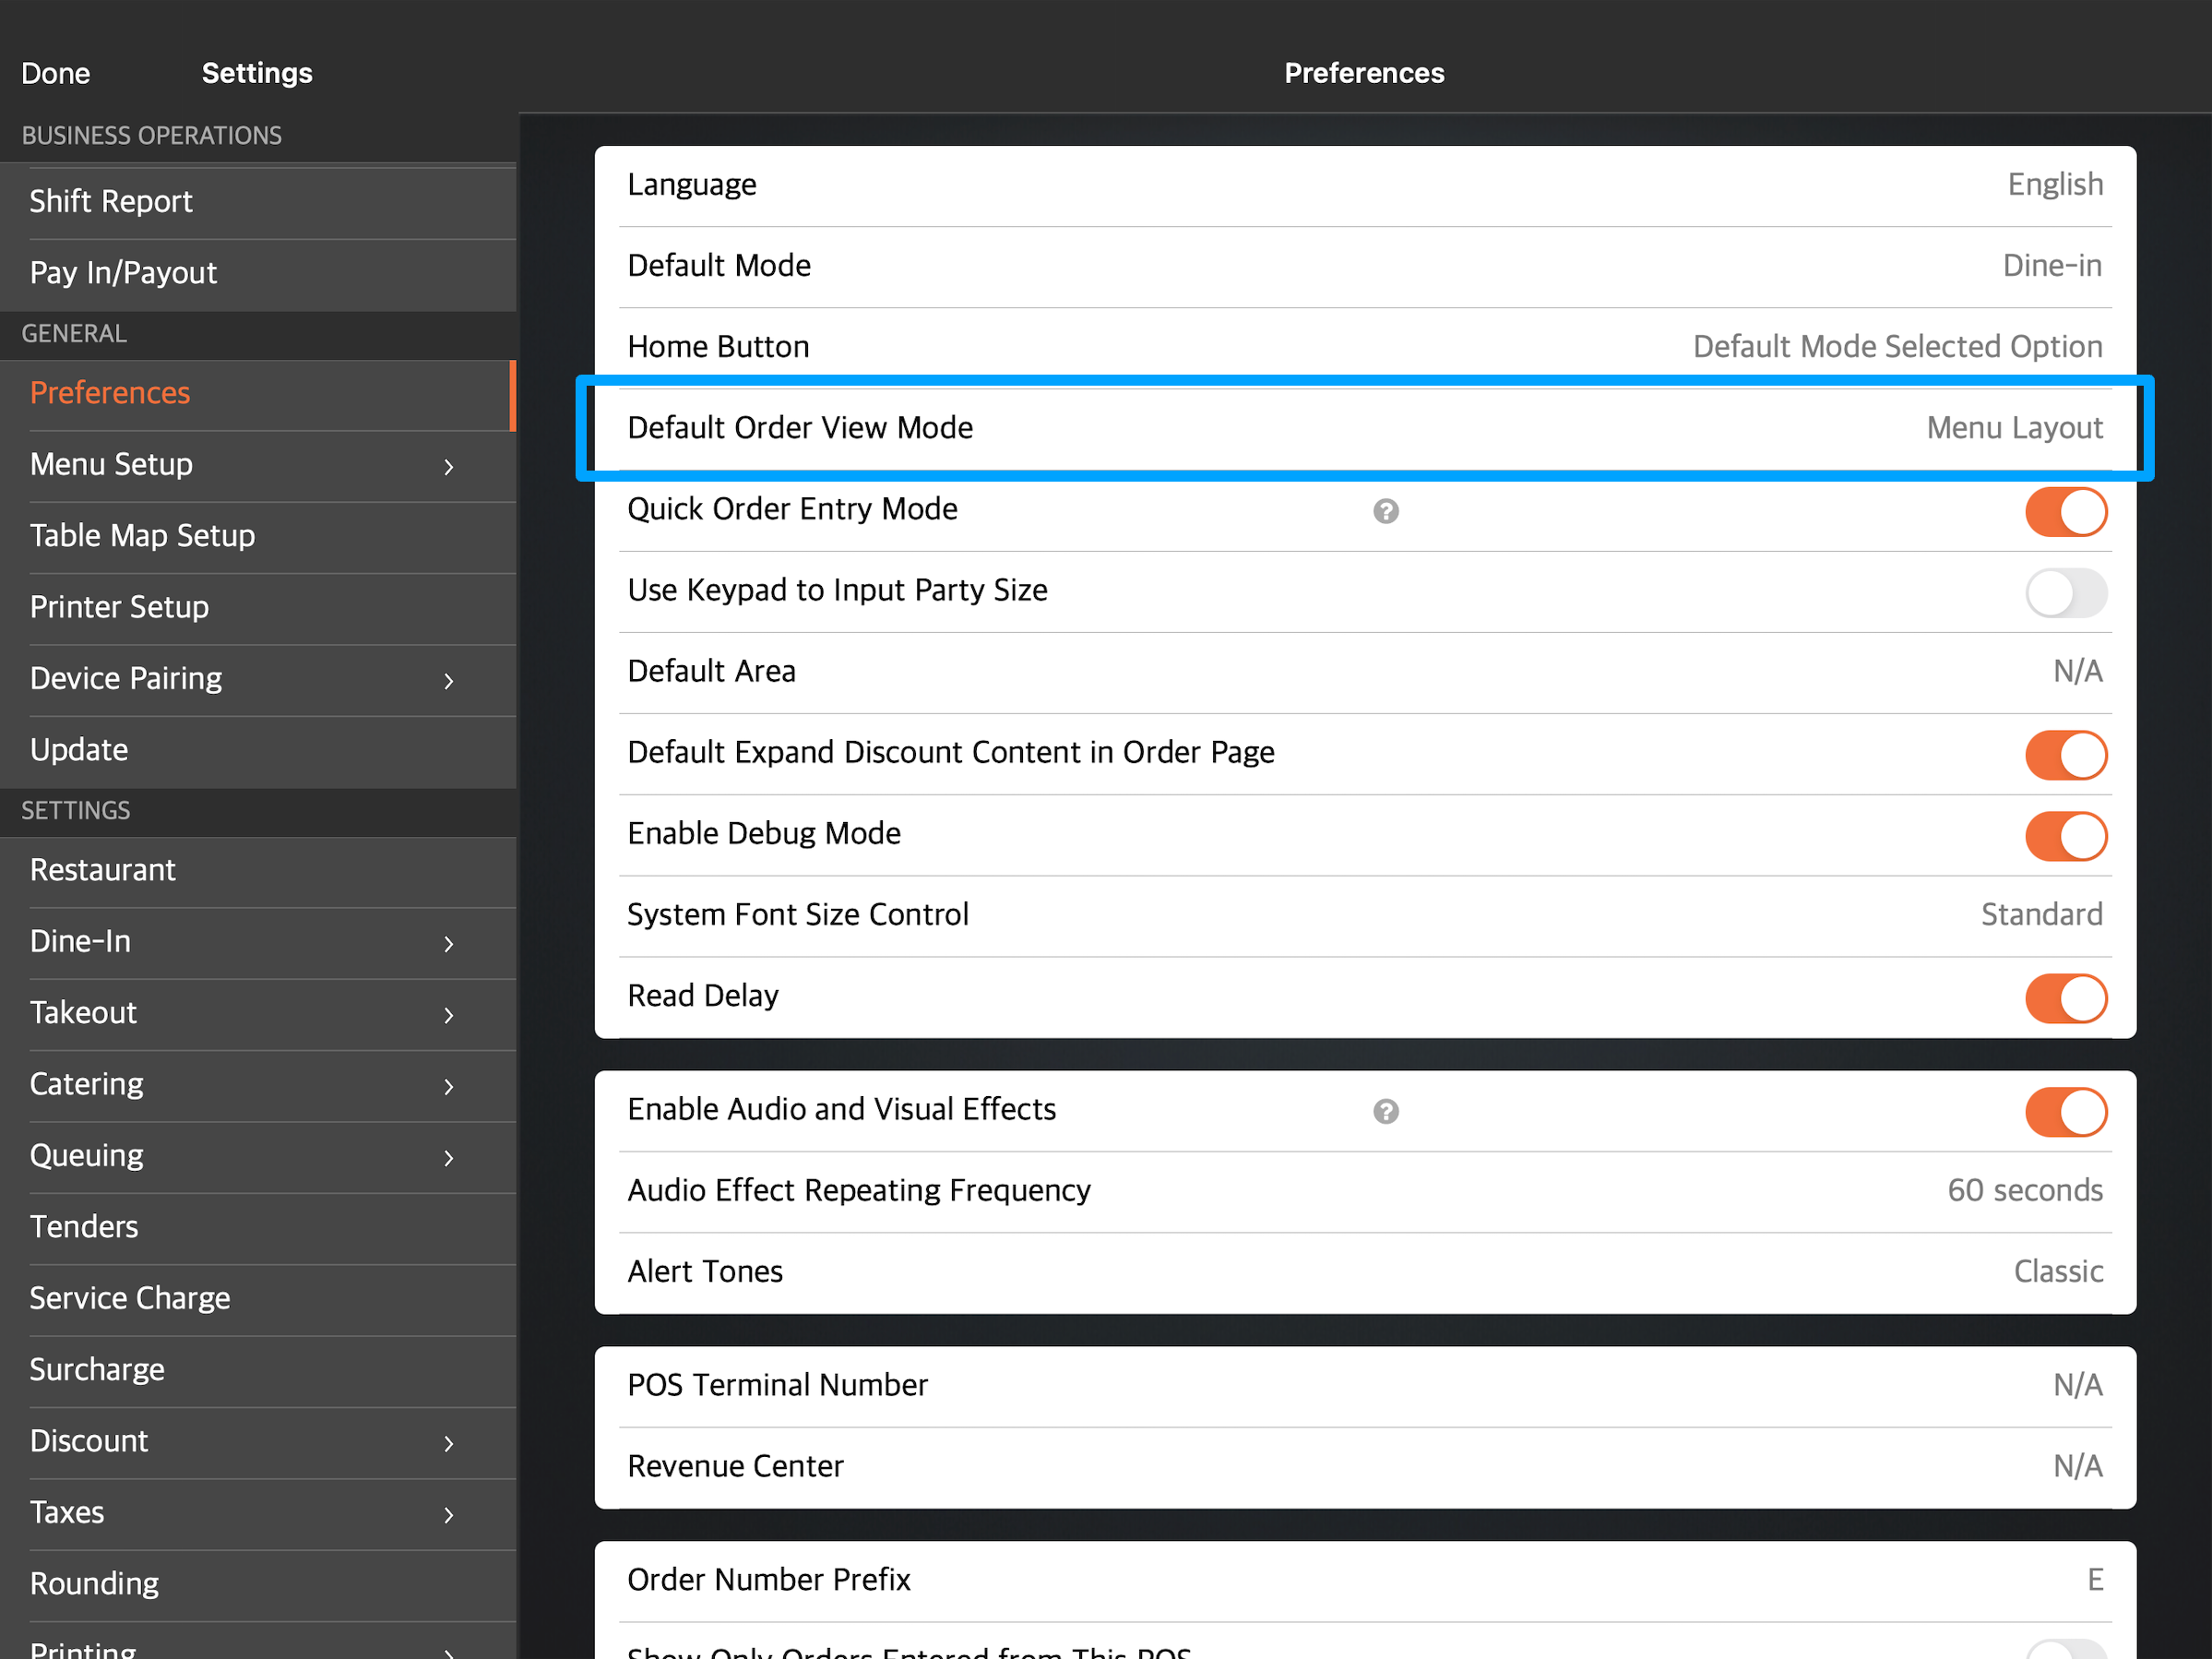
Configure Default Order view
If you want to set up the order-taking screen to show either the "Menu Layout" or the
"Product Code Layout" as the default, follow the steps below:
- Log in to the Eats365 POS.
- At the top left, tap Settings .
- Under "General," tap Preferences.
- Tap Default Order View Mode. Then, select the order view that you want to use as the default. You can select either "Menu Layout" or "Product Code Layout."