 Eats365 Products
 Merchant Guide
 Modules
 Membership
 Integrations
 Hardware
 Staff Operations
 Roles & Permissions
 Payments
 Reports
 What’s New
 Release Notes
 Troubleshooting
 Simulators
 Glossary
 Troubleshooter
 System Status
System Preferences
Contact Us
If you still have questions or prefer to get help directly from an agent, please submit a request.
We’ll get back to you as soon as possible.
- Explore Eats365 products
- Set up and Installation
- Menu Setup
- Set up and manage a Category (Full Service)
- Set up and manage a Category (Quick Serve)
- Set up and manage a Category (Food Court)
- Set up and manage Product and Sub Product Type
- Set up a Single Item (Full Service)
- Set up a Single Item (Quick Serve)
- Set up a Single Item (Food Court)
- Set up a Combo Item (Full Service)
- Set up a Combo Item (Quick Serve)
- Set up a Combo Item (Food Court)
- Set up Catering Items
- Manage menu items
- Set up and manage a Custom Menu
- Set up a tax-inclusive menu
- Set up and manage Modifiers
- Set up and manage Modifier Masters
- Set up and manage Modifier Presets
- Set up and manage Tier Pricing Rules
- Allocate item sales to different sales categories
- Set up and manage a Kitchen Station
- Set up a Pickup Station
- Set up a Pickup Station (Food Court)
- Customize the menu layout
- Set up and manage Special Request Quick Keys
- Set up and manage Menu Tags
- View and manage Inventory
- Set up courses
- Display supplementary notes for selected modifier combinations
- Table Map Setup
- Restaurant Settings
- Dine-In Settings
- Takeout Settings
- Catering settings
- Queuing Settings
- System Preferences
- Manage General Preferences
- Manage System Preferences (Full Service)
- Manage System Preferences (Quick Serve)
- Manage System Preferences (Food Court)
- Set up and manage Ordering Quantity Limit
- Modify Action Button options
- Set up a Revenue Center
- Enable Sequential Order Number
- Configure Audit Log settings
- Set up pre-checkout item prompts
- Device Management
- Set a primary POS
- Reset the Eats365 POS
- Update the Eats365 POS
- Change POS device name
- Configure POS to sign out automatically
- Maintain restaurant operations using Offline Mode
- Configure POS login preferences
- Available features when in Offline Mode
- Create a home screen shortcut for the Merchant Portal
- Account Management
- Reservation
- Import Tools
- Time Sheets
- Menu Template
- Scan to Order
- All You Can Eat Menu
- Food Court Settings
Enable Sequential Order Number
Learn how to include sequential order numbers.
"Sequential Order Number" assigns sequential numbers to orders for an organized and traceable system. These numbers can be used as the check name that will be displayed for takeout and dine-in (Quick Serve and Food Court) orders. For example, a sequential order number may follow the sequence of 1000, 1001, 1002, and so on. Once the sequence reaches the end number, it will reset. This feature enhances order tracking and record-keeping.
Note:
- Enable "Check Name Display" to print sequential order numbers on tickets and receipts. For more information, refer to Manage receipt printing settings.
- If a "Check Name" is assigned to an order, the system displays the check name instead of a sequential order number. For more information about creating check names, refer to Manage System Preferences.

In this article, you’ll learn how to add sequential order numbers.
To enable sequential order number, follow the steps below:
- Log in to the Merchant Portal.
- On the left panel, click on Advanced Settings, then click on Sequential Order Number.
- Turn on Enable Sequential Order Number
 .
.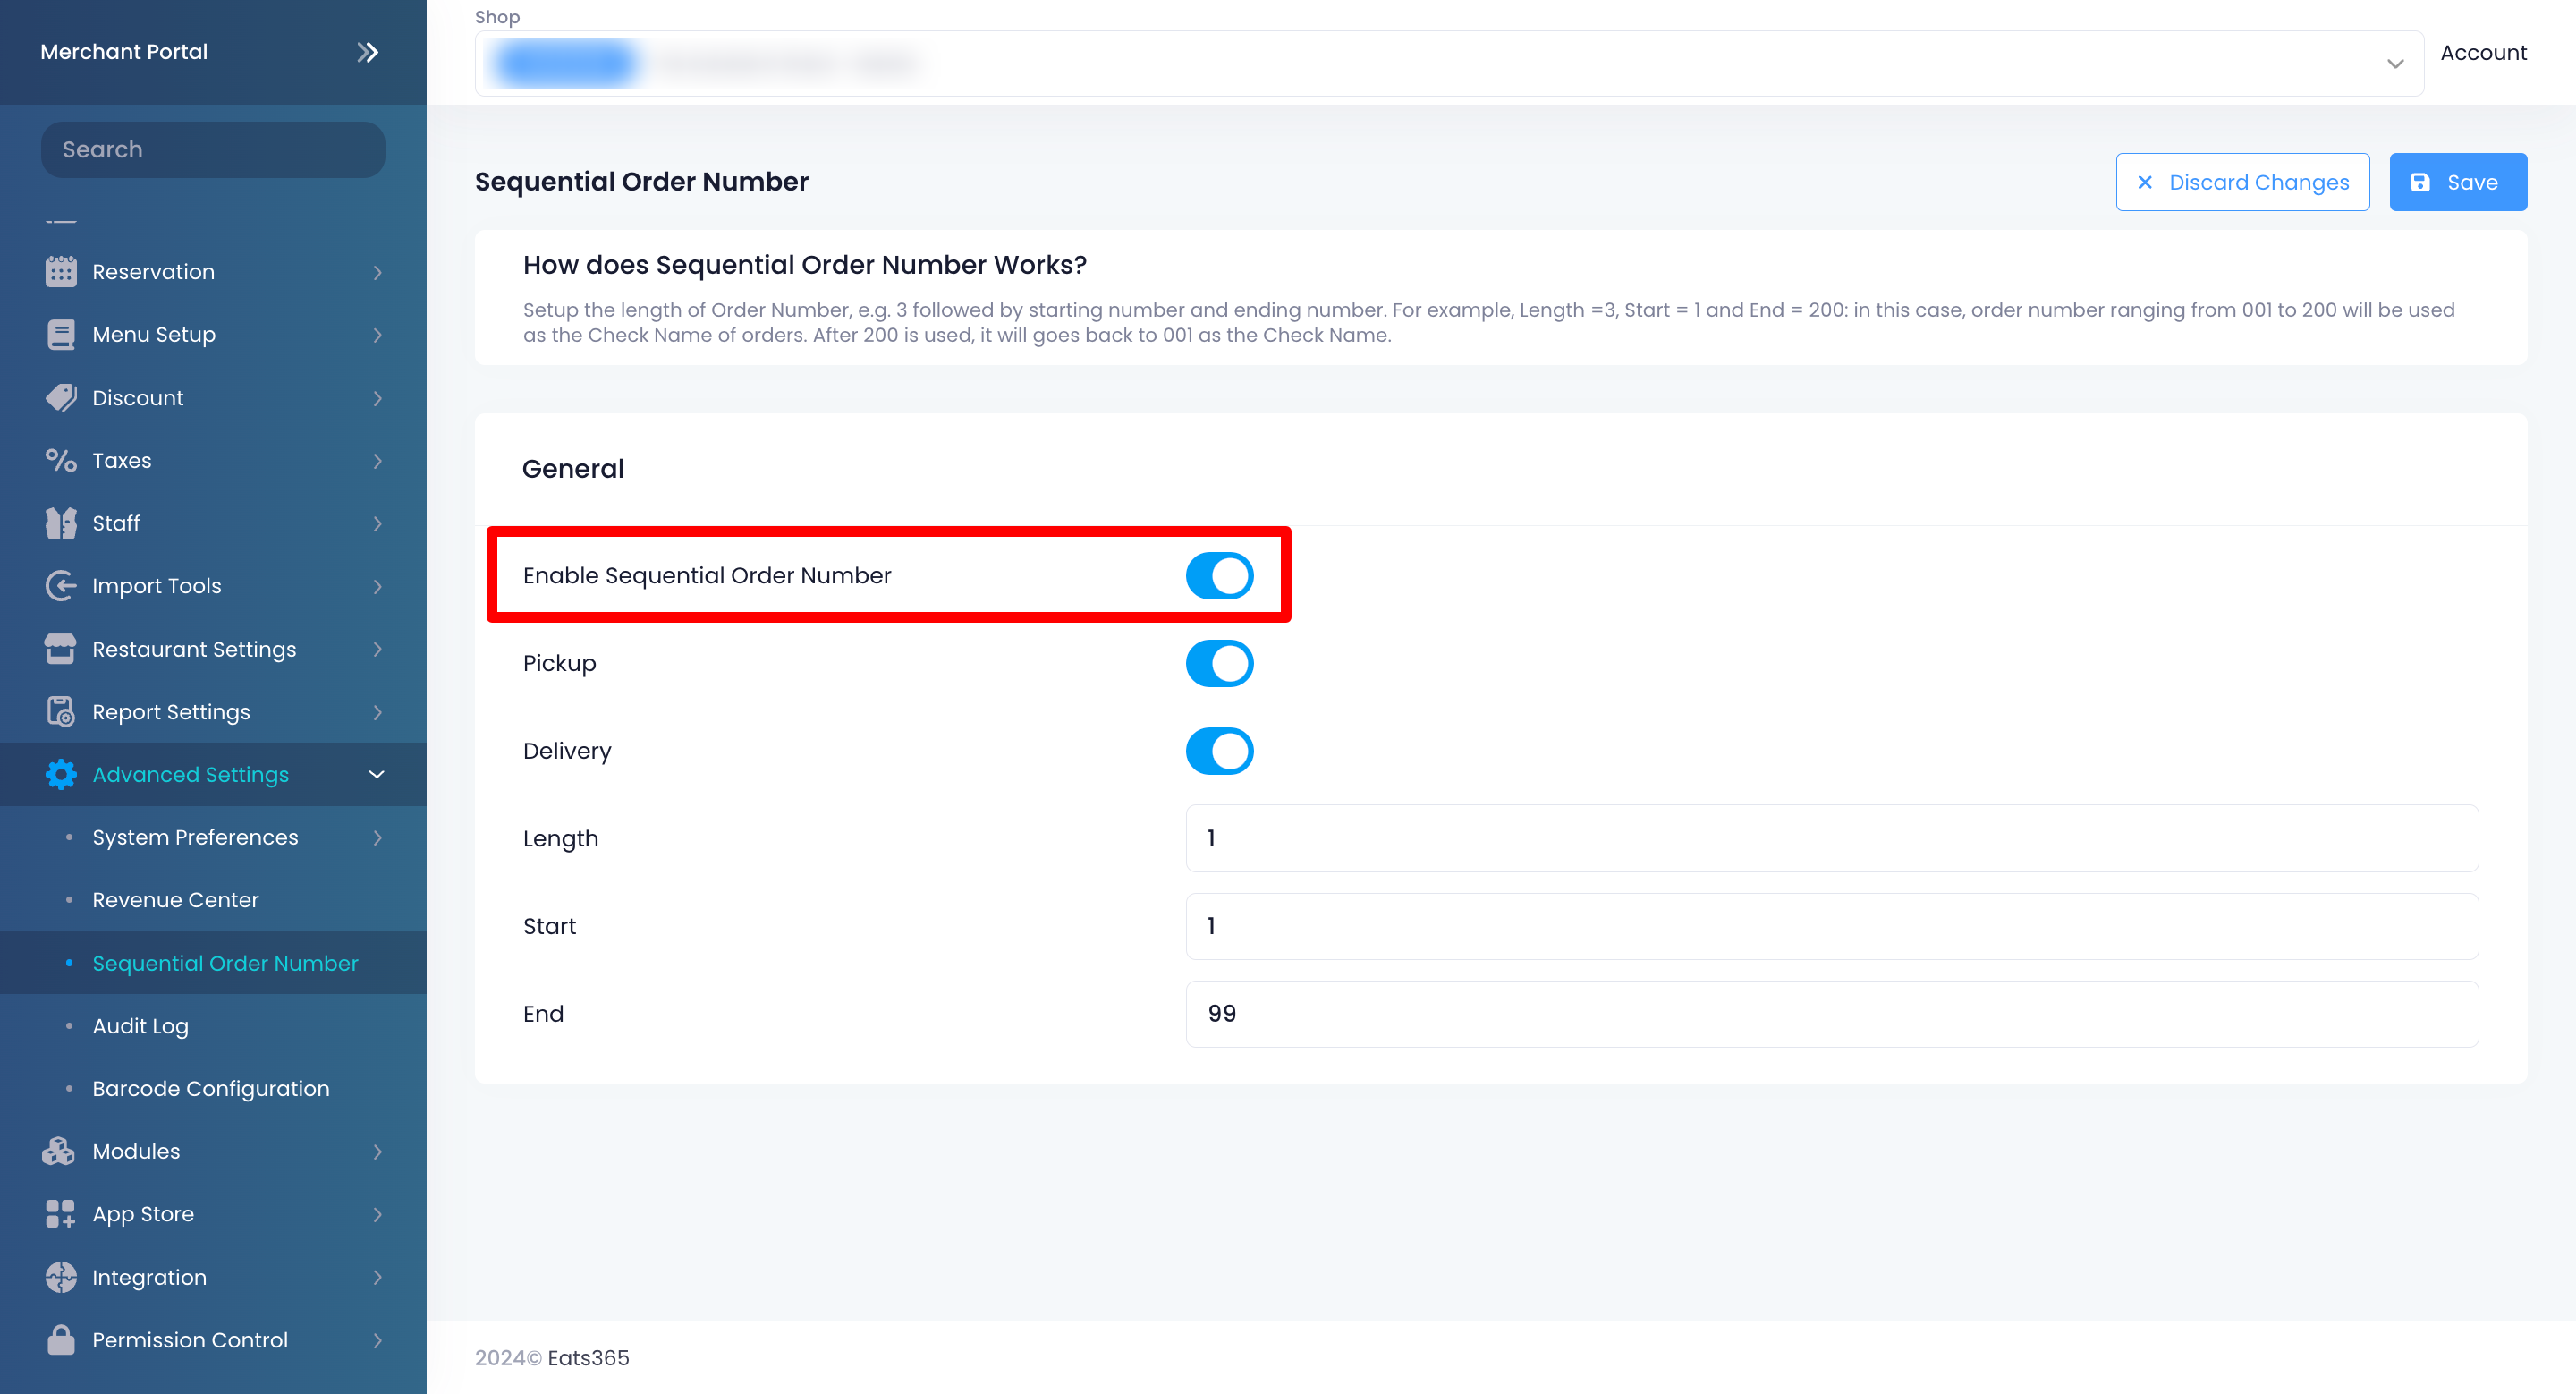
- Select where the sequential order number applies. You can toggle the options for the following:
- Pickup
- Delivery
- Dine-In (Quick Serve and Food Court restaurants)
- Set the values for the following:
- Length - Sets the length of the sequence. For example, if you enter “4” as the length, the sequence will show up as “0000”
- Start - Sets the starting number for the sequence. For example, if you enter “4” as the length then “1” as the starting sequence, the sequence will show up as “0001”
- End - Sets the number when the sequence will end. Once the sequence reaches the end number, the sequence will reset. For example, if you enter “4” as the length then “1” as the starting sequence and “100” as the end sequence, the sequence will start at “0001” and end at “0100.” After reaching 0100, the sequence will go back to “0001”
- At the top right, click on Save to confirm.
Once enabled, Sequential Order Numbers will be displayed on printed tickets, receipts, and transaction reports.
- Receipts and tickets
- Transaction report
