 Eats365 Products
 Merchant Guide
 Modules
 Membership
 Integrations
 Hardware
 Staff Operations
 Roles & Permissions
 Payments
 Reports
 What’s New
 Release Notes
 Troubleshooting
 Simulators
 Glossary
 Troubleshooter
 System Status
Menu Setup
Table of Contents
Manage menu items
Learn how to create and manage menu items on the Eats365 POS or on the Merchant Portal.
This article discusses how to modify, delete, or create a copy of an existing item. For information on how to create a new item, refer to the following articles:
- Set up a Single Item (Full Service)
- Set up a Single Item (Quick Serve)
- Set up a Single Item (Food Court)
- Set up a Combo Item (Full Service)
- Set up a Combo Item (Quick Serve)
- Set up a Combo Item (Food Court)
- Set up Catering Items
Update a menu item
To modify an item, follow the steps below:
Eats365 POS
- Log in to the Eats365 POS.
- At the top left, tap Settings
 .
. - Under "General," tap Menu Setup, then select Item.
- Tap the item that you want to edit. You can also tap the three-dot menu
 , then tap Edit
 .
.
- Update the item.
- At the top right, tap Update to confirm.
Merchant Portal 2.0
- Log in to the Merchant Portal.
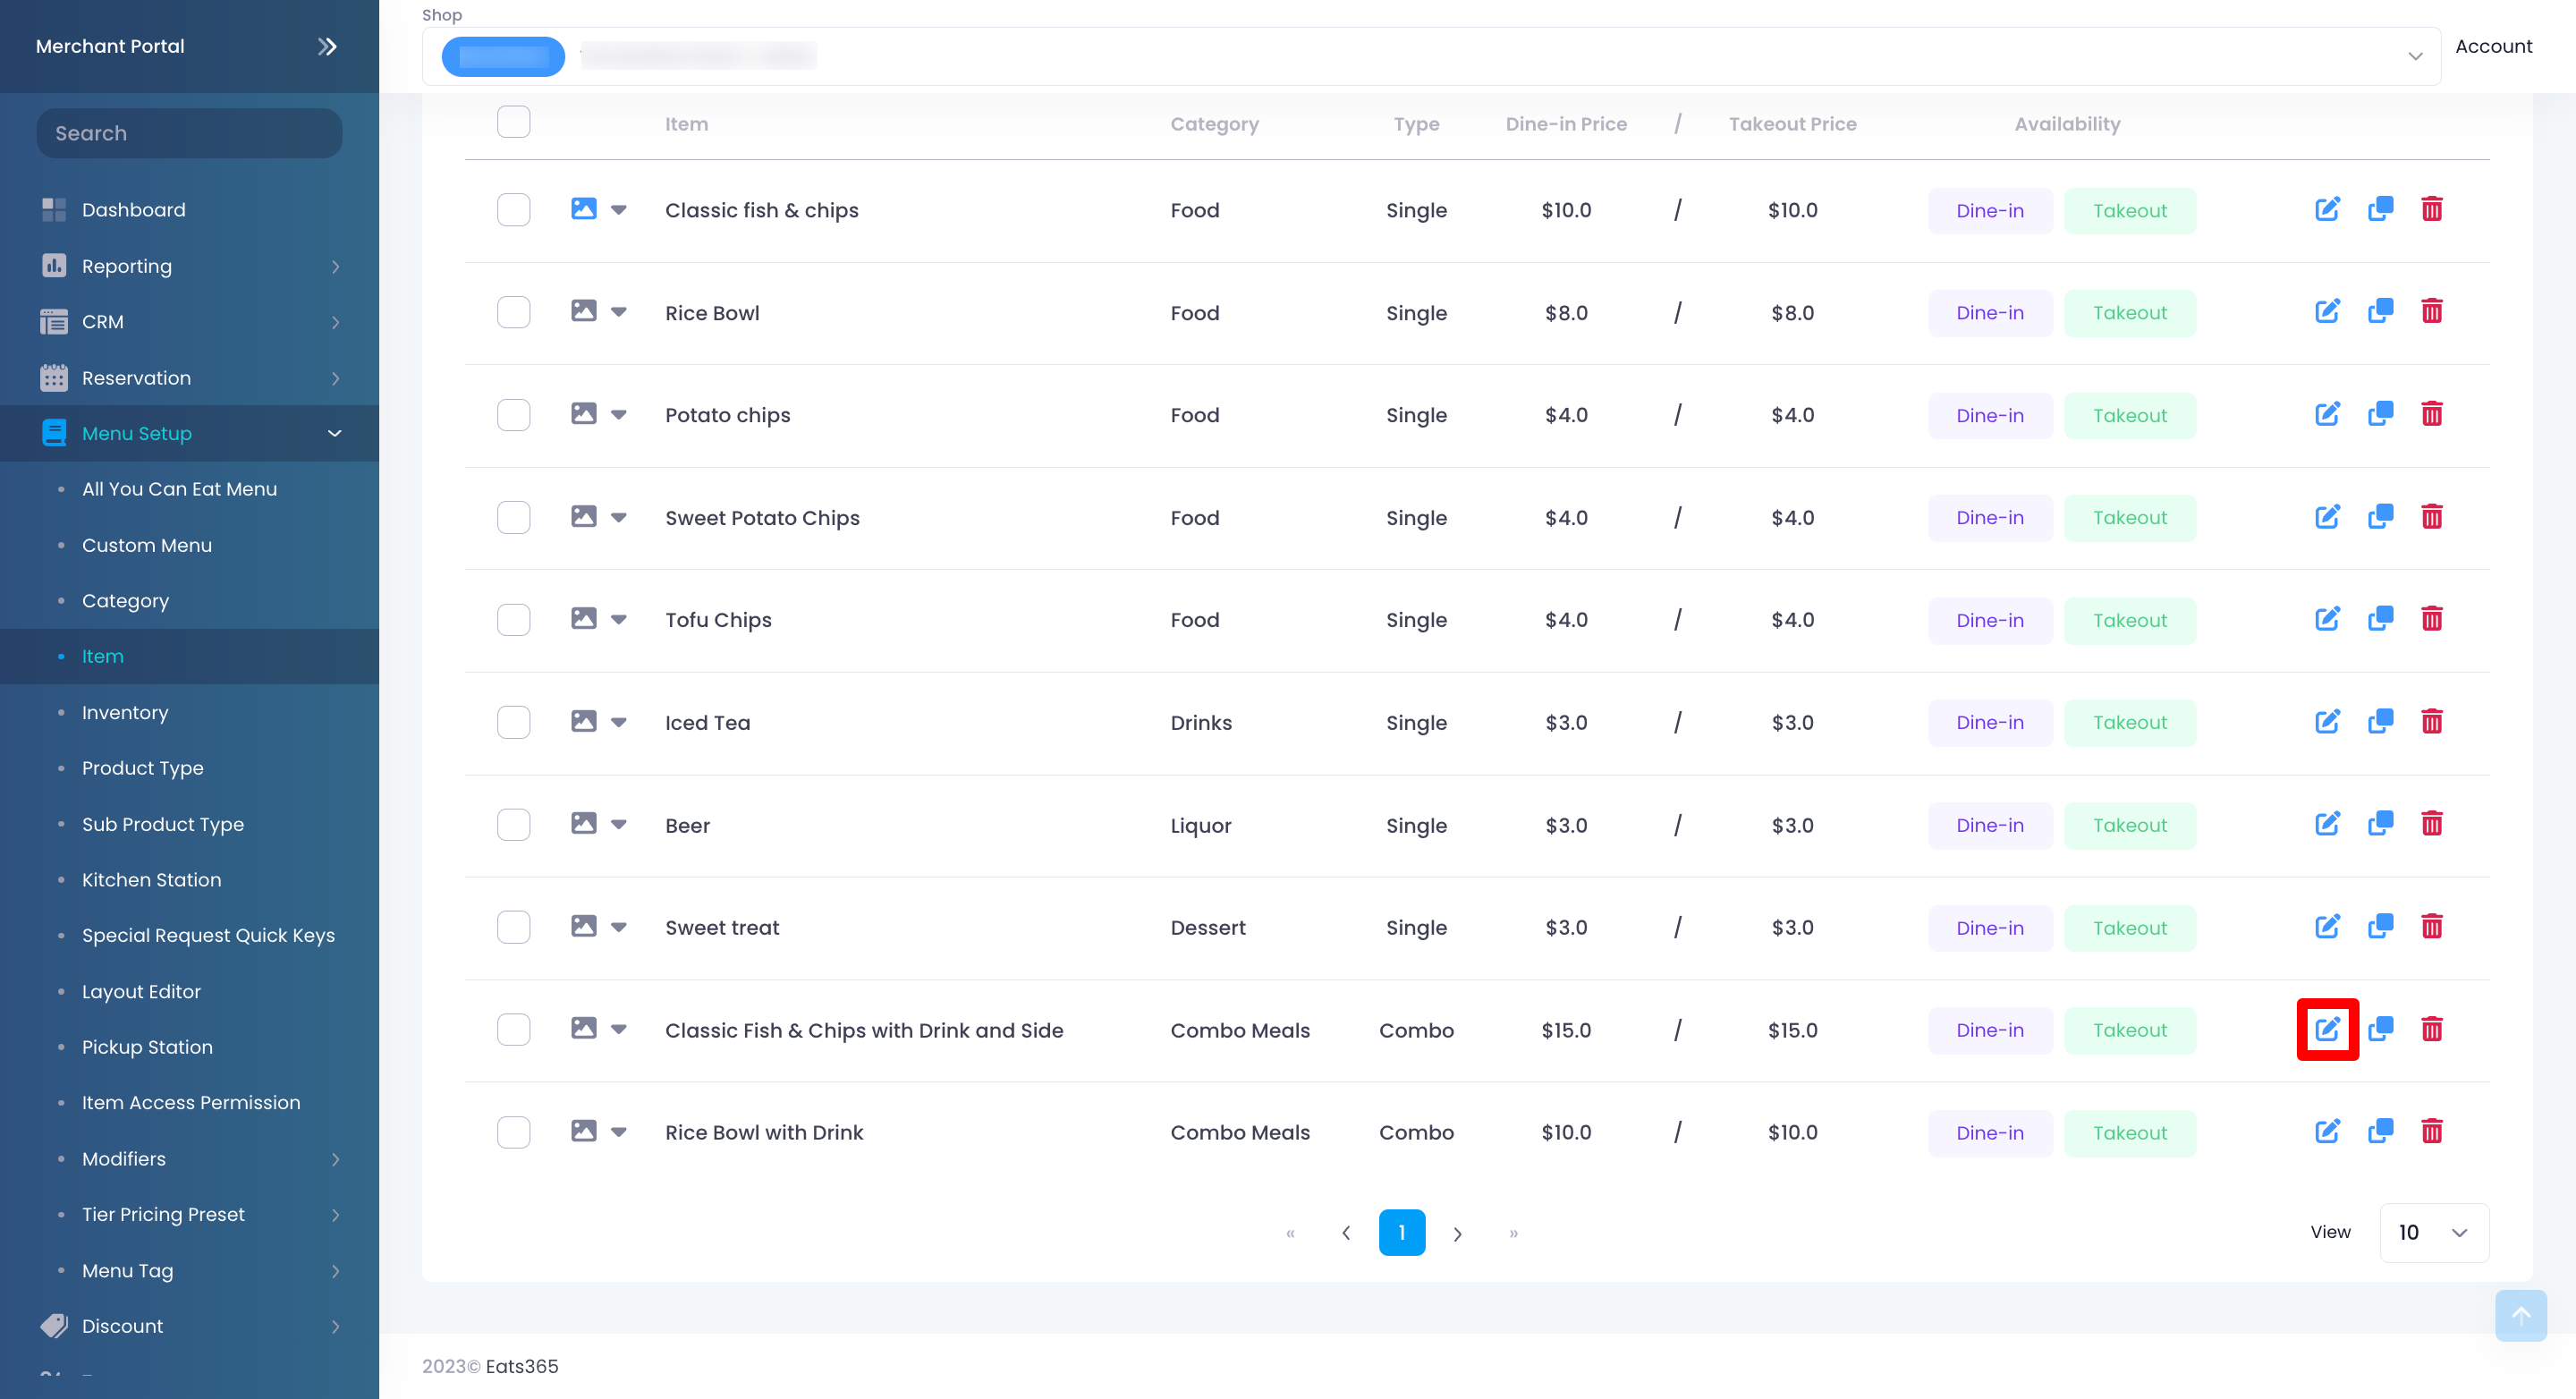
- On the left panel, click on Menu Setup, then select Item.
- Select the item that you want to edit. Then, click on Edit
 .
.
- Update the item.
- At the top right, click on Save to confirm.
Merchant Portal (Classic Theme)
- Log in to the Merchant Portal.
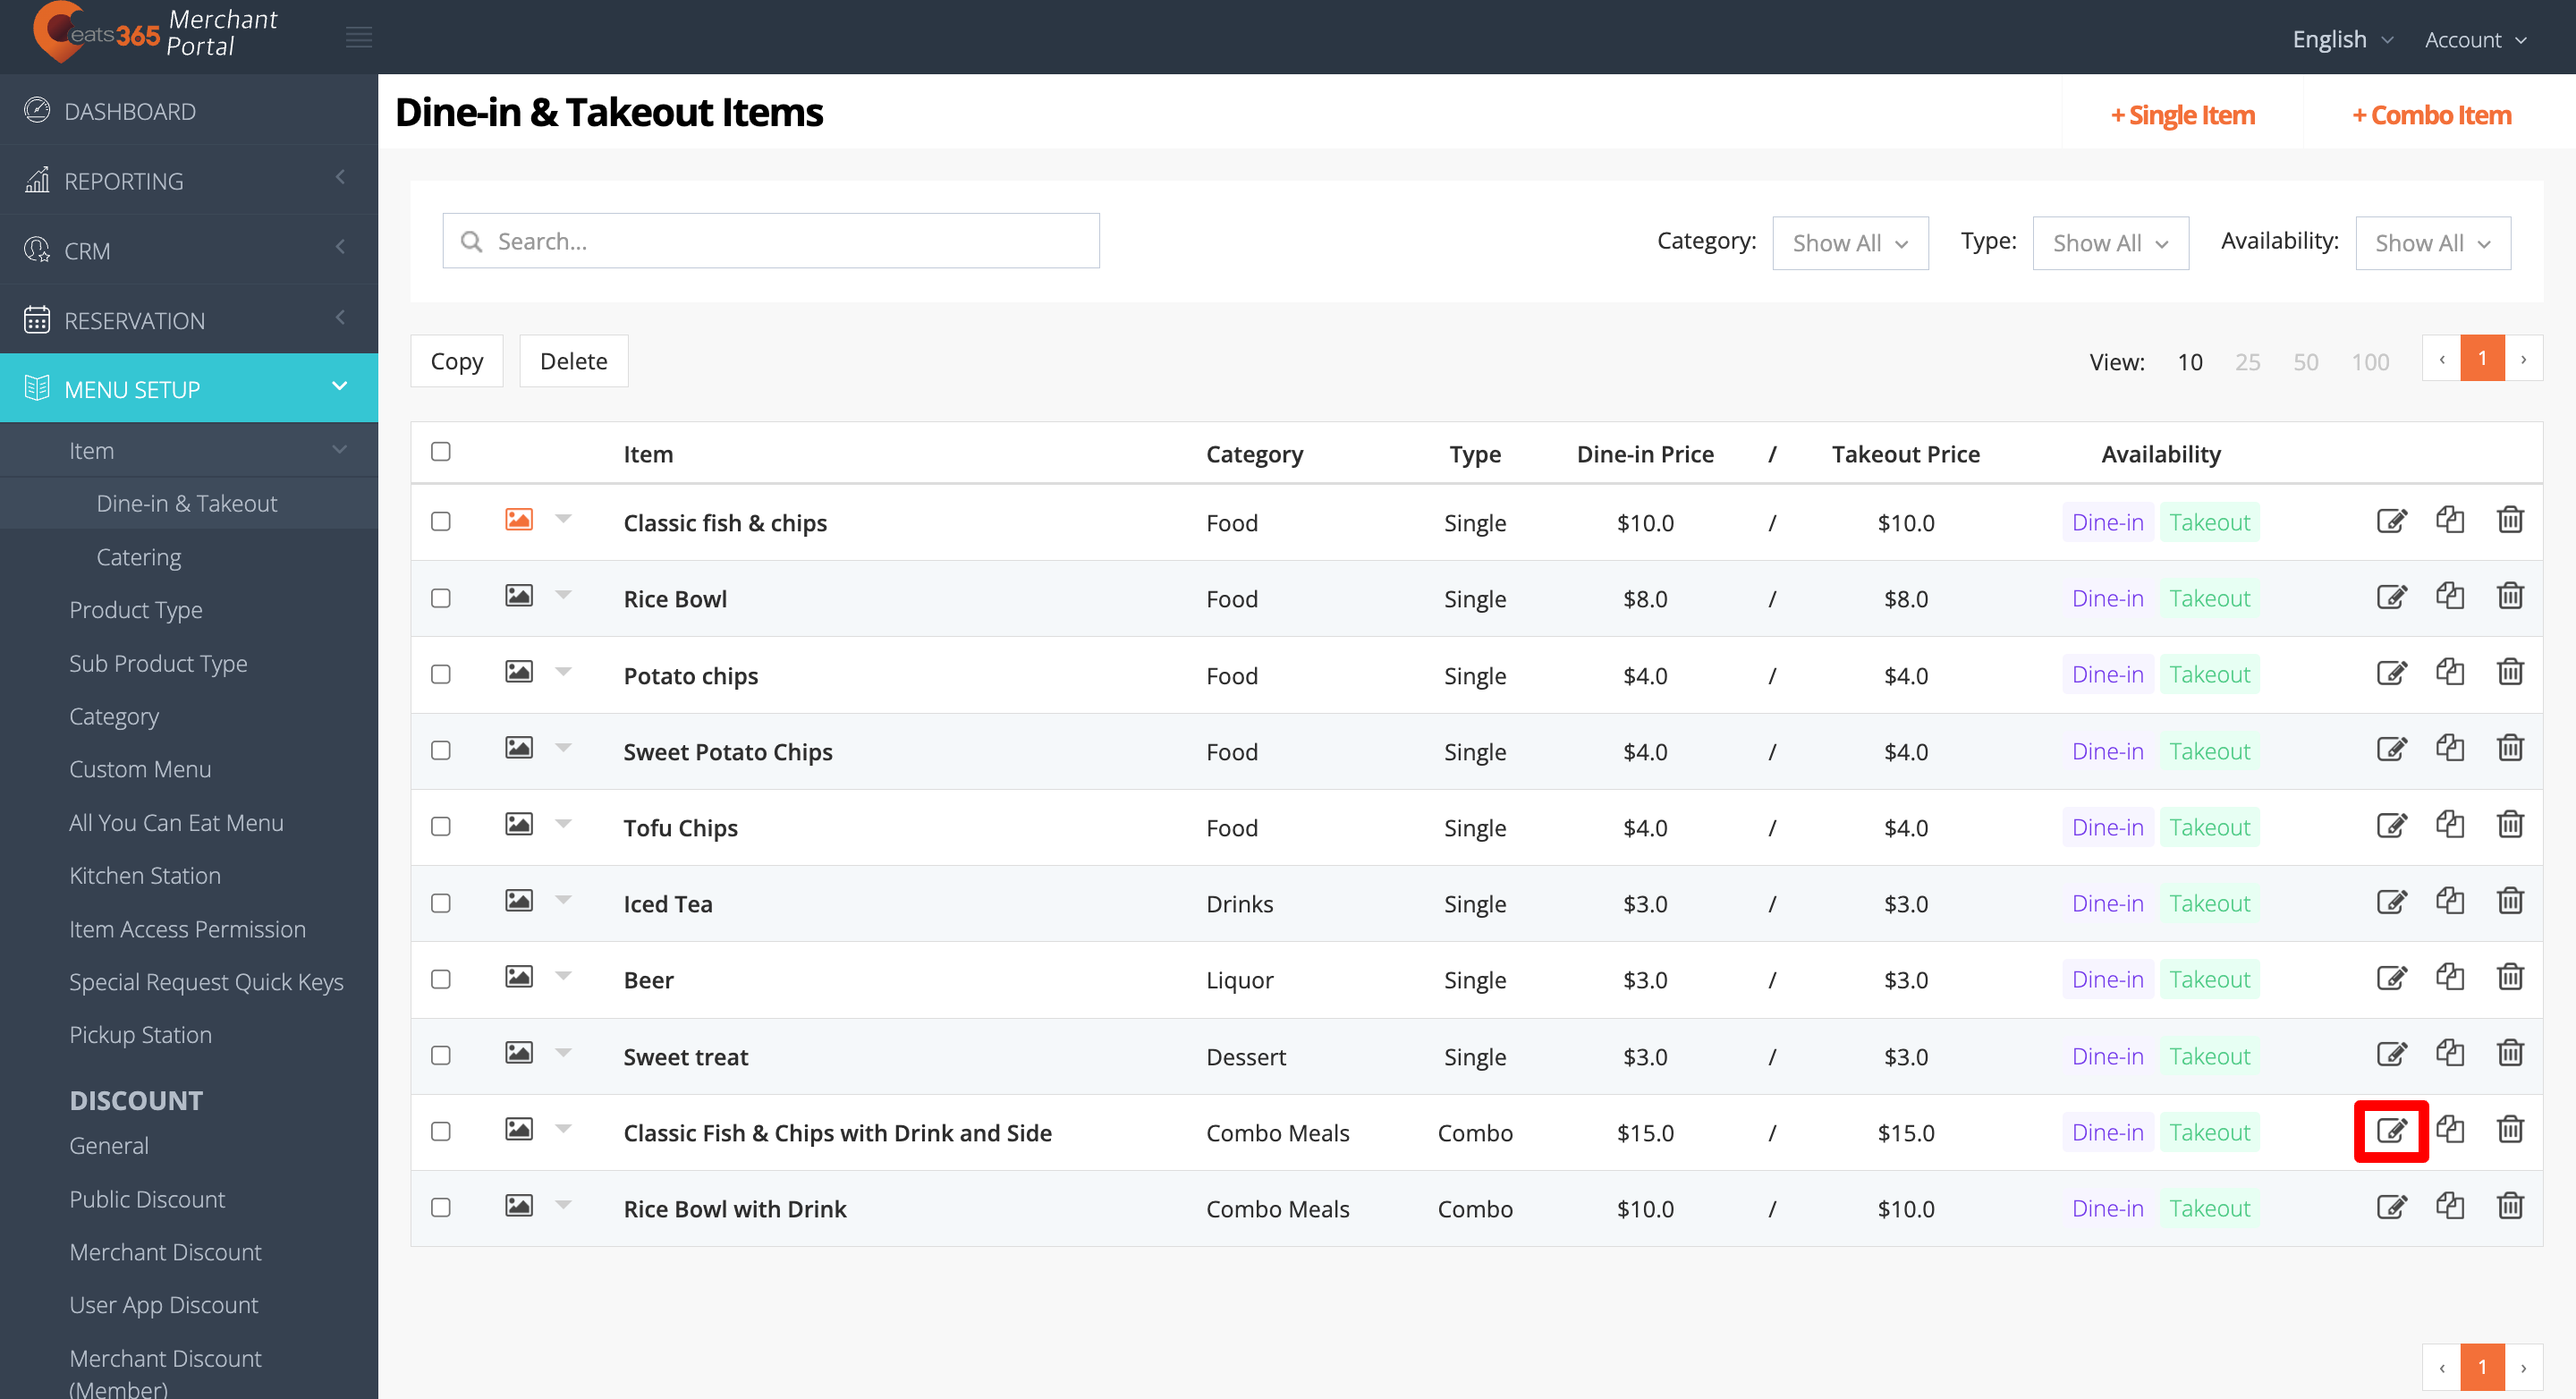
- On the left panel, click on Menu Setup, then select Item.
- Select the item that you want to edit. Then, click on Edit .
- Update the item.
- At the top right, click on Save to confirm.
Delete a menu item
To remove an item, follow the steps below:
Eats365 POS
- Log in to the Eats365 POS.
- At the top left, tap Settings .
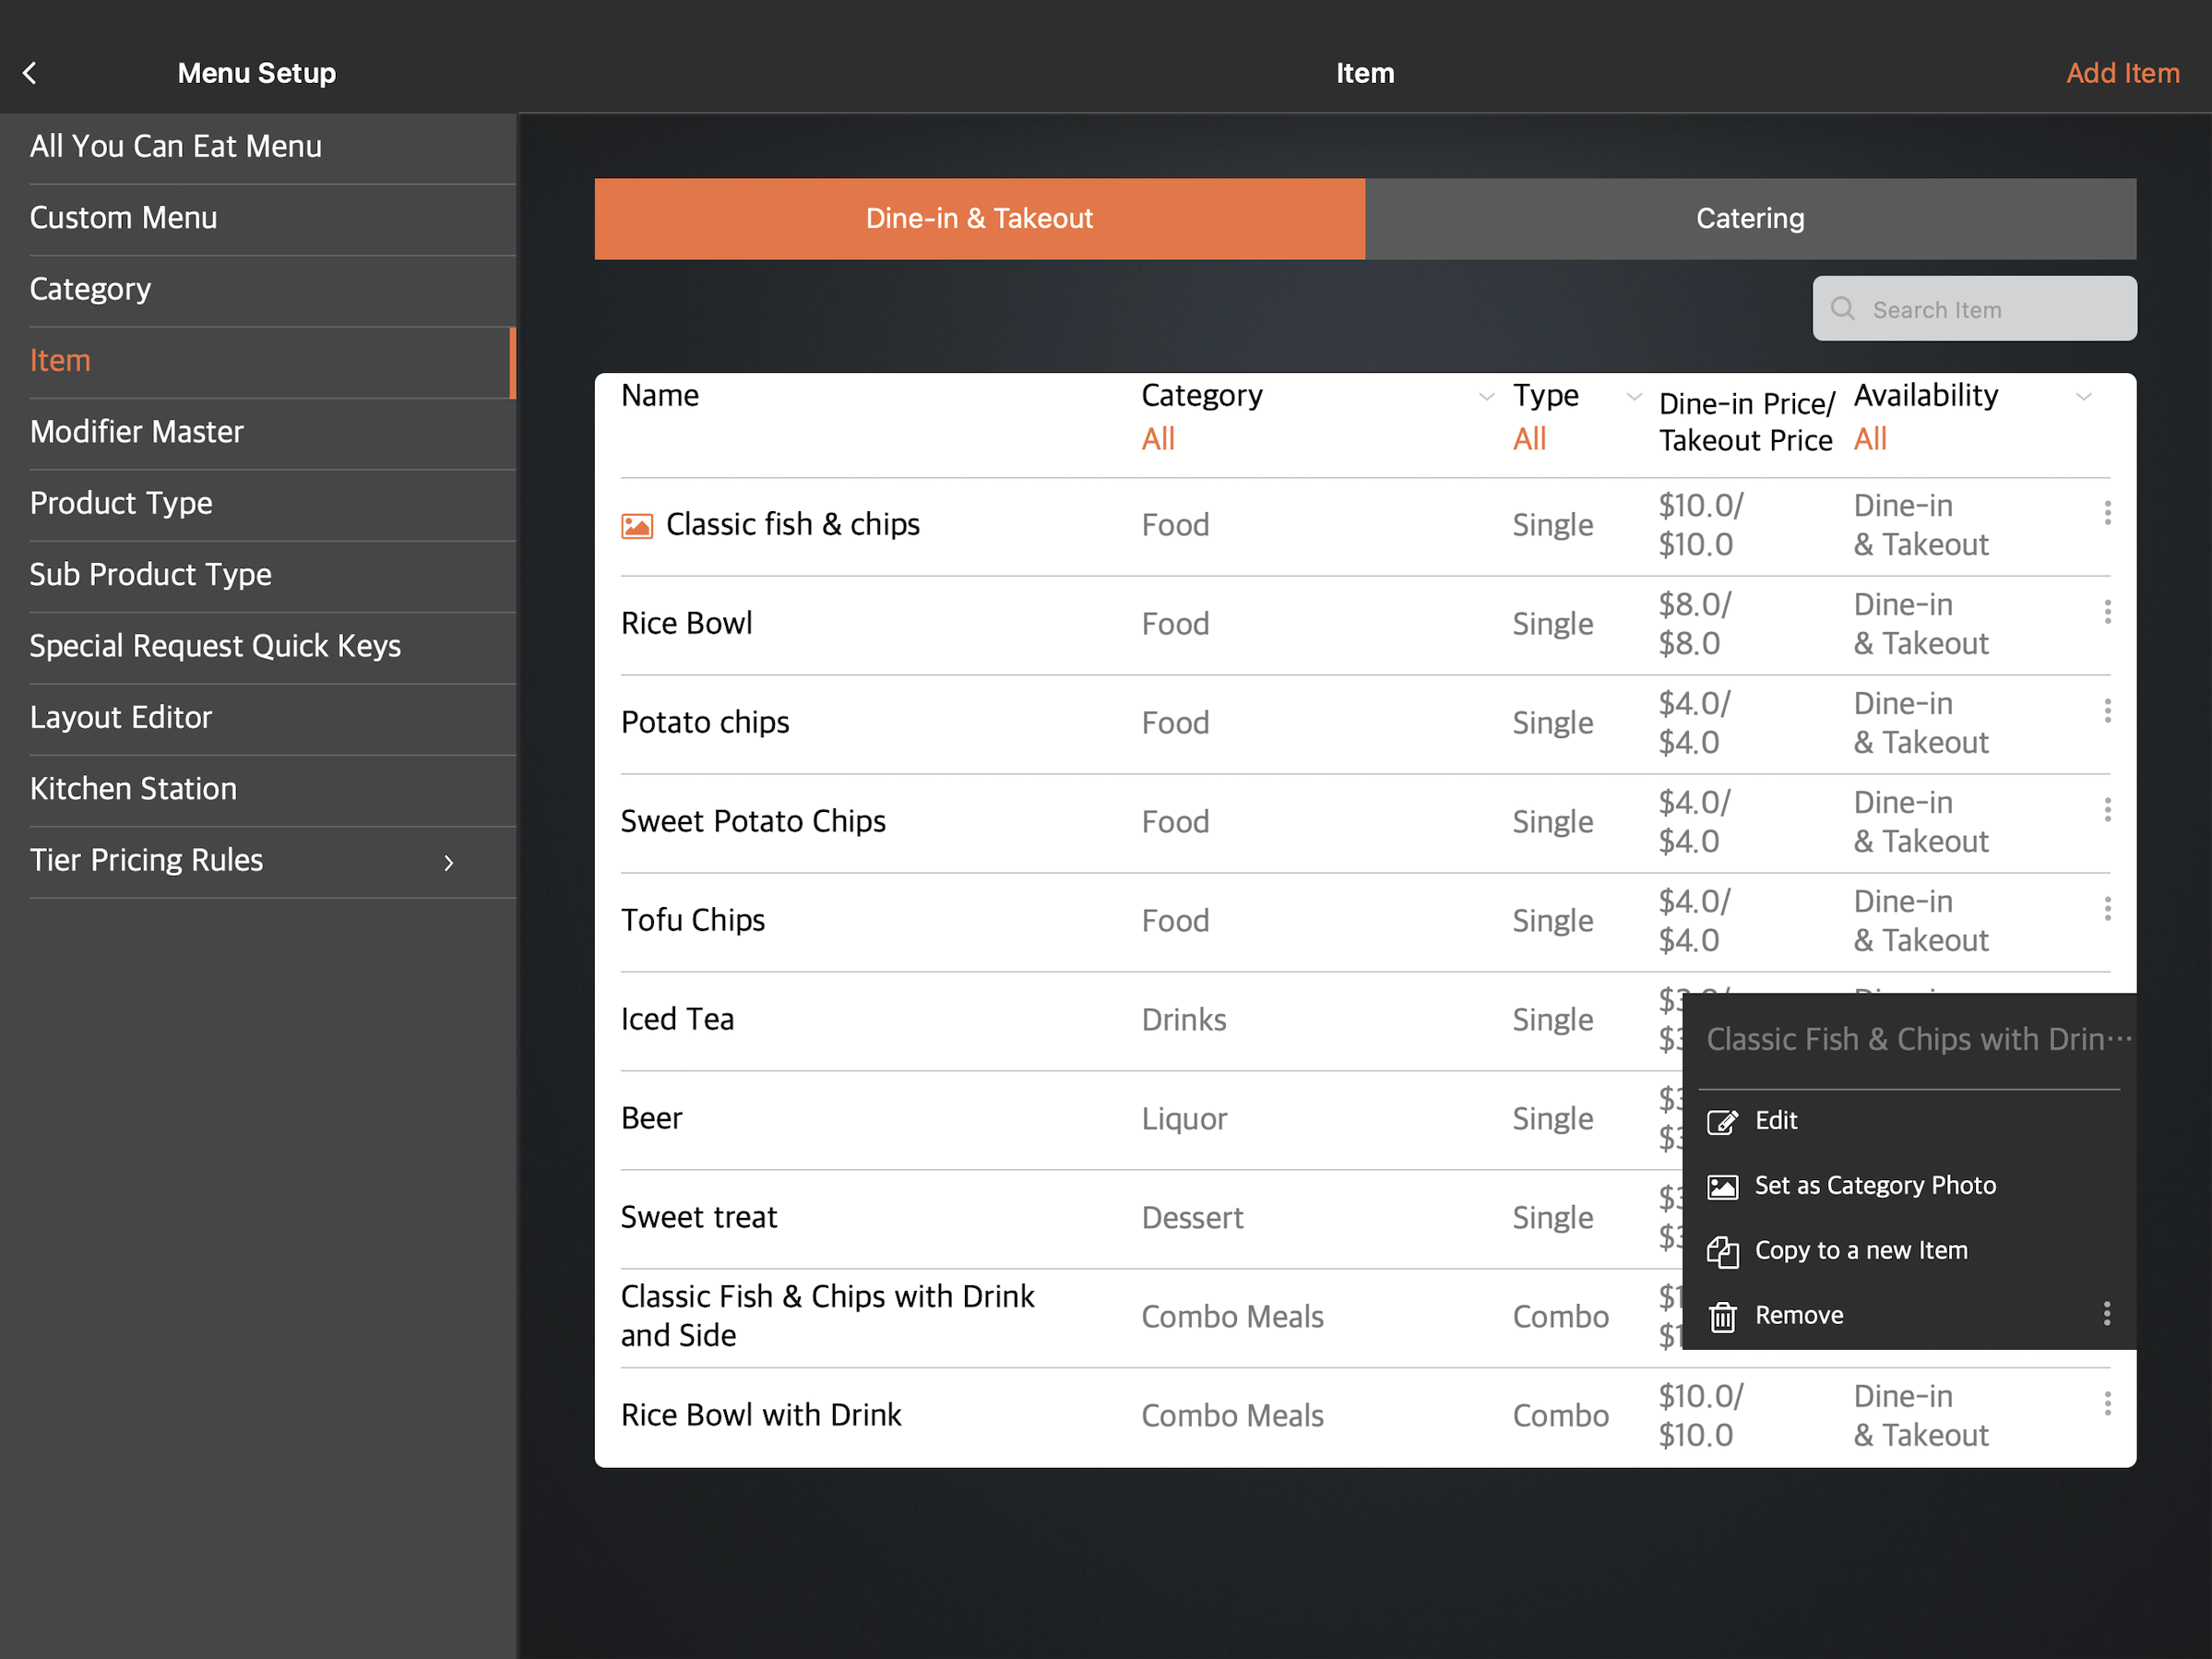
- Under "General," tap Menu Setup, then select Item.
- There are two ways to delete an item:
- Tap the item you want to delete. At the top right, tap Delete. A prompt appears if you want to remove the item.
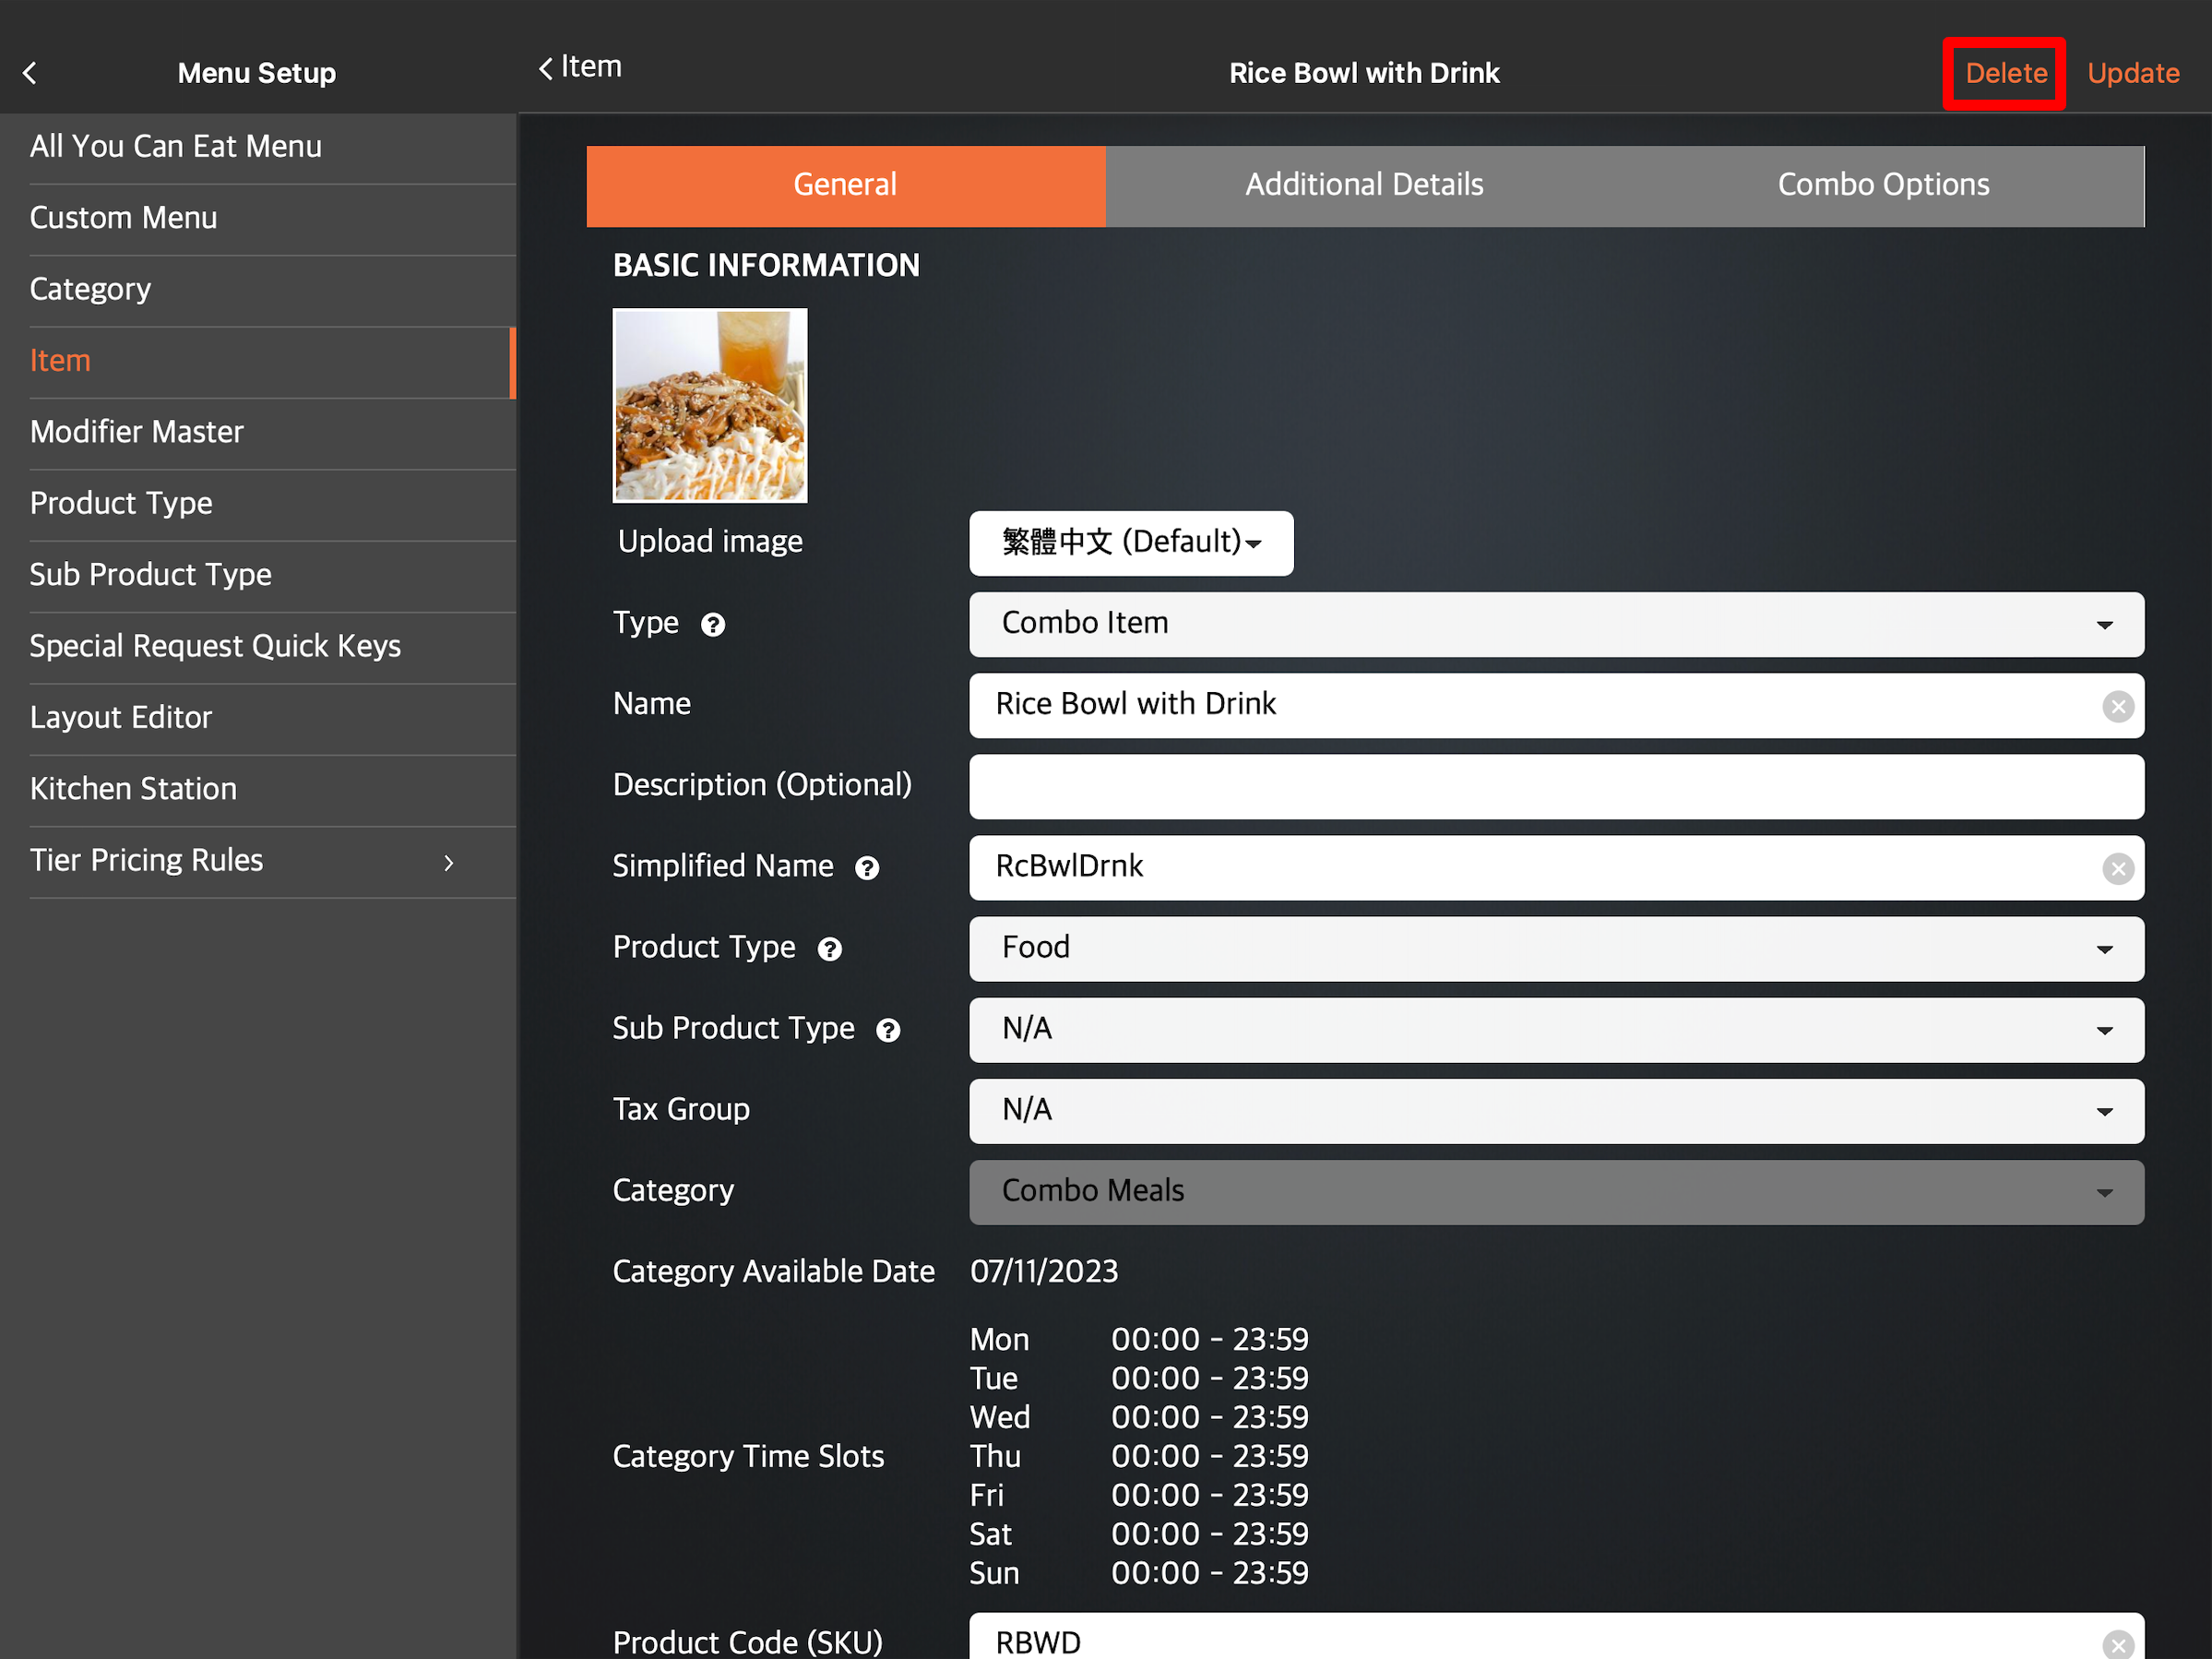
- Tap the three-dot menu, then tap Remove
 . A prompt appears if you want to remove the item.
- Tap the item you want to delete. At the top right, tap Delete. A prompt appears if you want to remove the item.
- Tap Delete to confirm.
Merchant Portal 2.0
- Log in to the Merchant Portal.
- On the left panel, click on Menu Setup, then select Item.
- Select the item that you want to delete. Then, click on Delete
 . A prompt appears to confirm if you want to delete the item.
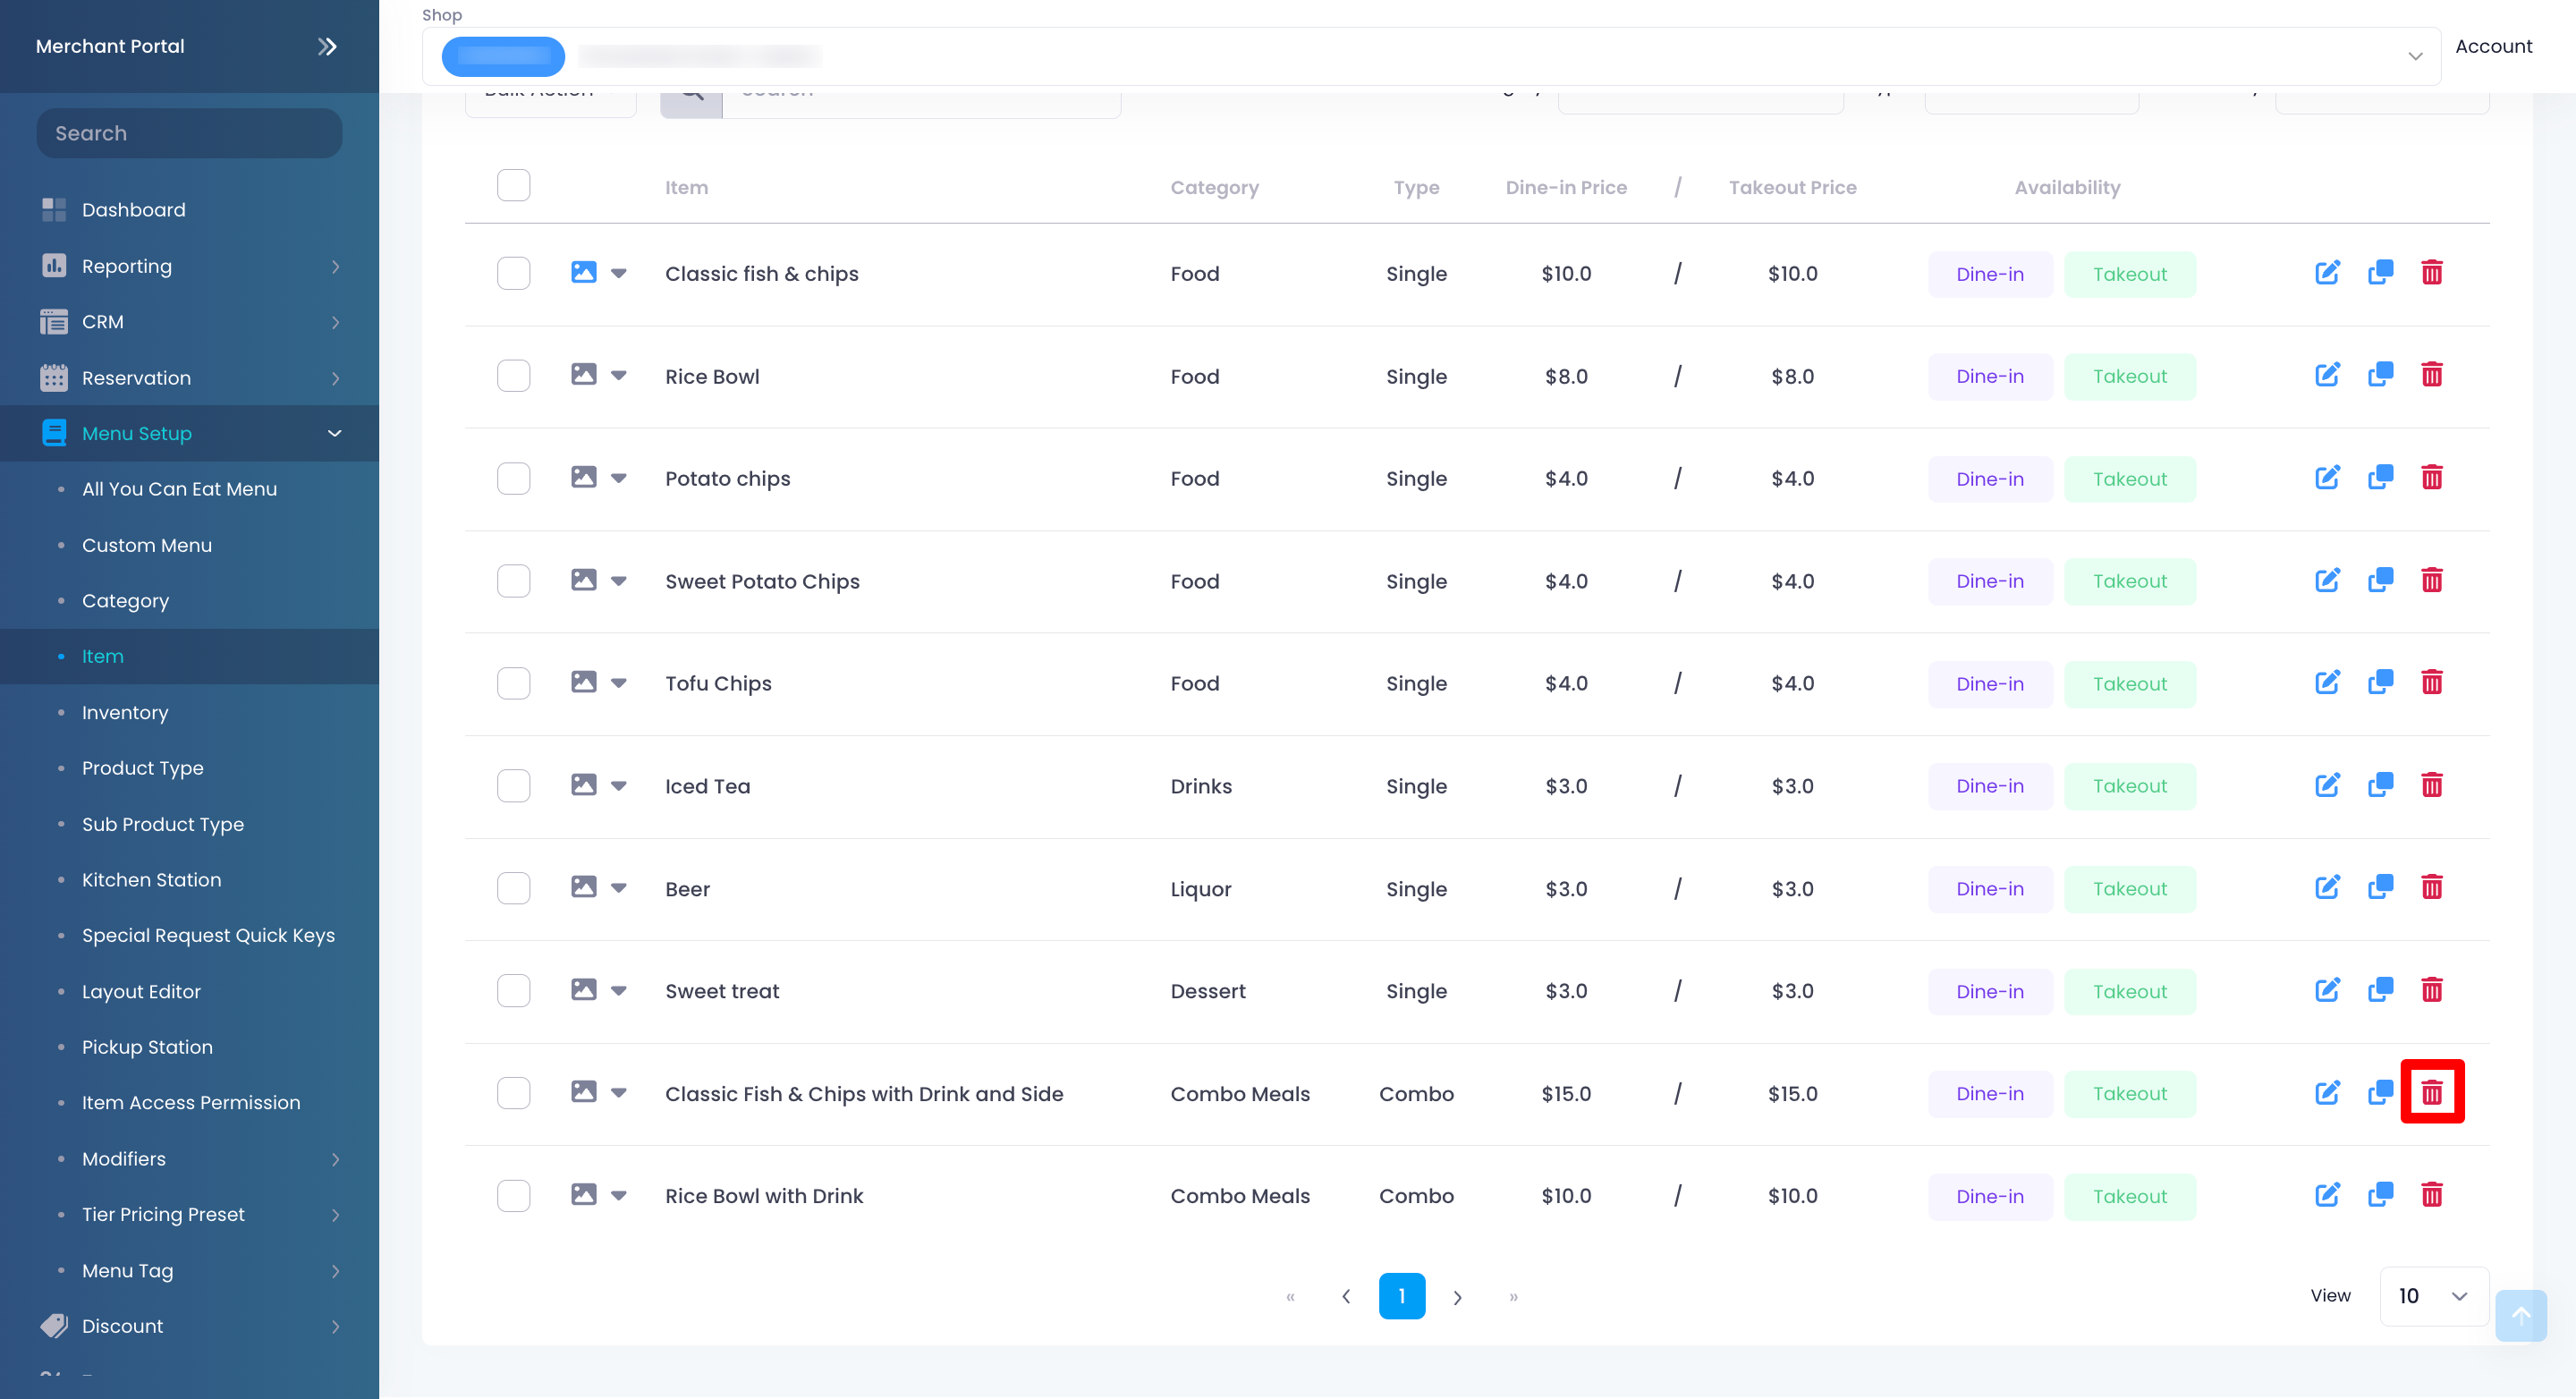
- Click on Confirm to delete.
Merchant Portal (Classic Theme)
- Log in to the Merchant Portal.
- On the left panel, click on Menu Setup, then select Item.
- Select the item that you want to edit. Then, click on Delete . A prompt appears to confirm if you want to delete the item.
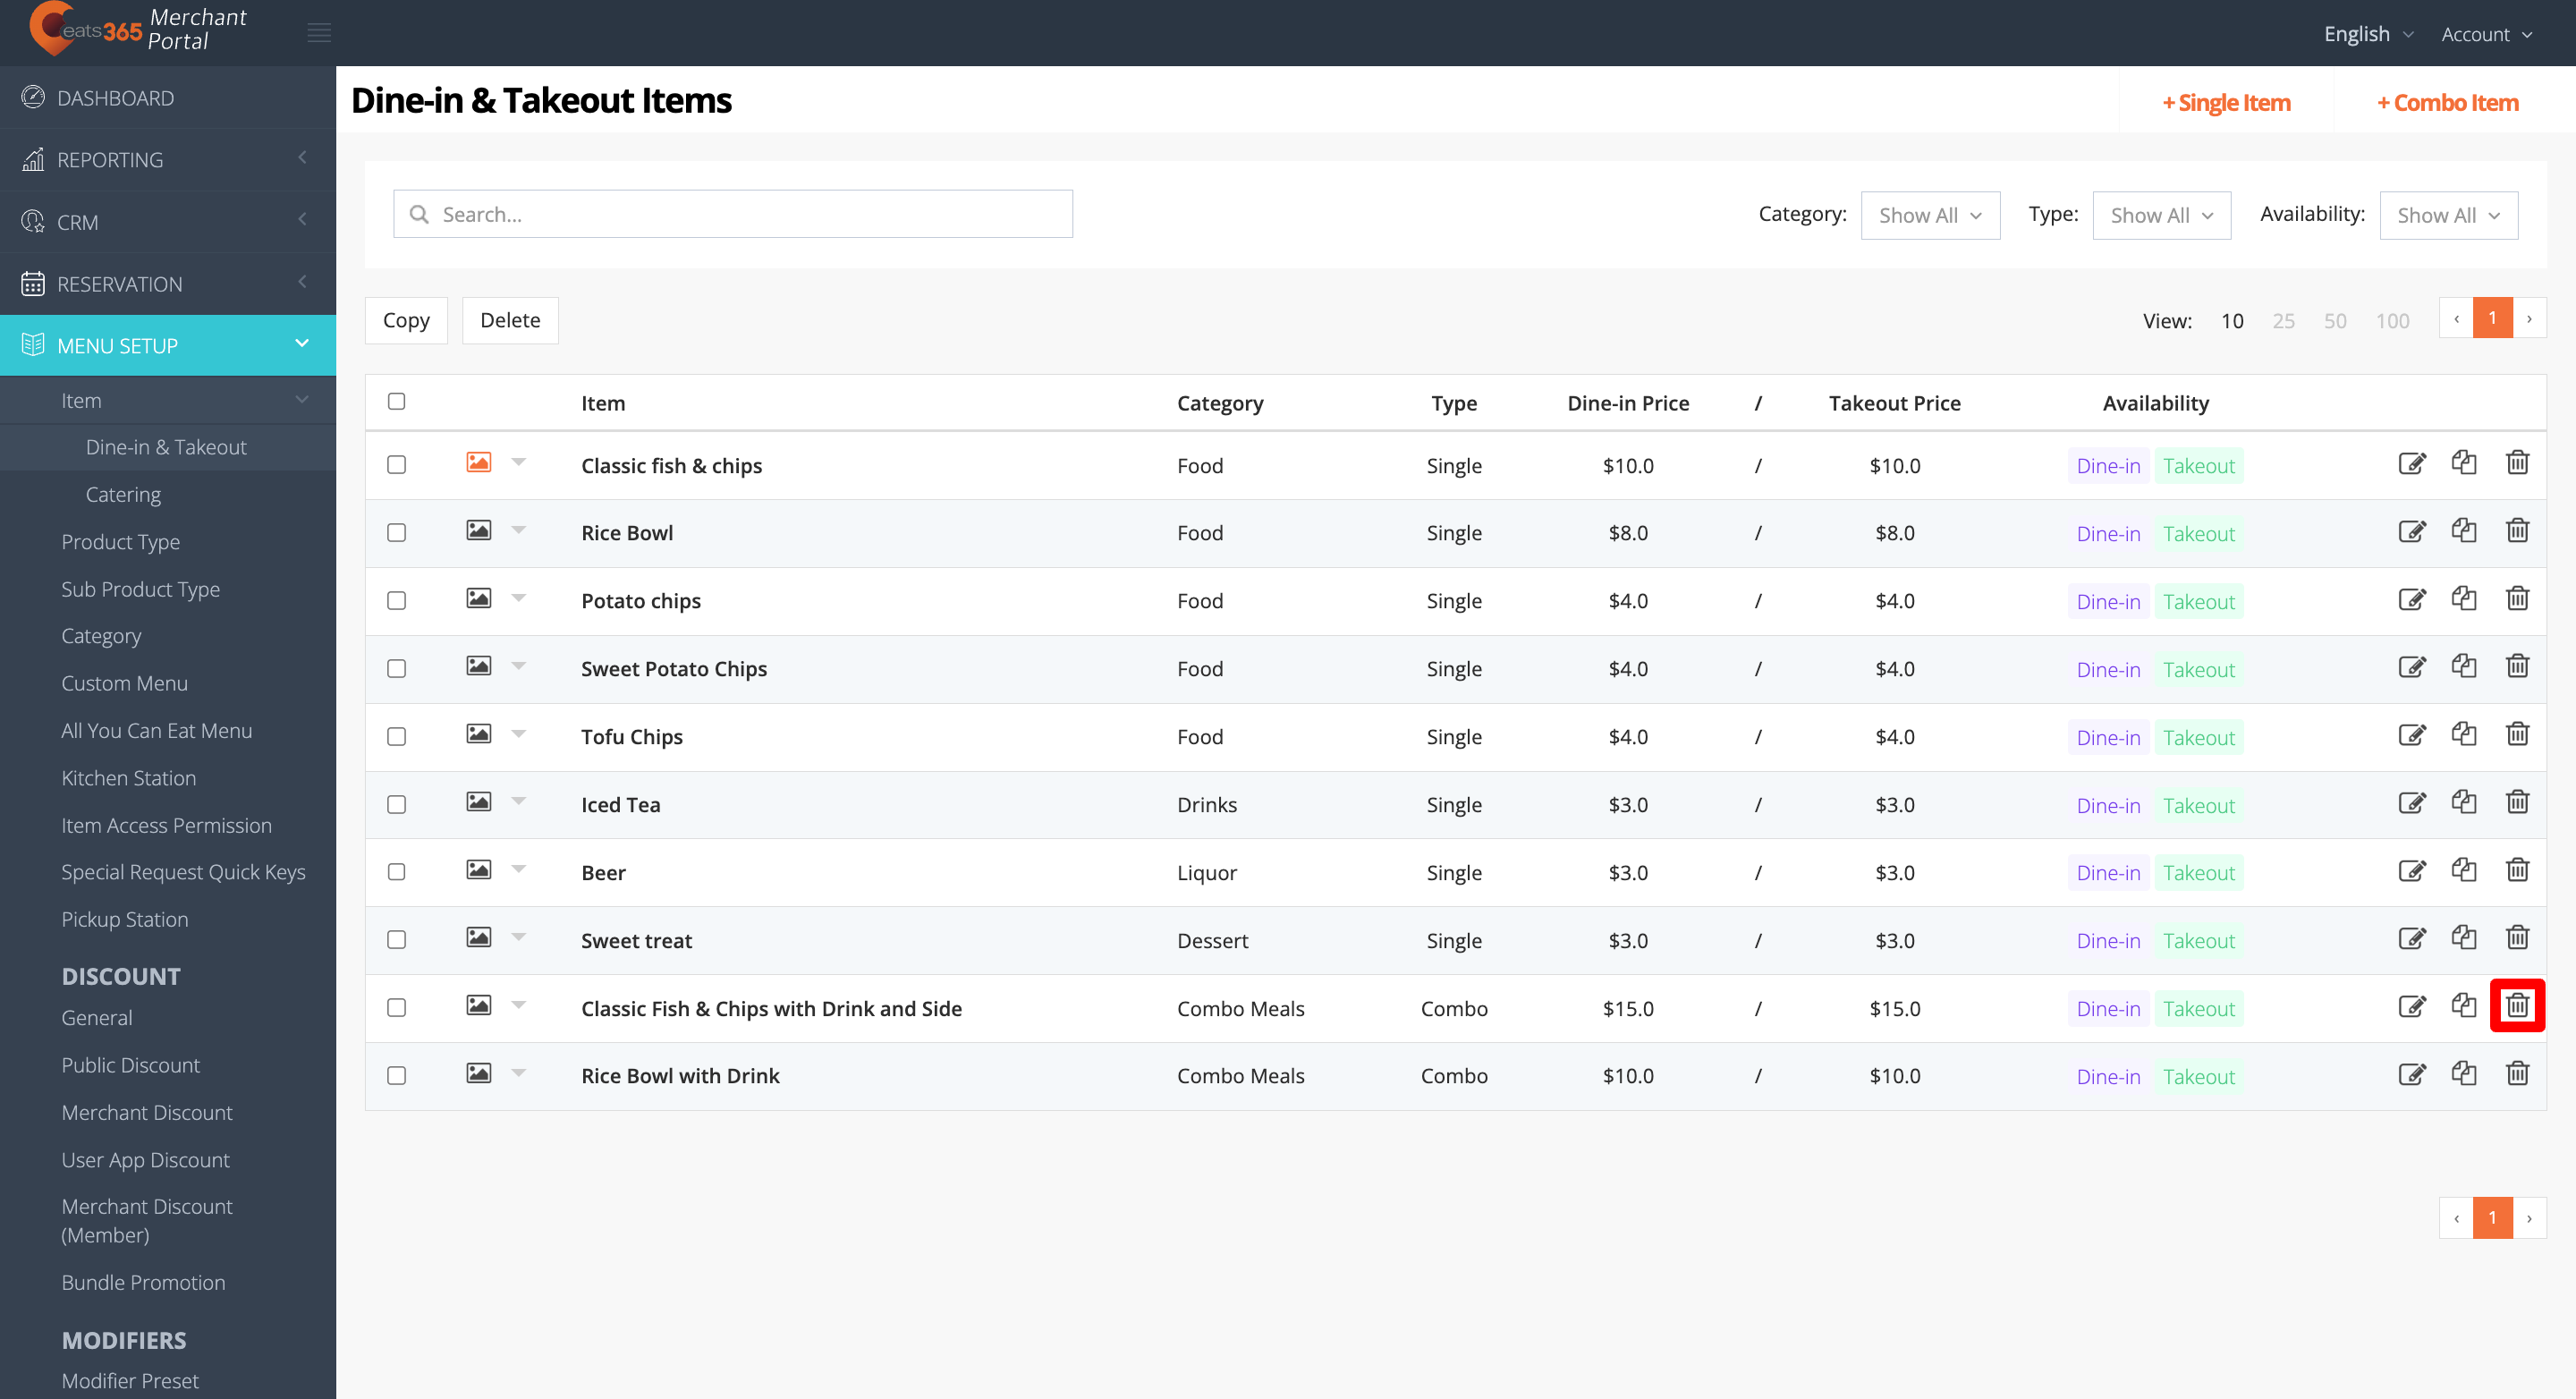
- Click on Confirm to delete.
Delete multiple items
To delete multiple items simultaneously, follow the steps below:
Merchant Portal 2.0
- Log in to the Merchant Portal.
- On the left panel, click on Menu Setup, then select Item.
- Next to the items that you want to delete, click on the check box
 .
.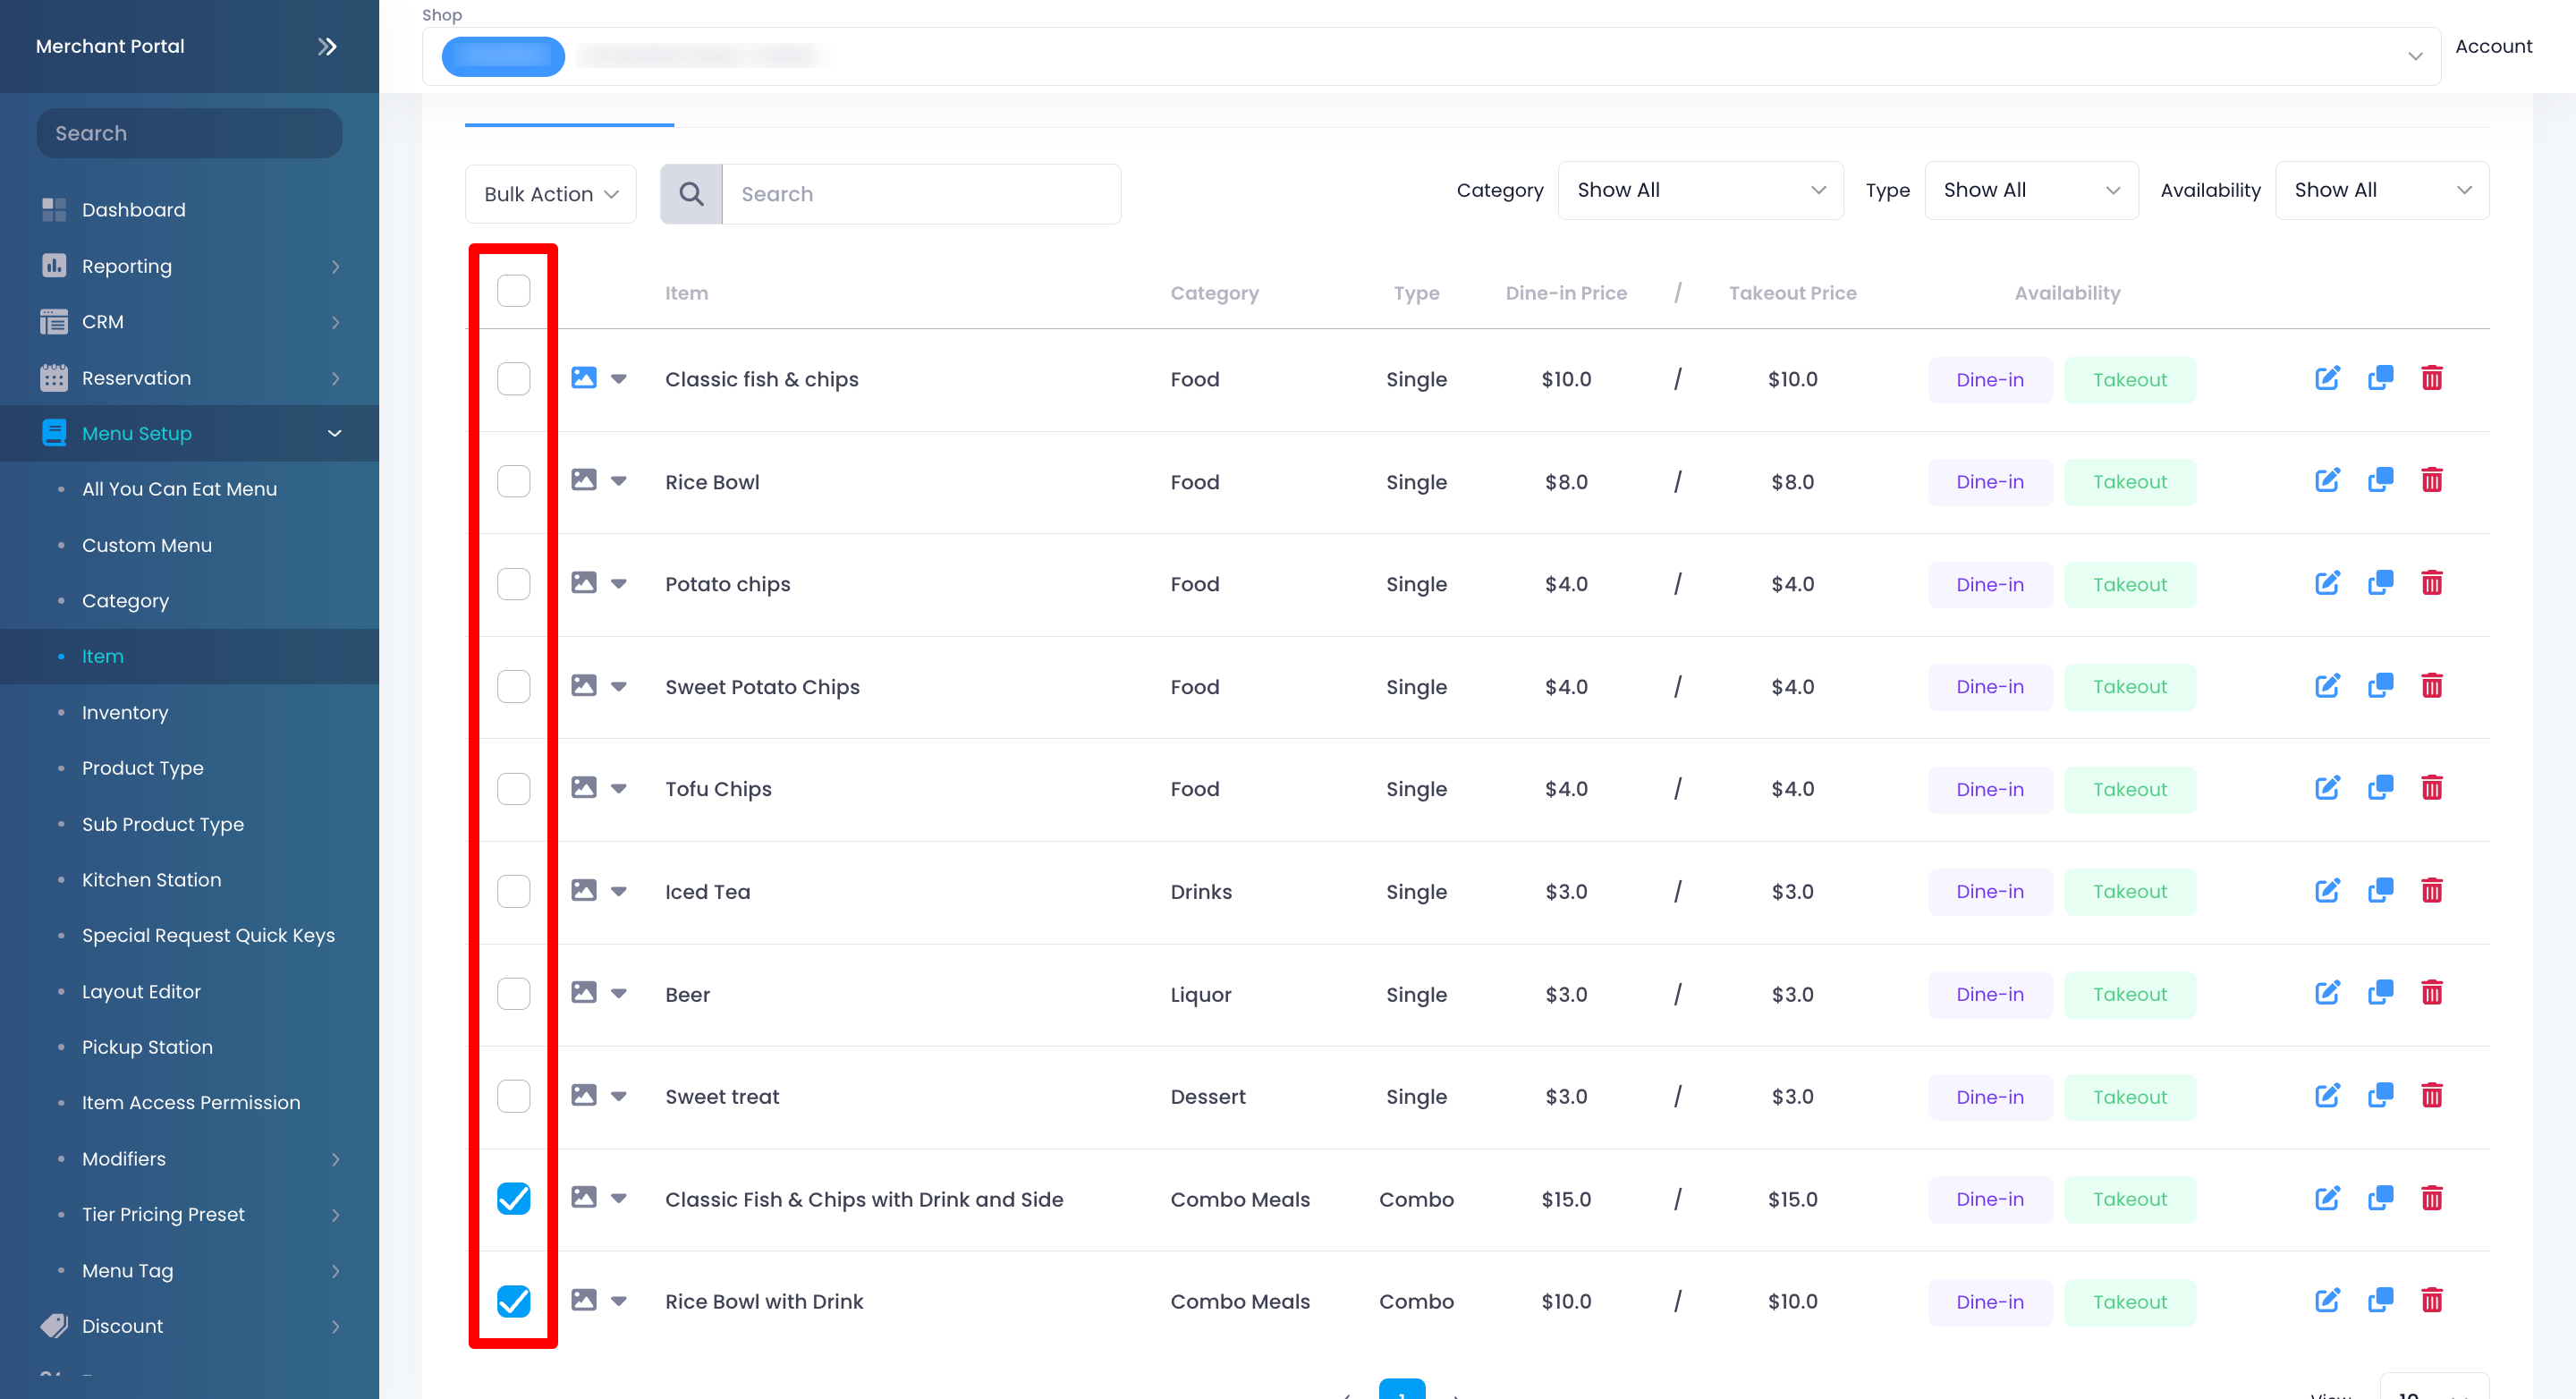
- From the bulk action drop-down list, click on Delete. A prompt appears to confirm if you want to delete the item.
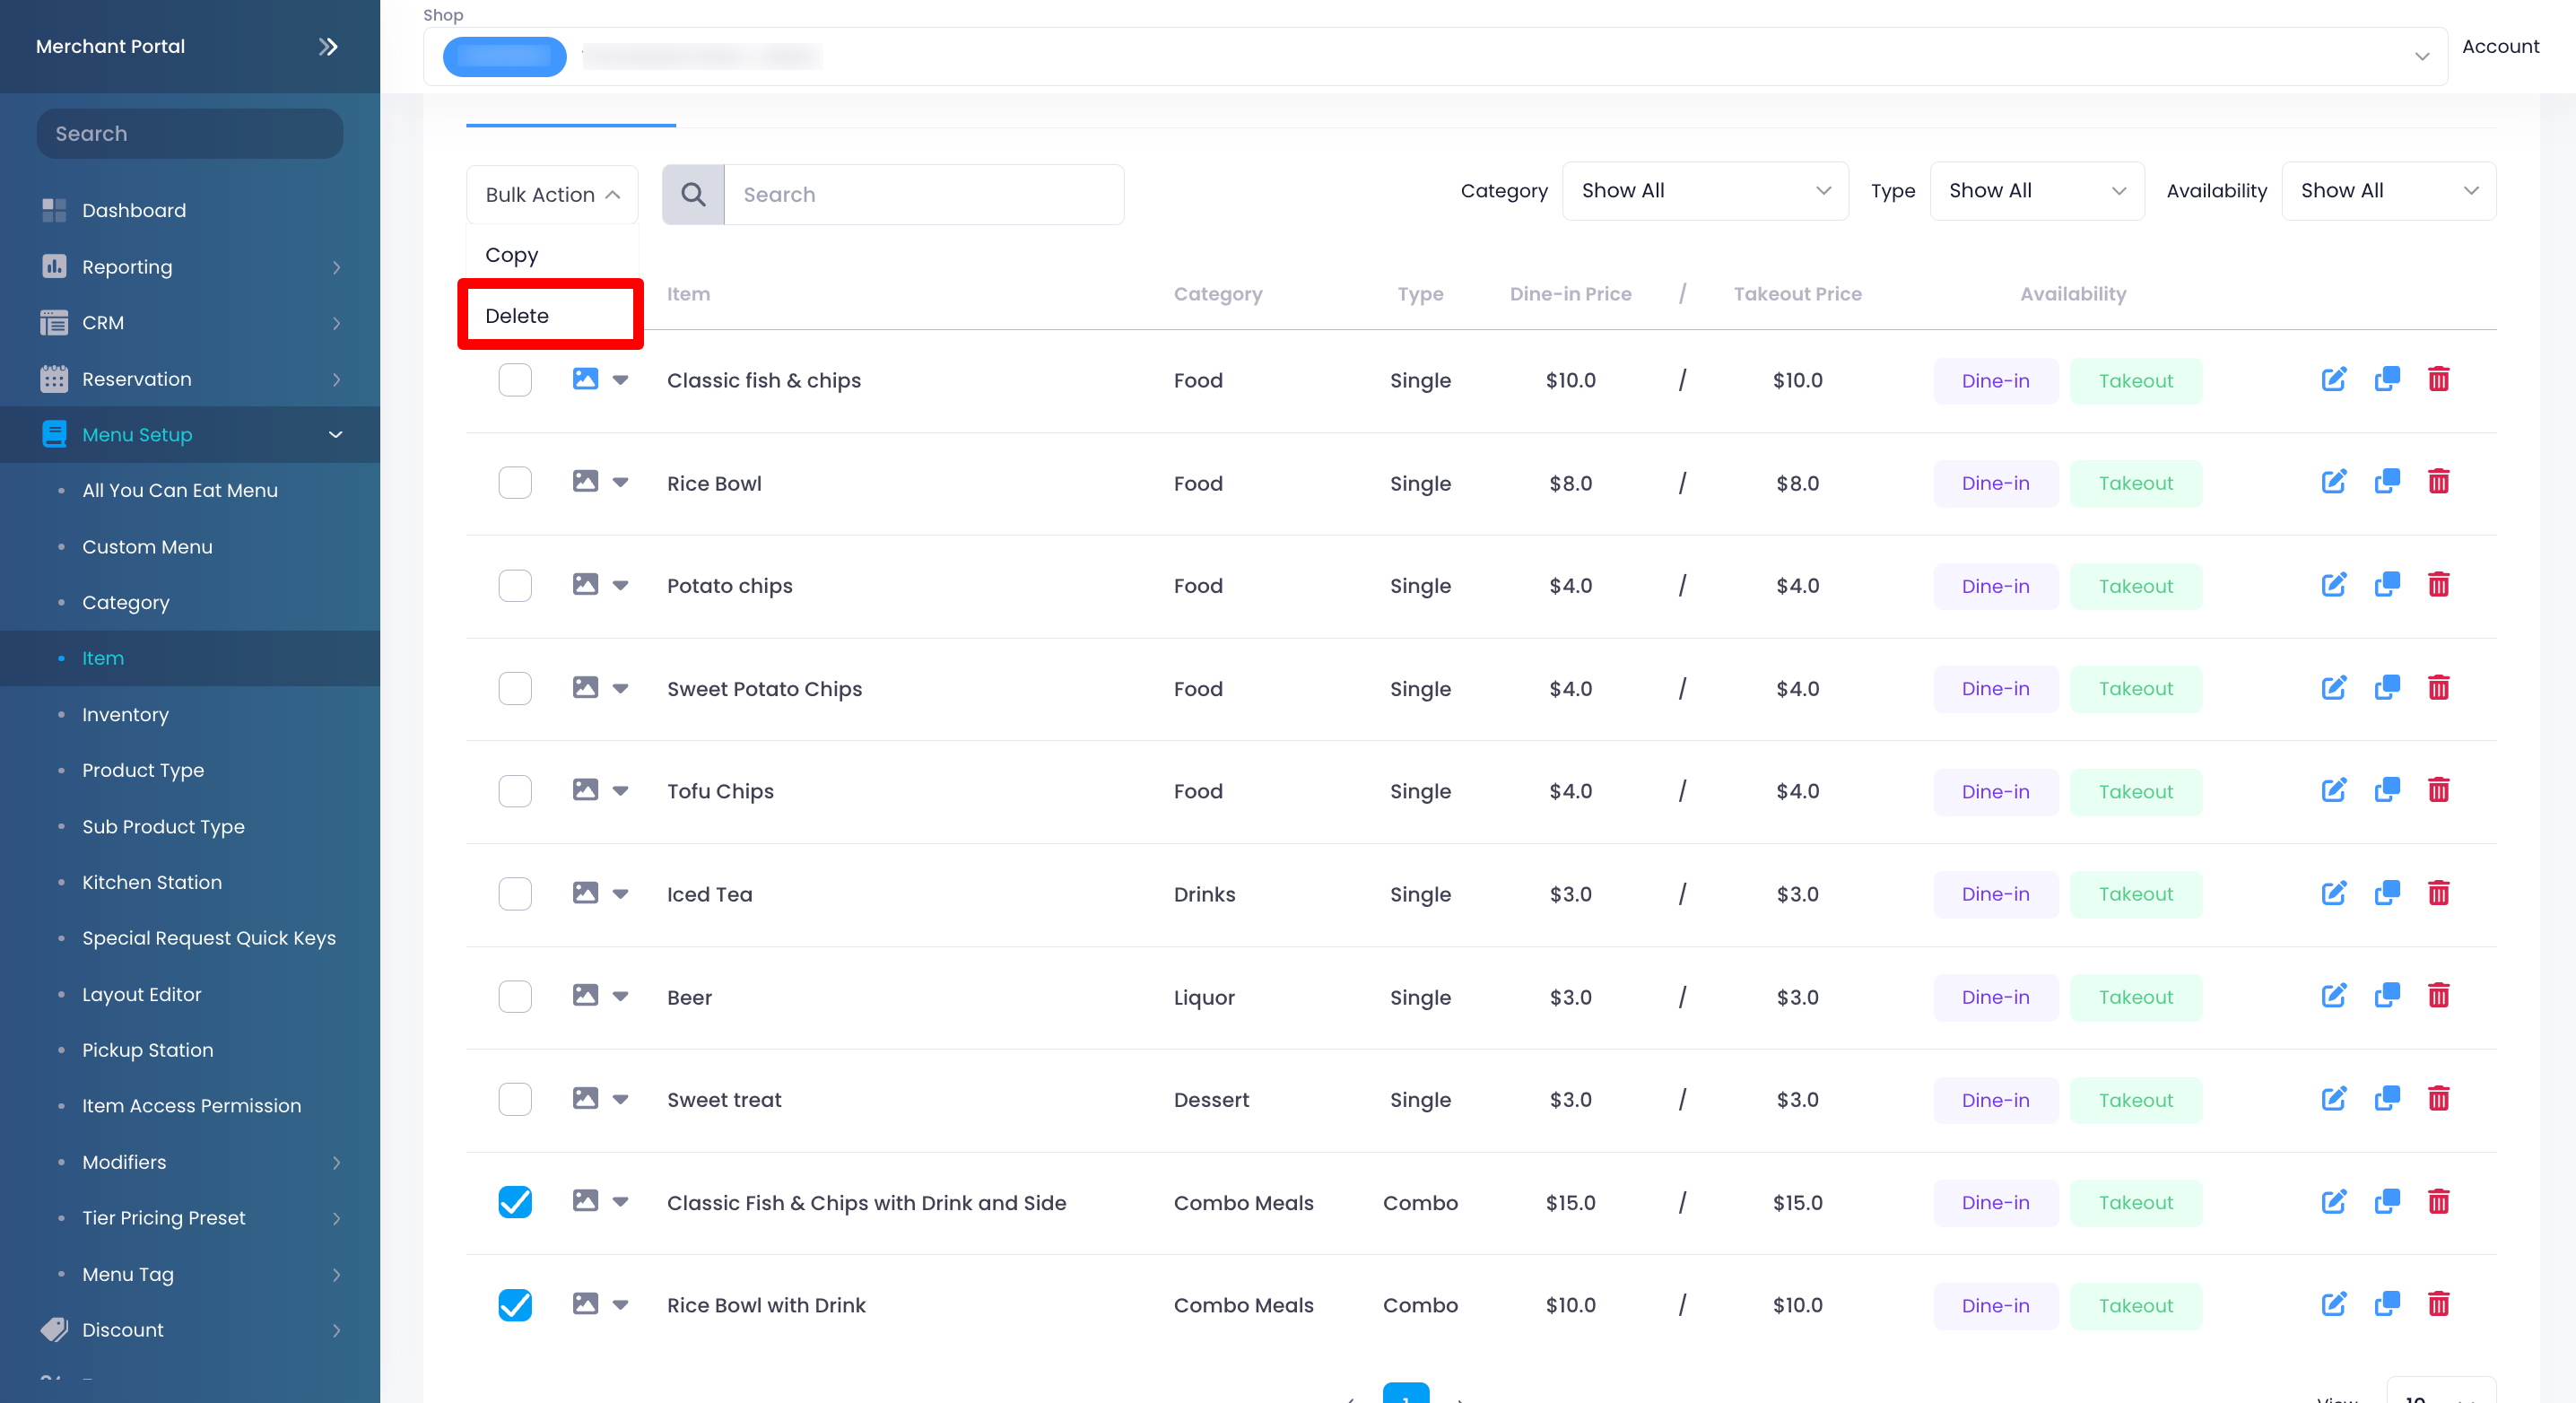
- Click on Confirm to delete.
Merchant Portal (Classic Theme)
- Log in to the Merchant Portal.
- On the left panel, click on Menu Setup, then select Item.
- Next to the items that you want to delete, click on the check box.
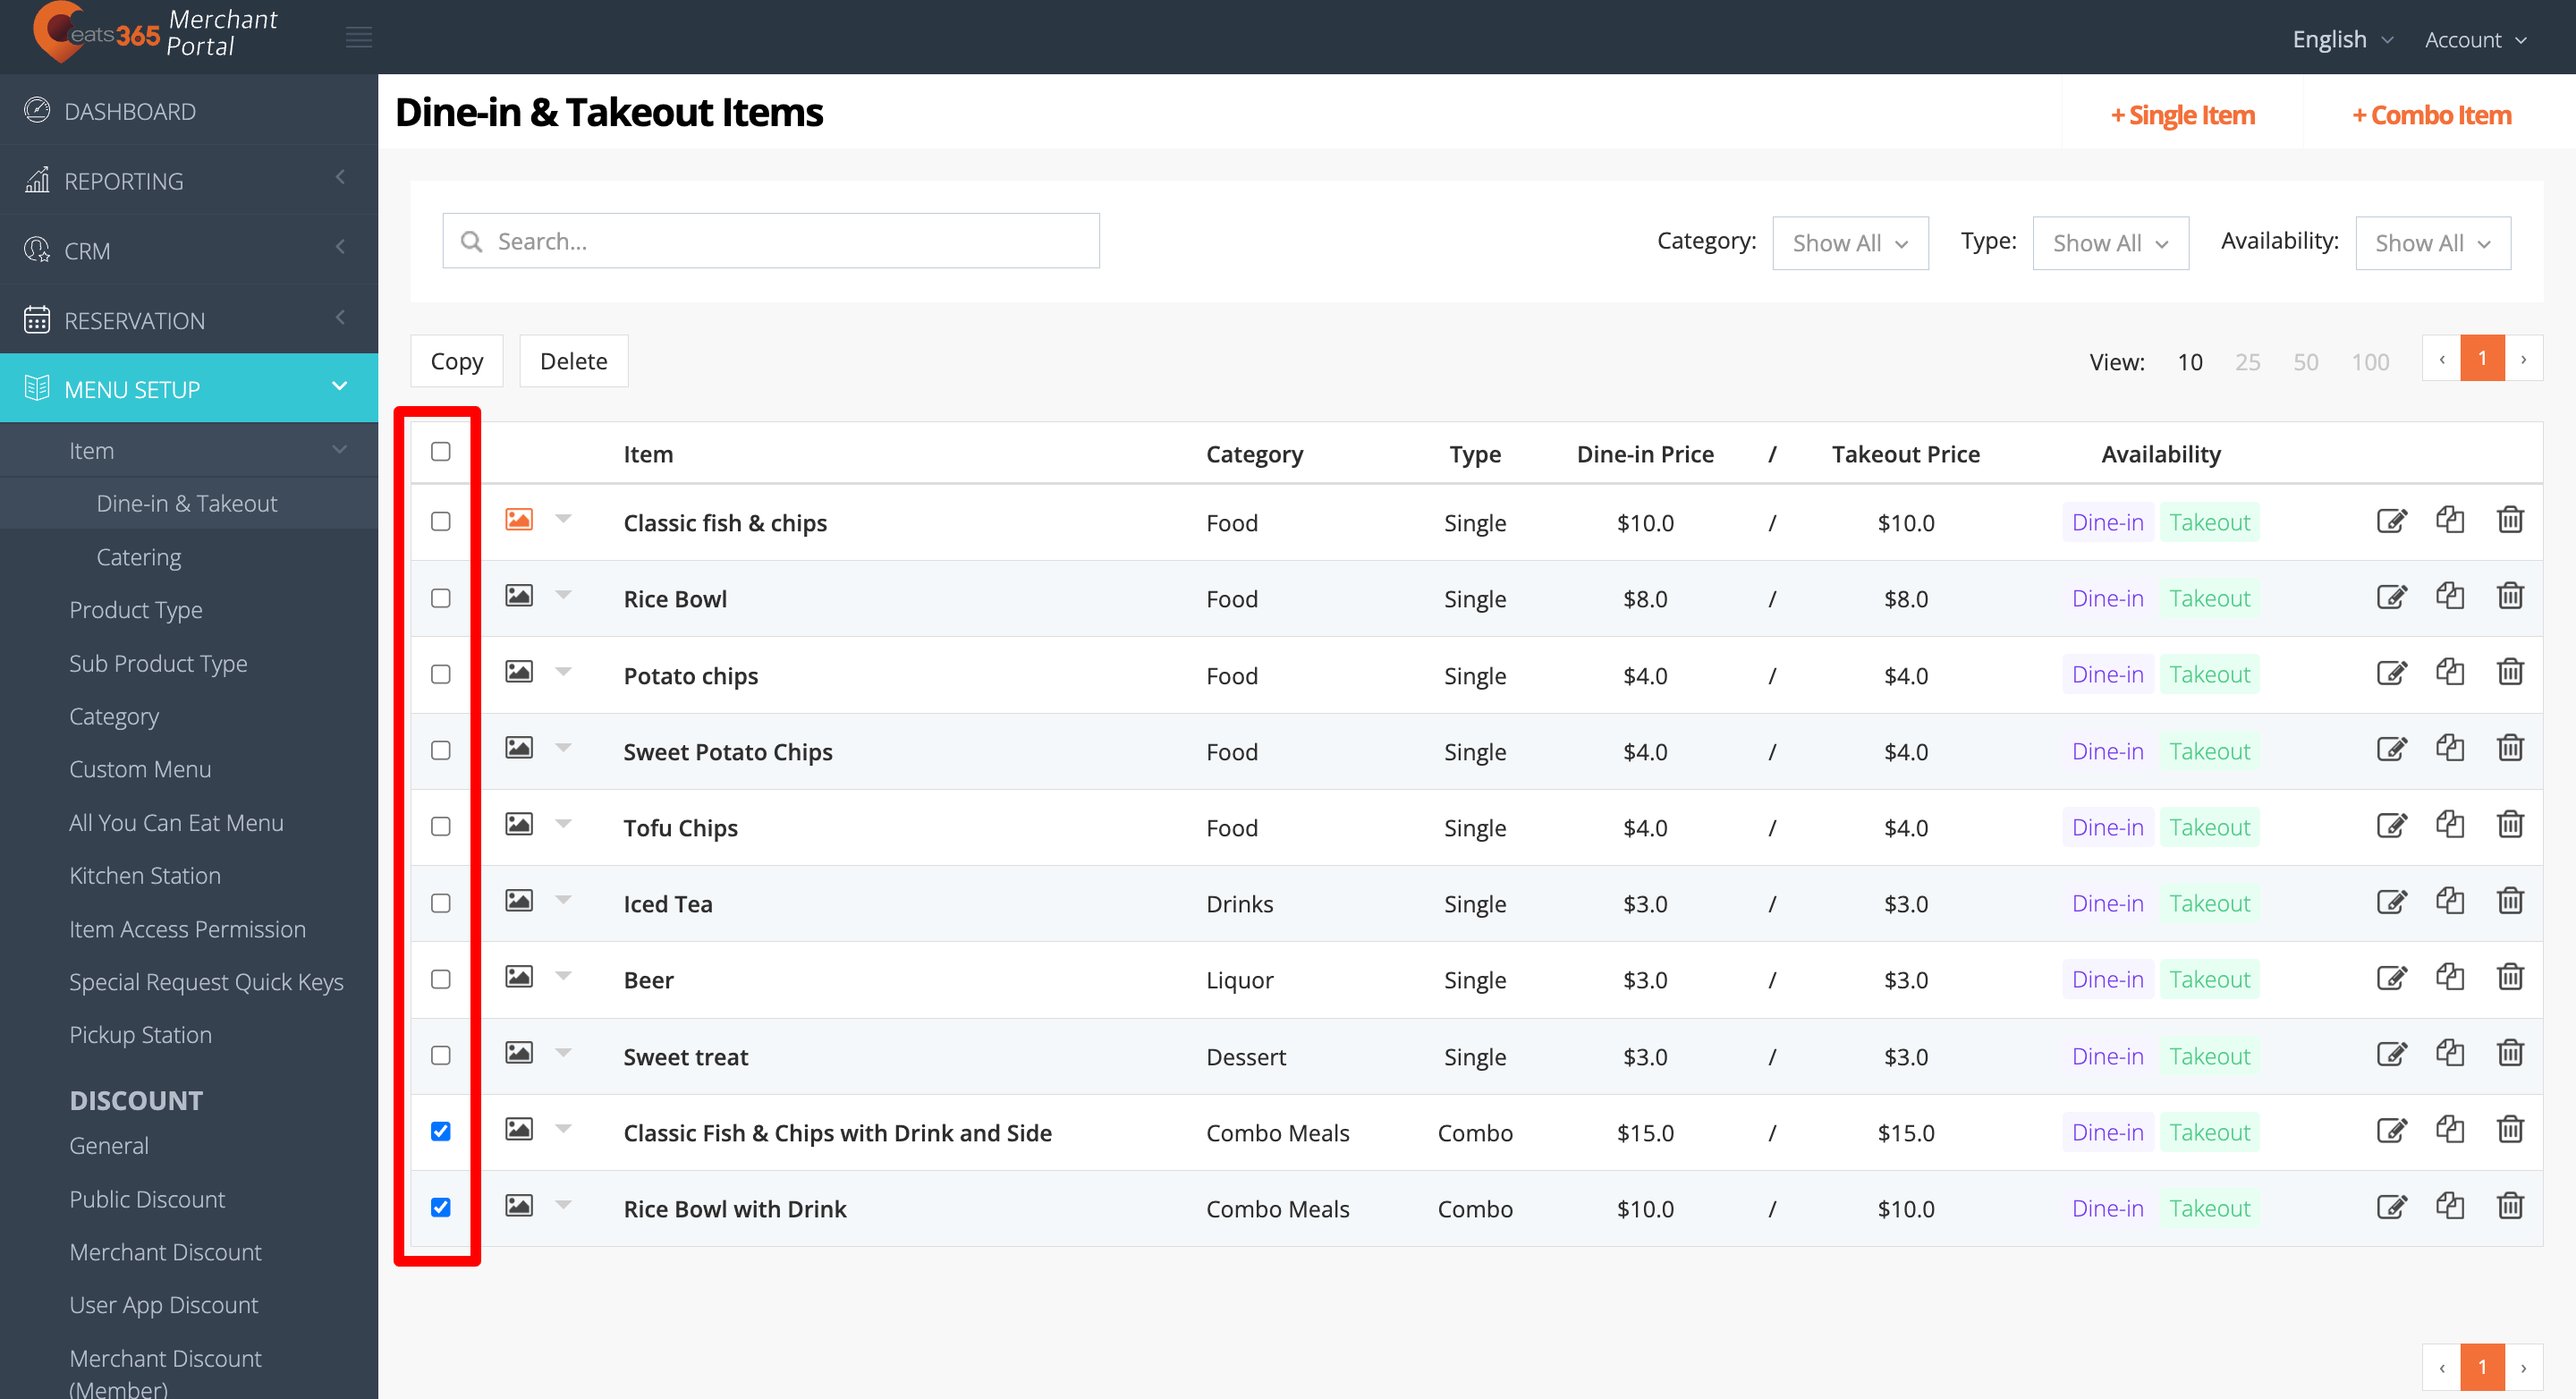
- At the top of the items, click on Delete. A prompt appears to confirm if you want to delete the item.
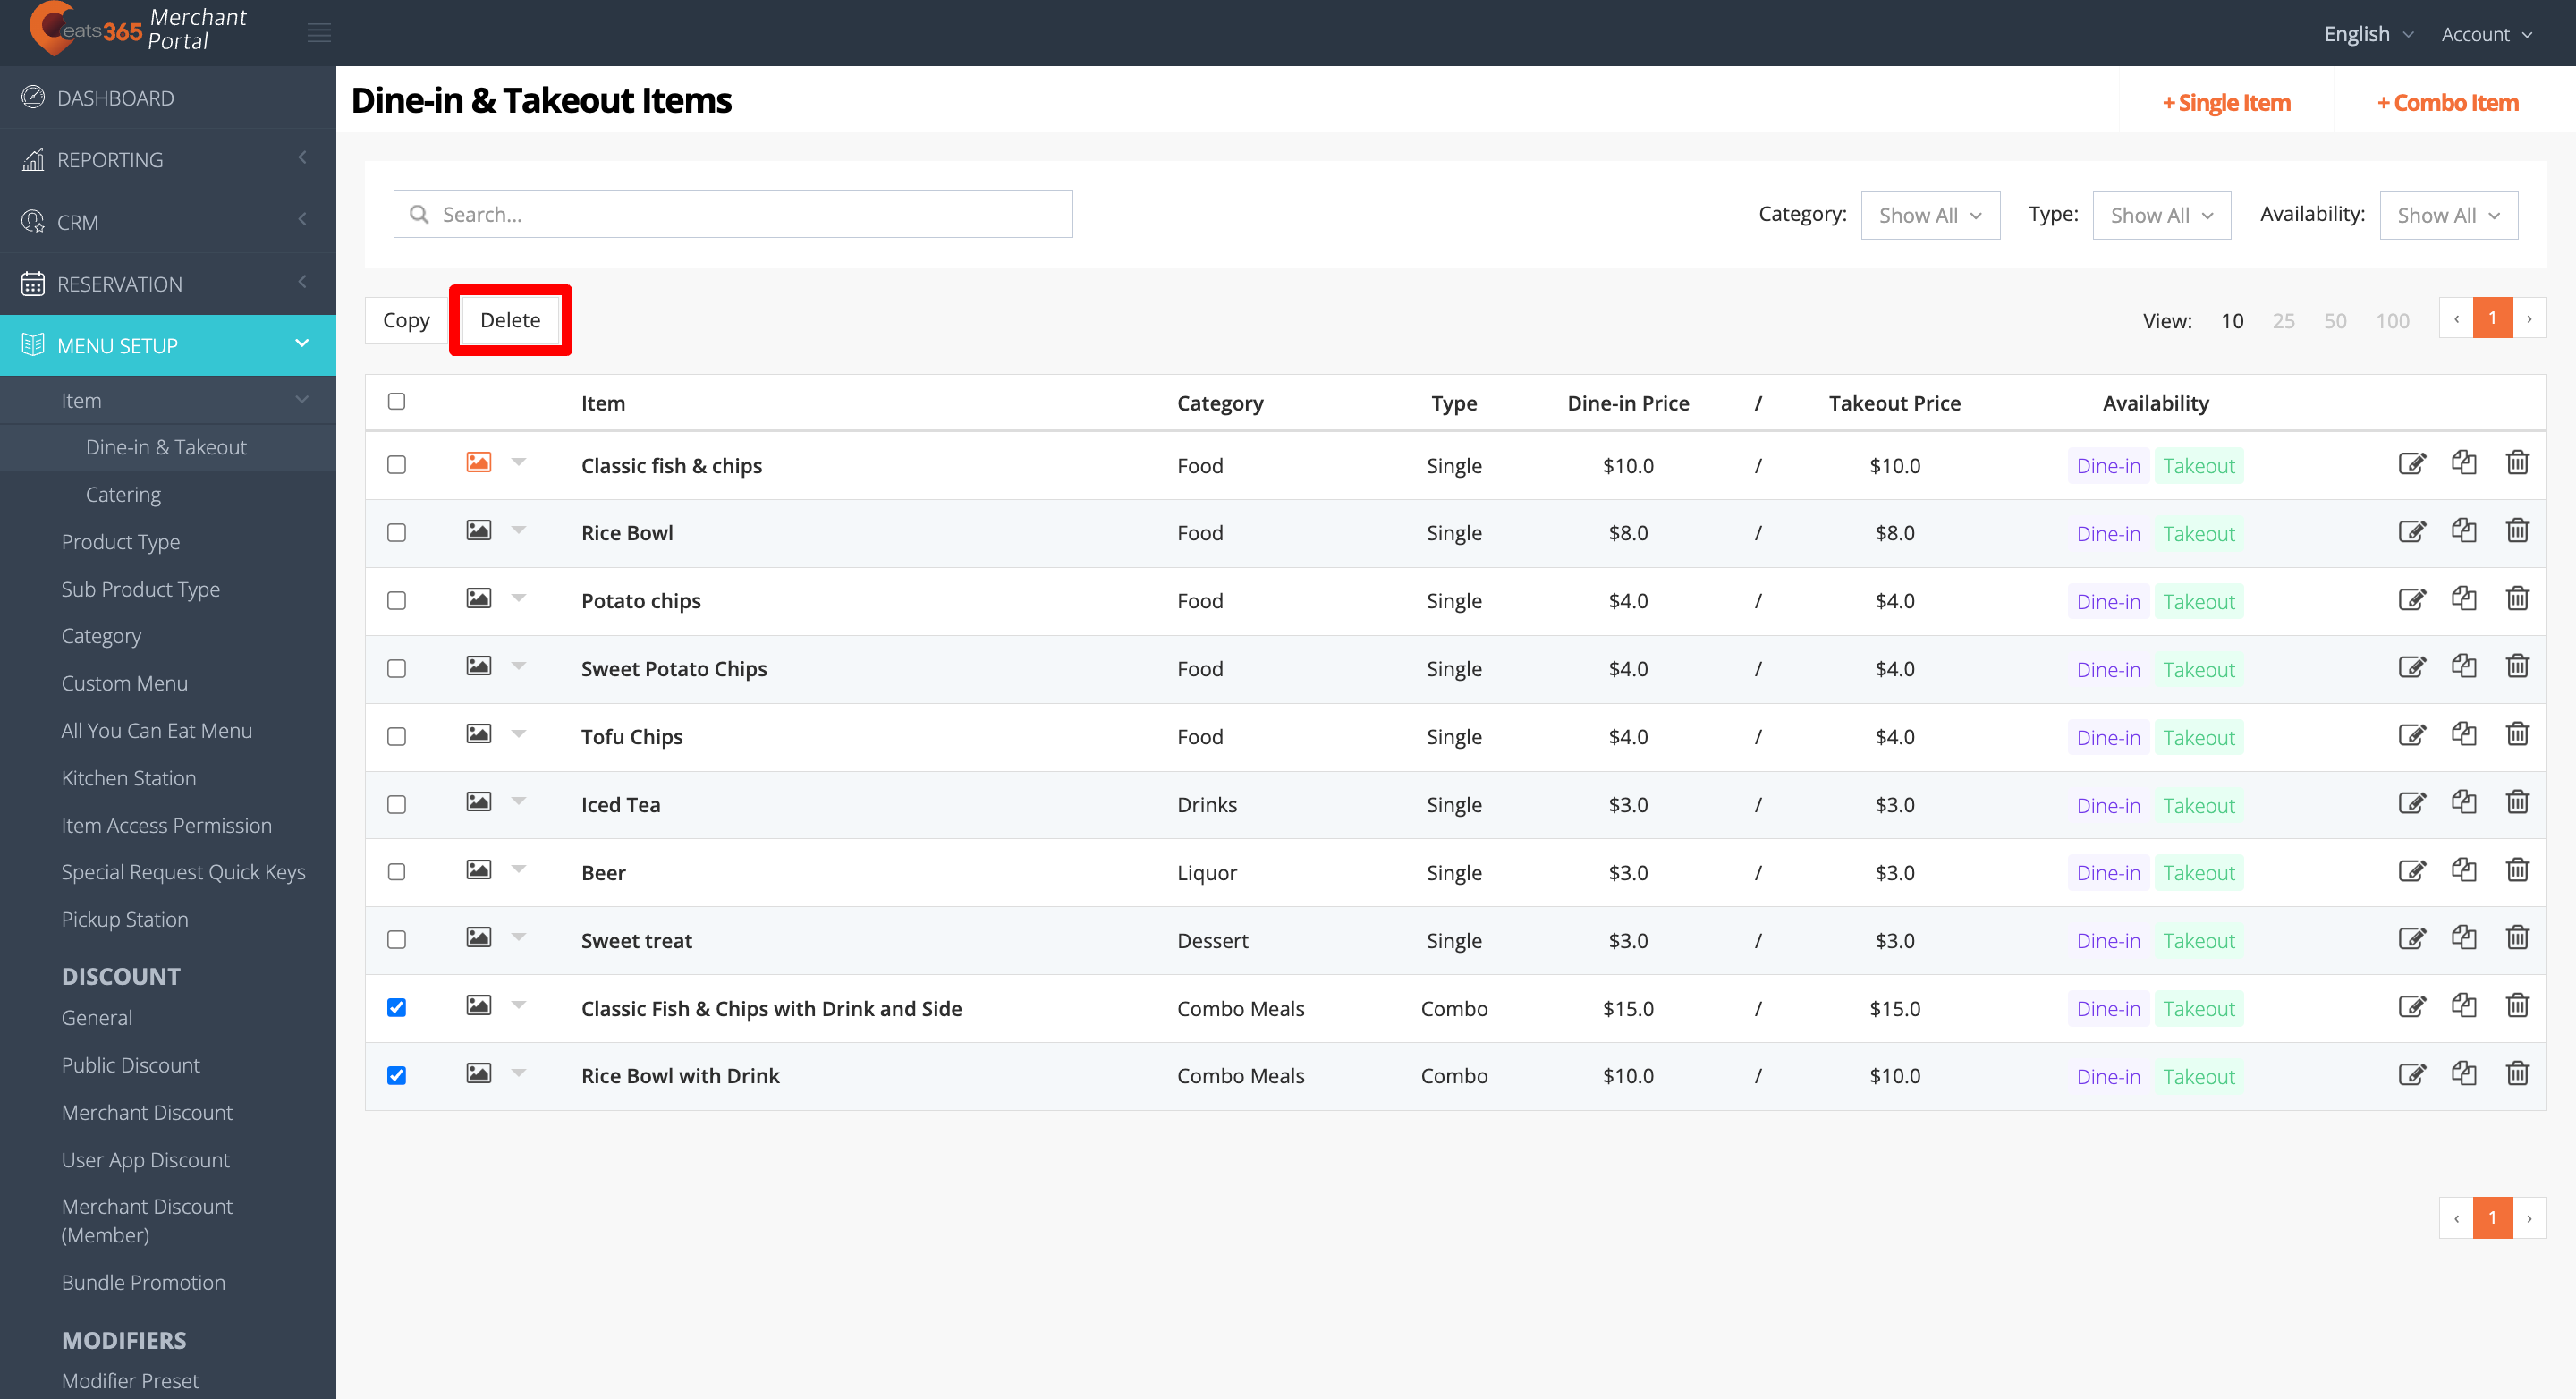
- Click on Confirm to delete.
Reorder items
To rearrange your menu items’ sequence, follow the steps below:
Eats365 POS
- Log in to the Eats365 POS.
- At the top left, tap Settings .
- Under "General," tap Menu Setup, then select Item.
- Tap the "Category" filter and select the category with the items that you want to reorder.

- Next to the item that you want to move, tap and hold Reorder
 . Then, drag the item in the order that you want it to appear.
Merchant Portal 2.0
- Log in to the Merchant Portal.
- On the left panel, click on Menu Setup, then select Item.
- Click on the "Category" filter and select the category with the items that you want to reorder.

- Next to the item that you want to move, click and hold Reorder . Then, drag the item in the order that you want it to appear.

Merchant Portal (Classic Theme)
- Log in to the Merchant Portal.
- On the left panel, click on Menu Setup, then select Item.
- Click on the "Category" filter and select the category with the items that you want to reorder.
- Next to the item that you want to move, click and hold Reorder . Then, drag the item in the order that you want it to appear.
Create a copy of an item
Duplicating an item is necessary in order to move the item to a different category. You won’t be able to do so unless you create a copy of the item. Once an item has been saved under a category, you won’t be able to change it from the Item settings.
To create a copy of an item, follow the steps below:
Eats365 POS
- Log in to the Eats365 POS.
- At the top left, tap Settings .
- Under "General," tap Menu Setup, then select Item.
- Next to the item that you want to copy, tap the three-dot menu . Then, tap Copy to a new item
 .
.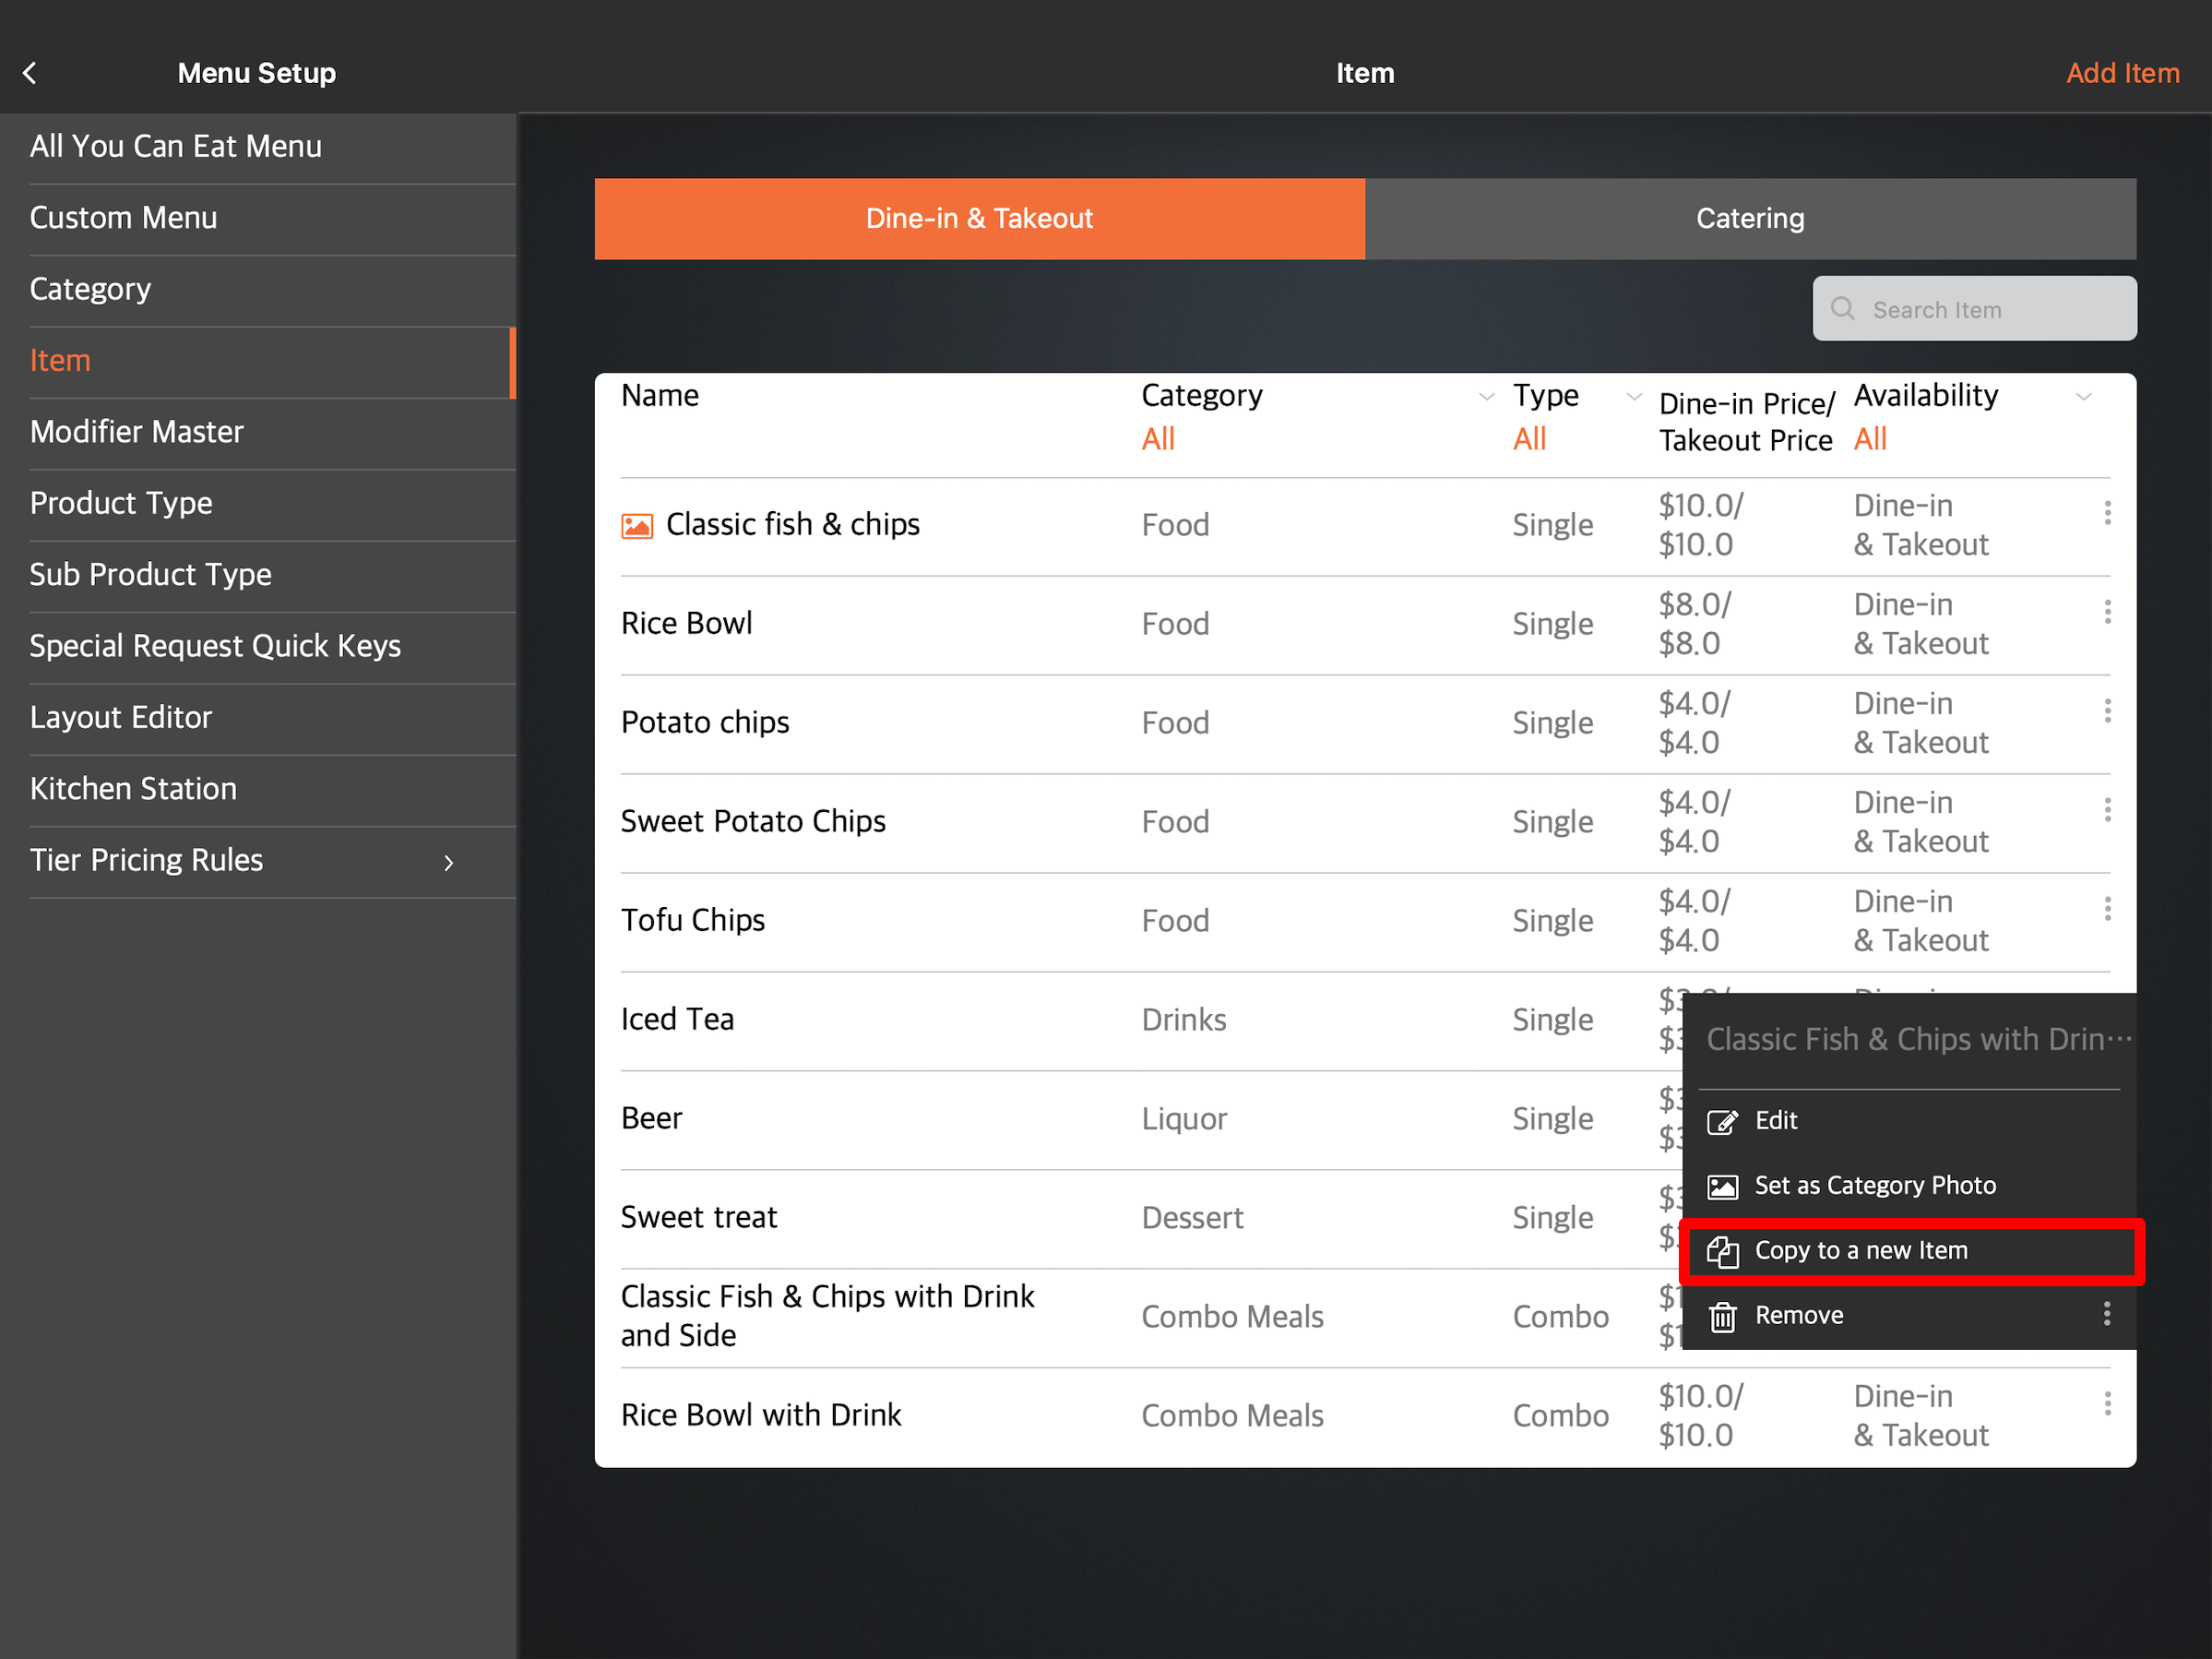
- At the top right, tap Save to confirm.
Merchant Portal 2.0
- Log in to the Merchant Portal.
- On the left panel, click on Menu Setup, then select Item.
- Select the item that you want to copy. Then, click on Copy
 .
.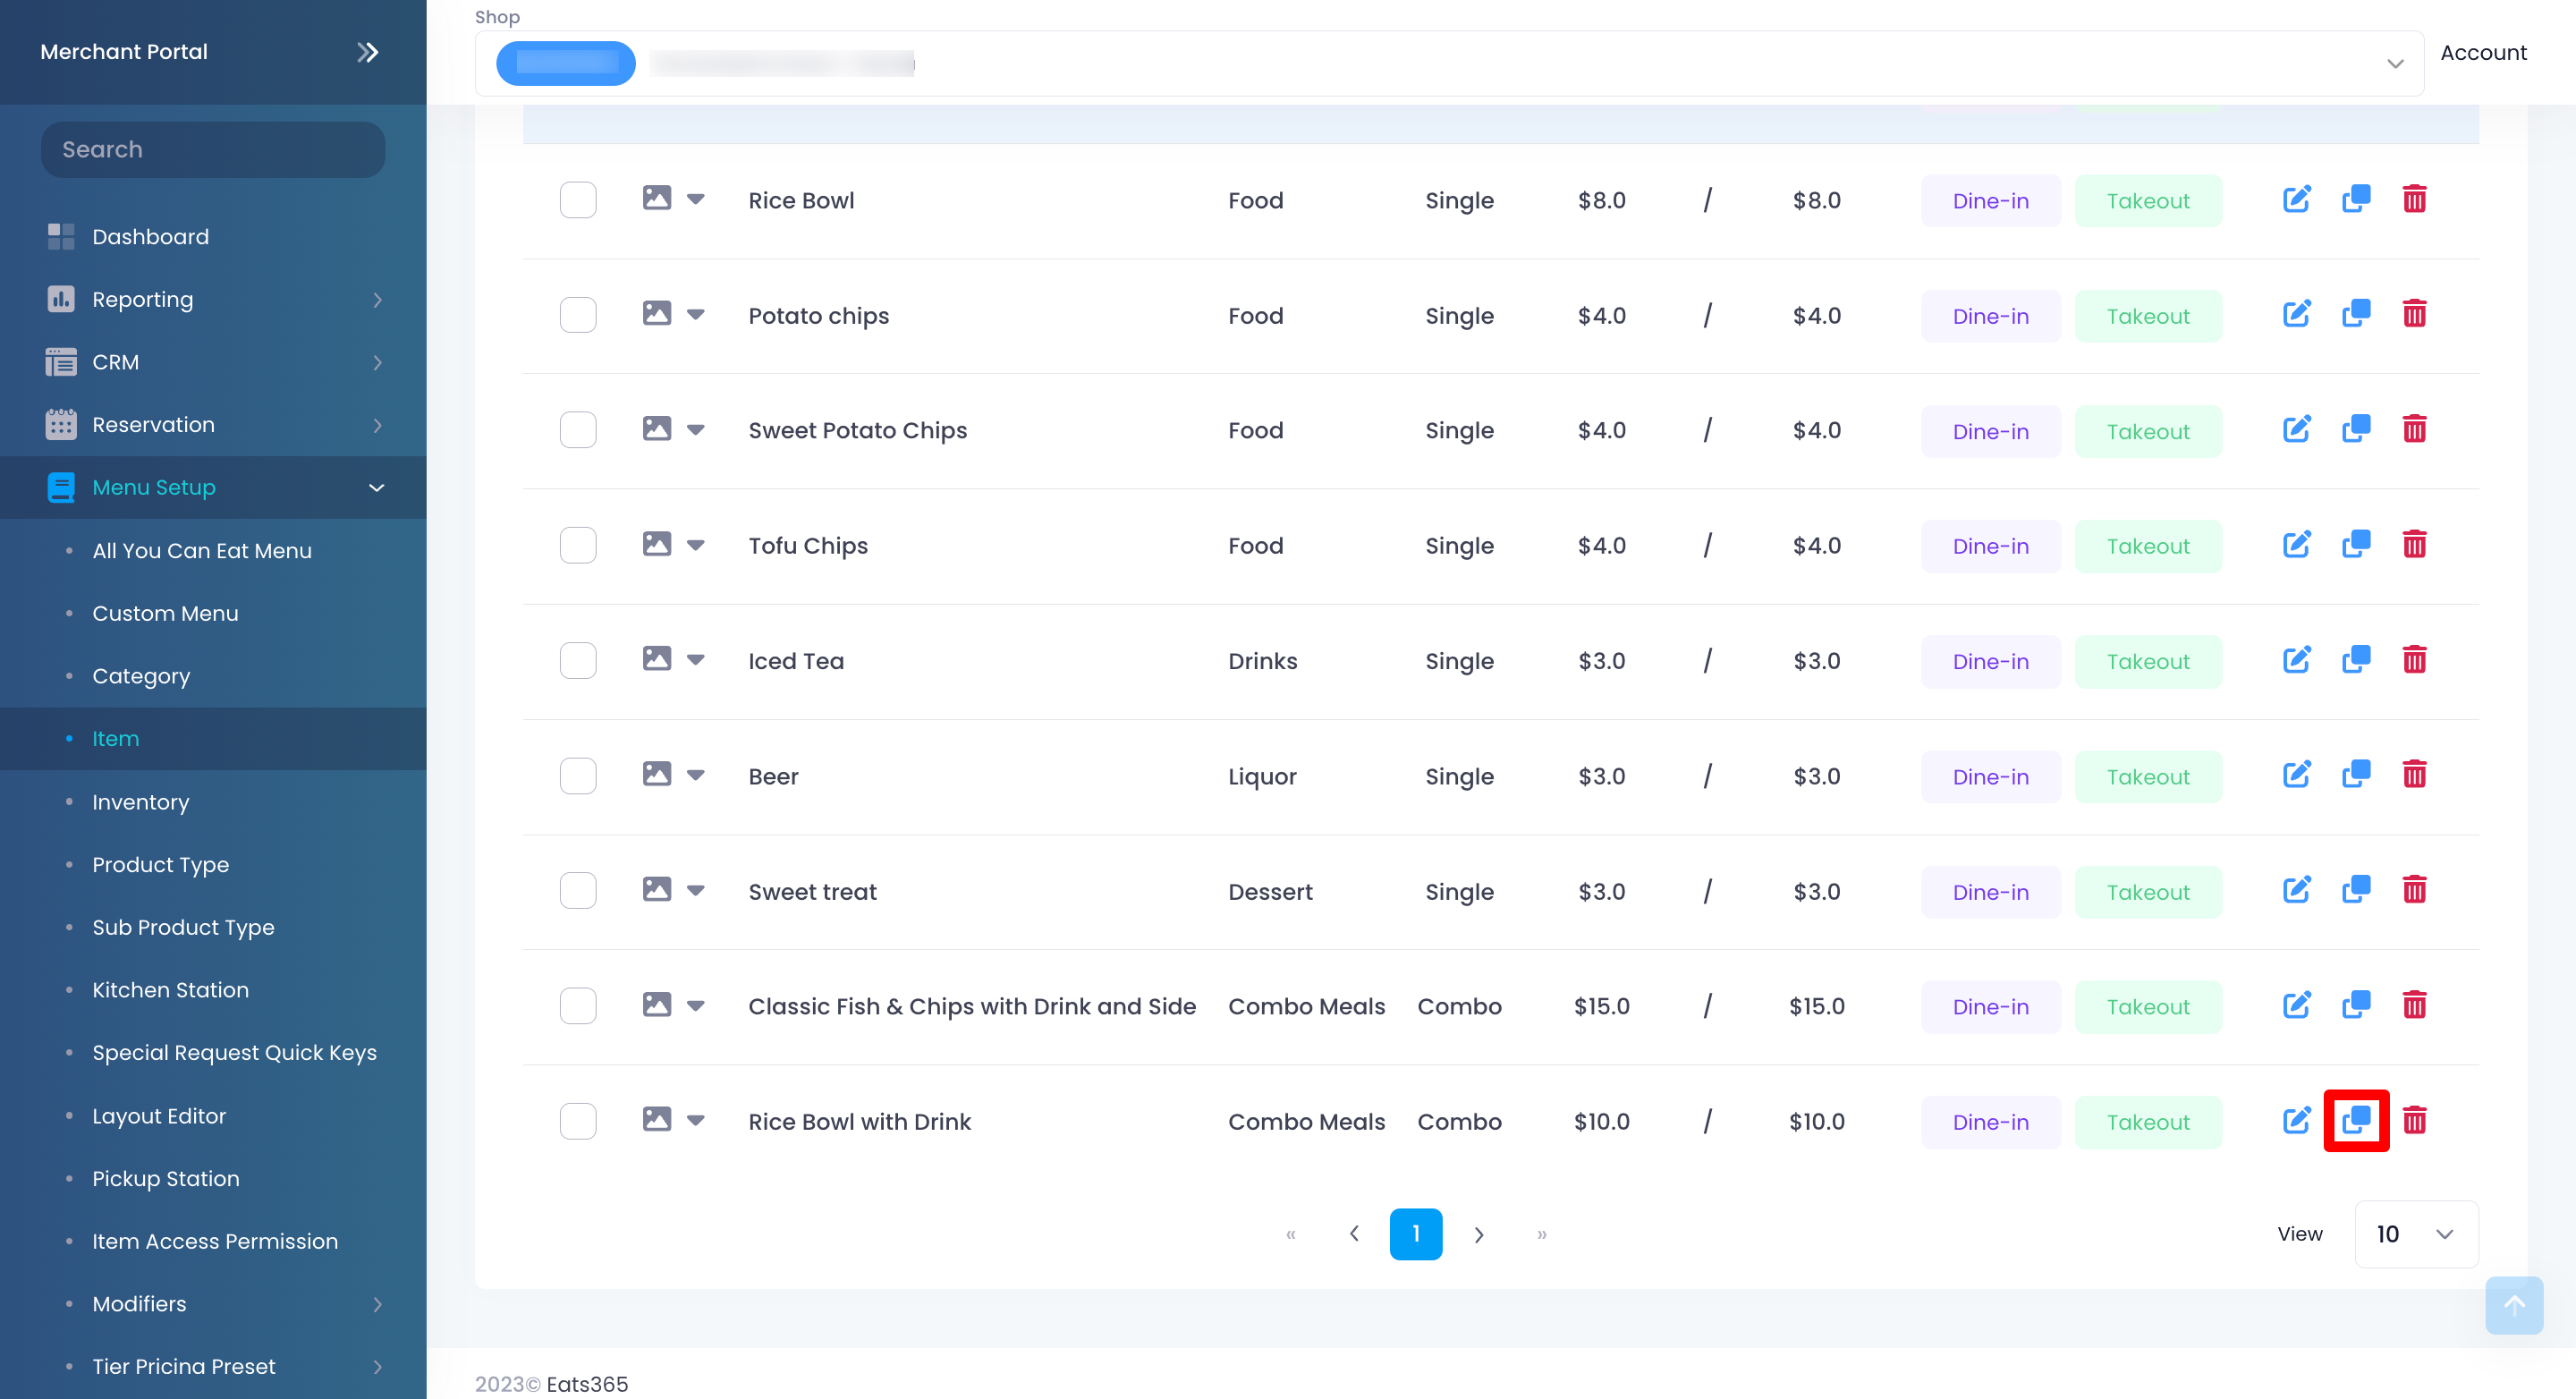
- Make your changes, if you have any.
- At the top right, click on Save to confirm.
Merchant Portal (Classic Theme)
- Log in to the Merchant Portal.
- On the left panel, click on Menu Setup, then select Item.
- Select the item that you want to edit. Then, click on Copy.
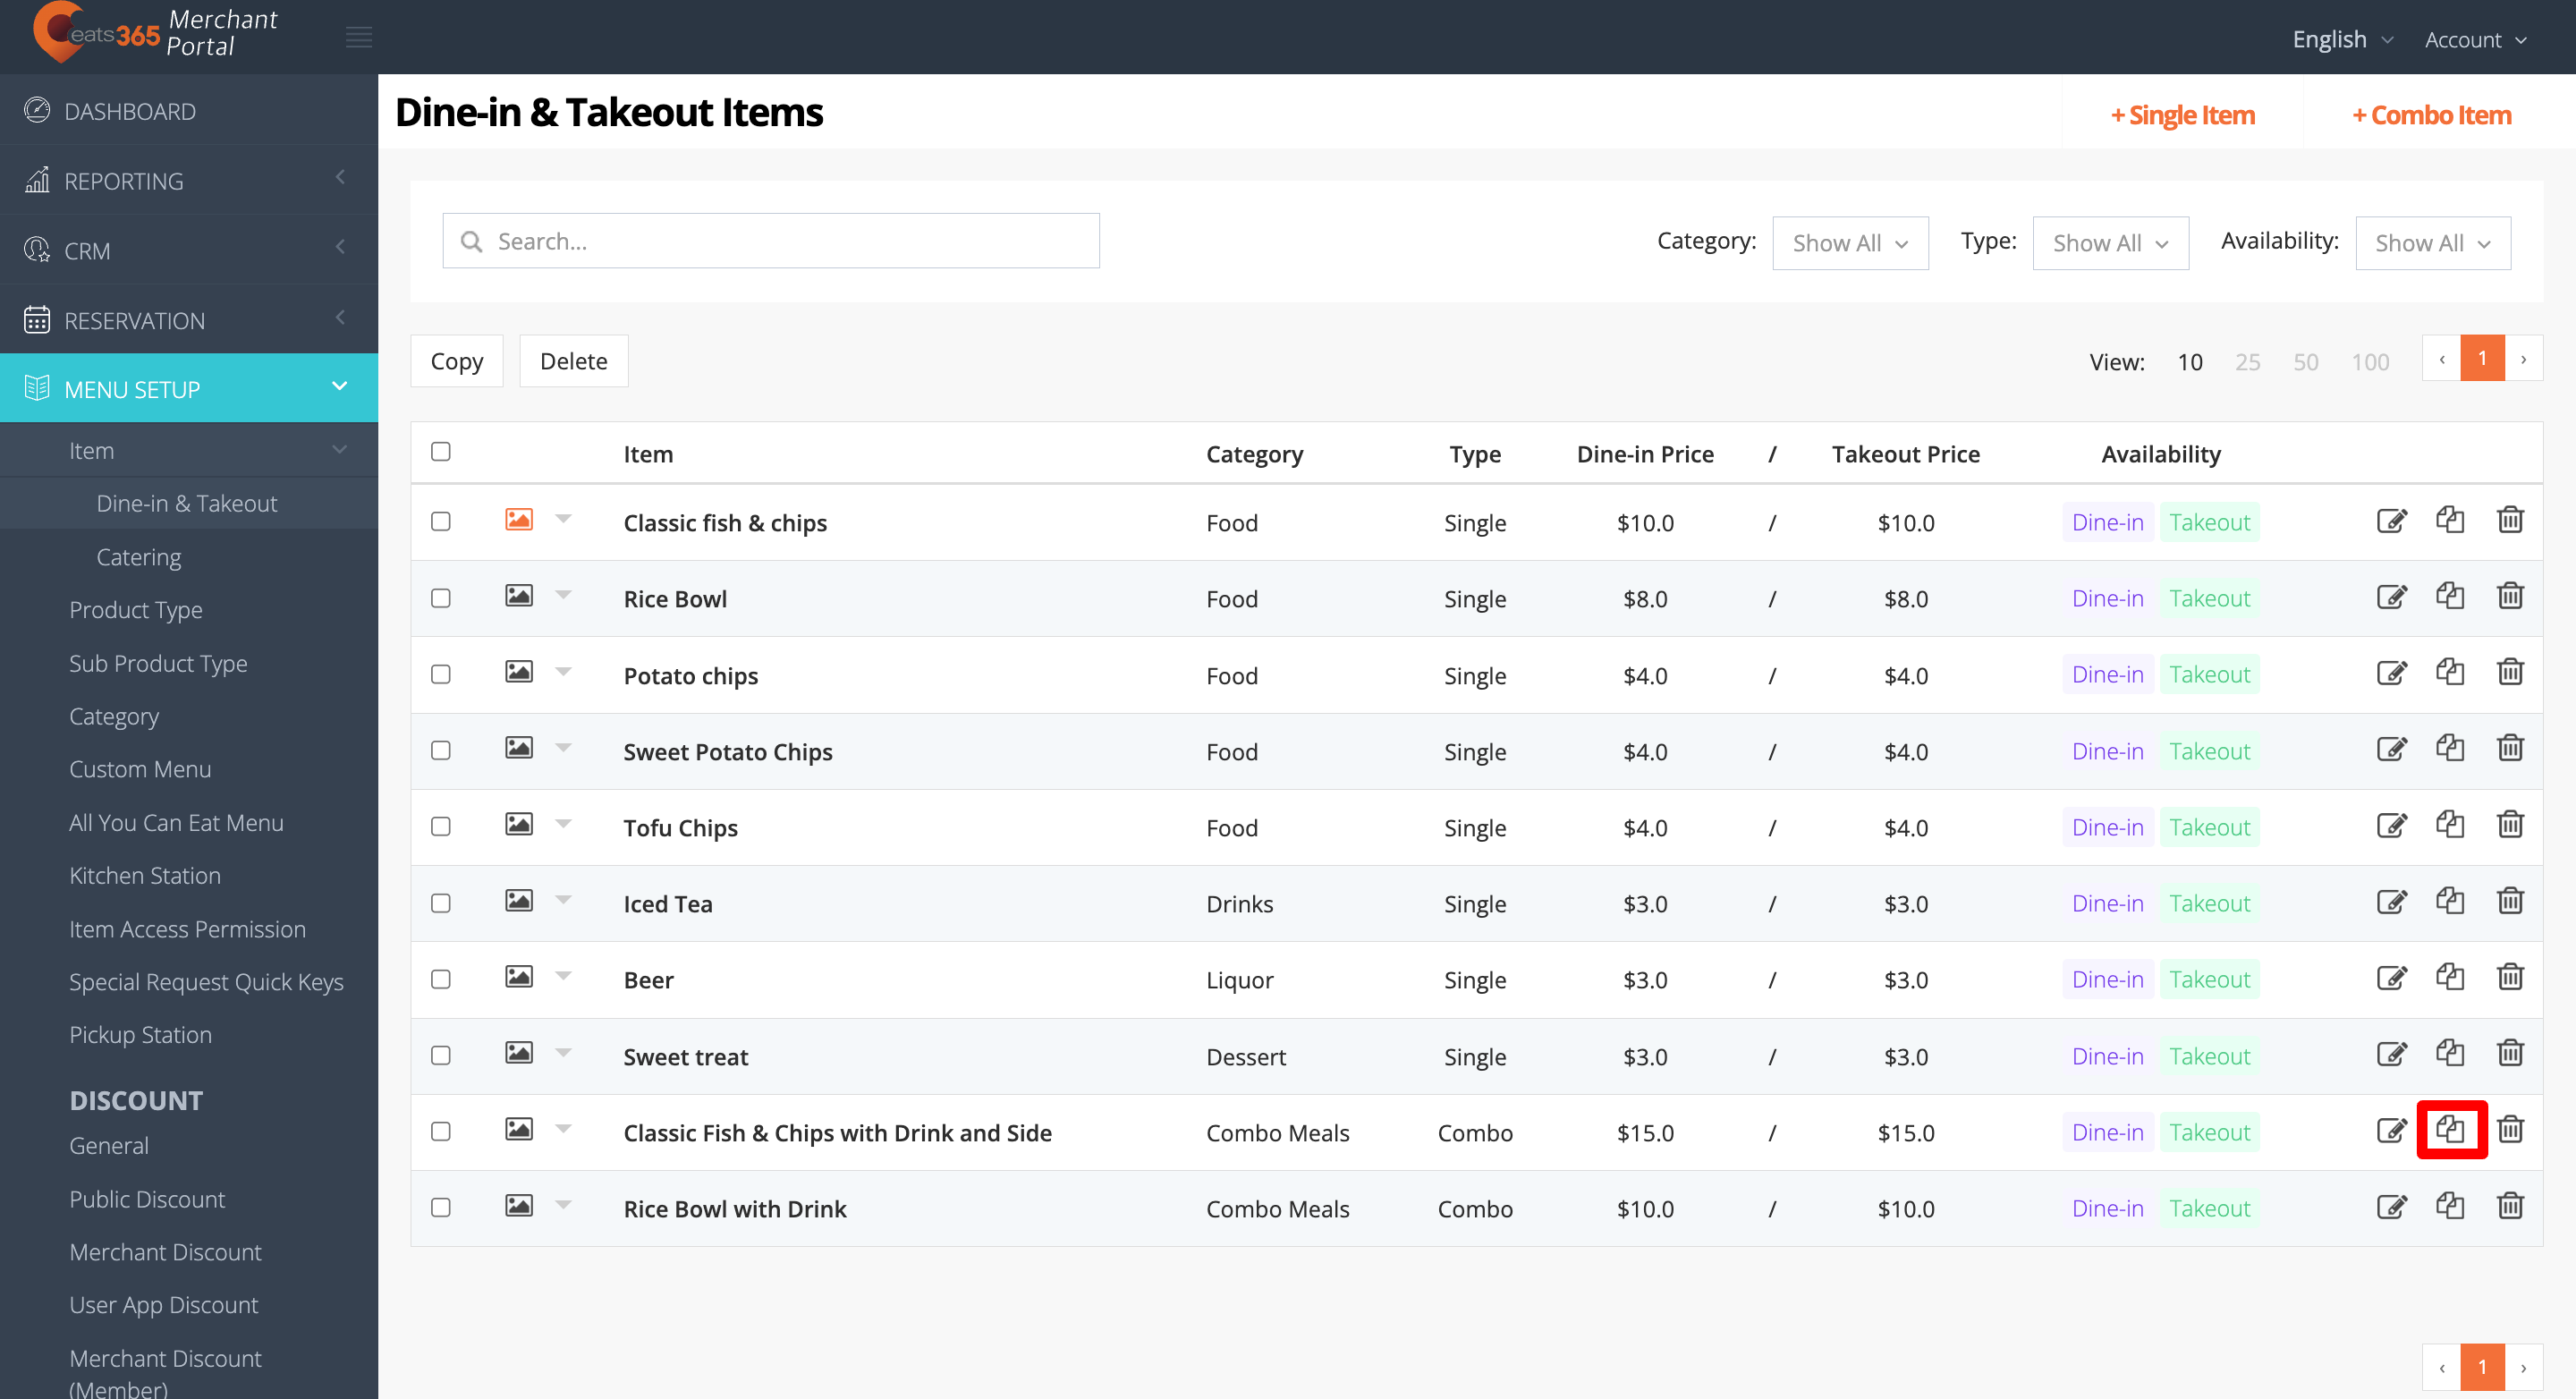
- Make your changes, if you have any.
- At the top right, click on Save to confirm.
Create a copy of multiple Items
When you create a copy of multiple items, you’ll be able to change multiple settings on different items simultaneously. These settings include item “Category,” “Availability,” and “Roles and Permissions.”
To create a copy of multiple items, follow the steps below:
Merchant Portal 2.0
- Log in to the Merchant Portal.
- On the left panel, click on Menu Setup, then select Item.
- Next to the items that you want to copy, click on the check box.
- From the bulk action drop-down list, click on Copy.
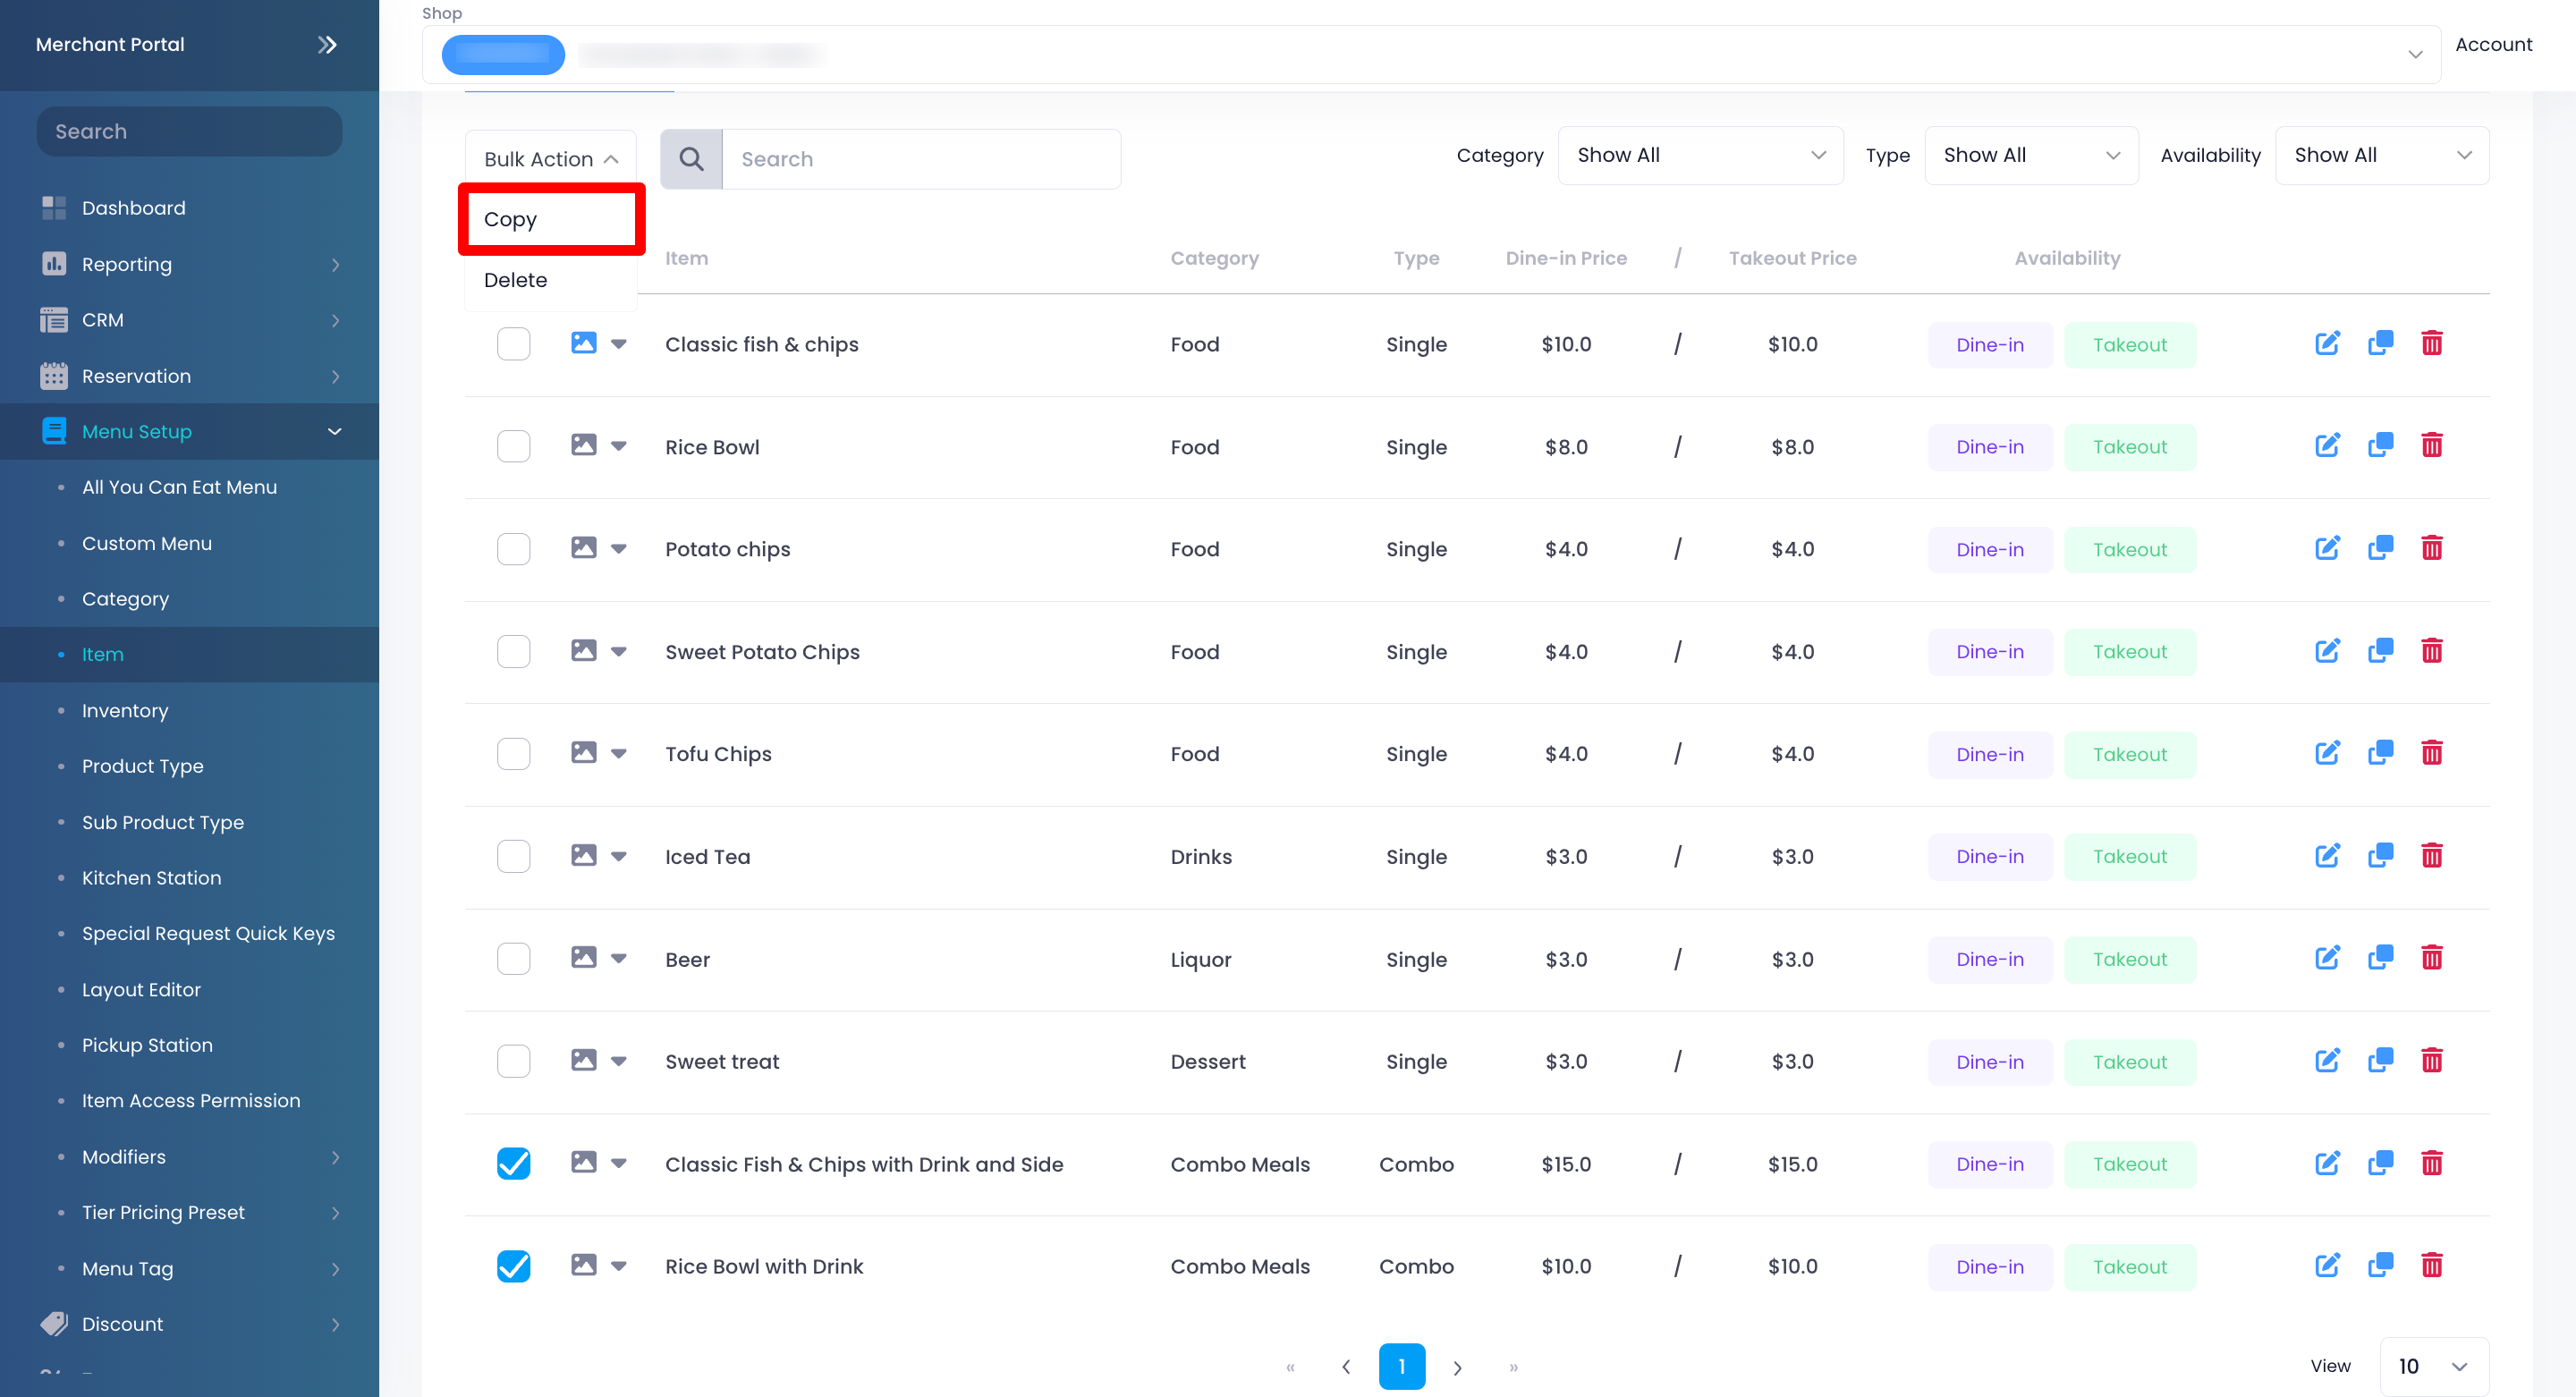
- Make your changes, if you have any.
- At the top right, click on Copy to confirm.
Merchant Portal (Classic Theme)
- Log in to the Merchant Portal.
- On the left panel, click on Menu Setup, then select Item.
- Next to the items that you want to copy, click on the check box.
- At the top of the items, click on Copy.
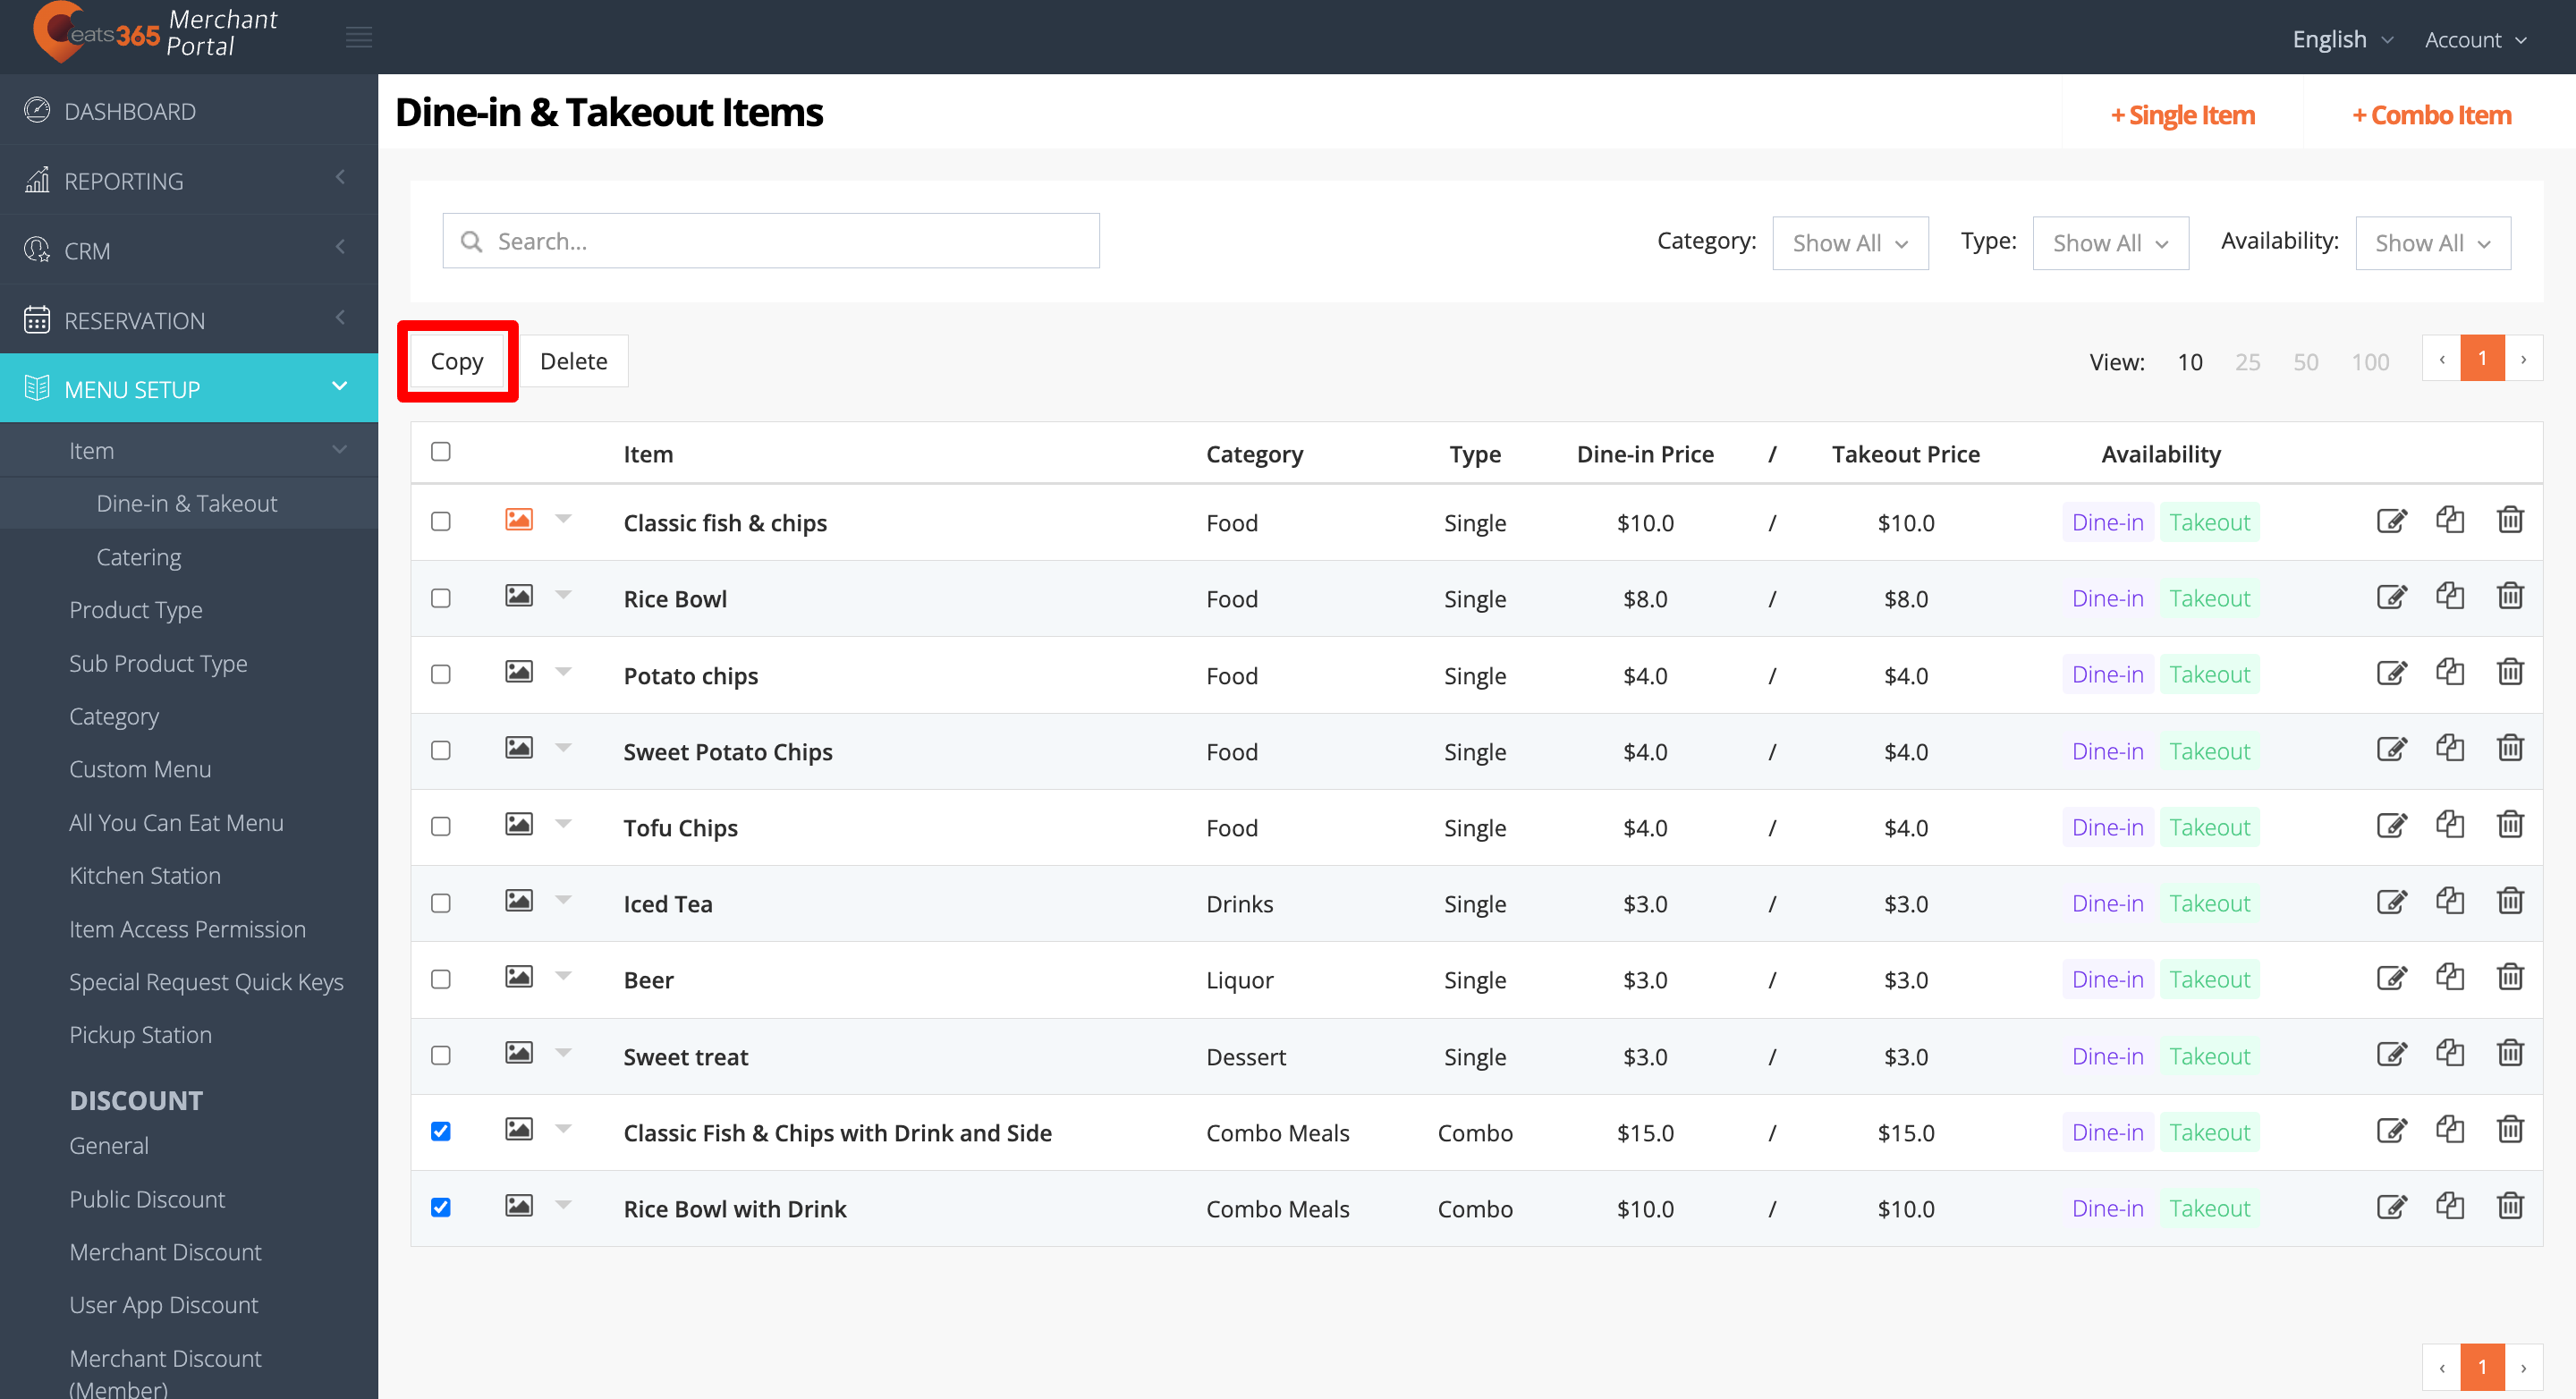
- Make your changes, if you have any.
- At the top right, click on Copy to confirm.