 Eats365 Products
 Merchant Guide
 Modules
 Membership
 Integrations
 Hardware
 Staff Operations
 Roles & Permissions
 Payments
 Reports
 What’s New
 Release Notes
 Troubleshooting
 Simulators
 Glossary
 Troubleshooter
 System Status
Catering settings
Table of Contents
Set up Catering settings
Learn how to configure your restaurant’s Catering workflow and settings on the Eats365 POS app or on the Merchant Portal.
The "Catering" feature allows you to create menu items that are available for large-quantity orders. You can also customize the workflow to fit your restaurant's specific needs.
In this article, you’ll learn how to manage your restaurant’s Catering workflow and settings on the Eats365 POS and the Merchant Portal.
Enable Catering
To enable catering, follow the steps below:
Eats365 POS
- Log in to the Eats365 POS.
- At the top left, tap Settings
 .
. - Under "Settings," tap Catering.
- Turn on Enable Catering
 .
.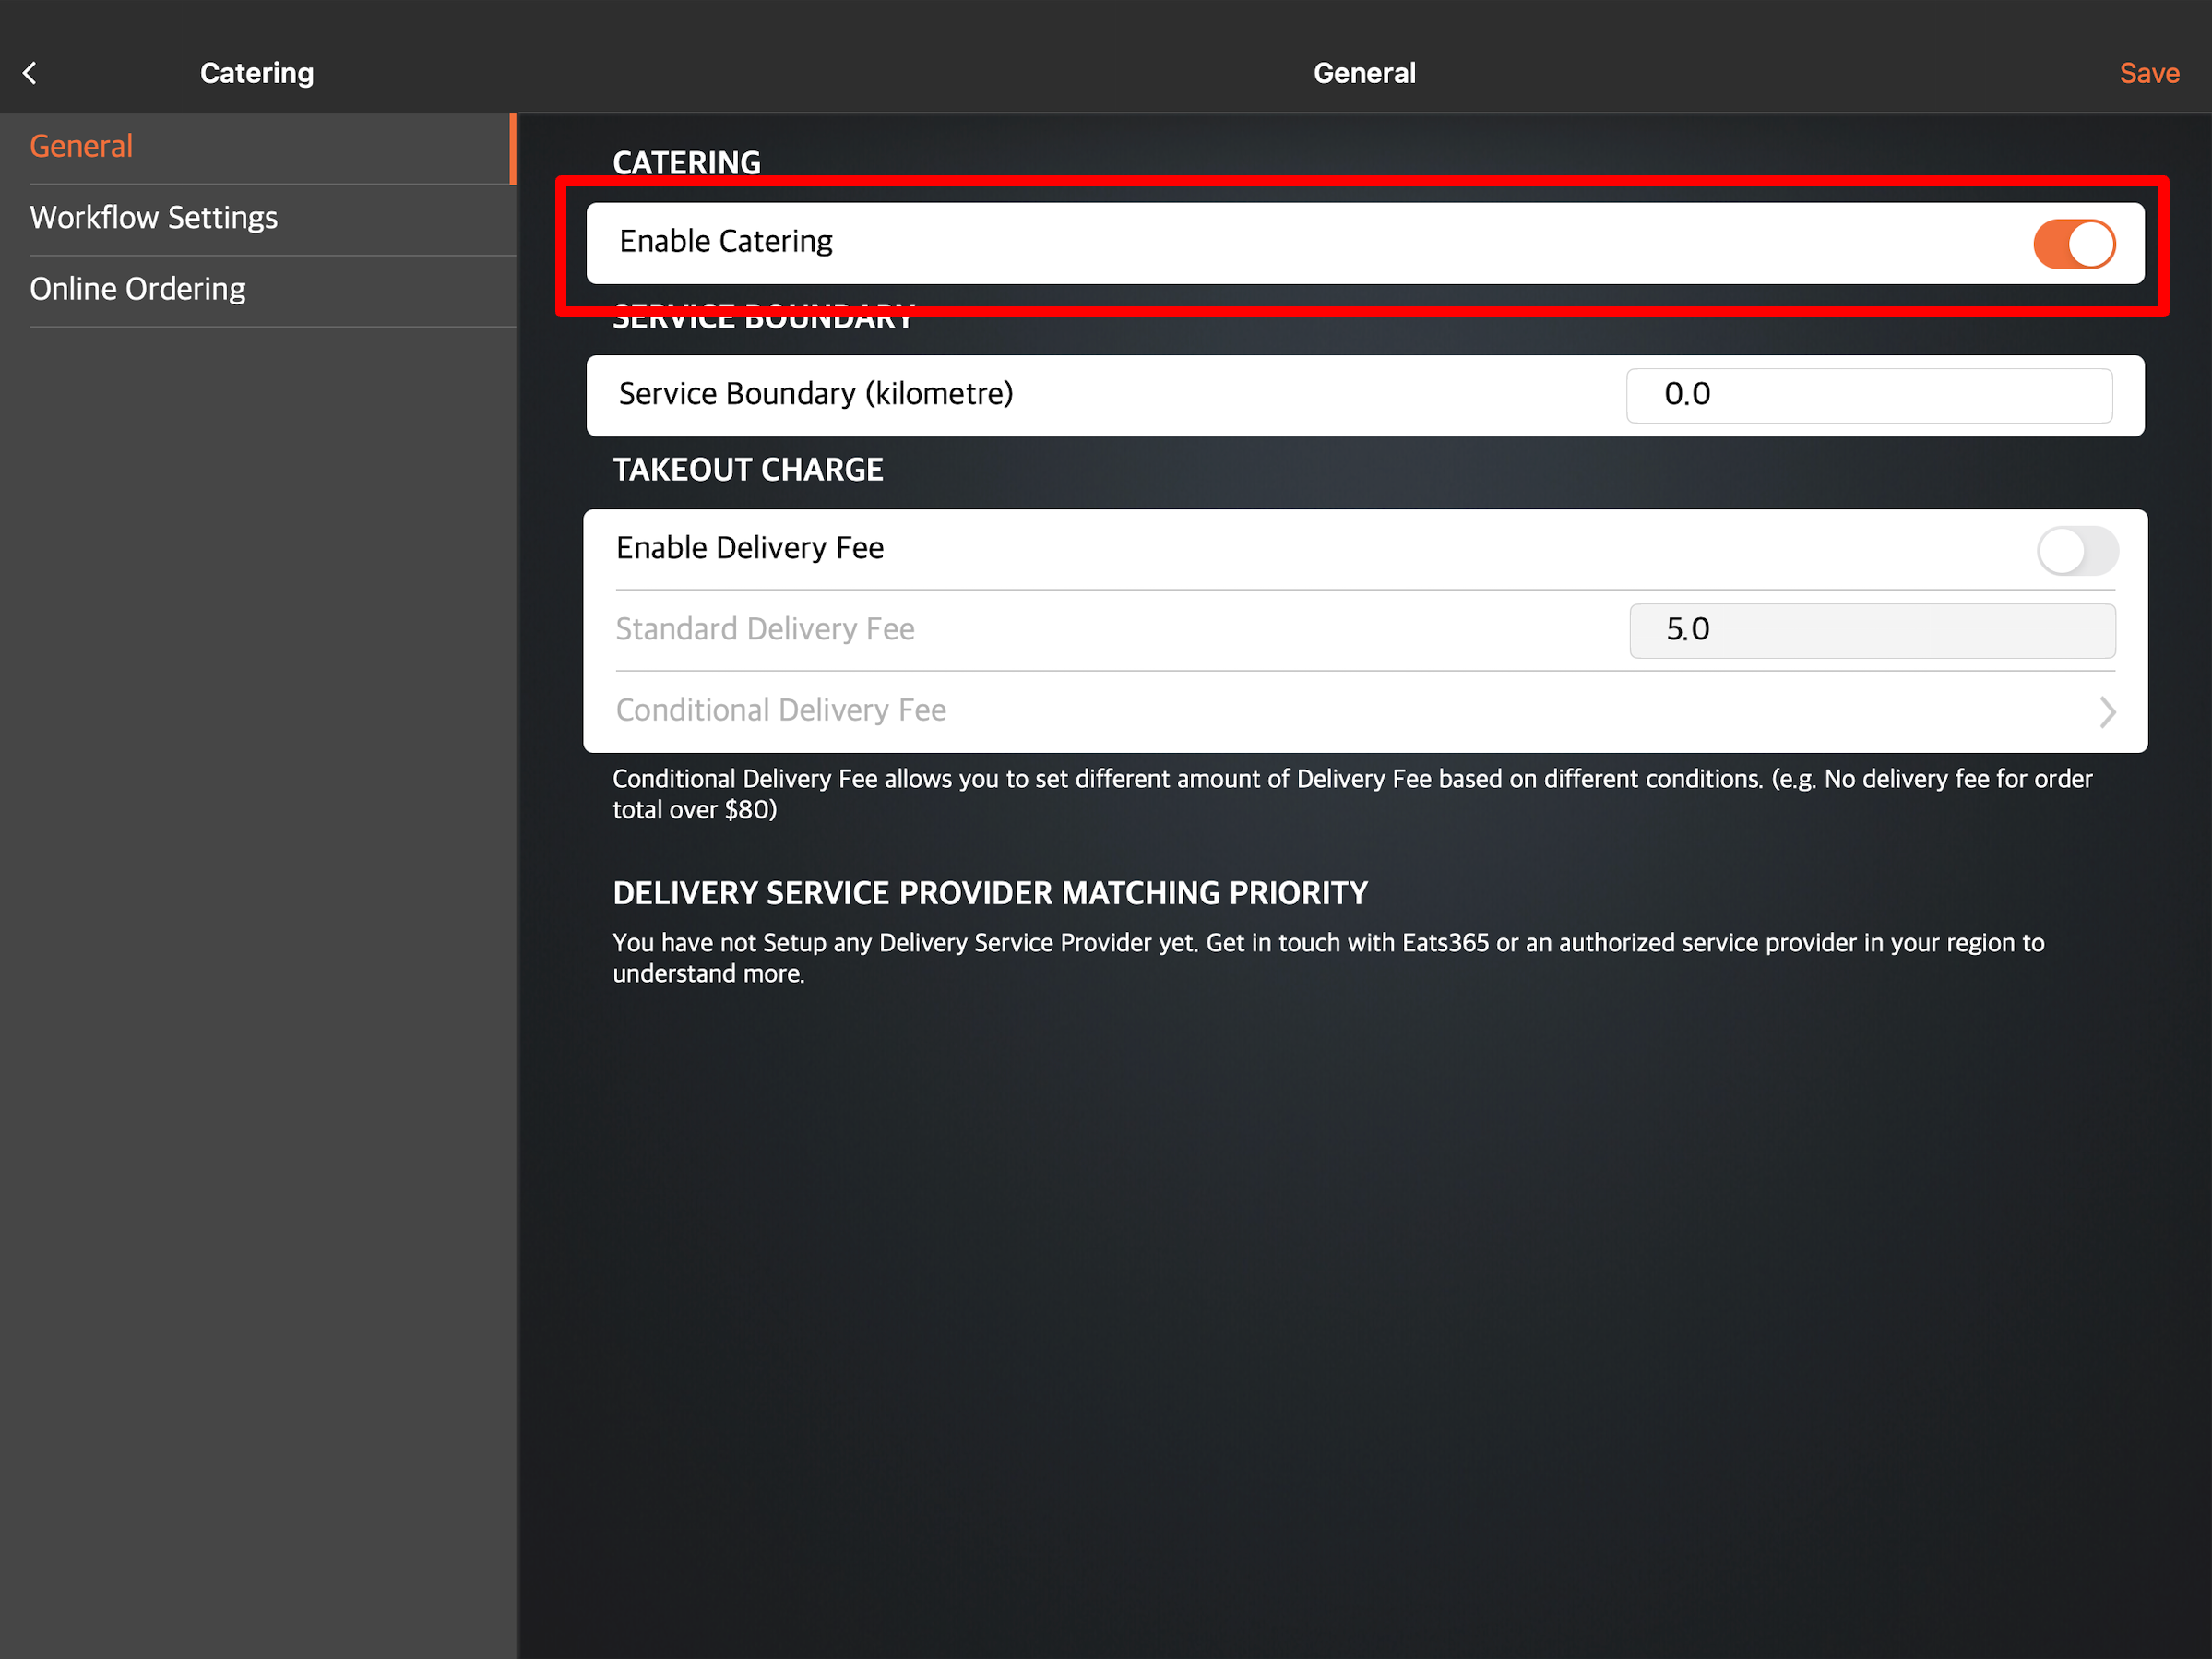
- At the top right, tap Save to confirm.
Merchant Portal (Classic Theme)
To enable Catering, follow the steps below:
- Log in to the Merchant Portal.
- On the left panel, click on Restaurant Settings. Then, select Catering.
- Under "General" tab, turn on Enable Catering
 .
.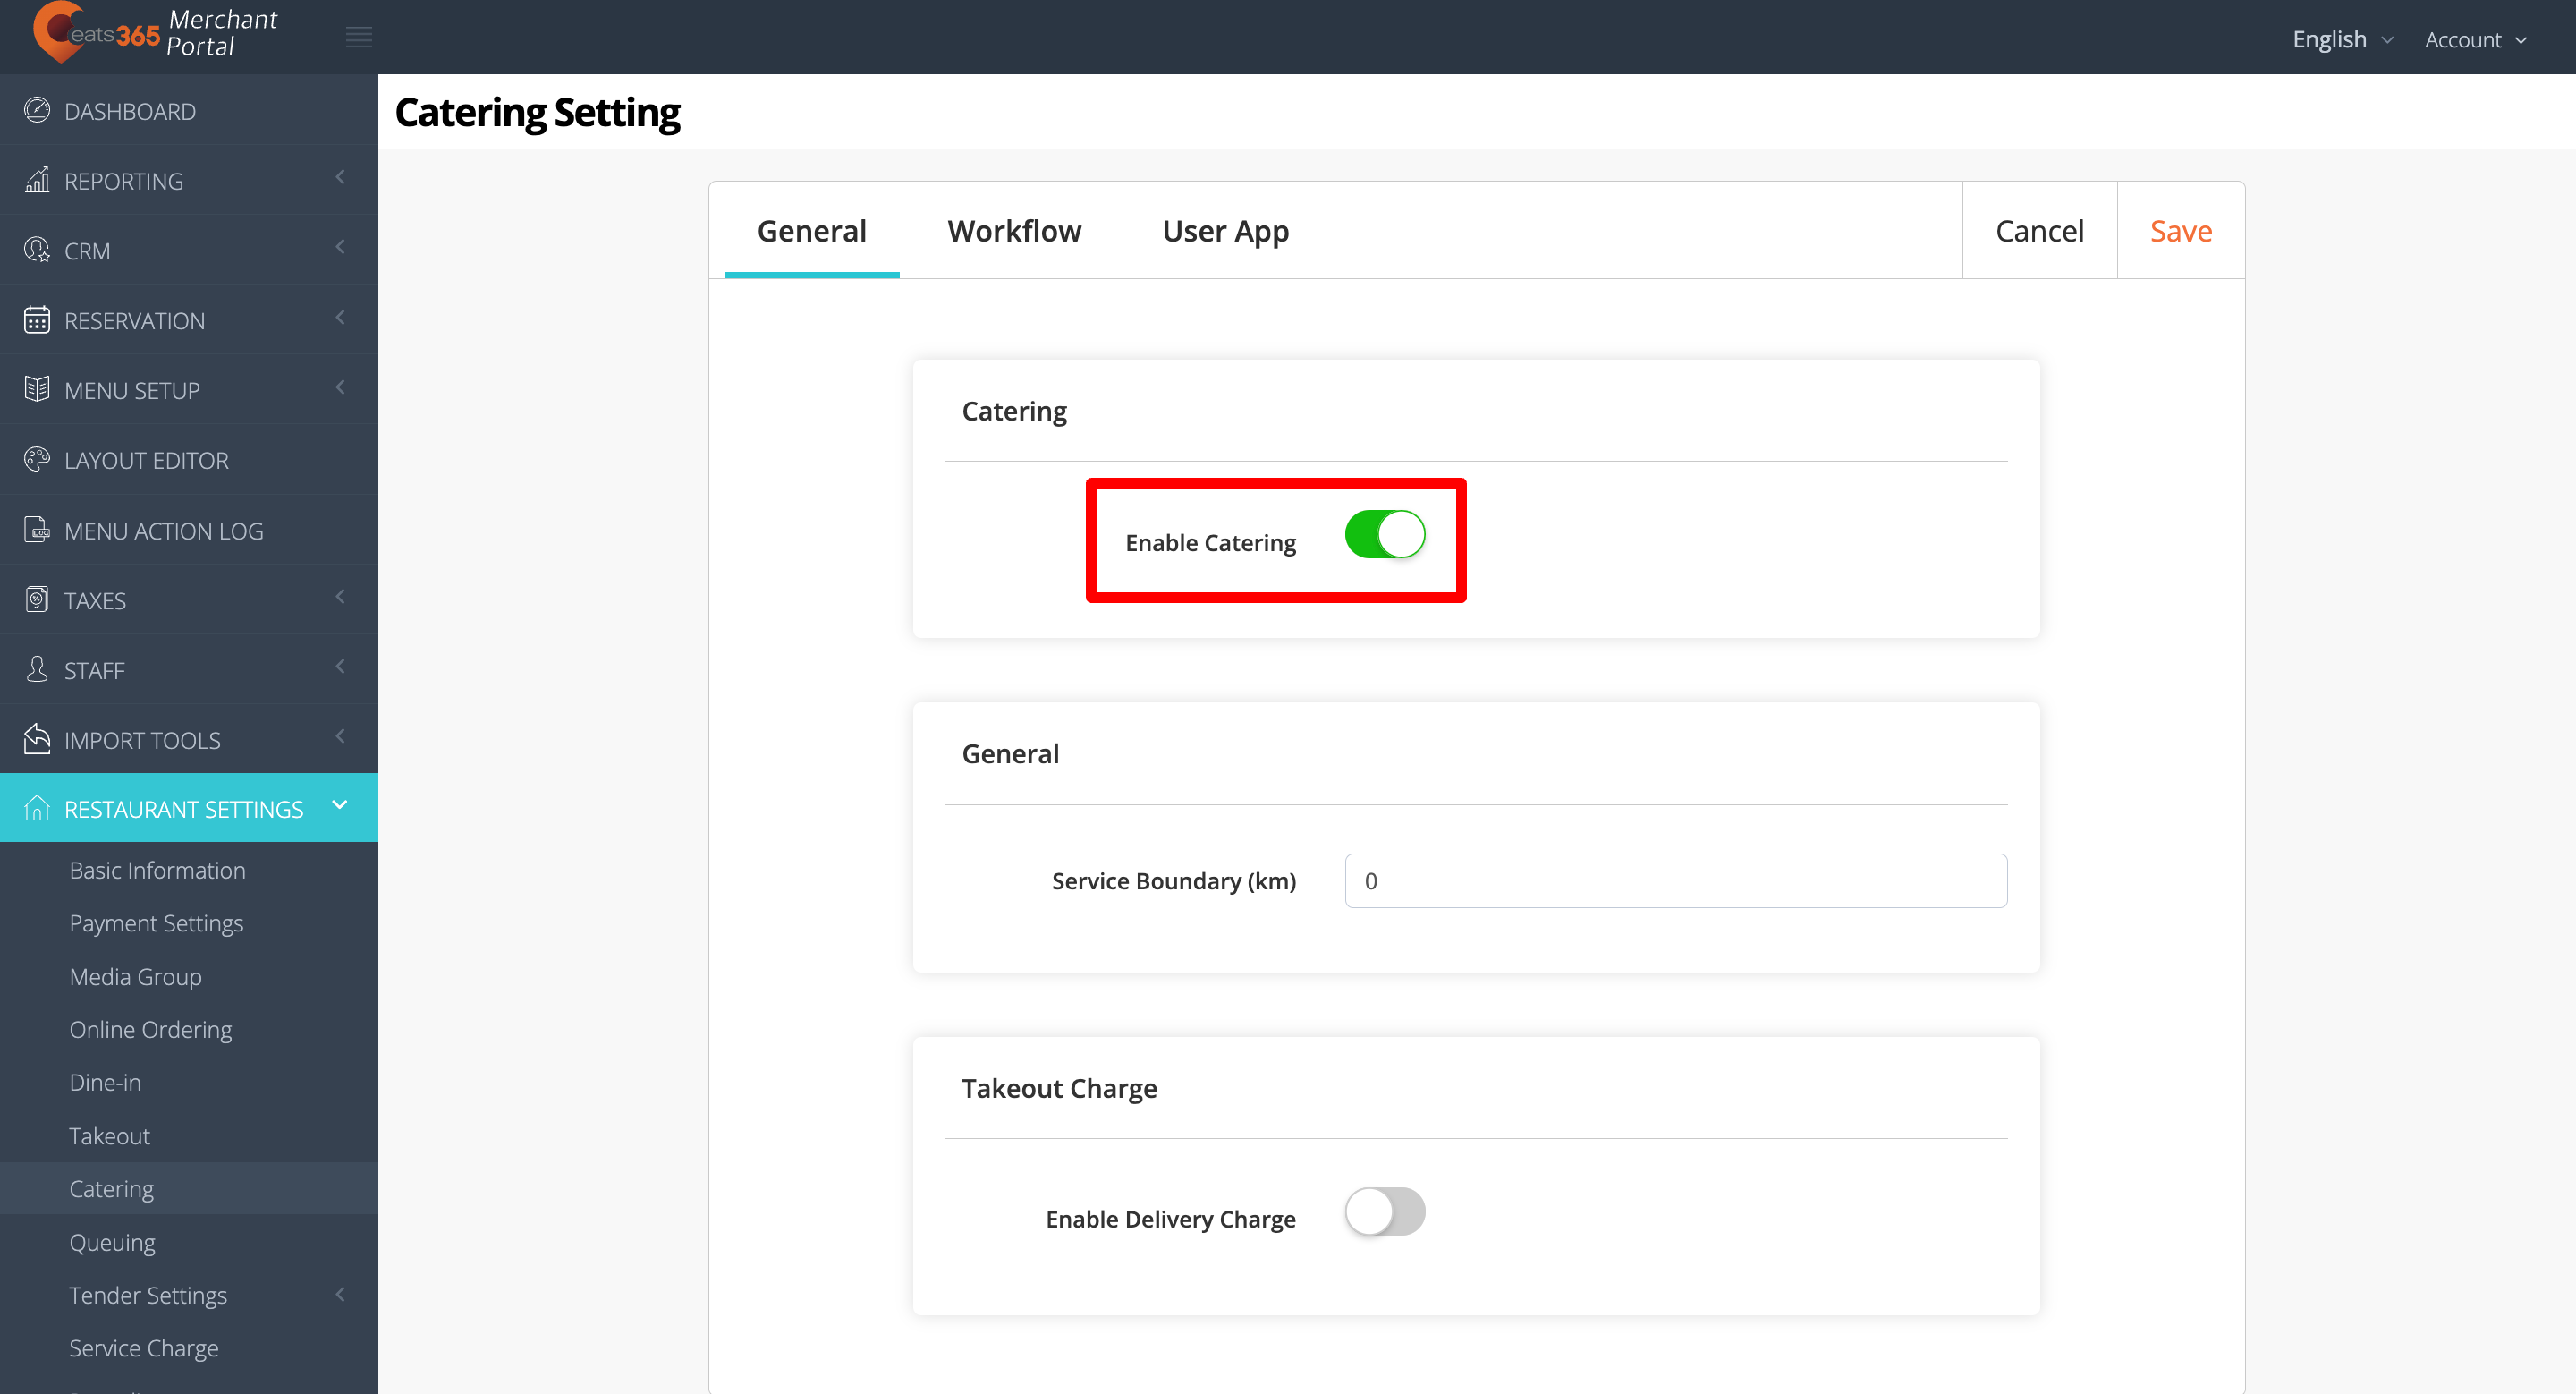
- At the top right, click on Save to confirm.
Merchant Portal 2.0
To enable Catering, follow the steps below:
- Log in to the Merchant Portal.
- On the left panel, click on Restaurant Settings.
- Click on Catering. Then, select General.
- Turn on Enable Catering
 .
.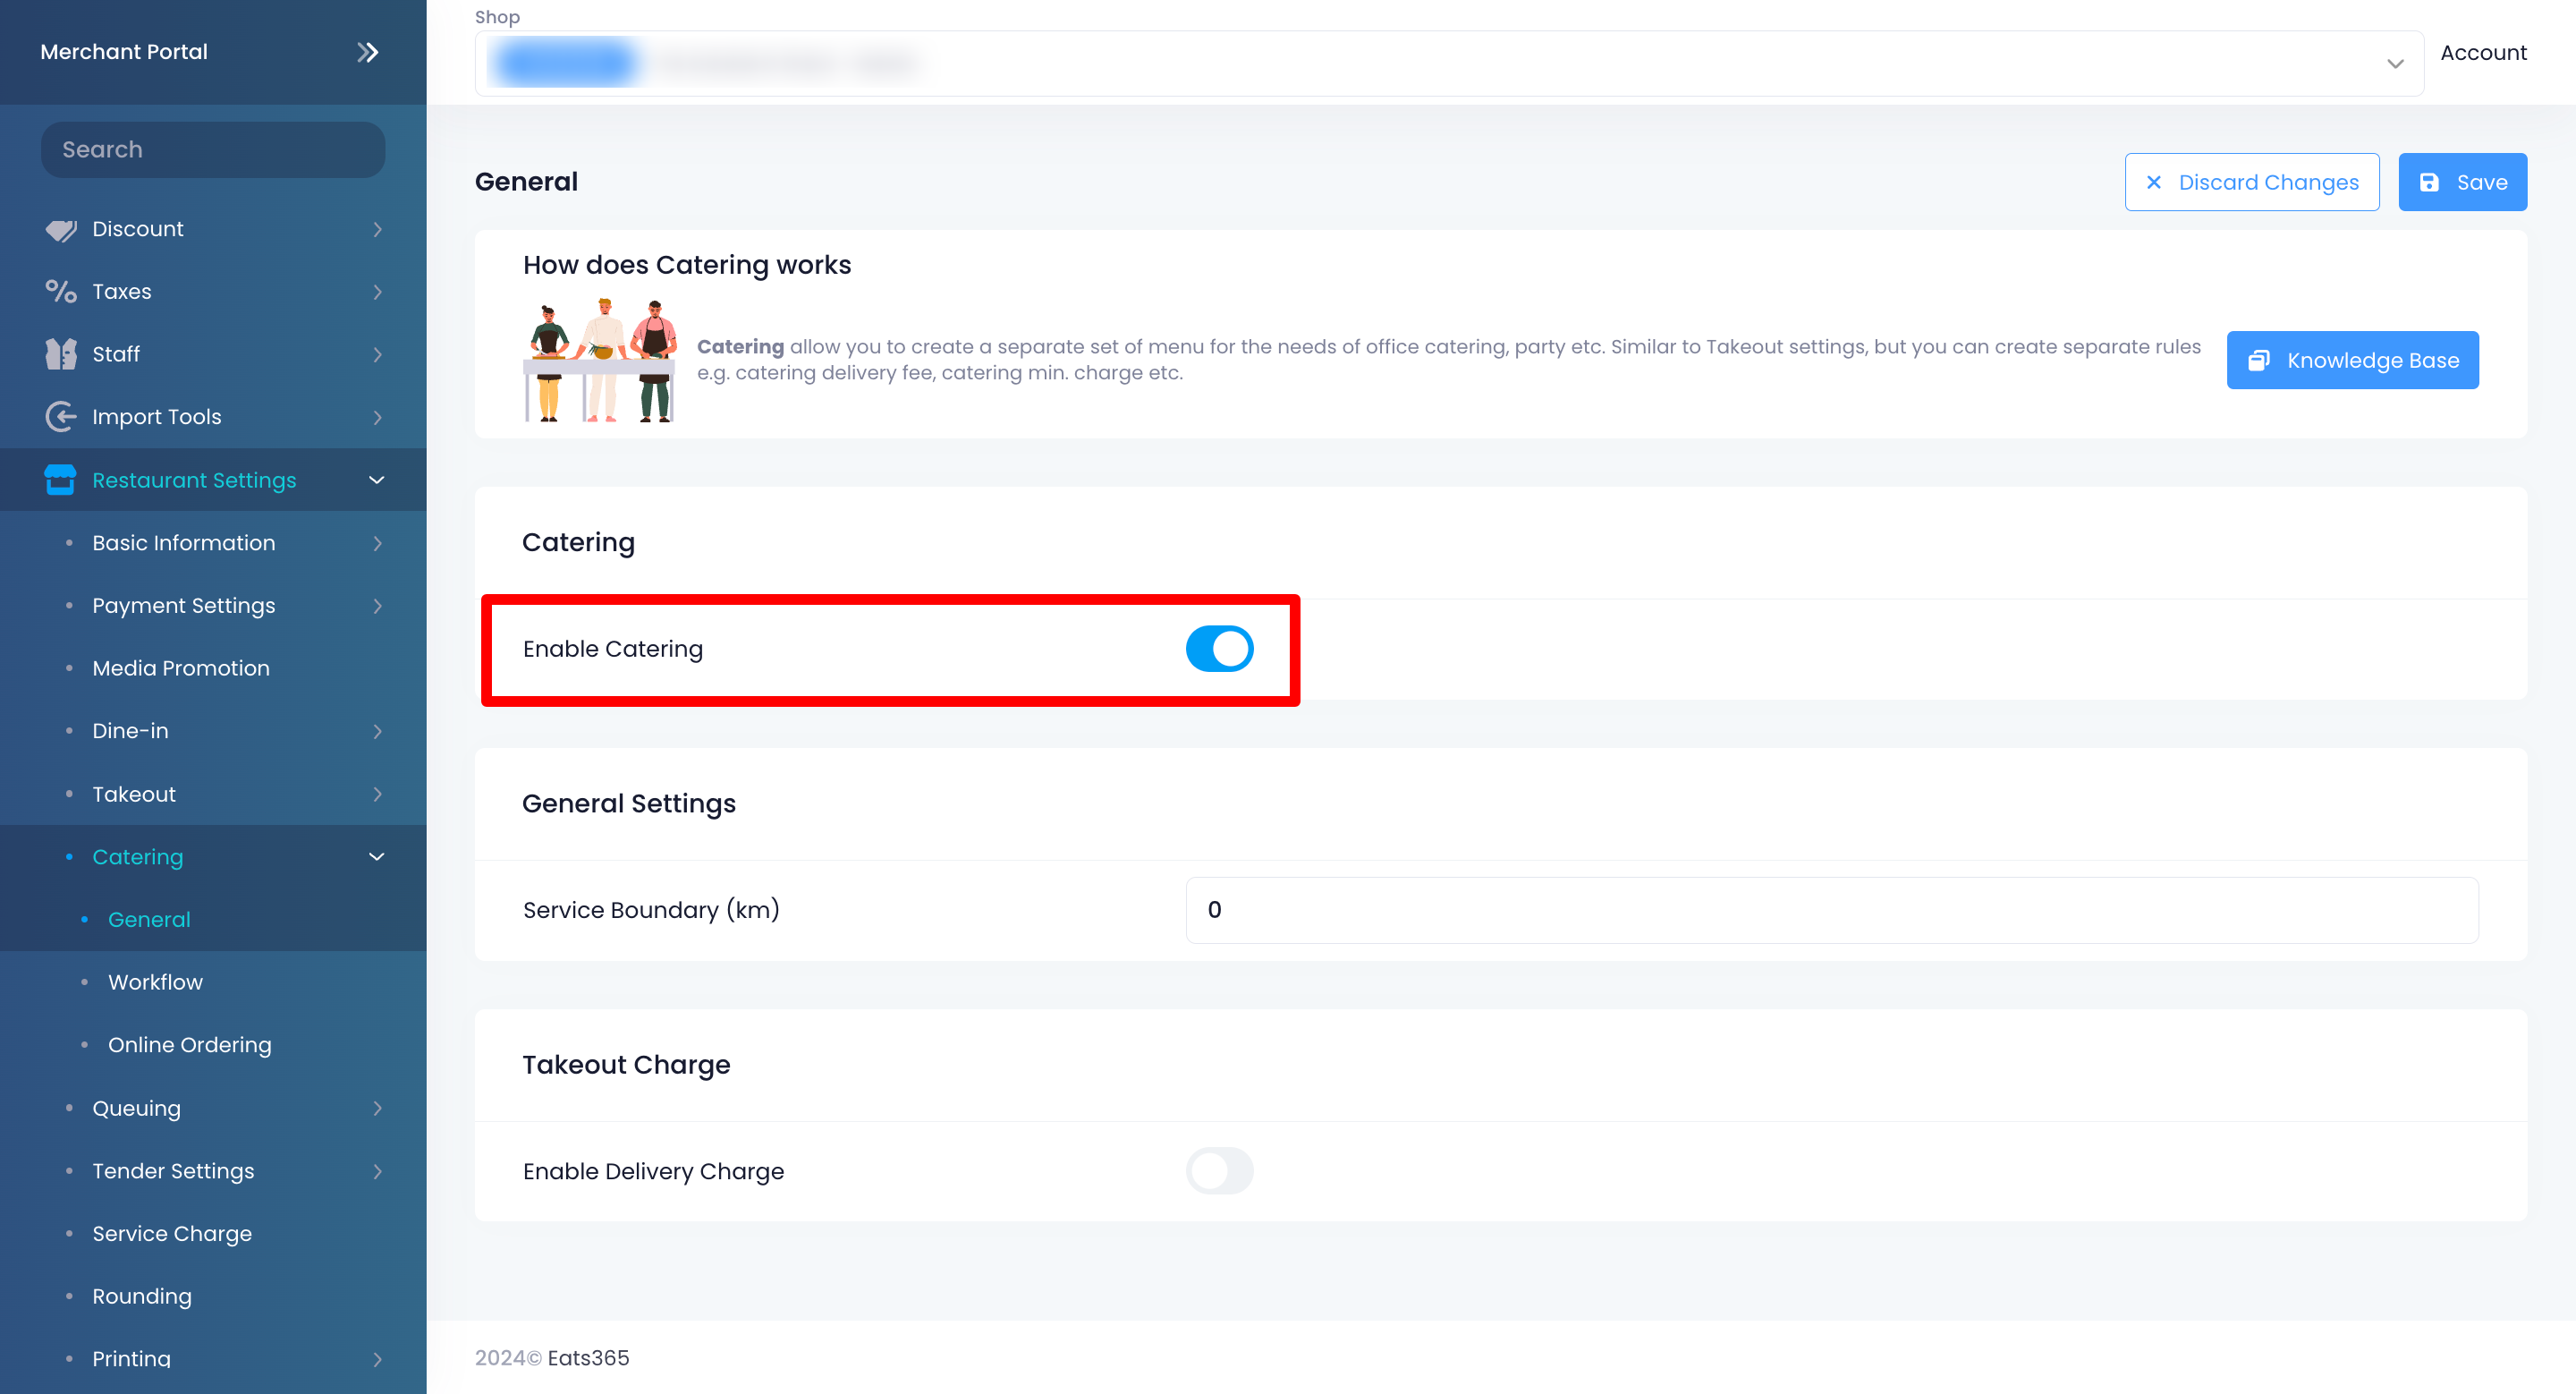
- At the top right, click on Save to confirm.
Set up or manage Catering settings
To set up or manage your Catering settings, follow the steps below:
Eats365 POS
- Log in to the Eats365 POS.
- At the top left, tap Settings .
- Under "Settings," tap Catering.
- Set up your preferred Catering settings.
- At the top right, tap Save to confirm.
Below is the list of settings that you can set up and manage on the POS:
General
Catering
Enable Catering
When enabled, the Catering feature becomes available for your restaurant. Customers will be able to place orders meant for large gatherings and social functions.
Service Boundary
Service Boundary (kilometre)
Set a limit on the allowed delivery distance.
Takeout Charge
Enable Delivery Fee
When enabled, the POS adds a delivery charge to the total order amount.
You can set a standard delivery fee or set a delivery fee for different order amounts and distances.
- Standard delivery fee - Set a fixed delivery fee.
- Conditional delivery fee - Set a different delivery fee depending on the condition. For example, you can set a "No delivery fee" rule for orders that exceed a certain amount.
Workflow Settings
Return Home
Return Home after Payment Processing
When enabled, the POS automatically returns to the default home screen after payment. If you turn the setting off, the POS stays at the payment screen so you can perform other actions, like making a tip and printing a receipt.
Order Payment
Require Payment when Placing Order
When enabled, all orders automatically require payment. This setting disables the Confirm button on the POS.
Order
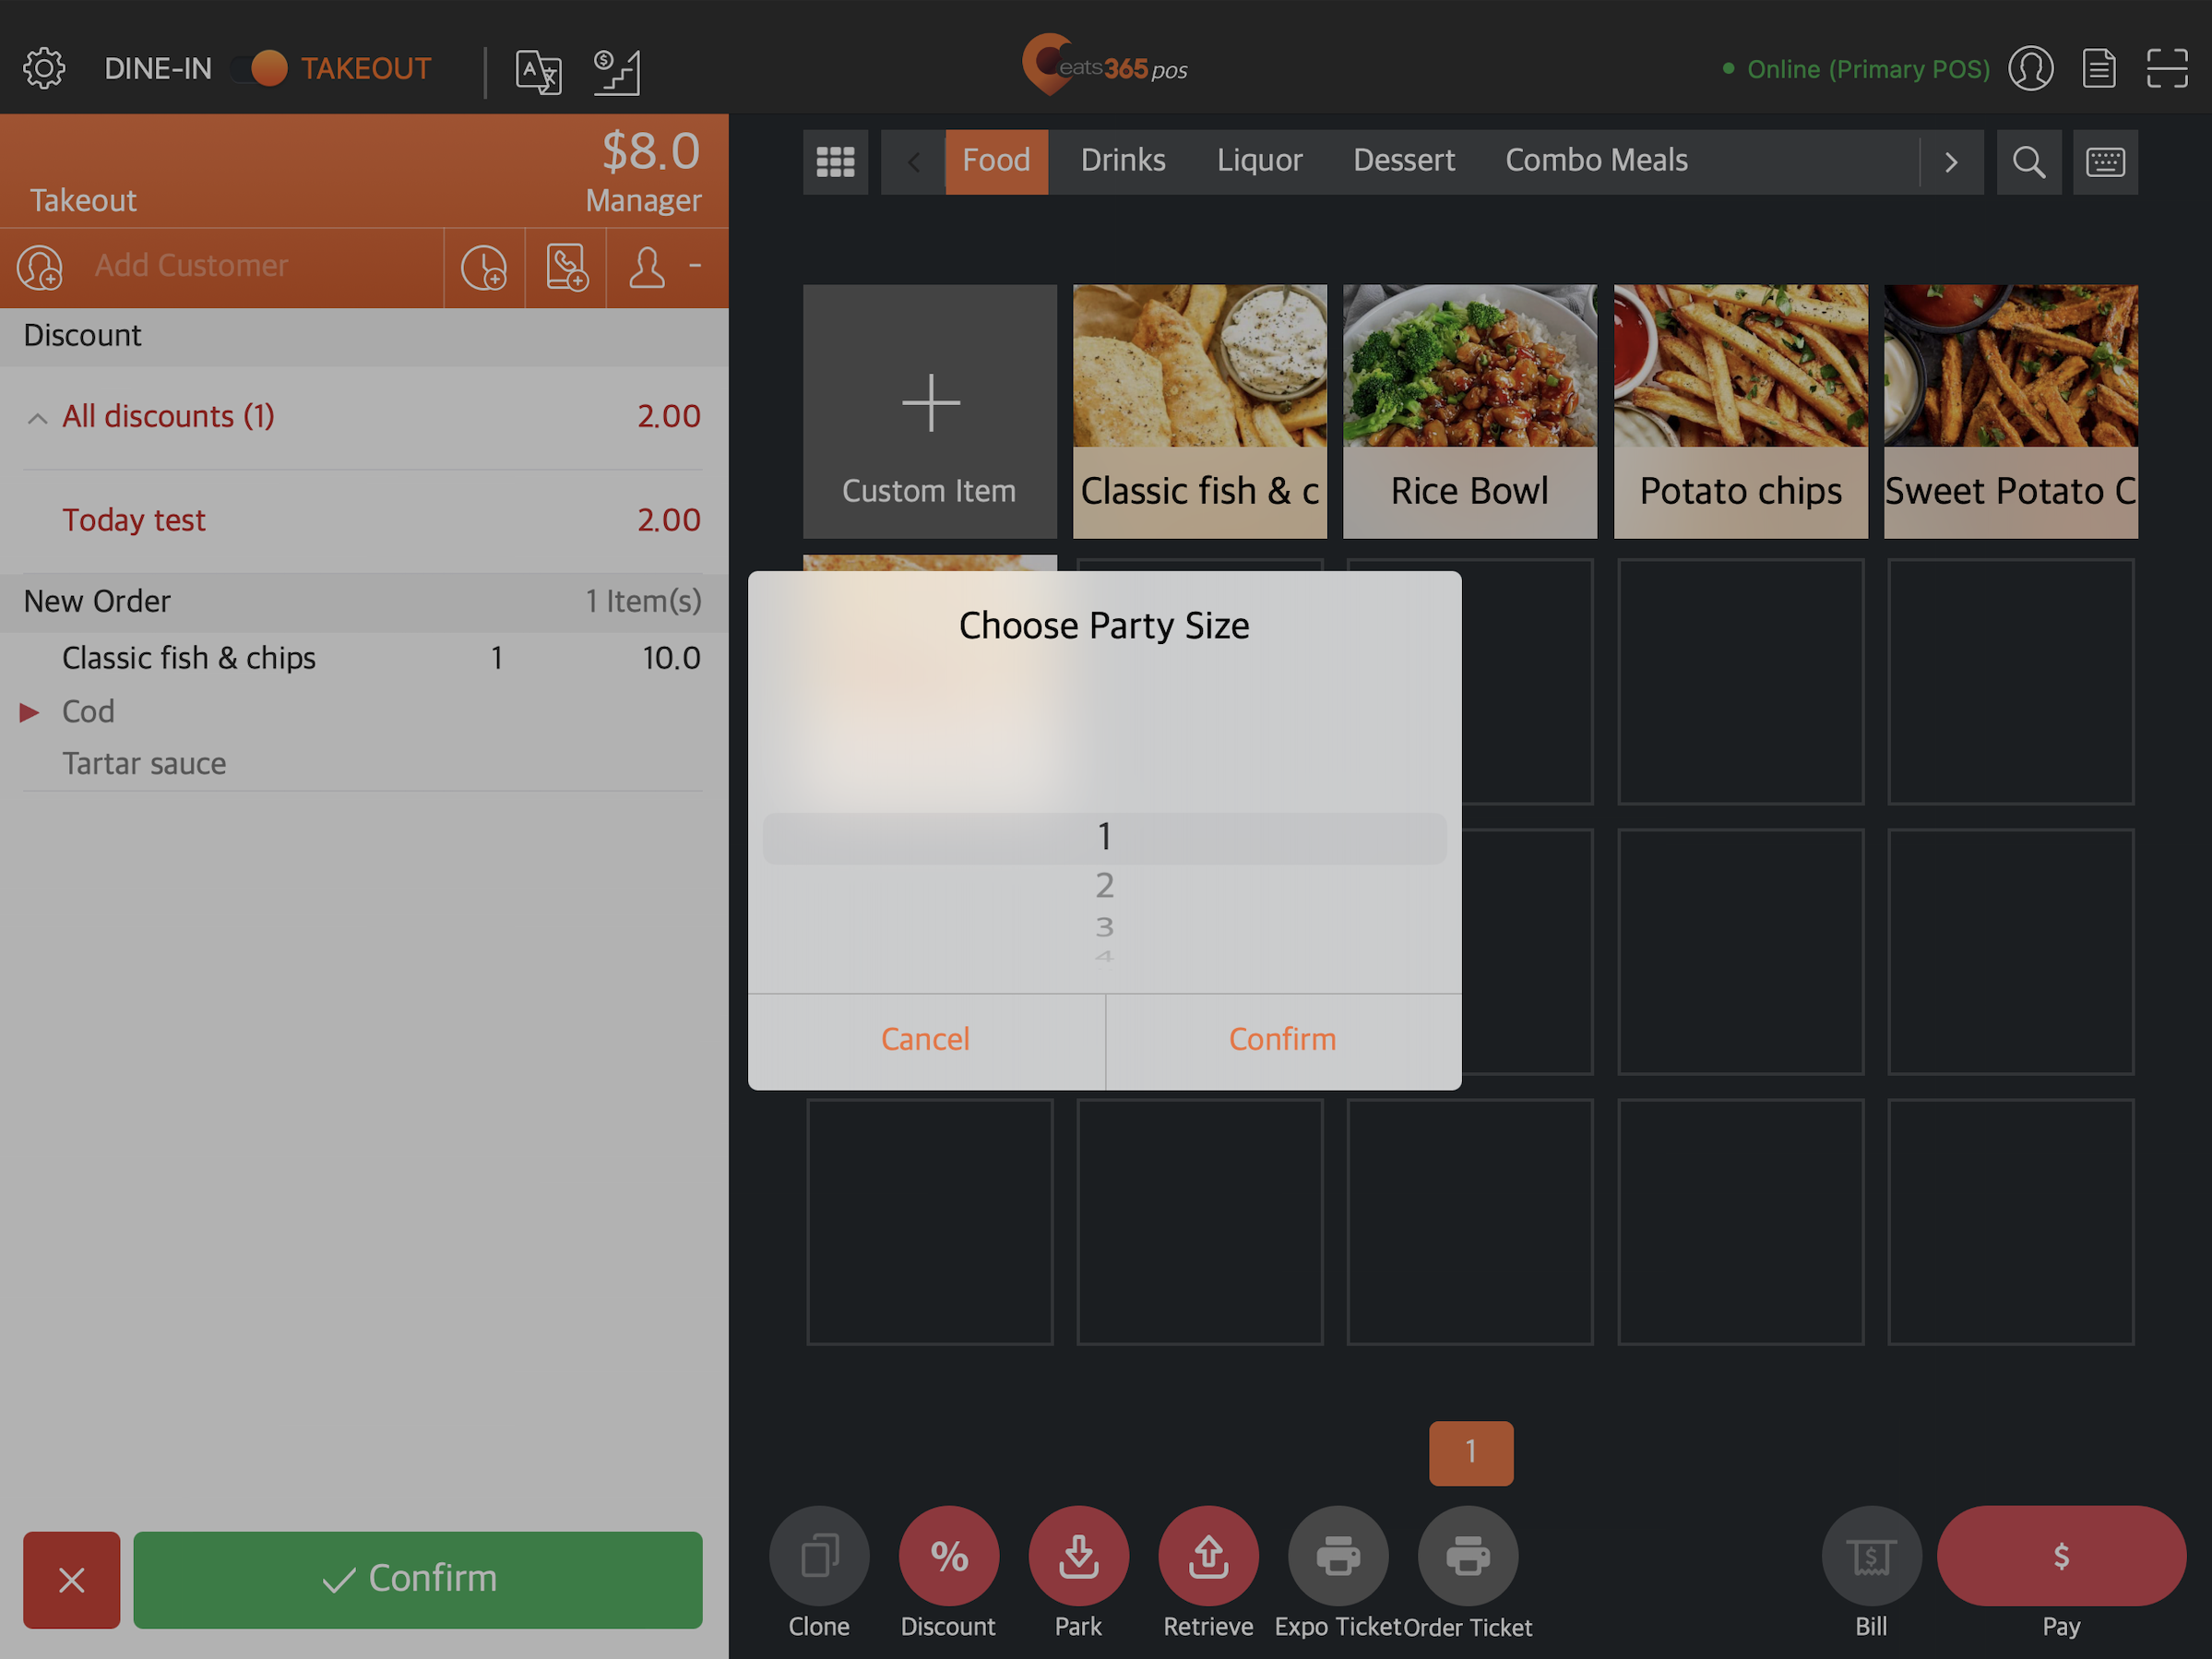
Force Enter Party Size
When enabled, you are required to enter a party size in the POS before taking an order.
Delivery Order displayed on Pickup Display
When enabled, delivery orders will be displayed on the Pickup Display.
Auto Add Item
Auto Add Items when enter party size
When enabled, you can set which items will be automatically added to every open check. For example, you can configure this setting to automatically add sauces to every order.
Pickup Order Setting
Minimum Charge
Set the minimum amount that customers must spend to place a pickup order.
Minimum Days in Advance
Set the minimum number of days that customers can place their catering orders in advance for pickup orders.
Pre-order Period
Specify how far in advance customers can place catering orders for pickup. The maximum allowable time is 365 days.
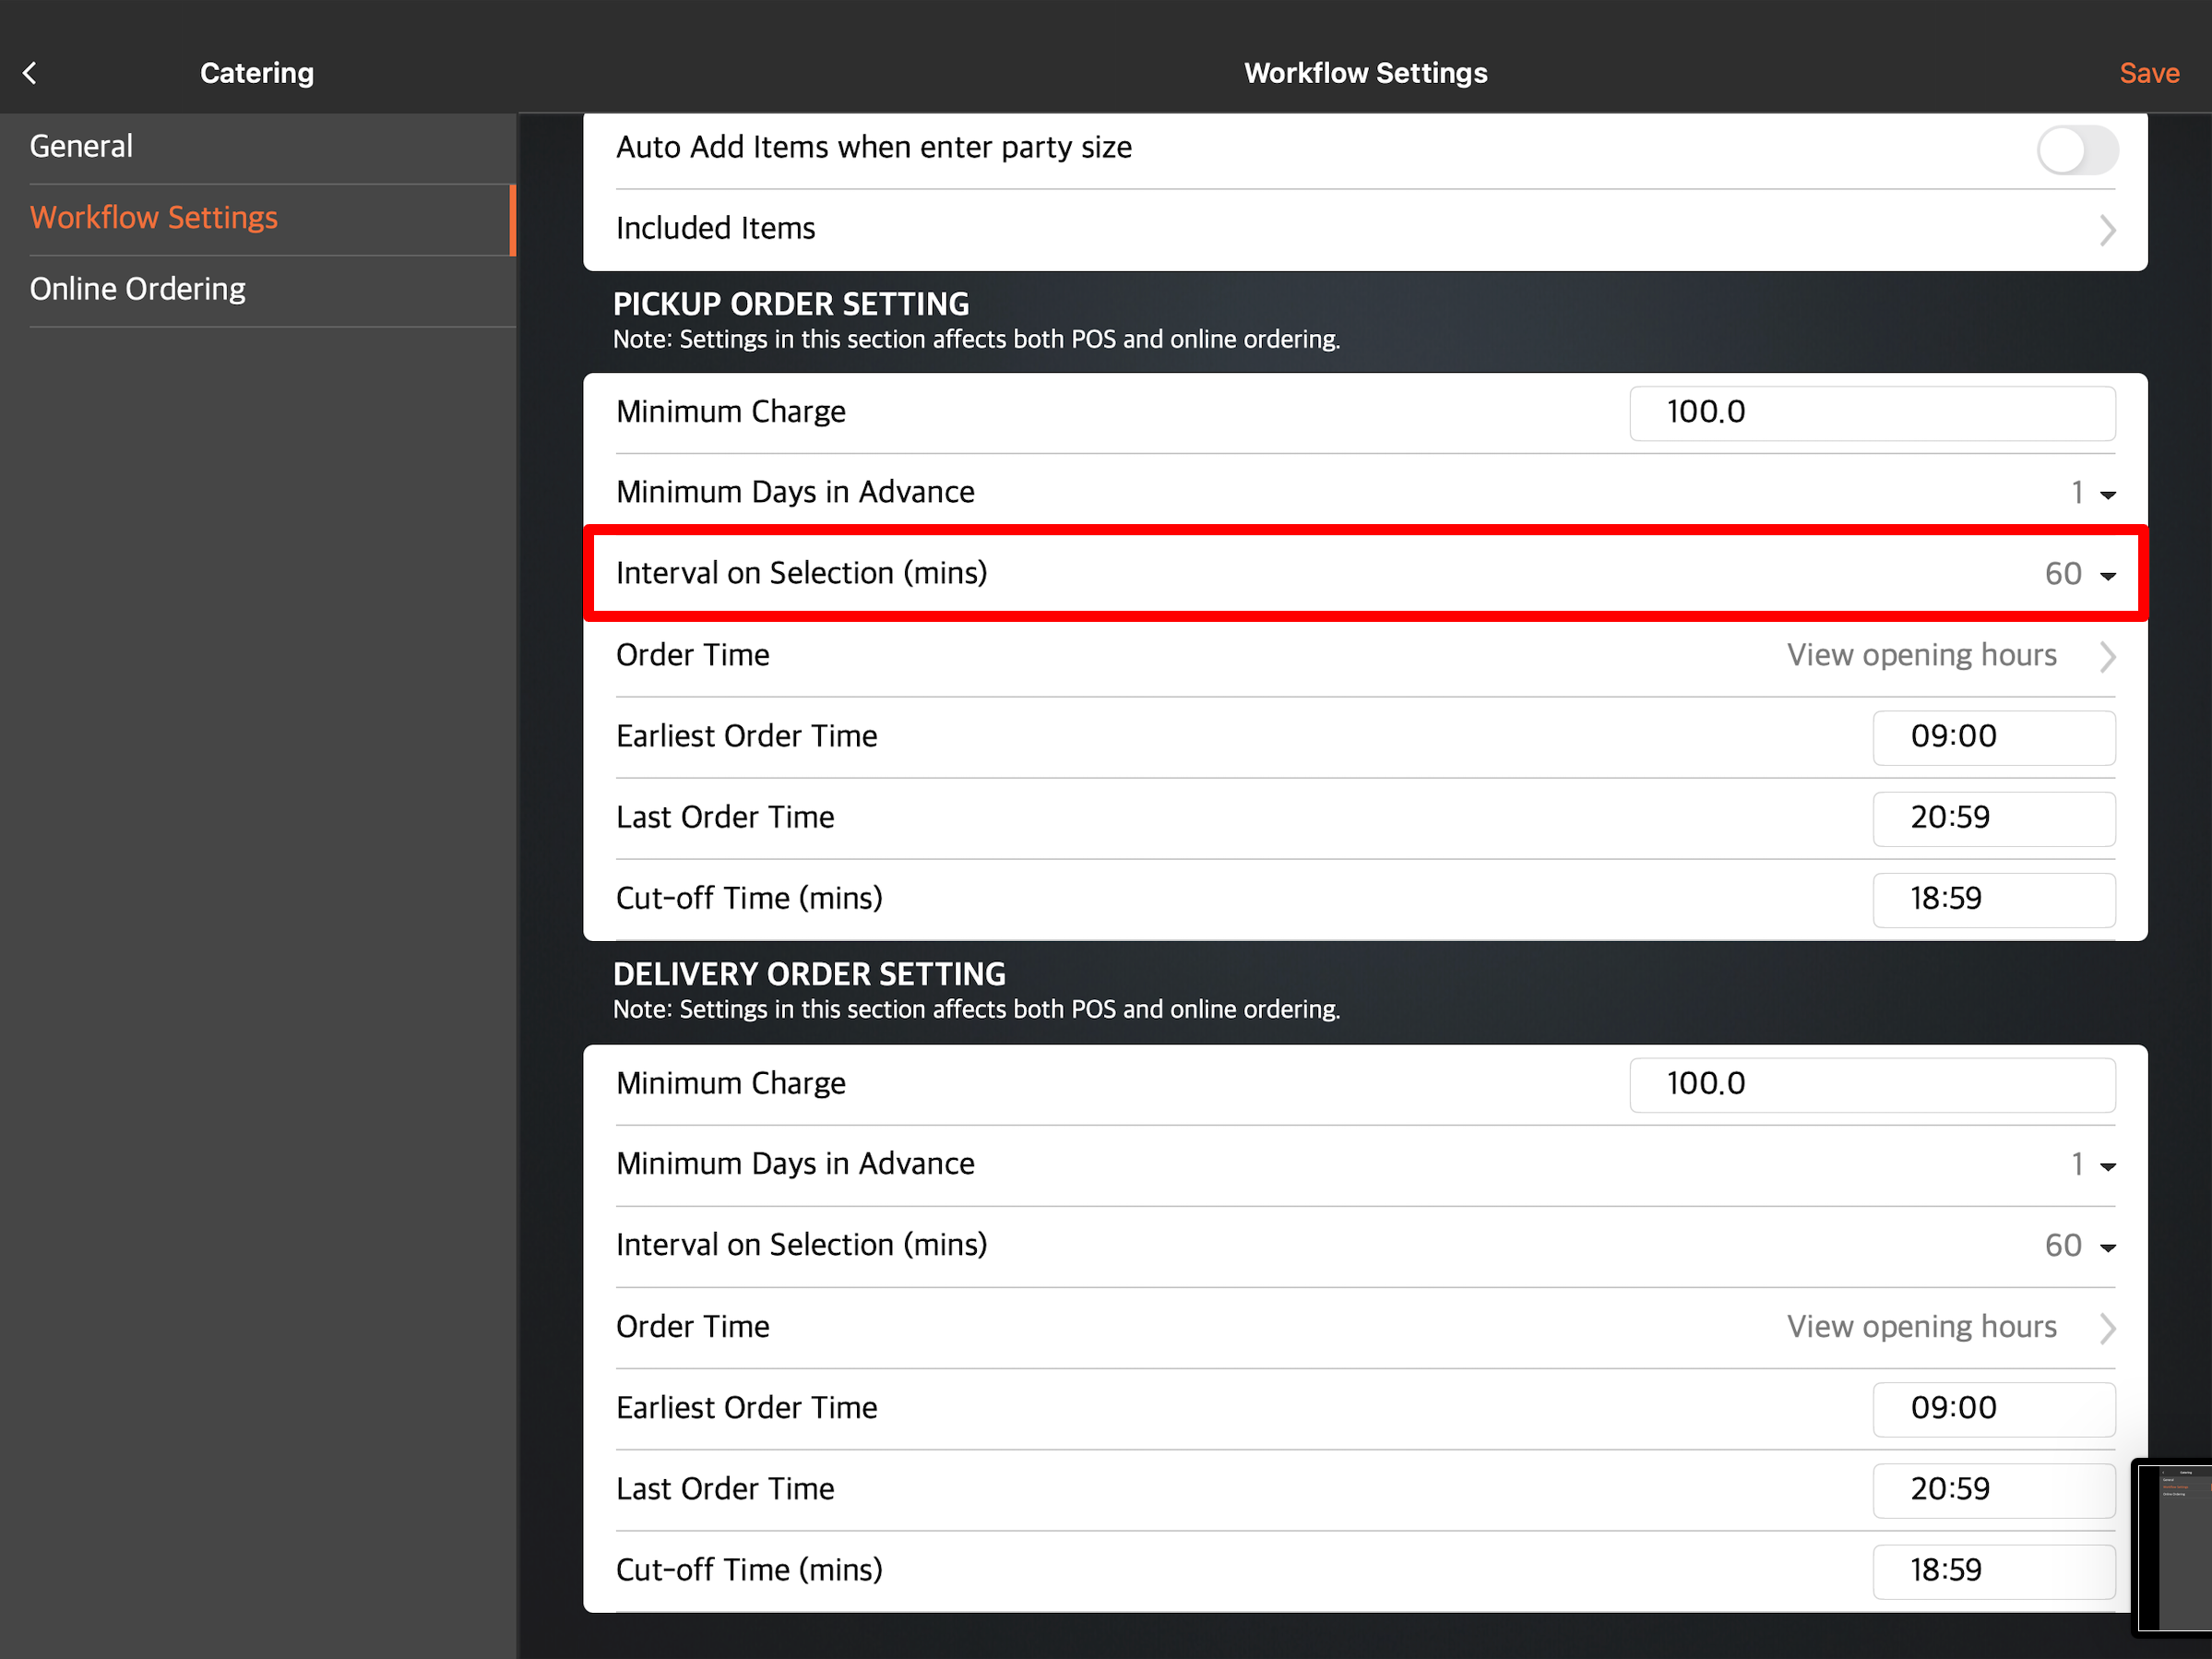
Interval on Selection (mins)
Set the interval to determine how far apart the available time slots should be. For example, an interval set to 30 minutes will display the pickup options as 13:00, 13:30, 14:00, and so on.
Earliest Order Time
Set the earliest time that customers can place their order.
Last Order Time
Set the latest time that customers can place their order for the particular business day. For example, if you set the latest order time to 17:00, customers won’t be able to place orders beyond the set time.
Cut-Off Time
Set the cut-off time when the restaurant can no longer process orders for that particular business day. Orders made past the cut-off time can still be accepted, but the order won’t be processed until the next business day.
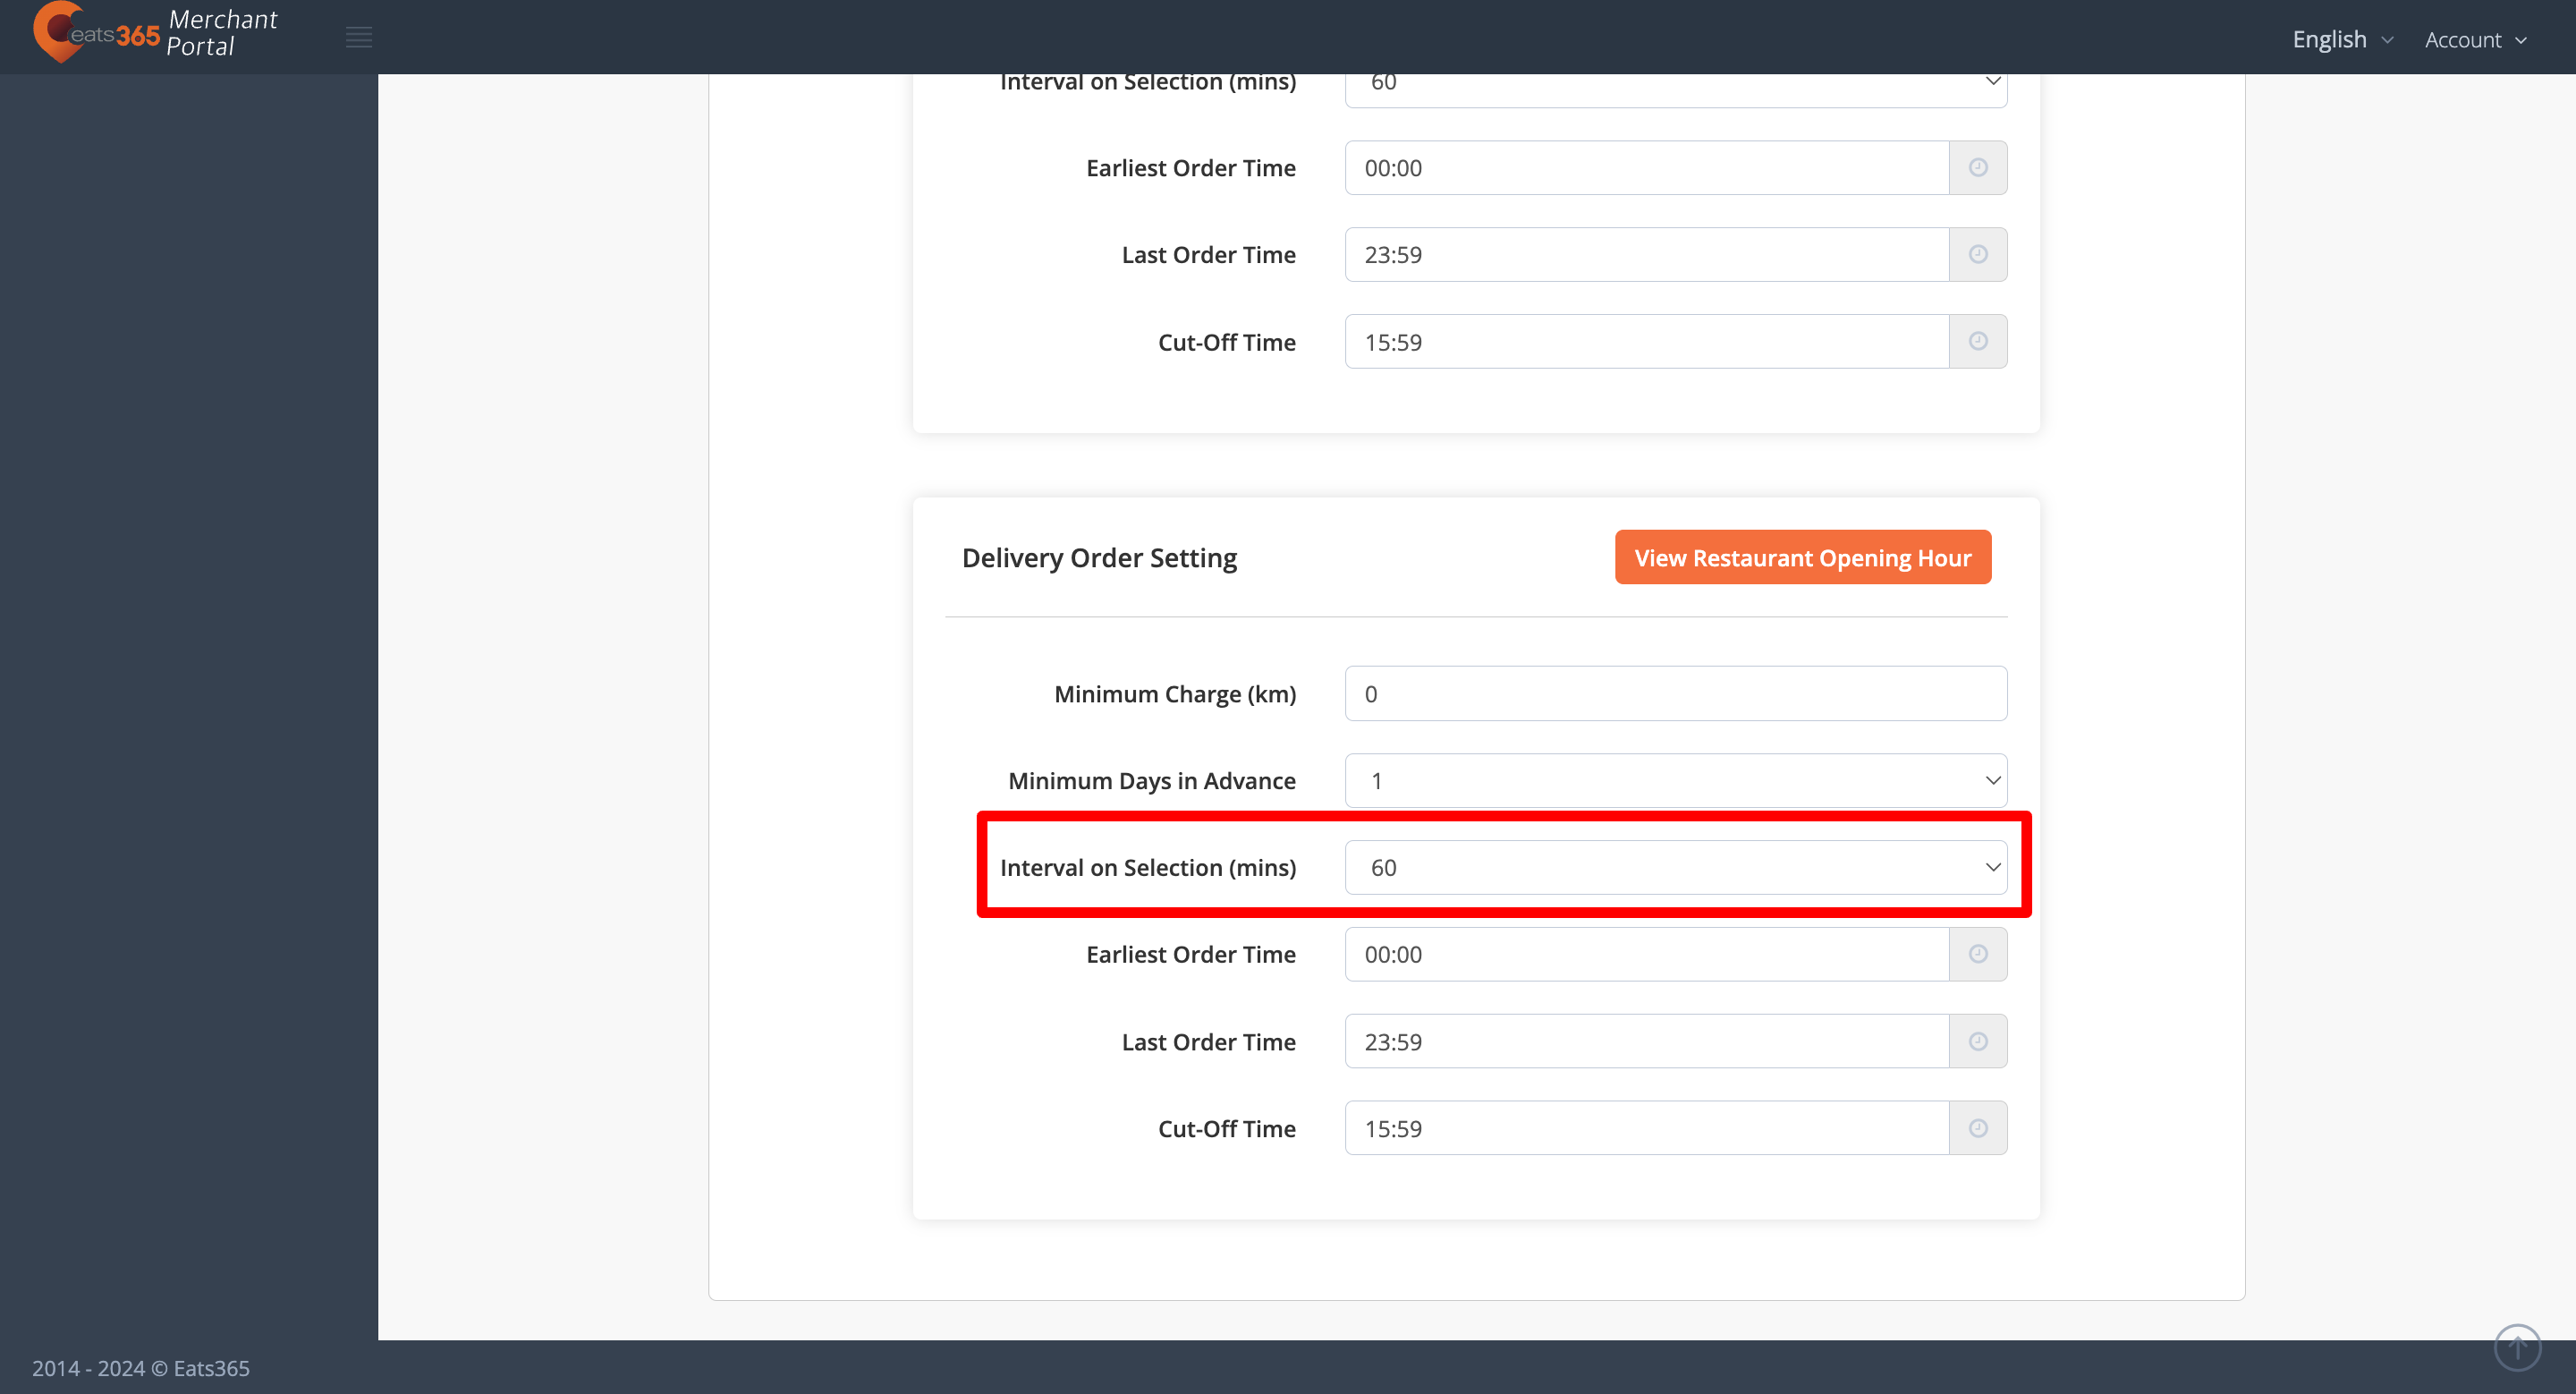
Delivery Order Setting
Minimum Charge
Set the minimum amount that customers must spend to place a delivery order.
Minimum Days in Advance
Set the minimum days that customers can place their catering orders in advance for delivery orders.
Pre-order Period
Specify how far in advance customers can place catering orders for delivery. The maximum allowable time is 365 days.
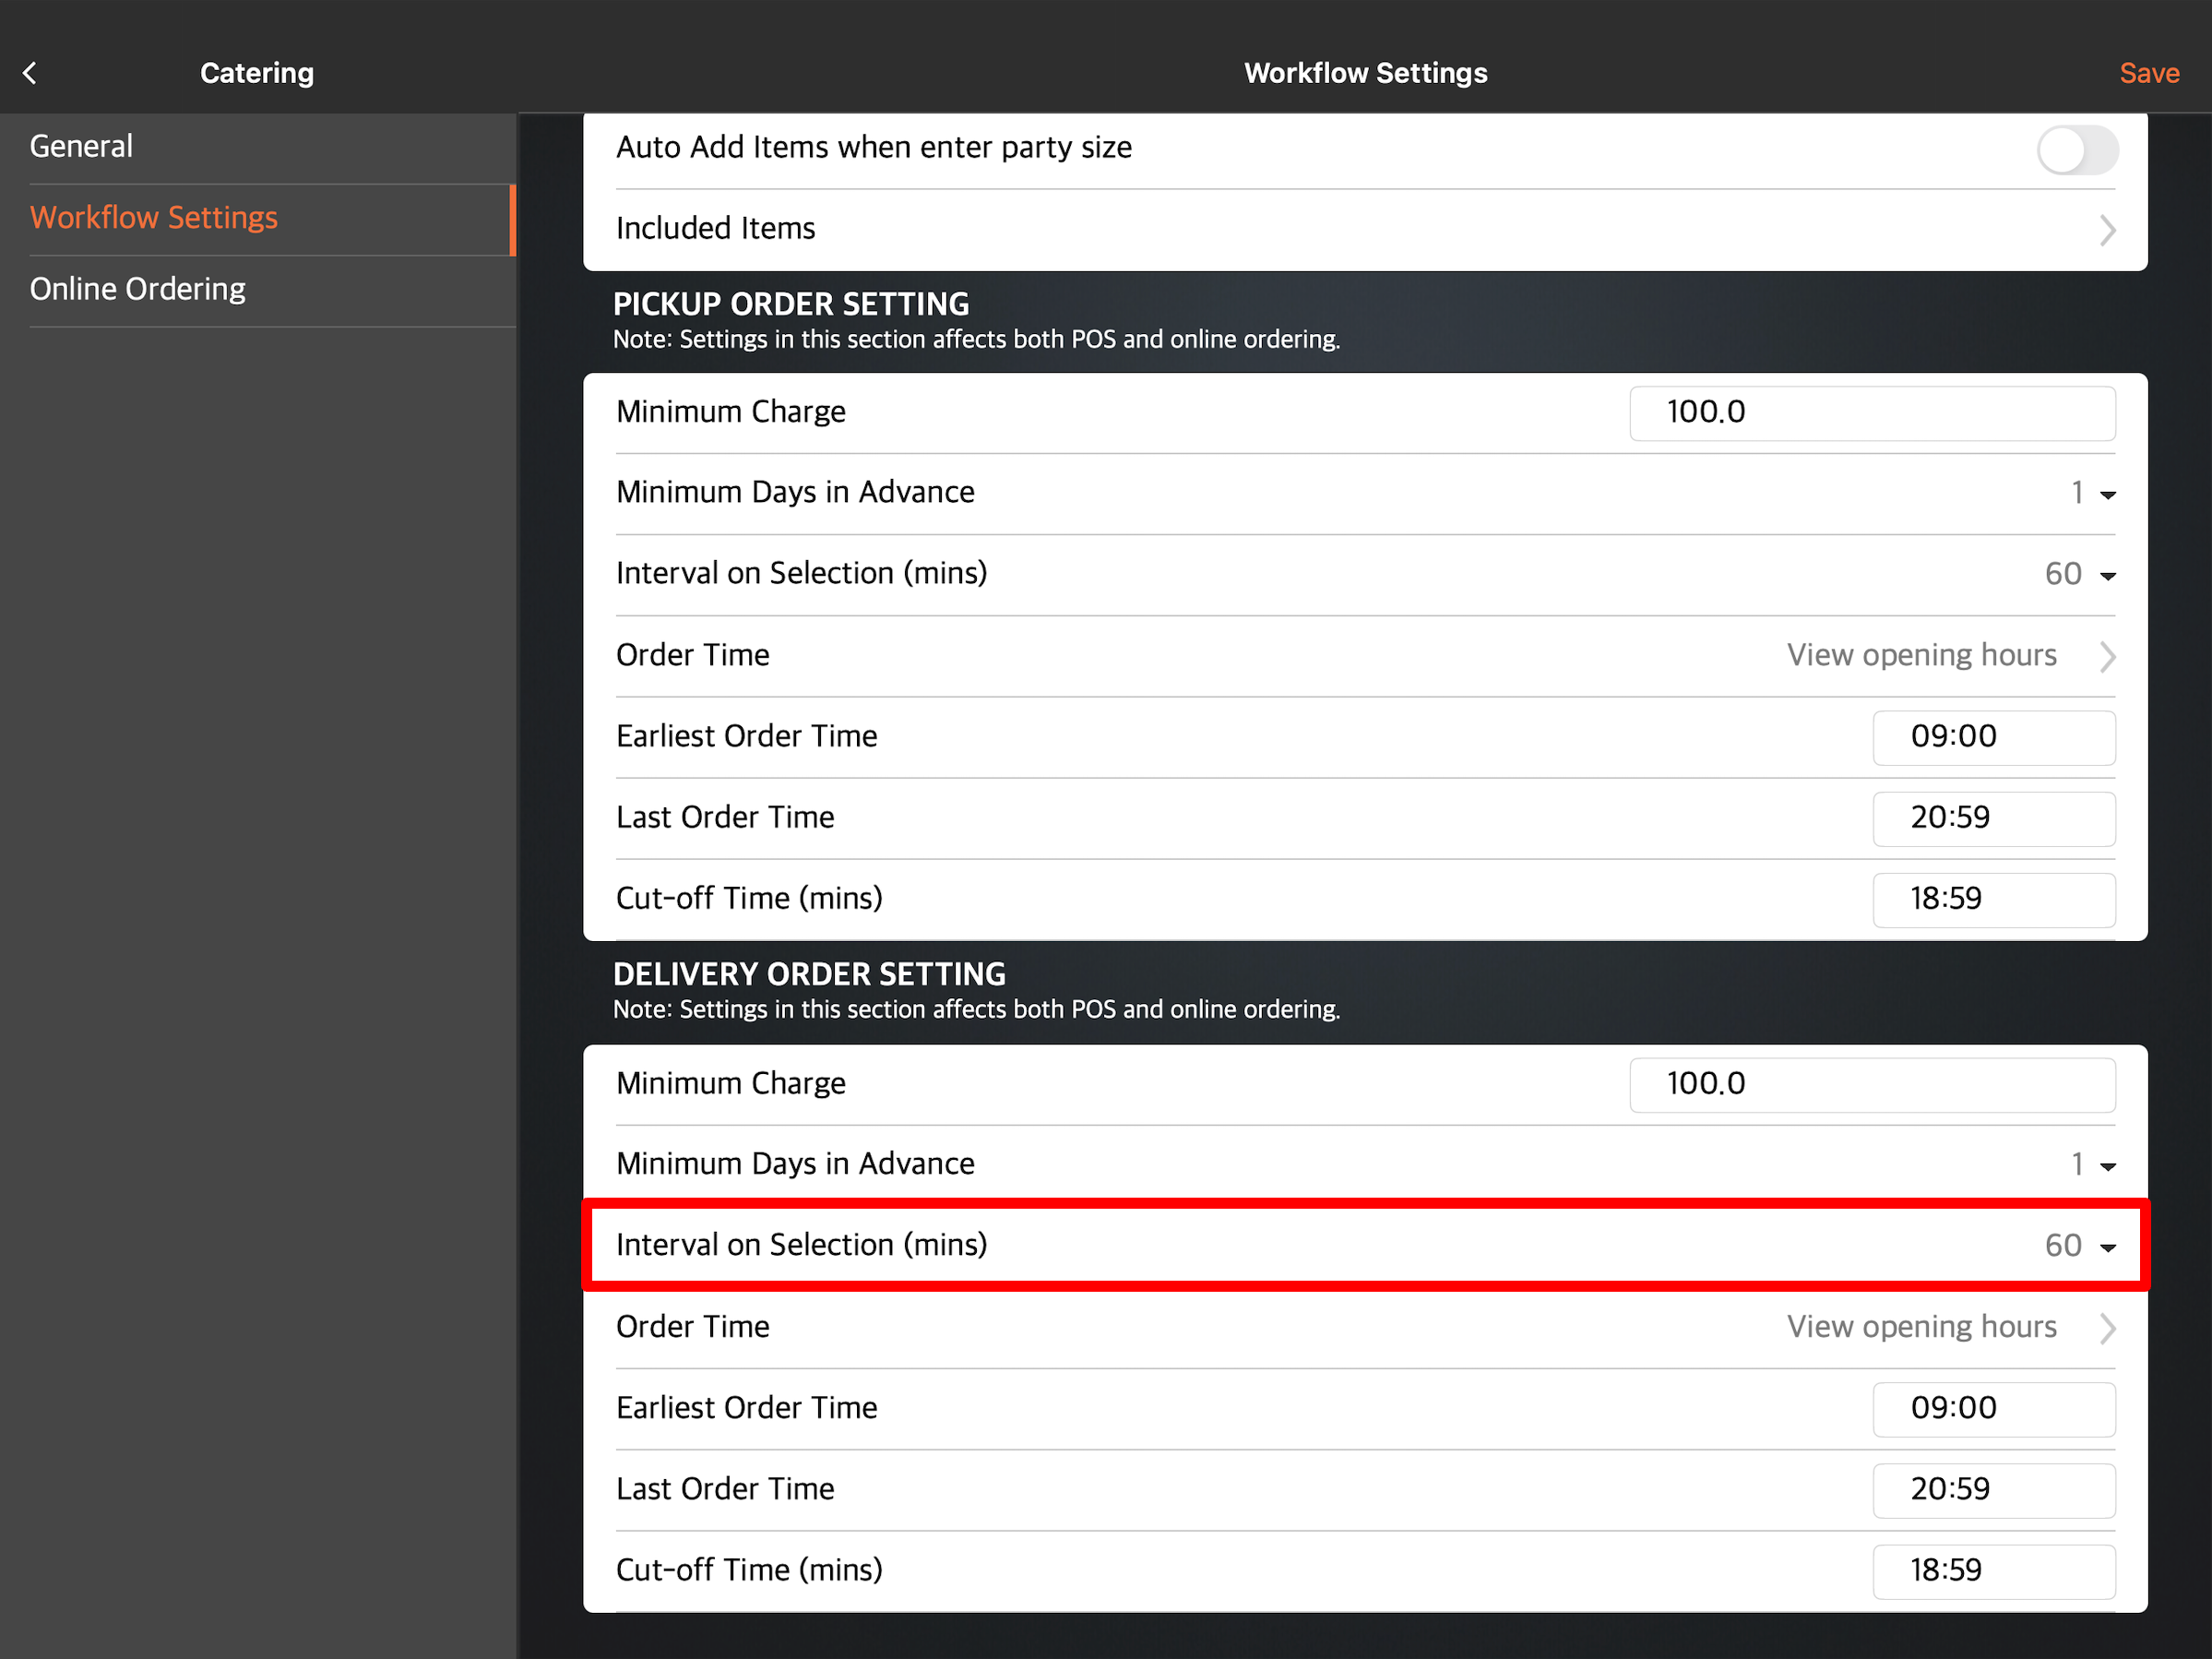
Interval on Selection (mins)
Set the interval to determine how far apart the available time slots should be. For example, an interval set to 30 minutes will display the delivery options as 13:00, 13:30, 14:00, and so on.
Earliest Order Time
Set the earliest time that customers can place their order.
Last Order Time
Set the latest time that customers can place their order for the particular business day. For example, if you set the latest order time to 17:00, customers won’t be able to place orders beyond the set time
Cut-Off Time
Set the cut-off time when the restaurant can no longer process orders for that particular business day. Orders made past the cut-off time can still be accepted, but the order won’t be processed until the next business day.
DeleteOnline Ordering
Pickup Order Setting
Allow Pickup Order
Allows customers to place pickup orders from the Branded Online Store.
Allow Cash on Pickup
Allows customers to pay cash upon picking up their order.
Auto Accept Paid Order
When enabled, online orders are automatically accepted on the POS if orders are paid.
Override Minimum Charge
Allows you to override the minimum charge set in "Workflow" settings.
Override Workflow Settings
Allows you to override "Pickup Order" settings from the "Workflow" settings.
Delivery Order Setting
Allow Delivery Order
Allows customers to place delivery orders from the Branded Online Store.
Allow Cash on Delivery
Allows customers to pay cash upon delivery of their order.
Auto Accept Paid Order
When enabled, online orders are automatically accepted on the POS if orders are paid.
Override Minimum Charge
Allows you to override the minimum charge set in "Workflow" settings.
Override Workflow Settings
Allows you to override "Delivery Order" settings from the "Workflow" settings.
DeleteMerchant Portal (Classic Theme)
- Log in to the Merchant Portal.
- On the left panel, click on Restaurant Settings. Then, select Catering.
- Set up your preferred Catering settings.
- At the top right, click on Save to confirm.
Below is the list of settings that you can set up and manage on the Merchant Portal:
General
Catering
Enable Catering
When enabled, the Catering feature becomes available for your restaurant. Customers will be able to place orders meant for large gatherings and social functions.
General
Service Boundary (km)
Set a limit on the allowed delivery distance.
Takeout Charge
Enable Delivery Charge
When enabled, the POS adds a delivery charge to the total order amount.
Conditional delivery fee
Set a different delivery fee depending on a specified condition. For example, you can set a No delivery fee rule for orders that exceed a certain amount.
DeleteWorkflow
Return Home
Return Home after Payment Processing
When enabled, the POS automatically returns to the the default home screen after payment. If you turn the setting off, the POS stays at the payment screen so you can perform other actions, like making a tip and printing a receipt.
Order Payment
Require Payment when Placing Order
When enabled, all orders automatically require payment. This setting disables the Confirm button on the POS.
Order
Force Enter Party Size
When enabled, you are required to enter a party size in the POS before taking an order.
Delivery Order Display on Pickup Display
When enabled, delivery orders will be displayed on the Pickup Display.
Auto Add Item
Auto Add Items when Open Check
When enabled, you can set which items will be automatically added to every open check. For example, you might want to automatically add sauces to every order.
Pickup Order Setting
Minimum Charge
Set the minimum amount that customers must spend to place a pickup order.
Minimum Days in Advance
Set the minimum number of days that customers can place their Catering orders in advance for pickup orders.
Pre-order Period
Specify how far in advance customers can place catering orders for pickup. The maximum allowable time is 365 days.
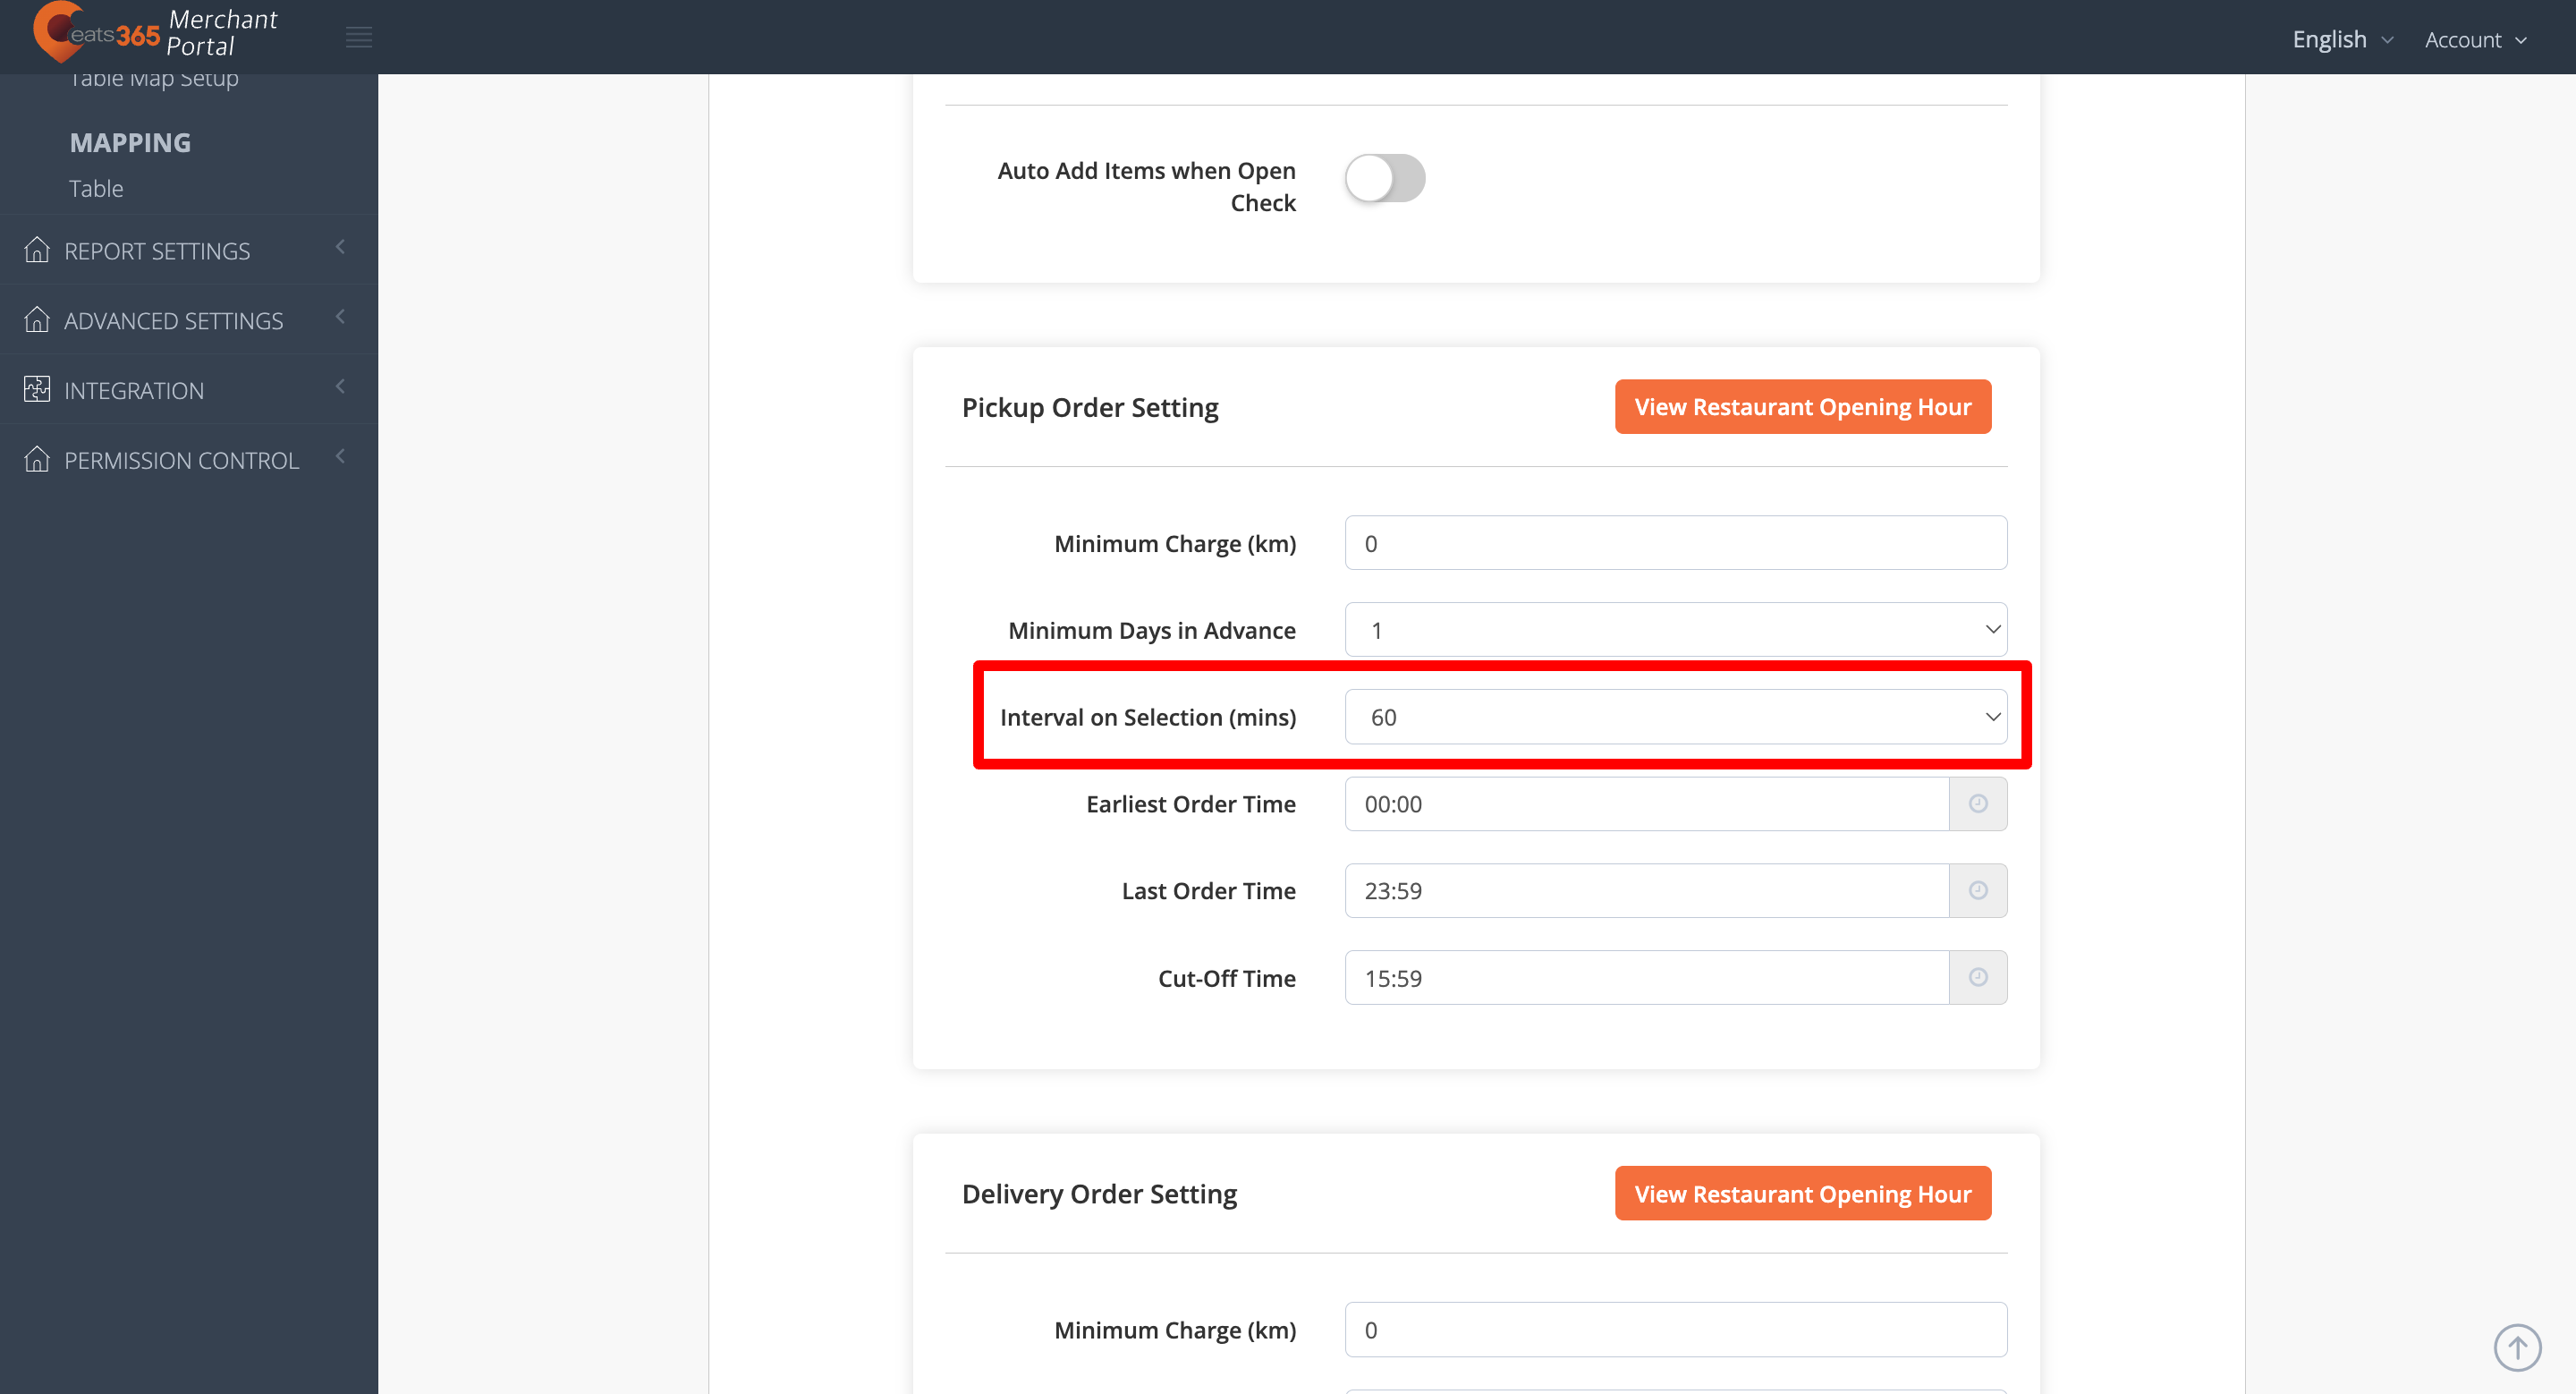
Interval on Selection (mins)
Set the interval to determine how far apart the available time slots should be. For example, an interval set to 30 minutes will display the pickup options as 13:00, 13:30, 14:00, and so on.
Earliest Order Time
Set the earliest time that customers can place their order.
Last Order Time
Set the latest time that customers can place their order for the particular business day. For example, if you set the latest order time to 17:00, customers won’t be able to place orders beyond the set time.
Cut-Off Time
Set the cut-off time when the restaurant can no longer process orders for that particular business day. Orders made past the cut-off time can still be accepted, but the order won’t be processed until the next business day.
Delivery Order Setting
Minimum Charge
Set the minimum amount that customers must spend to place a delivery order.
Minimum Days in Advance
Set the minimum days that customers can place their Catering orders in advance for delivery orders.
Pre-order Period
Specify how far in advance customers can place catering orders for delivery. The maximum allowable time is 365 days.
Interval on Selection (mins)
Set the interval to determine how far apart the available time slots should be. For example, an interval set to 30 minutes will display the pickup options as 13:00, 13:30, 14:00, and so on.
Earliest Order Time
Set the earliest time that customers can place their order.
Last Order Time
Set the latest time that customers can place their order for the particular business day. For example, if you set the latest order time to 17:00, customers won’t be able to place orders beyond the set time.
Cut-Off Time
Set the cut-off time when the restaurant can no longer process orders for that particular business day. Orders made past the cut-off time can still be accepted, but the order won’t be processed until the next business day.
DeleteUser App
User App Pickup Order
Allow User App to Place Pickup Order
Allows customers to place pickup orders from the Branded Online Store.
Minimum Charge Override
Allows you to override the Minimum Charge set in Workflow settings.
Allow Cash on Pickup
Allows customers to pay cash upon picking up their order.
Auto Accept Paid Order
When enabled, online orders are automatically accepted on the POS if orders are paid.
Override Workflow Settings
Allows you to override Pickup Order settings from the Workflow settings.
User App Delivery Order
Allow User App to Place Delivery Order
Allows customers to place delivery orders from the Branded Online Store.
Minimum Charge Override
Allows you to override the Minimum Charge set in Workflow settings.
Allow Cash on Delivery
Allows customers to pay cash upon delivery of their order.
Auto Accept Paid Order
When enabled, online orders are automatically accepted on the POS if orders are paid.
Override Workflow Settings
Allows you to override Delivery Order settings from the Workflow settings.
DeleteMerchant Portal 2.0
- Log in to the Merchant Portal.
- On the left panel, click on Restaurant Settings.
- Click on Catering. Then, select a catering setting.
Note: A drop-down list shows the three main settings you can configure, which include "General," "Workflow," and "Online Ordering."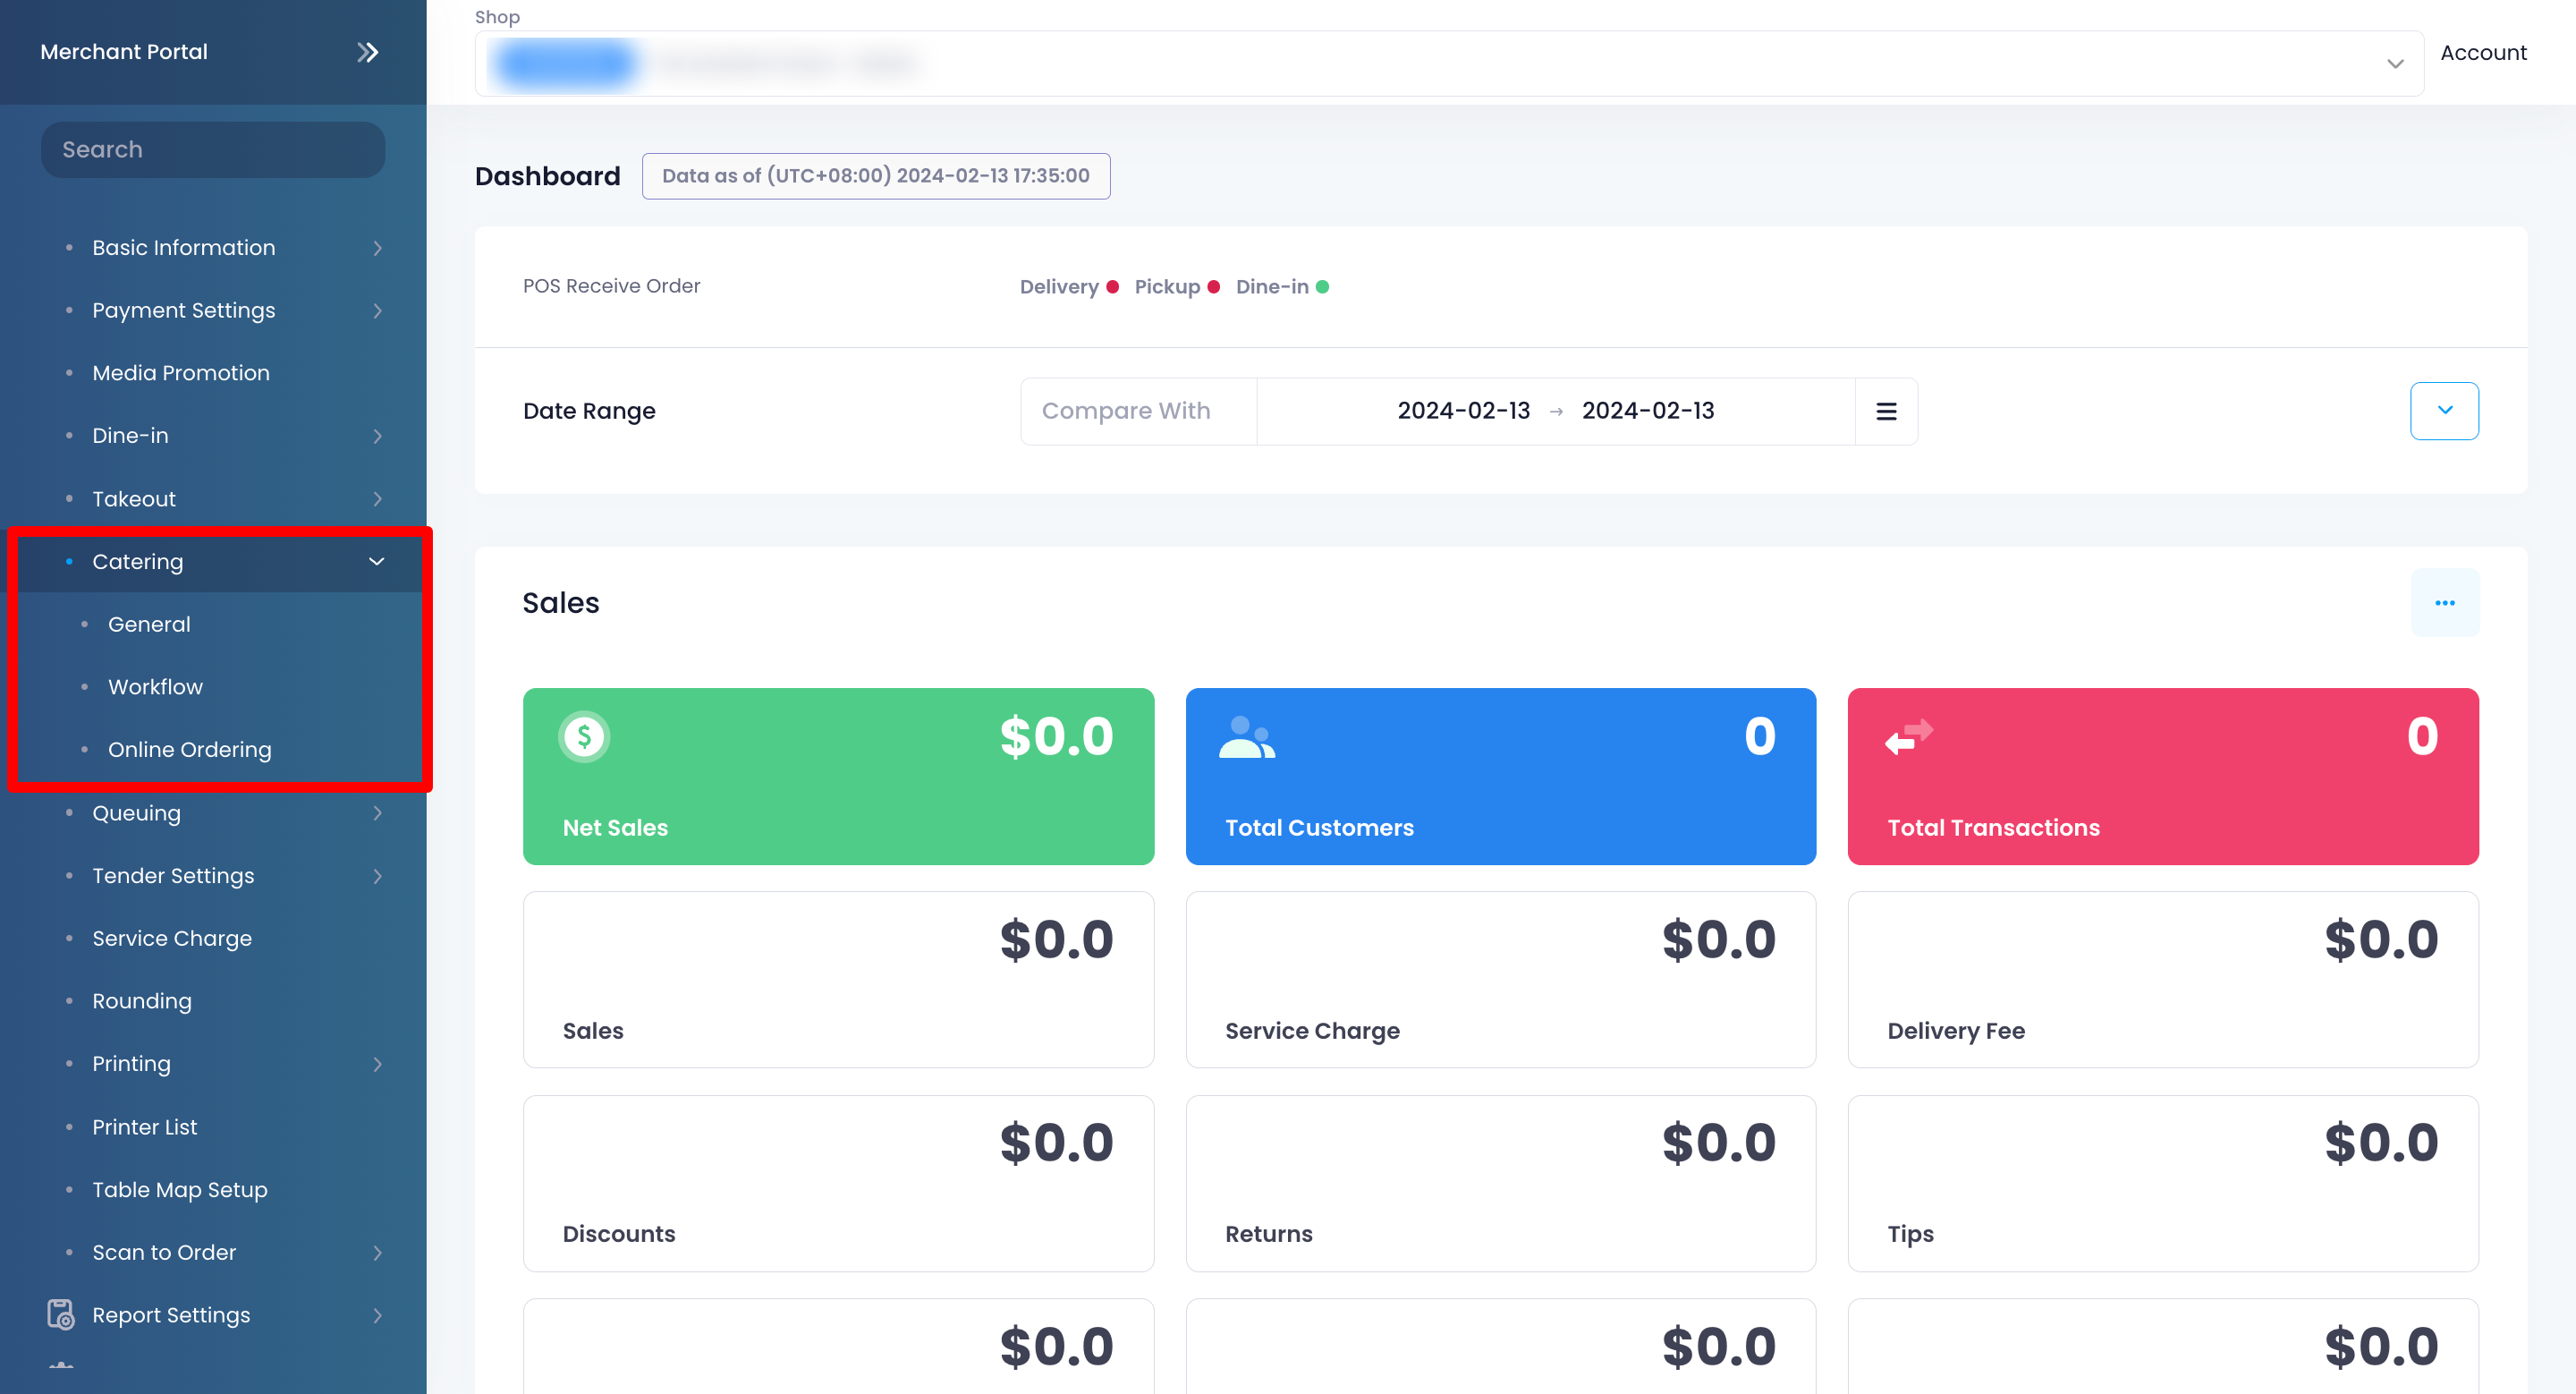
- Set up your preferred catering settings.
- At the top right, click on Save to confirm.
Below is the list of settings that you can set up and manage on the Merchant Portal:
General
Catering
Enable Catering
When enabled, the Catering feature becomes available for your restaurant. Customers will be able to place orders meant for large gatherings and social functions.
General Settings
Service Boundary
Set a limit on the allowed delivery distance.
Takeout Charge
Enable Delivery Charge
When enabled, the POS adds a delivery charge to the total order amount.
You can set a standard delivery fee or set a delivery fee for different order amounts and distances.
- Standard delivery fee - Set a fixed delivery fee.
- Conditional delivery fee - Set a different delivery fee depending on the condition. For example, you can set a "No delivery fee" rule for orders that exceed a certain amount.
Workflow
Return Home
Return Home after Payment Processing
When enabled, the POS automatically returns to the default home screen after payment. If you turn the setting off, the POS stays at the payment screen so you can perform other actions, like making a tip and printing a receipt.
Order Payment
Require Payment when Placing Order
When enabled, all orders automatically require payment. This setting disables the Confirm button on the POS.
Others
Prompt for Party Size Input
When enabled, you are required to enter a party size in the POS before taking an order.
Display Delivery Order on Pickup Display
When enabled, delivery orders will be displayed on the Pickup Display.
Auto Add Item
Auto Add Items when Open Check
When enabled, you can set which items will be automatically added to every open check. For example, you might want to automatically add sauces to every order.
Catering Pickup Order Setting
Minimum Charge
Set the minimum amount that customers must spend to place a pickup order.
Minimum Days in Advance
Set the minimum number of days that customers can place their Catering orders in advance for pickup orders.
Pre-order Period
Specify how far in advance customers can place catering orders for pickup. The maximum allowable time is 365 days.
Interval on Selection (mins)
Set the interval to determine how far apart the available time slots should be. For example, an interval set to 30 minutes will display the pickup options as 13:00, 13:30, 14:00, and so on.
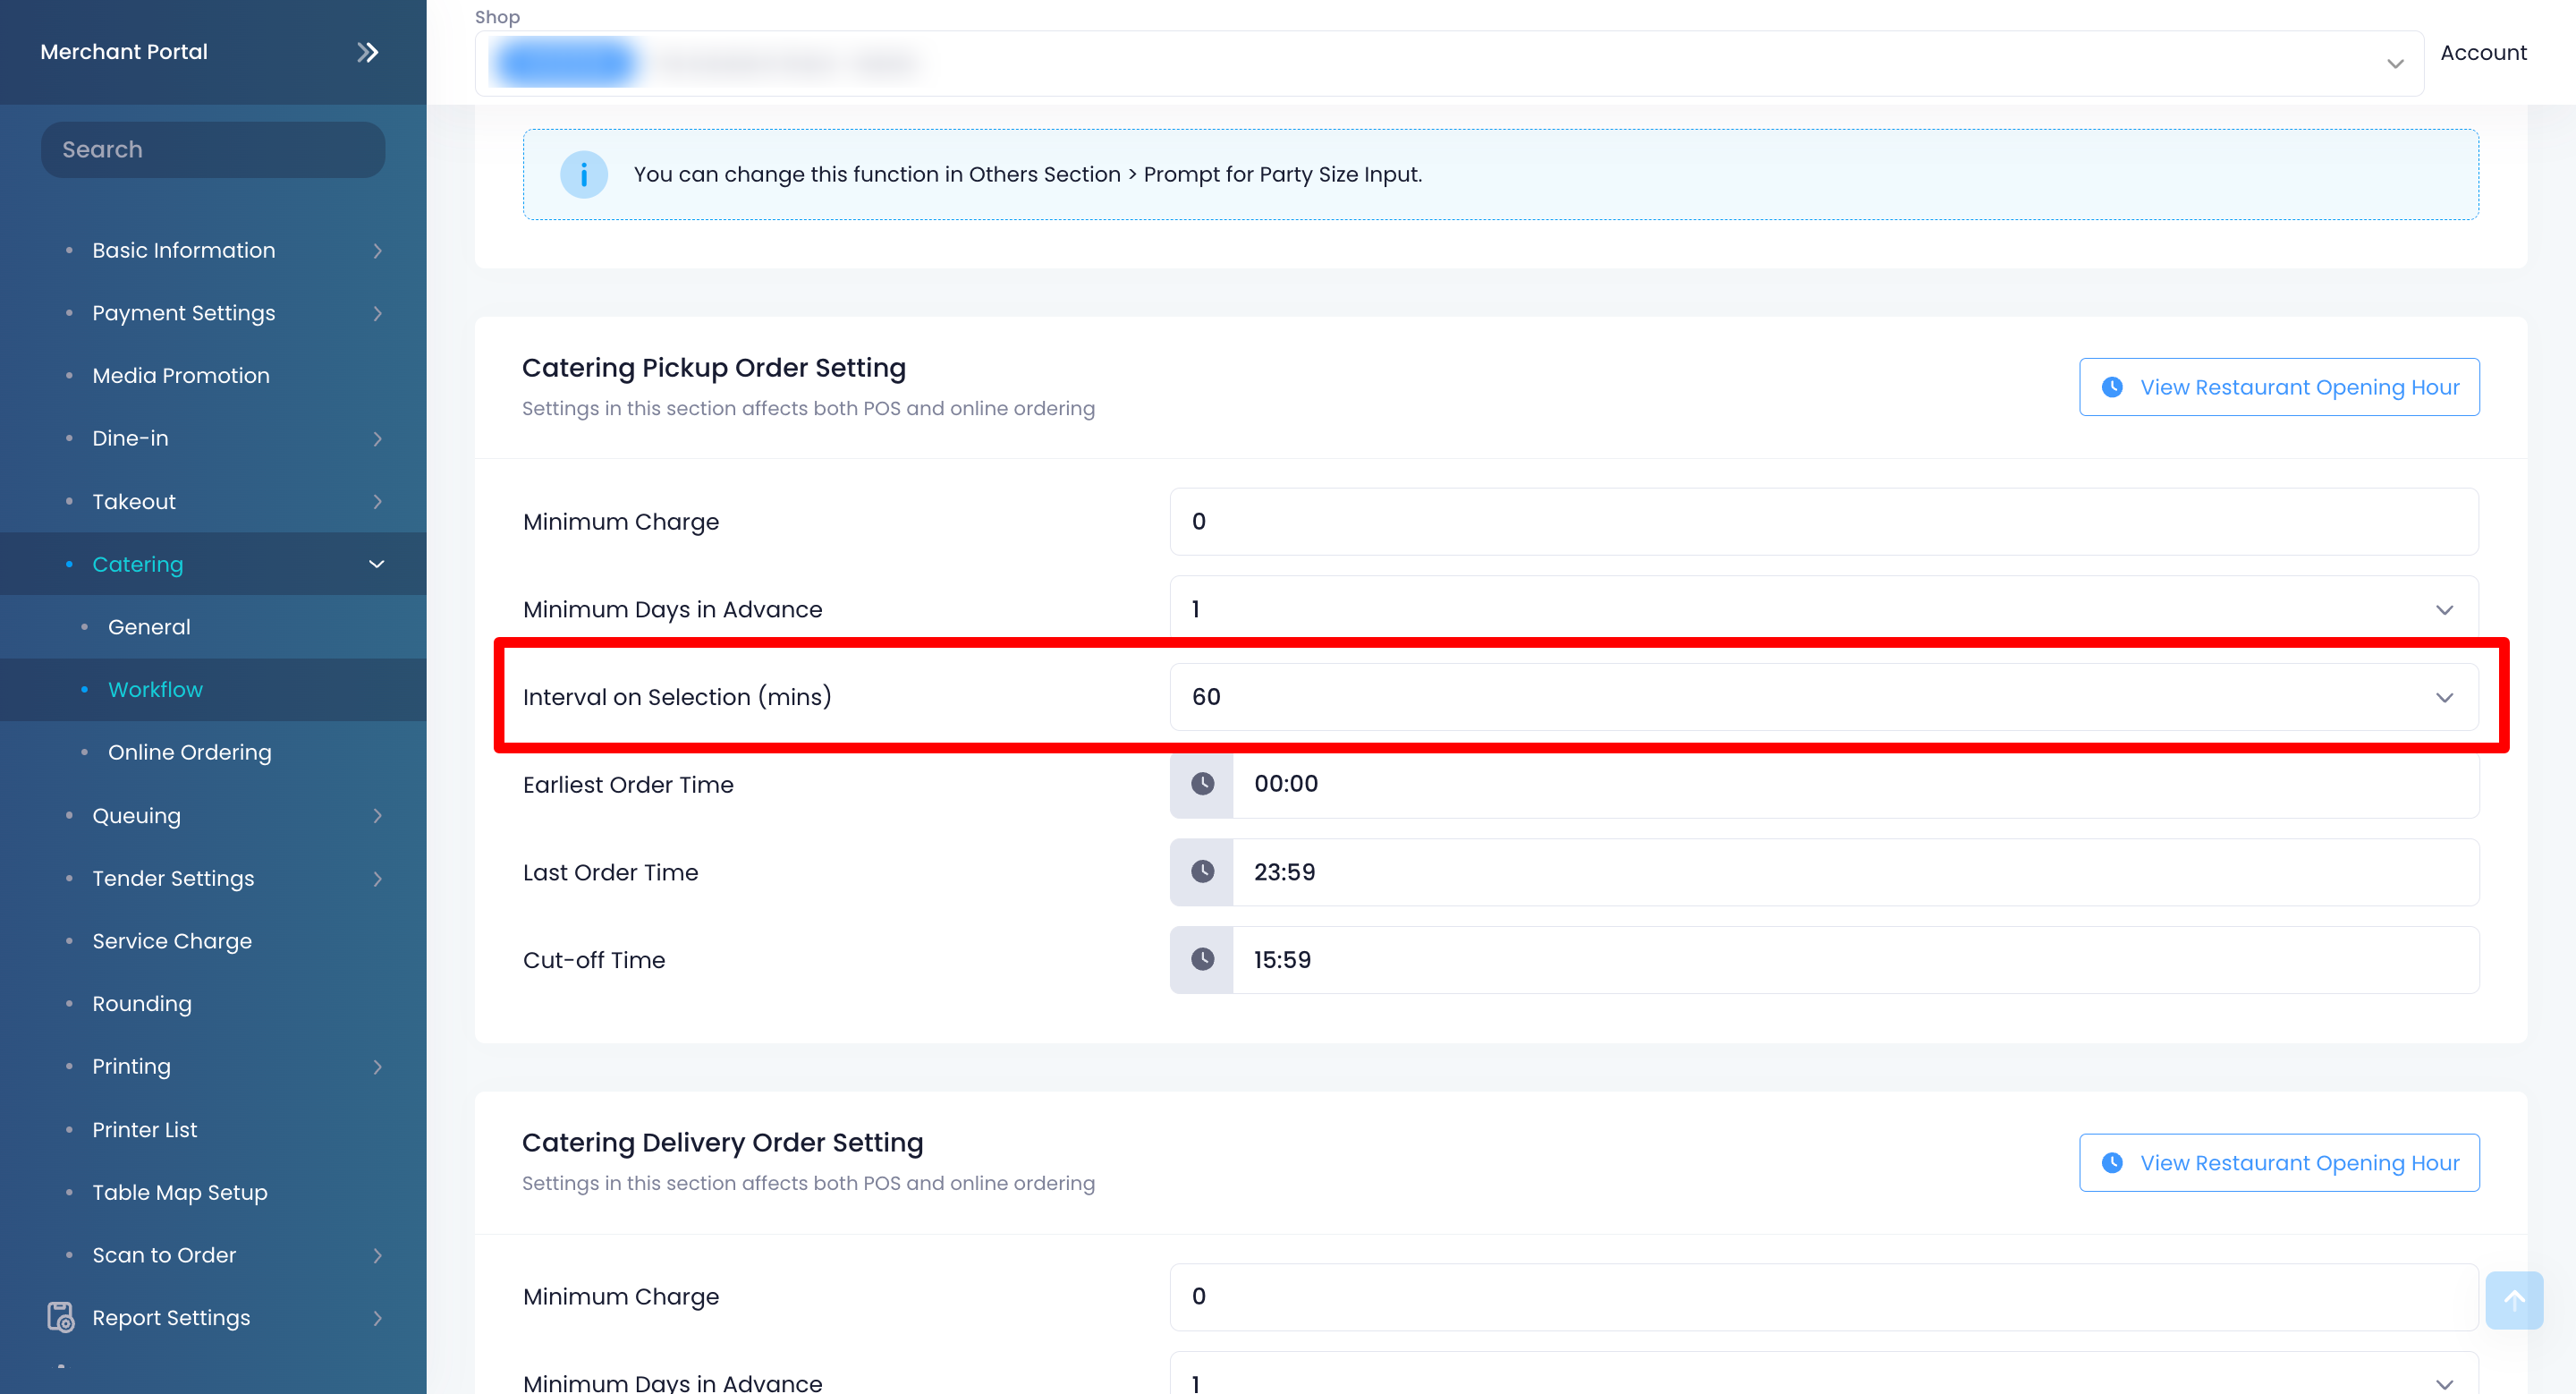
Earliest Order Time
Set the earliest time that customers can place their order.
Last Order Time
Set the latest time that customers can place their order for the particular business day. For example, if you set the latest order time to 17:00, customers won’t be able to place orders beyond the set time.
Cut-Off Time
Set the cut-off time when the restaurant can no longer process orders for that particular business day. Orders made past the cut-off time can still be accepted, but the order won’t be processed until the next business day.
Catering Delivery Order Setting
Minimum Charge
Set the minimum amount that customers must spend to place a delivery order.
Minimum Days in Advance
Set the minimum days that customers can place their Catering orders in advance for delivery orders.
Pre-order Period
Specify how far in advance customers can place catering orders for delivery. The maximum allowable time is 365 days.
Interval on Selection (mins)
Set the interval to determine how far apart the available time slots should be. For example, an interval set to 30 minutes will display the pickup options as 13:00, 13:30, 14:00, and so on.
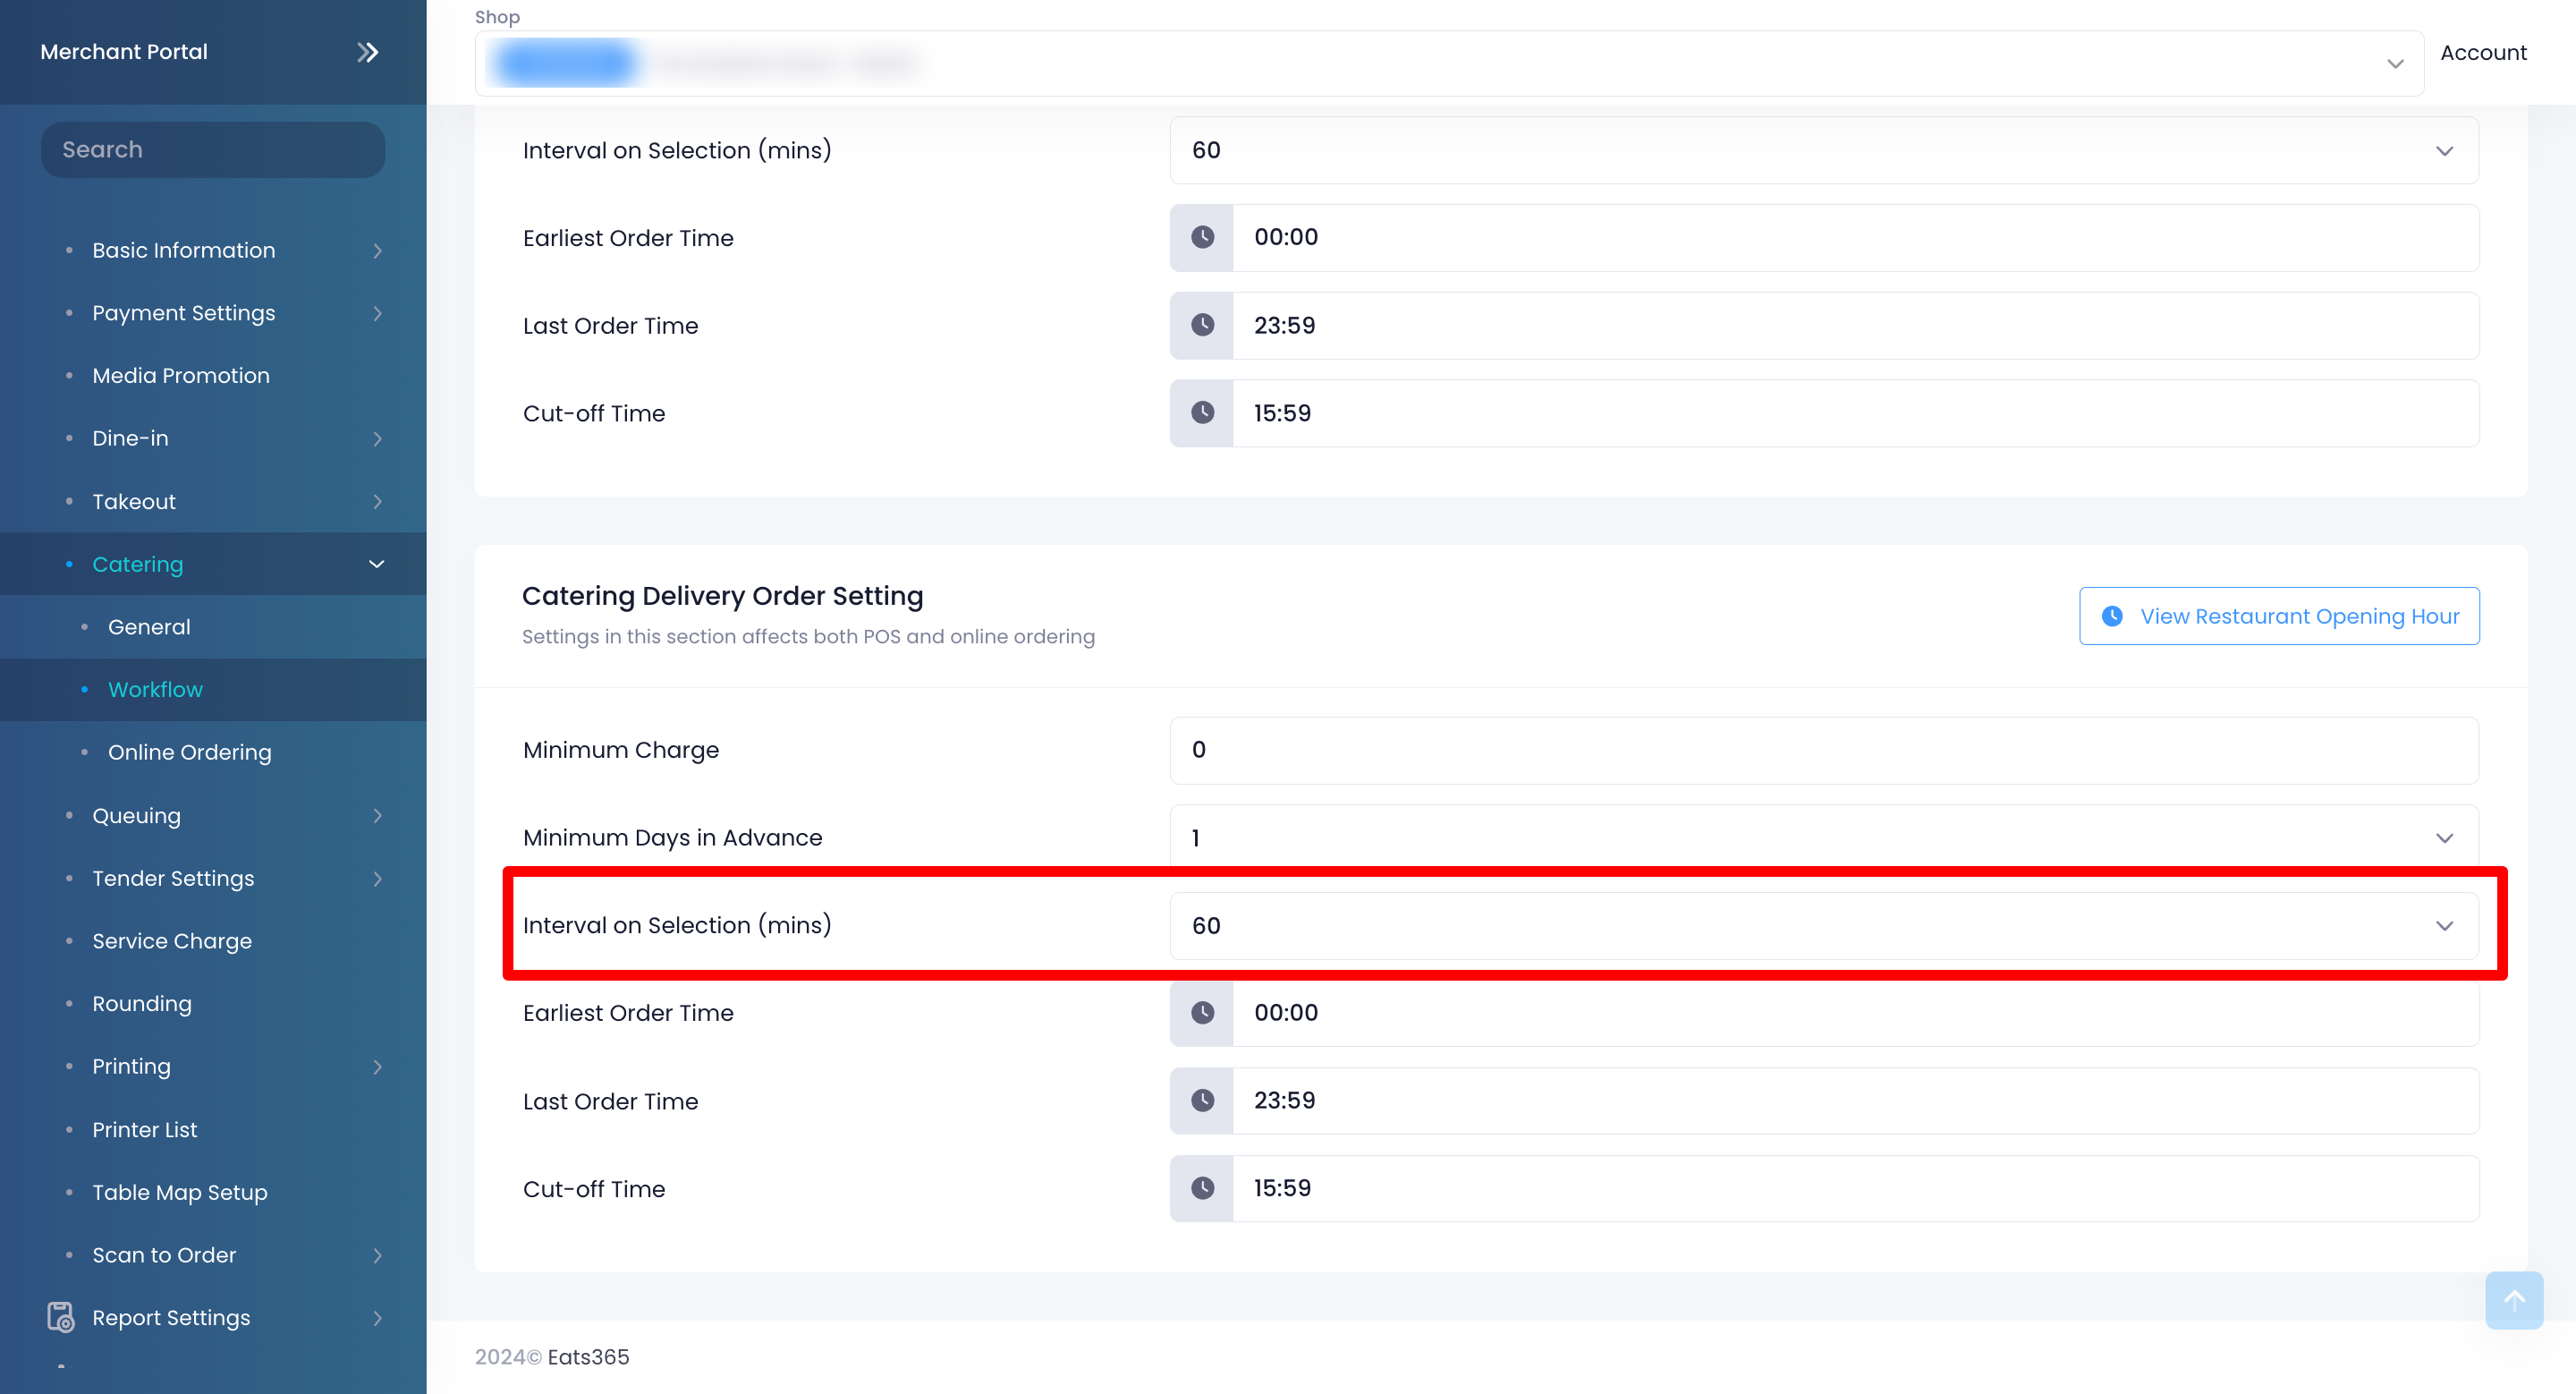
Earliest Order Time
Set the earliest time that customers can place their order.
Last Order Time
Set the latest time that customers can place their order for the particular business day. For example, if you set the latest order time to 17:00, customers won’t be able to place orders beyond the set time.
Cut-Off Time
Set the cut-off time when the restaurant can no longer process orders for that particular business day. Orders made past the cut-off time can still be accepted, but the order won’t be processed until the next business day.
DeleteOnline Ordering
Order Notification Settings
Enable Order Notification
Allows you to create an email list so those included in the list will be notified of next operation period pre-orders and catering orders placed on the Branded Online Store.
When enabled, select the recipient's preferred email language and enter the email address.
Online Pickup Order
Allow Pickup Order
Allows customers to place pickup orders from the Branded Online Store.
Override Minimum Charge
Allows you to override the Minimum Charge set in Workflow settings.
Auto Accept Paid Order
When enabled, online orders are automatically accepted on the POS if orders are paid.
Override Workflow Settings
Allows you to override Pickup Order settings from the Workflow settings.
Allow Payment on Pickup
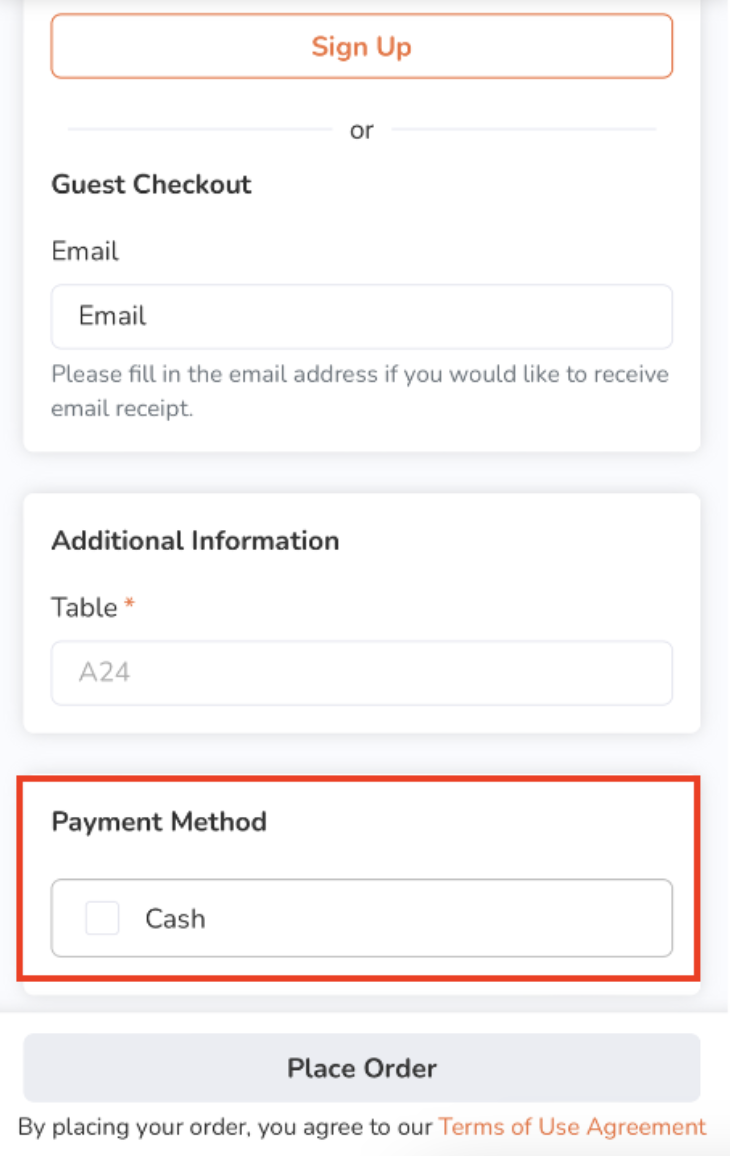
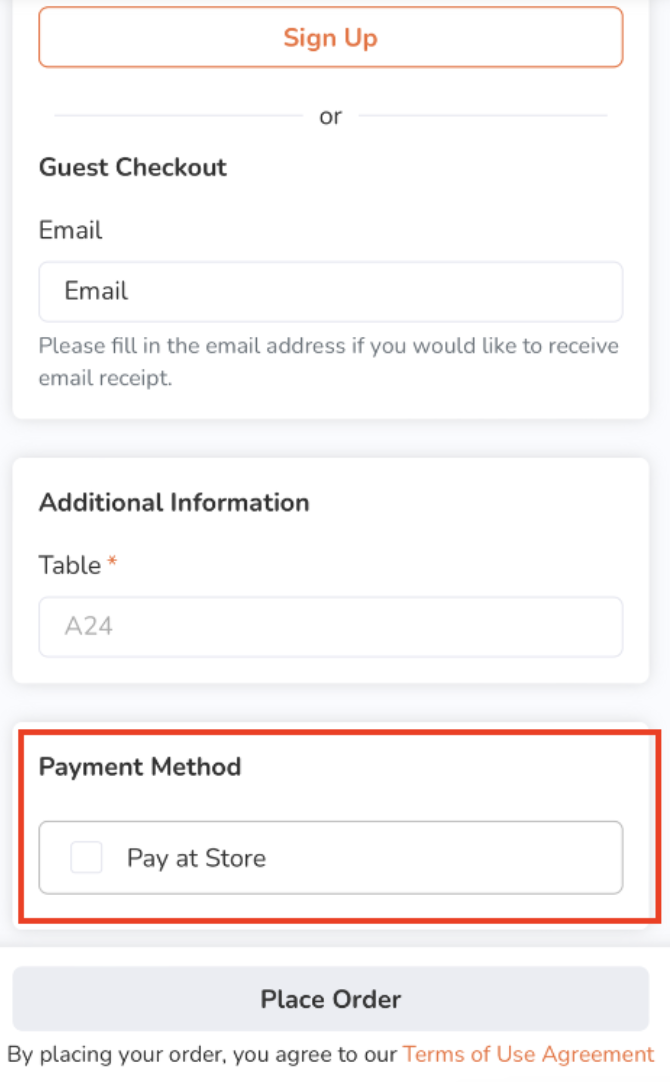
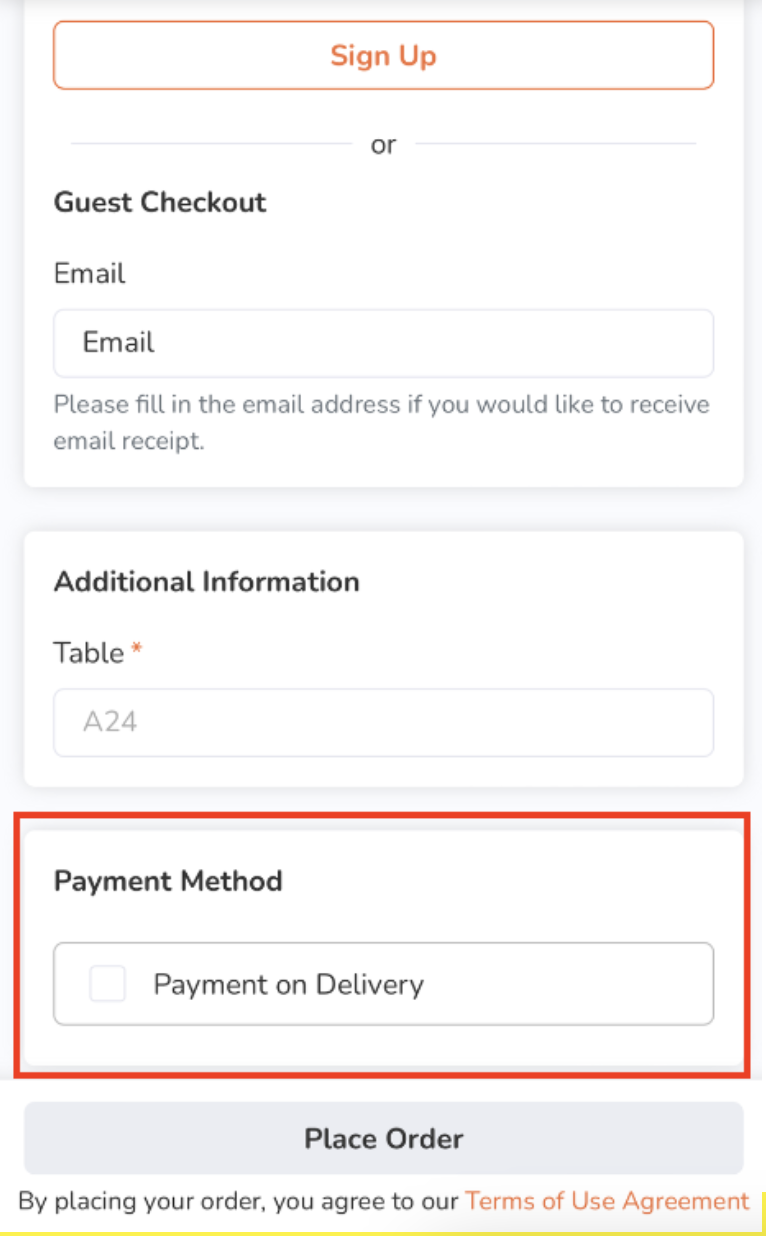
Allows customers to pay upon picking up their order. You can select the payment option wording that would appear on the restaurant’s website. You can choose from the following options:
-
Cash

-
Pay at Store

-
Payment on Delivery

-
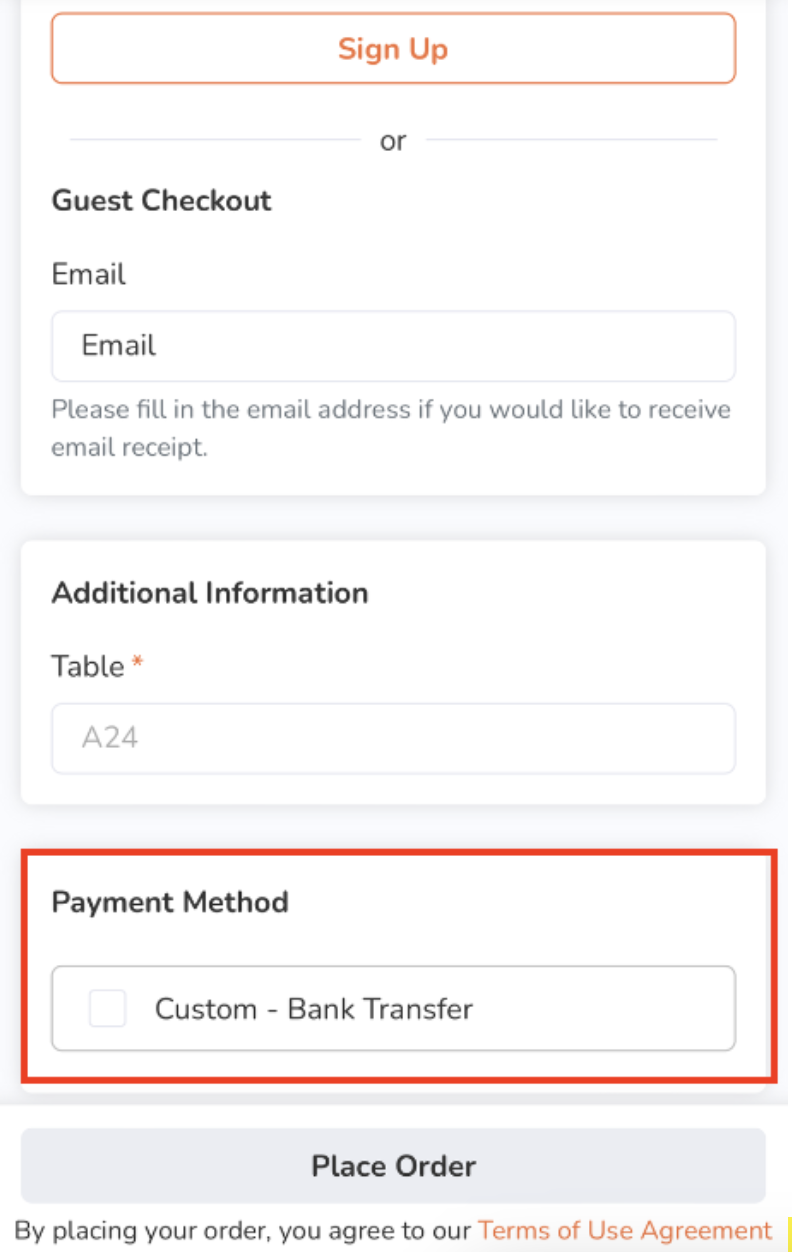
Custom
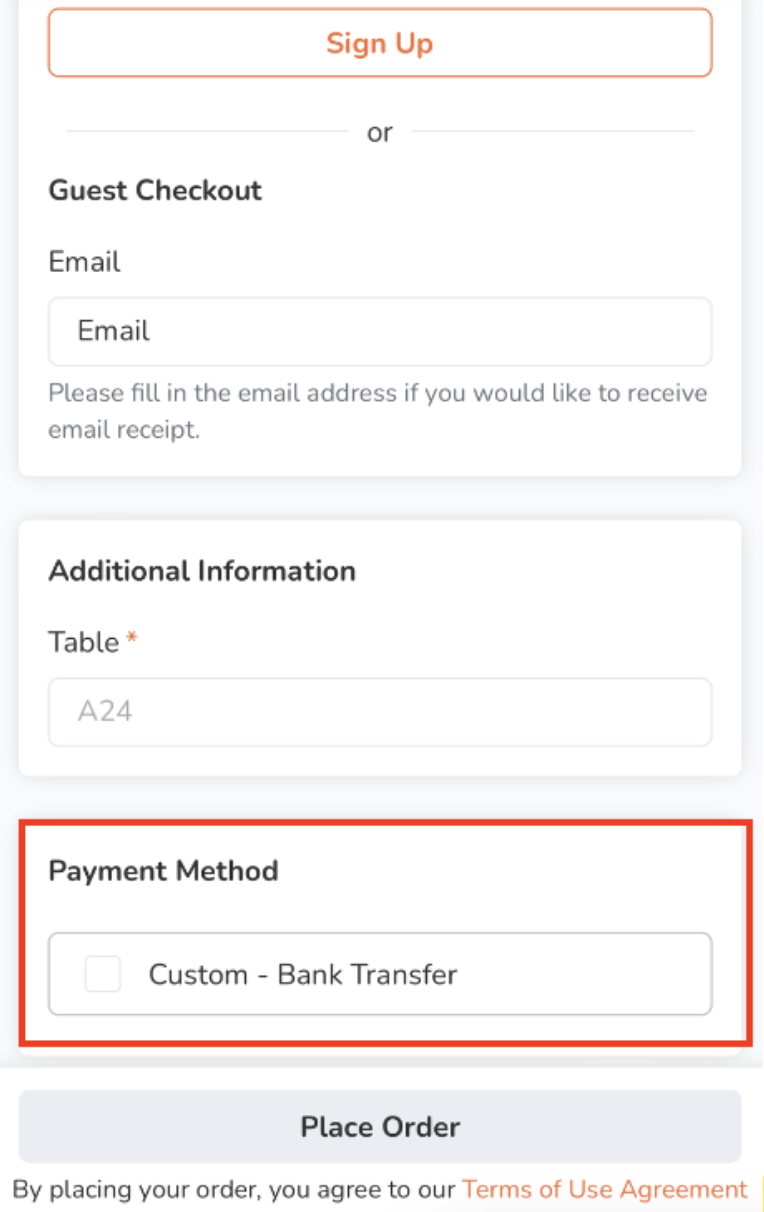
Note: The custom option allows you to create your preferred payment option wording. You can add a custom option in different languages. To add another language, select the language from the drop-down list. Then, click on +Add.
Online Delivery Order
Allow Delivery Order
Allows customers to place delivery orders from the Branded Online Store.
Override Minimum Charge
Allows you to override the minimum charge set in "Workflow" settings.
Auto Accept Paid Order
When enabled, online orders are automatically accepted on the POS if orders are paid.
Override Workflow Settings
Allows you to override "Delivery Order" settings from the "Workflow" settings.
Allow Payment on Delivery
Allows customers to pay cash upon delivery of their order. You can select the payment option wording that would appear on the restaurant’s website. You can choose from the following options:
-
Cash
-
Pay at Store
-
Payment on Delivery
-
Custom
Note: The custom option allows you to create your preferred payment option wording. You can add a custom option in different languages. To add another language, select the language from the drop-down list. Then, click on +Add.