 Eats365 Products
 Merchant Guide
 Modules
 Membership
 Integrations
 Hardware
 Staff Operations
 Roles & Permissions
 Payments
 Reports
 What’s New
 Release Notes
 Troubleshooting
 Simulators
 Glossary
 Troubleshooter
 System Status
Menu Template
Table of Contents
Create and manage a Menu Template
Learn how to add and edit menu templates, as well as display different menus based on your preferred conditions on the Eats365 POS using the Merchant Portal.
Menu Templates enable you to save existing menus, converting them into customizable templates for reuse at your convenience. While specific menu sets can only be displayed one at a time, if your restaurant offers various menu types, such as seasonal menus, you can use your existing Menu Templates as a convenient way to instantly switch between different sets of menus. For example, if your restaurant offers a different menu during summer, you can create a Menu Template for summer season and switch to it when summer comes.
In this article, you’ll learn how to create, edit, clone, delete, and apply changes to a menu using a Menu Template.
Create a Menu Template
To create a Menu Template, follow the steps below:
Merchant Portal 2.0
- Log in to the Merchant Portal.
- On the left panel, click on Menu Template, then click on Menu Template.
- At the top left, click on the drop-down menu, and choose the shop that uses the menu that you’d like to create a template from.
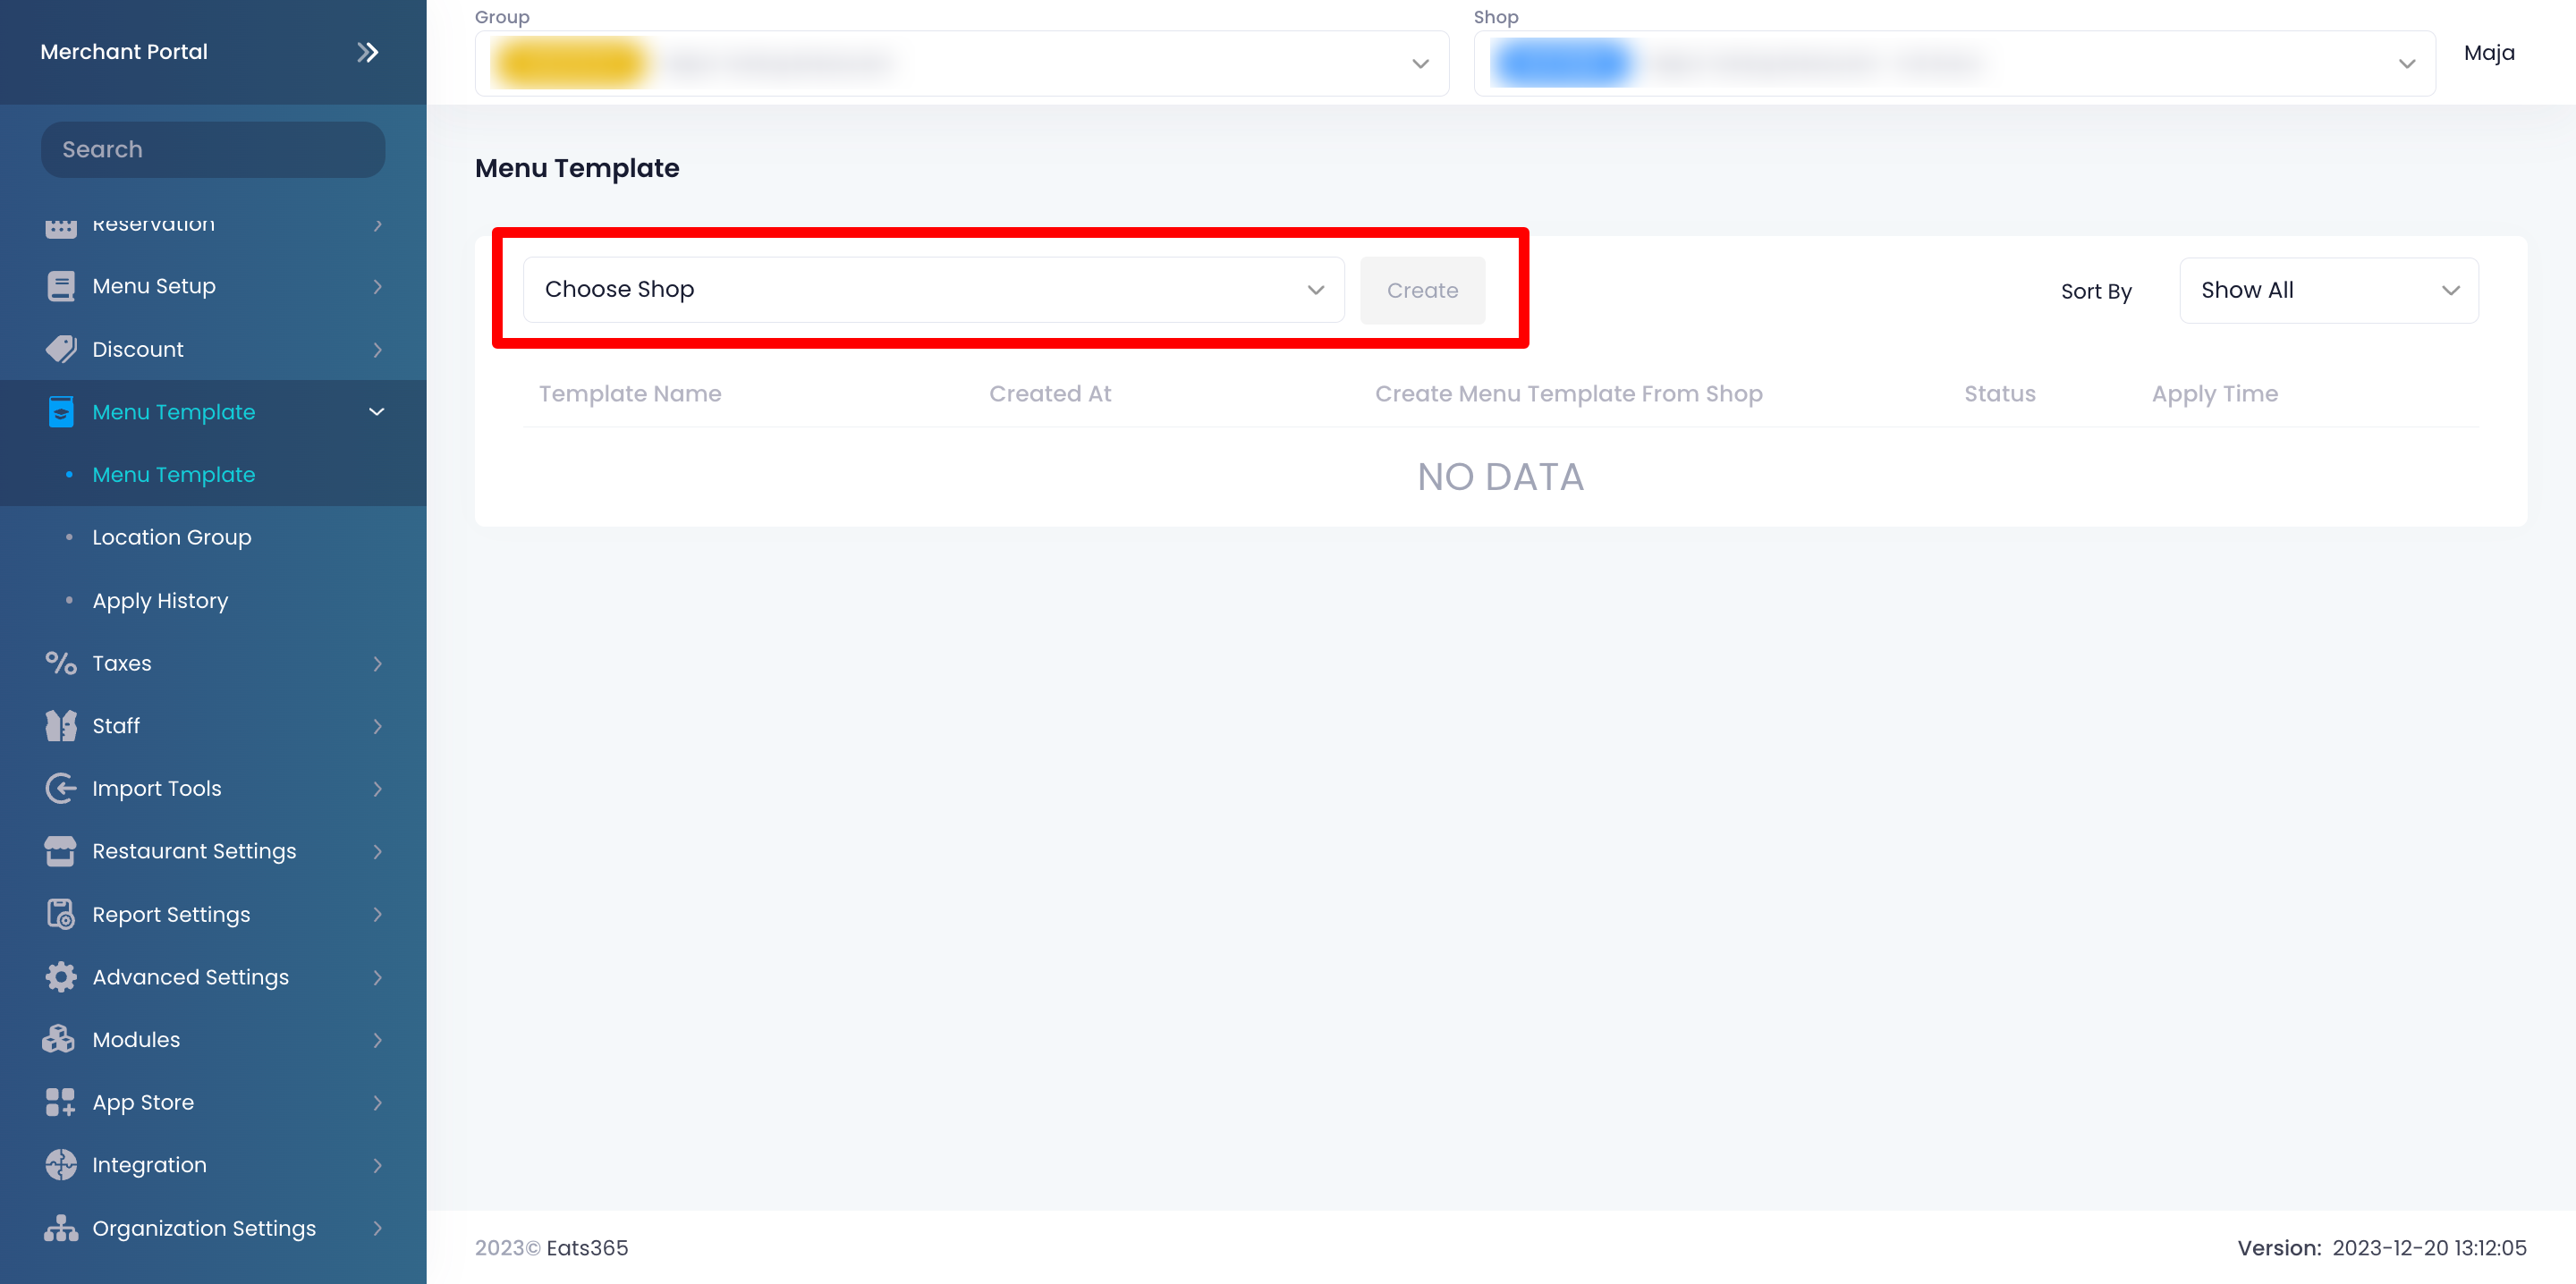
- Enter the name for the Menu Template.
Once created, you’ll find the Menu Template listed as “Processing.” It may take a few minutes for the Menu Template to be available. 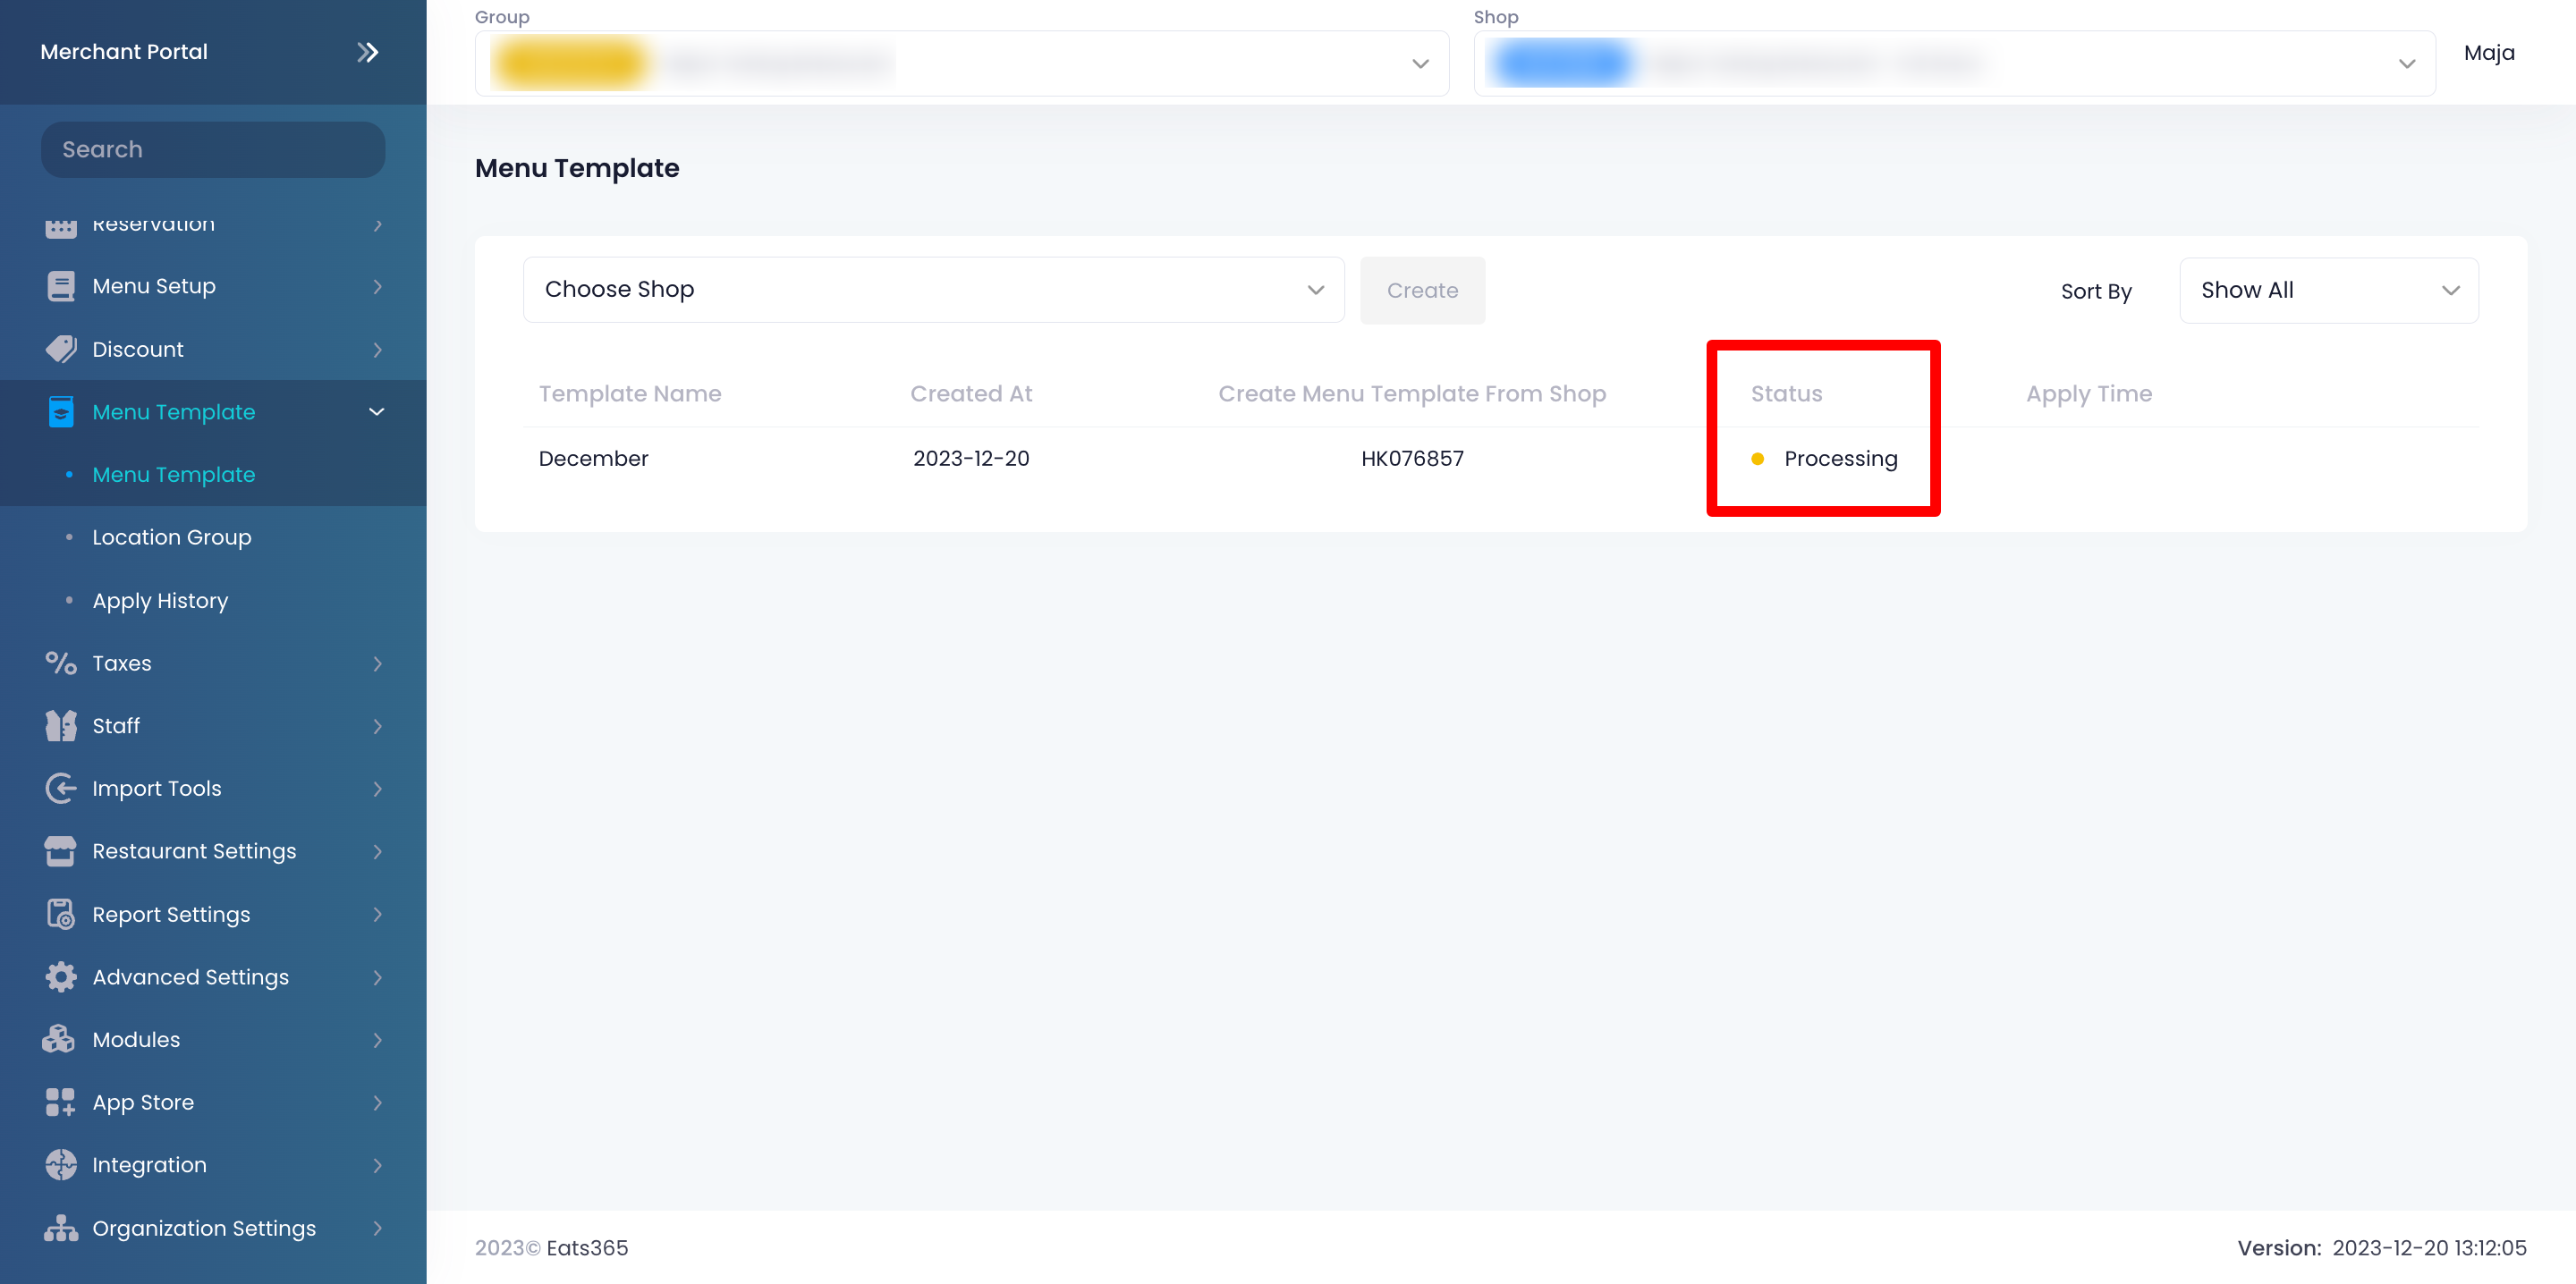
Merchant Portal (Classic Theme)
- Log in to the Merchant Portal.
- On the left panel, click on Menu Template, then click on Menu Template.
- At the top left, click the drop-down menu, and choose the shop that uses the menu that you’d like to create a template from.
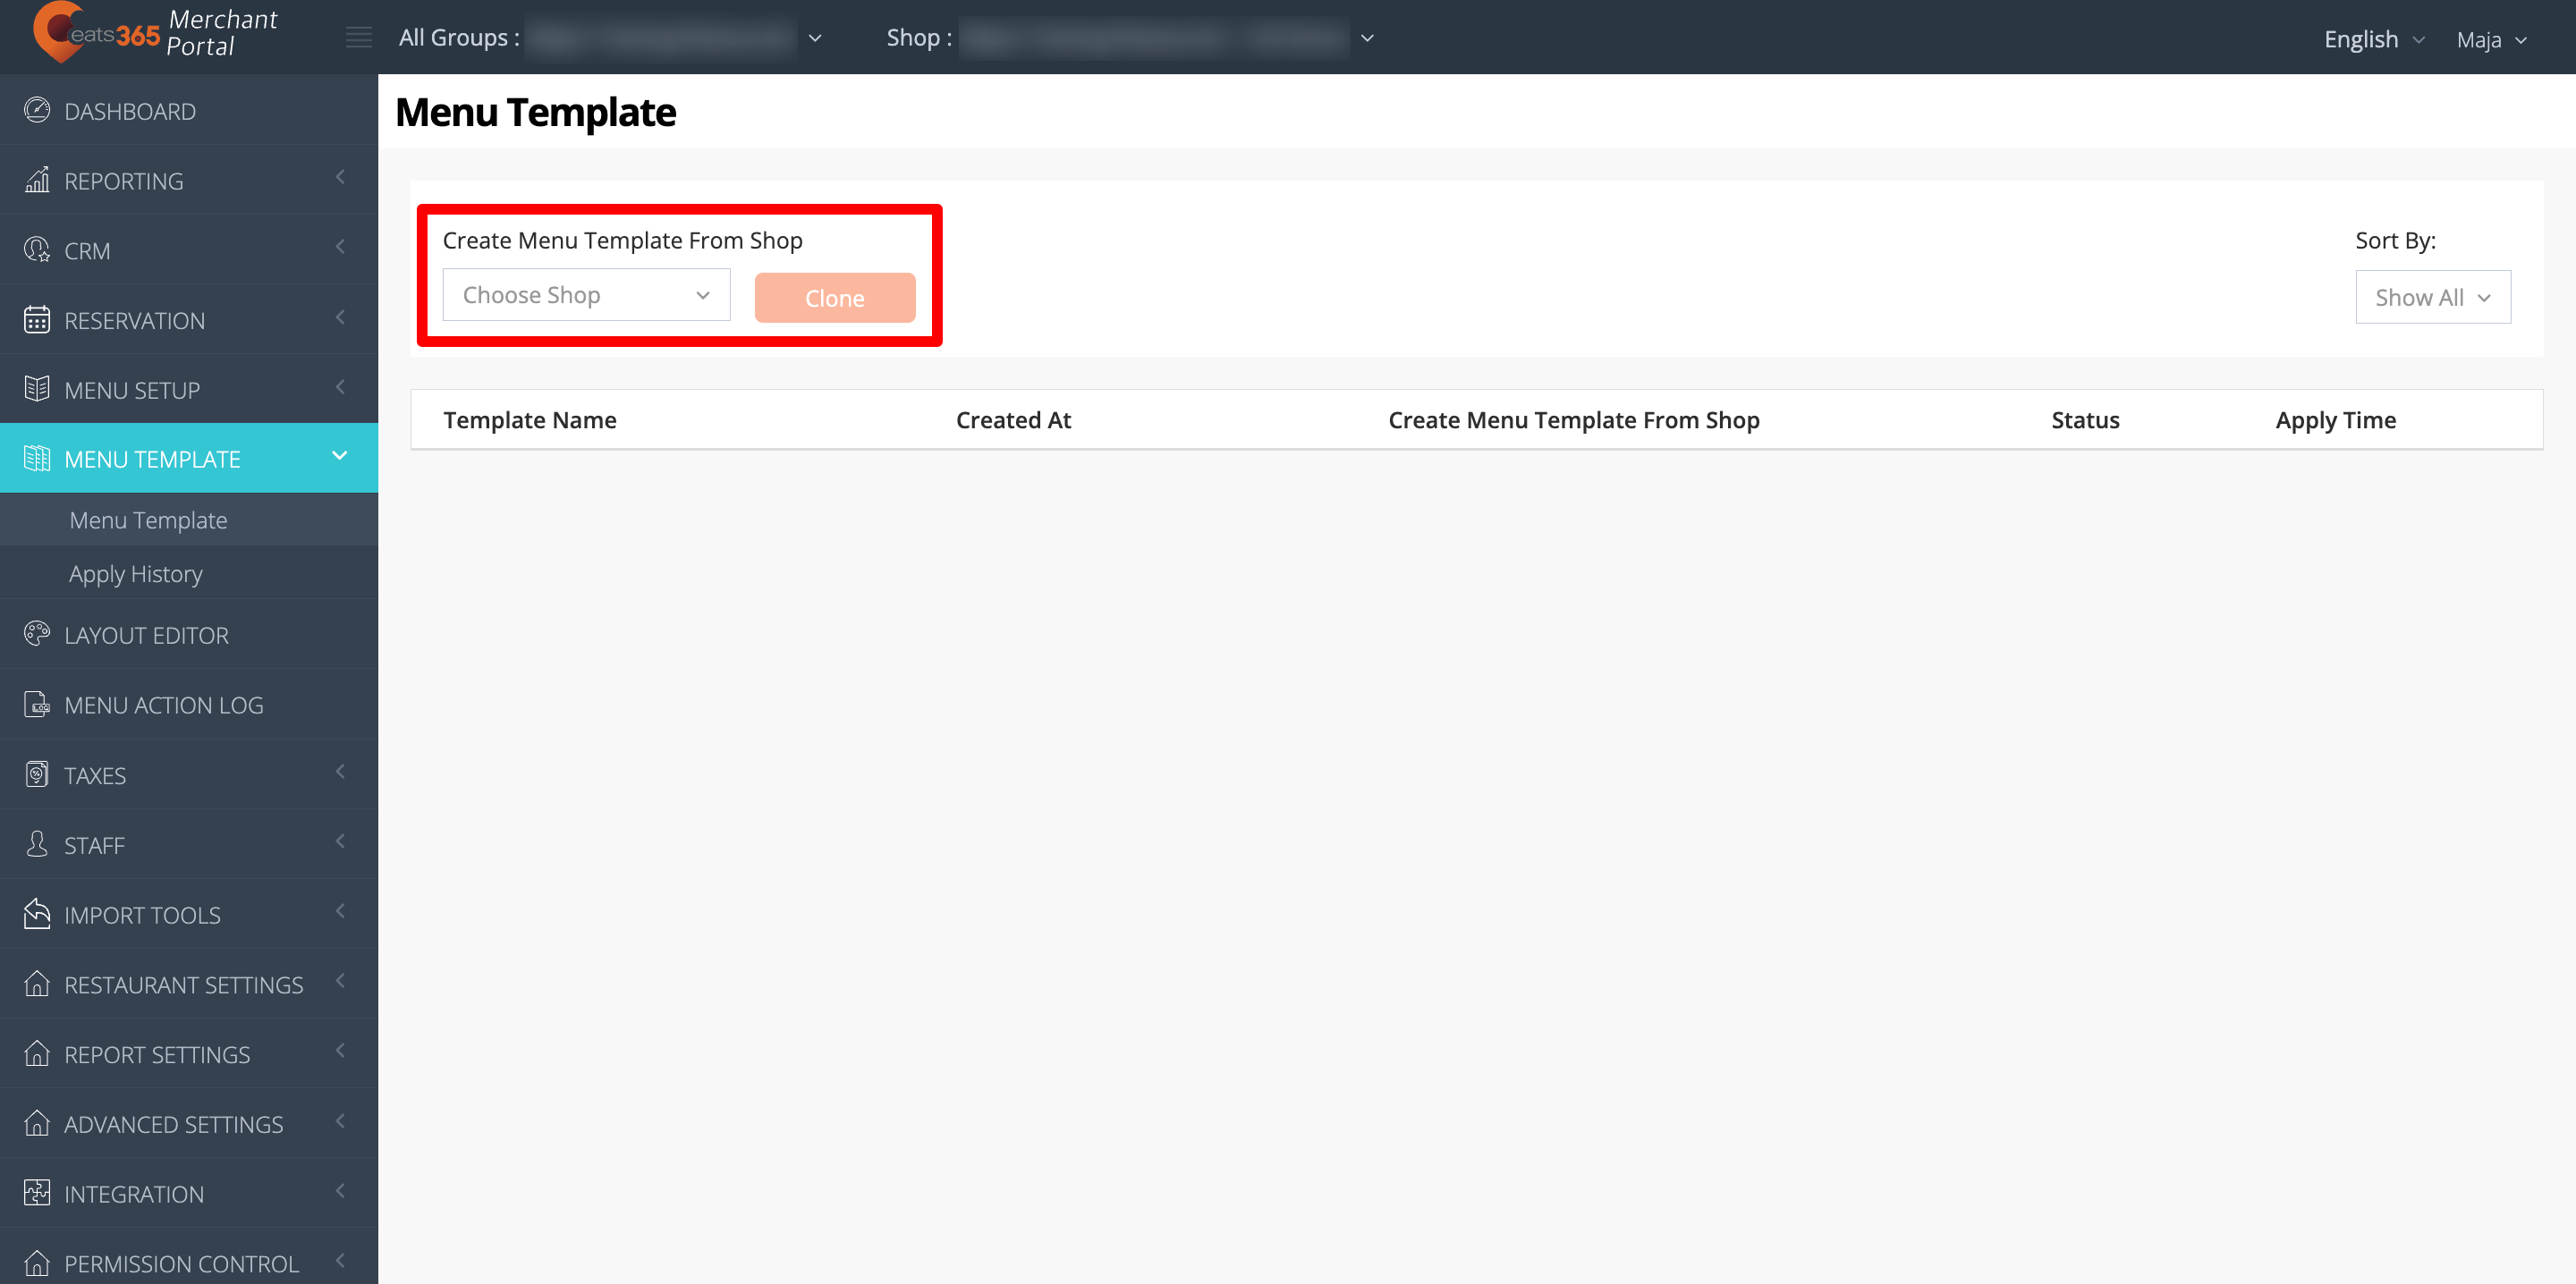
- Enter the name for the Menu Template.
Once created, you’ll find the Menu Template listed as “Processing.” It may take a few minutes for the Menu Template to be available. 
Manage a Menu Template
Modify a Menu Template
A Menu Template is a copy of the your whole menu, which includes items, categories, discounts, tax types, and more. To learn how to configure each of these menu settings, refer to Menu Setup and Payment articles.
Merchant Portal 2.0
A Menu Template can include the following menu settings depending on your setup:
-
Menu Setup
- Items
- Product Type
- Sub Product Type
- Category
- Custom Menu
- All You Can Eat Menu
- Menu Tier
- Ordering Quantity Limit
- Kitchen Station
- Coursing
- Item Access Permission
- Special Request Quick Keys
- Layout Editor
- Pickup Station
-
Taxes
- Tax Type
- Tax Group
-
Menu Tag
- Menu Tag
- Menu Tag Type
-
Tier Pricing Preset
- Tier Pricing
- Period Rule
- Membership Plan Rule
- Custom Rule
-
Modifiers
- Bulk Replace Item Modifiers
- Modifier Preset
-
Modifier Master
- Bulk Price Editor (Location Group pricing)
Note: To learn more about applying location-based menu pricing in bulk, refer to Apply pricing changes to shops in a Location Group. -
Discount
- Discount List
Note: When cloning a shop menu to another shop with a Menu Template, if an item discount is configured for a specific menu item and that item is excluded from the template, it will result in an unidentified discount offer. In Discount 2.0, the discount will be deemed invalid, while in Discount 1.0, the offer field will be blank. This occurs when you exclude the specific item but include the discount in the Menu Template. In this case, the system doesn't recognize the offer of the discount since it's tied to a specific item that's not included in the template you applied.
For example, a "Free Drink" discount will be unrecognized when the free item (drink) is not included in the Menu Template contents you're applying.
- Bundle Discount
- Discount Folder
- Discount Tags
- Non-stackable Discount
- Discount List
- Import Tools
Note: Refer to the "Use Import Toolsin the Menu Template" section for steps on how to update menu item details in bulk.- Import Product Name
- Import Product Description
- Import Combo Option Name
- Import Modifiers Name
- Import Discount Name
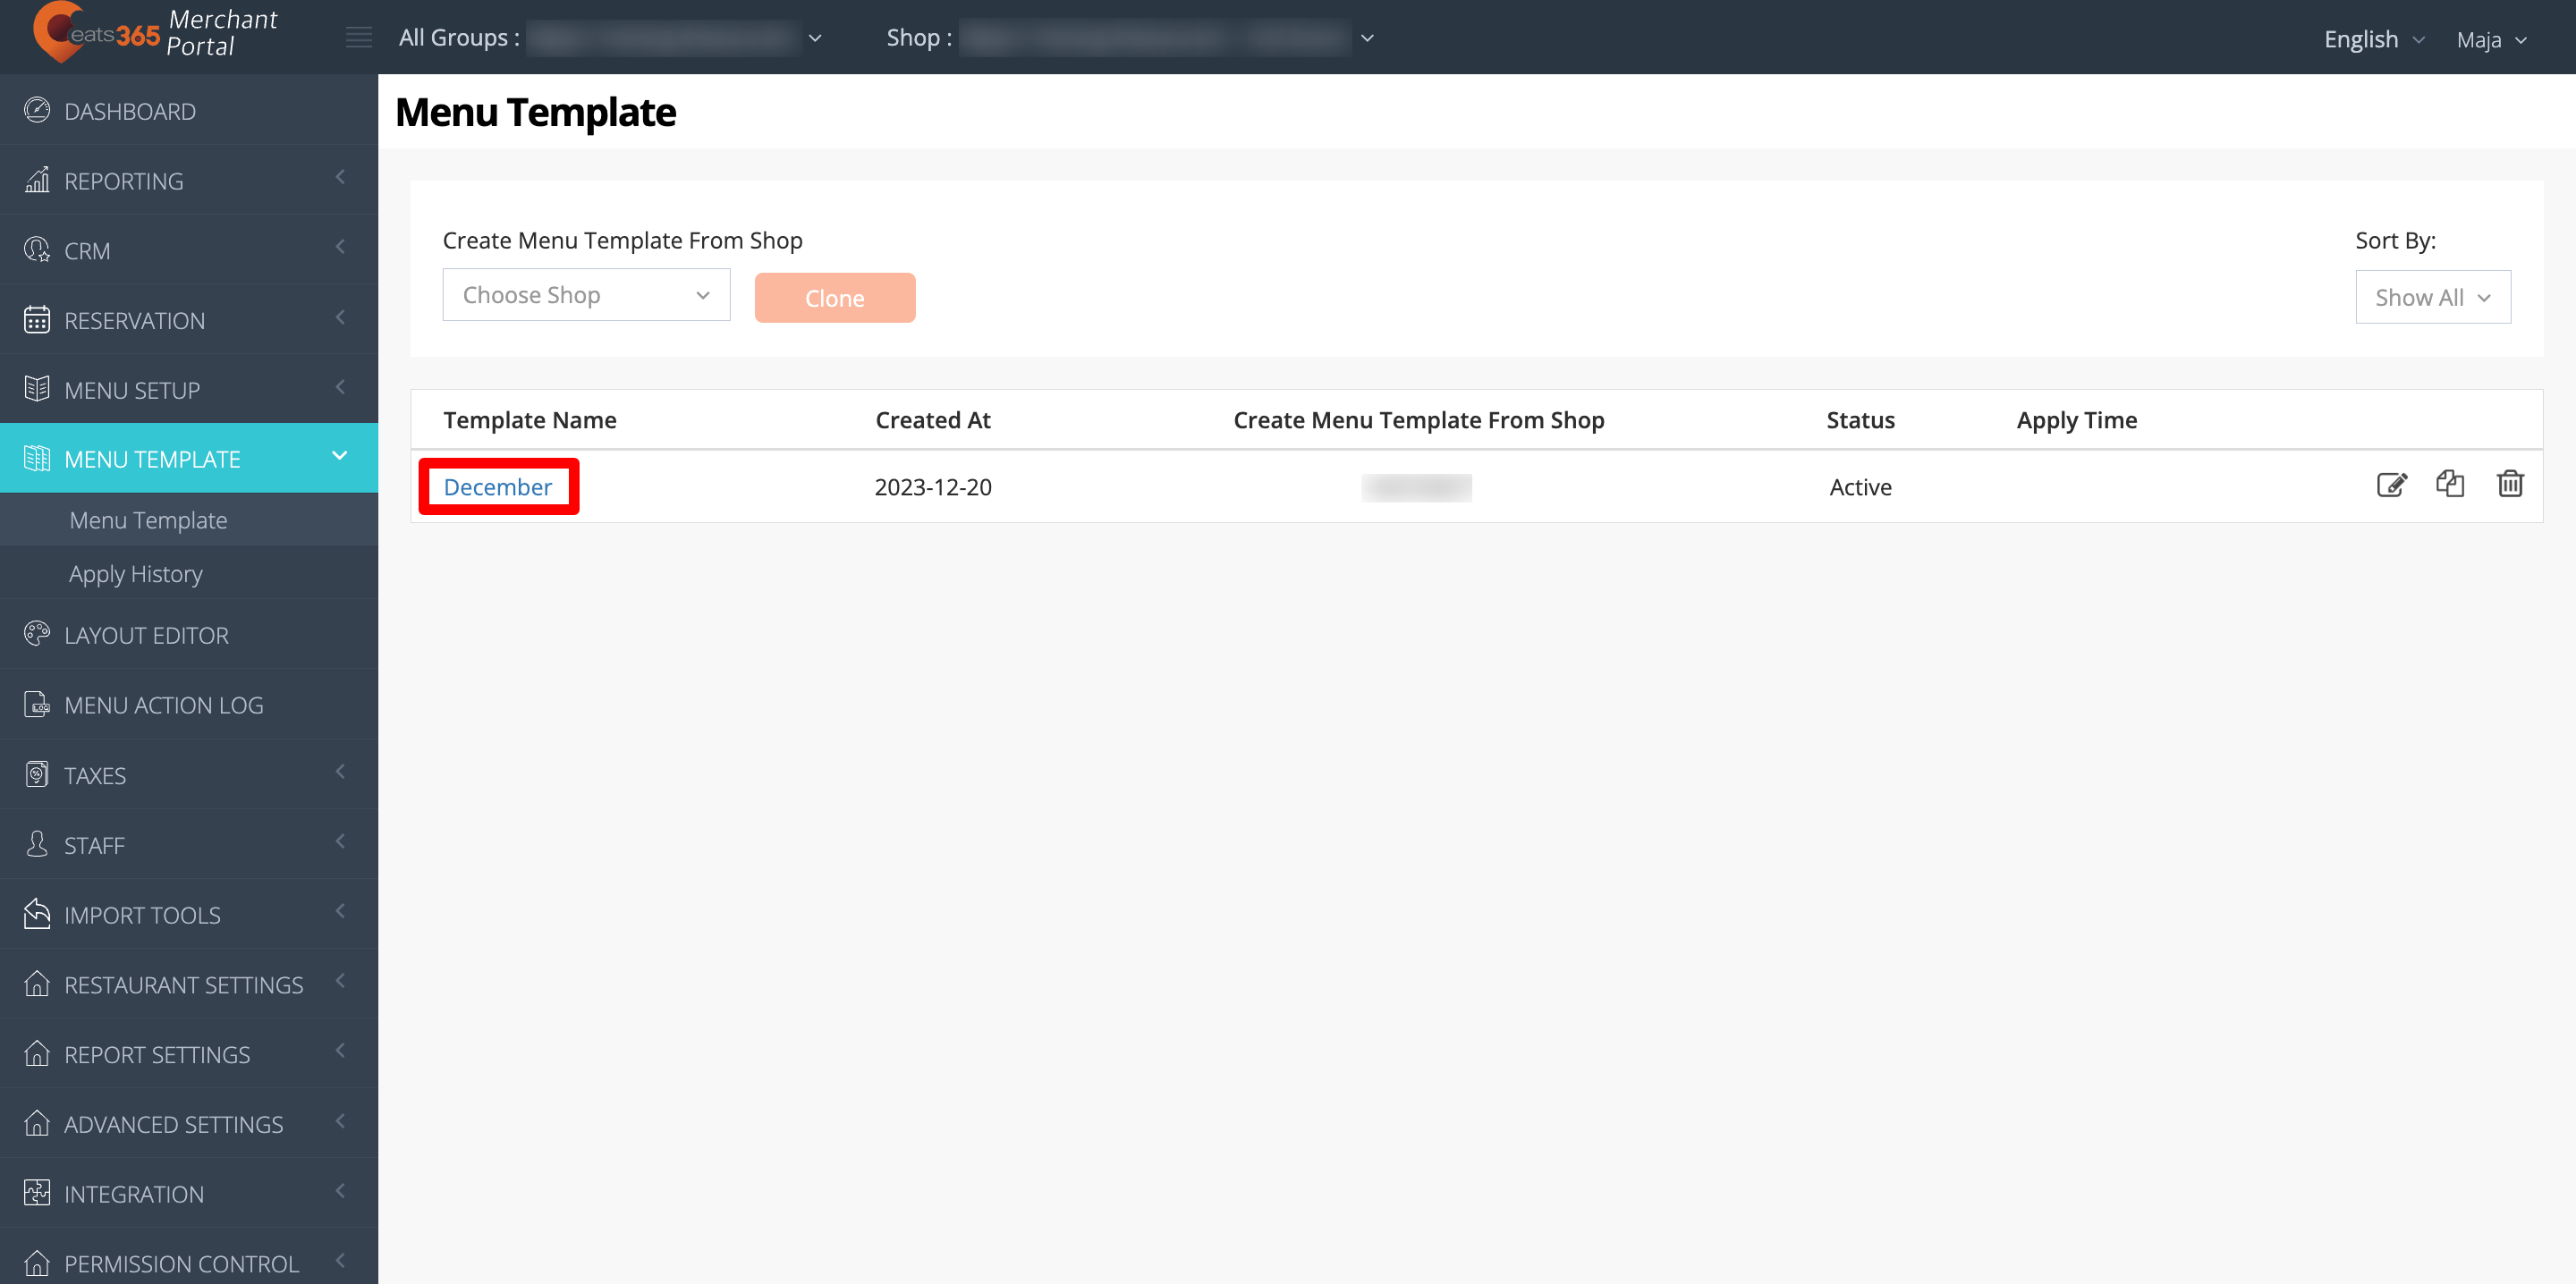
To edit a Menu Template’s contents, follow the steps below:
- Log in to the Merchant Portal.
- On the left panel, click on Menu Template, then click on Menu Template.
- Next to the Menu Template that you’d like to update, click on Edit
 .
.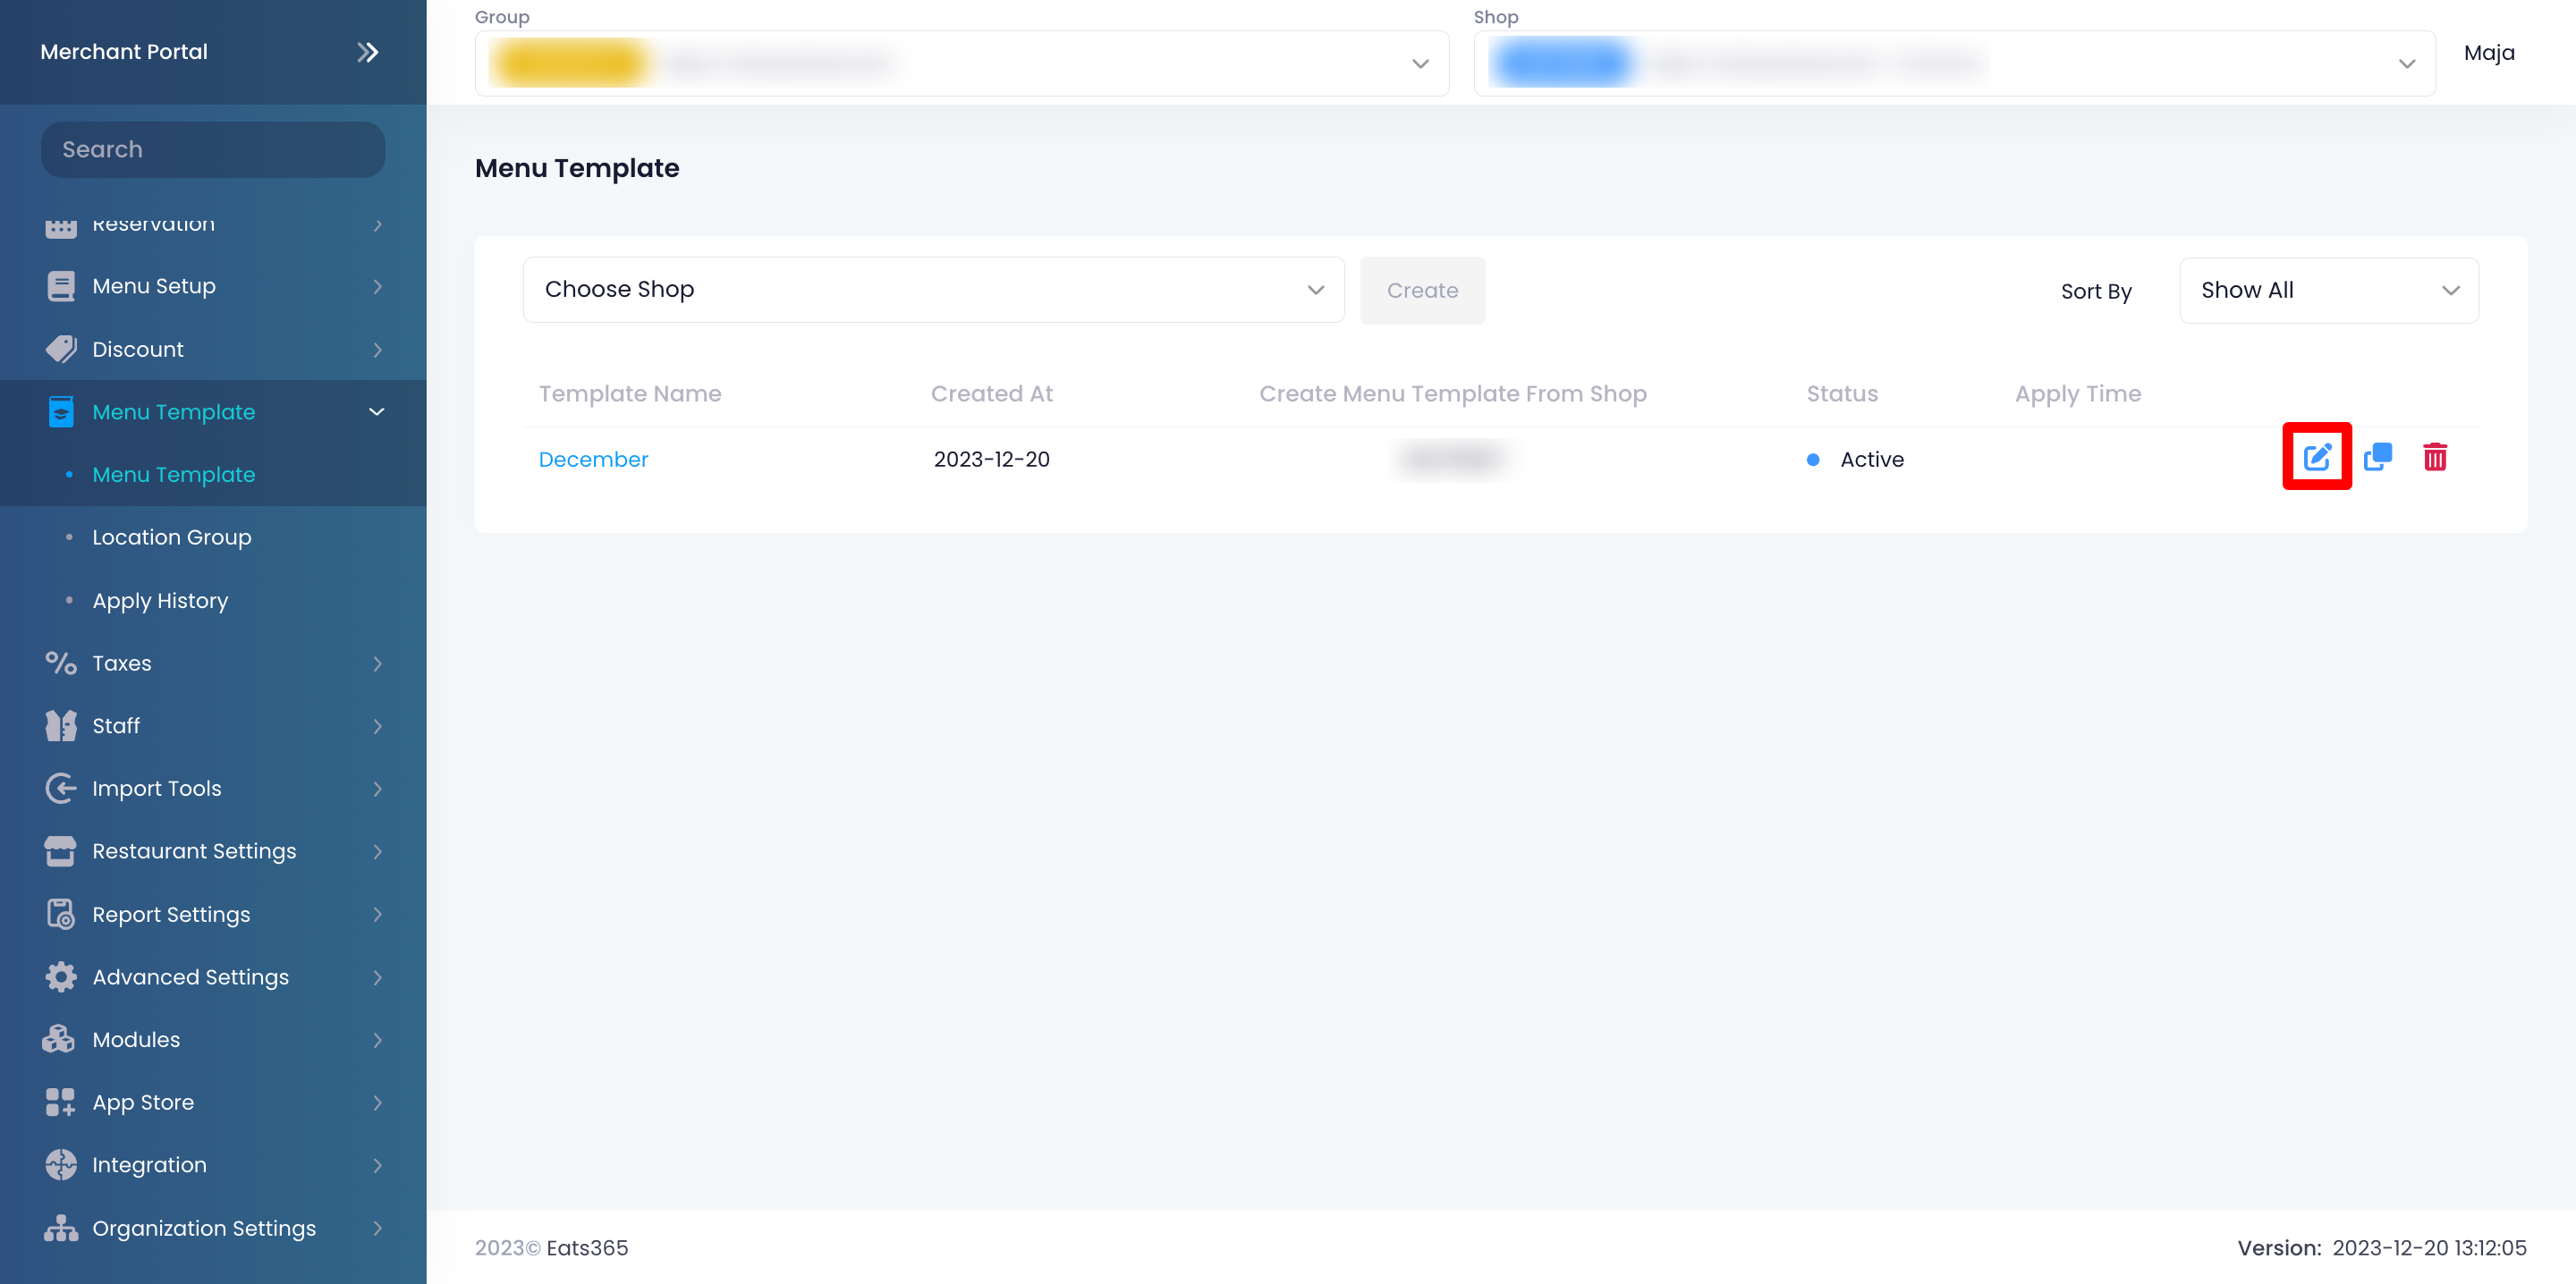
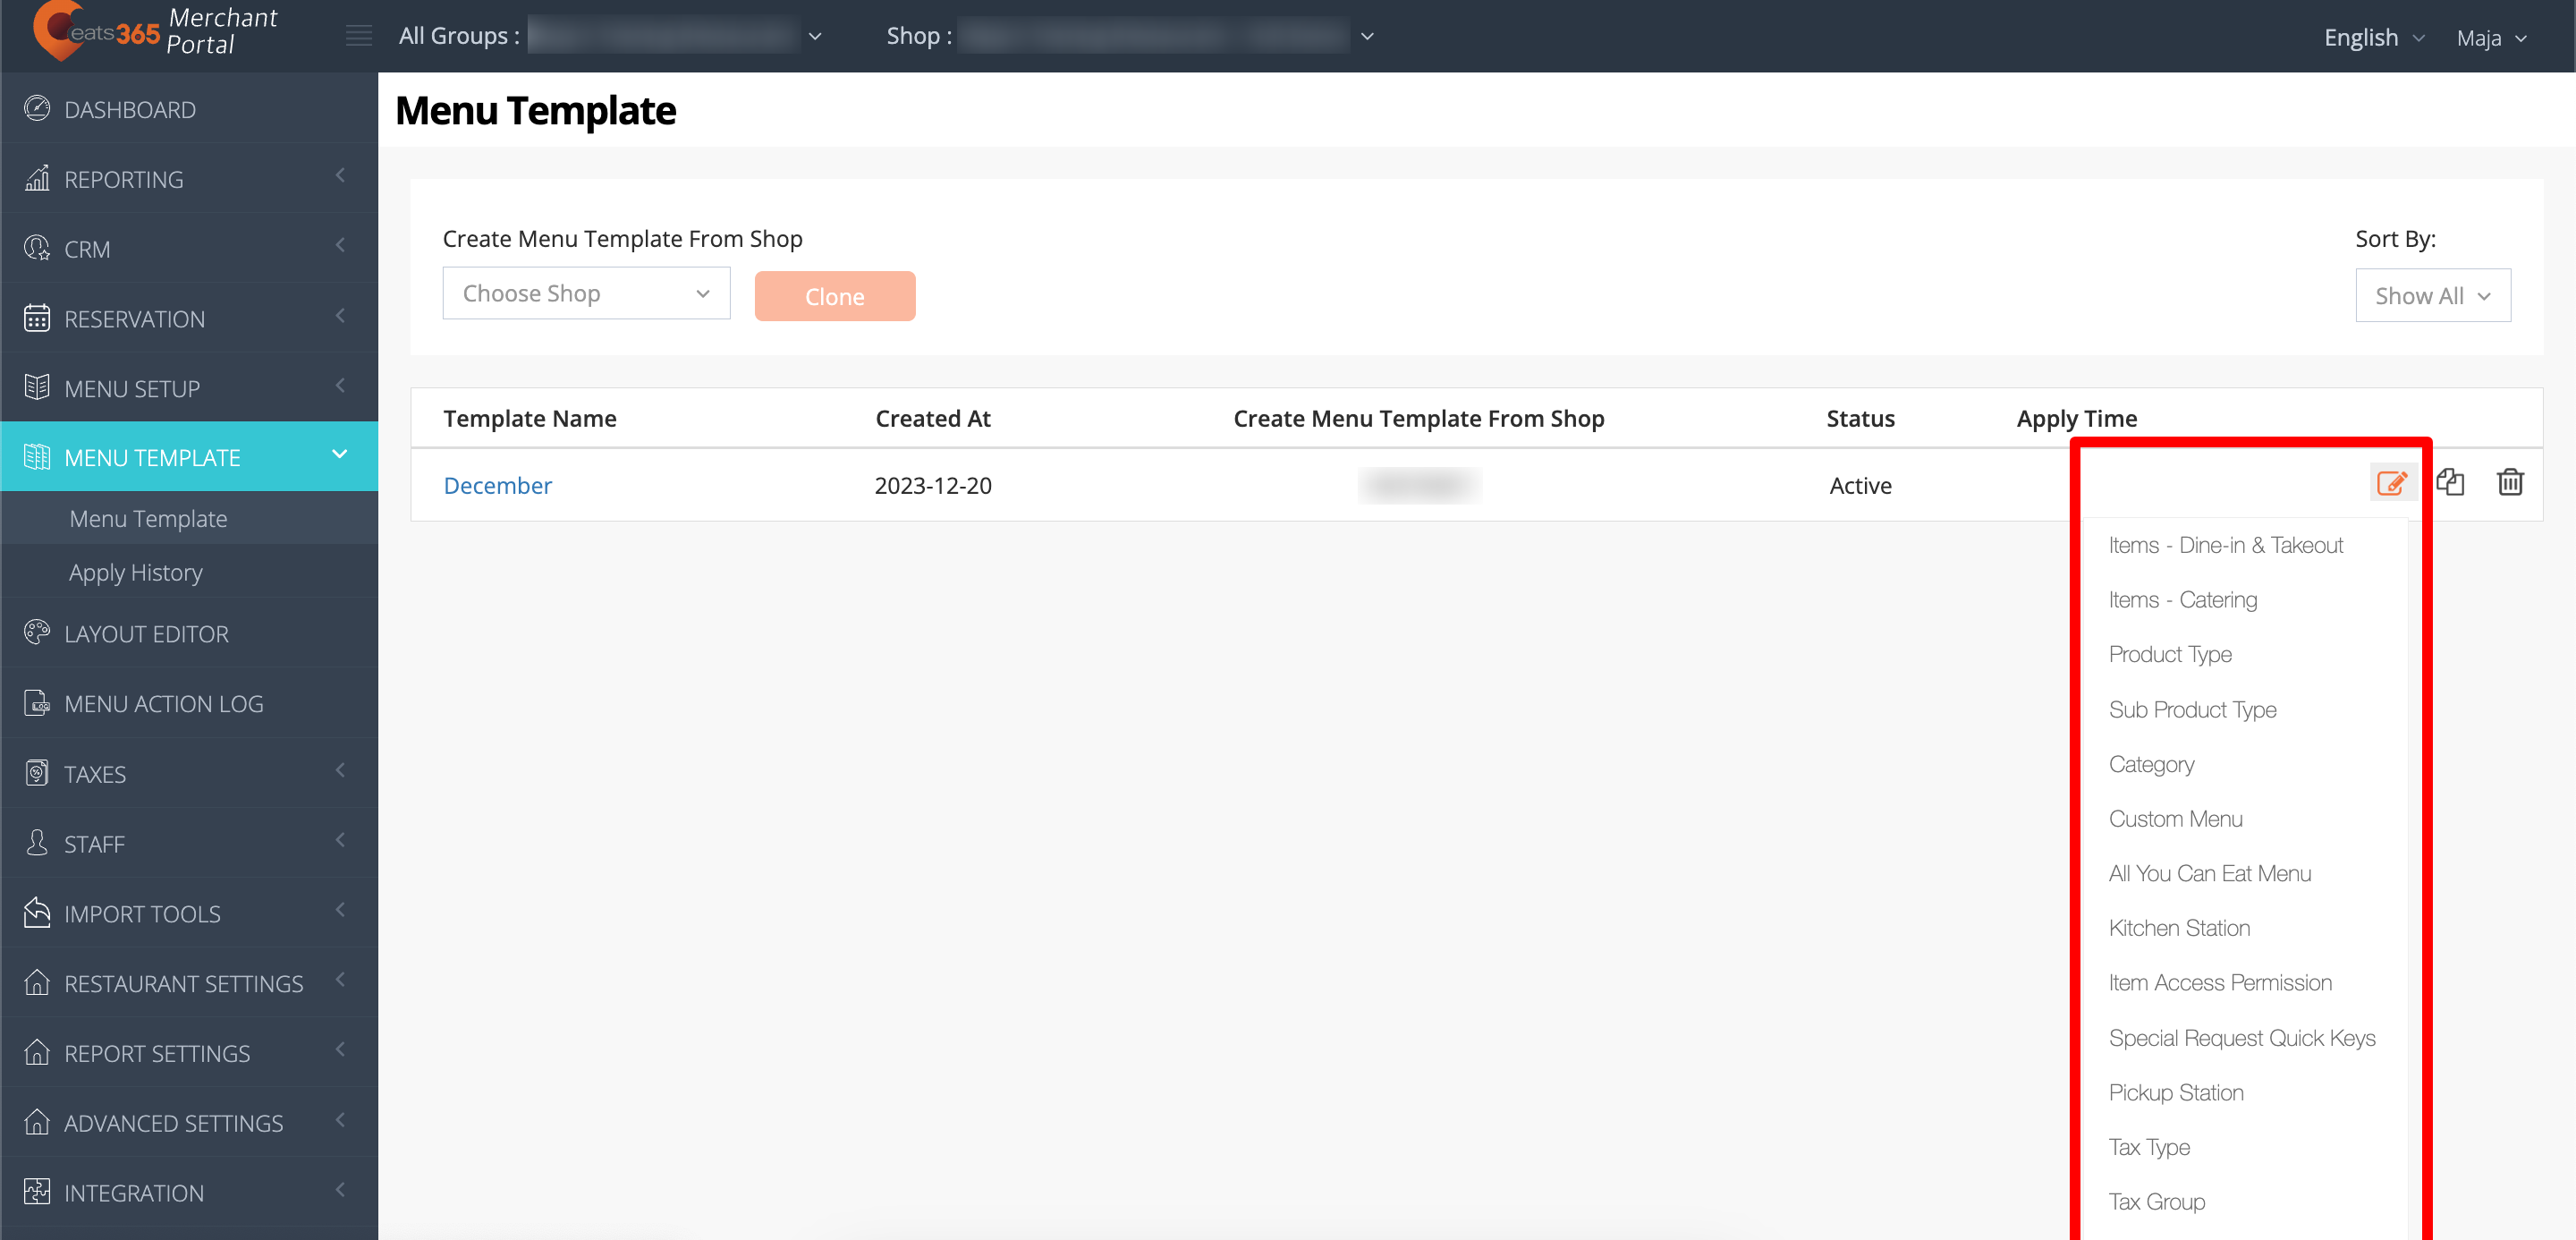
- At the top right, click on the Edit Mode drop-down menu. Then, select the setting that you’d like to modify.

- Apply your changes.
Note: To learn how to use the Import Tool functions, refer to the "Use Import Tools in the Menu Template" section below.
Tip:- You can exclude items, categories, discounts, and custom menus from being applied to particular shops when applying menu changes using a Menu Template.
- While on the appropriate "Edit Mode," click on Edit or add a new item, category, discount, or custom menu.
- Under "Shop(s) Unavailable," select the shop(s) that won’t receive changes made to the item, category, discount, or custom menu when applying the Menu Template changes.

- At the top right, click on Save.
- While on the appropriate "Edit Mode," click on Edit
- If you’ve created a Location Group, you can choose to select the group and customize the menu and item pricing. For more information on creating a Location Group, refer to Set up and manage a Location Group.
- You can exclude items, categories, discounts, and custom menus from being applied to particular shops when applying menu changes using a Menu Template.
Use Import Tools in the Menu Template
To update menu item details in bulk using the template import options, follow the steps below:
Import Product Name
- In the Edit Mode drop-down list, make sure to select "Import Product Name."
- Click on the Dining Type drop-down and select the dining type of the menu items you want to update the product names of. Then, click on Next.

- Under "Step 1," click on the Included Category(s) and Included Item(s) drop-down lists and select the categories and items you want to include in the template. When selecting a category, you can also choose to exclude certain items through the Excluded Item(s) drop-down.

- Under "Step 2," click on Download Template. This downloads a file that includes your menu items to your device.

- To modify the template, enter the data in all of the relevant fields in the Excel file.
Tips:- Don’t leave the Category field blank.
- Only the languages included in the template are supported.
- To save time, only leave the rows that need to be edited.
- Once you've modified and saved the file, under "Step 3," click on Upload to upload your modified template file. Then, select the xls file from the list.

- Click on Submit to proceed.
Import Product Description
- In the Edit Mode drop-down list, make sure to select "Import Product Description."
- Click on the Dining Type drop-down and select the dining type of the menu items you want to update the modifier names of. Then, click on Next.

- Under "Step 1," click on the Included Category(s) and Included Item(s) drop-down lists and select the categories and items you want to include in the template. When selecting a category, you can also choose to exclude certain items through the Excluded Item(s) drop-down.

- Under "Step 2," click on Download Template. This downloads a file that includes your menu items to your device.

- To modify the template, enter the data in all of the relevant fields in the Excel file.
Tips:- Only the languages included in the template are supported.
- To save time, only leave the rows that need to be edited.
- Once you've modified and saved the file, under "Step 3," click on Upload to upload your modified template file. Then, select the xls file from the list.

- Click on Submit to proceed.
Import Combo Option Name
- In the Edit Mode drop-down list, make sure to select "Import Combo Option Name."
- Click on the Dining Type drop-down and select the dining type of the menu items you want to update the modifier names of. Then, click on Next.

- Under "Step 1," click on the Included Category(s) and Included Item(s) drop-down lists and select the categories and items you want to include in the template. When selecting a category, you can also choose to exclude certain items through the Excluded Item(s) drop-down.

- Under "Step 2," click on Download Template. This downloads a file that includes your menu items to your device.

- To modify the template, enter the data in all of the relevant fields in the Excel file.
Tips:- Only the languages included in the template are supported.
- To save time, only leave the rows that need to be edited.
- Once you've modified and saved the file, under "Step 3," click on Upload to upload your modified template file. Then, select the xls file from the list.

- Click on Submit to proceed.
Import Modifiers Name
- In the Edit Mode drop-down list, make sure to select "Import Modifiers Name."
- Click on the Dining Type drop-down and select the dining type of the menu items you want to update the modifier names of. Then, click on Next.

- Under "Step 1," click on the Included Category(s) and Included Item(s) drop-down lists and select the categories and items you want to include in the template. When selecting a category, you can also choose to exclude certain items through the Excluded Item(s) drop-down.

- Under "Step 2," click on Download Template. This downloads a file that includes your menu items to your device.

- To modify the template, enter the data in all of the relevant fields in the Excel file.
Tips:- Only the languages included in the template are supported.
- To save time, only leave the rows that need to be edited.
- Once you've modified and saved the file, under "Step 3," click on Upload to upload your modified template file. Then, select the xls file from the list.

- Click on Submit to proceed.
Import Discount Name
- In the Edit Mode drop-down list, make sure to select "Import Discount Name."
- At the top right, click on Add new task.

- Under "Step 1," click on Download Template.

- To modify the template, enter the data in all of the relevant fields in the Excel file.
- To upload your modified template file, under "Step 3," click on Upload. Then, select your modified file.

- Click on Submit to confirm.
Merchant Portal (Classic Theme)
A Menu Template can include the following menu settings depending on your setup:
- Items (Dine-in, Takeout, Catering)
- Product Type
- Sub Product Type
- Category
- Custom Menu
- All You Can Eat Menu
- Kitchen Station
- Item Access Permission
- Special Request Quick Keys
- Pickup Station
- Tax Type
- Tax Group
- Public Discount
- Merchant Discount
- User App Discount
- Merchant Discount (Member)
- Bundle Promotion
- Tier Pricing
- Period Rule
To edit a Menu Template’s contents, follow the steps below:
- Log in to the Merchant Portal.
- On the left panel, click on Menu Template, then click on Menu Template.
- Next to the Menu Template that you’d like to update, click on Edit
 .
. 
- Select the setting that you’d like to modify.
- Apply your changes.
Apply menu changes to restaurant menu
Once your Menu Template is ready, you can apply that menu to your shop or Location Group to update the POS menu with the contents of the Menu Template. To do this, follow the steps below:
Merchant Portal 2.0
- Log in to the Merchant Portal.
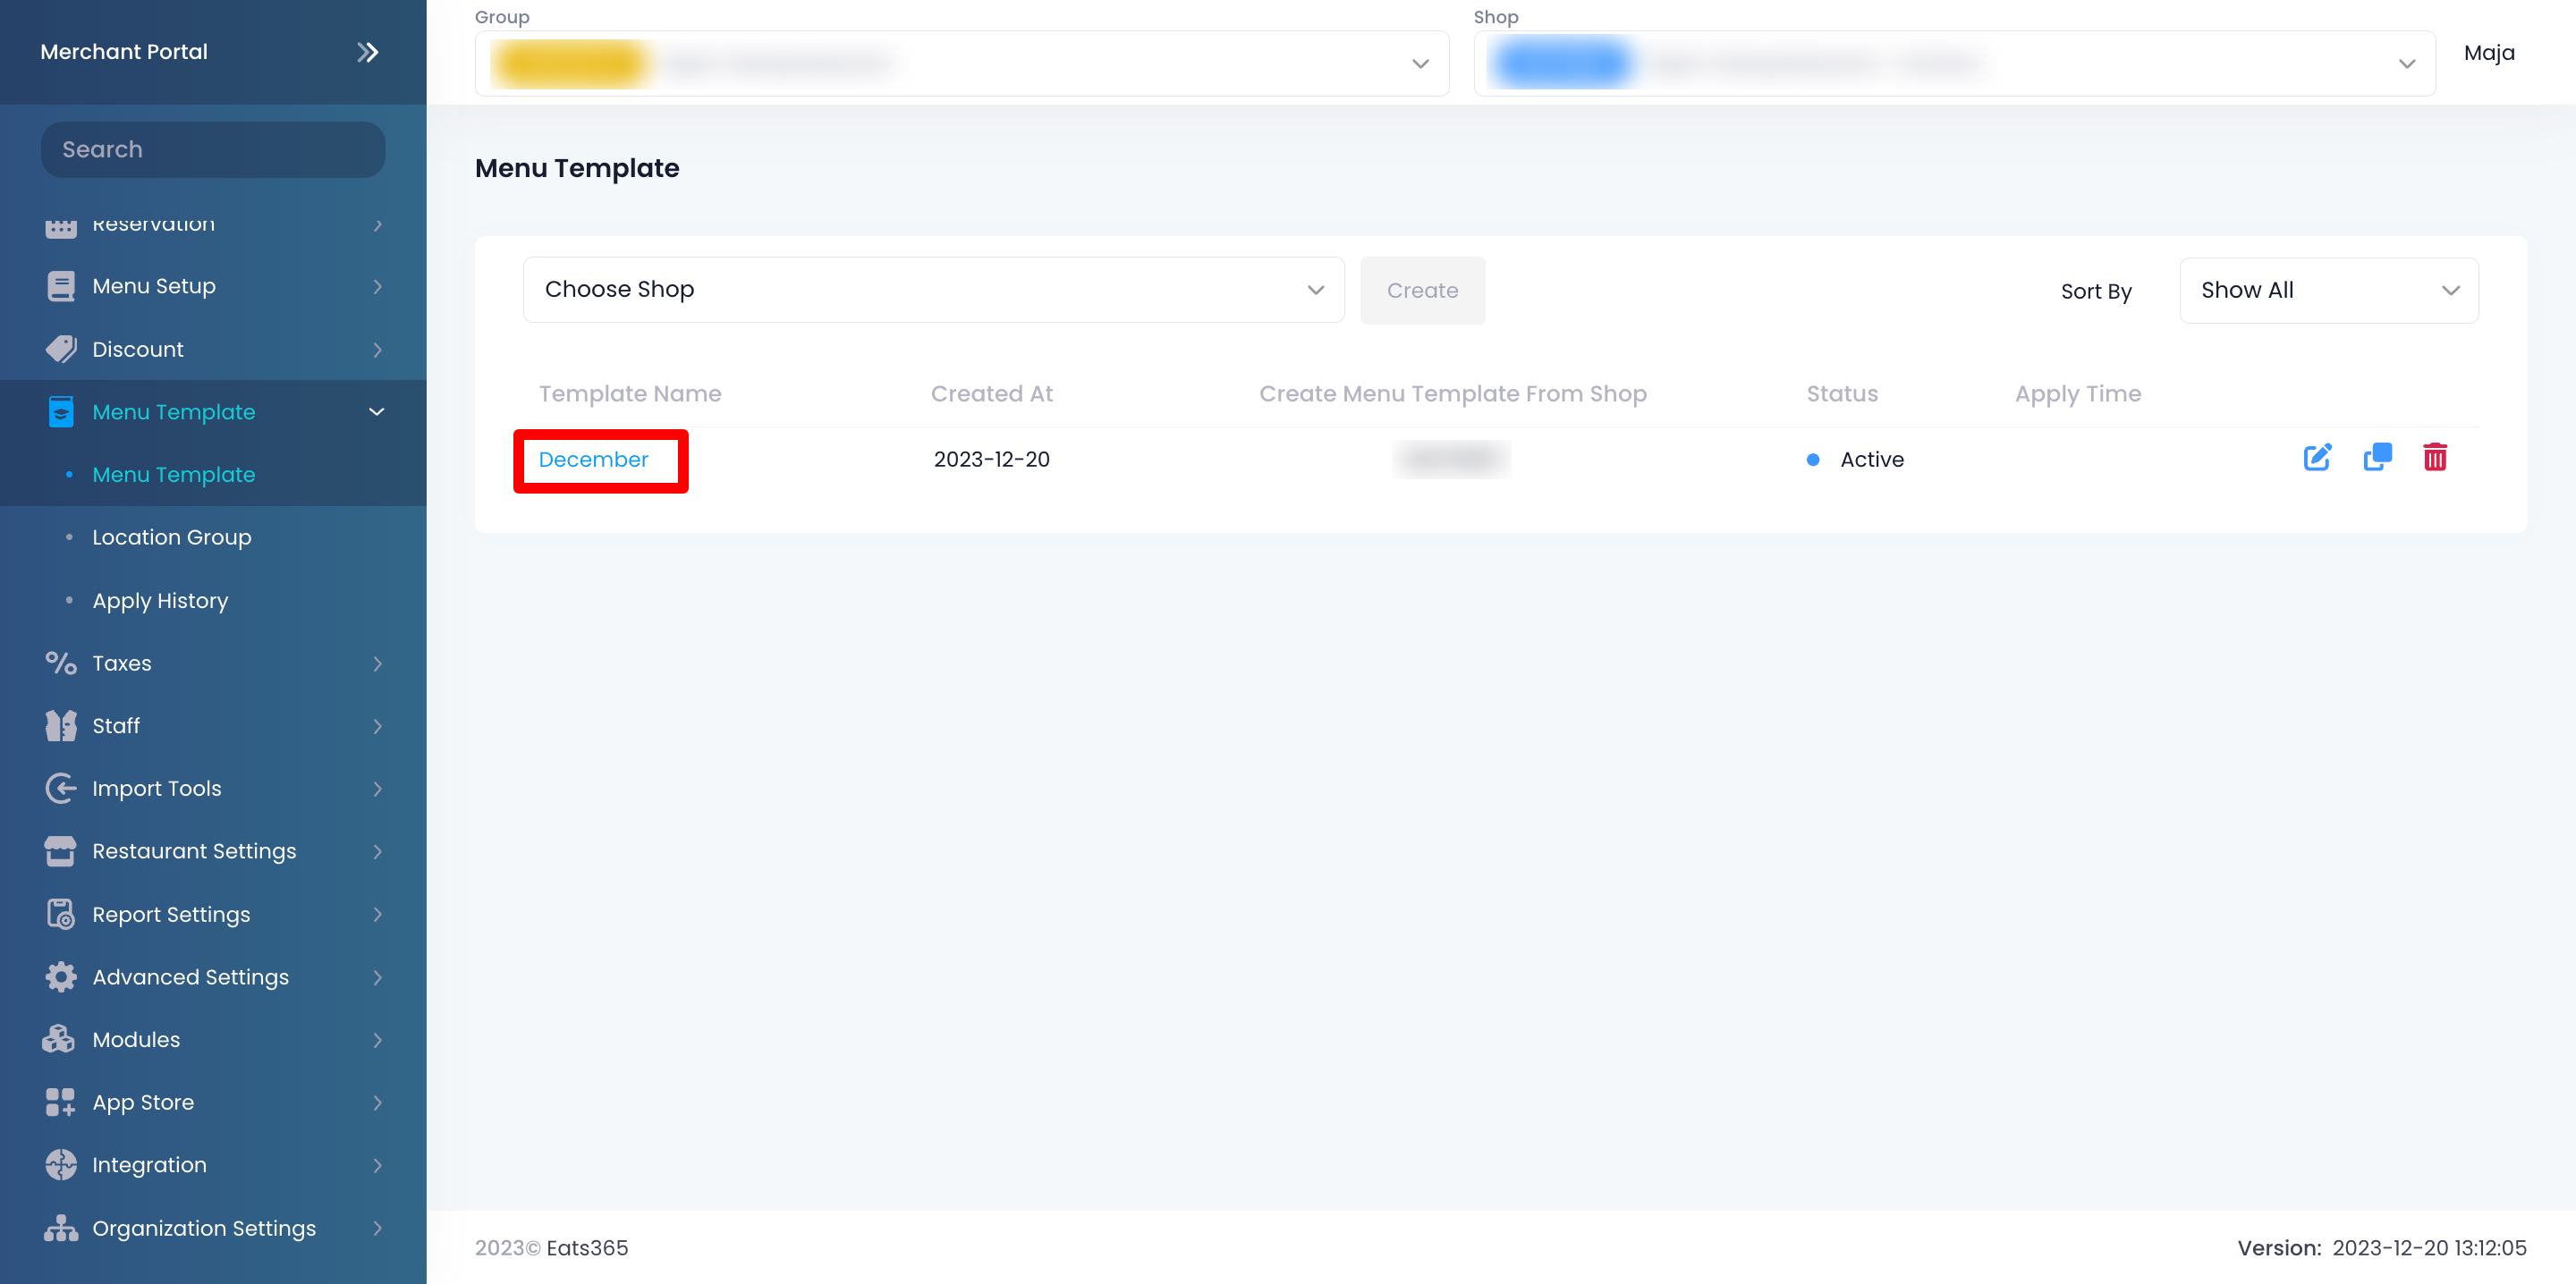
- On the left panel, click on Menu Template, then click on Menu Template.
- Click on the name of the Menu Template.
- To control how inventory tracking is applied to menu items, toggle Skip Inventory Tracking Update.

-
Enabled
 : Each item retains its current inventory configuration. The Menu Template does not override existing values.
- Example 1: If the existing item quantity is 100 and the Menu Template has no inventory tracking, upon Menu Template application, the item quantity will remain as 100.
- Example 2: If the existing item quantity has no inventory tracking and the Menu Template quantity is 100, upon Menu Template application, the item quantity will remain as Unlimited.
- Example 3: If the existing item quantity is 20 and the Menu Template quantity is 100, upon Menu Template application, the item quantity will remain as 20.
-
Disabled
 : The Menu Template inventoryconfiguration is applied and overrides existing item settings.
- Example 1: If the existing item quantity is 100 and the Menu Template has no inventory tracking, upon Menu Template application, the item quantity will change to Unlimited.
- Example 2: If the Existing item quantity has no inventory tracking and the Menu Template quantity is 100, upon Menu Template application, the item quantity will change to 100.
- Example 3: If the existing item quantity is 20 and the Menu Template quantity is 100, upon Menu Template application, the item quantity will change to 100.
-
Enabled
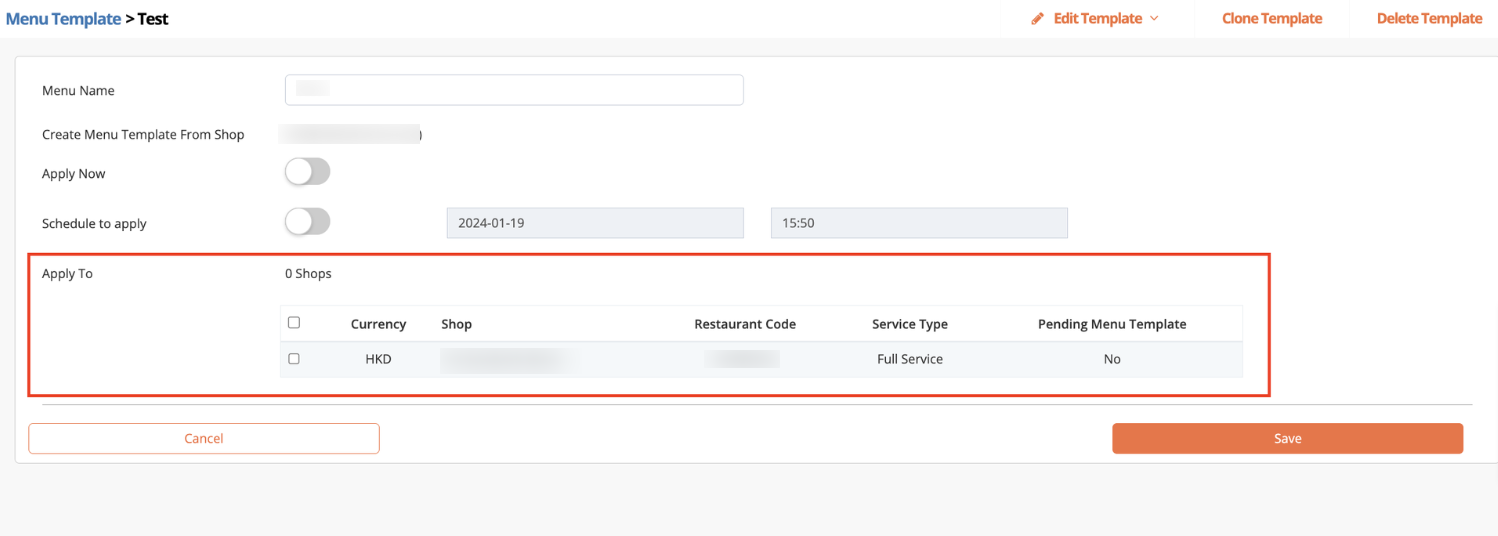
- Next to "Apply Mode," click on Apply Now to apply the menu change immediately. To apply the menu change automatically at a later time, click on Schedule Time instead. Then, set your preferred date and time.
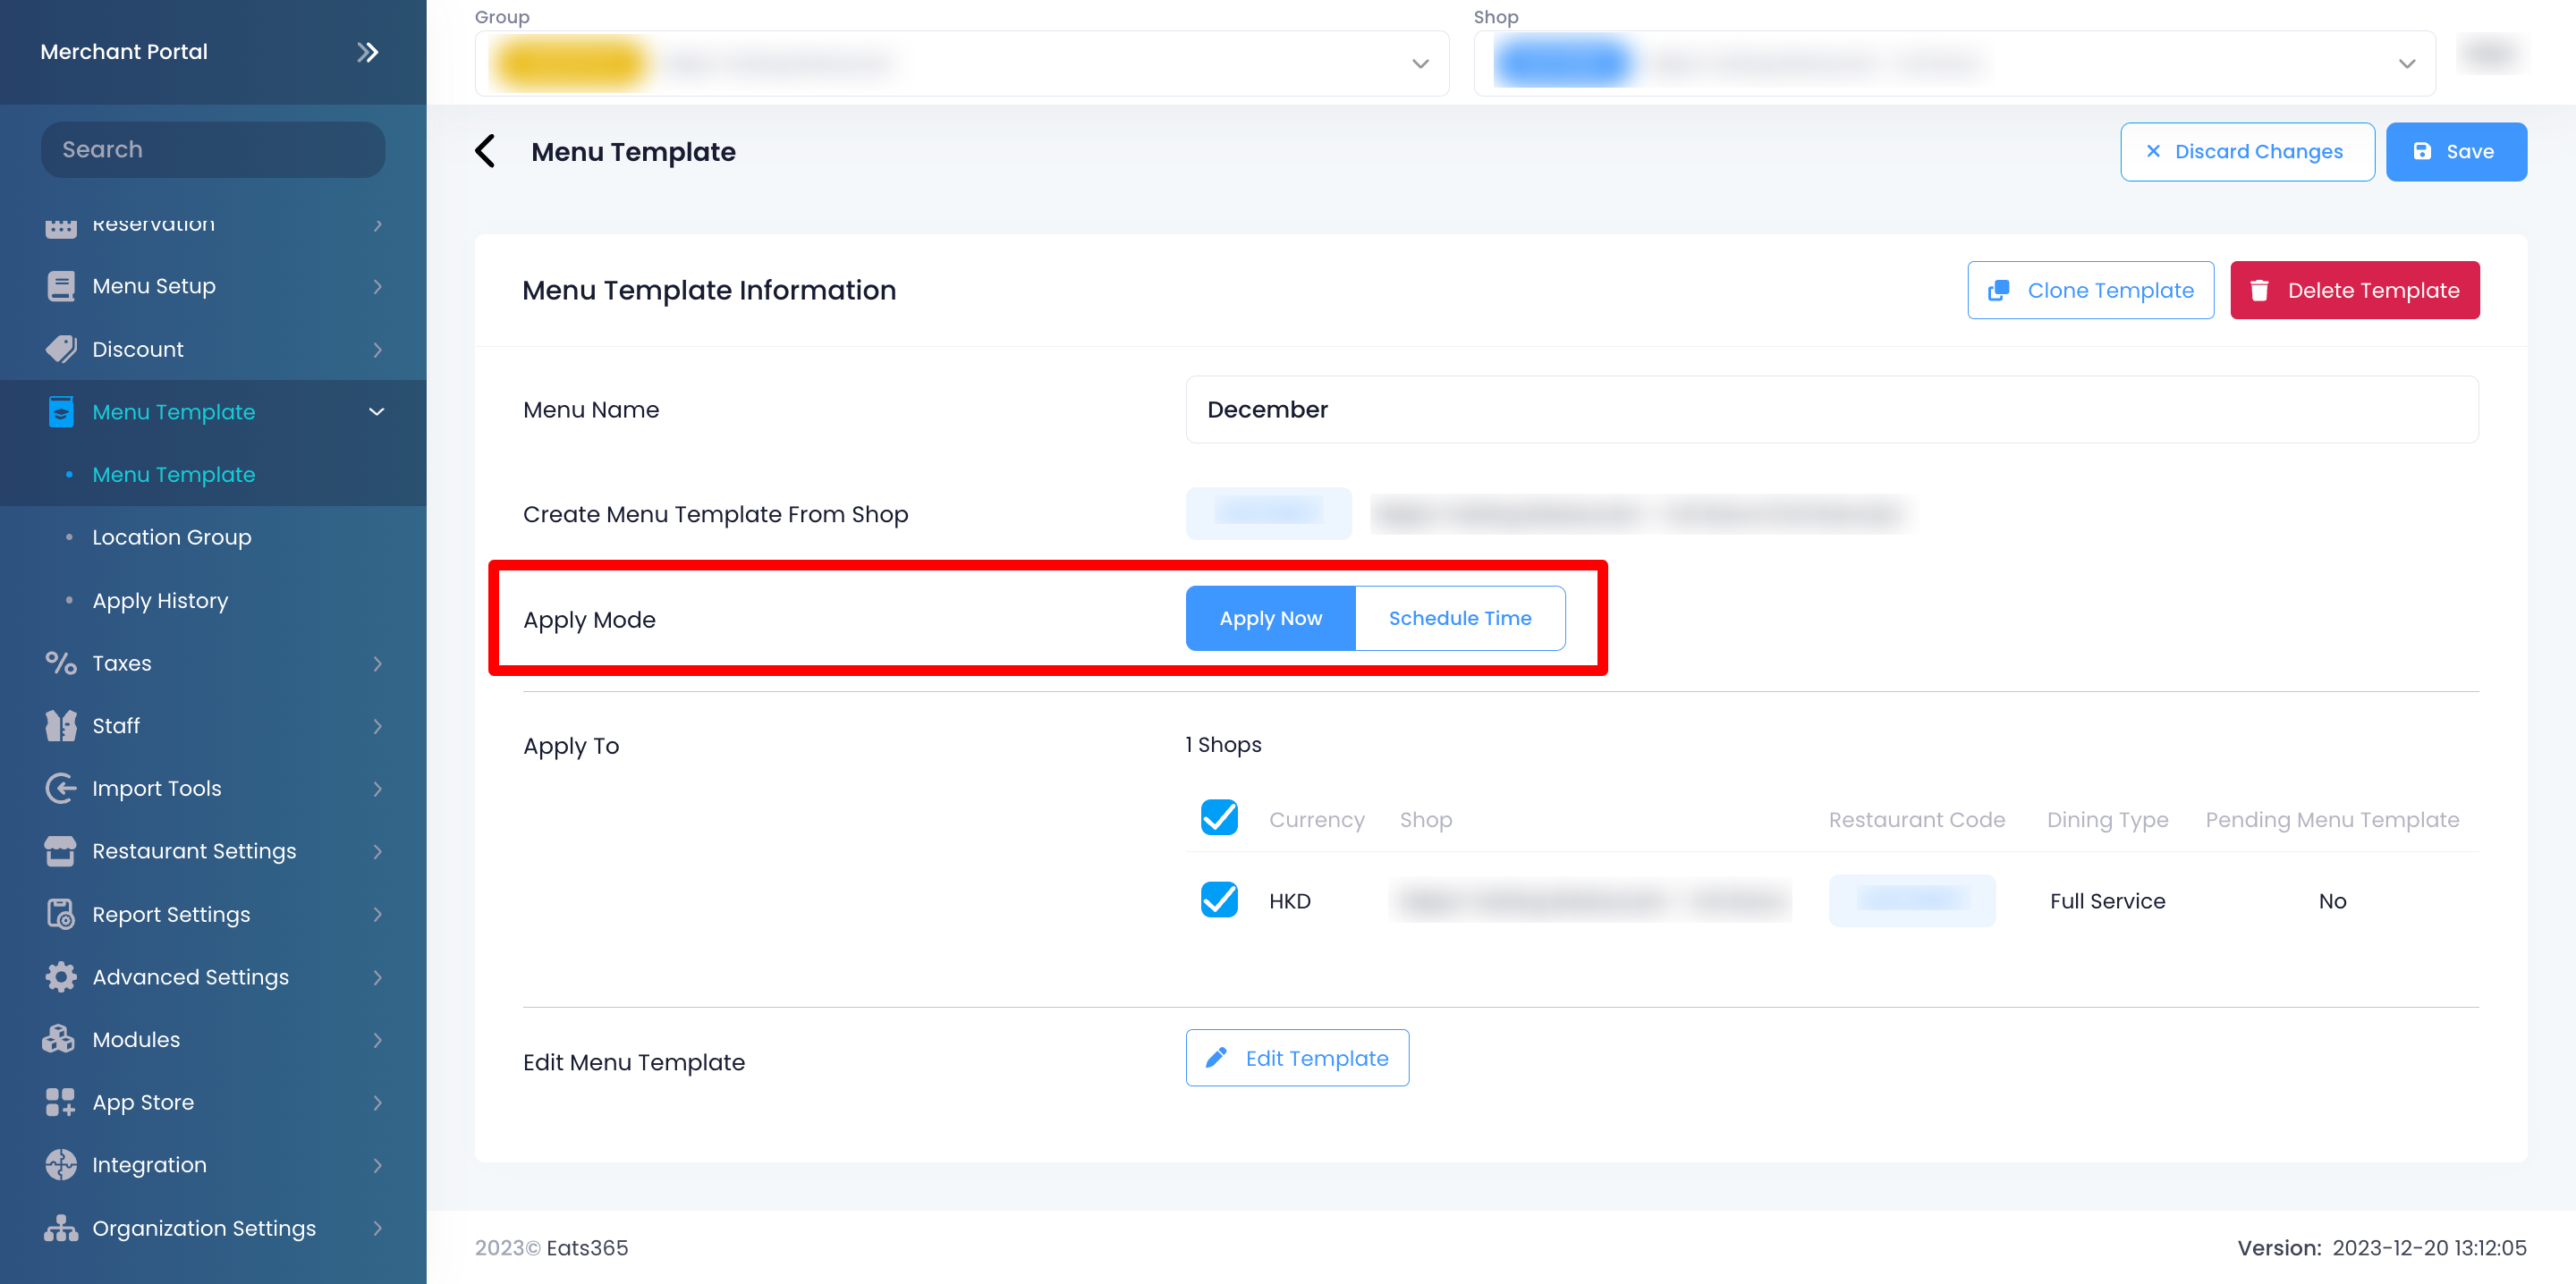
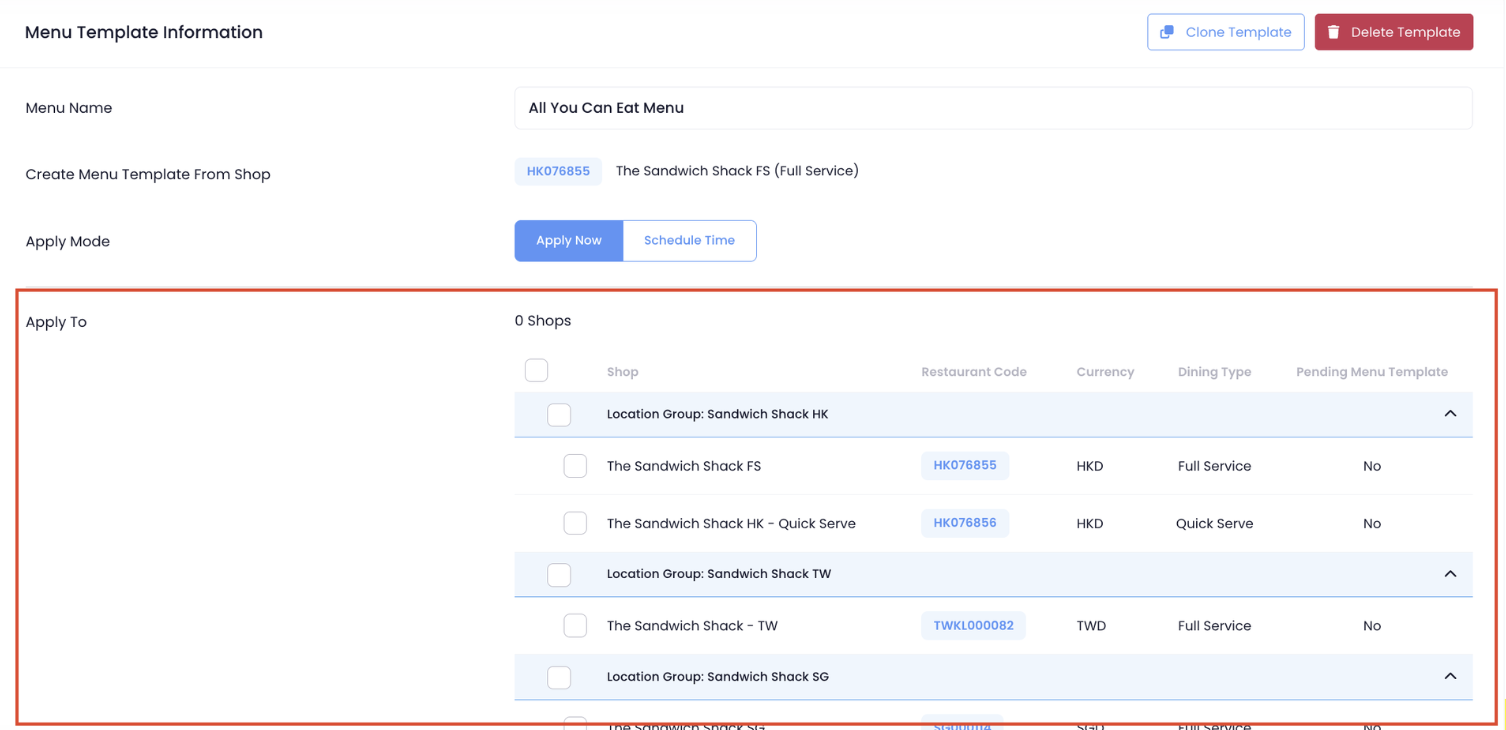
- Under "Apply To," select the shop(s) where you want the menu to apply.
Tip: If you’ve created a Location Group, you can choose to select the group and customize the menu and item pricing. For more information on creating a Location Group, refer to Set up and manage a Location Group.
At the top right, click on Save to confirm.
Merchant Portal (Classic Theme)
- Log in to the Merchant Portal.
- On the left panel, click on Menu Template, then click on Menu Template.
- Click on the name of the Menu Template.
- Toggle Apply Now
 on if you want to apply the menu change immediately. To apply the menu change automatically at a later time, toggle on Schedule to apply instead. Then, set your preferred date and time.
- Under "Apply To," select the shops where you want the menu to apply.
 .
. - Click on Save to confirm.
Once the Menu Template has been applied to the applicable shops or Location Group, you must update the Eats365 POS to load the updated menu.
Create a copy of a Menu Template
To duplicate a Menu Template, follow the steps below:
Merchant Portal 2.0
- Log in to the Merchant Portal.
- On the left panel, click on MenuTemplate, then click on MenuTemplate.
- Next to the Menu Template that you’d like to duplicate, click on Copy
 .
. 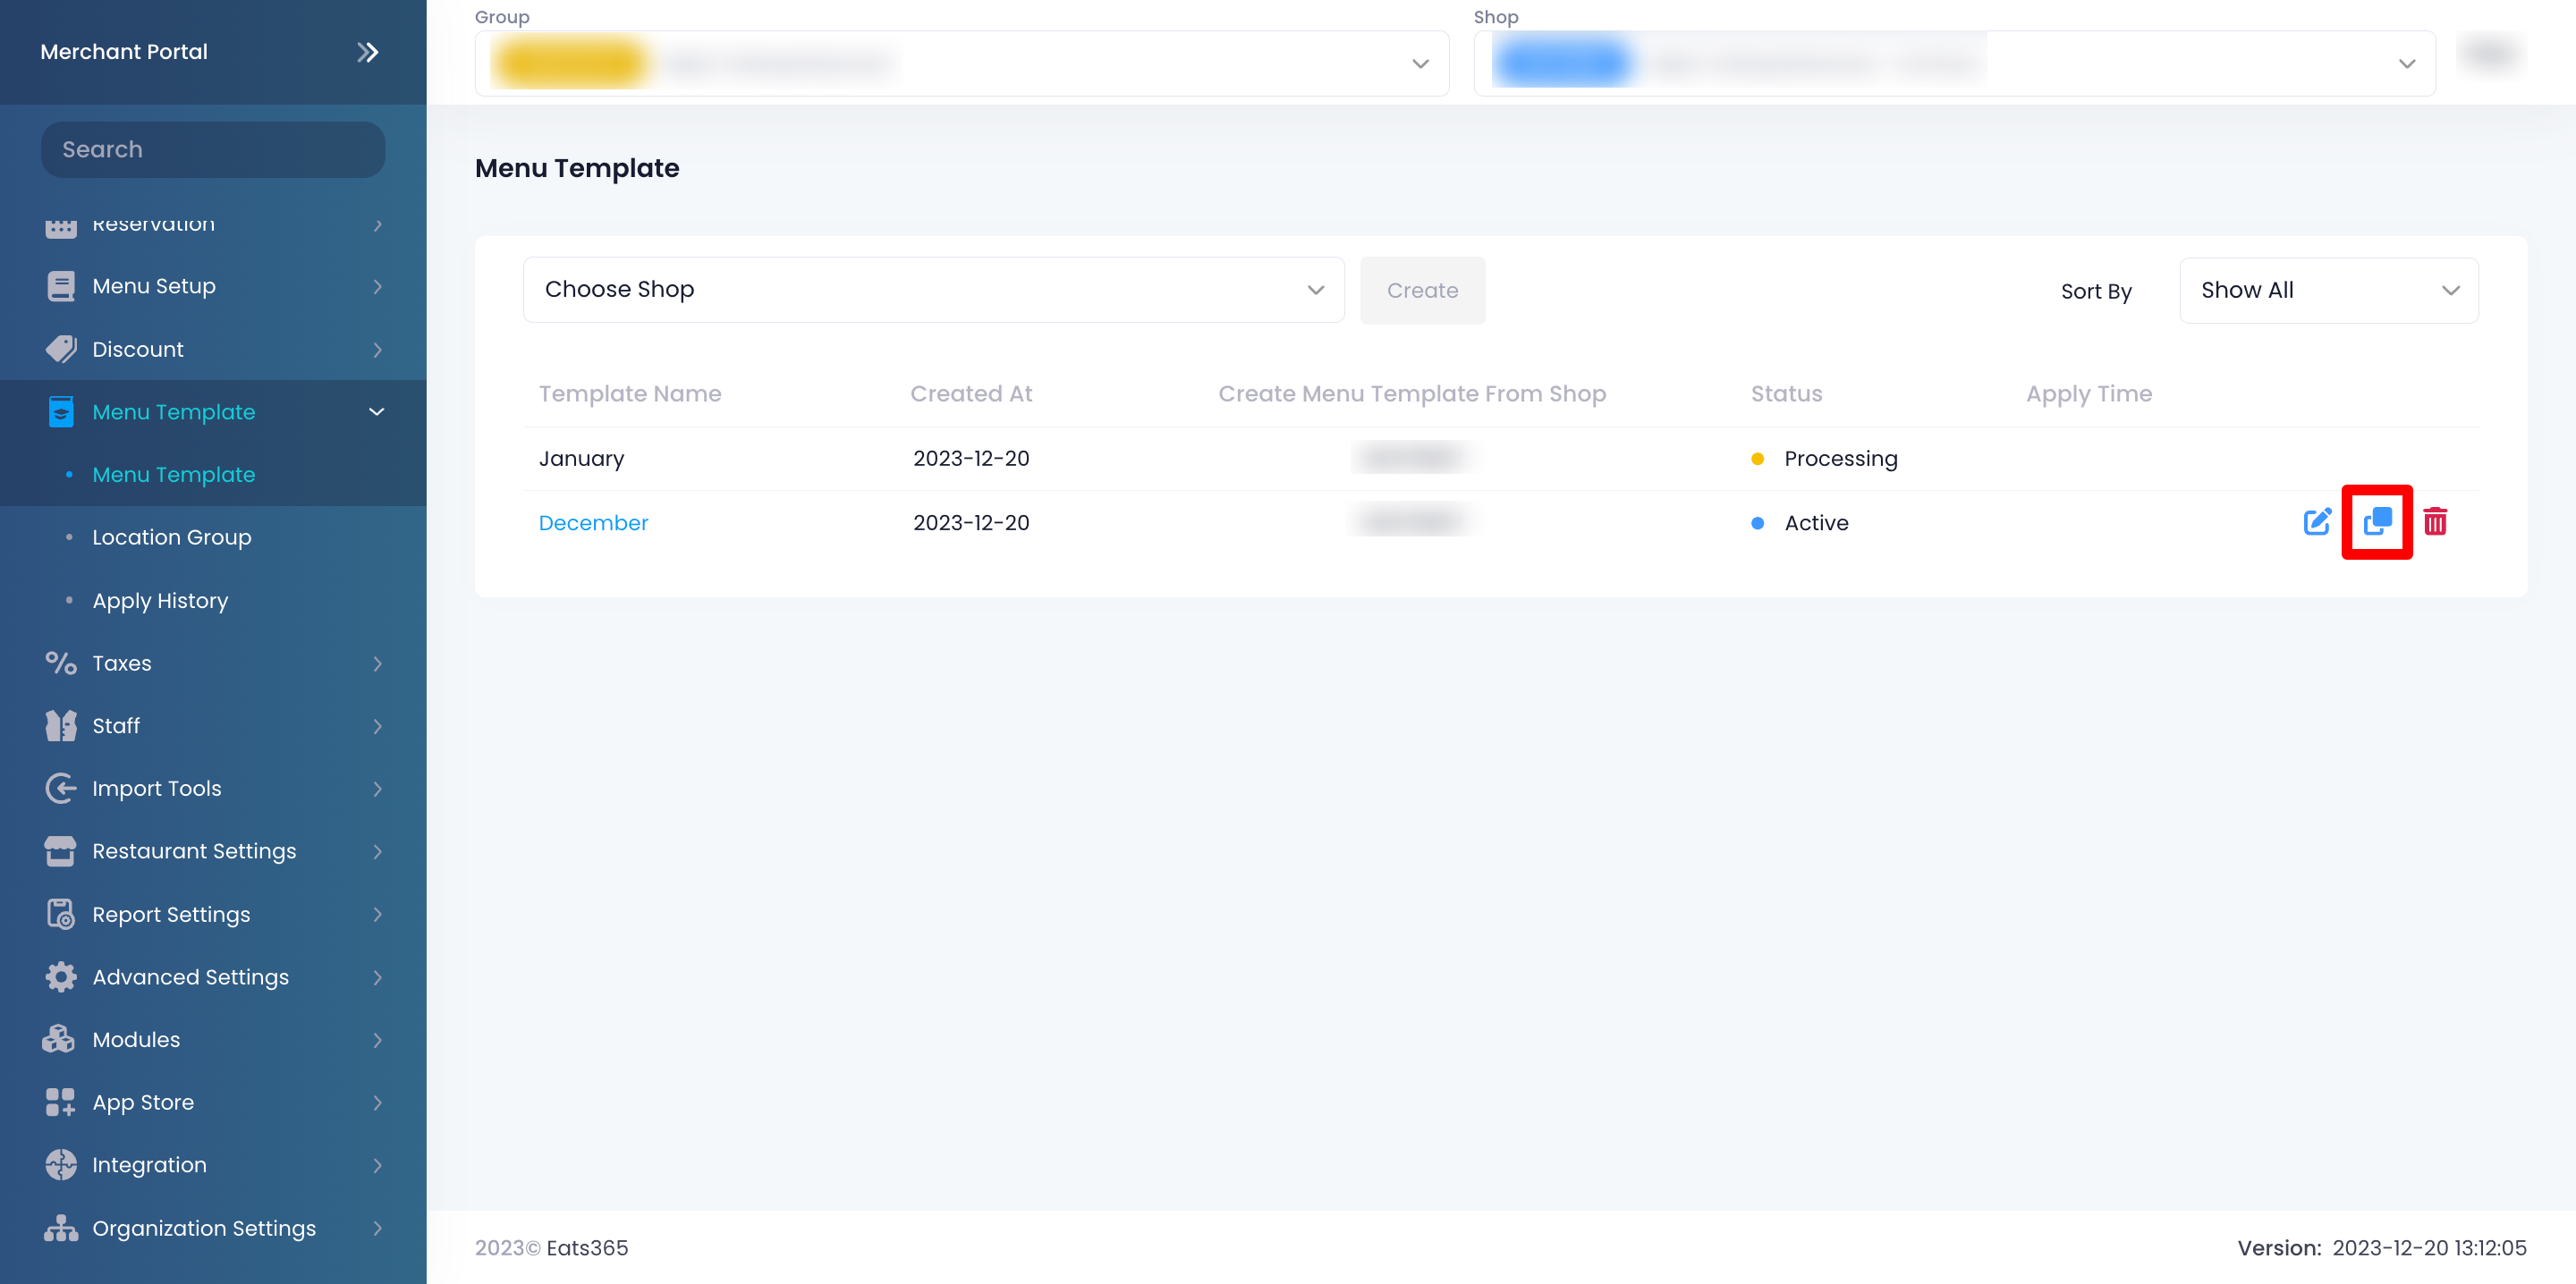
- Enter the name for the new Menu Template.
Once created, you’ll find the Menu Template listed as “Processing.” It may take a few minutes for the Menu Template to be available.
Merchant Portal (Classic Theme)
- Log in to the Merchant Portal.
- On the left panel, click on MenuTemplate, then click on MenuTemplate.
- Next to the Menu Template that you’d like to duplicate, click on Copy
 .
. 
- Enter the name for the new Menu Template.
Once created, you’ll find the Menu Template listed as “Processing.” It may take a few minutes for the Menu Template to be available.
Delete a Menu Template
To remove a Menu Template, follow the steps below:
Merchant Portal 2.0
- Log in to the Merchant Portal.
- On the left panel, click on MenuTemplate, then click on MenuTemplate.
- Next to the Menu Template that you’d like to delete, click on Delete
 . A prompt appears to confirm that you want to proceed.
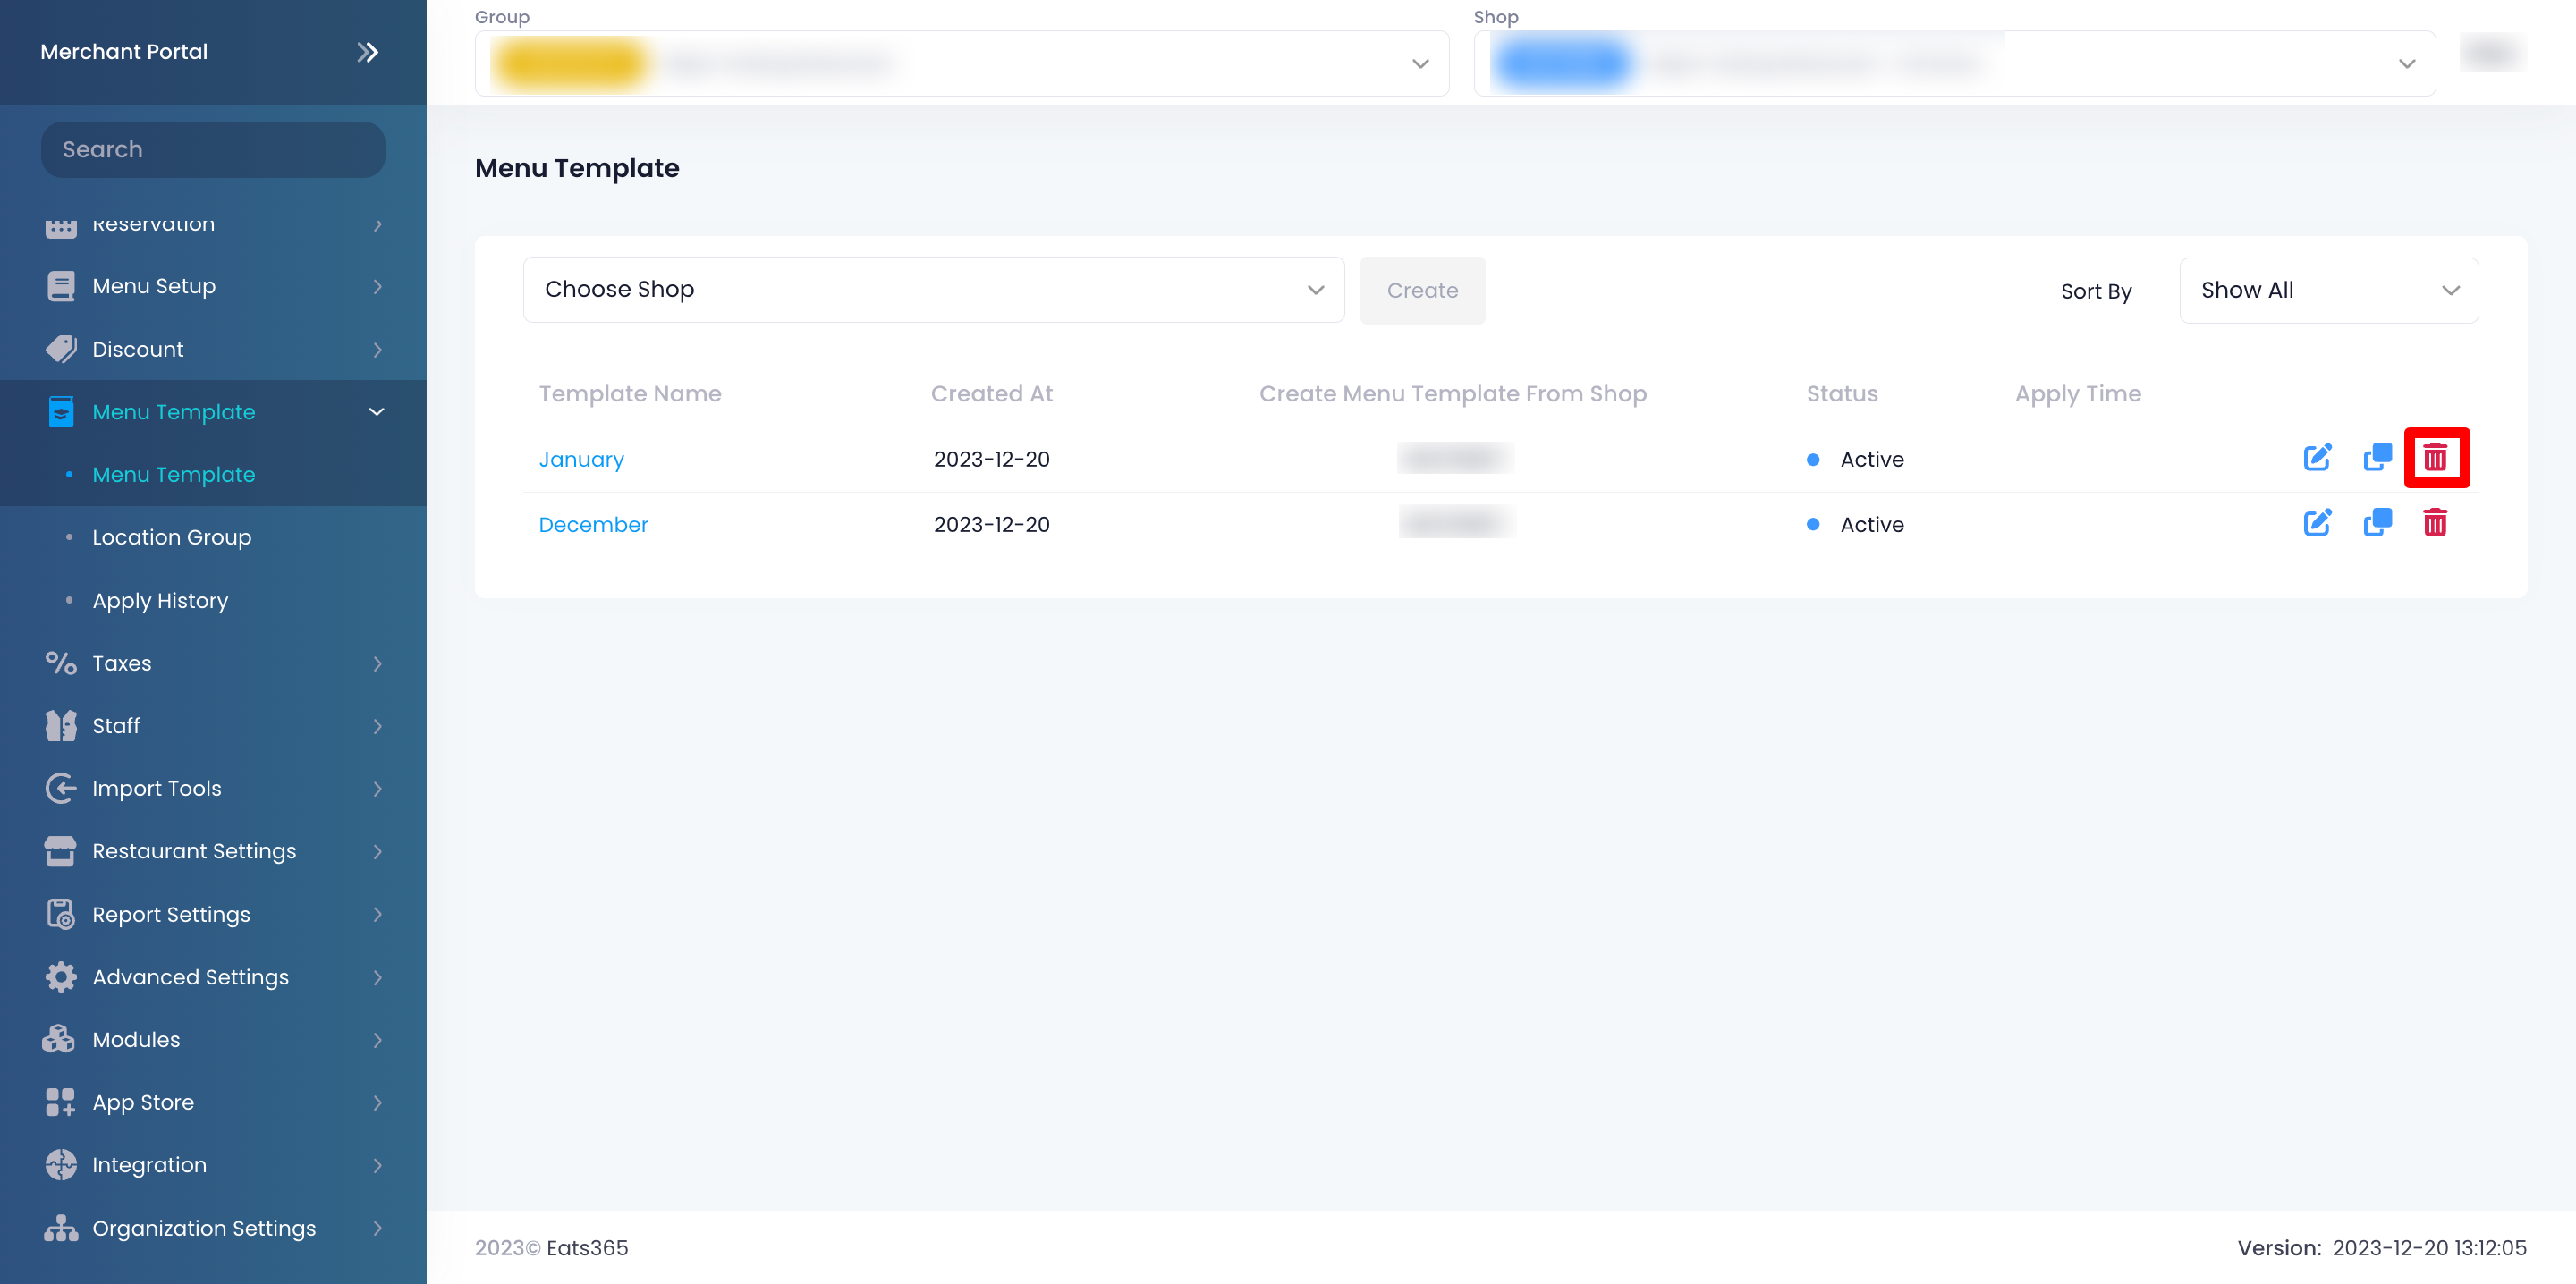
- Click on Confirm to delete.
Merchant Portal (Classic Theme)
- Log in to the Merchant Portal.
- On the left panel, click on MenuTemplate, then click on MenuTemplate.
- Next to the Menu Template that you’d like to delete, click on Delete
 . A prompt appears to confirm that you want to proceed.
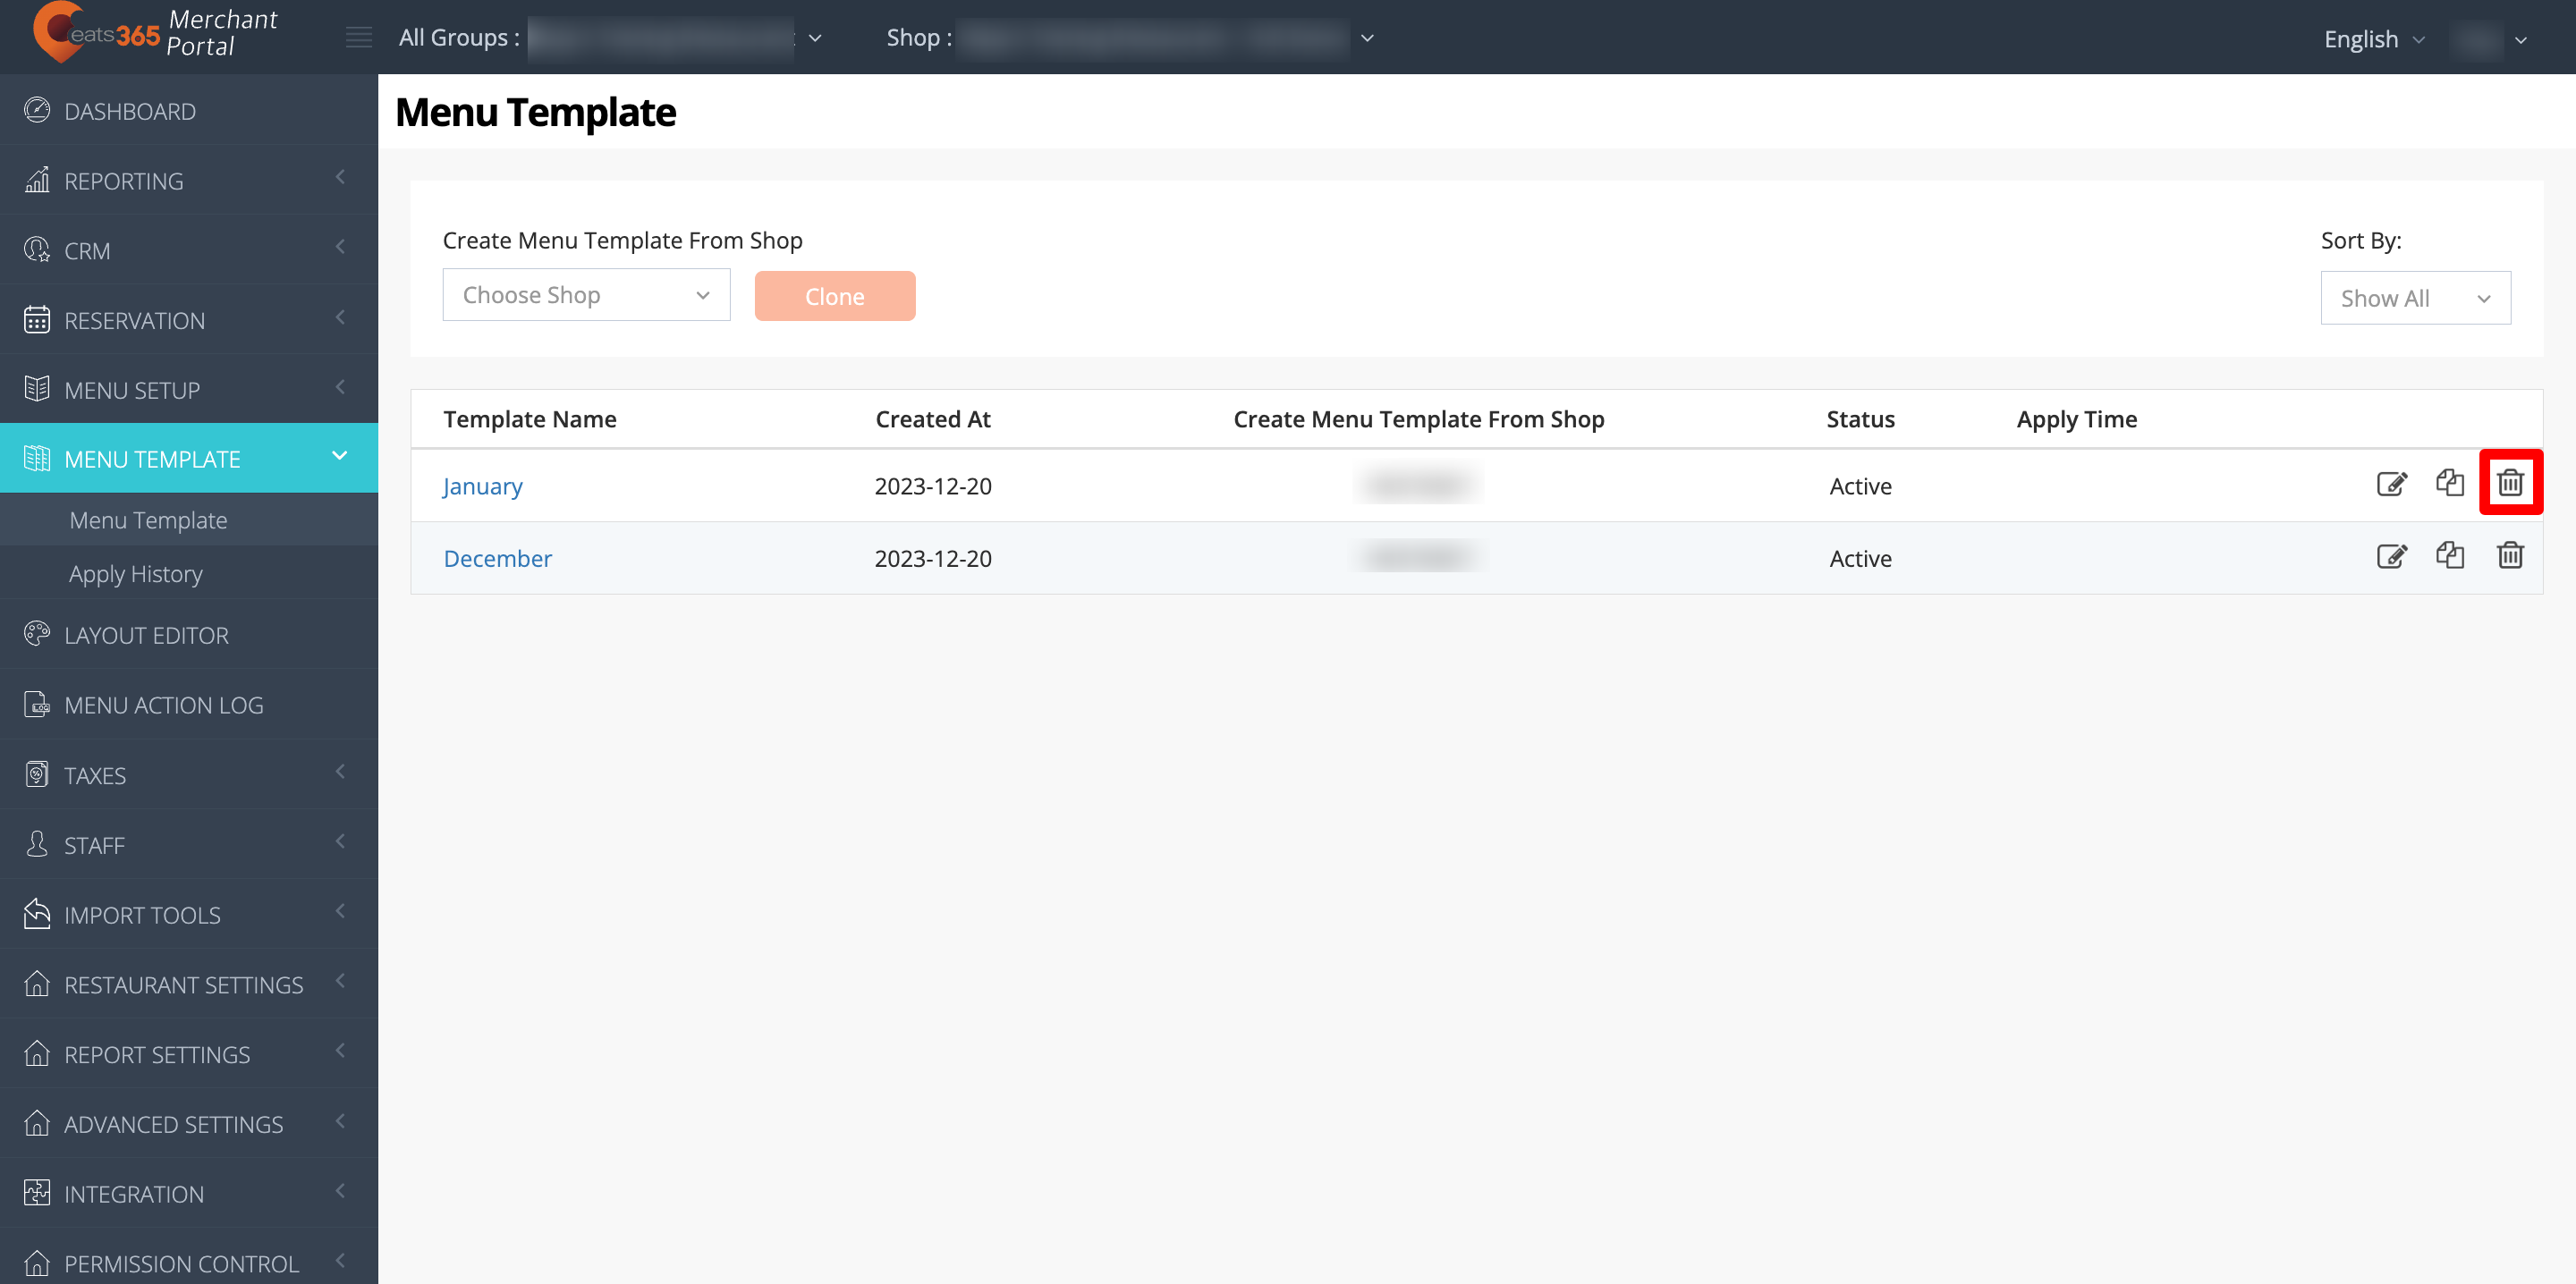
- Click on Confirm to delete.
Convert a Menu Template for Discount 2.0 migration
If your restaurant’s discount setup upgrades to Discount 2.0, you’ll need to convert pre-existing Menu Templates to align with the new discount structure. Menu Templates that require conversion will display a “Migration Needed” status.

To learn how to convert a Menu Template to work with the Discount 2.0 system, refer to Migrate a Menu Template to Discount 2.0.