Handling Payments
Table of Contents
Add tip to an order
Learn how to include tips on customers’ payments on the Eats365 POS.
Tips can be any monetary amount added to a customer’s bill as a form of gratuity. Depending on the tender type the customer used for payment, you can manually enter the tip amount on payments or convert the customer’s change into a tip.
In this article, you’ll learn how to include tips in customers’ payments.
Add a tip on credit card payments
There are two ways to add a tip to an order paid using a credit card. You can either add a tip from the payment page or the payment confirmation page.
To add a tip on credit card payments, follow the steps below:
From the payment page
- Select the order that you want to process payment for. Then, tap Pay.
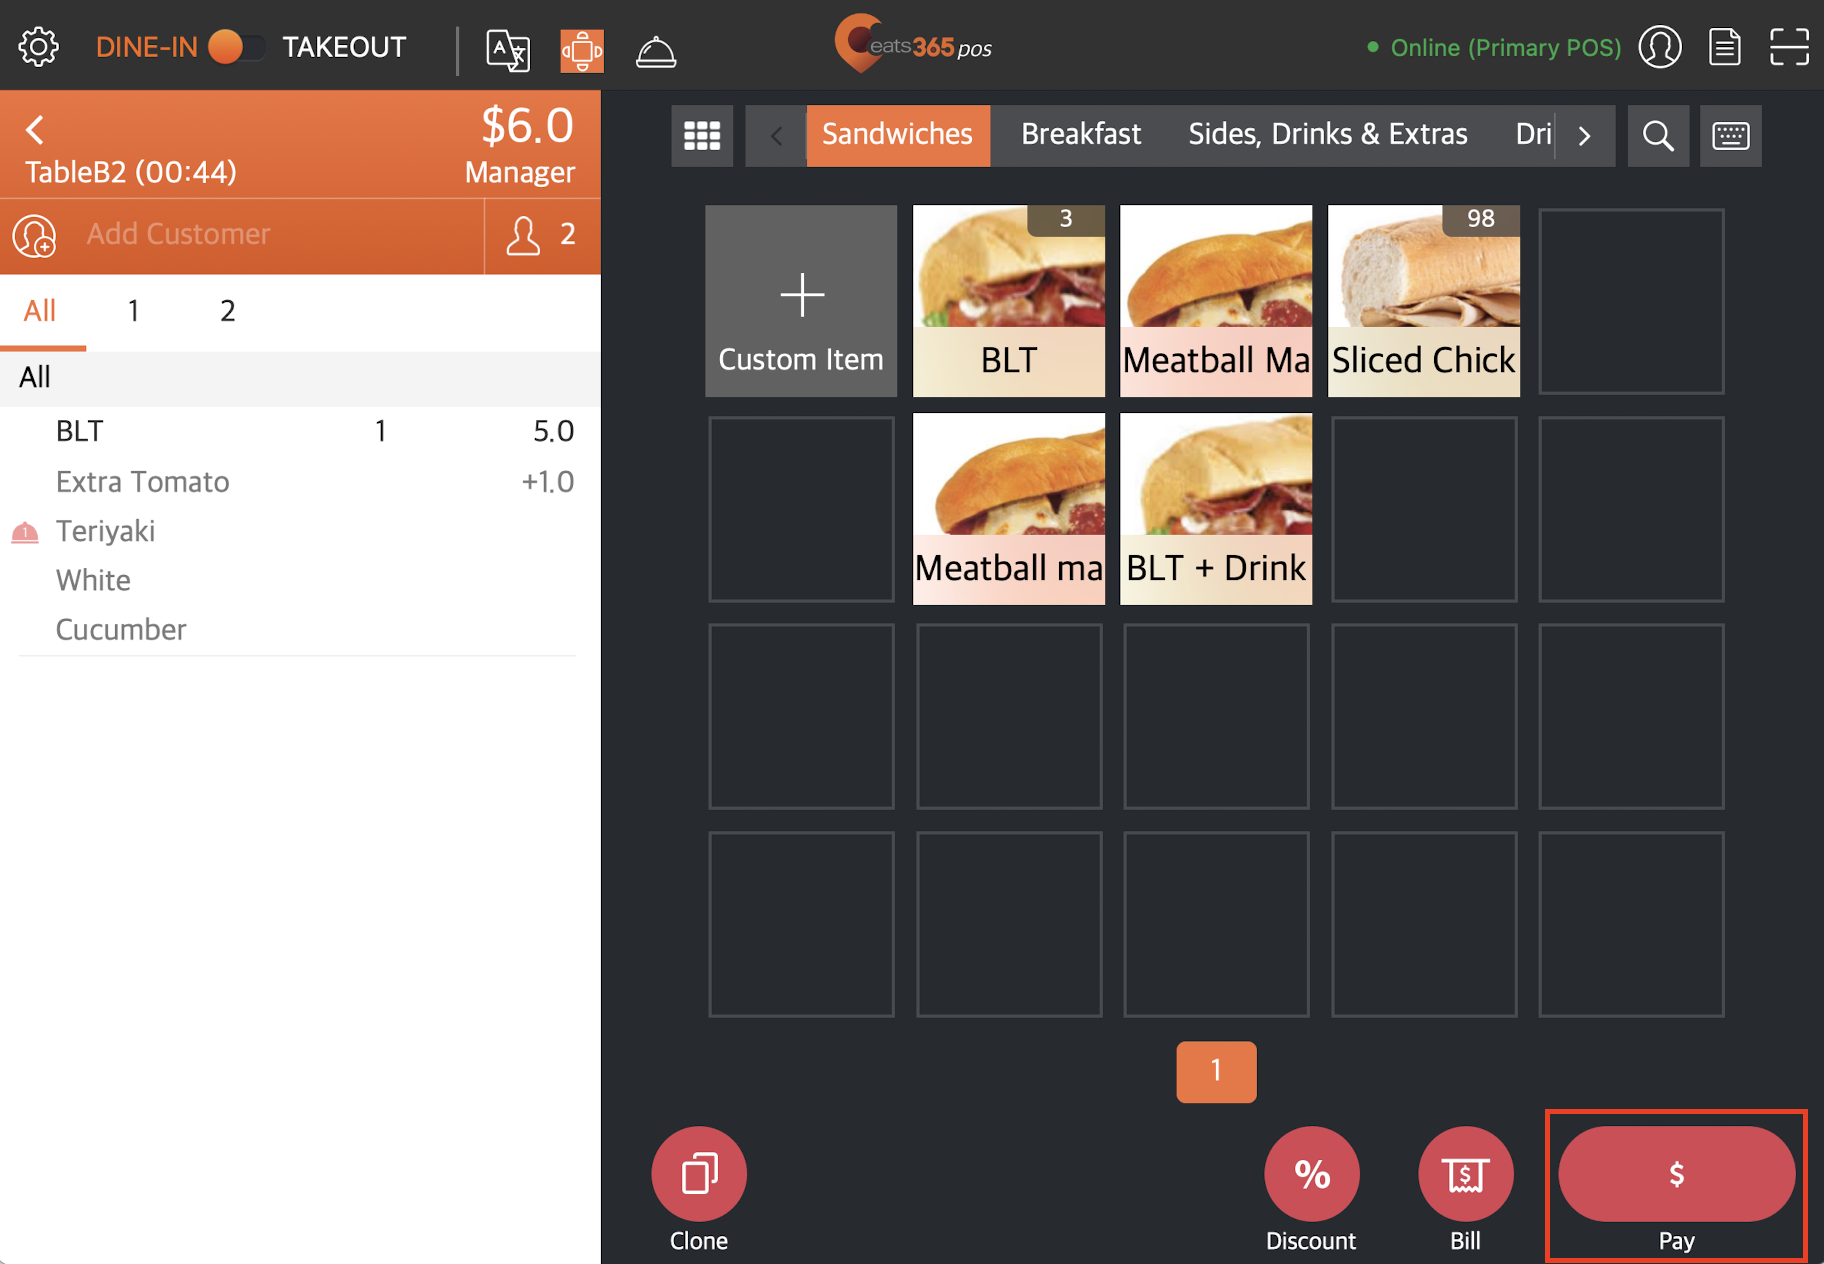
Tip: To check all existing orders, go to Order List
 All. Select an order, then tap To Payment.
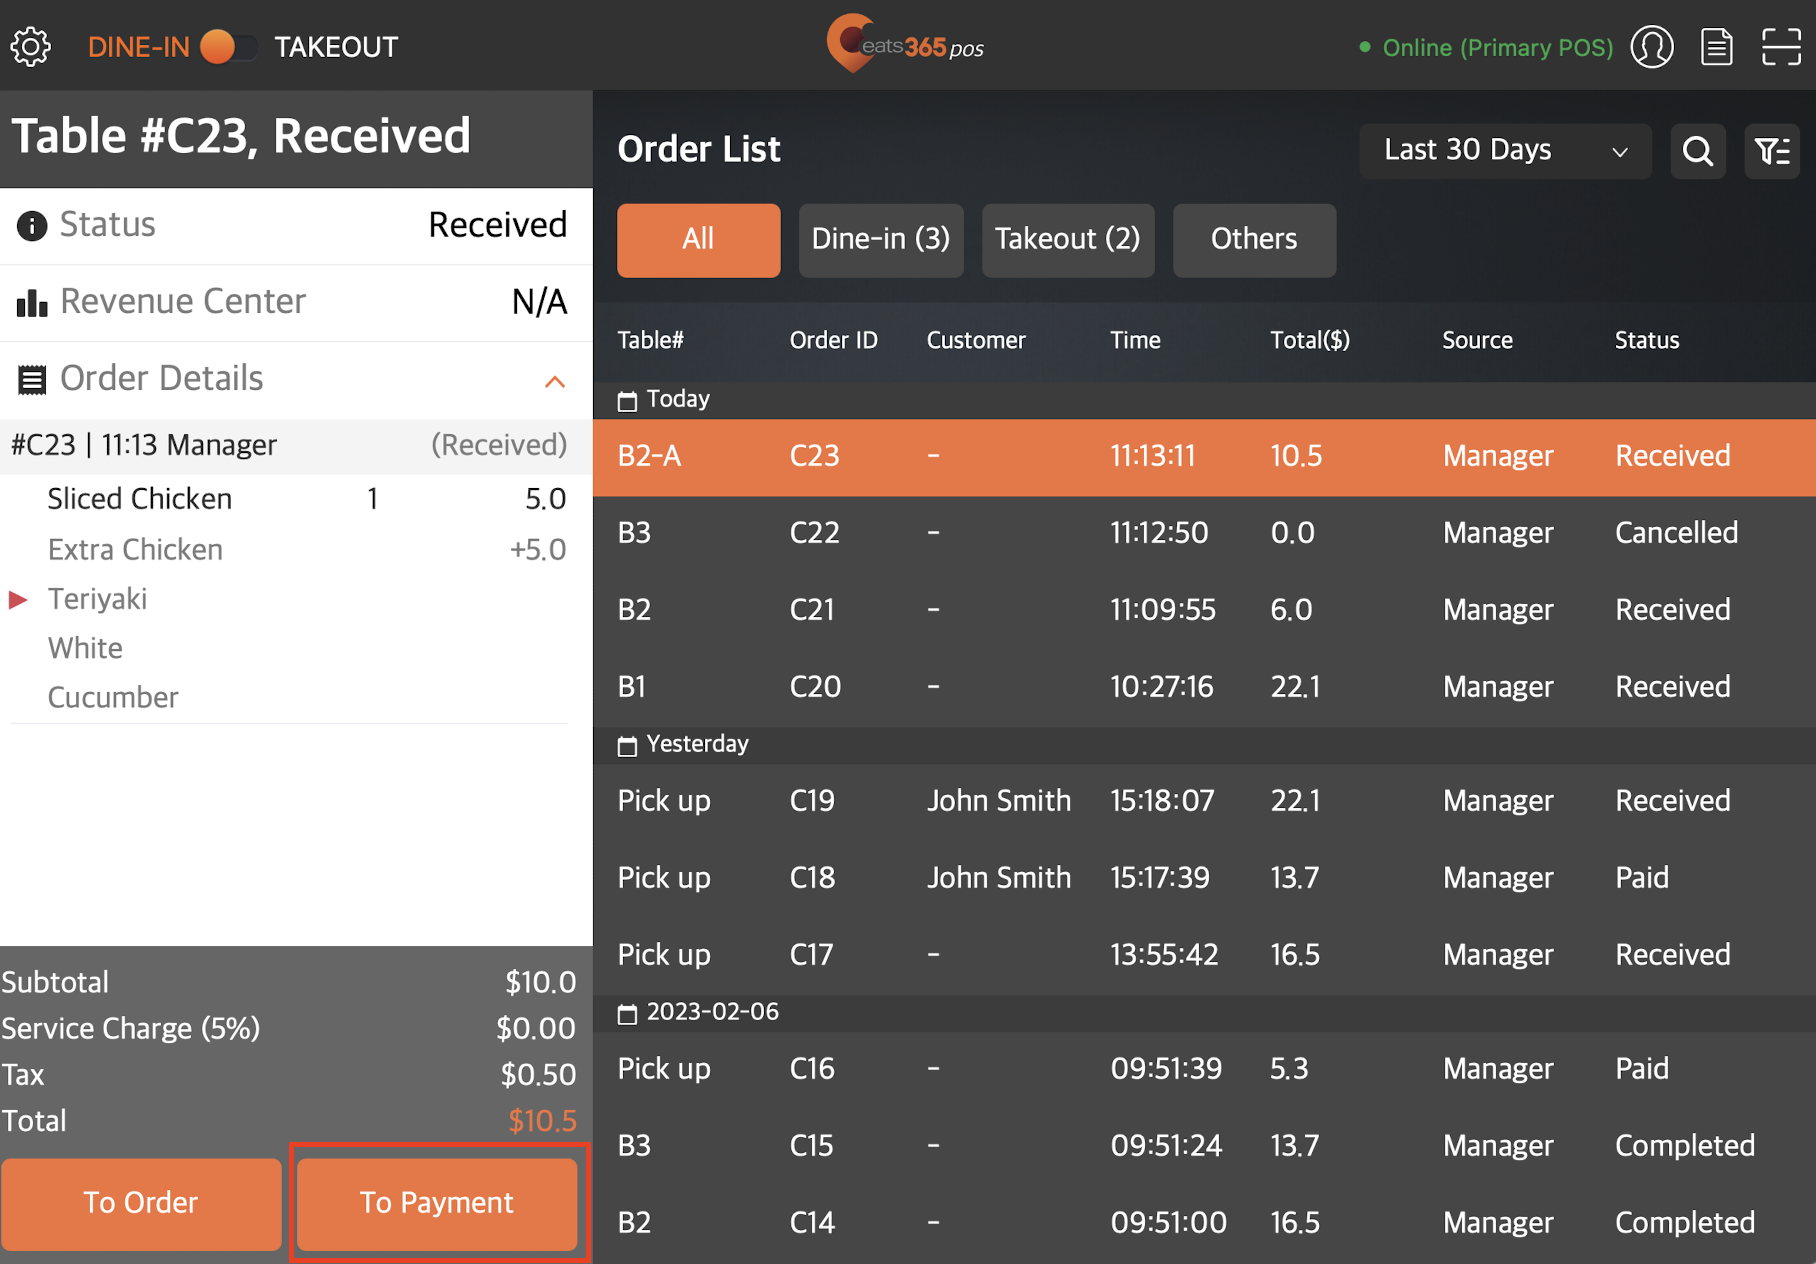
- On the payment screen, check that the "Balance Due" is correct. Then, enter the total amount of the order plus the tip that the customer wants to add. For example, if the total amount is $30 and the customer wants to give a $10 tip, enter $40 as the amount tendered. The tip amount is automatically filled.
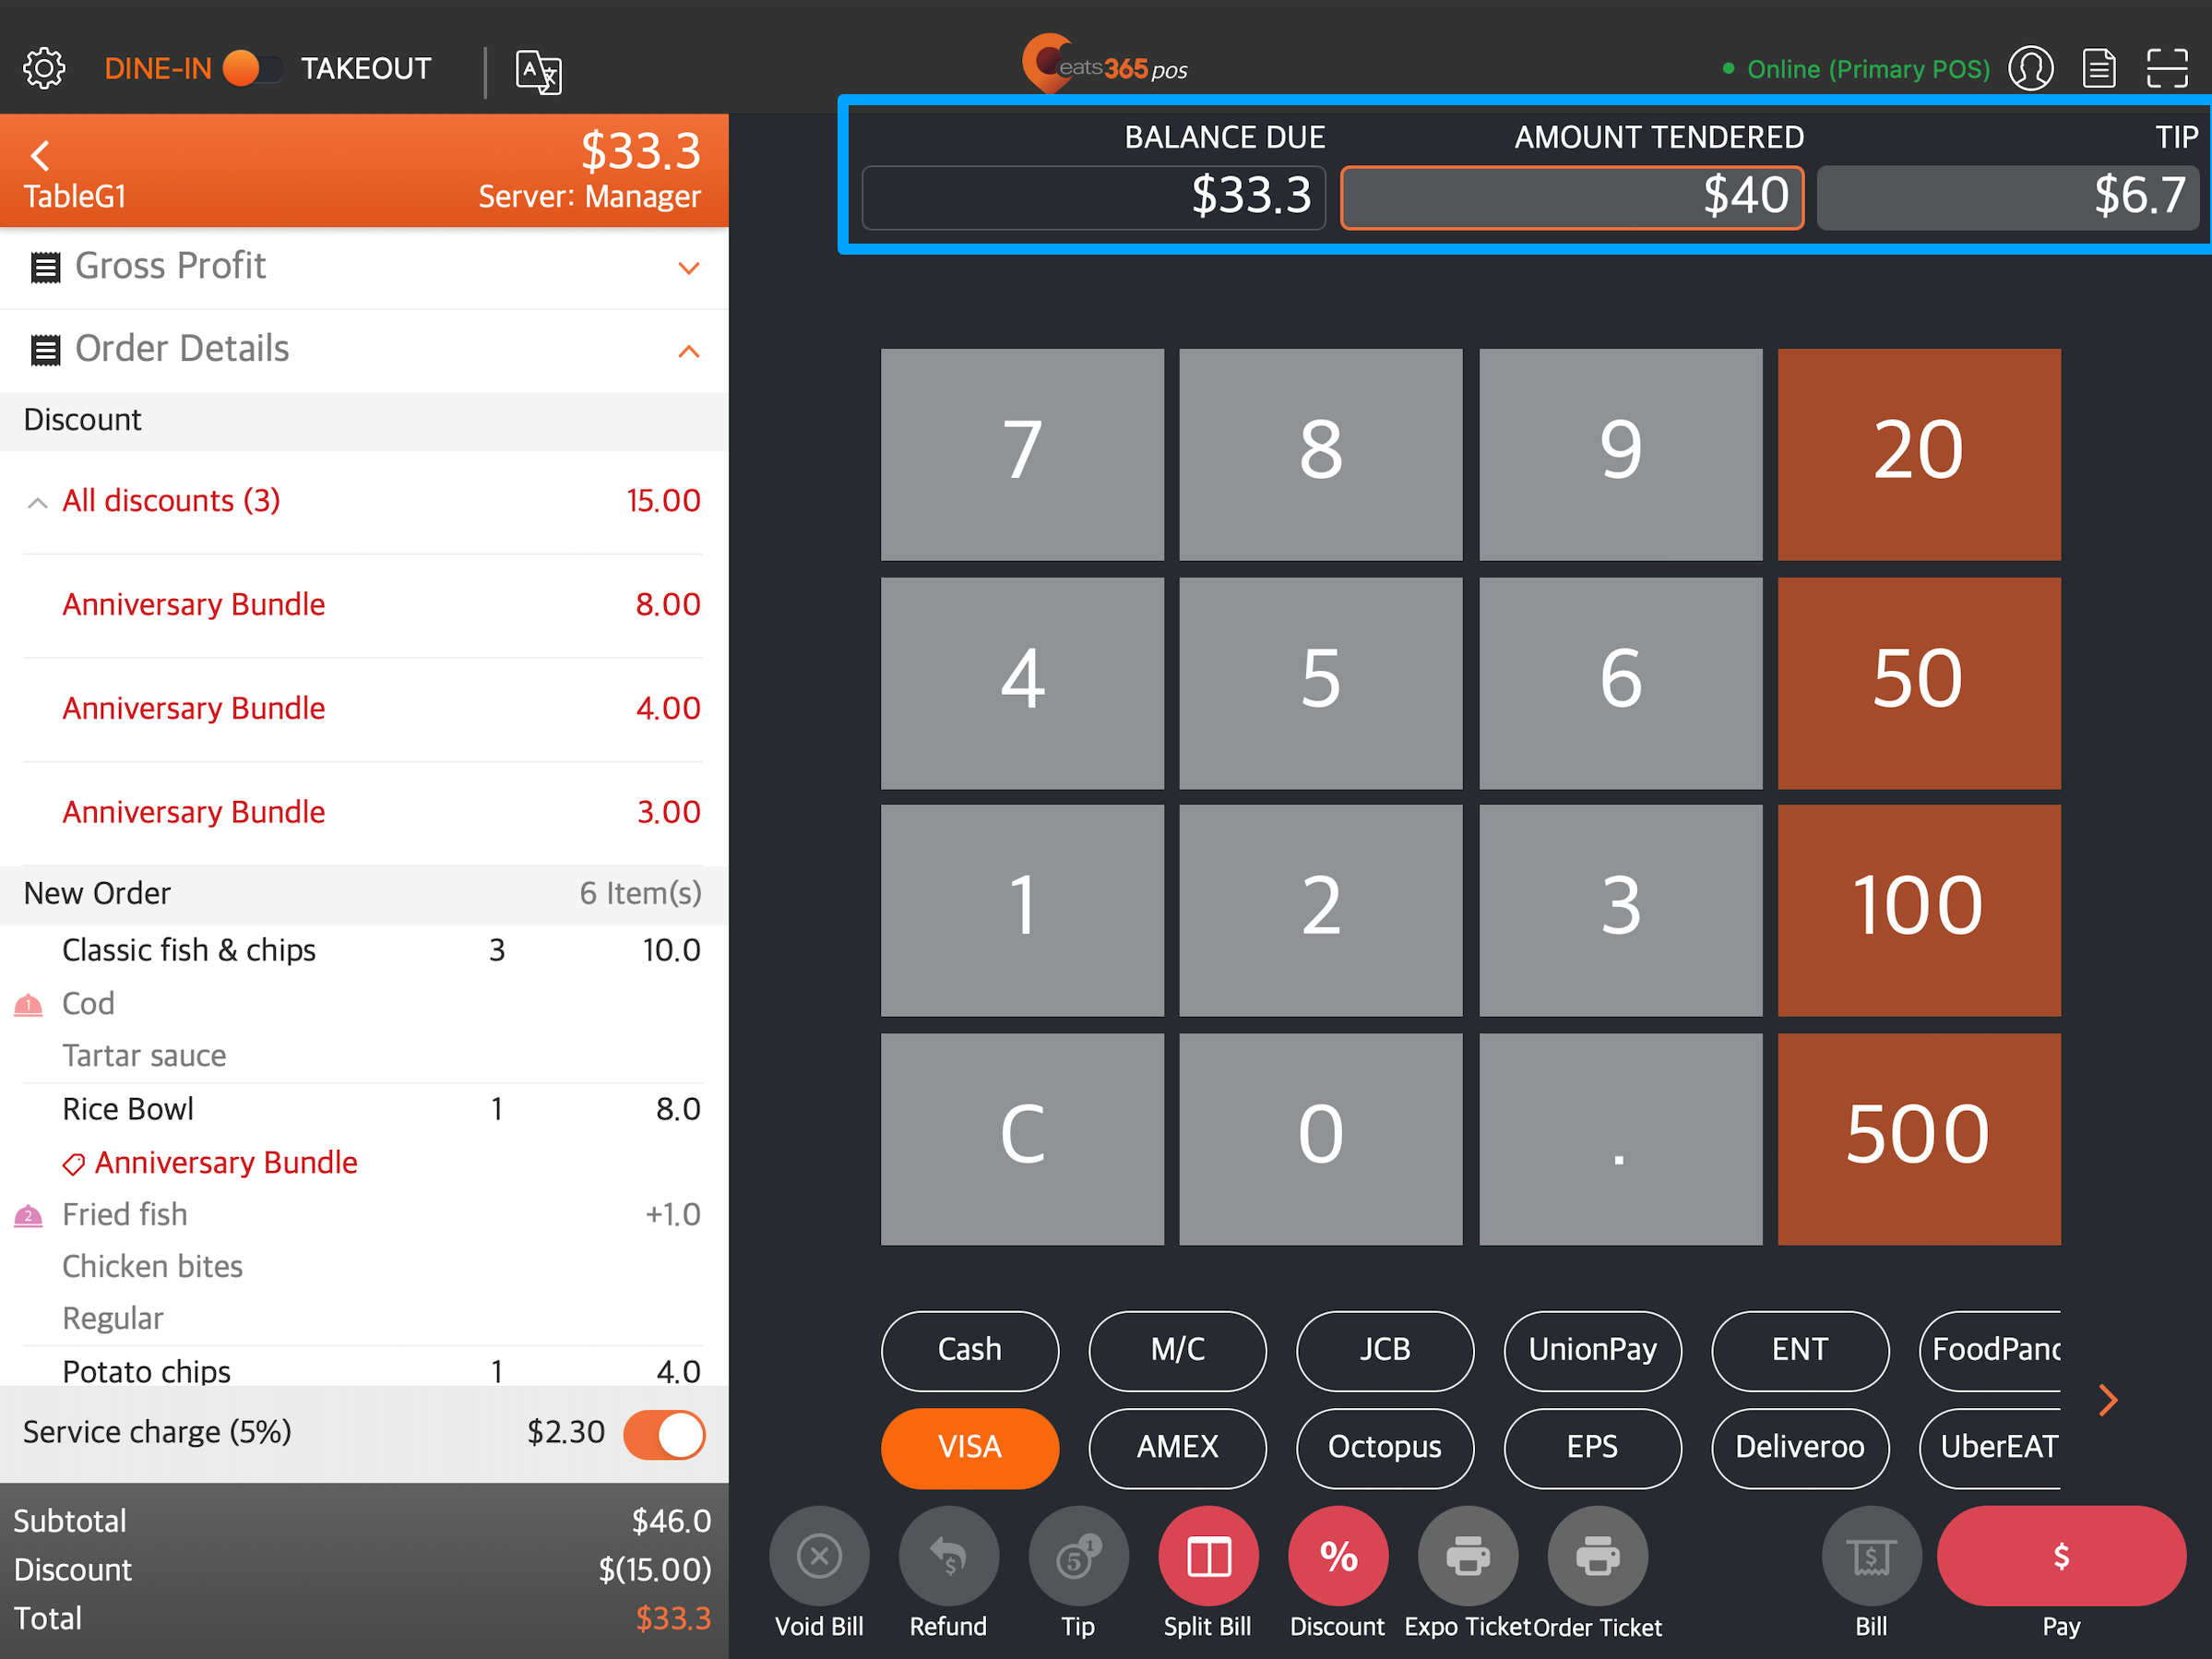
- Select the correct credit card type.
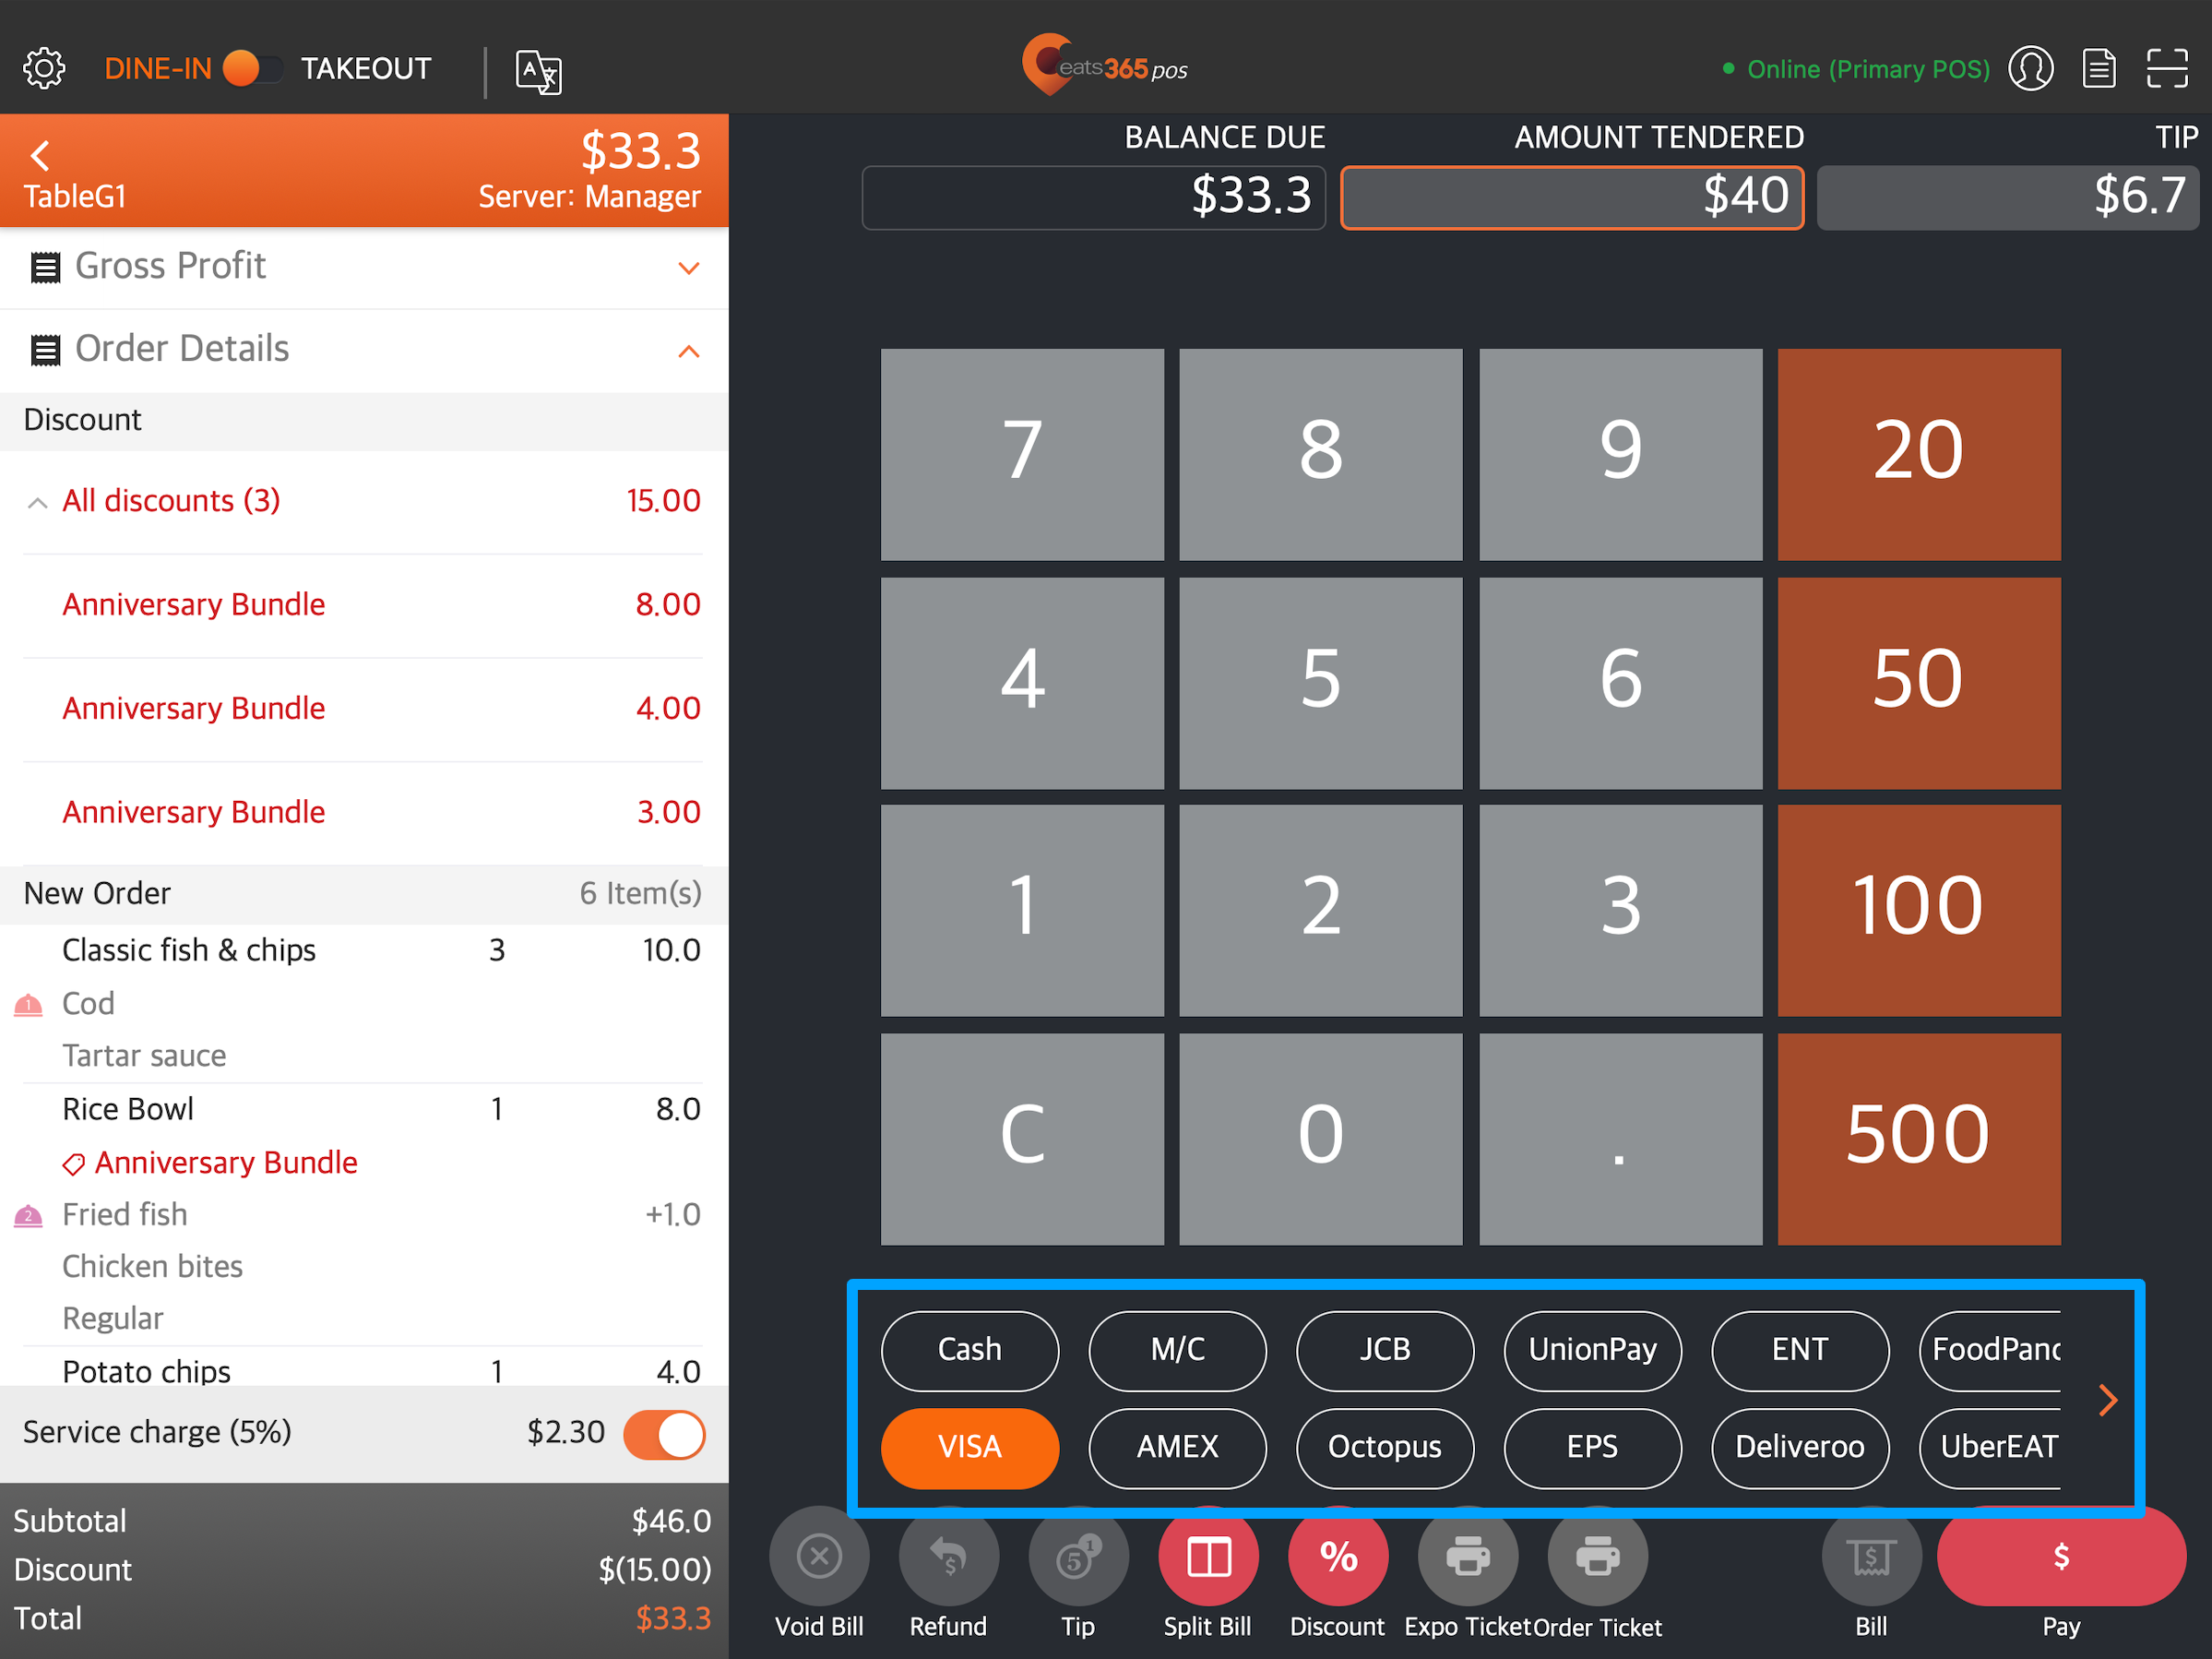
- (Optional) If "Remark Request for Non-Cash Tender" is turned on, a prompt appears to enter payment remarks. Enter payment remarks.
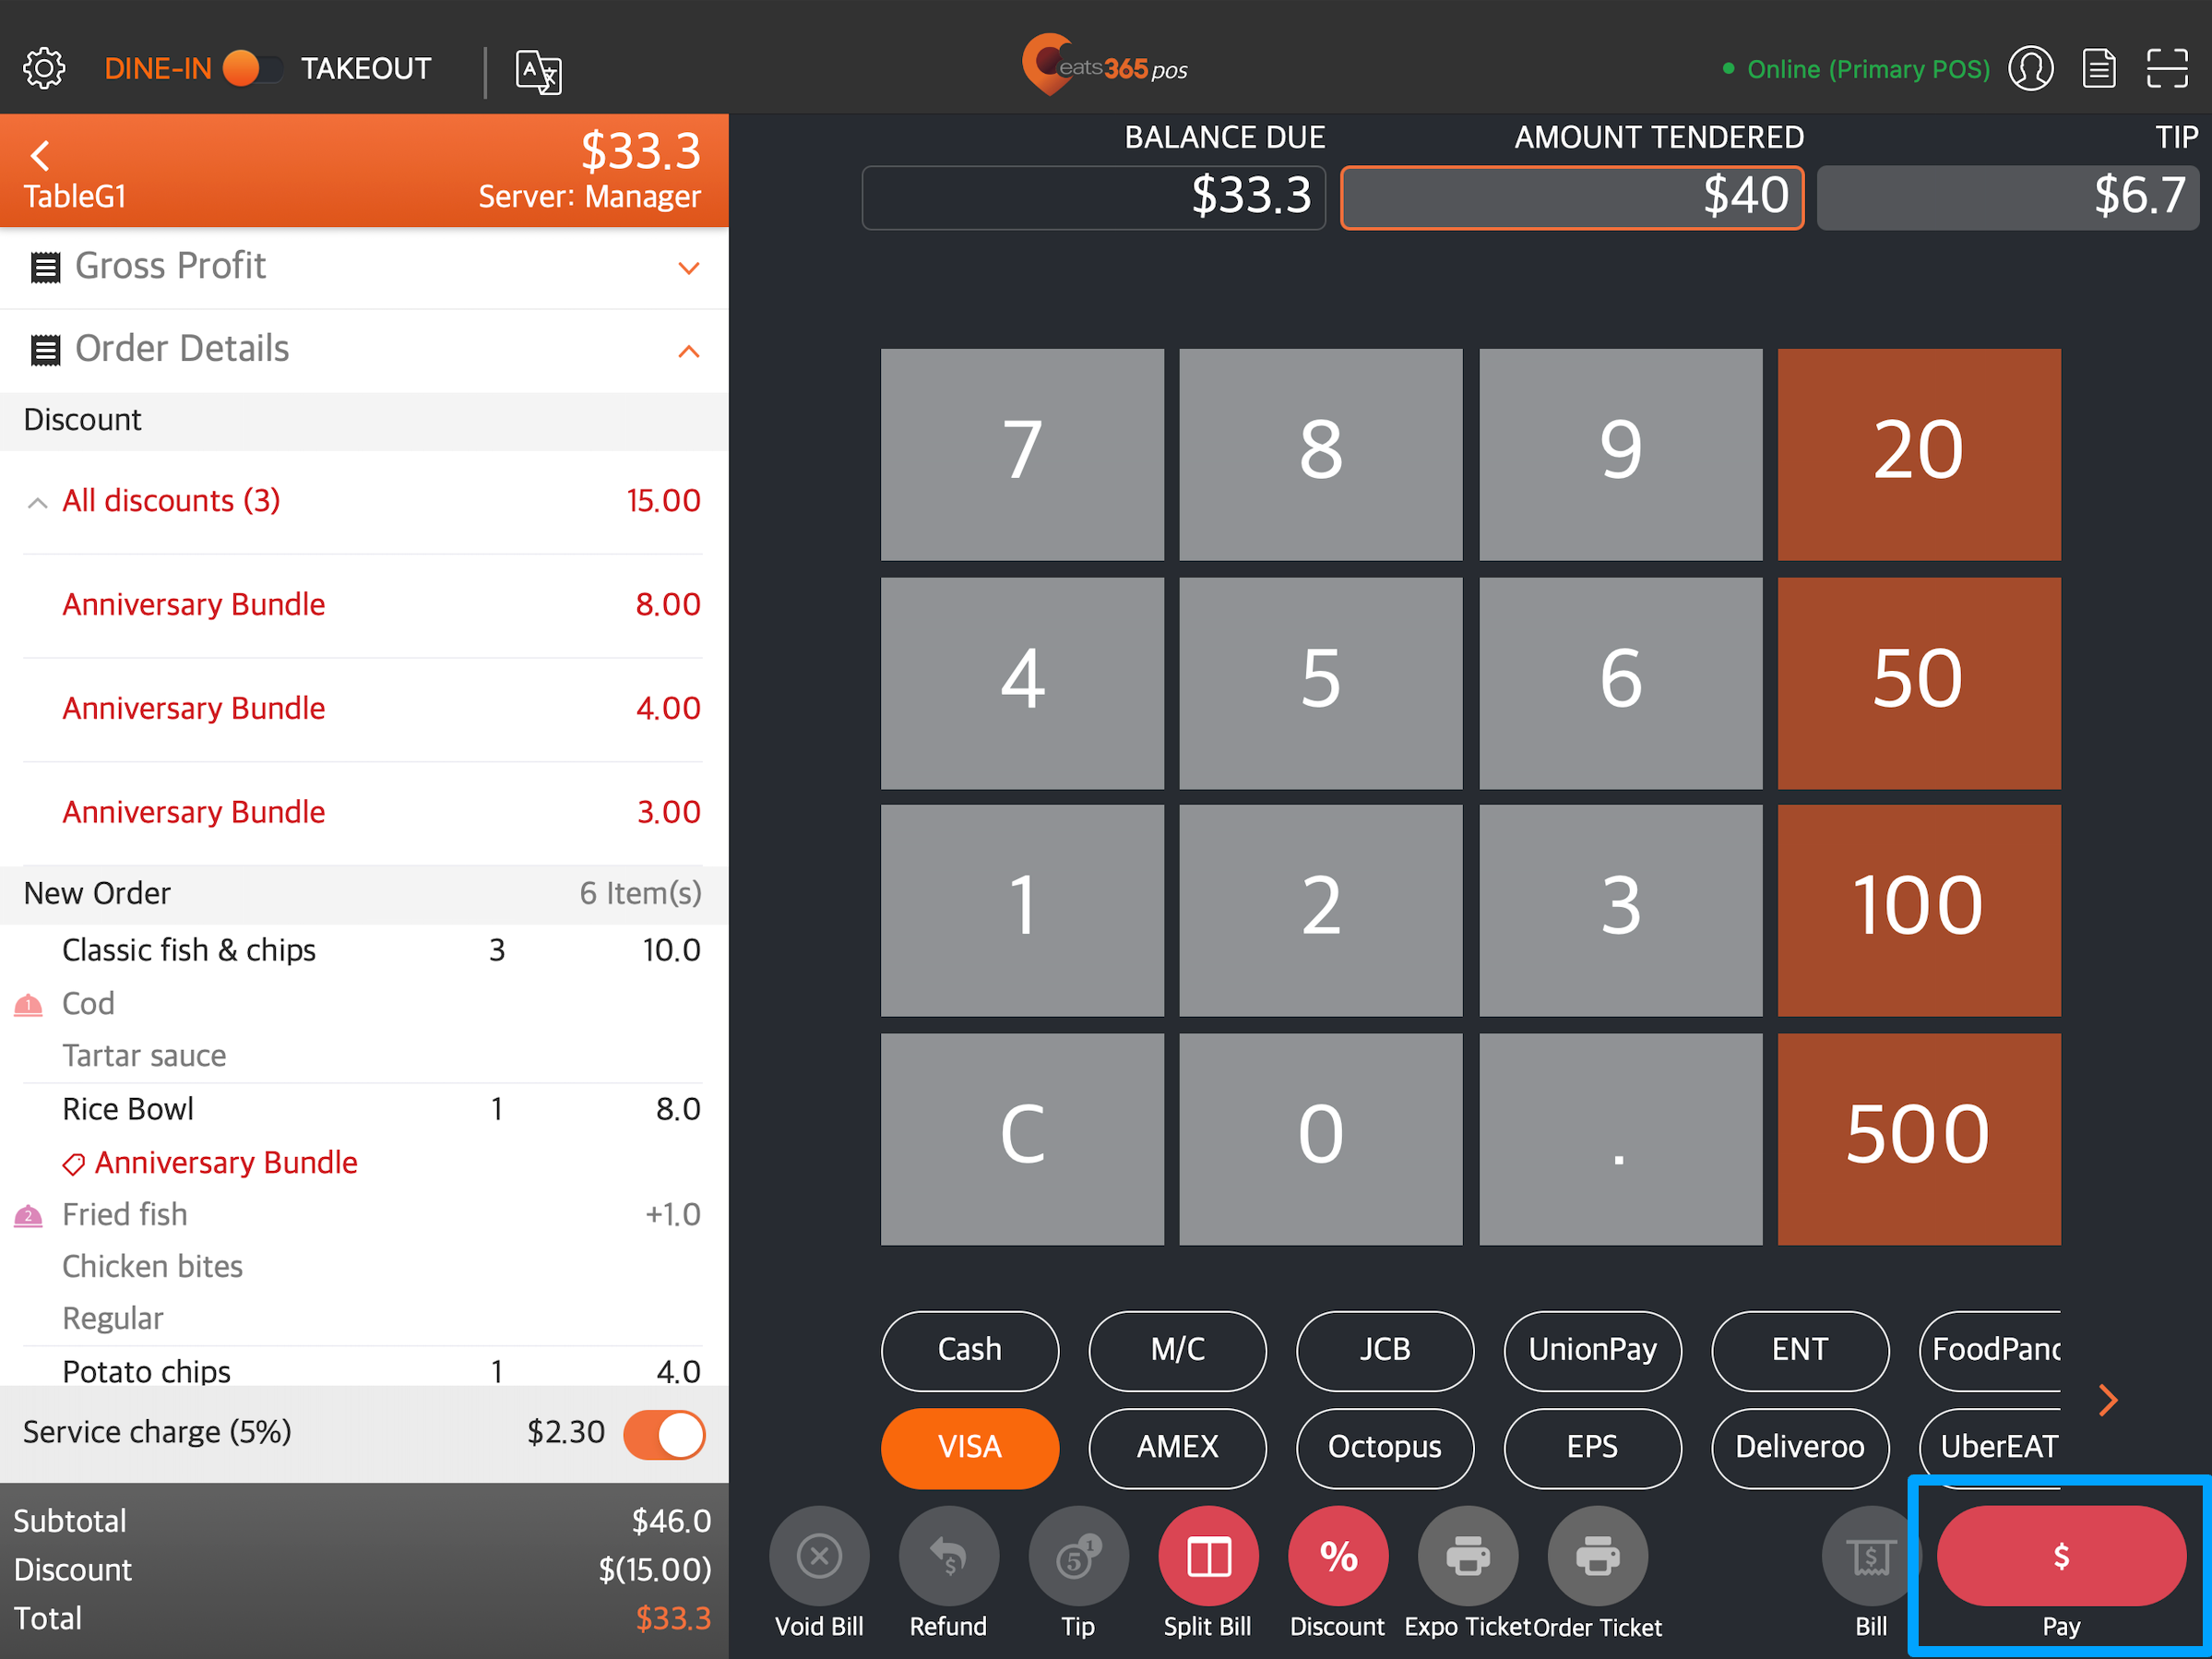
- At the bottom right, tap Pay to confirm.
From the payment confirmation page
- Select the order that you want to process payment for. Then, tap Pay.
Tip: To check all existing orders, go to Order List All. Select an order, then tap To Payment.
- On the payment screen, check that the "Balance Due" is correct. Then, enter the same amount under "Amount Tendered."
Tip: If "Auto Fill Amount Tendered" is turned on, you won’t need to enter the amount manually.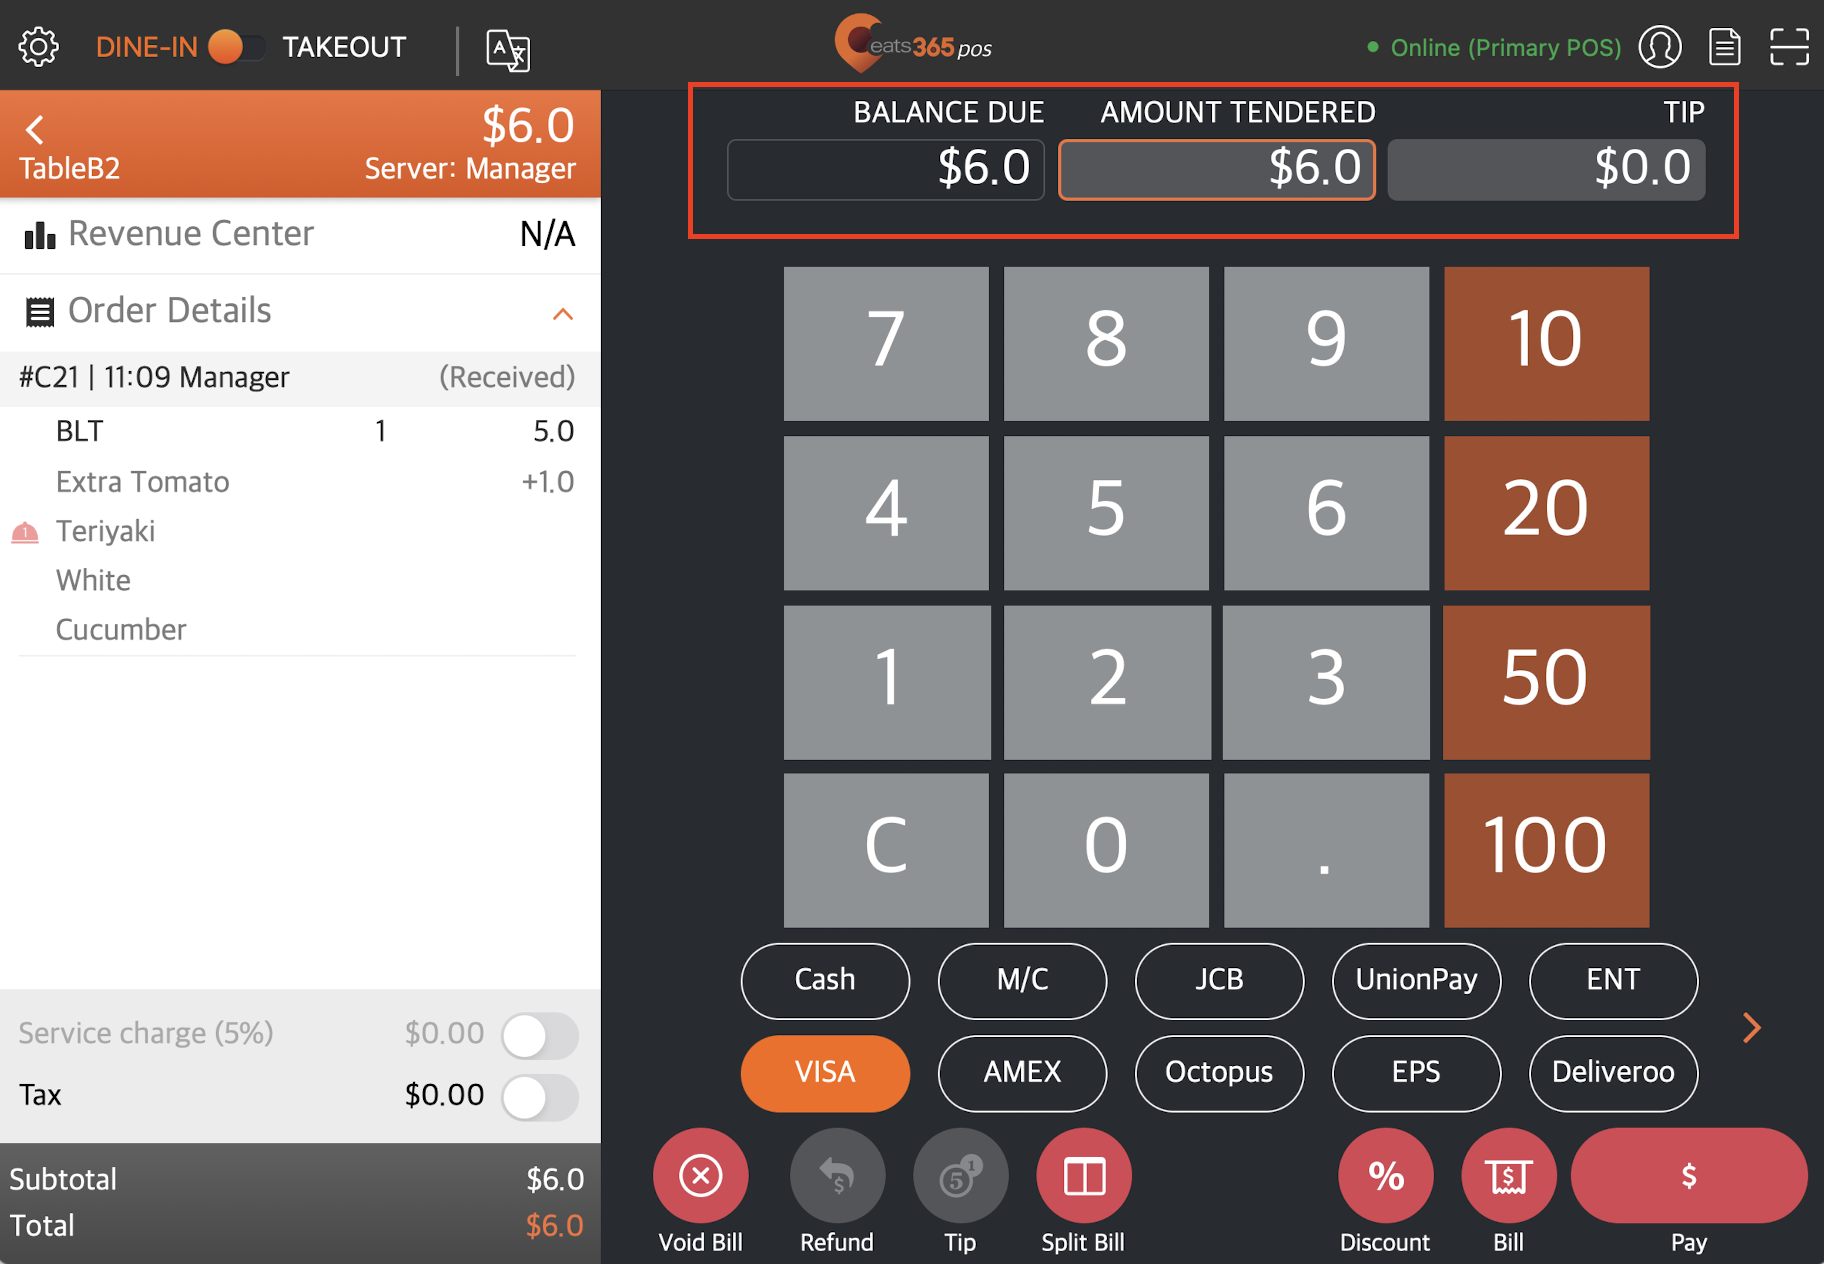
- Select the correct credit card type.
- (Optional) If "Remark Request for Non-Cash Tender" is turned on, a prompt appears to enter payment remarks. Enter payment remarks.
- At the bottom right, tap Pay to confirm.
- On the payment confirmation screen, tap Tip.

- Enter the tip amount.
- Tap Confirm Tip.
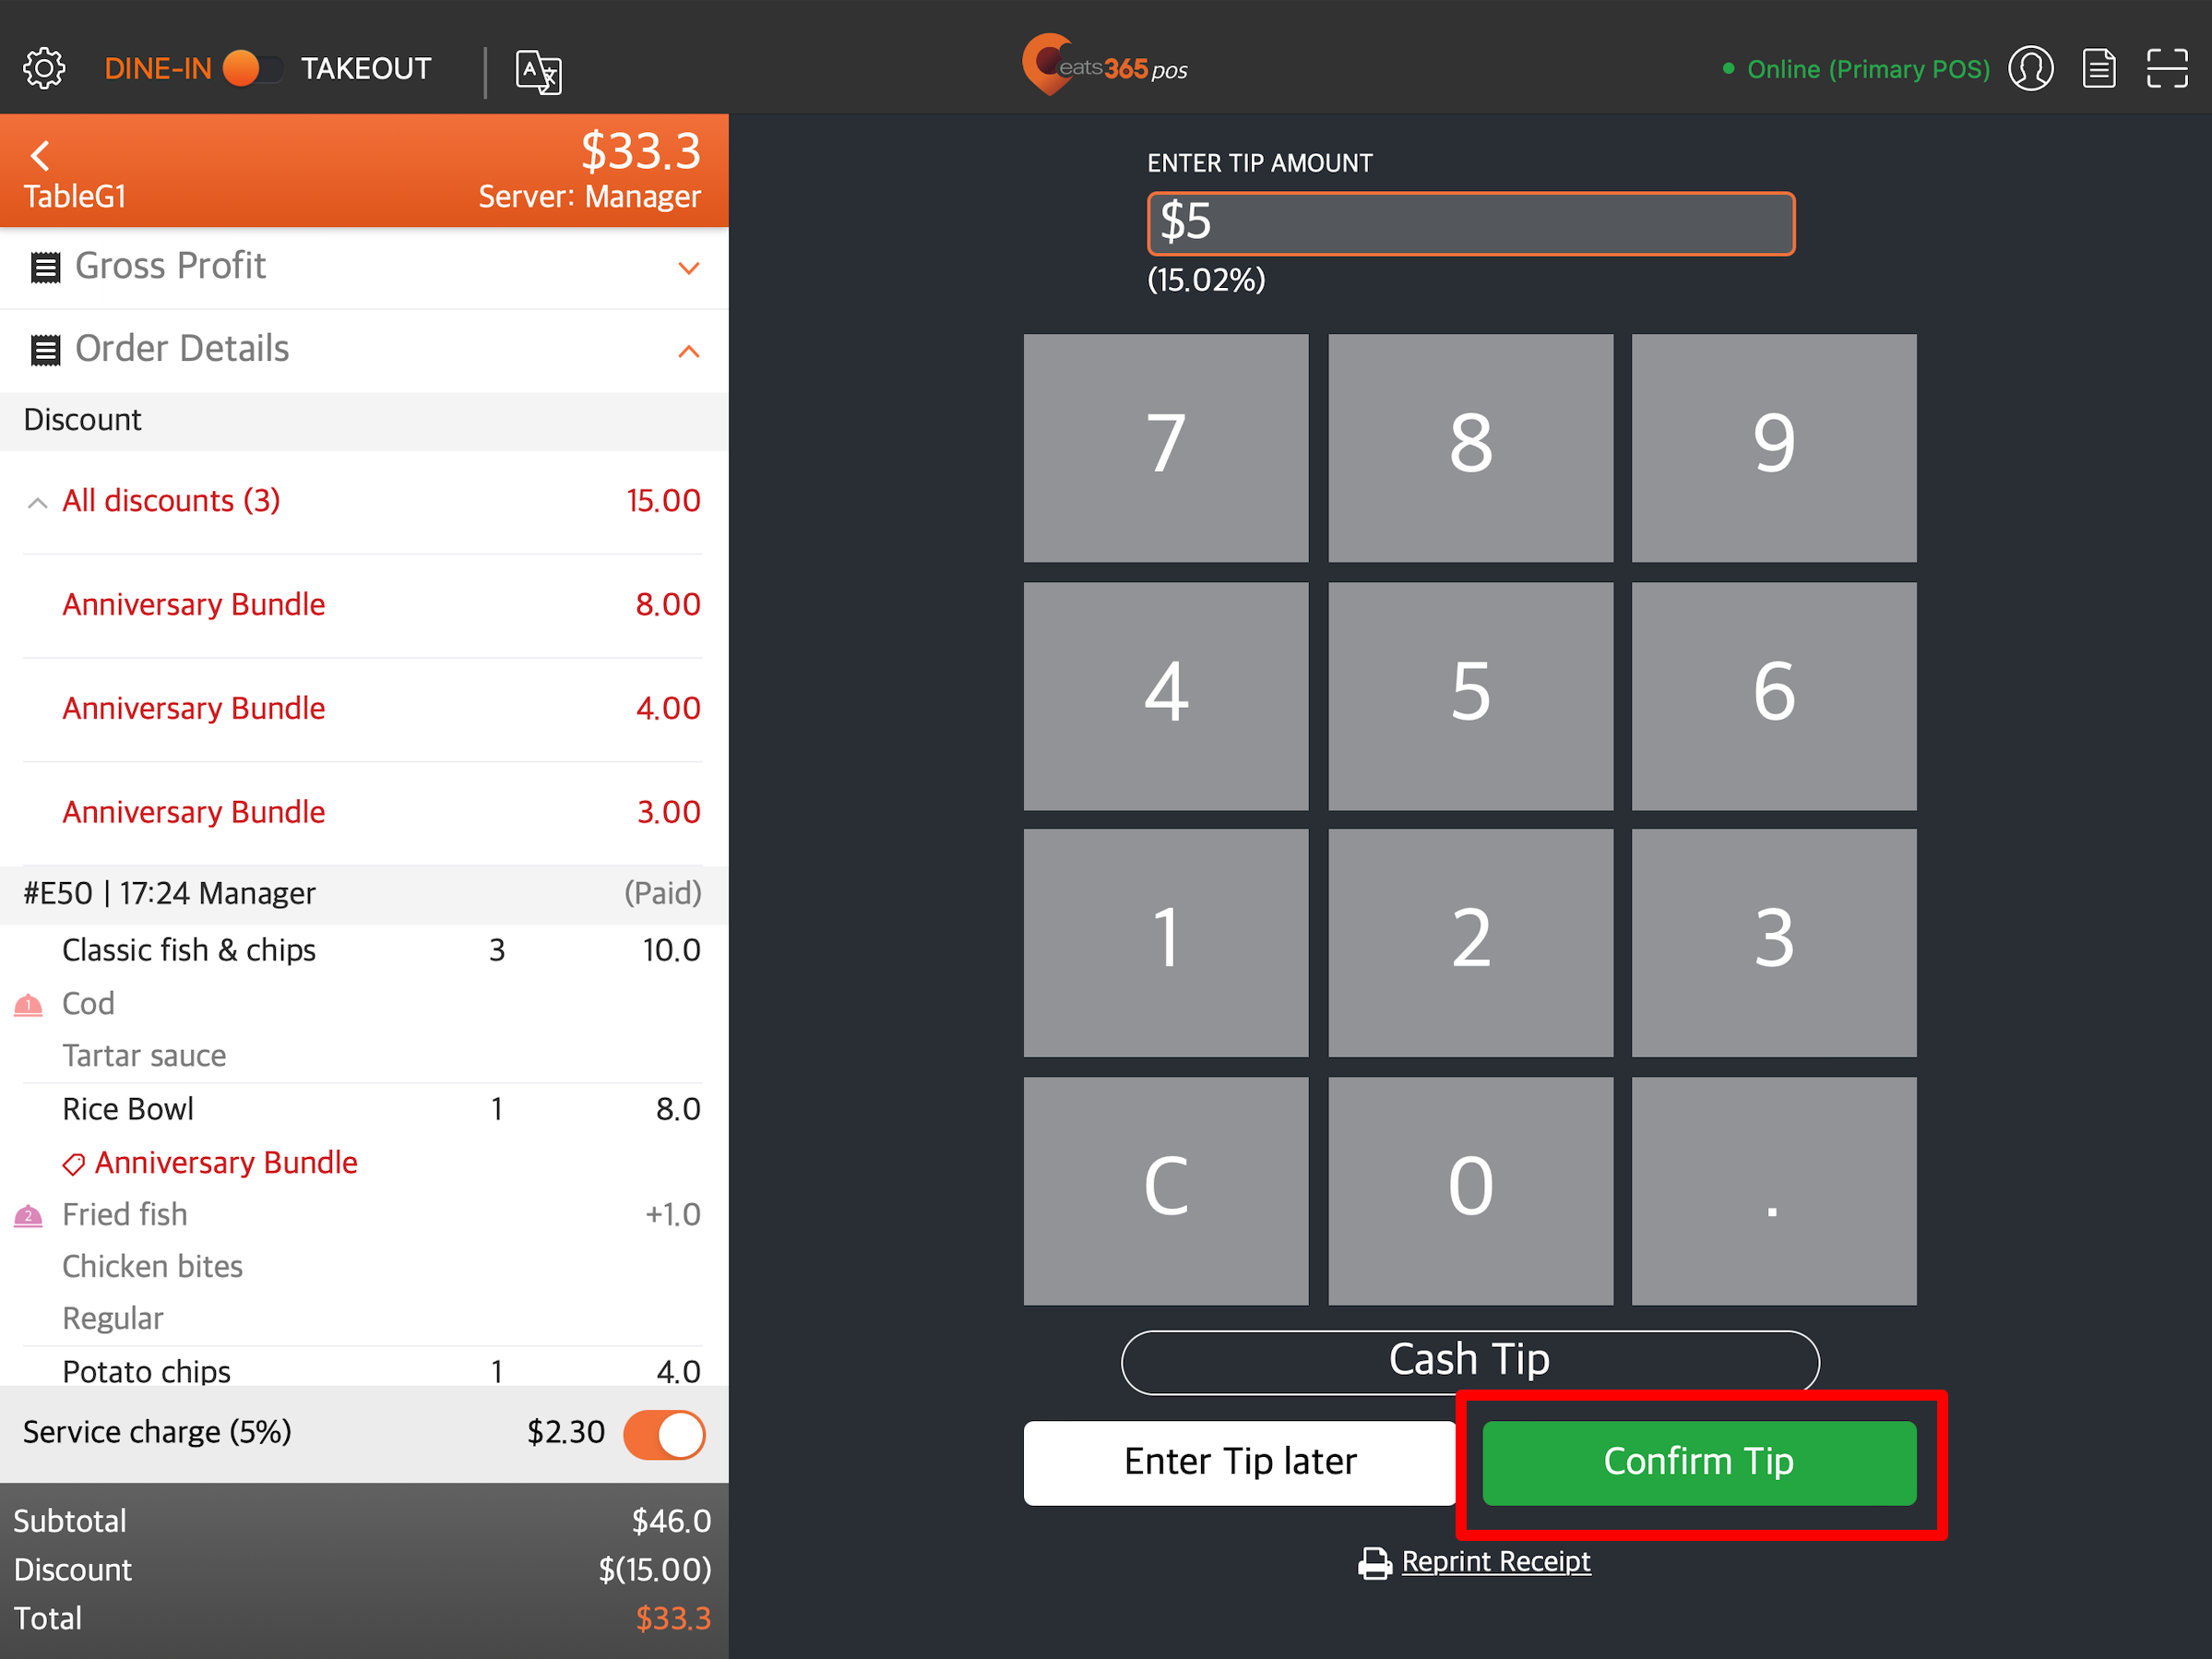
Once done, the POS redirects to the payment confirmation screen. You can then print the receipt, which includes the tip.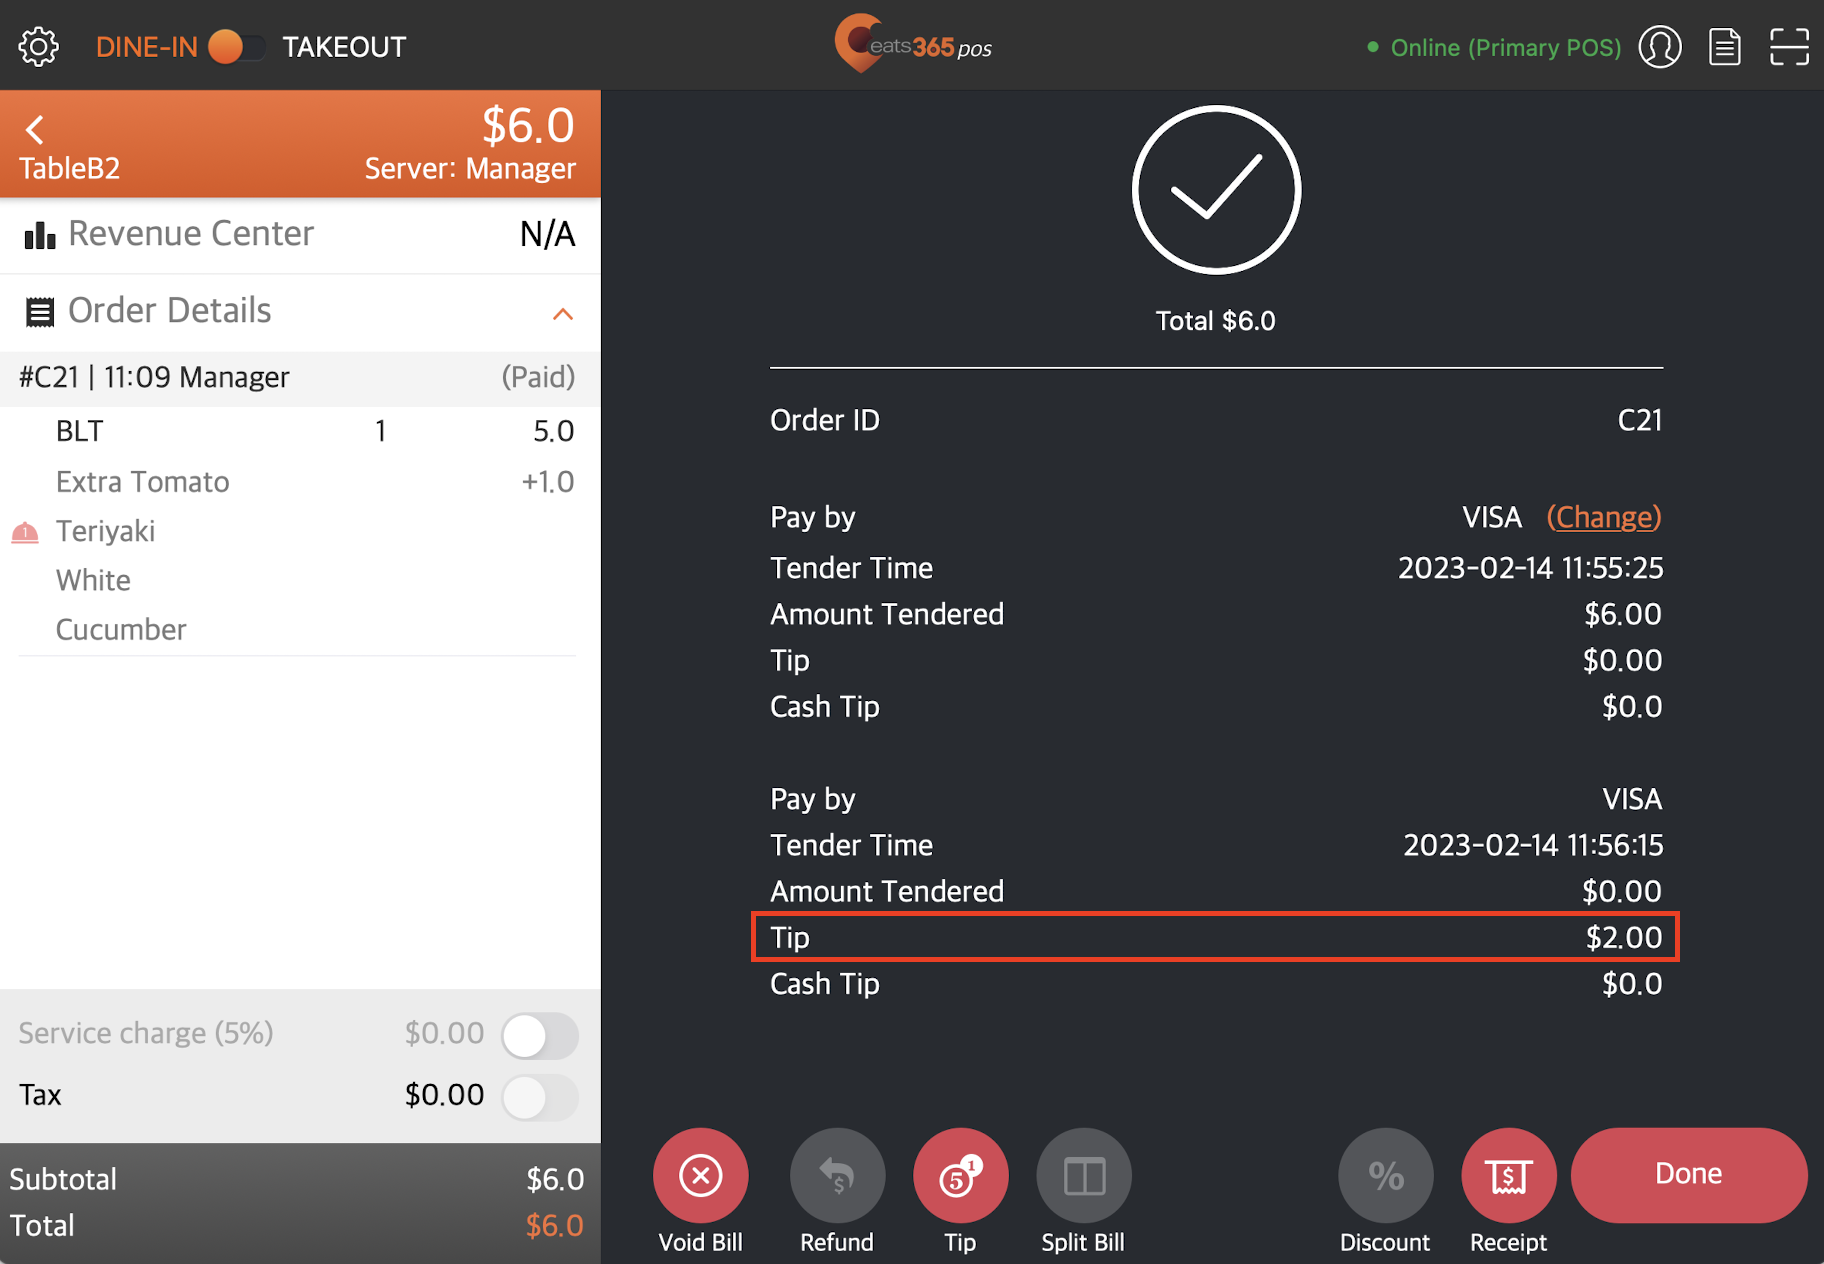
Add a tip on cash payments
To add a tip on cash payments, follow the steps below:
- Select the order that you want to process payment. Then, tap Pay.
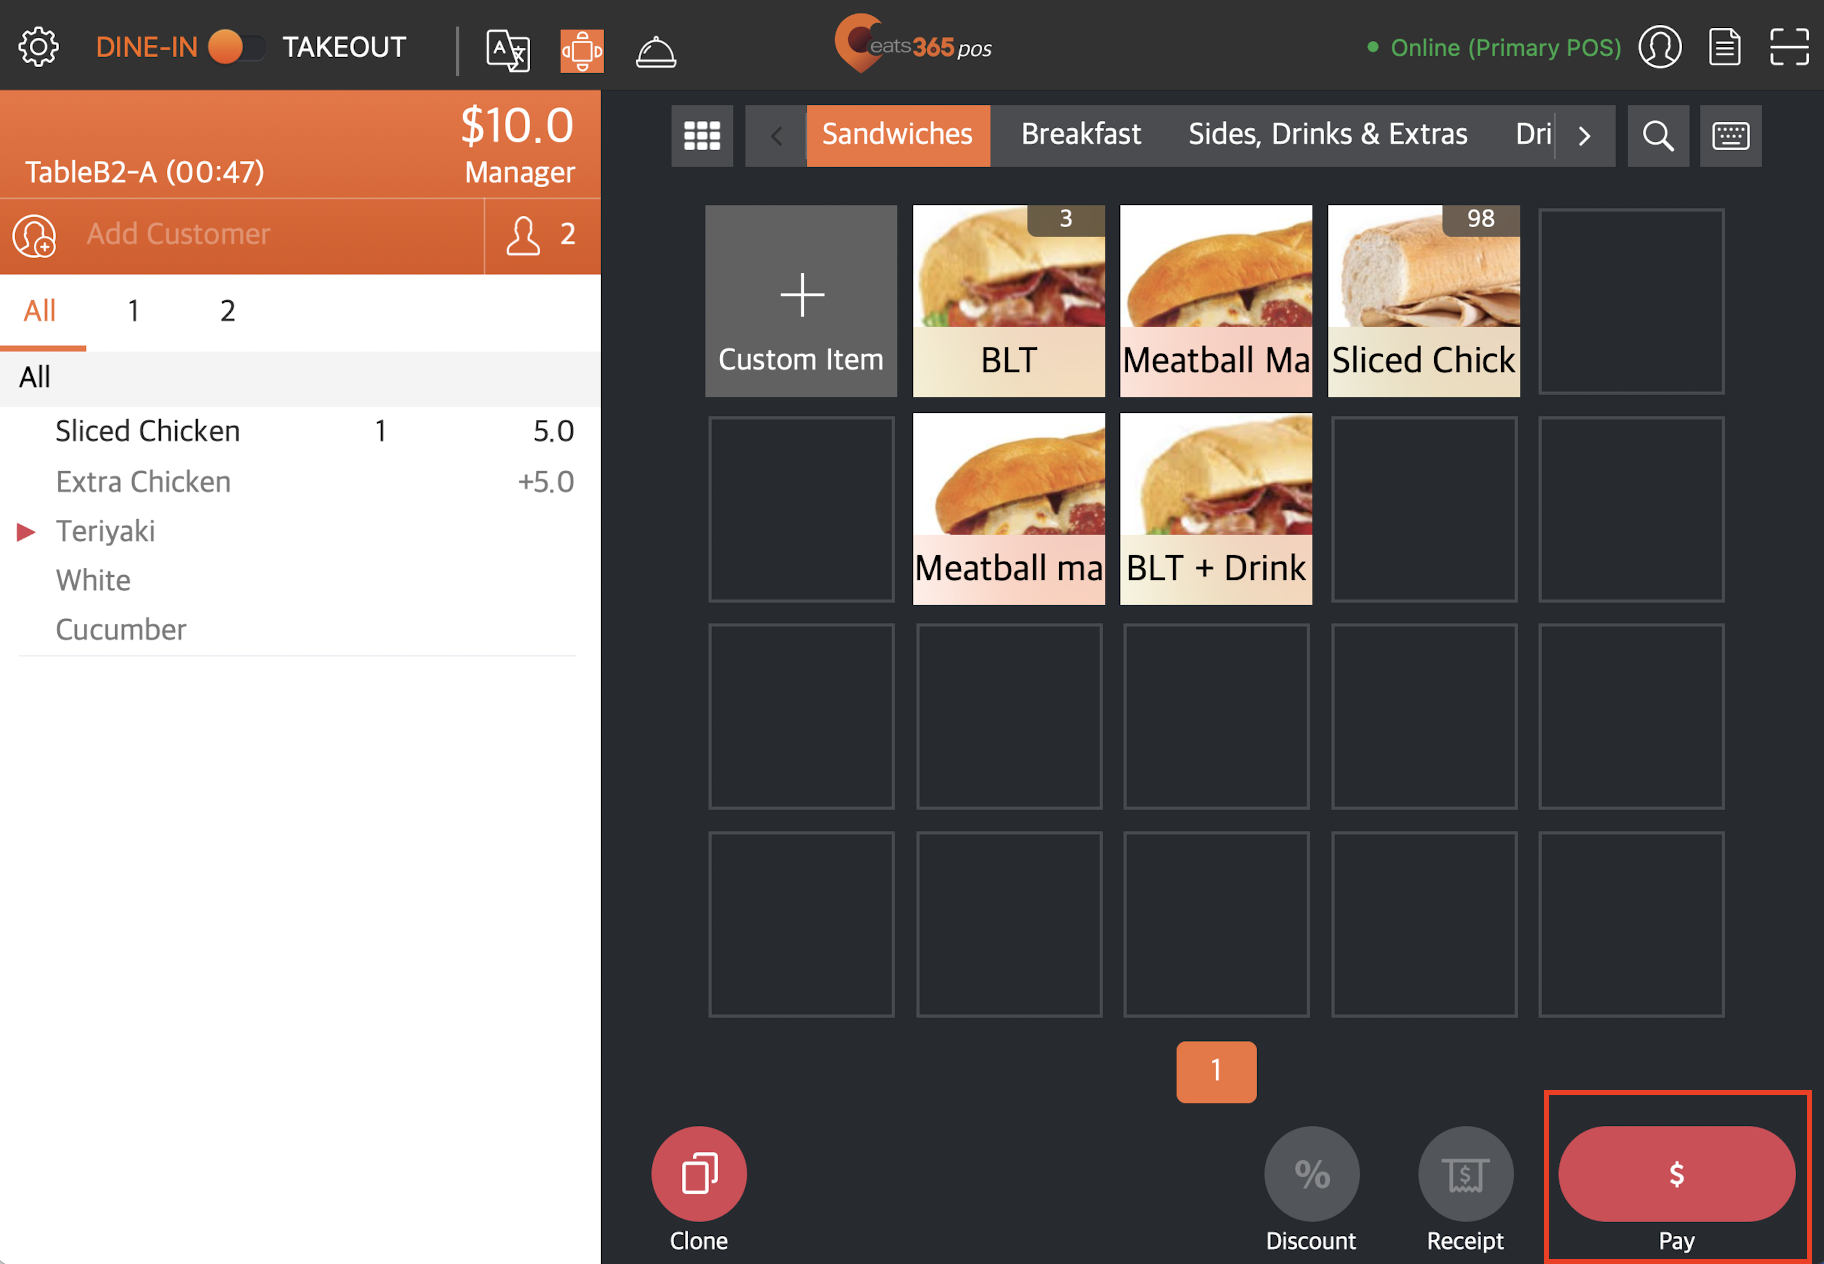 Tip: To check all existing orders, go to Order List All. Select an order, then tap To Payment.
- On the payment screen, check that the "Balance Due" is correct. Then, enter the same amount under "Amount Tendered."
Tip: If "Auto Fill Amount Tendered" is turned on, you won’t need to enter the amount manually.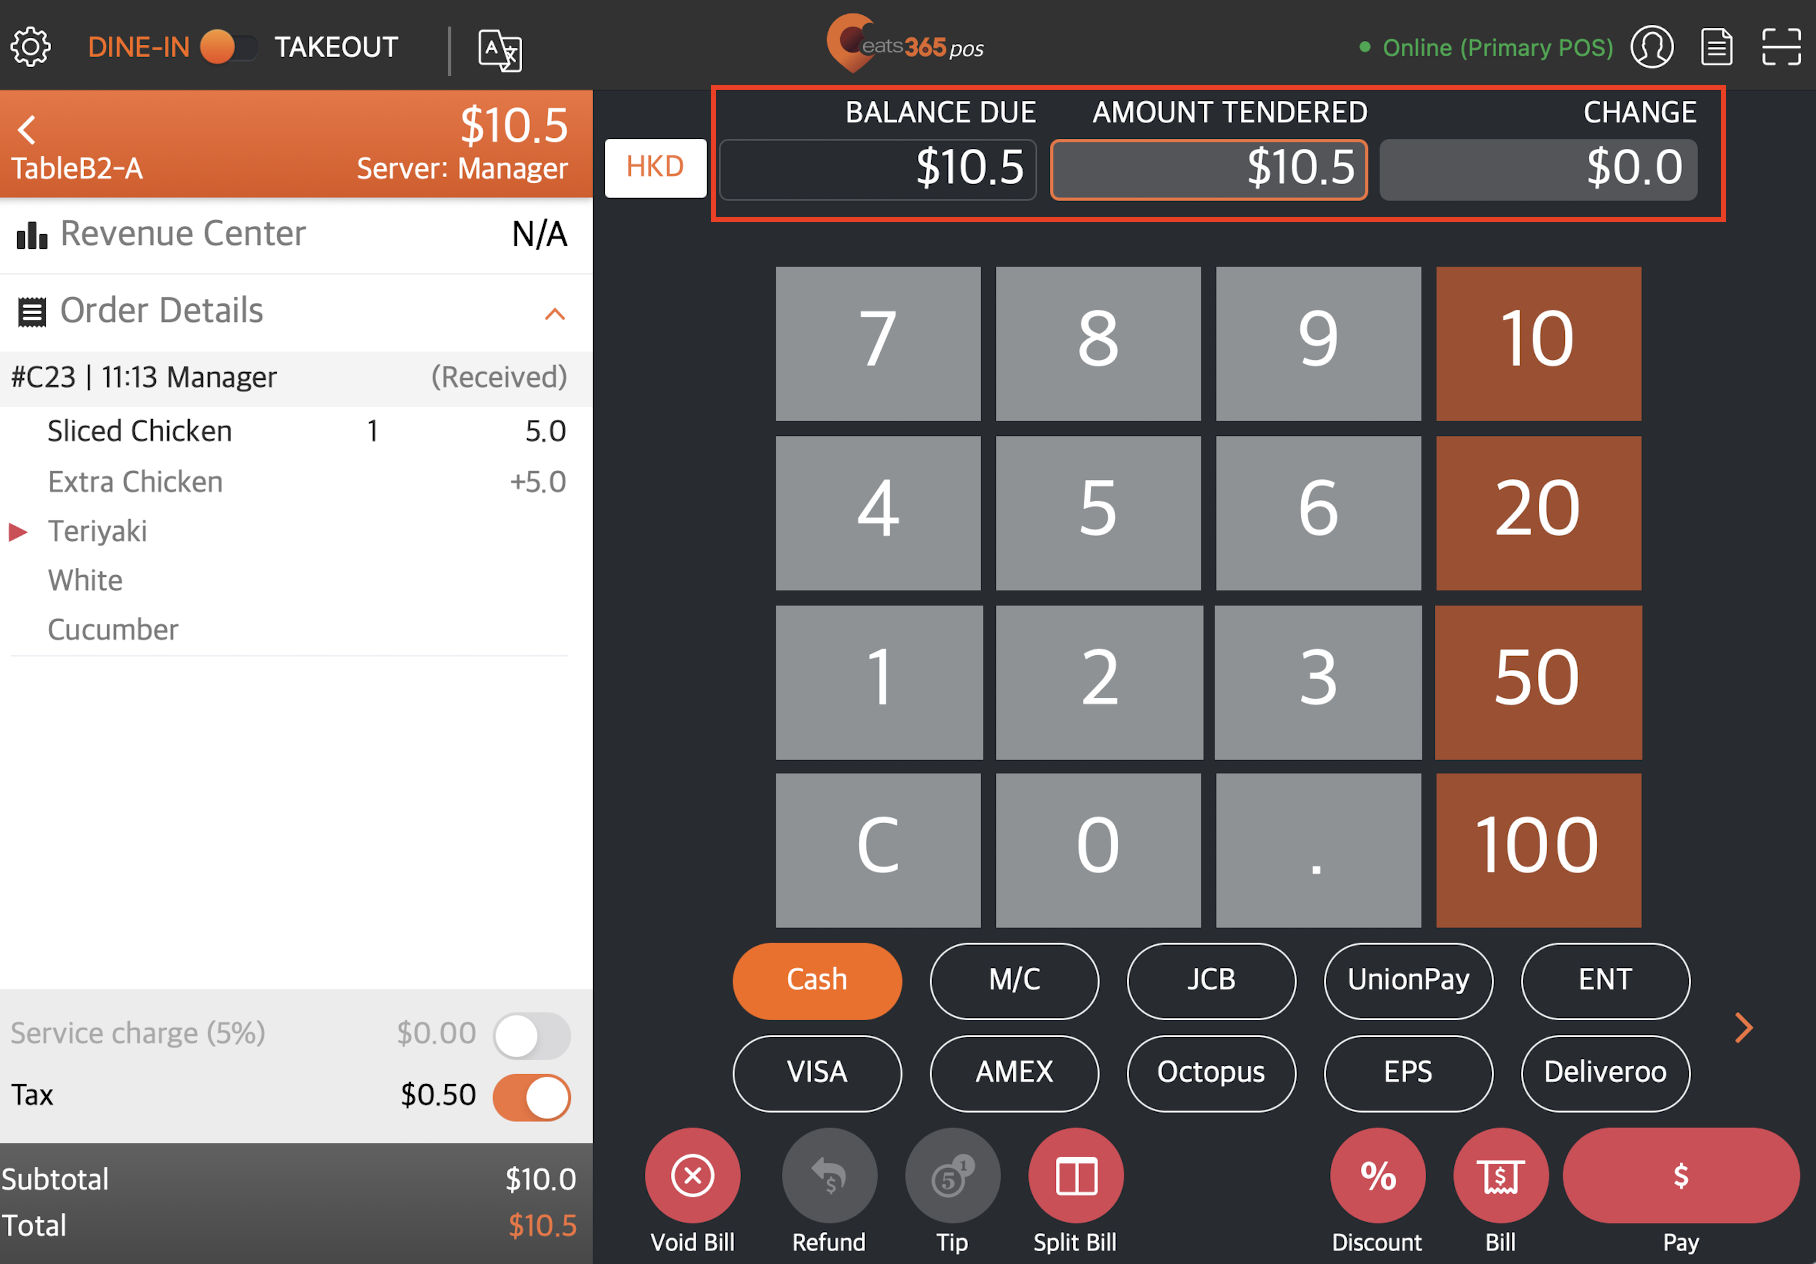
- Select Cash.
- At the bottom right, tap Pay to confirm.
- On the payment confirmation screen, tap Tip.
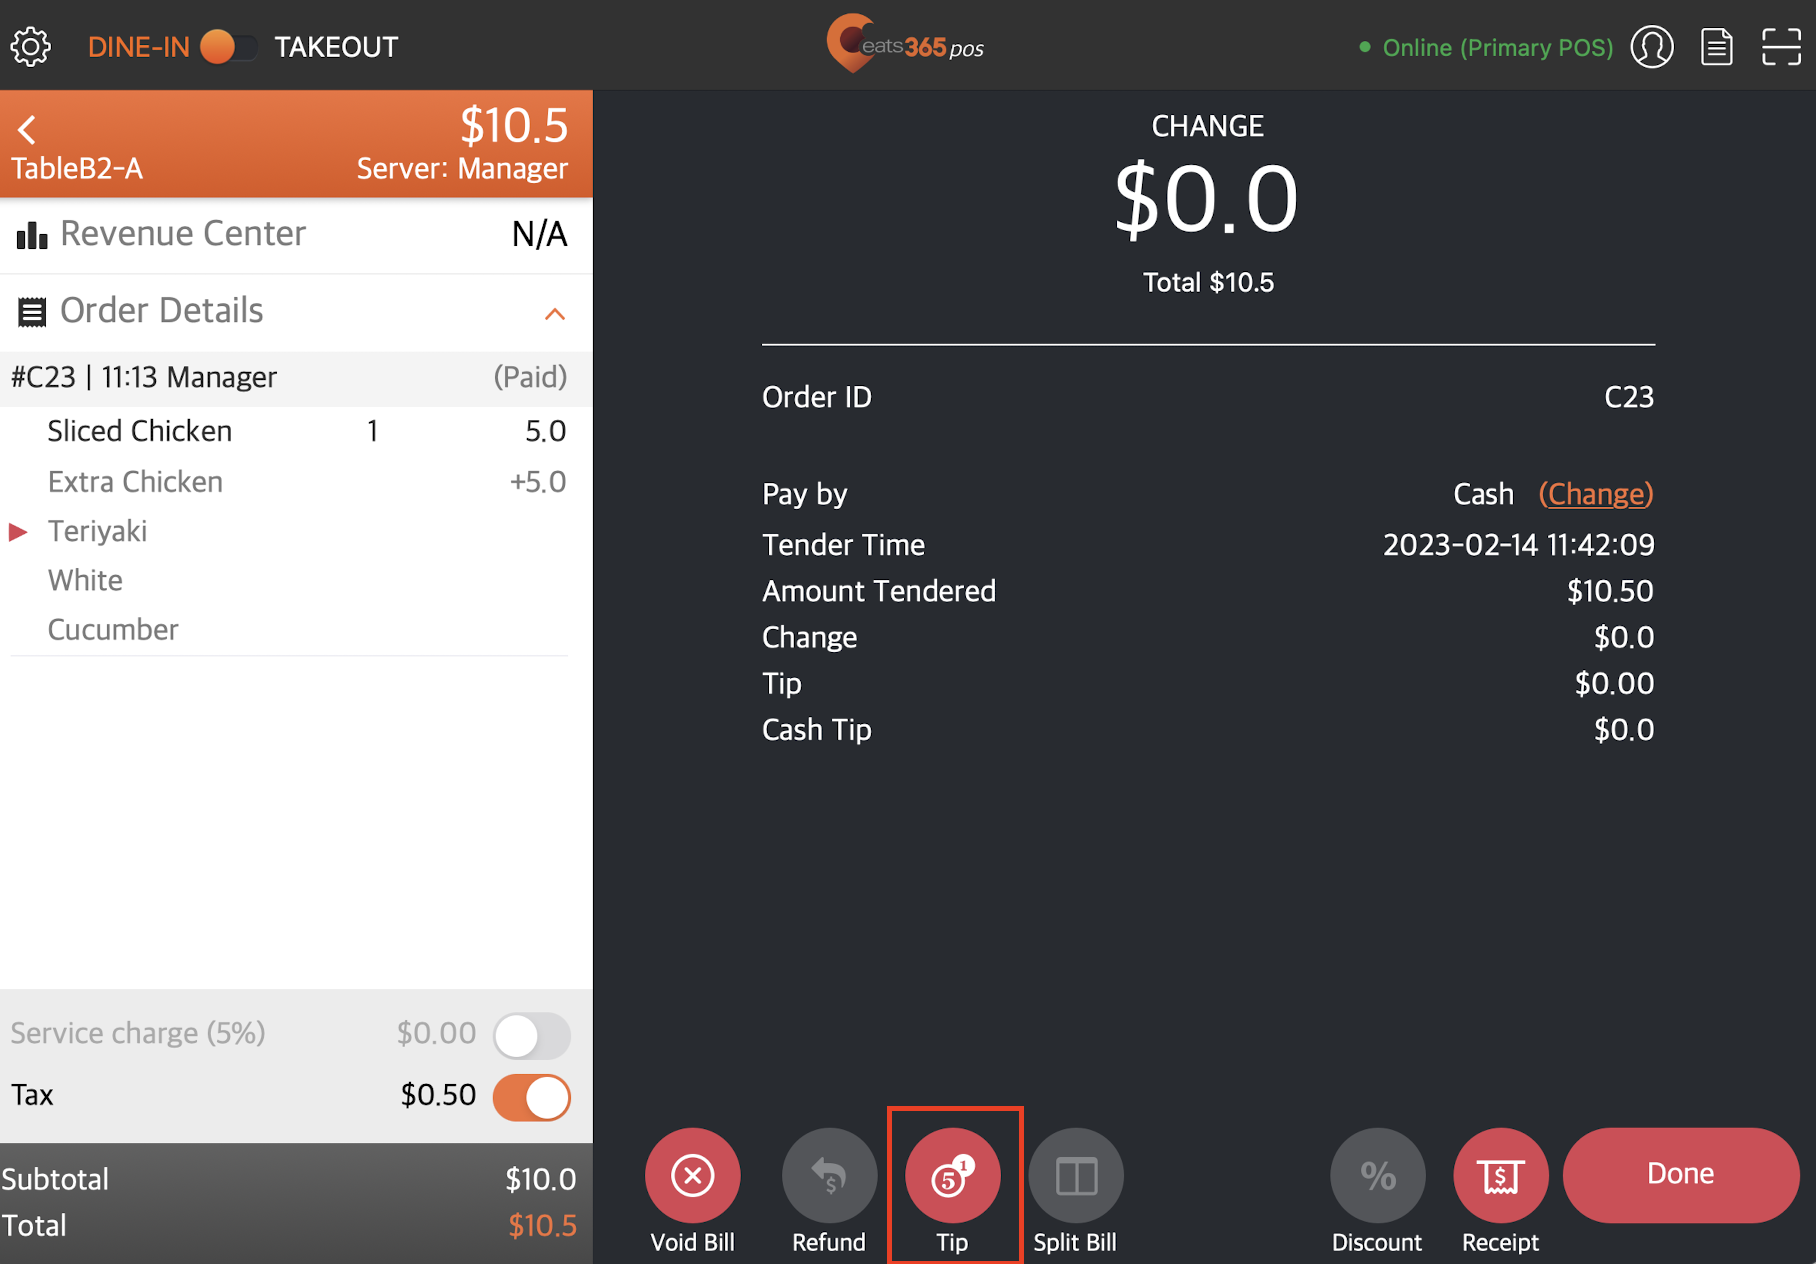
- Enter the tip amount.
- Tap Confirm Tip.
Once done, the POS redirects to the payment confirmation screen. You can then print the receipt, which includes the tip.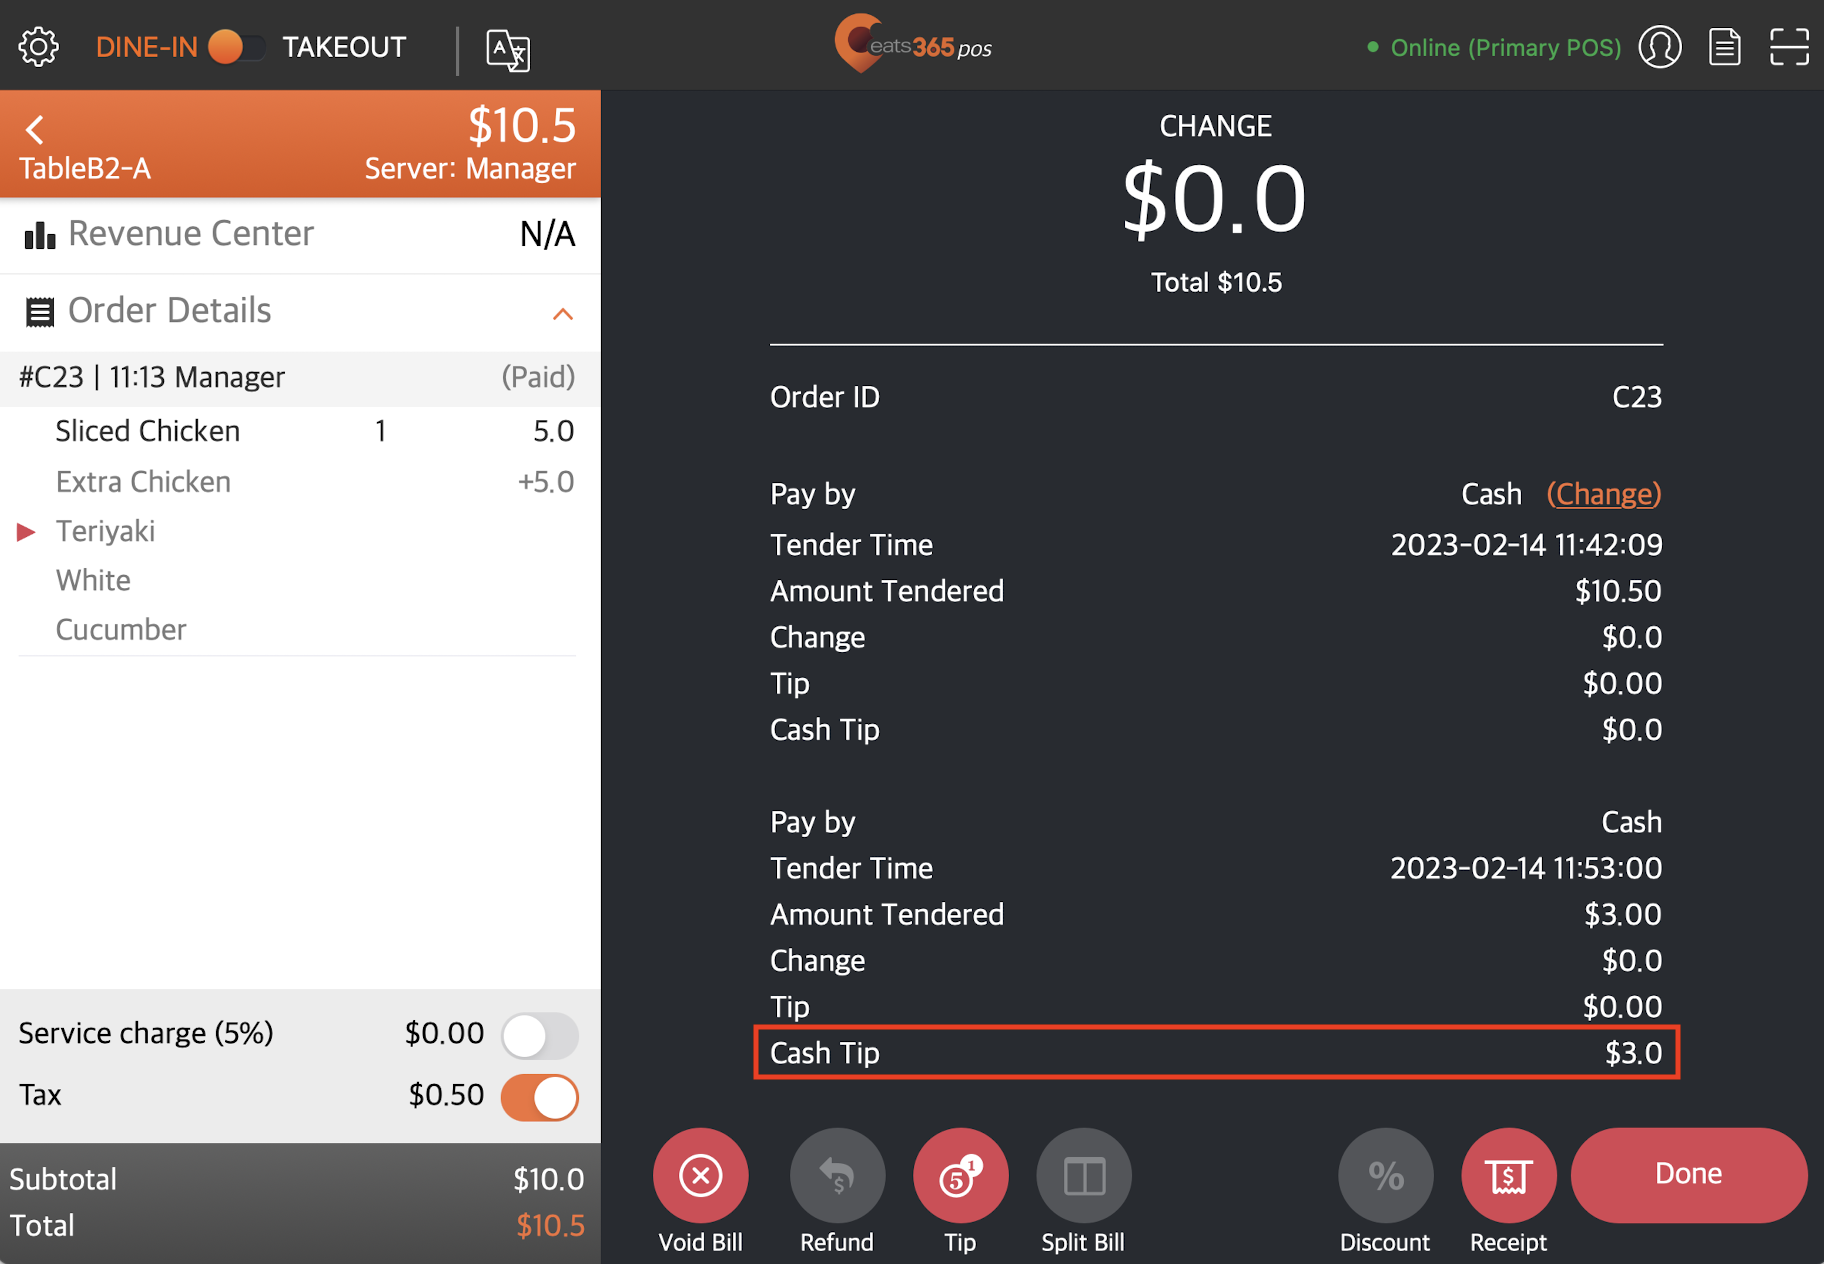
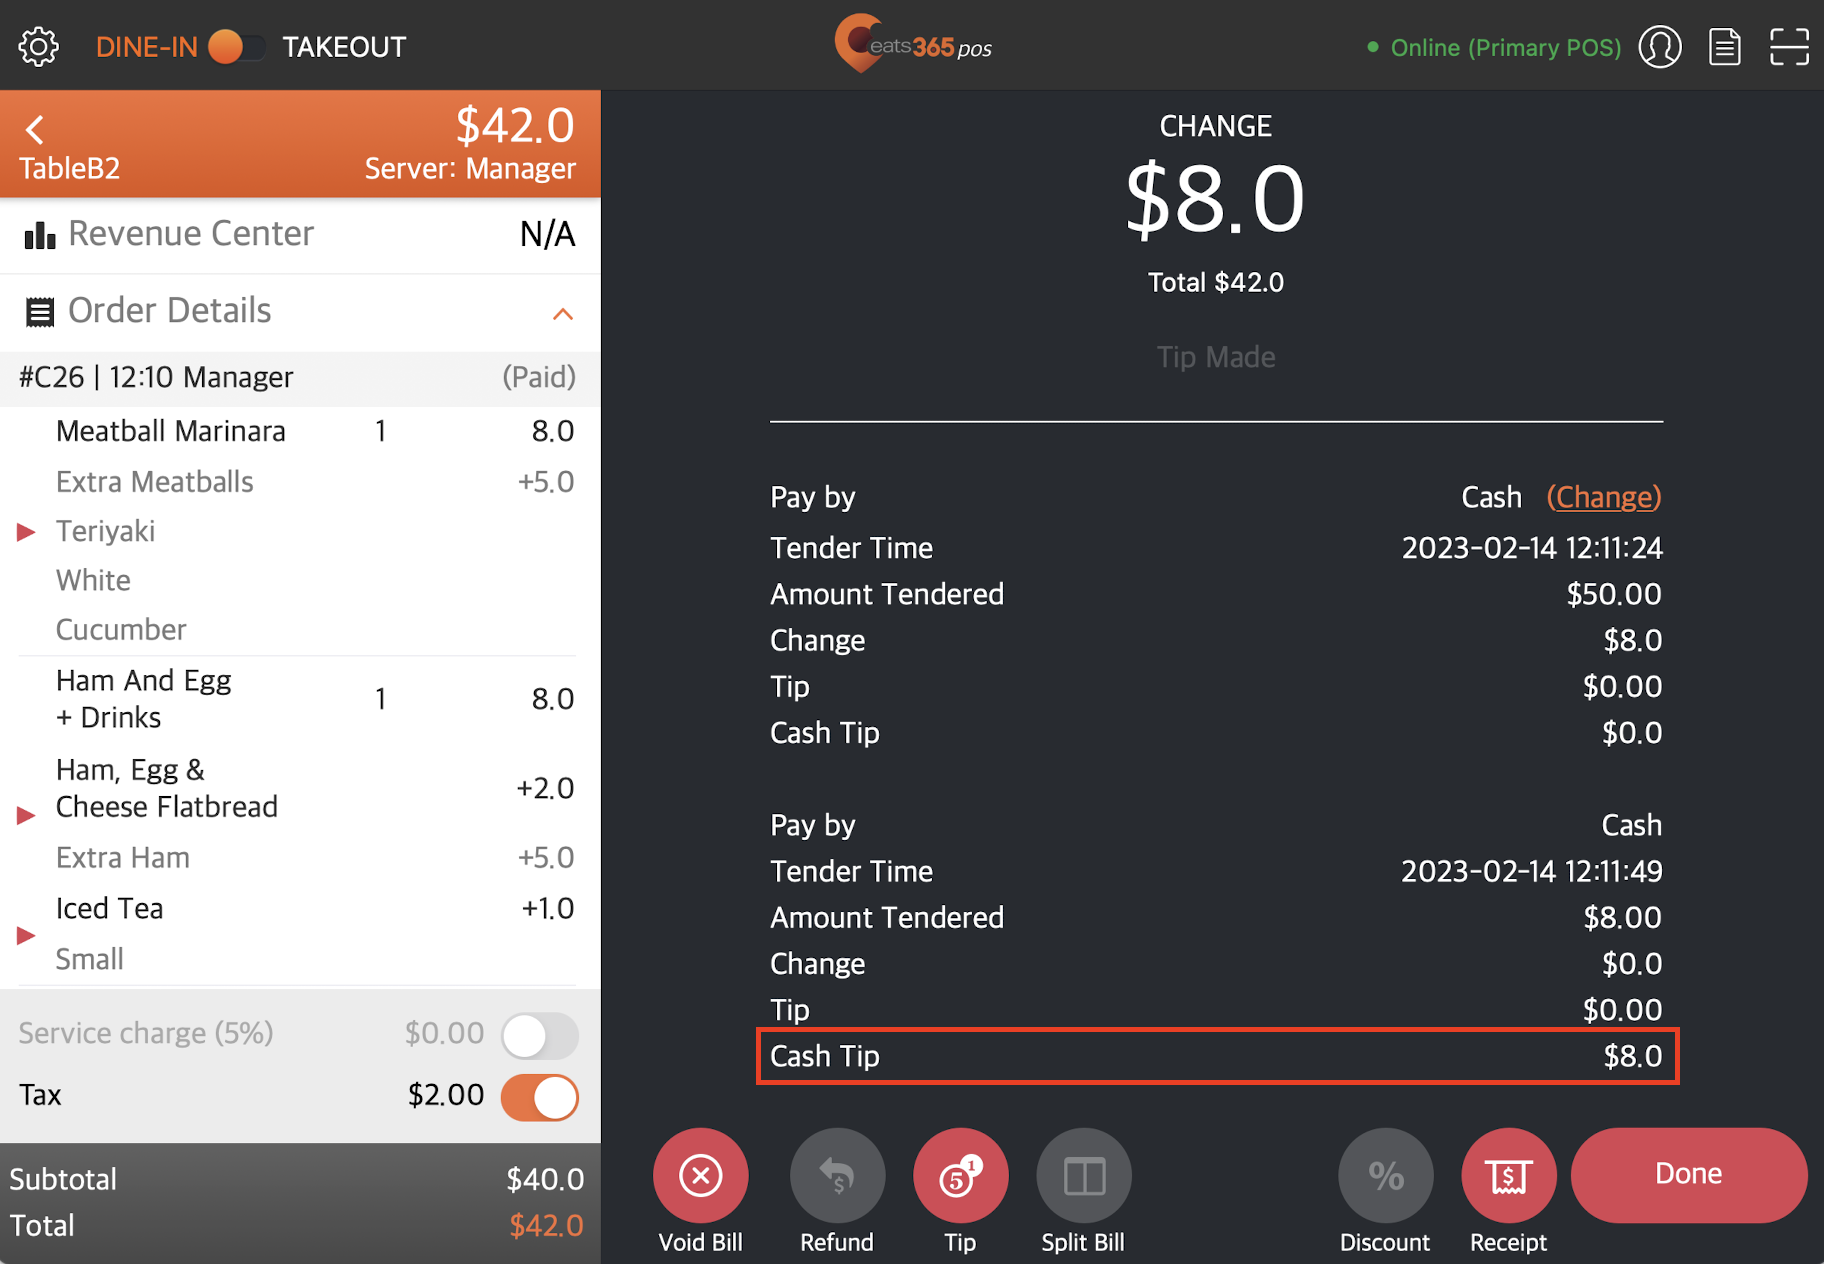
Convert change into a tip
If the customer wants to use their change as a tip, you can convert their change into a tip on the POS. On the payment confirmation screen, tap Make TipConfirm Tip.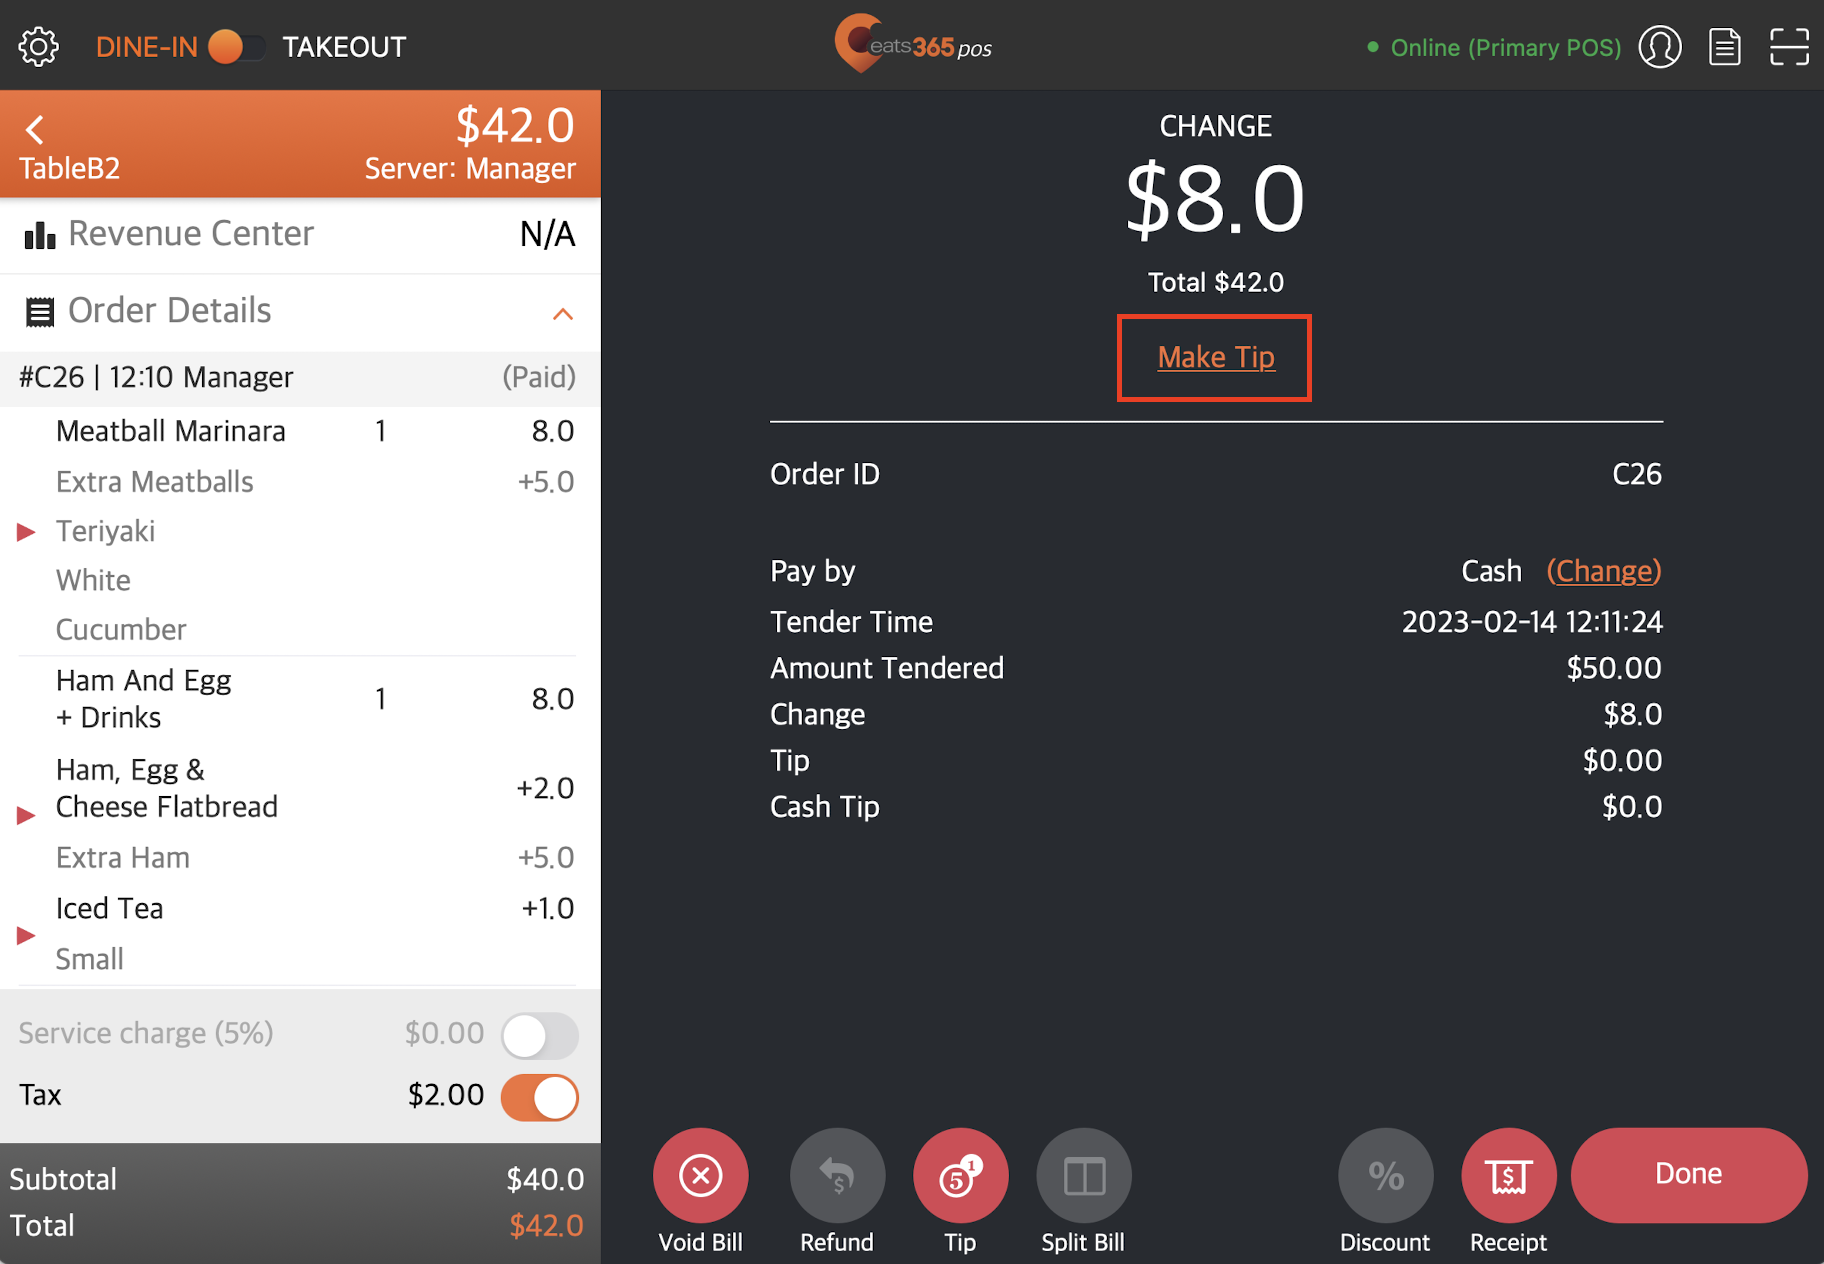
The change is automatically converted into a tip.