 Eats365 Products
 Merchant Guide
 Modules
 Membership
 Integrations
 Hardware
 Staff Operations
 Roles & Permissions
 Payments
 Reports
 What’s New
 Release Notes
 Troubleshooting
 Simulators
 Glossary
 Troubleshooter
 System Status
Menu Setup
Table of Contents
Set up courses
Learn how to create and manage Courses on the Eats365 POS.
"Coursing" allows you to configure menu items to be served at specific points during a meal. This supports structured dining experiences, such as fixed-price (prix fixe) menus, table service, and other multi-course meal formats.
In this article, you’ll learn how to create and manage courses.
Before you begin
You can configure Eats365 POS settings to optimize how you operate item courses. Consider enabling the following settings in your POS app:
| Setting |
Setting location |
|
Force Enter Party Size Displays a prompt that requires you to enter the number of customers. |
|
|
Display by Seat Displays the option to associate specific seats with different orders by default. |
|
|
Course Override Quick Key Displays the option to change courses at the bottom of the order-taking screen. It also allows the POS to override the set course for items and assign a default course for all items. Tip: If course presets are not being used at an item level, it’s recommended to set the default to "Instant." |
|
|
Prep Tickets Sends a print job request to print prep tickets once an order is confirmed. |
|
|
Auto Fire Course Automatically sends a course to the kitchen after a set time Note: Auto Fire Course is only available for system-default courses. If you've created customized courses, you must manually fire the course to send items to the kitchen. |
|
 .
.Create a course by category or by item
Courses are set up in the Menu Setup settings. You can assign courses to categories or individual menu Items. If a course default is assigned to a category, items belonging to that category adopt the same course default. Courses can be modified anytime in the order-taking screen.
Create a course by category
To set a course by category, follow the steps below:
From the Category setting
Eats365 POS
- Log in to the Eats365 POS.
- At the top left, tap Settings
 .
. - Under "General" tap Menu Setup >Category.
- If you have an existing category, tap an existing category. Otherwise, to create a new category, tap Add Category.
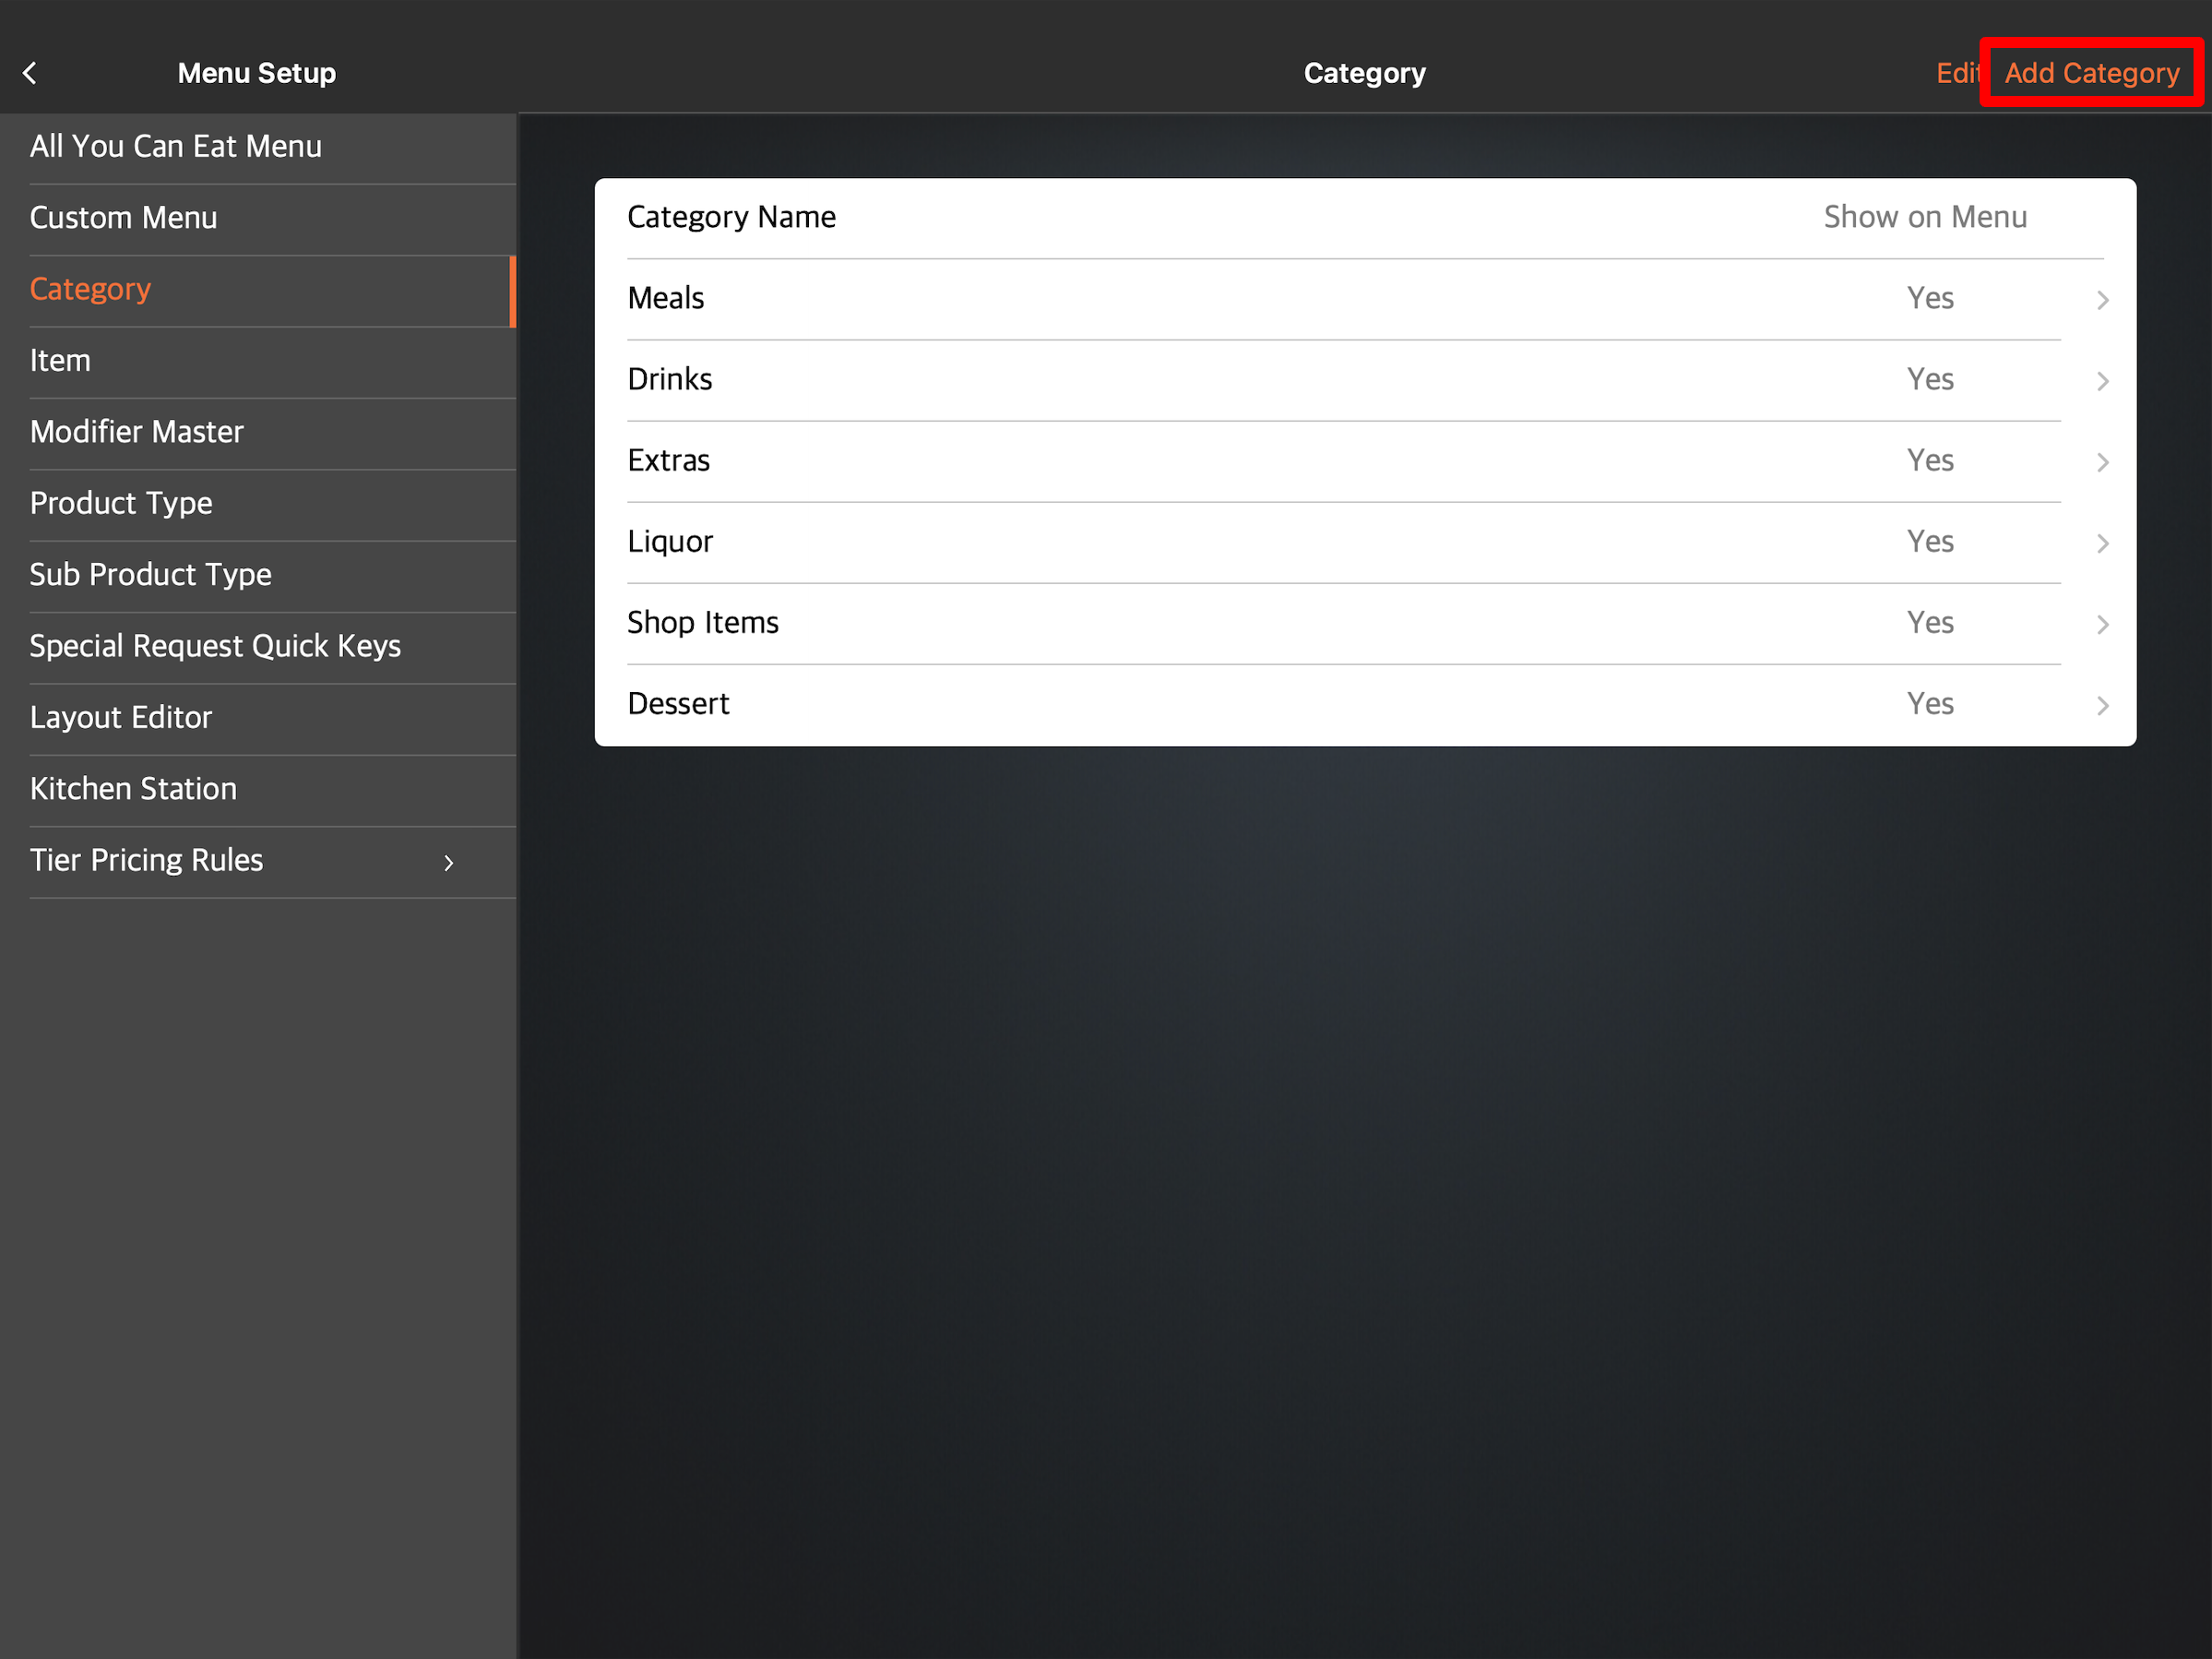
- Next to Course, tap the drop-down menu and assign a default course for the category.
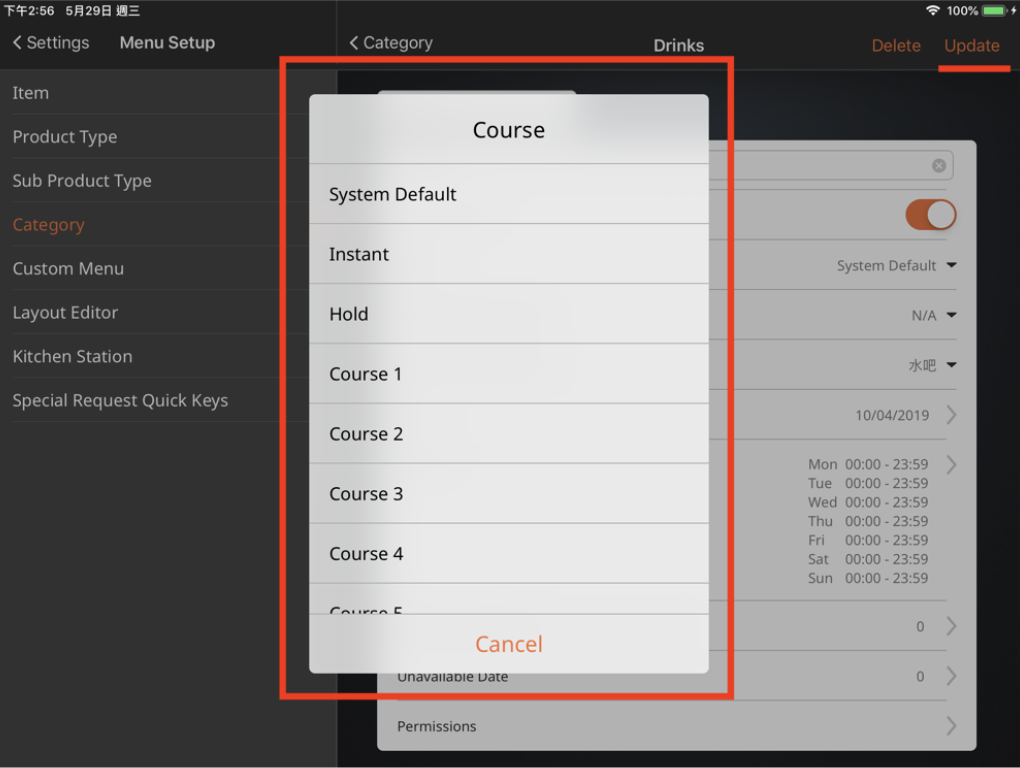
- If you’re adding a course to an existing category, tap Update. Otherwise, tap Save to create a new category.
Merchant Portal
- Log in to the Merchant Portal.
- On the left panel, click on Menu Setup > Category.
- If you have an existing menu item, click on Edit. Otherwise, to create a new category, click on +Category.
- Next to "Course," click on the drop-down menu and assign a course to the category.
- Click on Save to confirm.
From the Coursing setting
- Log in to the Merchant Portal.
- On the left panel, click on Menu setup > Coursing.
- Next to the course that you want to assign to an item, click on Edit.
- To assign a course to a category, select the checkbox next to the category name.
- Click on Save to confirm.
Create a course by menu item
To set a course by menu item, follow the steps below:
From the Item setting
Eats365 POS
- Log in to the Eats365 POS.
- At the top left, tap Settings .
- Under General, tap Menu Setup >Item.
- If you have an existing menu item, tap an existing item. Otherwise, to create a new item, tap Add Item.

- Next to "Course," tap the drop-down menu and assign a default course for the item.
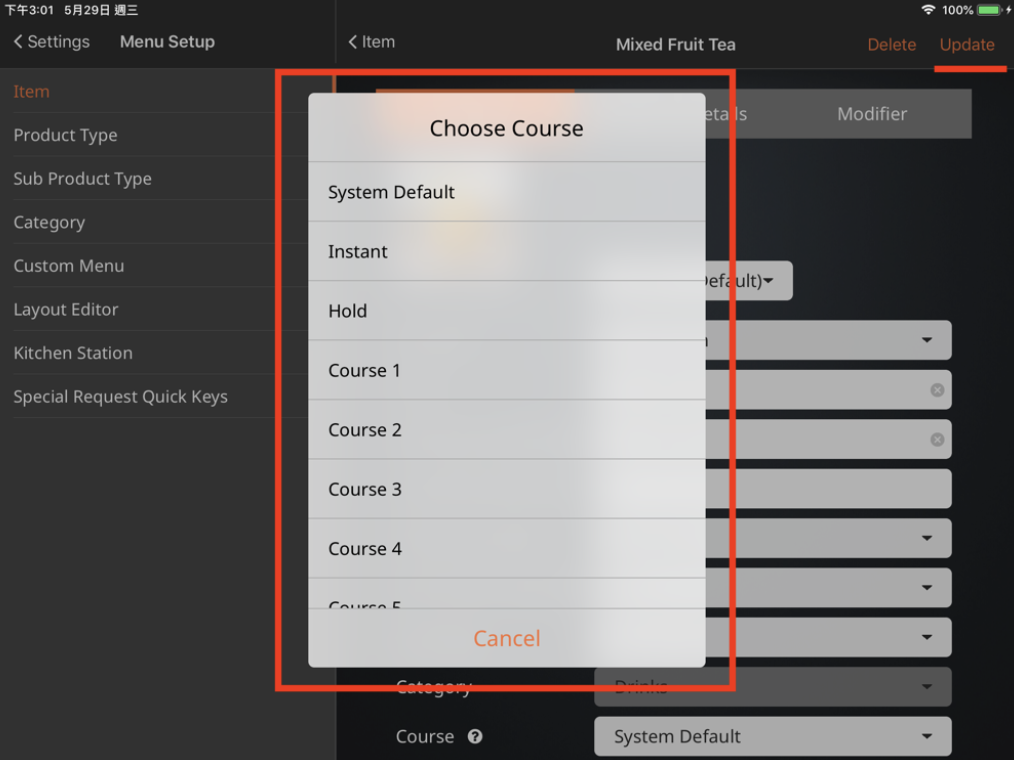
- If you’re adding a course to an existing menu item, Tap Update. Otherwise, tap Save to create a new item.
Merchant Portal
- Log in to the Merchant Portal.
- On the left panel, click on Menu Setup > Item.
- If you have an existing menu item, click on Edit. Otherwise, to create a new item, click on +Single Item or +Combo Item.
- Next to "Course," click on the drop-down menu and assign a course to the item.
- Click on Save to confirm.
From the Coursing setting
- Log in to the Merchant Portal.
- On the left panel, click on Menu setup > Coursing.
- Next to the course that you want to assign to an item, click on Edit.
- To assign a course to individual items, click on the drop-down to expand the category and select the items you want to assign to the course.
- Click on Save to confirm.
Create customized courses
There are eight different courses available on the Eats365 POS by default. To add more courses, you can create your own customized courses.
To create a new course, follow the steps below:
- Log in to the Merchant Portal.
- On the left panel, click on Menu Setup > Coursing.
- At the top right, click on +Add Coursing.
- Enter the course name for each language.
- Next to "Course Colour," select the color that represents the course.
- Next to "Course Number," select the course number associated with the new course.
Note: The priority of the courses will be based on the selected course number. - Under "Included Items," assign the course to a category or an item.
Note: If a category or item is already assigned to a course, the system will override the existing course assignment. - To assign a course to a category, select the checkbox next to the category name.
- To assign a course to individual items, click on the drop-down to expand the category and select the items you want to assign to the course.
- Click on Save to confirm