 Eats365 Products
 Merchant Guide
 Modules
 Membership
 Integrations
 Hardware
 Staff Operations
 Roles & Permissions
 Payments
 Reports
 What’s New
 Release Notes
 Troubleshooting
 Simulators
 Glossary
 Troubleshooter
 System Status
Table Map Setup
Table of Contents
Set up and manage Areas and Tables
Learn how to recreate your restaurant’s table map on the Eats365 POS and the Merchant Portal.
The Table Map Setup setting allows you to create Areas and Tables, which you can customize to resemble your restaurant’s layout. Each table can be assigned a table number, and you can also indicate the number of seats that the table can accommodate.
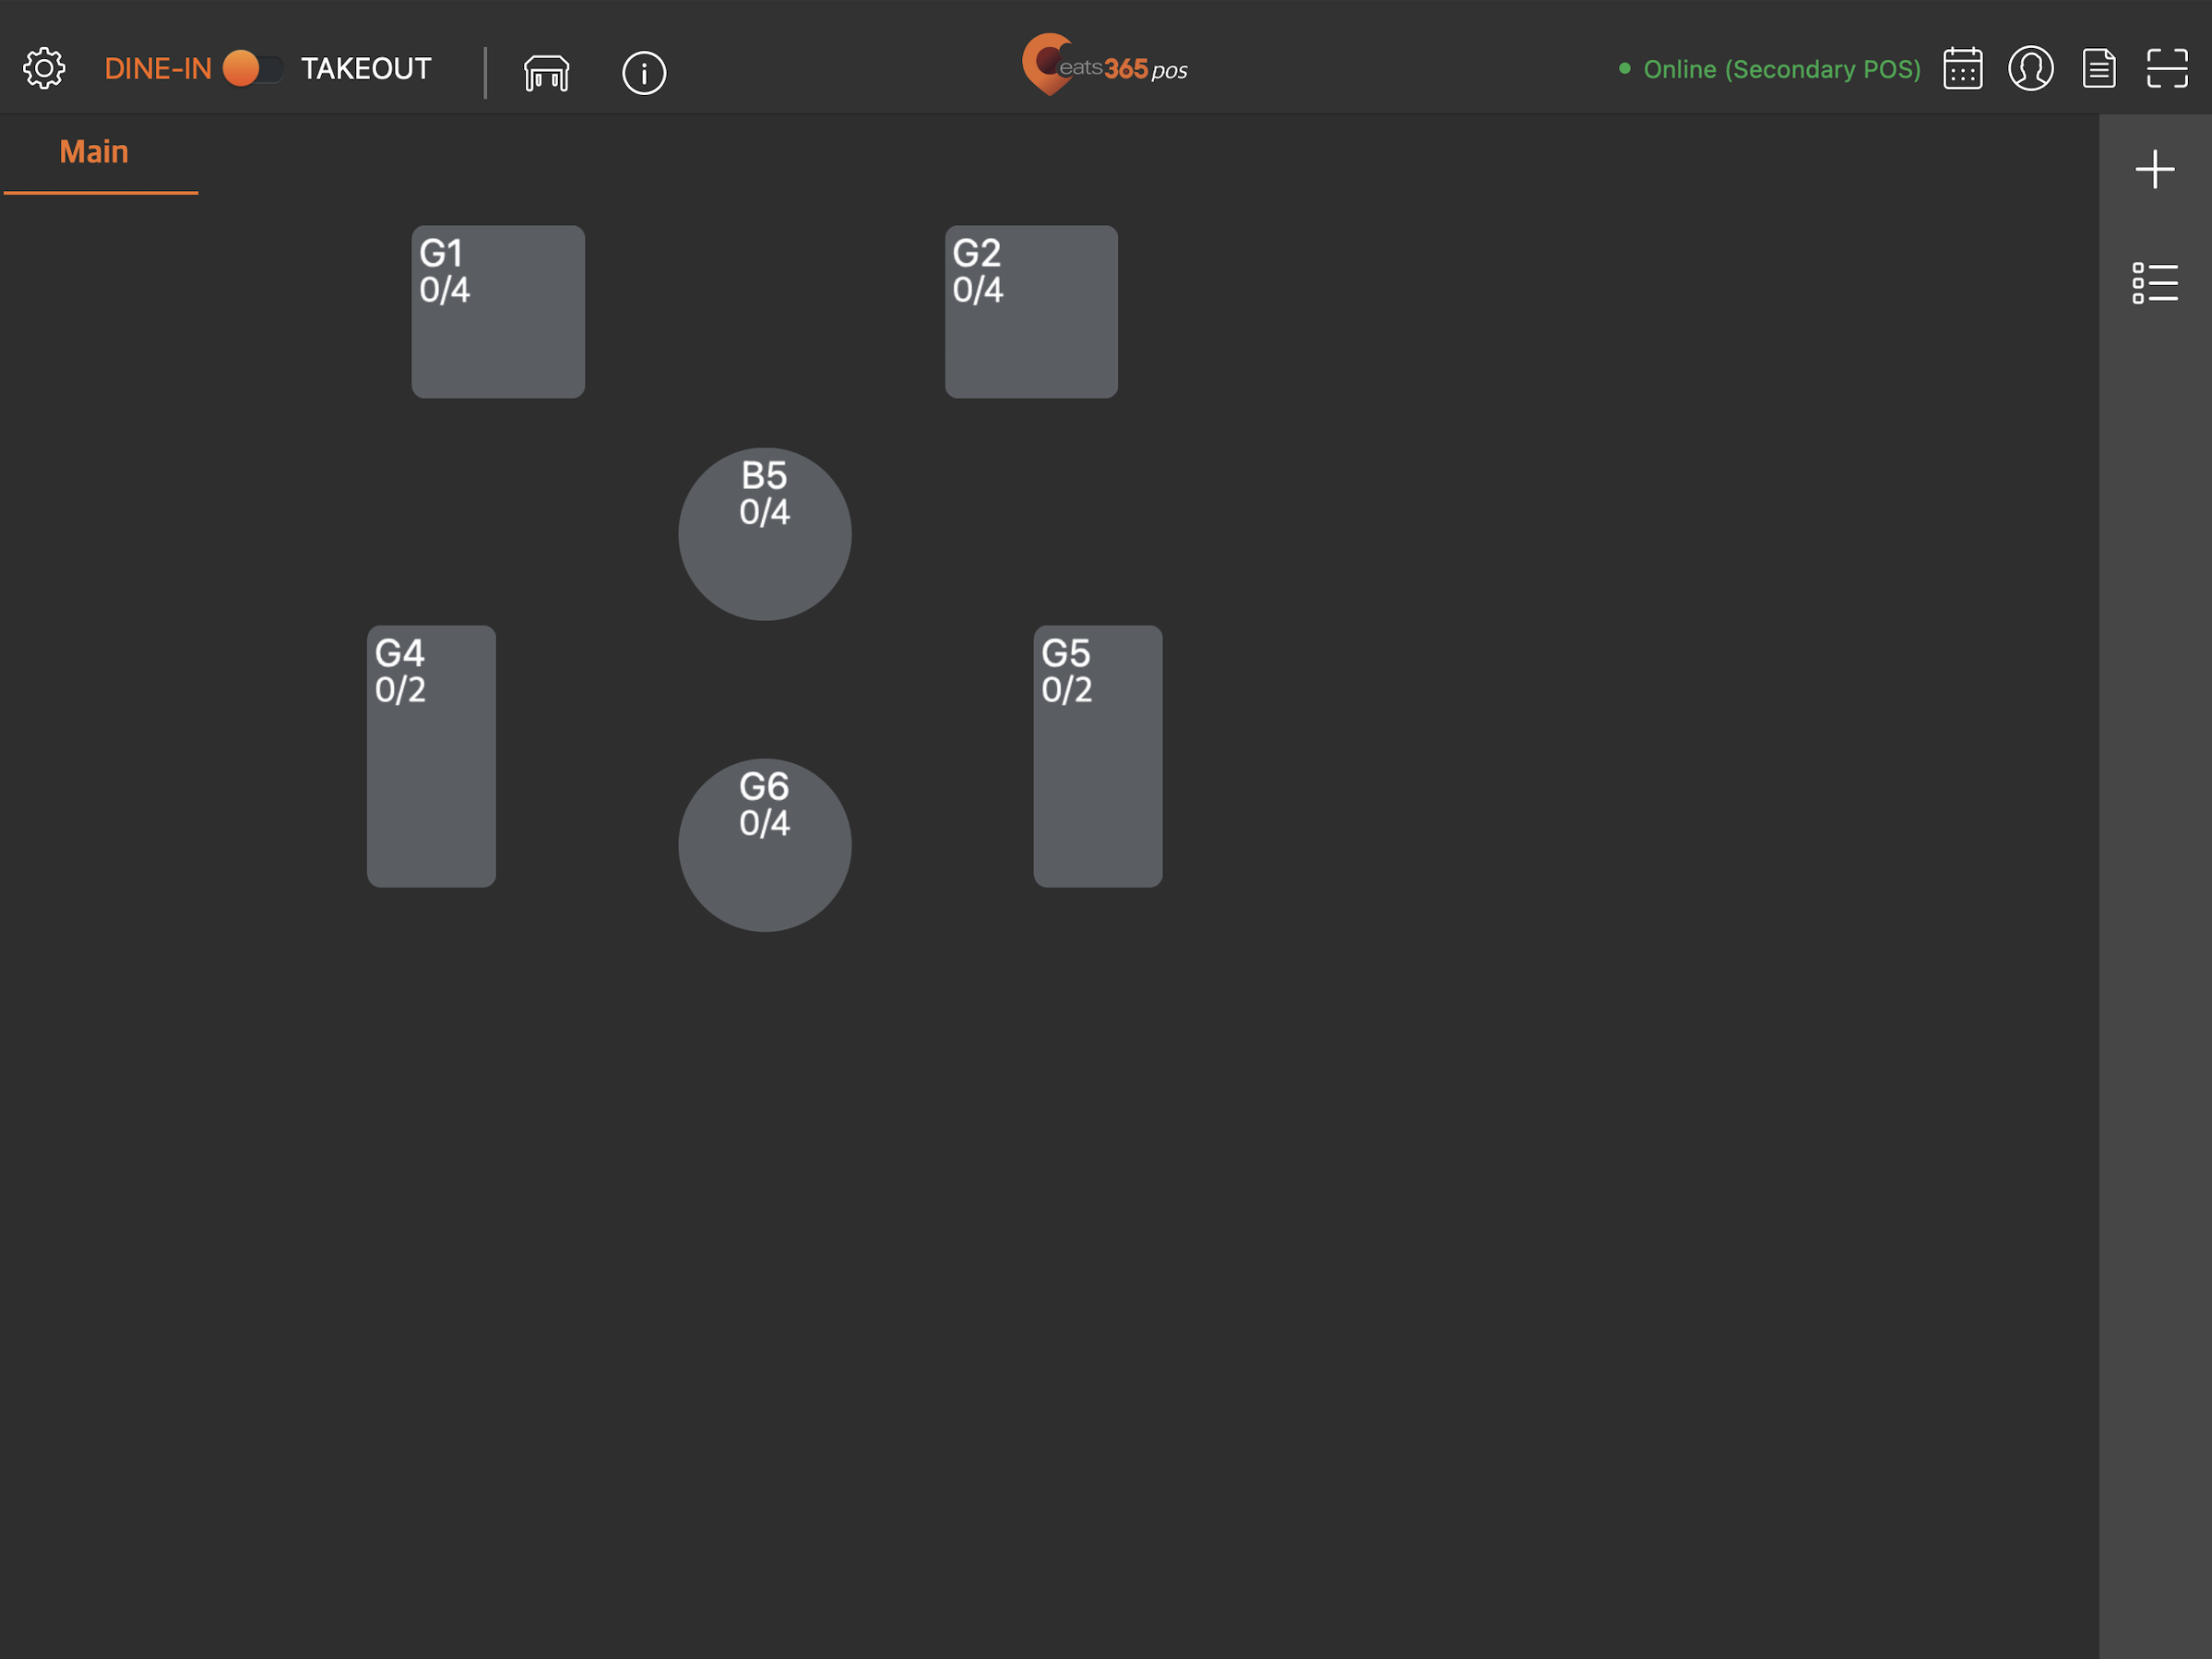 In this article, you’ll learn how to set up areas and tables on the POS, as well as, manage existing areas and tables.
Add an area
An area represents the location where you can create and assign tables to. You can have multiple areas representing different locations of your restaurant, with each area containing multiple tables.
Eats365 POS
- Log in to the Eats365 POS.
- At the top left, tap Settings
 .
. - Under General, tap Table Map Setup.
- At the top right, tap Add, then select New Area.
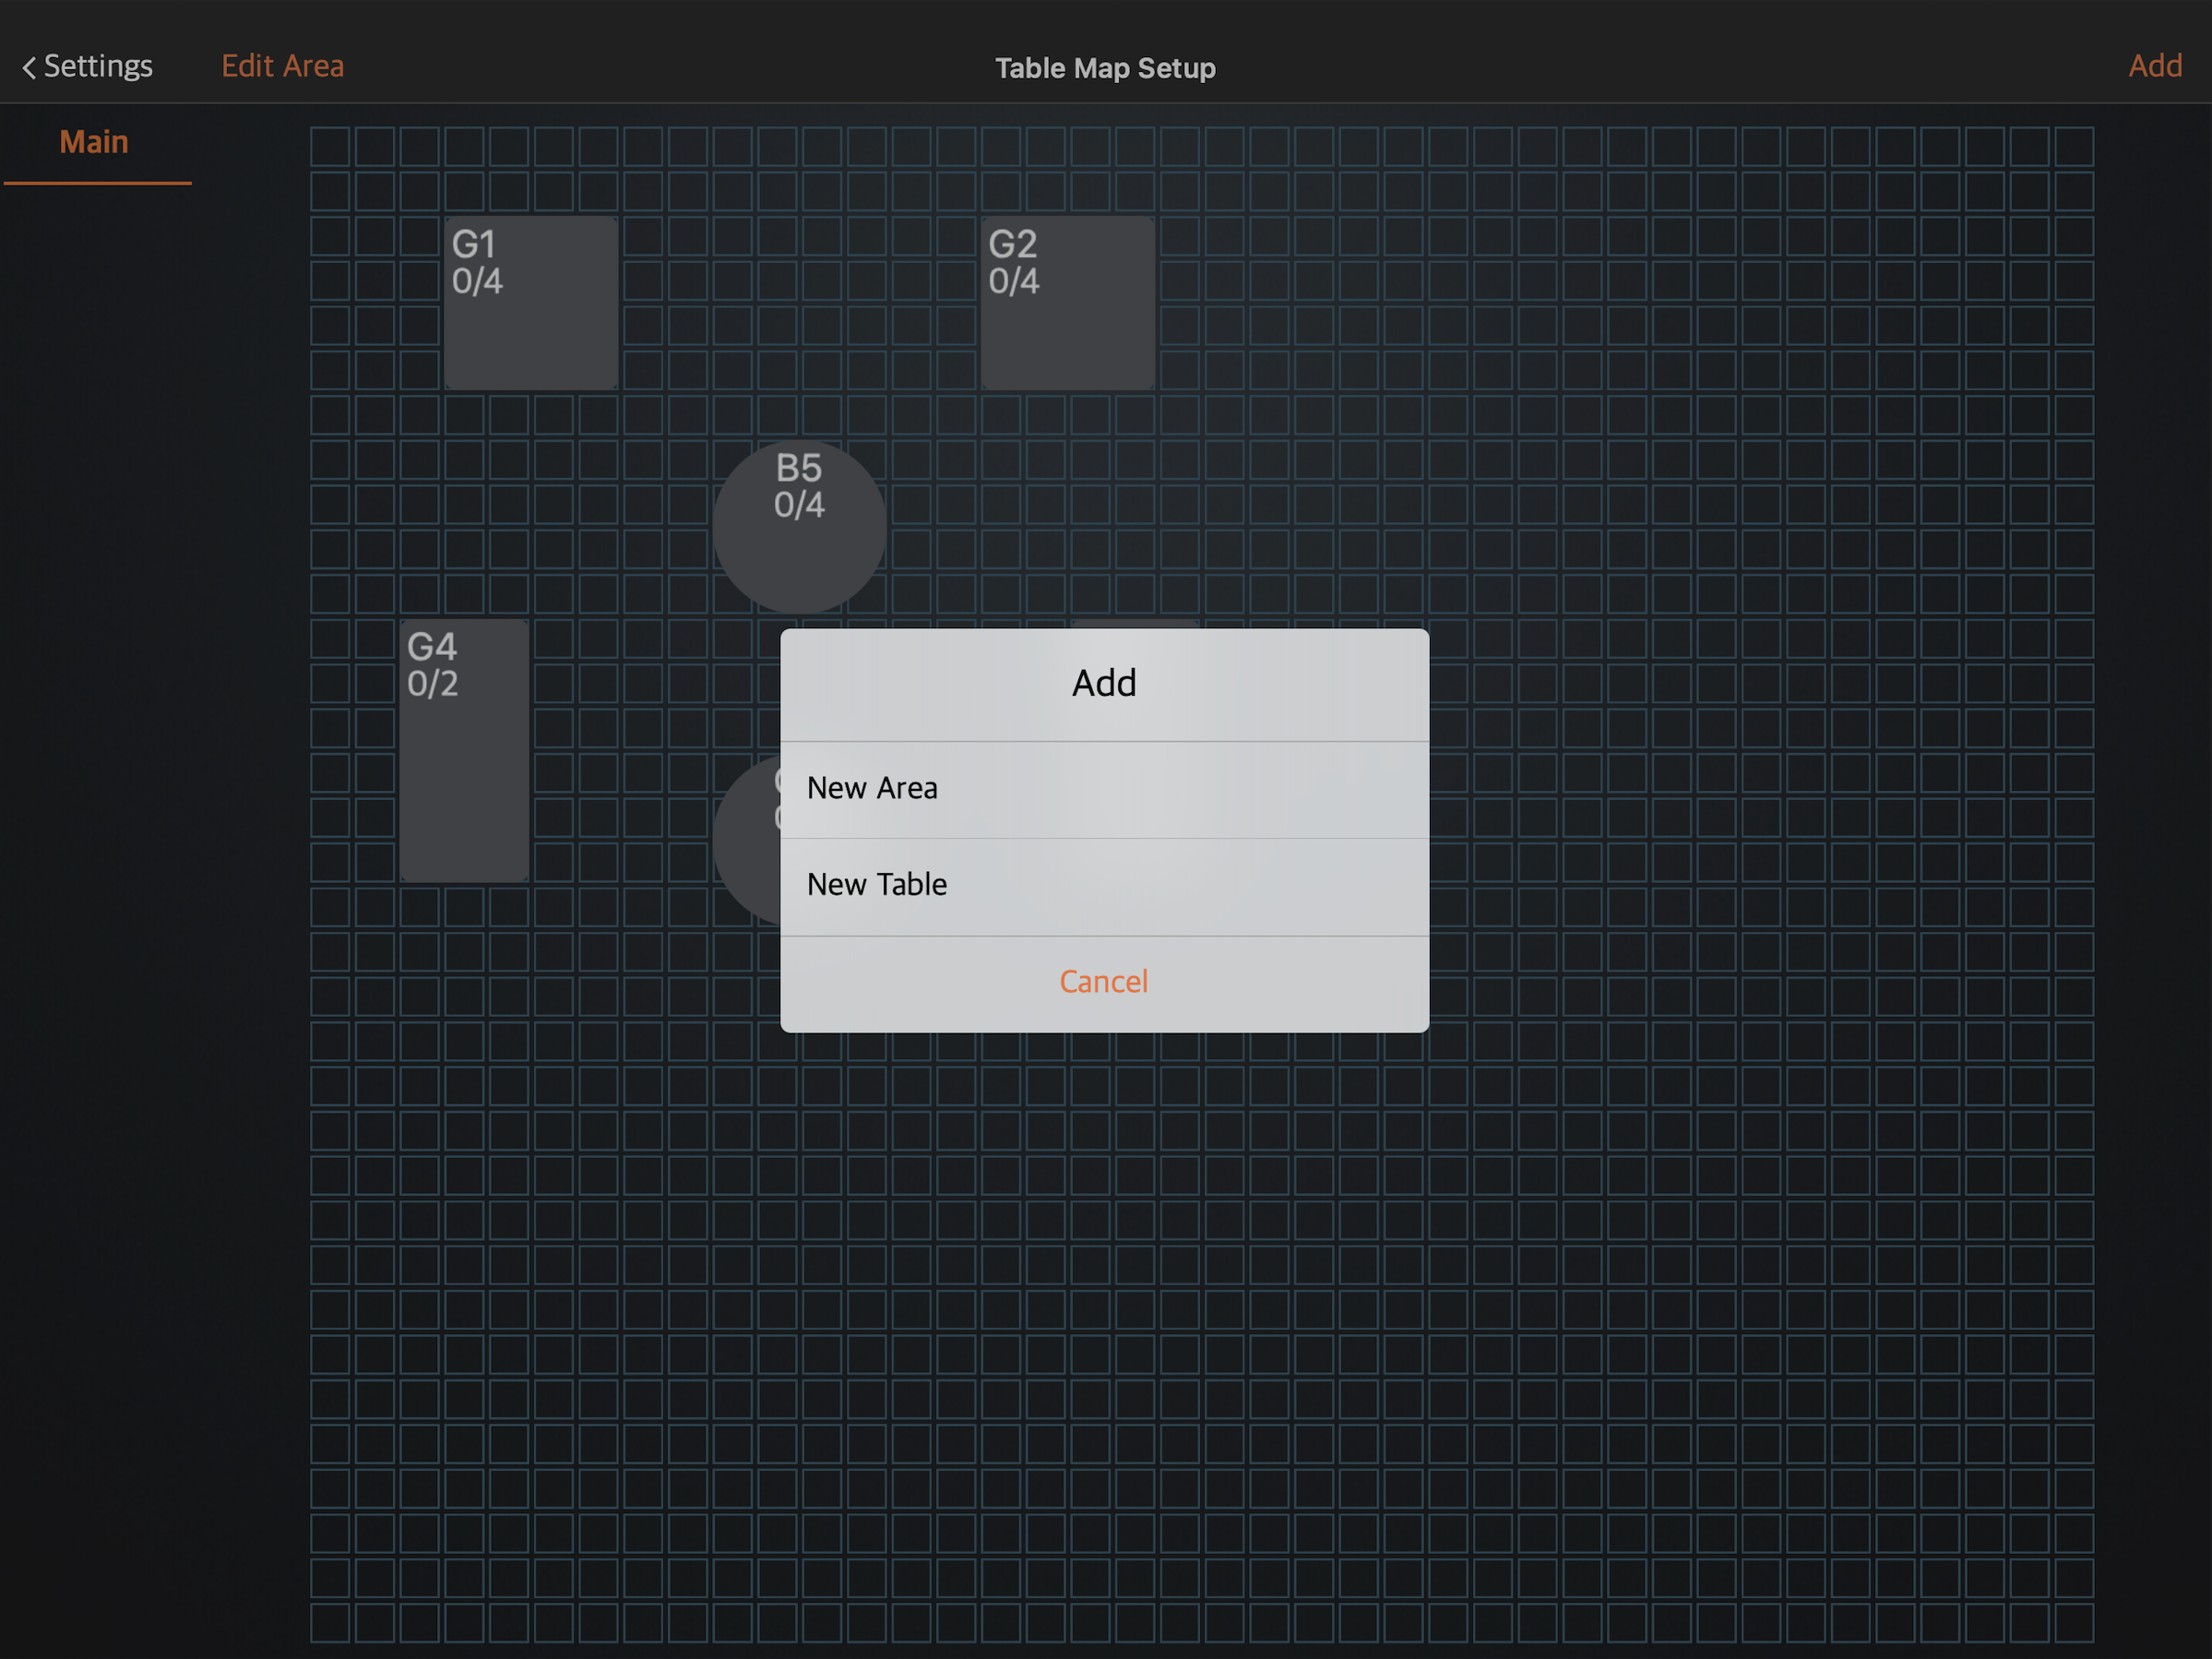
- Enter the area name.
- Tap Add to confirm.
Merchant Portal (Classic Theme)
- Log in to the Merchant Portal.
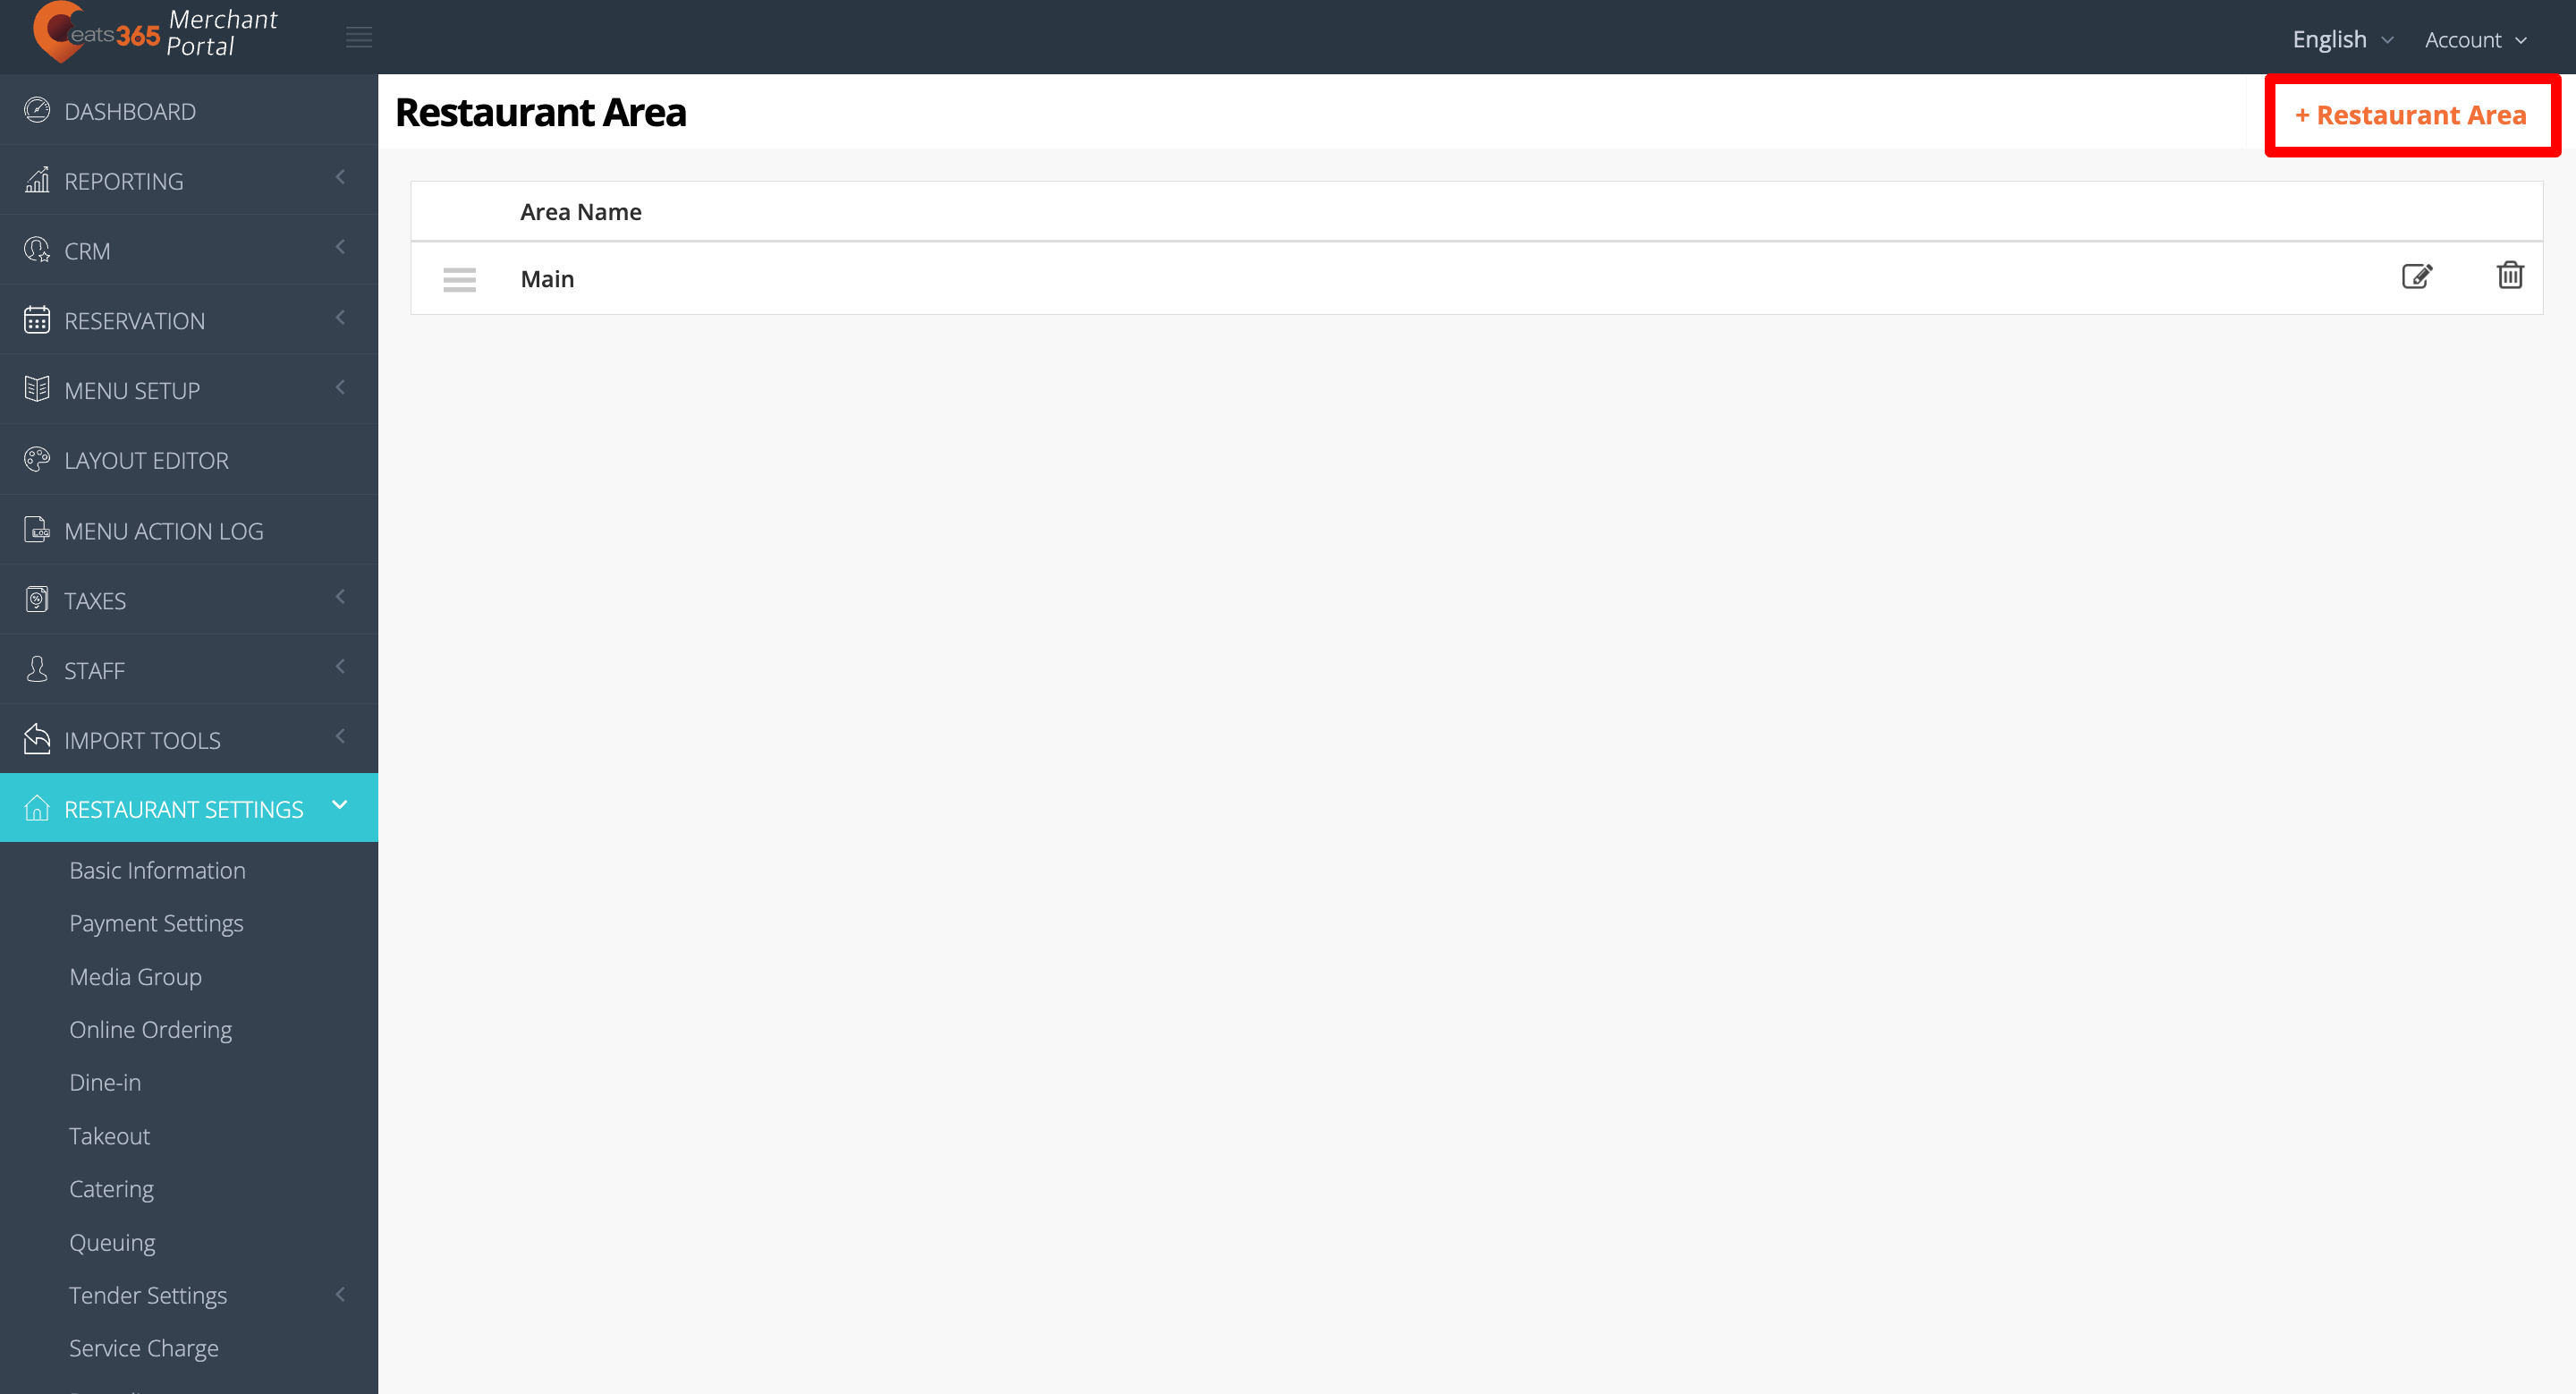
- On the left panel, click on Restaurant Settings. Then, select Table Map Setup.
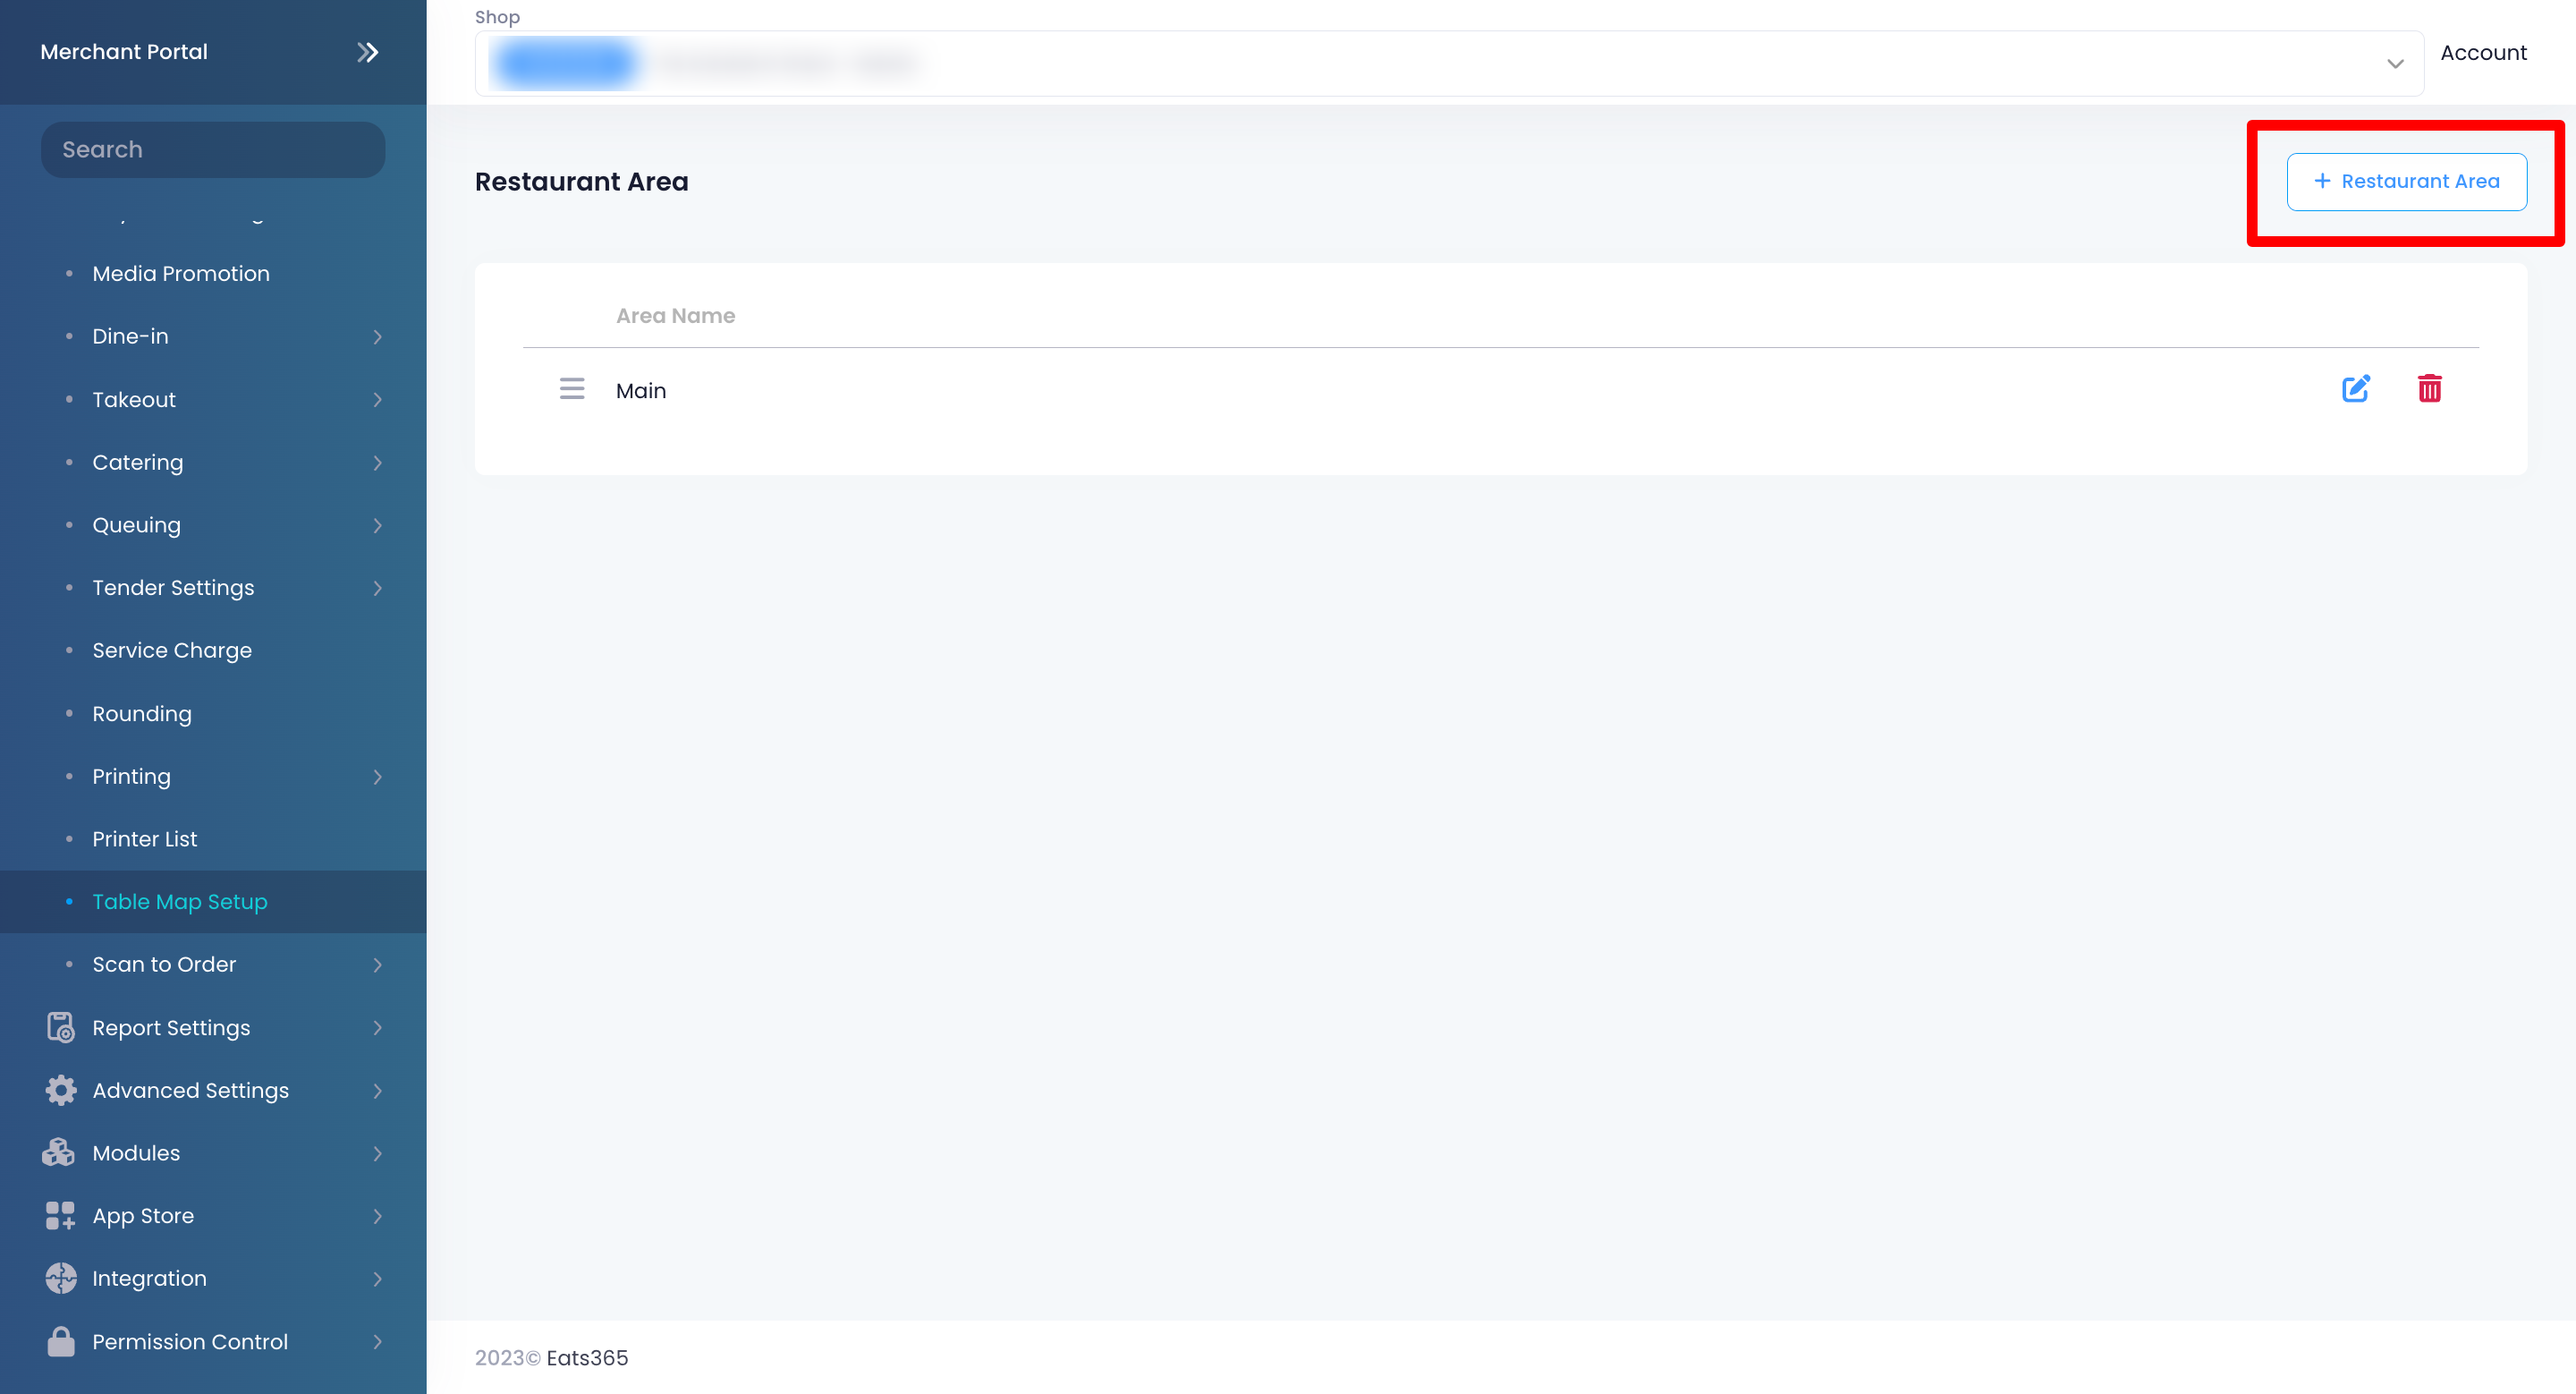
- At the top right, click on +Restaurant Area.
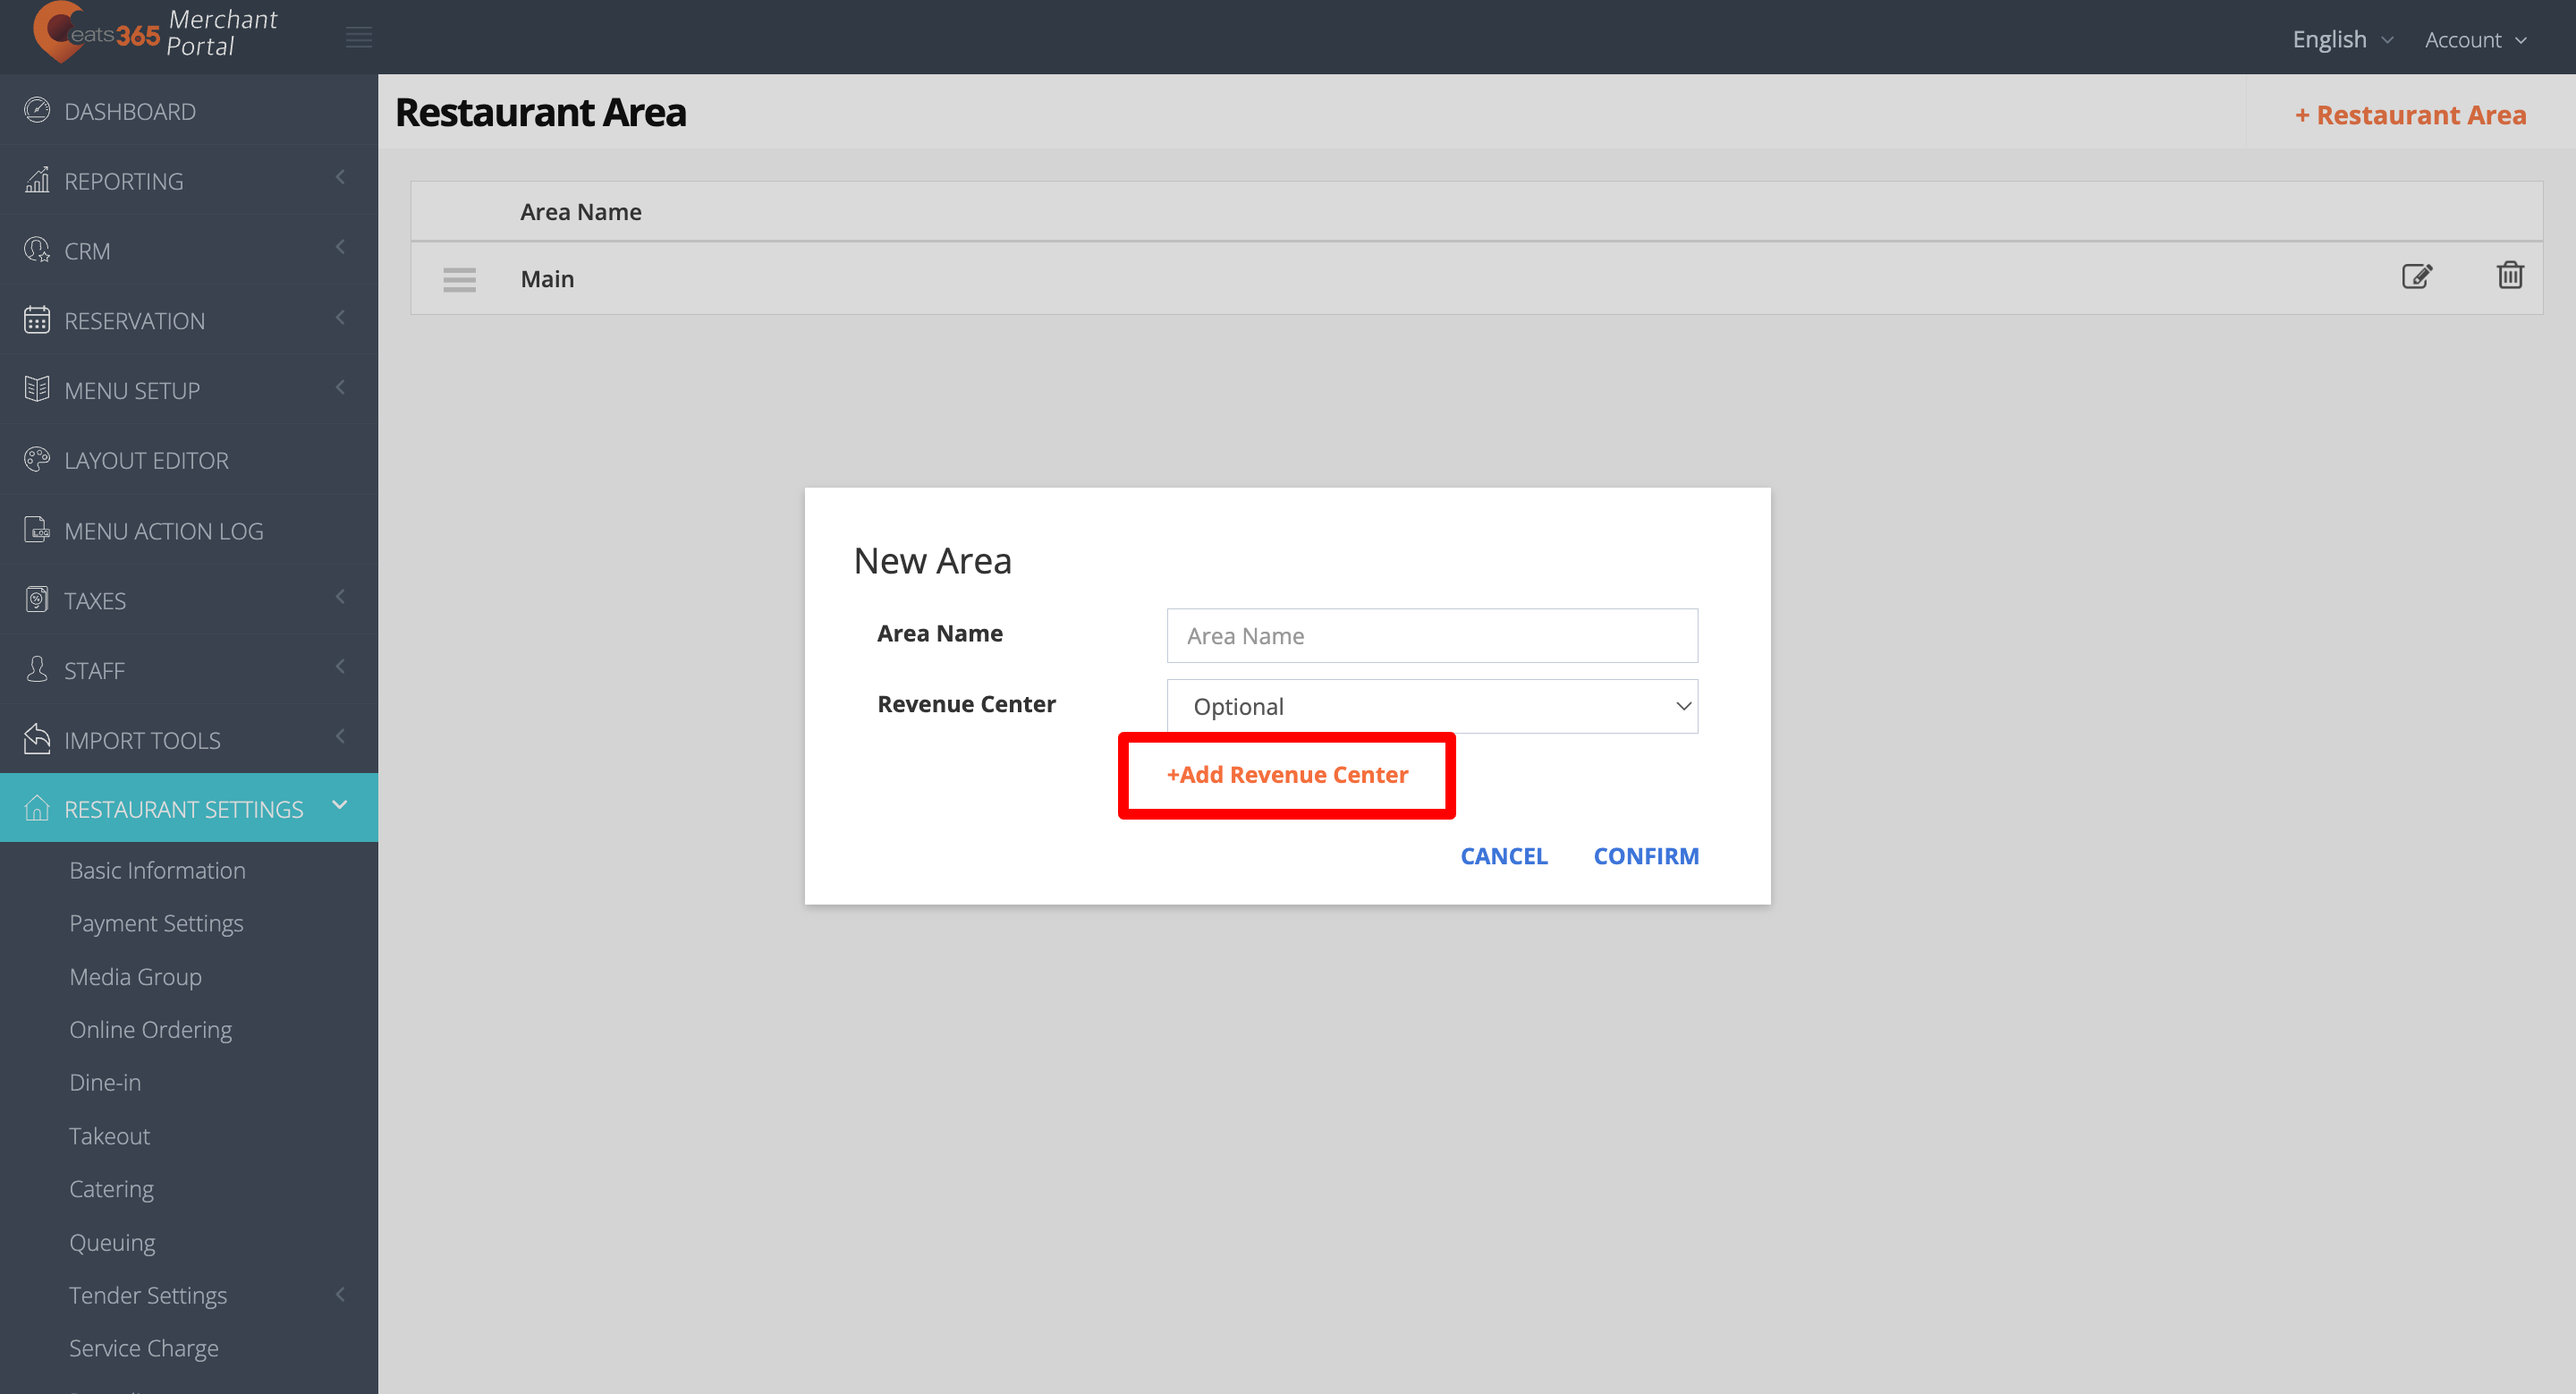
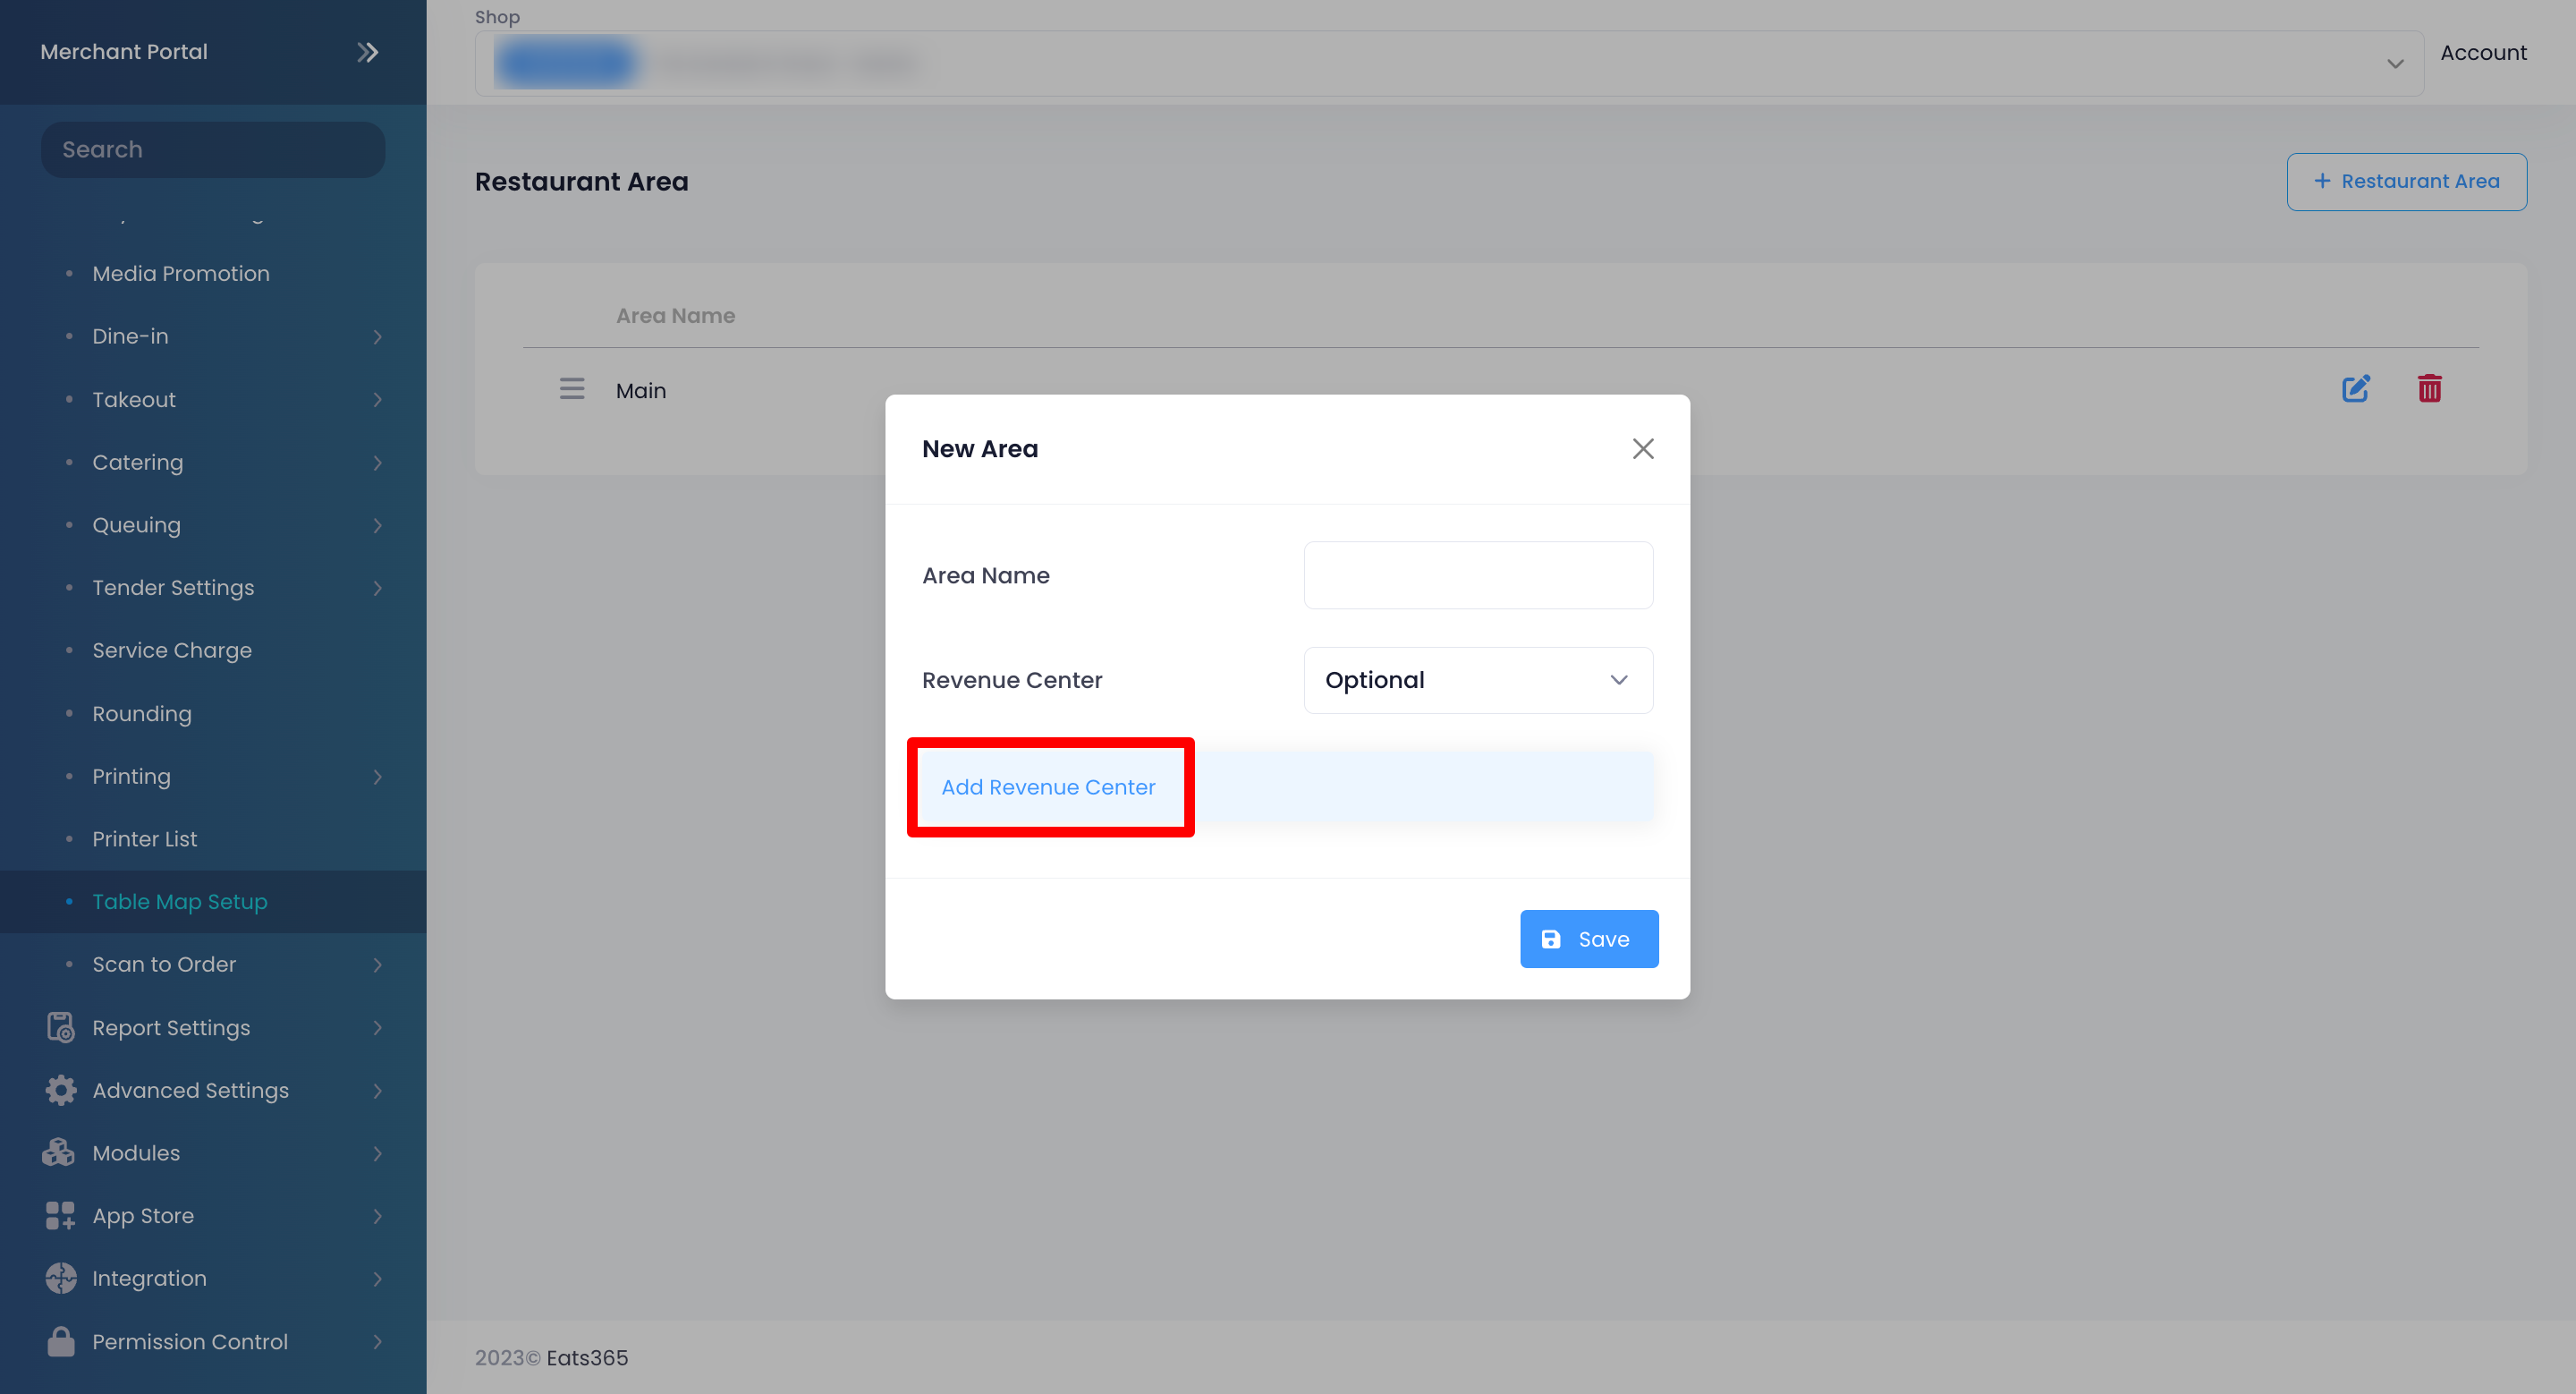
- Enter the area name.
- (Optional) To add a Revenue Center, click on +Add Revenue Center. Then, enter the Revenue Center name.
 Tip: Revenue Centers are used in reporting differentiating total income for your restaurant. For example, if your restaurant has a bar, a dining, and a grab 'n' go area, you can create three separate Revenue Centers for each area to analyze the profits of each area. You can also create a Revenue Center from the System Preferences settings. For more information, refer to Manage System Preferences.
 - Click on Confirm to finish.
Merchant Portal 2.0
- Log in to the Merchant Portal.
- On the left panel, click on Restaurant Settings. Then, select Table Map Setup.
- At the top right, click on +Restaurant Area.
- Enter the area name.
- (Optional) To add a Revenue Center, click on Add Revenue Center. Then, enter the Revenue Center name.
 Tip: Revenue Centers are used in reporting differentiating total income for your restaurant. For example, if your restaurant has a bar, a dining, and a grab 'n' go area, you can create three separate Revenue Centers for each area to analyze the profits of each area. You can also create a Revenue Center from the System Preferences settings. For more information, refer to Manage System Preferences.
 - Click on Save to finish.
Manage areas
Reorder areas
To change the order of your areas, follow the steps below:
Eats365 POS
- Log in to the Eats365 POS.
- At the top left, tap Settings .
- Under General, tap Table Map Setup.
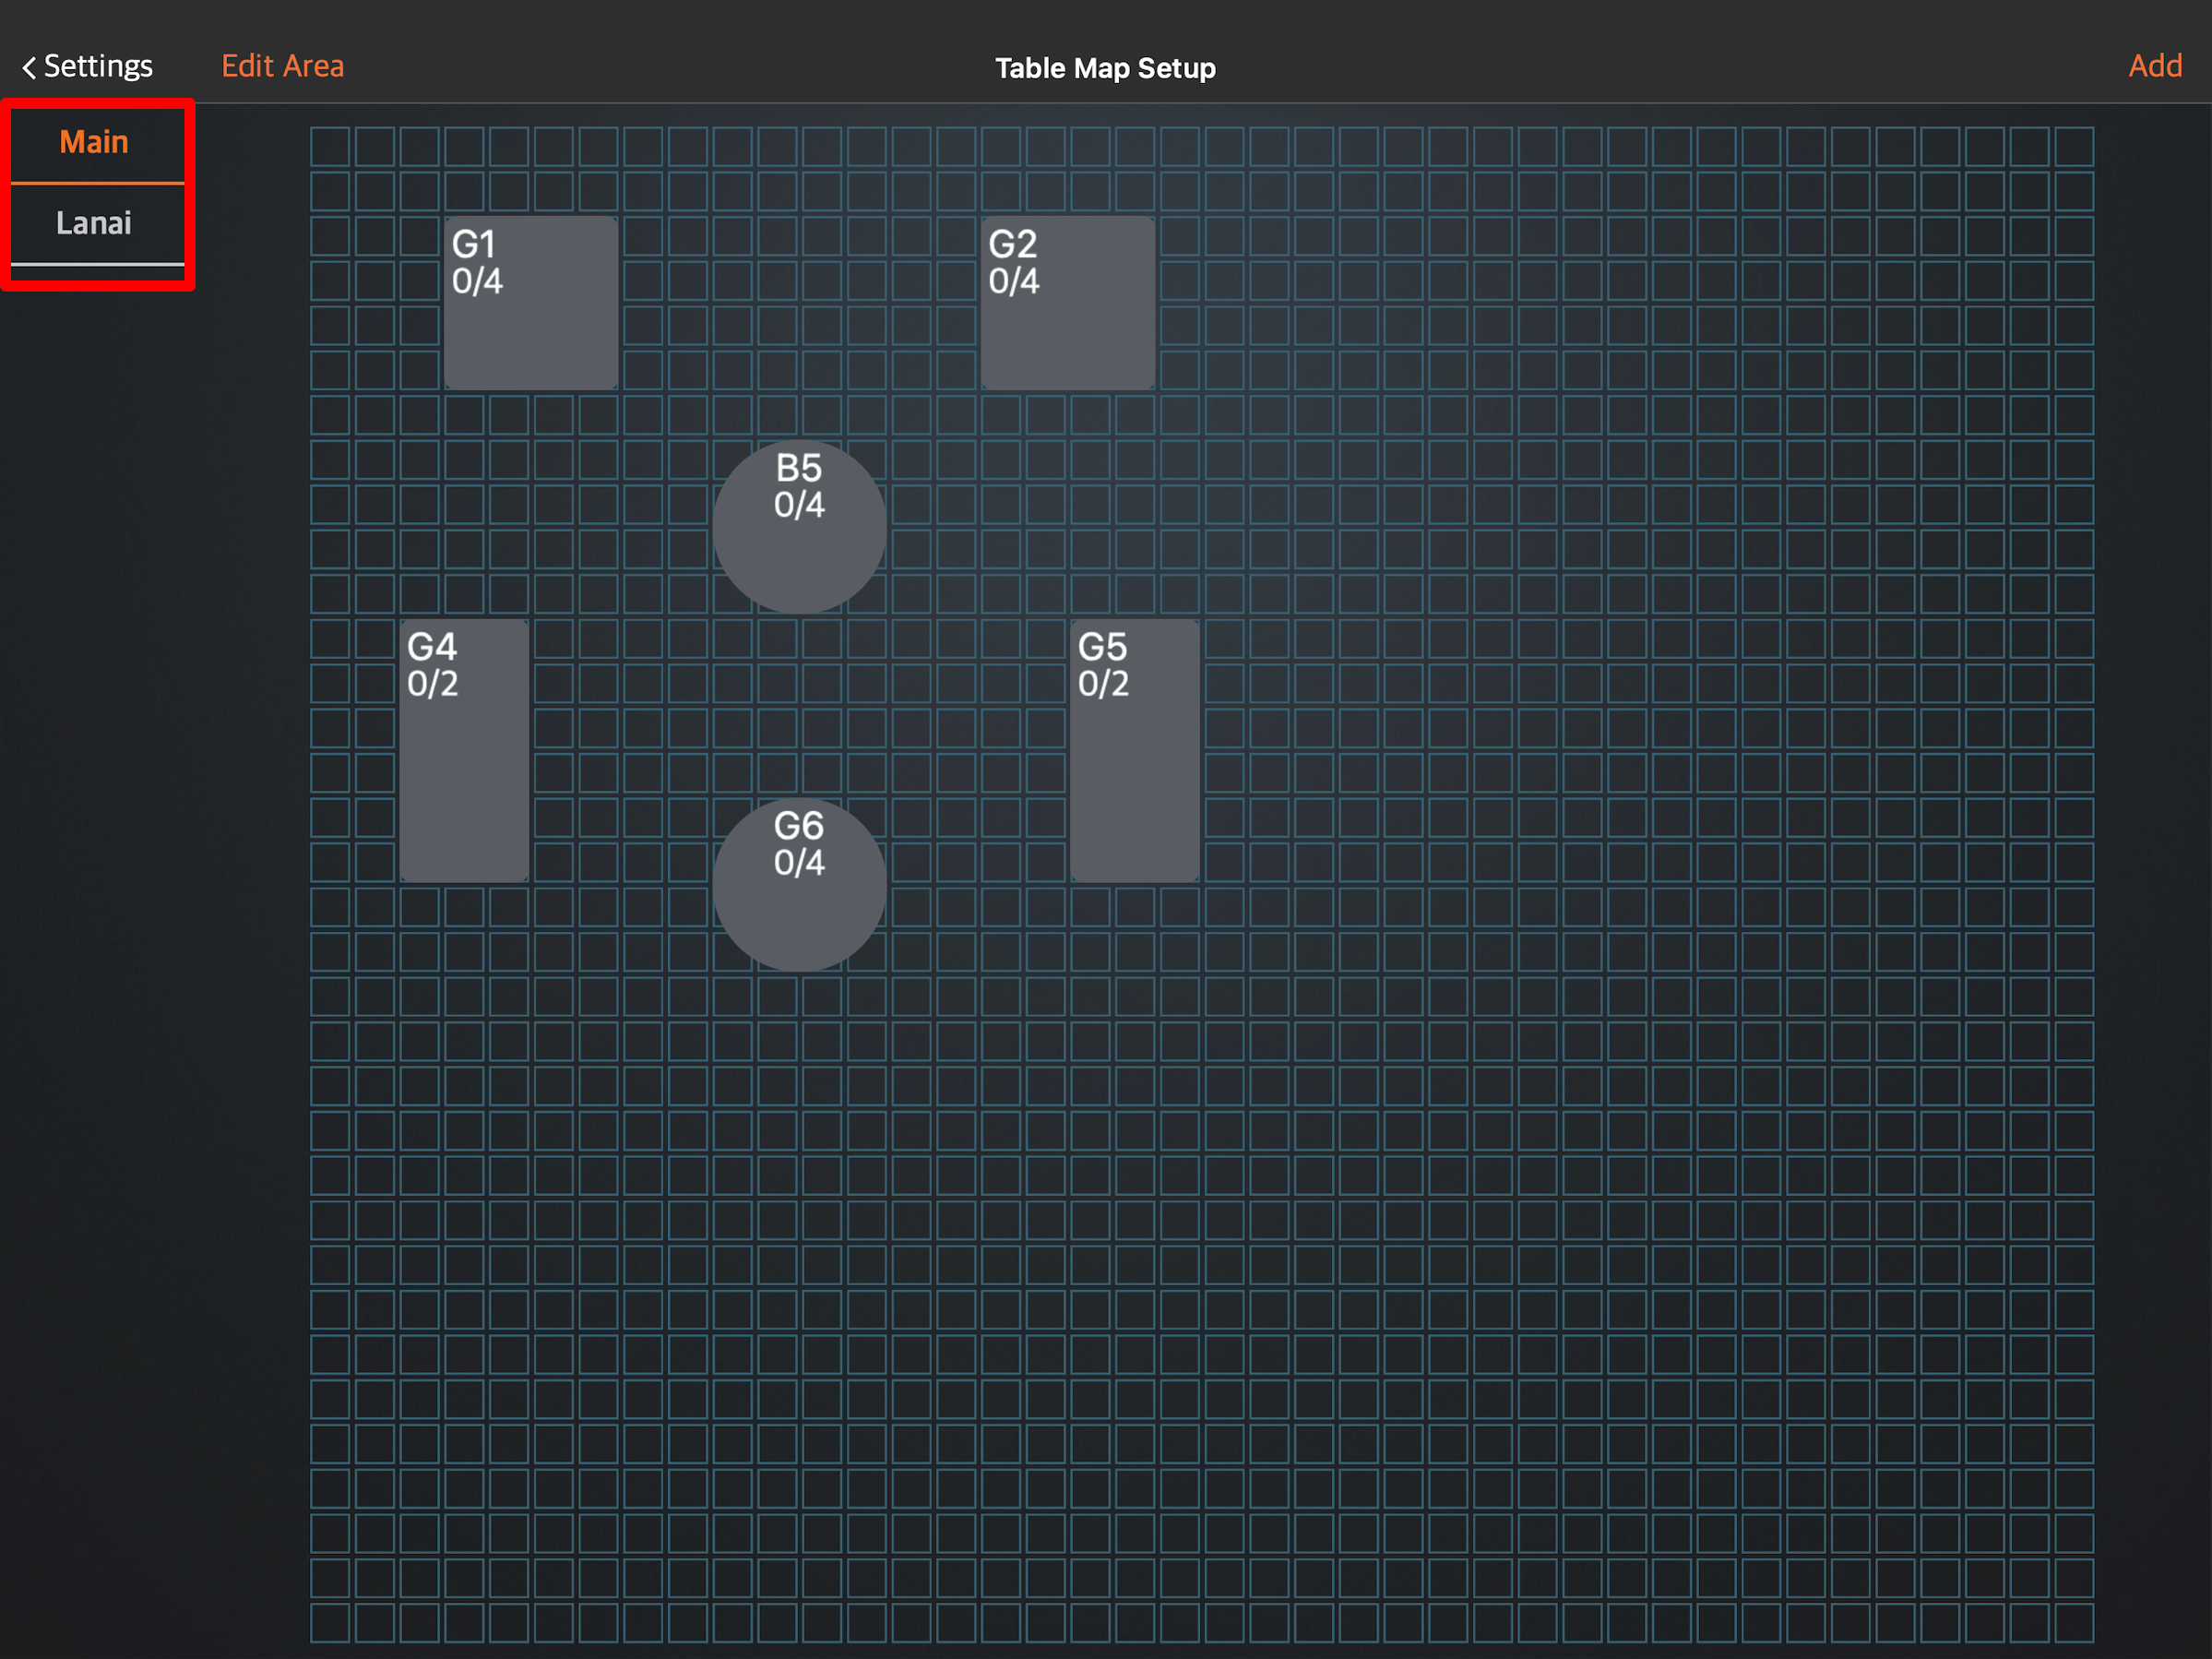
- On the left panel, tap and hold the area that you’d like to reorder. Then, drag the area up or down to your preferred position.
Merchant Portal (Classic Theme)
- Log in to the Merchant Portal.
- On the left panel, click on Restaurant Settings. Then, select Table Map Setup.
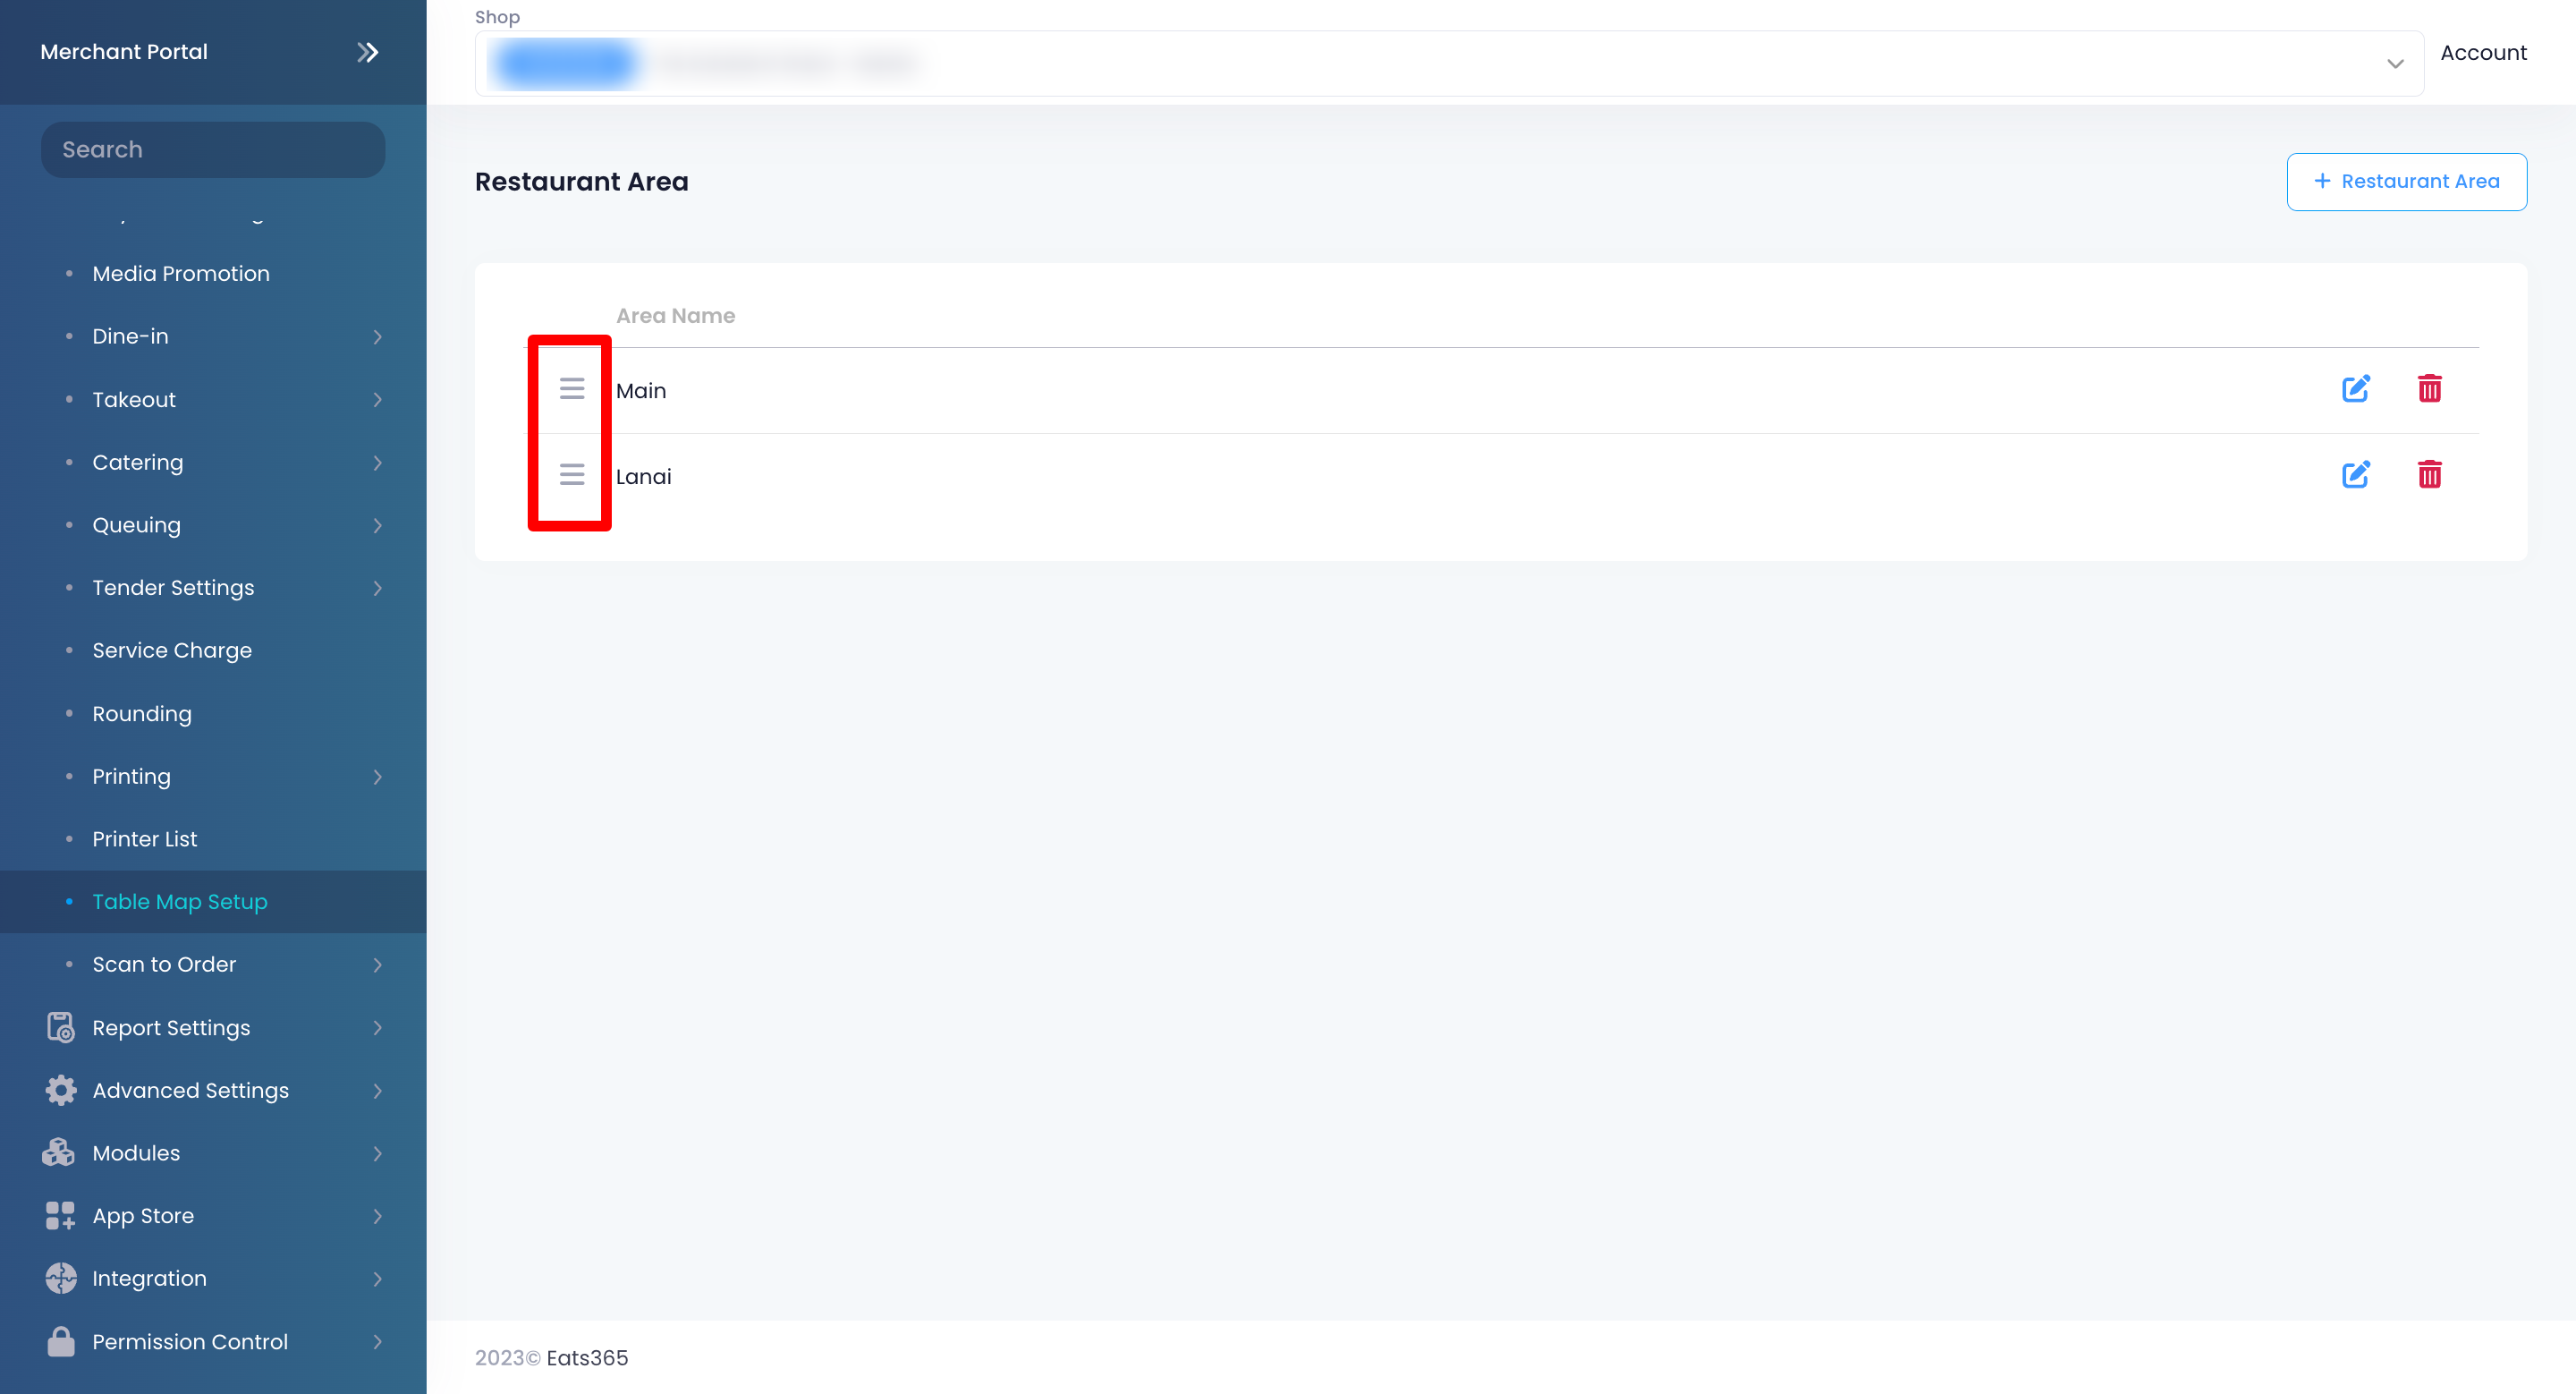
- Next to the area that you’d like to reorder, click and hold Reorder
 . Then, drag the area up or down to your preferred position.
Merchant Portal 2.0
- Log in to the Merchant Portal.
- On the left panel, click on Restaurant Settings. Then, select Table Map Setup.
- Next to the area that you’d like to reorder, click and hold Reorder. Then, drag the area up or down to your preferred position.
Edit an area
To rename an area, follow the steps below:
Eats365 POS
- Log in to the Eats365 POS.
- At the top left, tap Settings .
- Under General, tap Table Map Setup.
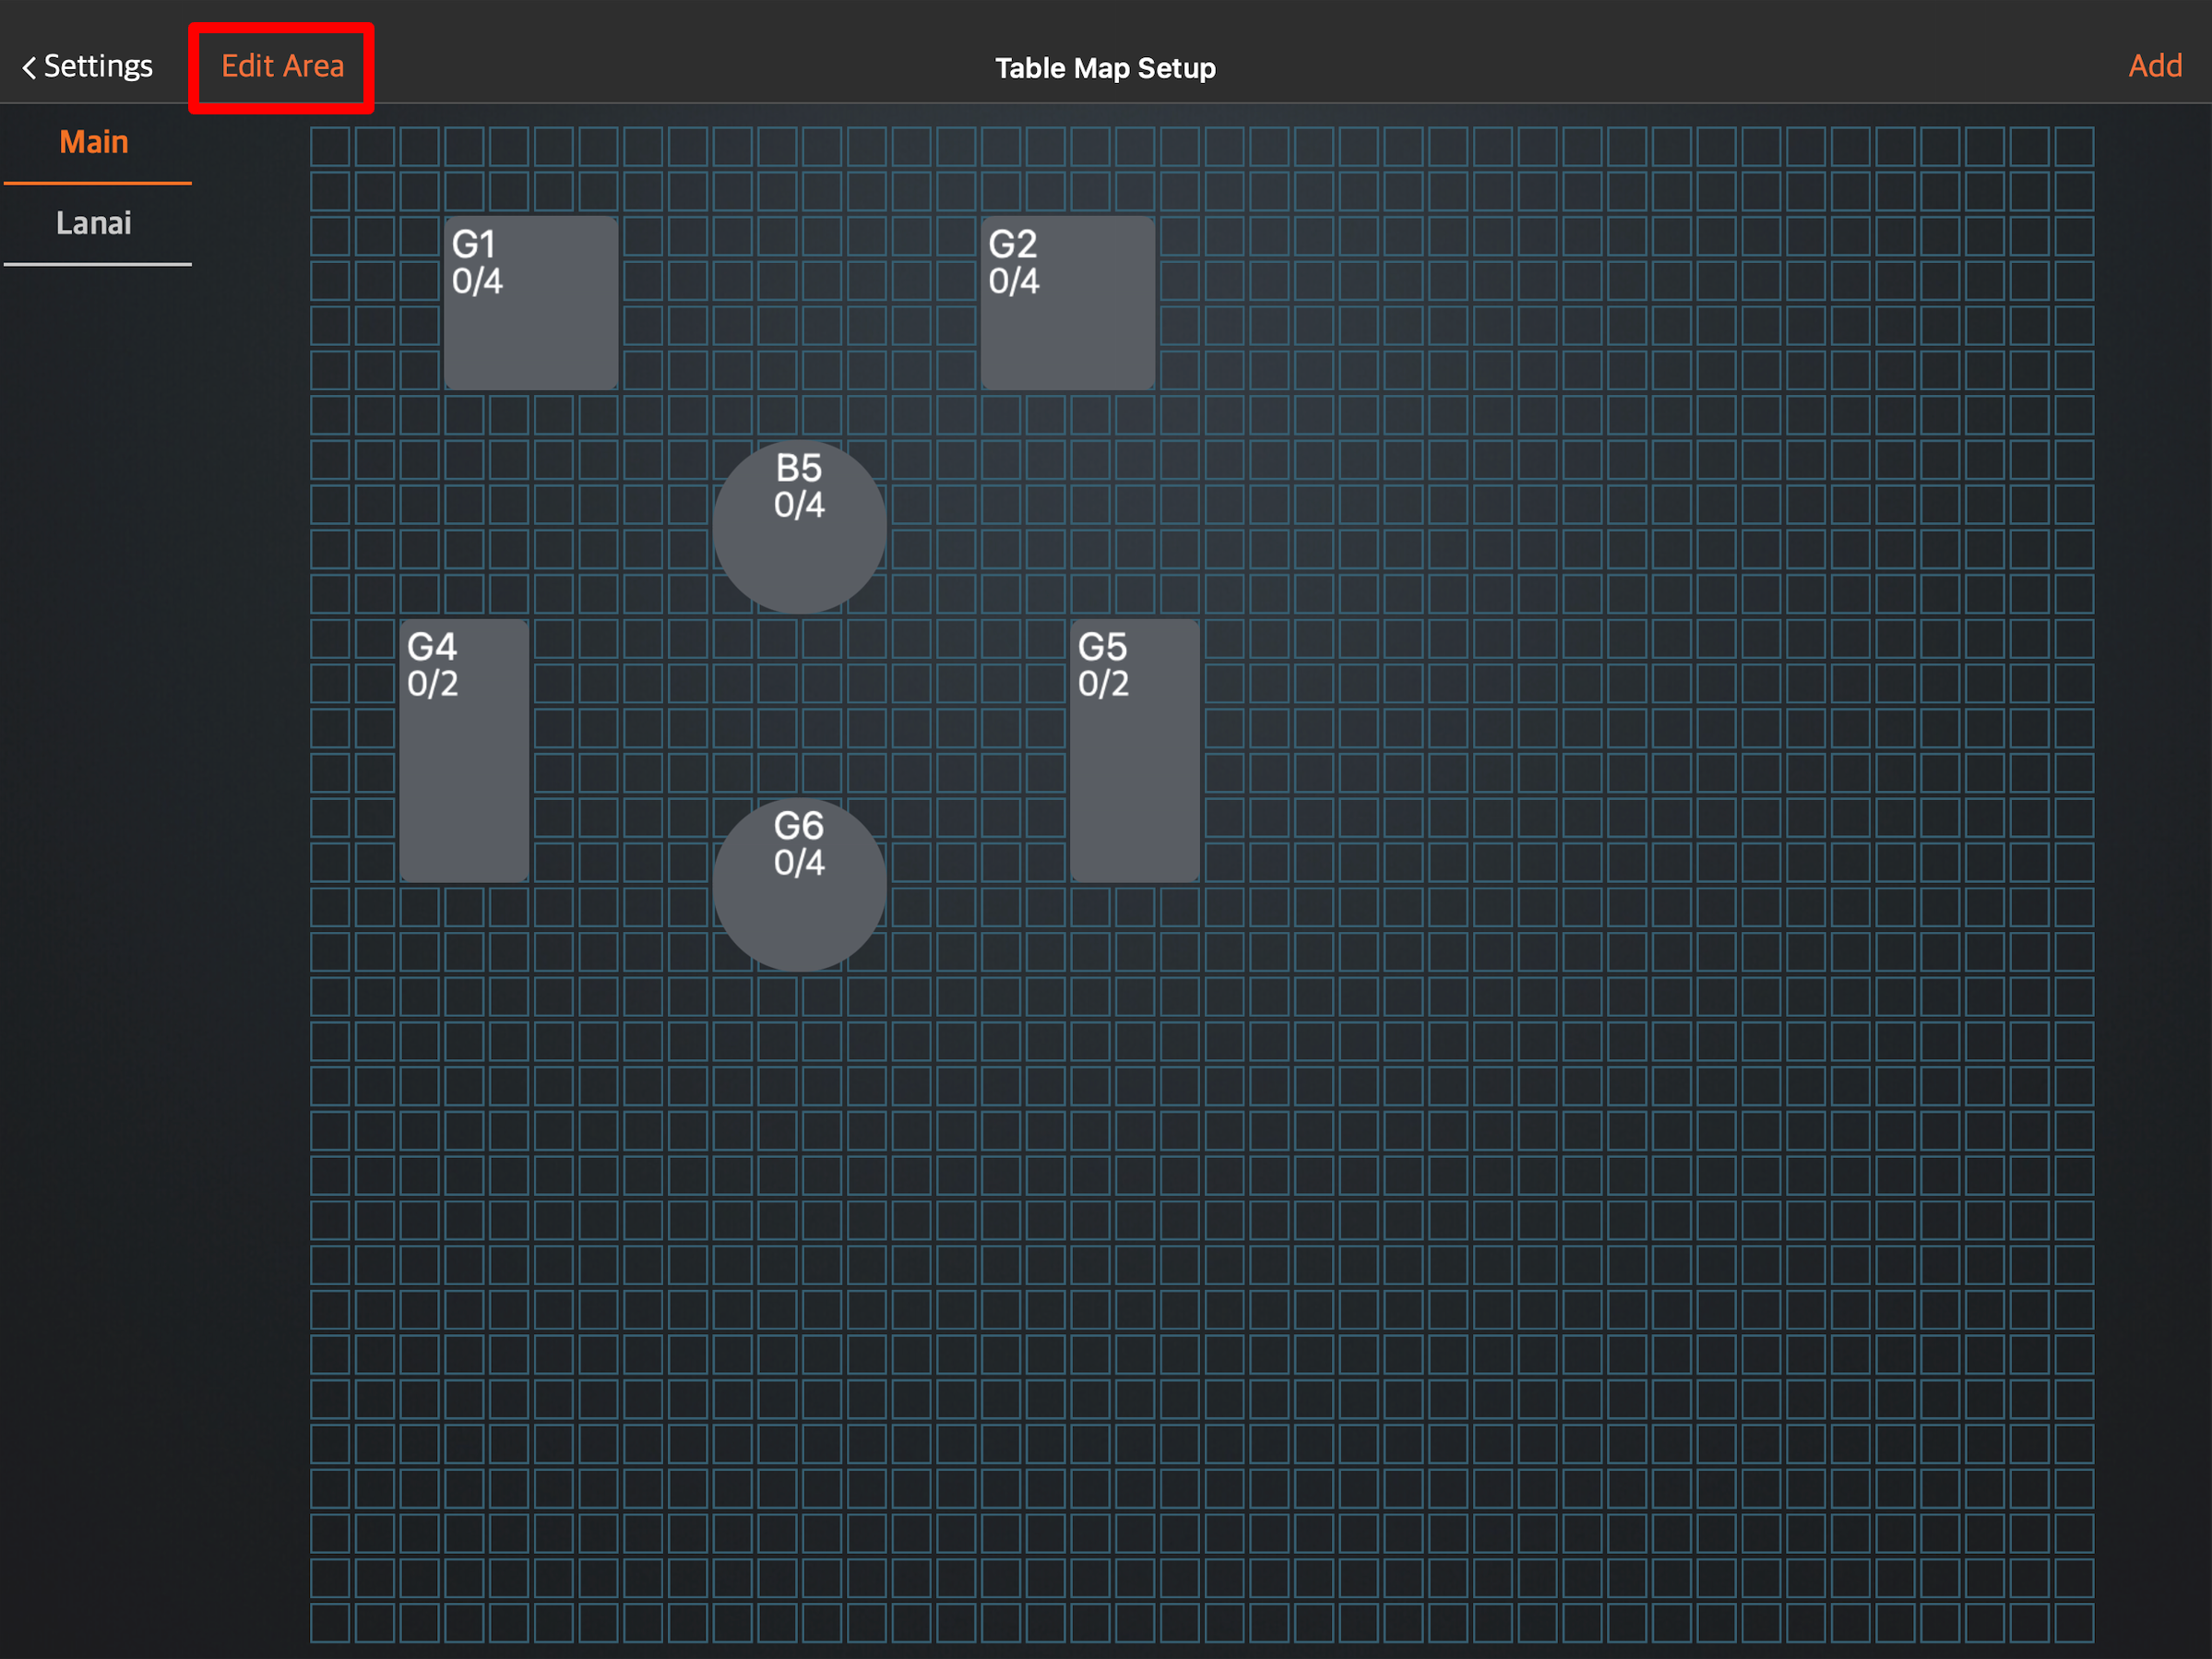
- On the left panel, select the area that you want to rename, then tap Edit Area.
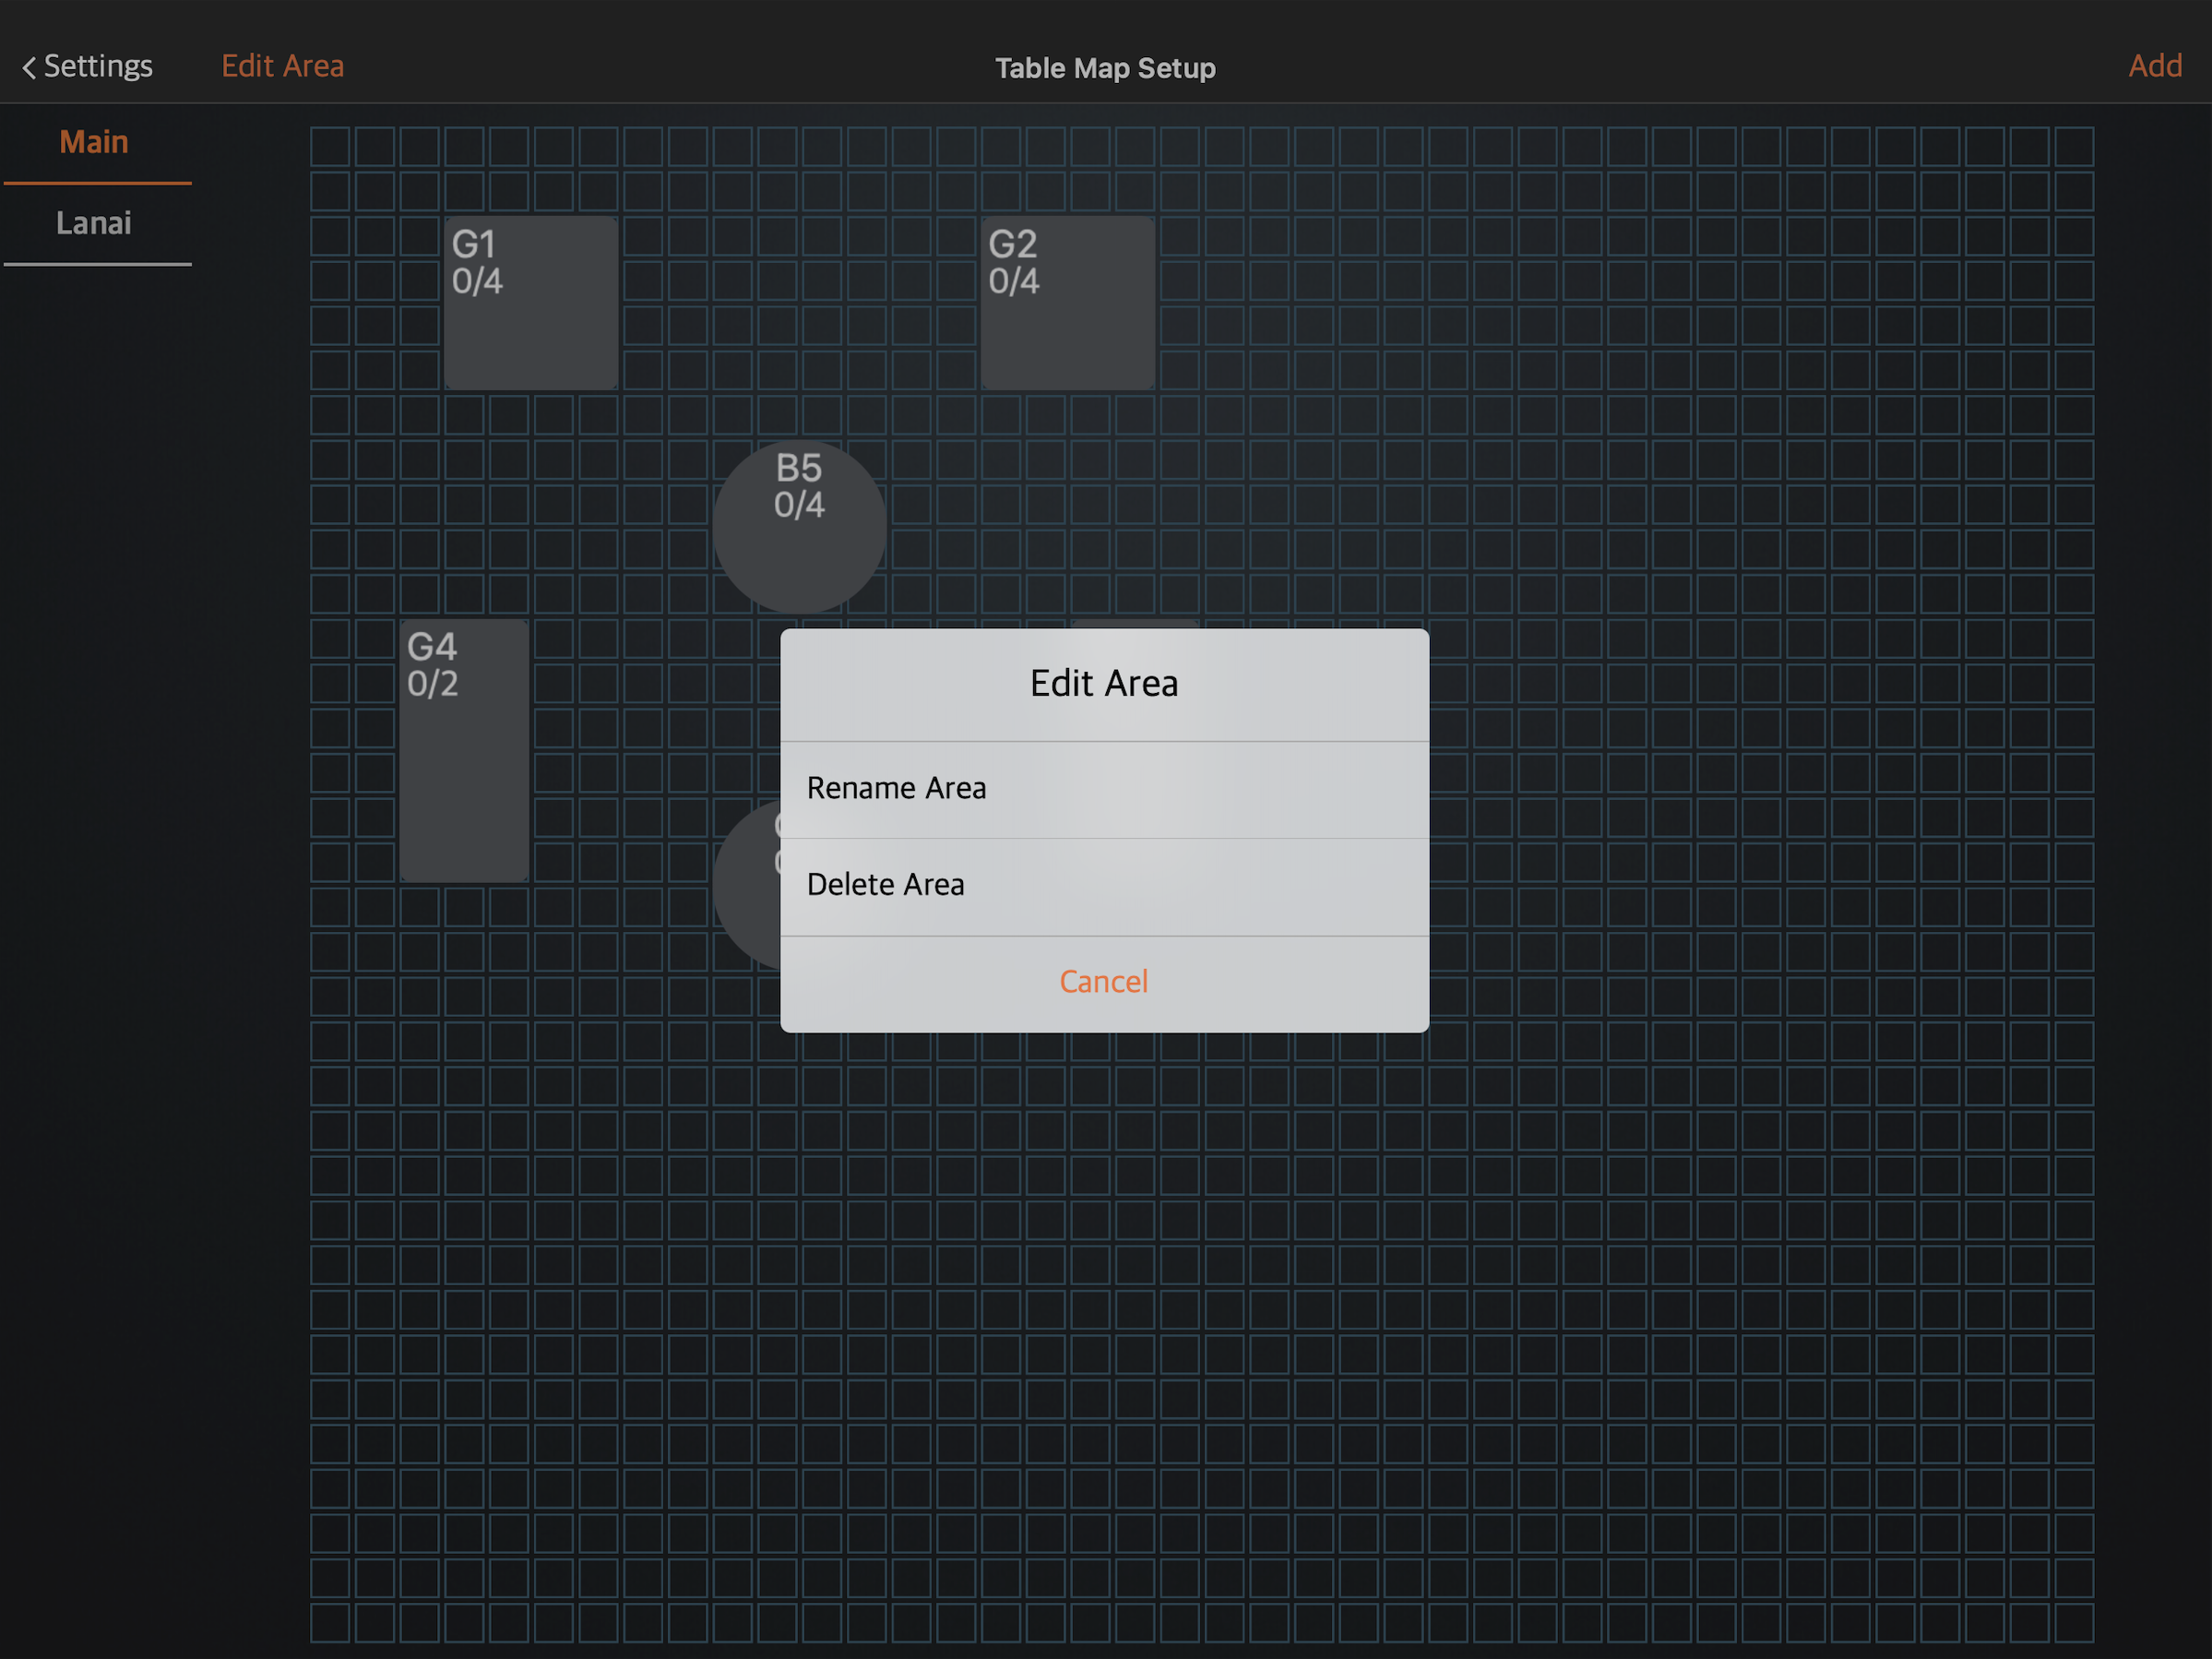
- Tap Rename Area.
- Enter the new area name.
- Tap Save to confirm.
Merchant Portal (Classic Theme)
- Log in to the Merchant Portal.
- On the left panel, click on Restaurant Settings. Then, select Table Map Setup.
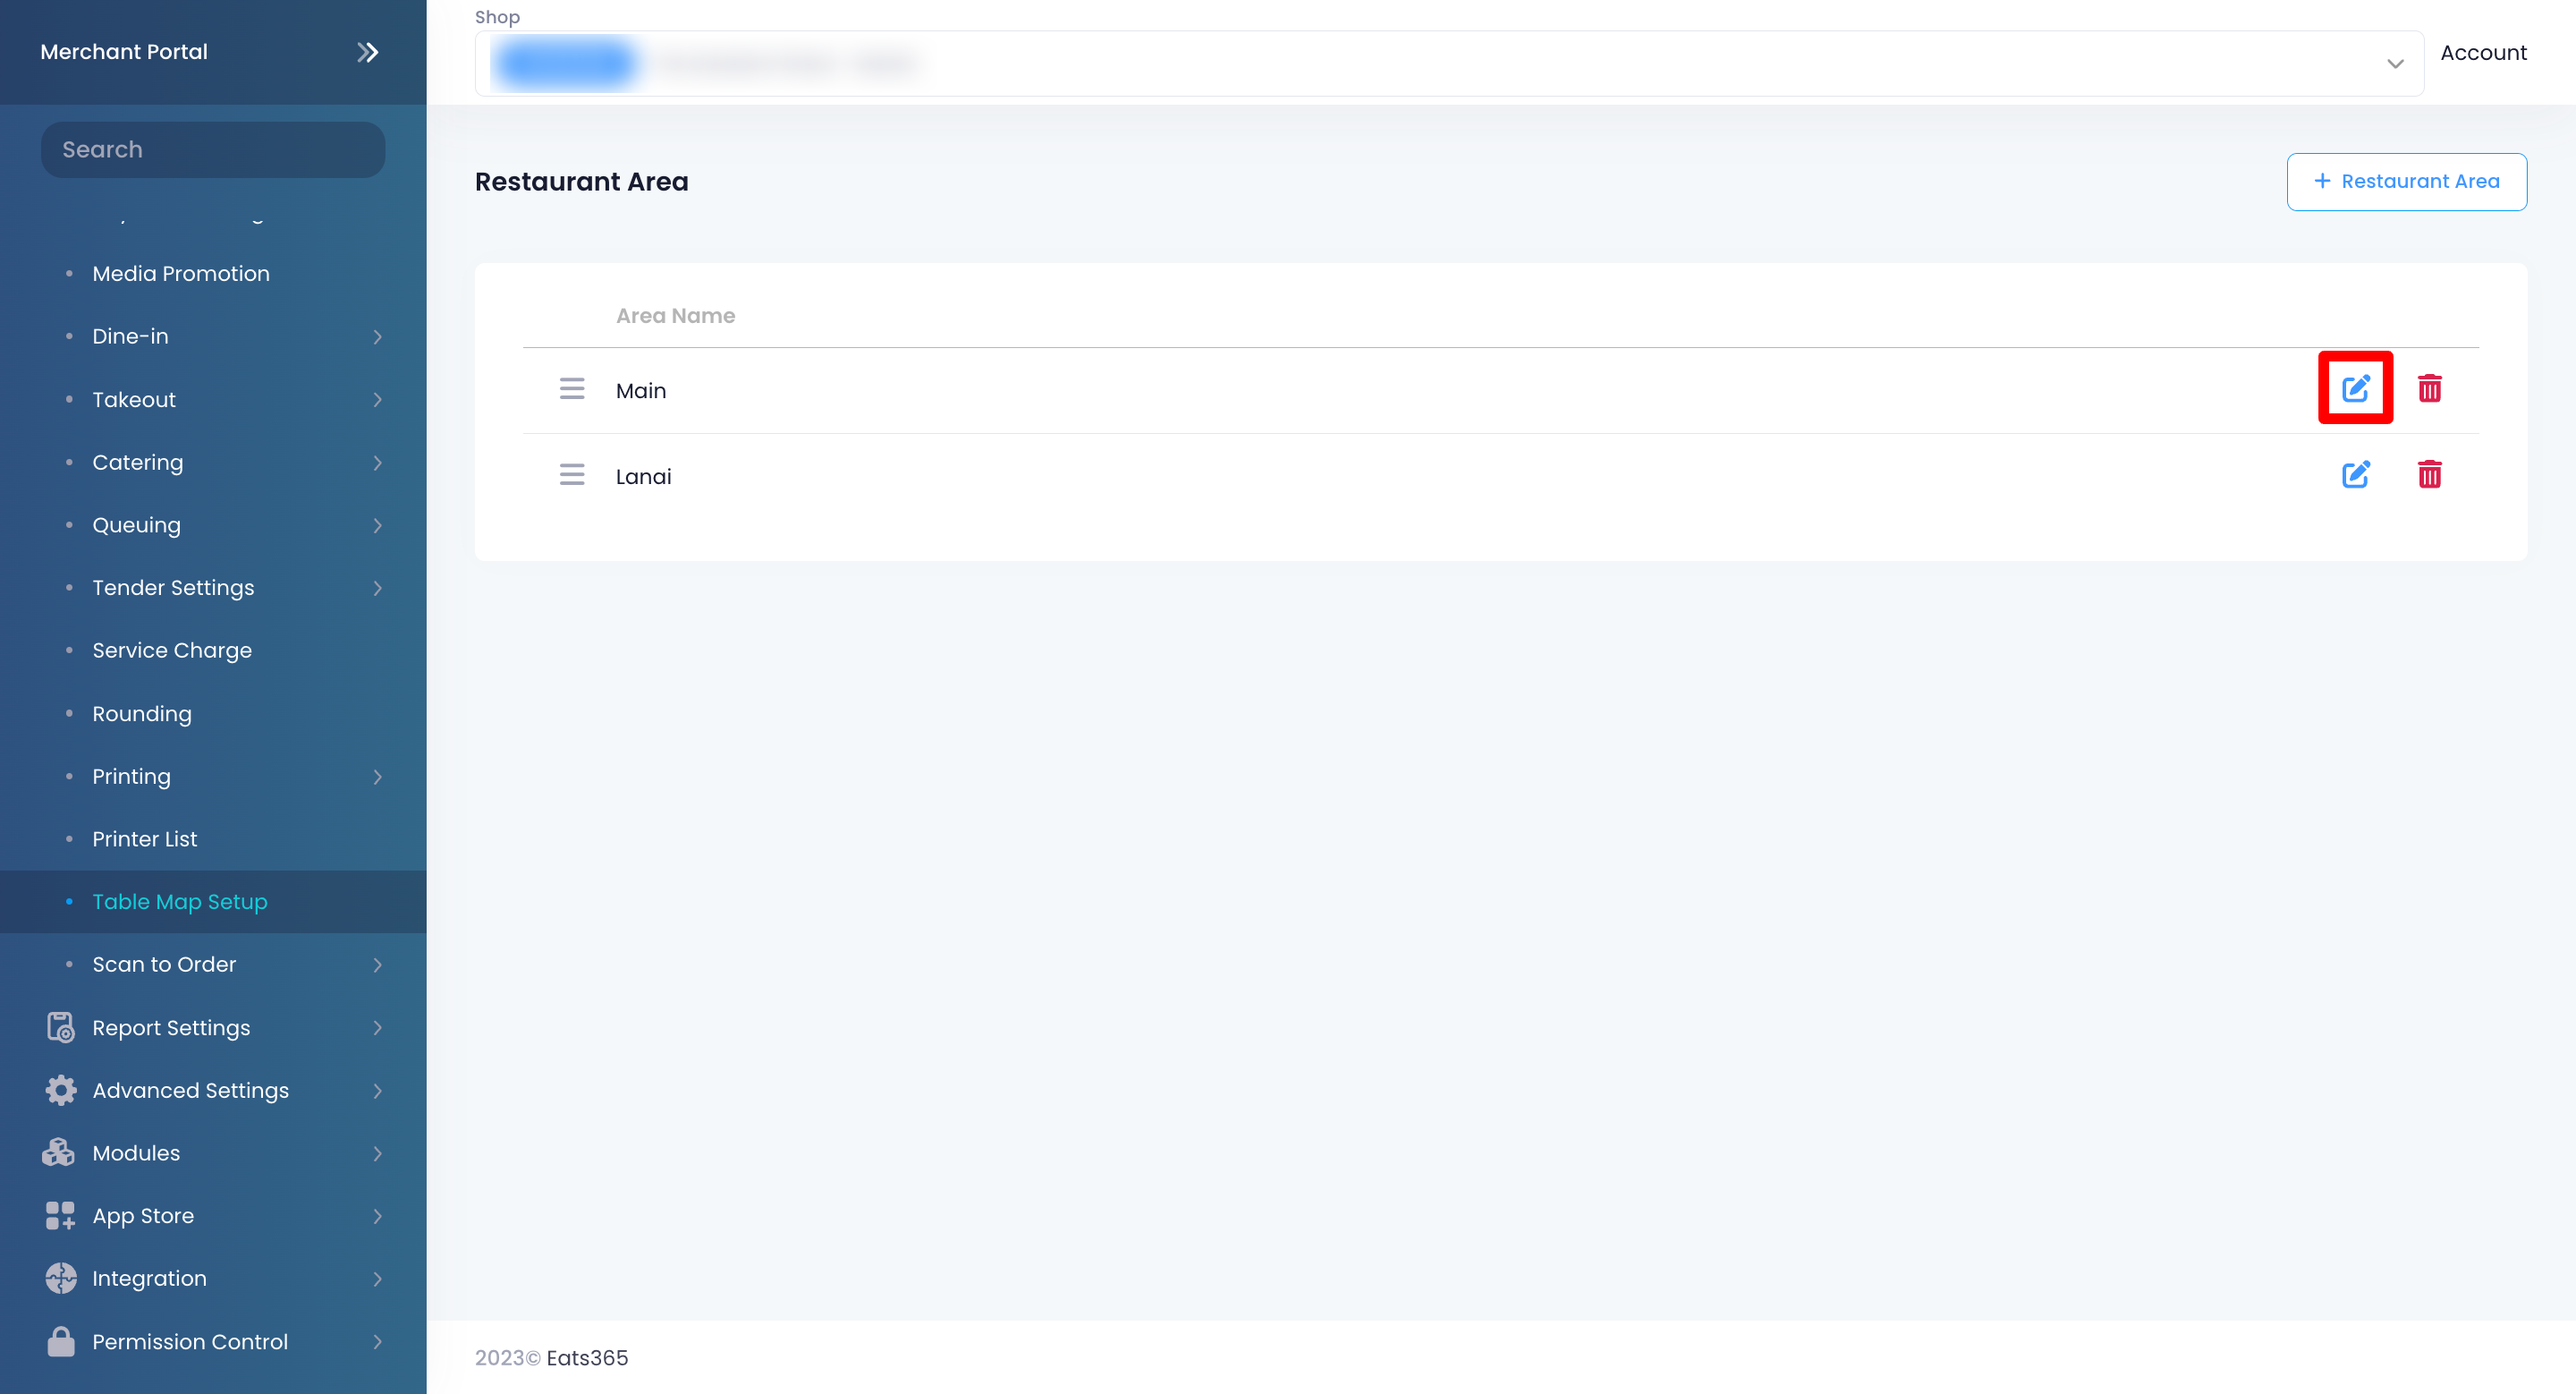
- Next to the area that you want to update, click on Edit
 .
.
- At the top left, next to the area’s name, tap Edit again.
- Enter the new Area Name.
- To assign the area to a different Revenue Center, select an available Revenue Center from the drop-down list.
Note: If you want to assign the area to a new Revenue Center, go back to the Table Map Setup screen, then under Revenue Center, click on +Add Revenue Center.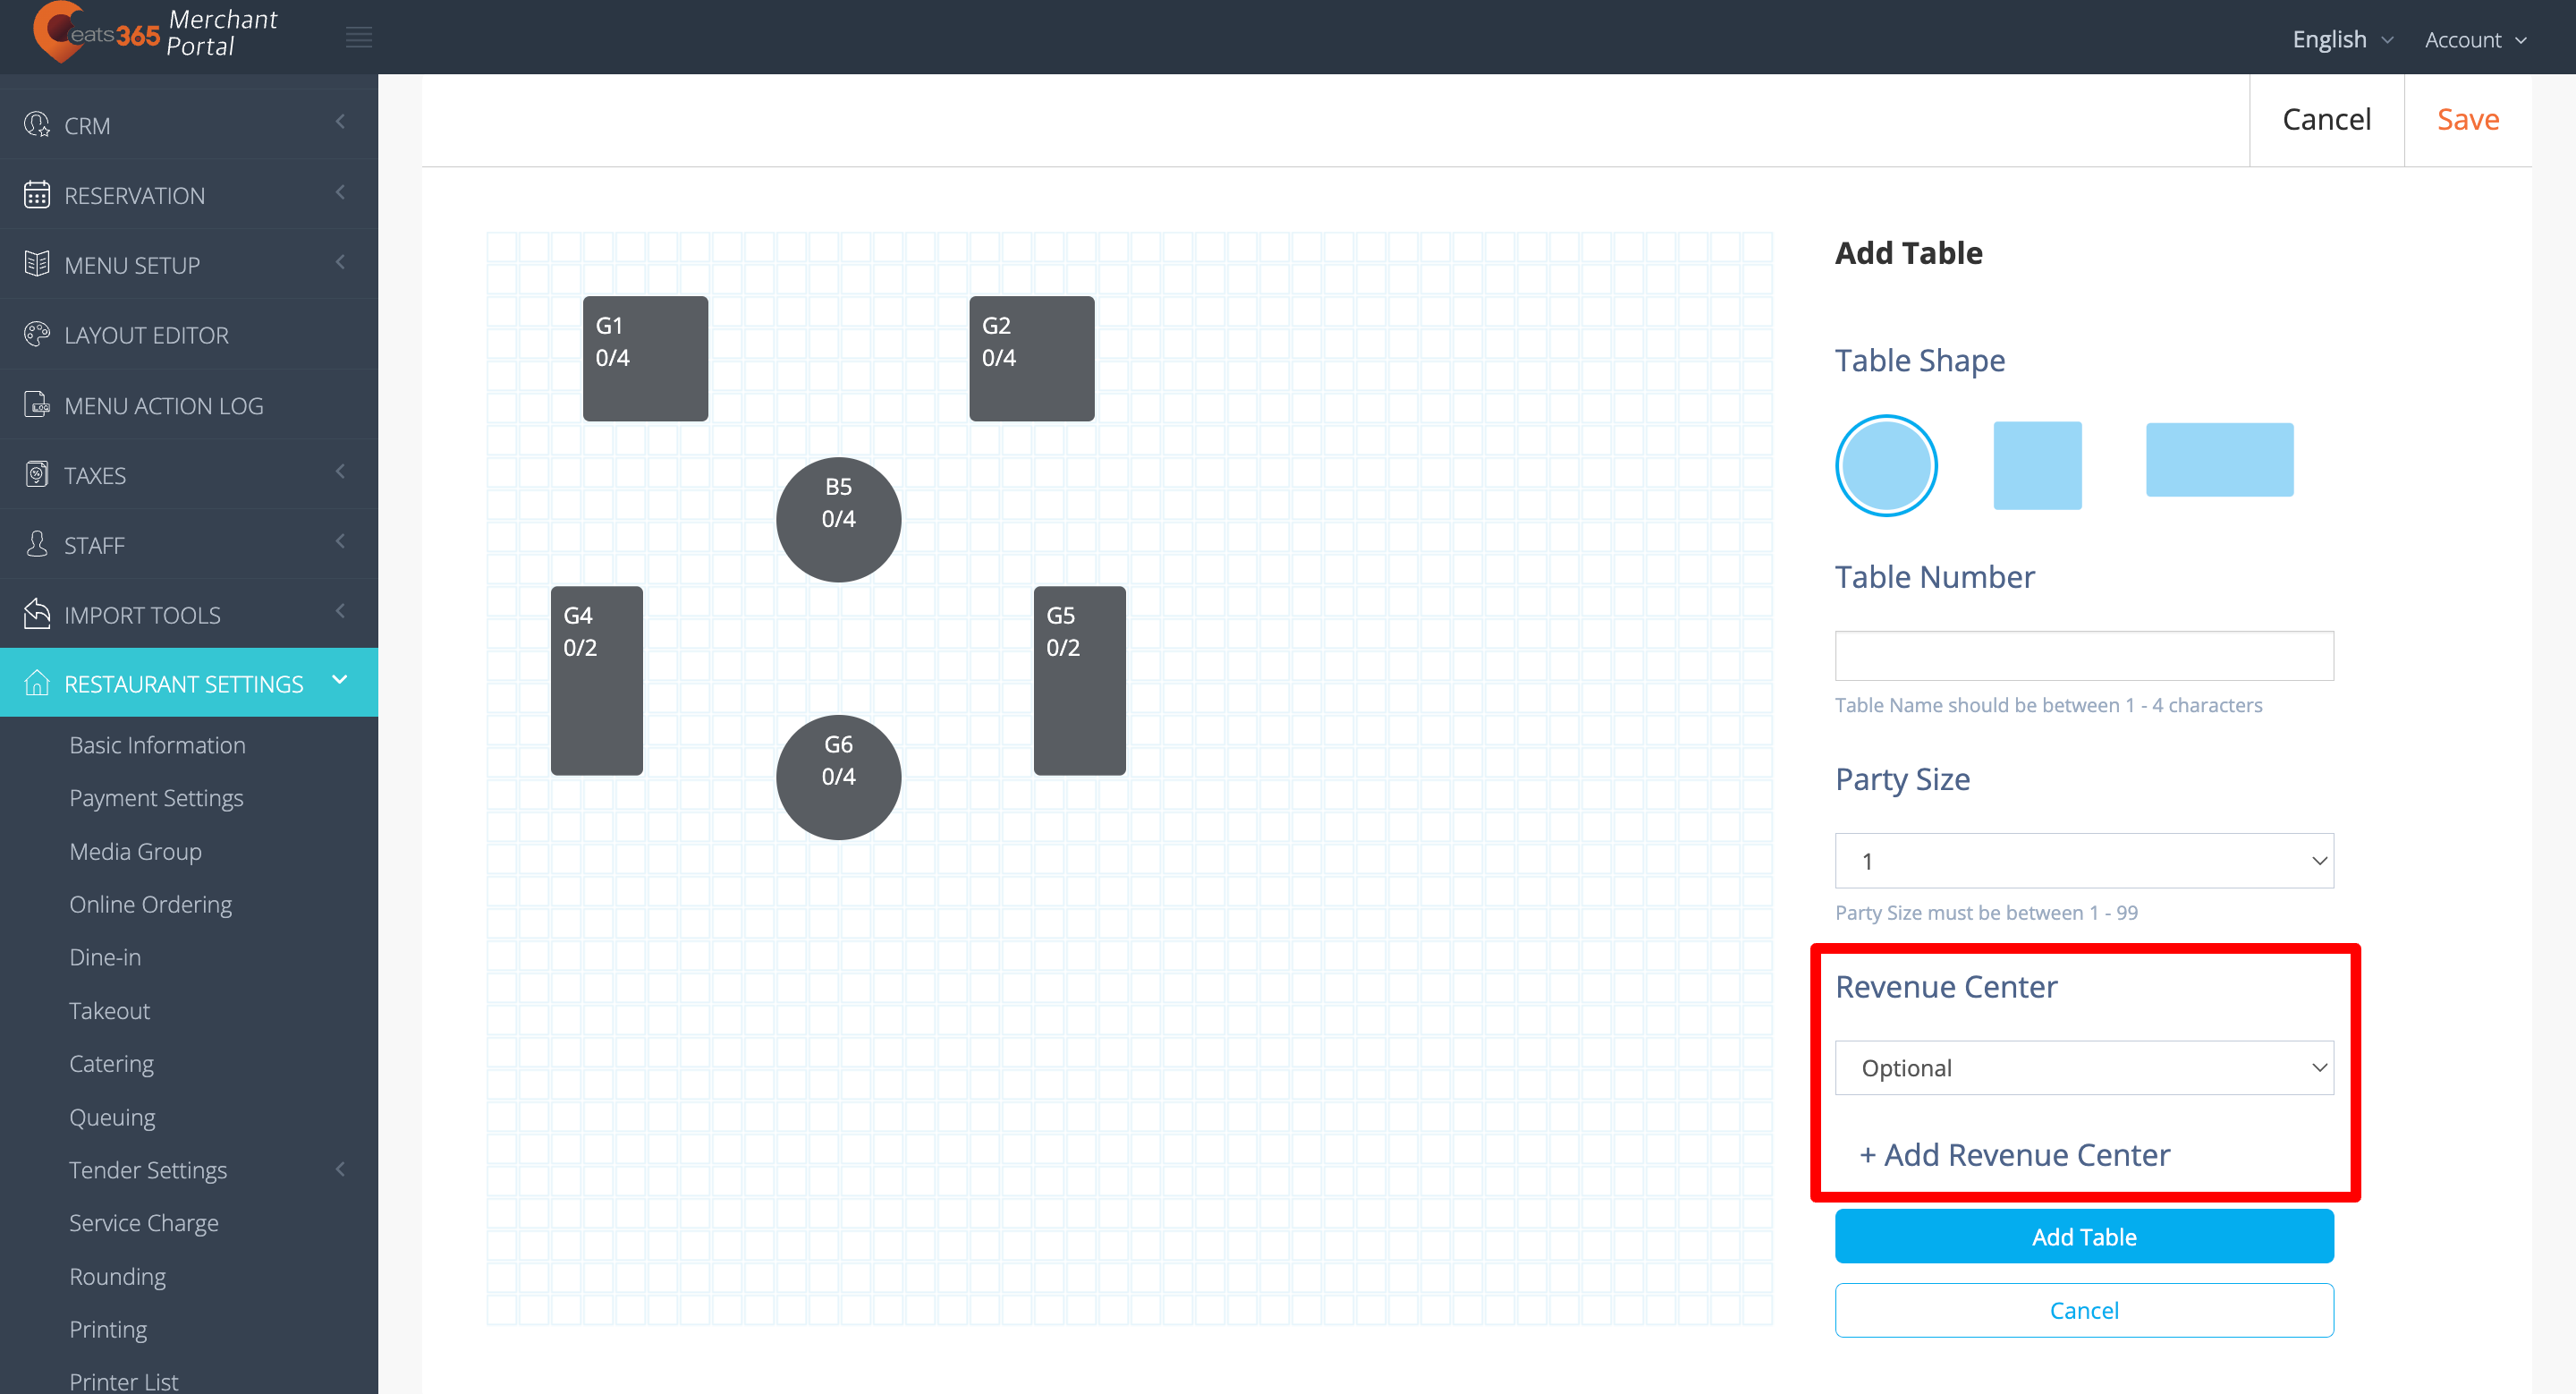
- Click on Confirm to finish.
Merchant Portal 2.0
- Log in to the Merchant Portal.
- On the left panel, click on Restaurant Settings. Then, select Table Map Setup.
- Next to the area that you want to update, click on Edit
 .
.
- At the top left, next to the area’s name, tap Edit
 again.
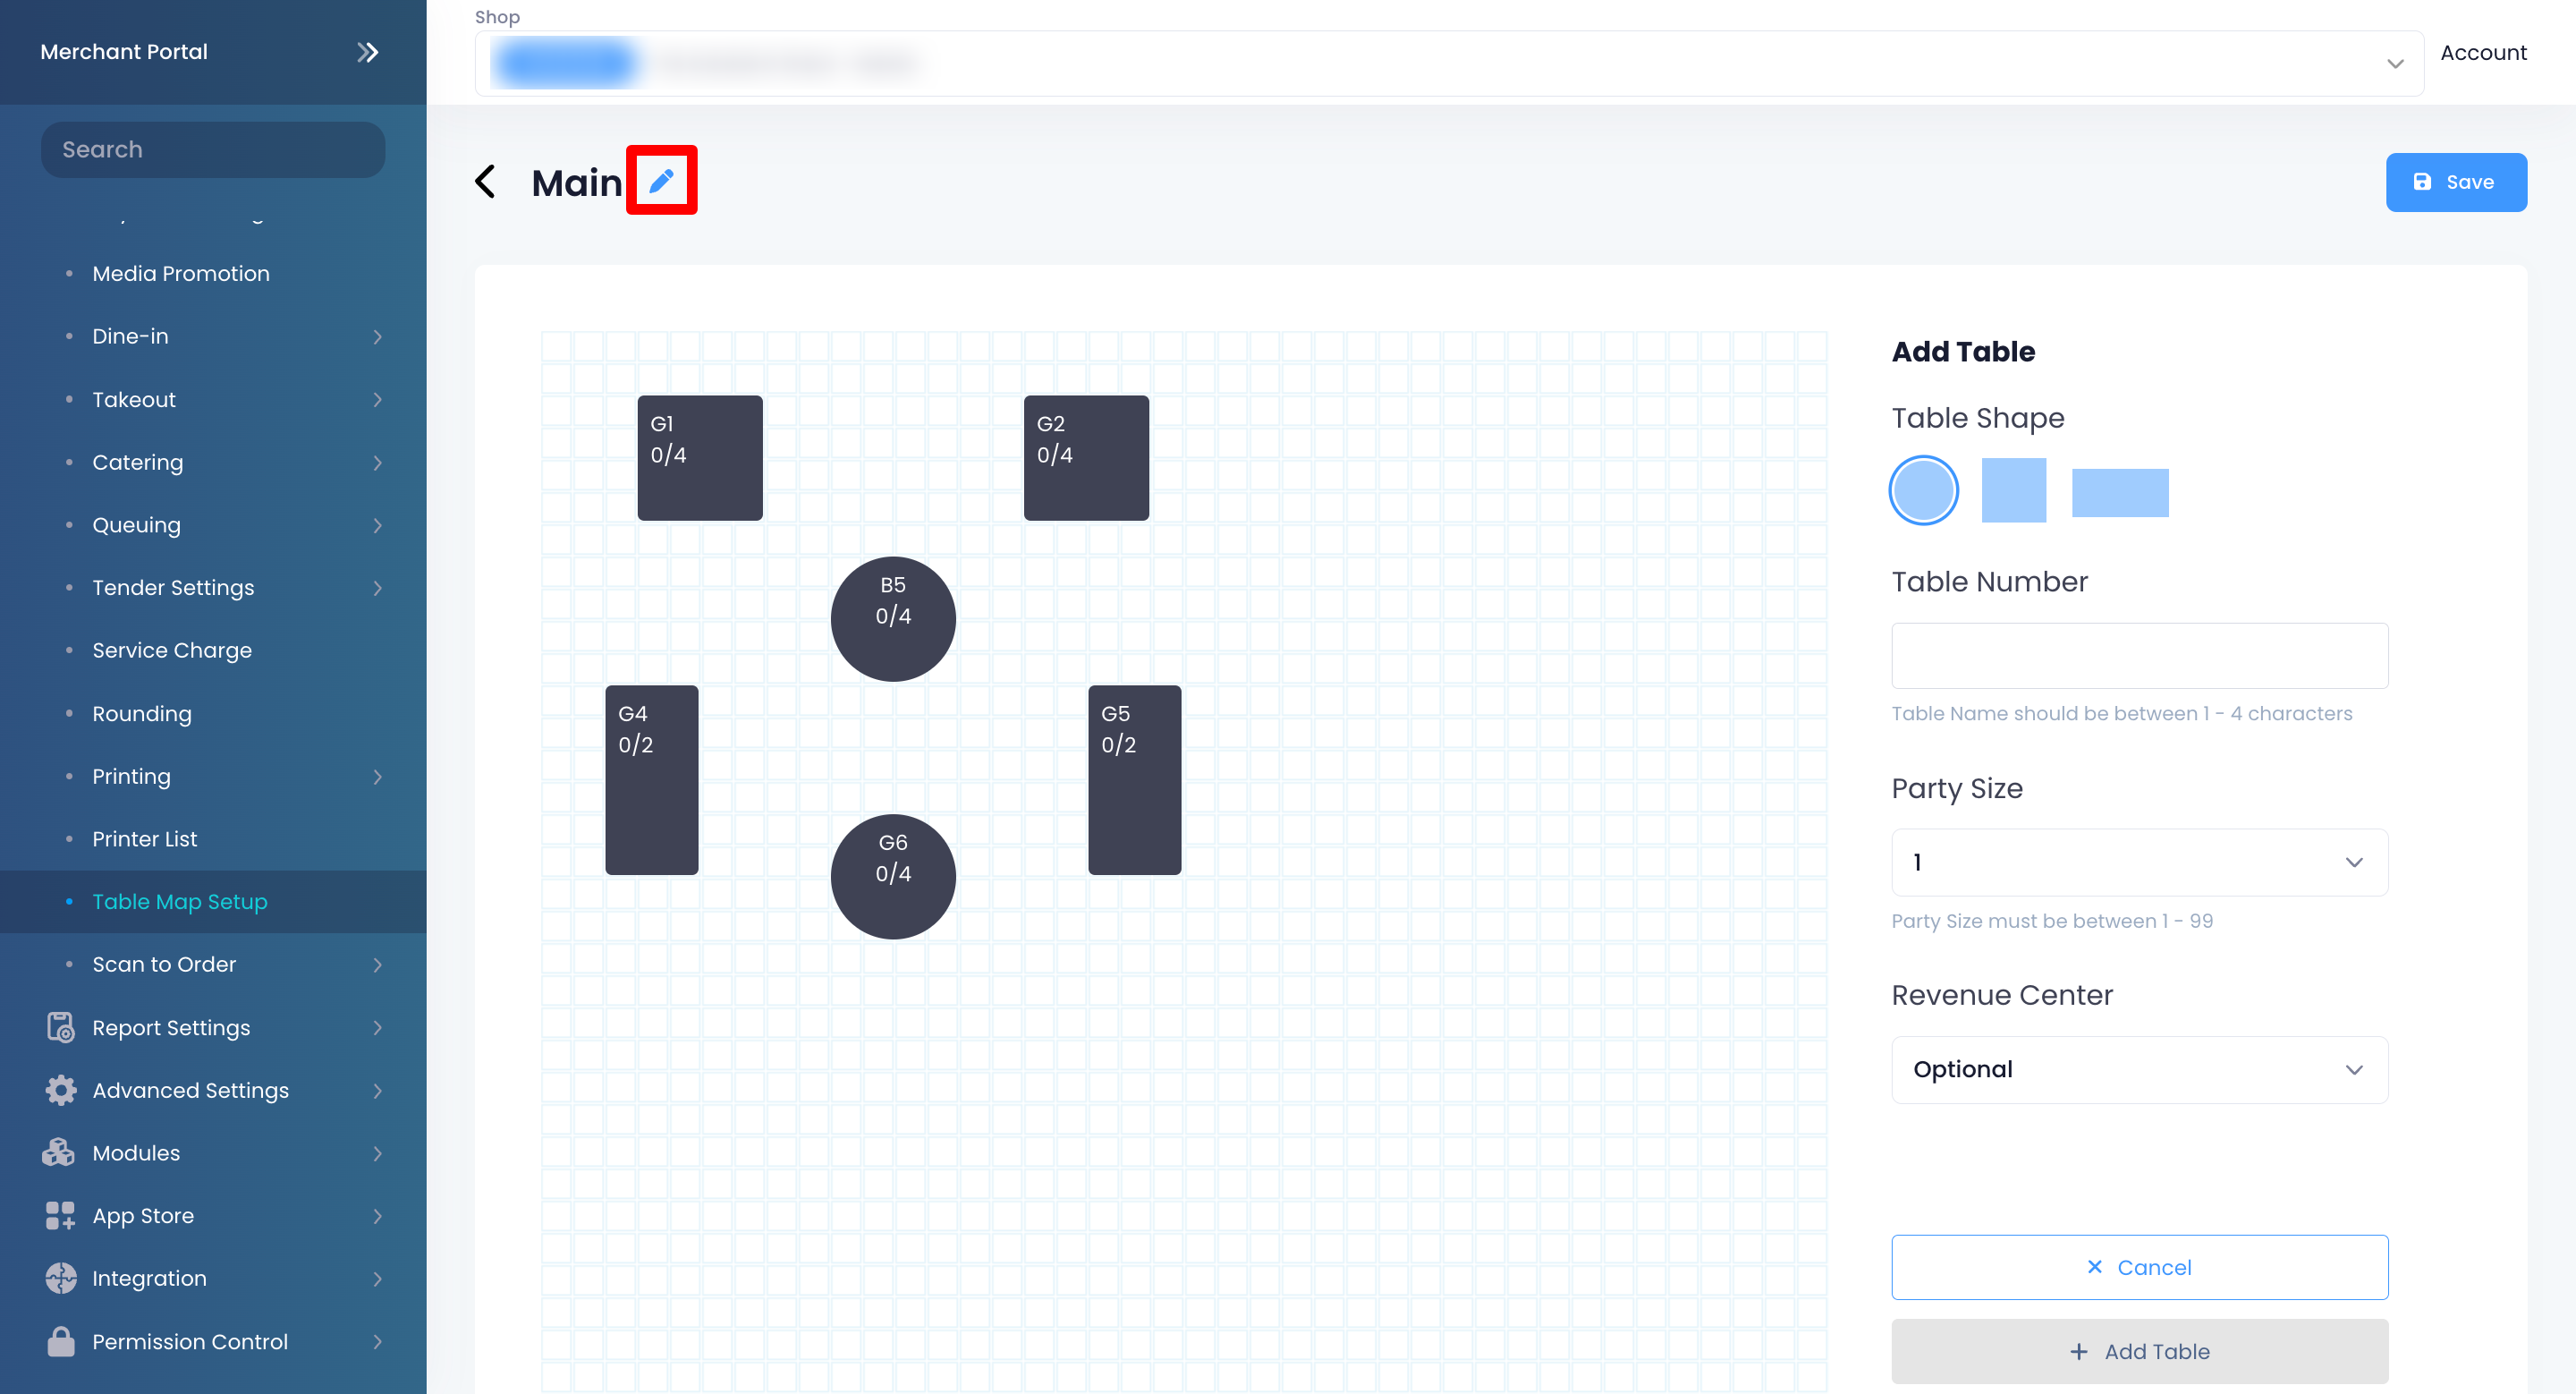
- Enter the new Area Name.
- To assign the area to a different Revenue Center, select an available Revenue Center from the drop-down list.
Note: If you want to assign the area to a new Revenue Center, go back to the Table Map Setup screen, then under Revenue Center, select Add Revenue Center from the drop-down list.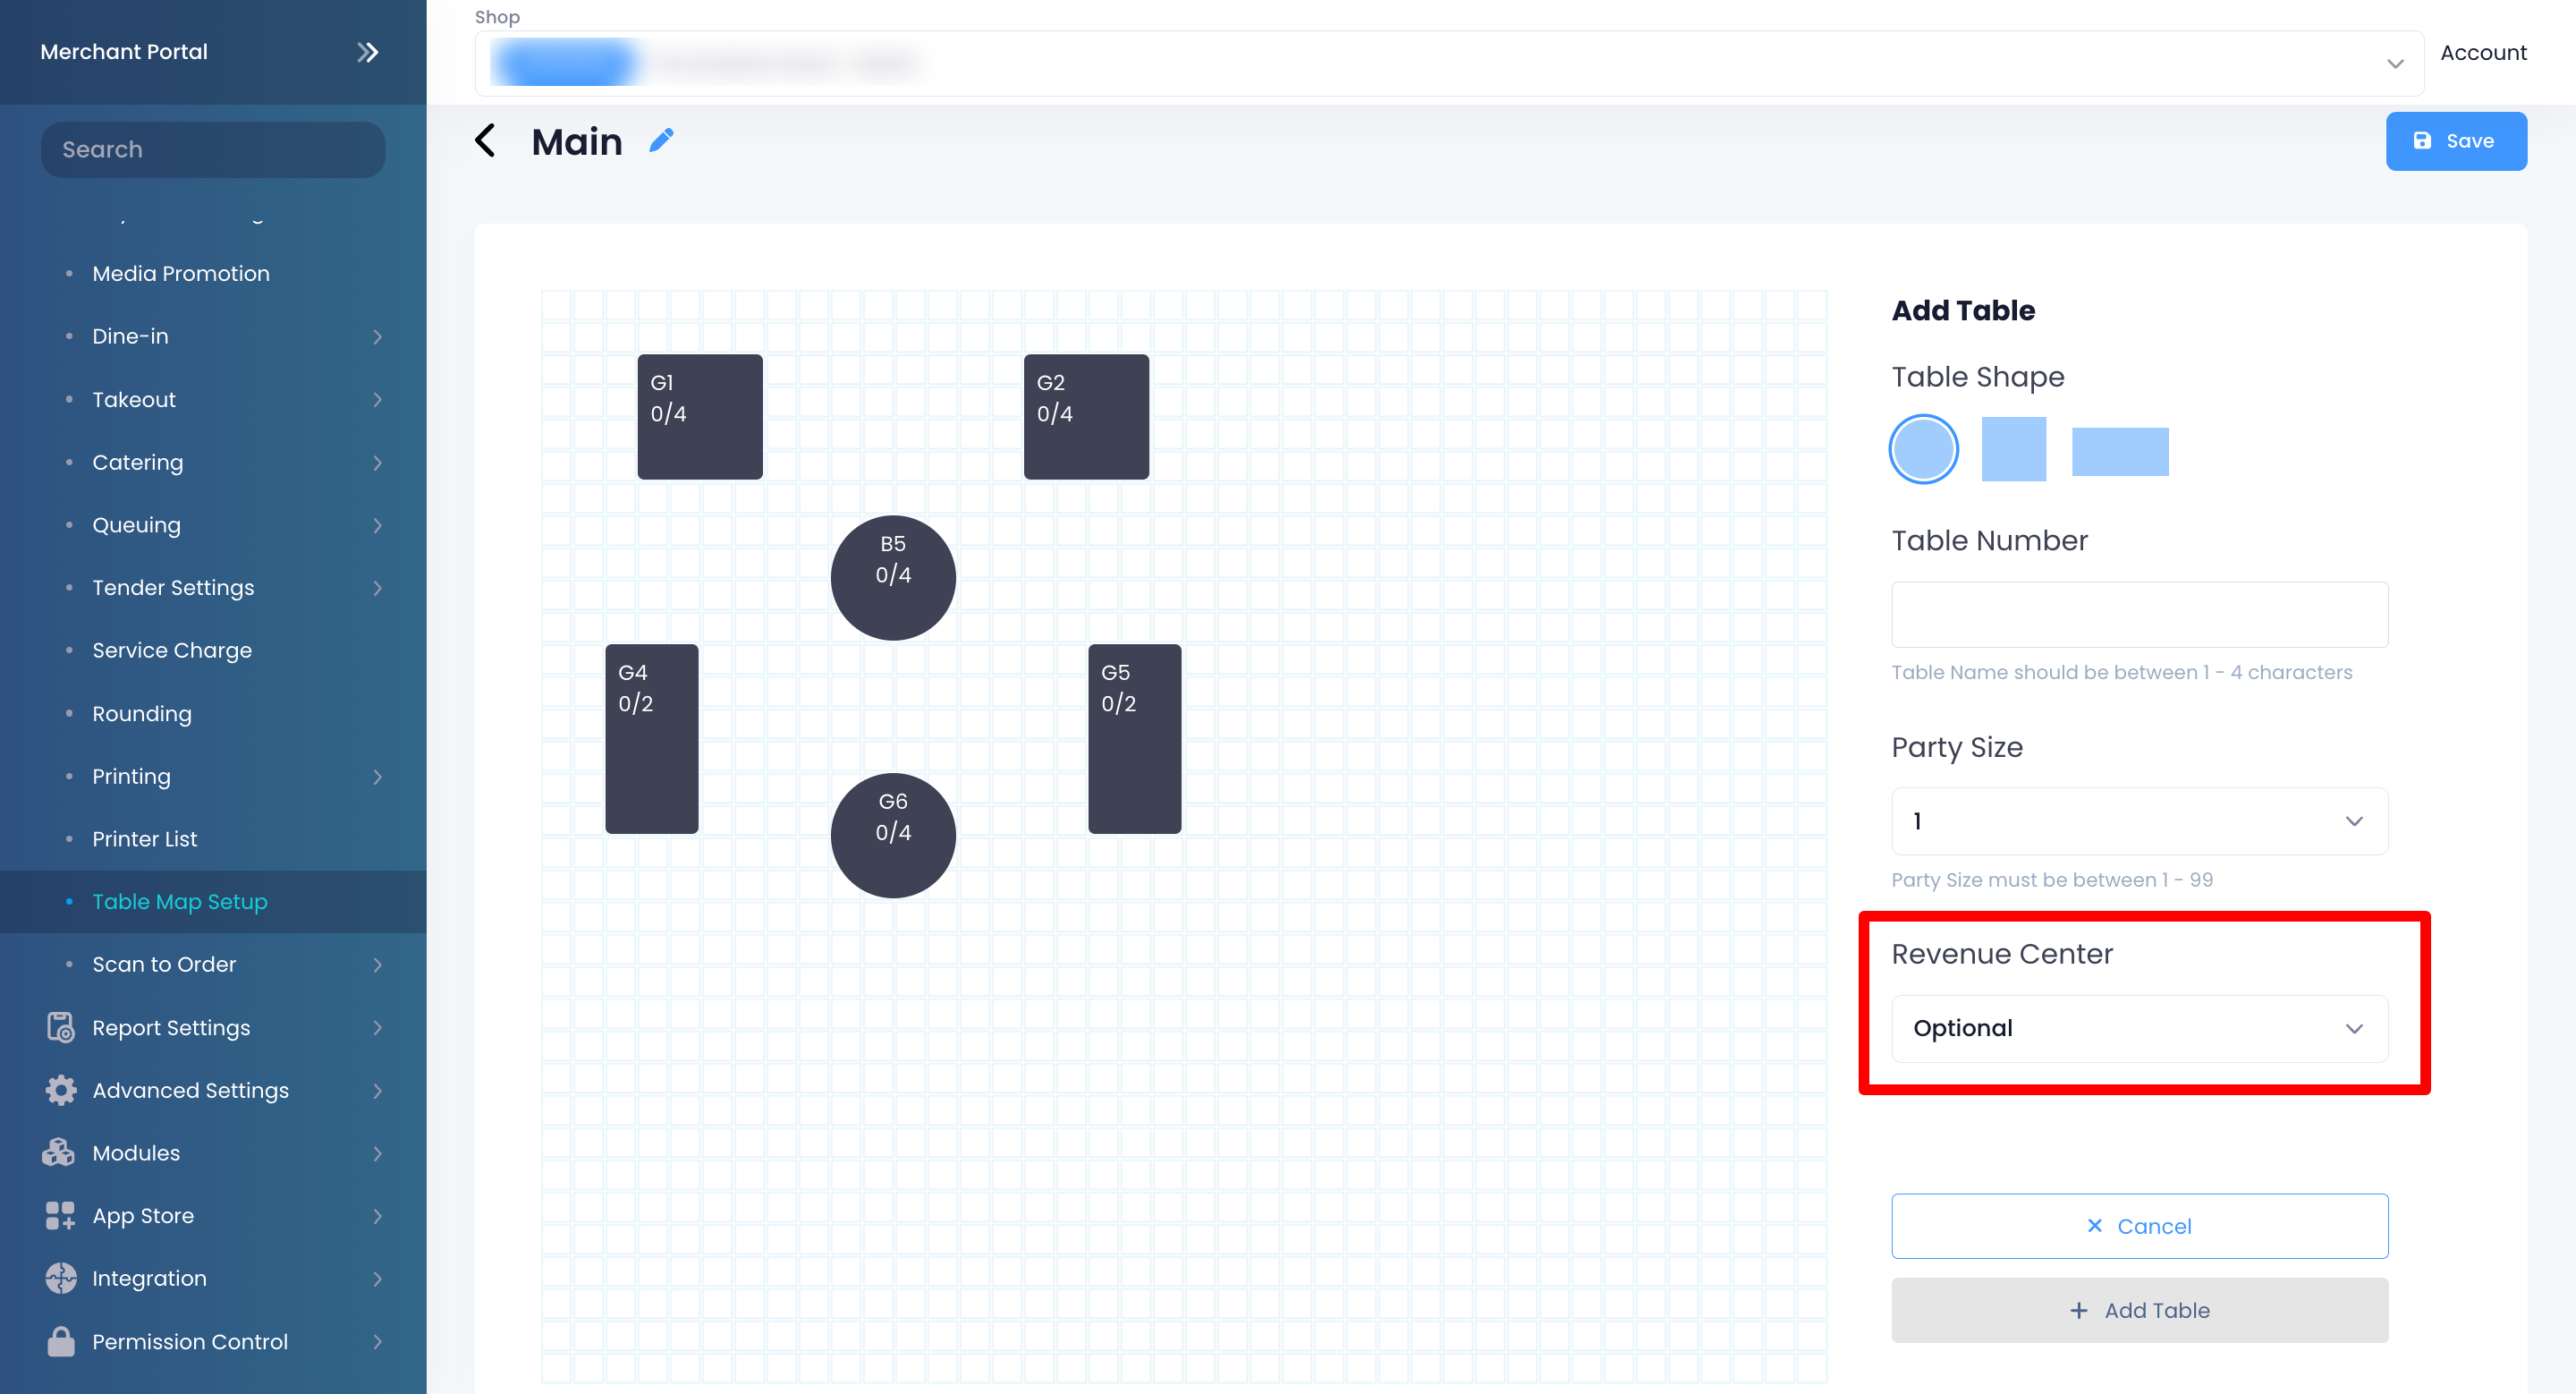
- Click on Confirm to finish.
Delete an area
To delete an Area, follow the steps below:
Eats365 POS
Log in to the Eats365 POS.
- At the top left, tap Settings .
- Under General, tap Table Map Setup.
- On the left panel, select the area that you want to delete, then tap Edit Area.
- To remove the area from the Table Map, tap Delete Area.
- Tap Delete to confirm.
Merchant Portal (Classic Theme)
- Log in to the Merchant Portal.
- On the left panel, click on Restaurant Settings. Then, select Table Map Setup.
- Next to the area that you want to delete, click on Delete
 .
.
- Click on Confirm to finish.
Merchant Portal 2.0
- Log in to the Merchant Portal.
- On the left panel, click on Restaurant Settings. Then, select Table Map Setup.
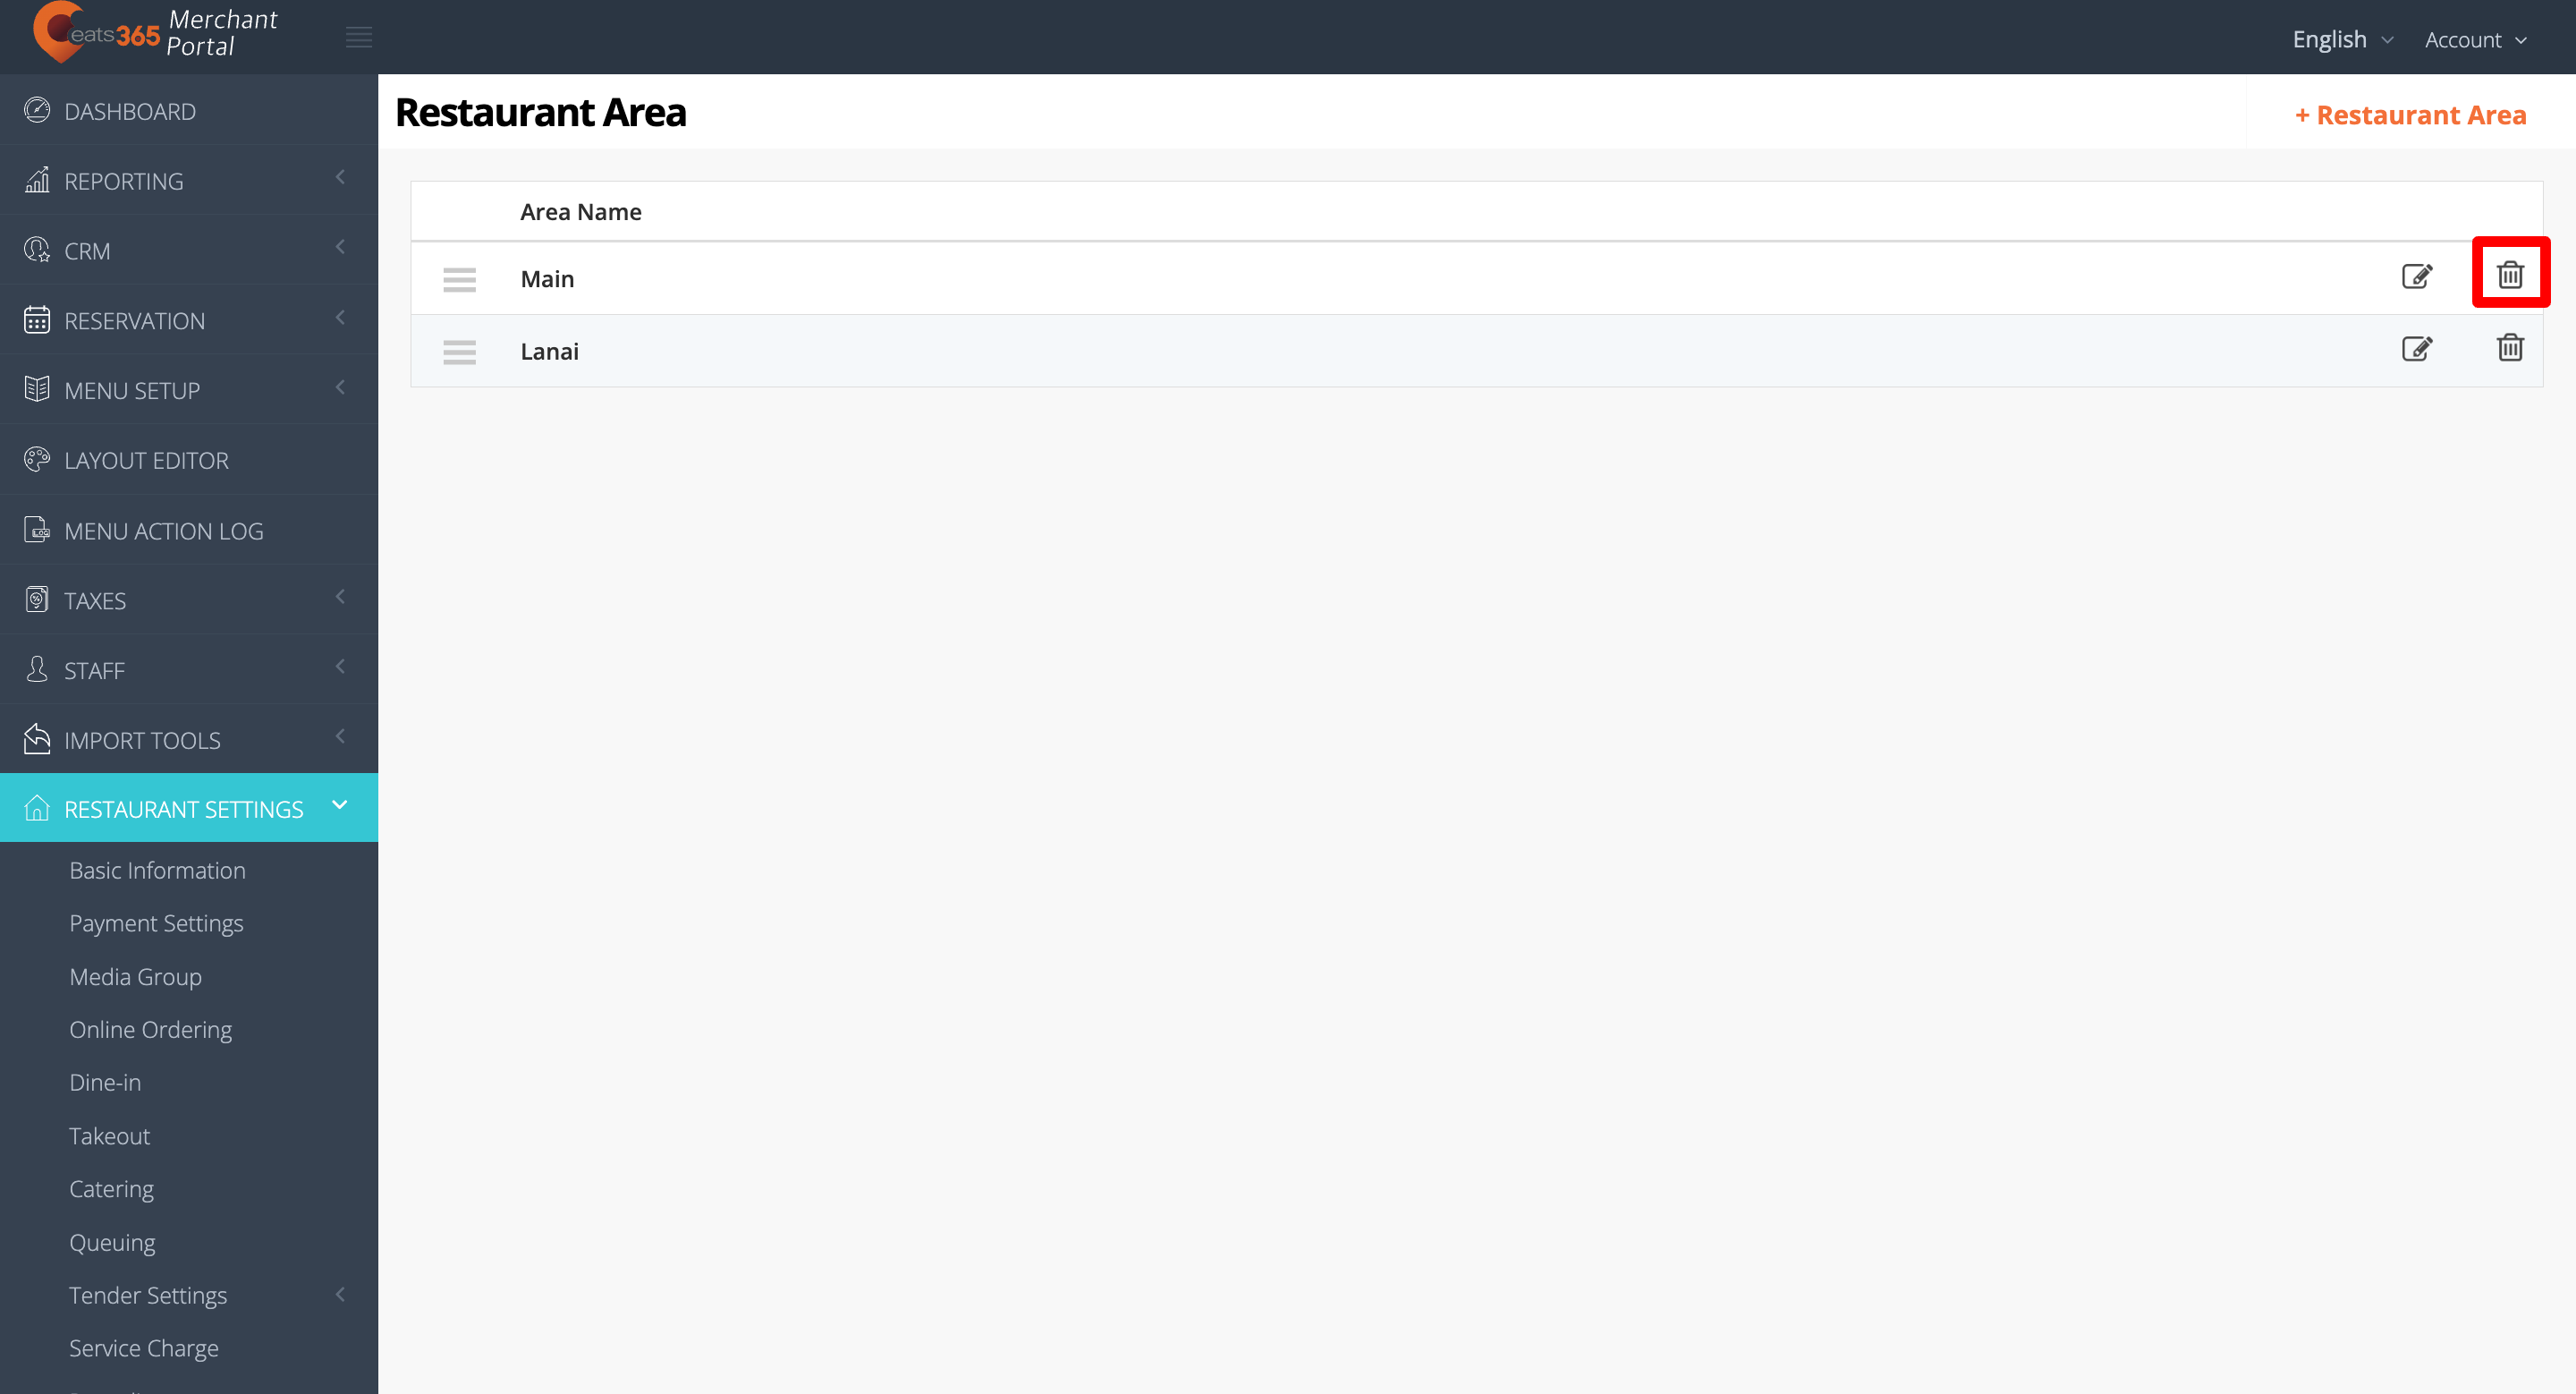
- Next to the area that you want to delete, click on Delete
 .
.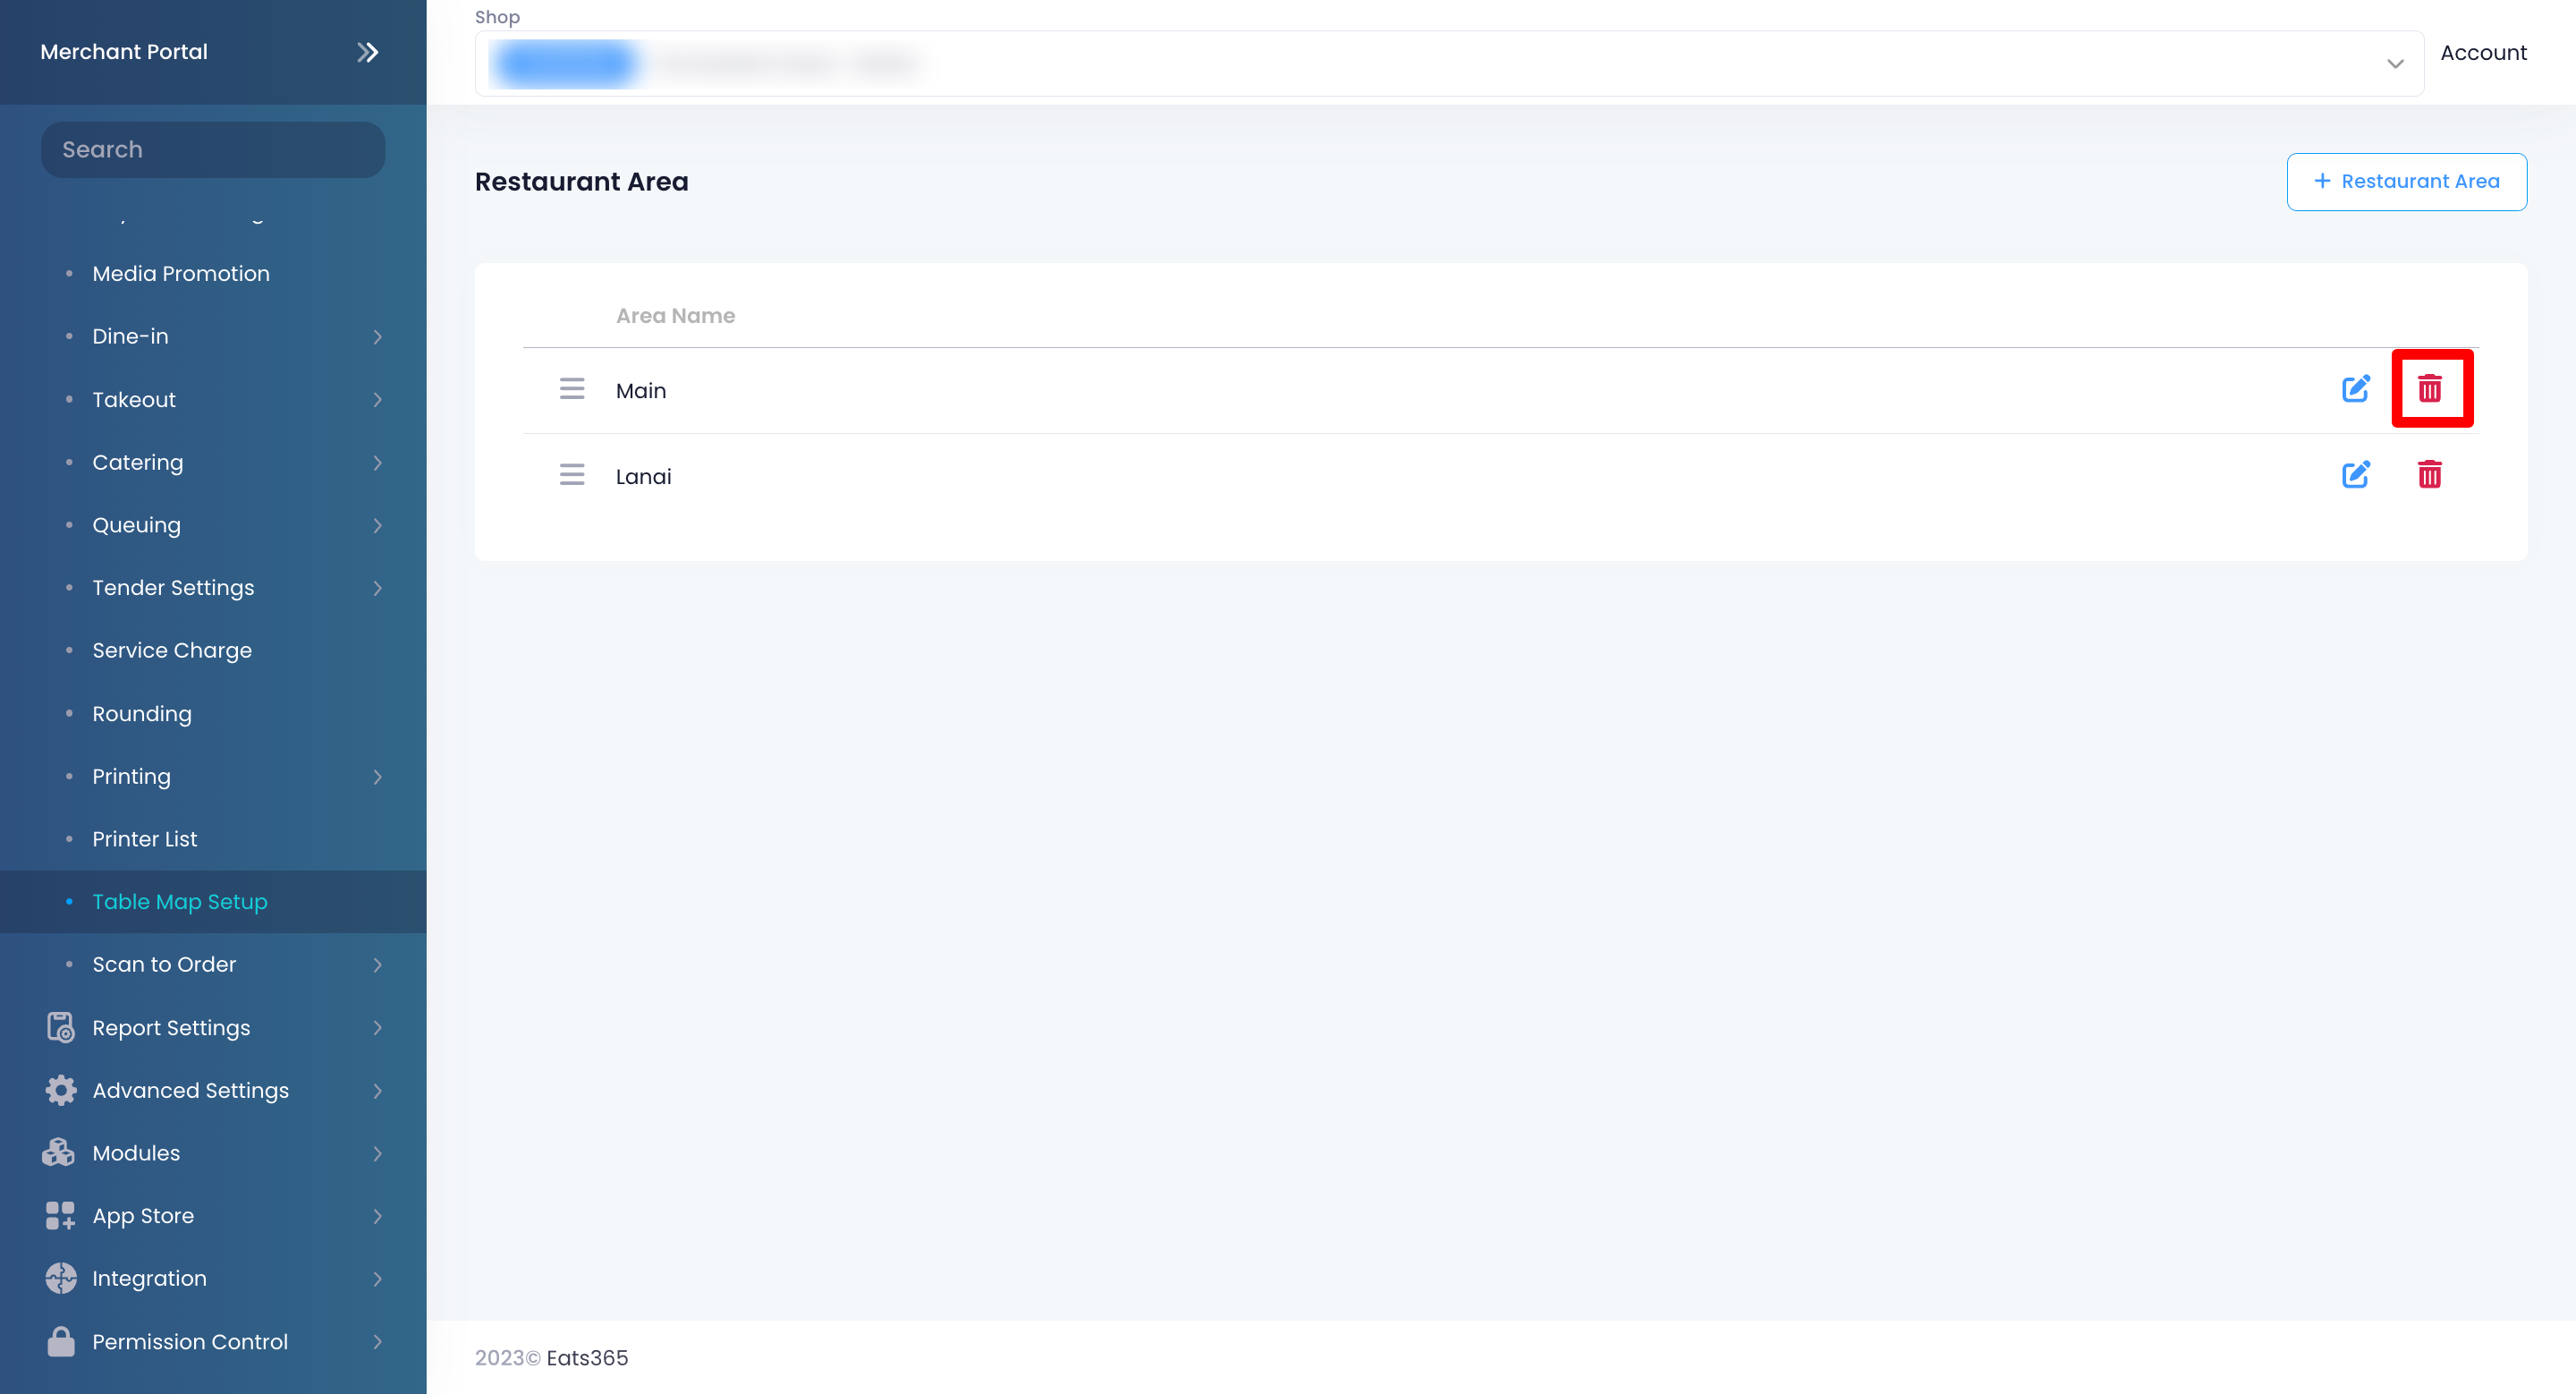
- Click on Confirm to finish.
Add a table
Eats365 POS
- Log in to the Eats365 POS.
- At the top left, tap Settings .
- Under General, tap Table Map Setup.
- On the left panel, select the area where you want to add a table.
- At the top right, tap Add, then select New Table.
- Enter the table’s information. You can assign a Table Number, add the Party Size, and choose the type of table that you want to set up.
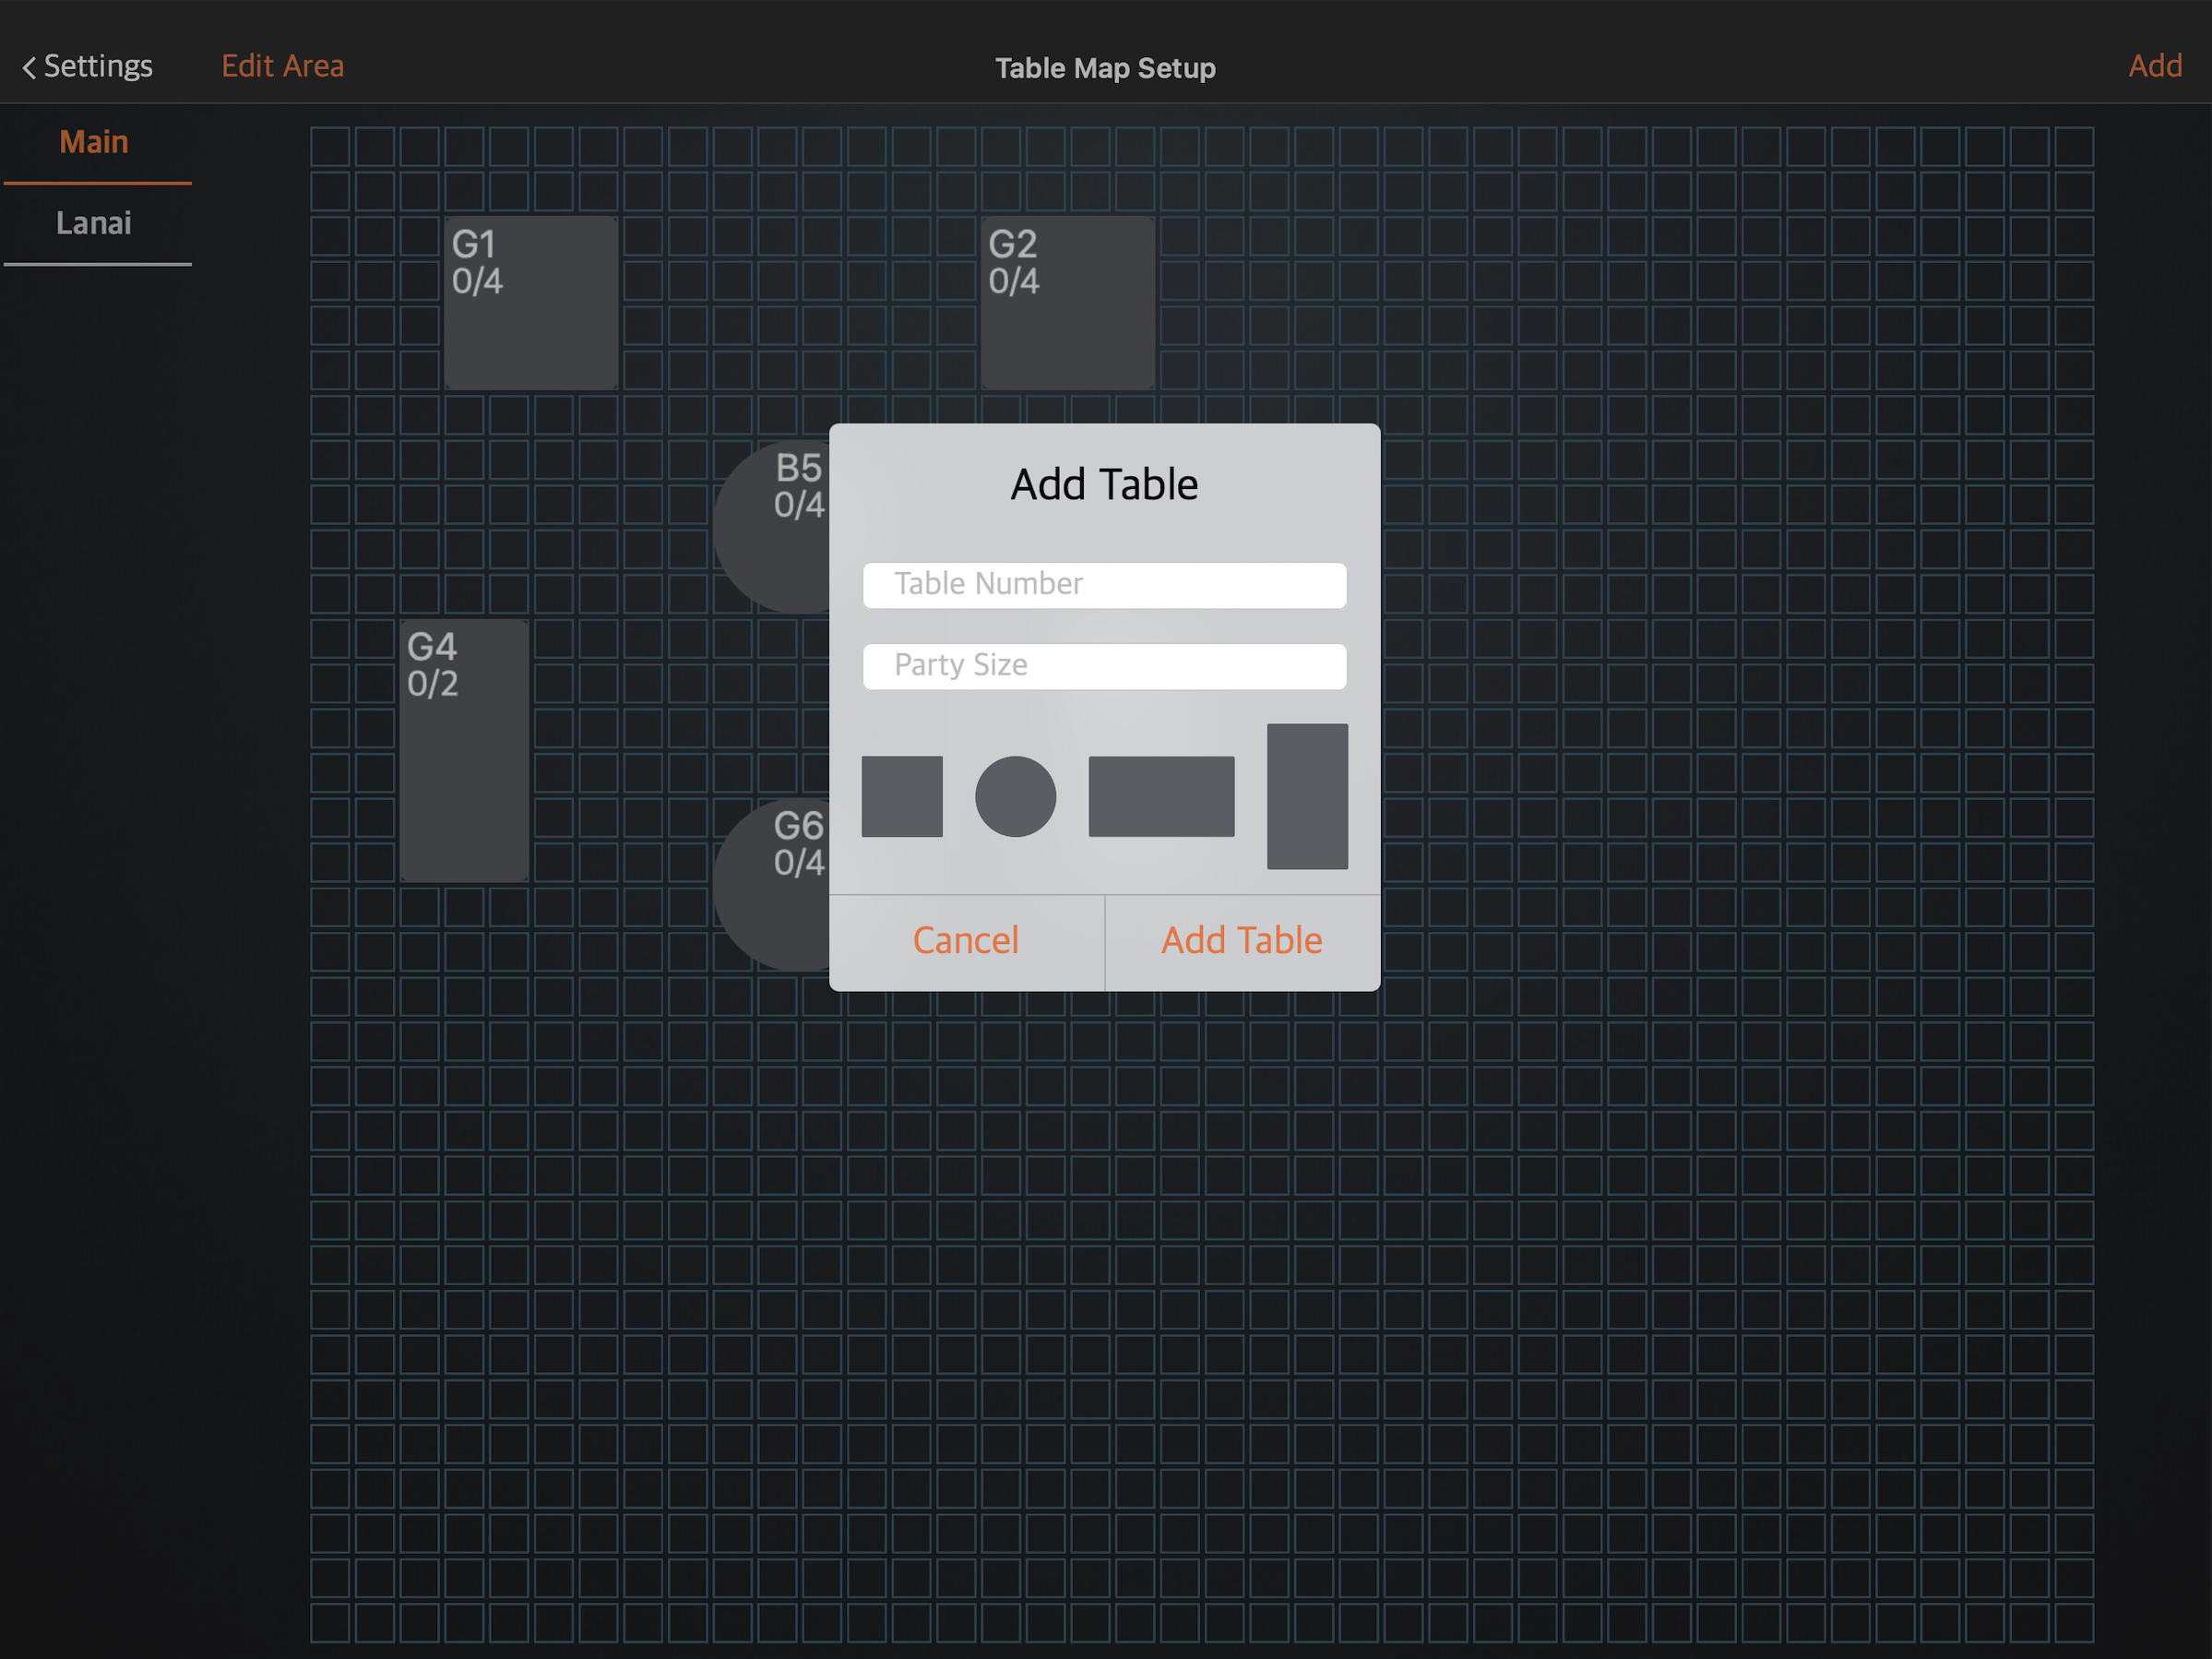
- Tap Add Table to confirm.
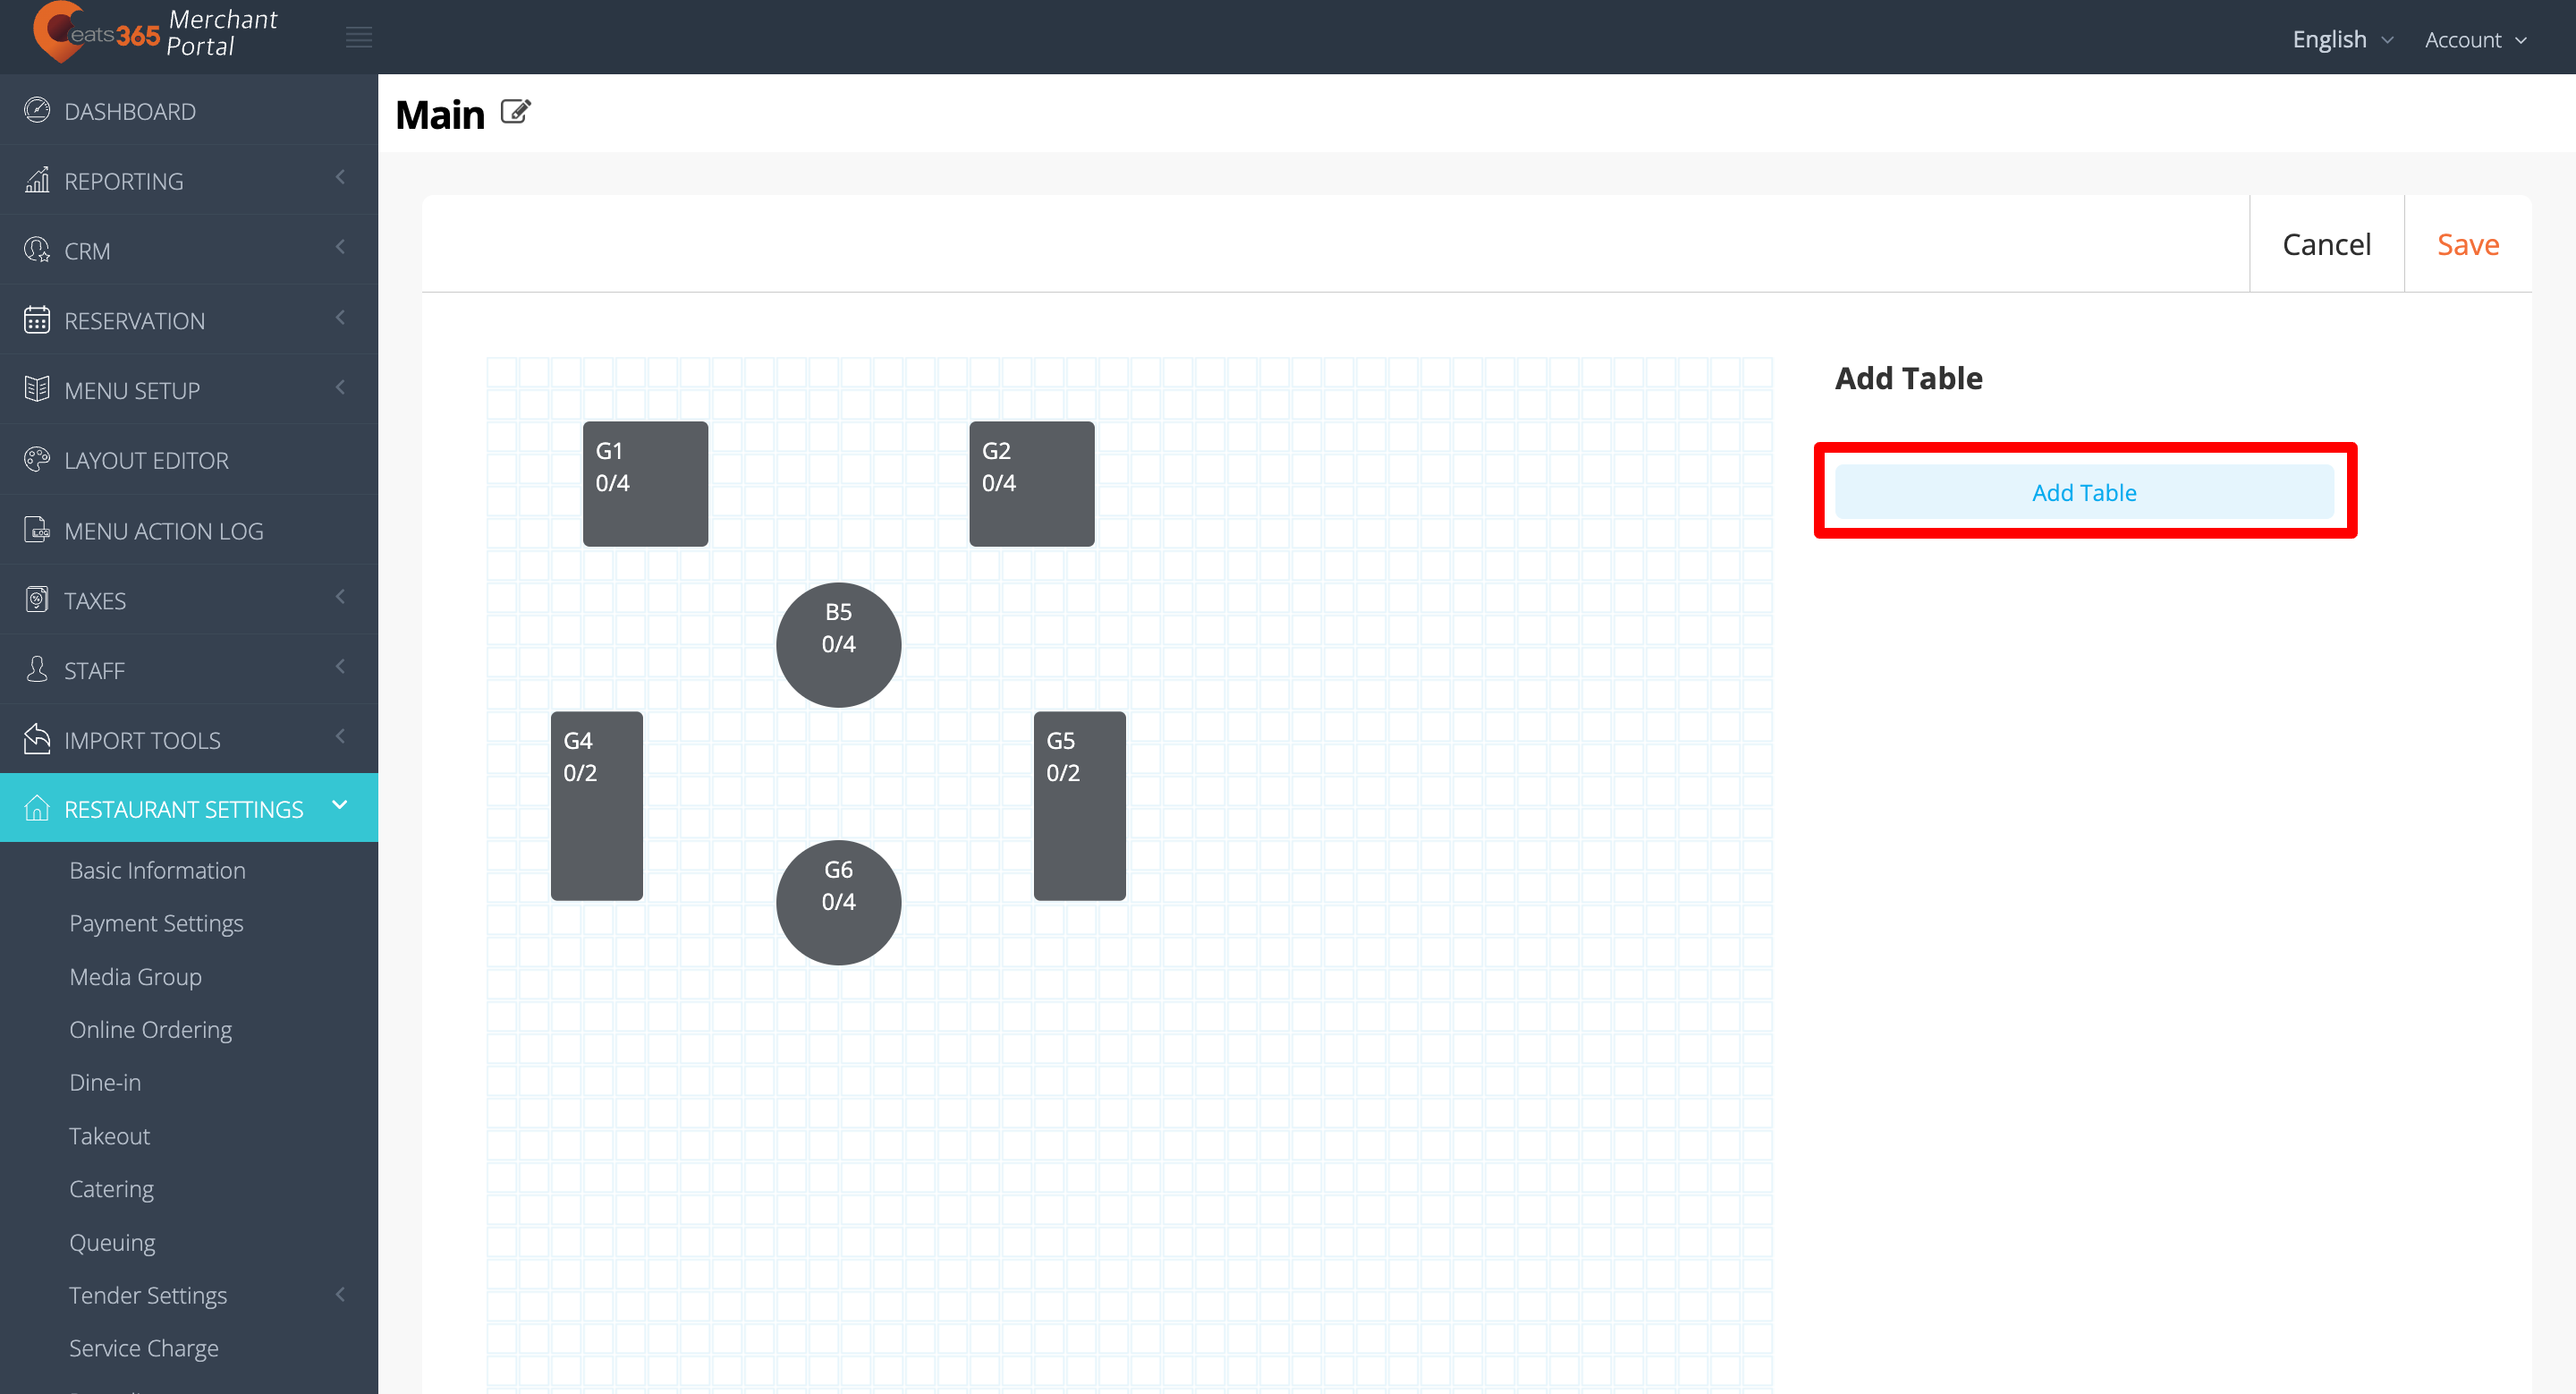
Merchant Portal (Classic Theme)
- Log in to the Merchant Portal.
- On the left panel, click on Restaurant Settings. Then, select Table Map Setup.
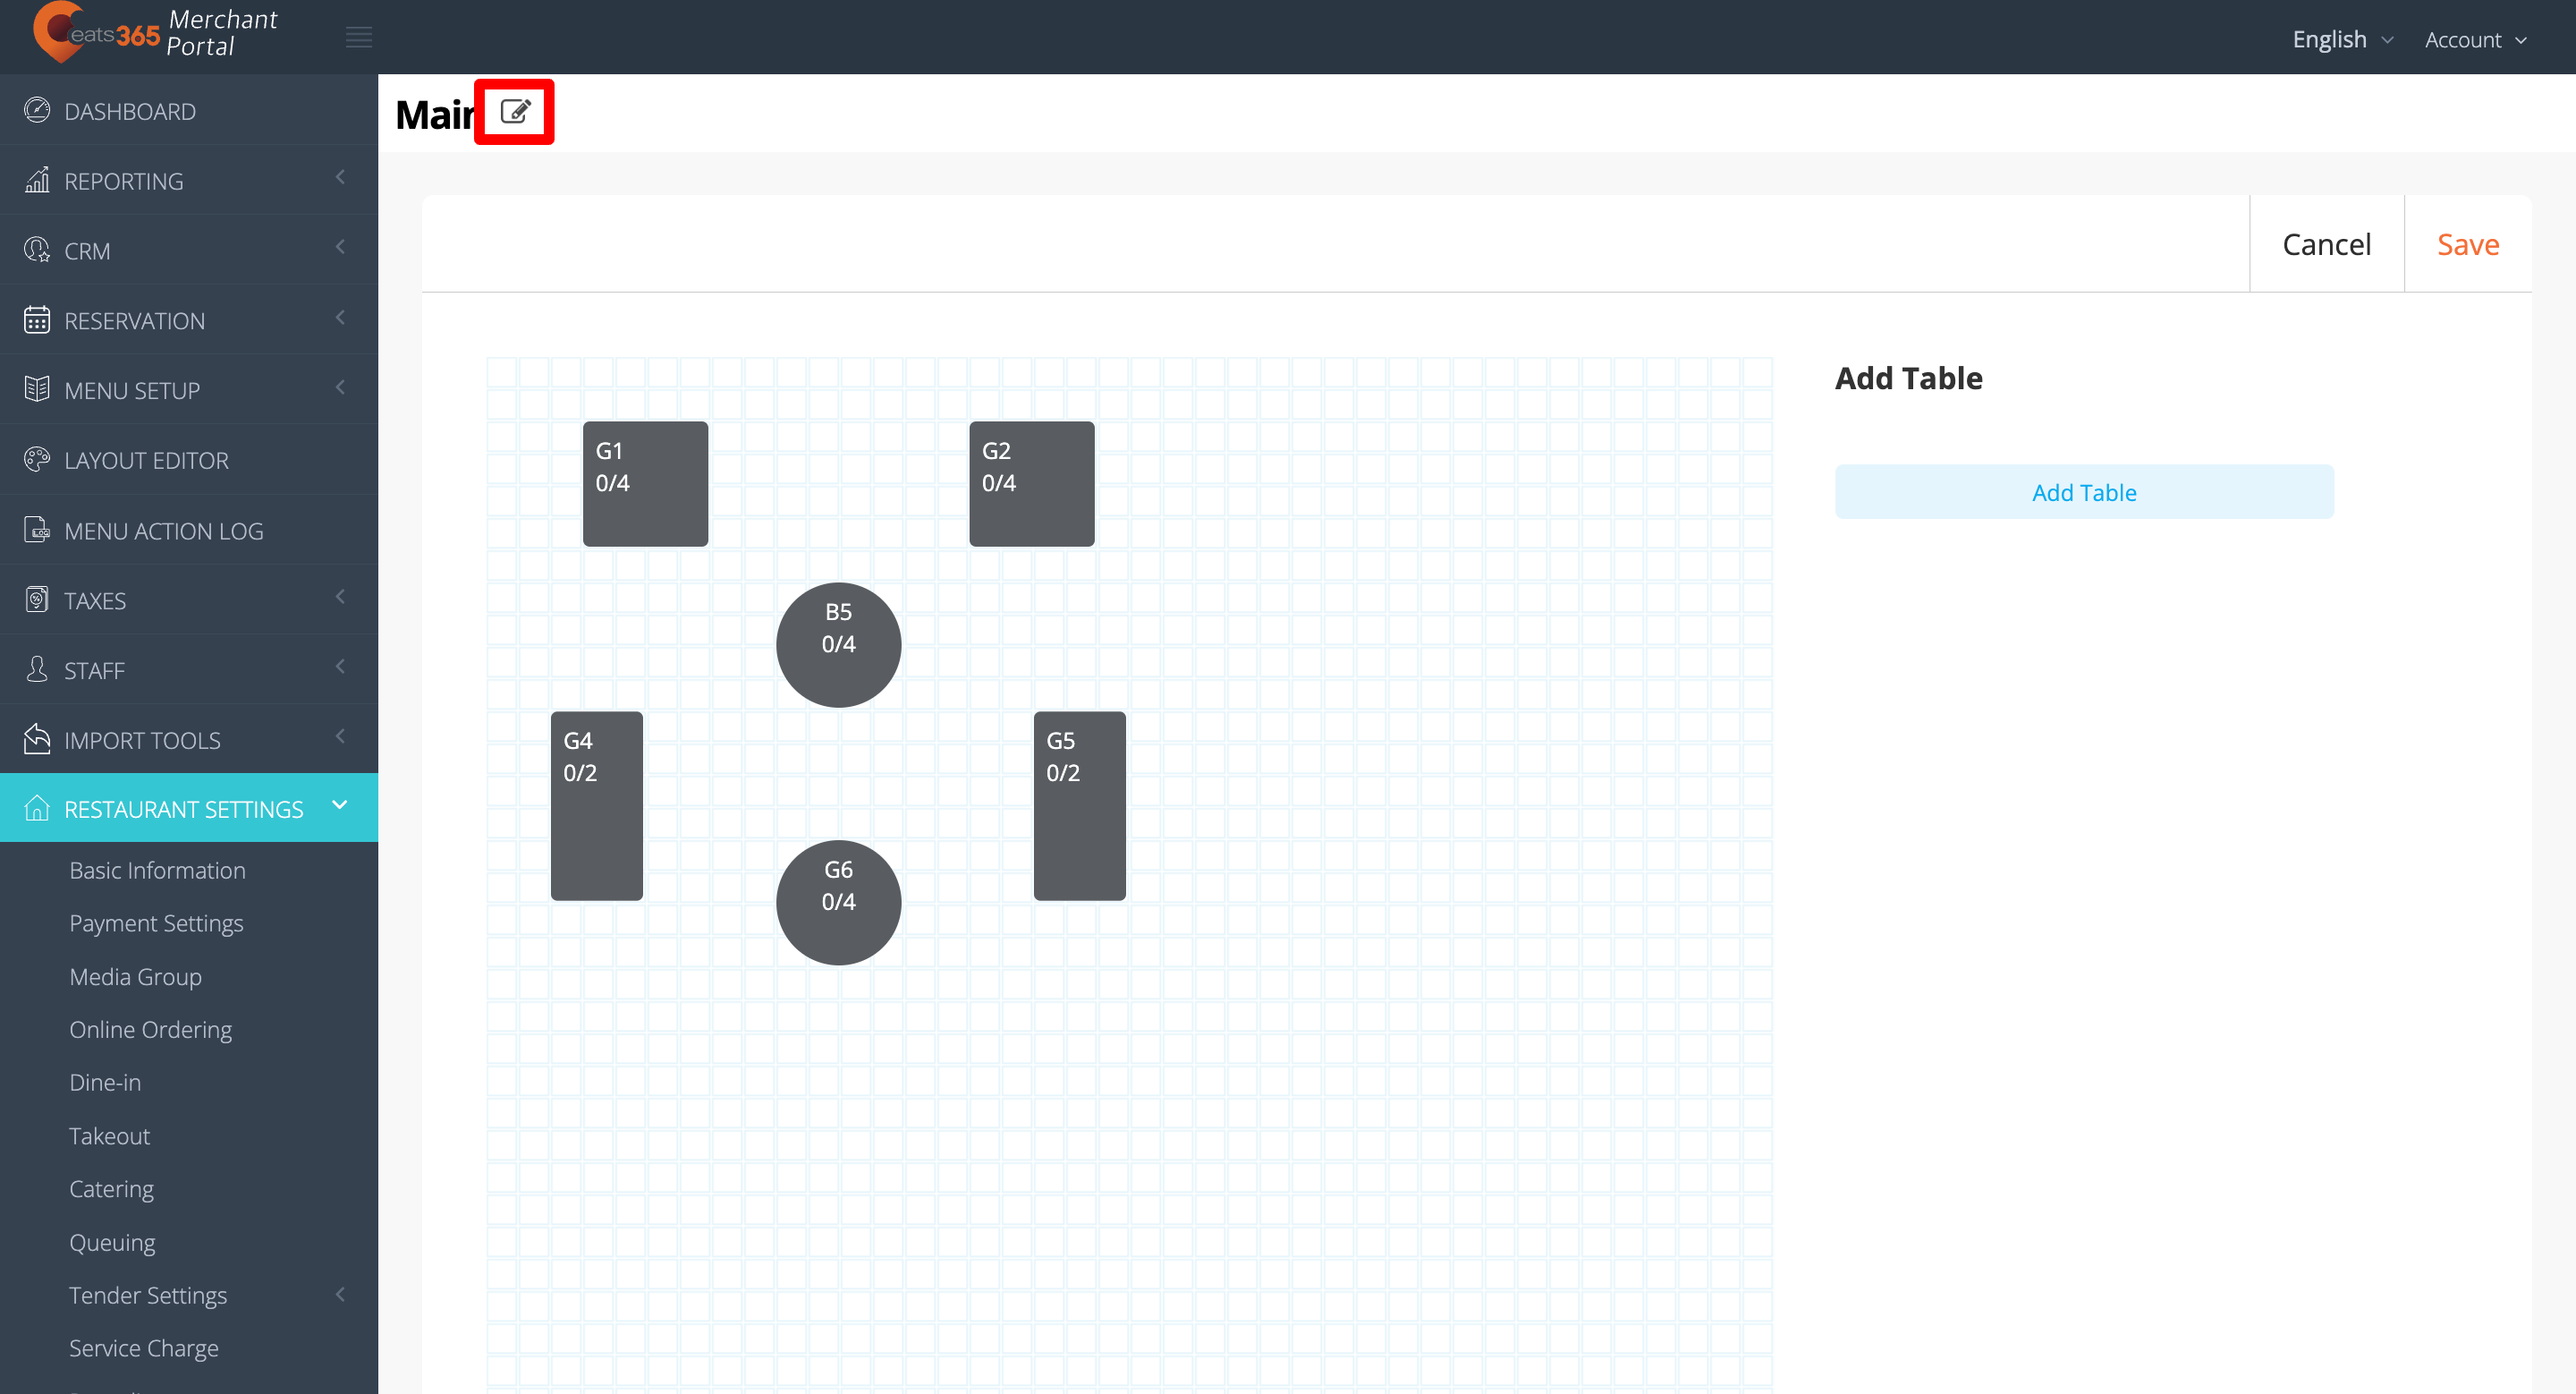
- Select the area where you want to add a table, then click on Edit .
- Under Add Table, click on Add Table.
- Enter the table’s information. You can assign a Table Number, add the Party Size, and choose the type of table that you want to set up.
Tip: You can enter multiple table numbers to generate multiple tables simultaneously.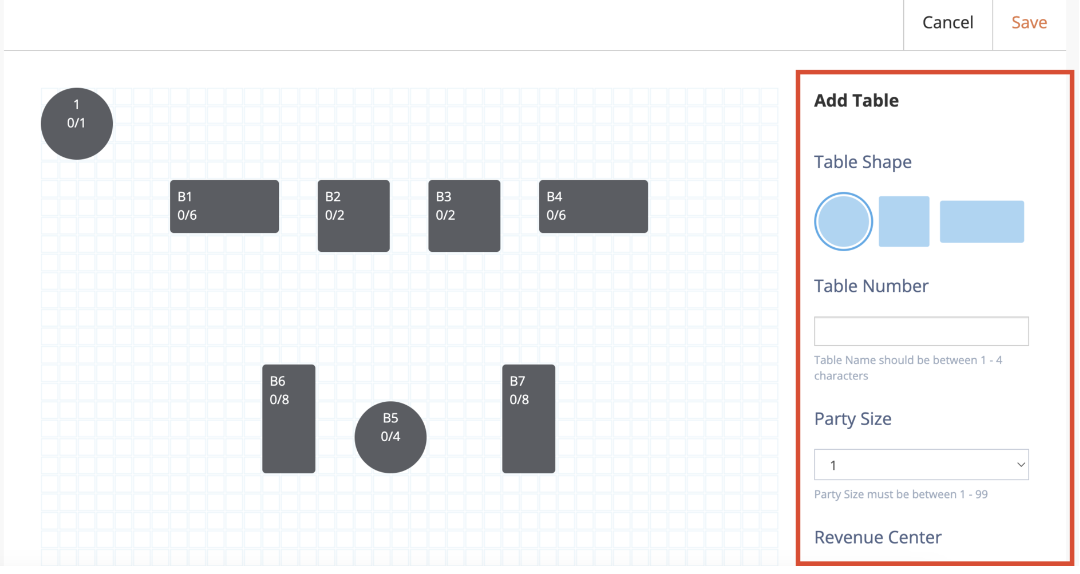
- (Optional) To add a Revenue Center, click on +Add Revenue Center. Then, enter the Revenue Center name. Tip: A Revenue Center can determine how much revenue is generated per area or table. When you add a Revenue Center to a table, you can analyze how much revenue is generated for that table. You can also create a Revenue Center from the System Preferences settings. For more information, refer to Manage System Preferences.
- Click on Add Table.
- Click on Save to confirm.
Merchant Portal 2.0
- Log in to the Merchant Portal.
- On the left panel, click on Restaurant Settings. Then, select Table Map Setup.
- Select the area where you want to add a table, then click on Edit .
- Enter the table’s information. You can assign a Table Number, add the Party Size, and choose the type of table that you want to set up.
Tip: You can enter multiple Table Numbers to generate multiple tables simultaneously.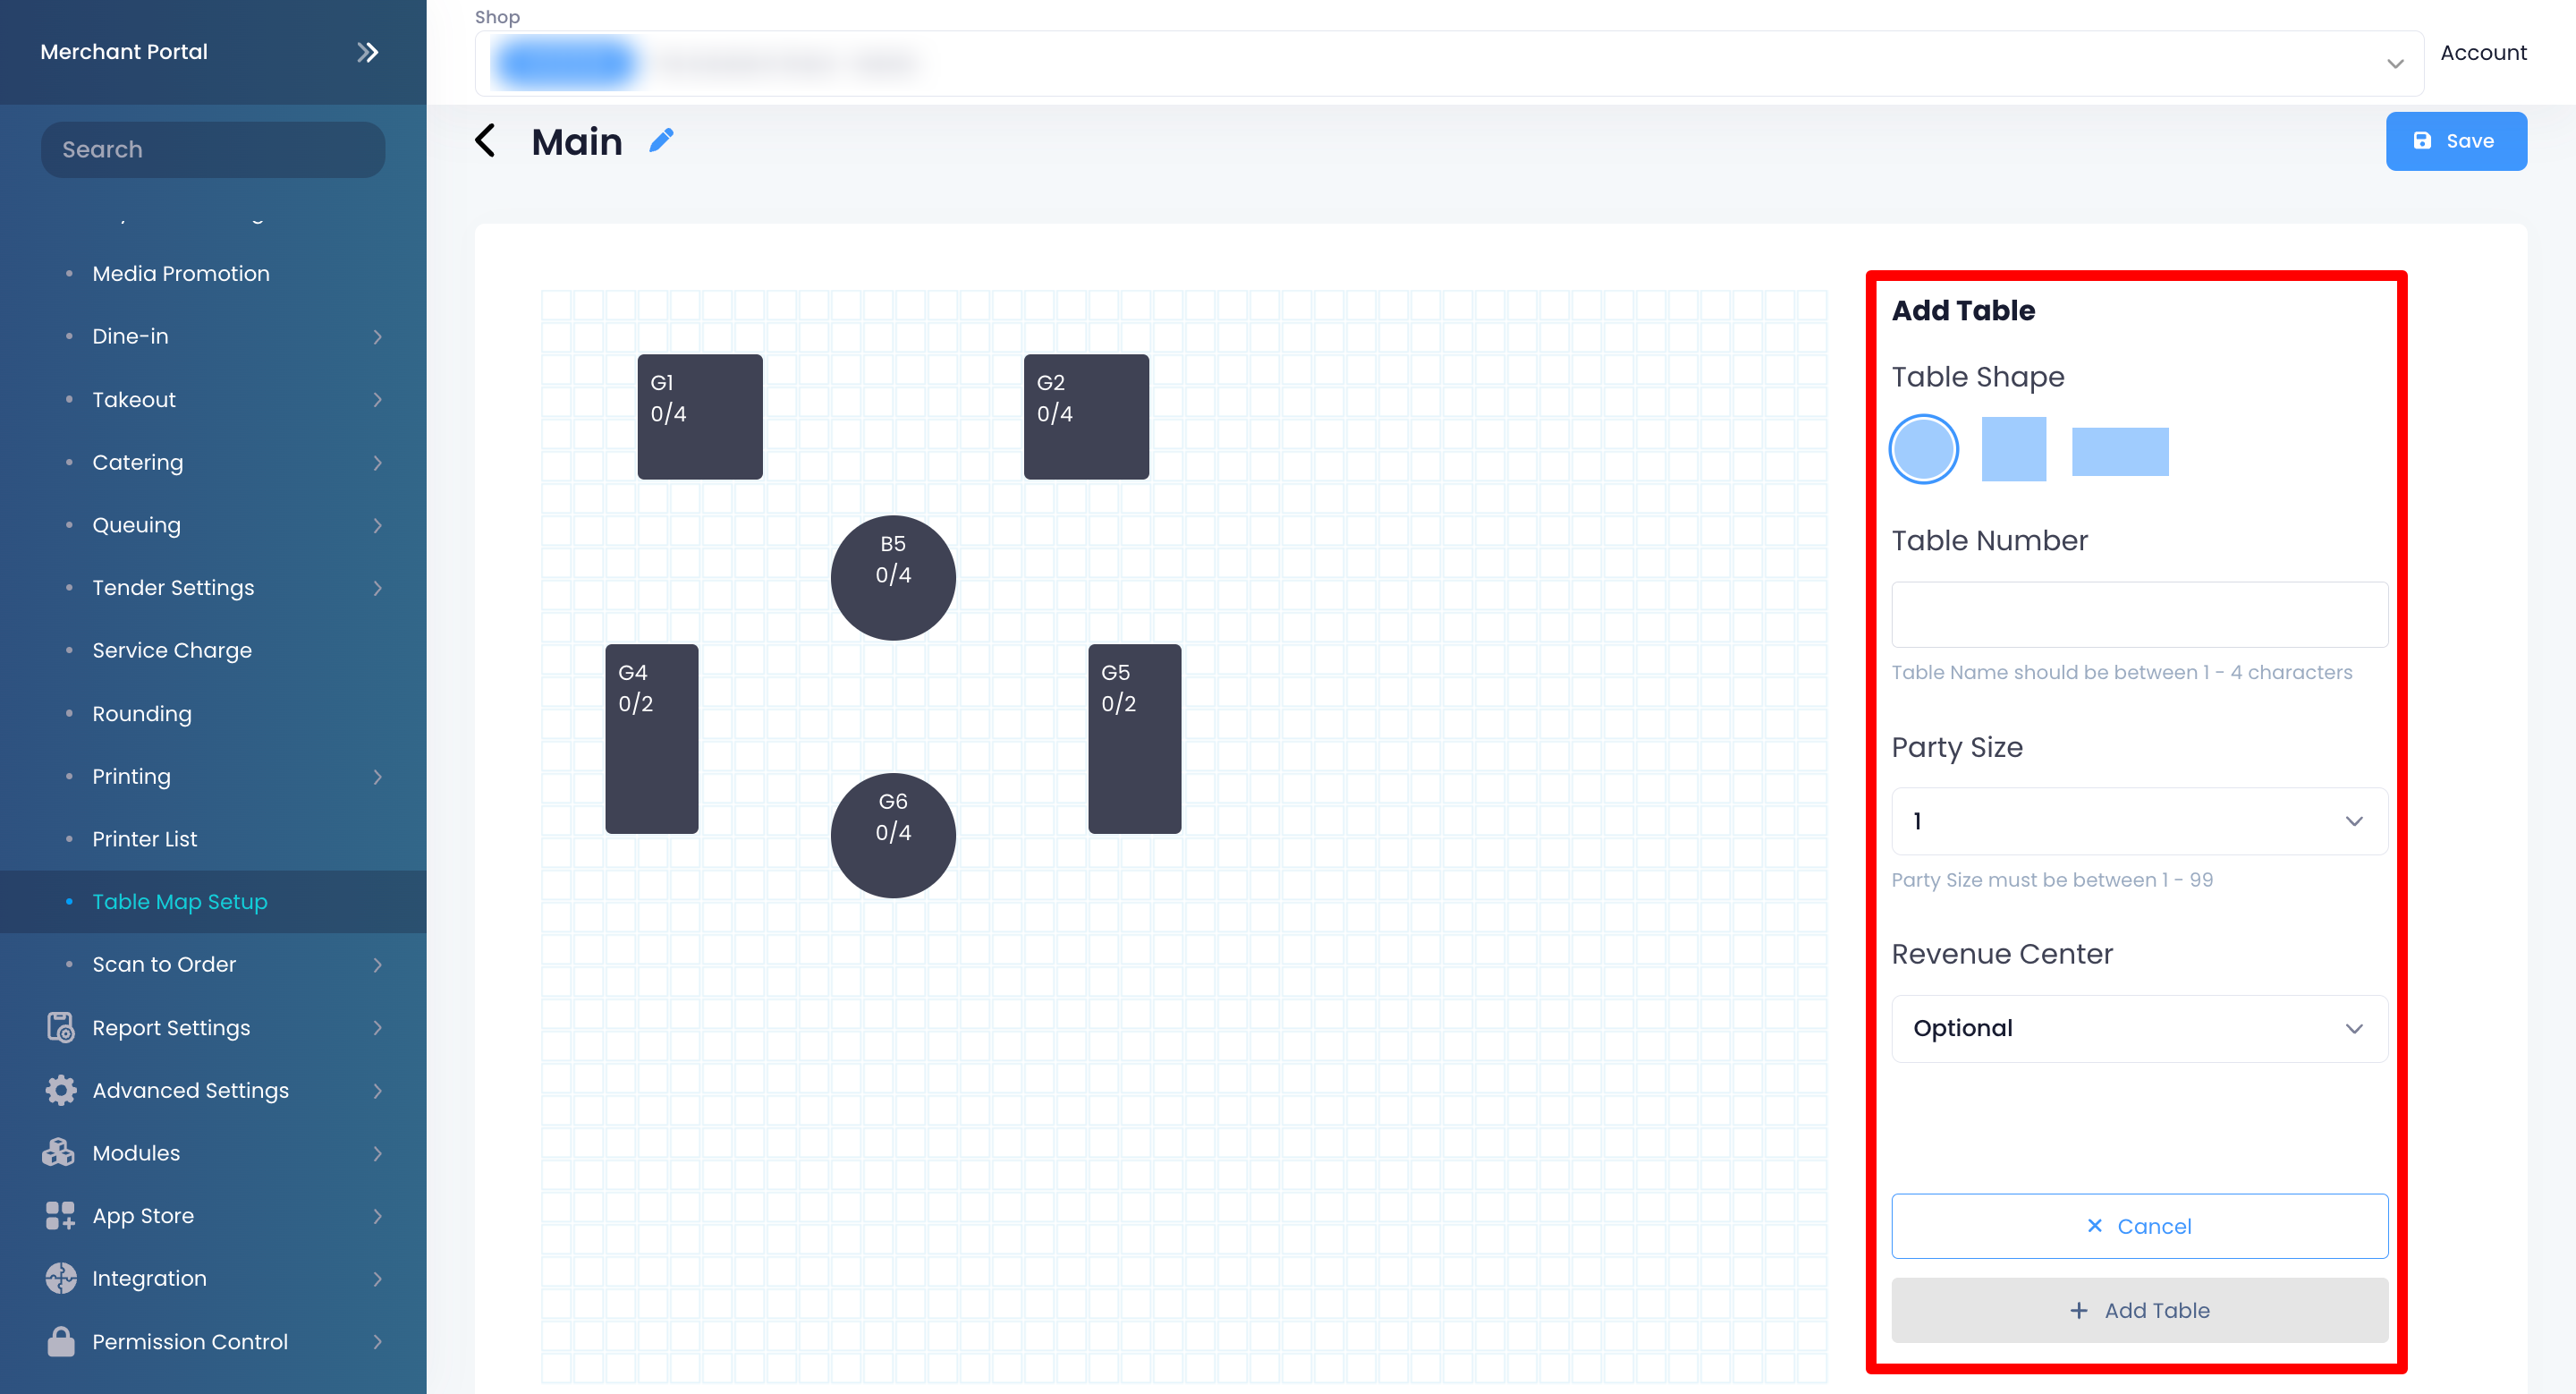
- (Optional) To add a Revenue Center, under Revenue Center, select Add Revenue Center from the drop-down list. Then, enter the Revenue Center name. Tip: A Revenue Center can determine how much revenue is generated per area or table. When you add a Revenue Center to a table, you can analyze how much revenue is generated for that table. You can also create a Revenue Center from the System Preferences settings. For more information, refer to Manage System Preferences.
- Click on Add Table.
- Click on Save to confirm.
Manage tables
Reorder tables
To rearrange the placement of your tables, follow the steps below:
Eats365 POS
- Log in to the Eats365 POS.
- At the top left, tap Settings .
- Under General, tap Table Map Setup.
- On the left panel, select the area where you want to reorder tables.
- Tap and hold the table that you’d like to reorder. Then, drag the table to your preferred position.
Merchant Portal (Classic Theme)
- Log in to the Merchant Portal.
- On the left panel, click on Restaurant Settings. Then, select Table Map Setup.
- Select the area where you want to reorder tables, then click on Edit .
- Click and hold on the table that you’d like to reorder. Then, drag the table to your preferred position.
Merchant Portal 2.0
- Log in to the Merchant Portal.
- On the left panel, click on Restaurant Settings. Then, select Table Map Setup.
- Select the area where you want to reorder tables, then click on Edit .
- Click and hold on the table that you’d like to reorder. Then, drag the table to your preferred position.
Edit a table
To modify a table, follow the steps below:
Eats365 POS
- Log in to the Eats365 POS.
- At the top left, tap Settings .
- Under General, tap Table Map Setup.
- On the left panel, select the area where you want to edit a table.
- Tap the table that you’d like to edit. Then, update the table.
Note: You can’t modify the shape of the table. To change the shape of an existing table, you must delete the existing table first and then create a new table. - Tap Save to confirm the changes.
Merchant Portal (Classic Theme)
- Log in to the Merchant Portal.
- On the left panel, click on Restaurant Settings. Then, select Table Map Setup.
- Select the area where you want to edit a table, then click on Edit .
- Click on the table that you’d like to edit. Then, update the table.
- At the top right, click on Save to confirm the changes.
Merchant Portal 2.0
- Log in to the Merchant Portal.
- On the left panel, click on Restaurant Settings. Then, select Table Map Setup.
- Select the area where you want to edit a table, then click on Edit .
- Click on the table that you’d like to edit. Then, update the table.
- At the top right, click on Save to confirm the changes.
Delete a table
To delete a table, follow the steps below:
Eats365 POS
- Log in to the Eats365 POS.
- At the top left, tap Settings .
- Under General, tap Table Map Setup.
- On the left panel, select the area where you want to delete a table.
- Tap the table that you’d like to delete. Then, tap Delete. A prompt appears to confirm if you want to delete the table.
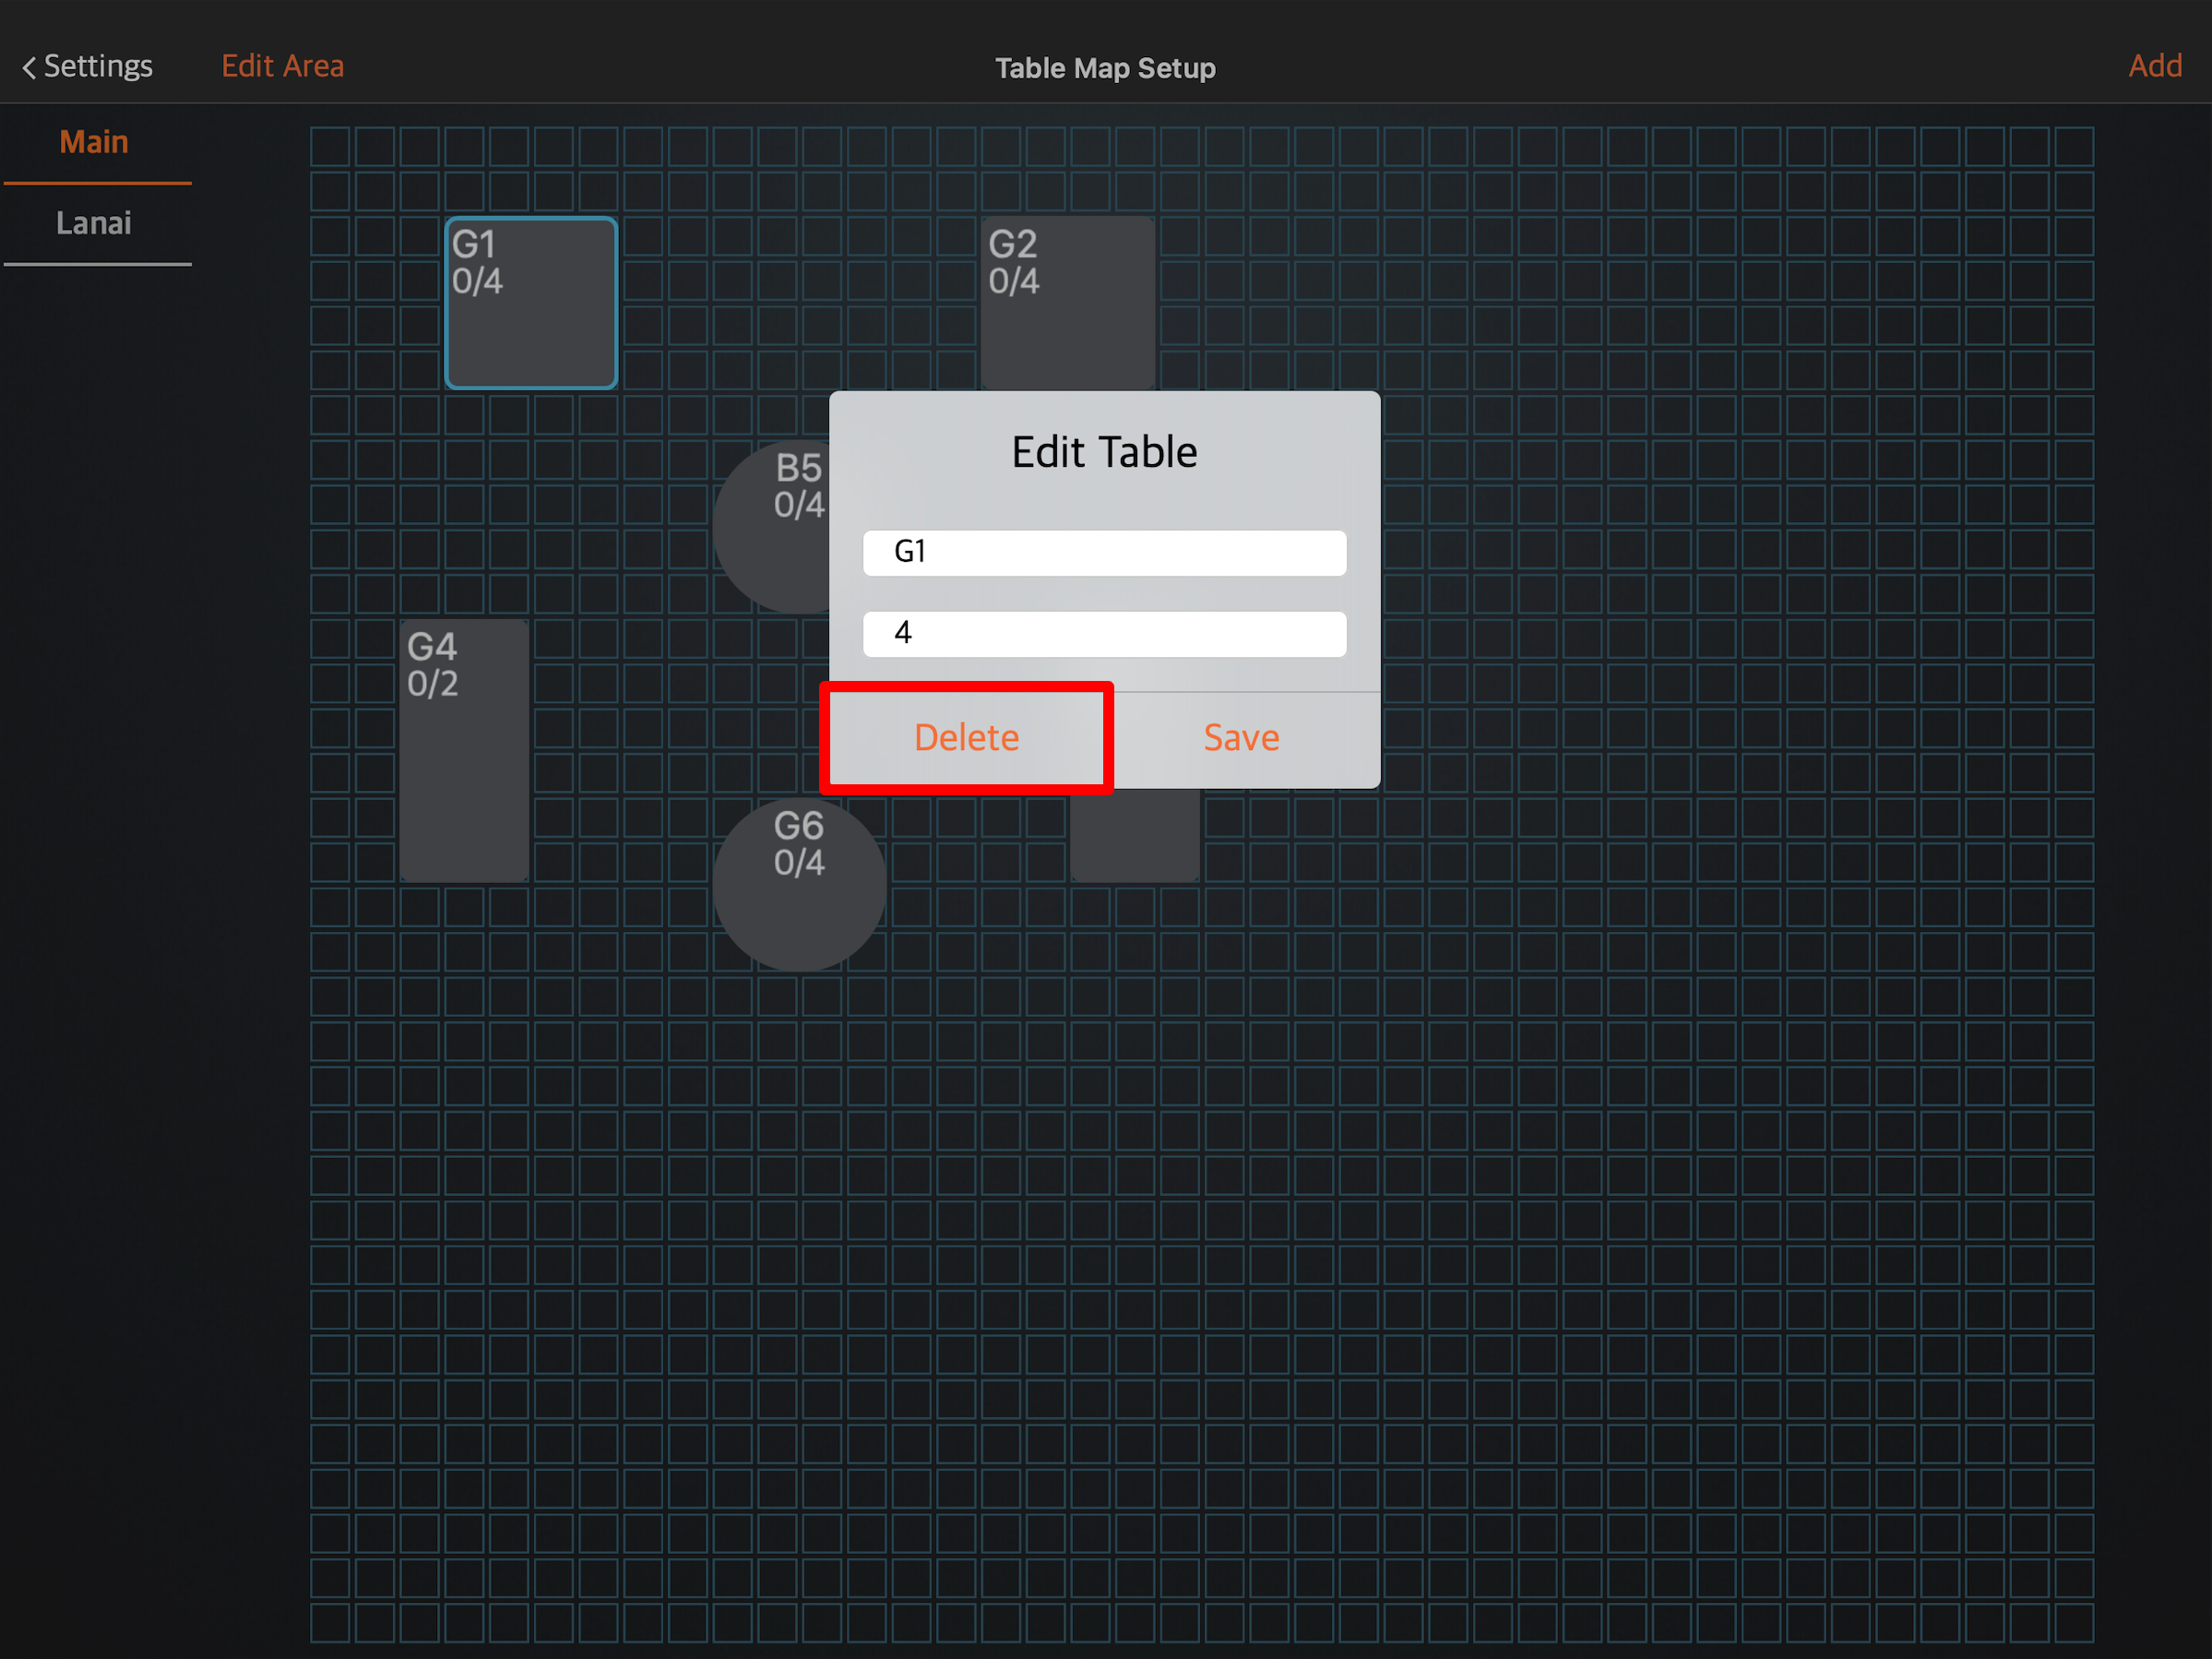
- Tap Delete to confirm.
Merchant Portal (Classic Theme)
- Log in to the Merchant Portal.
- On the left panel, click on Restaurant Settings. Then, select Table Map Setup.
- Select the area where you want to delete a table, then click on Edit .
- Click the table that you’d like to delete.
- Under Edit Table, click on Delete Table. Then, click on Confirm.

- At the top right, click on Save to confirm the changes.
Merchant Portal 2.0
- Log in to the Merchant Portal.
- On the left panel, click on Restaurant Settings. Then, select Table Map Setup.
- Select the area where you want to delete a table, then click on Edit .
- Click the table that you’d like to delete.
- Under Edit Table, click on Delete Table.
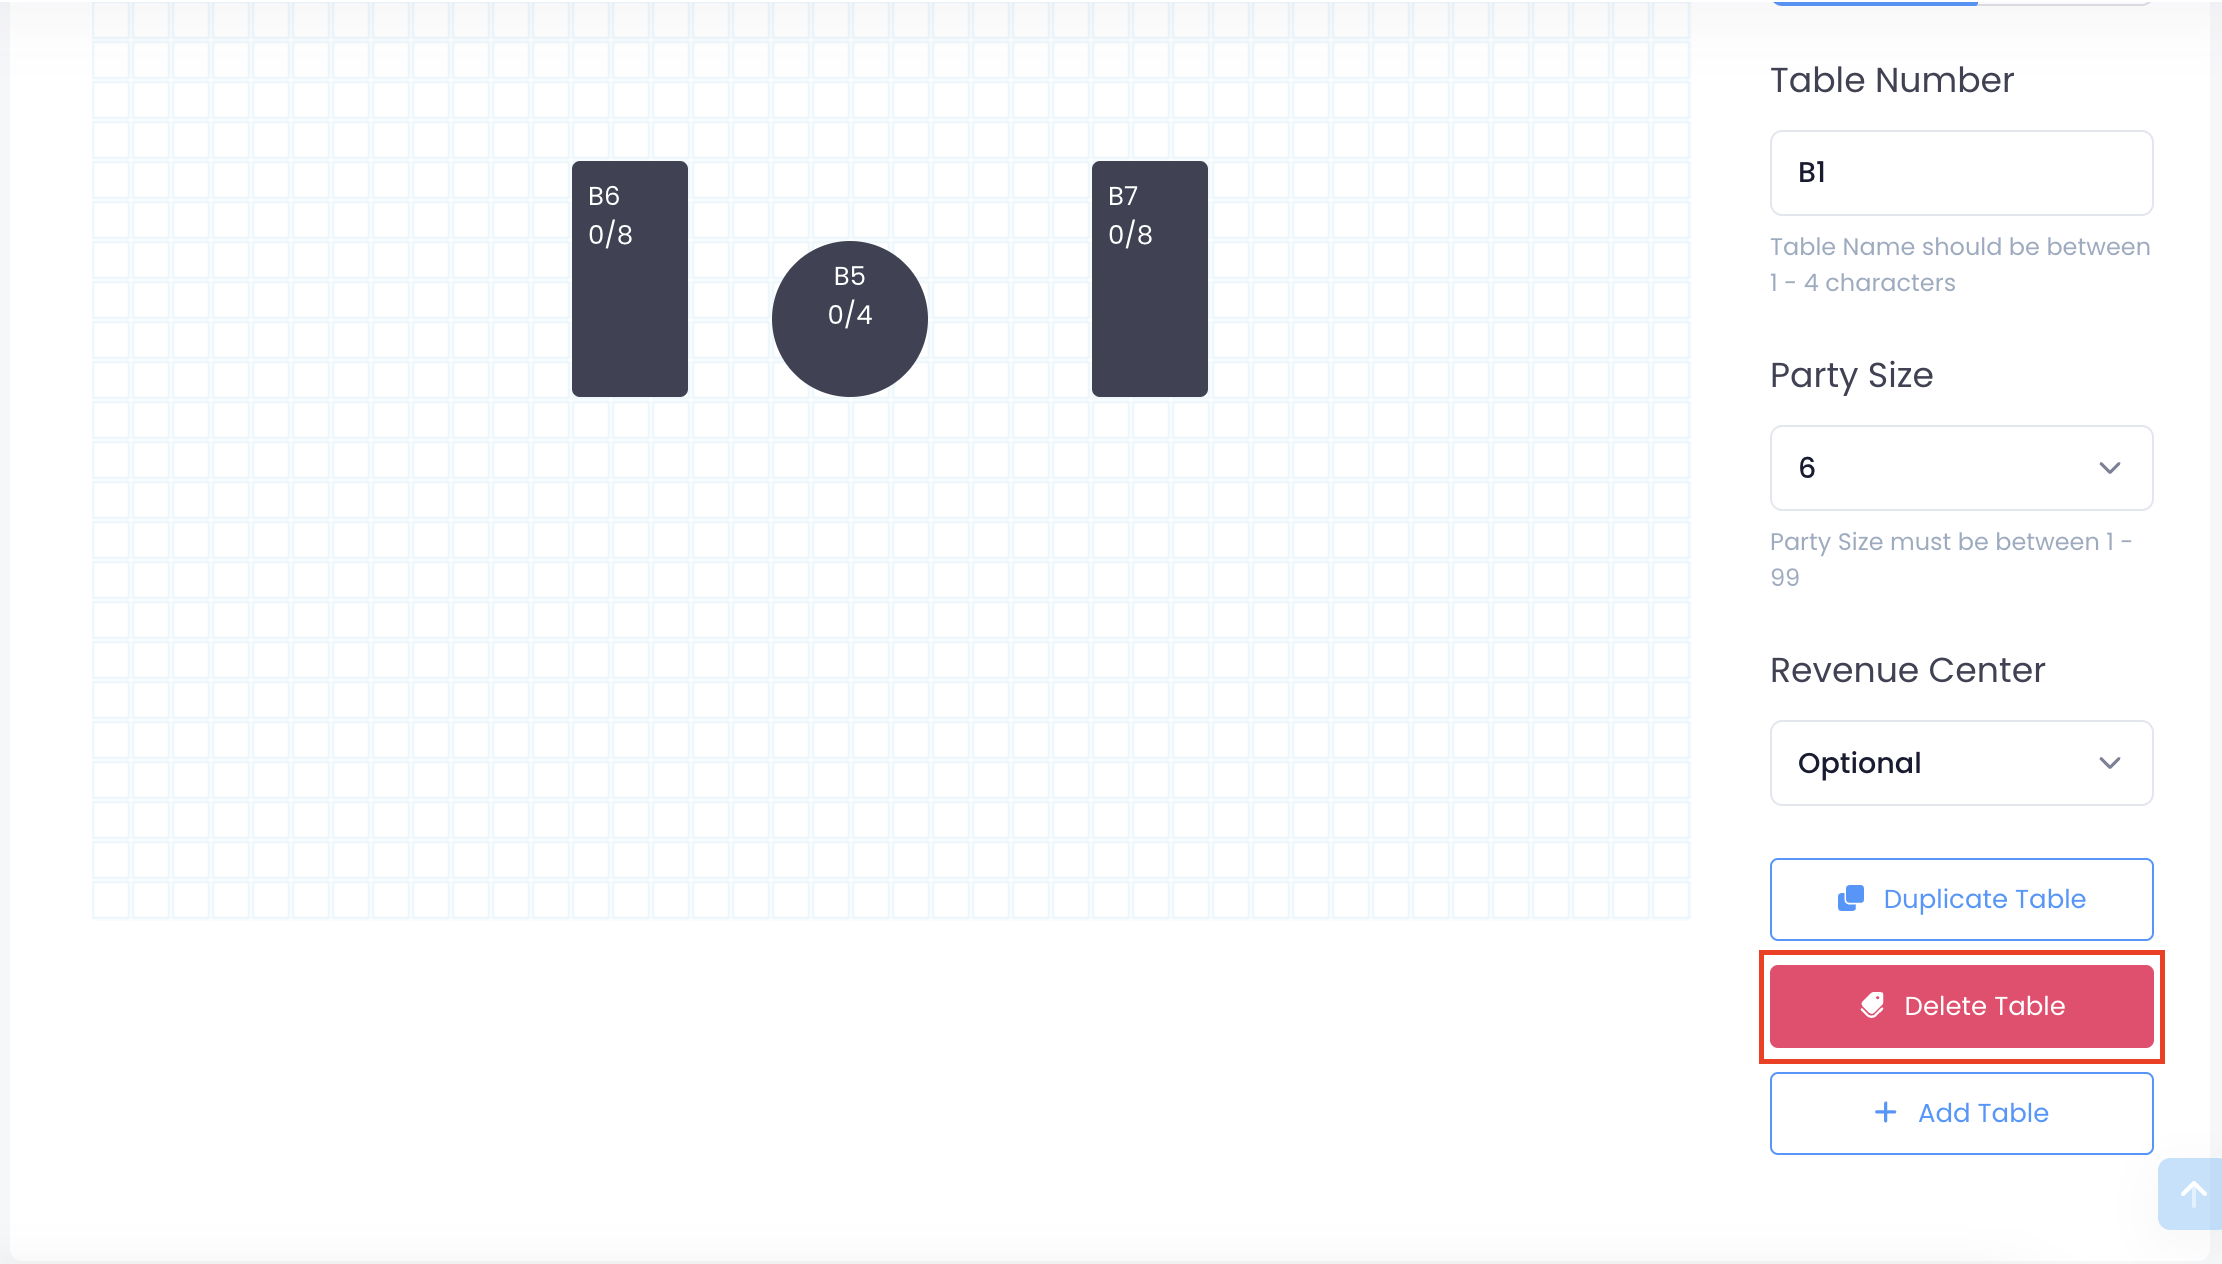
- At the top right, click on Save to confirm the changes.
Duplicate a table
To make a copy of a table, follow the steps below:
Merchant Portal (Classic Theme)
- Log in to the Merchant Portal.
- On the left panel, click on Restaurant Settings. Then, select Table Map Setup.
- Select the area where you want to duplicate a table, then click on Edit .
- Click the table that you’d like to duplicate.
- Under Edit Table, click on Duplicate Table.
Note: The duplicate table appears next to the original table.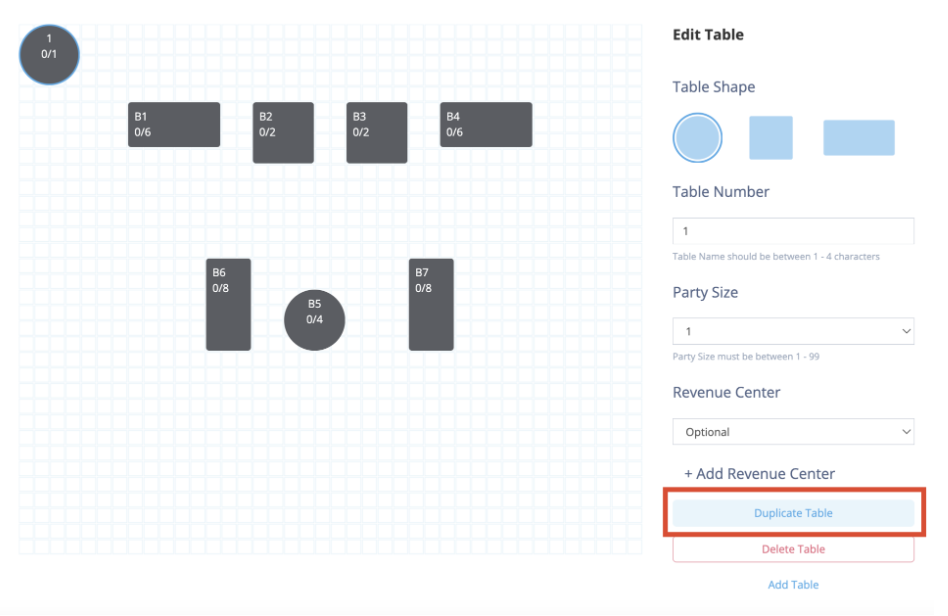
- At the top right, click on Save to confirm the changes.
Merchant Portal 2.0
- Log in to the Merchant Portal.
- On the left panel, click on Restaurant Settings. Then, select Table Map Setup.
- Select the area where you want to duplicate a table, then click on Edit.
- Click the table that you’d like to duplicate.
- Under Edit Table, click on Duplicate Table.
Note: The duplicate table appears next to the original table.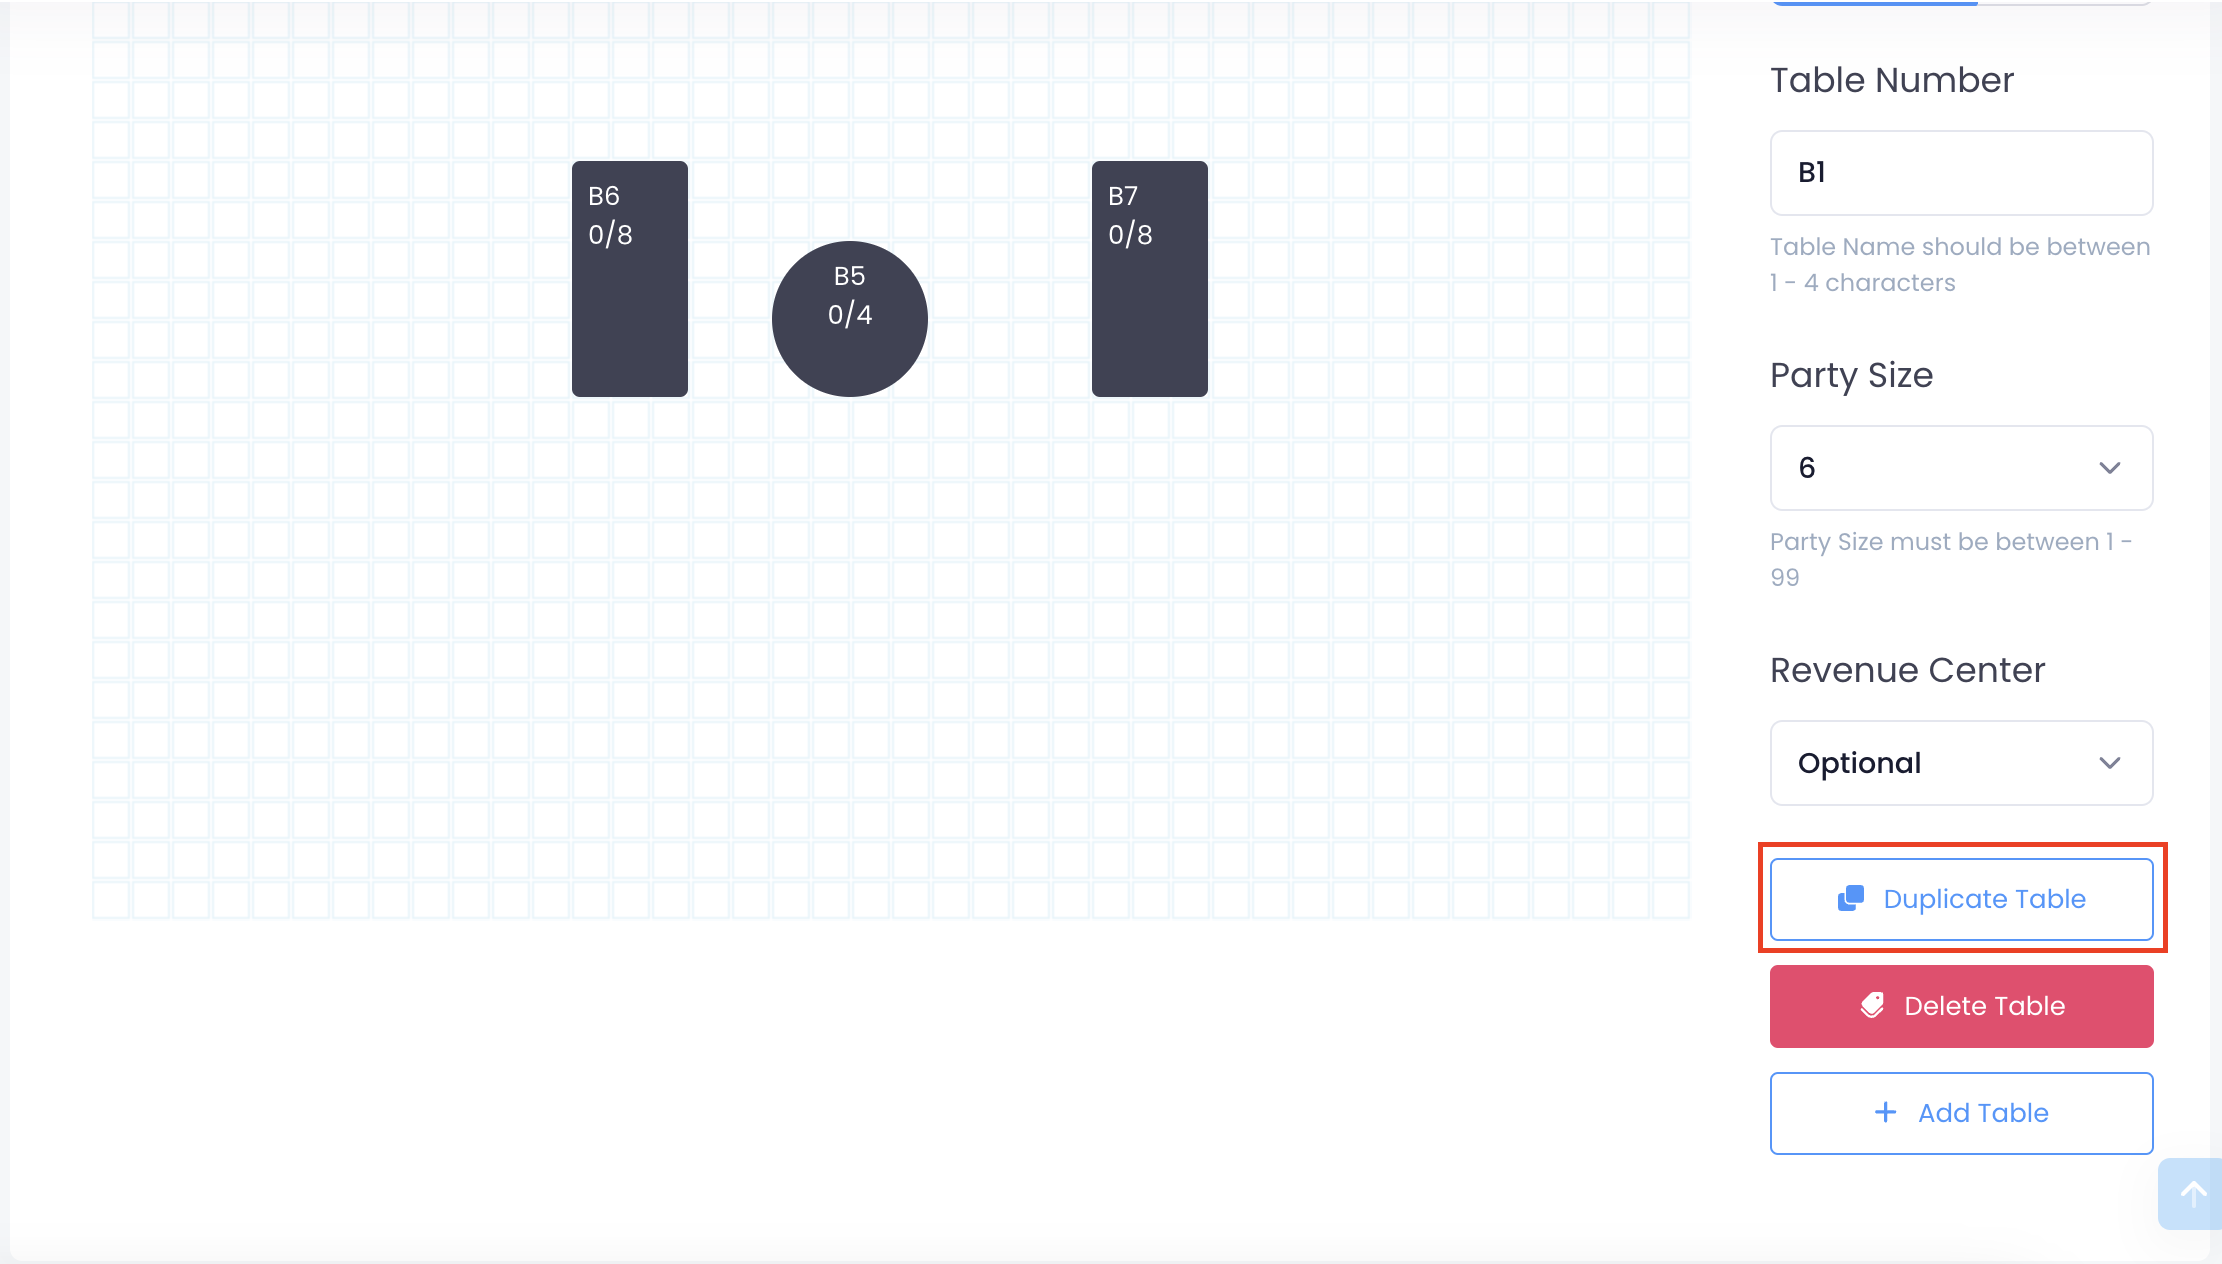
- At the top right, click on Save to confirm the changes.