Order Handling
All Product
Table of Contents
Add items to an order (Full Service)
Learn how to take and process dine-in and takeout orders for full-service restaurants on the Eats365 POS.
Once the customer is seated at a table or is ready to order, you can then take their orders and process them on the POS.
Add items to a dine-In order
To add items to a dine-In order, follow the steps below:
- Log in to the Eats365 POS.
- At the top left, tap Dine-In to get to the Table Map screen.
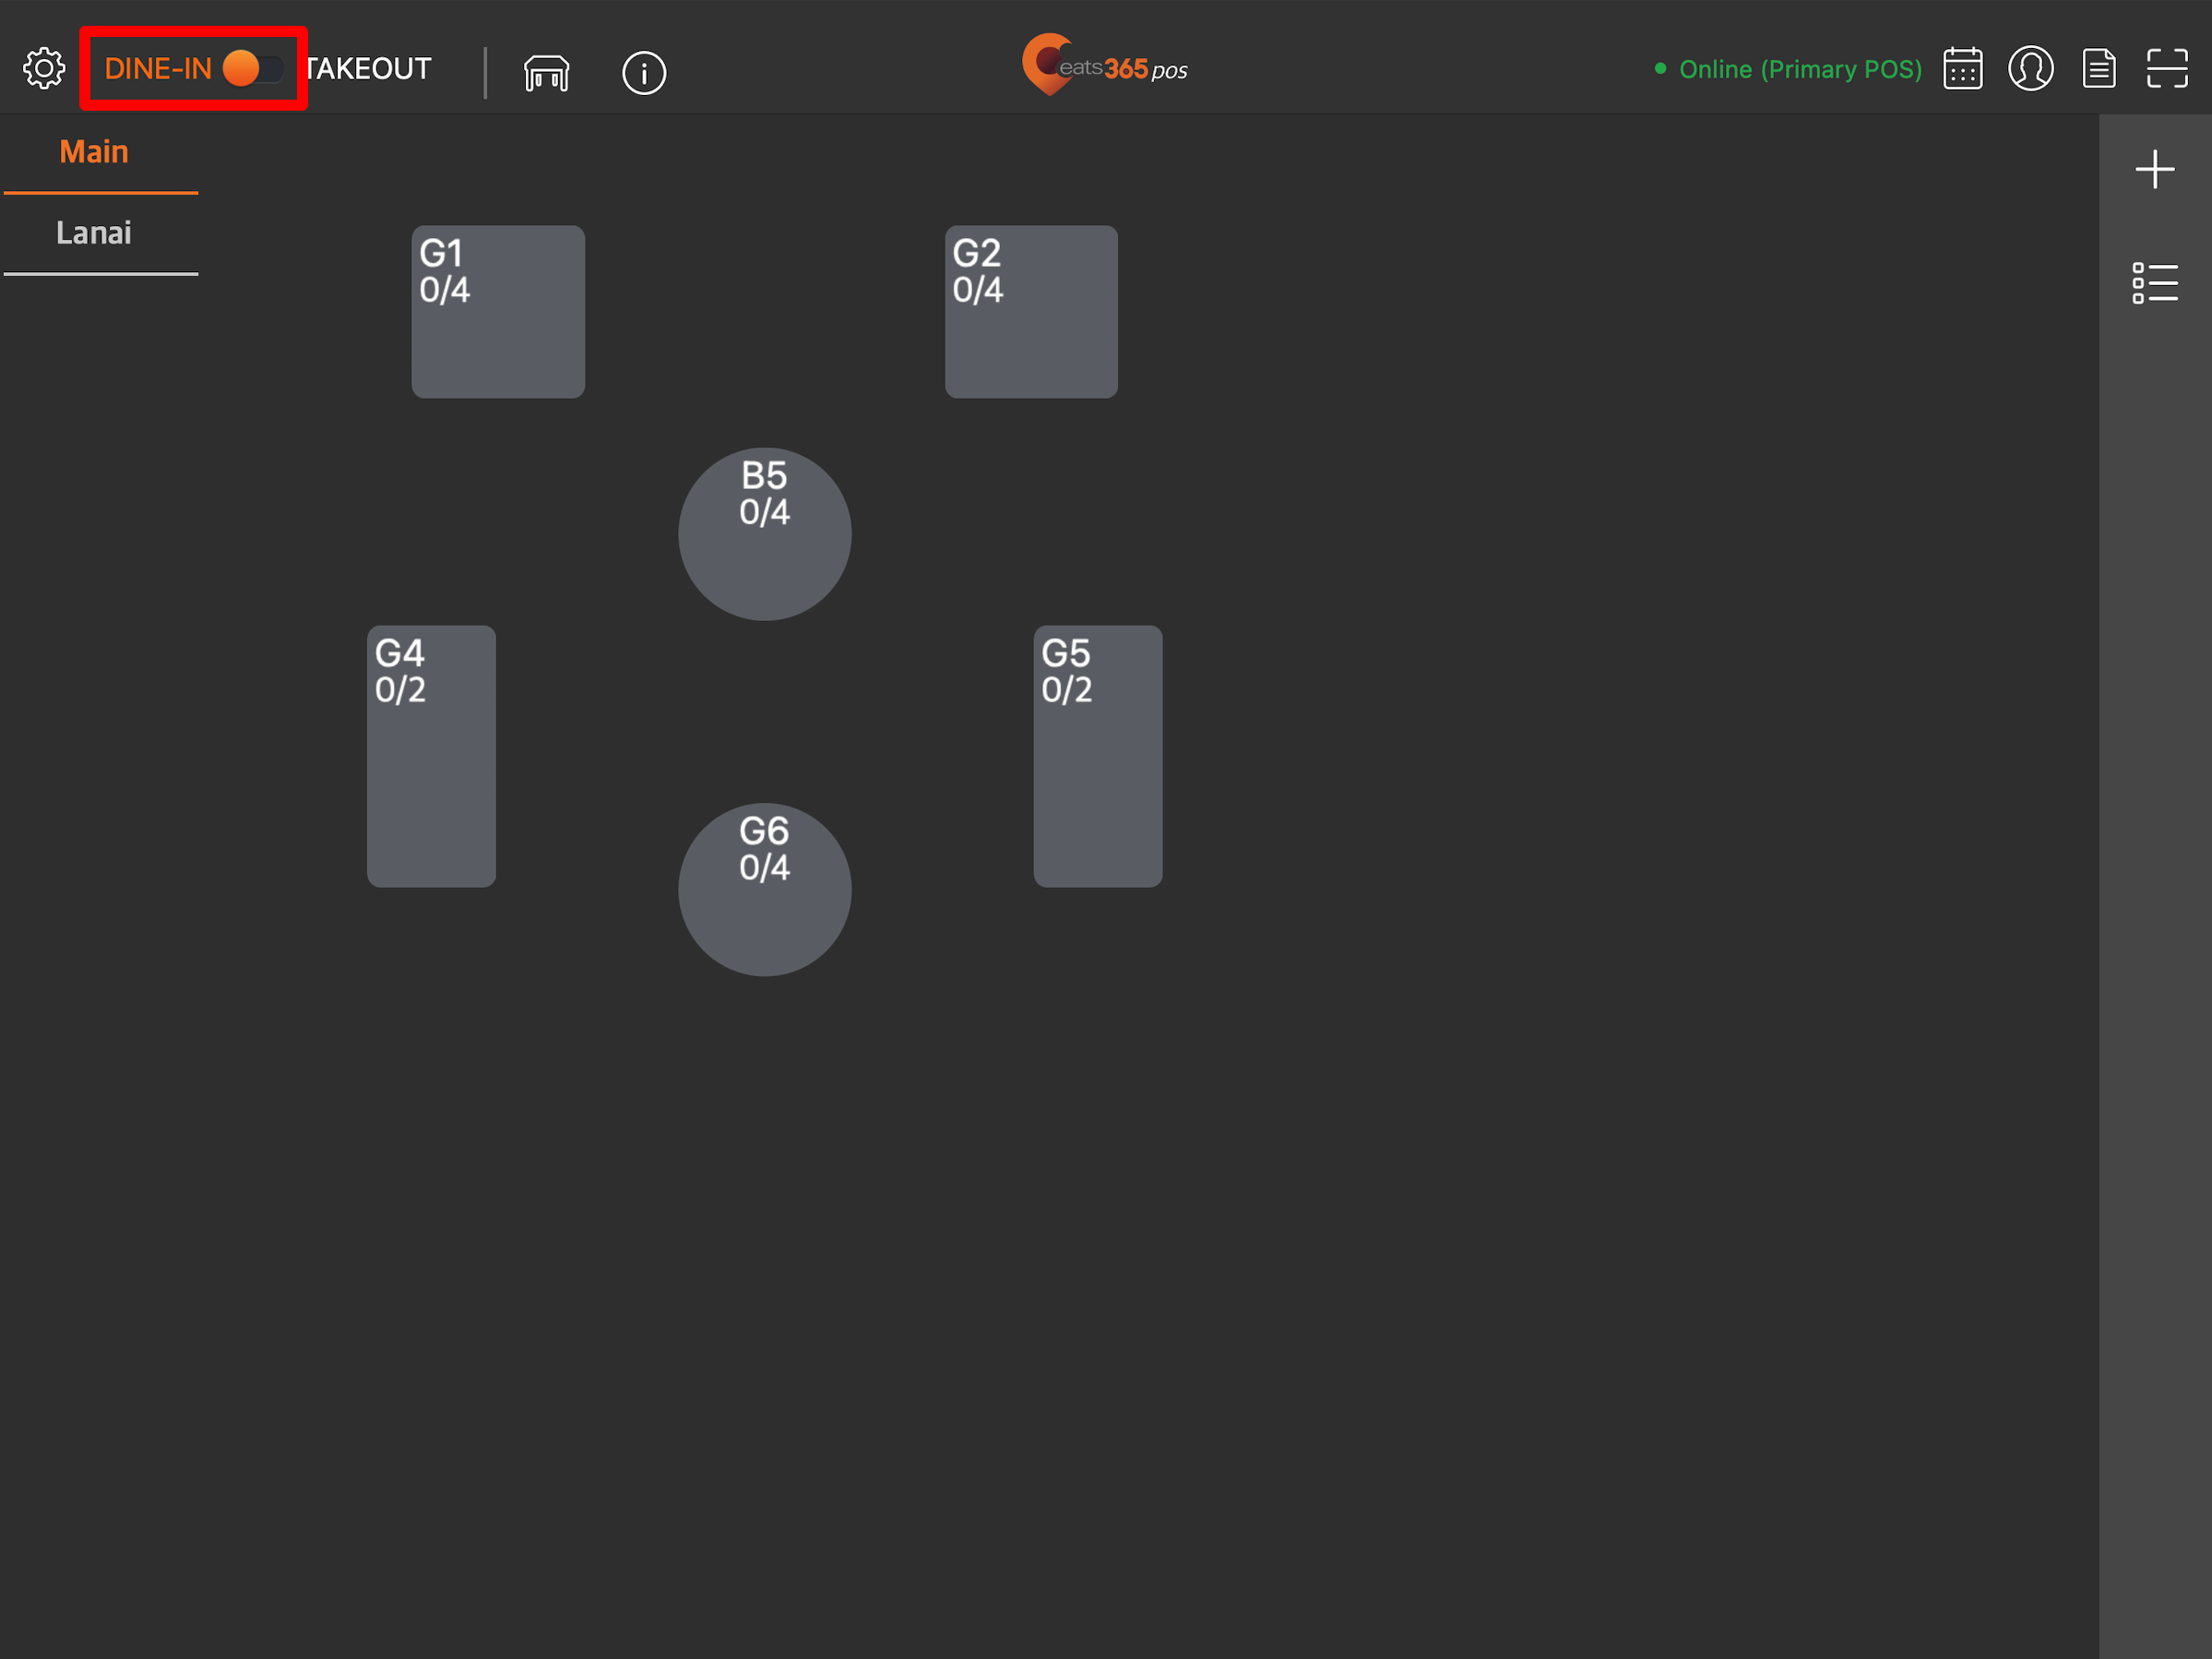
Tip: You can set the Table Map screen as the default view from the General Preferences settings, so you won’t need to tap "Dine-In" every time you log in. - If you have multiple areas, select the area where the table is located. Then, tap the table where the party is seated.
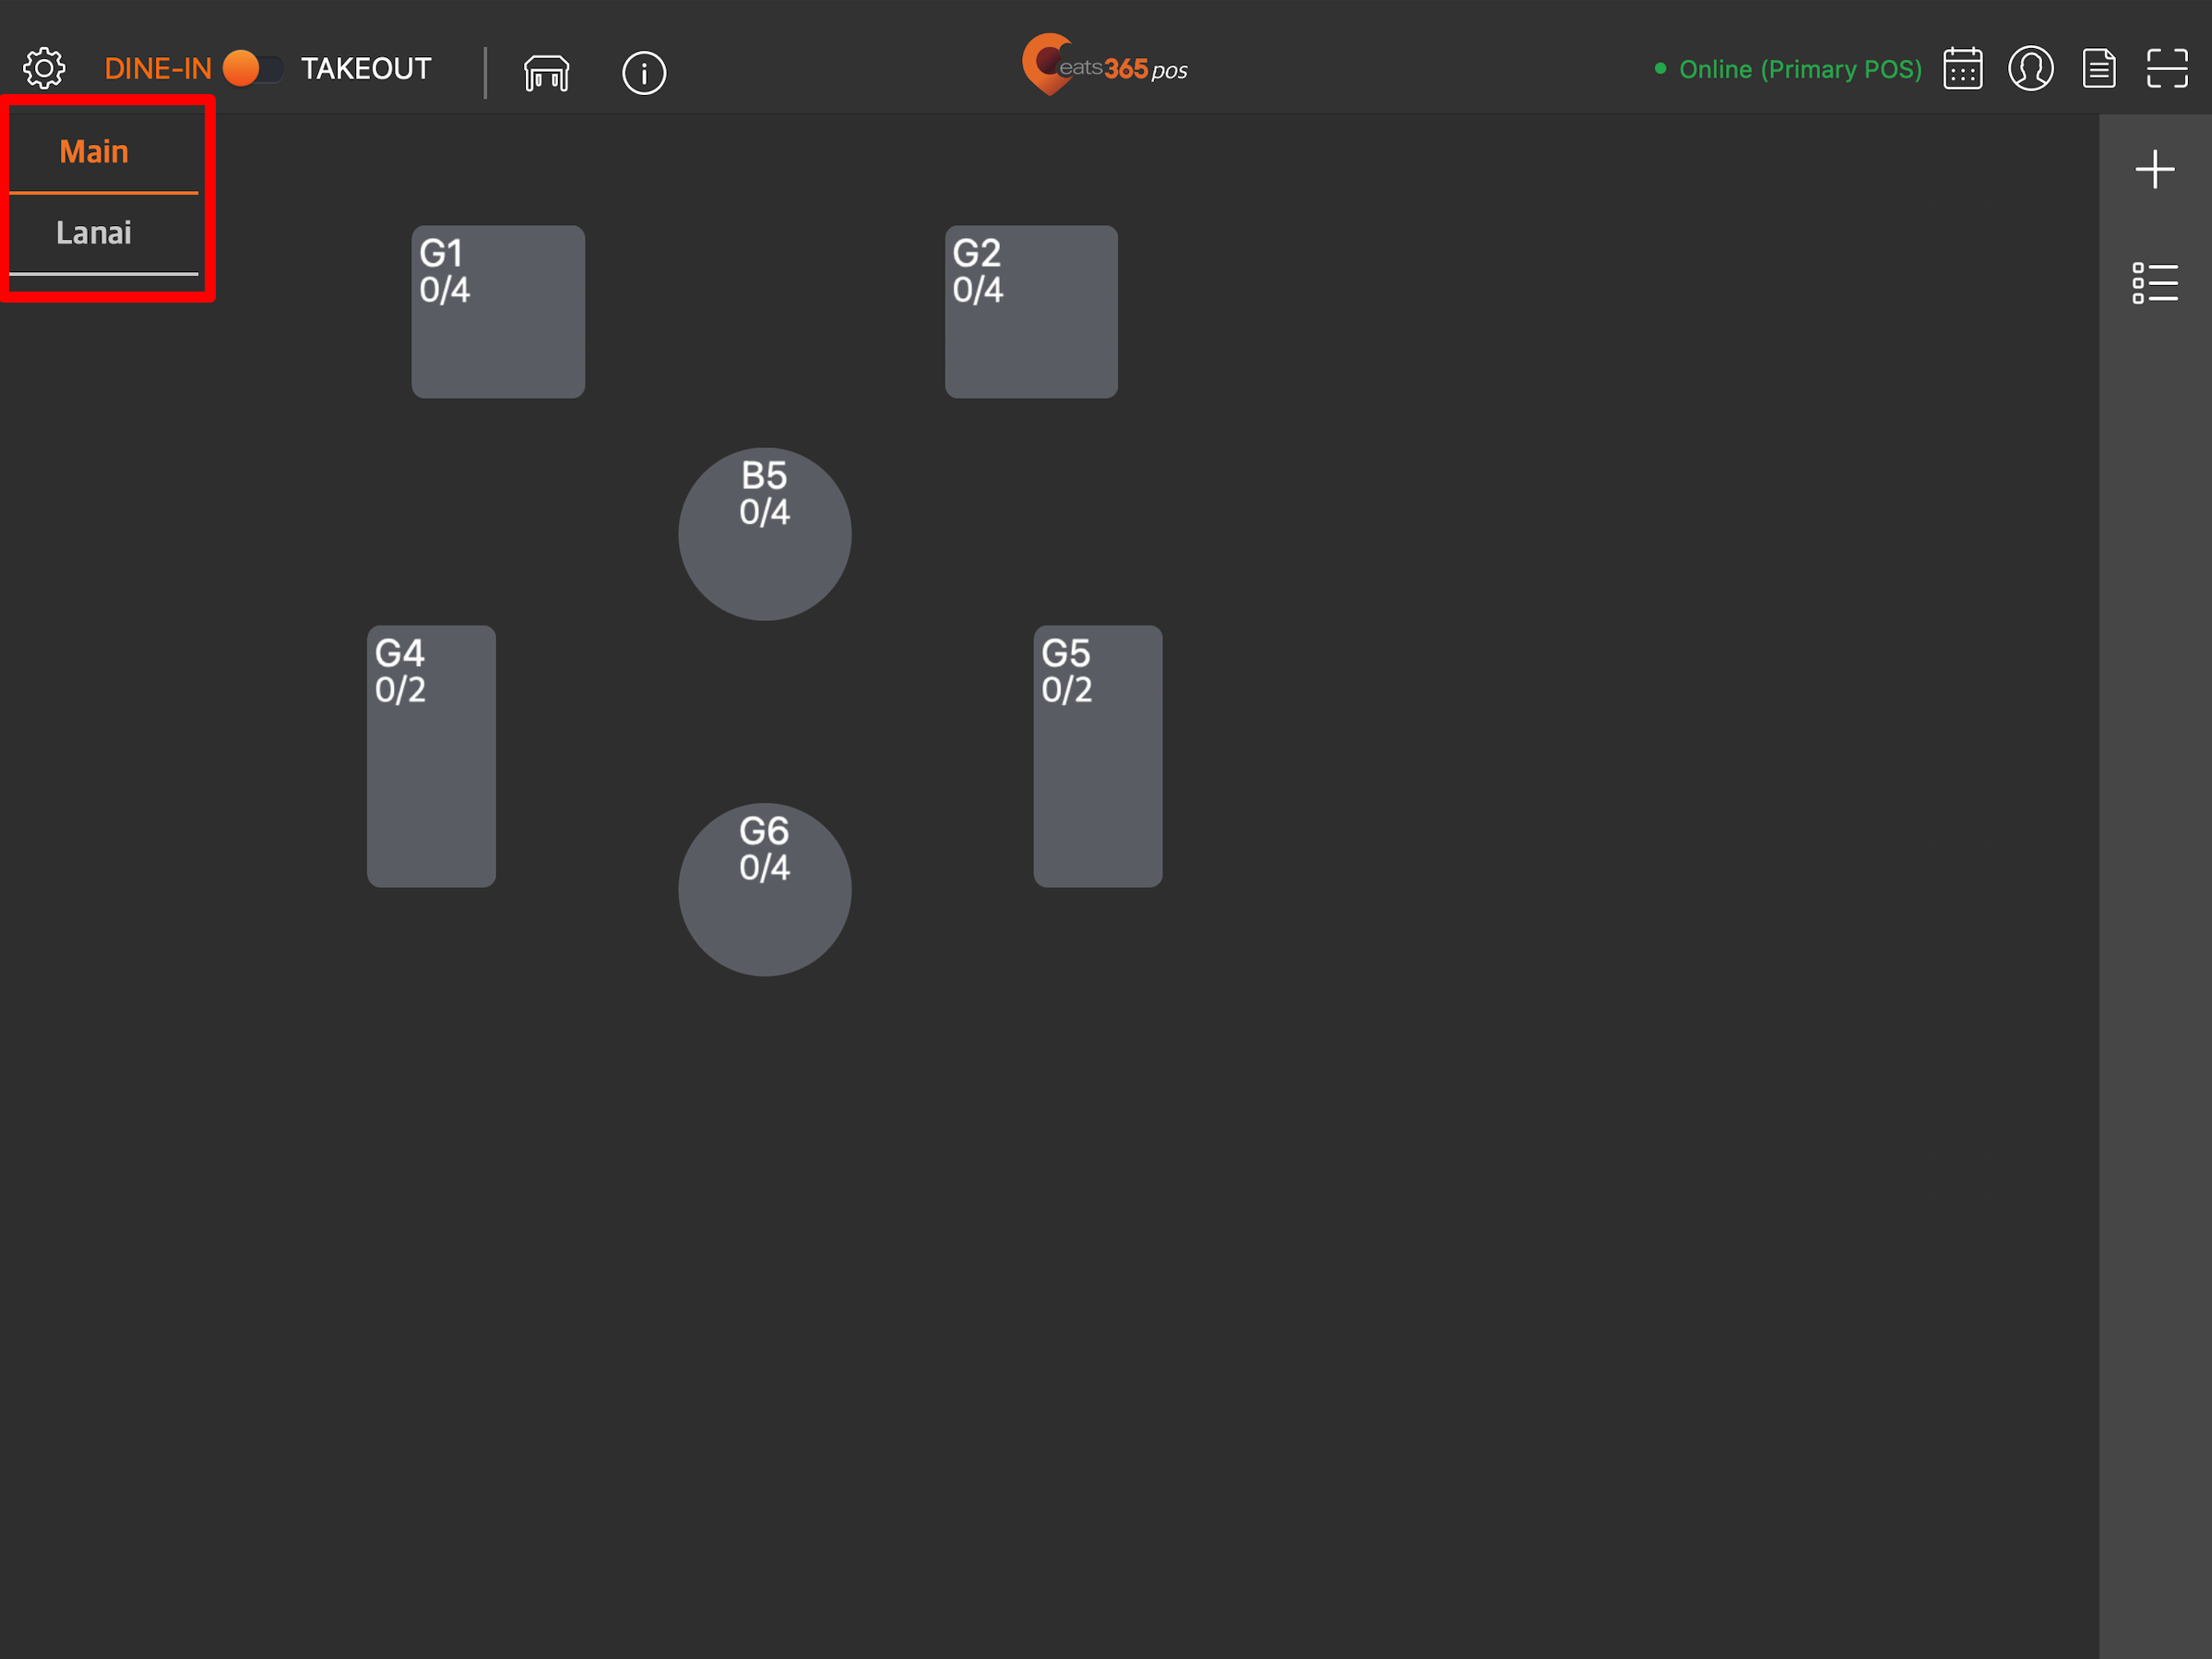
Tip: If a party has been seated but has not yet placed their order, then the table is colored yellow. To learn more about table status, refer to Manage table statuses. - On the order-taking screen, select the items that you want to add to the customer's order.
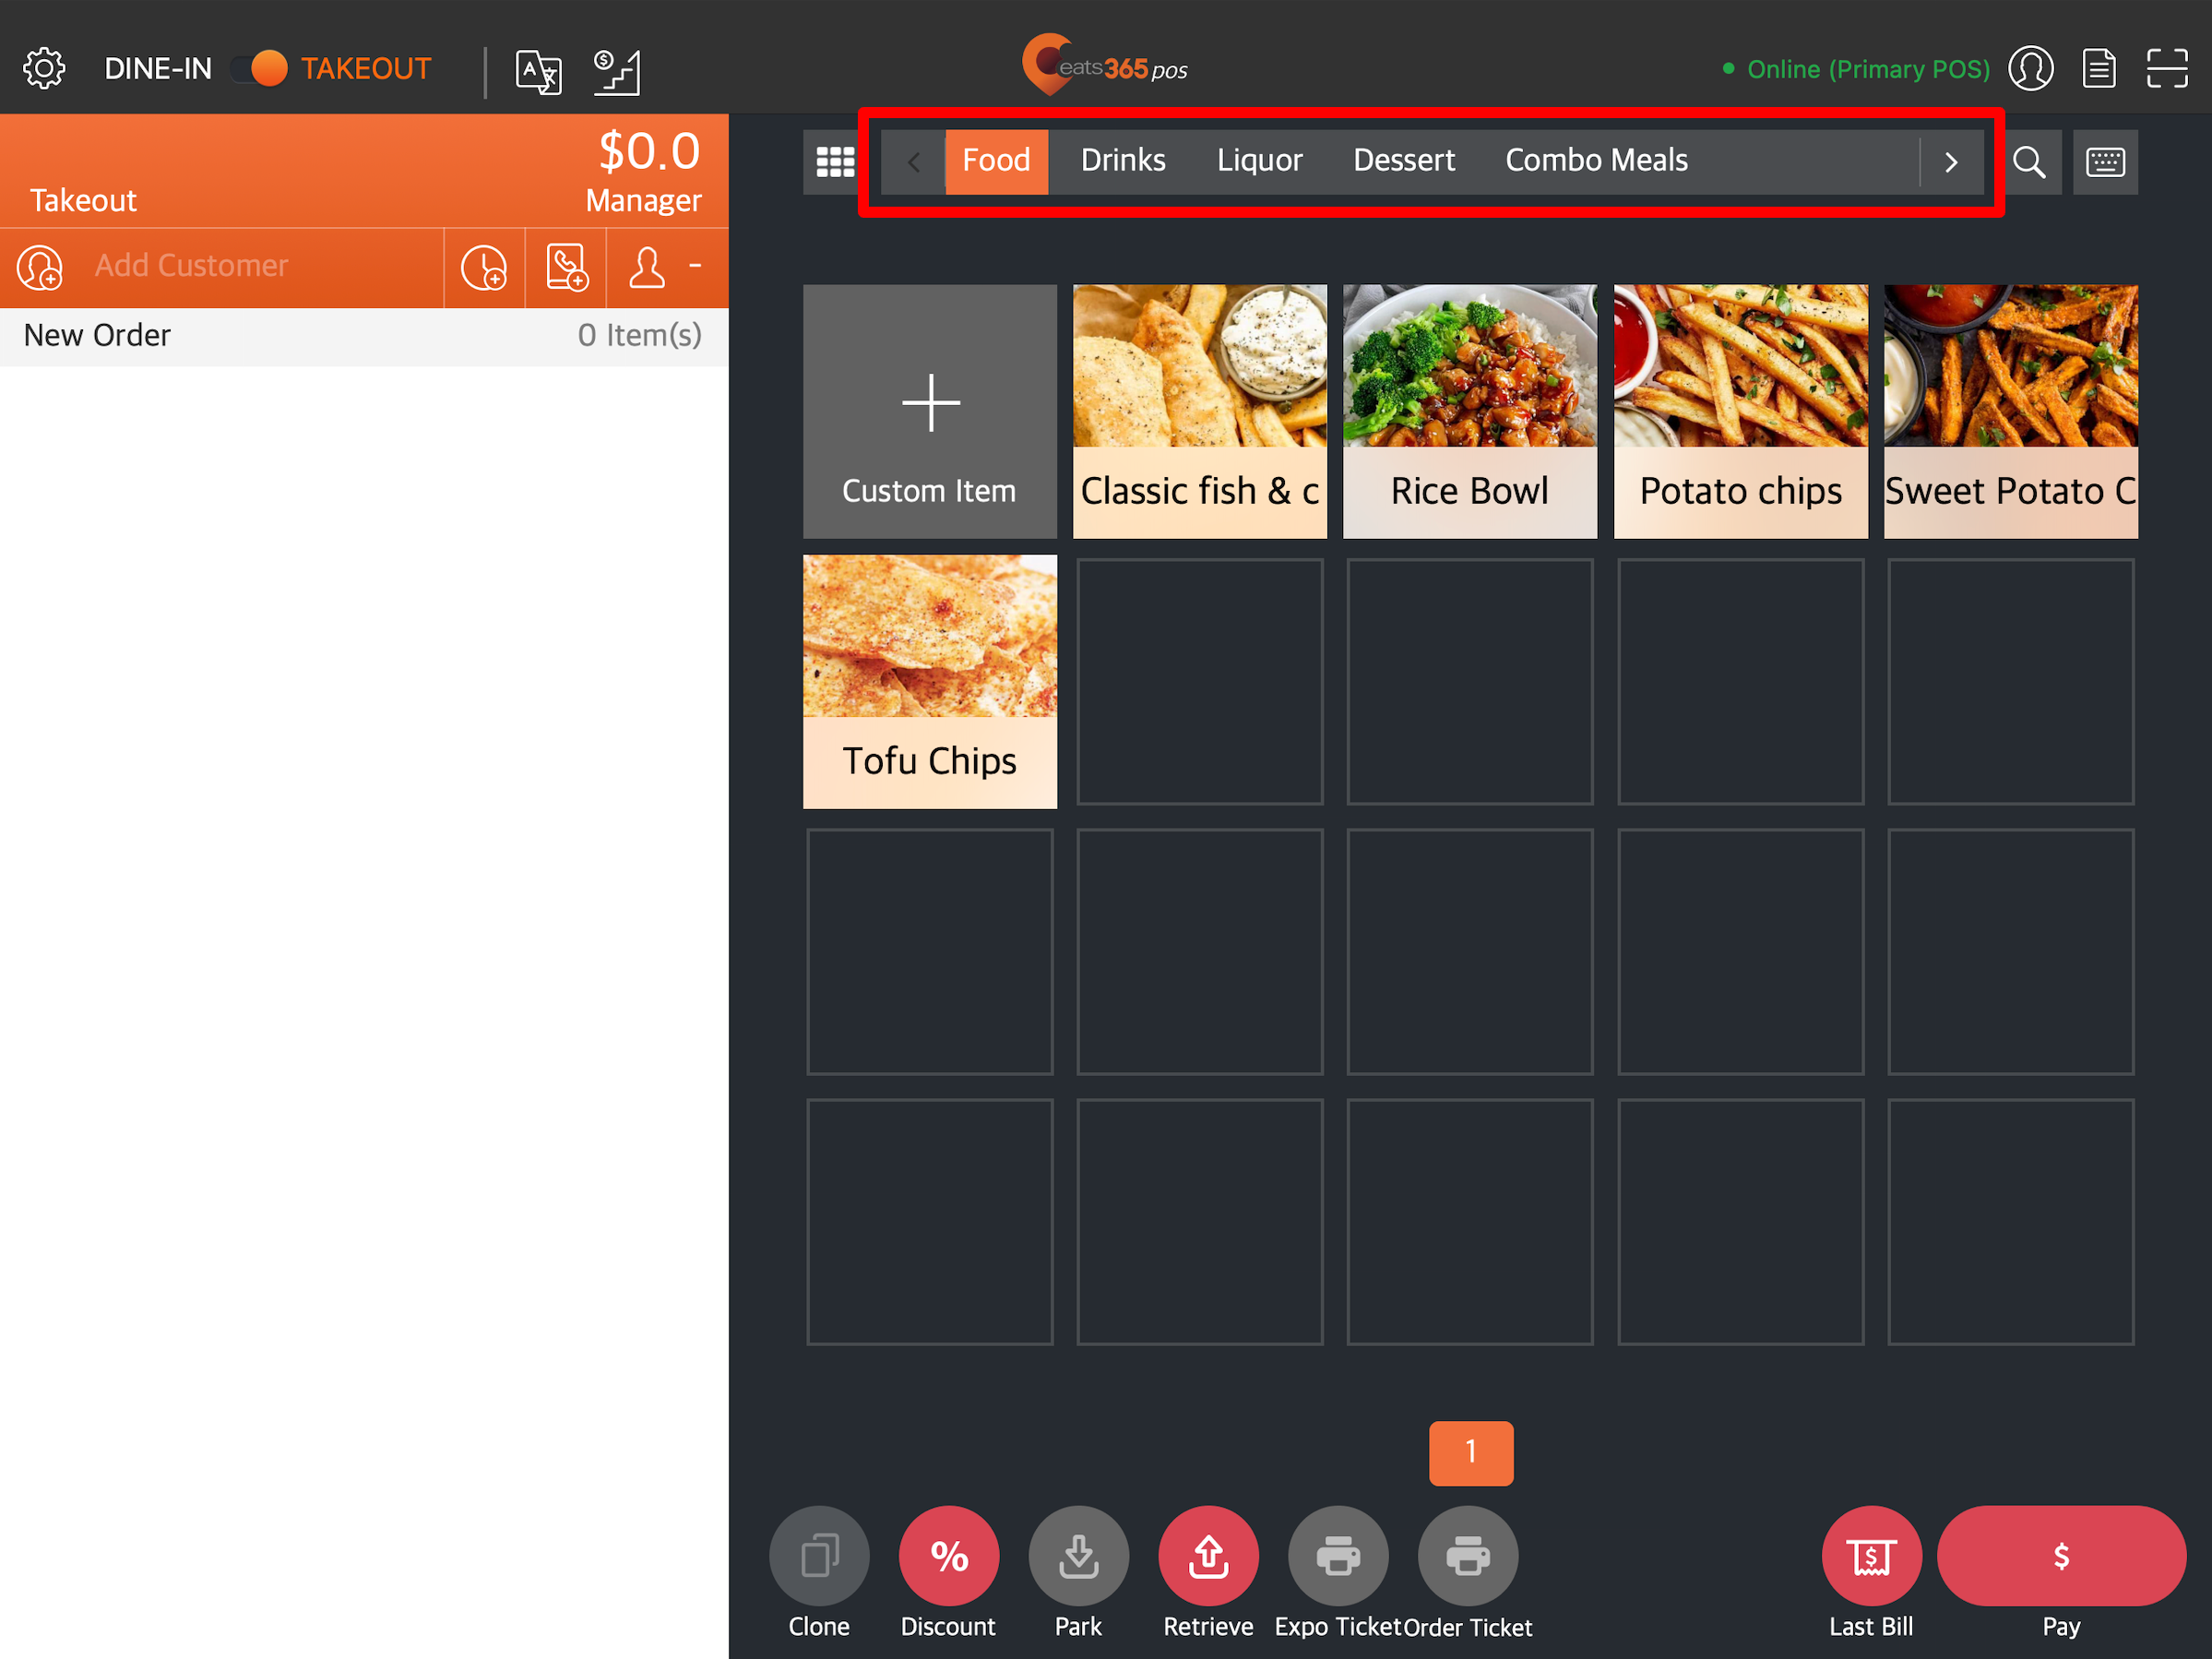
Note: Items exclusive to memberplans can only be purchased by customers whose active membership includes the required plan.- To browse through different categories, tap the left and right arrows on the categories bar.
- If you created a Custom Menu, tap All
 then select your Custom Menu to switch menus.
Note: A Custom Menu only appears in the time slot that you set it to appear. For more information about Custom Menu, refer to Set up and manage a Custom Menu.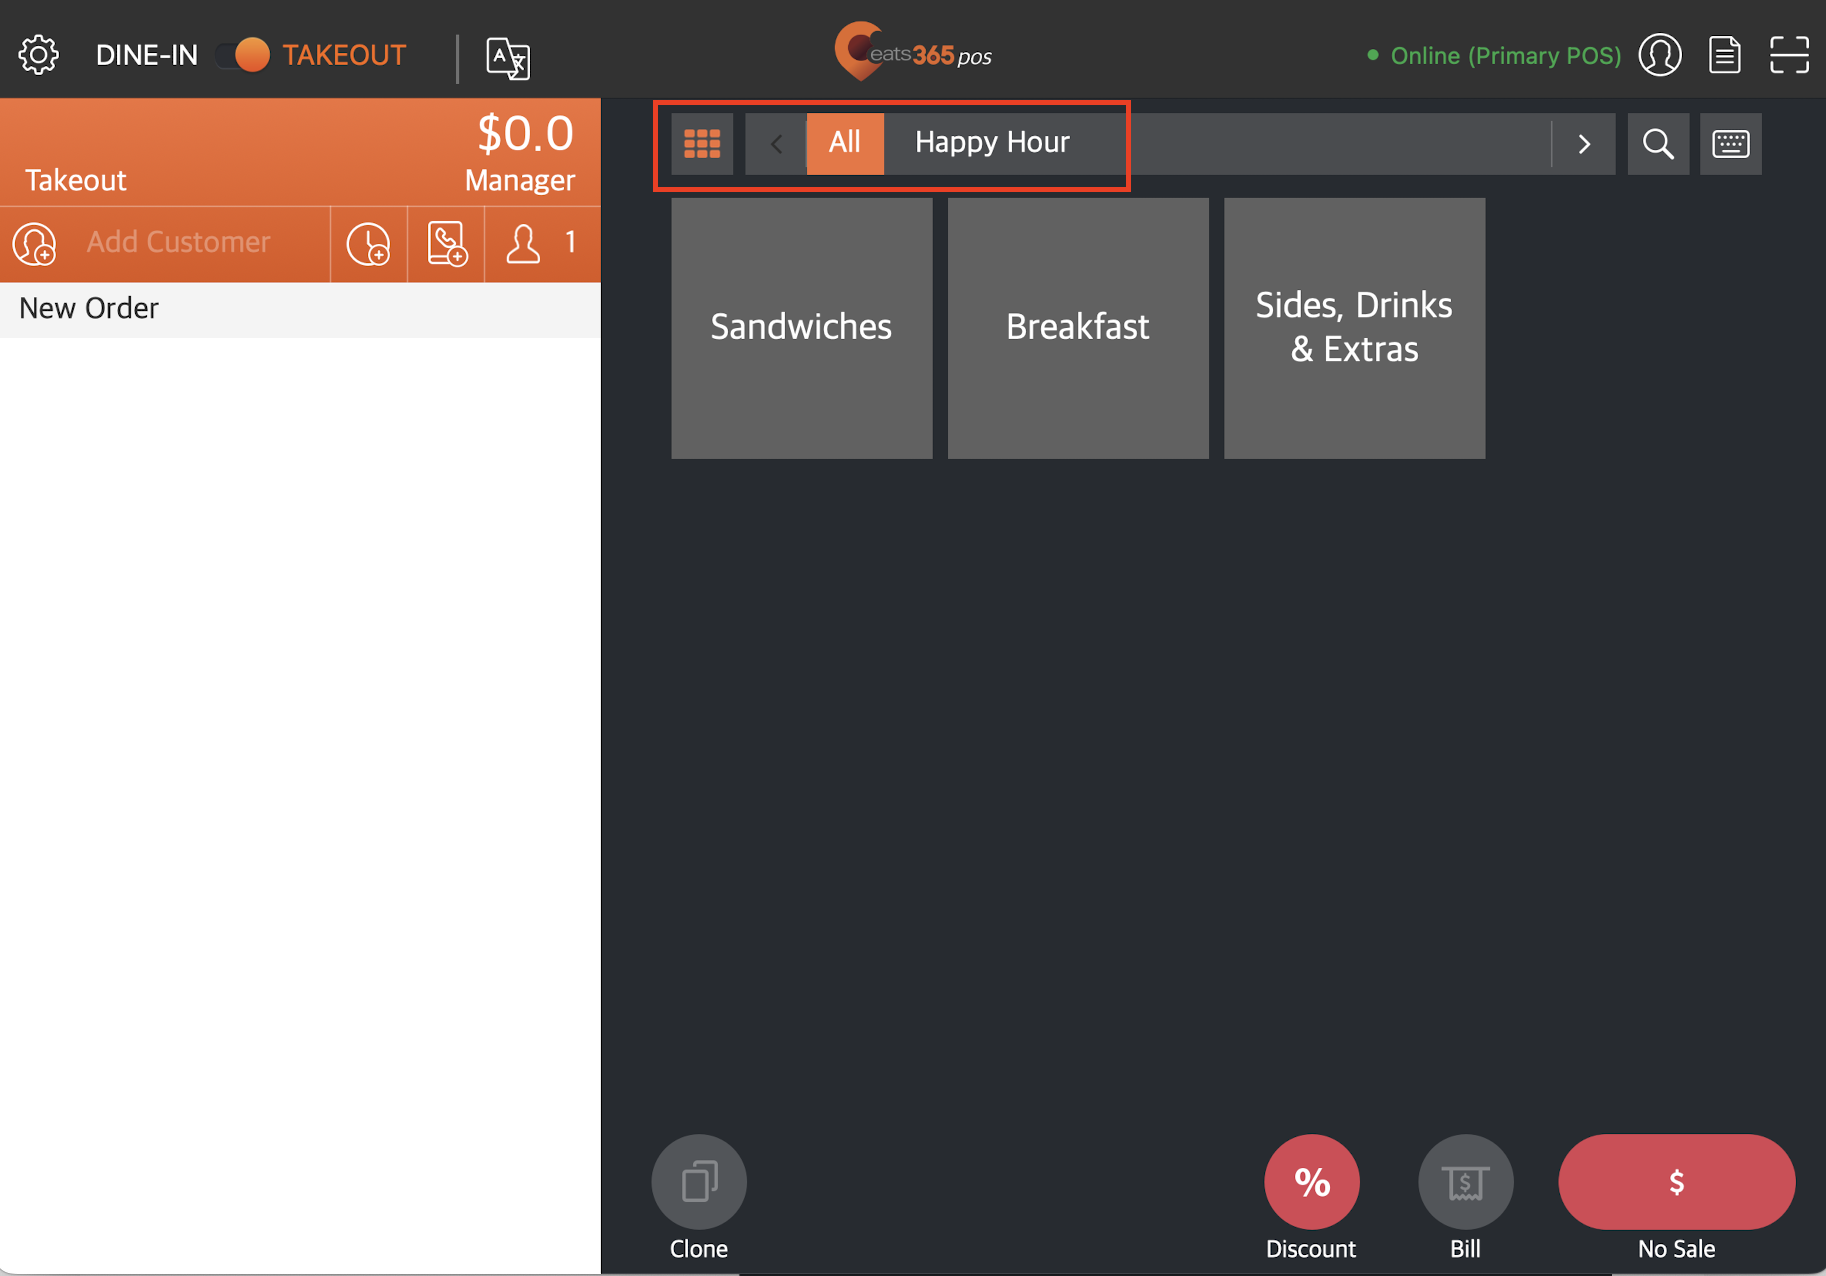
- To browse through different categories, tap the left and right arrows on the categories bar.
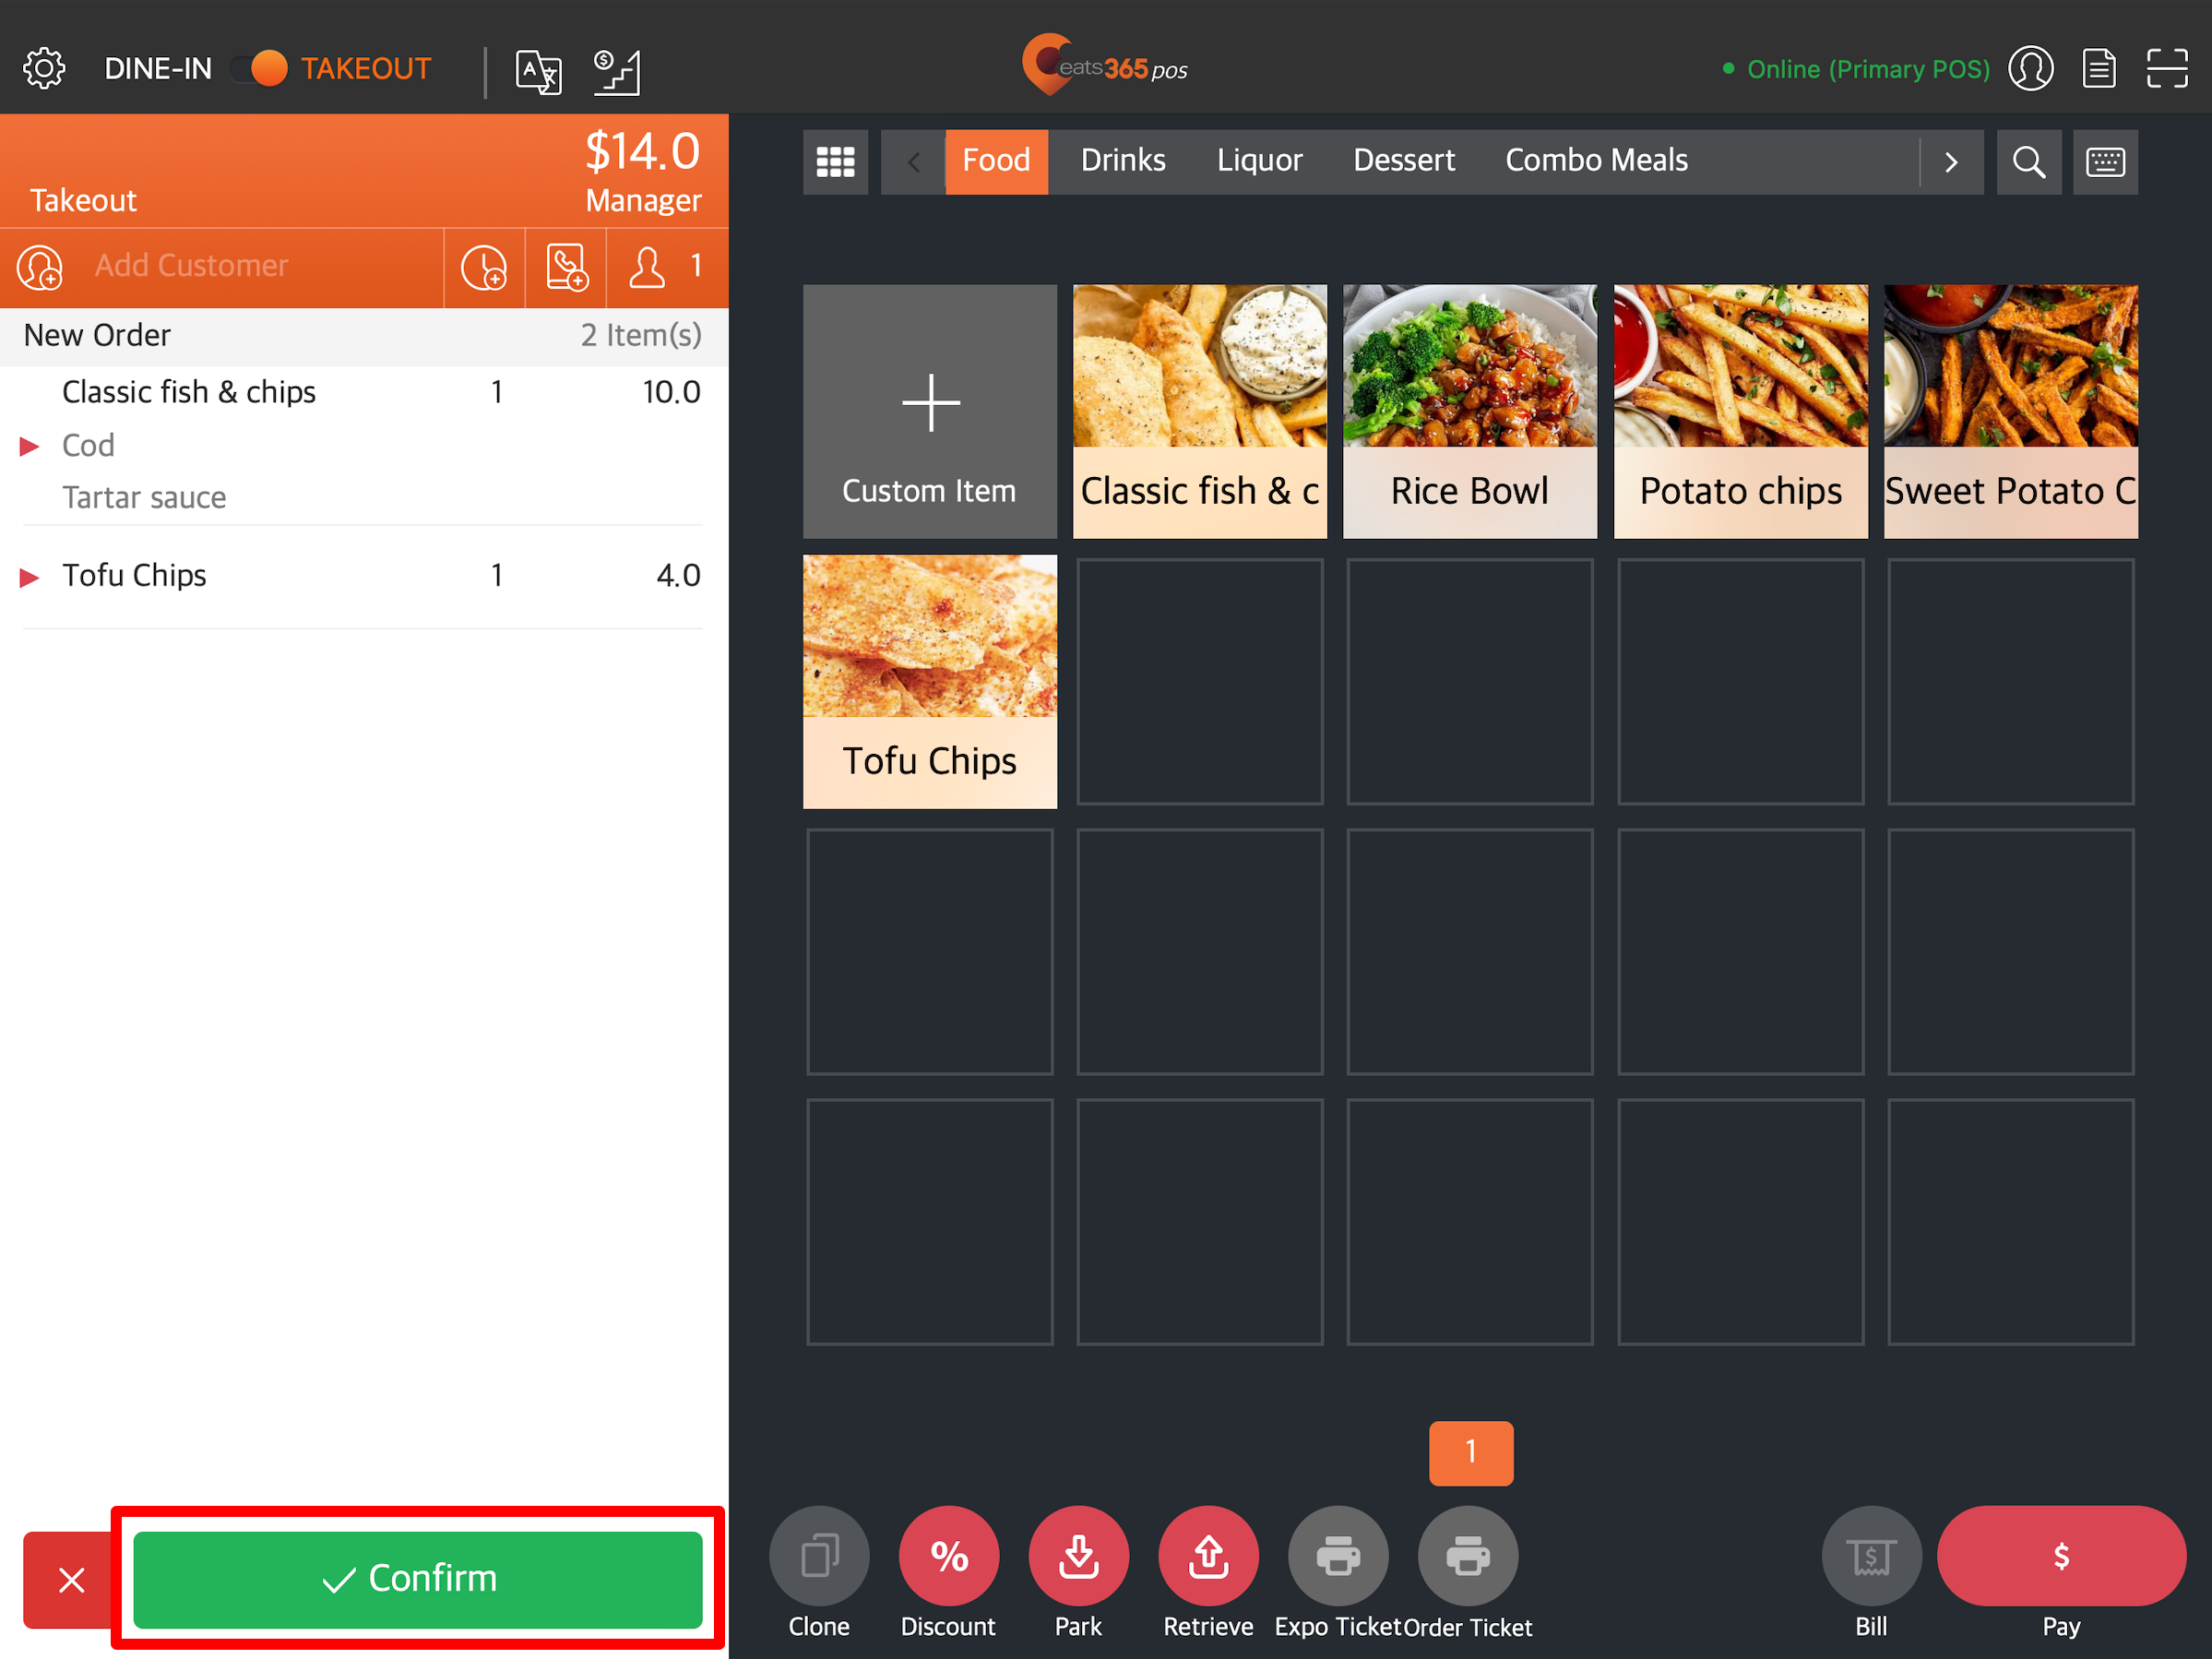
- When you’ve completed adding the items to the customer’s order, tap Confirm.

Tip: If “Require Payment when Placing Order” has been enabled from the Dine-In settings, you won’t be asked to confirm the order. Instead, you’ll be required to complete the payment before you can place the order.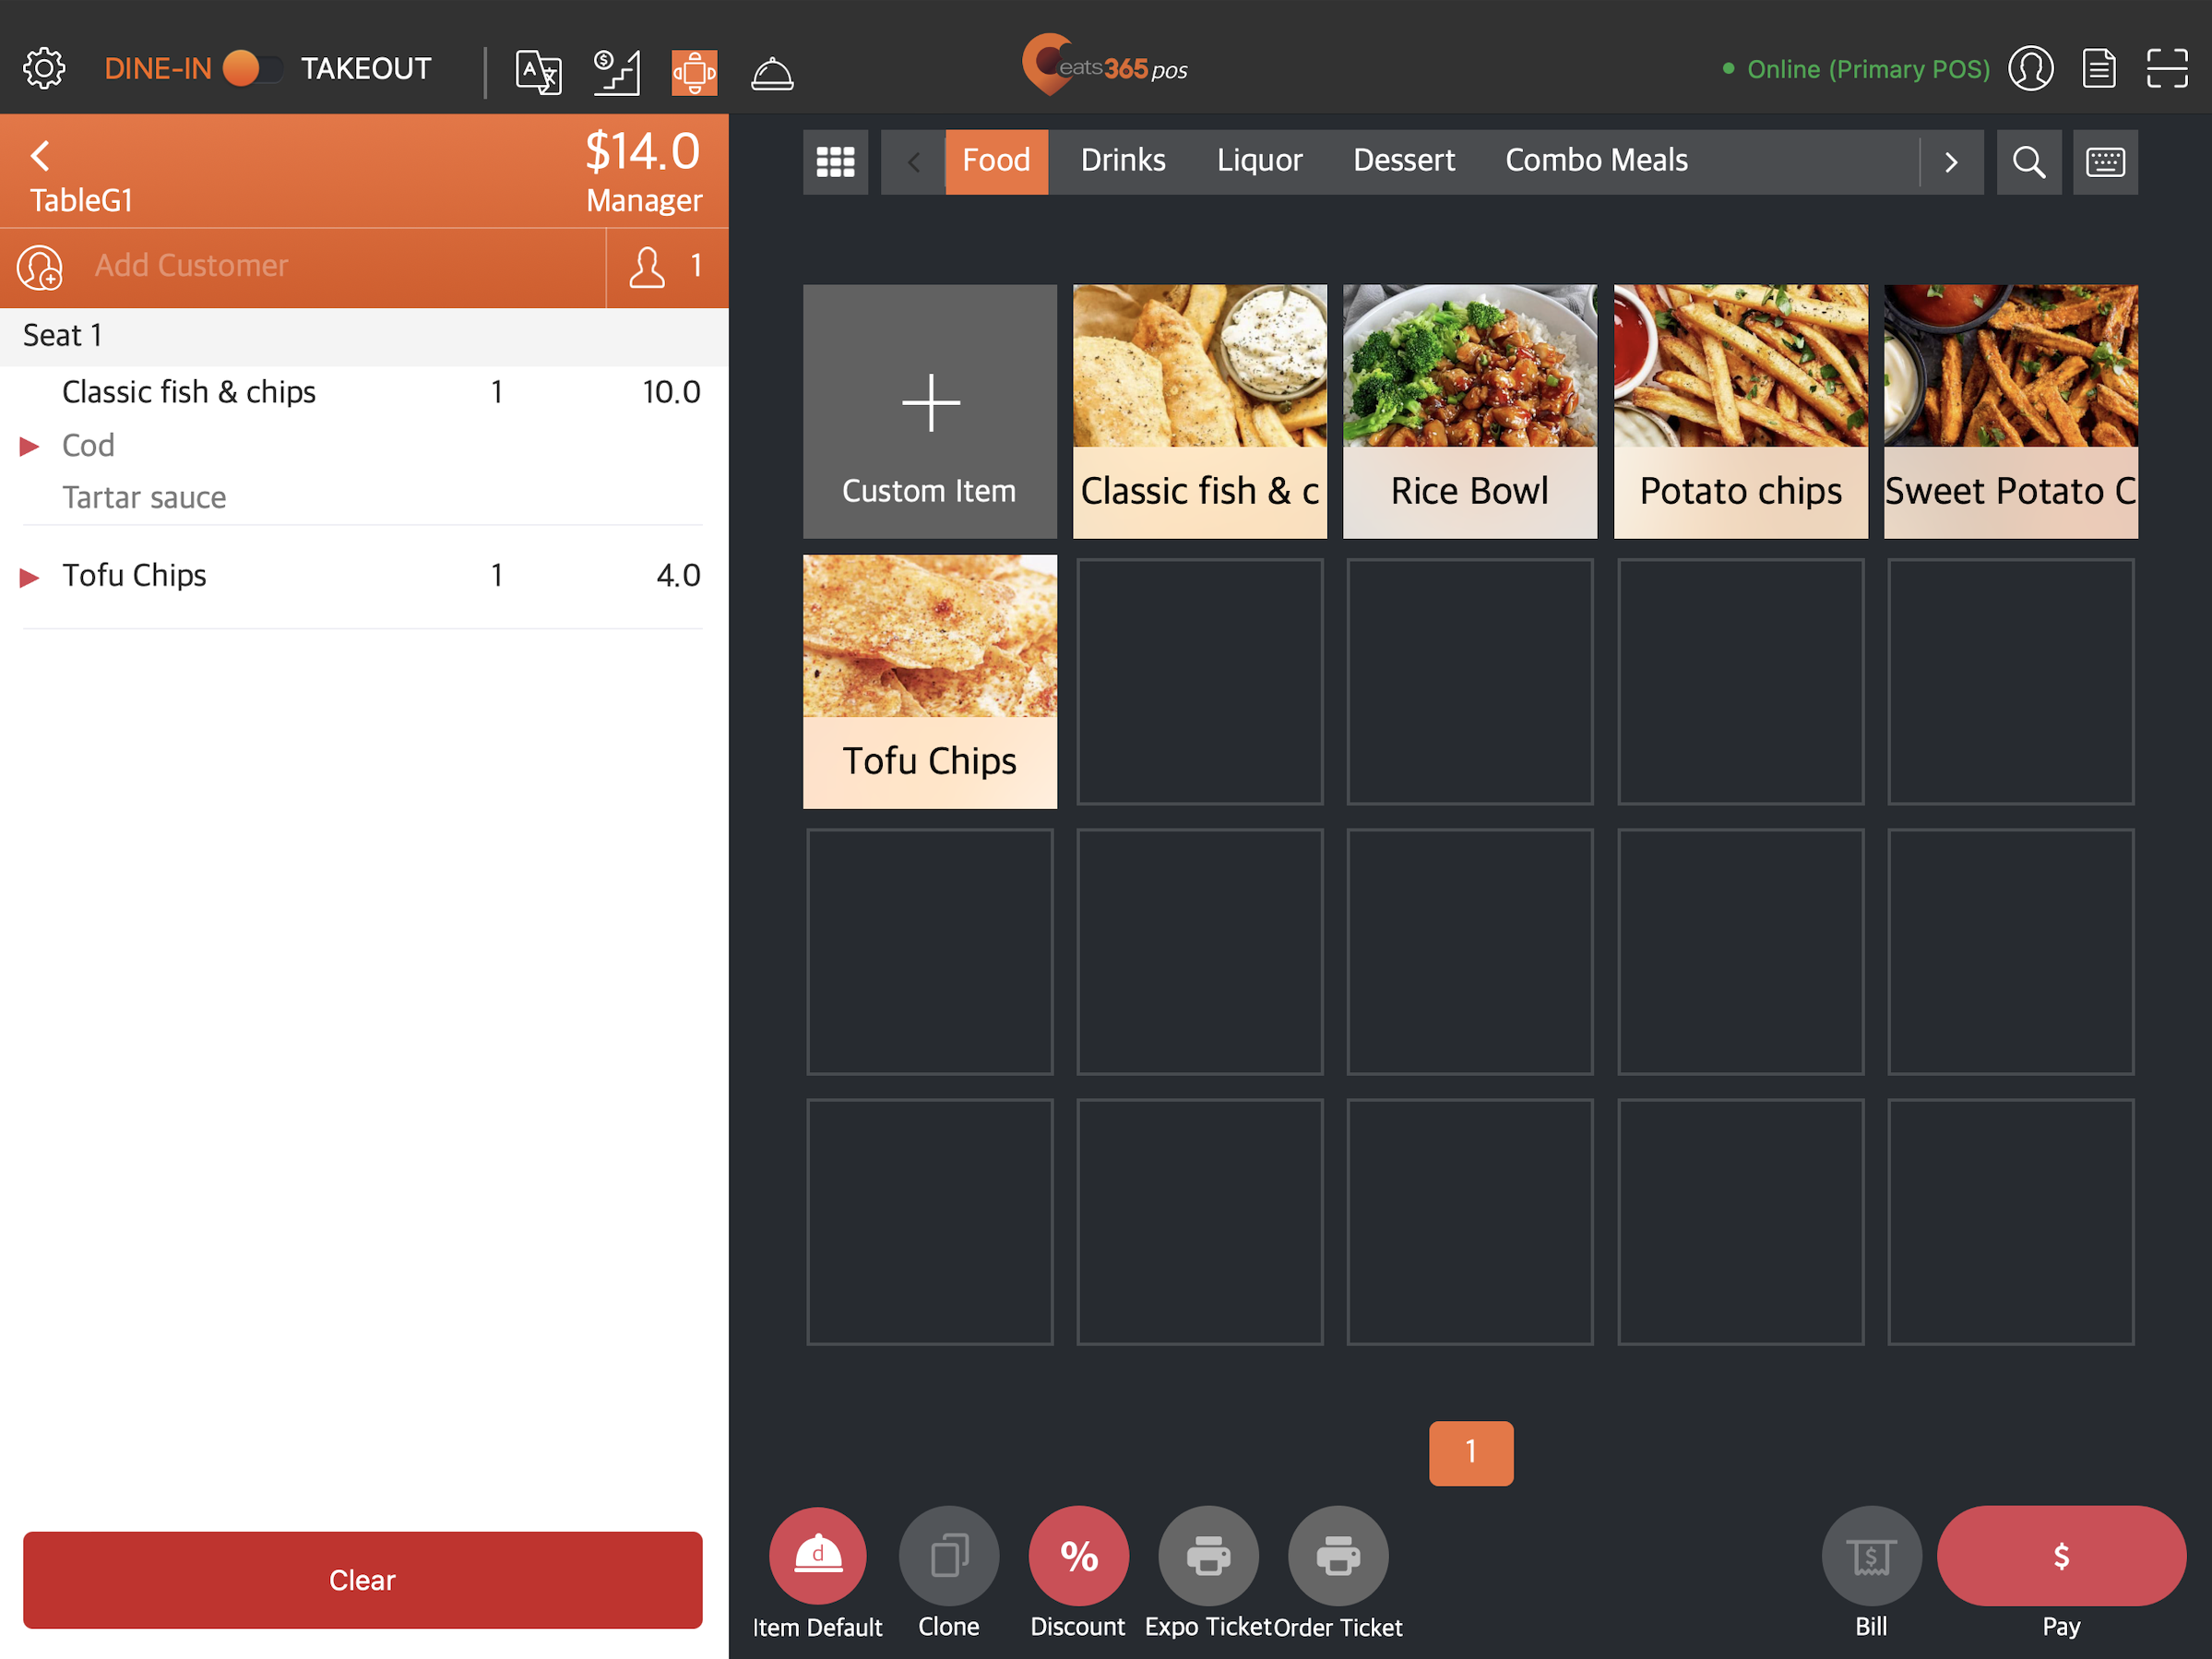
Add more items to an existing dine-in order
If the customer wants to add more items to their order, follow the steps below:
- Log in to the Eats365 POS.
- At the top left, tap Dine-In to get to the Table Map screen.
Tip: You can set the Table Map screen as the default view from the General Preferences settings, so you won’t need to tap "Dine-In" every time you log in. - If you have multiple areas, select the area where the table is located. Then, tap the table where the party is seated.
- On the order-taking screen, select the additional items that you want to add to the customer's order.
Note: Items exclusive to memberplans can only be purchased by customers whose active membership includes the required plan.- To browse through different categories, tap the left and right arrows on the categories bar.
- If you created a Custom Menu, tap All then select your Custom Menu to switch menus.
Note: A Custom Menu only appears in the time slot that you set it to appear. For more information about Custom Menu, refer to Set up and manage a Custom Menu.
- To browse through different categories, tap the left and right arrows on the categories bar.
- When you’ve completed adding the items to the customer’s order, tap Confirm.
Add items to a takeout order
To add items to a takeout order, follow the steps below:
- Log in to the Eats365 POS.
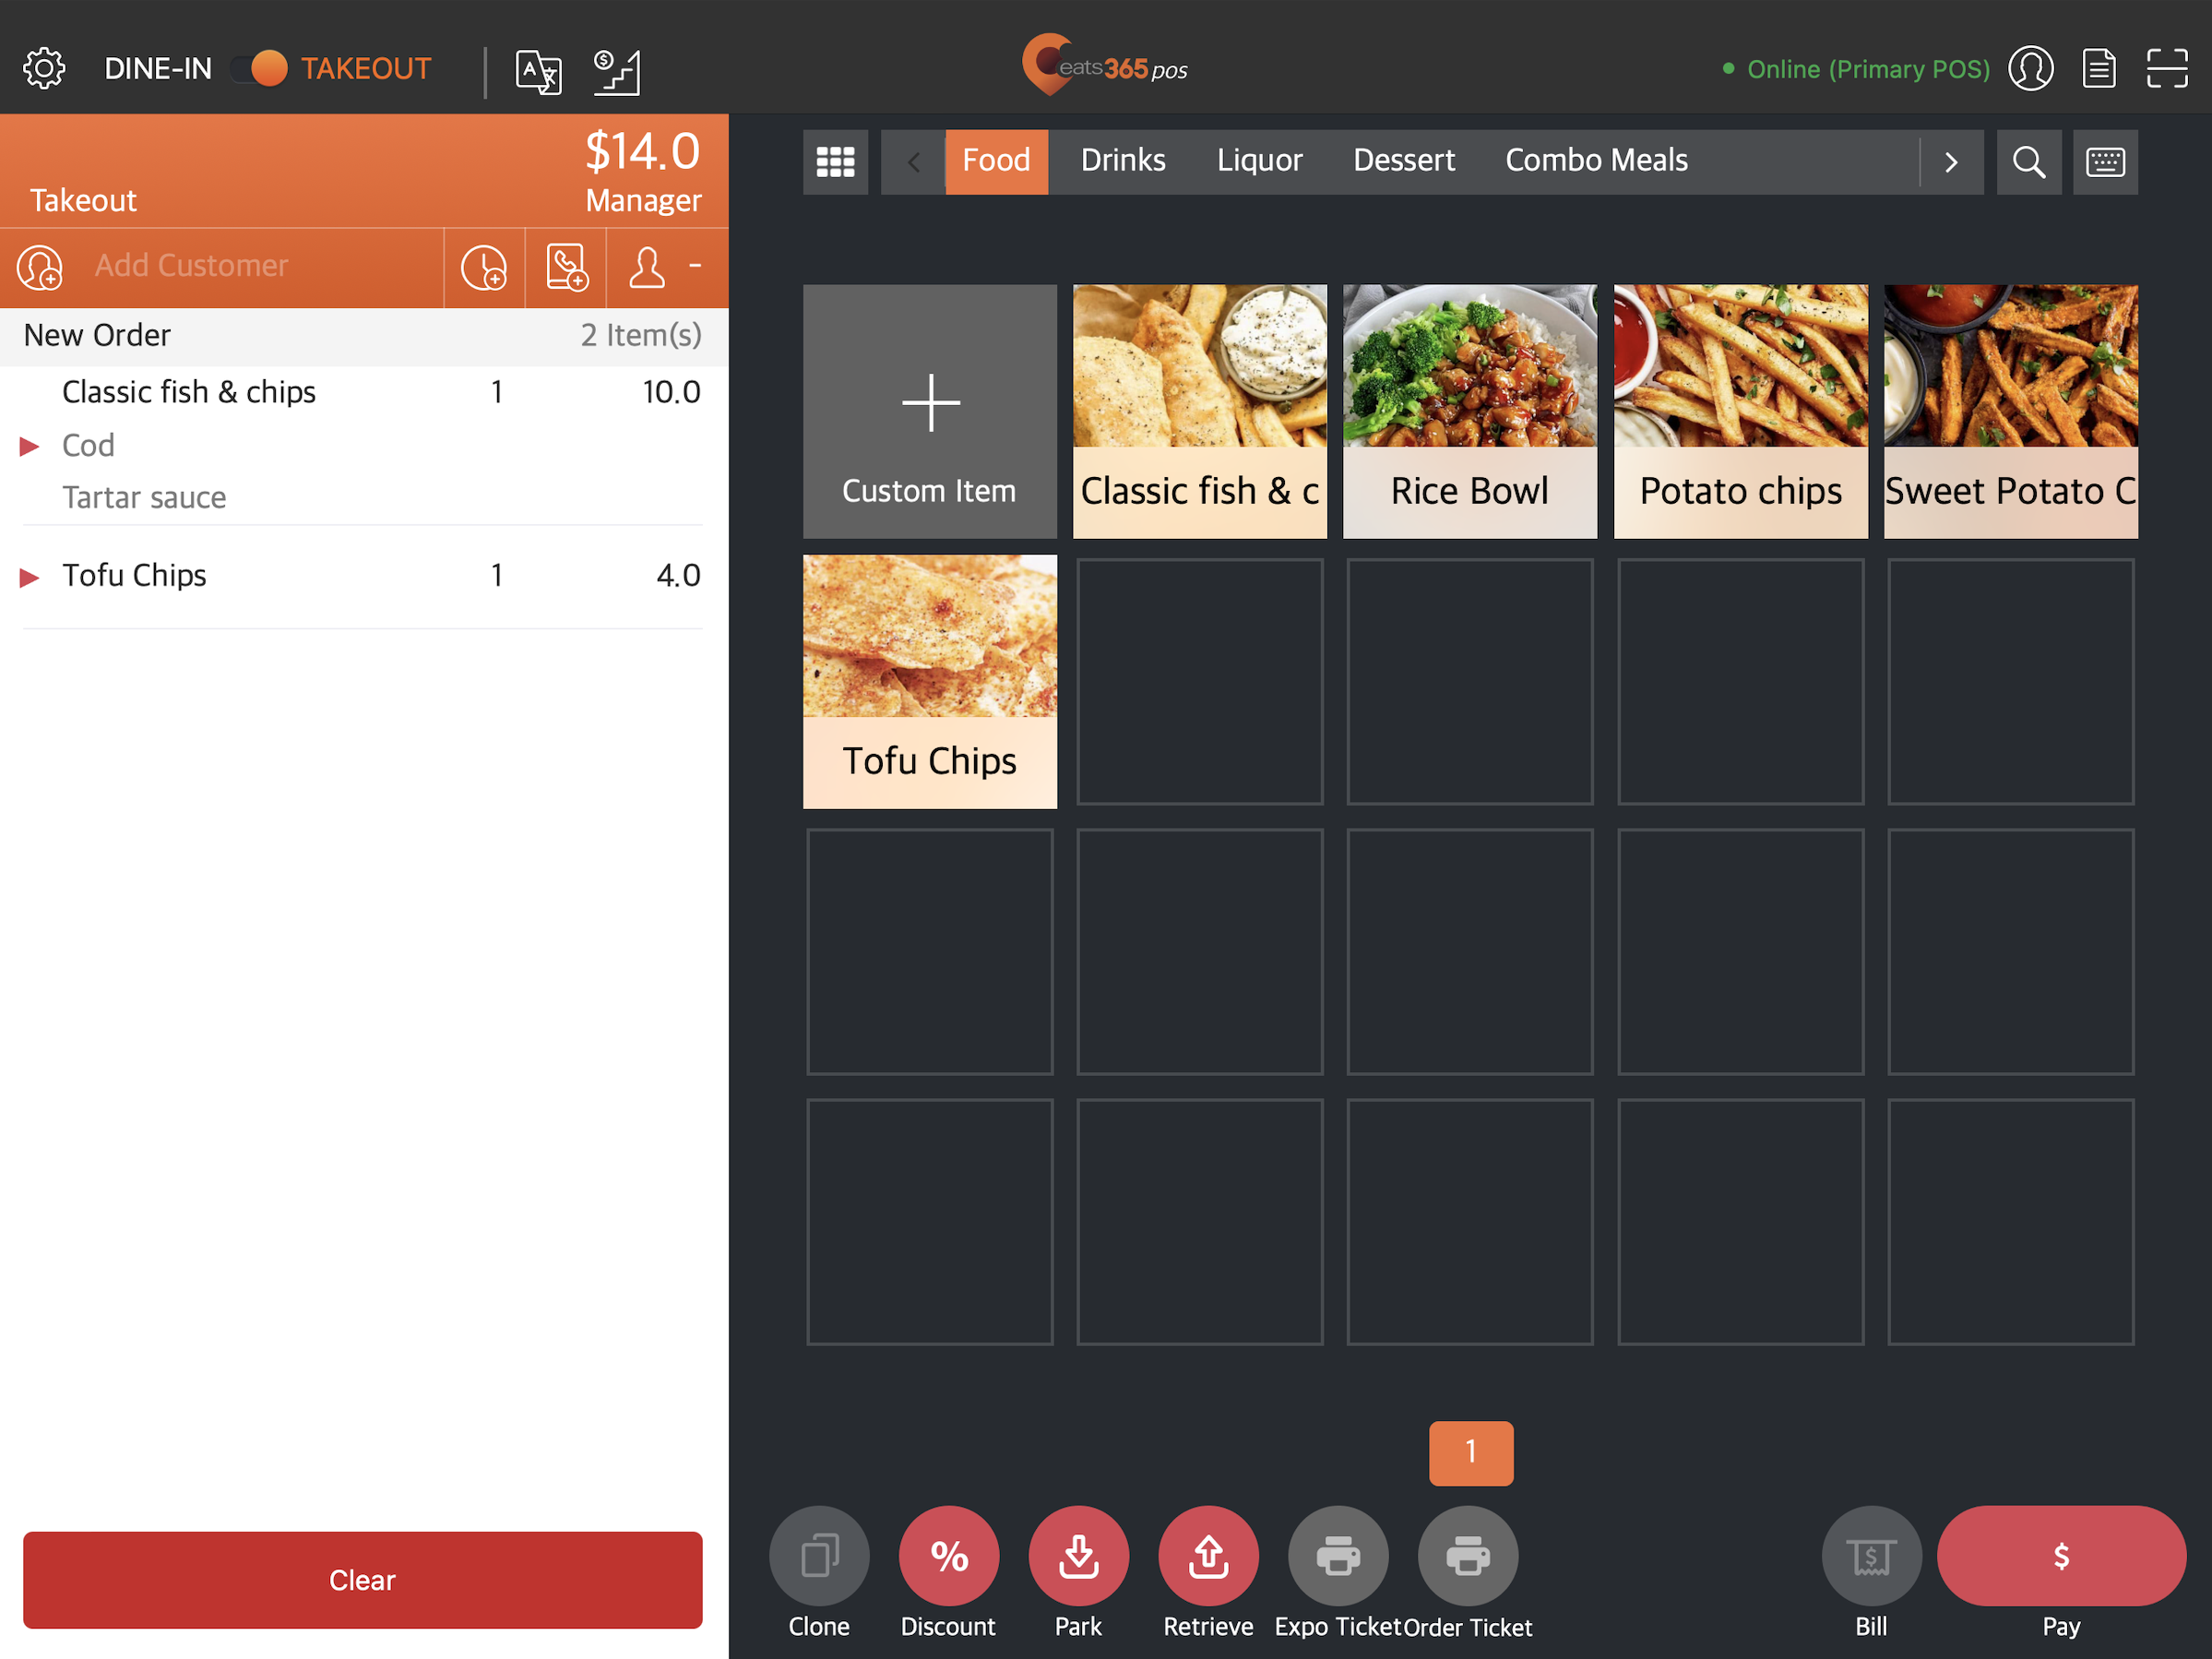
- At the top left, tap Takeout to get to the order-taking screen.

Tip: If you’re using the POS mainly for takeout orders, you can set the order-taking screen as the default view from the General Preferences settings, so you won’t need to tap "Takeout" every time you log in. - On the order-taking screen, select the items that you want to add to the customer's order.
Note: Items exclusive to memberplans can only be purchased by customers whose active membership includes the required plan.- To browse through different categories, tap the left and right arrows on the categories bar.
- If you created a Custom Menu, tap All then select your Custom Menu to switch menus.
Note: A Custom Menu only appears in the time slot that you set it to appear. For more information about Custom Menu, refer to Set up and manage a Custom Menu.
- To browse through different categories, tap the left and right arrows on the categories bar.
- When you’ve completed adding the items to the customer’s order, tap Confirm.
Note:- If “Require Payment when Placing Order” has been enabled from the Takeout settings, you won’t be asked to confirm the order. Instead, you’ll be required to complete the payment before you can place the order.
- If “Force Enter Party Size” has been enabled from the Takeout settings, you must enter the party size after tapping Confirm.
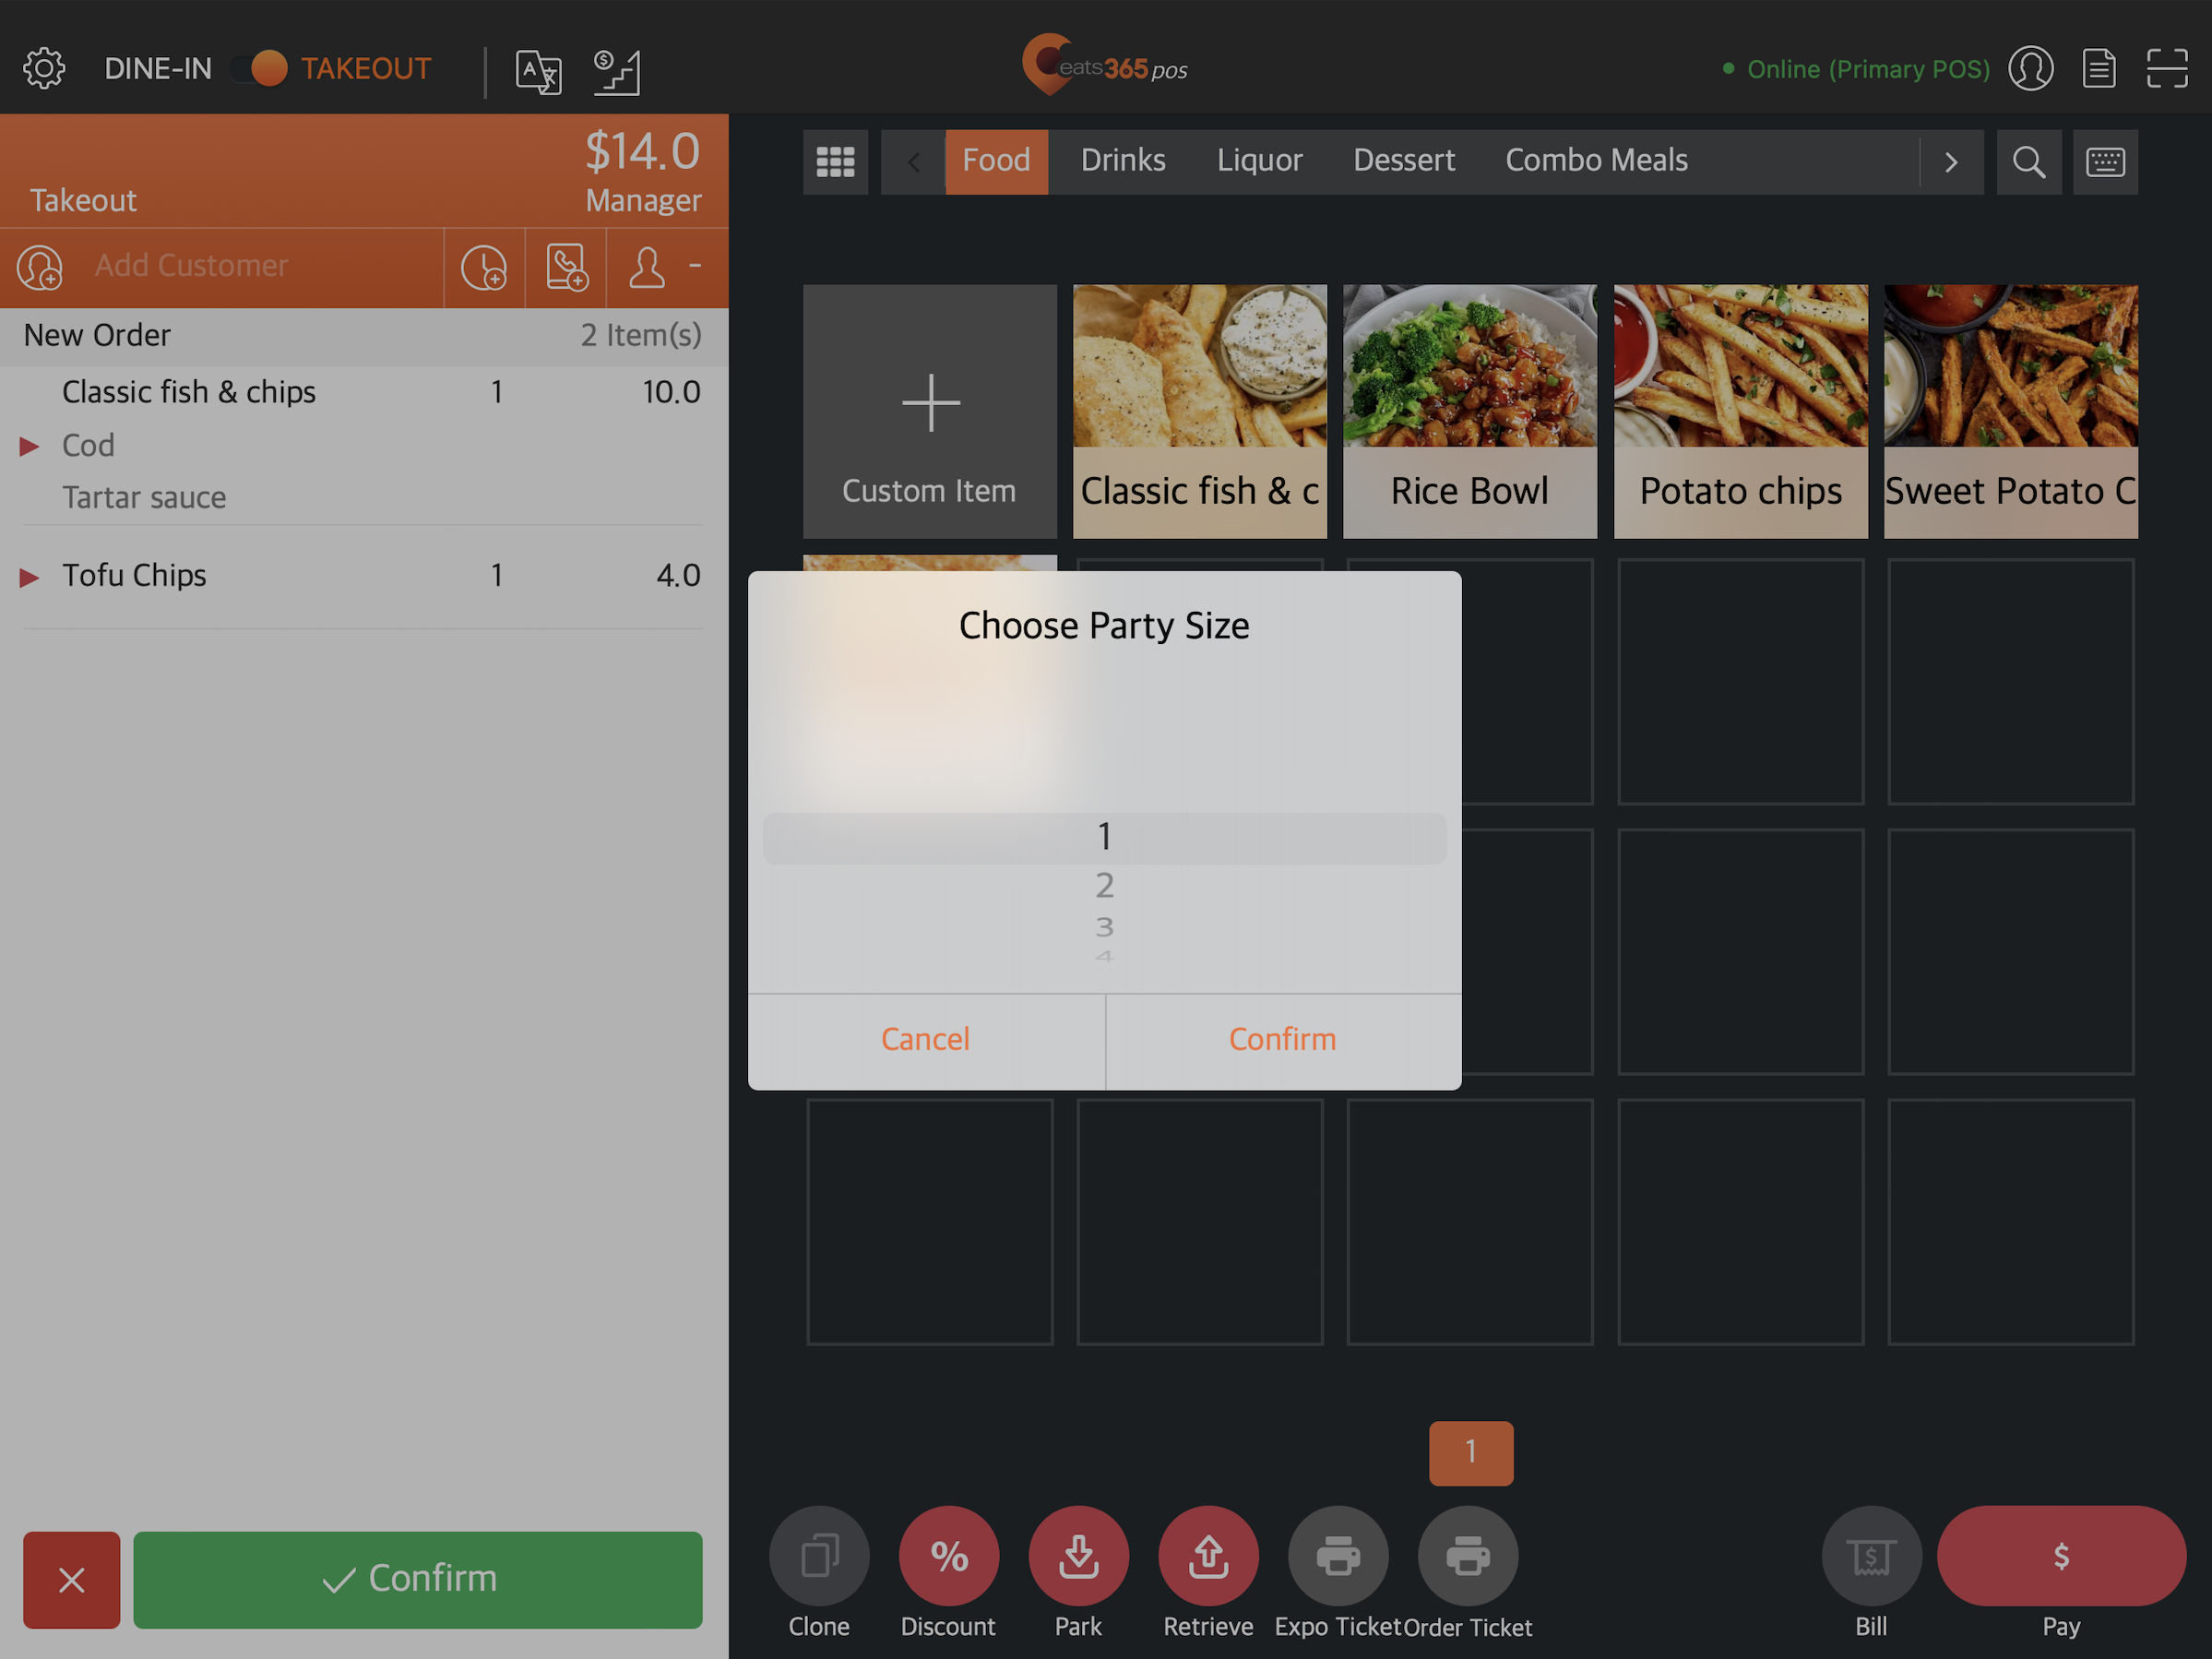
- If “Require Payment when Placing Order” has been enabled from the Takeout settings, you won’t be asked to confirm the order. Instead, you’ll be required to complete the payment before you can place the order.
Add more items to an existing takeout order
To add more items to an existing takeout order, follow the steps below:
- Log in to the Eats365 POS.
- At the top left, tap Takeout to get to the order-taking screen.
Tip: If you are using the POS mainly for takeout orders, you can set the order-taking screen as the default view from the General Preferences settings, so you won’t need to tap "Takeout" every time you log in - At the top right, tap Order List
 . Then, select Processing.
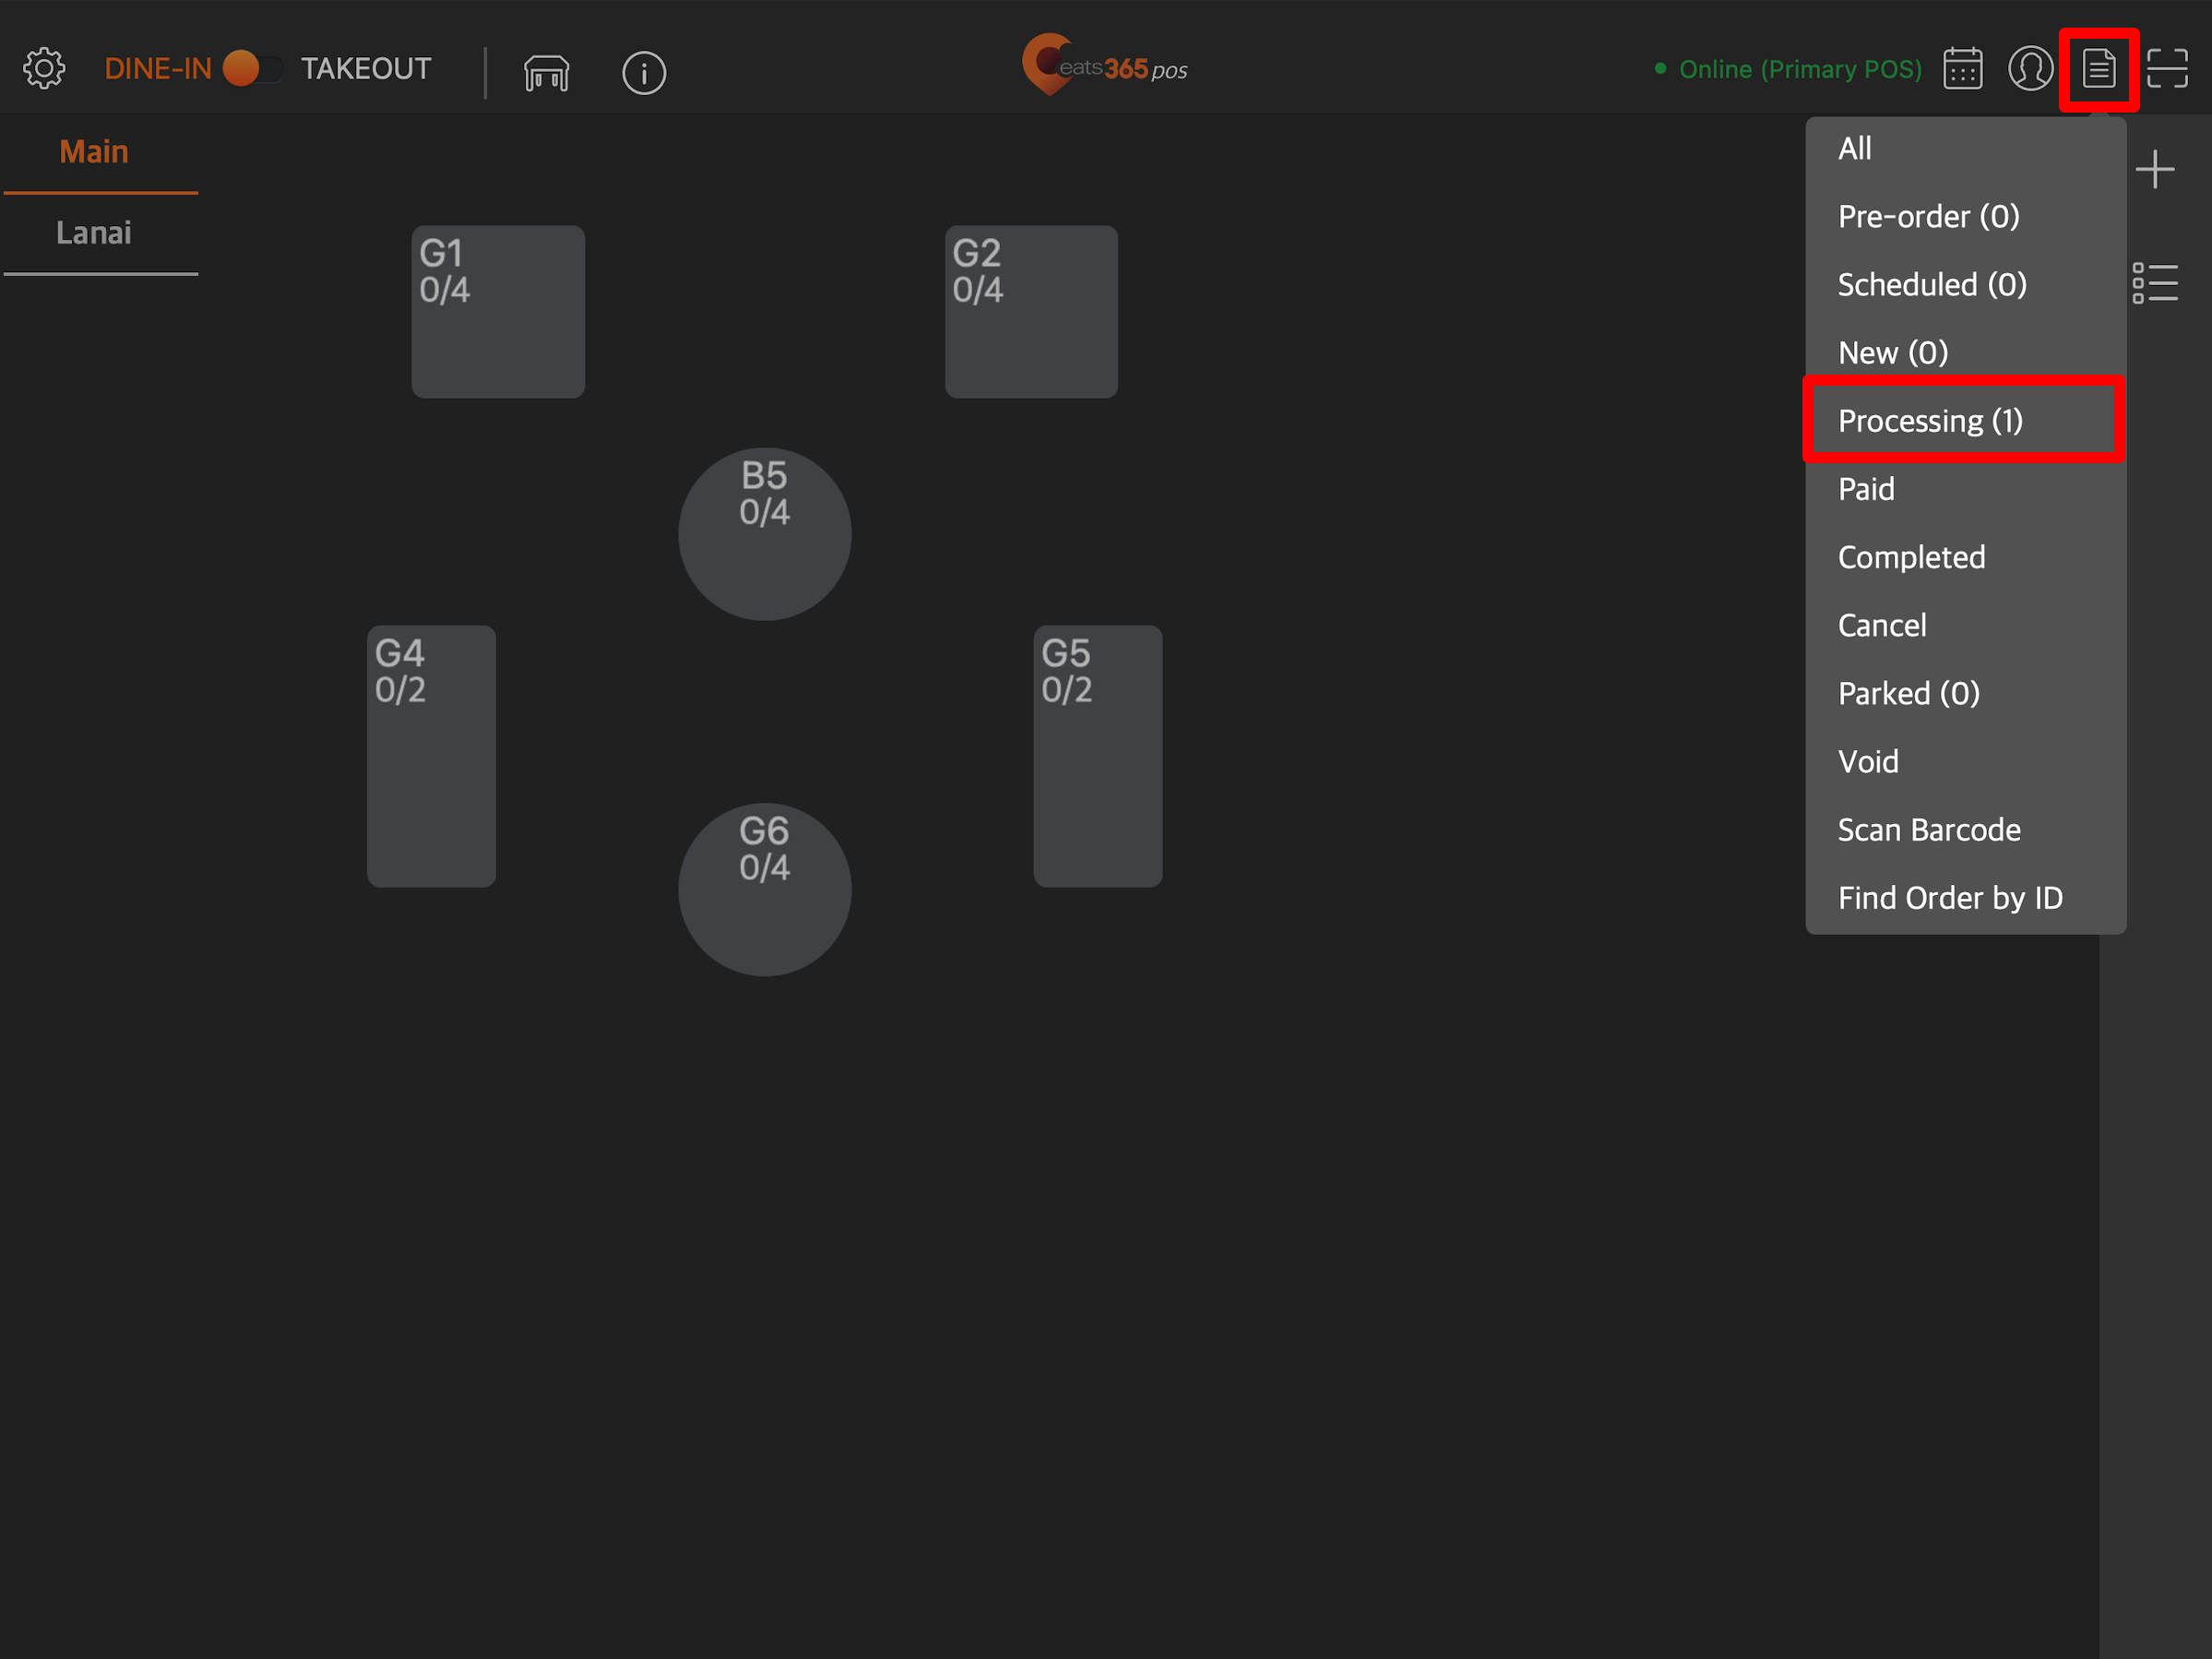
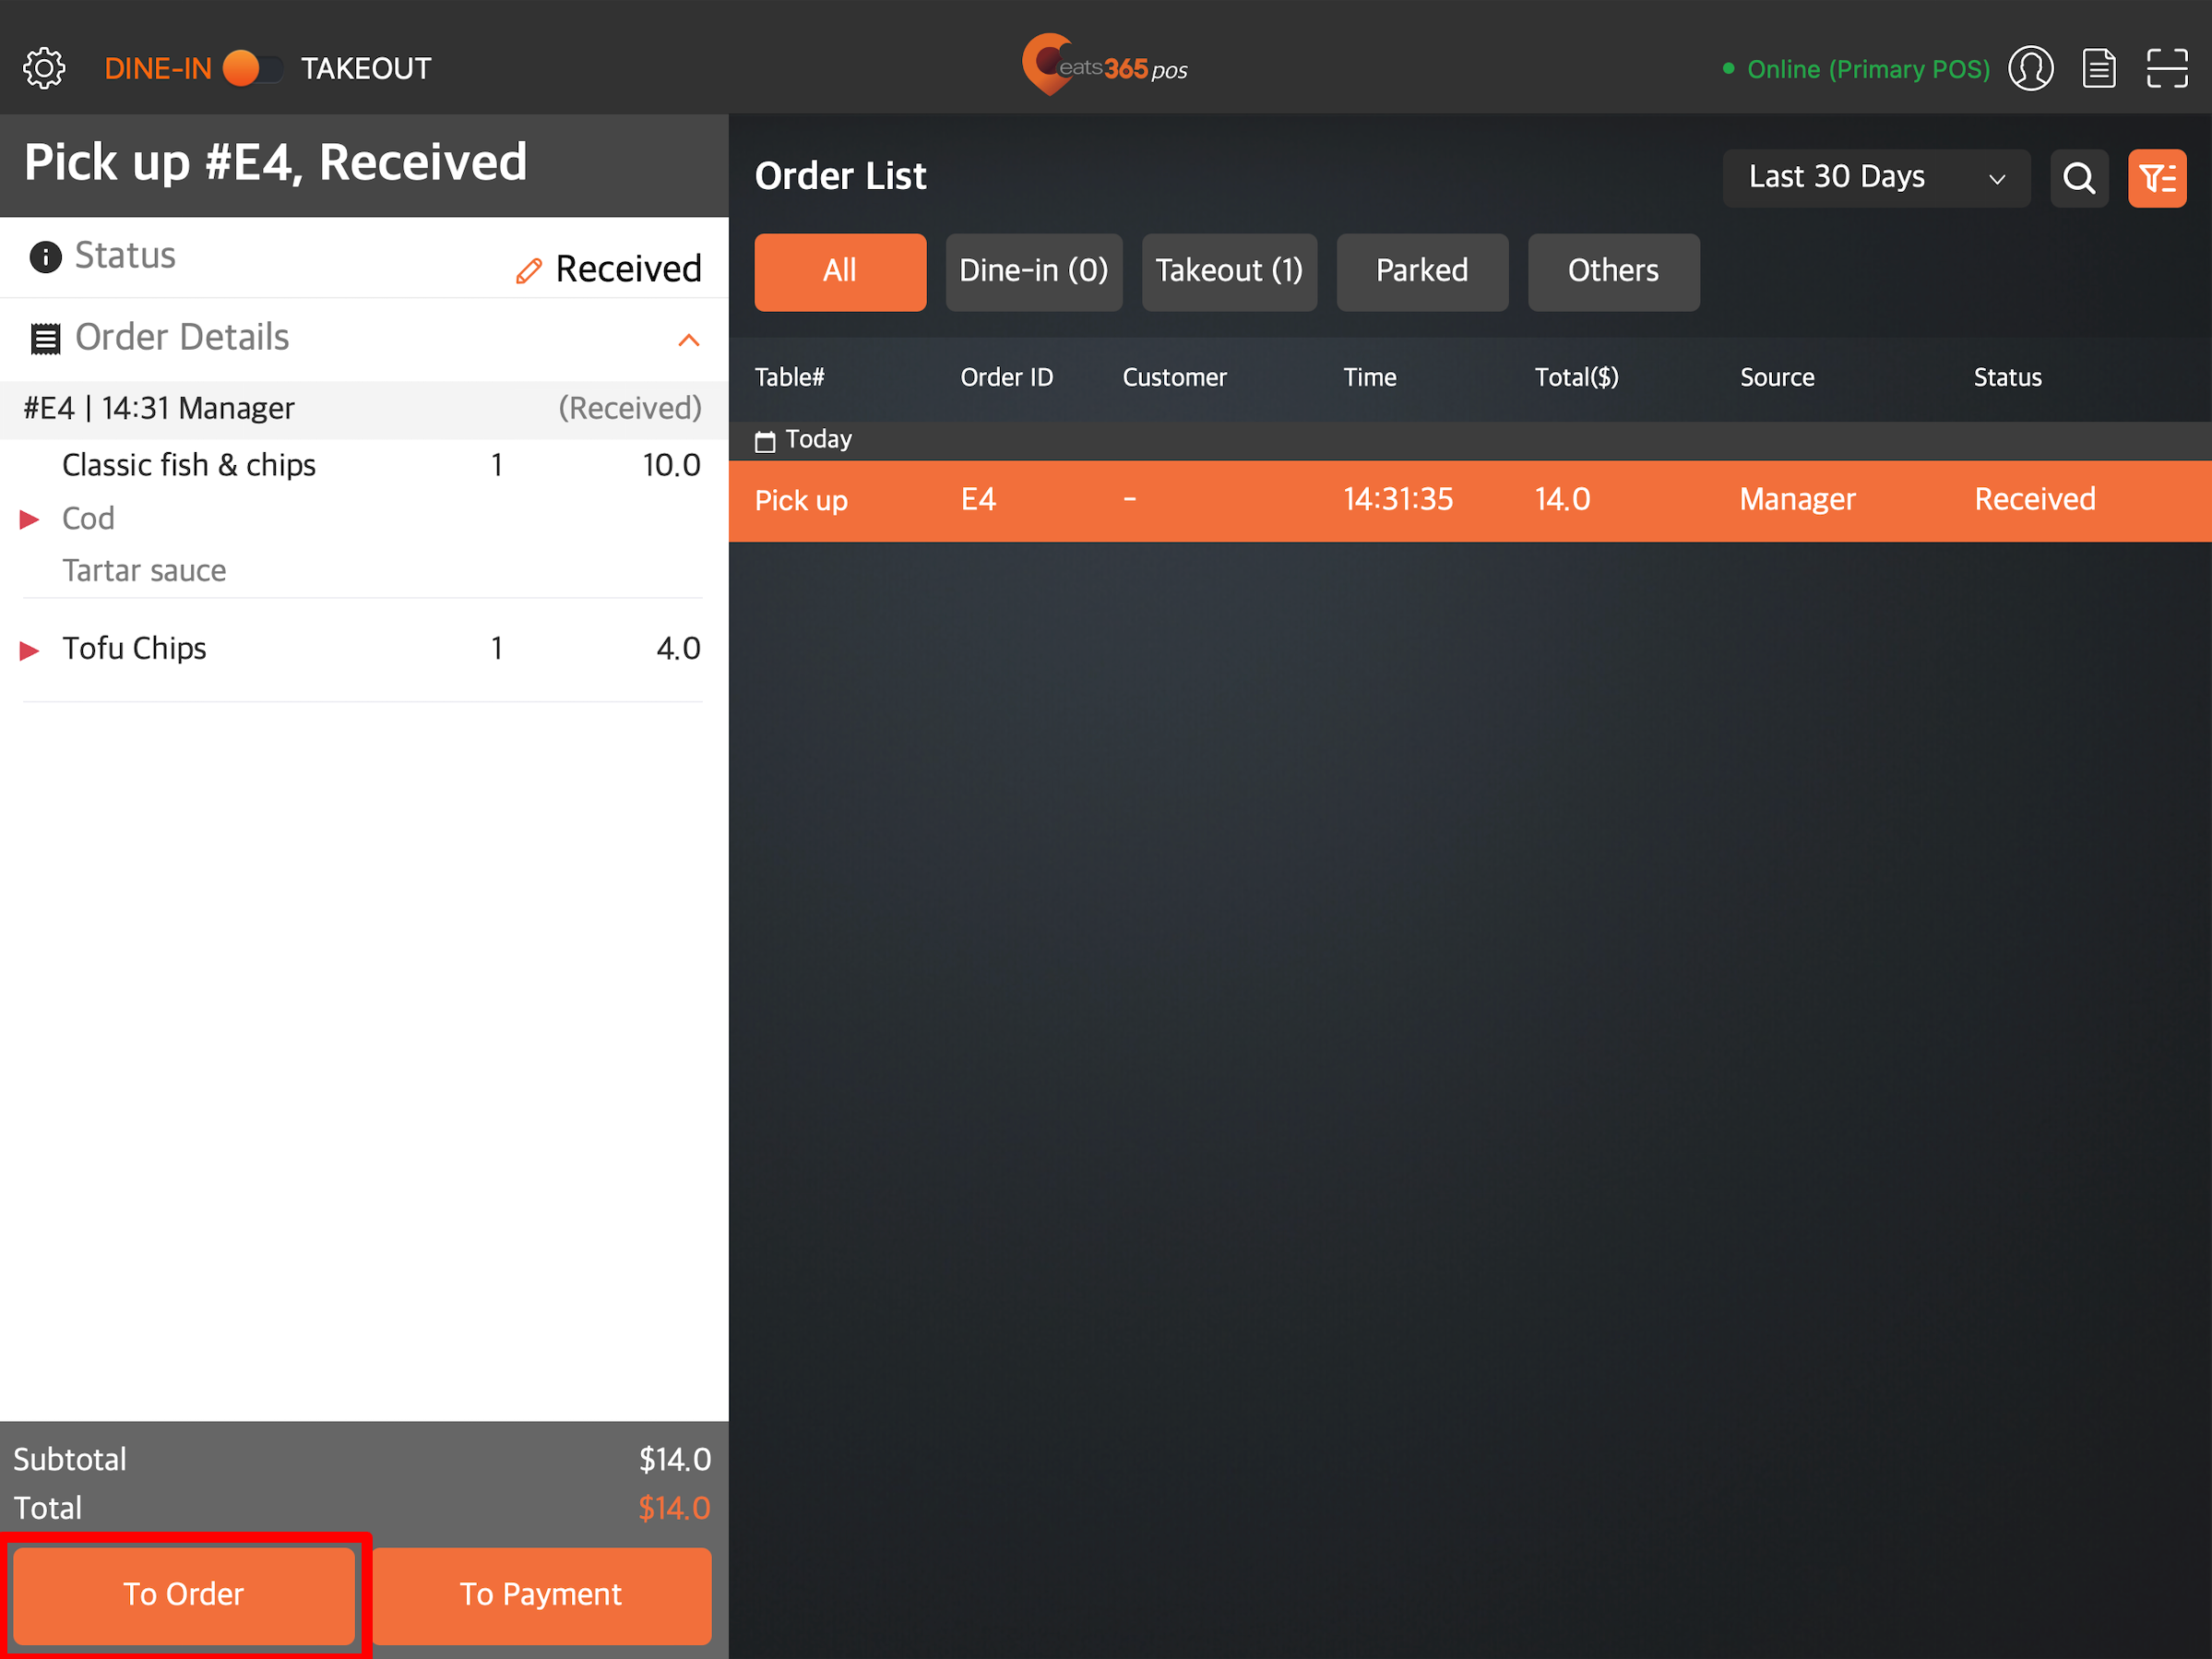
- Tap the order that you want to add items to.
- At the bottom of the order, tap To Order.
- On the order-taking screen, select the items that you want to add to the customer's order.
Note: Items exclusive to memberplans can only be purchased by customers whose active membership includes the required plan.- To browse through different categories, tap the left and right arrows on the categories bar.
- If you created a Custom Menu, tap All then select your Custom Menu to switch menus.
Note: A Custom Menu only appears in the time slot that you set it to appear. For more information about Custom Menu, refer to Set up and manage a Custom Menu.
- To browse through different categories, tap the left and right arrows on the categories bar.
- When you’ve completed adding the items to the customer’s order, tap Confirm.