Order Handling
Table of Contents
Create pickup and delivery orders
Learn how to create Pickup and Delivery orders on the Eats365 POS.
Pickup orders are placed to accommodate customers who choose to make an advanced order and then drop by the restaurant to pick up their items instead of dining in. Delivery orders are placed to accommodate customers who choose to have their orders sent to their preferred address instead of going to the restaurant.
Any order can be placed for pickup or delivery through the Takeout option on the Eats365 POS.
In this article, you’ll learn how to place new immediate and scheduled delivery or pickup orders.
For more information on how to set up and configure Takeout settings for pickup and delivery, refer to Set up Takeout settings.
Place an order for pickup or delivery
To place an immediate pickup or delivery order, follow the steps below:
- Log in to the Eats365 POS.
- At the top, tap Takeout.
Tip: You can set the Takeout screen as the default view from the General Preferences settings, so you won’t need to tap "Takeout" every time you log in.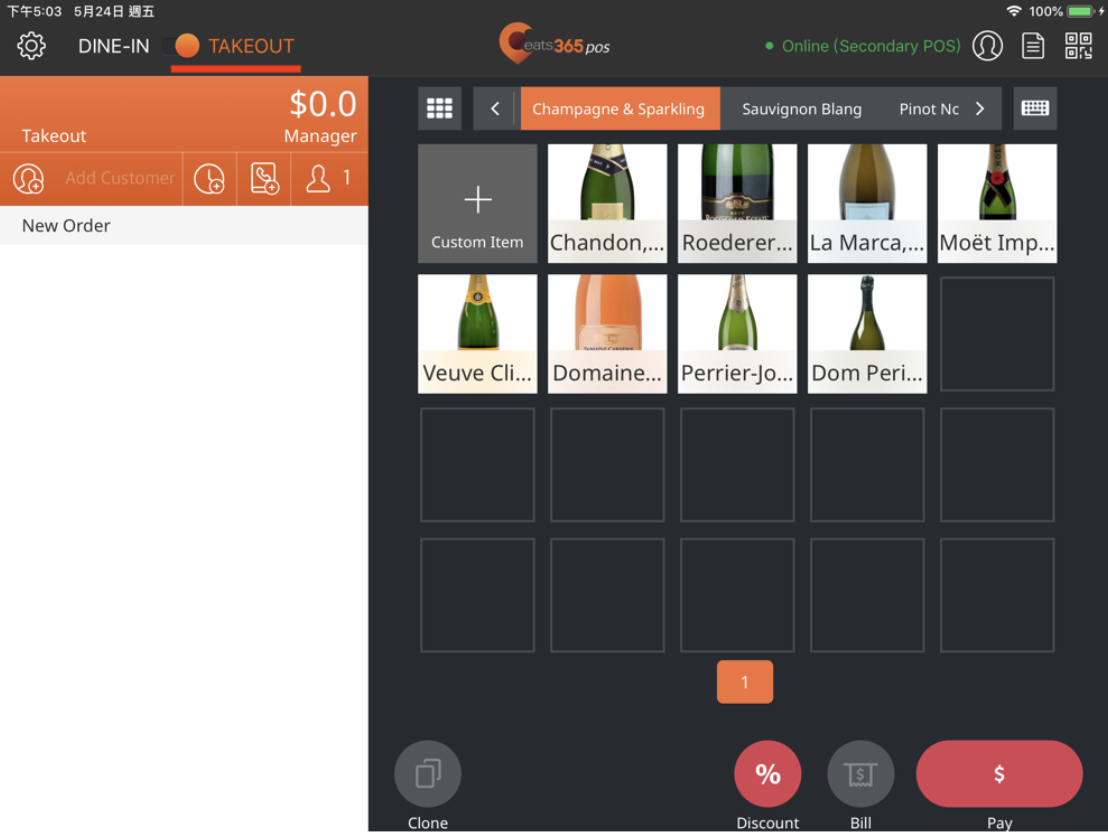
- At the top of the order list, tap Contact Info
 .
. - Select whether you want to place a Pickup or Delivery order. Then, enter all relevant customer details on the "Contact Info" screen.
- Pickup order: Enter the customer’s name and phone number.
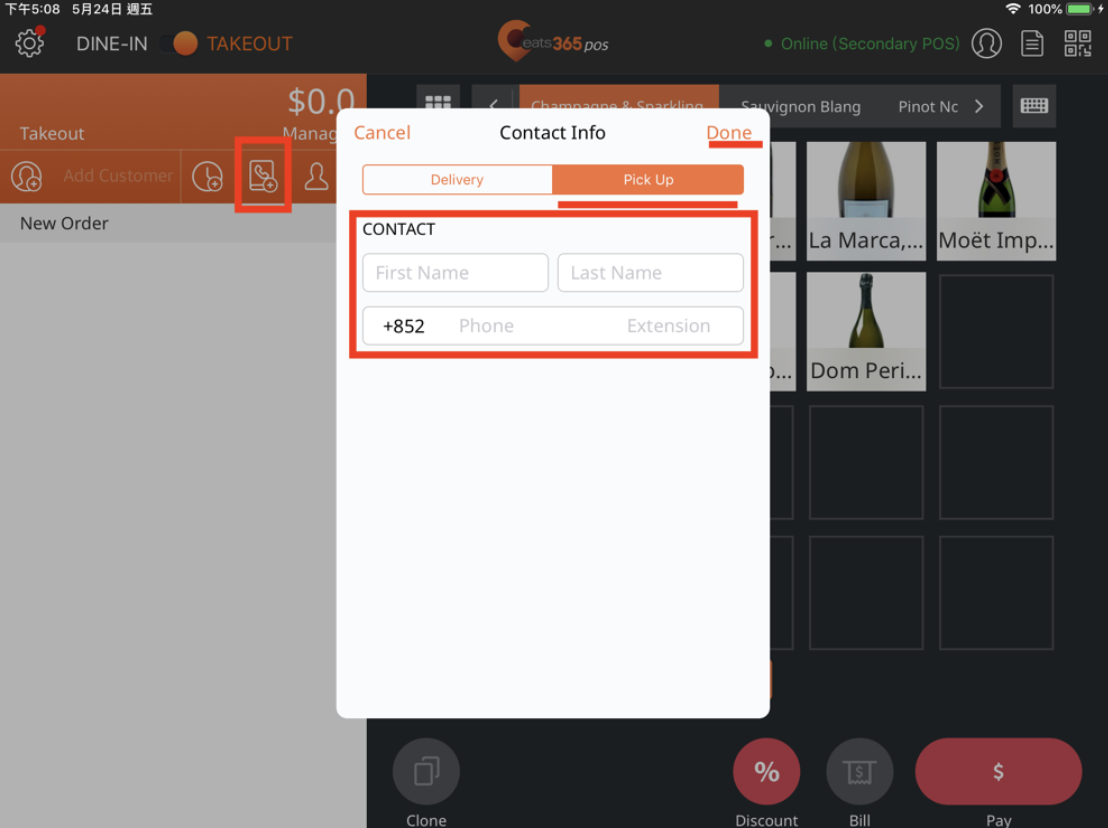
- Delivery order: Enter the customer’s name, address, and phone number.
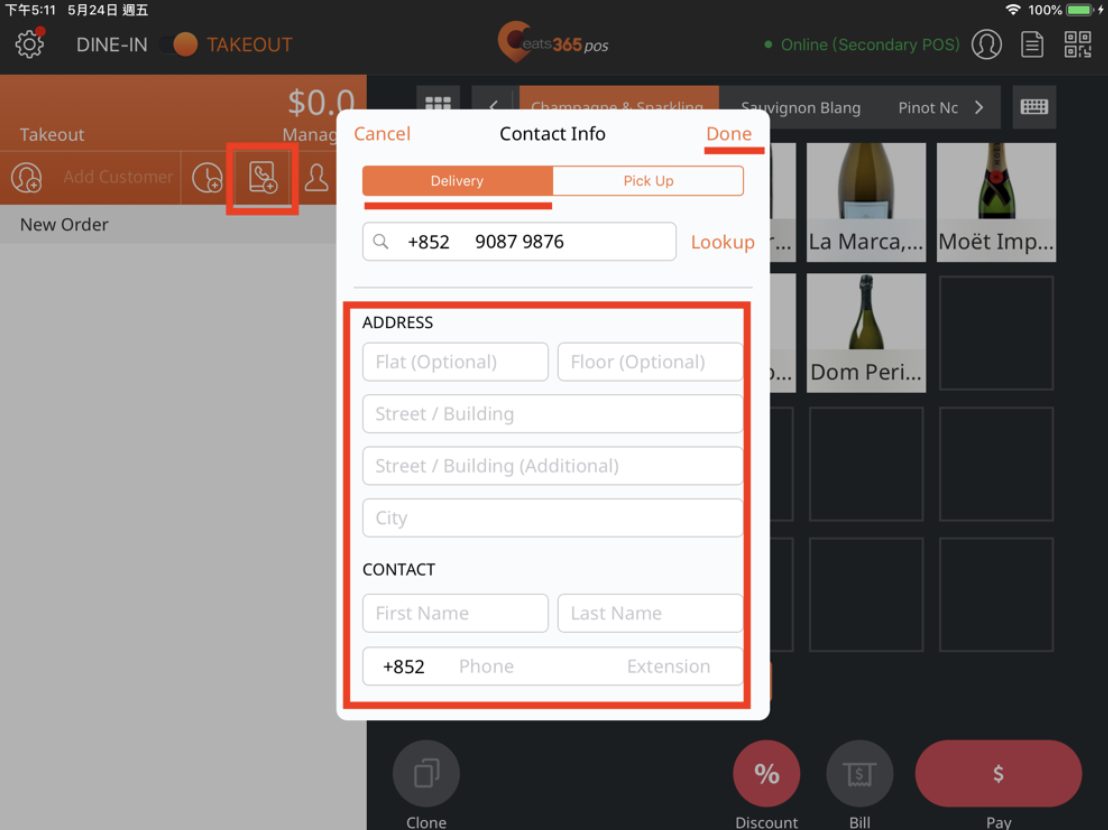
Tip: If the customer is a returning customer, they might already have a record, which includes their address, on file. To search for the customer’s profile, on the Contact Info screen, enter the customer’s phone number, then tap Lookup. After a successful search, select the customer’s address.
- Pickup order: Enter the customer’s name and phone number.
- At the top right, tap Done to confirm.
- Proceed with the order by adding the customer’s preferred items.
Place a scheduled pickup or delivery order
To create a pickup or delivery order in advance, follow the steps below:
- Log in to the Eats365 POS.
- At the top, tap Takeout.
Tip: You can set the Takeout screen as the default view from the General Preferences settings, so you won’t need to tap "Takeout" every time you log in. -
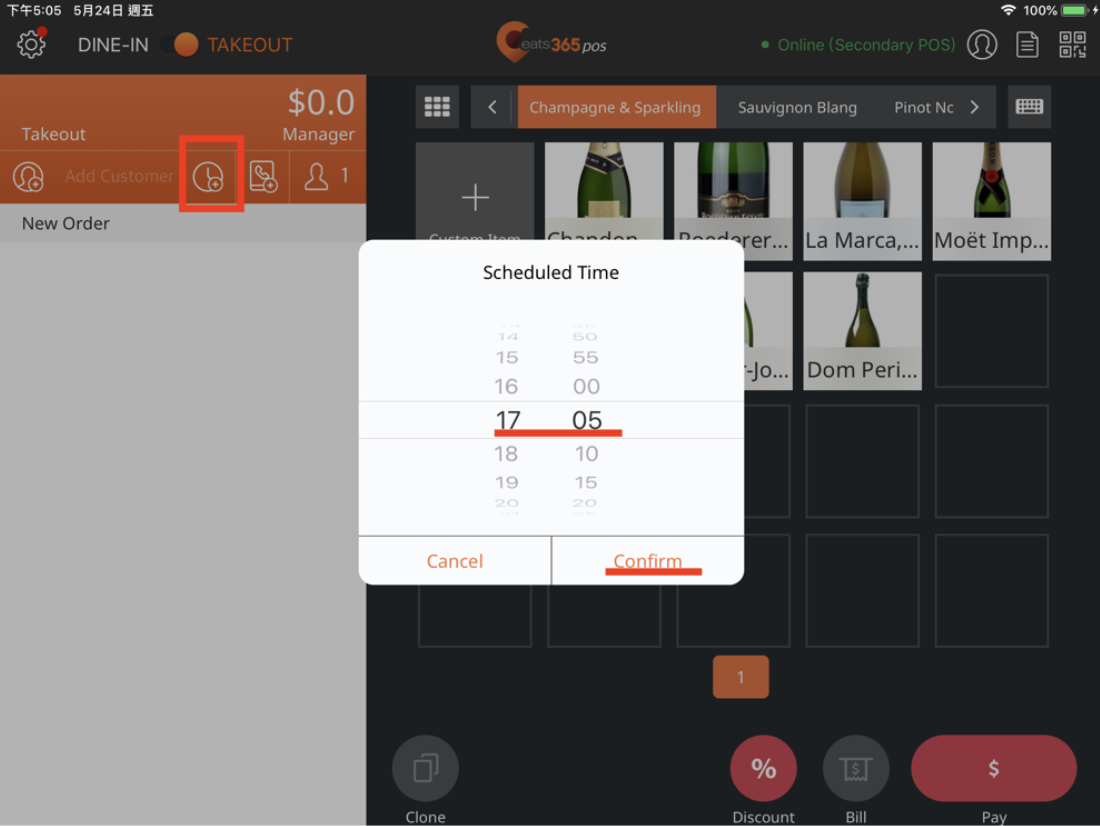
At the top of the order list, tap Scheduled Time
 .
. - Choose a Scheduled Time. Then, tap Confirm.
- At the top of the order list, tap Contact Info .
- Select whether you want to place a Pickup or Delivery order. Then, enter all relevant customer details on the "Contact Info" screen.
- Pickup order: Enter the customer’s name and phone number.
- Delivery order: Enter the customer’s name, address, and phone number.
Tip: If the customer is a returning customer, they might already have a record, which includes their address, on file. To search for the customer’s profile, on the Contact Info screen, enter the customer’s phone number, then tap Lookup. After a successful search, select the customer’s address.
- Pickup order: Enter the customer’s name and phone number.
- At the top right, tap Done to confirm.
- Proceed with the order by adding the customer’s preferred items.

Display customer contact info on receipt
To show a customer’s delivery address, name, or phone number on their receipt, follow the steps below:
Eats365 POS
- Log in to the Eats365 POS.
- At the top left, tap Settings
 .
. - Under "Settings," tap Printing.
- Tap Receipt Template.
- Under "Contact Info," turn on
 the following contact info options:
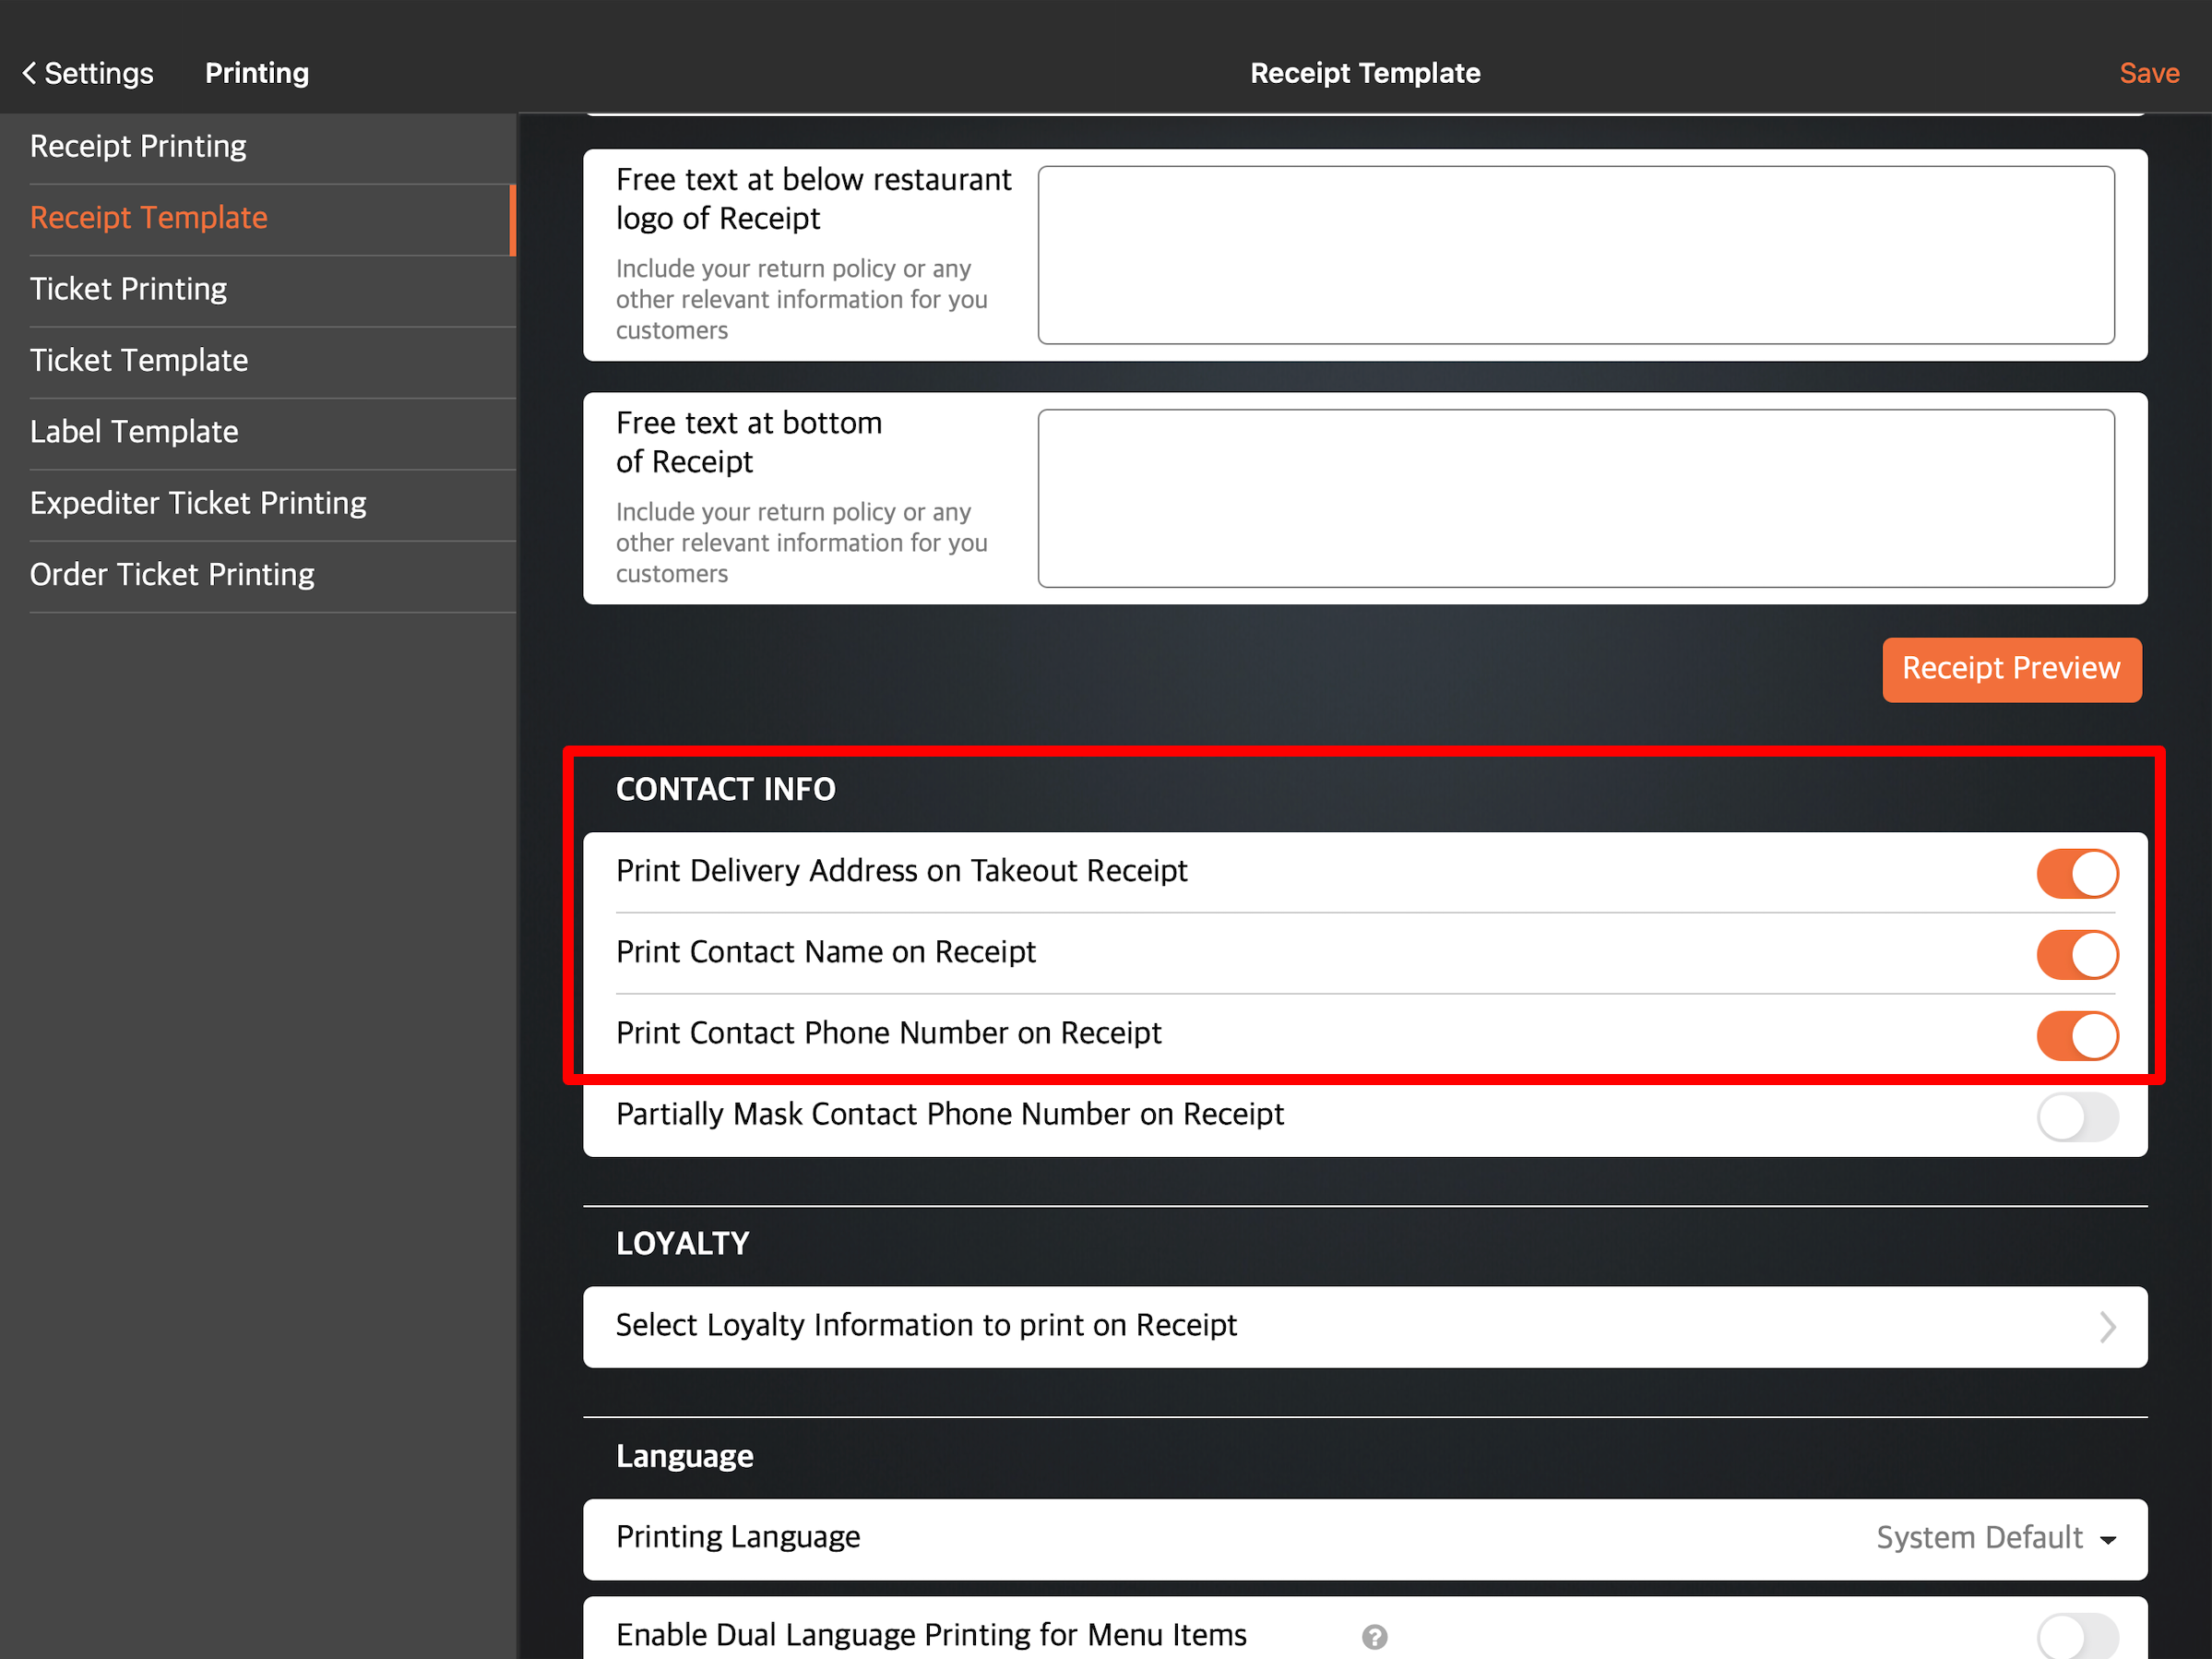
- Print Delivery Address on Takeout Receipt
- Print Contact Name on Receipt
- Print Contact Phone Number on Receipt
Note: Turning on "Print Contact Phone Number on Receipt" will enable you to turn on "Partially Mask Contact Phone Number on Receipt" . This option replaces some numbers as special characters.
- Tap Save to confirm.
Merchant Portal (Classic Theme)
- Log in to the Merchant Portal.
- On the left panel, click on Restaurant Settings. Then, click on Printing.
- Click on the Receipt Template tab.
- Under "Contact Info," turn on
 the following contact info options:
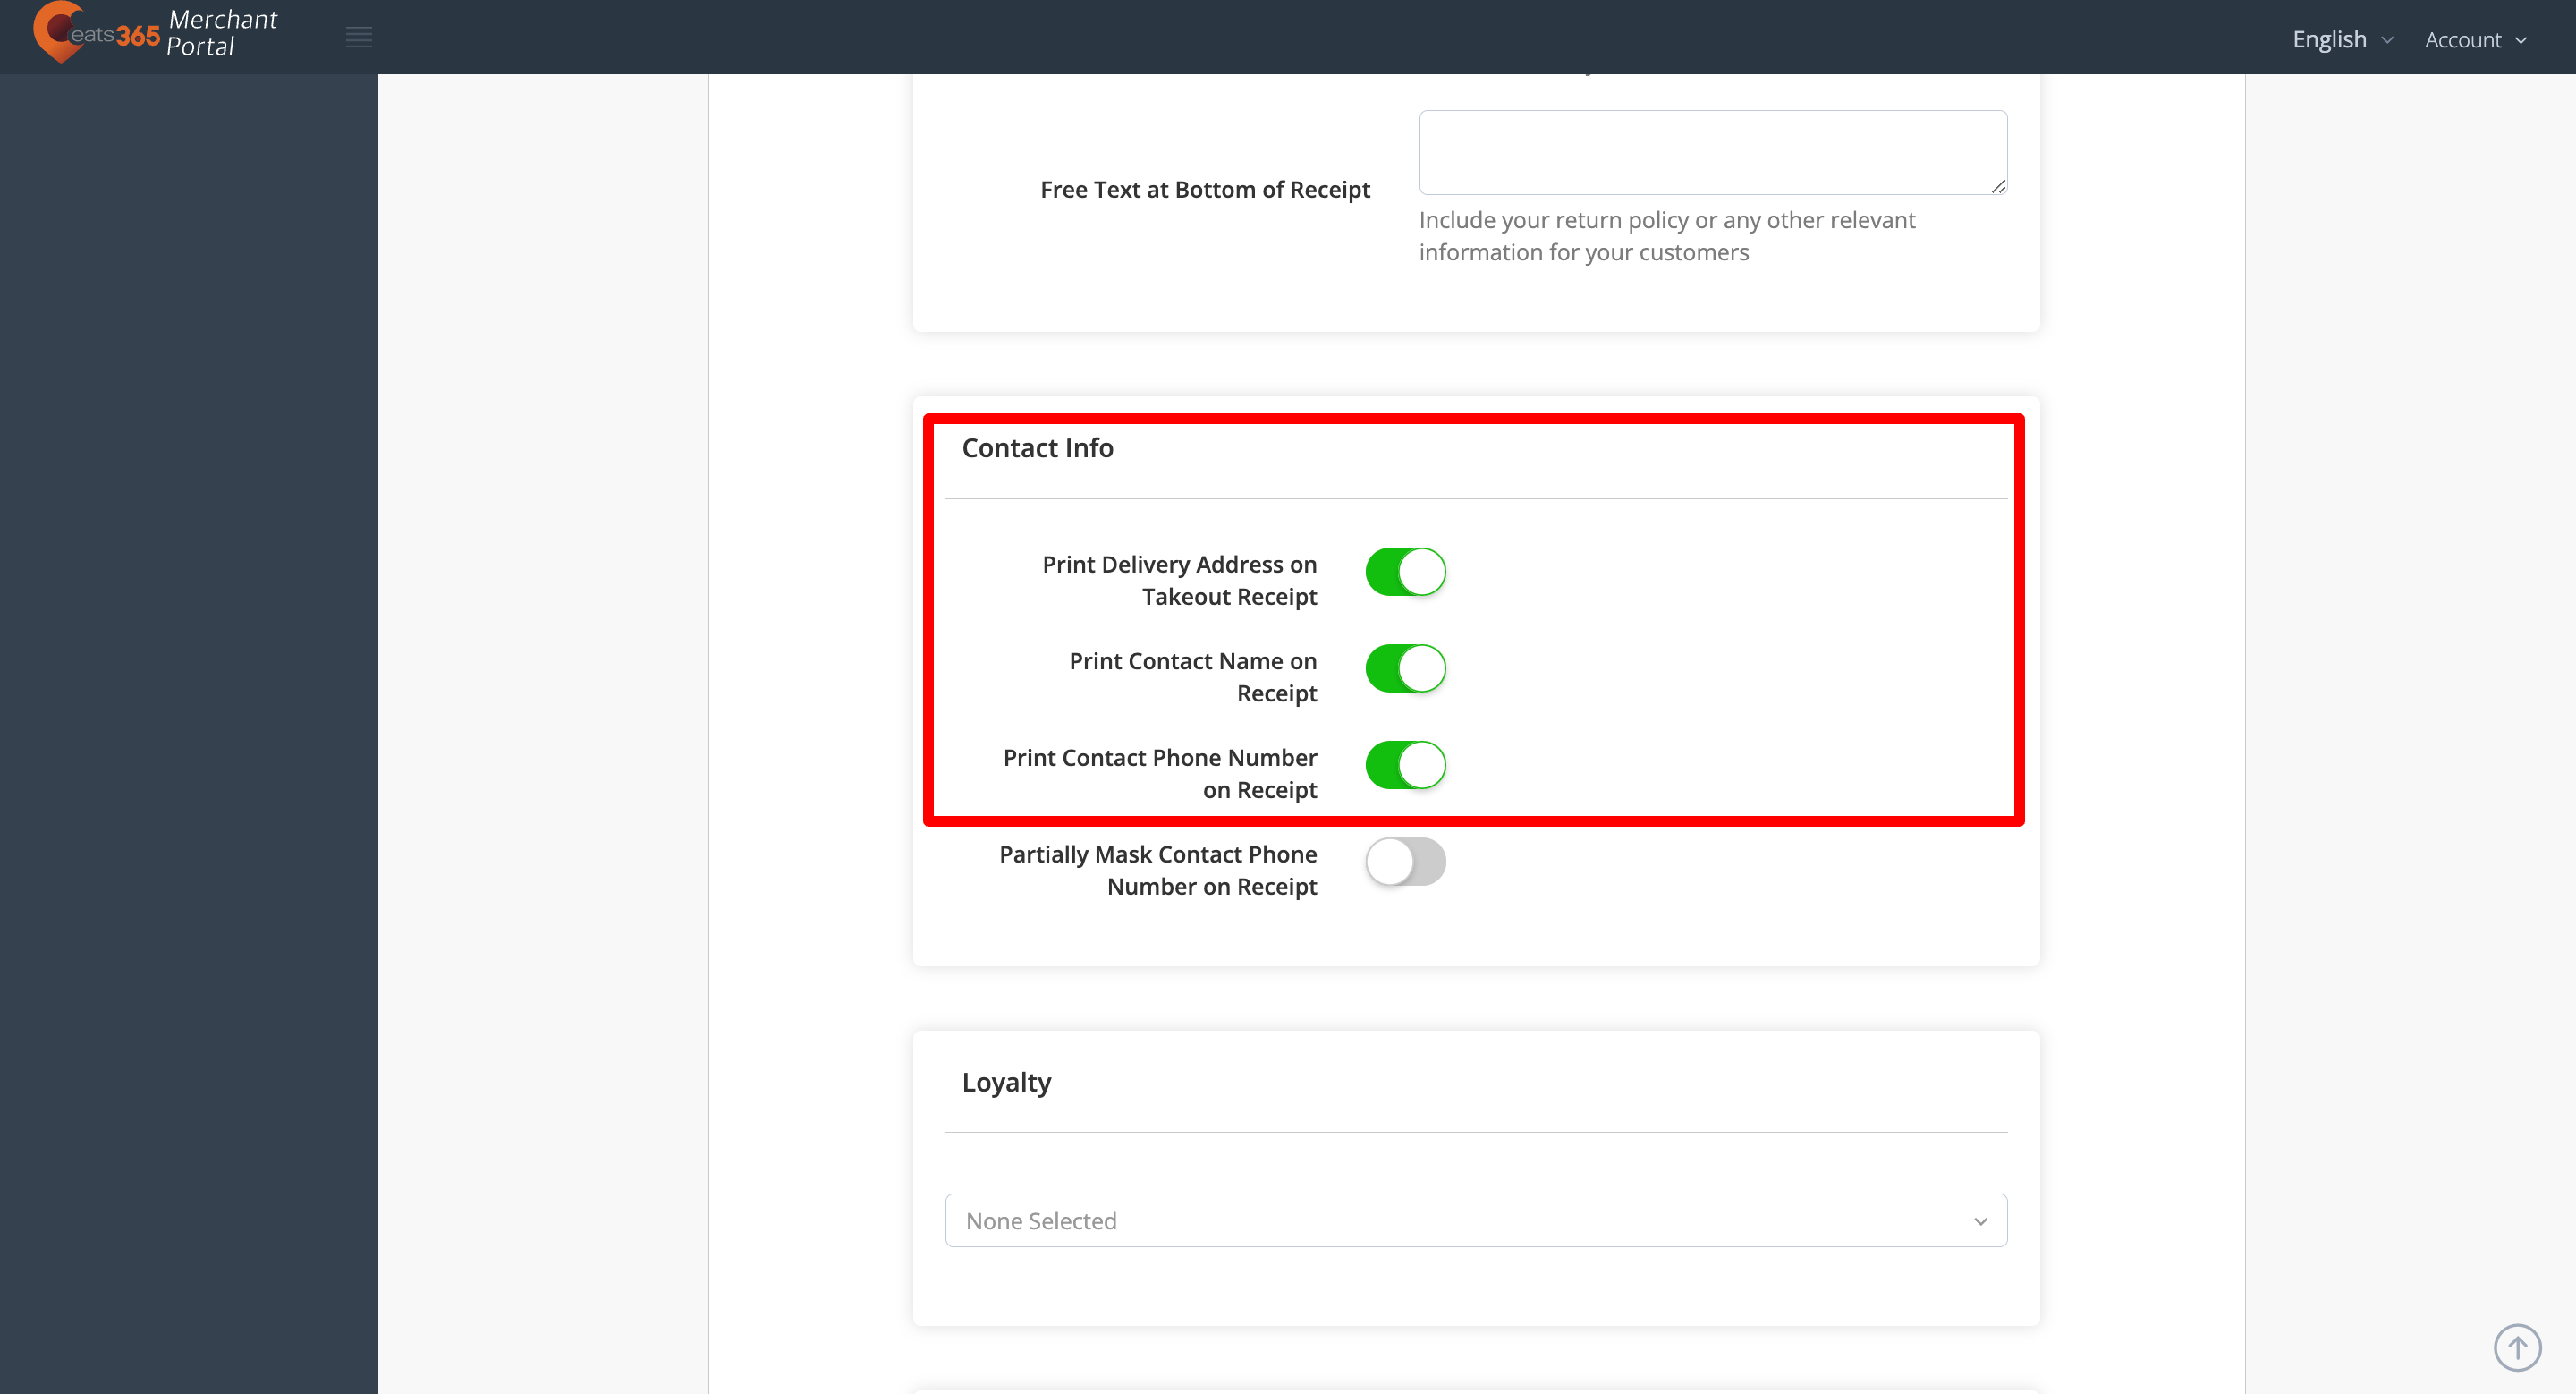
- Print Delivery Address on Takeout Receipt
- Print Contact Name on Receipt
- Print Contact Phone Number on Receipt
Note: Turning on "Print Contact Phone Number on Receipt" will enable you to turn on "Partially Mask Contact Phone Number on Receipt". This option replaces some numbers as special characters.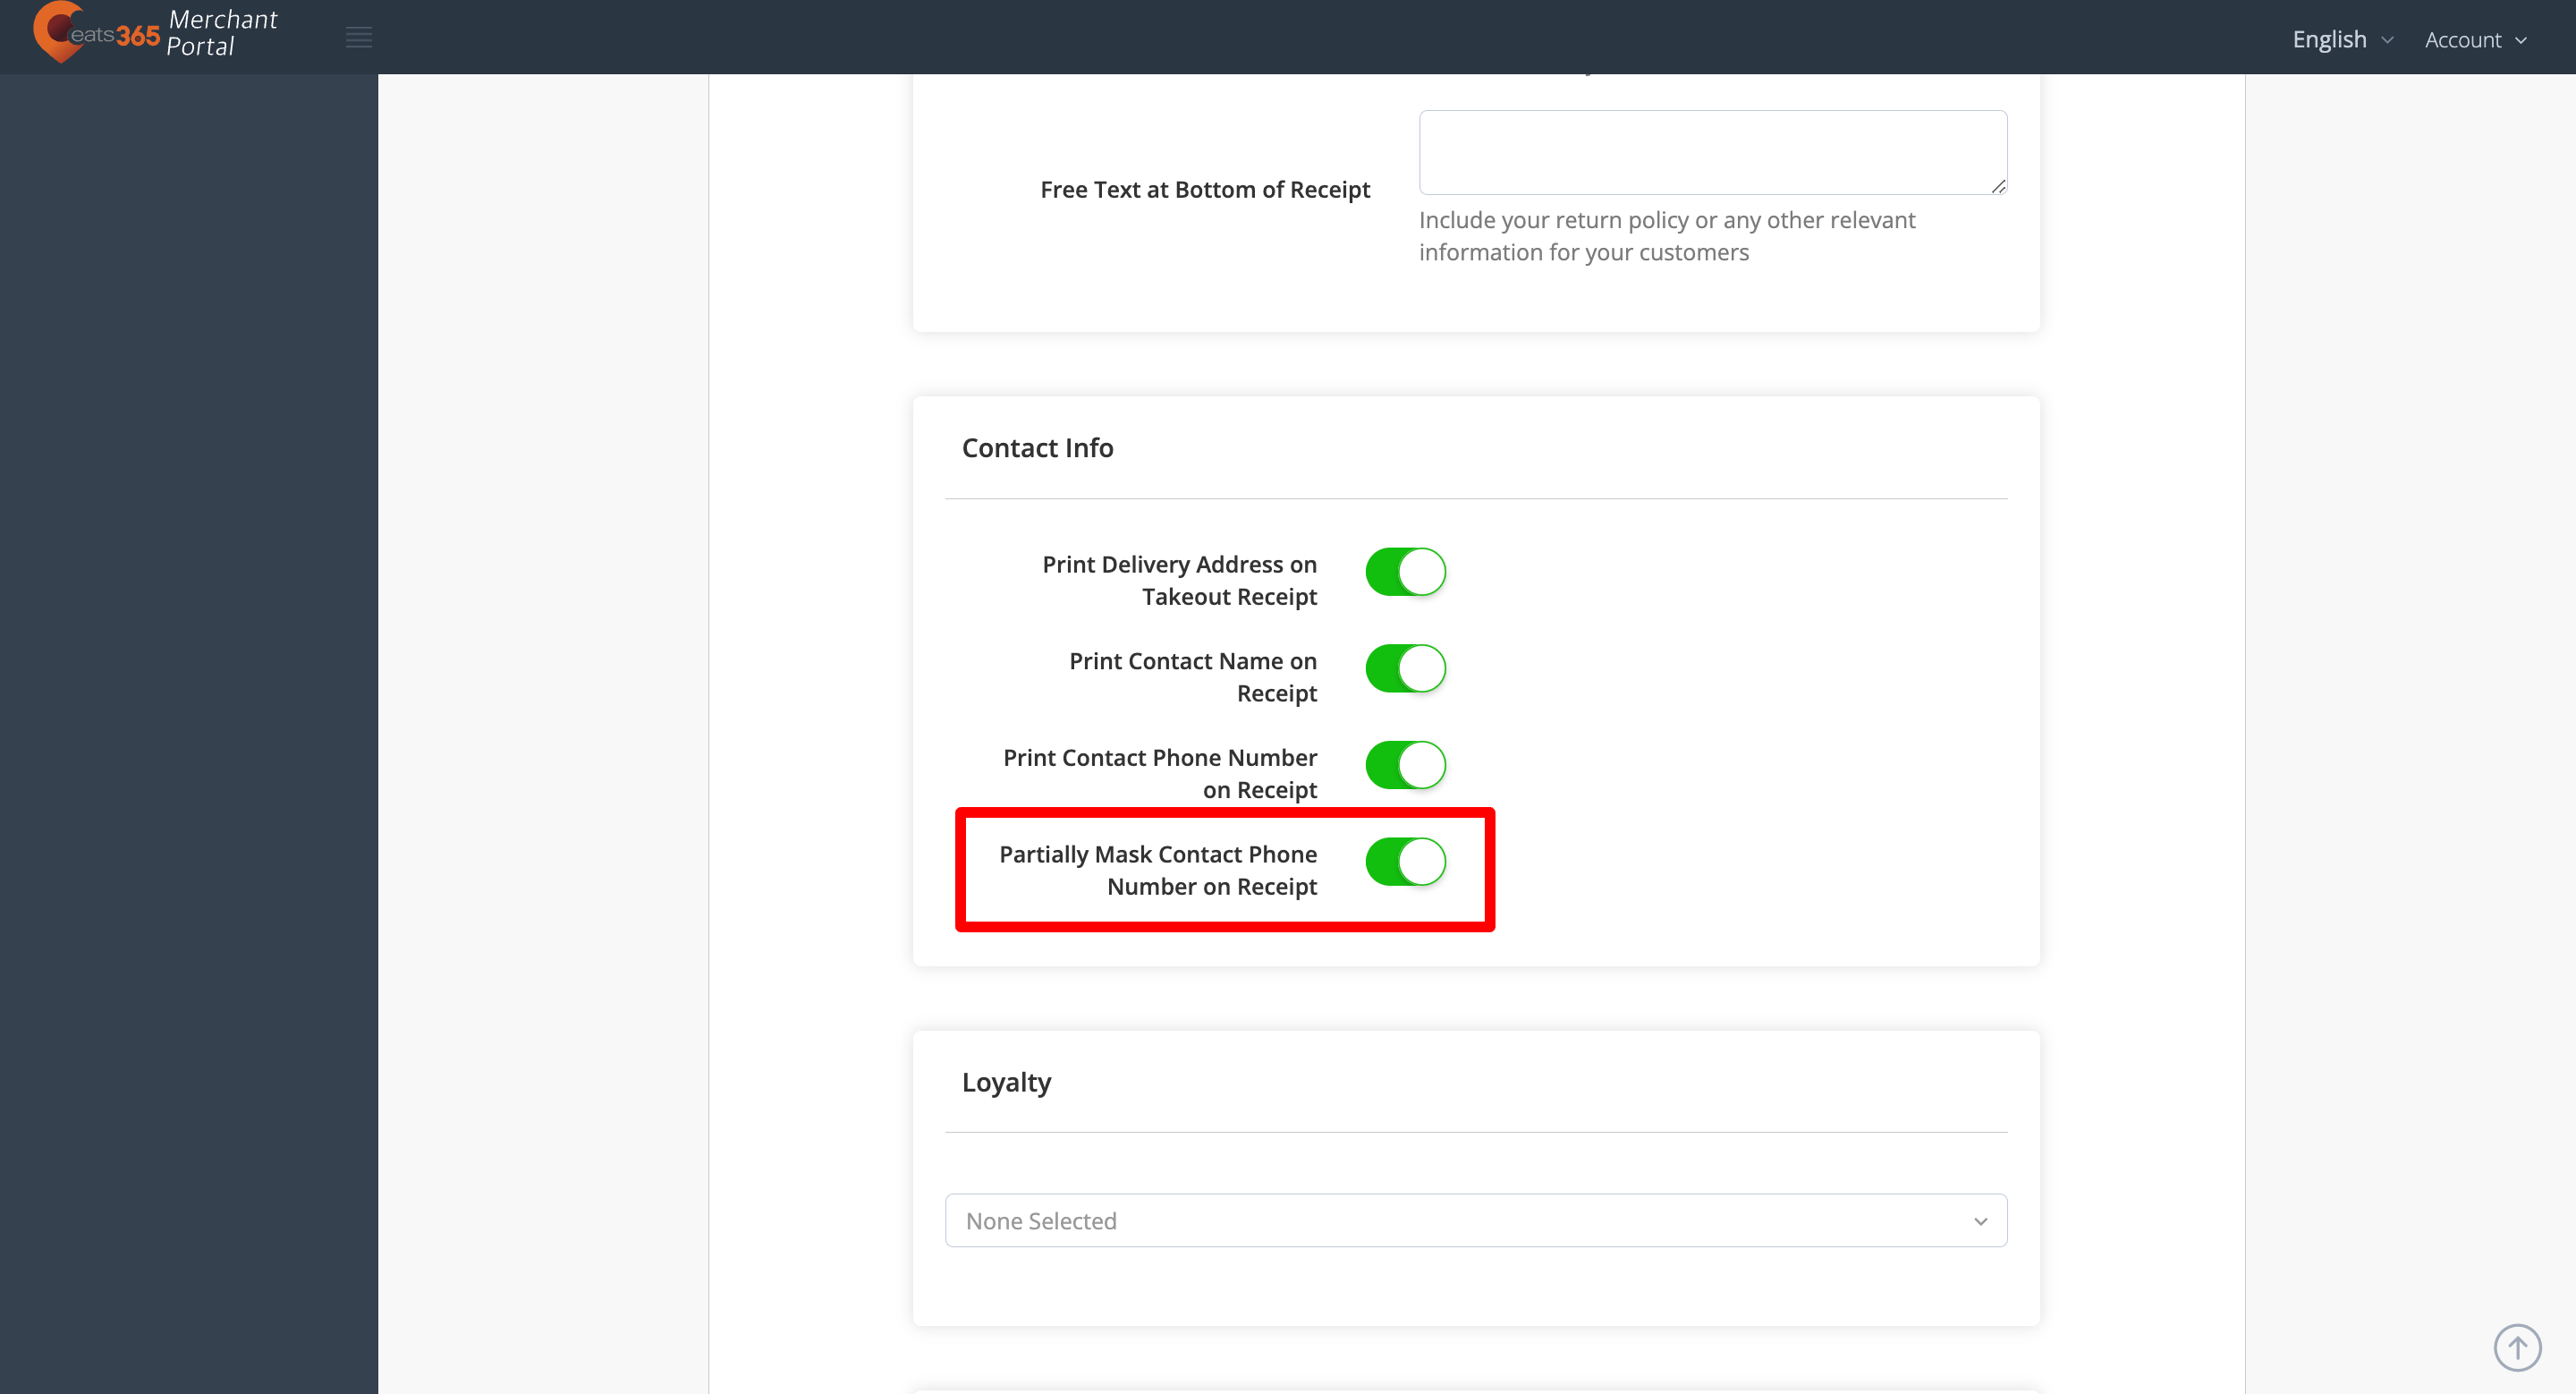
- At the top right, click on Save to confirm.
Merchant Portal 2.0
- Log in to the Merchant Portal.
- On the left panel, click on Restaurant Settings. Then, click on Printing.
- Click on Receipt Settings.
- Click on the Receipt Template tab.
- Under "Contact Info," turn on
 the following contact info options:
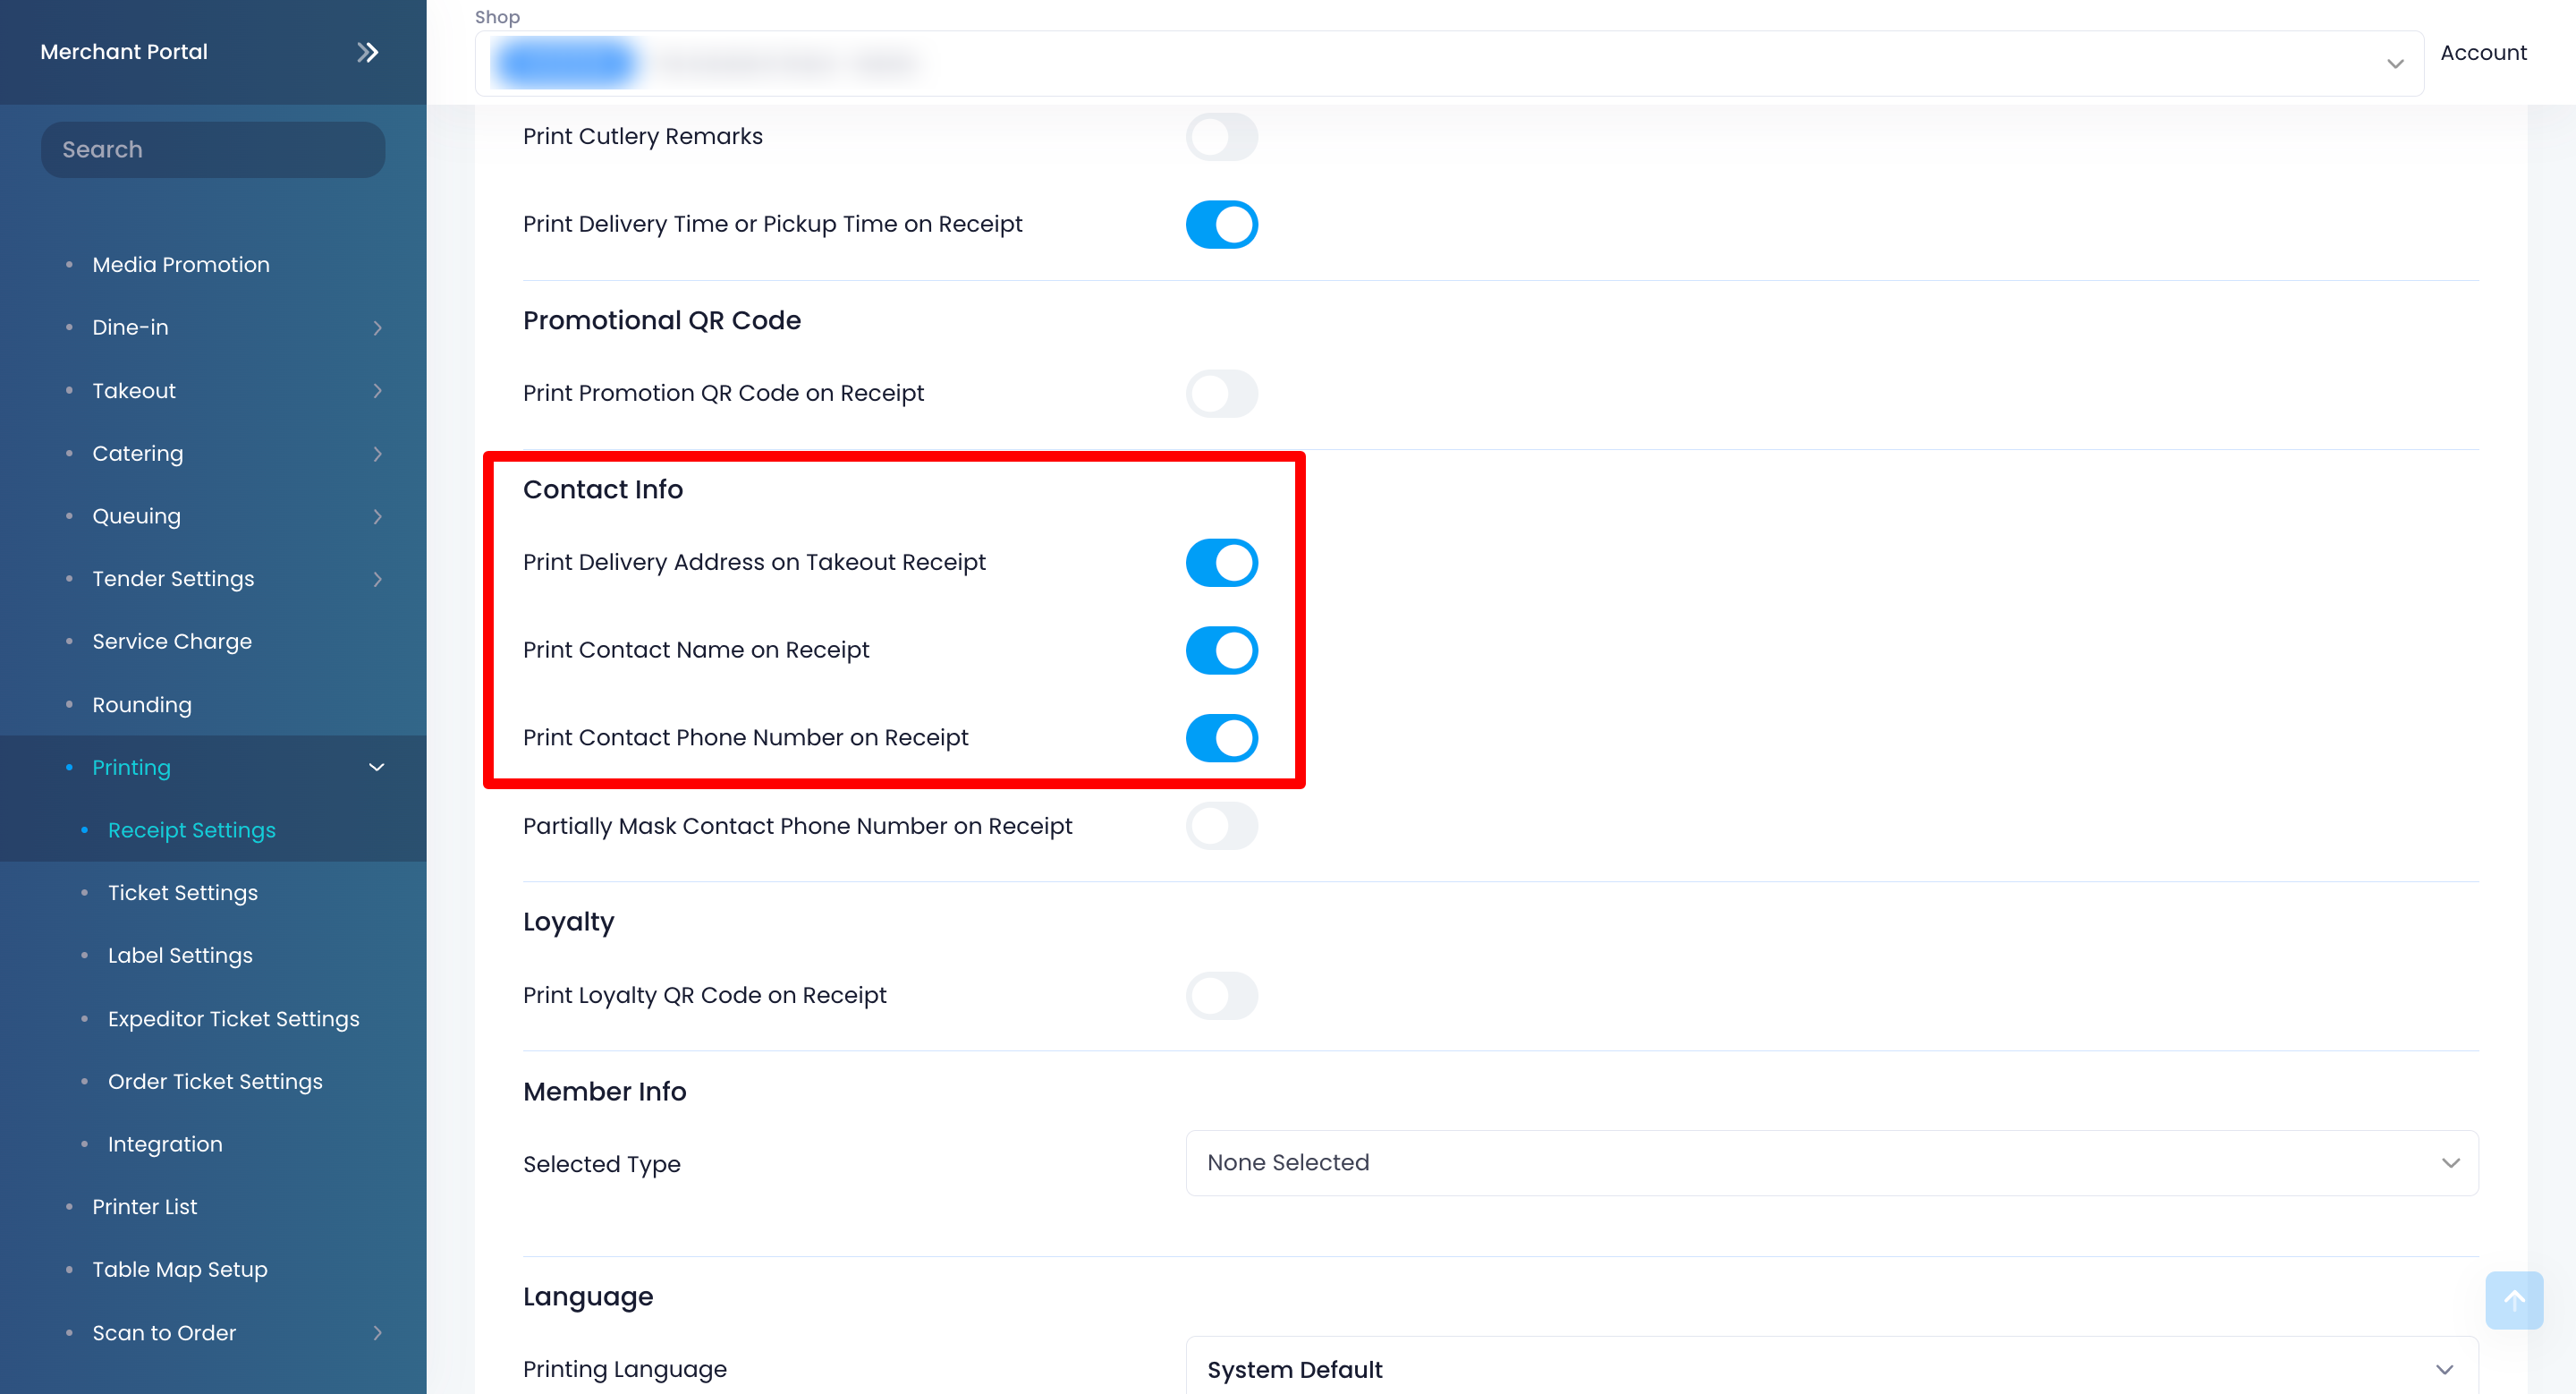
- Print Delivery Address on Takeout Receipt
- Print Contact Name on Receipt
- Print Contact Phone Number on Receipt
Note: Turning on "Print Contact Phone Number on Receipt" will enable you to turn on "Partially Mask Contact Phone Number on Receipt" . This option replaces some numbers as special characters.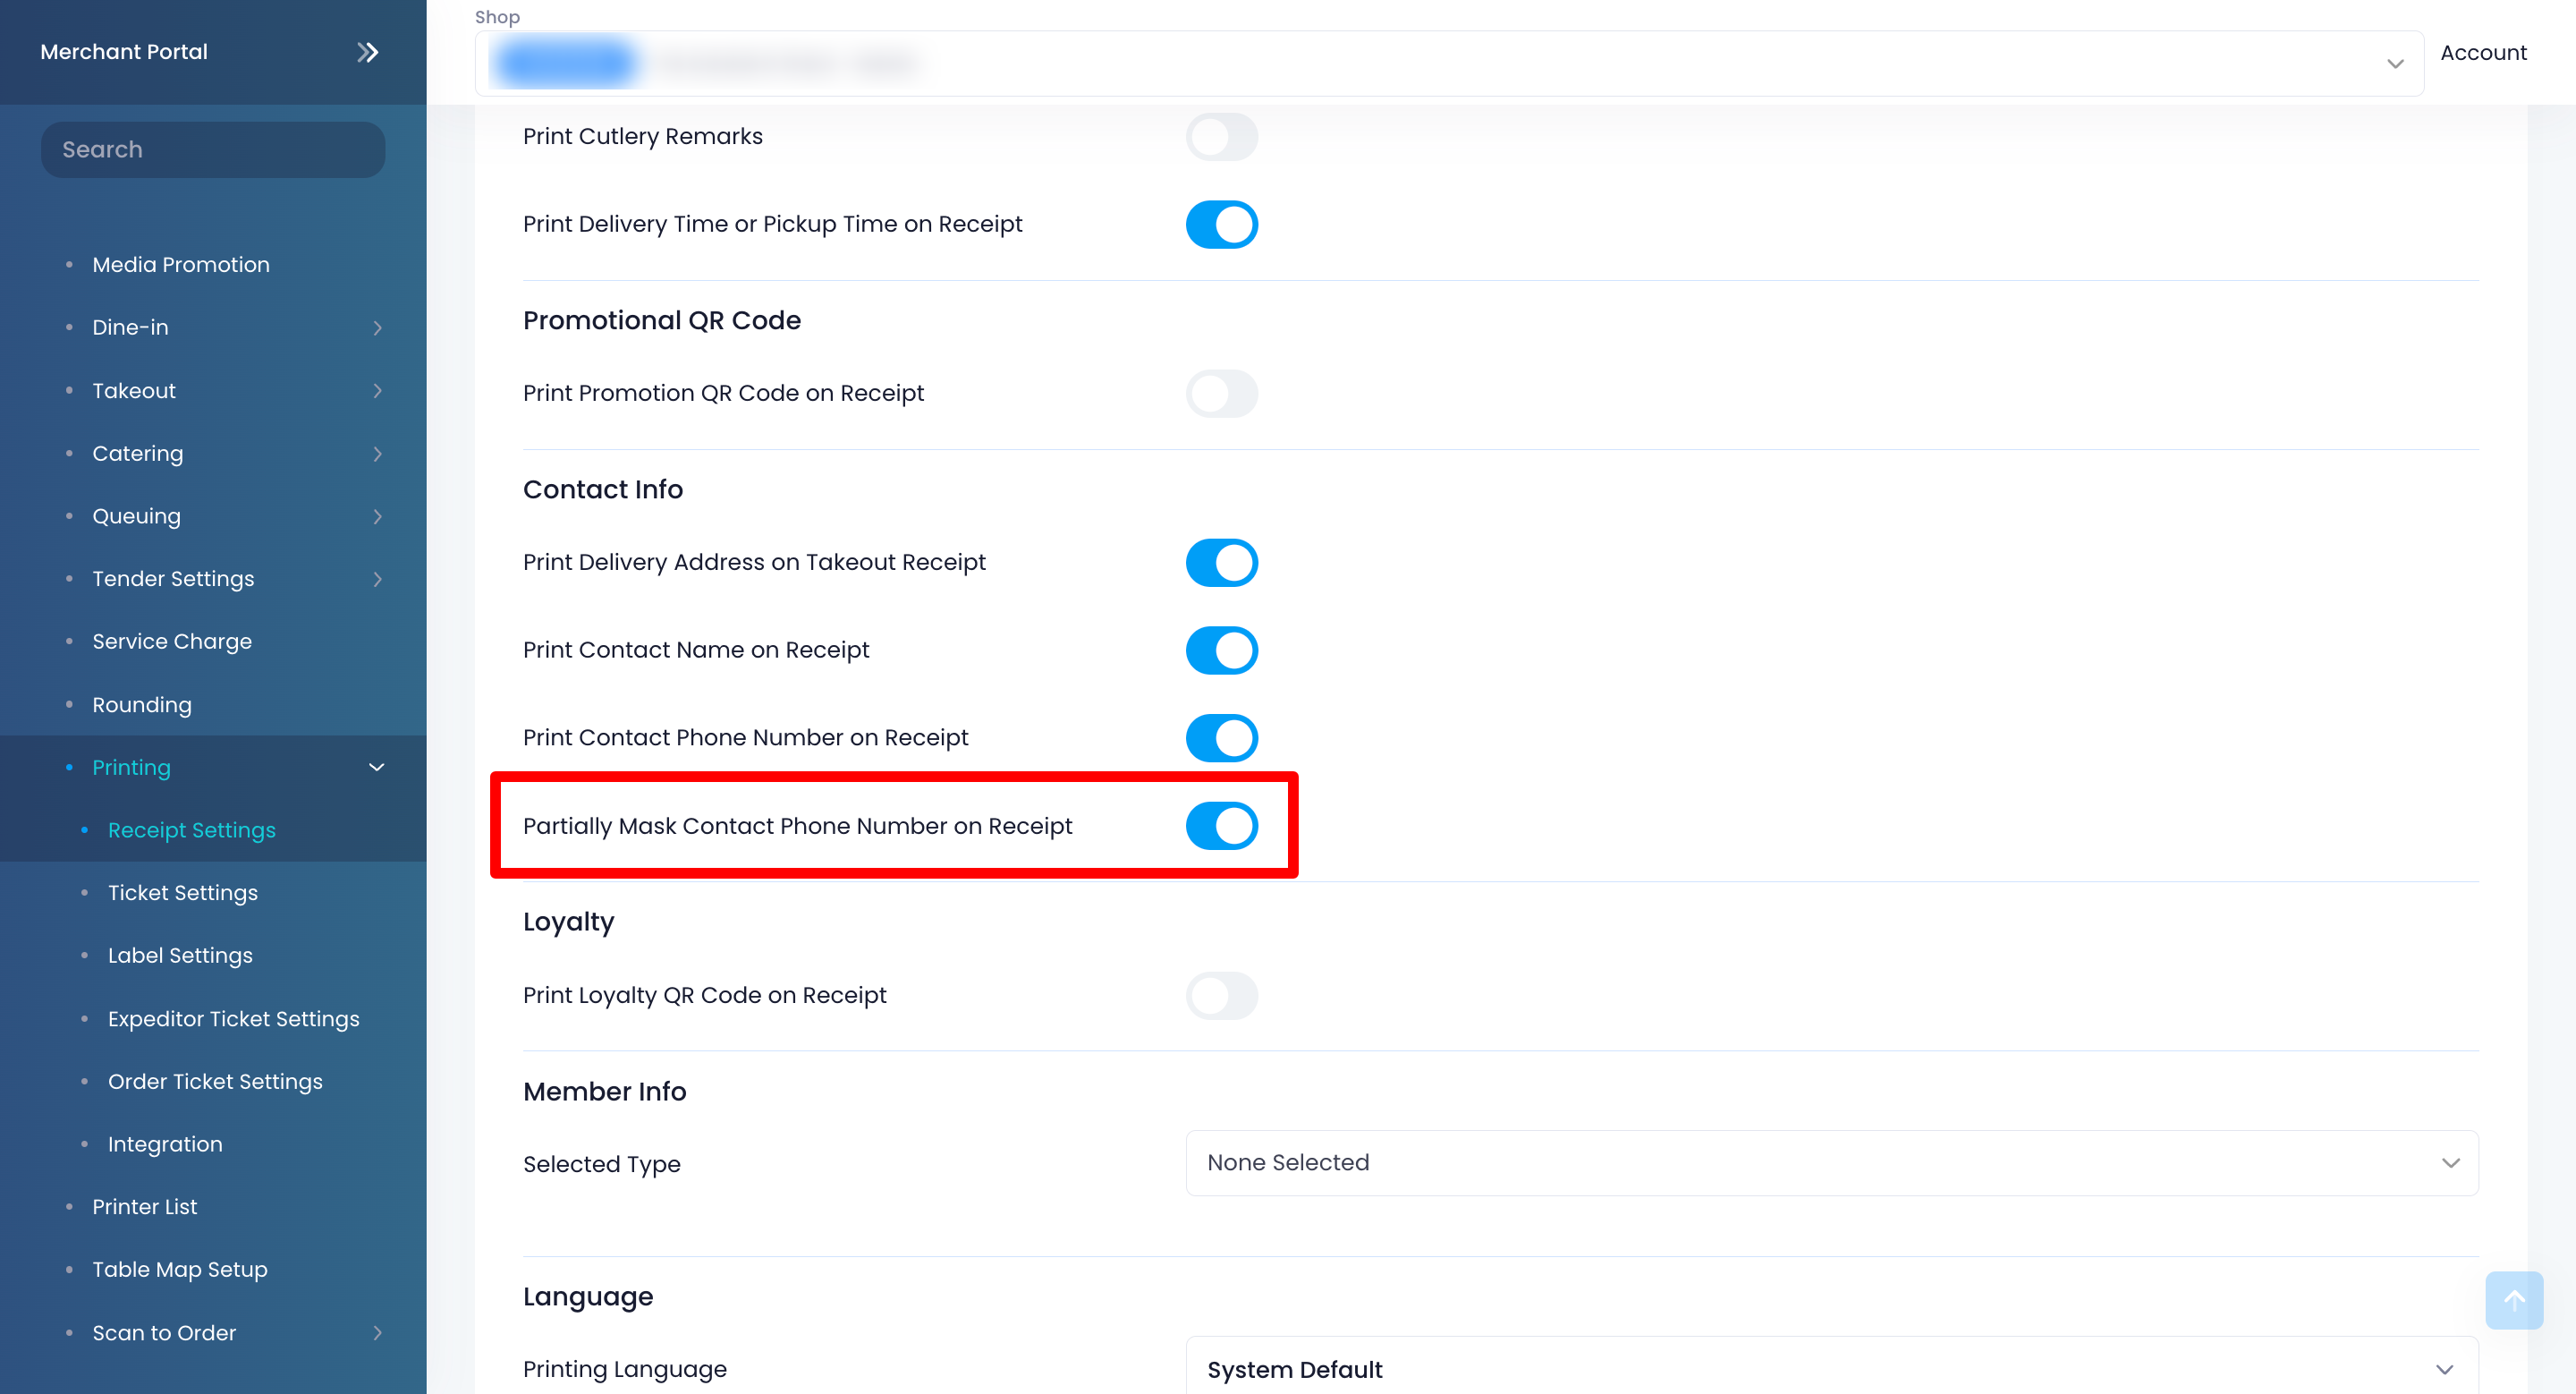
- At the top right, click on Save to confirm.